

Build your own treehouse bed for about $200! This free plan include step by step diagrams, cut list and shopping list. You'll just need a few basic power tools to build - no plywood and no pocket holes!
Does your child dream about a playhouse bed, but you don't want to spend thousands on furniture that they will outgrow? You can build a dream bed, even if you don't have a ton of tools or a big budget!
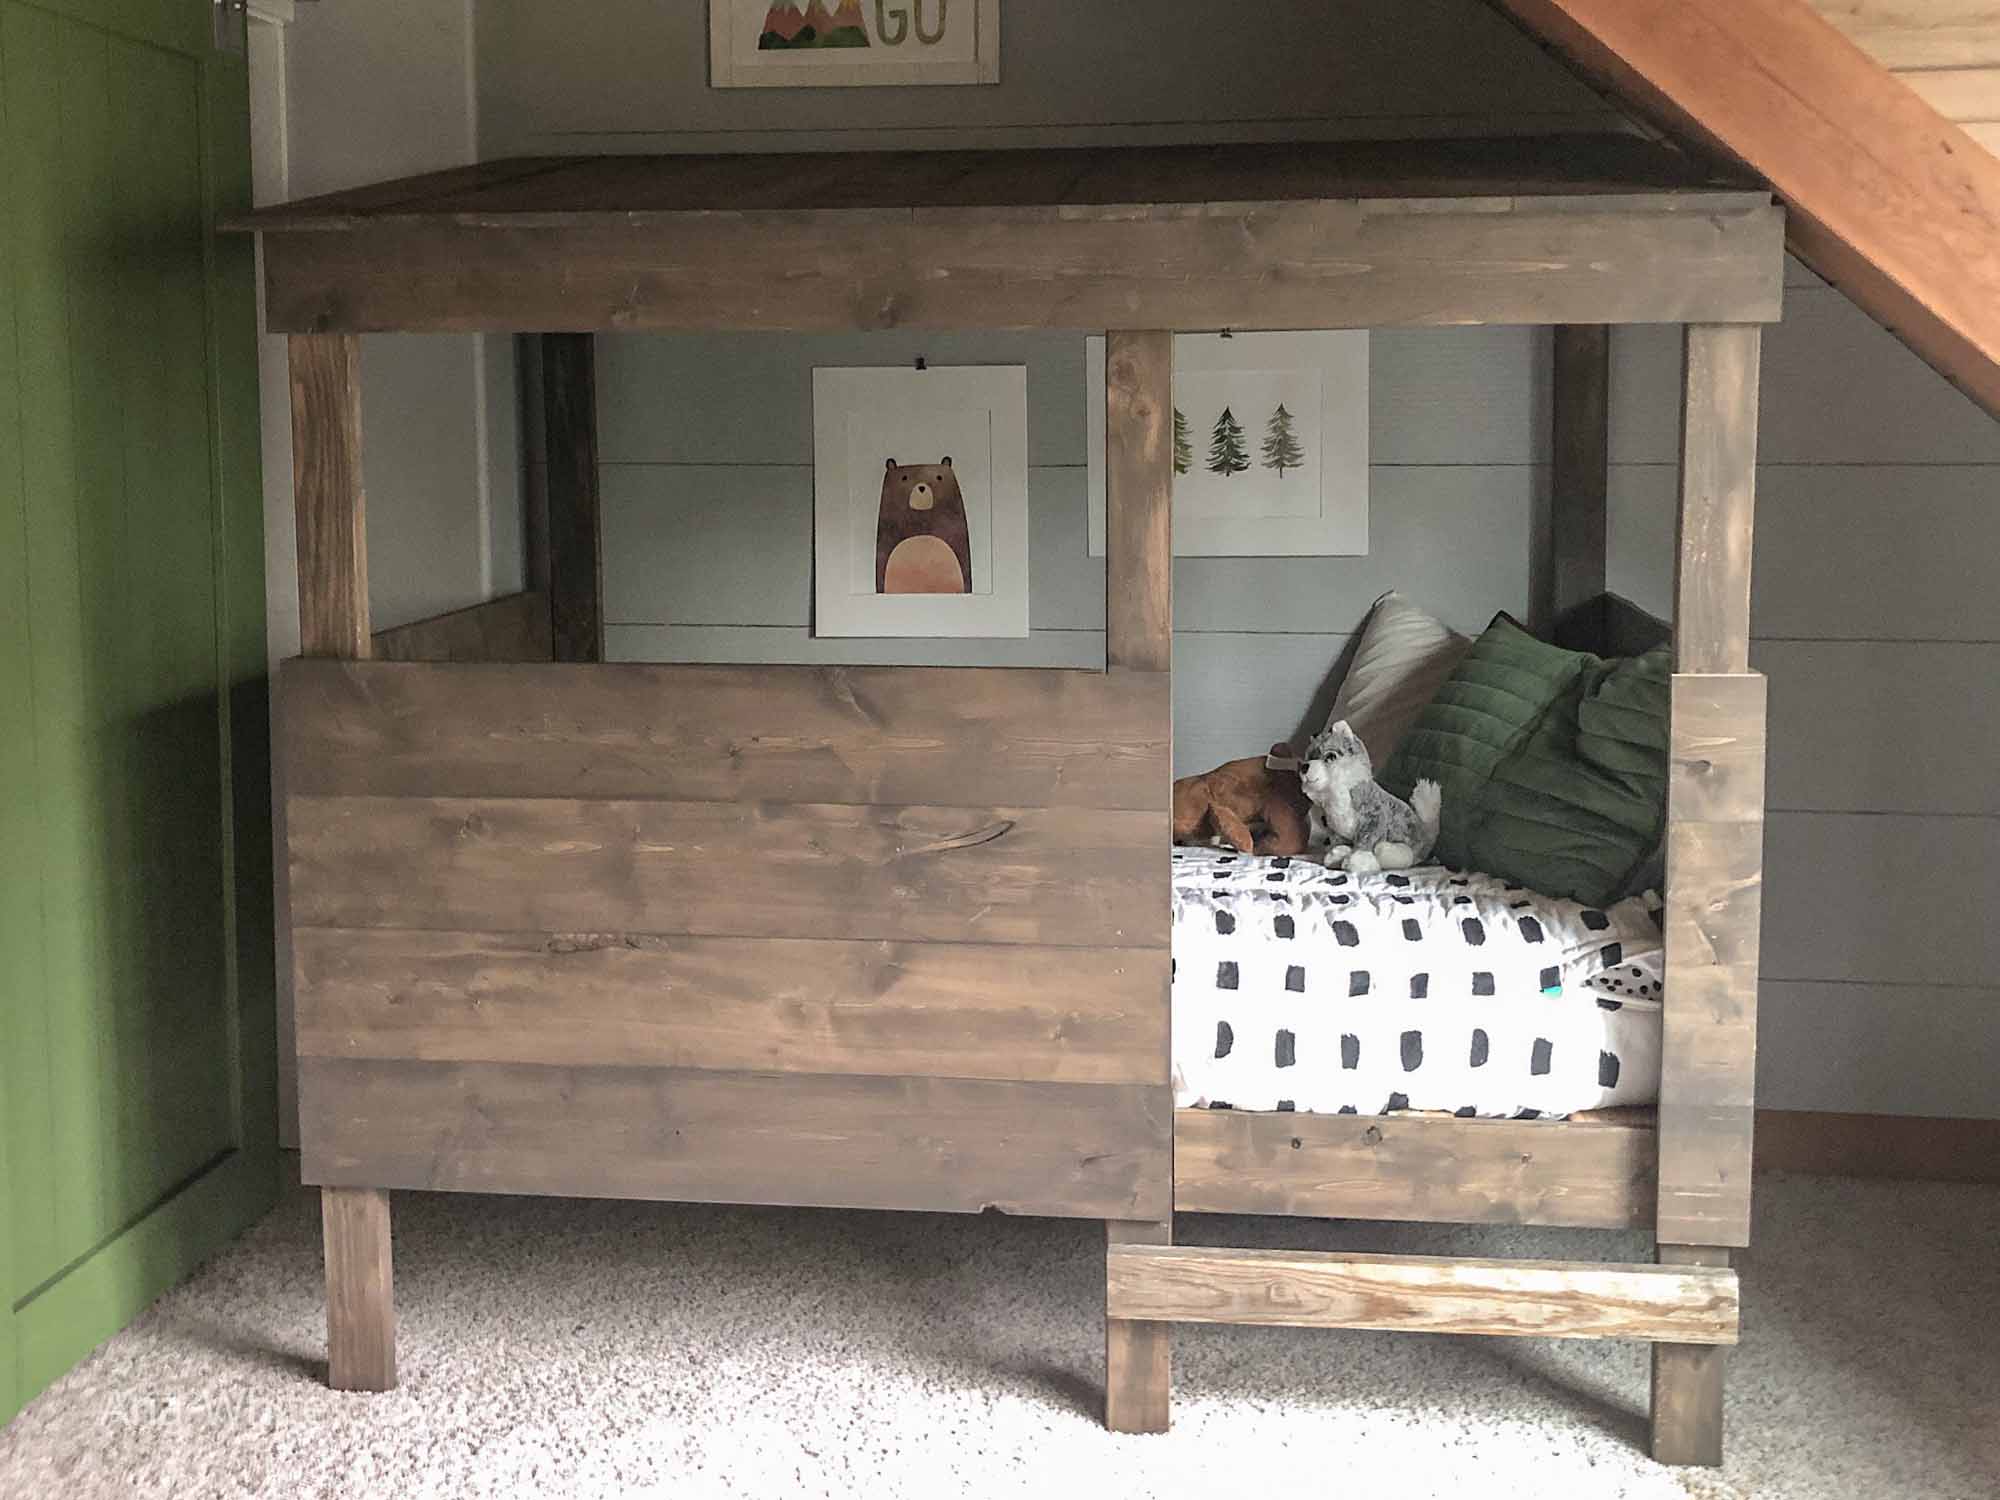
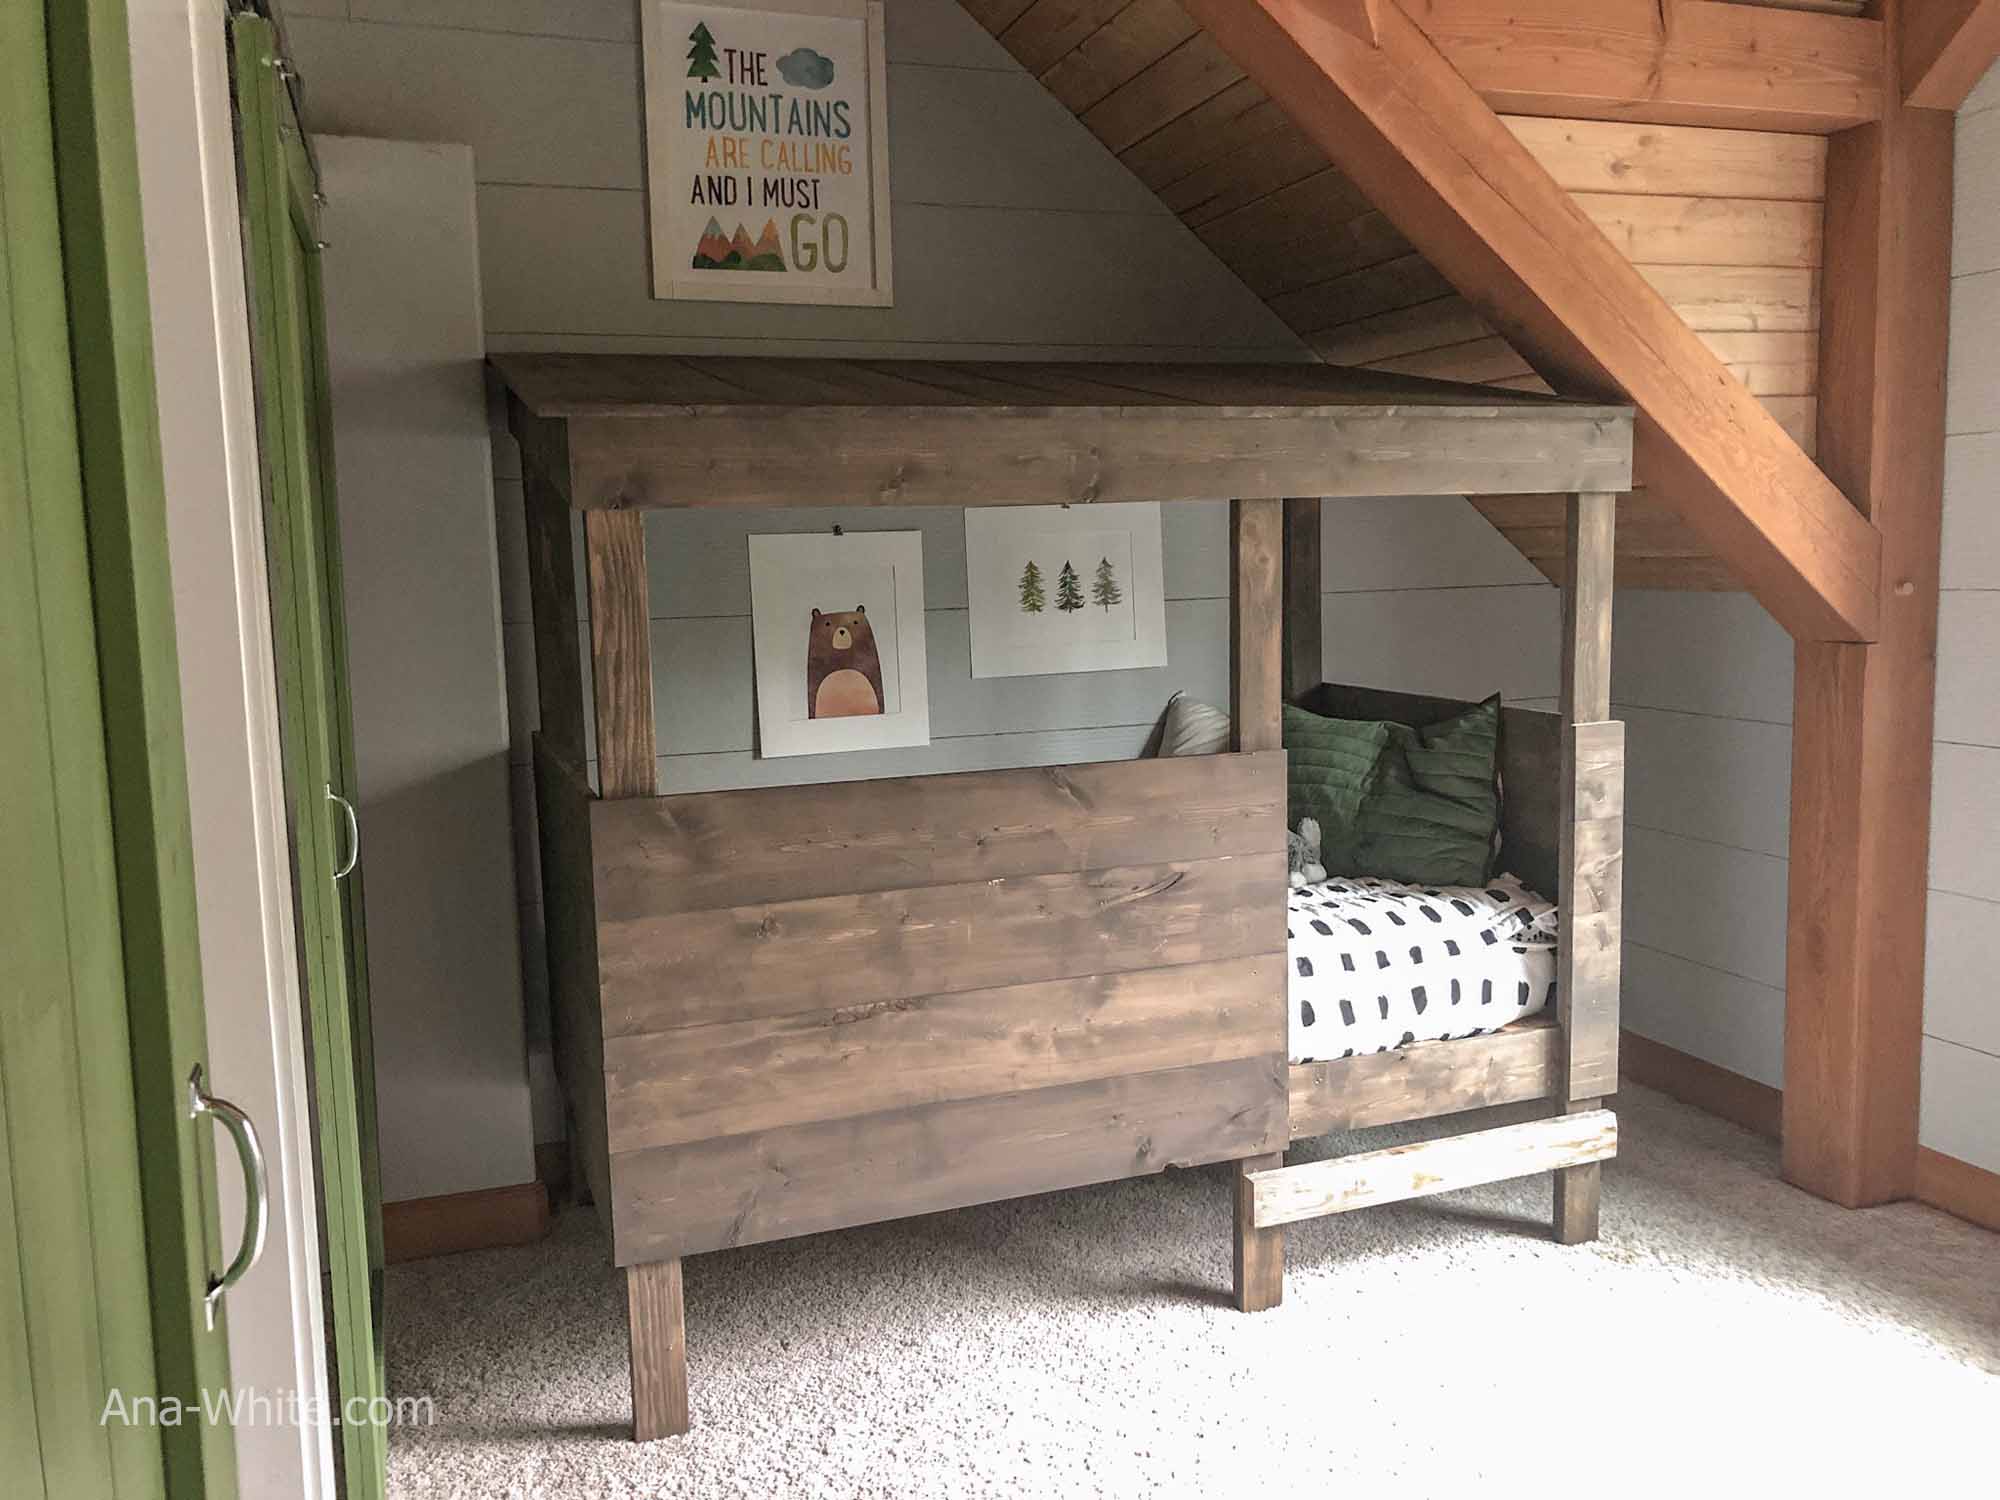
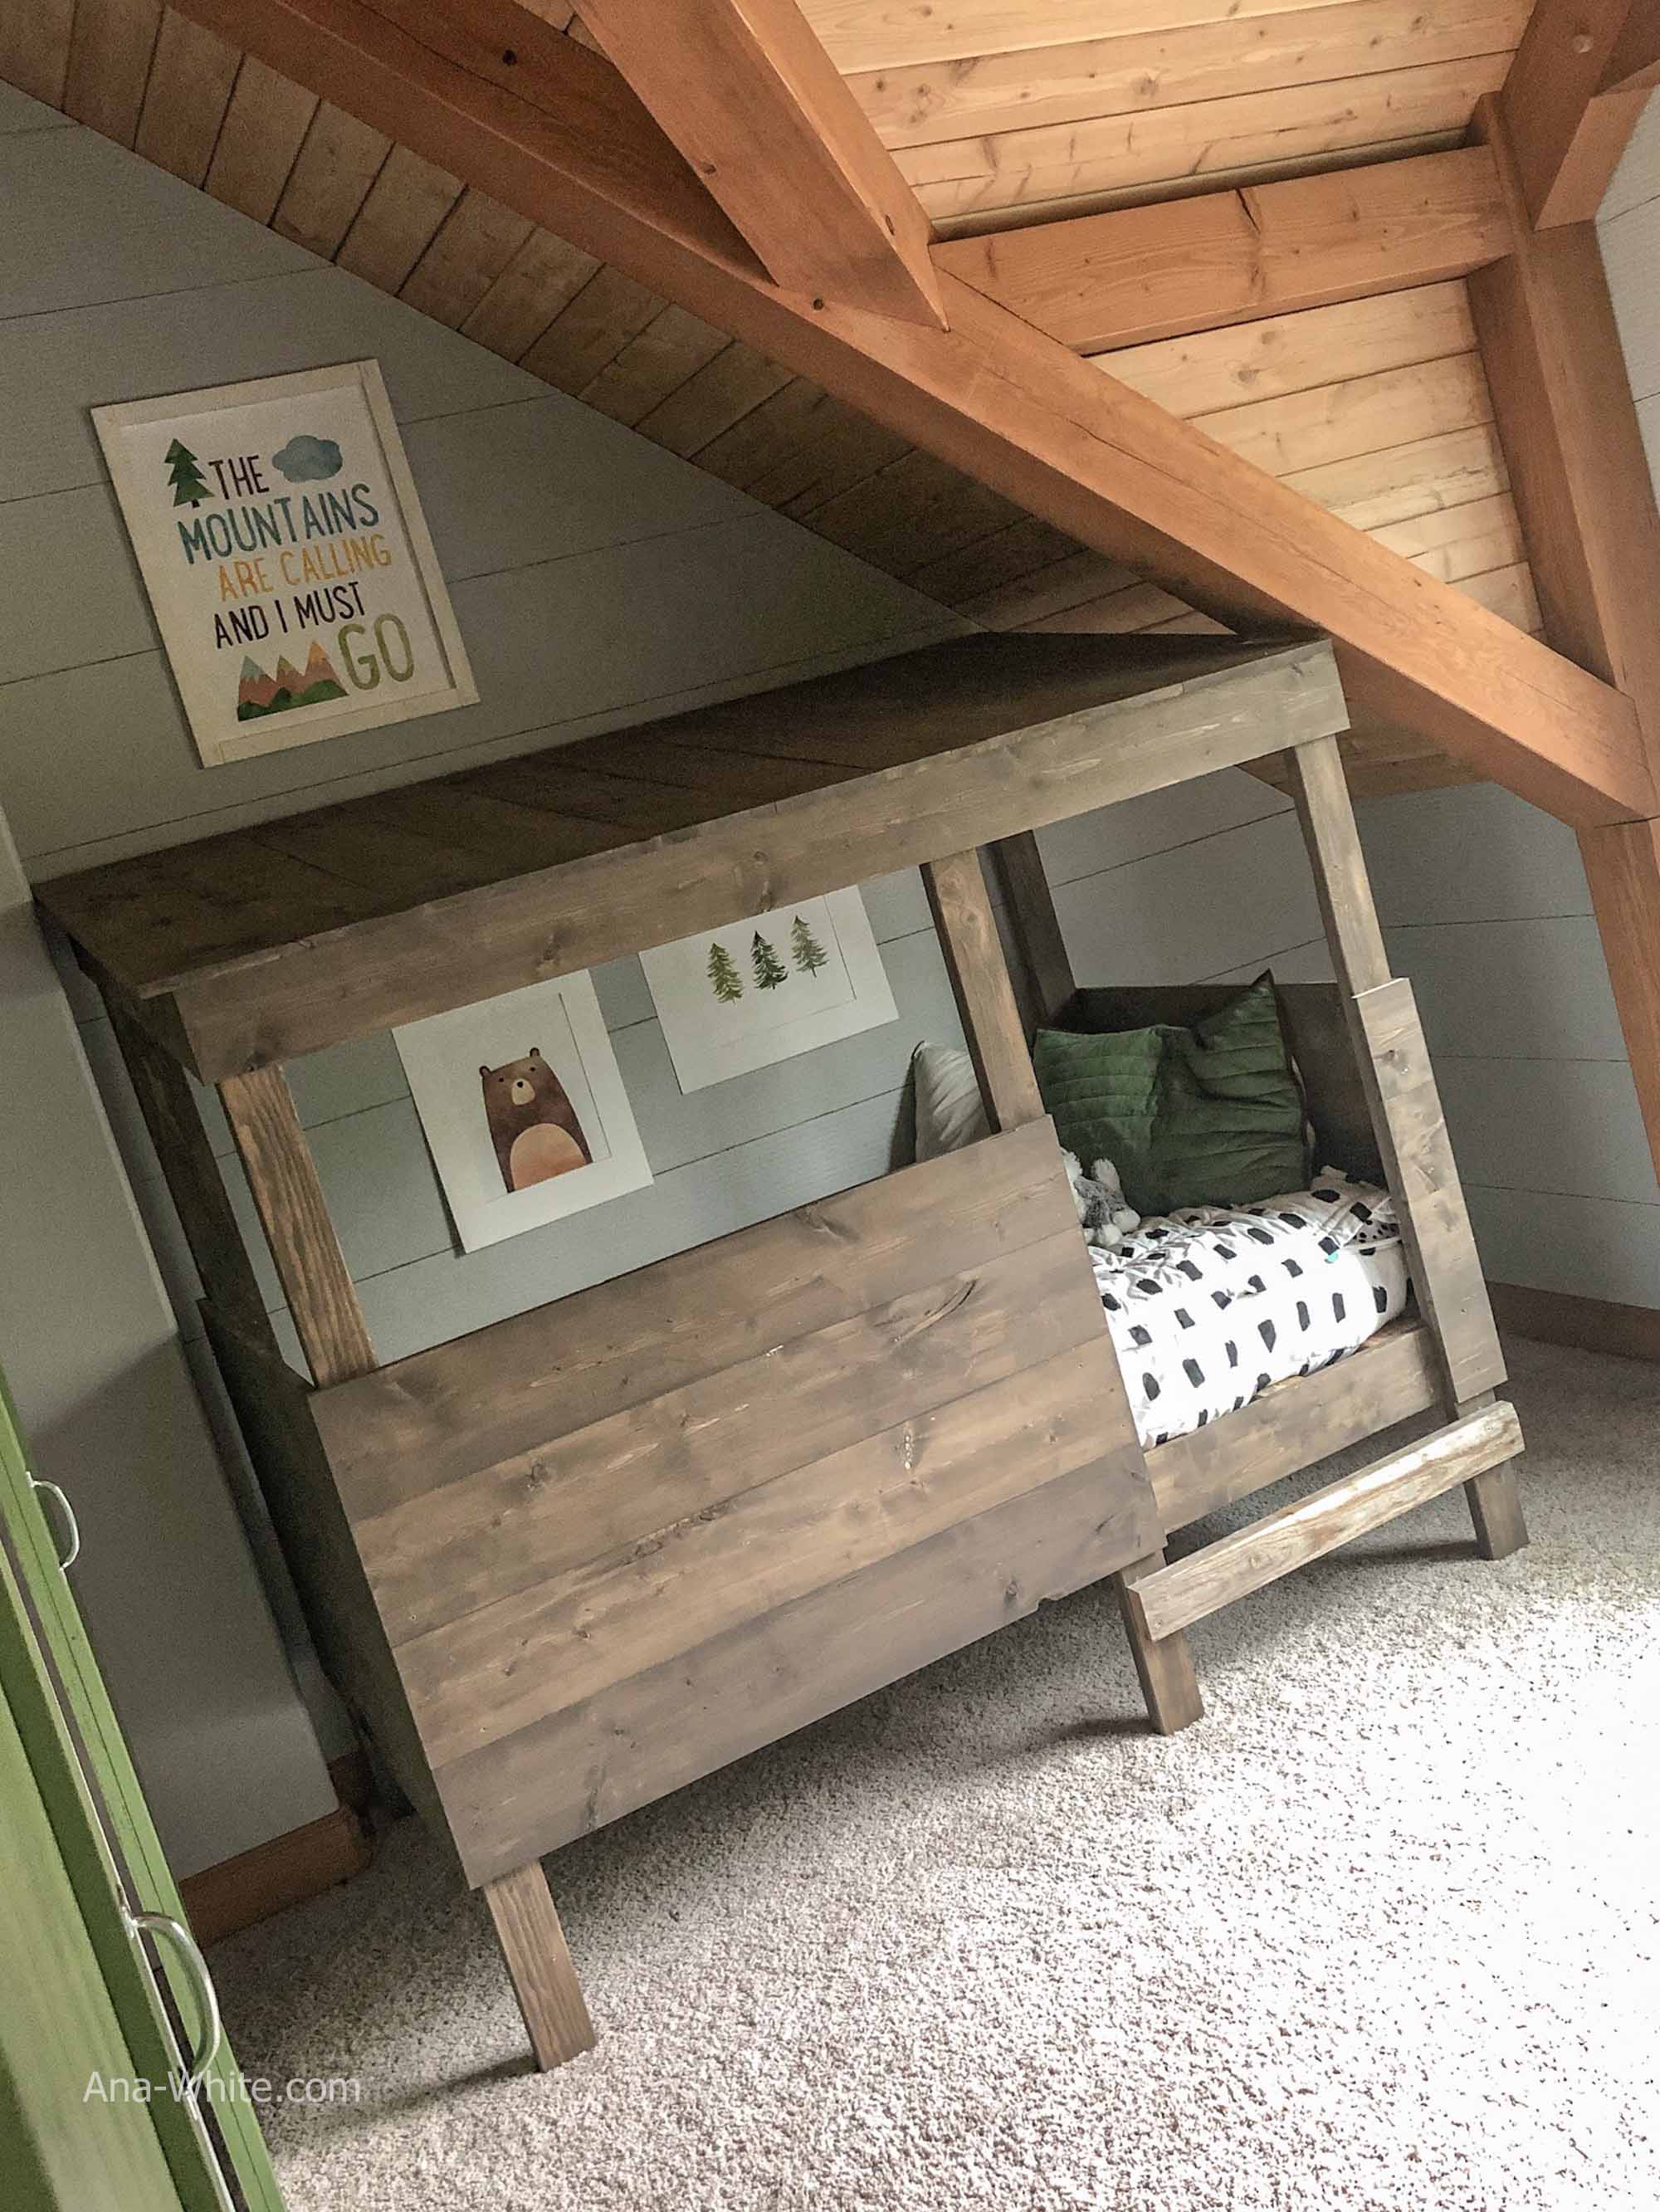
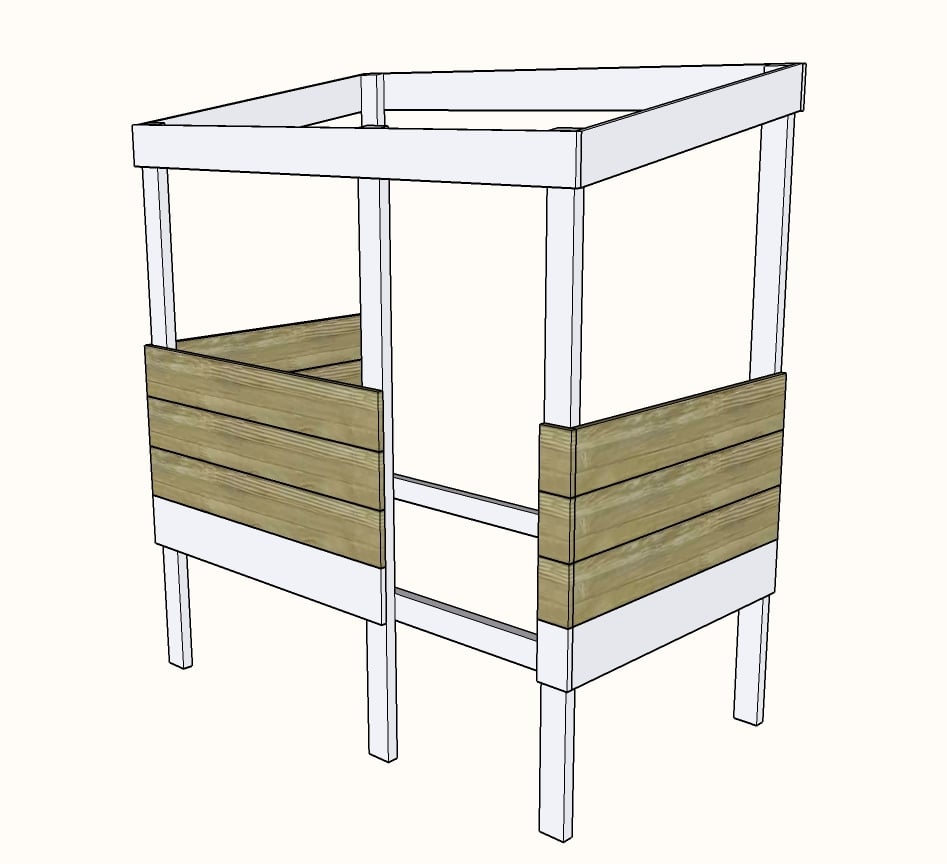
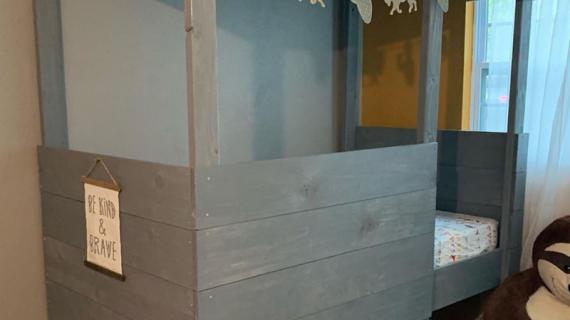
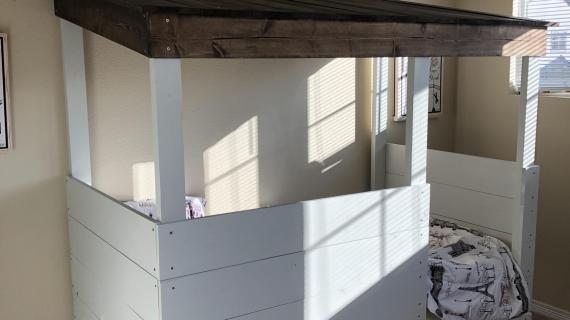
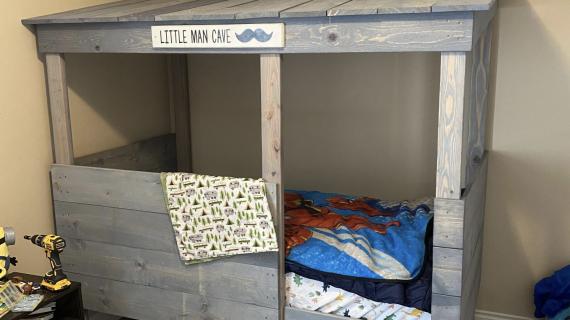
We just built this treehouse bed for my 5 year old son using just a drill and saw - and it turned out awesome!
It was a seriously easy build, with just a saw to cut the boards and a drill and some screws to put it all together. We spent about $200 on materials - a similar bed could be five times as much!
Woodland or Forest Themed Boys Room
Our son loves the outdoors and feels most comfortable when in the woods. The bed itself is designed to look like a treehouse or treefort.
We built around the woodland or forest theme by adding elements that complimented. Here's the source links for your convienience.
- Bear Artwork Printable from Etsy
- Mountains Are Calling Printable from Etsy
- Tree Printable from Etsy
- Dash Bedding by Beddys
- Green Pillow and Quilt from Target
We are debating adding our son's name to the front of the bed in wood letters too - we will post photos if we make that modification.
Treehouse Bed Plans
Love this? Build for yourself with the free plans following!
If you build, please share, we very much appreciate each and every brag post and it helps us keep doing what we are doing - sharing free plans with the world. Thank you in advance!
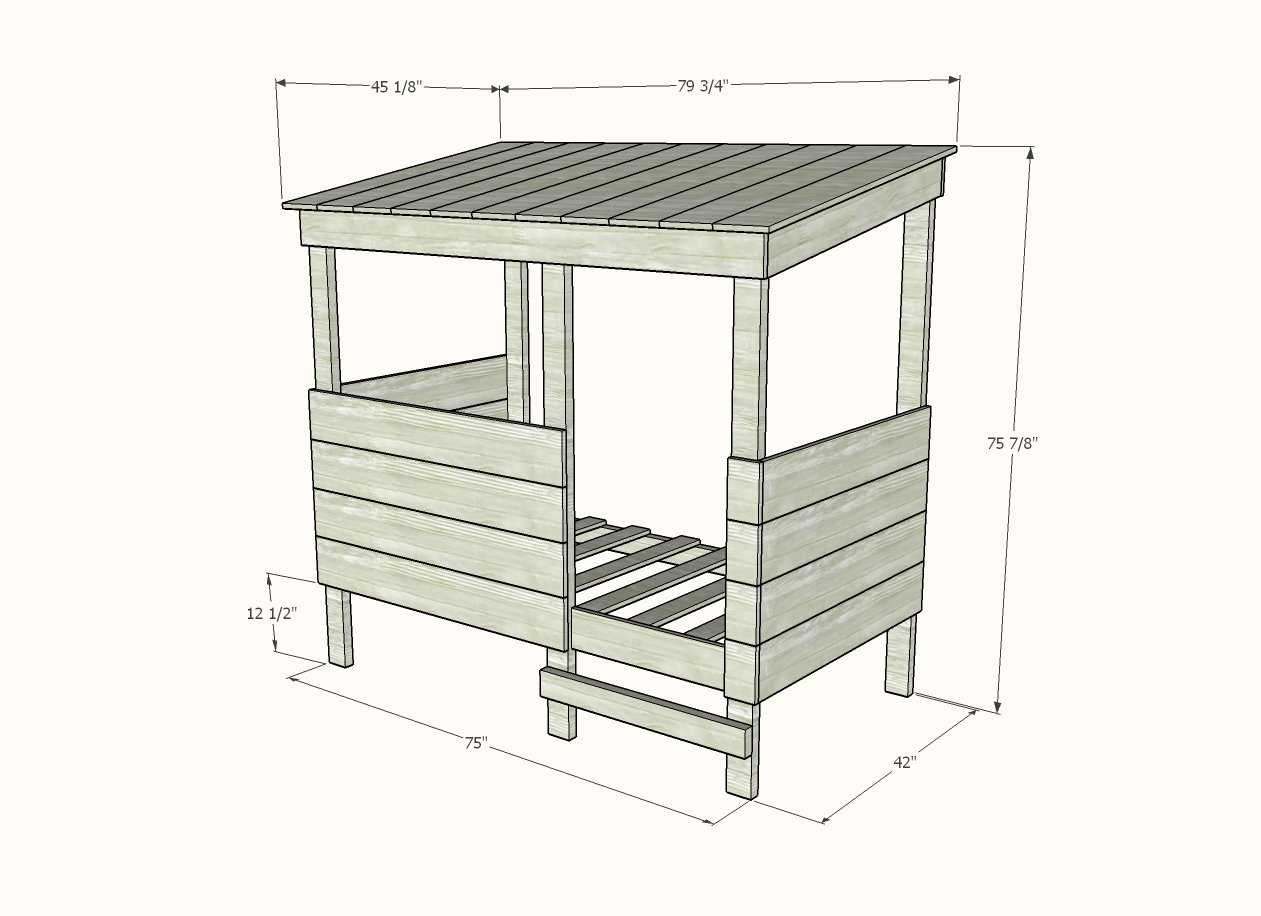
Preparation
12 - 2x4 @ 8 feet or stud length (whatever is cheaper or better material)
3 - 1x6 @ 8 feet long
12 - 1x8 @ 8 feet long
About 60 - 2-3/4" self tapping screws (SPAX or similar) (can be 2-1/2" length to 3" length)
About 150 - 1 - 3/4" self tapping screws (SPAX or similar) (can also use brad nails but will be hard to dismantle bed to move from room)
2 - 2x4 @ 75" - longest point measurement, one end cut at 10 degree bevel - back legs
3 - 2x4 @ 67-7/8" - longest point measurement, one end cut at 10 degree bevel - front legs
2 - 2x4 @ 75" - mattress cleats
2 - 1x6 @ 42-5/8" - long point to short point measurement, both ends cut at 10 degree angle, ends ARE parallel - side roof trim
2 - 1x6 @ 76-1/2" - front/back roof trim
8 - 1x8 @ 42" - side siding
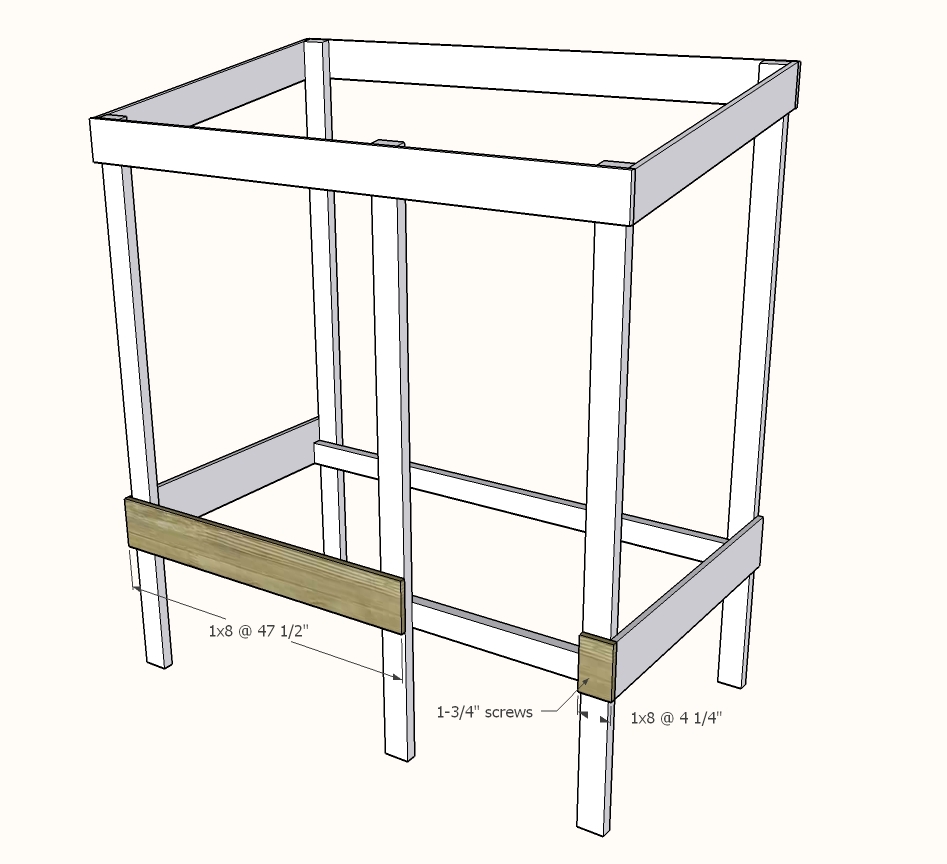
4 - 1x8 @ 47-1/2" - front siding
4 - 1x8 @ 4-1/4" - small front siding - cut last from scraps
1 - 1x8 @ 24-3/4" - front mattress trim
1 - 2x4 @ 31-3/4" - step
11 - 1x8 @ 45-3/4" - roof
9 - 2x4 @ 39" - mattress slats


It may be easier to prefinish all of the boards before assembly
Instructions
Step 1
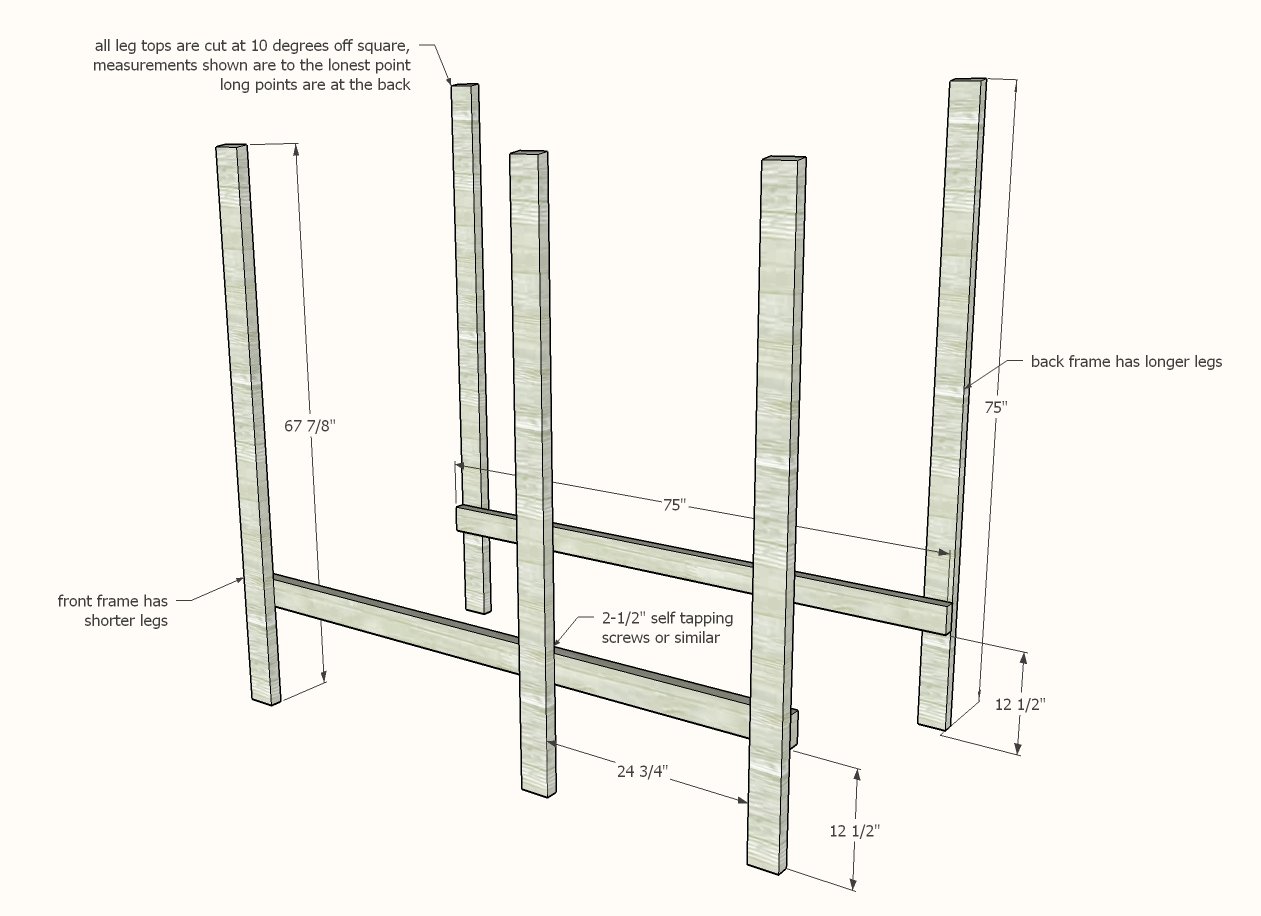
Layout the front and back frames carefully and attach the mattress cleats as shown, taking care to keep the roof angles right on the tops of the legs. Make sure the top of the legs are 75" wide, as is the bottom.
Step 2

Attach the front frame to the back frame with the roof angled trim.
Step 3
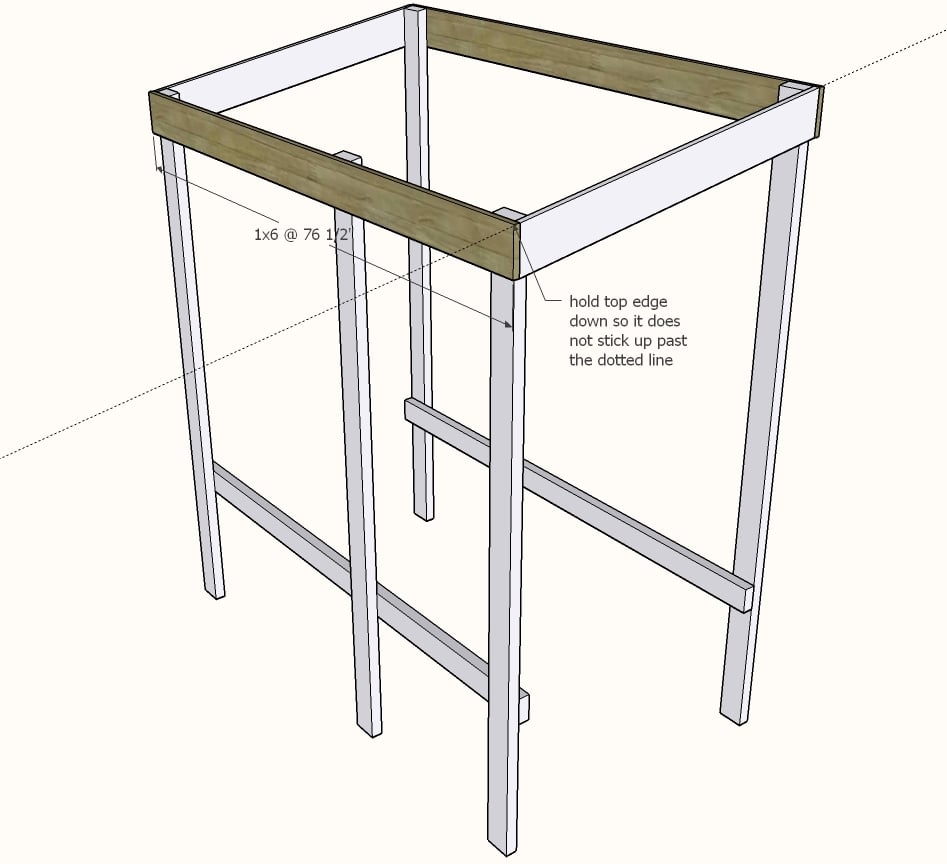
Attach remaining roof trim to the fronts of the legs and back.
For the front, keep the top down enough so the roofing boards attached in later steps will be able to lay flat on the dotted line.
Step 4
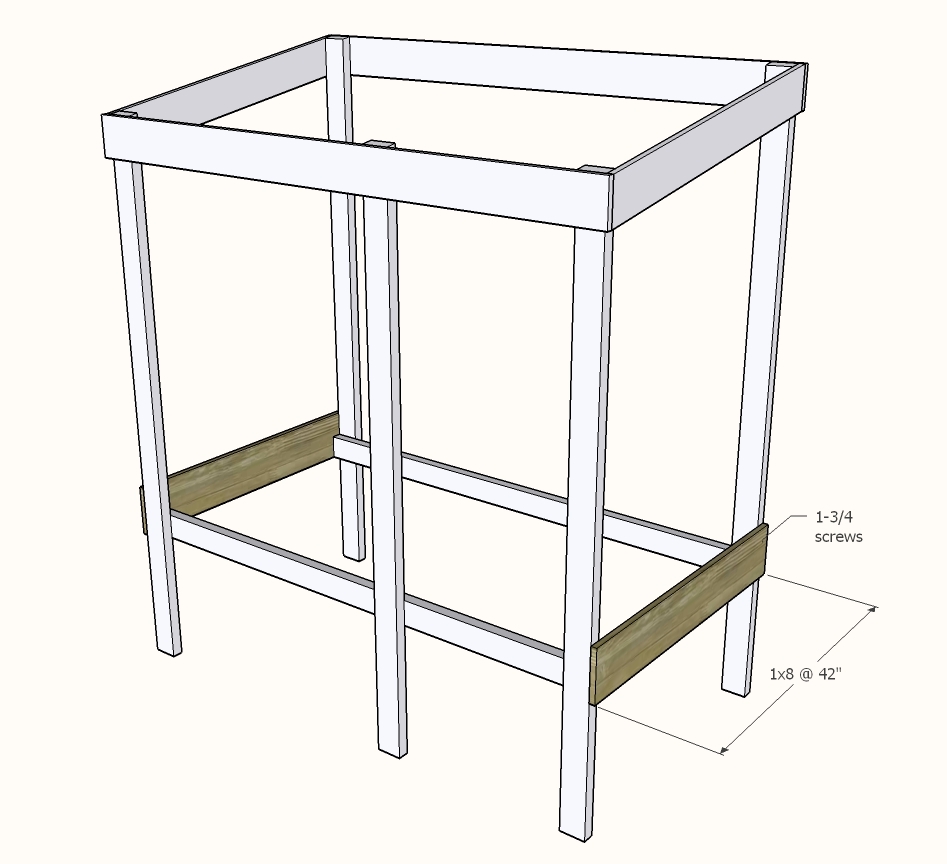
Attach the bottom side siding first, adjusting for square and level.
Step 5
Step 6
Repeat siding steps to complete the siding.
Step 7

Add the mattress trim and ladder rung. Note: ladder rung should be centered vertically on height of bed
Step 8
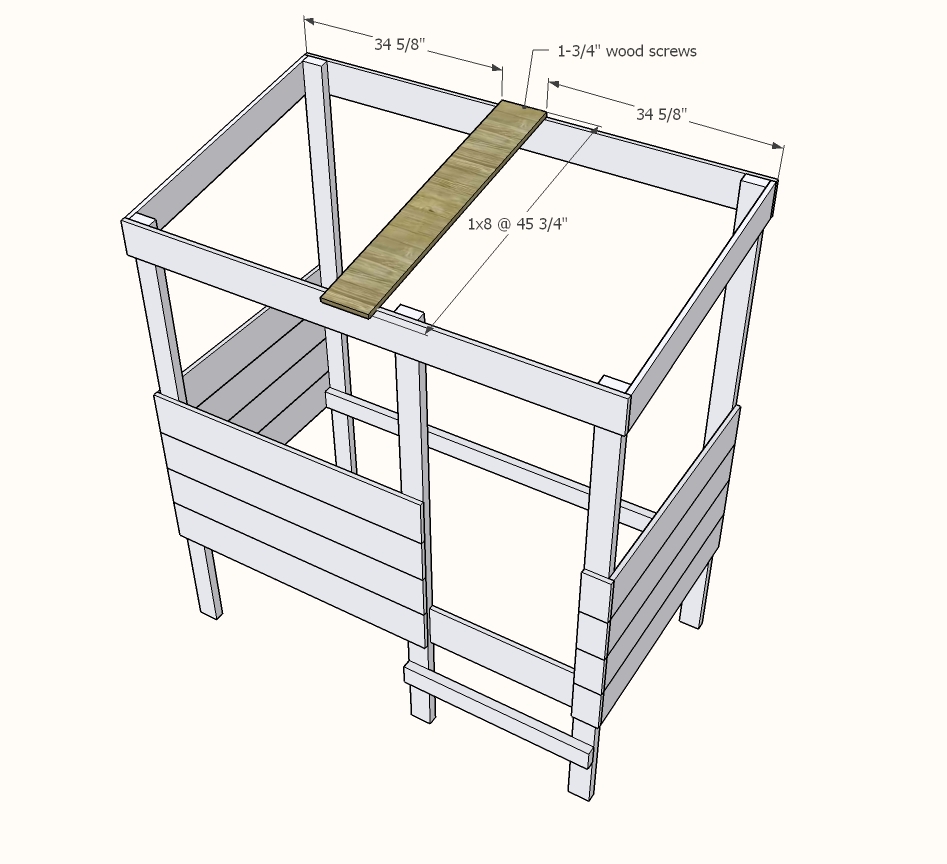
Attach center roof panel first, carefully screwing into the front 1x6 roofing trim. This may be a little tricky, so take your time and make sure the screw hits the board.
Step 9
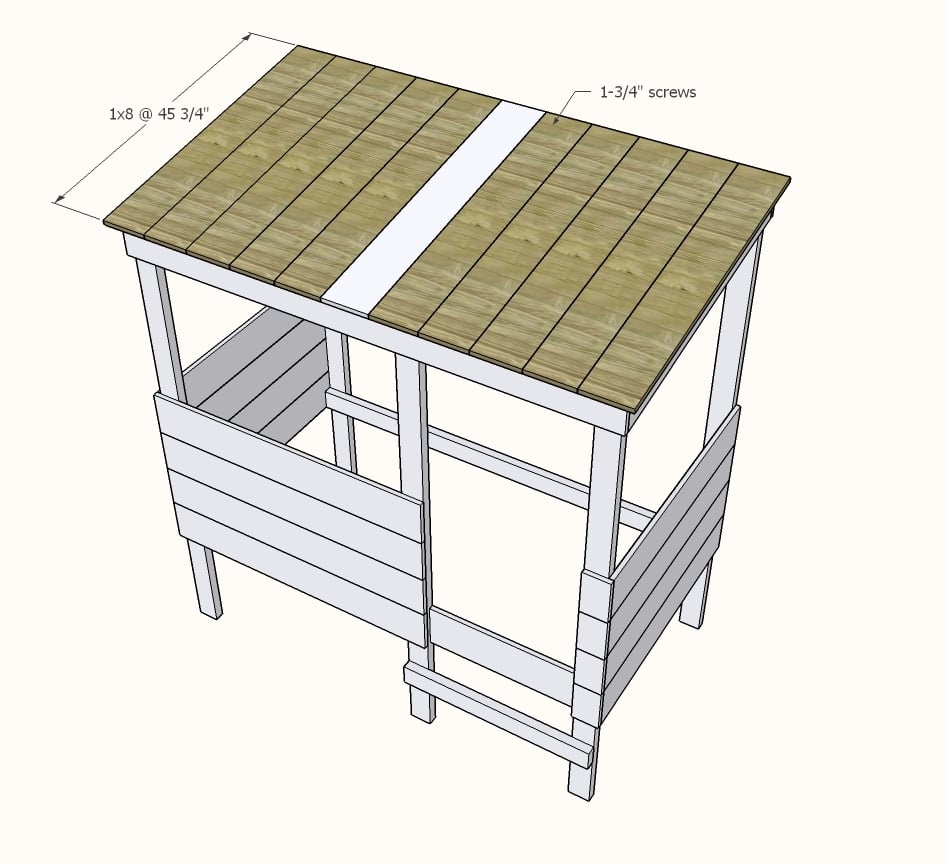
Repeat, working from the center out, for the rest of the roof boards.
Step 10
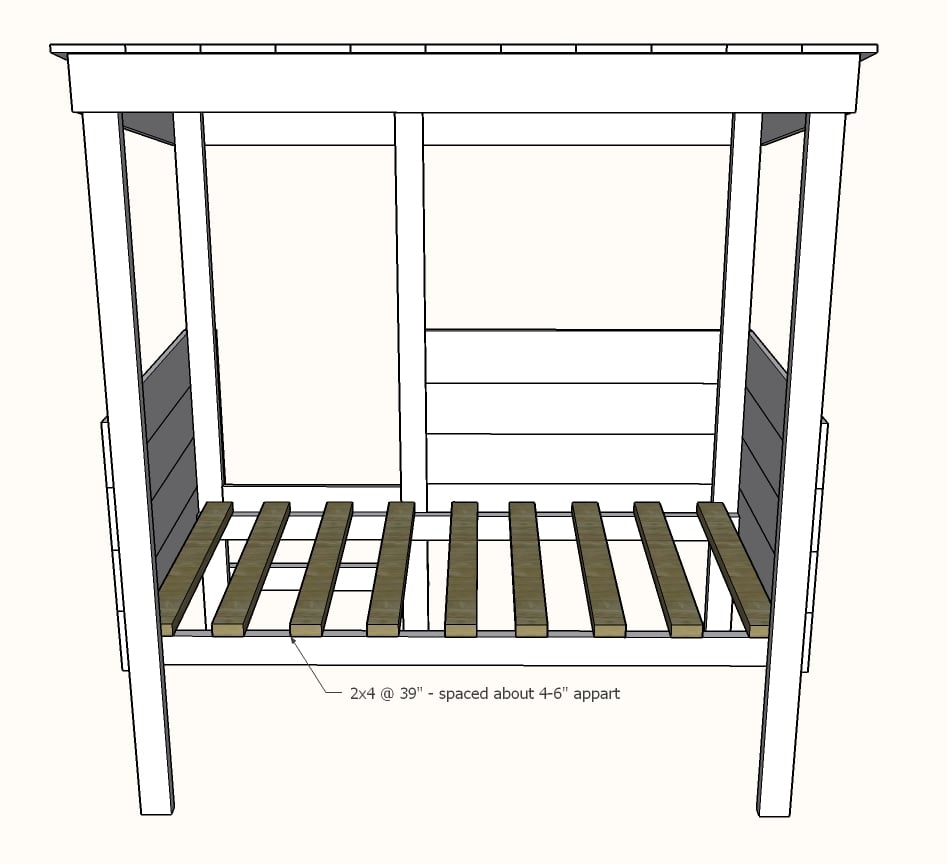
Lay 2x4 slats inside the bed on the mattress cleats. Attach with screws.
NOTE: Your mattress may require more slats than shown. Spacing shown is about 5" appart - add mor slats if in doubt.
We prefinished all the boards first, and then brought the boards into the room and build the bed.
Comments
OliveAnn
Mon, 08/05/2019 - 07:02
baby mattress size
Are there any instructions on how to make this using the size of a crib mattress? Or is this not recommended for a child under 5yrs old?
In reply to baby mattress size by OliveAnn
Ana White
Mon, 08/05/2019 - 16:44
That would be cute! I can't…
That would be cute! I can't promise anything, but will see what I can do!
In reply to baby mattress size by OliveAnn
Ana White
Sat, 08/10/2019 - 12:27
Thank you for requesting…
Thank you for requesting plans! We were able to make this happen for you!
https://www.ana-white.com/woodworking-projects/toddler-treehouse-bed
If you do end up building (no pressure!) please brag photos!
ashwilham
Tue, 02/11/2020 - 22:13
Advice.
Love this bed so much! Is there a way to make it into a junior loft bed? Would it be strong enough if I still used 2x4s on the corners or would 4x4s be better? I’d like to have about a 40” height under the bed to the floor.
Star
Tue, 02/25/2020 - 17:06
Thank you!
First of all—thank you for your website and YouTube channel. You have inspired me to try and build something so I chose to make this bed for my guy! It took us four days to complete the bed and it is a solid piece of furniture and we love it. I would like to know what wood you used and where you purchased it. When we priced wood for this project, it ranged from $500-$900. And how do you cut an angle? Our circular saw had the 10 degree bevel cut but we misread and cut the 10 degree angle cut as a bevel. And did you sand the wood before staining it? Have you ever considered making a basic how to video? Since we are new to building, we would love a how to video on bevel versus angle, how to use a circular saw, sanding, using a square, how to make sure the cuts are straight, how to prevent splintering of the wood as you cut it etc. #firsttimers #thankyou
MountainDrew
Mon, 05/25/2020 - 08:54
Great design, our toddler…
Great design, our toddler loves this bed! Here’s our finished product.
https://www.ana-white.com/community-projects/treehouse-bed-0