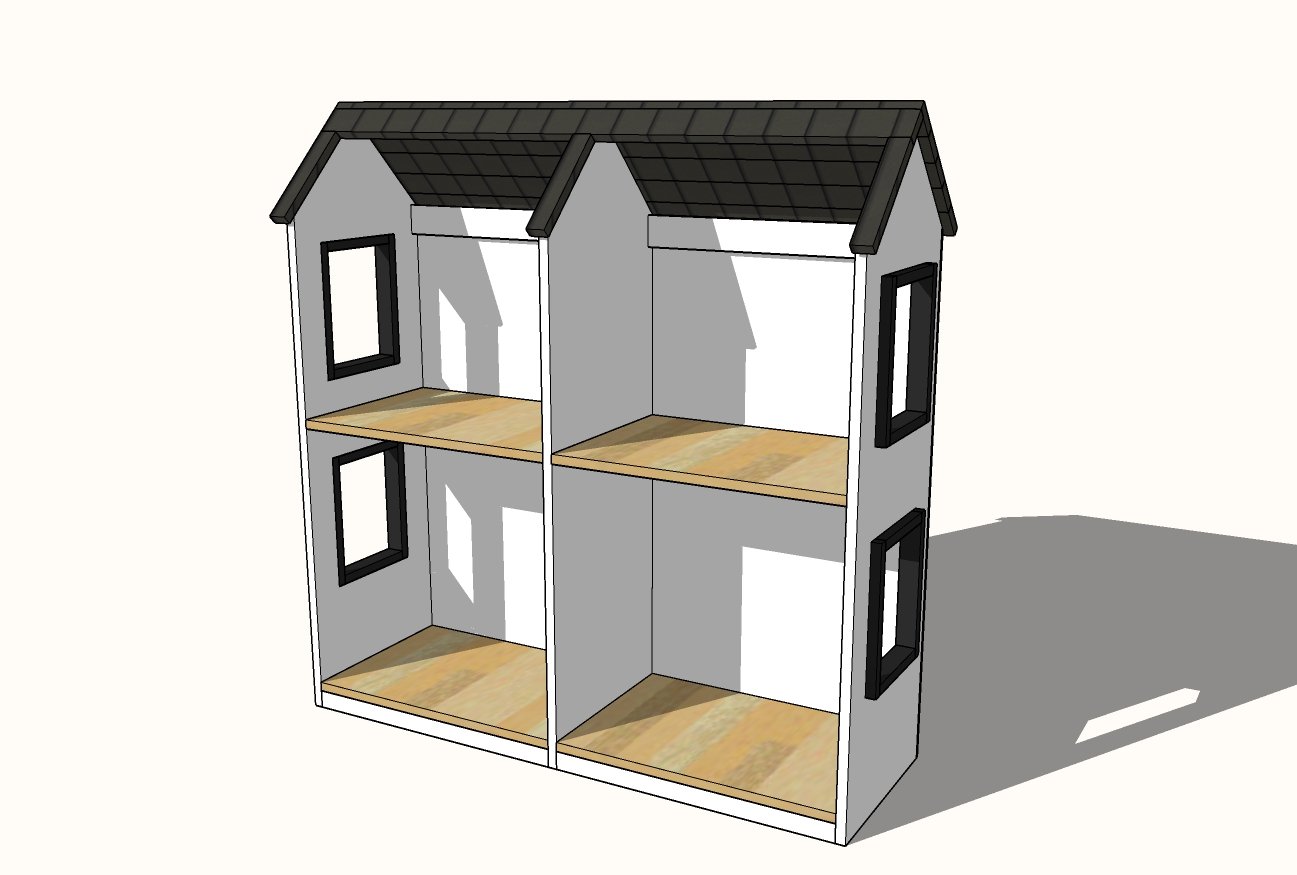
Build your own two story dollhouse for 18" or American Girl dolls. This is a more compact size that is easier to reach inside rooms.
Dimensions
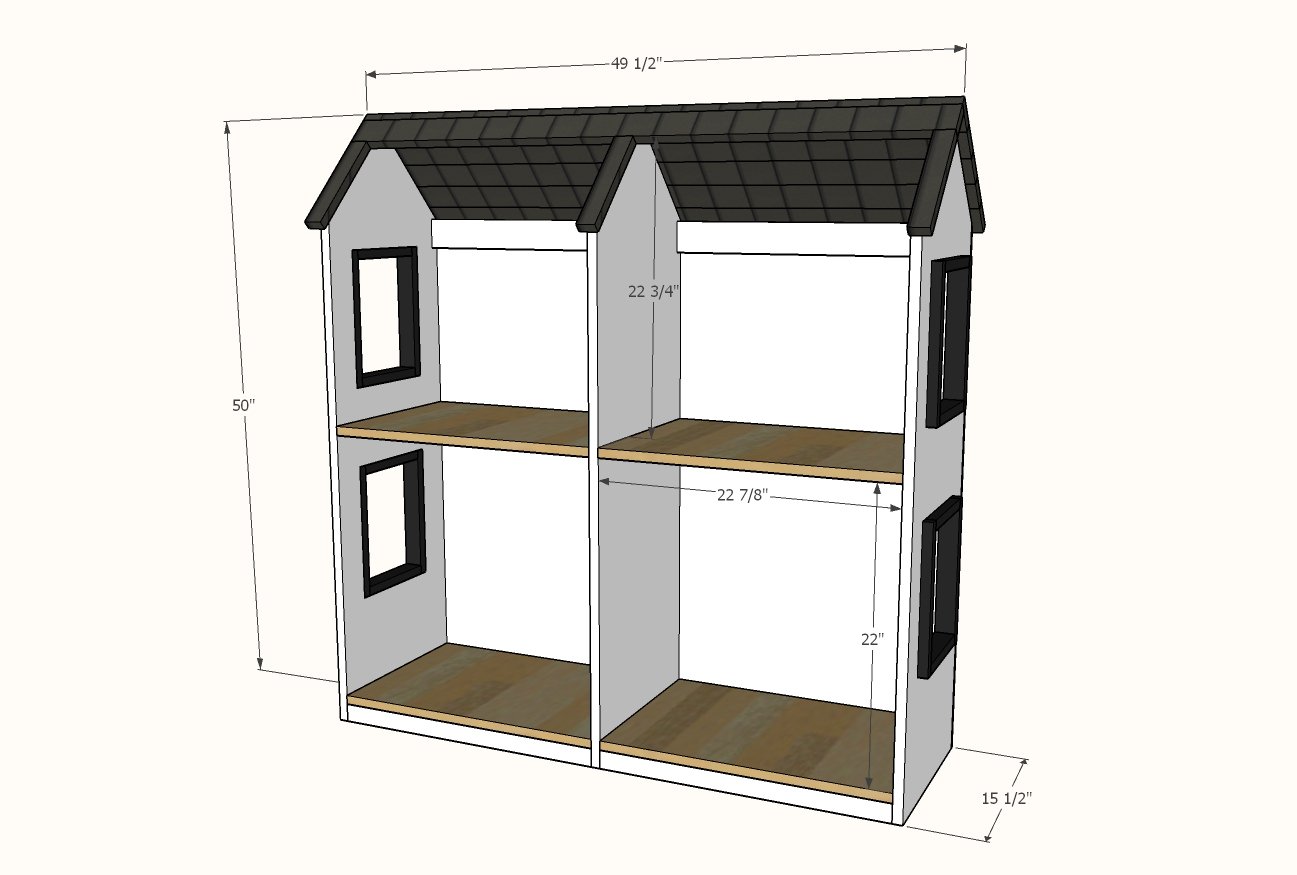
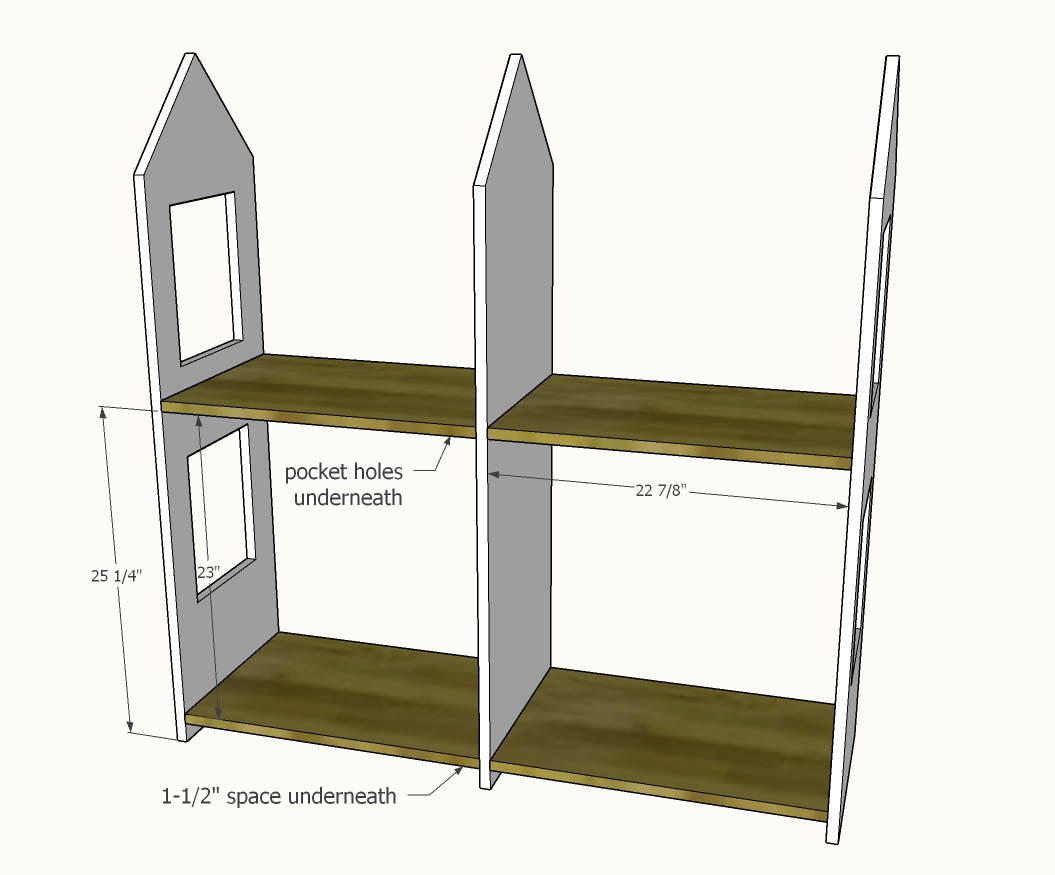
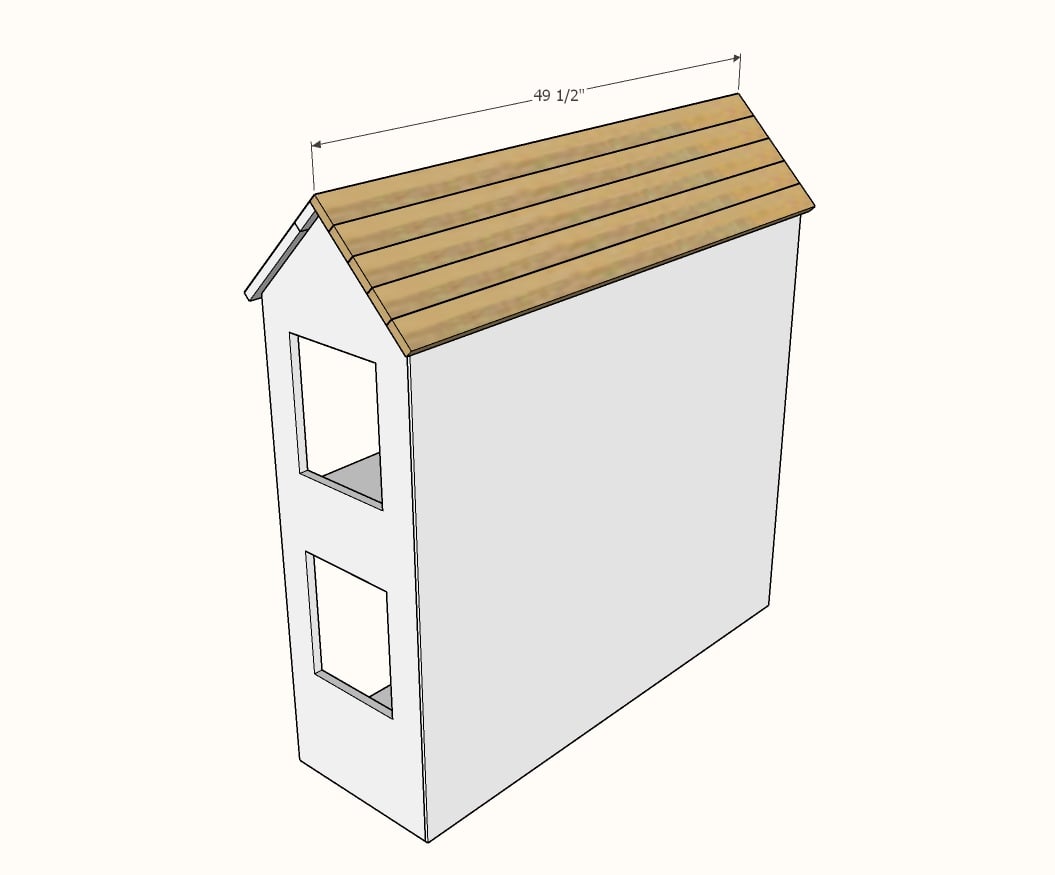
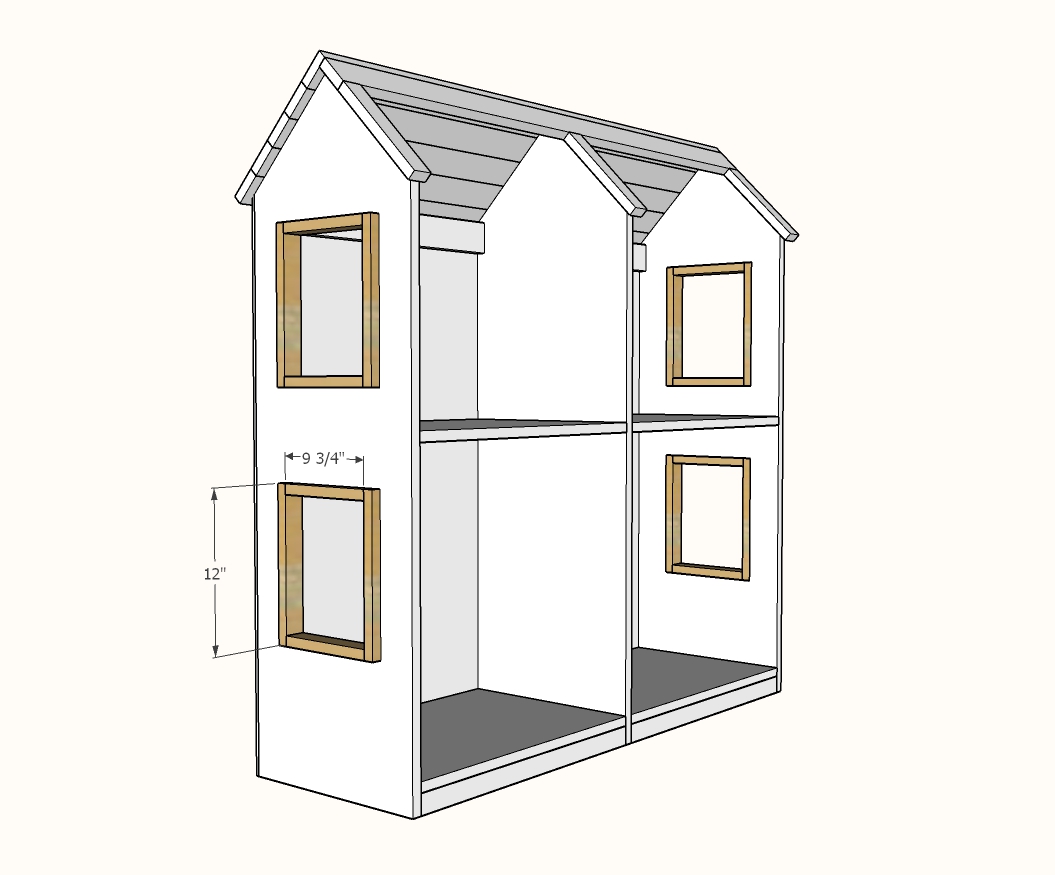
Dimensions shown in diagram. Note the rooms are not as deep. Deep rooms are hard to reach into for kids.
Preparation
Shopping List
- 1 - sheet of 3/4" plywood ripped into three strips, 8 feet long x 15-1/4" wide
- 1 - 4’x4’ x ¼” thick plywood panel for back (or similar paneling material)
- 6 - 1x3 @ 8 feet long
- 3 - 1x2 @ 8 feet long
- 50 - 1-¼” pocket hole screws and pocket hole jig
- 1-¼” and ¾” brad nails
- Wood glue
- Drill
- Circular Saw
- Jigsaw
- Brad Nailer
- Palm Sander
Cut List
3/4" thick plywood pieces
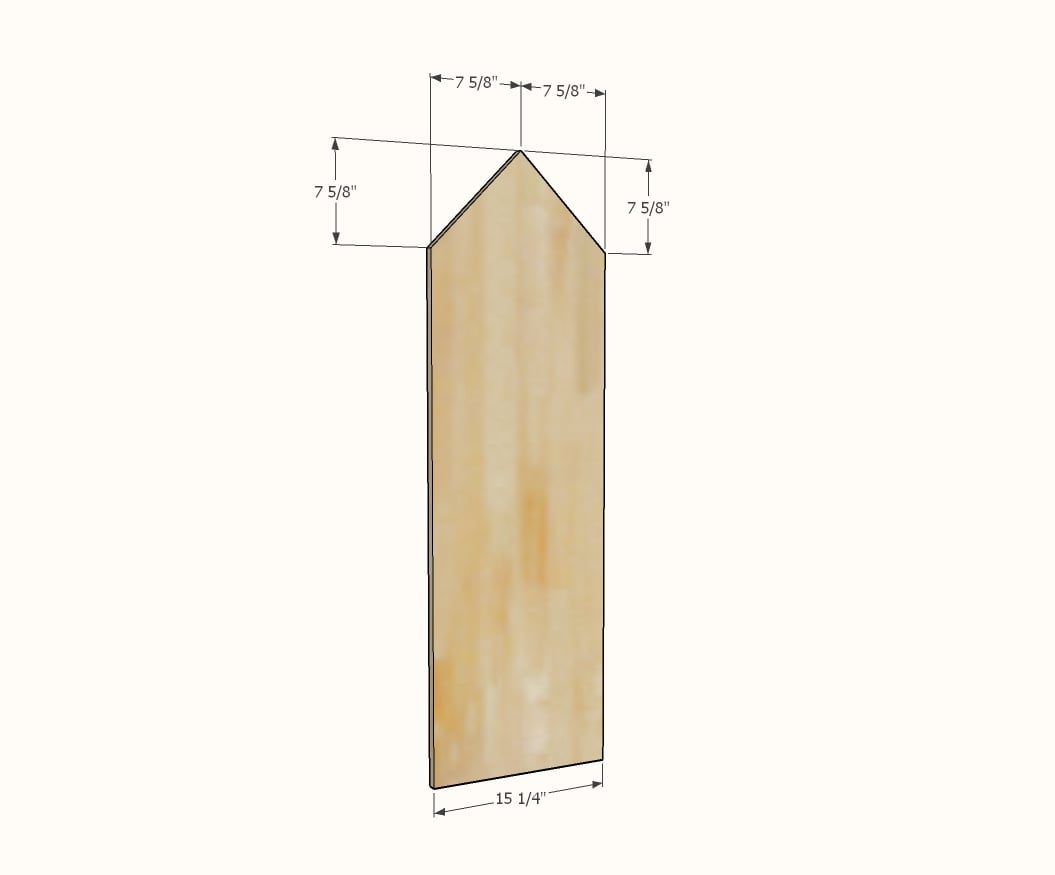
- 3 @ 15-1/4" x 49"
- 4 @ 15-1/4" x 22-7/8"
In addition to the plywood pieces, you'll also need:
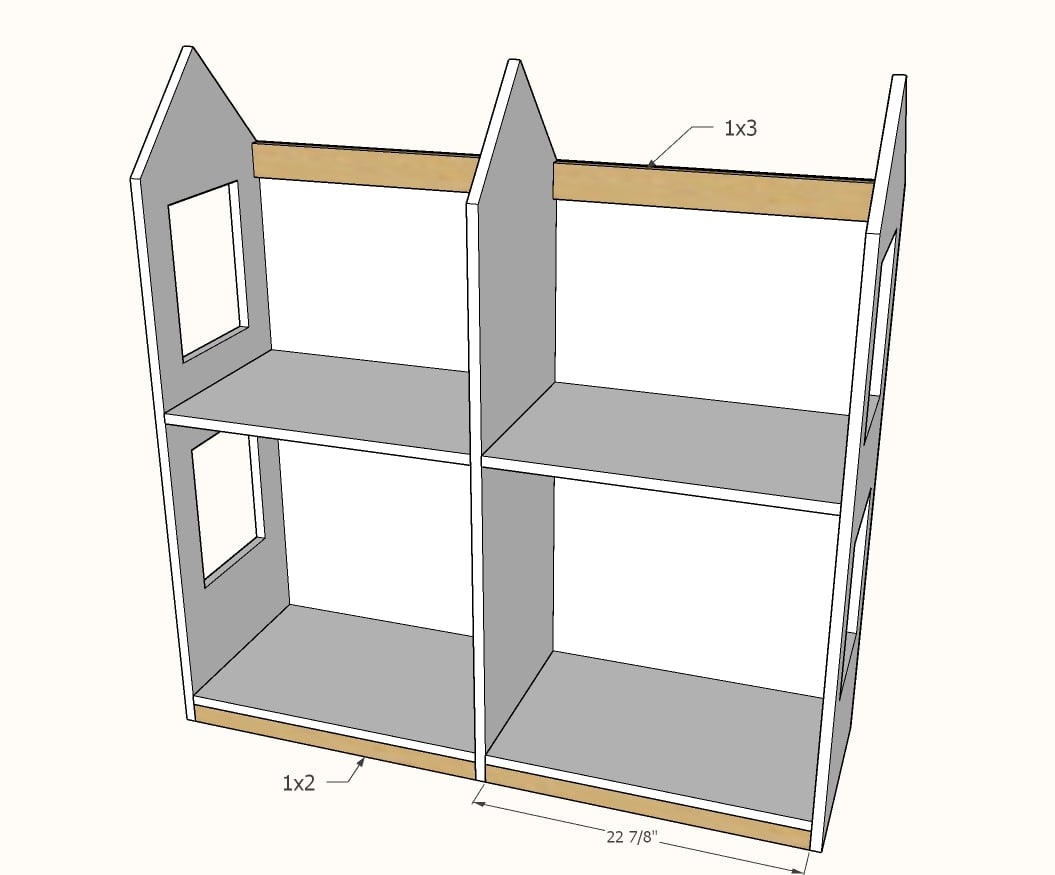
- 2 - 1x3 @ 22-⅞” - bay supports on top
- 2 - 1x2 @ 22-⅞” - bay supports bottom
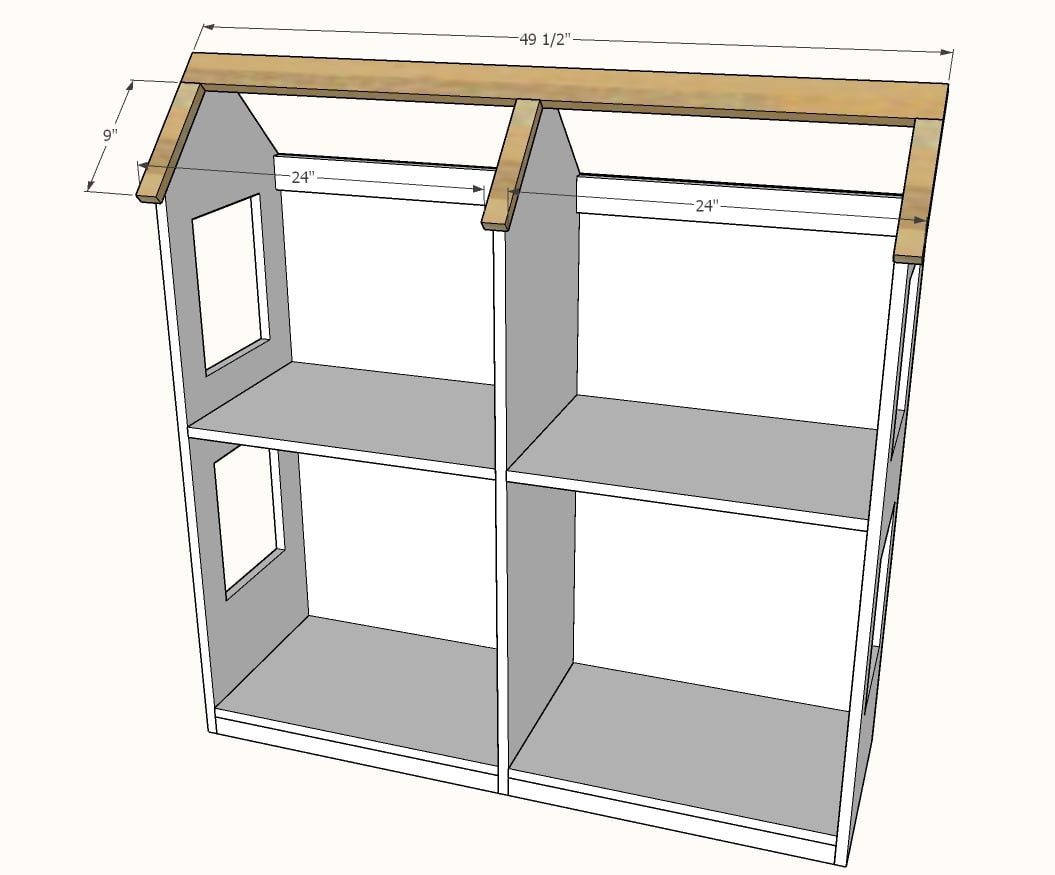
- 6 - 1x3 @ 49-½” - main roof
- 3 - 1x3 @ 9” - roof trim
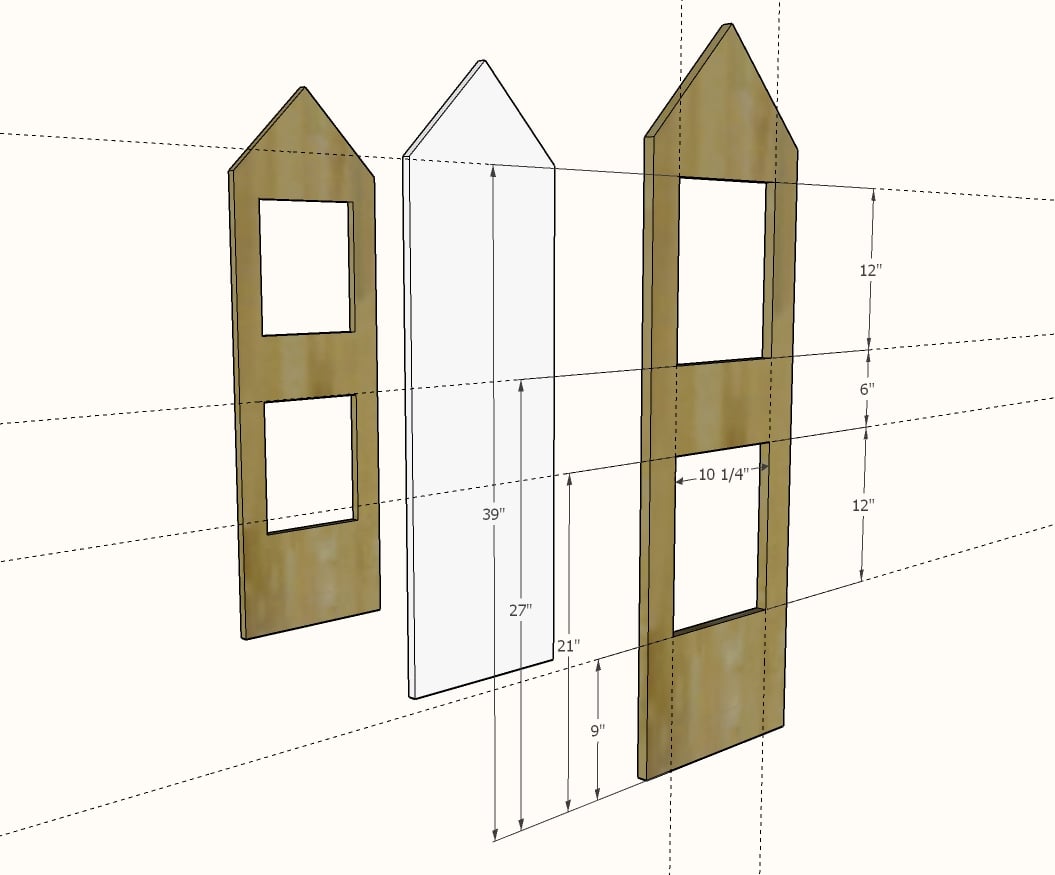
- 8 - 1x2 @ 12” - window trim
- 8 - 1x2 @ 9-¾” - window trim
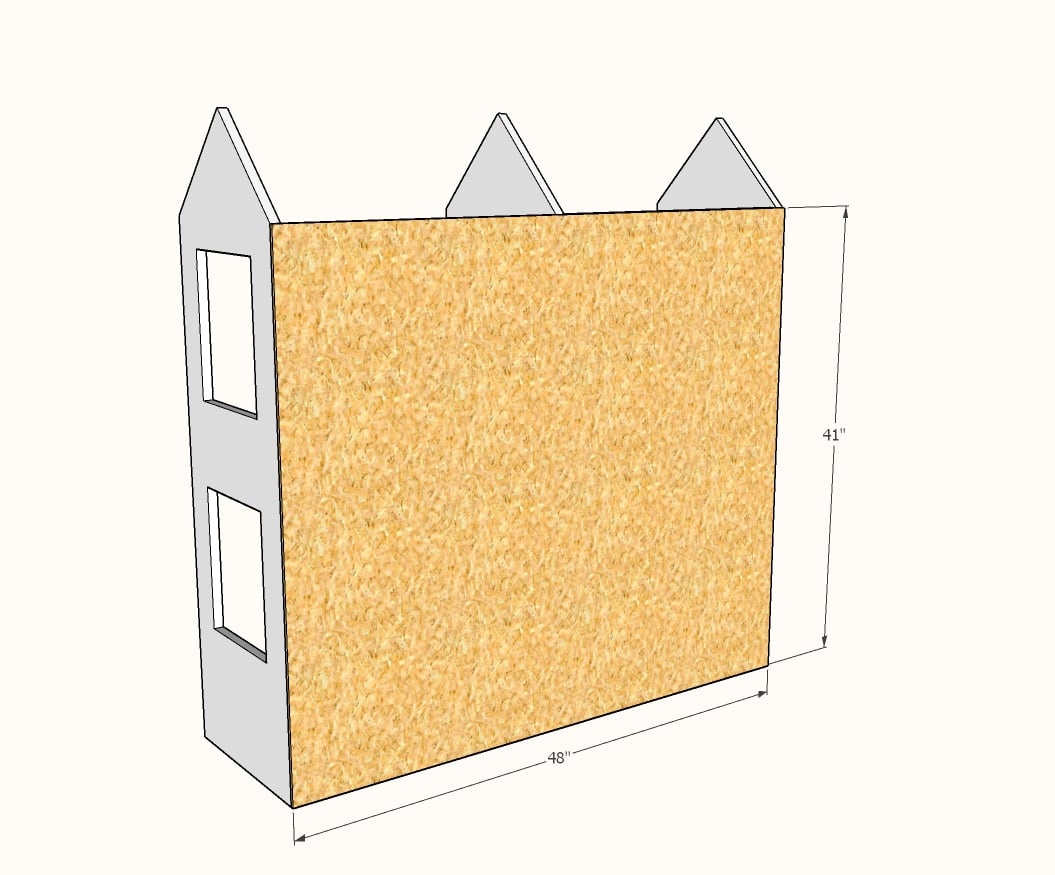
- 1 - ¼” plywood @ 41” x 48”
Cutting Instructions
Rip plywood with a circular saw, here is my easiest method:
Instructions
Step 1
Step 2
Step 3
Step 4
Step 5
Step 6
Step 7
Project Type
Room



Comments
pennstaterandy
Fri, 10/23/2020 - 08:01
love this and a question
I love this!
Real quick I was think about using your shelf help website to help me make a bathroom sink vanity. Could I use shelf help for that?
wedaphillips1
Fri, 10/30/2020 - 11:38
Bad link.
Bad link. Leads to an error. Is there any way to get the right link? I would greatly appreciate it as my daughter really wants one.
alex87
Mon, 11/23/2020 - 13:48
Does the kit come with the…
Does the kit come with the windows already cut out?