

Free plans to build your own garage shelving from Ana White
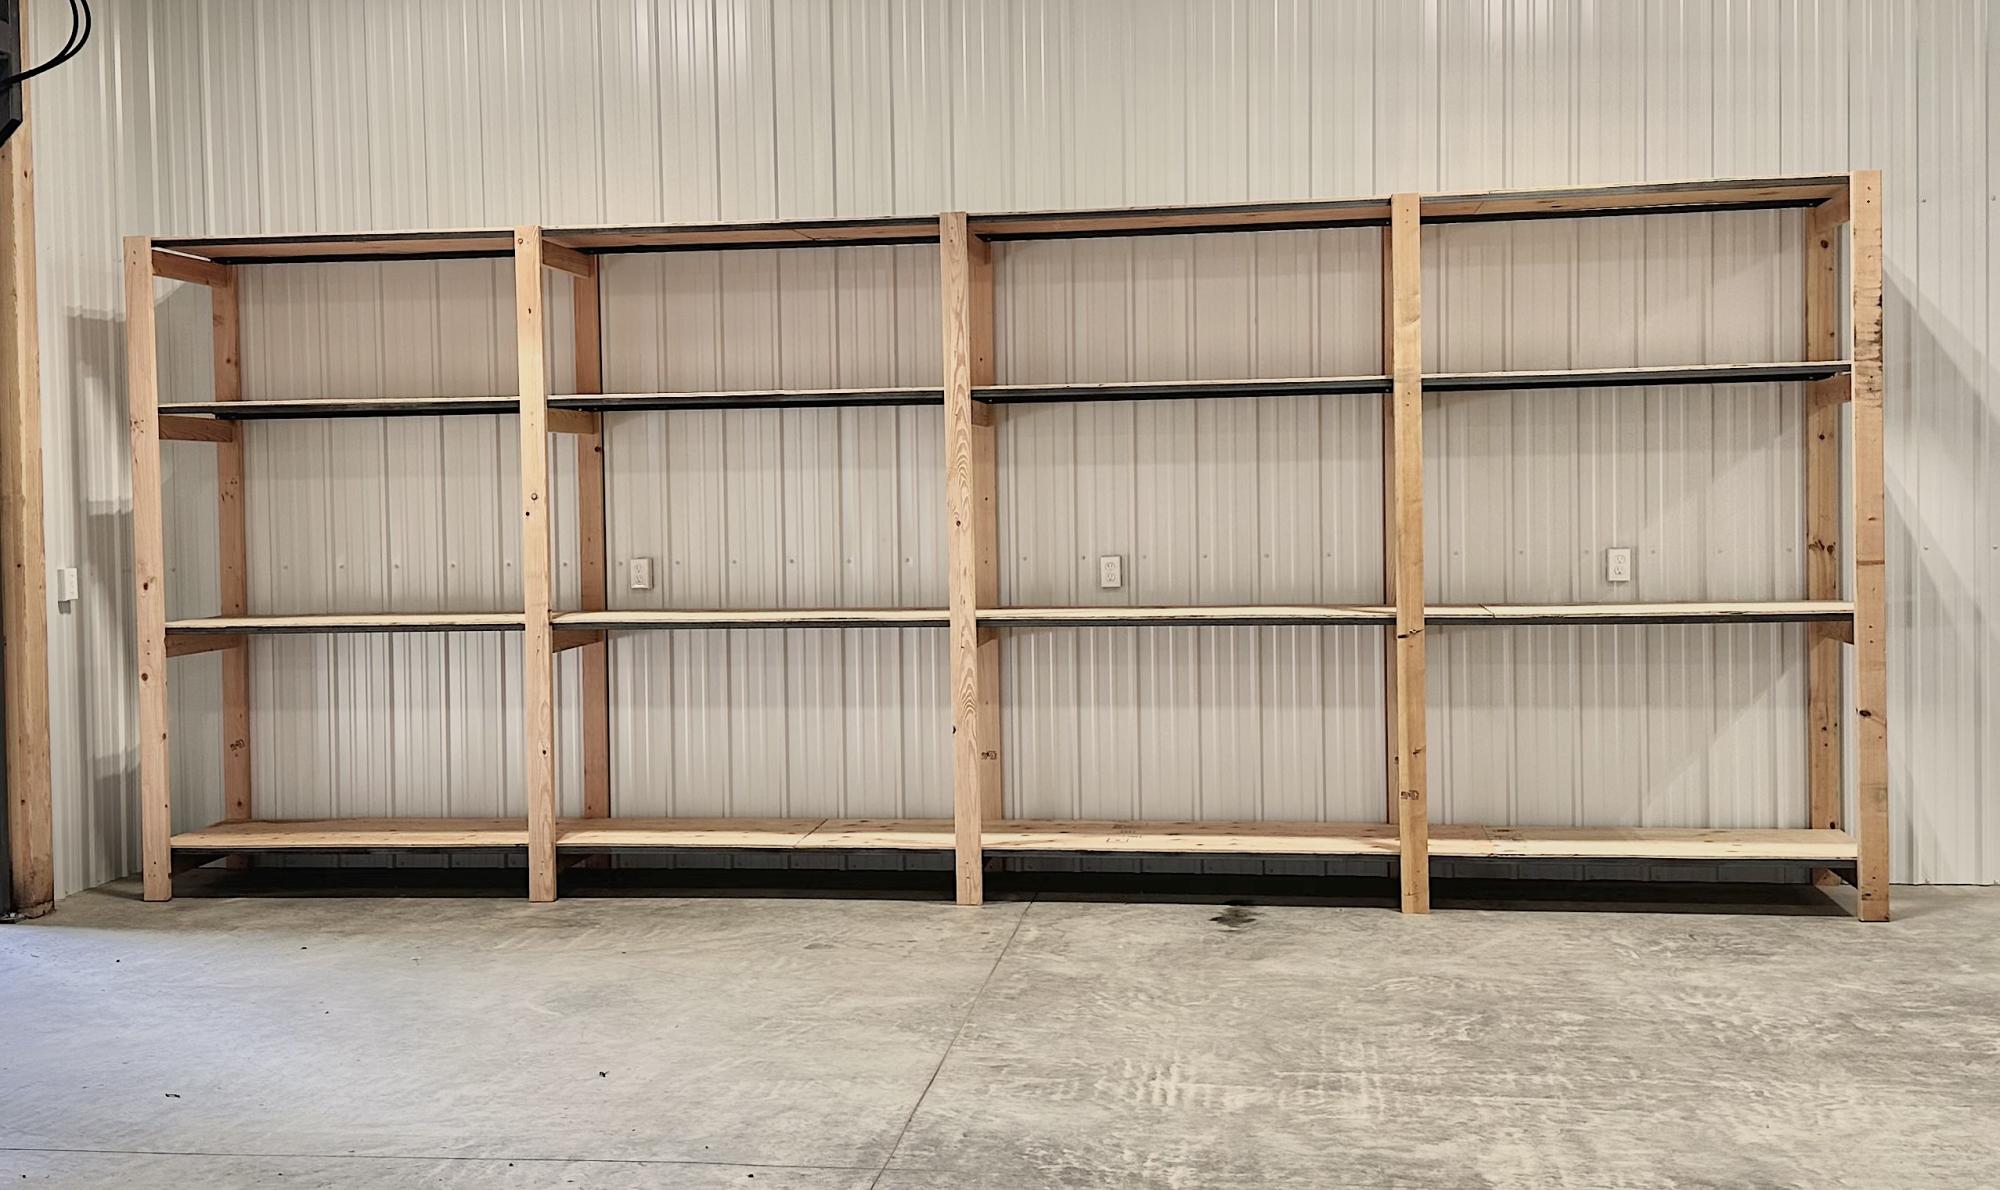
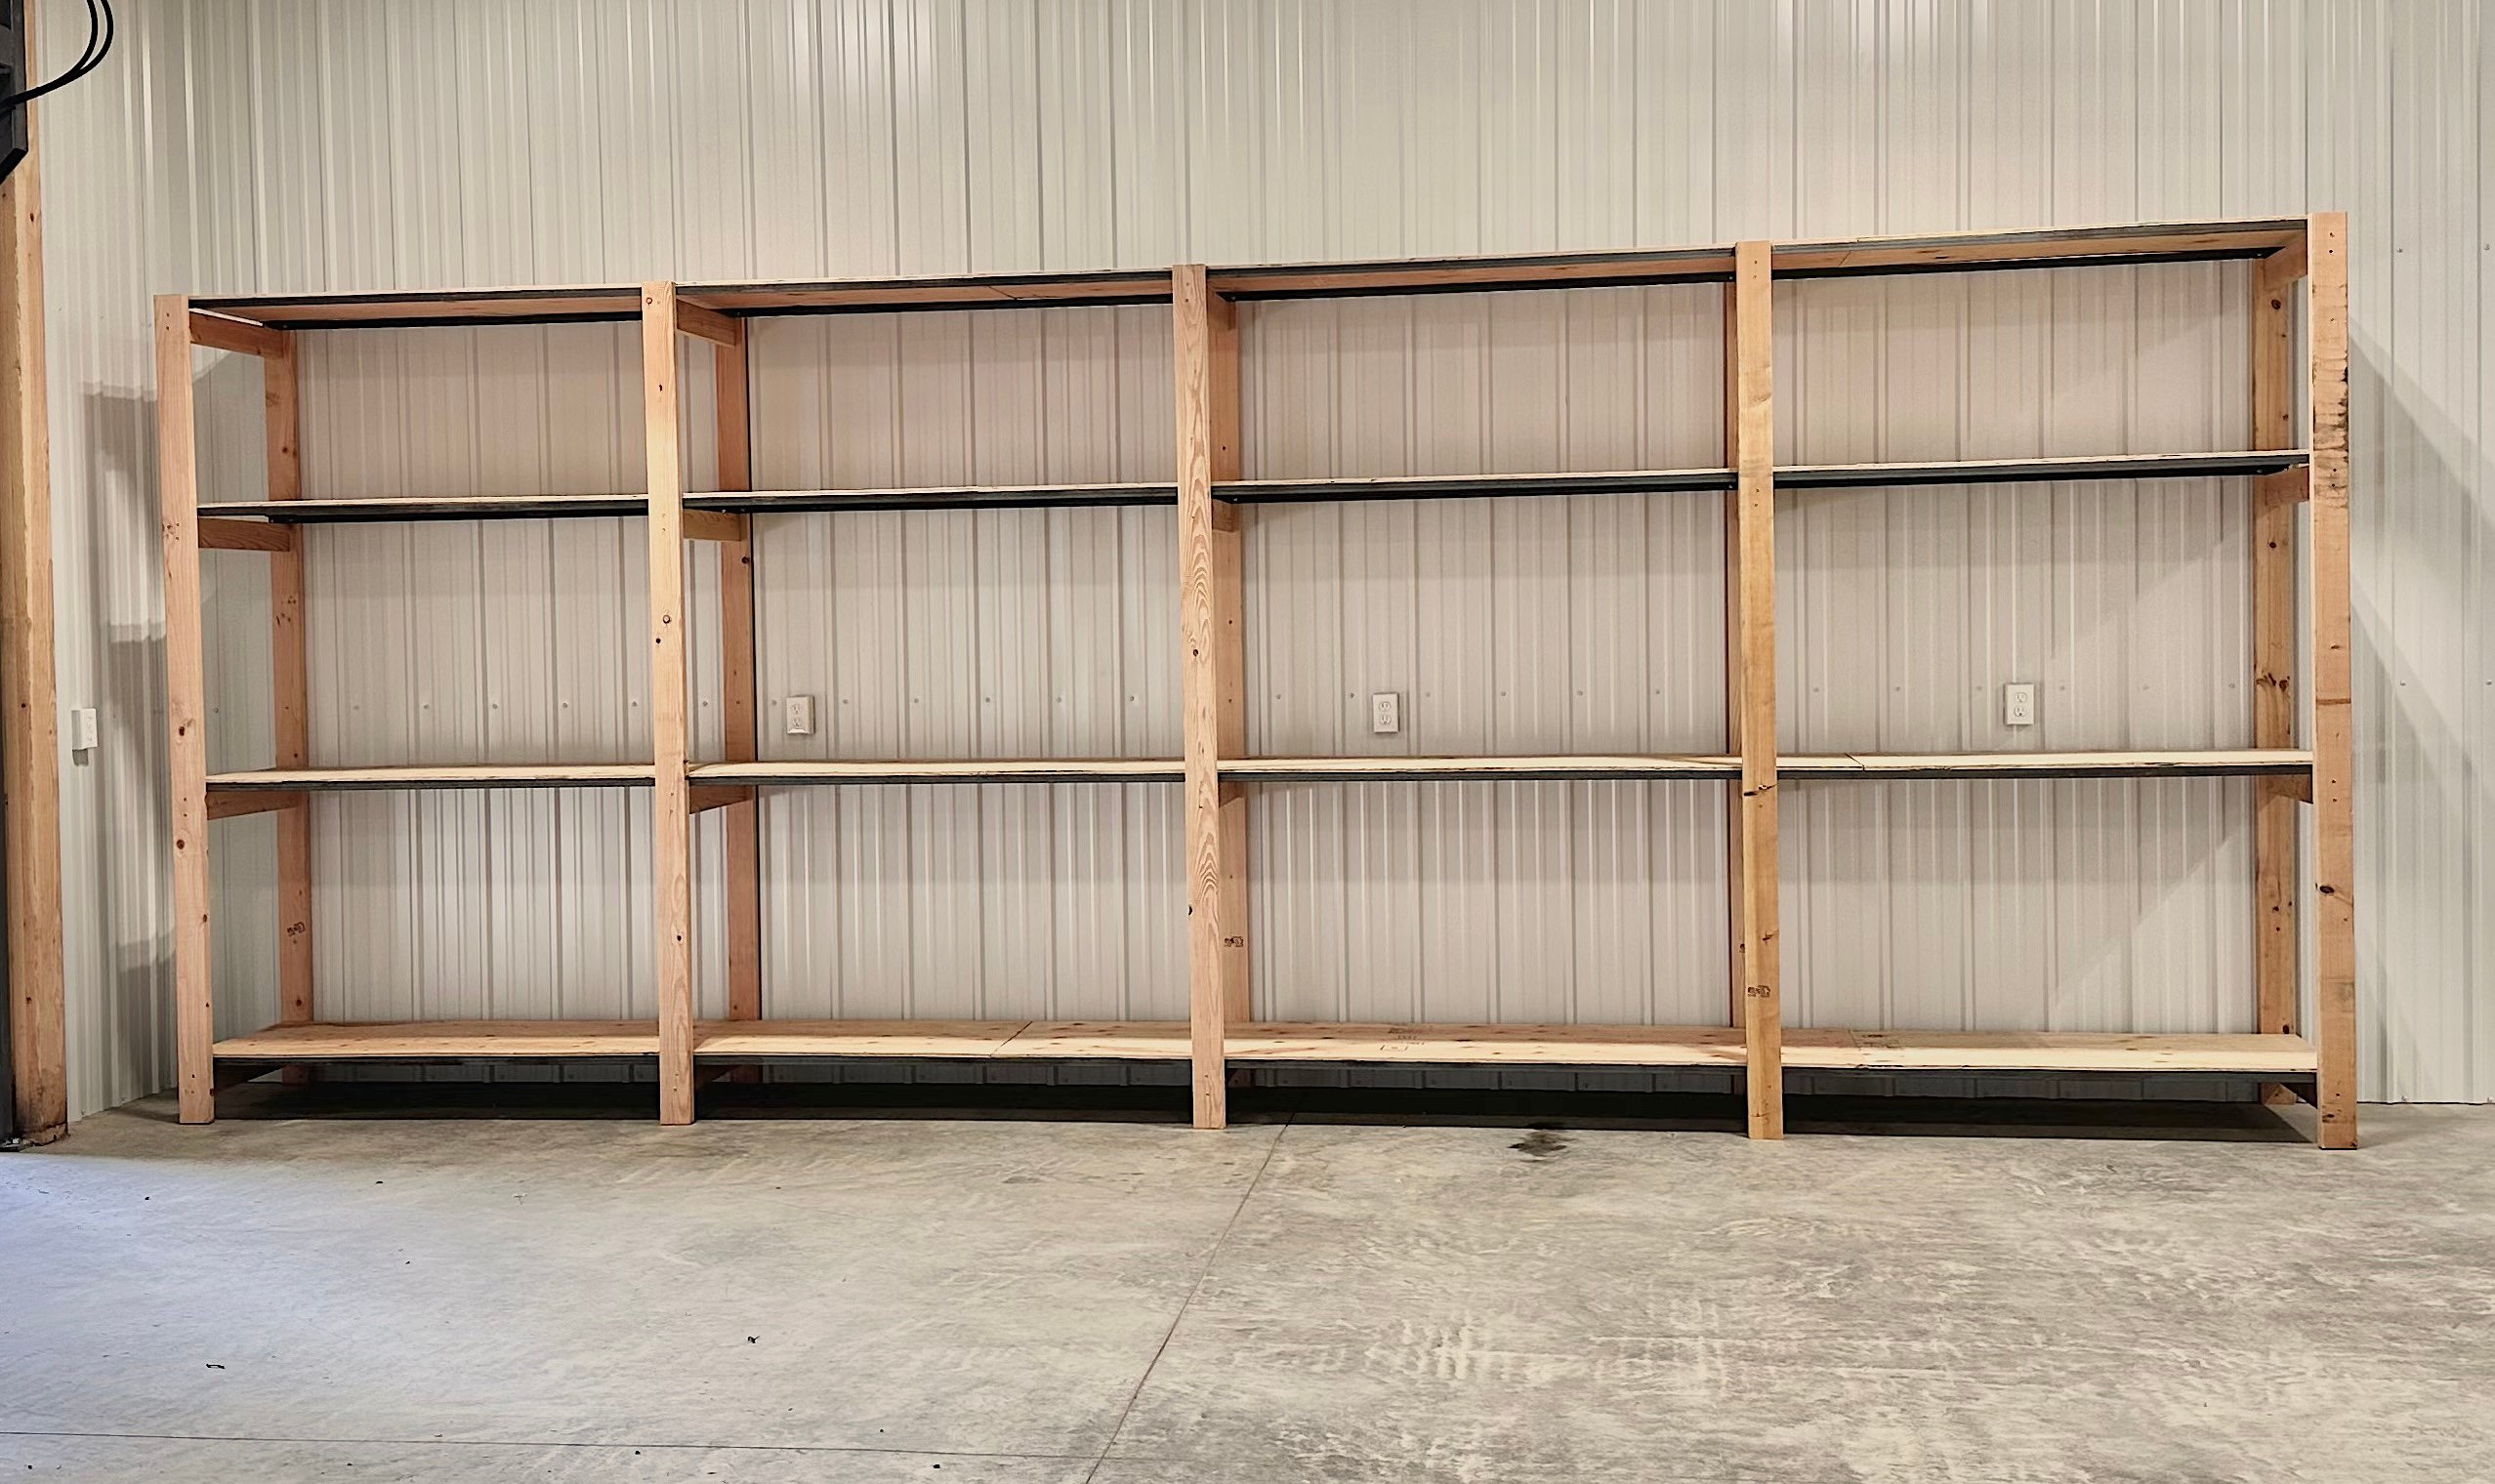
More storage, easier to build, super sturdy, and very customizable! This garage shelving plan uses metal angle for support, increasing vertical shelf space, and distance between legs for more storage in the same footprint! Built independent, but attached to the walls for rigidness and forward tipping, this well thought out design is a must build!
Why We Built this Garage Shelving Project
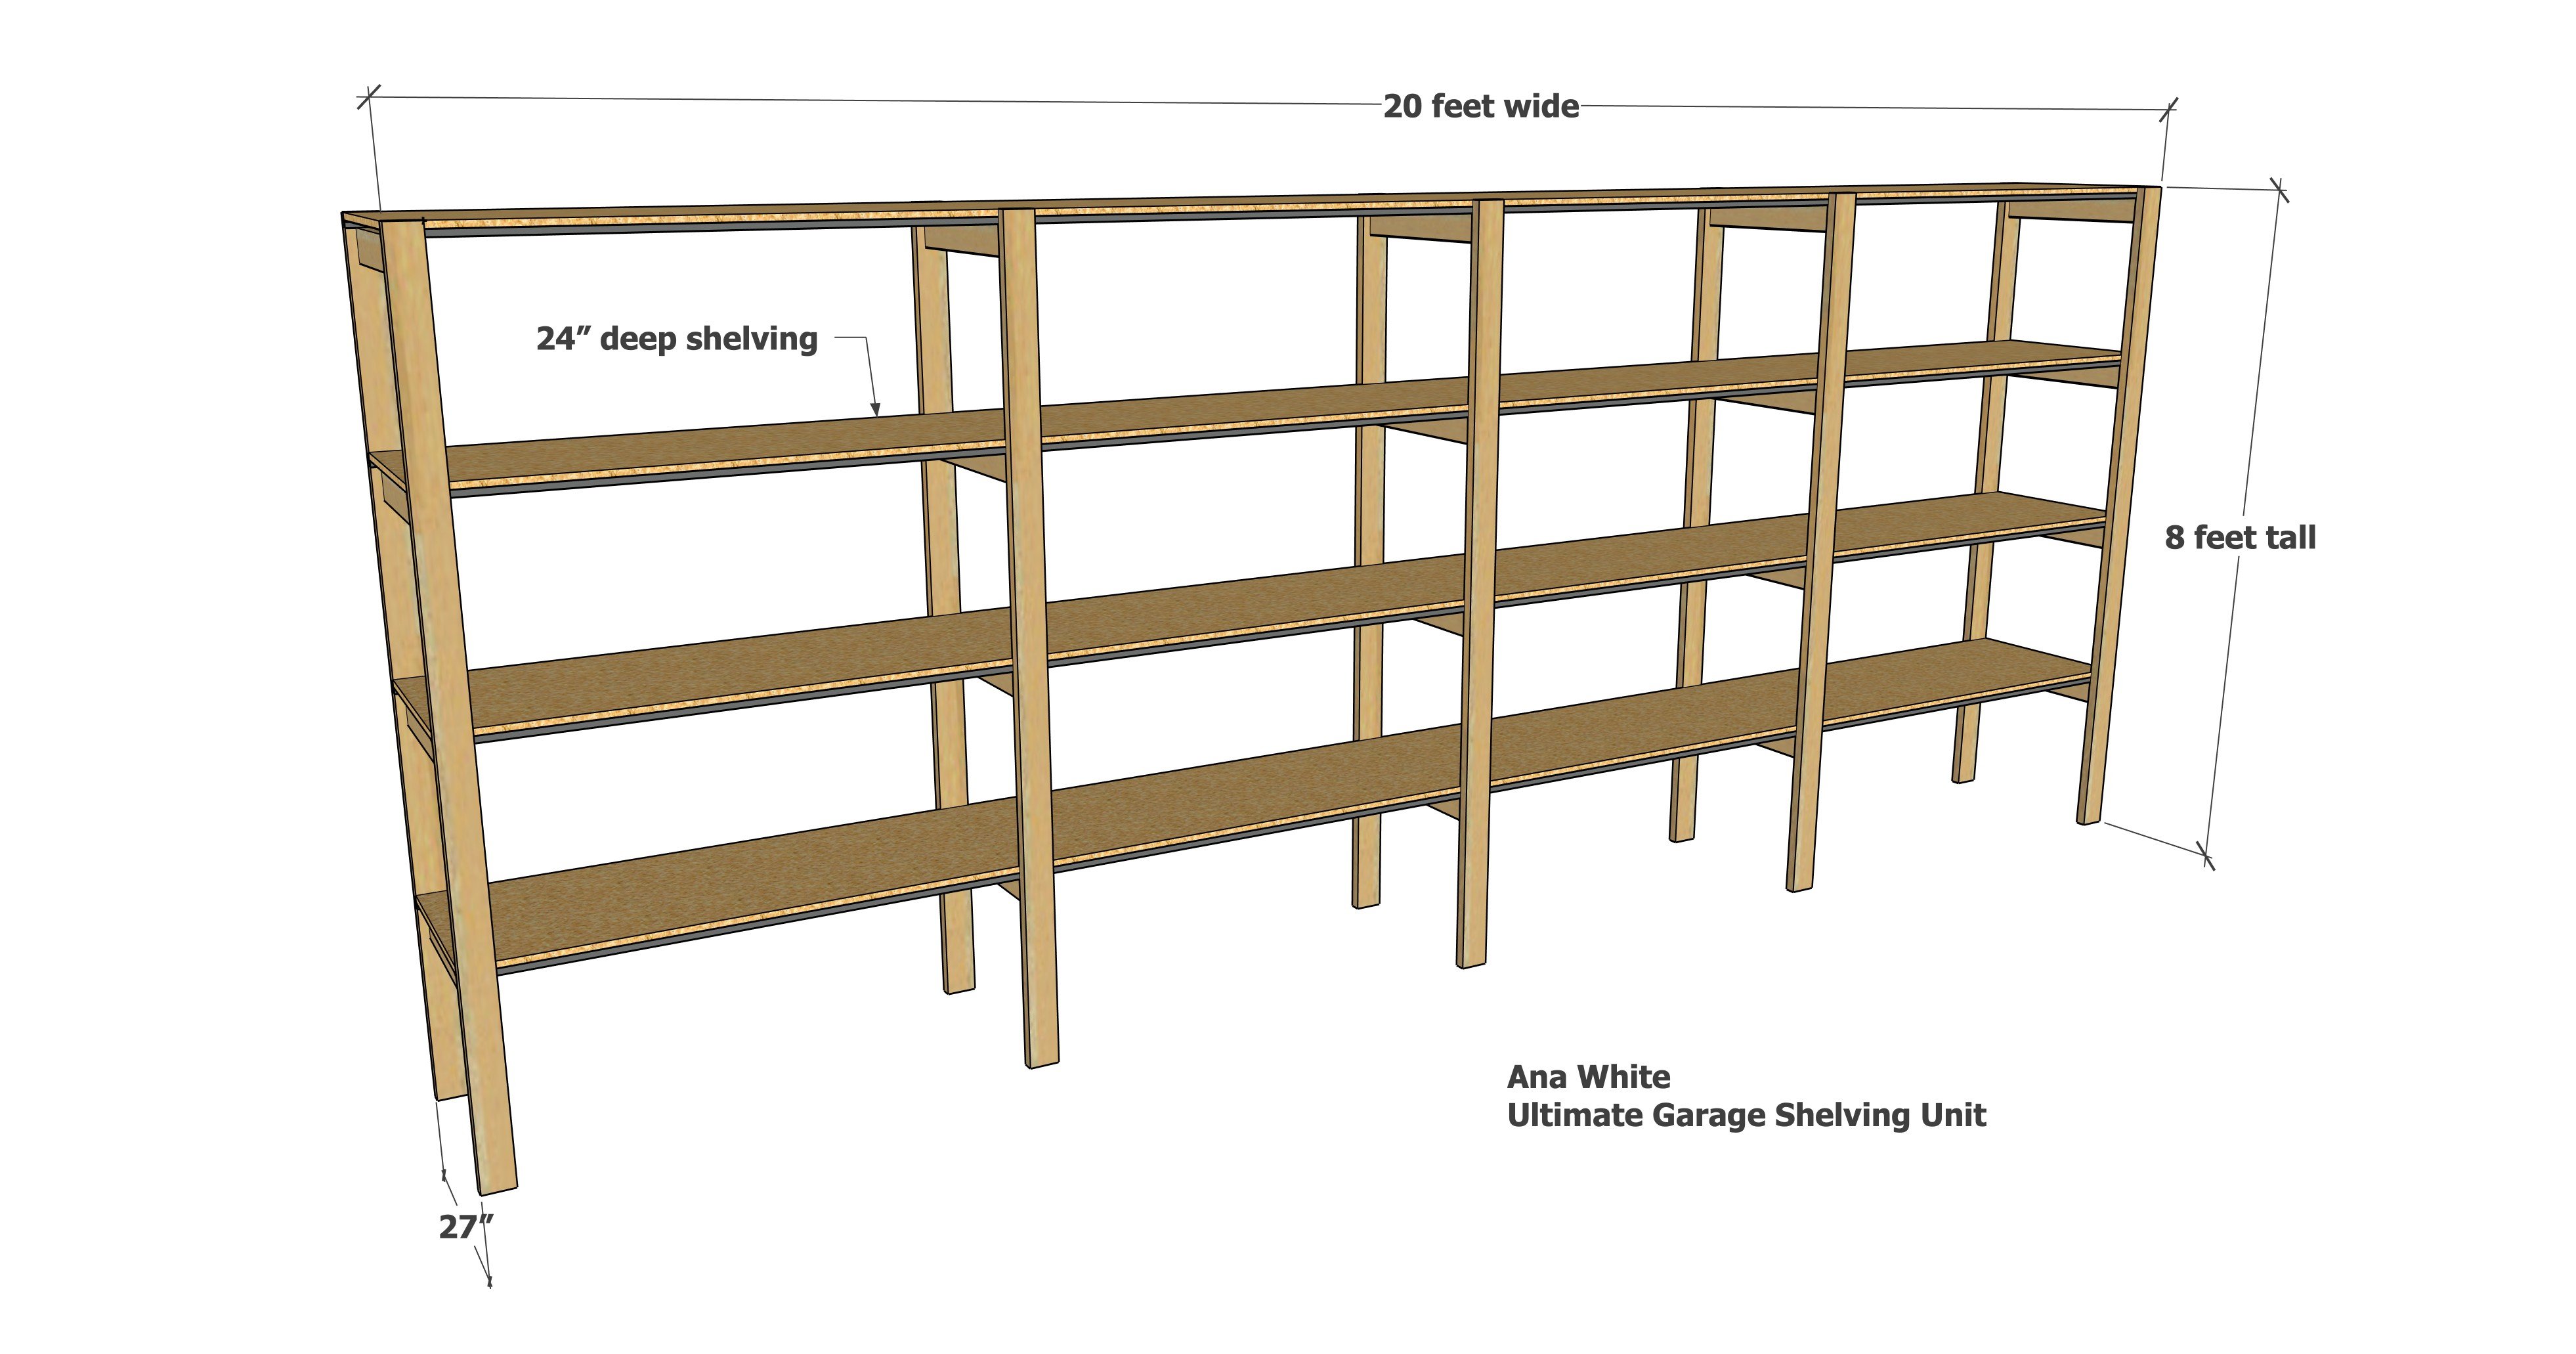
My husband asked me to design a 20' long garage shelving project for his shop.
I've done many different garage shelving projects, and wanted to see if we could get even more storage and greater strength by changing up the materials a bit.
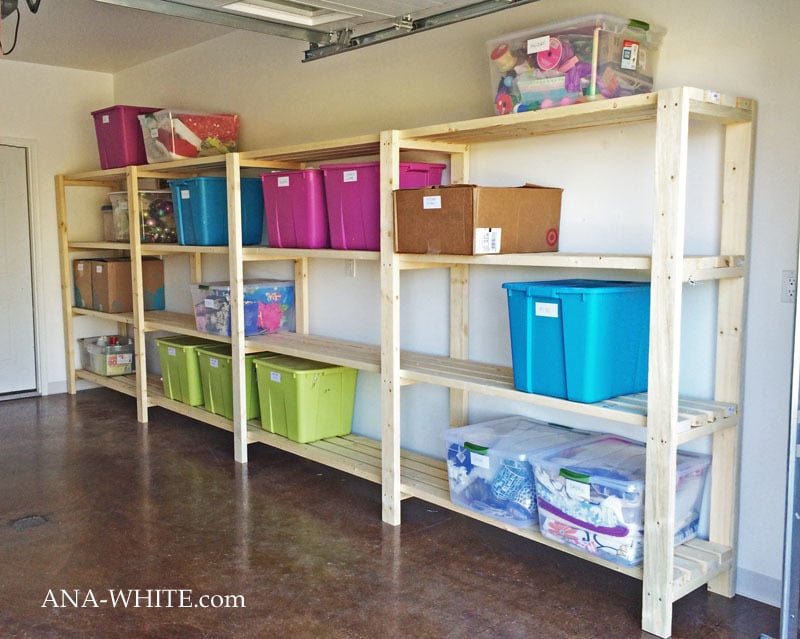
This is my original garage shelving unit. It was so quick and easy to build, I did it all by myself in a few hours, didn't even have to cut the shelving boards. Loved it, but how to make stronger (for a workshop), sturdier, without bulky supports?
The answer was using metal angle for the shelf supports.
Why We Love this Garage Shelving
- Easy to build, just build the ladders, add the metal angle, and the plywood on top
- Very sturdy and strong
- Minimally attached to studs in walls for forward tipping prevention
- Maximum vertical storage with shelves supports taking up less space
- Wide clearance between vertical leg supports
- Easy to customize in size and shape for a variety of needs
- 1/2" plywood on shelf tops is lightweight, inexpensive and fully covers the shelf
- Can be built against non traditional walls like metal cladding (as shown)
- Great looking shelf, can be painted or stained
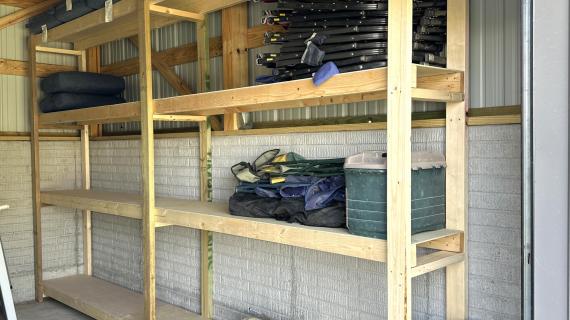
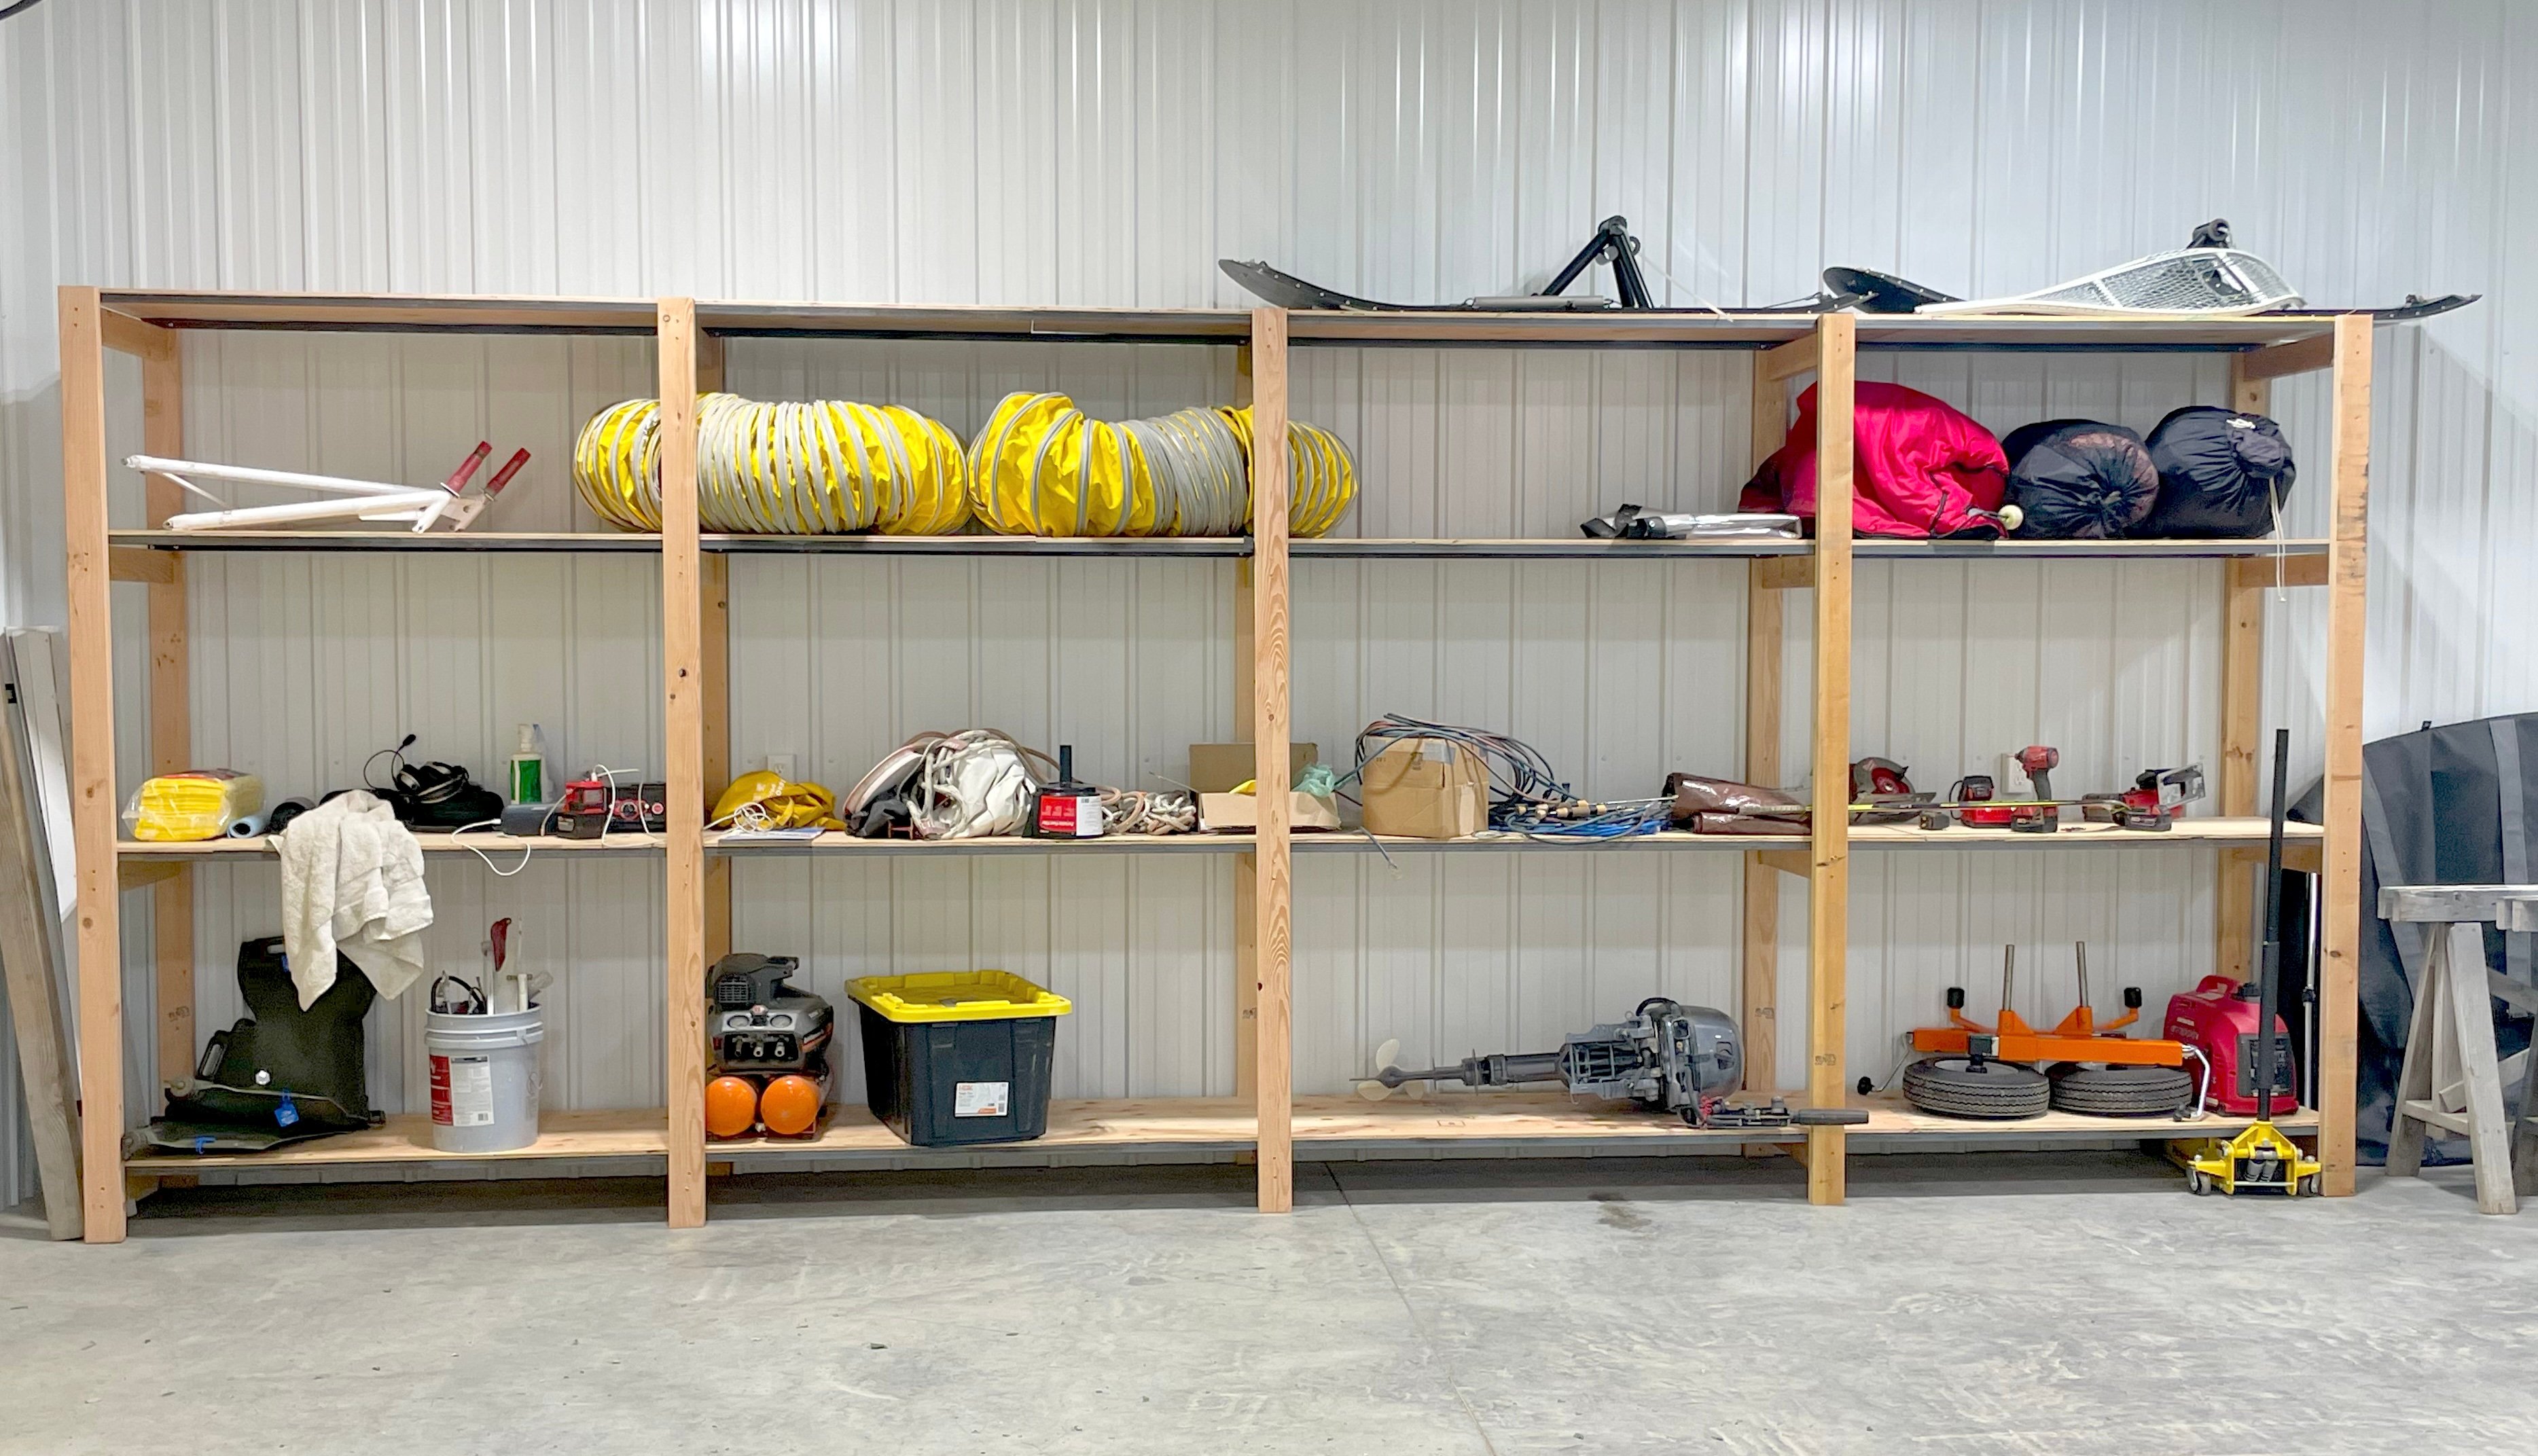
Here's what this shelving looks like now after filling it up -
Watch: Video Showing How this Shelving Is Built
Here's a quick video showing the basic steps to building this garage shelving unit - please take a few minutes to watch.
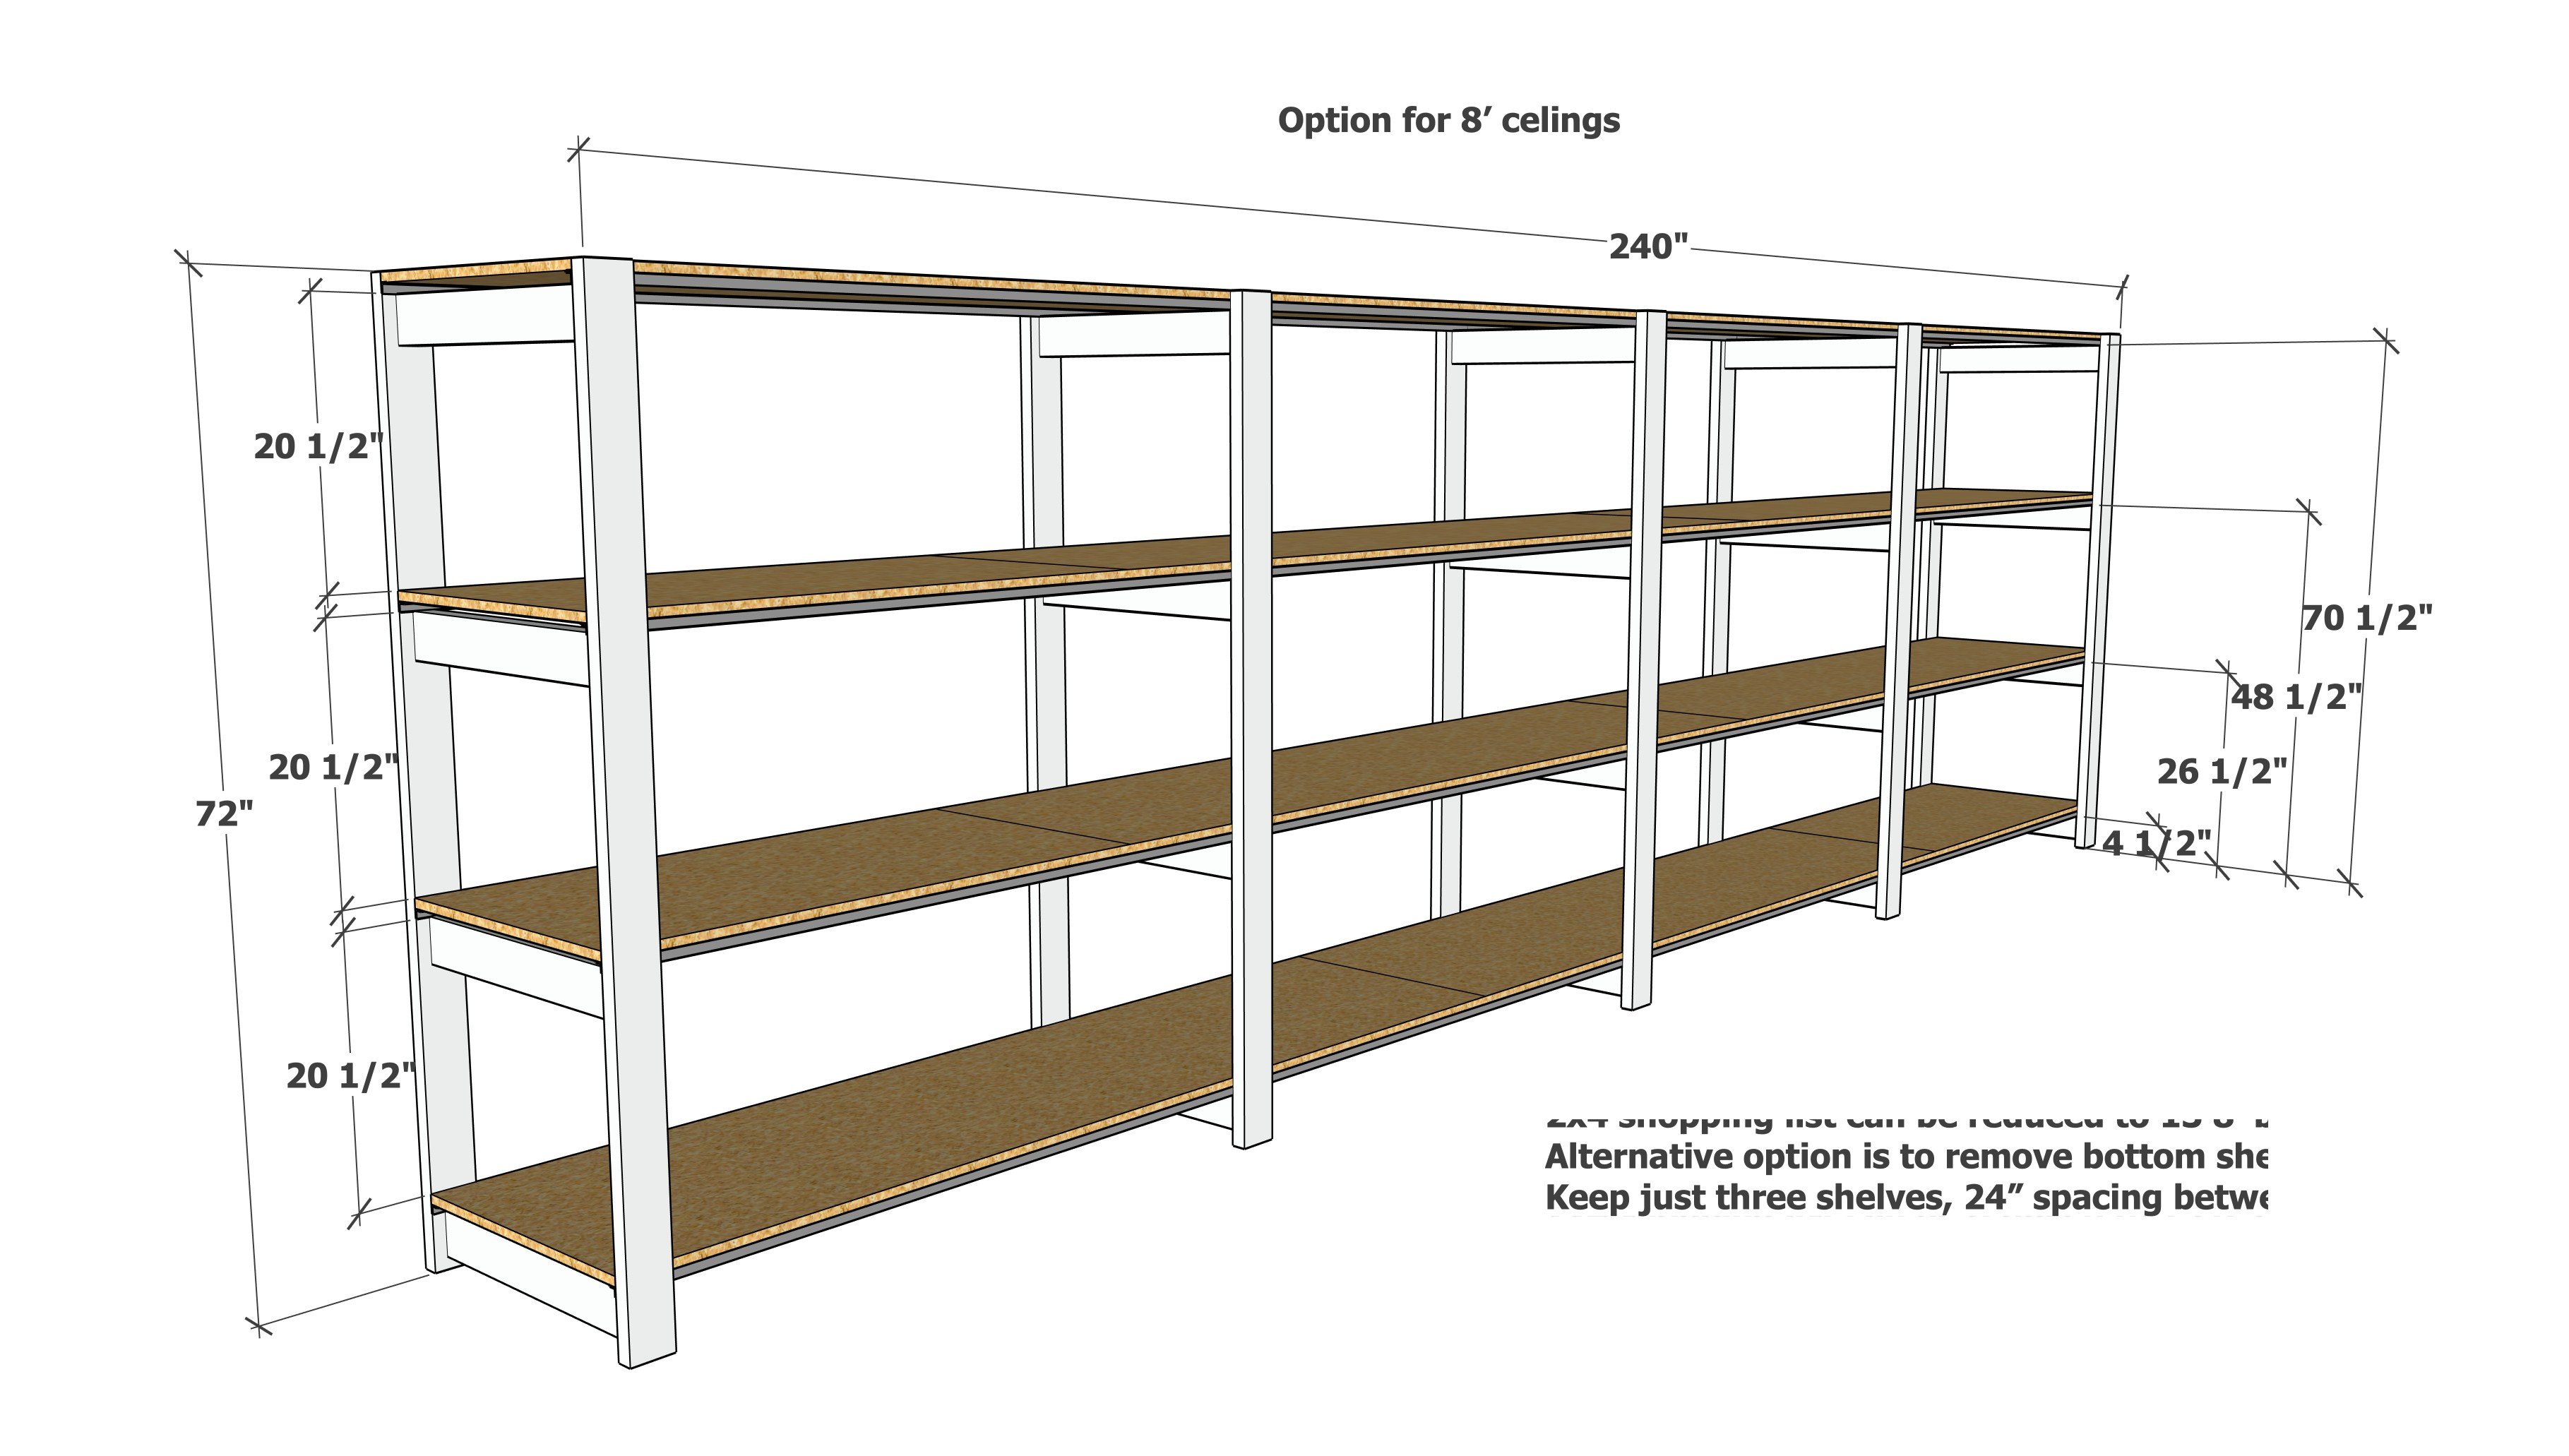
What If I Have 8' Ceilings?
You can easily adjust this plan for different size ceilings, by simply adjusting the ladder supports. Here is a diagram with a recommendation for 6' tall garage shelving:
Why Not Flip the Angle So the Plywood Is Embedded In It?
This is a great idea, and we definitely considered it. I ultimately choose the angle facing downward because with the 1/2" plywood, there would be a lip on the angle that could make pulling items off the shelf harder. You could go with a 3/4" plywood but this would increase costs and weight. Also, because the screw heads would be in between the plywood and the angle, it would create a small gap, where dirt and stuff could collect.
So we ended up going with the angle facing downward, and the plywood on top.
Why 20' Long Shelving?
We choose the 20' length because the metal angle came in 20' sticks.
You can certainly modify to different lengths but will need to cut the metal angle down to size.
If you do modify the size, consider that plywood is in 8' runs, so 16' shelving is a great choice.
Free Plans to Build Your Own Ultimate Garage Shelving
Ready to build? Here's the free plans!
Pin For Later!

Preparation
- 15 - 2x4 @ 8 feet long (each support ladder uses 3 2x4x8' boards)
- 5 - 4x8 sheets of 1/2" thick plywood
- 8 - 1" x 1" metal angle, 1/8" thick (outside dimensions), 20 feet long
- 100 - 3" self tapping wood screws
- 80" - 1-5/8" metal lath screws
Shopping list is as shown in photos and video
- 20 - 2x4 @ 24" long, can cut at 23-7/8" if 2x4x8 boards are exactly 8' and need to consider kerf to fit cuts on 8' board length
- 10 - 2x4 @ 8' long
- 8 - 1"x1" metal angle, at 240" long
- 1/2" thick plywood tops should be measured and cut to fit
Cut list is as shown in video and photos


Instructions
Step 1
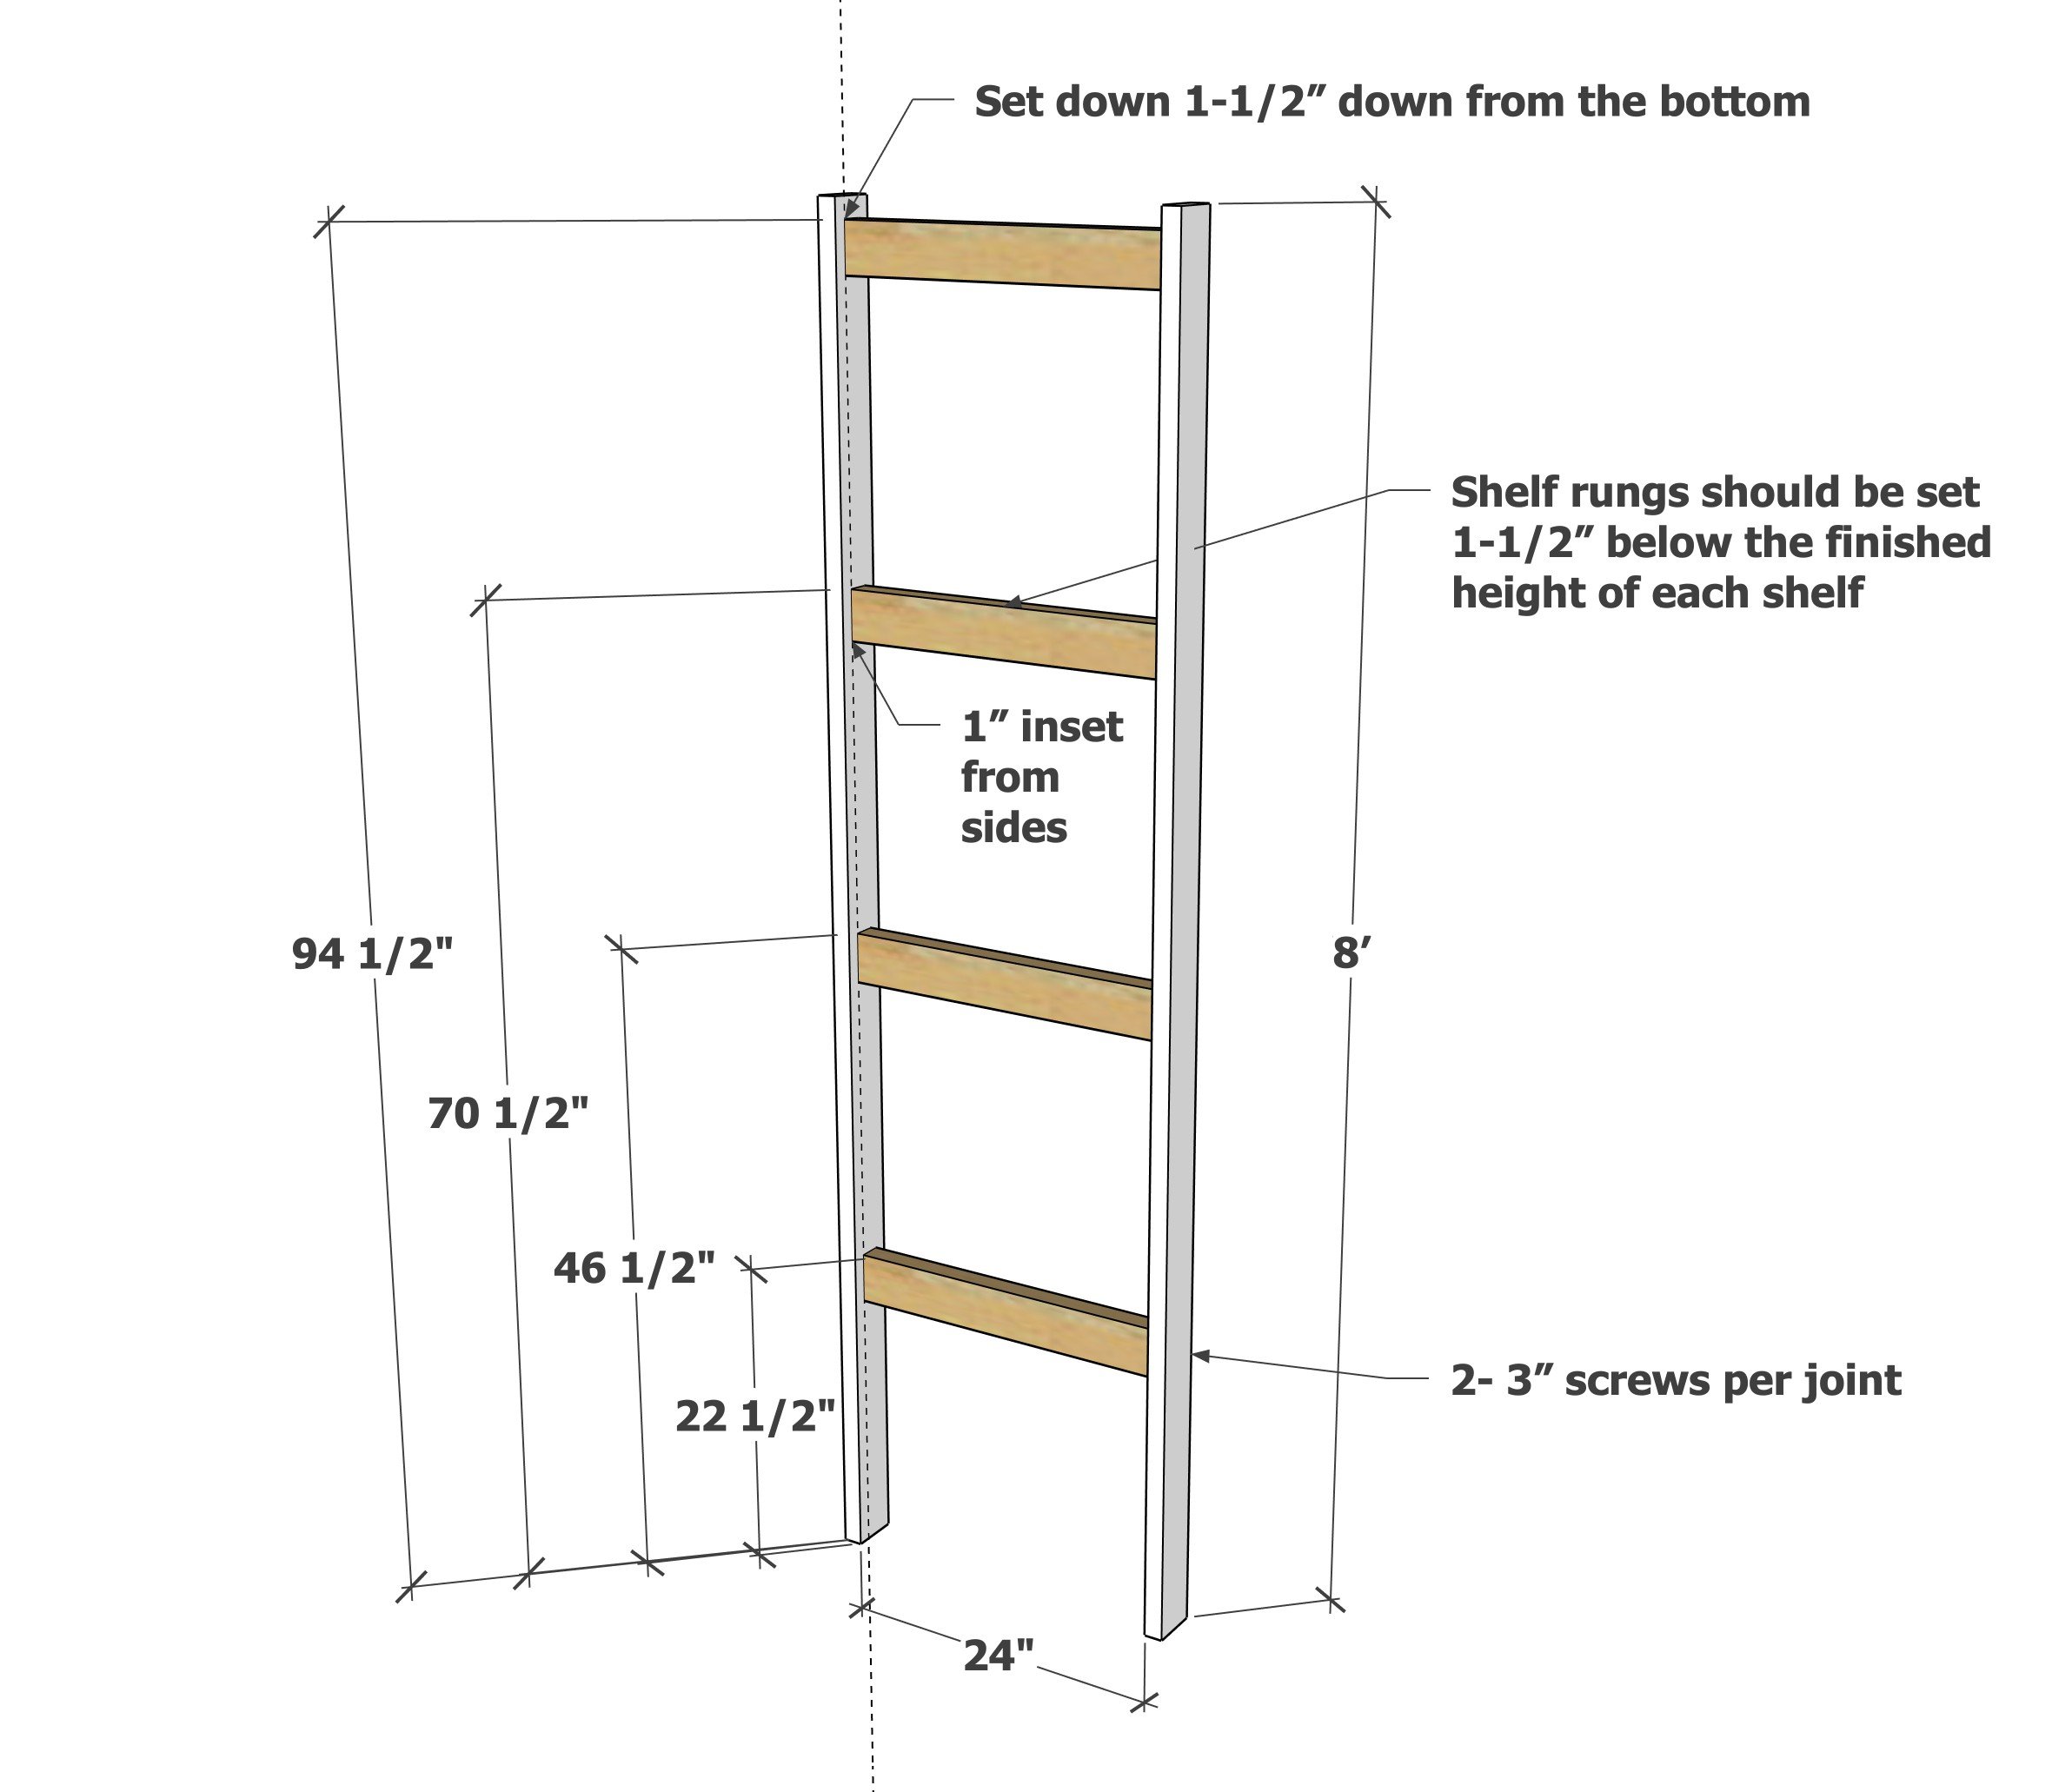
Build ladder supports with 2x4s as shown. The rungs should be placed 1-1/2" lower than the desired shelf heights.
The rungs are vertical so you can screw into the angle later.
A good span is about 5-6', so if modifying plans, build enough ladders to support these spans.
Step 2
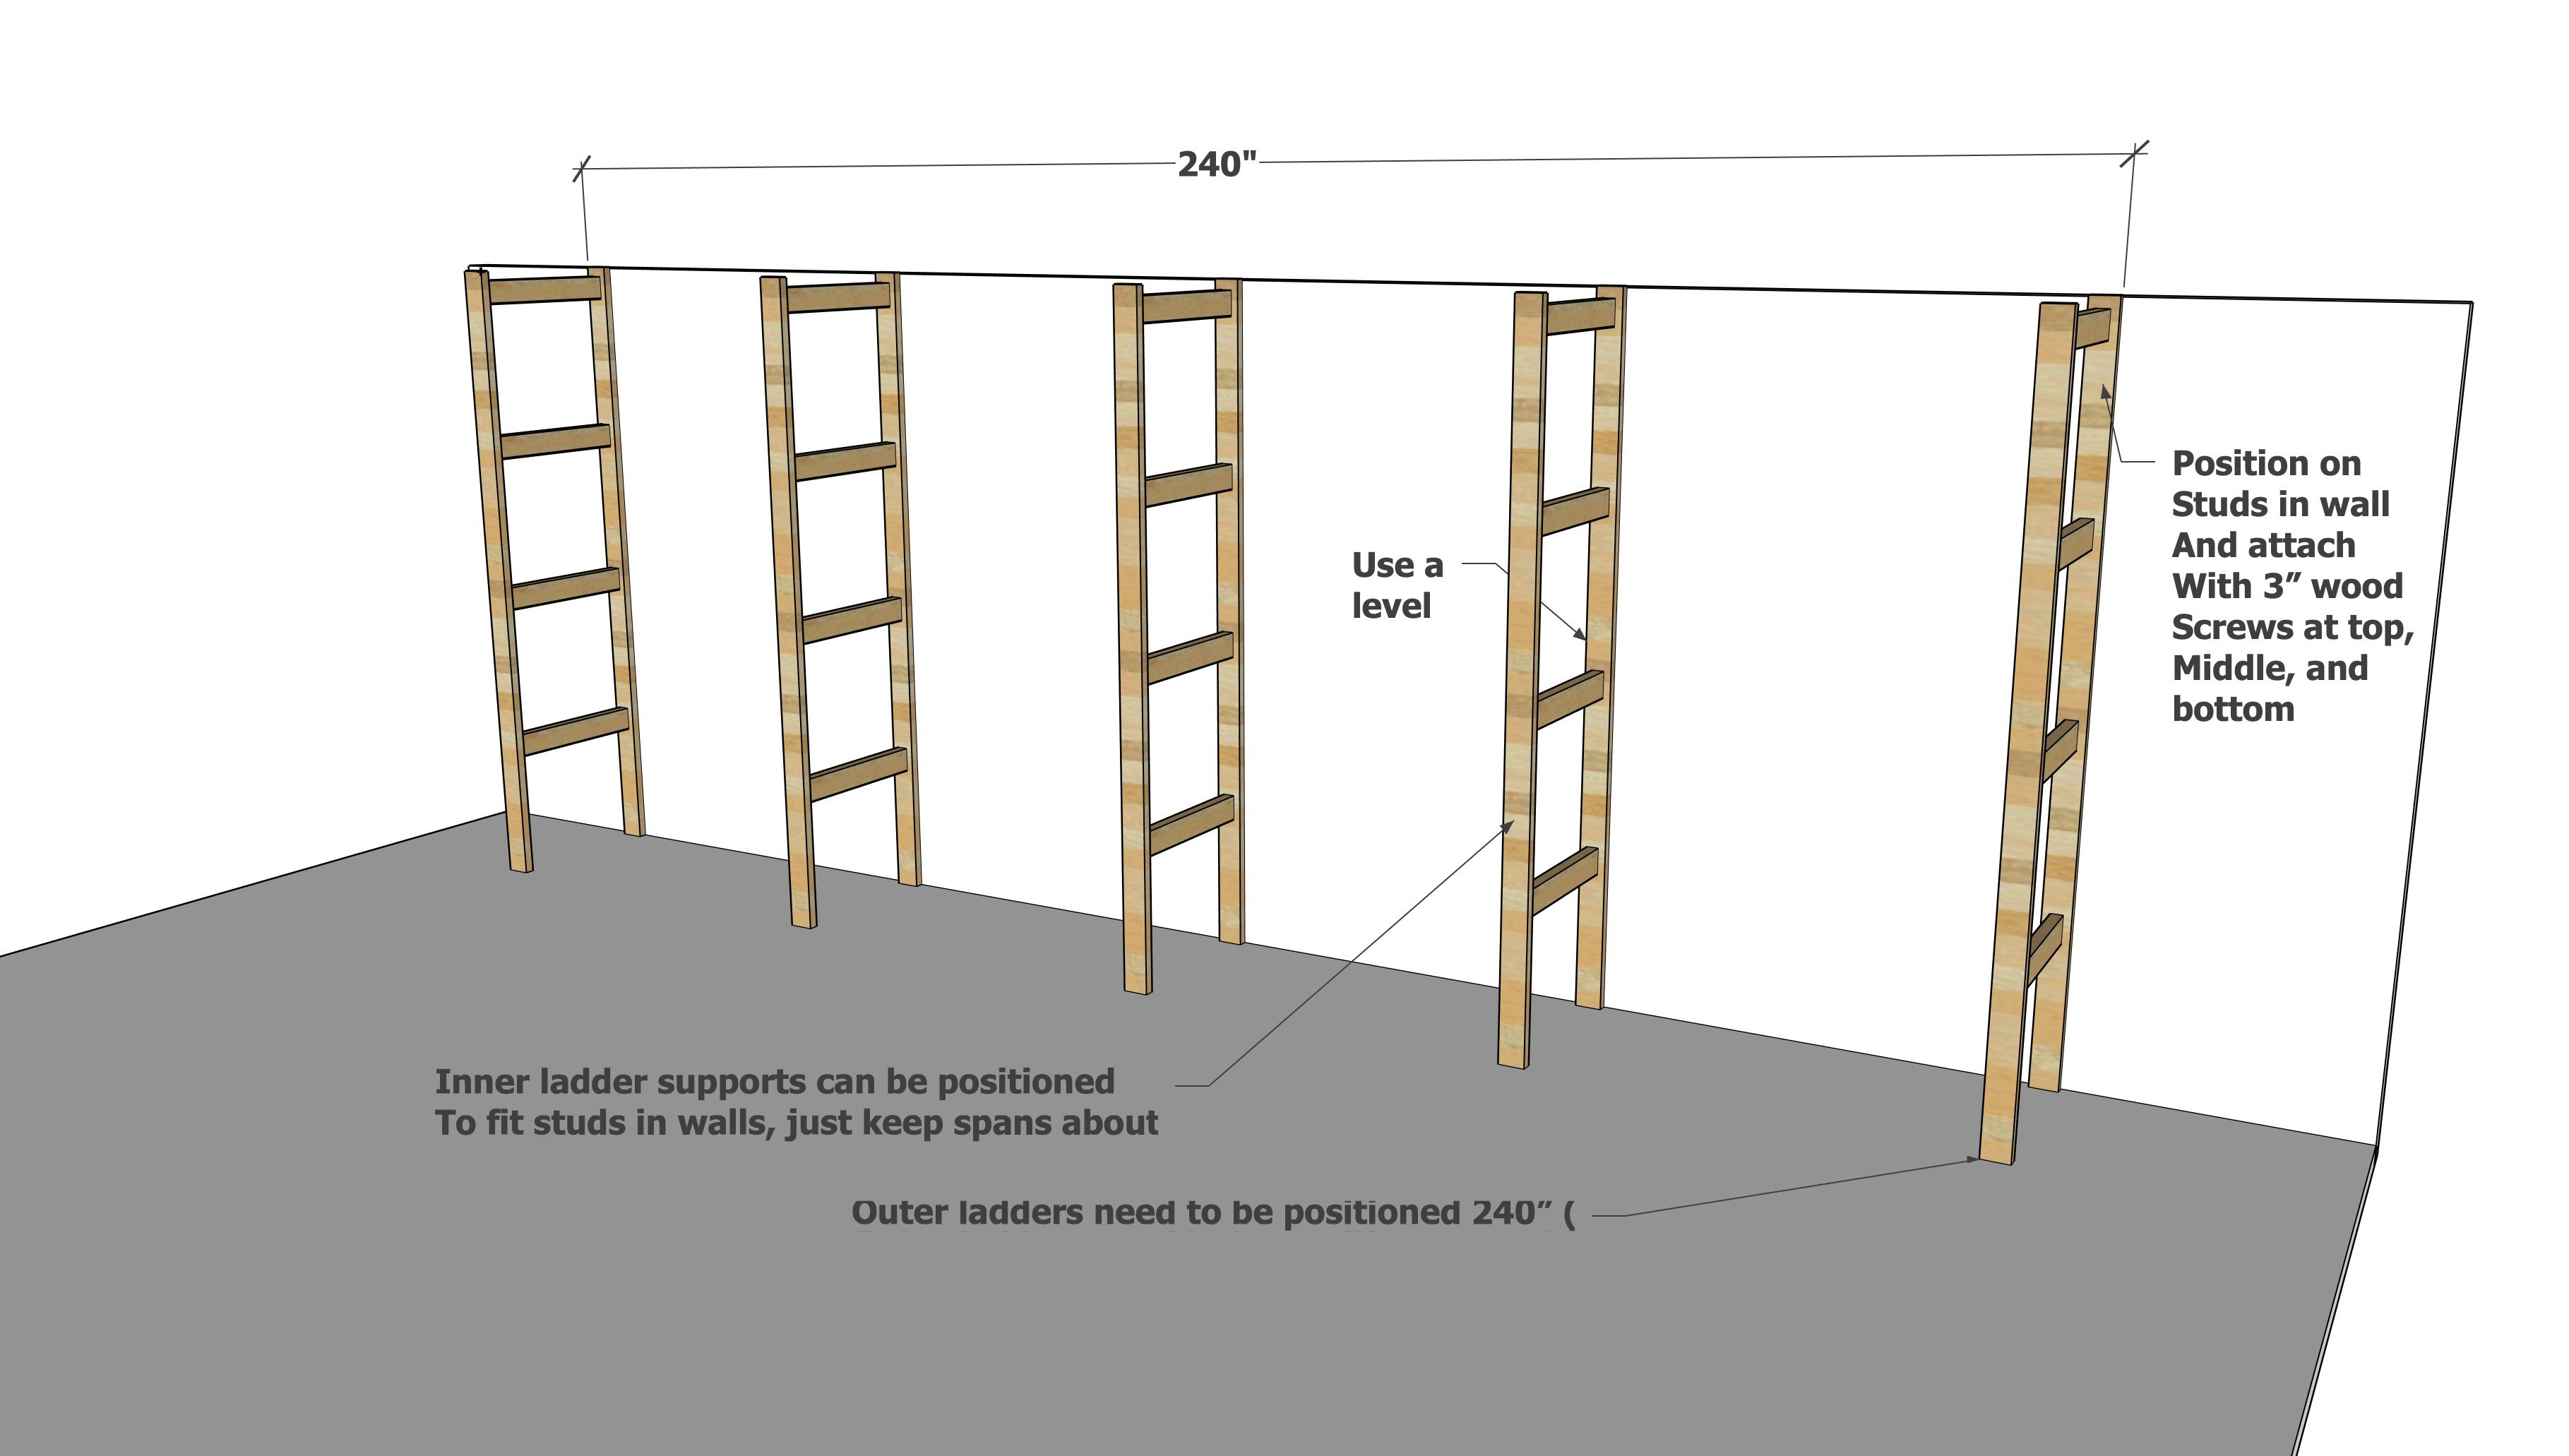
if your space does not allow, thread the angle pieces through the ladders before installing to the wall.
Position the ladders along the wall for final install. Attach to studs in the wall - center ladders can be moved to land on studs.
Step 3
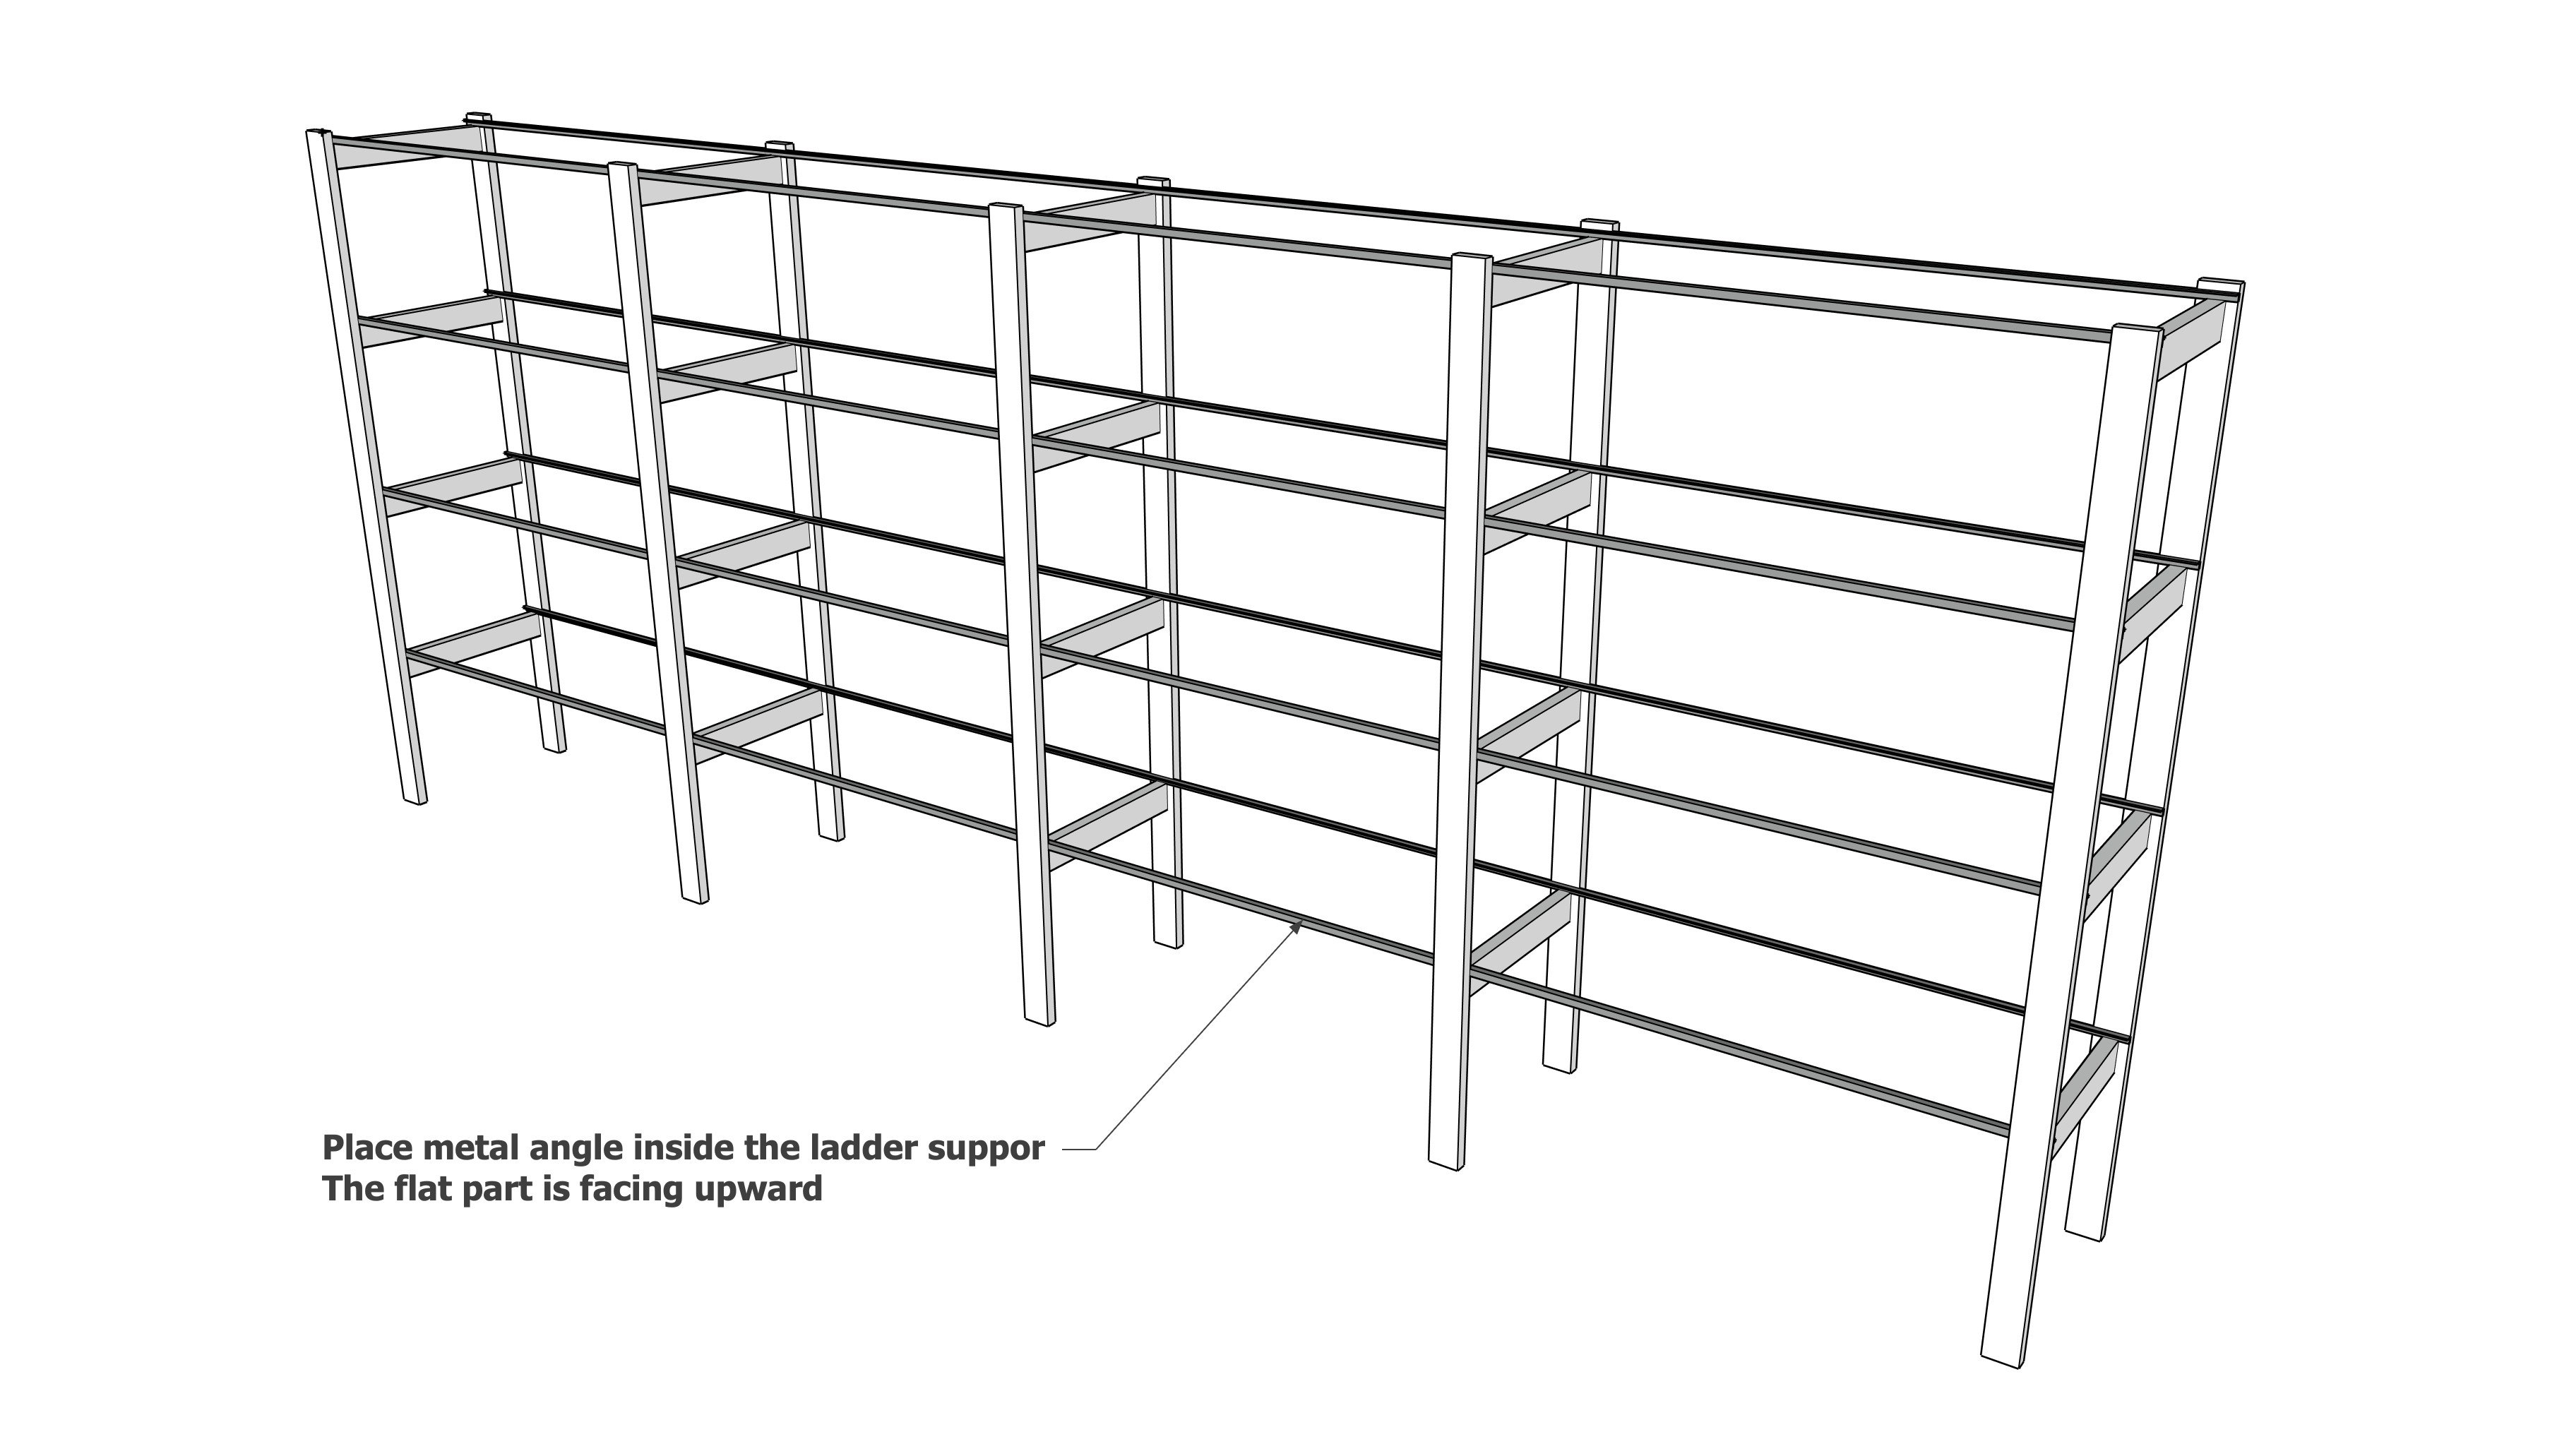
Place the angle inside the ladders.
Step 4
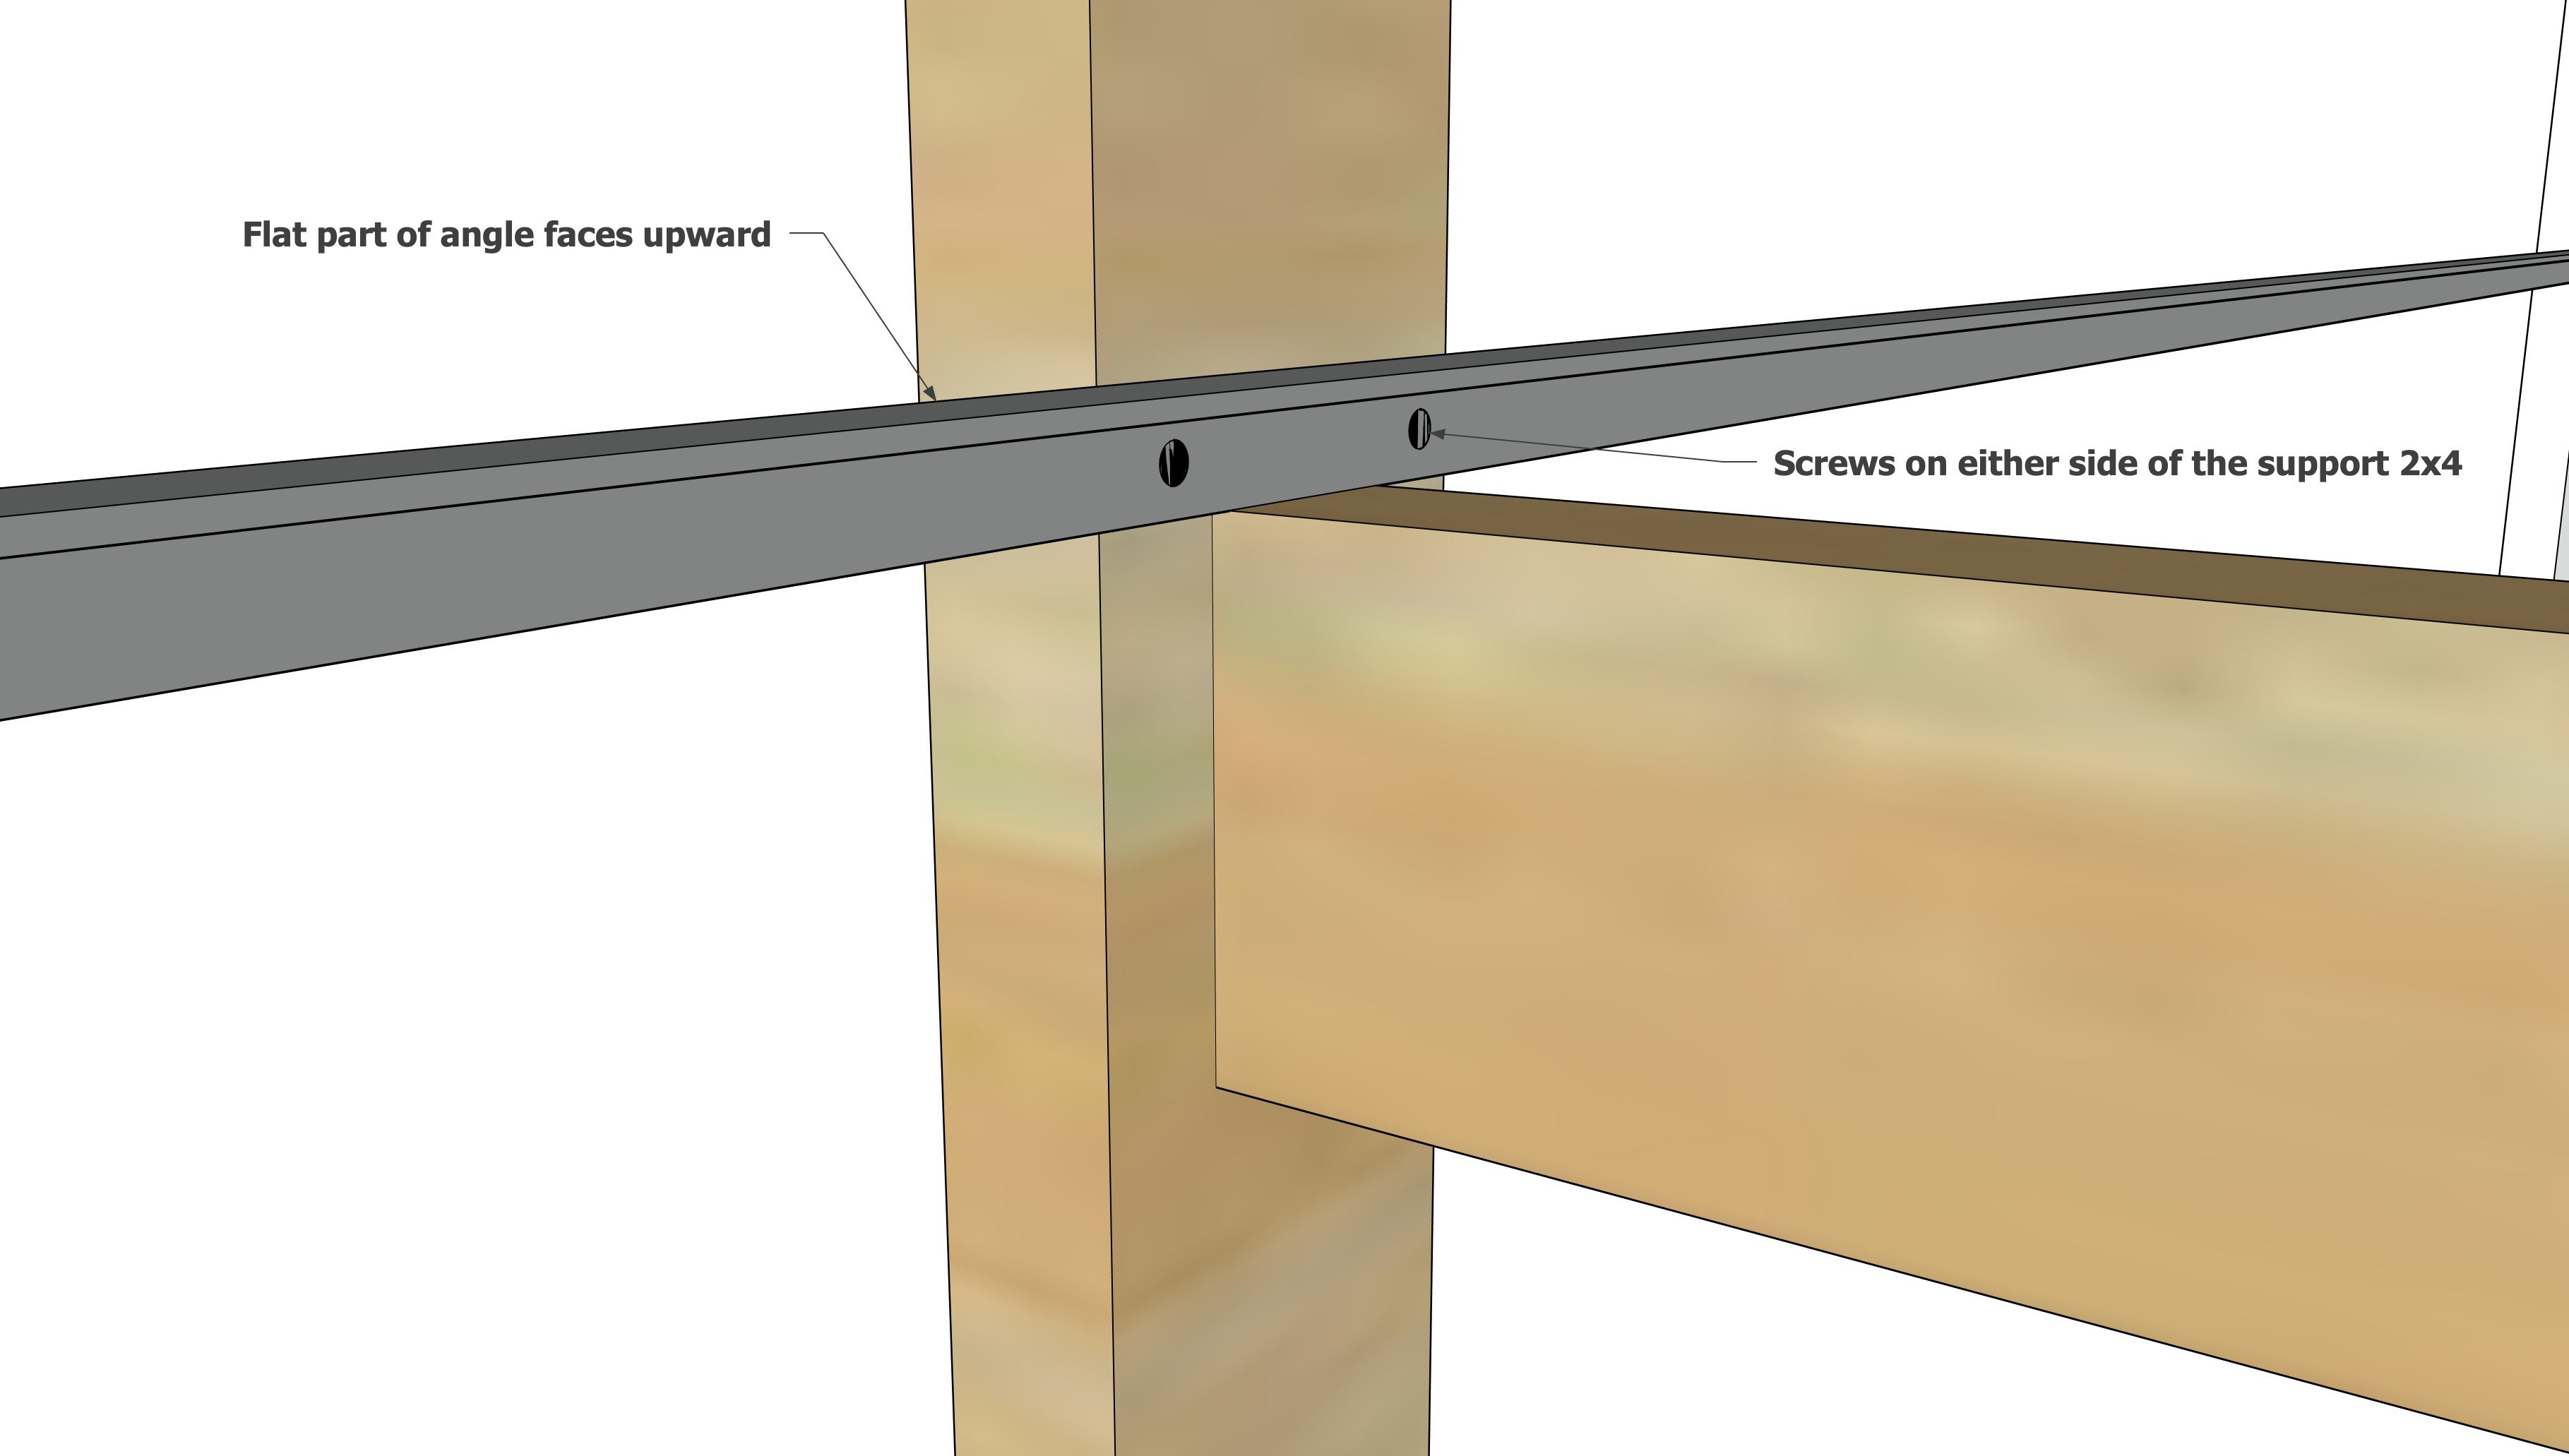
Mark and drill holes through the angle with a metal drill bit. Screw the angle to the 2x4 uprights on the ladders.
Step 5
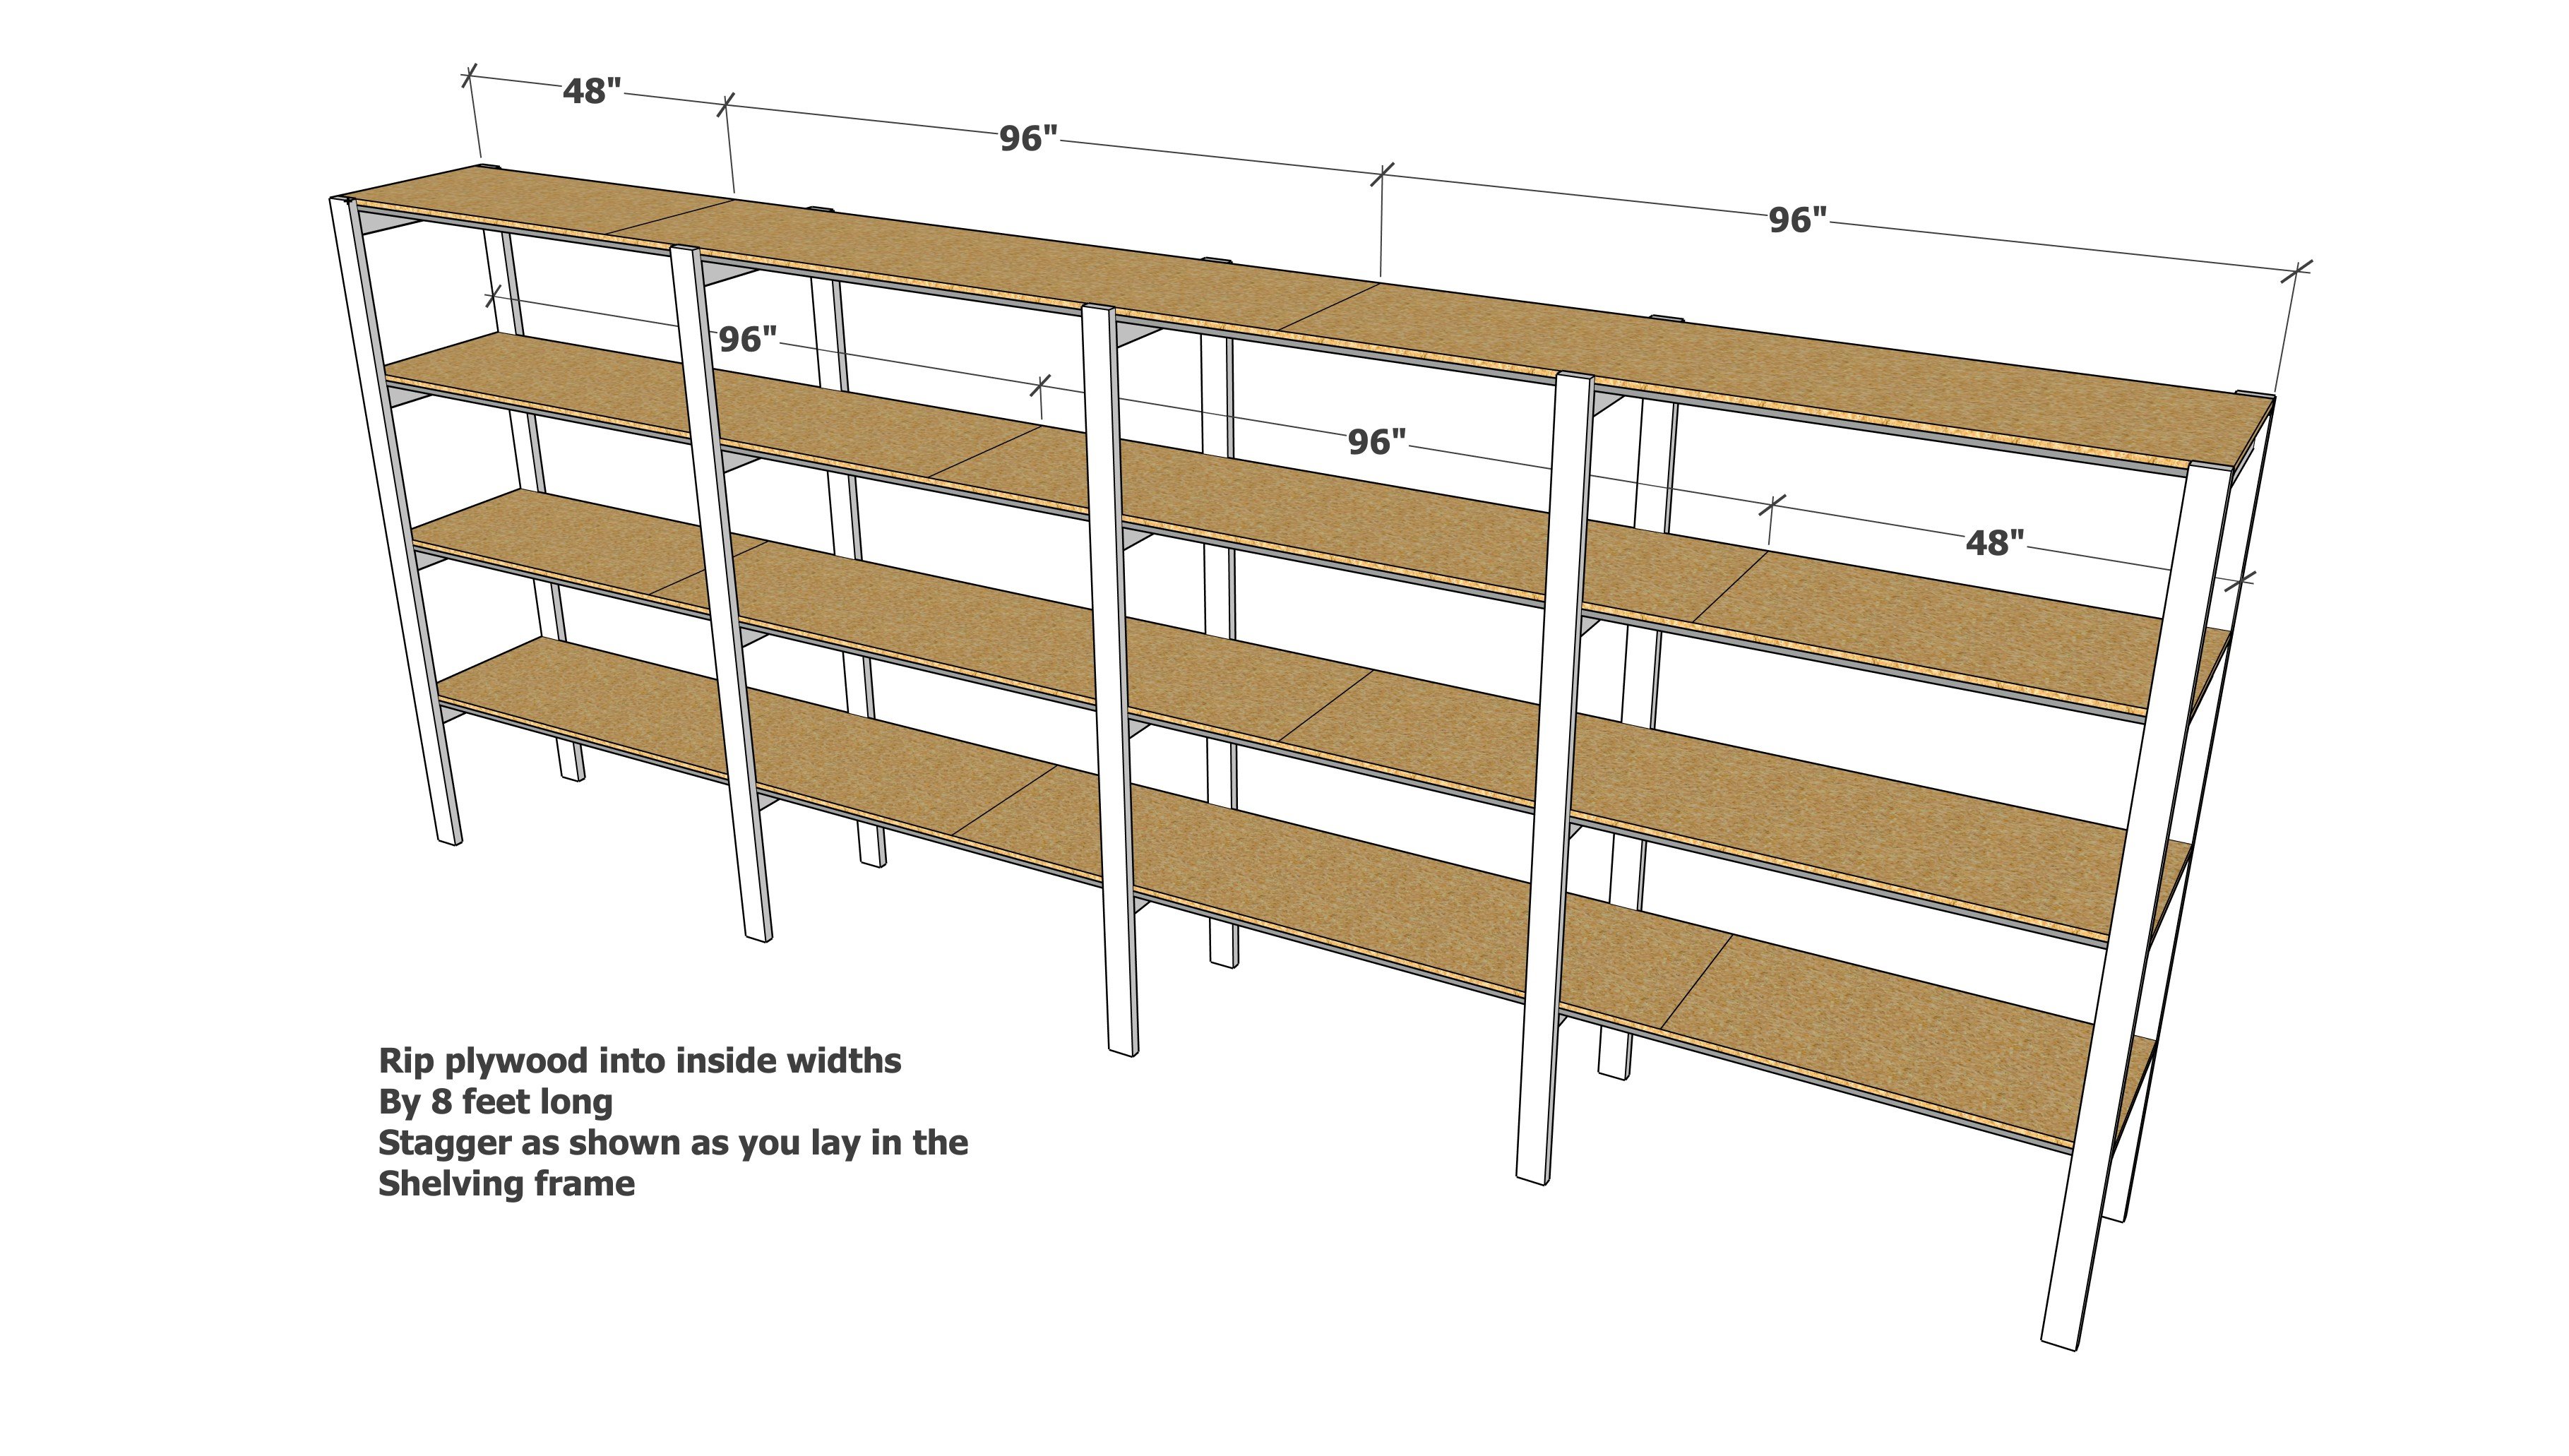
Measure the inside width and rip the plywood into strips to match this width. Crosscut pieces as needed.
We did not screw the plywood down, but it can be screwed to the metal angle.