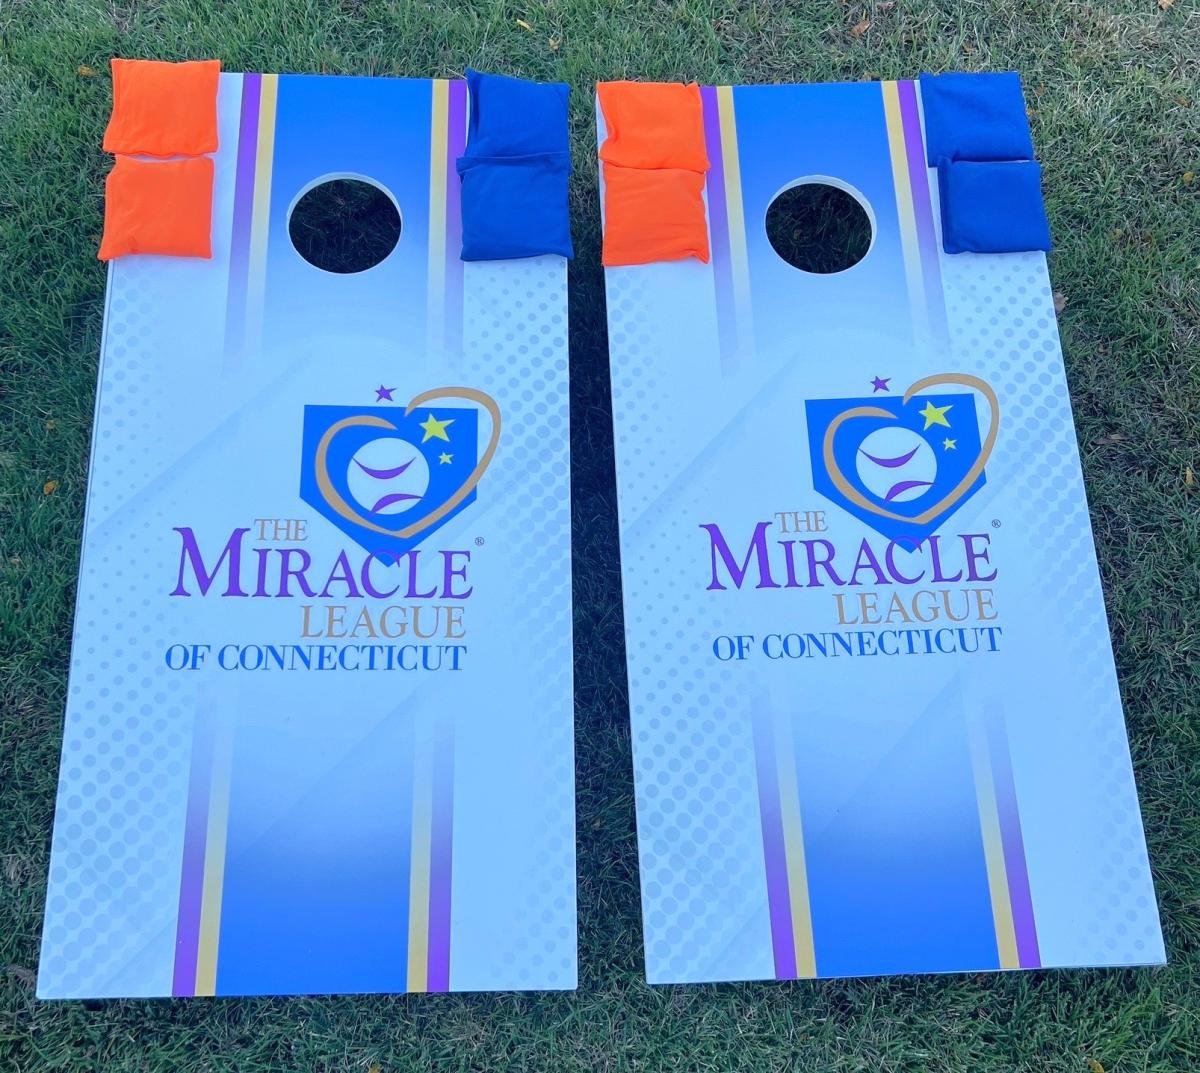
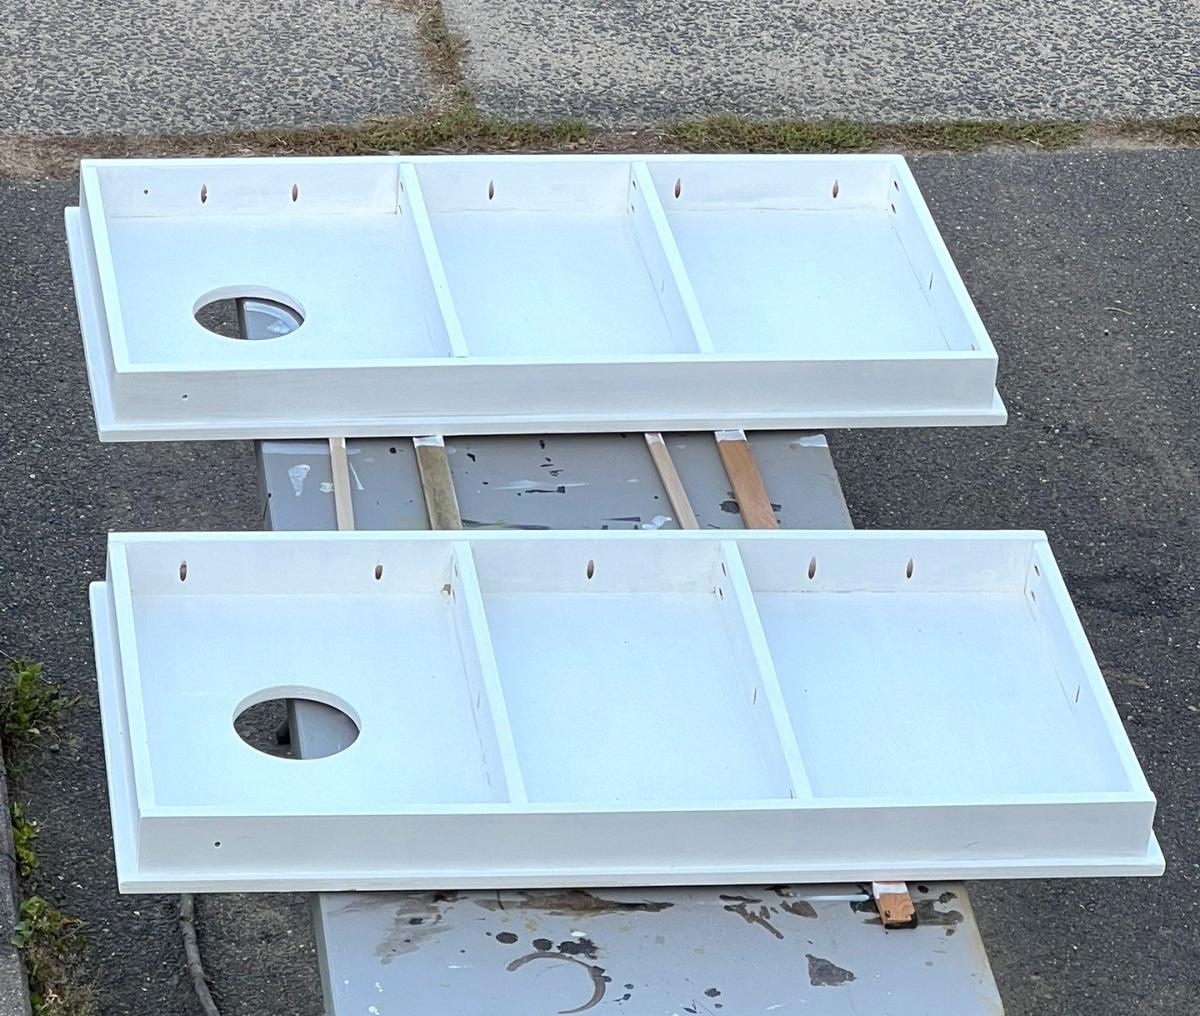
Corn Hole Boards for a Cause!
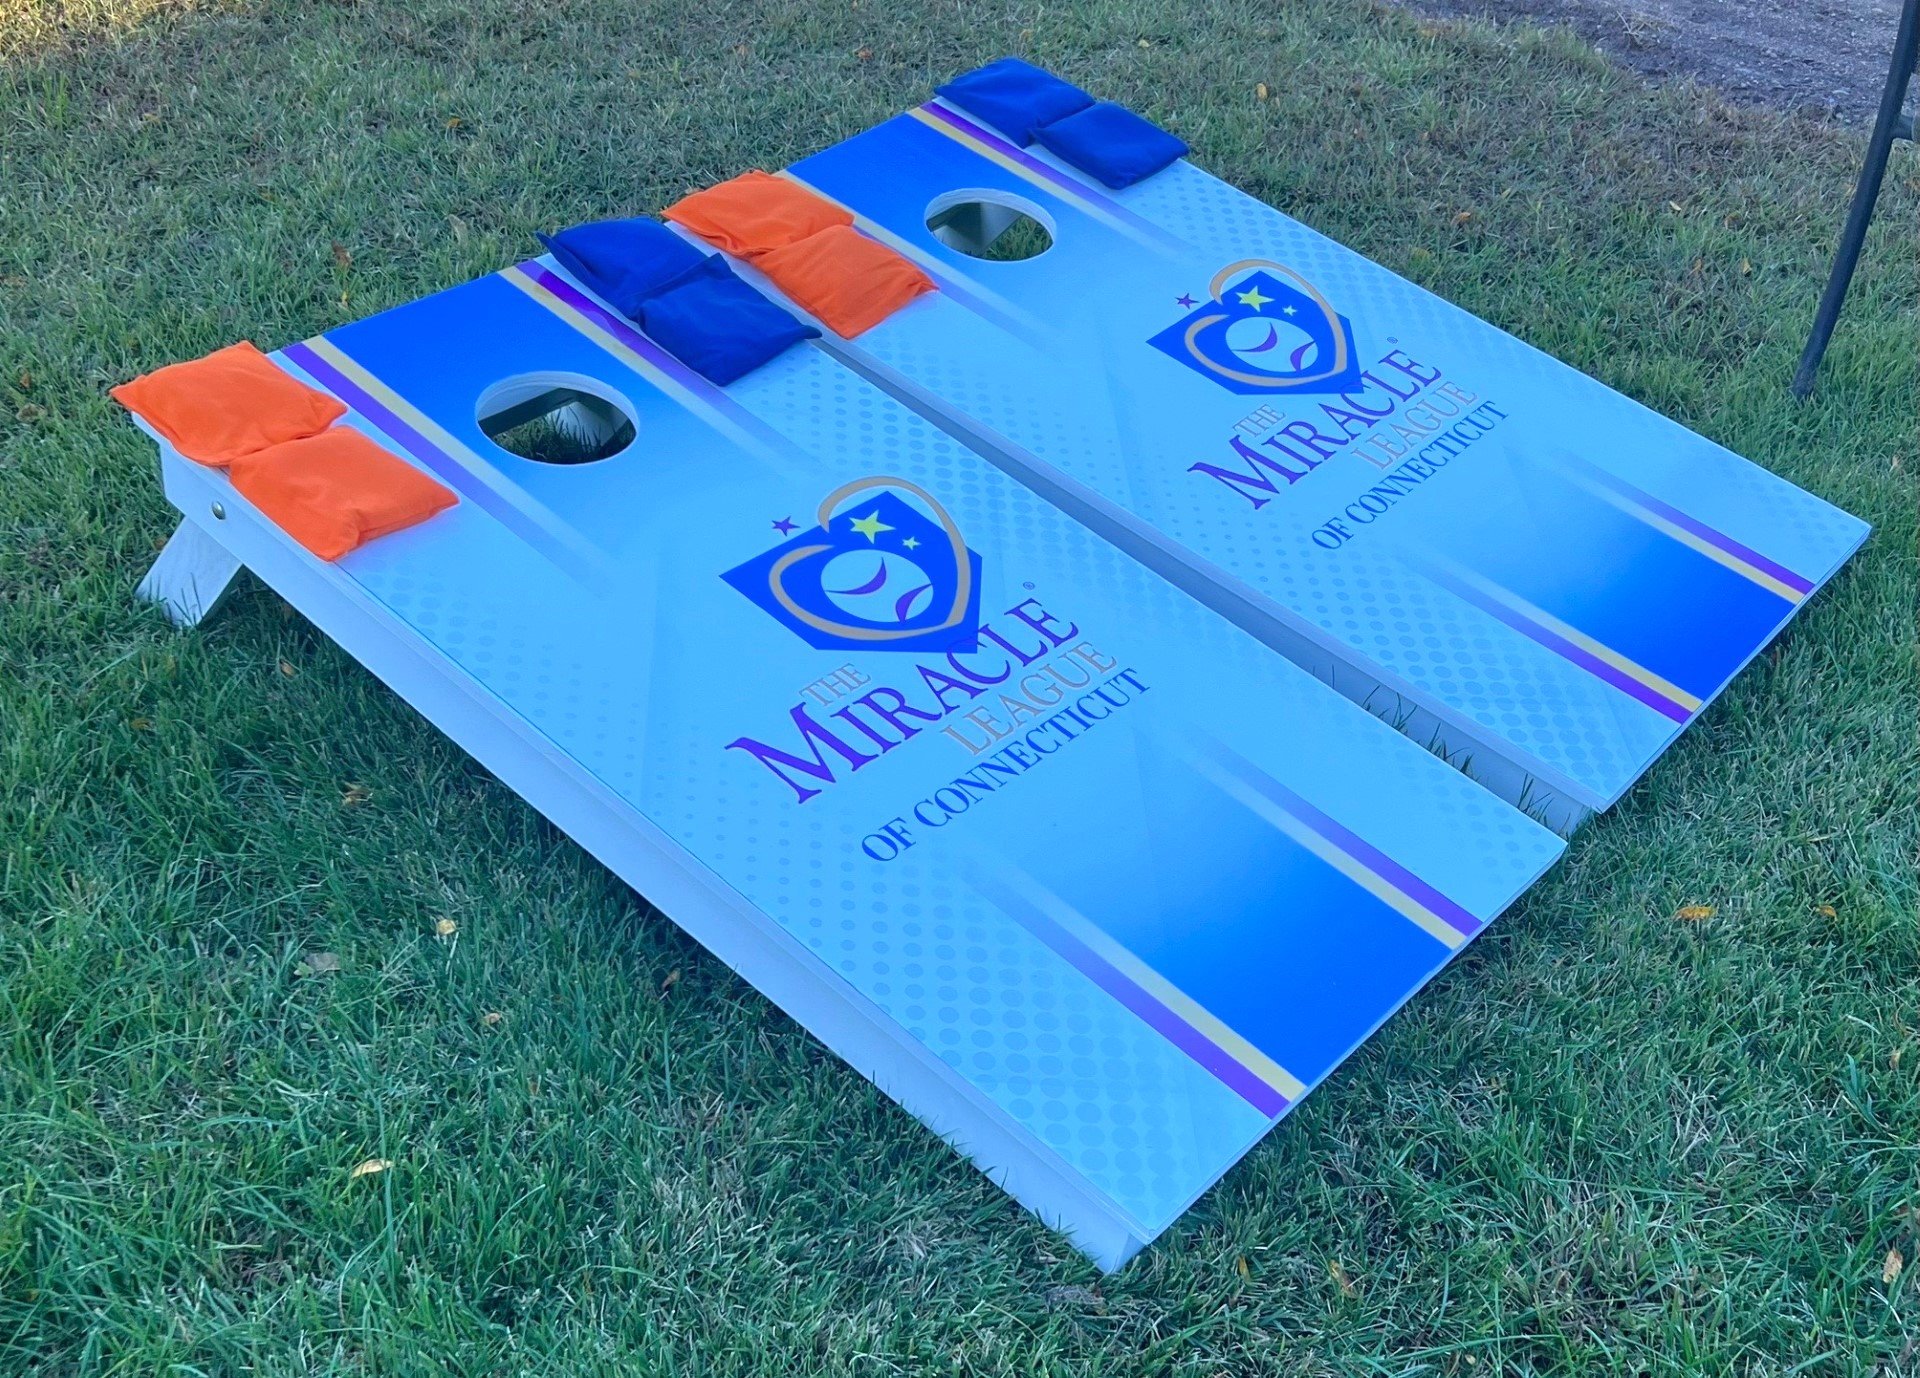
A Cornhole set I donated to a charity golf tournament. The Miracle League of Connecticut puts on social events for kids with intellectual and physical disabilities. It's built to ACL specs.
Built from Plan(s)
A Cornhole set I donated to a charity golf tournament. The Miracle League of Connecticut puts on social events for kids with intellectual and physical disabilities. It's built to ACL specs.
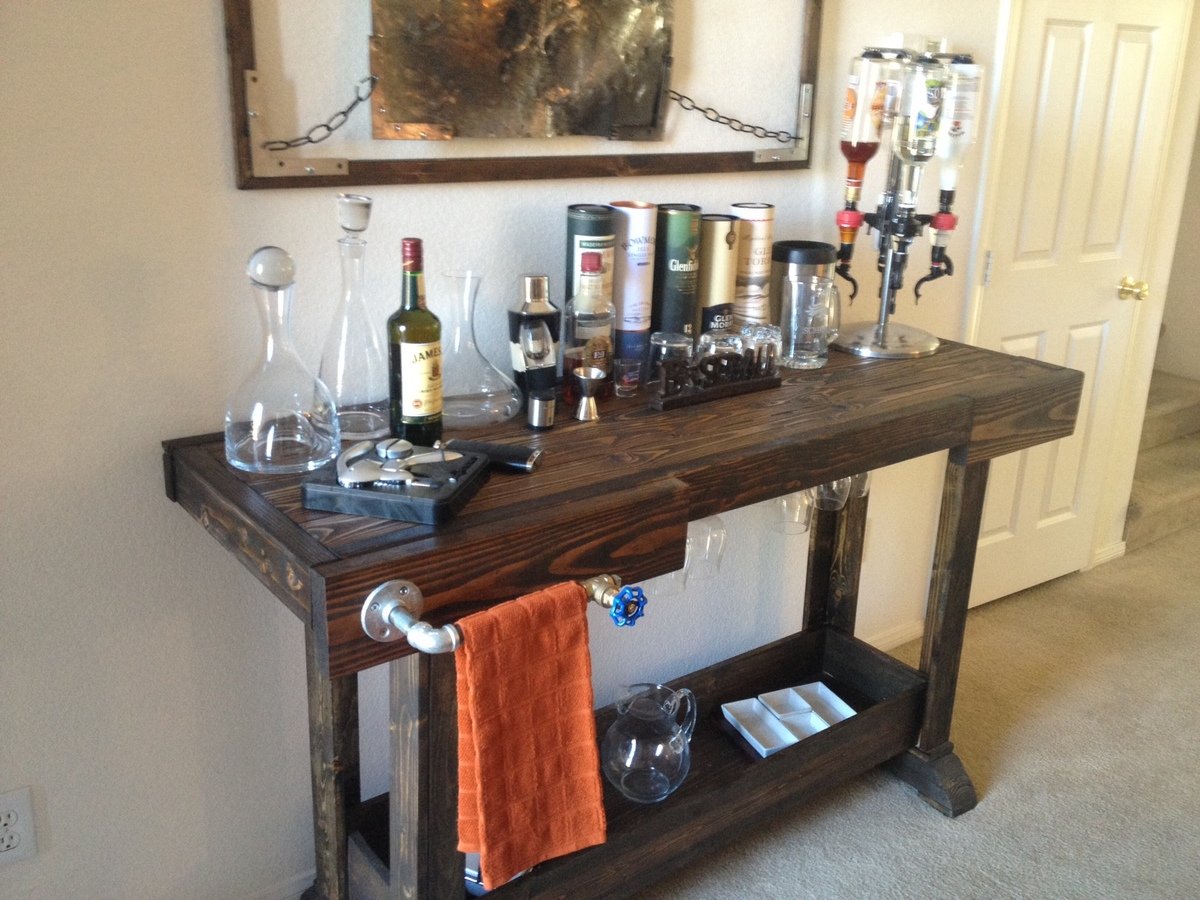
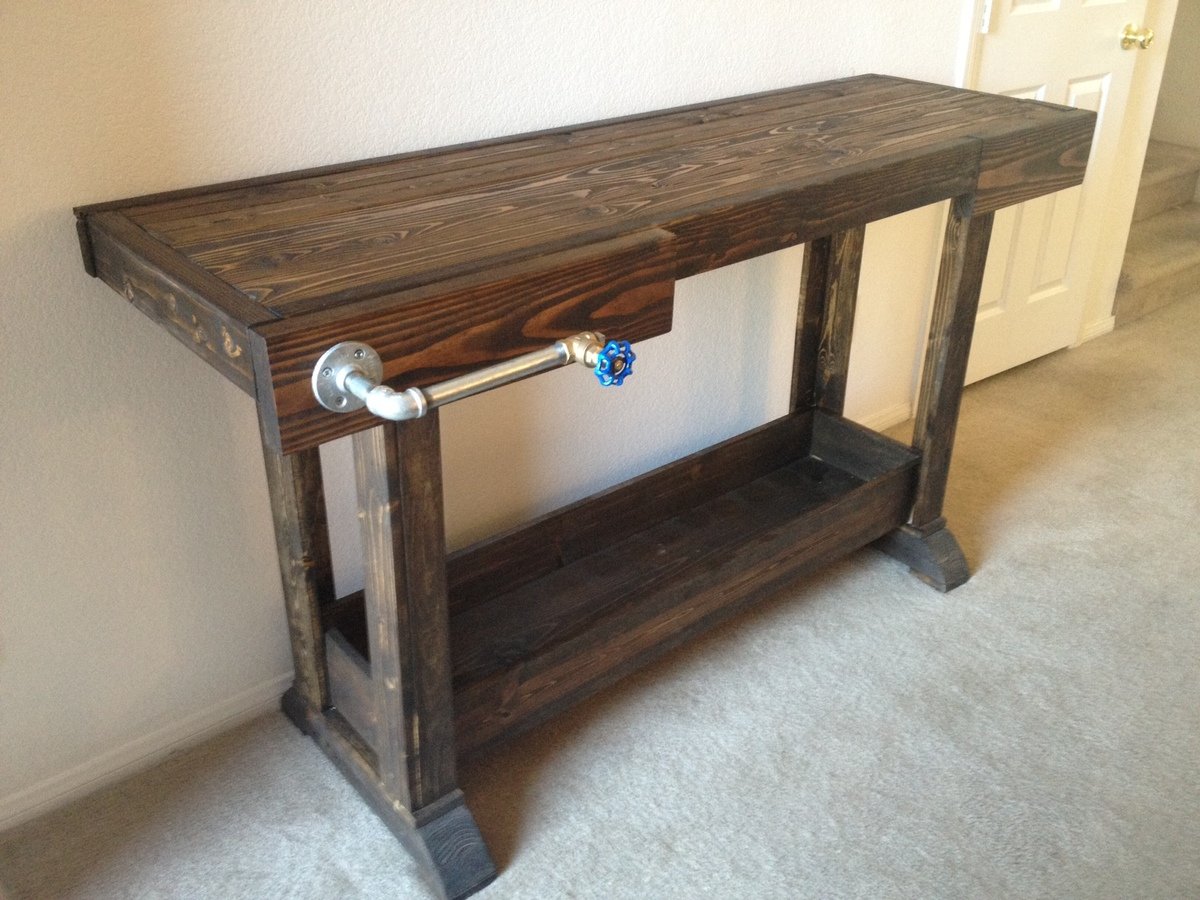
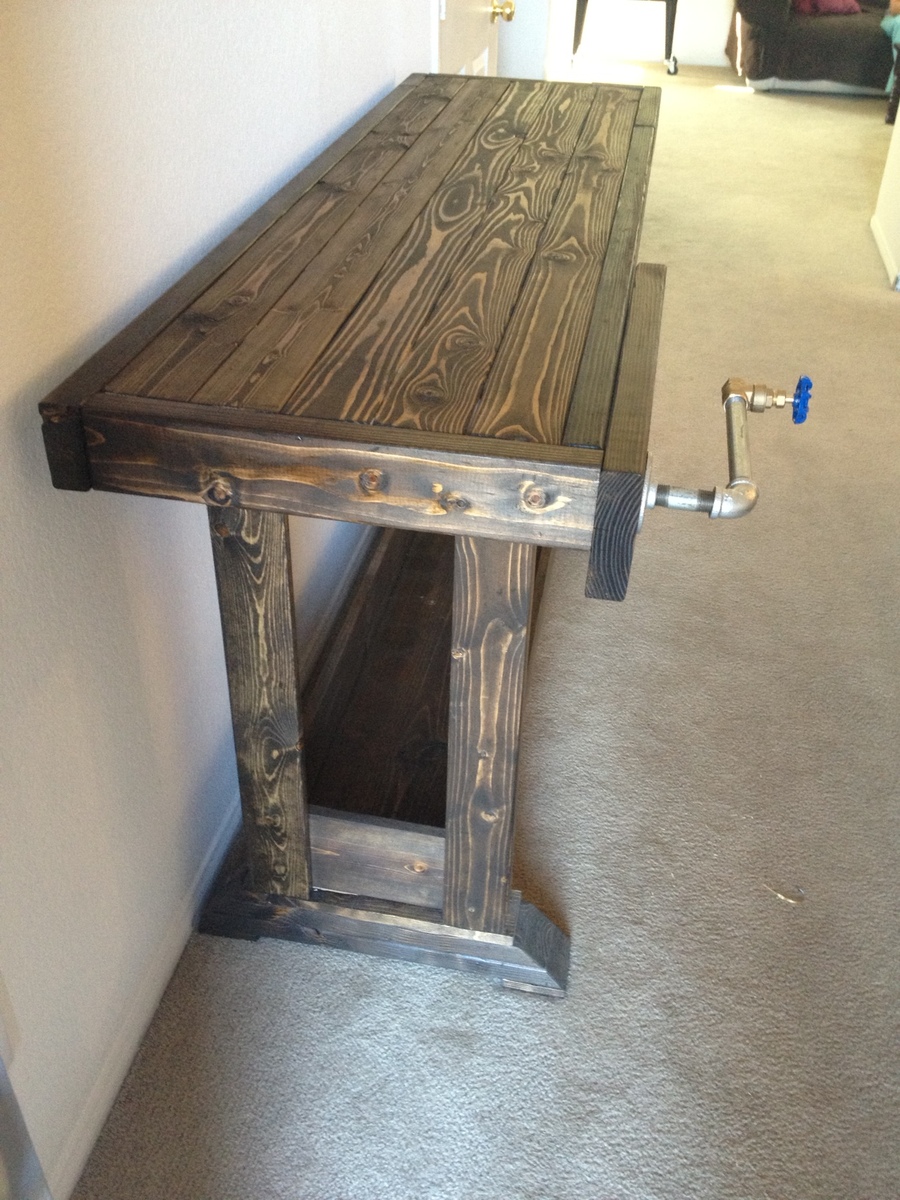
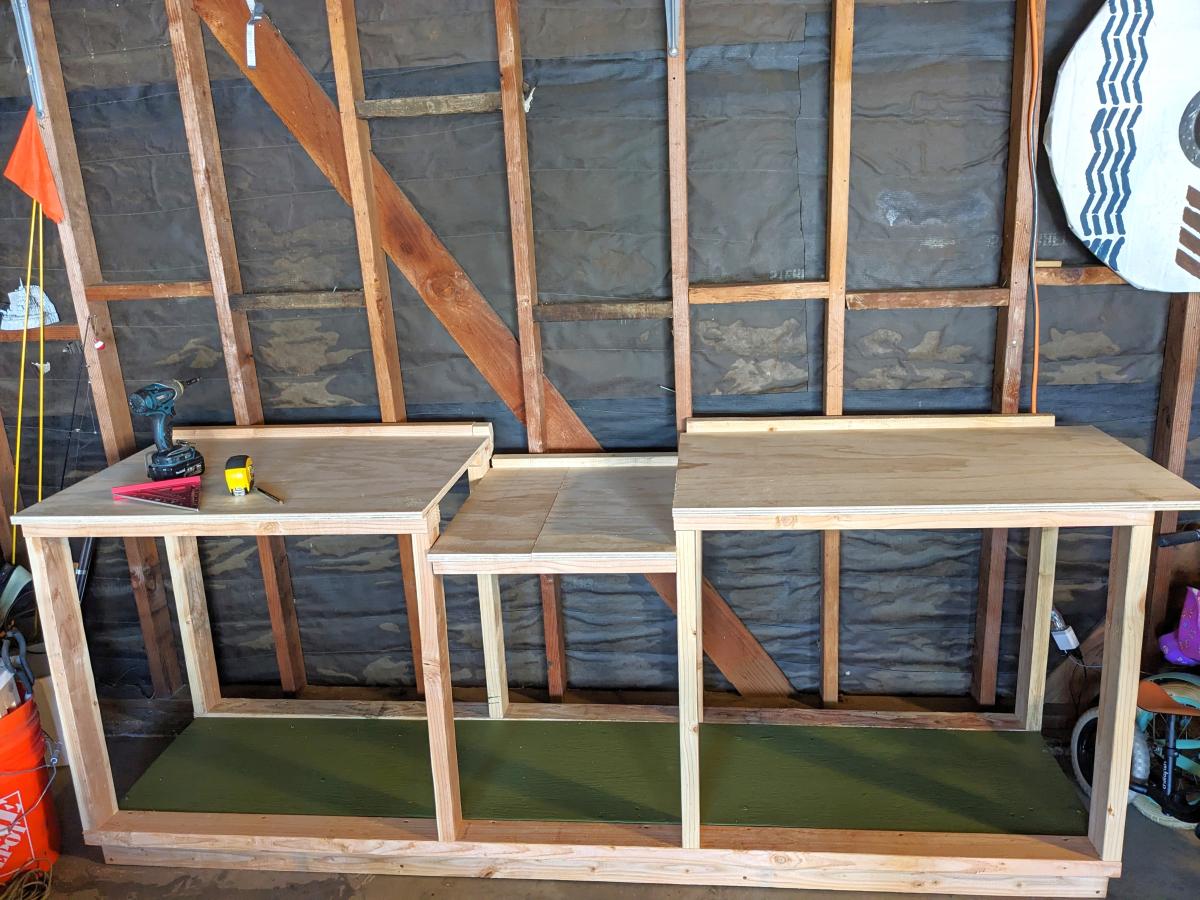
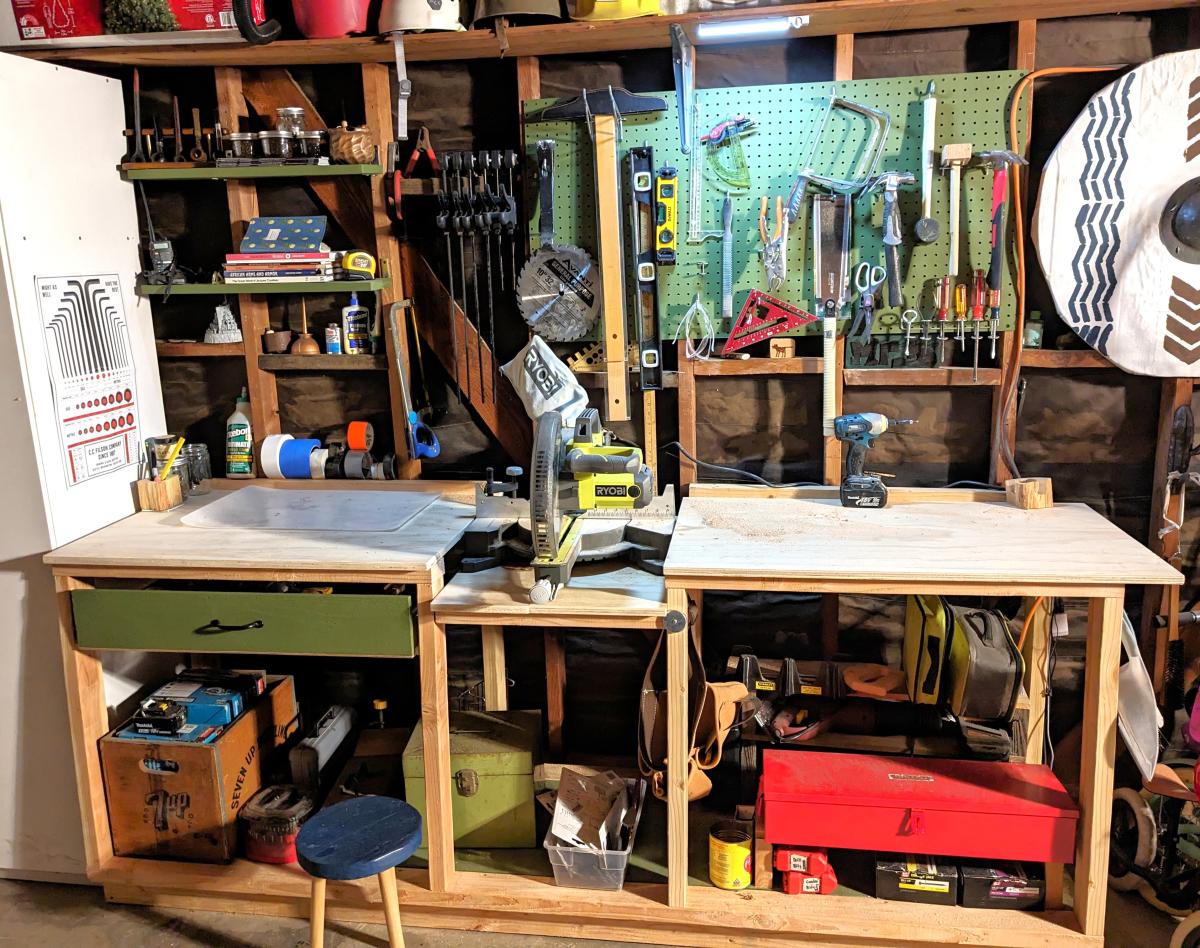
This is my version of the workbench console table. The plans were very easy to follow. I used studs for the top of the table, but at least one of them was warped. This left me with a warped top. Therefore, I had to redo the top, ensuring that I had straight studs the second time. I actually laid them all out in the aisle of the hardware store to make sure they were straight. I wish I did this the first time.
The towel rack is just piping and a valve from the hardware store. There's also a bottle opener on the right side.
I was going for a more rustic/industrial feel, so I didn't use a polyurethane.
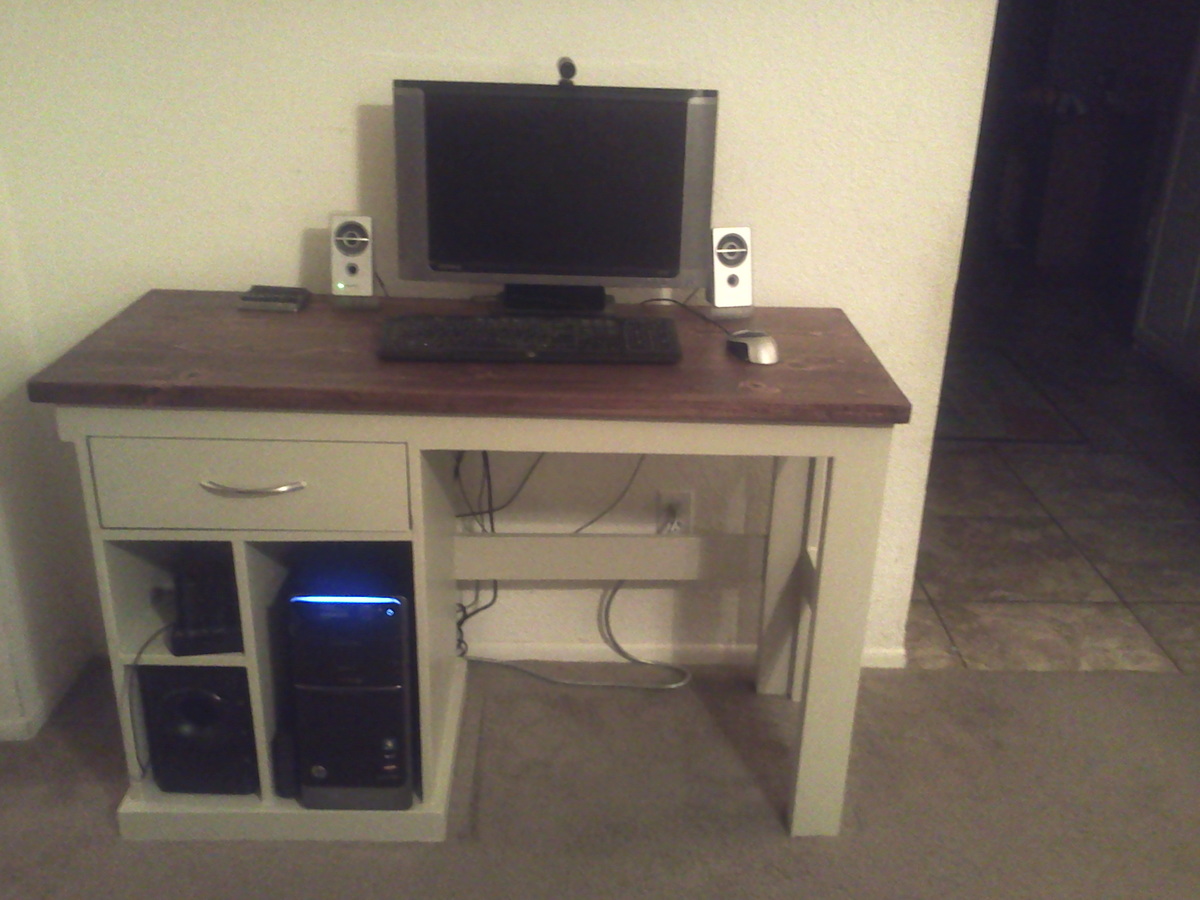
This is my first furniture project I wanted to replace my cheap computer desk that was falling apart. The build was pretty simple, the only problem was finding a good project board and finding a good stain. Tried several different stains an a piece of scrap before deciding on red elm gel stain. Project took longer than I anticipated but most of that time was in getting the finish right, the build part was pretty quick.

Mon, 05/05/2014 - 08:29
Well done. I feel your pain in looking for good boards - it takes me about an hour at Lowes just to find 4 or 5 good boards. Wish I had a lumber yard close by.
I like your finish on the top. I will try that one next time.
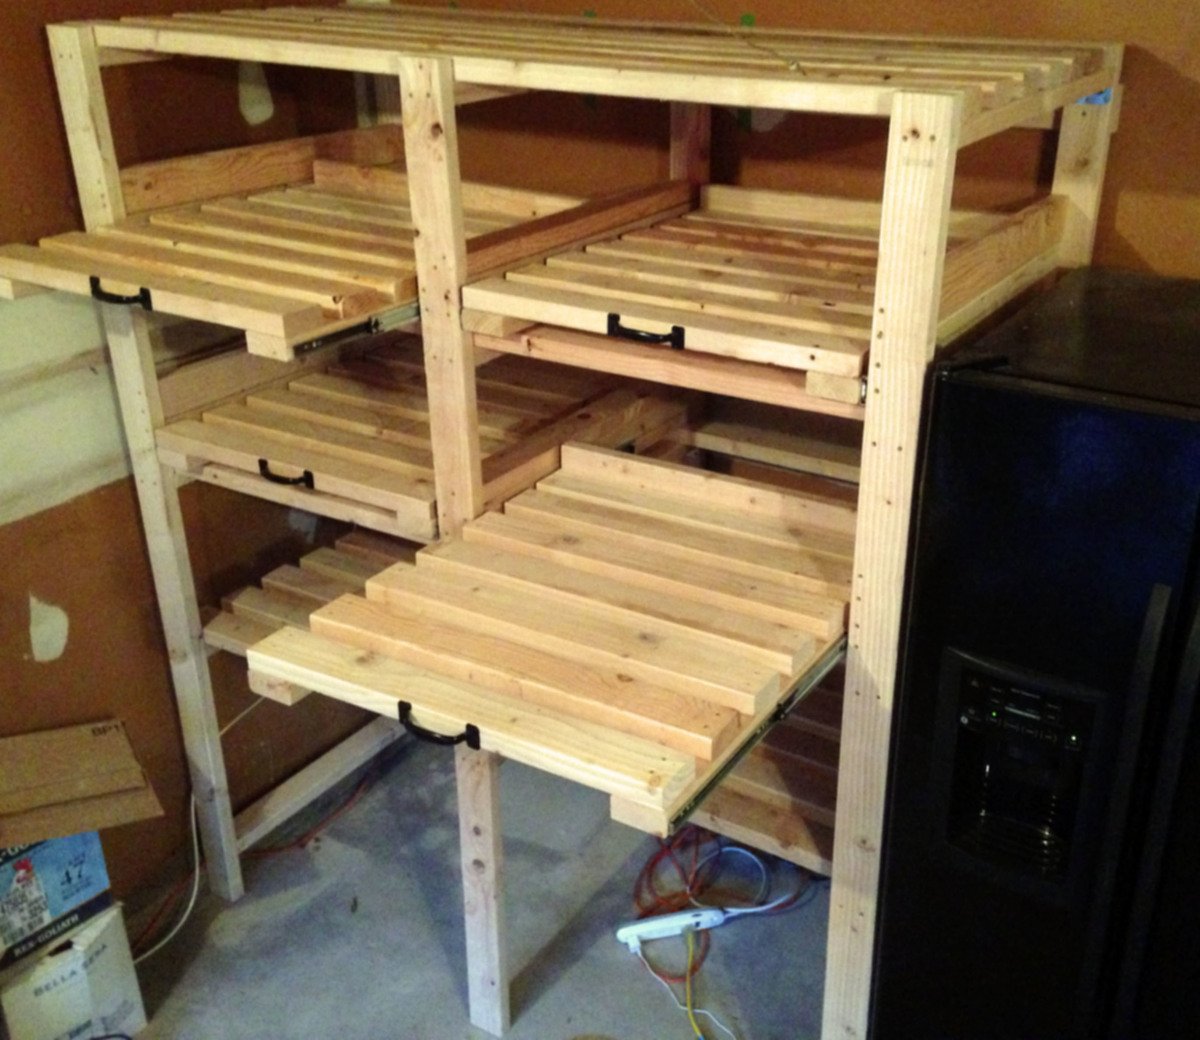
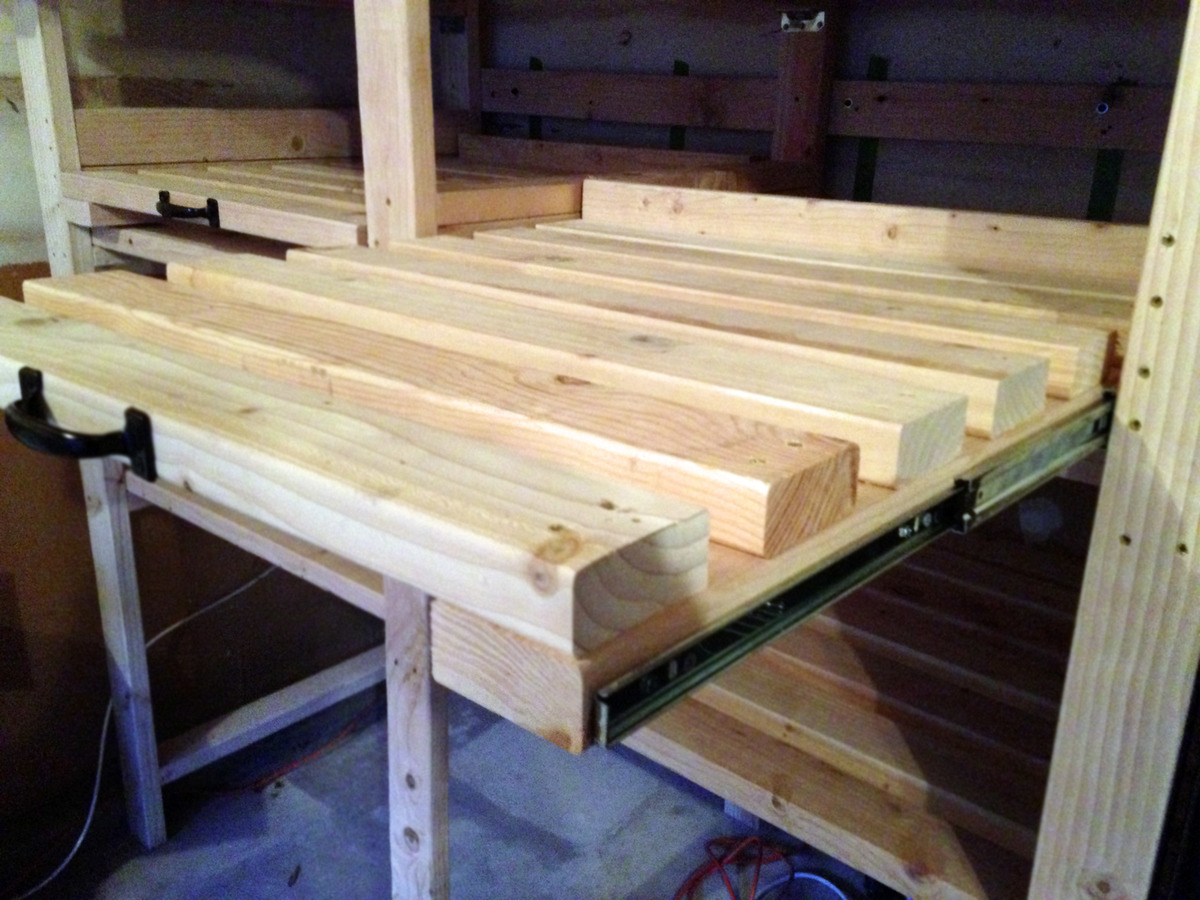
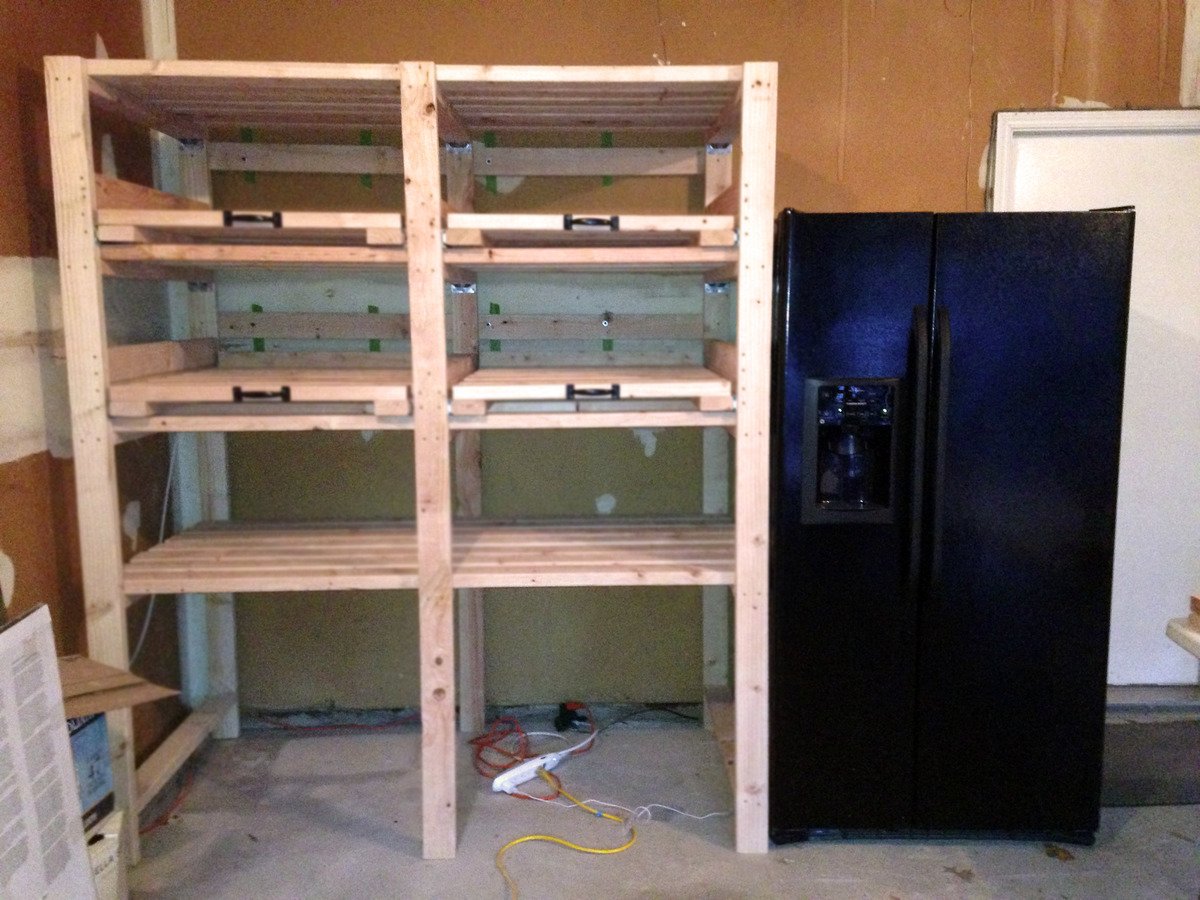
After undertaking many home improvement projects over the past few years, my garage was getting a little out of control. I had too many bulky tools taking up space, making it hard to get work done efficiently. I decided to build a storage shelf, but looking for more of a challenge, I wanted to add sliding shelves to provide easy access to items in the rear. Check out my blog post at JustMeasuringUp.com for all the details. I documented the project from beginning to end with lots of pics.
http://www.justmeasuringup.com/blog/creating-more-garage-storage
The shelves are 3 ft deep and stores a lot of stuff now. When I need something at the back, rather than wading through the stuff at the front, I just grab a handle and slide the whole shelf forward. So if you're looking to improve upon the pretty standard garage shelf design out there, check out mine!
Loved this project! The plans were so easy to follow, even for a begginer. Thank you so much!
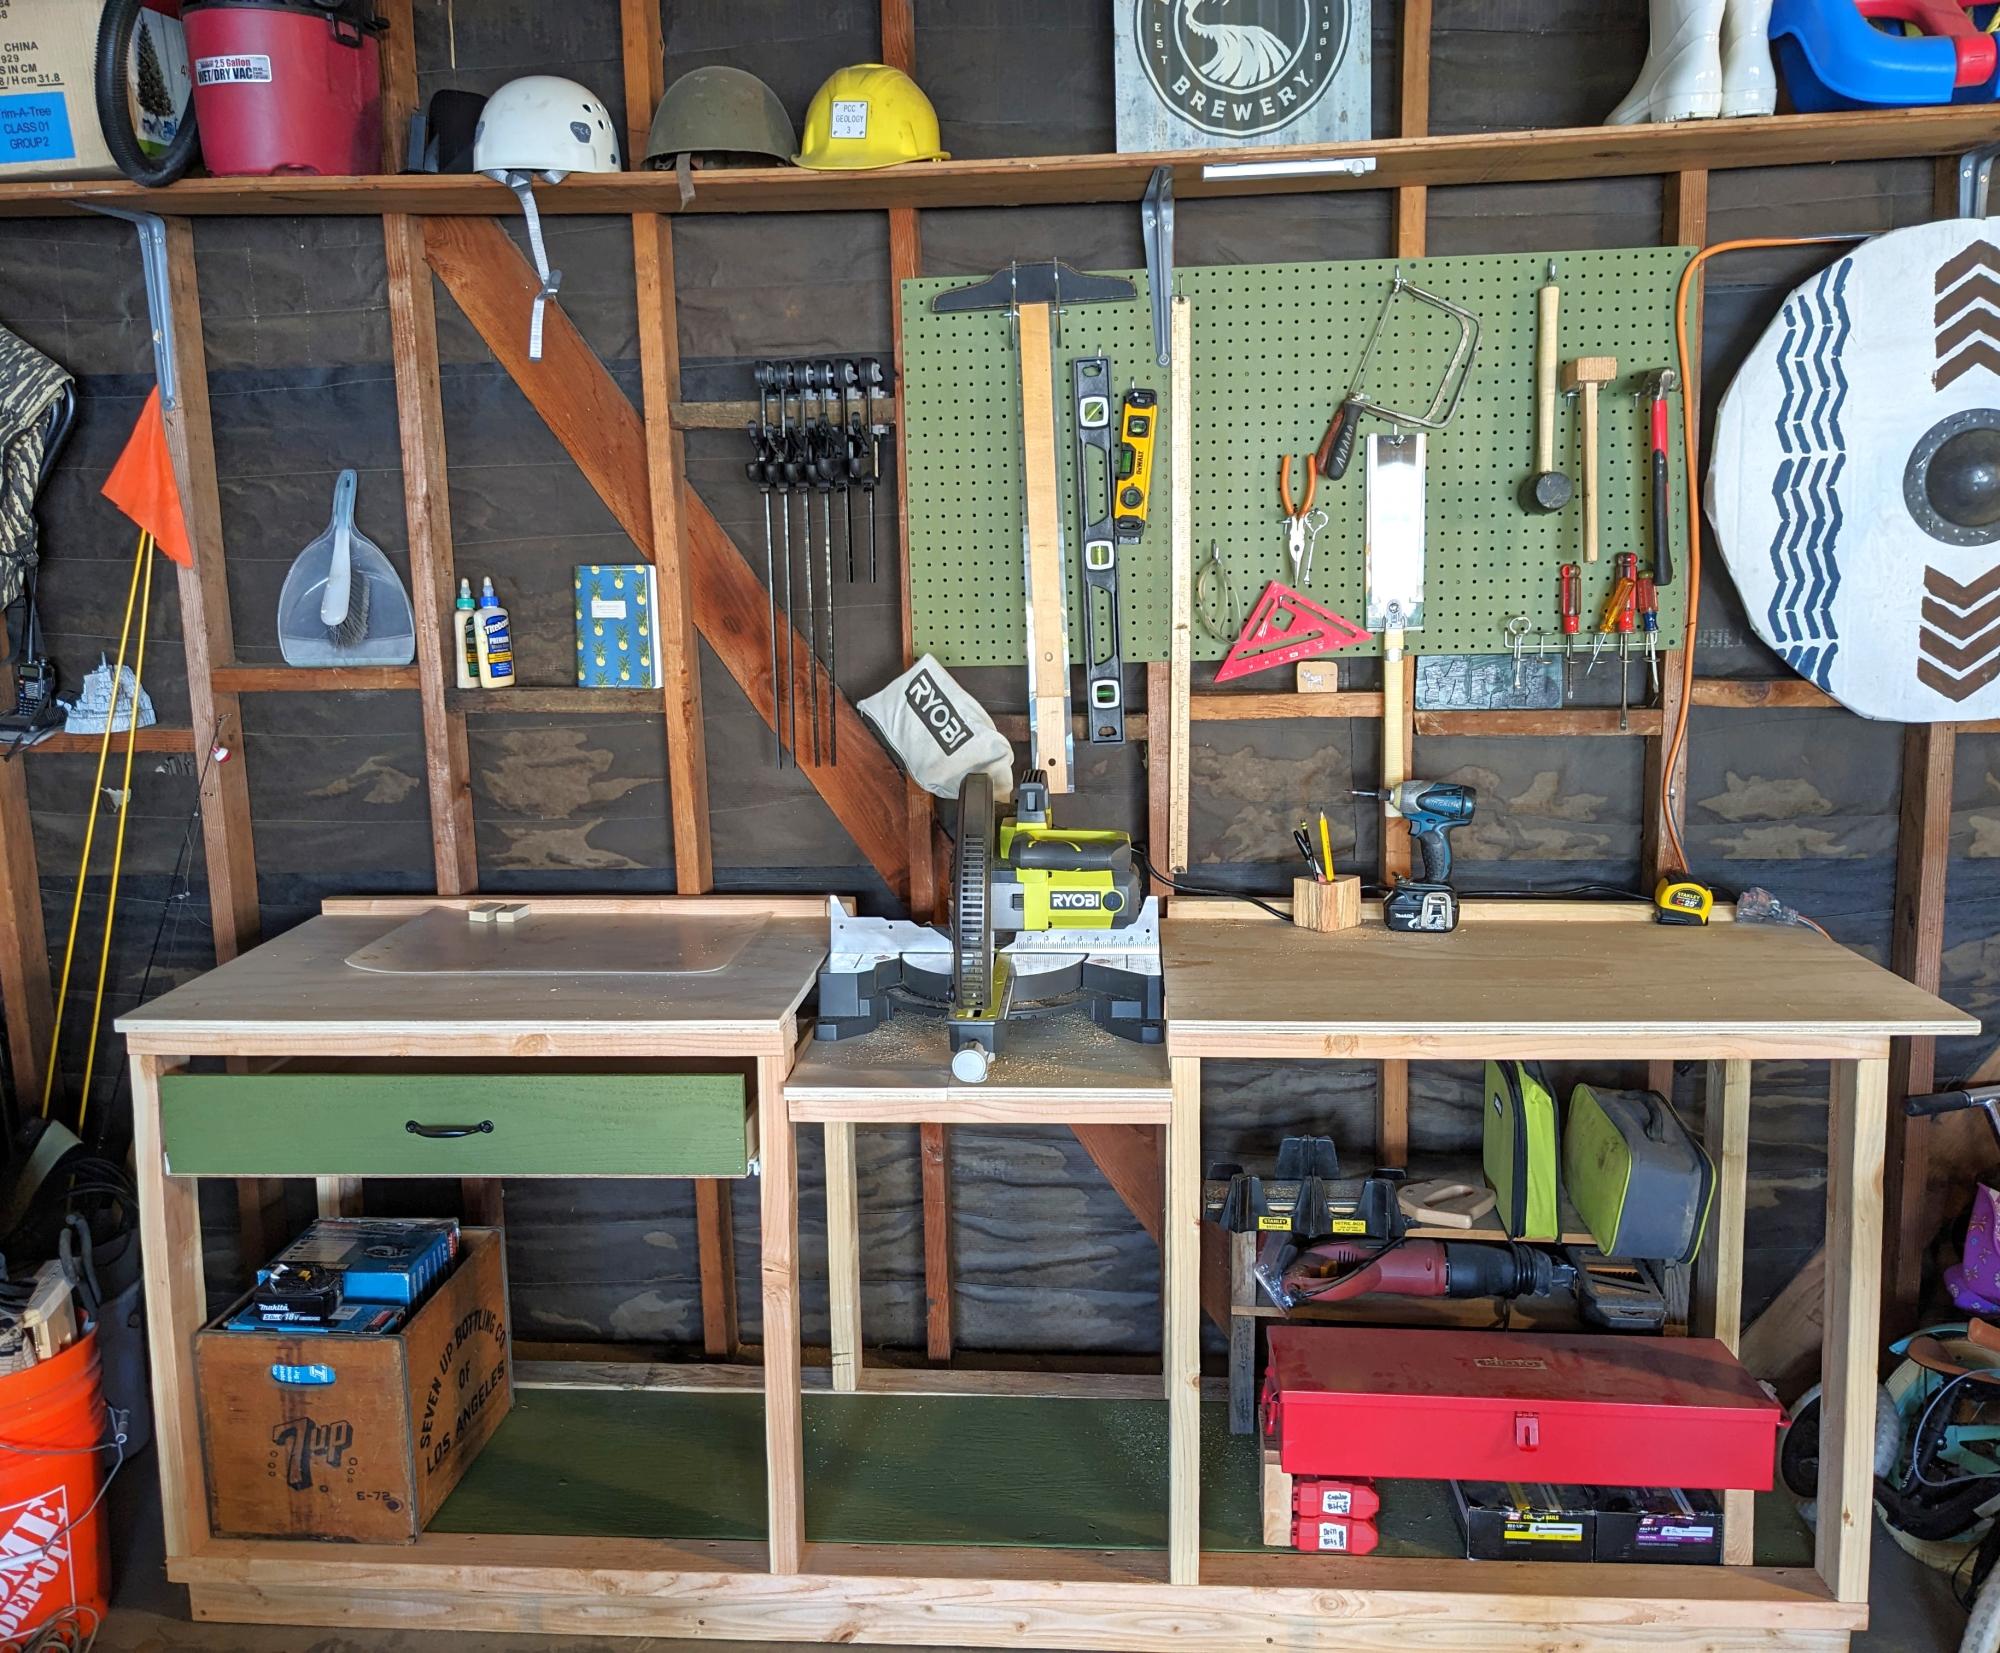
Made mine 8ft long, with just one drawer. So far the bench is great for my space, highly functional, holds all my stuff, and looks good too (I think).
bonan.califonica
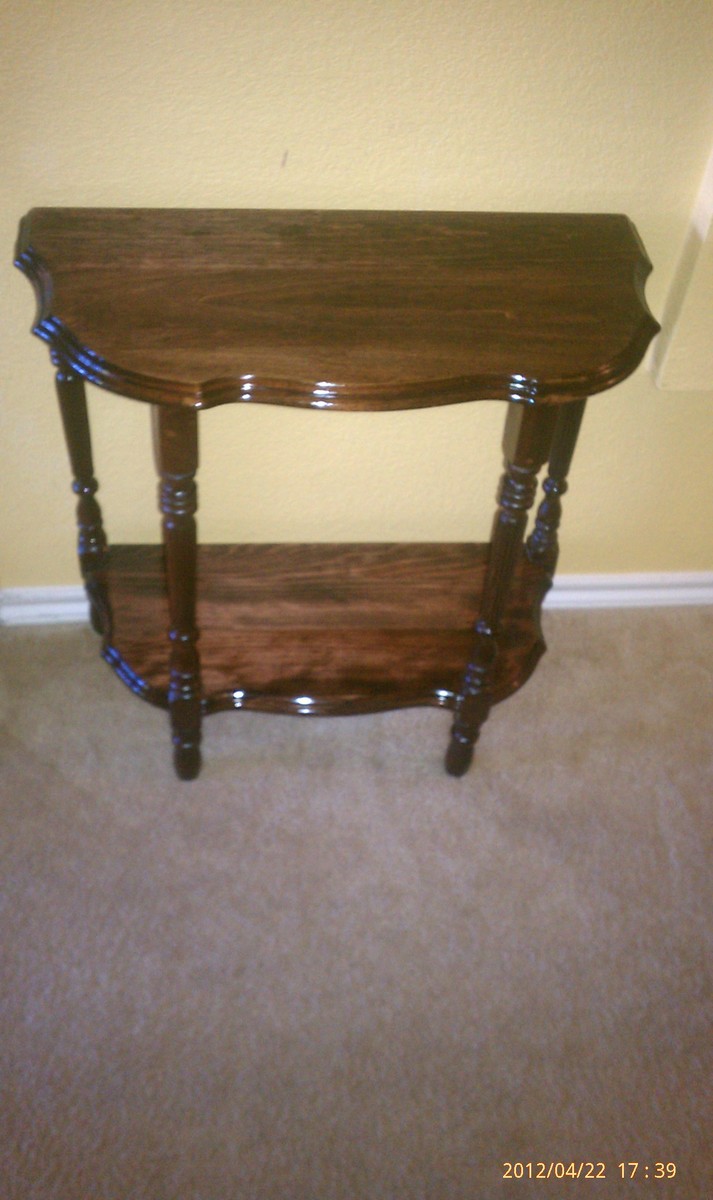
My mother found this old end table in her mother's basement in the mid 90's and brought it home with her to refinish. The table was very flimsy and Mom just didn't know how to fix it, so it sat in her garage since then. I saw it back in March when helping clean out the garage. I asked if I could restore it for her. I think it turned out really nice. Thanks to this site, I have been given the confidence to tackle projects like this. Just wanted to share the project and say thanks to everyone here for making this site a great resource.
I fixed the table legs, sanded the table, used red mahogany stain, and about 15 coats of Poly to give the table a high gloss finish.
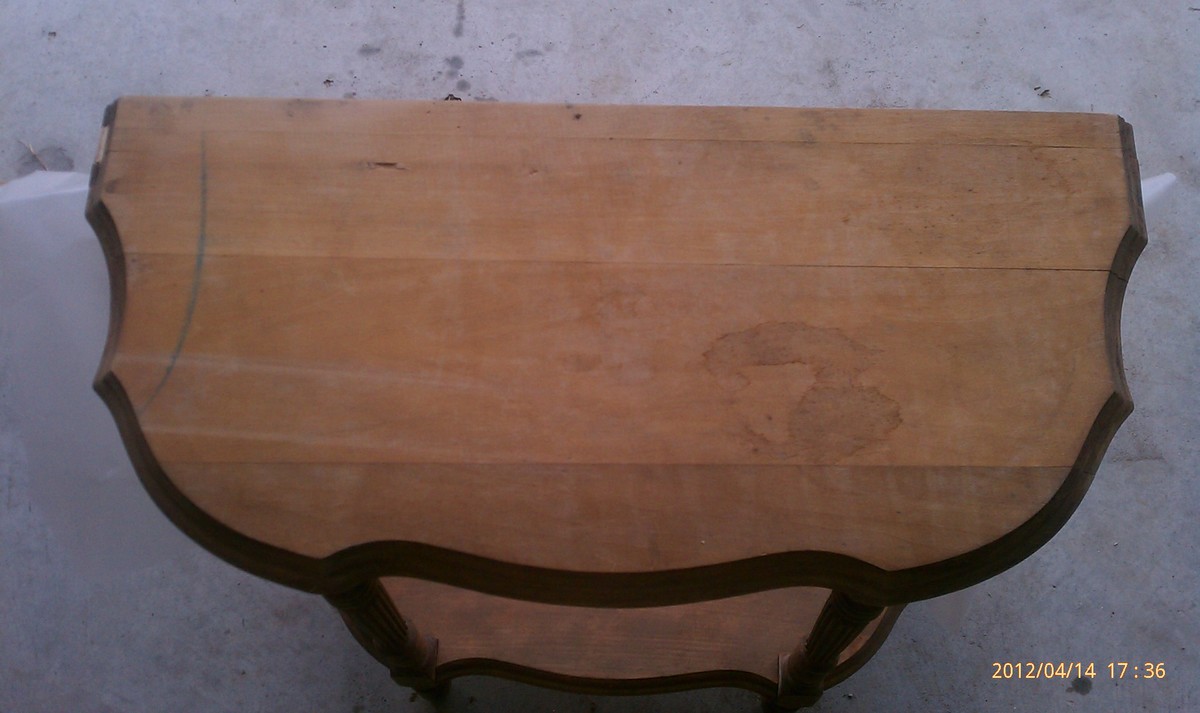
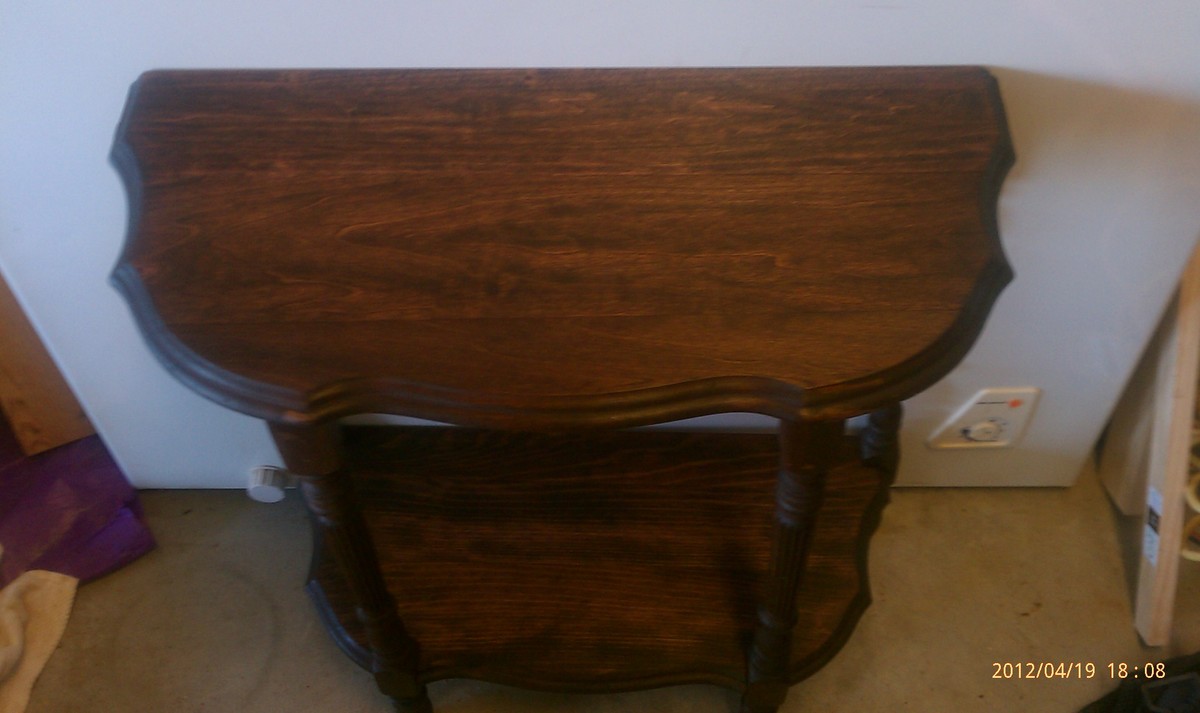
The additional photos are 1 of the original table and 1 of the table after staining and no Poly applied.
Mom was shocked with the finished project. Nothing more pleasing then see Mom smile!
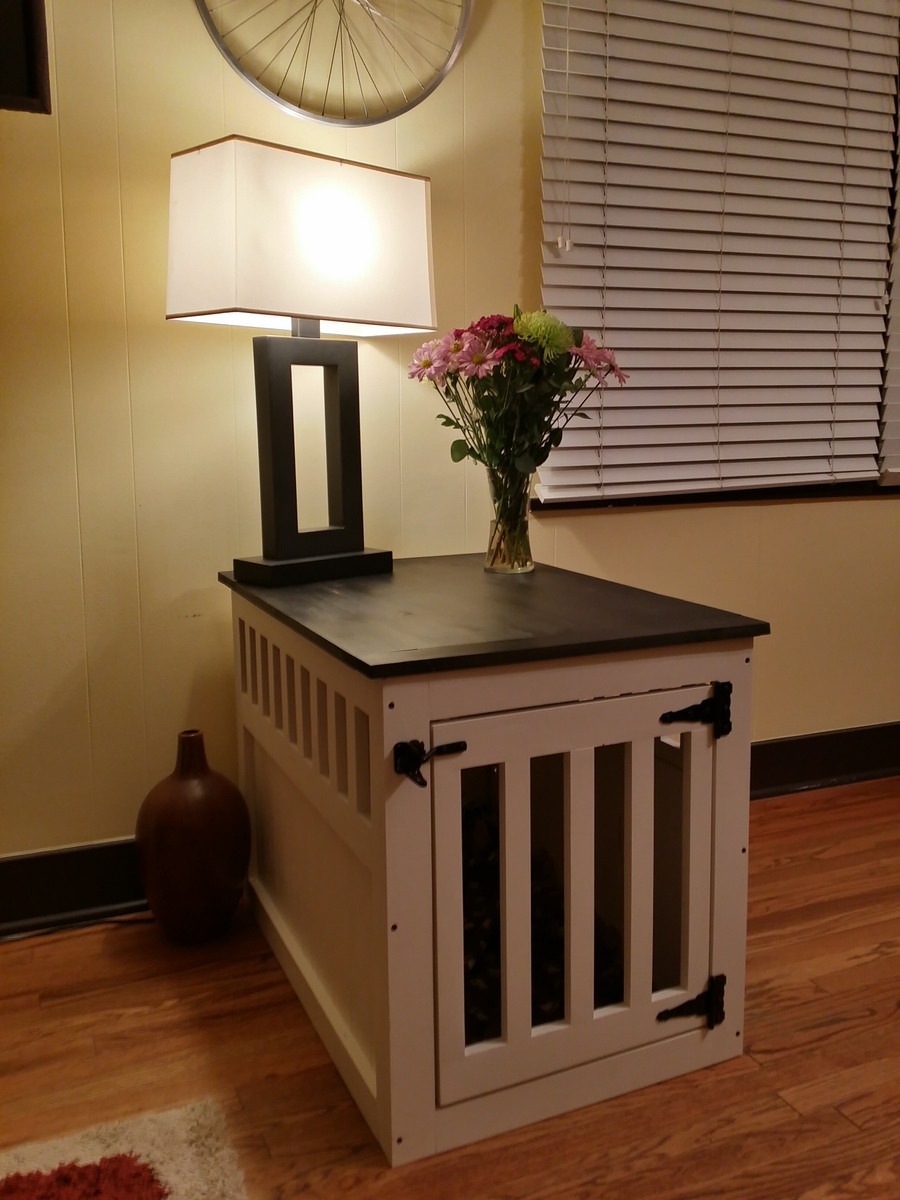
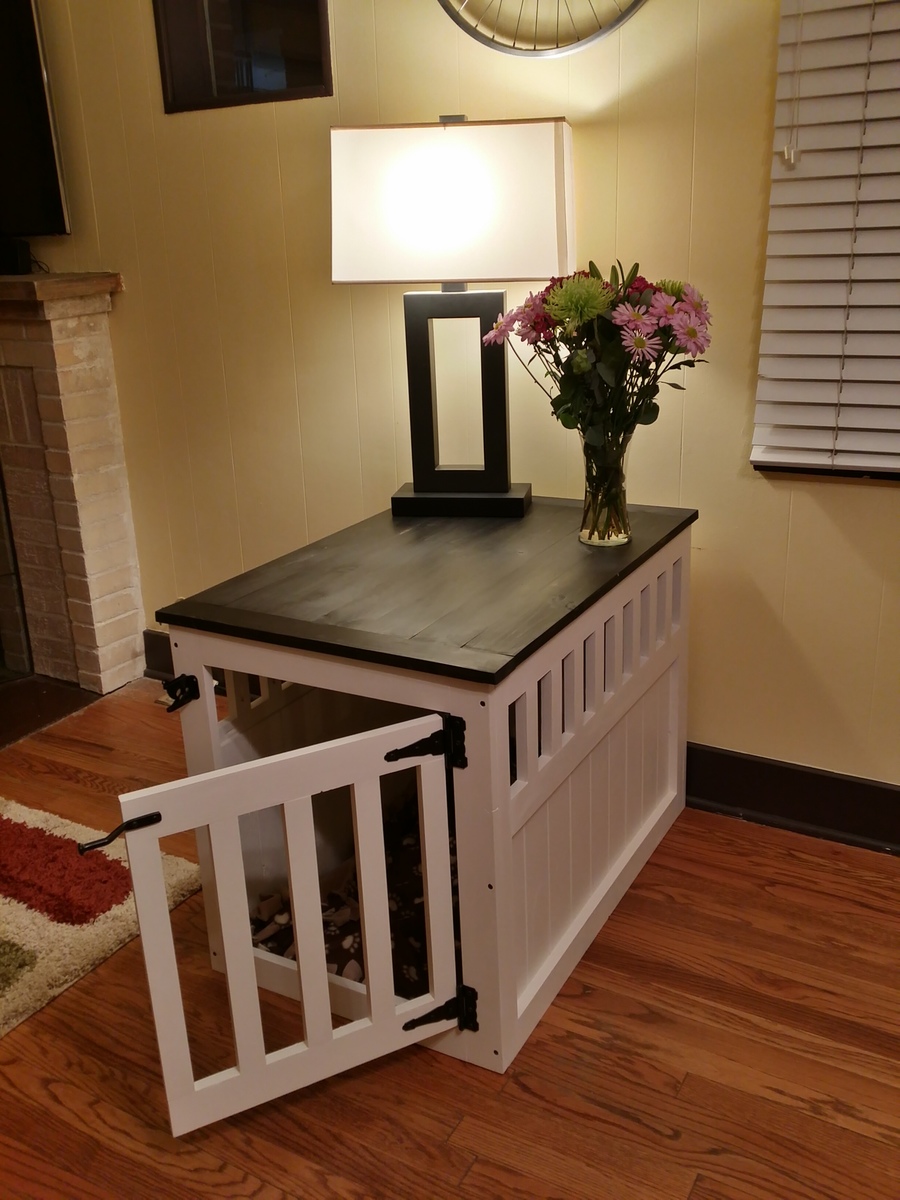
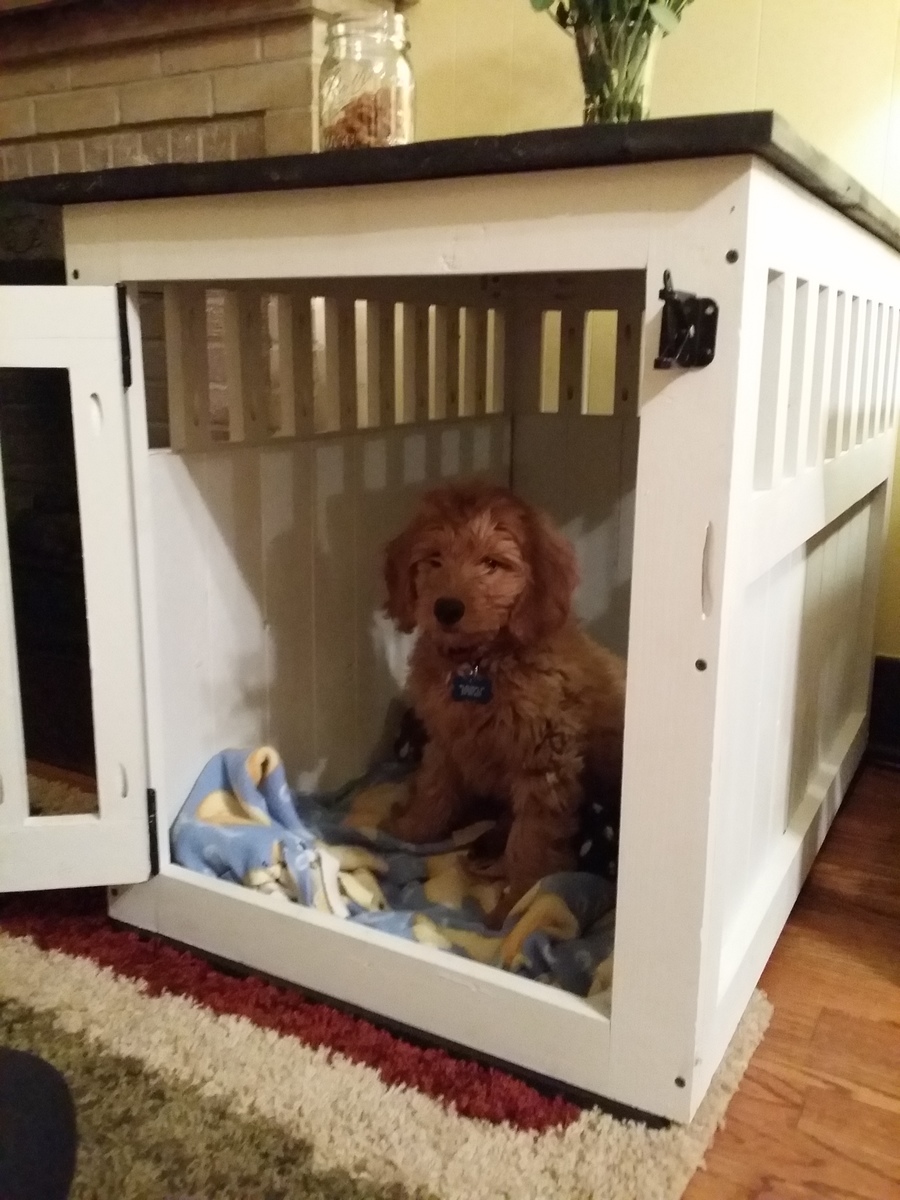
Recently I added a family member and his name is Myles. He needed a home so before we picked him up I built him one of these for him to grow into. The one pictured is actually the second one I built that was built for a friend. I followed the original instructions. I used a couple different bits of material. My table top is 1x4's and for the sides i used bead-board. I painted it an off white with eggshell finish. The table top is stained with Minwax Ebony stain. I love how it turned out and most of all my puppy enjoys it as well.
I left the bottom open. The dimensions in the plans make it so you can set the crate right on top of a crate replacement trey series 700 from PetCo. This makes it very easily to clean by just lifting the crate off the trey and hosing it off and also prevents the wood from absorbing any liquids.
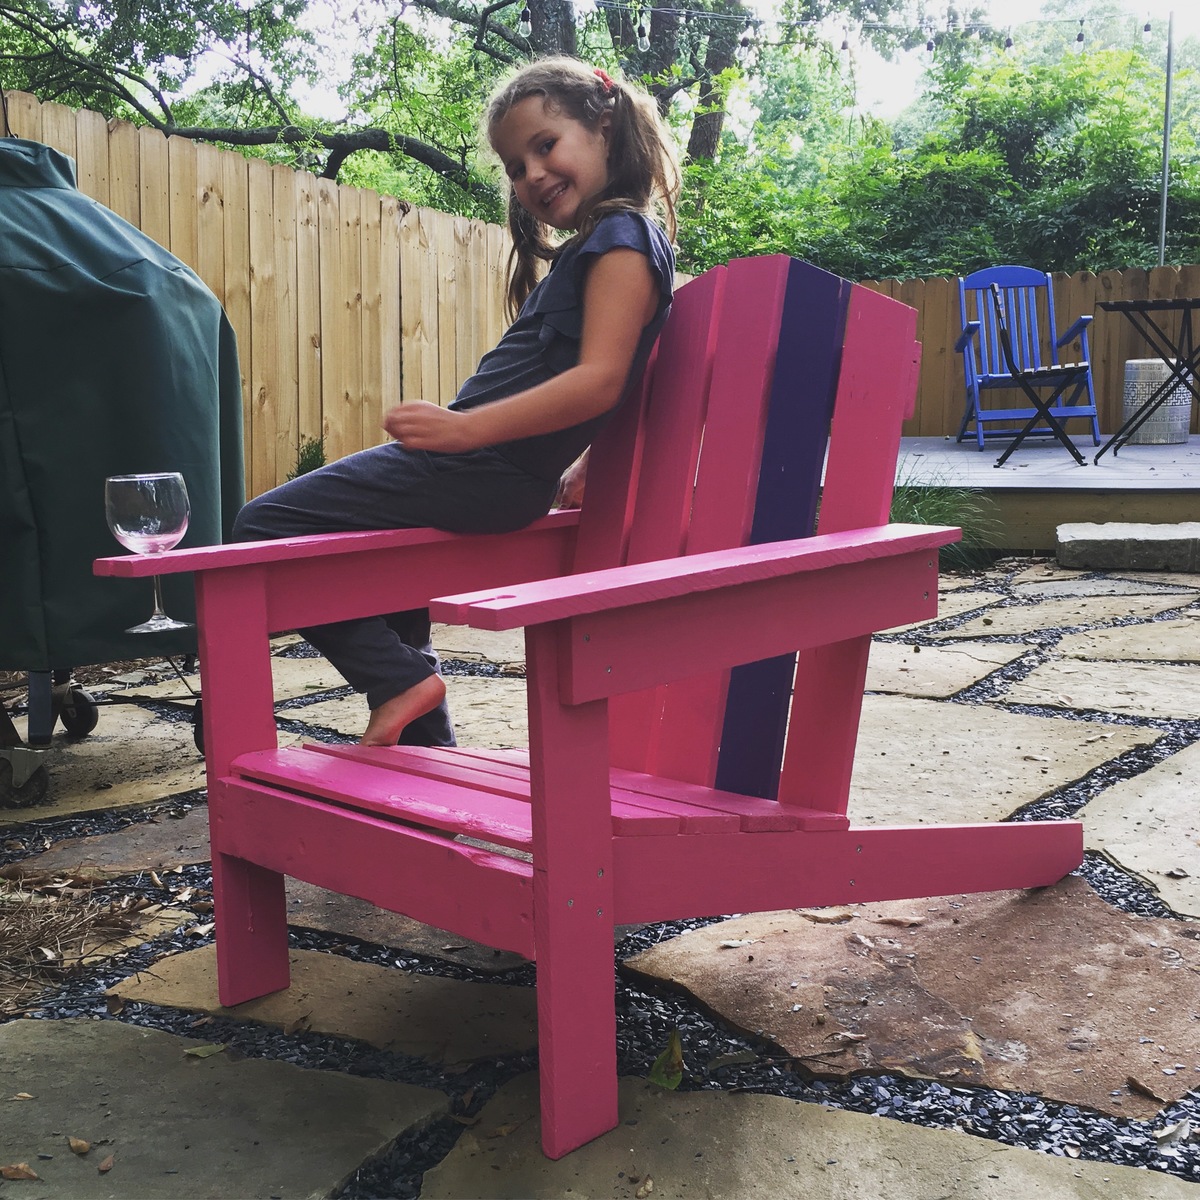
I had to make the back legs longer, since I used all pallet planks for this, threw me off a bit. And I made the arms an extra 5" long to notch in wine glass holders. If I do it again, I'll angle the back a bit more, but as is its pretty great. Guess who picked pink?
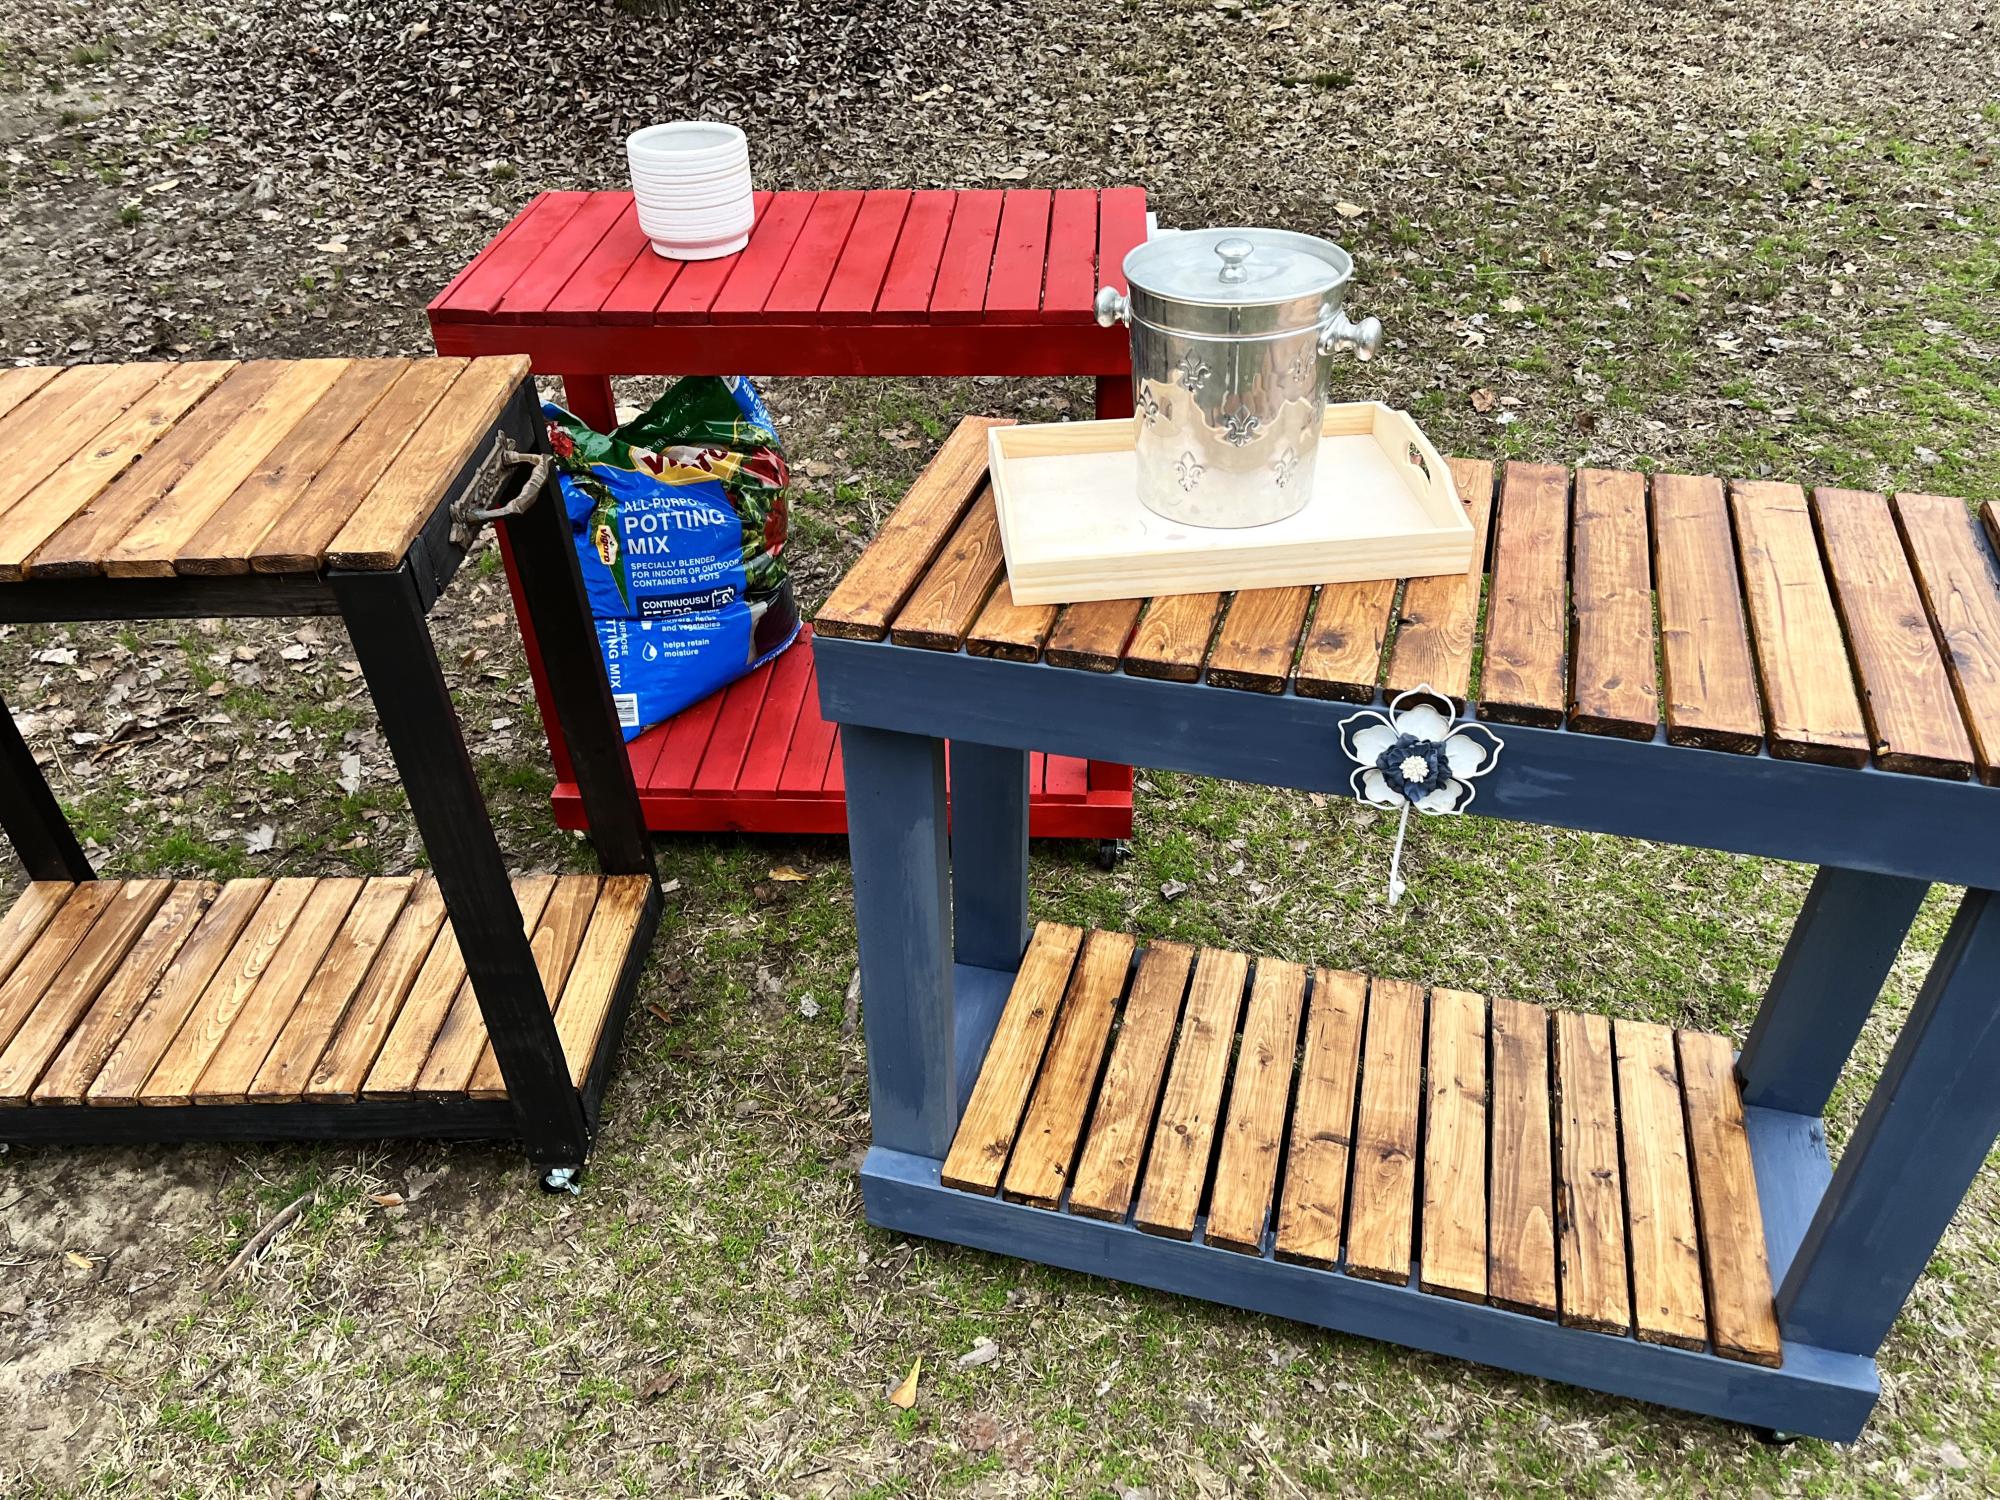
My first build was the rolling bar cart. It took 3 to work out my kinks but I love them!
Cerissa Neal

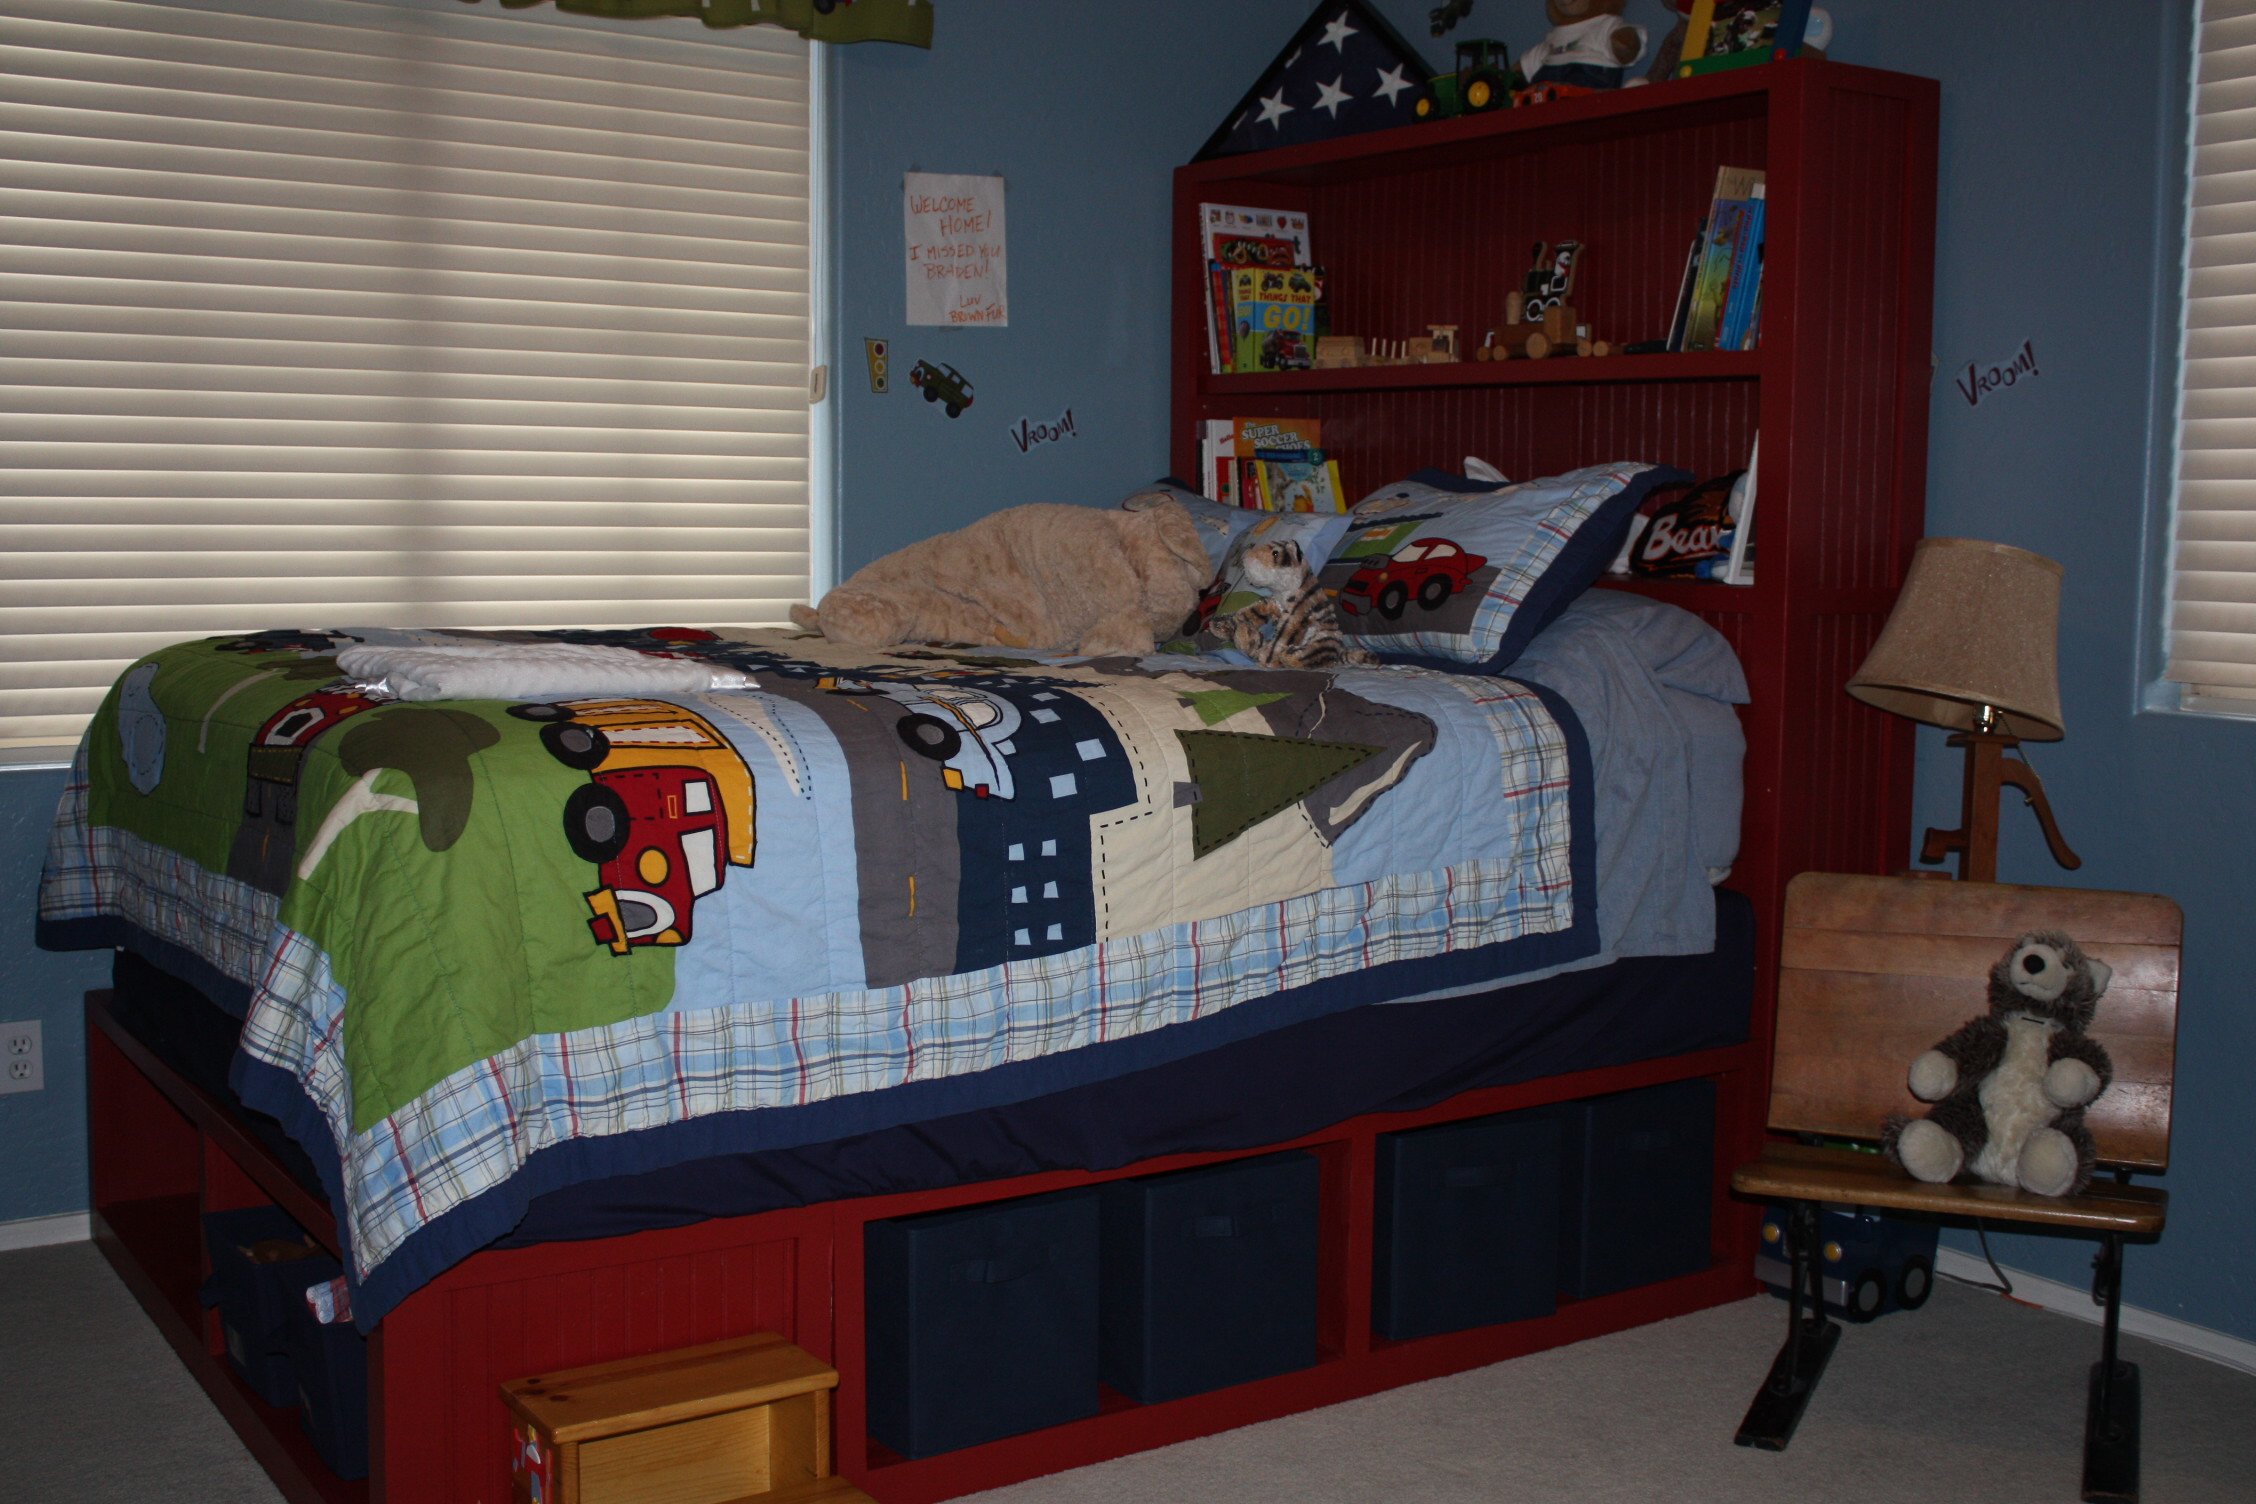
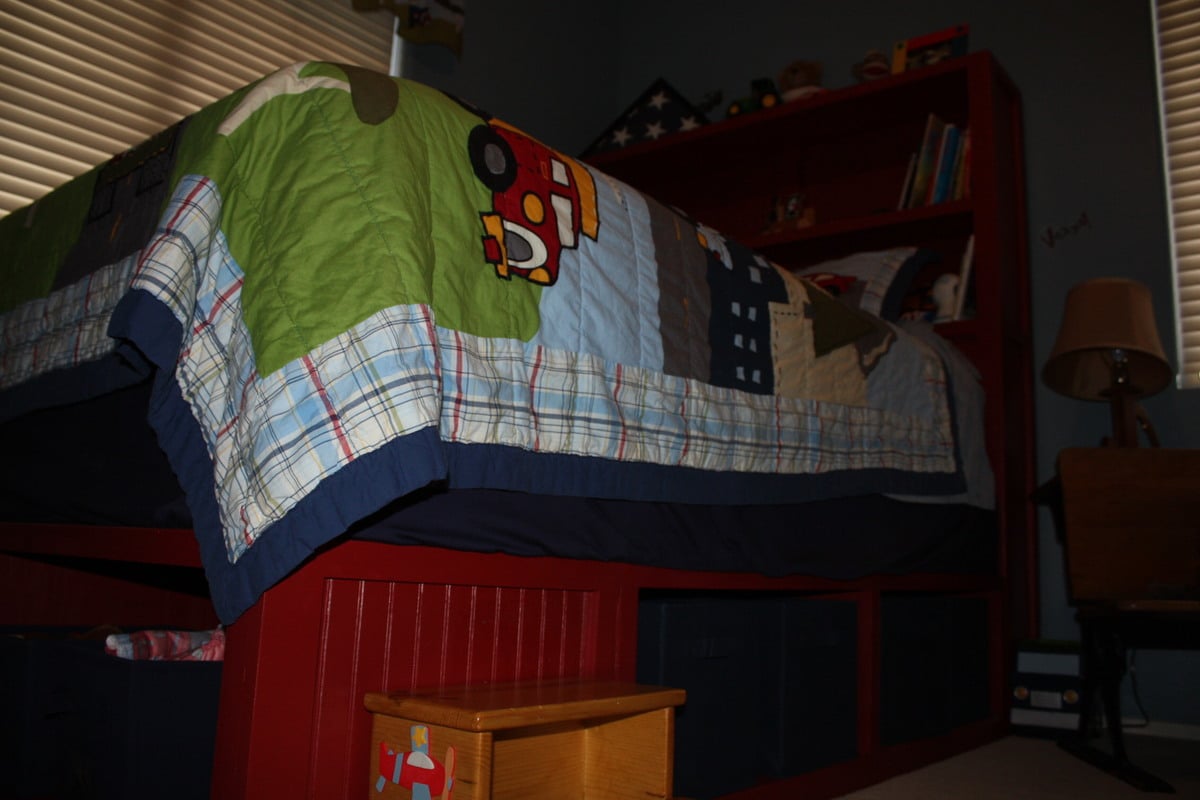
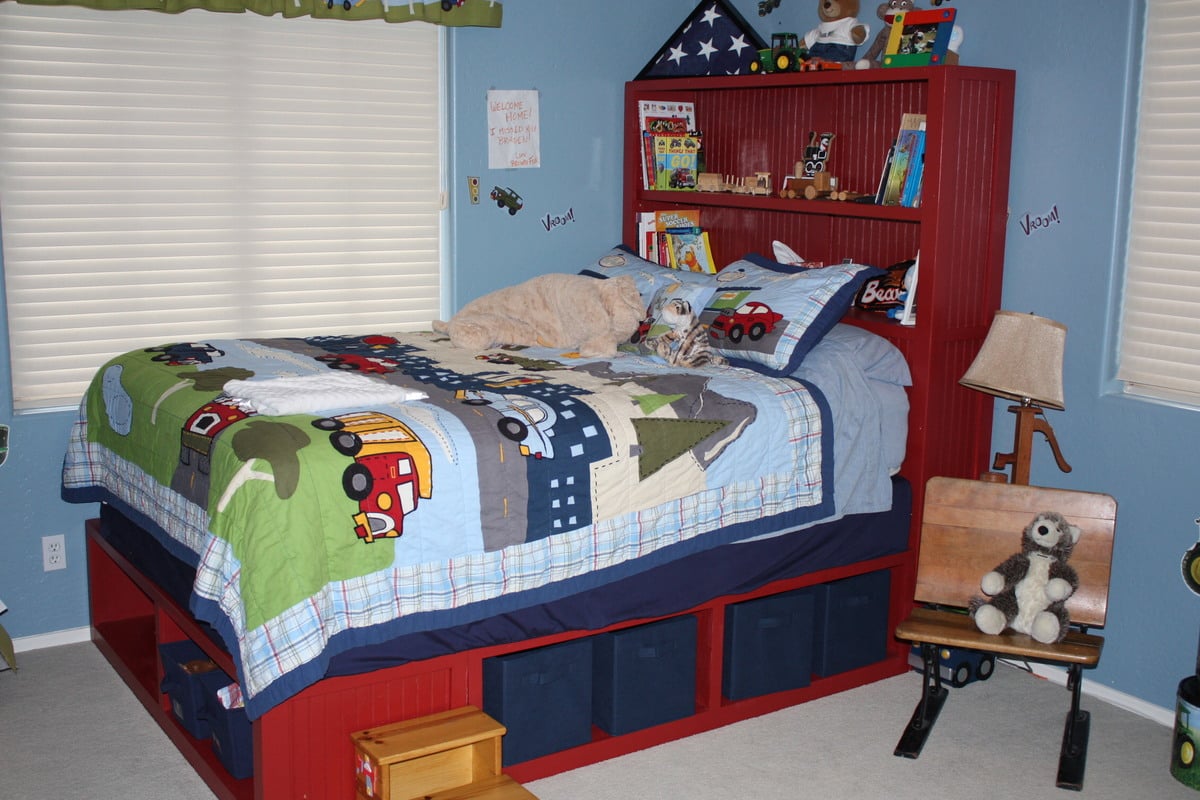
My boy was sleeping on a queen box spring / mattress sitting on the floor; figured he needed a bed and the storage bed seemed just the ticket.
Found some beadboard on clearance for $16 a 4x8 sheet so picked up about 5 sheets. It was on clearance since it was prefinished. Not a big deal since I knew I'd be painting the bed (had to prime the stained wood first). I think the beadboard adds a nice touch on the ends.
Haven't built drawers yet, but the wife kind of likes the looks of the cubby bins so drawers can wait.
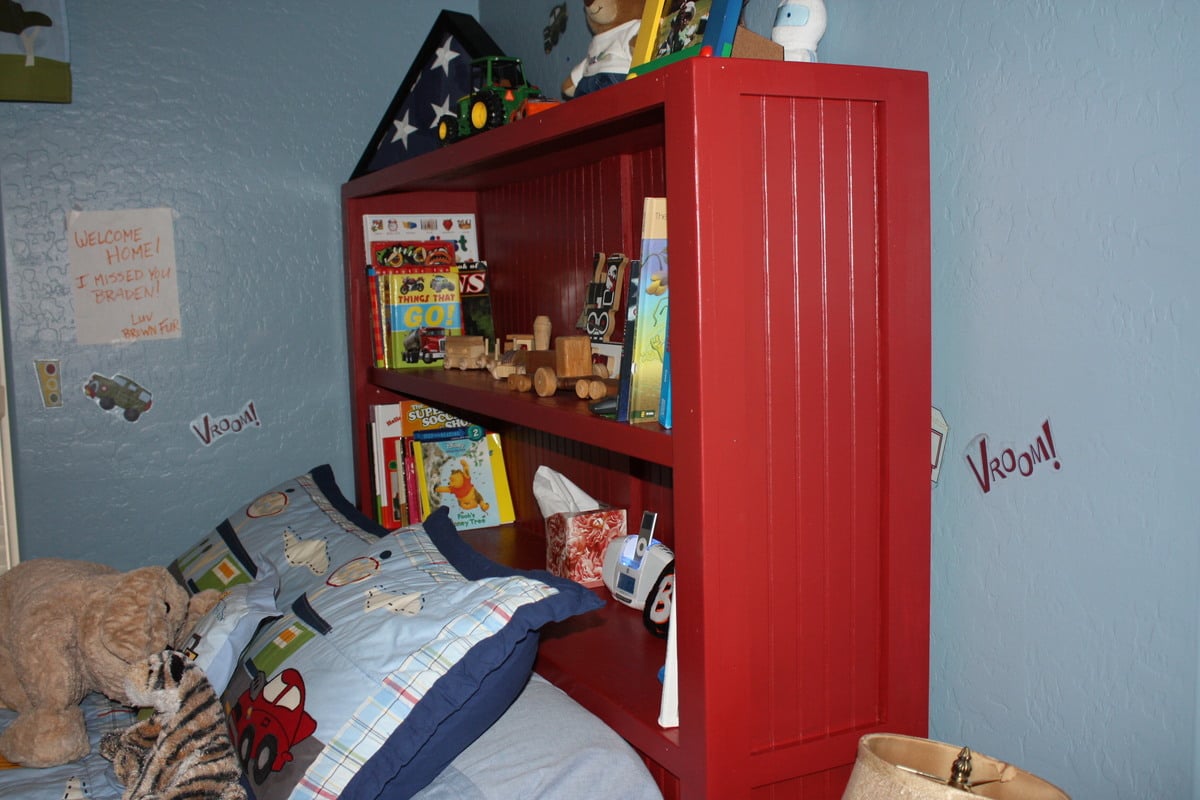
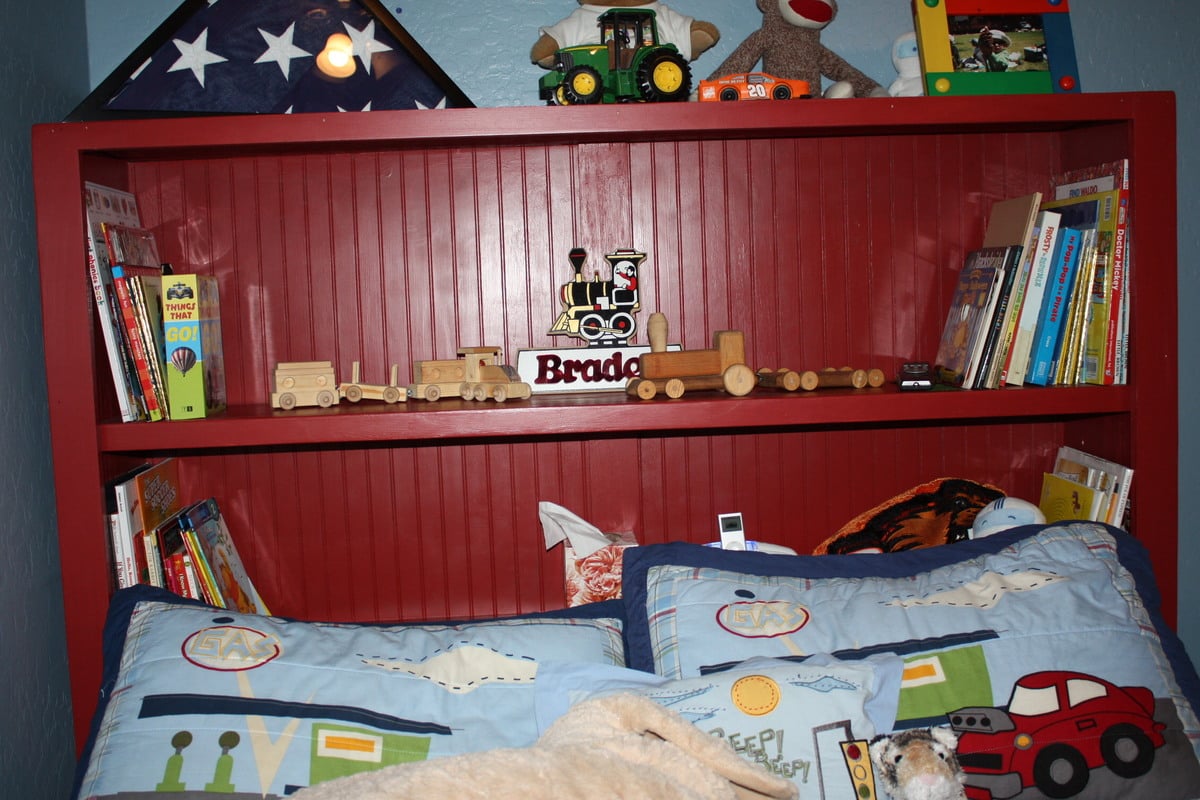
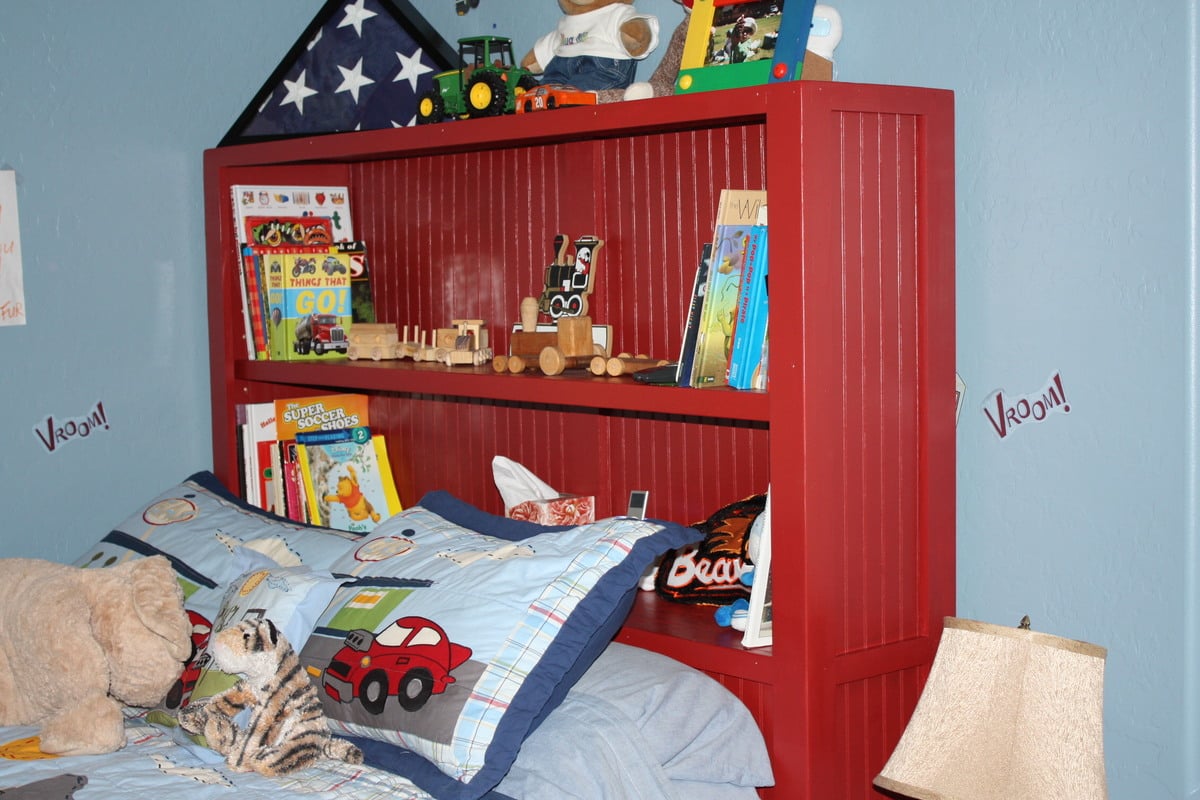
The headboard wasn't from any plan; just followed the same basic concept as the bed; sides are 3/4 plywood, but I rabbitted out the trim in order to insert the 1/4 beadboard. Used some scrap hardboard pegboard as a template for the shelf pin holes on the inside of the headboard to enable an adjustable shelf.
The bed sits up a little high for our liking, but eventually we will remove the boxspring and just set the mattress on the bed frame; just have to figure out where to store the boxspring . .
I miss the family when they're out of town, but at least I get a lot of projects done . . .

Thu, 08/30/2012 - 17:19
This is beautiful. Love your colors and use of beadboard! Great job! I love the bins too....really terrific!
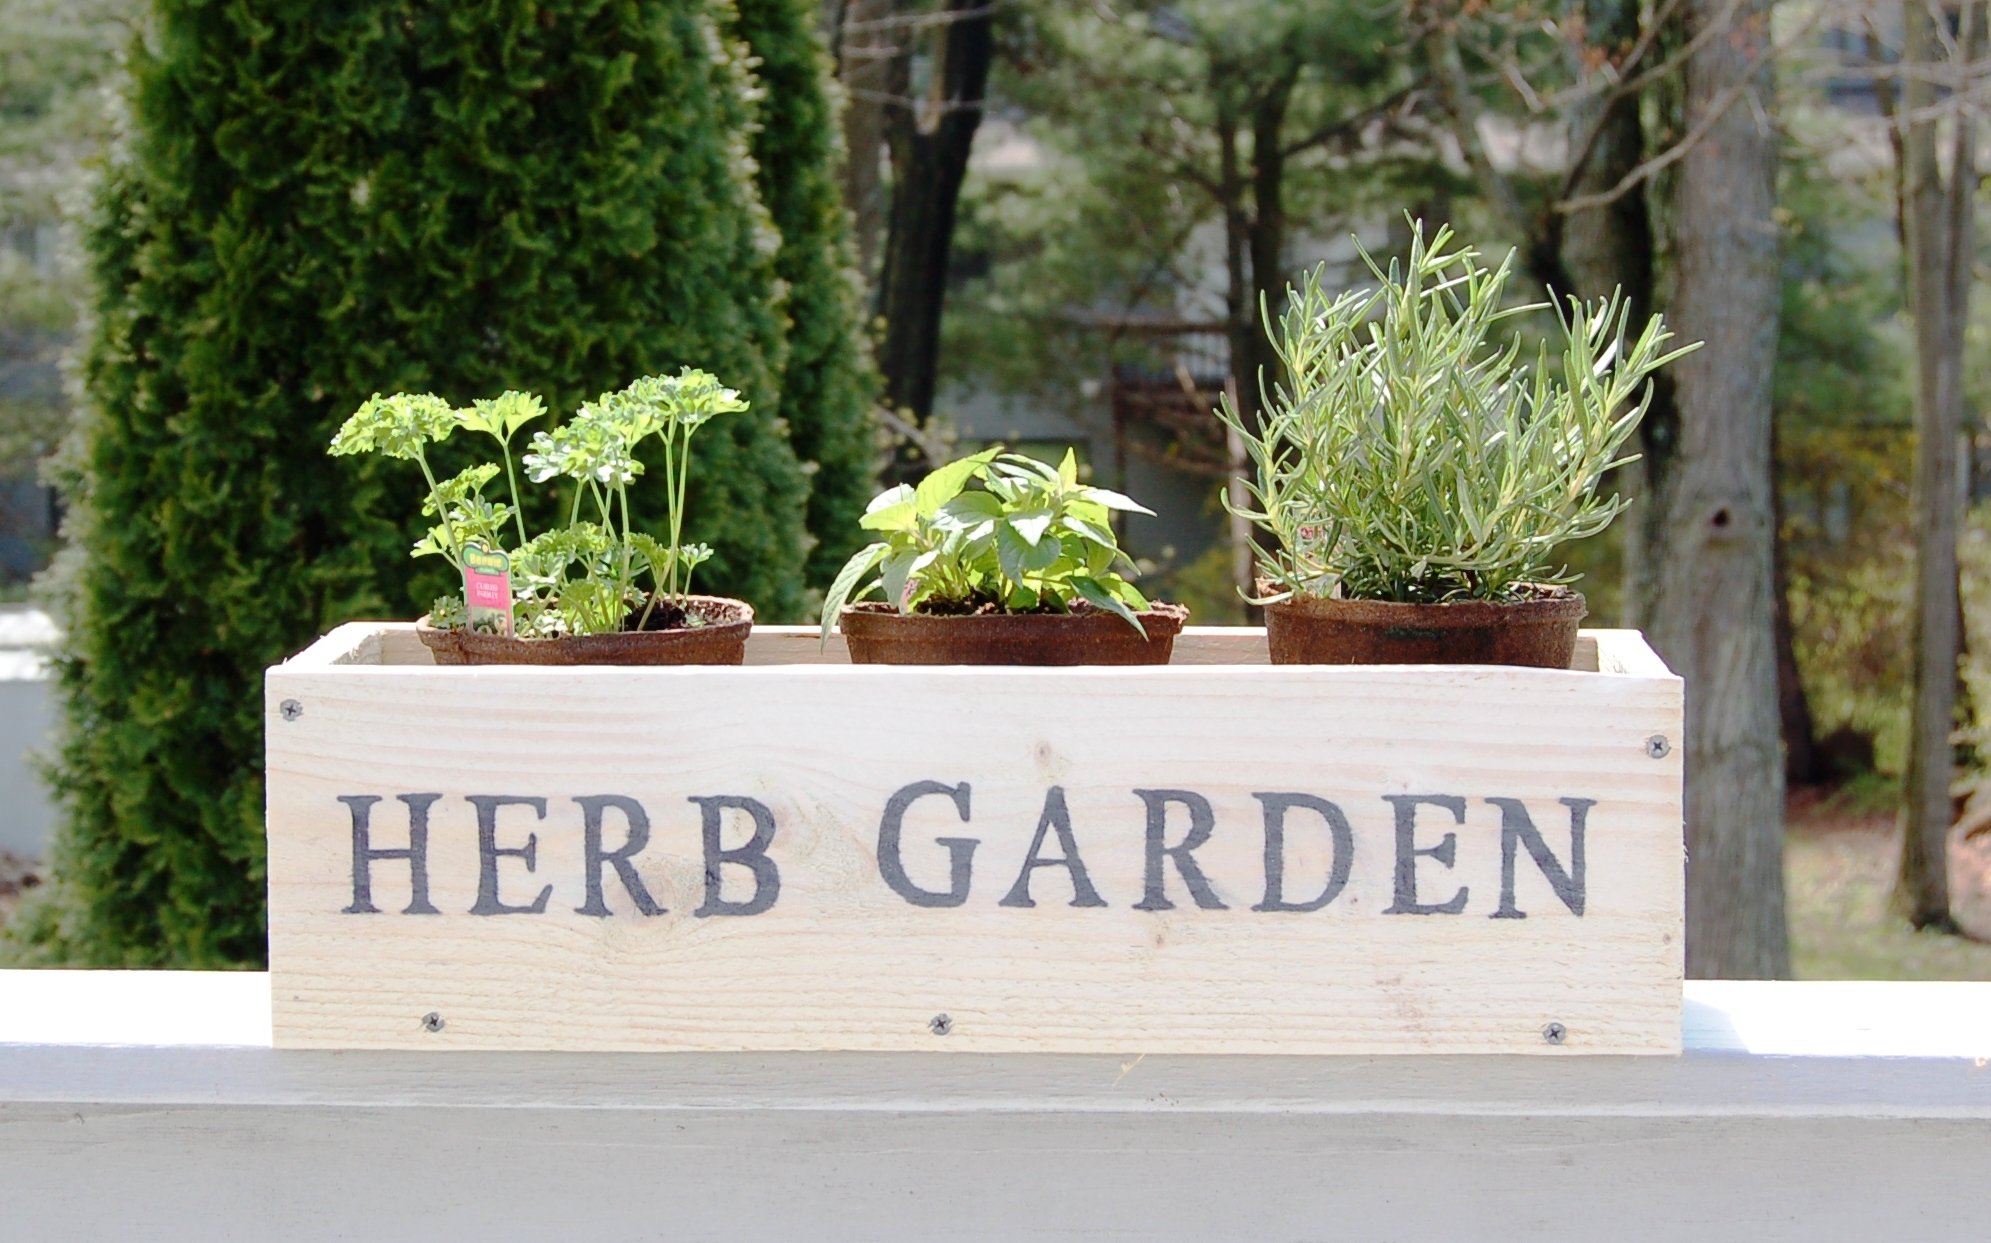
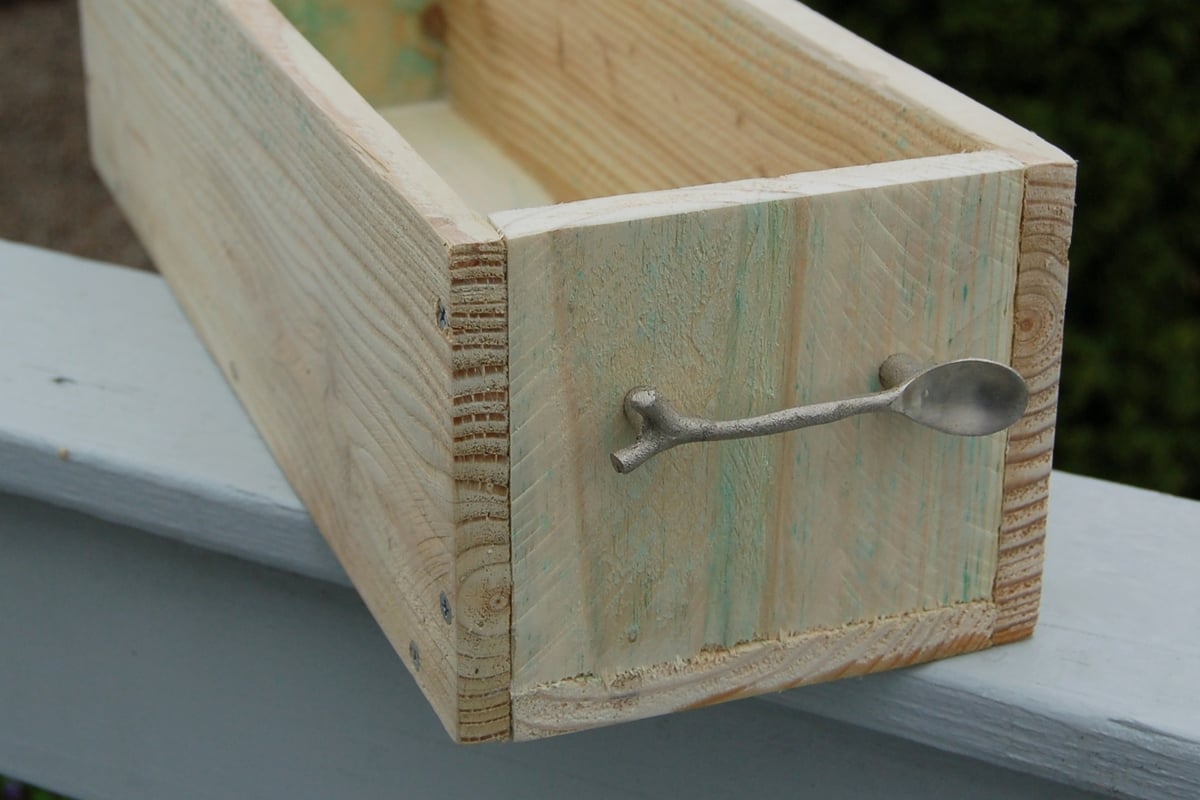
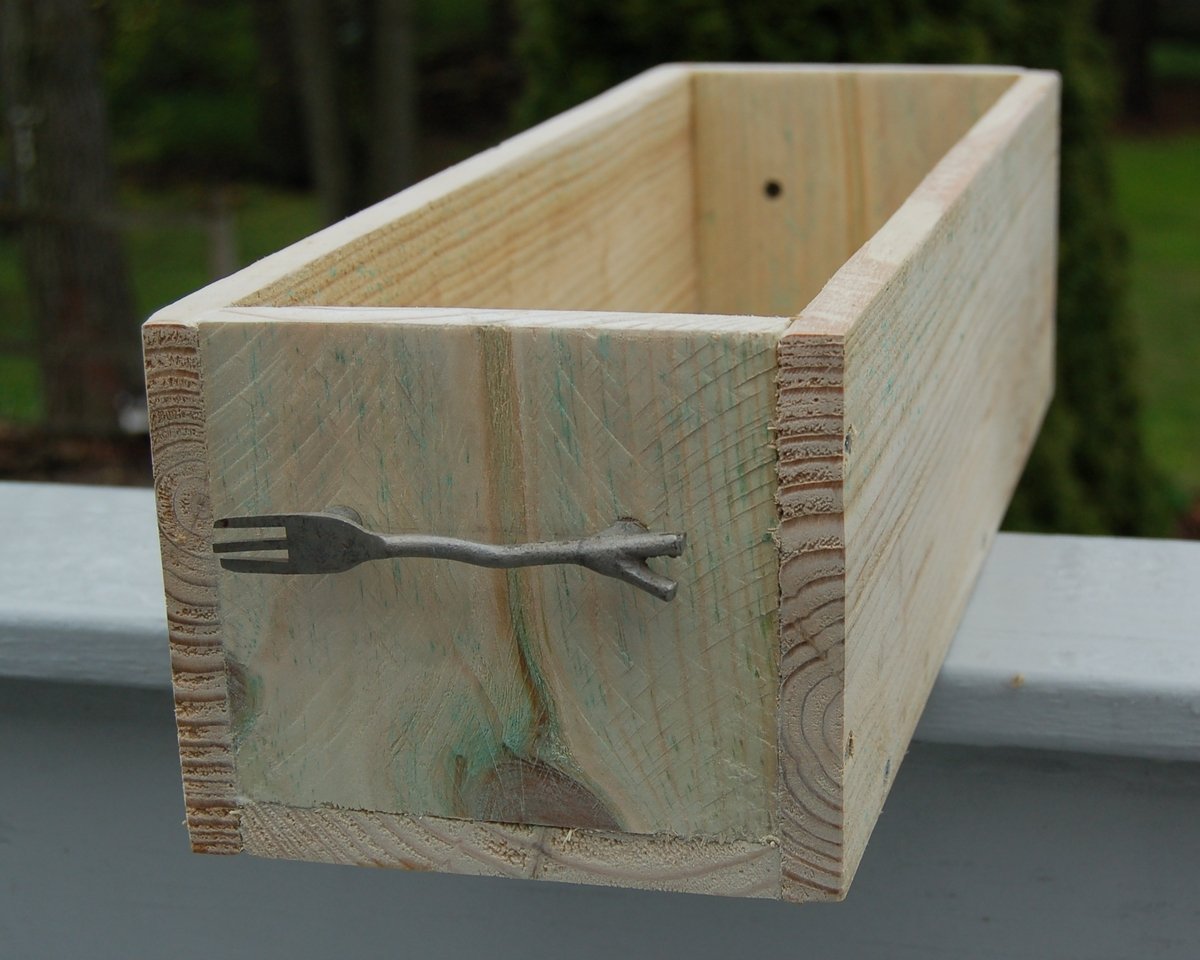
I'm just in love with all the Ana White projects. I tackled the faux fireplace mantel, made quite a few toolbox planters so this little box was easy. My biggest mistake was not verifying the thickness of the wood pickets I used. I couldn't find the cedar ones at Home Depot or Lowes so I used pressure treated pine pickets, on sale for $1.16 each! What I didn't realize until I was putting the first box together is that they were 5/8" thick instead of 1/2". I questioned my woodworking skills when everything didn't fit together correctly, but soon figured out the problem. Since I had cut out two of them together, I finagled the design slightly to be able to use the cut pieces. You'll notice the end pieces are on top of the bottom piece of wood on certain ones. I continued to build a third box and it went together smoothly. Wow, I wish that I had a nail gun! I used 1 1/4" exterior screws and pre-drilled the holes. I have three more pickets left and I'm going to run to Home Depot to find some galvanized nails for them. I wish I could find some cedar pickets, the pressure treated pine is rough to work with. I also printed out "HERB GARDEN" on my ink jet printer, then traced the letters using carbon paper. I outlined, then filled in the letters with a Sharpie paint pen. It came out rustic looking because the wood was rough. I was hesitant to sand the wood because I didn't want to breathe in the sawdust. I put a white wash finish on the stenciled box. The other ones are still unfinished. Looking through my stash of hardware, I found the cutest fork and spoon handles, saved from an old birdhouse. I put the picture on my Facebook timeline and a friend sent me a message asking to buy it for her daughter's birthday. I'd better get busy making the next three.

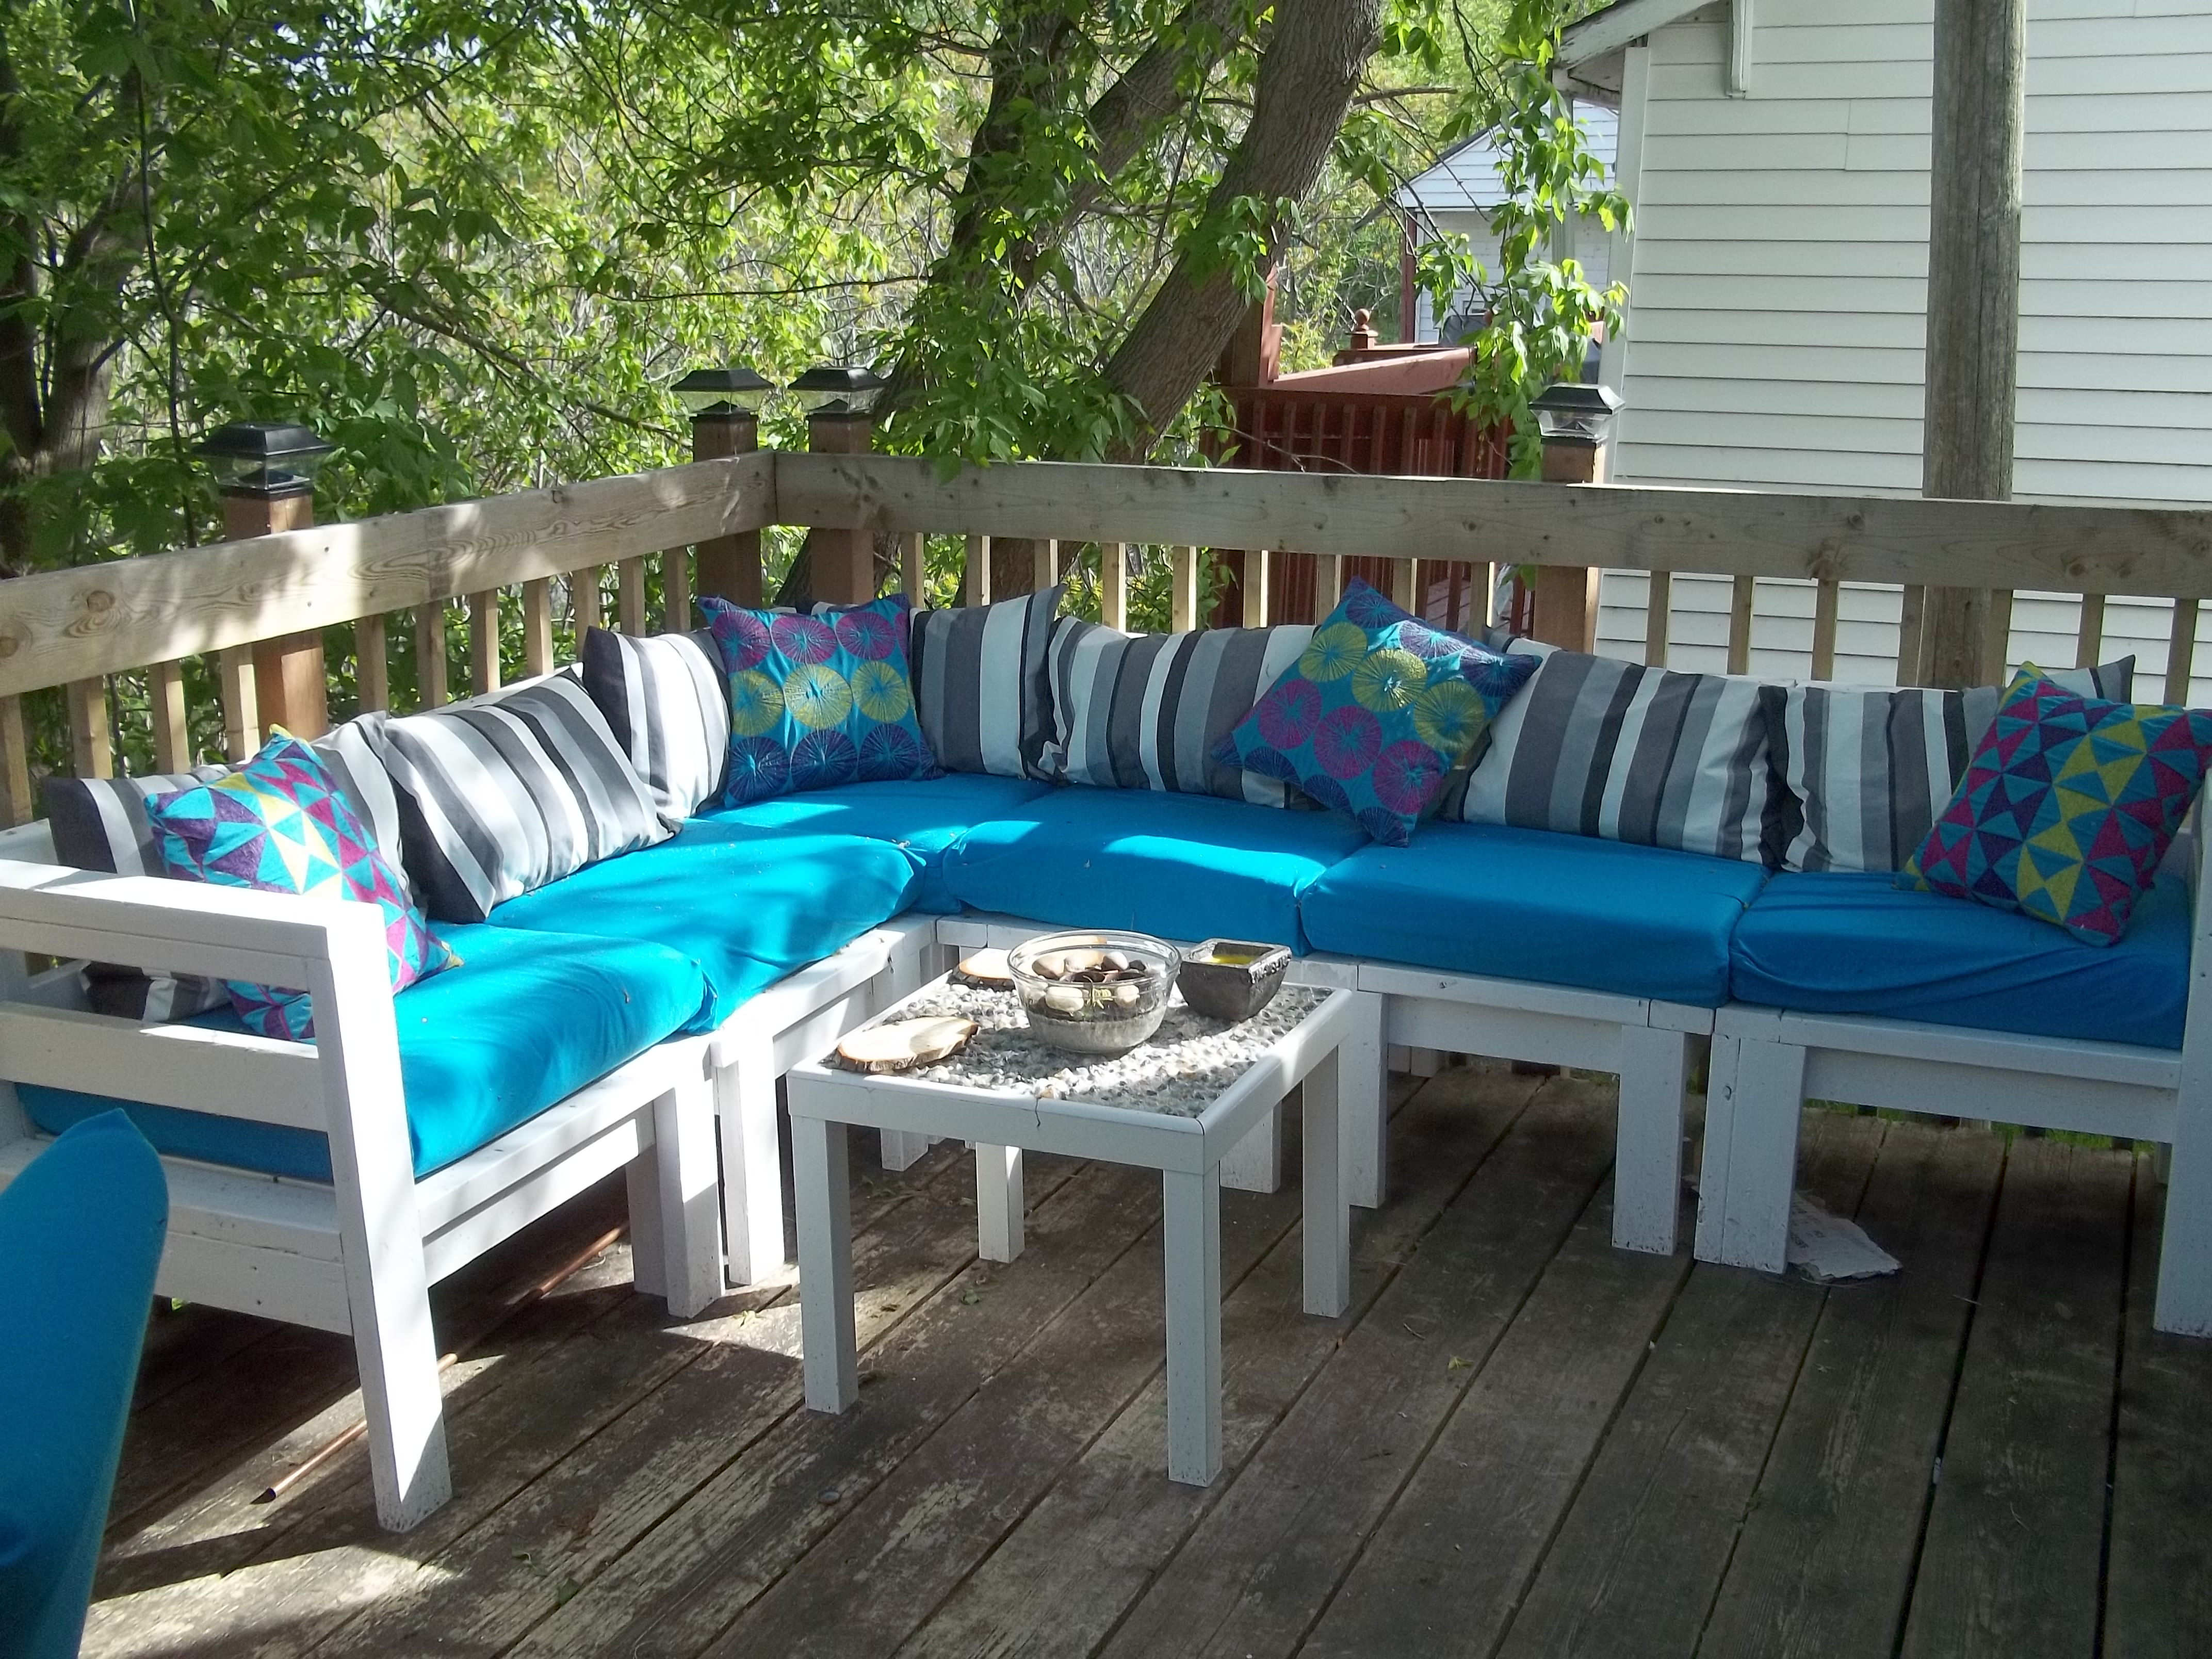
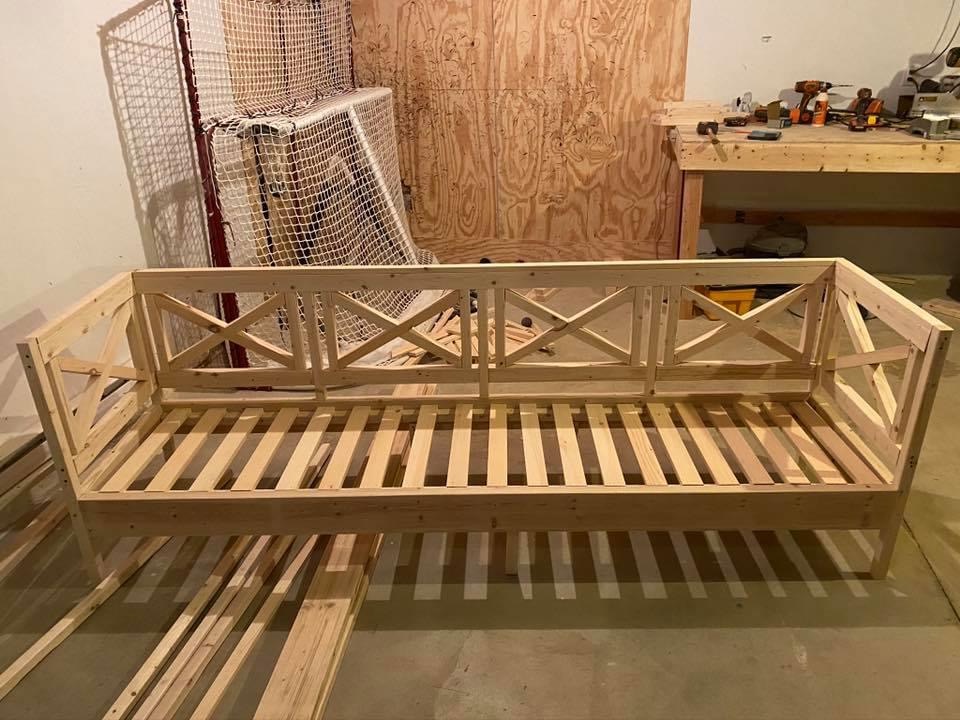
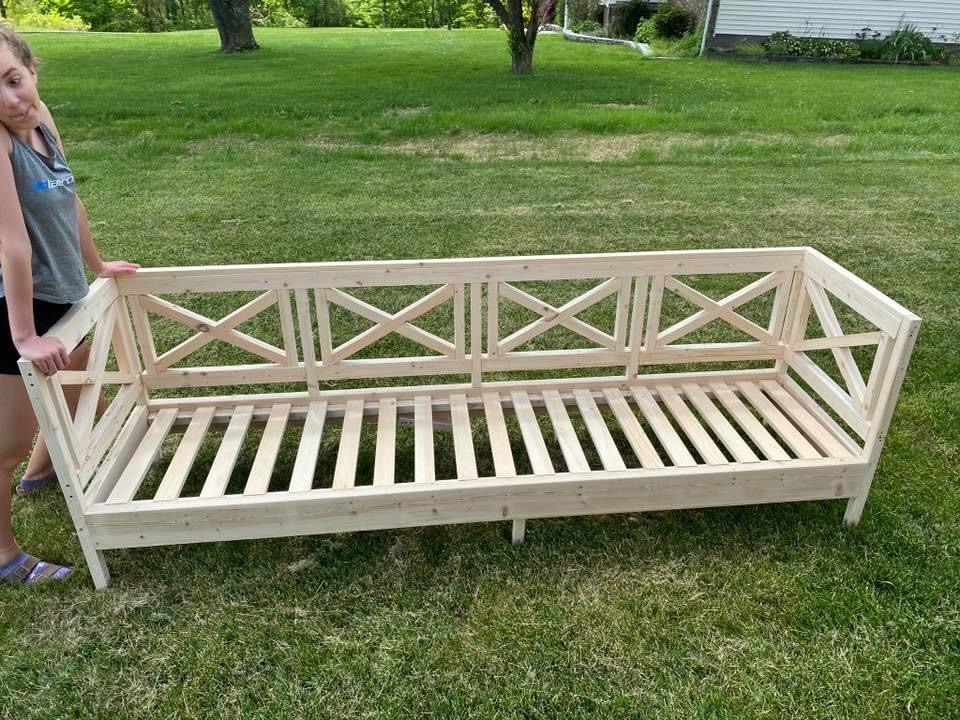
We were inspired when we saw Ana's Outdoor Sectional on Pinterest and after checking out the site we decided to build ours using the modified plans with 2 x 4s as it was much more cost effective. It was a really fun weekend project for my husband and I and not difficult at all.
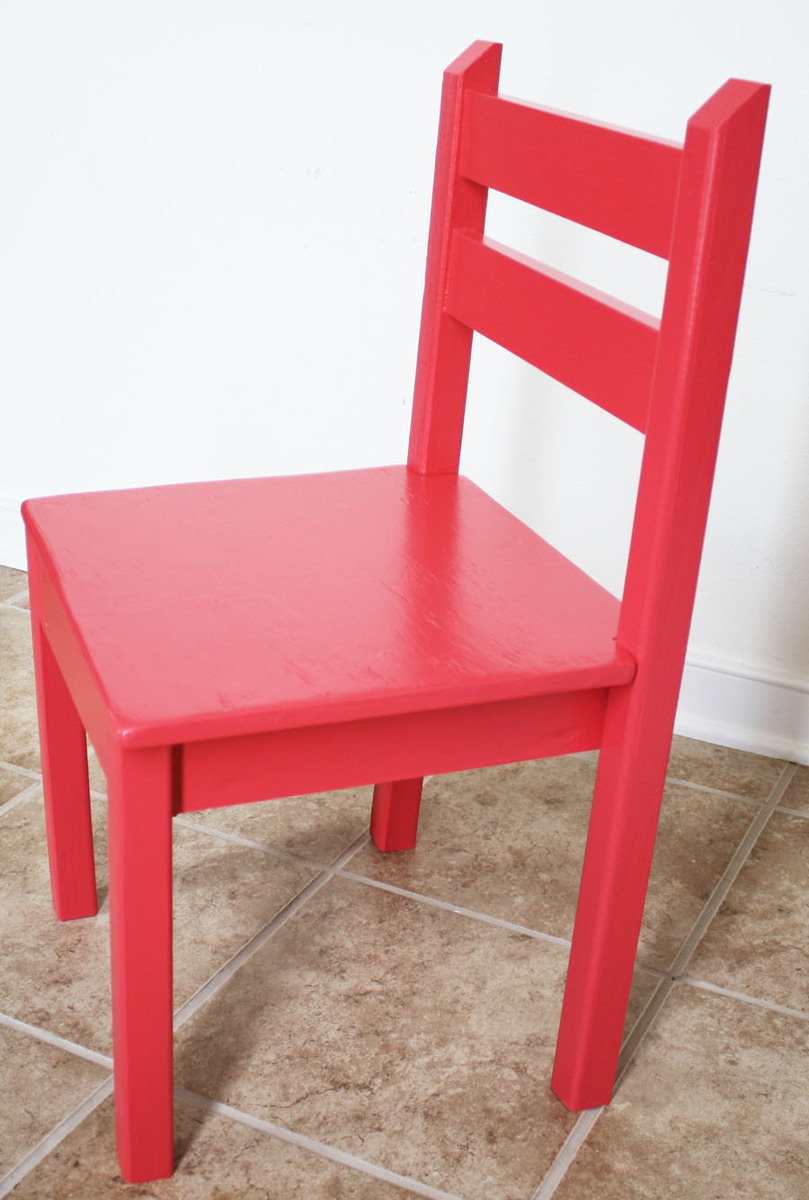
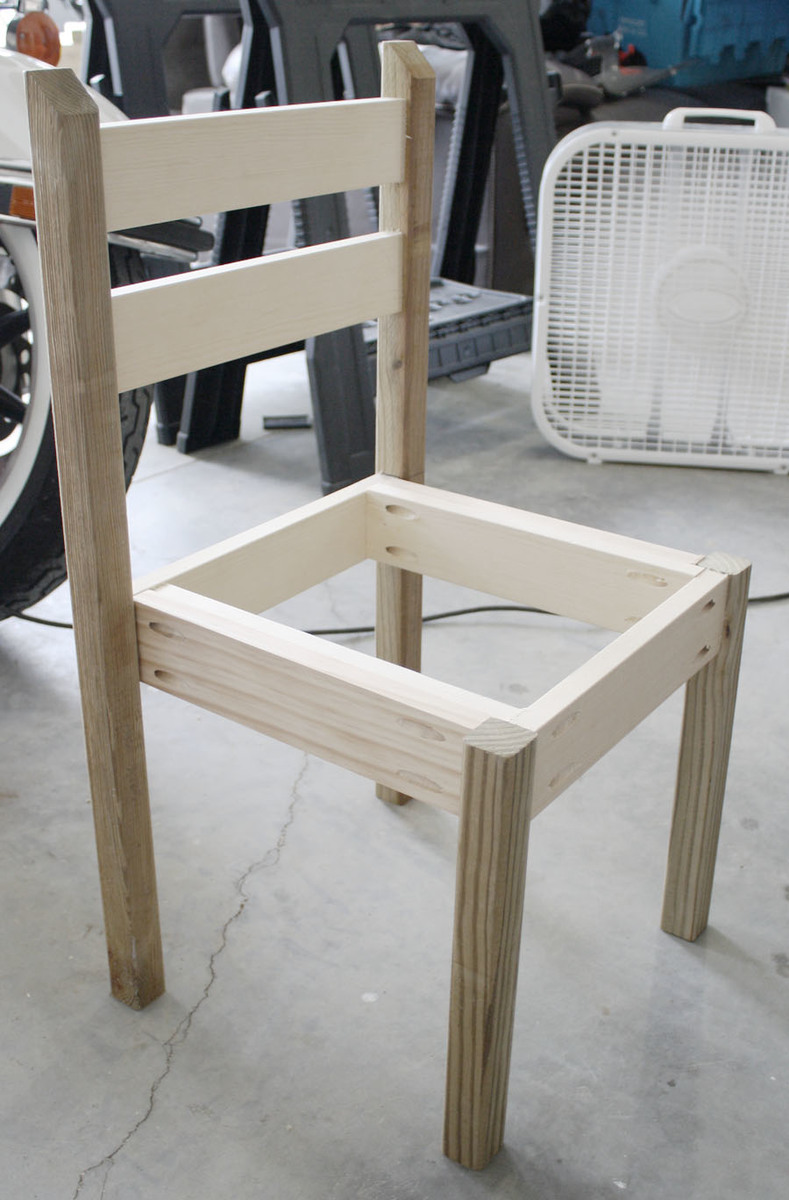
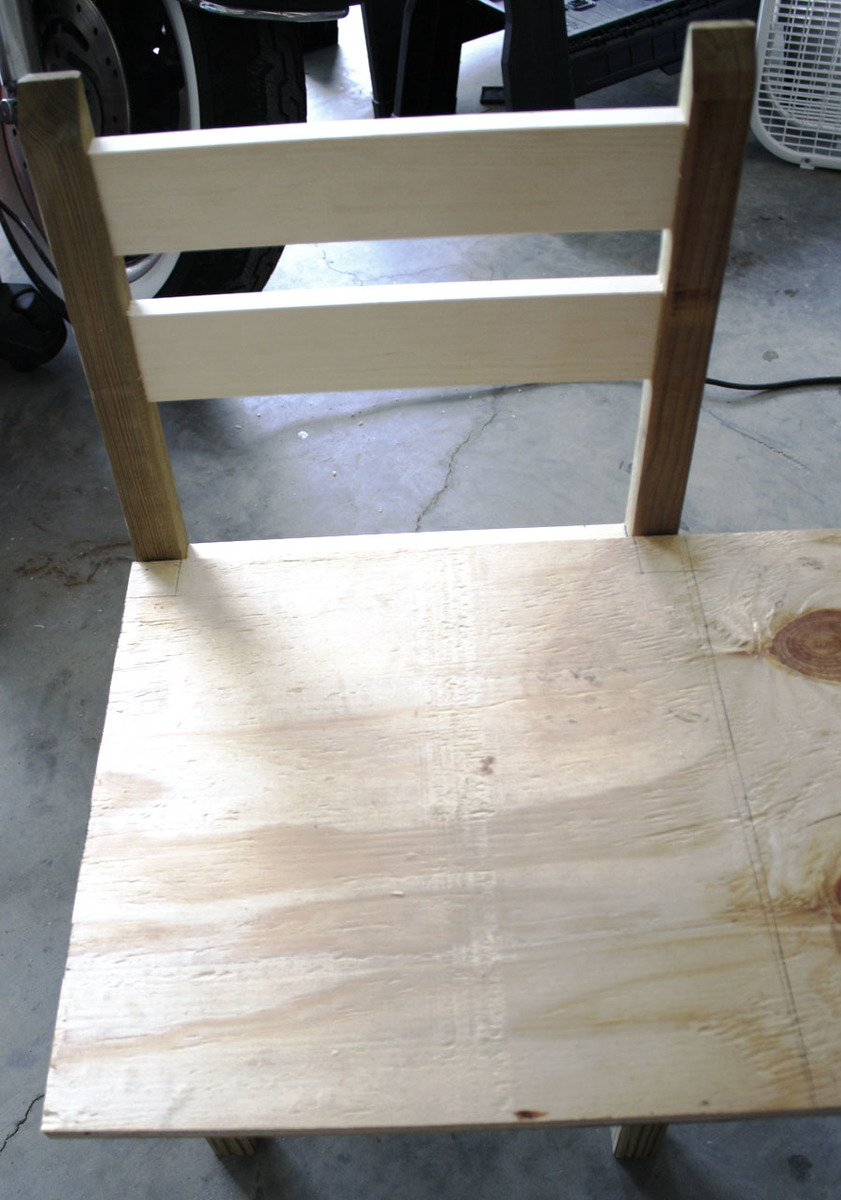
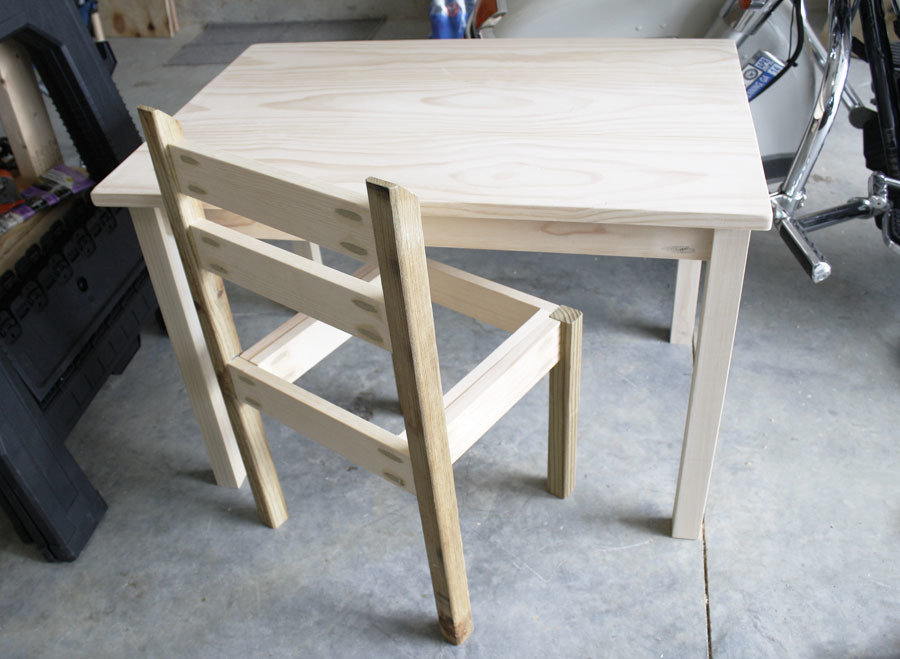
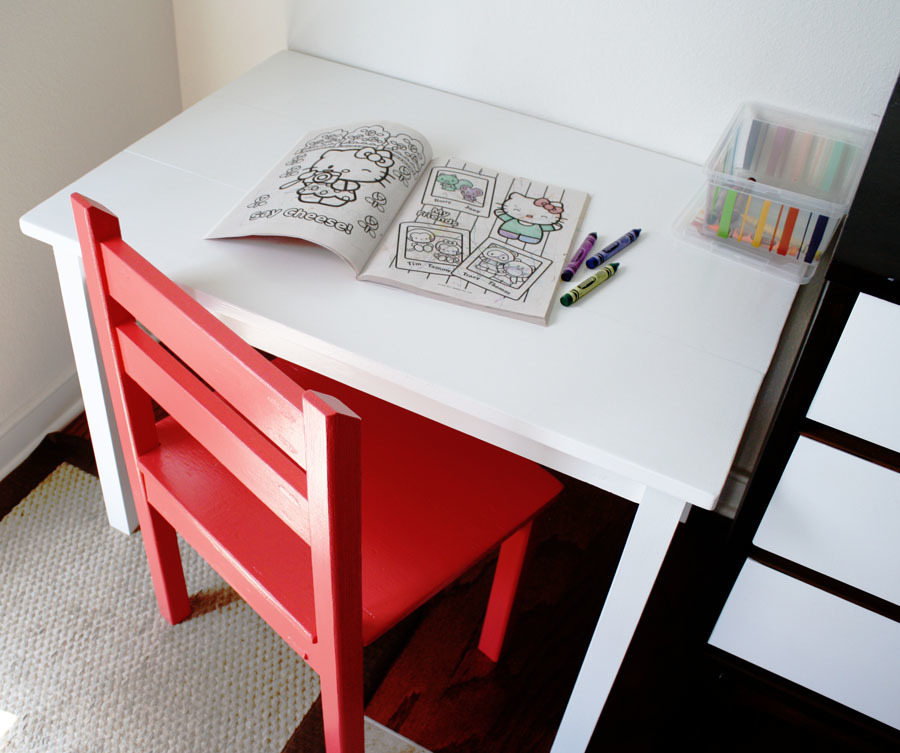
These chairs were easy to build, although I modified Ana's plans a little bit. I opted for solid wood 2x2s for the legs (I wanted it to be sturdier), and a solid seat instead of a slatted one. I notched out the back of the seat so it would fit flush against the back legs. Because of my modifications, my chair was just a couple bucks more.
Also, I was so excited to find solid wood balusters for the chair legs - they're not only better quality, but cheaper than furring strips!
Check out my blog link for a complete play-by-play!

Mon, 07/23/2012 - 08:25
Nice. I like the solid seat. Much easier to keep clean from kid grime.
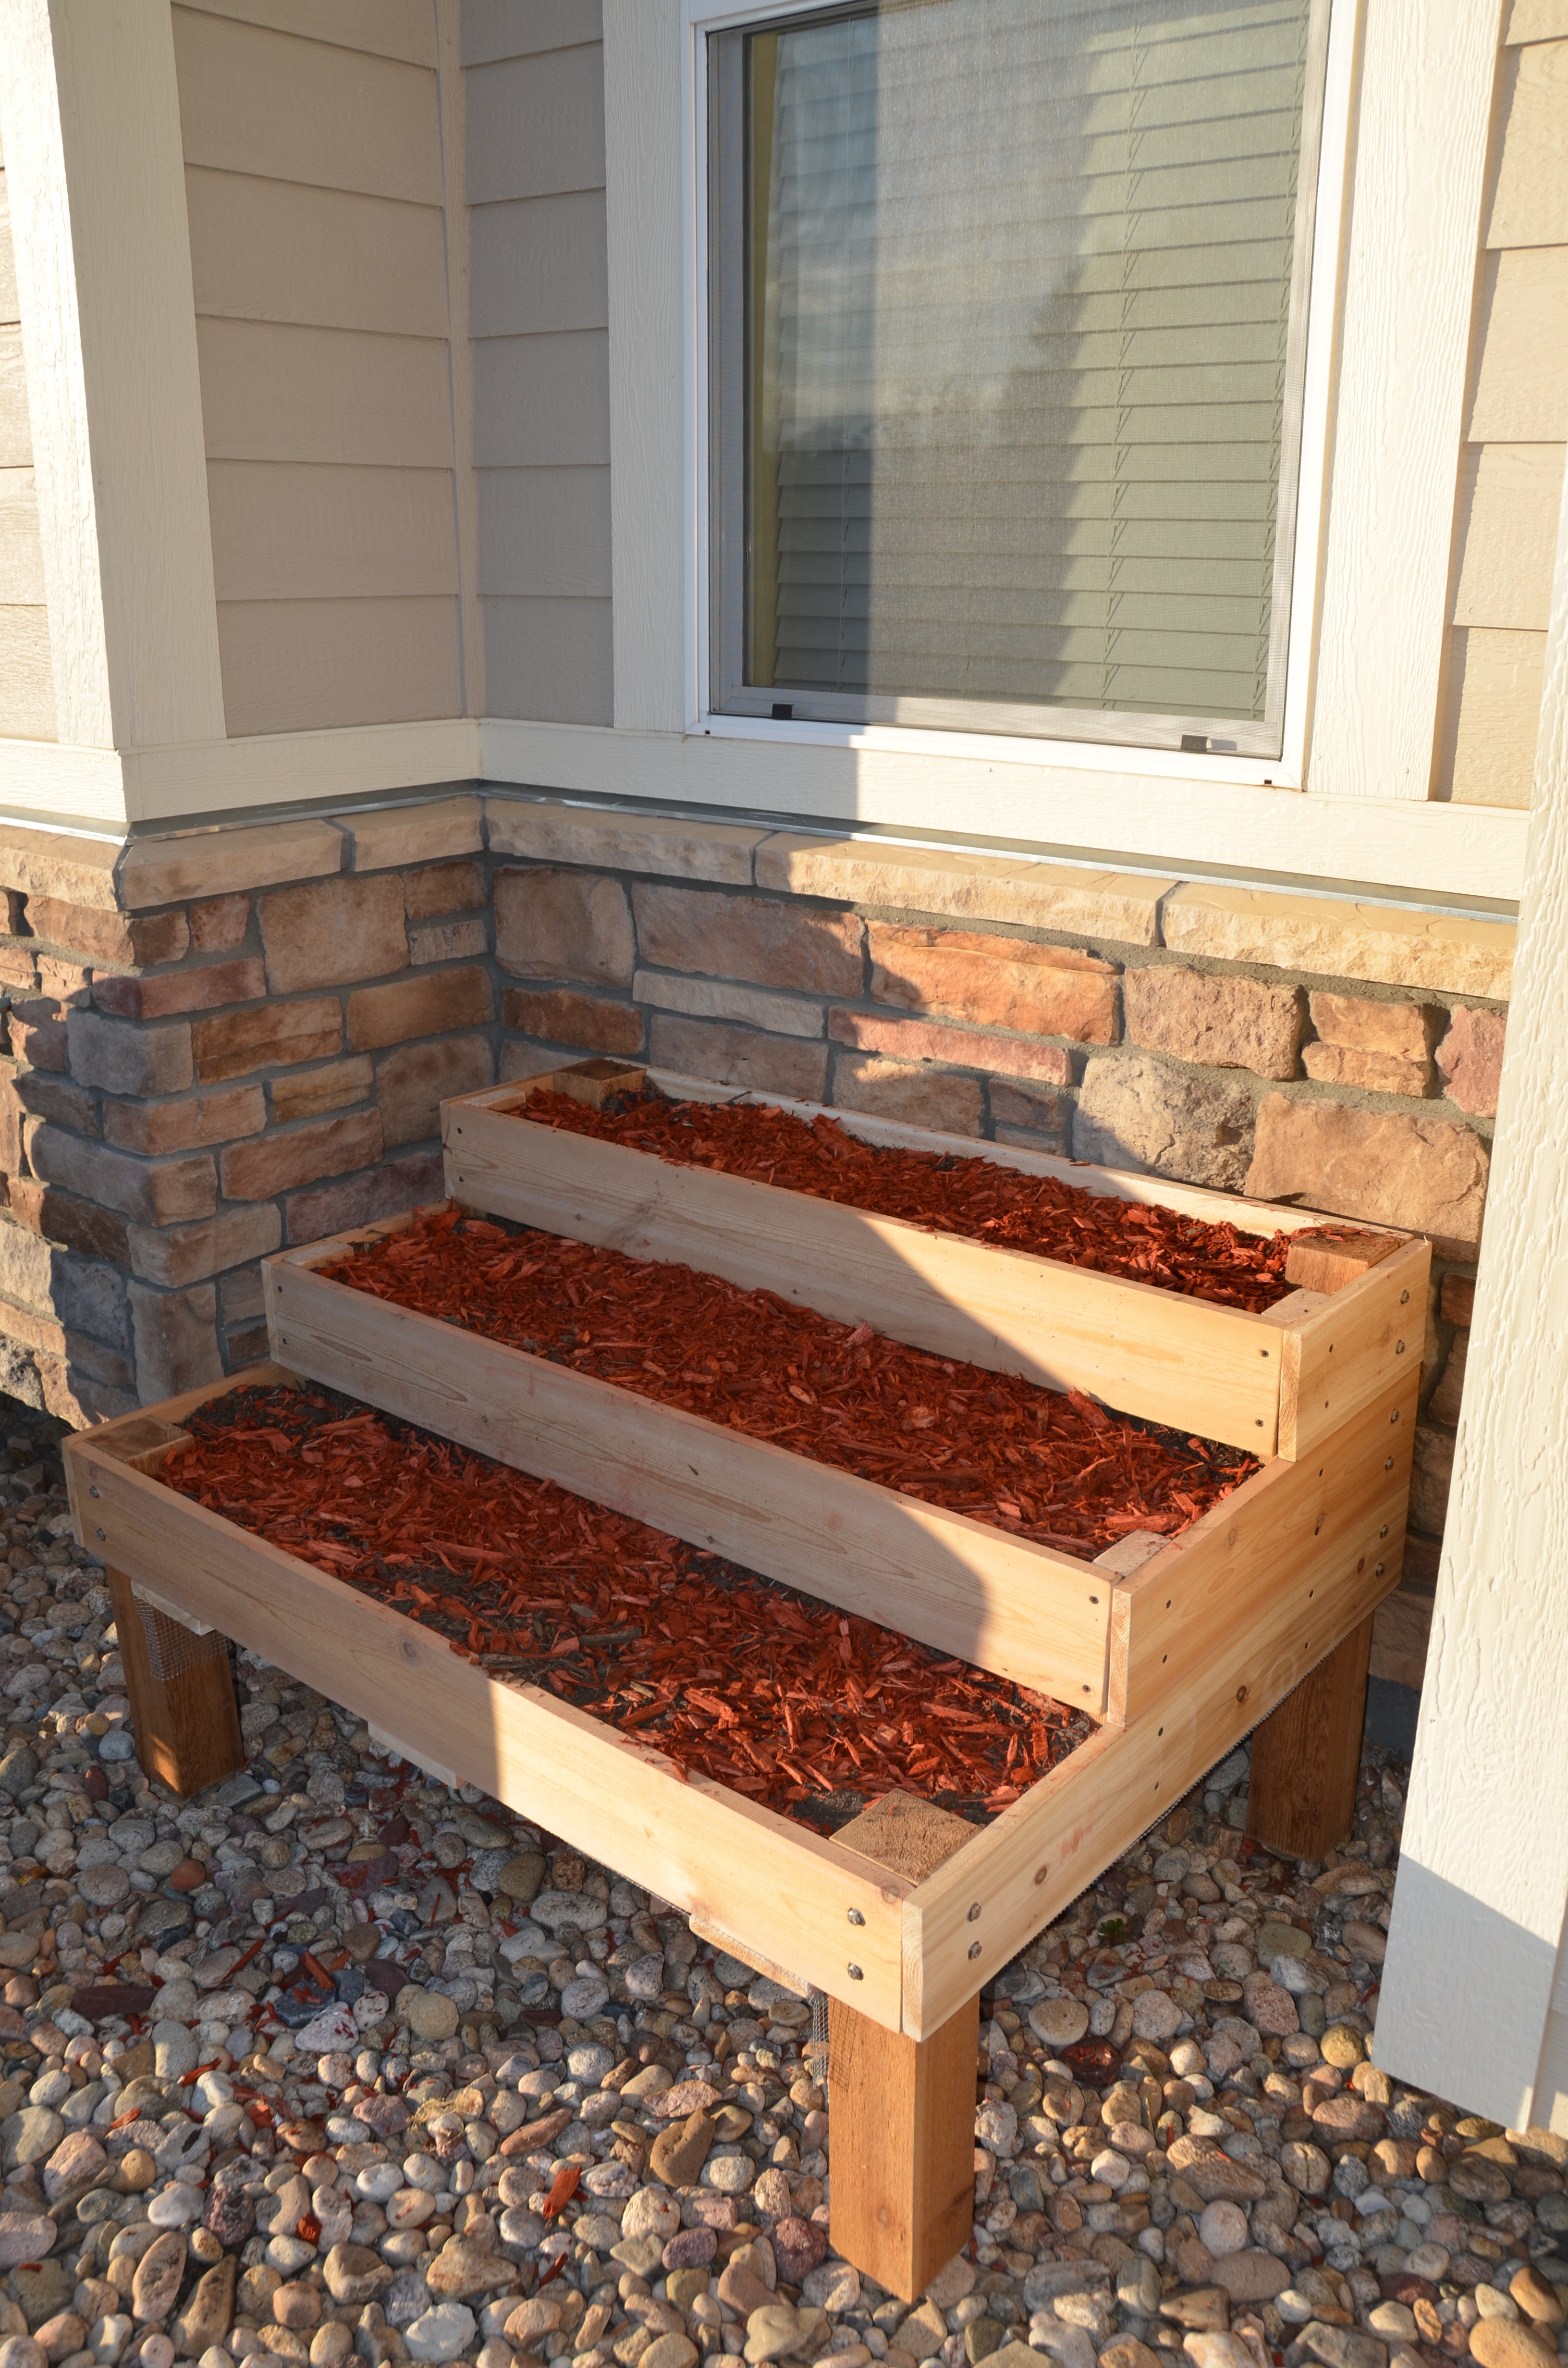
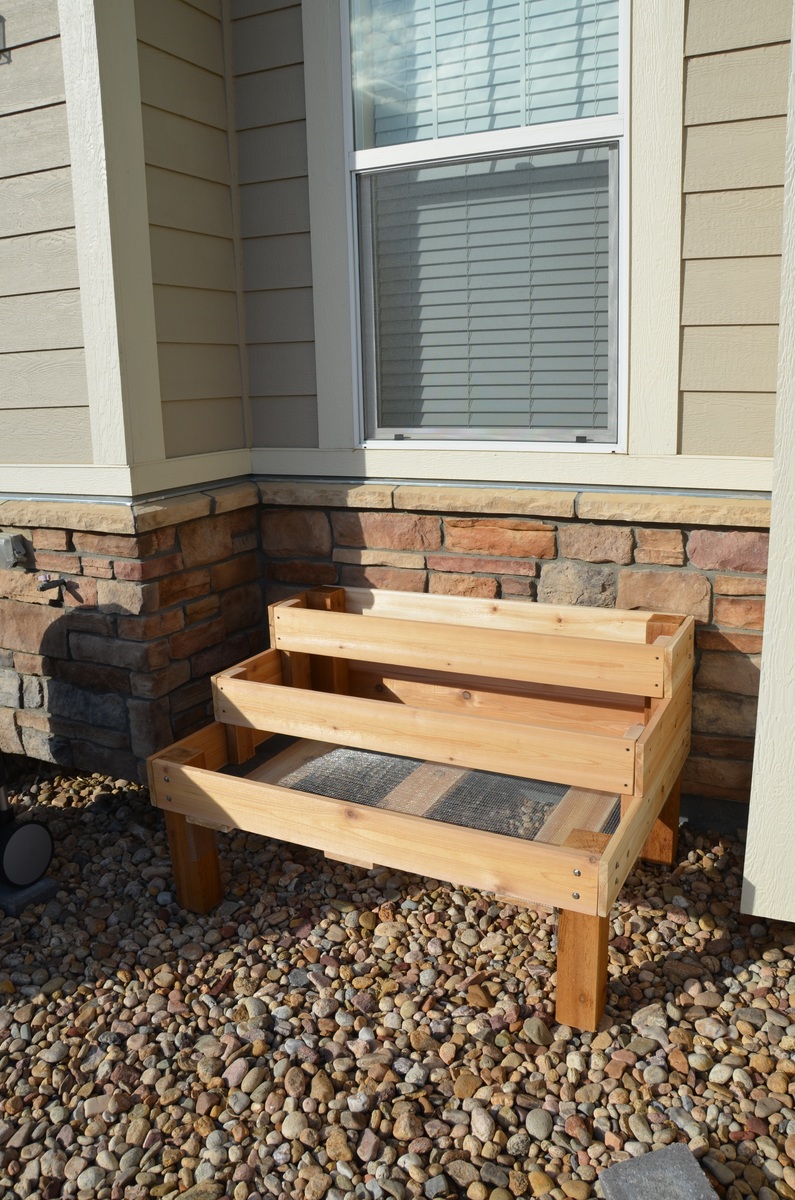
A modified version with tiered areas. 2x4's tie layers together. Happy Mother's Day!
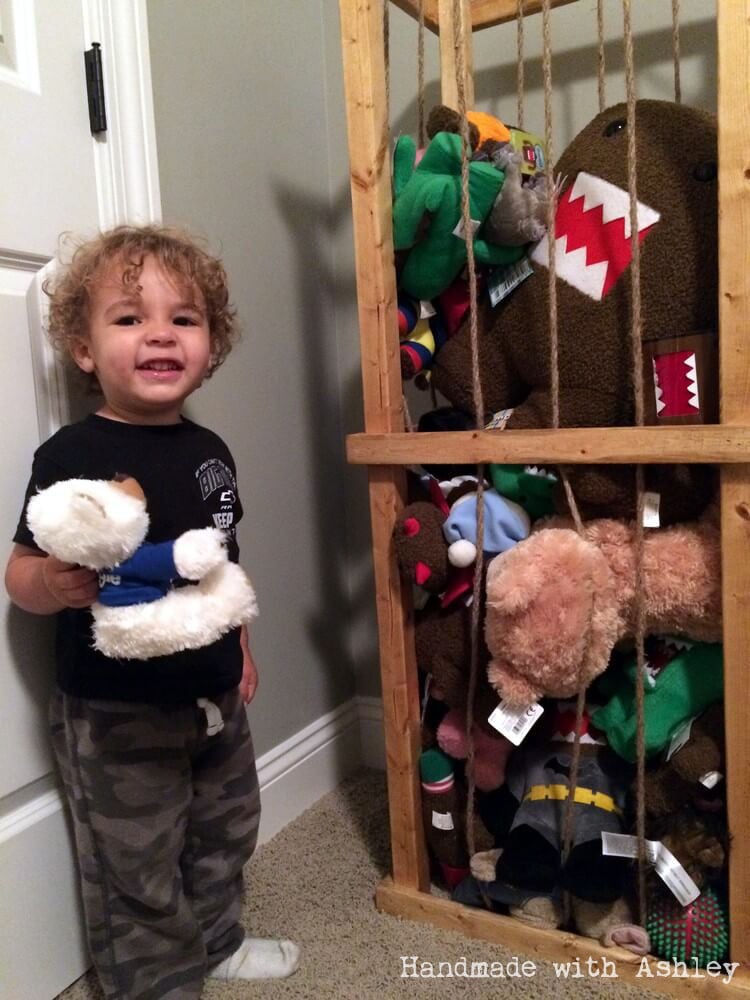
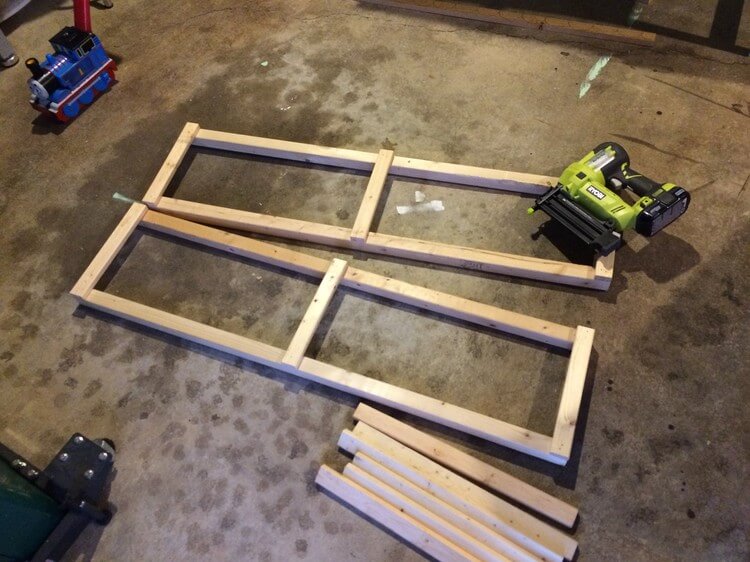
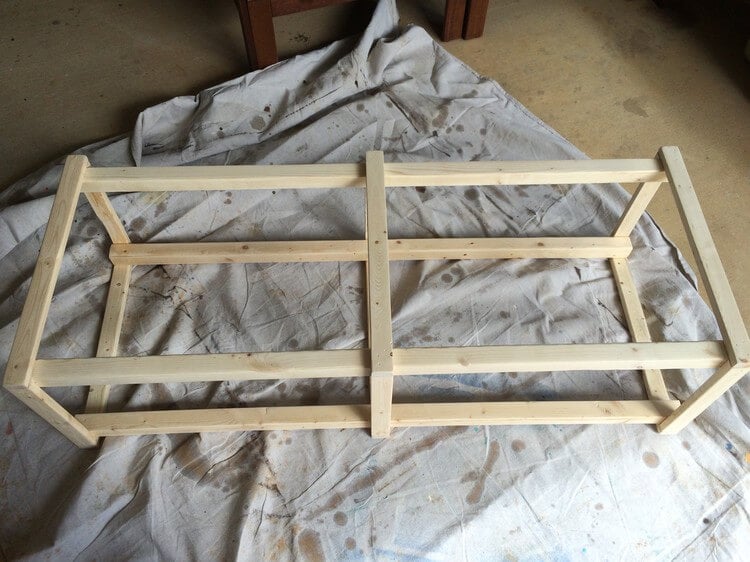
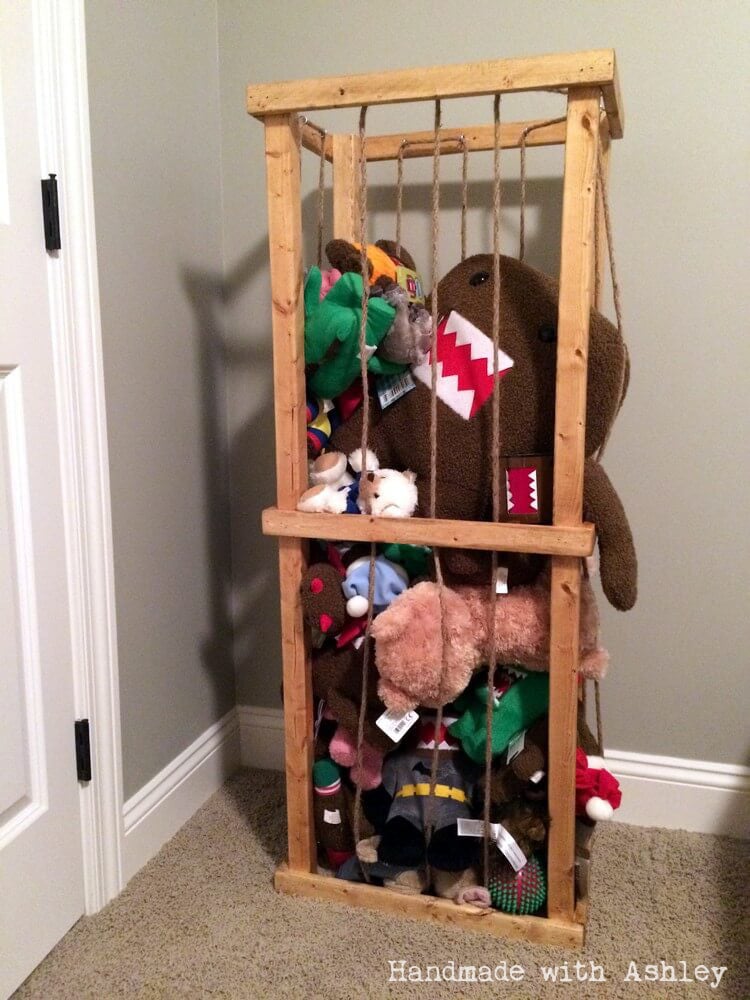
This is my second stuffed animal zoo tower. This time around I used cheap 2x2 furring strips. Not the best pick of lumber, but it gets the job done well. :)
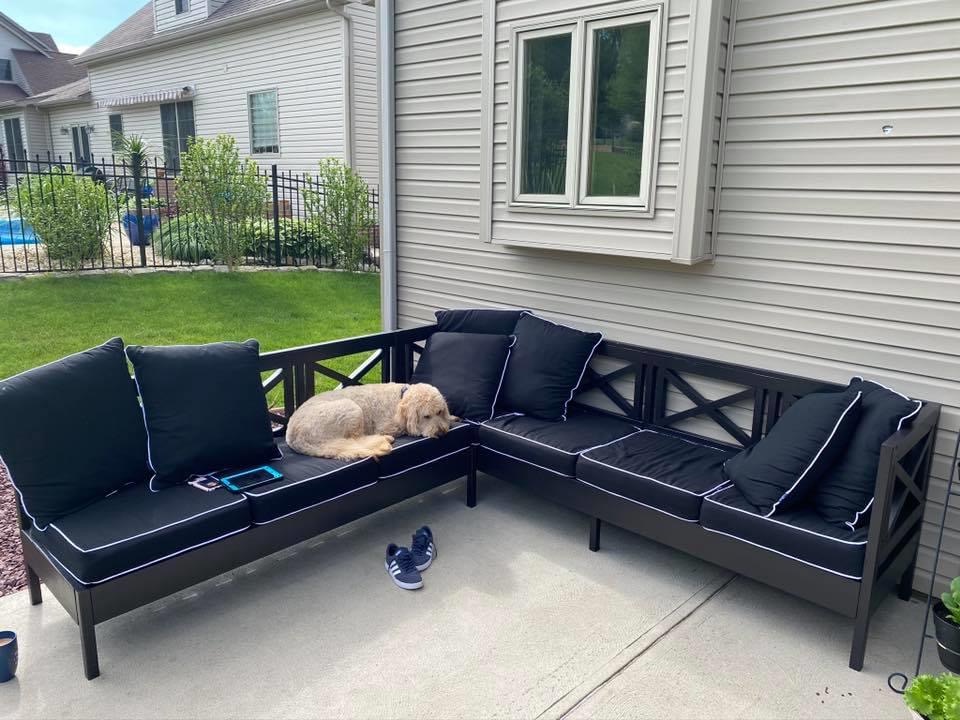
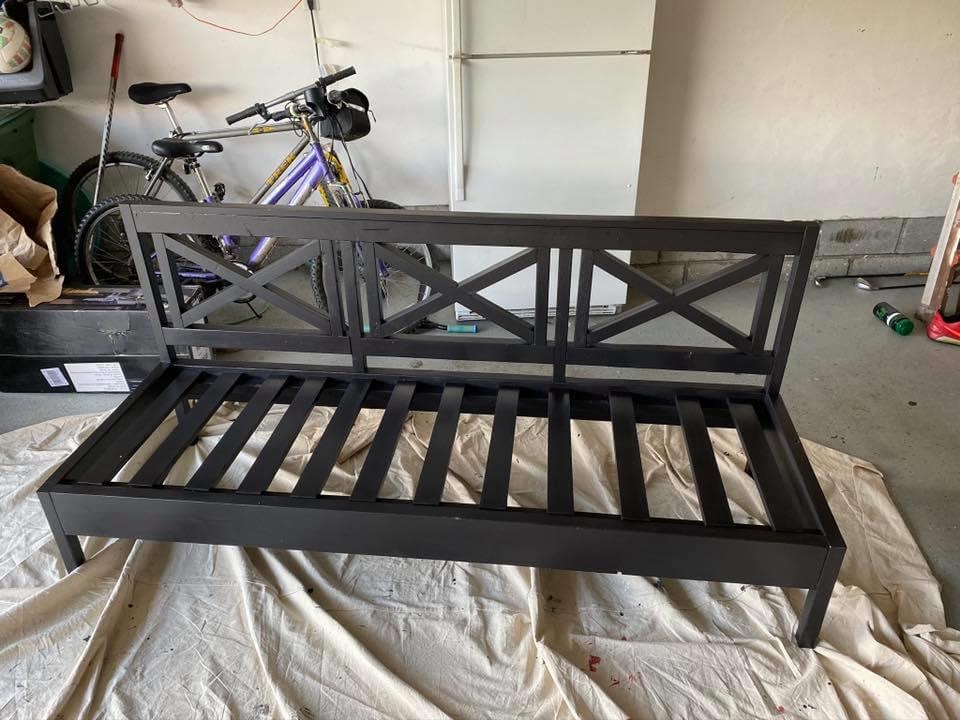
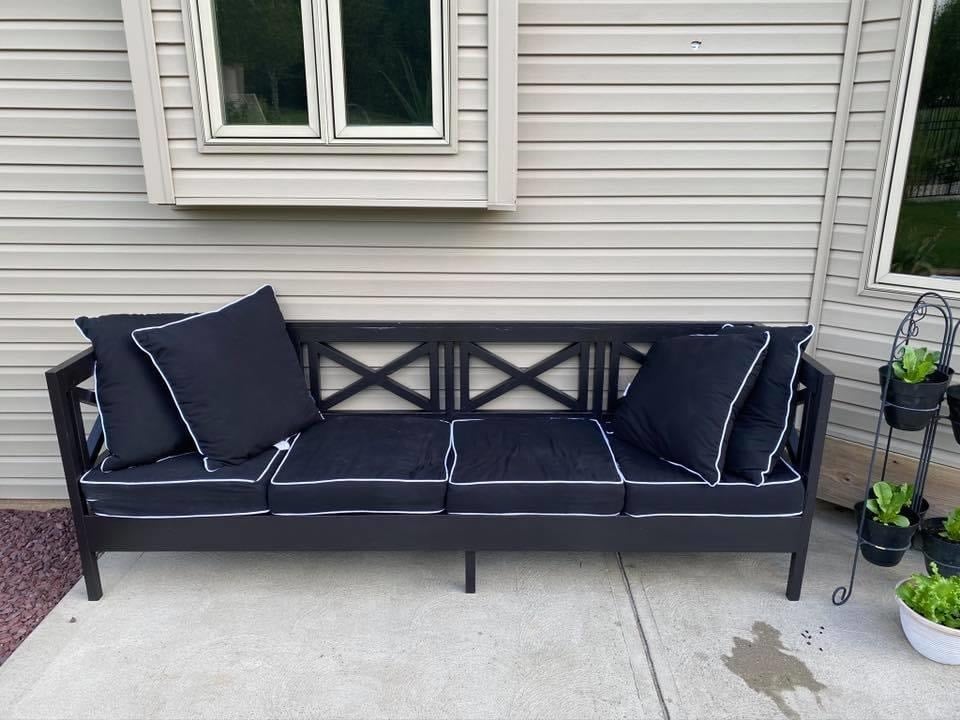
Great build. Hubbie extended to couch one seat and added legs for additional support. We painted after assembly and the x’s were a PITA to paint. Love the end result. Now to pick coffee table plans!
Built the Cassidy bed. It was a great project, and you’re right. The hot glue gun worked great on the shims.
Jonathan