TV console
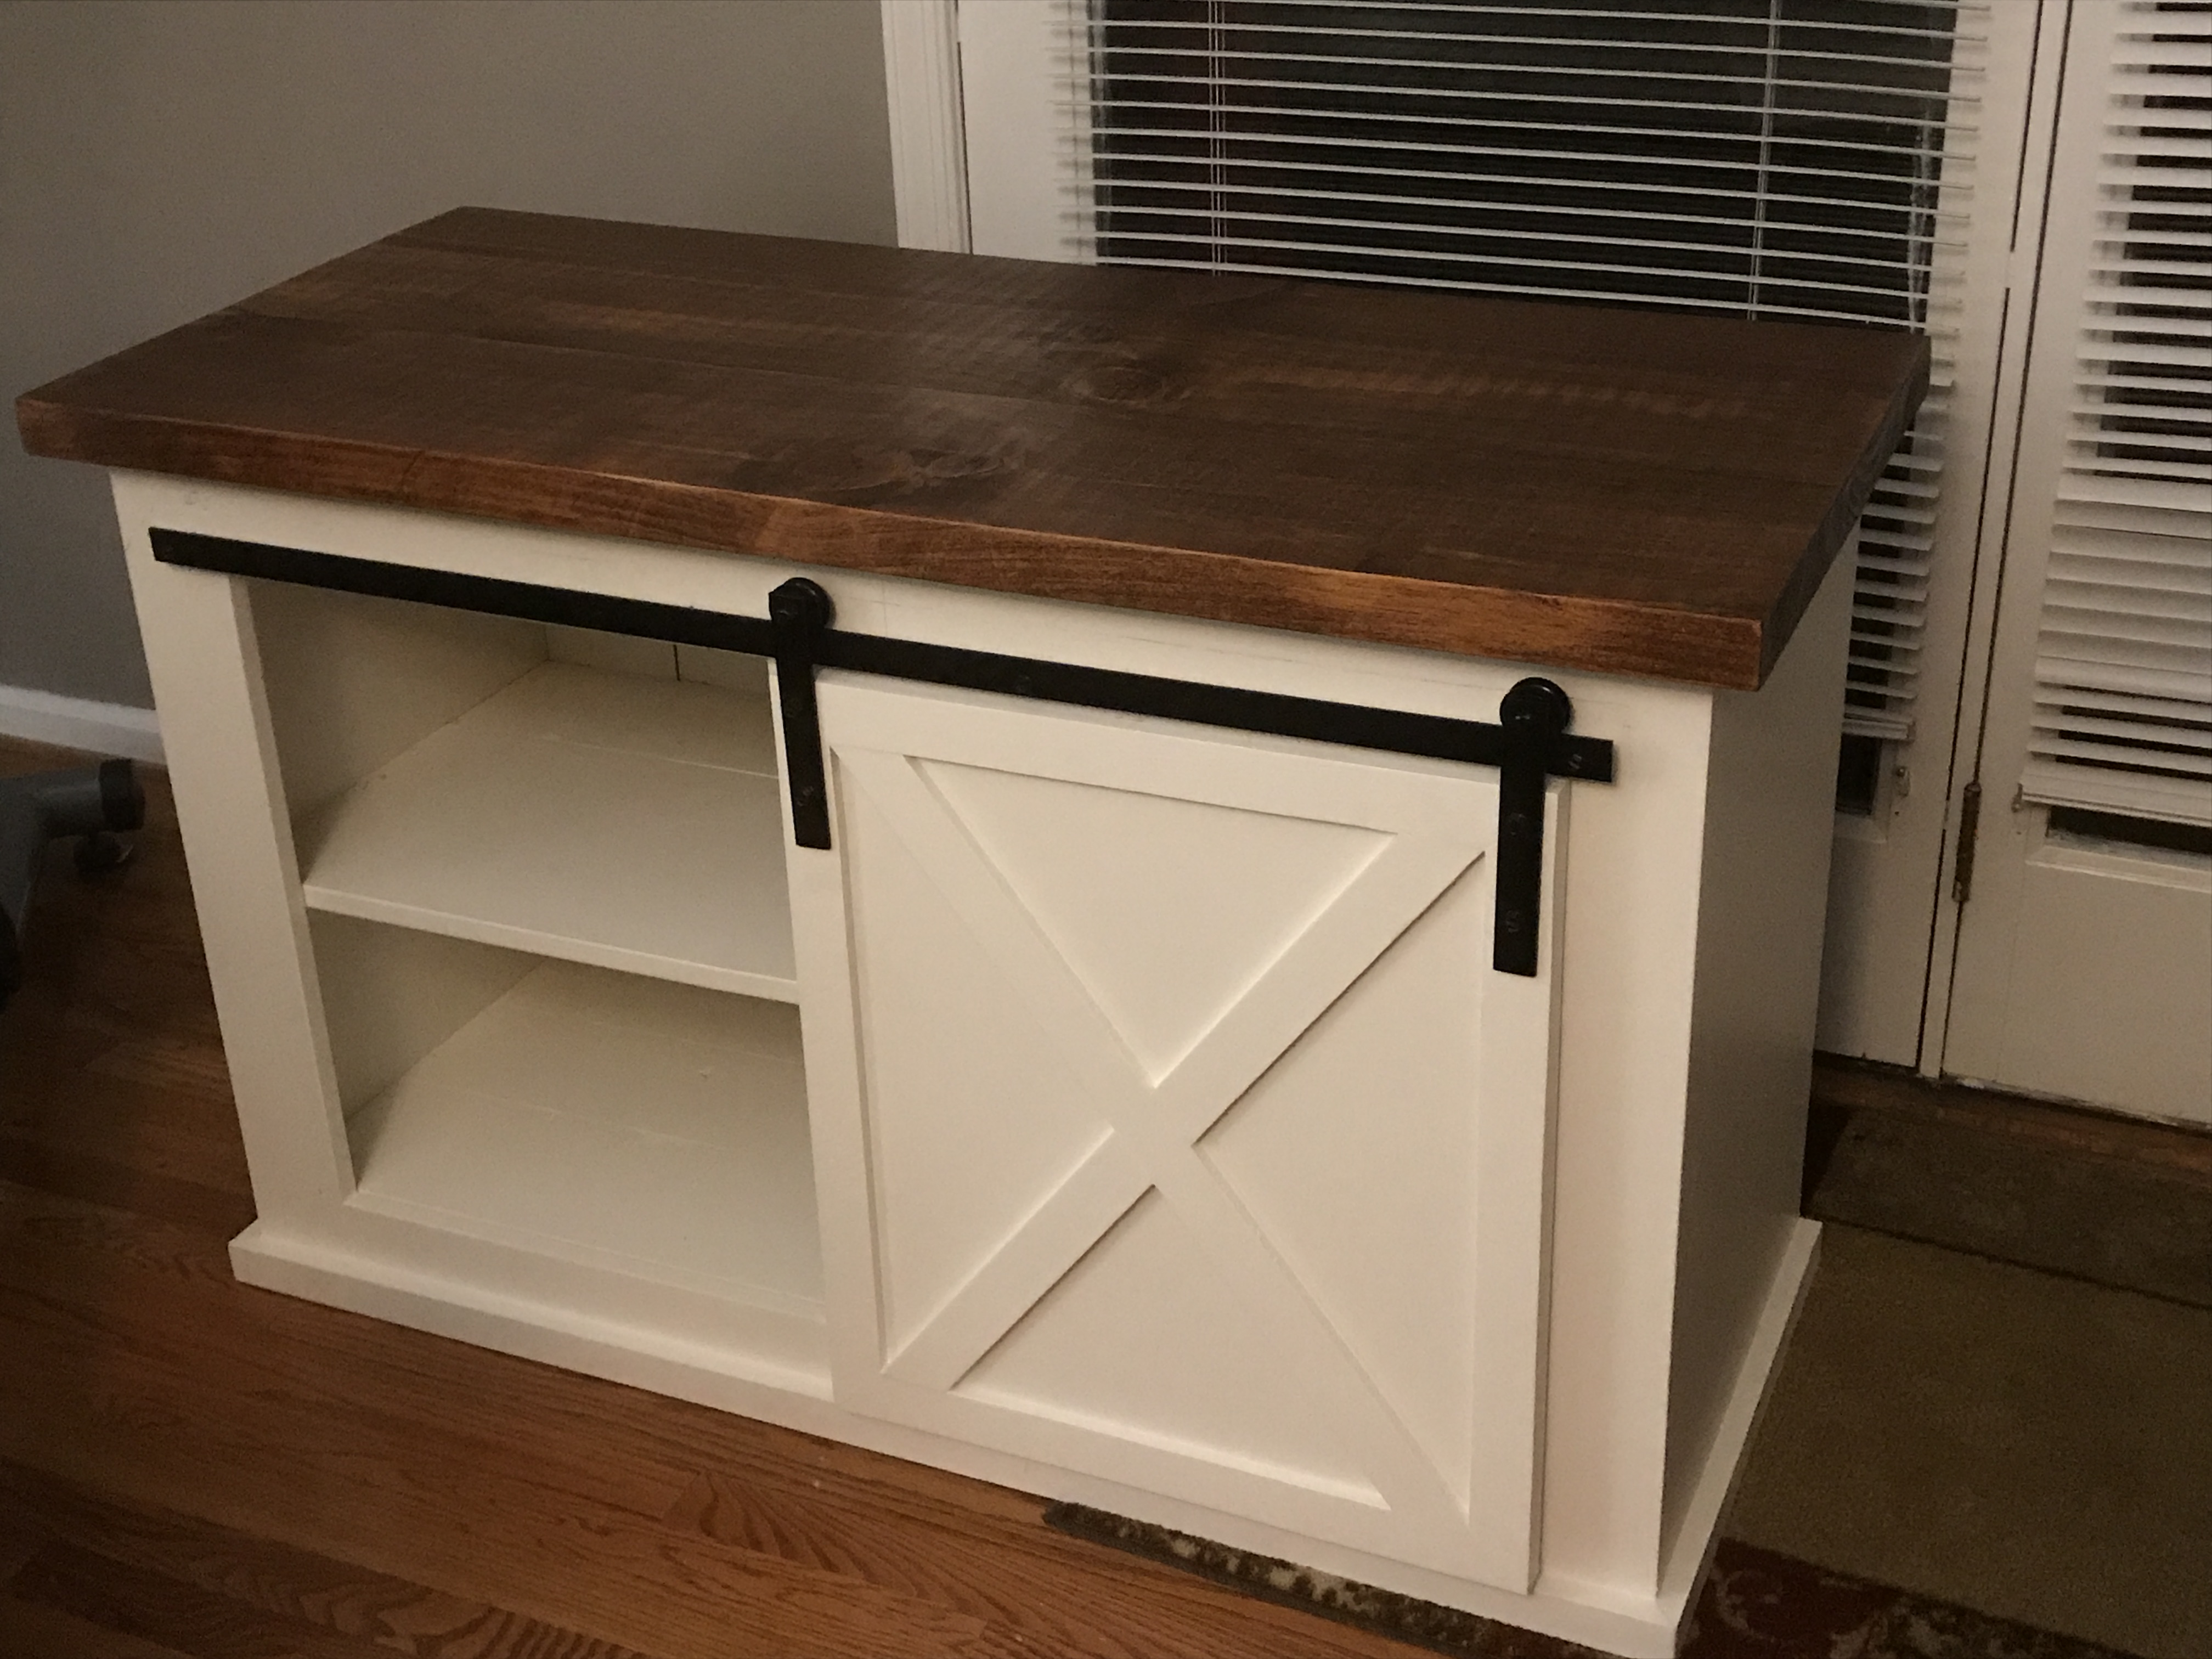
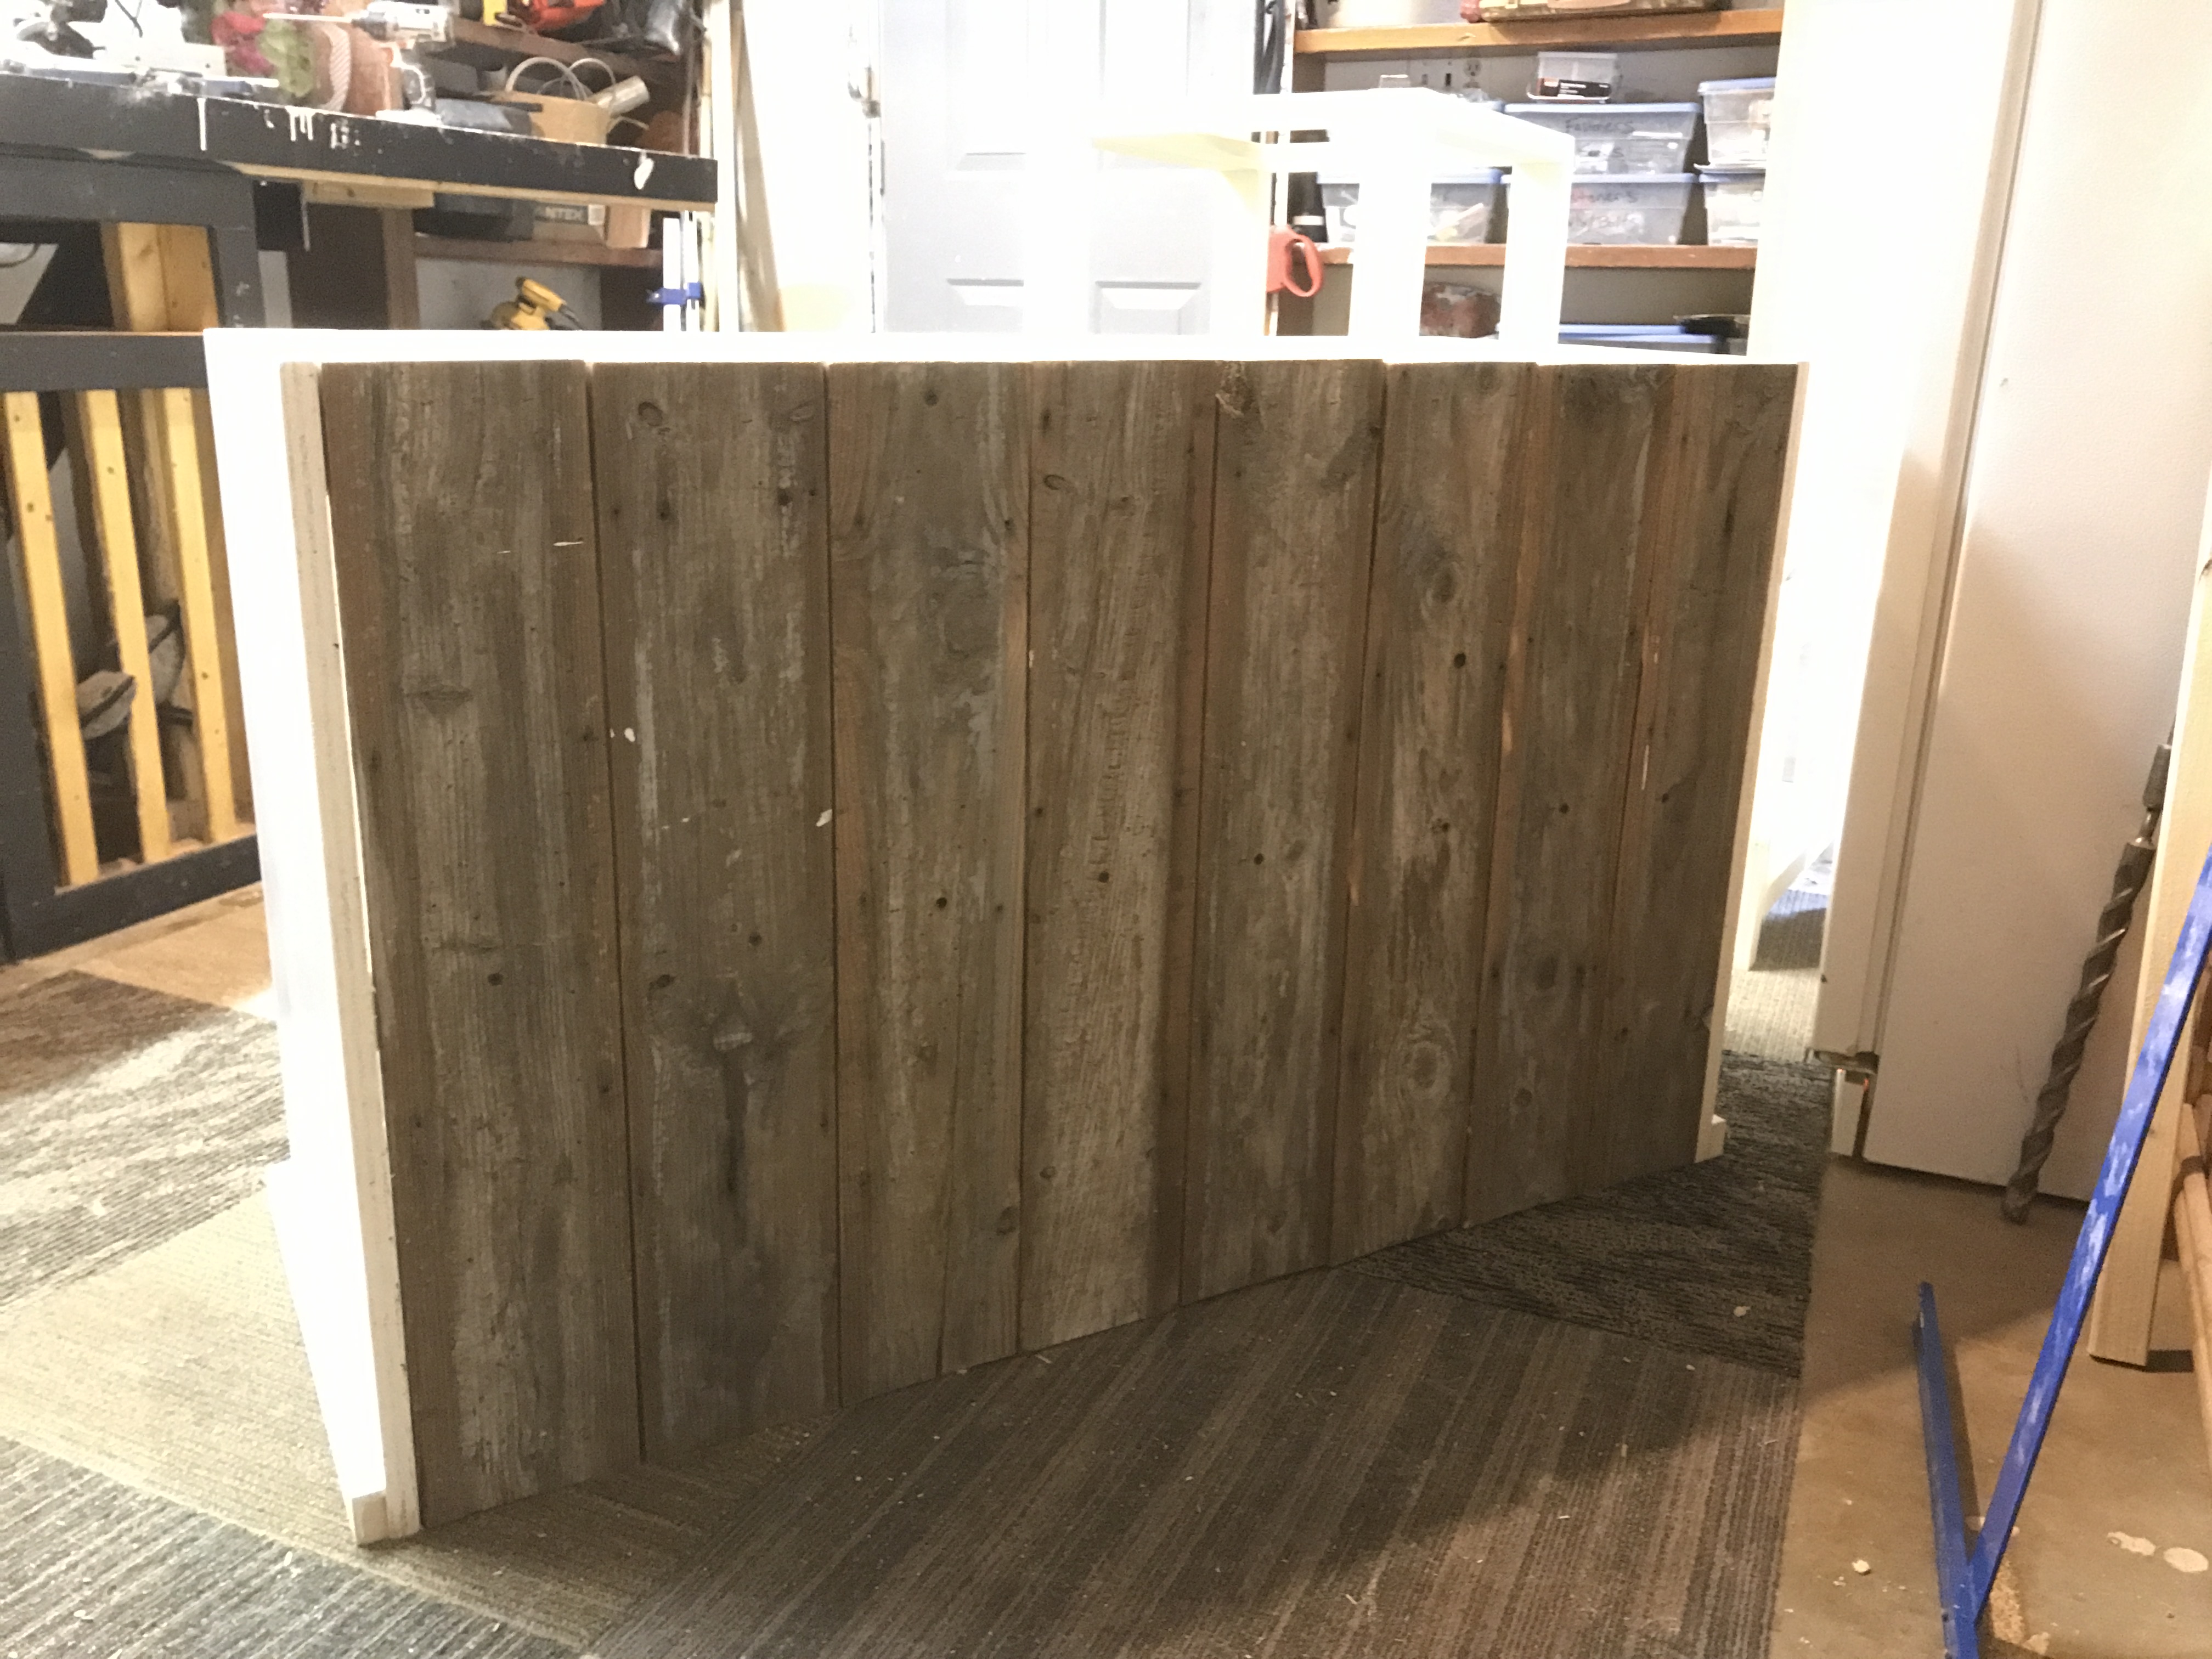
Single door slider. Made the hardware from standard 1 1/4 flat metal and rollers from a couple pulleys. Top is rough cut white pine that had some great saw marks and knots for character. Back is ship lap from an old barn.
Great Plans. I extended the back with an extra 1x10 and it works great being that I'm 6' 4". Also used a router to round the arms, front seat board, and the top back board. Just need to stain and waterproof for the patio. I'm new to woodworking (besides home trim work). Your plans are great as is or for just getting started. I'm trying this out as a hobby for retirement (sometime in the next 5 years). Buying the equipment now as needed. Thanks so much for the plans and videos.
I loved this plan from the minute I saw the post. We got the kids and their friends involved in this build. I love having a outdoor table that is large enough to have everyone around.
Easy to build. Just used 1x4's and 1x3's.
Thu, 03/19/2015 - 05:57
Awesome looking project! And well done. Do you happen to have any plans for it? I'd like to have one at my house.
Thu, 01/16/2020 - 07:59
Wow, this is plain awesome. Do you have detailed plans on did you make one. Am planning to make a cabinet which fits this dart board - Winmau Blade 5? Will it fit inside it?
Beautiful table
This crate was designed as a shower gift for a grandma-to-be. It was made with solid plywood sides instead of slats but otherwise follows the plans. The top edges were banded to conceal the plywood. The stain used was Minwax oil-based semi-transparent in Classic Gray. The decals were cut on a Silhouette Cameo 4 and adhered to each long side after one coat of poly followed by two additional coats.
Just bought a vacation home and need to furnish the place. Started with the size Farmhouse bed with side tables. Used Behr paint from Home Depot called Cotton Whisper sanded edges and used a dark walnut stain to antique. Finished it off with 2 heavy coats of poly.
Tue, 11/08/2016 - 10:57
Did you use a metal bed frame or did you make the side rails and frame? i am curious how high my mattress will sit above the footboard because I want to make the side rails and use slats. I have a boxspring that I will be using. I dont want my mattress to tower over my footboard. did you adjust the length of the 4x4s on your footboard?
Modified the potting bench plan to make an outdoor bar.
Planters from Easy Build DIY Planter Box. Some modifications, but essentially direct from the plans. I used redwood fence pickets for the slats, finished the frame with an "ancient oak" stain and the faces with spar varnish diluted with paint thinner.
Fri, 09/10/2021 - 08:22
Beautiful build, love the look, thank you for sharing!
My two daughters really enjoyed helping daddy make these birdhouses but most of the loved painting them.
This table was a cinch to put together and only took a couple of hours
This playhouse was built by my 4 year old son and I. We used the general plans and even added the drop down desk. Most of it was built using my miter saw stand, another great idea by Ana White!
Potting sink loosely based on the Simple 2x4 Potting Bench plan, using scraps I had on hand and an old kitchen sink. One of the uprights is warped, so I used a lattice back and curved outer brackets to detract from that. I was trying to keep this zero cost.
Tue, 09/21/2021 - 15:43
That turned out awesome, especially considering using what was on hand!
This is a rabbit hutch I created for my kids 5 rabbits. The thing that makes this hutch really nice is if you have a large lawn you can just move the hutch a little bit every day and the lawn gets mowed, fertilized and you don't have to worry about cleaning up all the rabbit droppings. I also mounted a rabbit feeder on the inside of the house door to keep the food dry, which has worked really well.
Here is a short blog of all the steps in its construction:
http://design.medeek.com/gallery/RH3080_COPALIS_2013/RH3080_COPALIS_201…
Sun, 05/05/2013 - 01:52
I apologize I haven't got the completed planset up for this project yet but I will try to get it up in the next couple of weeks as well as a very complete materials list. You will need to go to a farm/feed store to get the correct 1"x2" wire and 1/2"x1" wire for the floor. Do not go to Home Depot and use the cow wire they have or the hardware cloth for the floor, neither of which are the correct choice. Home Depot has the lumber but not the wire. If you have any questions or even improvements to my design I would be interested in hearing from you.
Sun, 09/13/2015 - 19:18
Finally got around to uploading the plans. I still need to create a material list for this plan but the basics are there now. We've had rabbits in it for about a year but recently we've tried some guinea pigs and it works great for that as well. The guinea pigs can pretty much live off just the grass and dandelions but you do need to move it daily to give them plenty to eat.
This cart was smaller then I expected but makes a great little addition to my office
This was my very first project... I went with antiquing the table, thanks to my Golden Retriever. (Even though he's a hundred times better than his puppy stages, if he chews, it won't show easily.)
The wood sizes are slightly off, but hey - this is what you do with free wood! Still worked perfectly!
This was a simple coat rack I decided to make with some random scraps of wood I had from previous projects. The only out of pocket costs for me was the hooks!
***update****
I decided to make a kid friendly version as my kids were creating quit the pile of courts and backpacks when they got home from school, mostly because they couldn't reach the adult one! With some left overs, problem solved!!
Tue, 05/07/2013 - 08:16
Exactly what I was looking to make without getting a router involved! What kind of moulding is that?
I took the original plans from the Farmhouse Table - Updated Pocket Hole Plans - and I modified it so that my table could be countertop height and join up to my counter - like a modified breakfast bar, so this table it countertop high, and is also more narrow and alittle longer. I can easily pull it away from the wall and sit 6 people around it. It is now my favorite place in the house!
I was looking for something for my son's room that would last him until college, so I adapted your plans and added hooks and a bench and stained it. Bookends are all we are missing to make it perfect. He loves it, and I don't think he will be able to break it. I could use a suggestion for anchoring it to the wall, though. Thank you for the great, easy-to-follow plan!
Tue, 06/27/2017 - 18:30
Your bookshelf and bench look really nice and sturdy! I'm sure it will hold up for many years. As far as anchoring it to a wall, I have had luck with anti-tip furniture straps. I would use several and anchor them right to the studs. I also use long, self tapping construction screws instead of the screws that come in the package.