Community Brag Posts
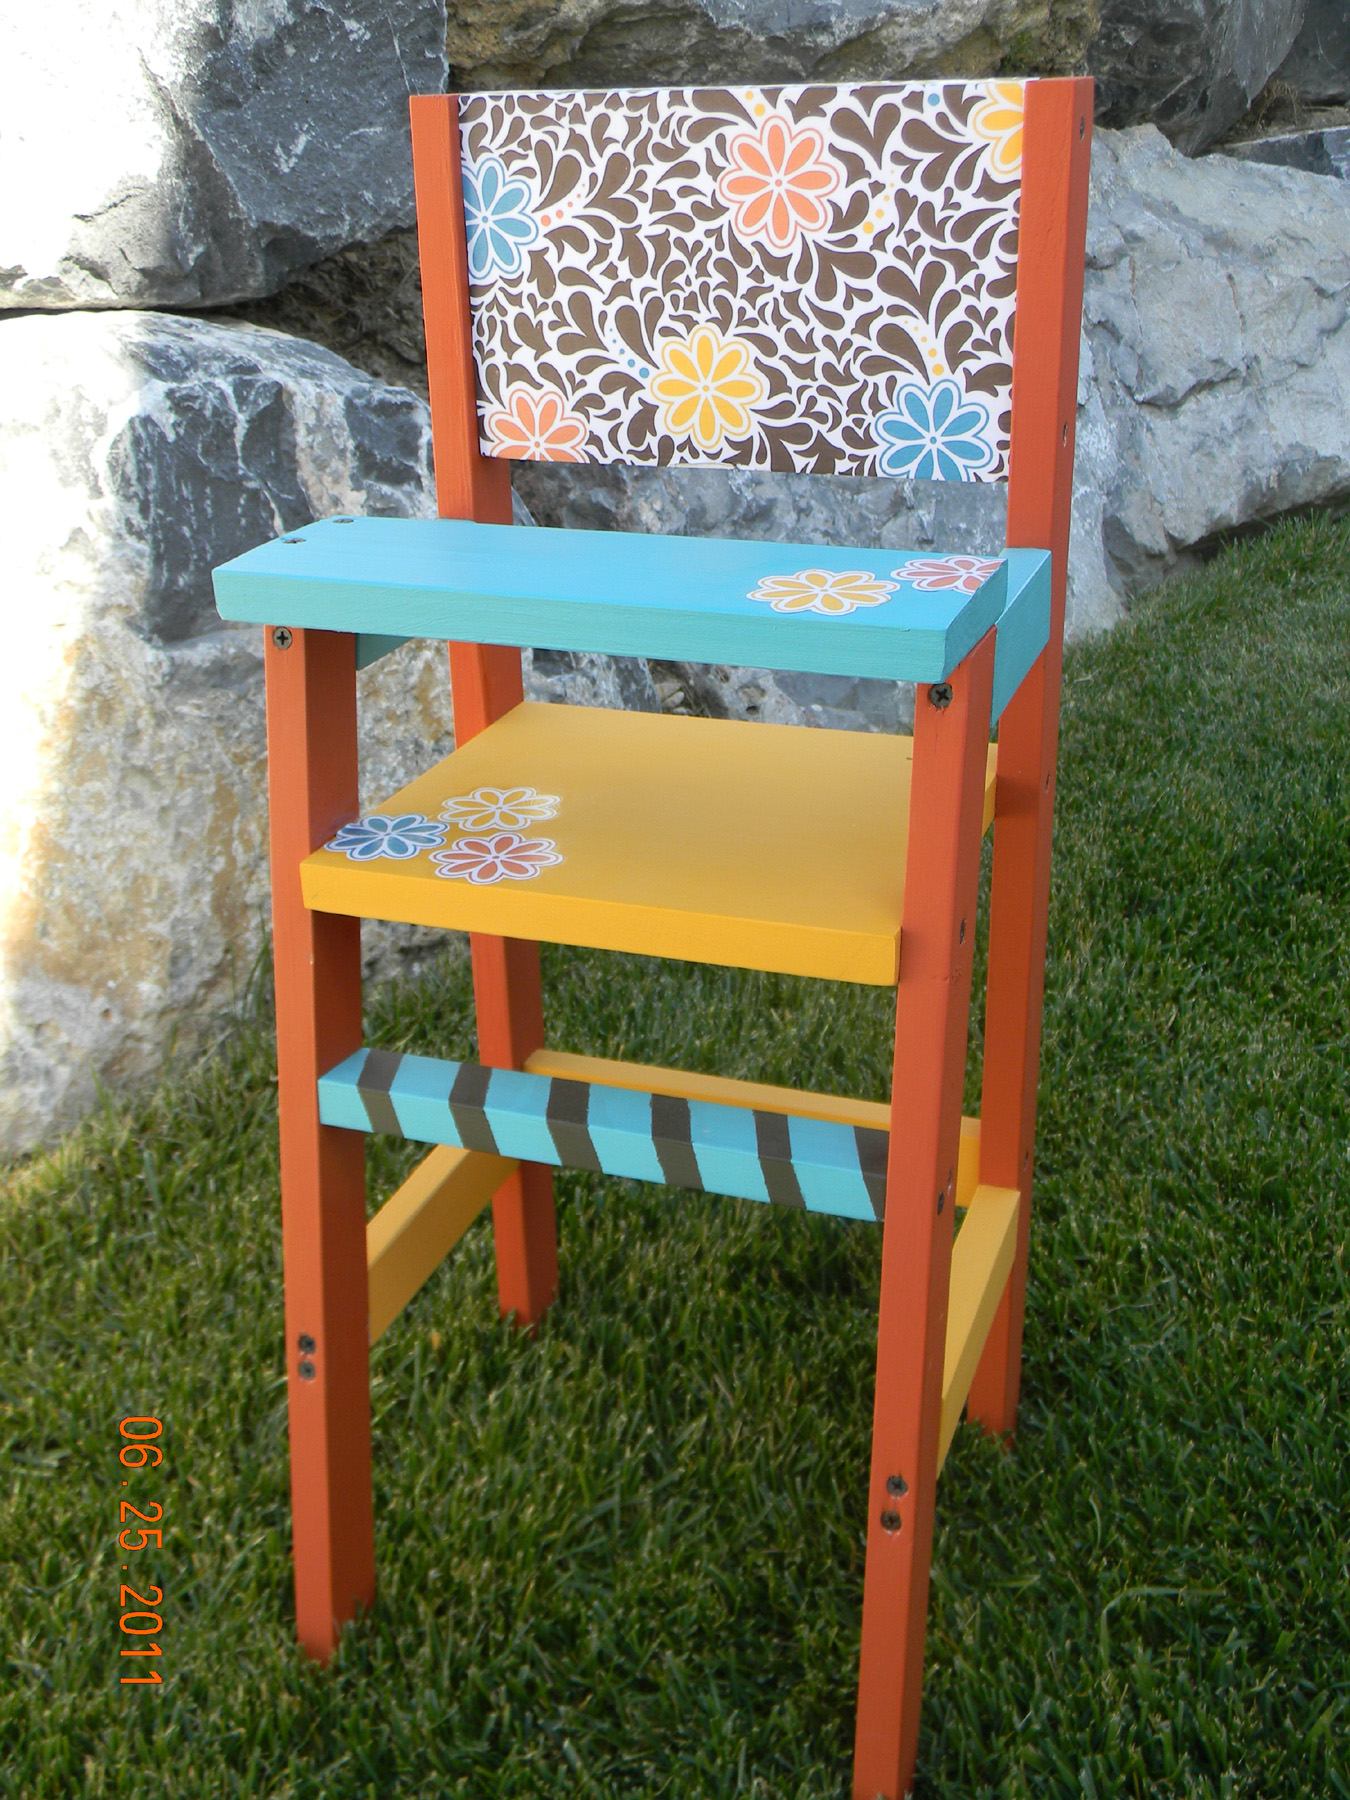
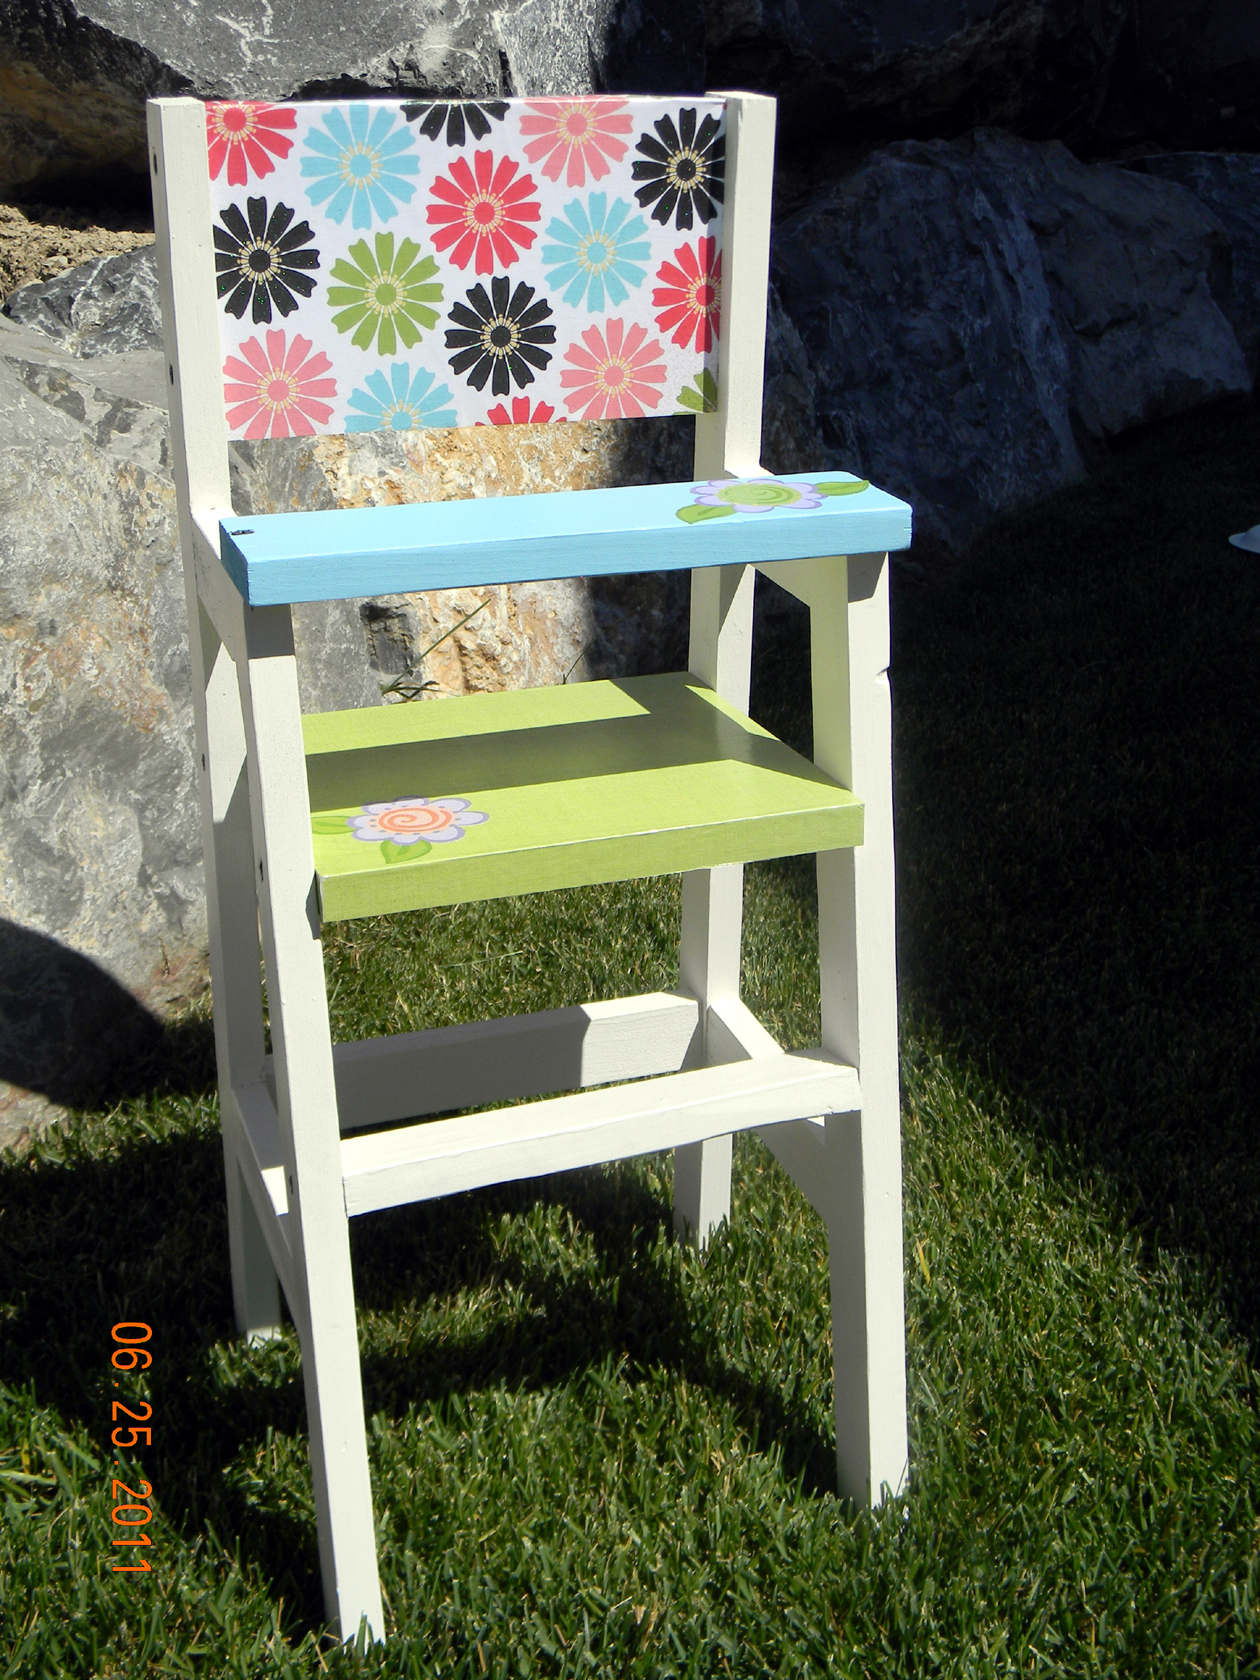
Doll Highchairs
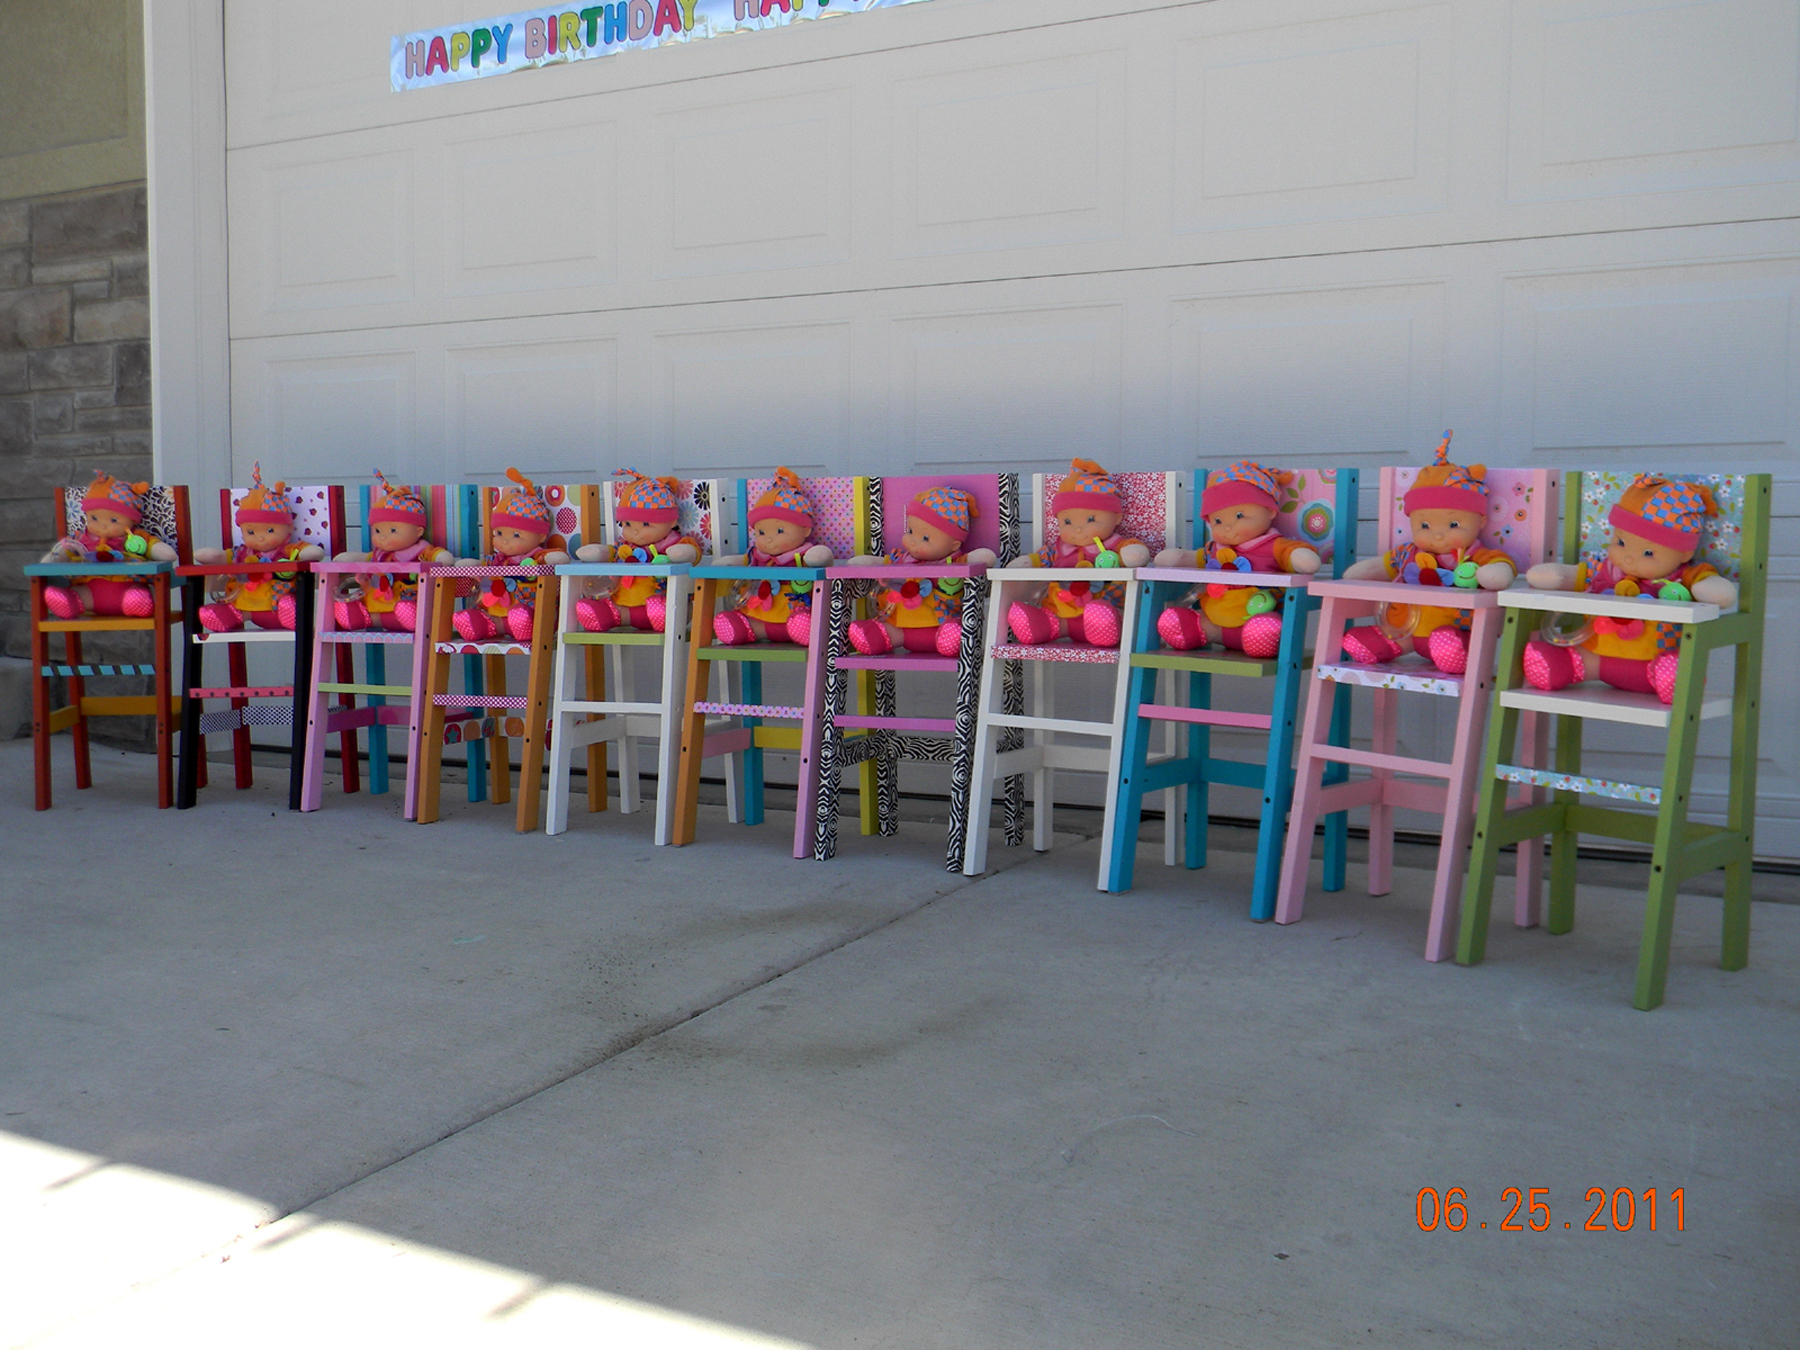
I built 11 doll highchairs for my daughters 5th "Adopt A Baby" birthday party! These chairs were fast and easy to build and I had a BLAST painting them! The girls loved, loved, loved them! A little extreme for a 5 year old birthday party? Maybe. But definitely worth it!


Estimated Cost
Under $10
Estimated Time Investment
Week Long Project (20 Hours or More)
Finish Used
Paint, scrapbook paper, modge podge and duct tape!
Recommended Skill Level
Beginner
Comments

Fri, 07/15/2011 - 05:13
Wow! That's a LOT of work!!!
Wow! That's a LOT of work!!! They turned out absolutely adorable, though.
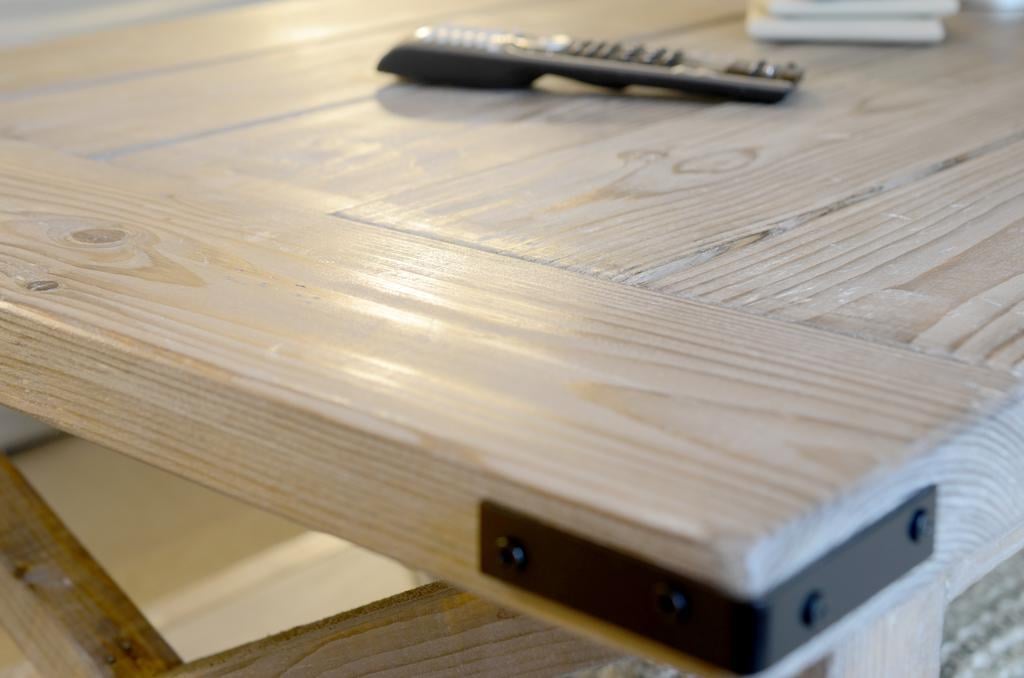
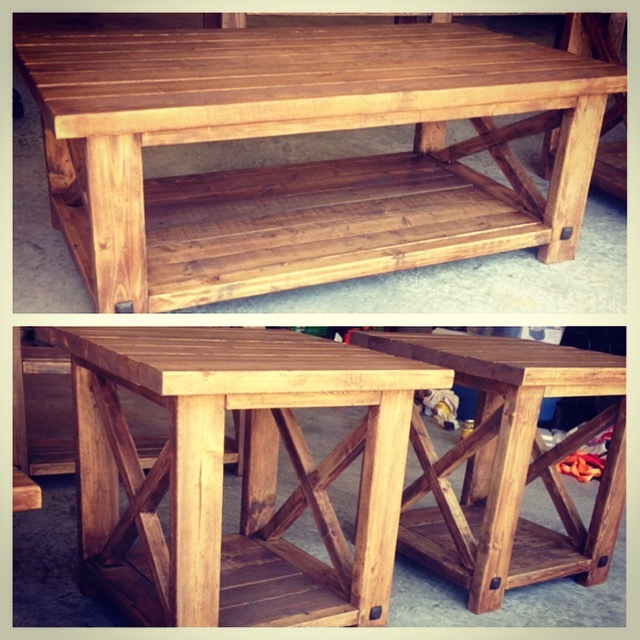
Rustic X Coffee Table with Bread Boards
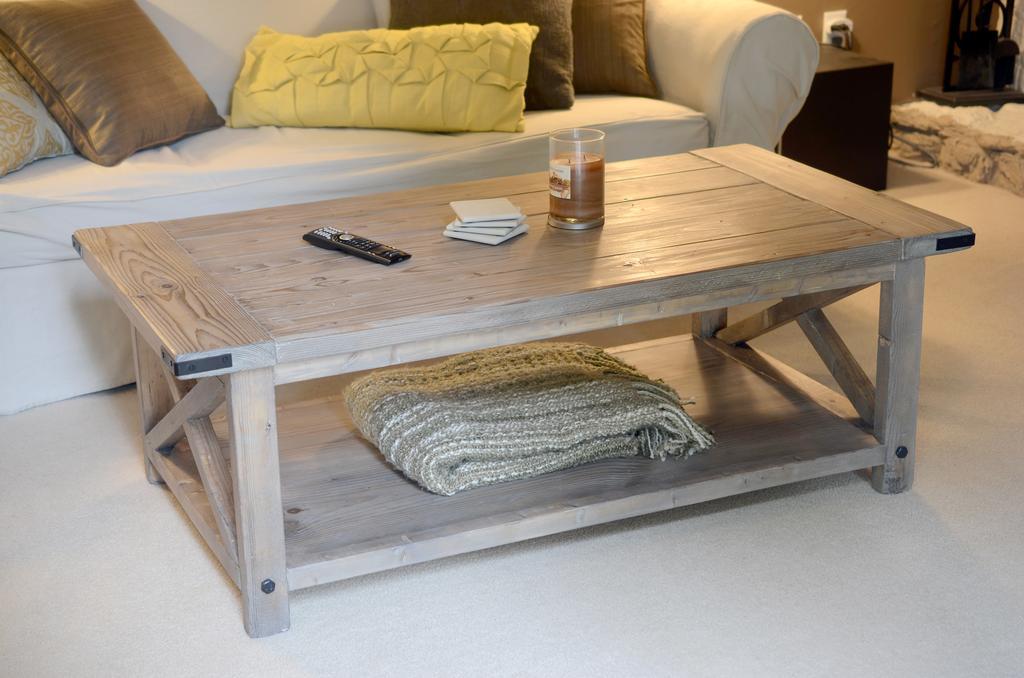
In need of a new coffee table and having a budget lower than what would allow for similar looking store bought tables, I decided to build a variation of the Rustic X coffee table. I used the modified plans by Pete Sveen which included the bread boards on the table top. We used a solution of white vinegar and steel wool to age the wood and used a clear furniture wax to finish it.
Estimated Time Investment
Weekend Project (10-20 Hours)
Finish Used
Vinegar/Steel Wool for Age. Clear furniture wax for finish.
Recommended Skill Level
Beginner
Comments
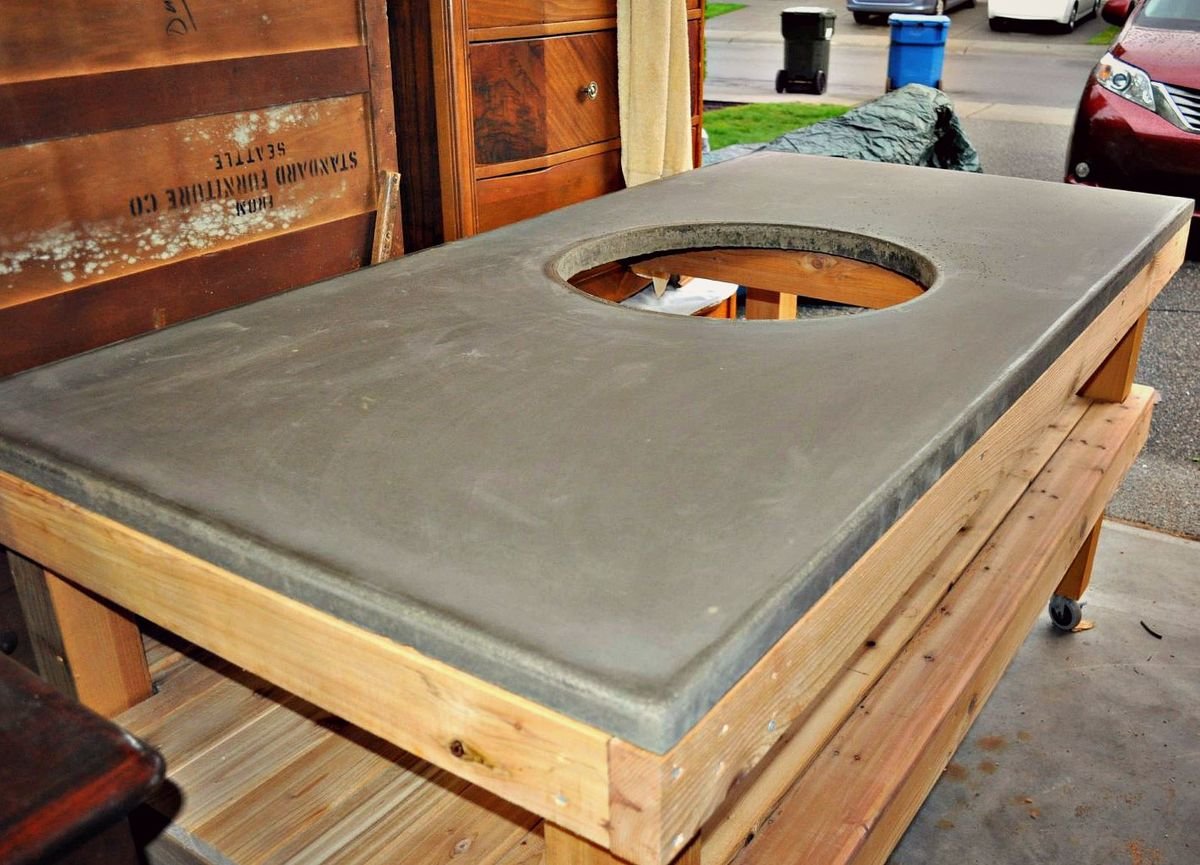
DIY Big Green Egg Grill Table with Concrete Top
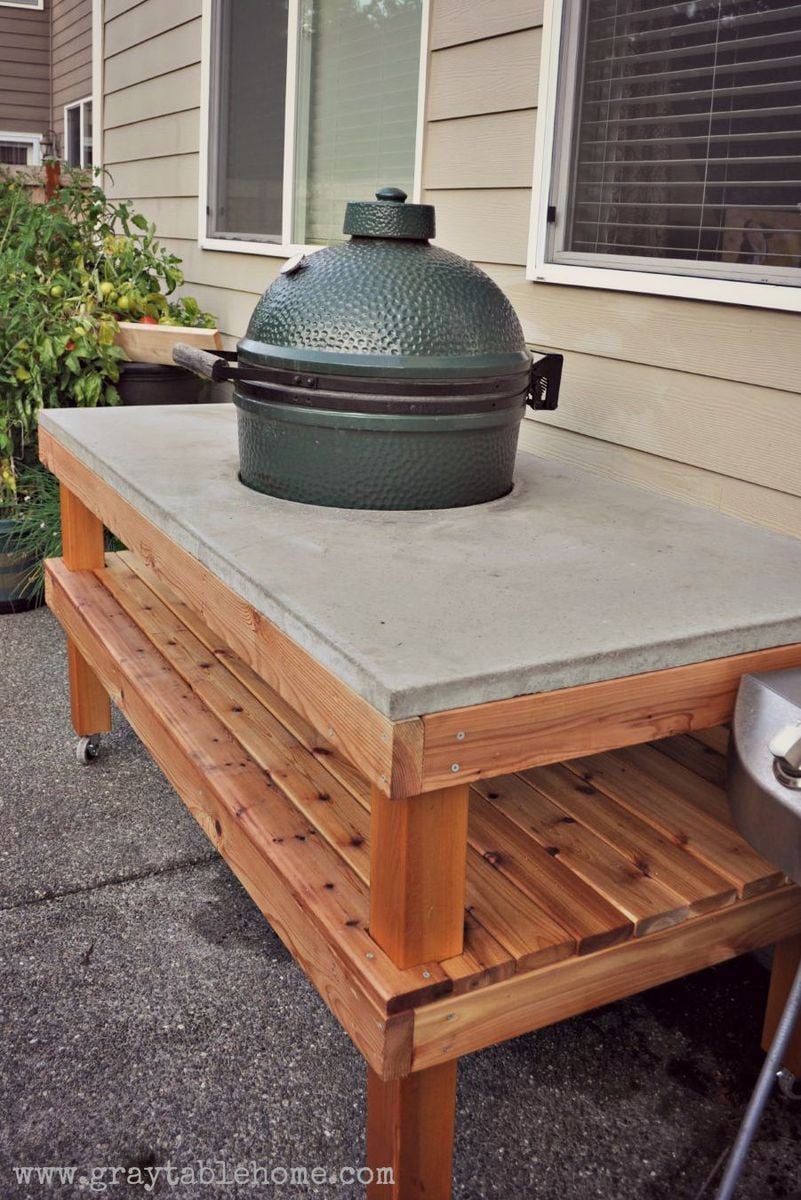
This grill table took a weekend to build. The base is made of cedar and top is concrete. More information on how to build this table is available on my blog.
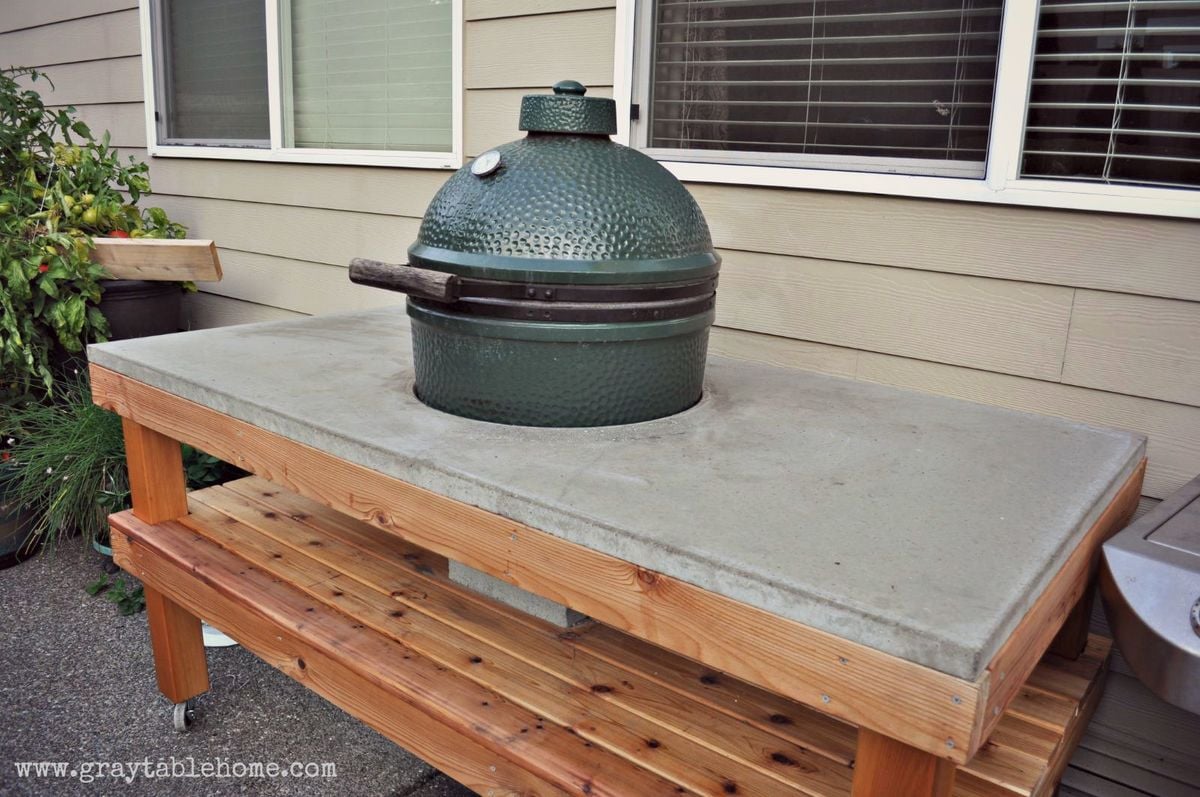
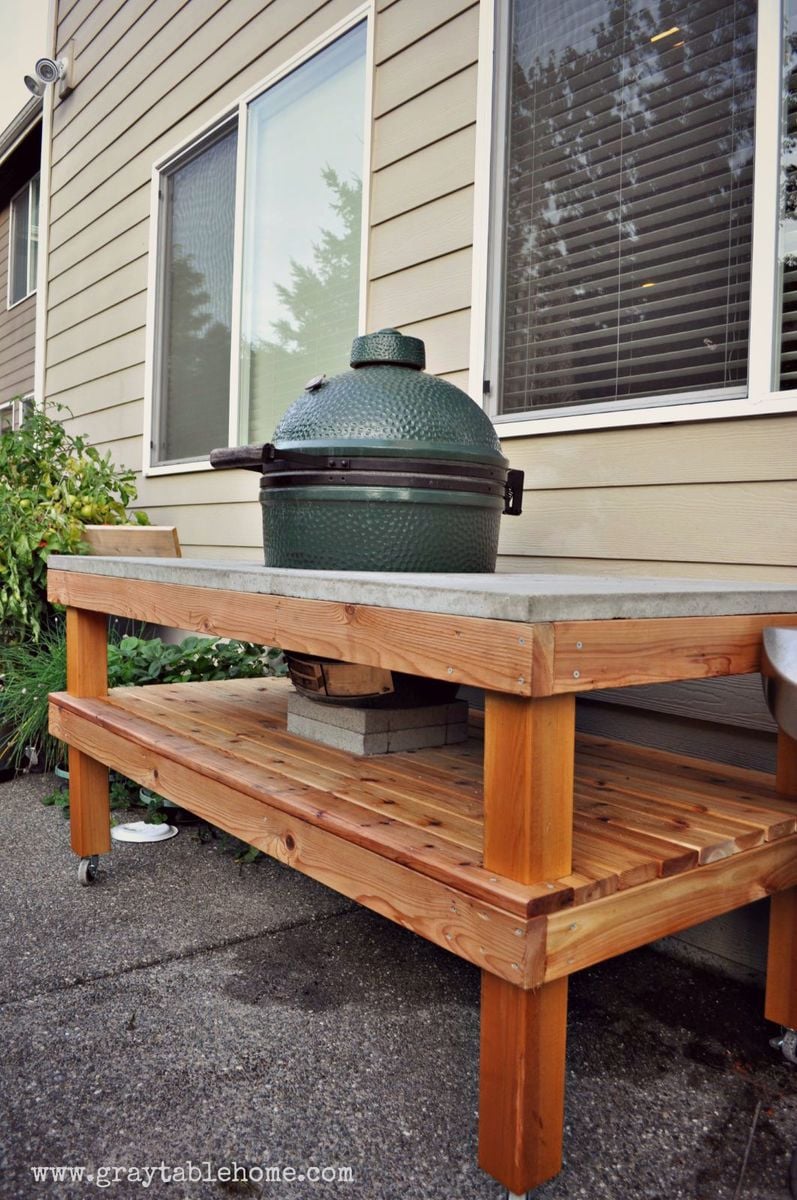
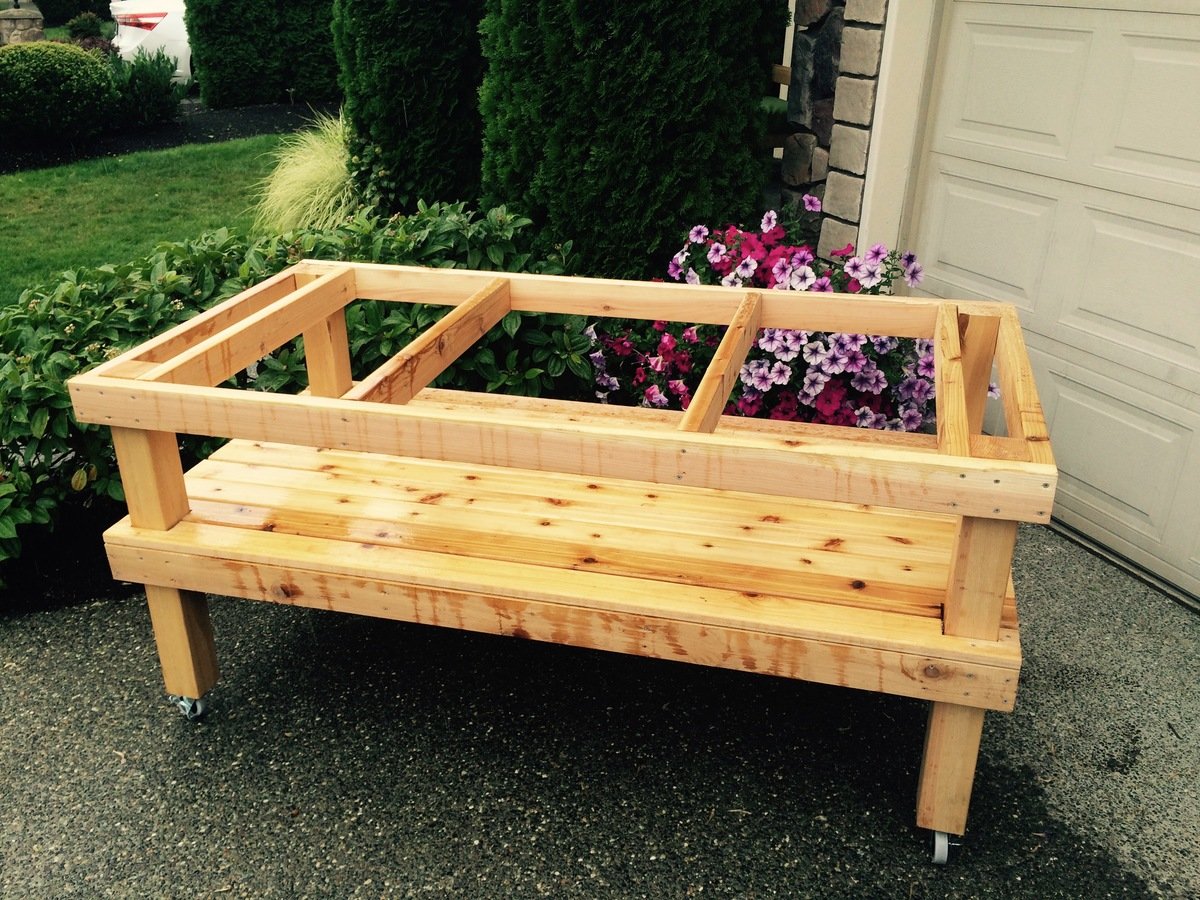
Estimated Cost
$250
Estimated Time Investment
Weekend Project (10-20 Hours)
Recommended Skill Level
Intermediate
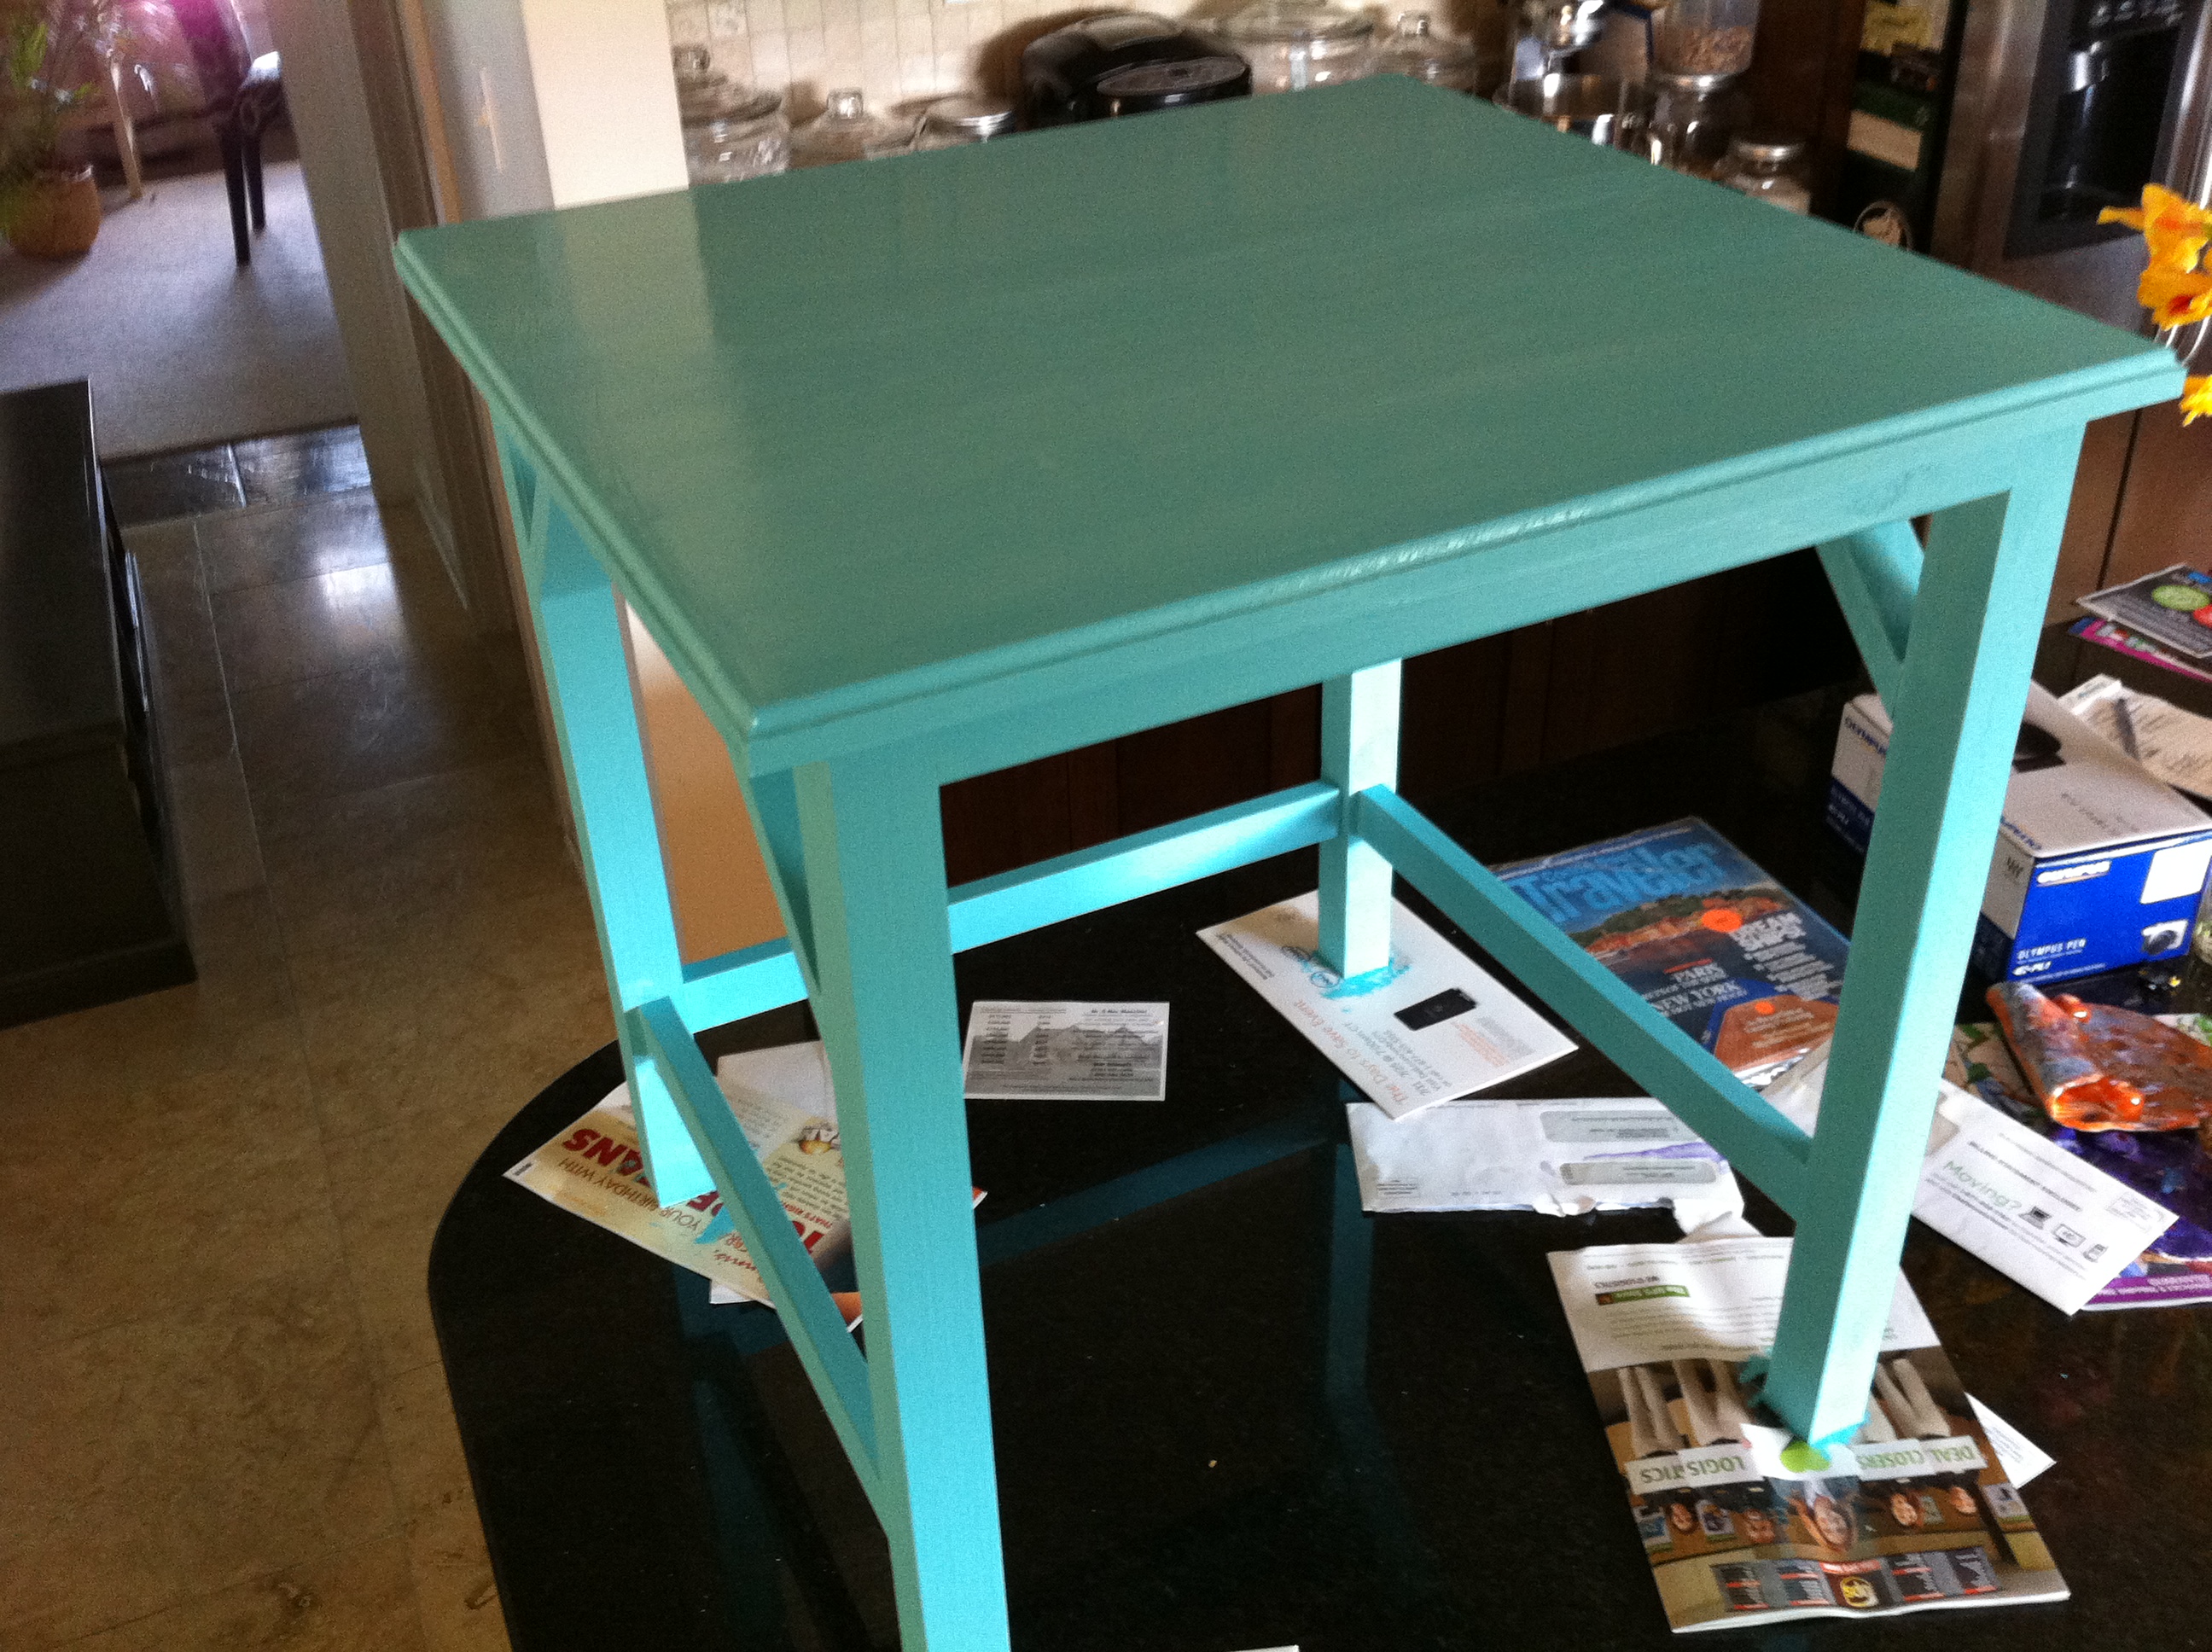
Slim Trus Console Table by Drew Cameron
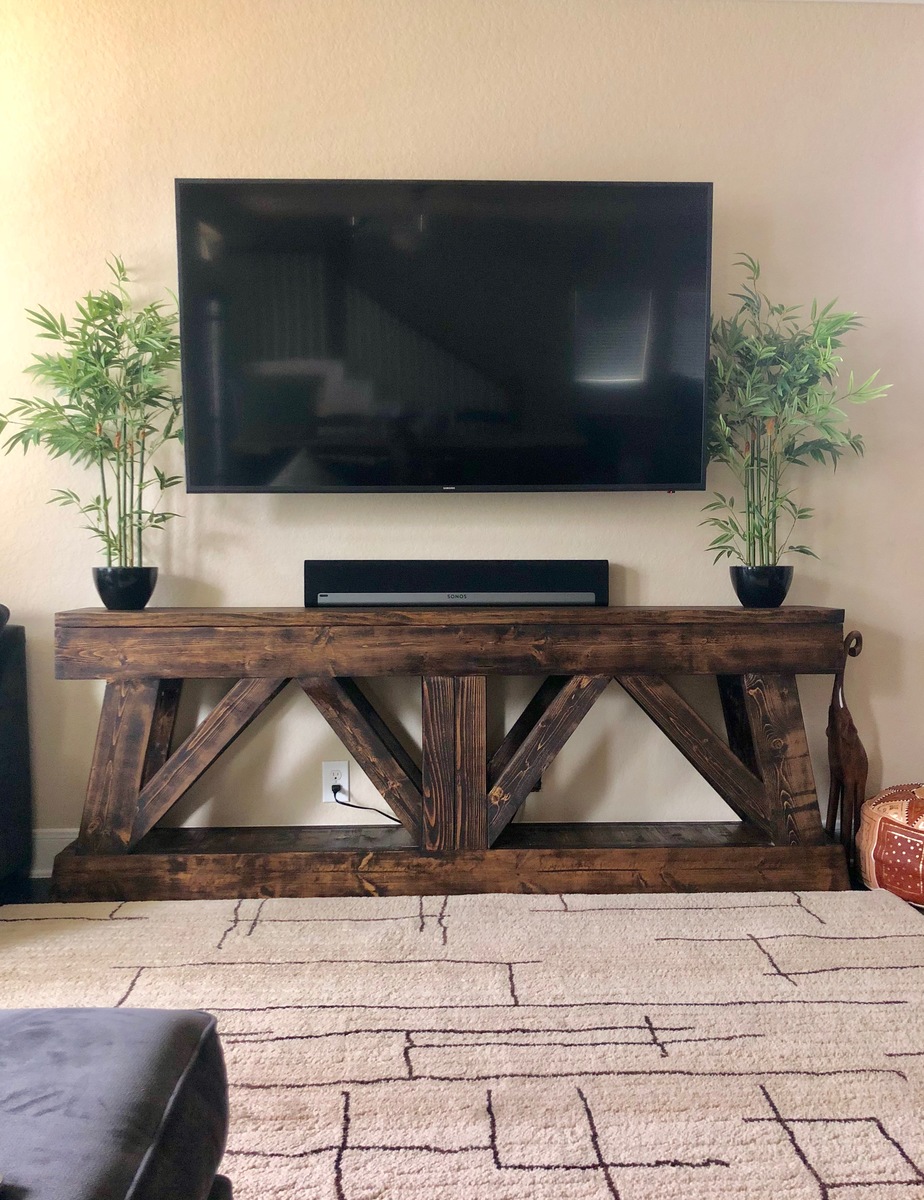
This project was a great learning experience and turned out fantastic. The mitered/beveled cuts were a bit tricky for me, It took me a while to understand how to use my miter saw to make the cuts correctly. Other than that, the building plans were clear and easy to follow. Cara, an author at Inspired Workshop, posted the plans at the following link: https://theinspiredworkshop.com/diy-slim-truss-console-table/
-Drew Cameron

Built from Plan(s)
Estimated Cost
$100
Estimated Time Investment
Weekend Project (10-20 Hours)
Finish Used
Minwax PolyShades Espresso Oil-based Interior Stain
Recommended Skill Level
Intermediate
Comments

Backyard seating
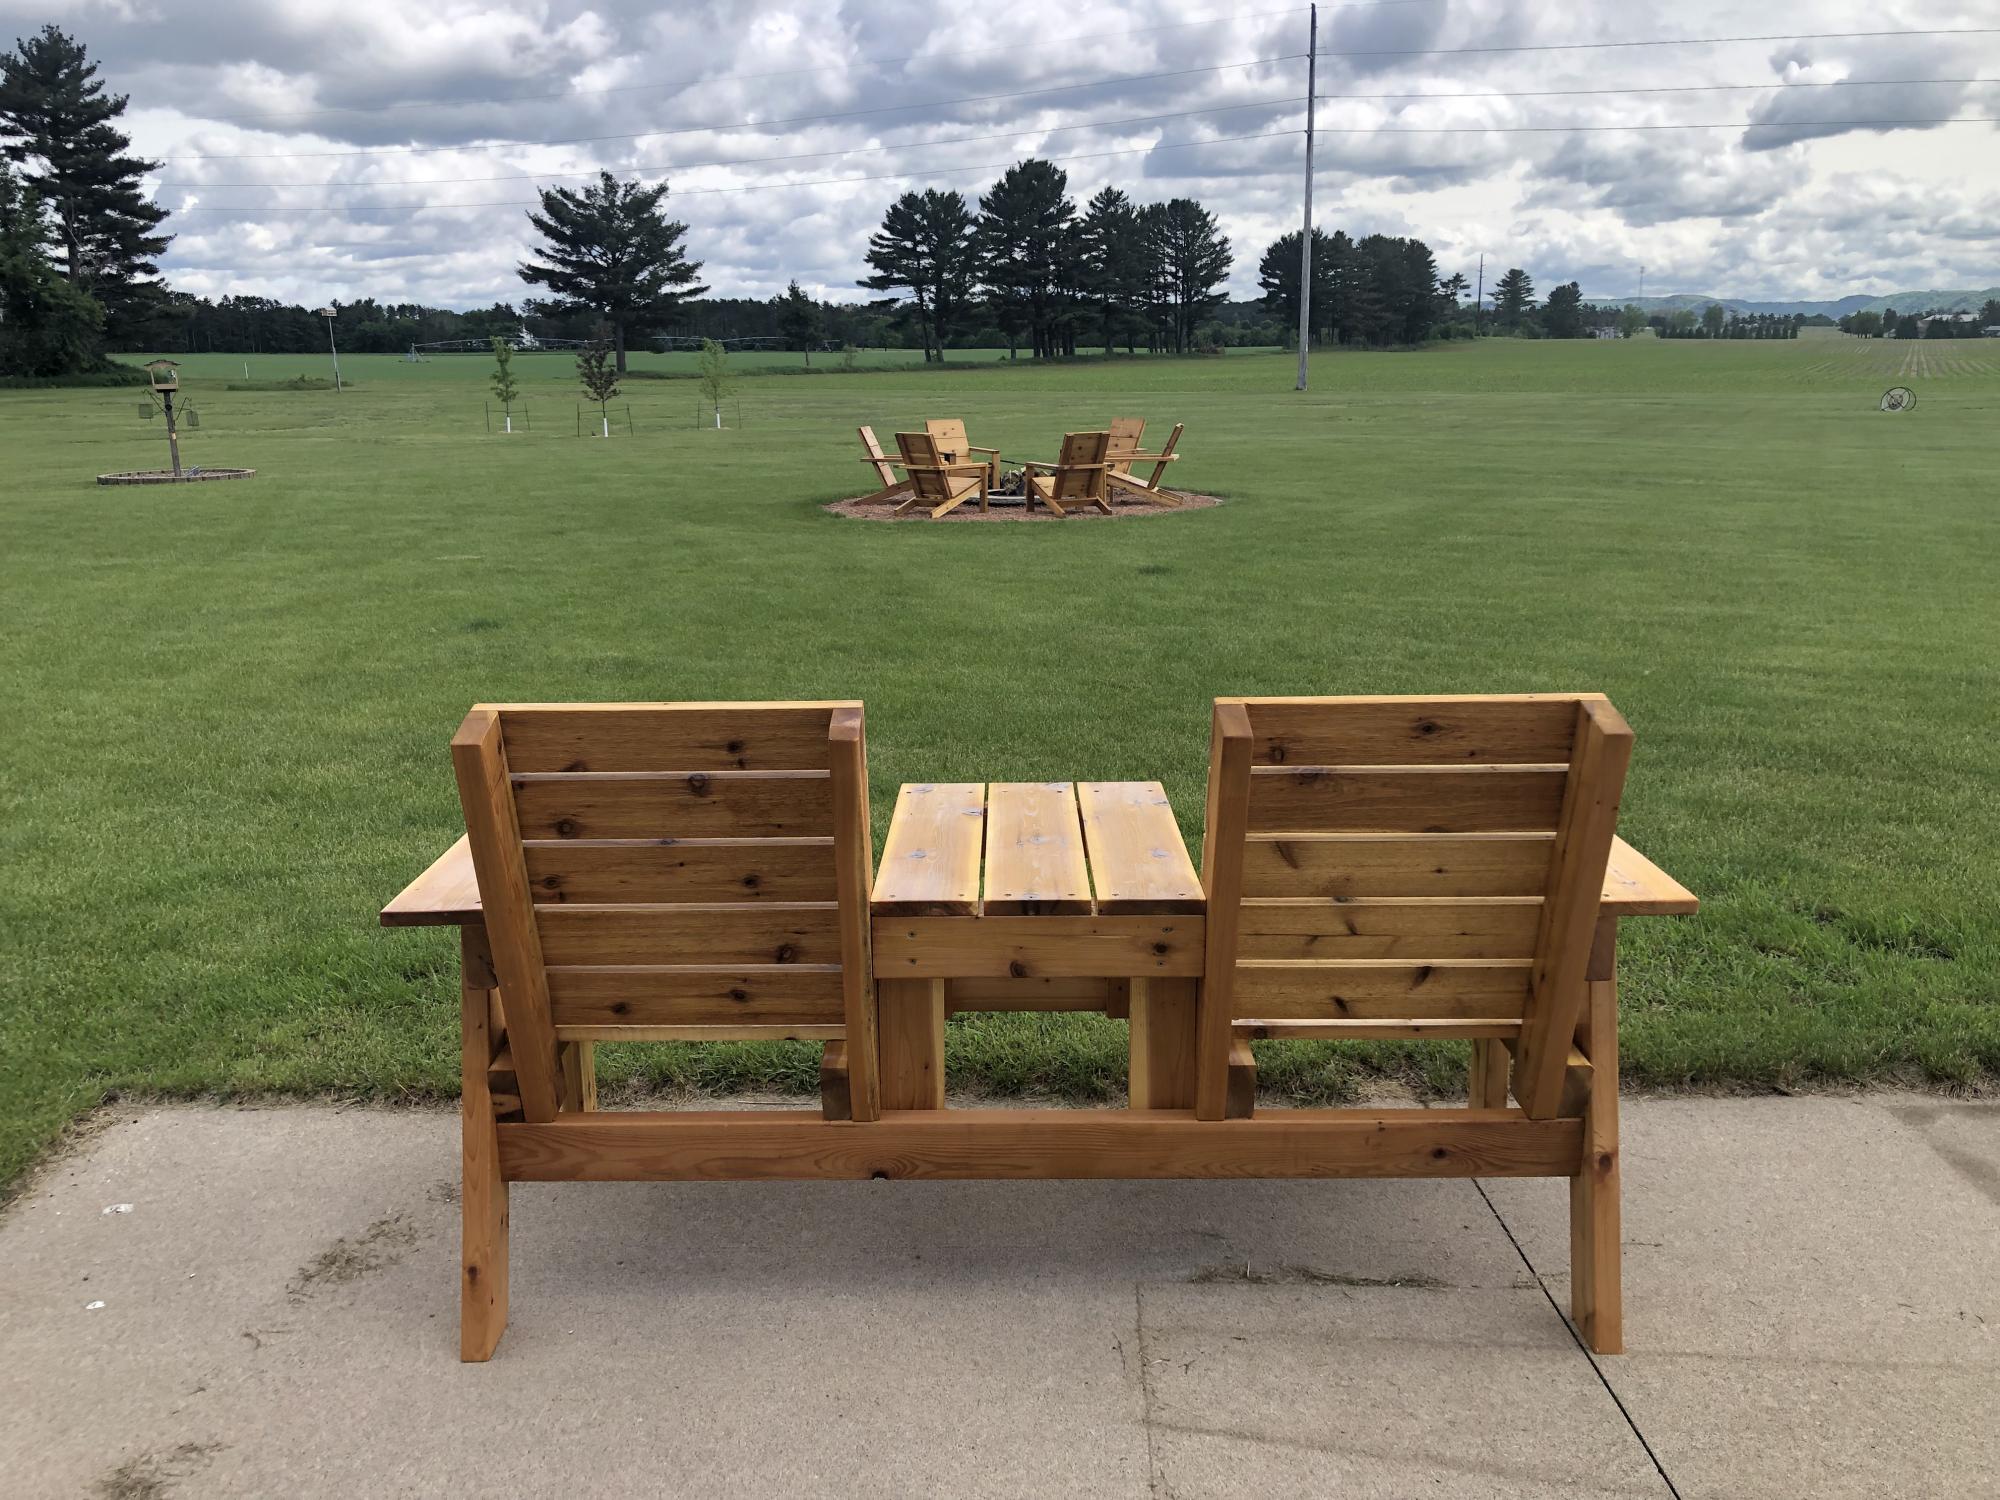
We needed some additional seating in the backyard so I built 6 Adirondack chairs for the fire pit and the bench using the plans that you have shared on Facebook. They turned out really nice and so far they have been a big hit!!
Thanks!!
Comments
Copy Cat Nesting Table - Larger Table
After seeing the $400 PB Tables on their website, I decided I wanted the look without paying such a high price.
I recreated a table using their table as an inspiration piece. I plan on building the little table next week.
Estimated Time Investment
An Hour or Two (0-2 Hours)
Finish Used
Paint, but I will be distressing it and glazing it too.
Recommended Skill Level
Beginner
Comments

Mon, 07/18/2011 - 06:59
LOVE LOVE LOVE
I requested plans for nesting tables because I don't have the confidence to try and do it myself. Beautiful job and yours look much better than PB's and their ridiculous price! Once you get the smaller table done, will you please post your plans? I would really appreciate it. We have an ottoman so there isn't room for a coffee table and we badly need tables for when our weekly guests arrive. I don't like the snack tables as they are too wobbly. Again, beautiful work!
Wed, 07/20/2011 - 12:50
Thank you!
And yes, I'll be posting the finished plans and table pictures this weekend. I even tried my first attempt at the plans on the sketch up program. The big table is already up on my little blog site.
http://www.thequaintcottage.net/2011/07/copy-cat-nesting-end-table-part…
My table is a bit larger than the PB table, but I wanted the little table to be able to be used as a secondary table when guests come visit (move to side tables).
Once I get them perfect, I'll post here.
THANKS for your positive feedback. :)
Karen
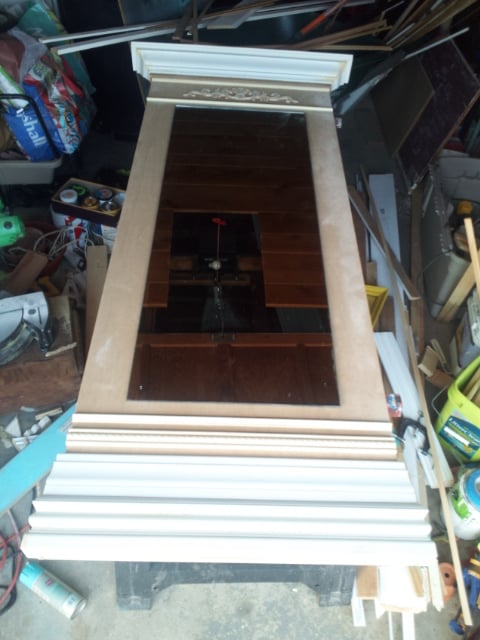
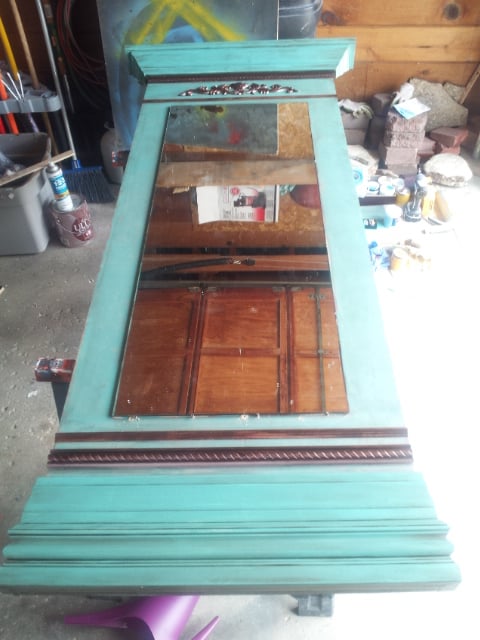
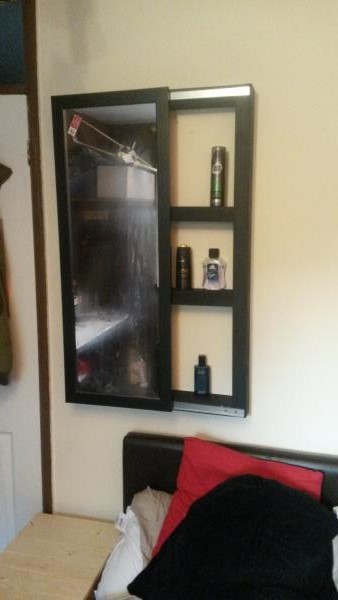
Leaner mirror
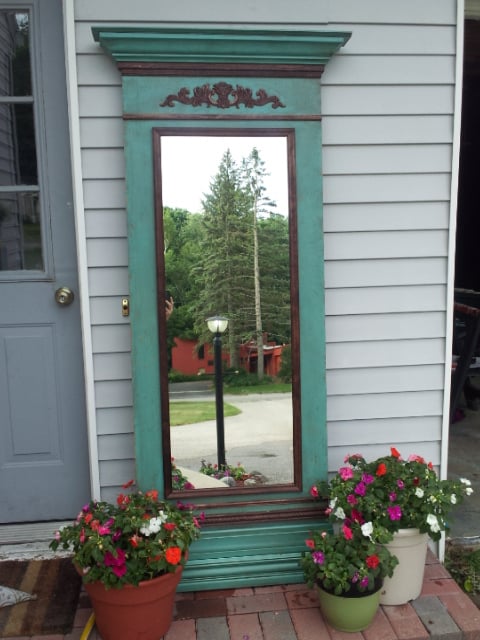
This was made as a present my mom's birthday. I found a good sized mirror at the thrift shop which was perfect for the project. I adhered it to some plywood, added trim around it, bulked up the top and bottom with multiple layers and types of trim and added some crown molding to the top. The finish is "A Day at the Jewellers" by Valspar with a Red Mahogany stain/glaze over top.
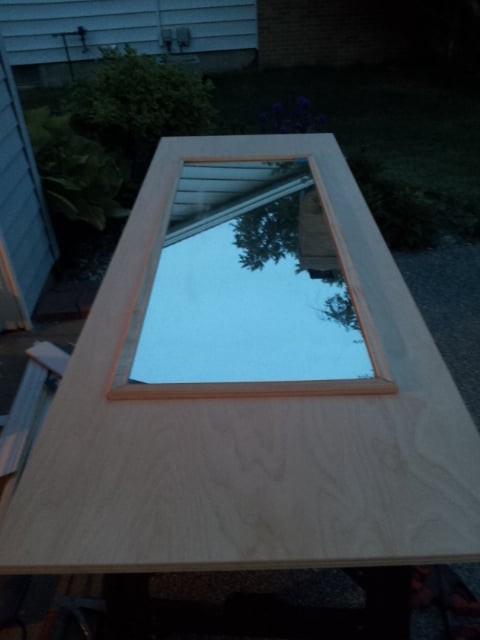
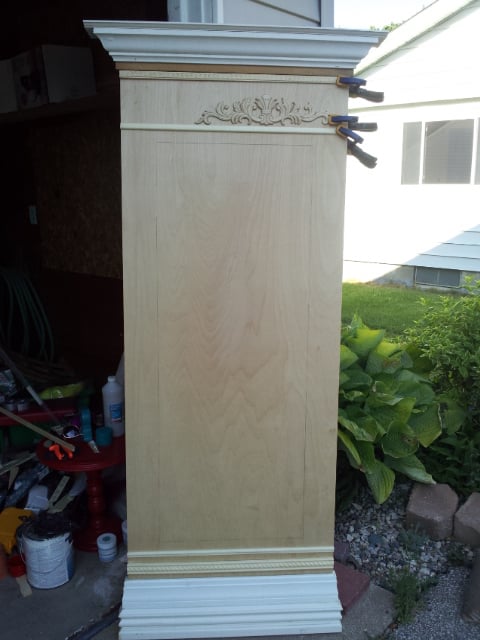

Estimated Time Investment
Day Project (6-9 Hours)
Finish Used
A Day at the Jeweller by Valspar with stain overtop
Recommended Skill Level
Starter Project
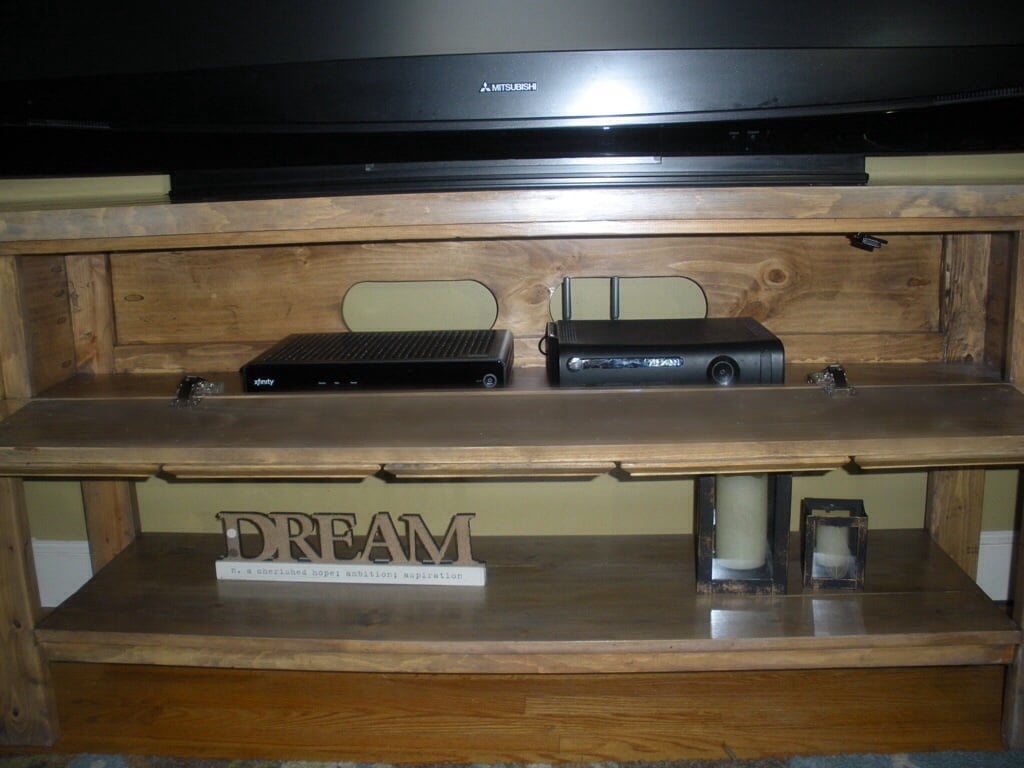
Ridge Media Console
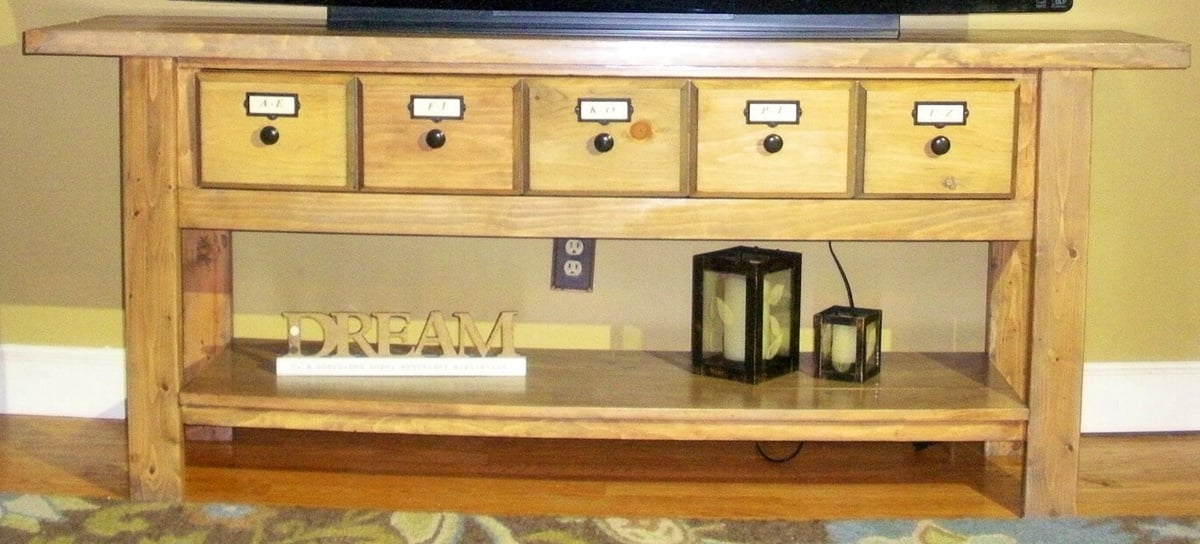
Project was a bit difficult but extremely rewarding when completed!! I followed Ana White's advice......"take a break and always finish your project!!!"
Built from Plan(s)
Estimated Time Investment
Weekend Project (10-20 Hours)
Recommended Skill Level
Intermediate
Comments

Farmhouse style queen headboard
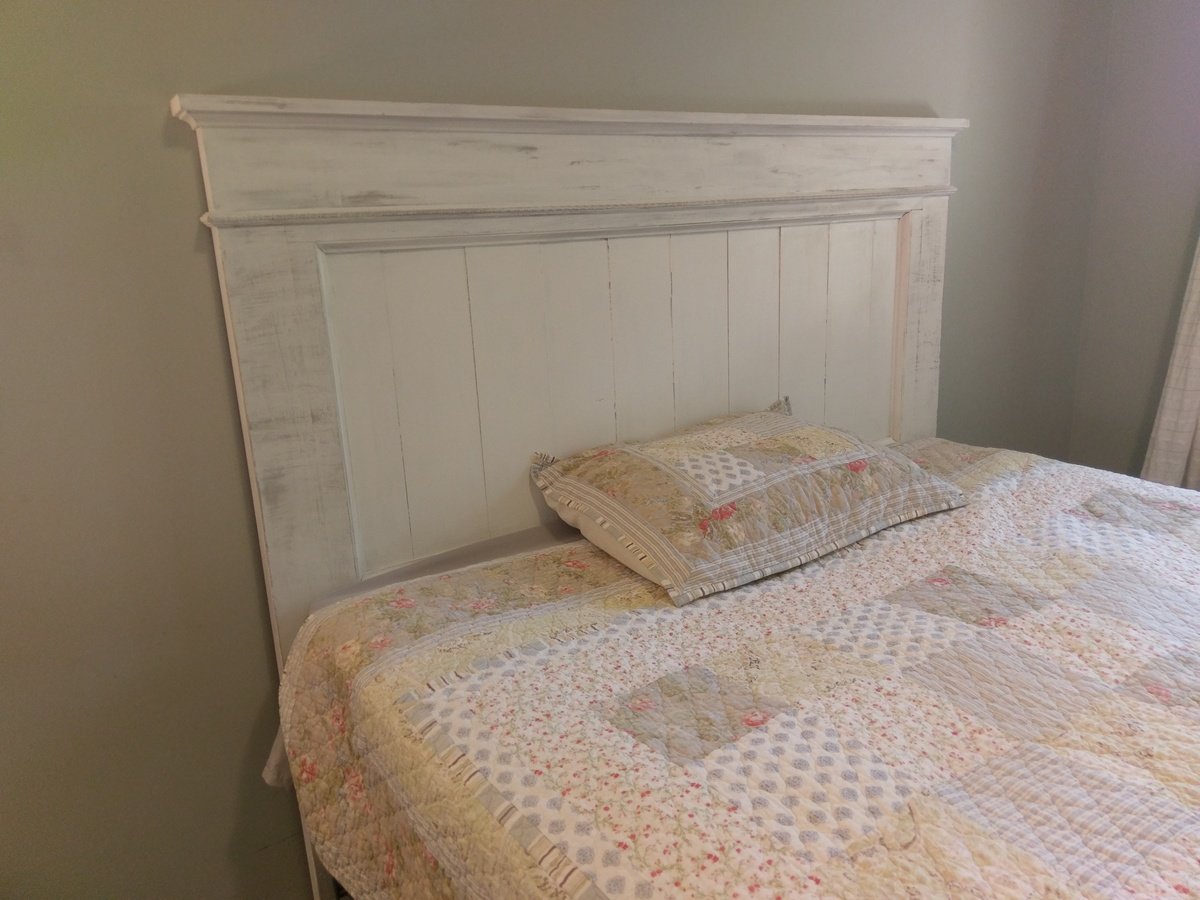
Here's a queen headboard we just completed for our guest bedroom.
It only took an afternoon to build this simple yet stunning headboard, and then a little more time to paint, distress, and wax it.
More information is available on our site at FamousArtisan.com
Estimated Cost
100
Estimated Time Investment
Afternoon Project (3-6 Hours)
Finish Used
Chalk paint and wax
Recommended Skill Level
Beginner
Coop Update
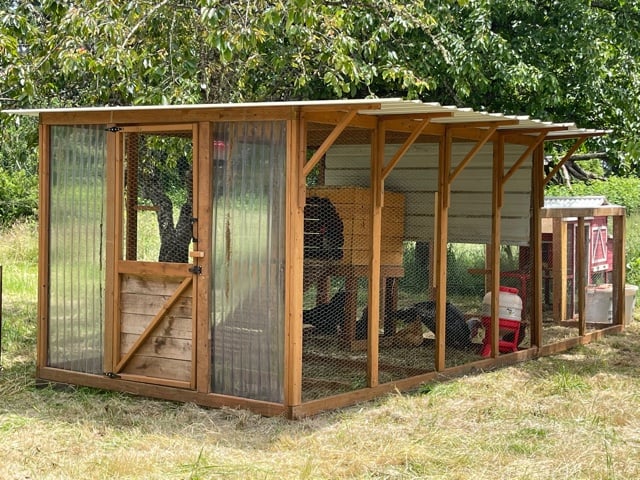
I had to move our original coop to another property, so decided to do a little upgrade. We used Ana's Chicken Run plan for both of the large sections and just added a roof. We attached the run to a small red coop that we purchased. Ana's plans are great for modifying for any size, as you can see the main tall portion is from her run plan just built taller and we added a door to the front.
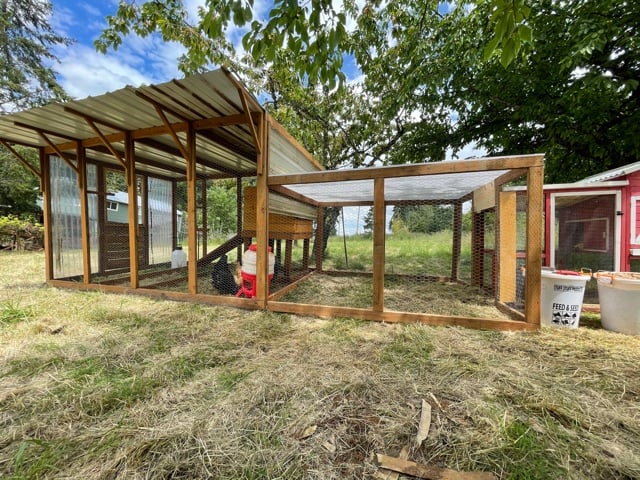
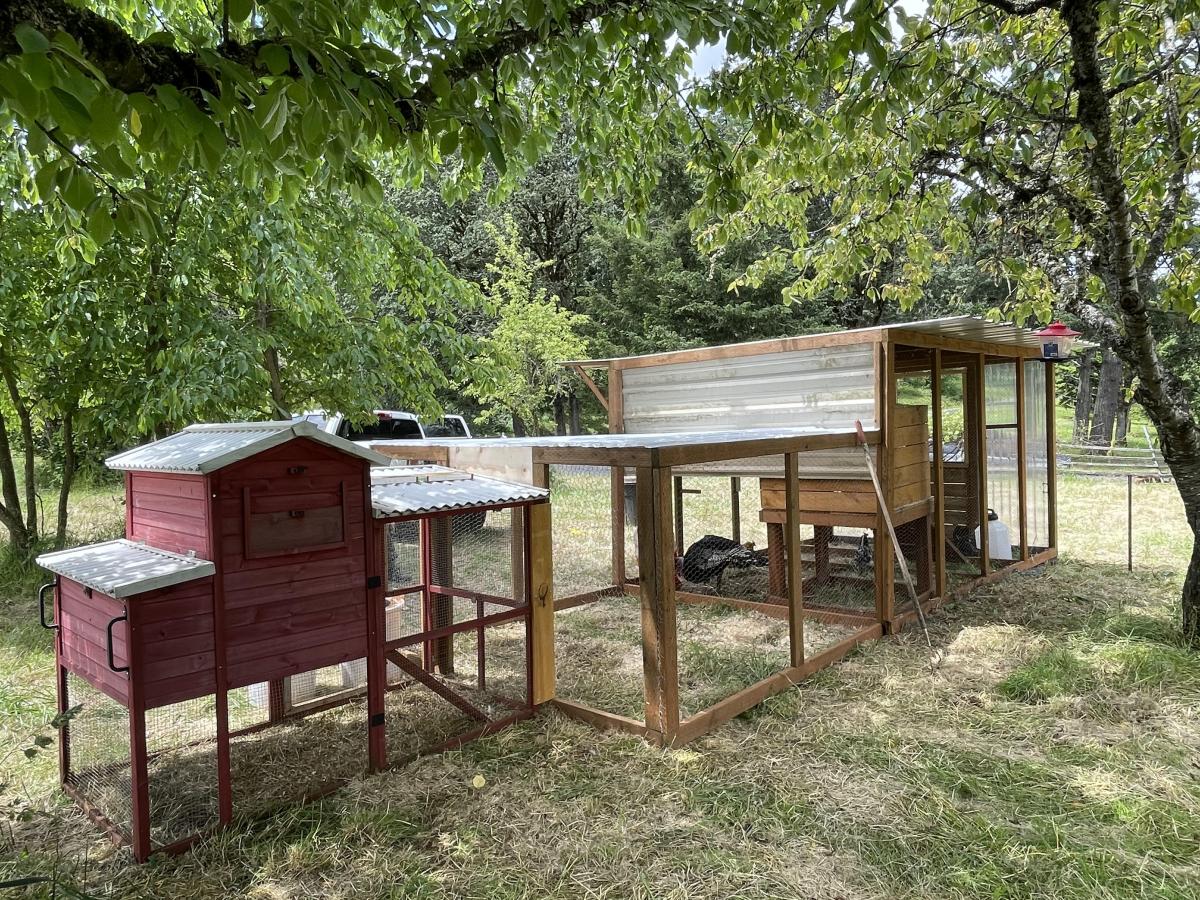
Built from Plan(s)
Whoop! I did it!!!!!!!
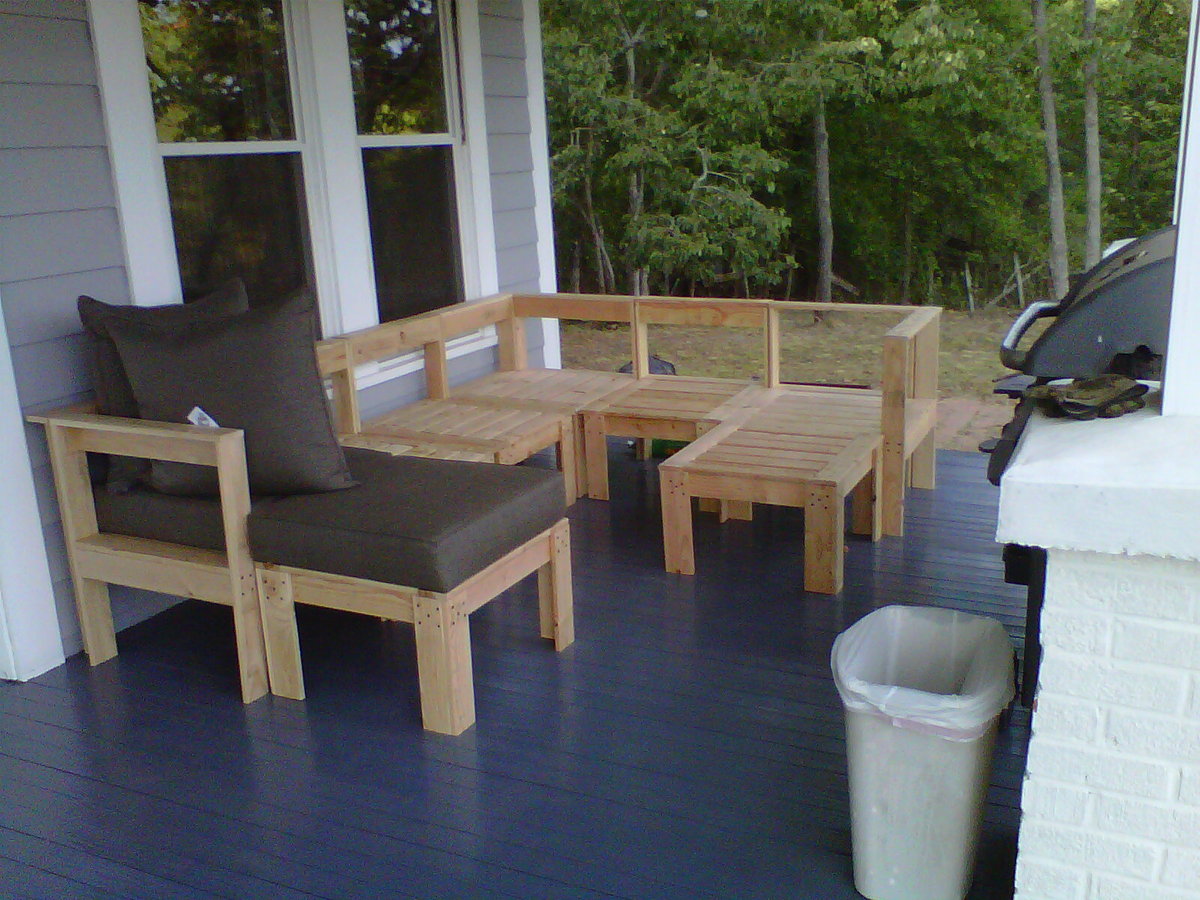
I am very suprised, but I made my very first ANYTHING with the help of this website and my very dear step-dad! We used two plans from this website and did some modifications by adding some back supports at the tops. We also made two foot stools to act as chaises on the two ends. I thought that I would go ahead and post the results now before I painted the sectional so more of the detail. What cost so much was the cushions. The cushions were from Target and they were $650.00. I was concerned that when people sat on the sectional they would be able to feel the wood underneath, so I purchased the 5" deep seat cushions and over sized pillows, which I am soooo glad that I did, it makes this sectional look so much more professional looking and gives it even more of a crisp look! I also didn't skimp on the paint which was $65.00 on the paint! The rest was wood, materials and tools that were needed. But if you priced purchasing something like this from PB or WestElm, it would easily be 3-4K at the least! Unto the next project!!!
Built from Plan(s)
Estimated Cost
$1000.00
Estimated Time Investment
Week Long Project (20 Hours or More)
Finish Used
My plan is to use wood filler where needed, sand 120 grit, prime and apply an outdoor black satin finish.
Recommended Skill Level
Beginner
Library Coffee Table with Reclaimed Barn Wood Top
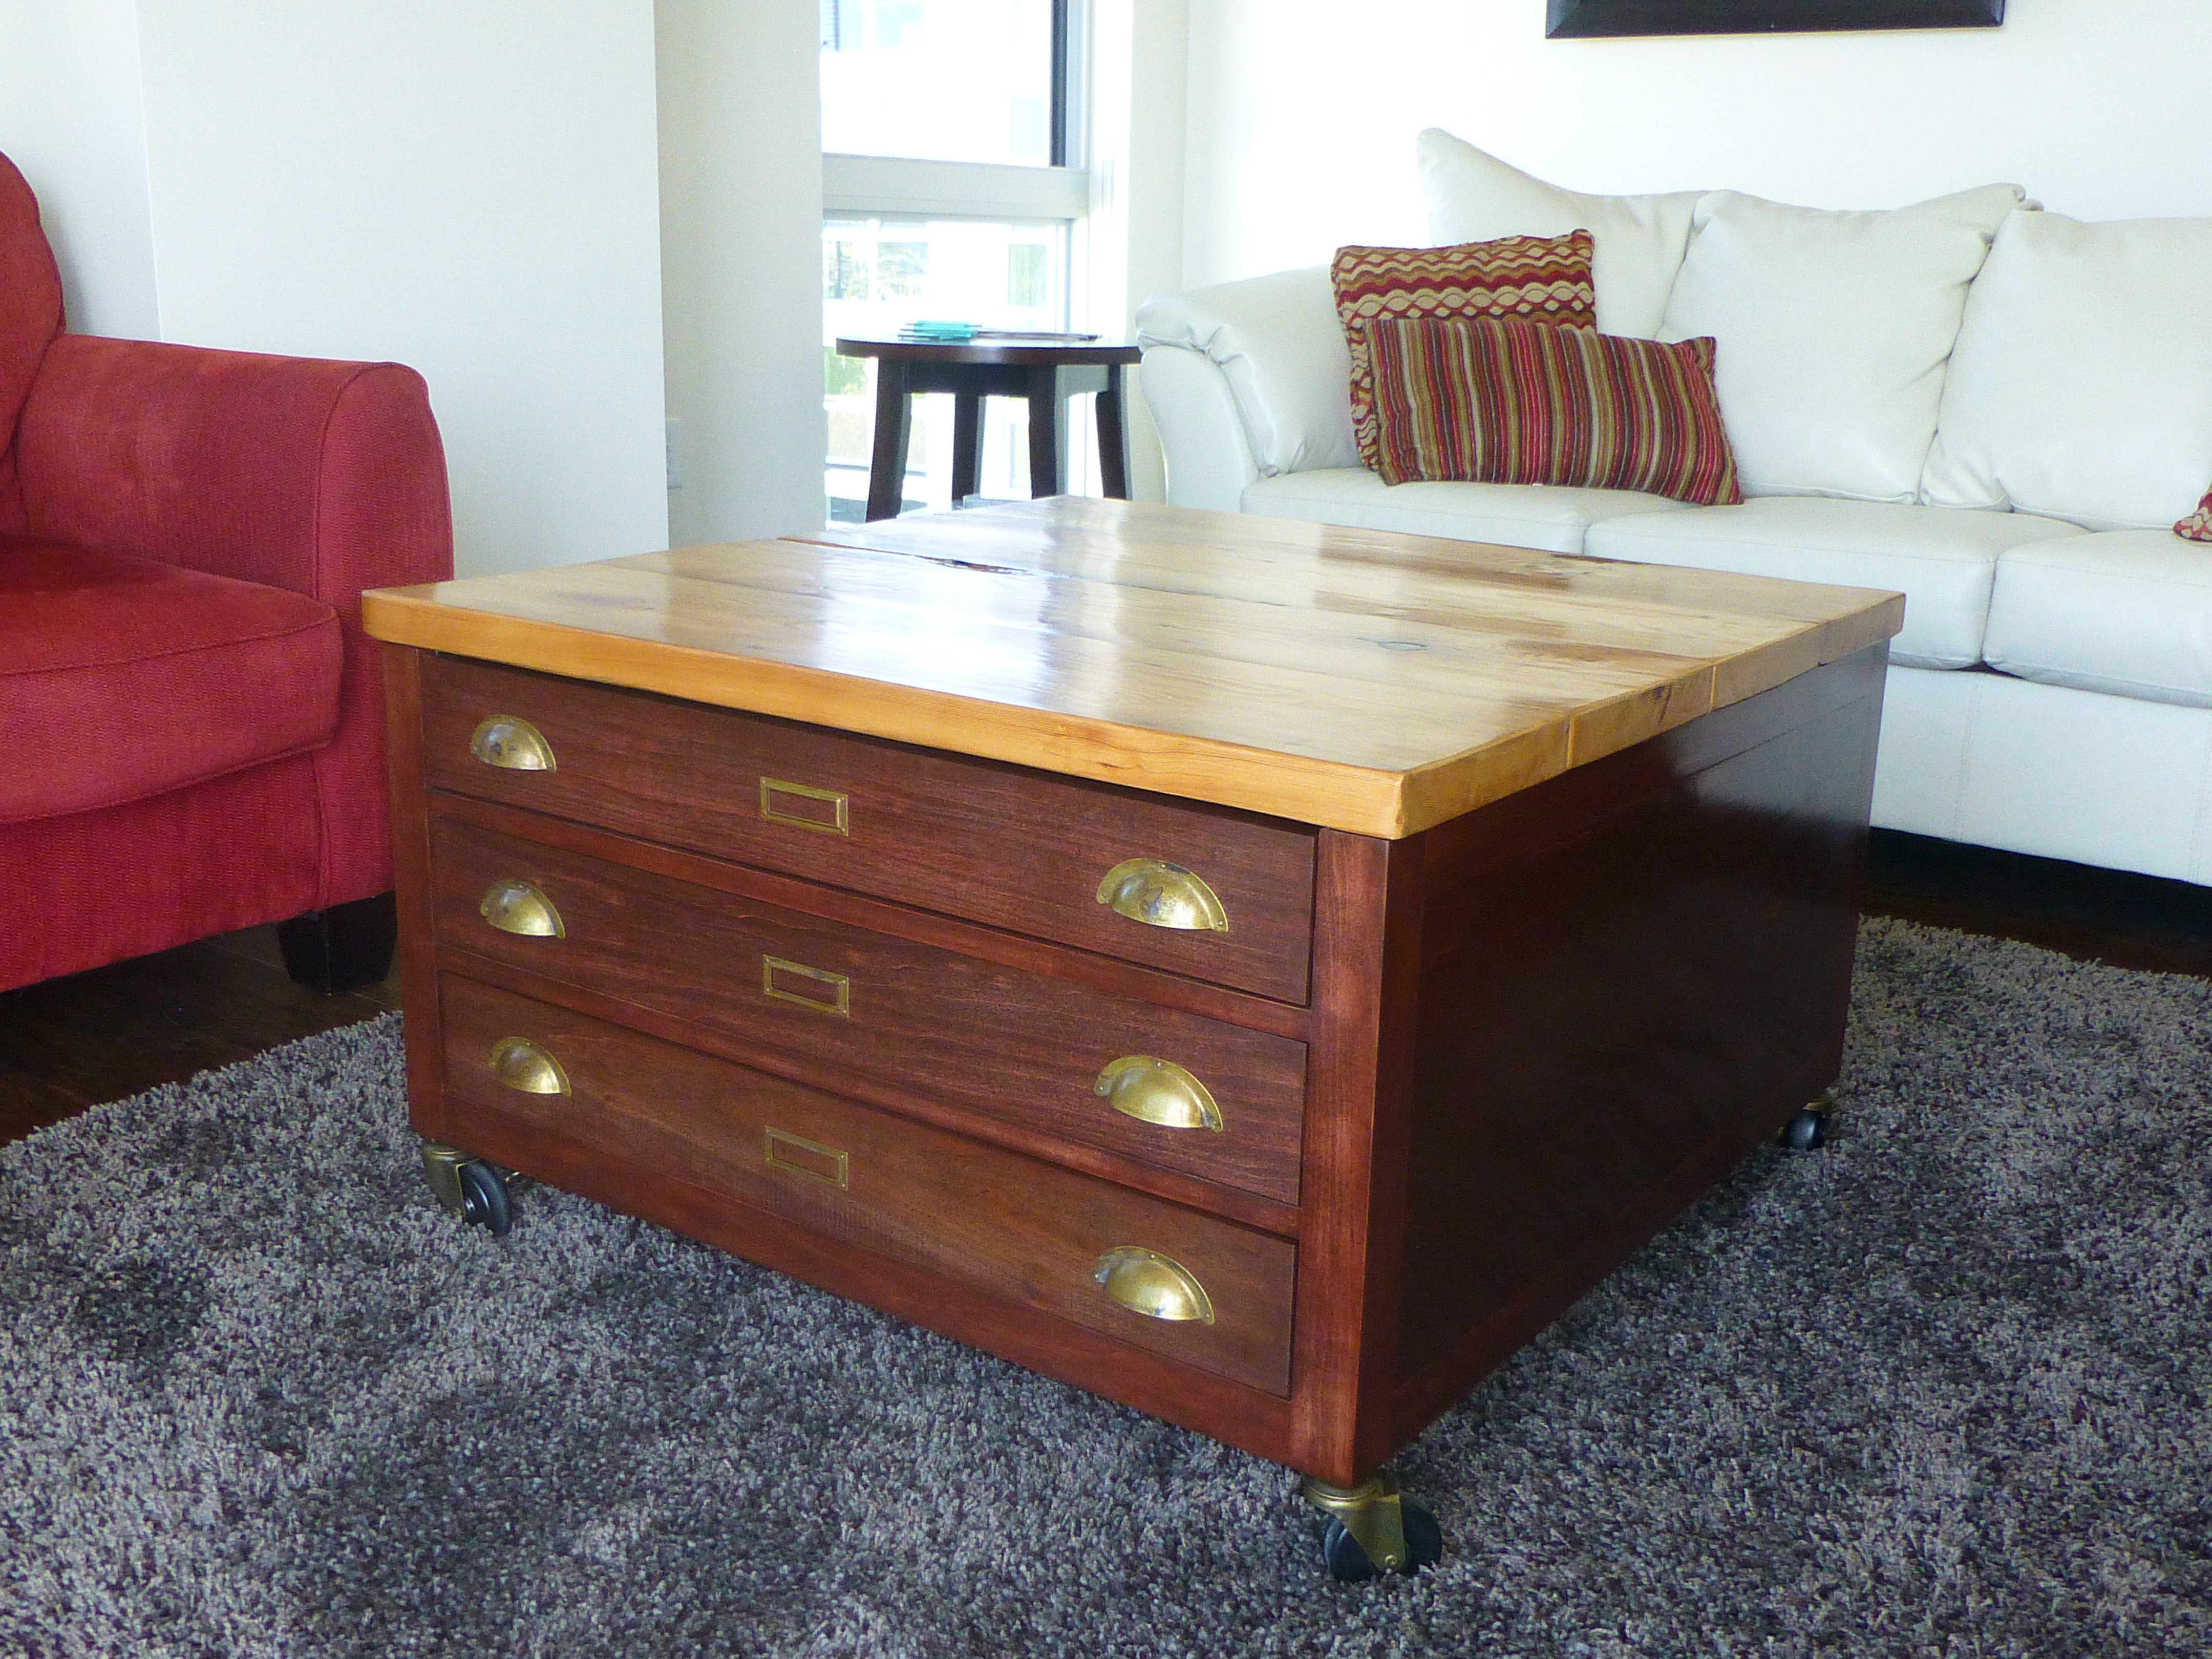
Modified the plans to be only 3 drawers which saved on weight and hardware. Used reclaimed 100+ year old barn wood for the top, adding lots of character.
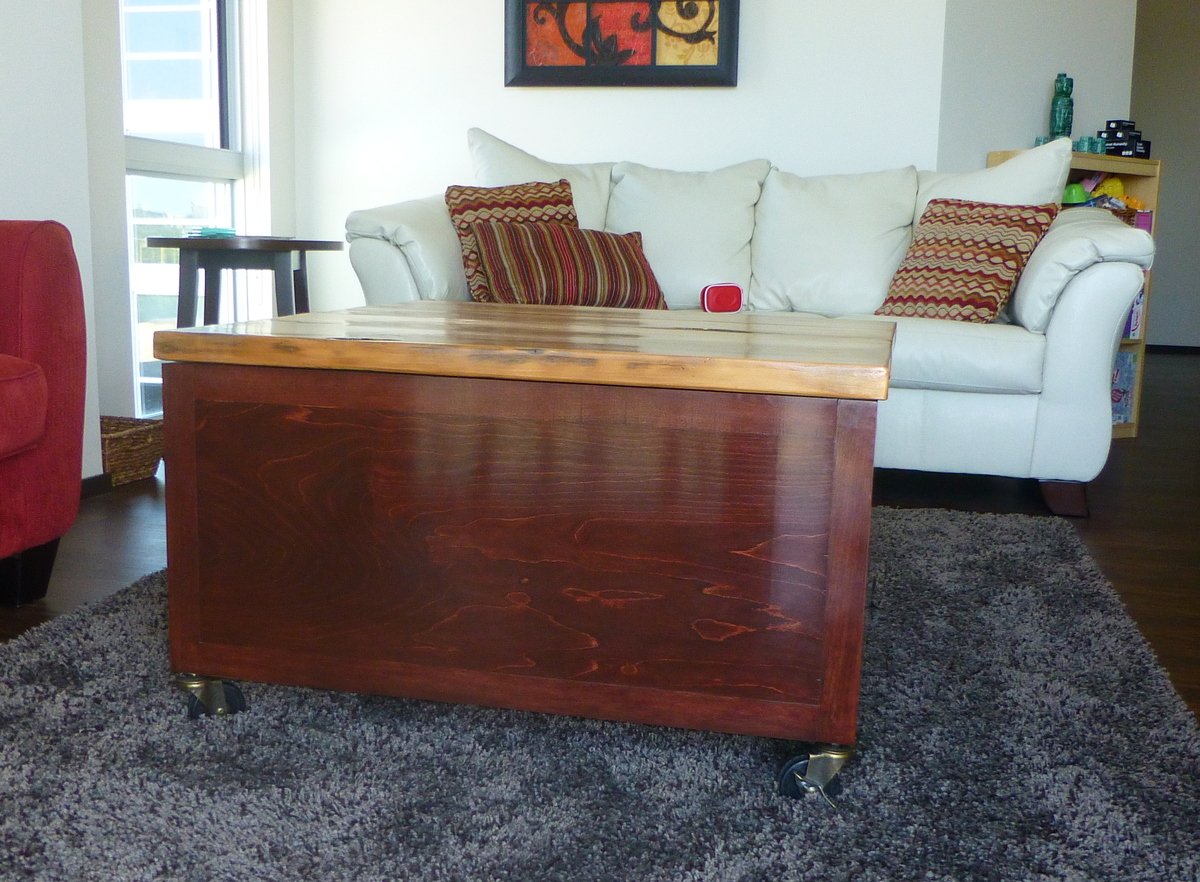

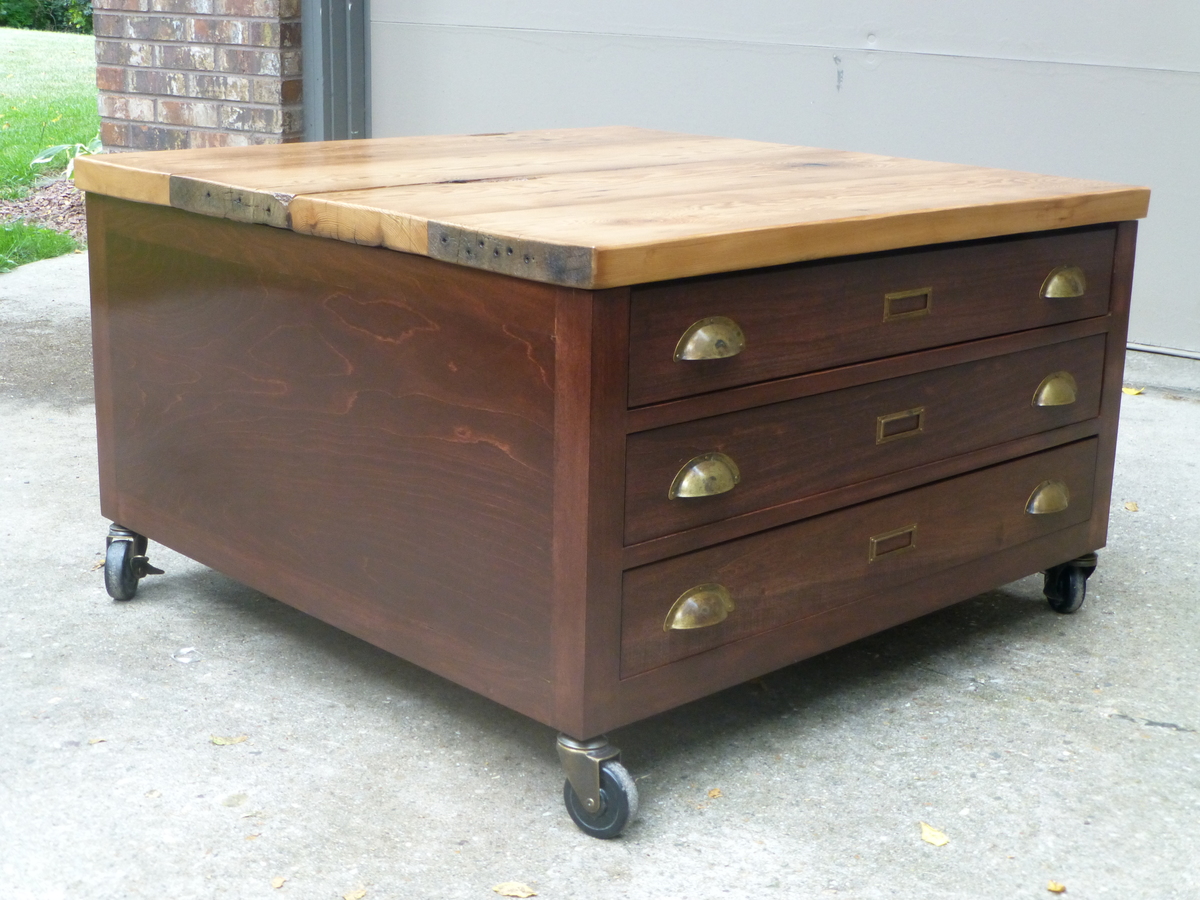
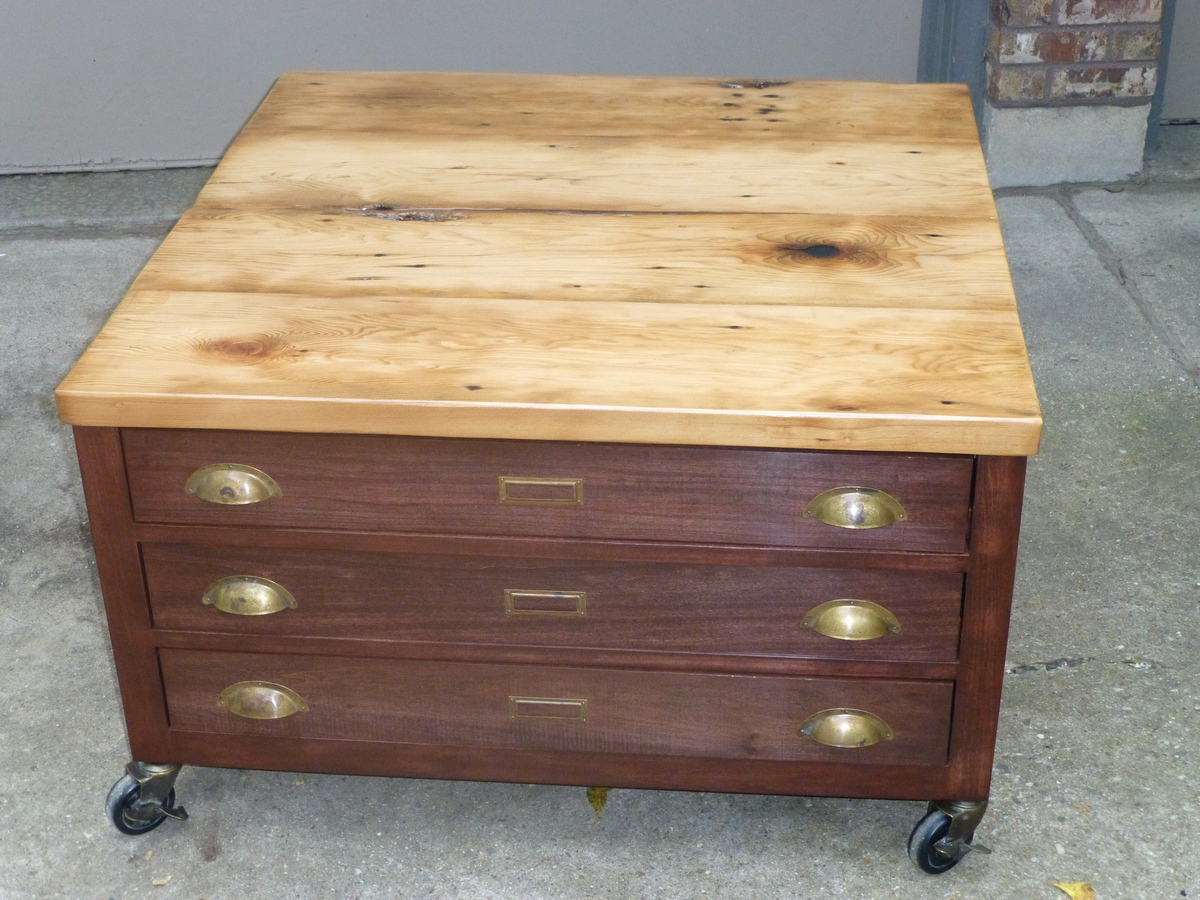
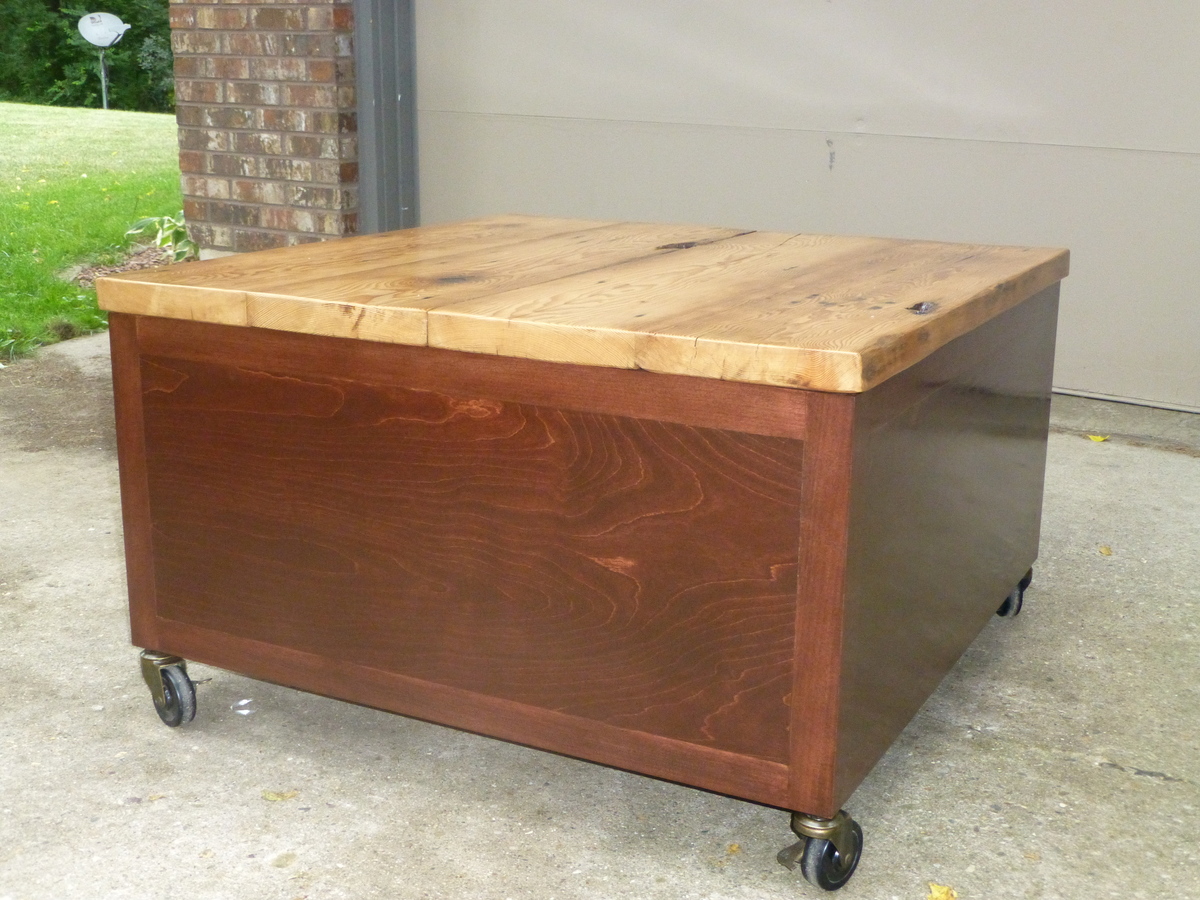
Built from Plan(s)
Estimated Time Investment
Week Long Project (20 Hours or More)
Finish Used
Cabinet: Minwax gel stain in Red Elm, and Winwax wipe-on satin poly. Top: West System epoxy to stabilize and fill 'defects', sanding sealer and wipe-on satin poly.
Recommended Skill Level
Intermediate
Comments
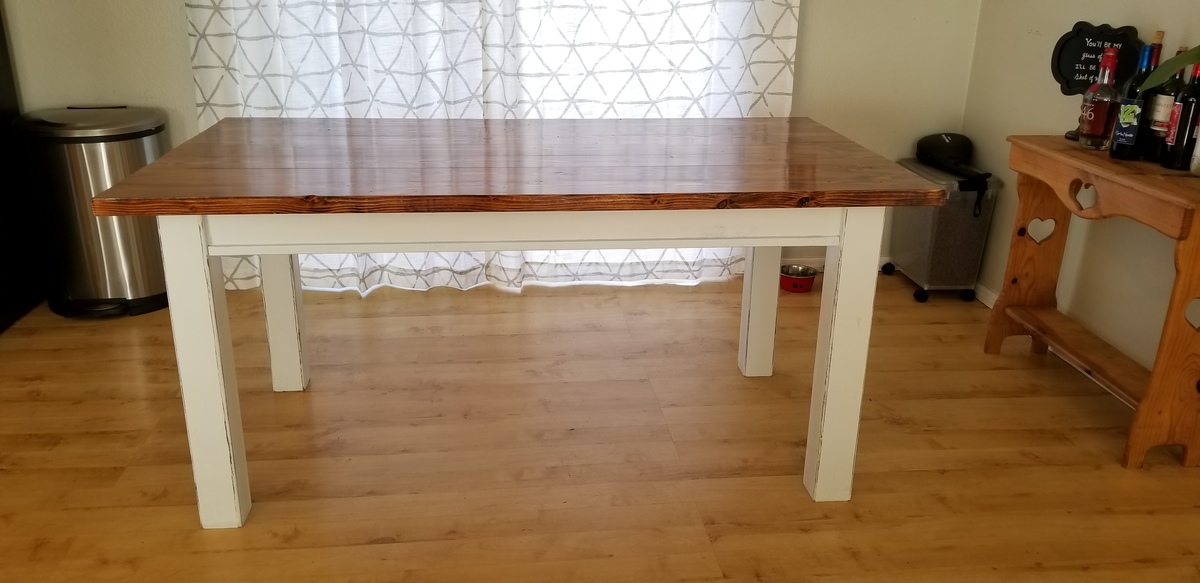
Modified Beginner Farm Table and Bench
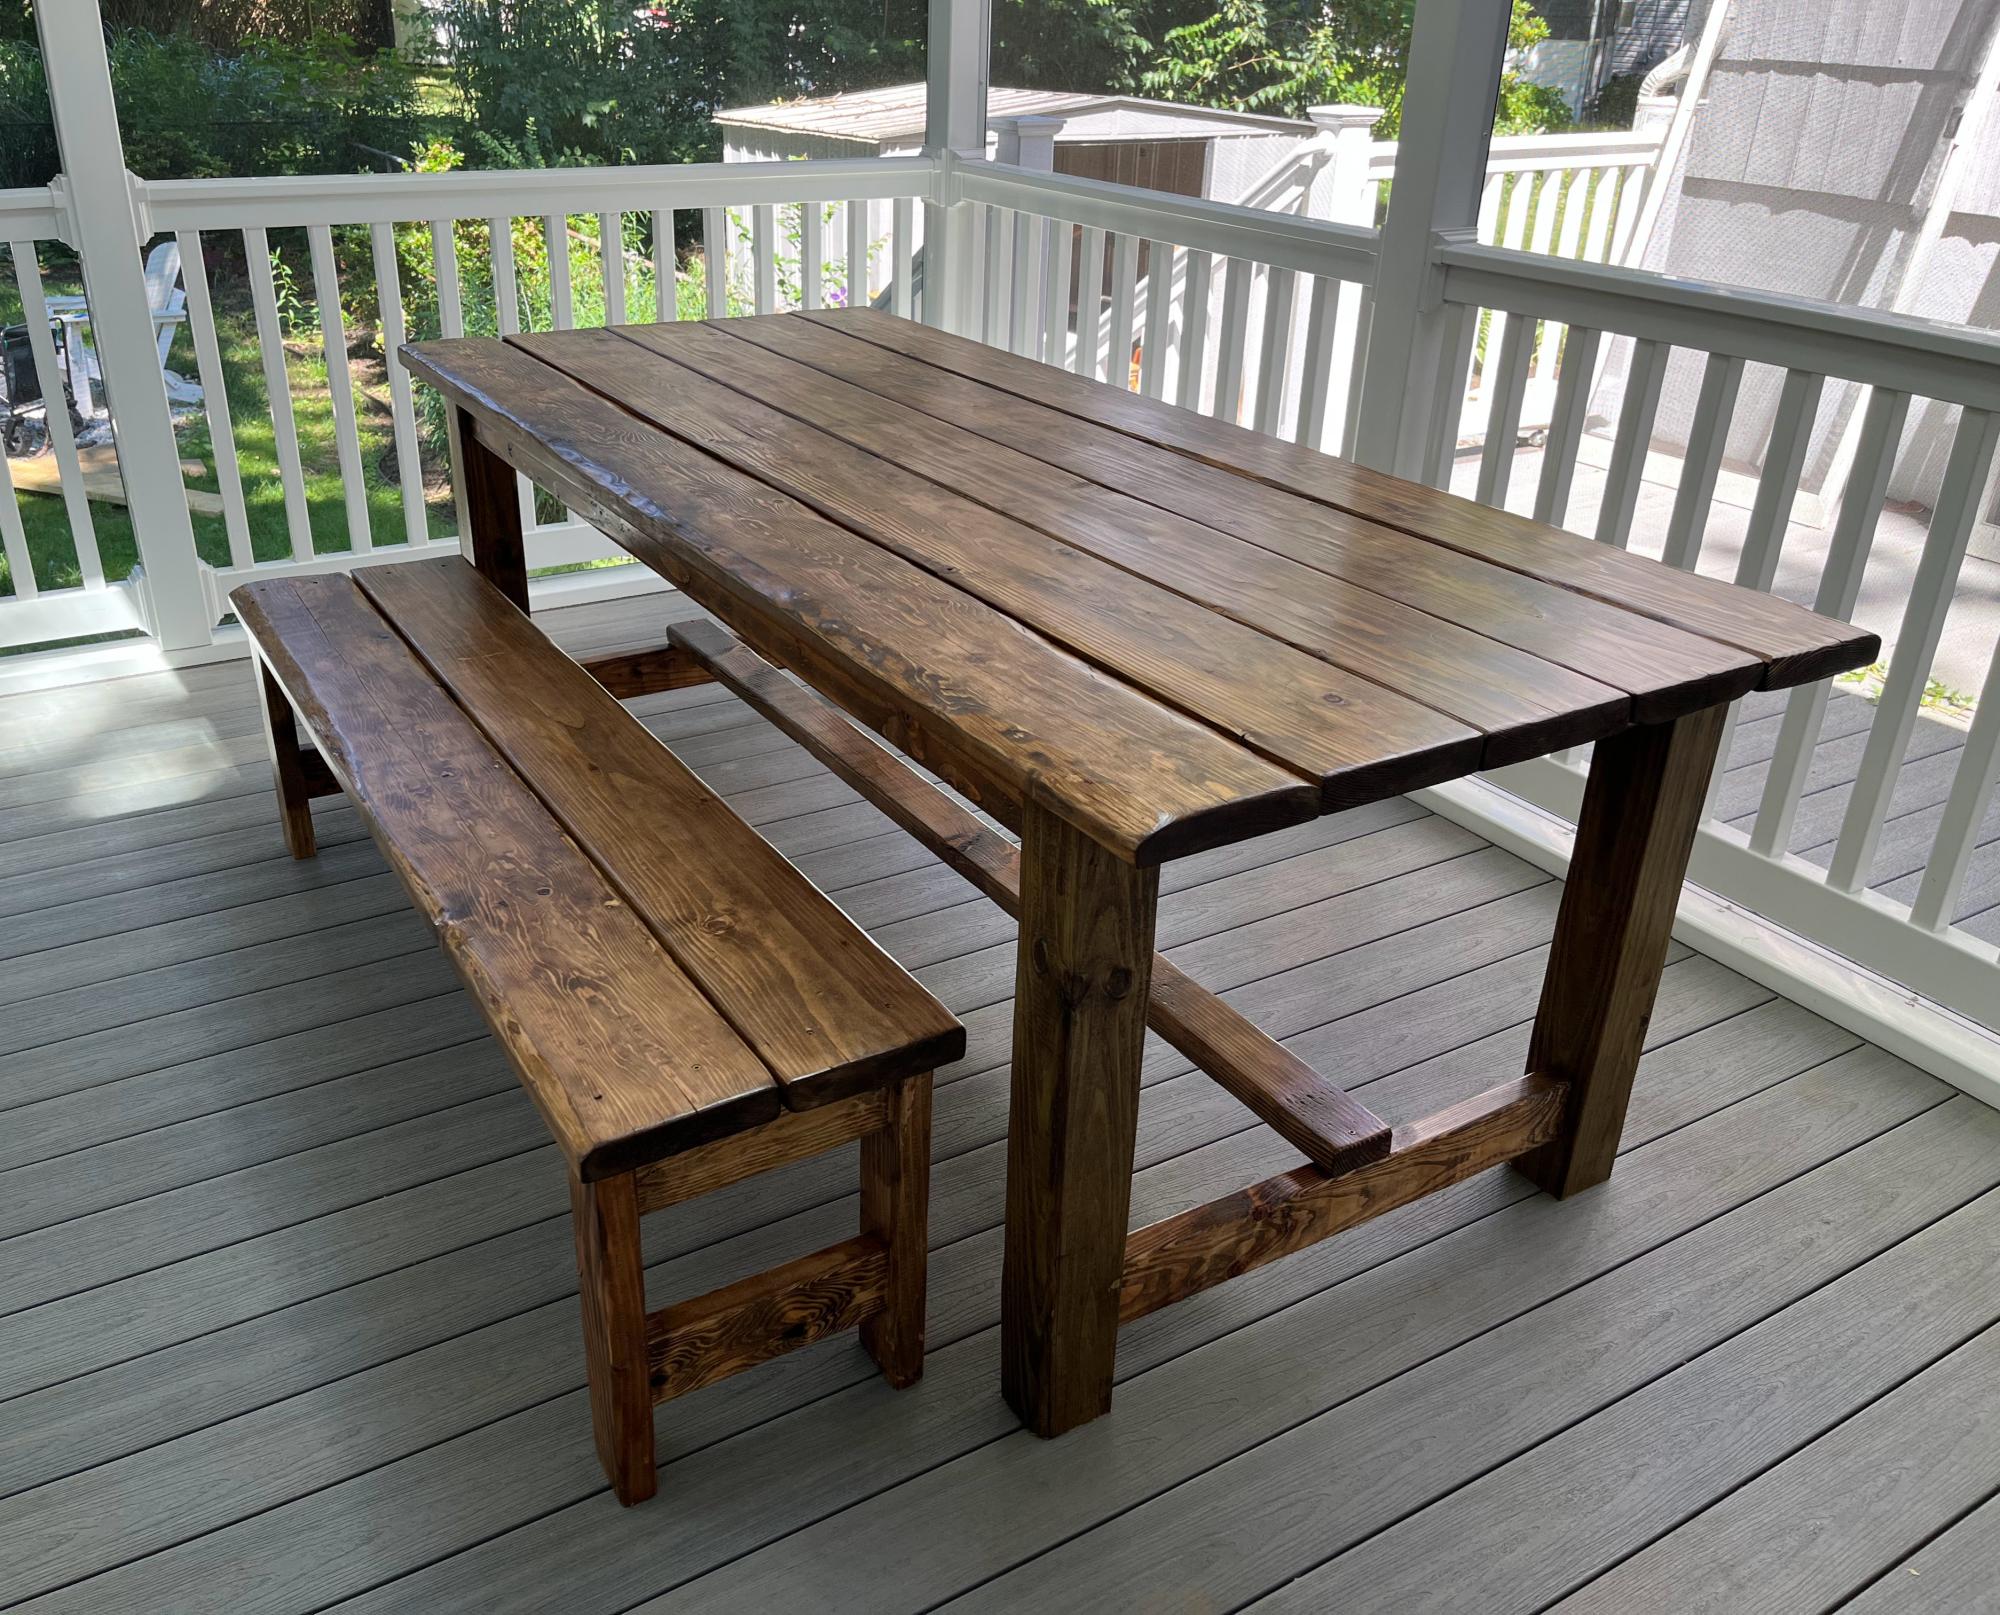
Altered the Beginner Farm Table plans to use 2x8s for the top and 4x4s for the legs. I used pocket holes for the table. I followed the bench plans almost exactly, adjusting slightly for the 2x8 tops. I am a beginner and I did it myself! The table and bench are beautiful and sturdy! Thanks Ana!
Comments
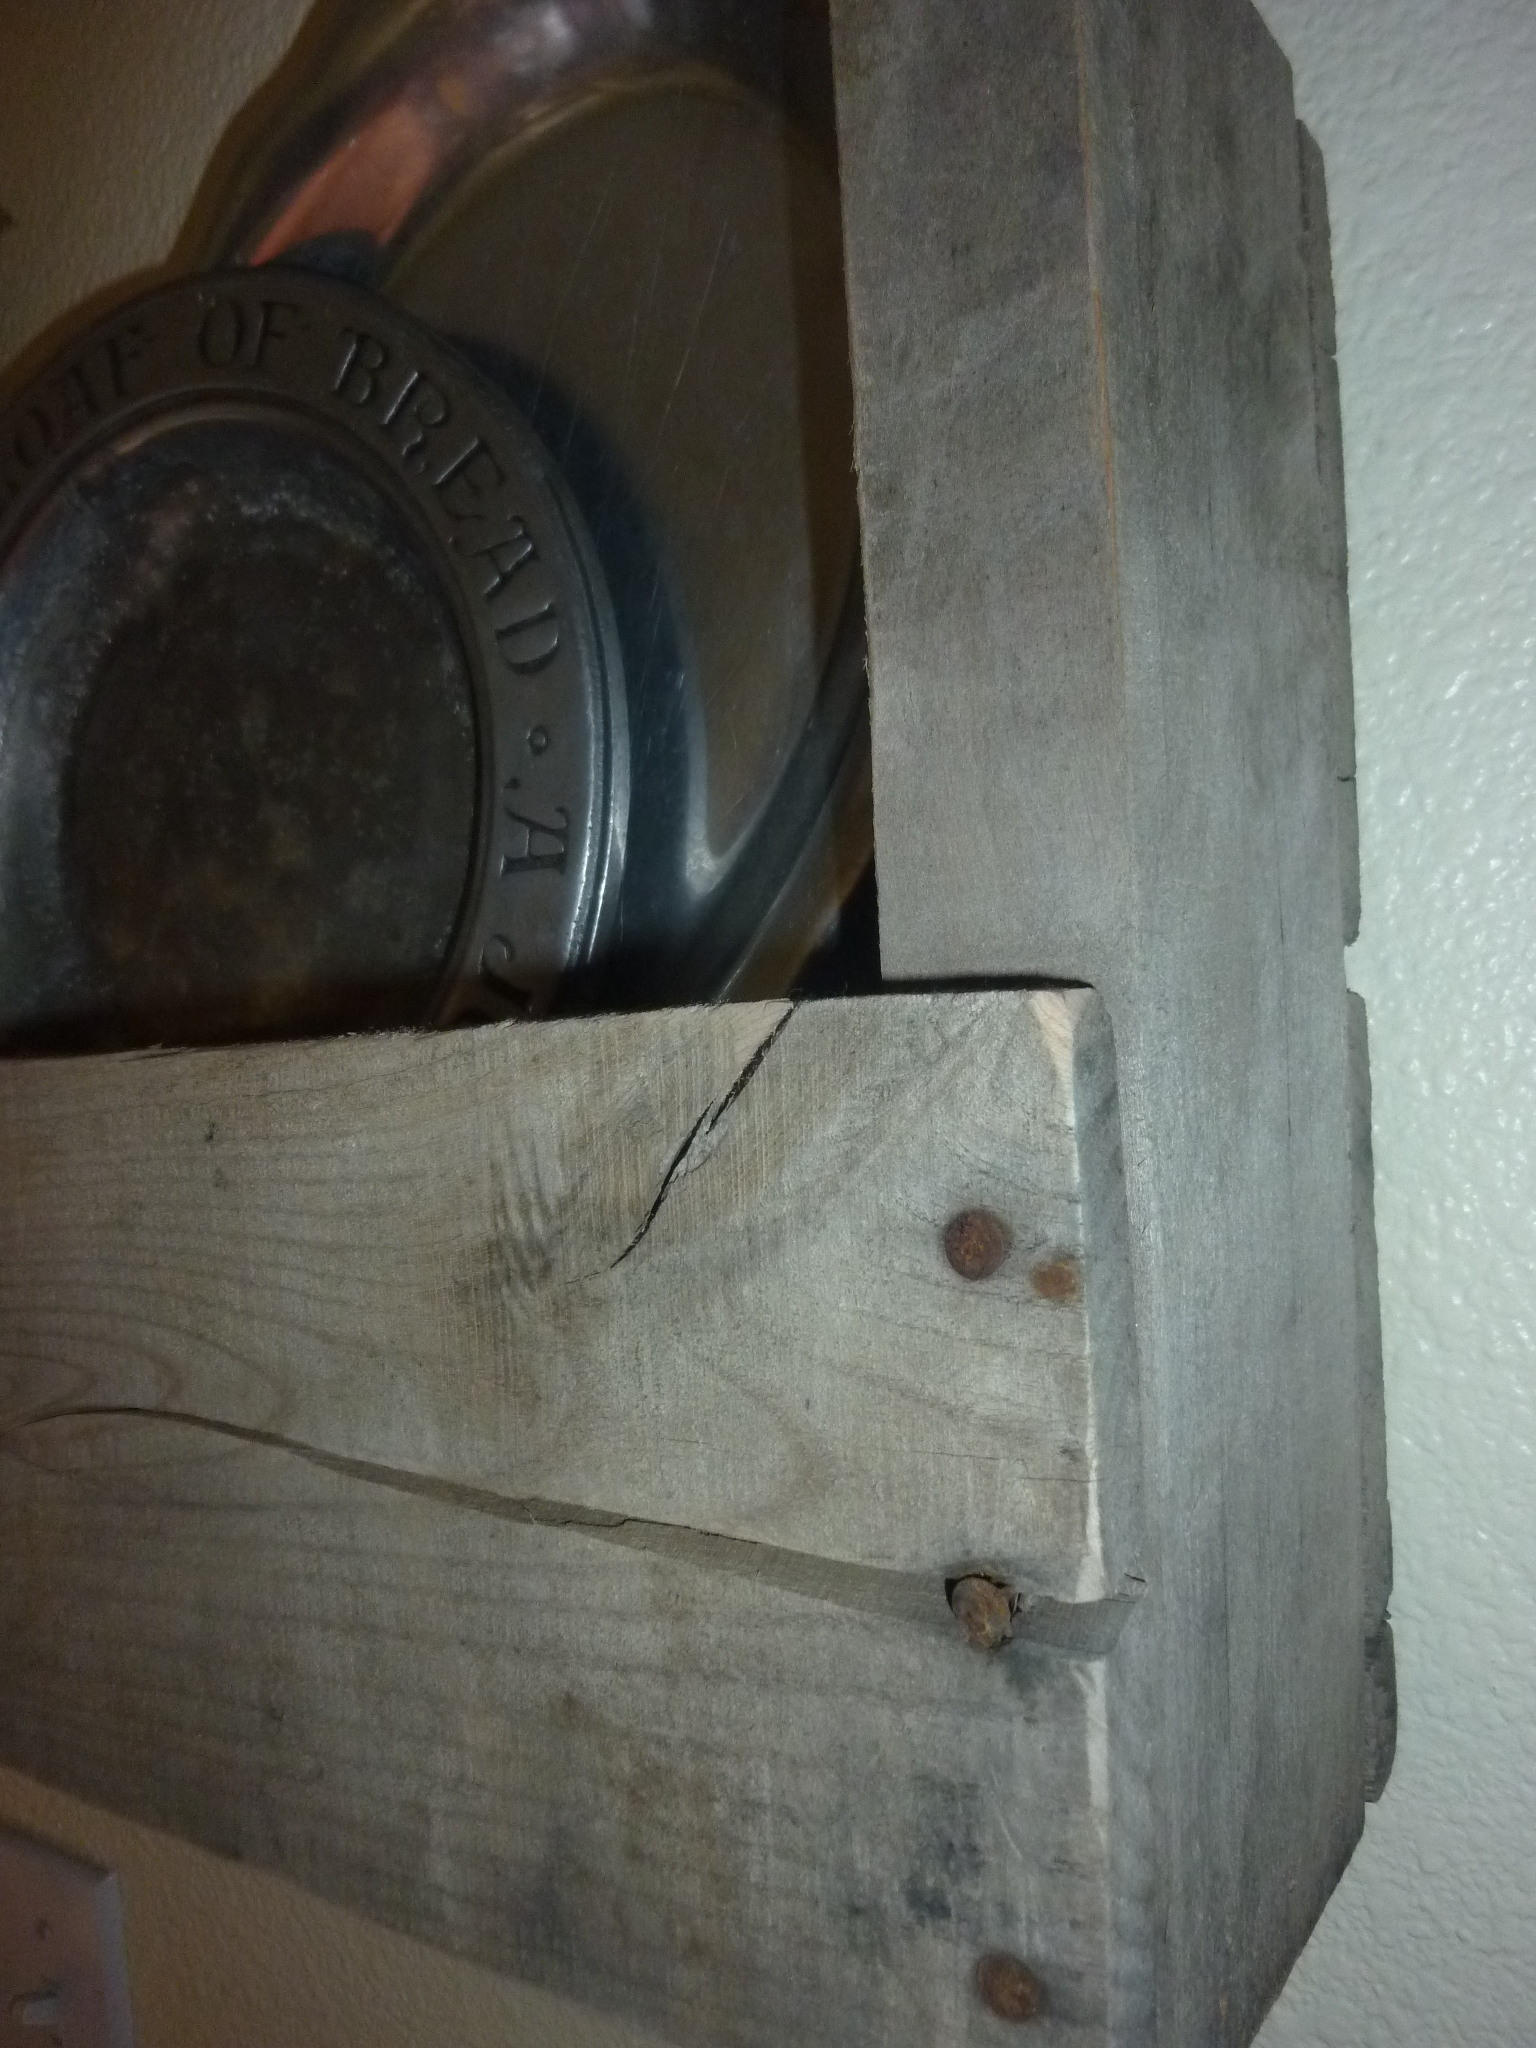
The Easiest Shelf!
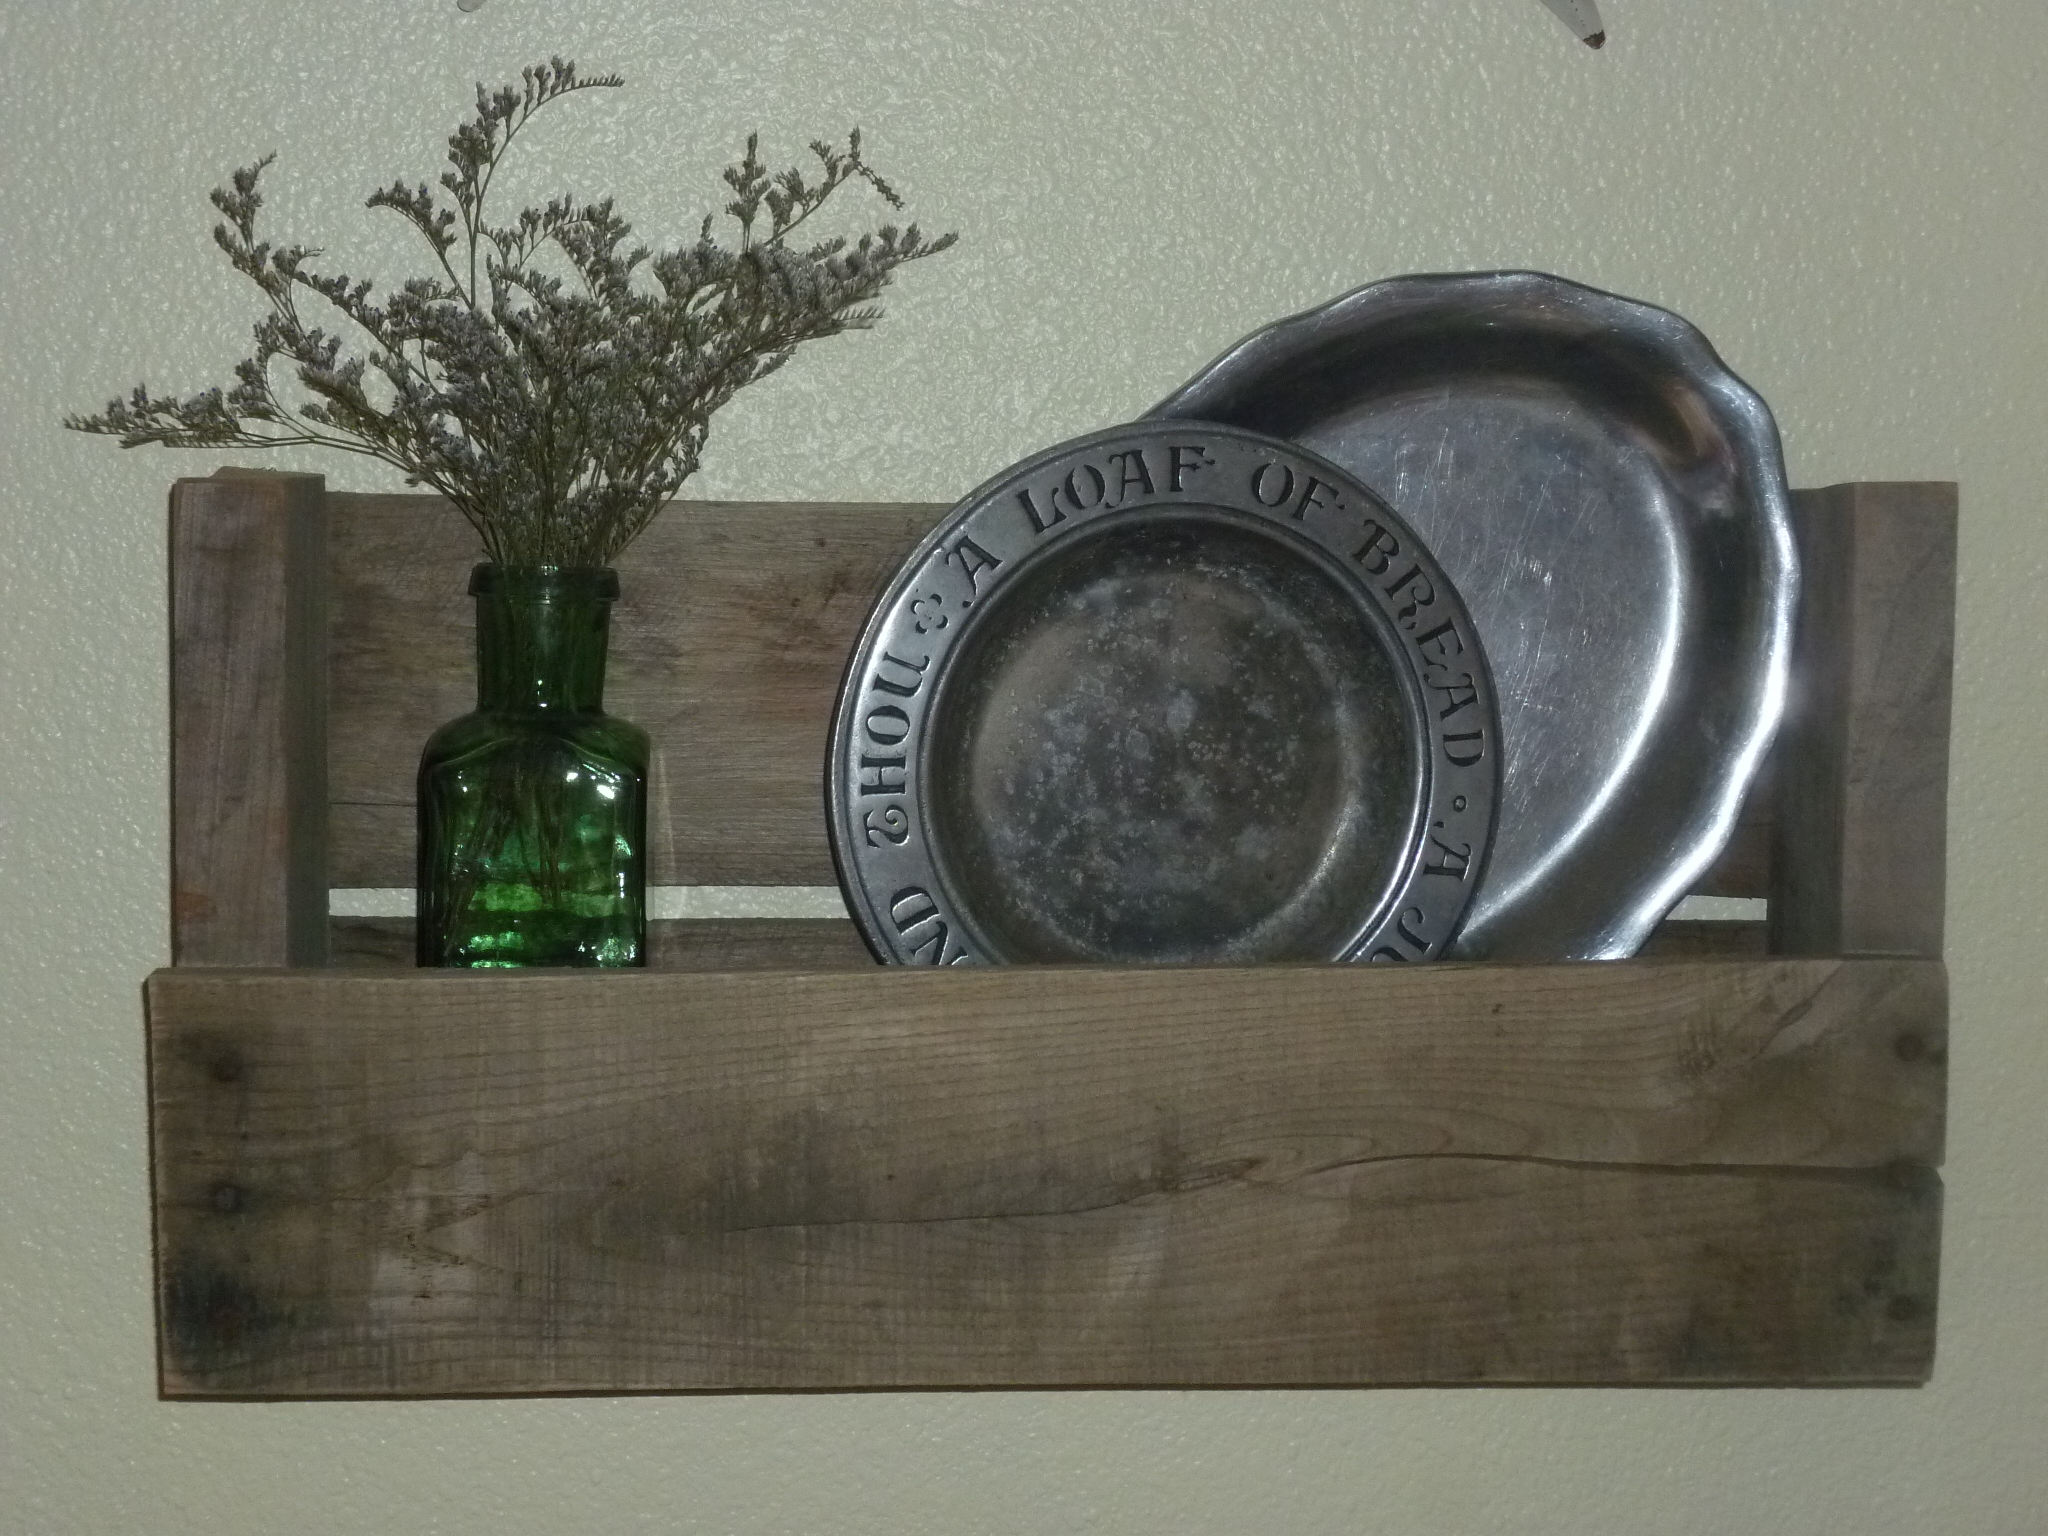
This really is a easy beginner project and adds instant decor for your wall.
This project is also pretty versatile because it lends itself to ANY decor. You could go totally country like I did or pick a nicer, newer pallet and paint or stain it for a more modern or traditional take. Whatever you choose, it's something you can do in no time at all!
Another great thing about this is you don't need any fancy tools, although it does make it easier! You can choose from a circular saw, a sawsall, a jig saw or even a hand saw to cut your section out.
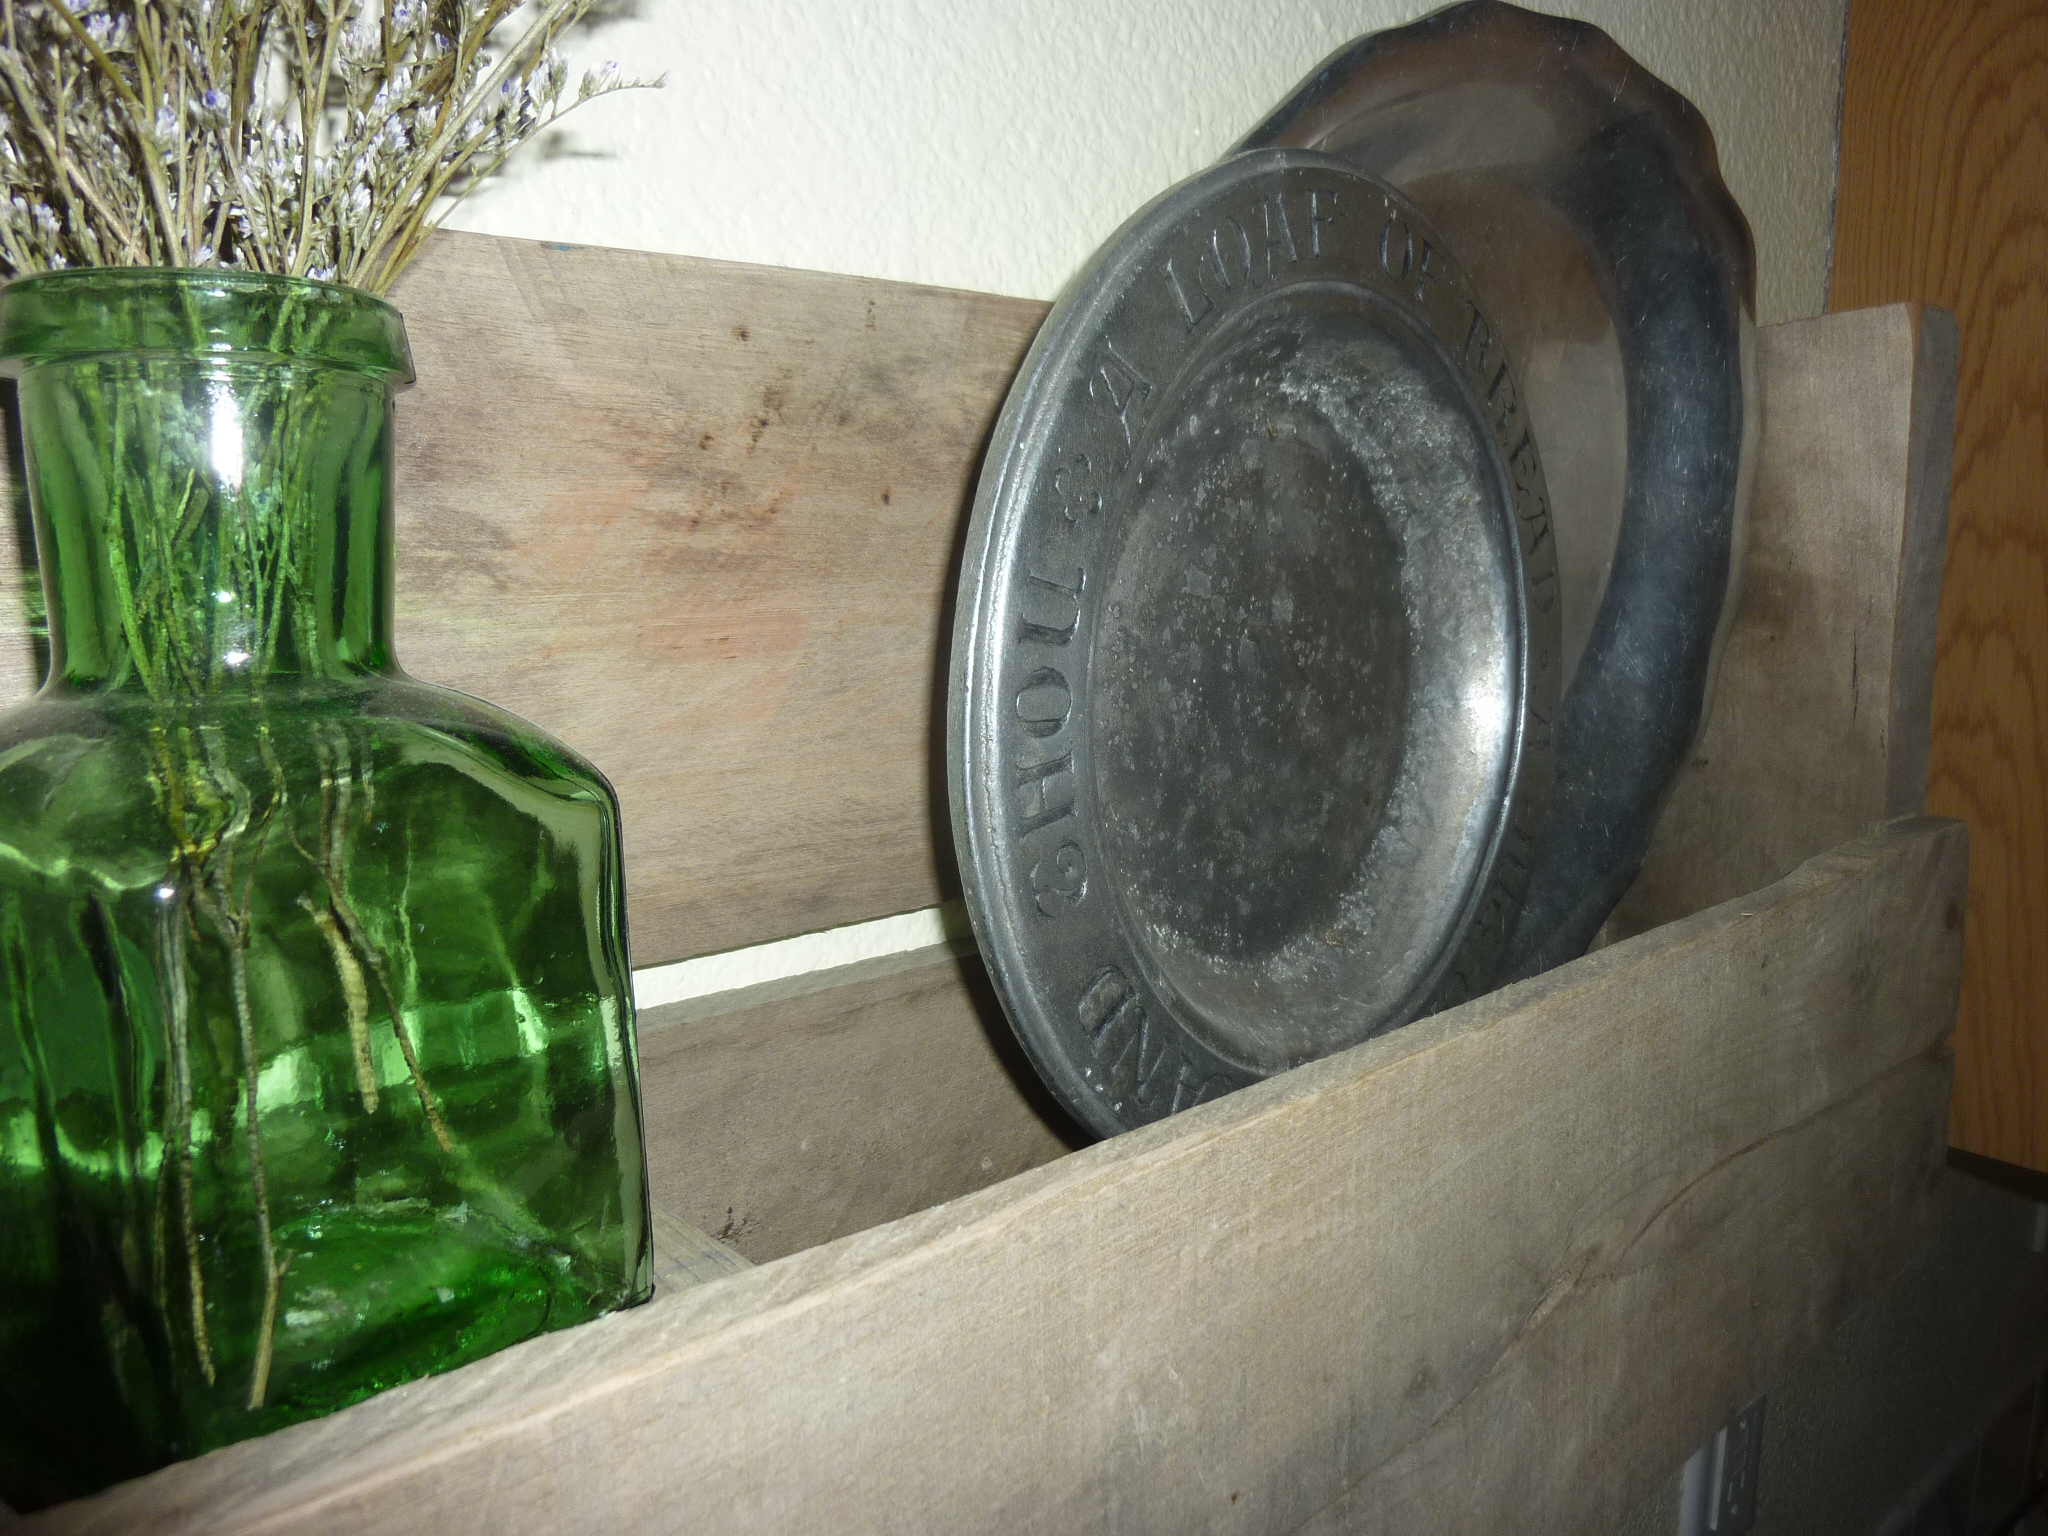
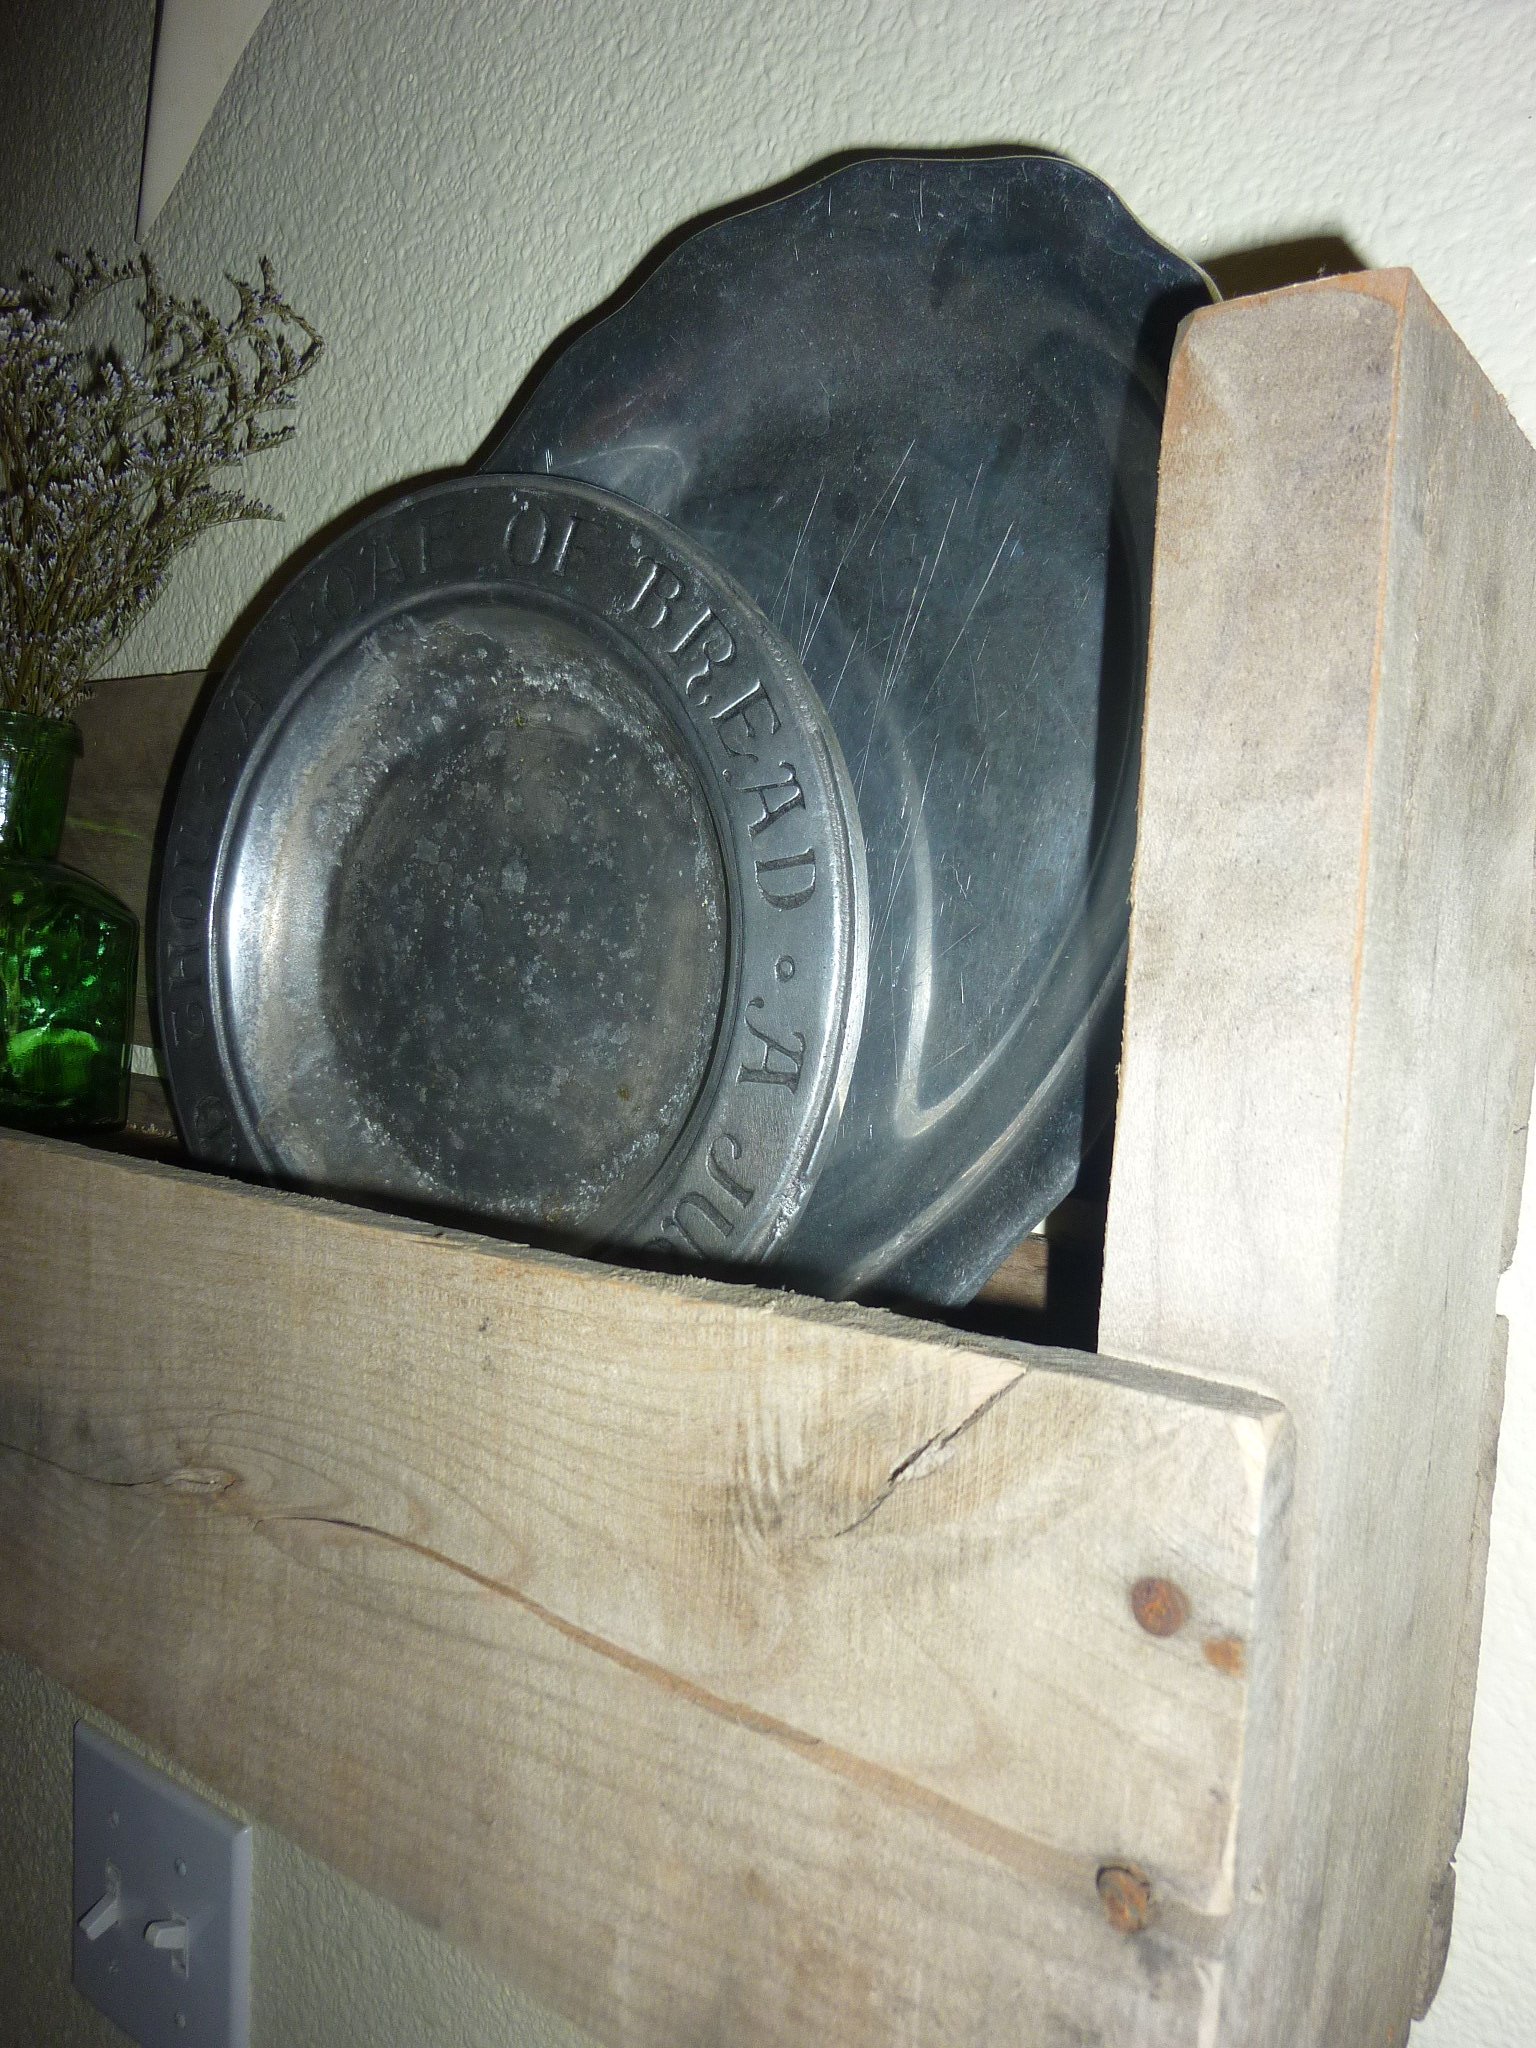
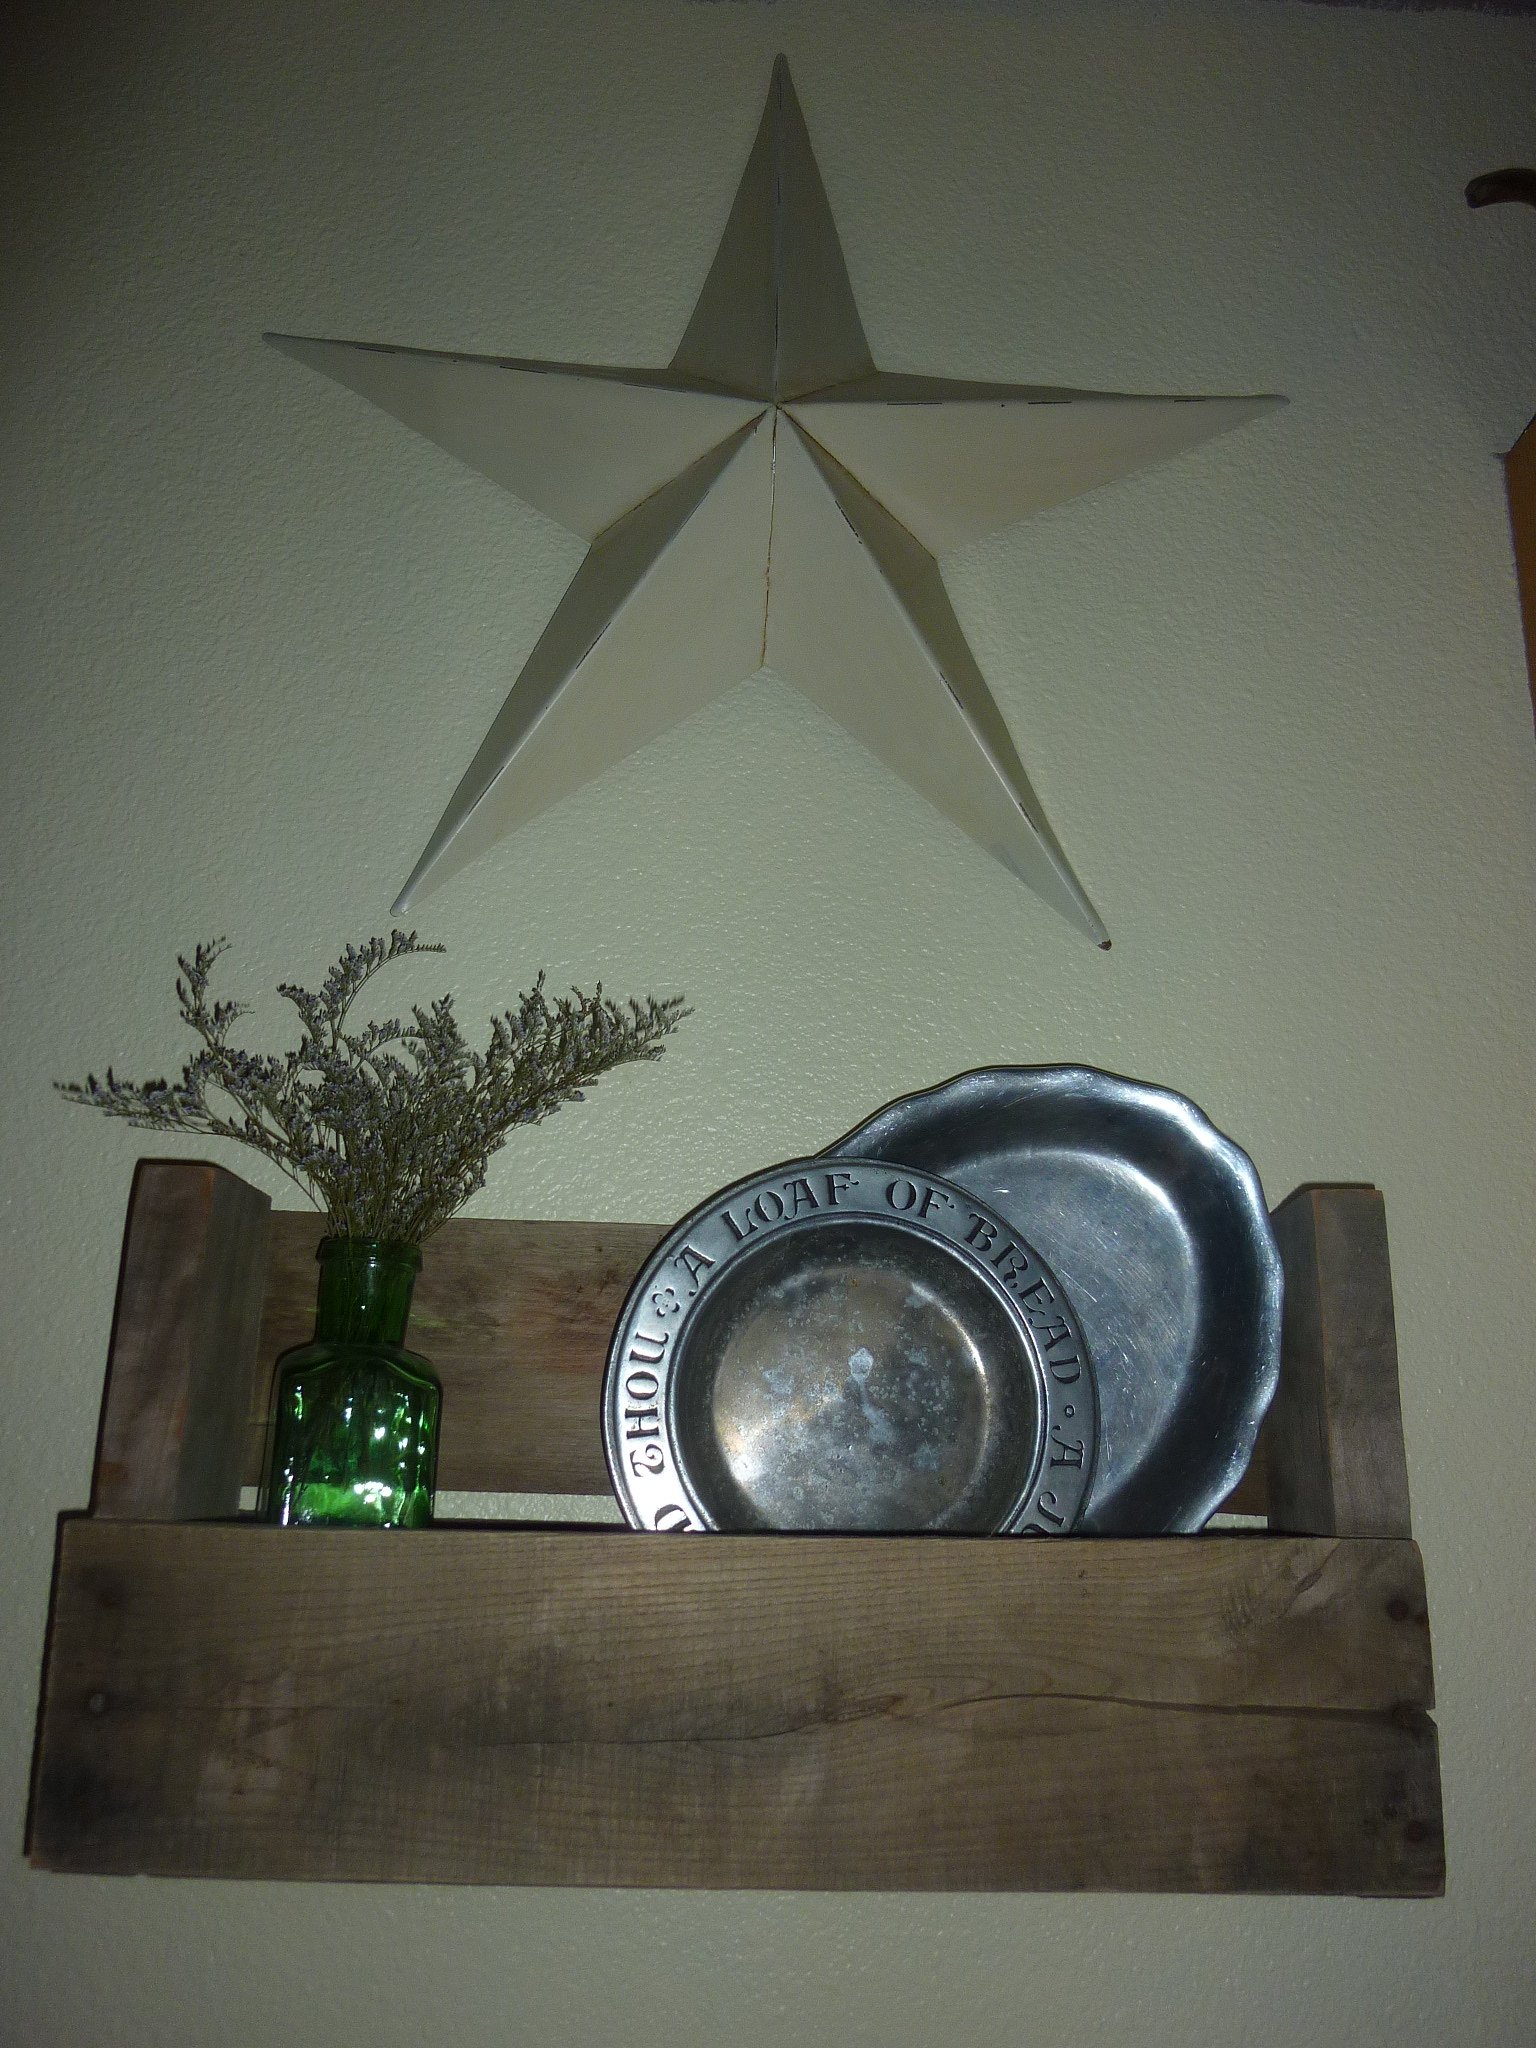
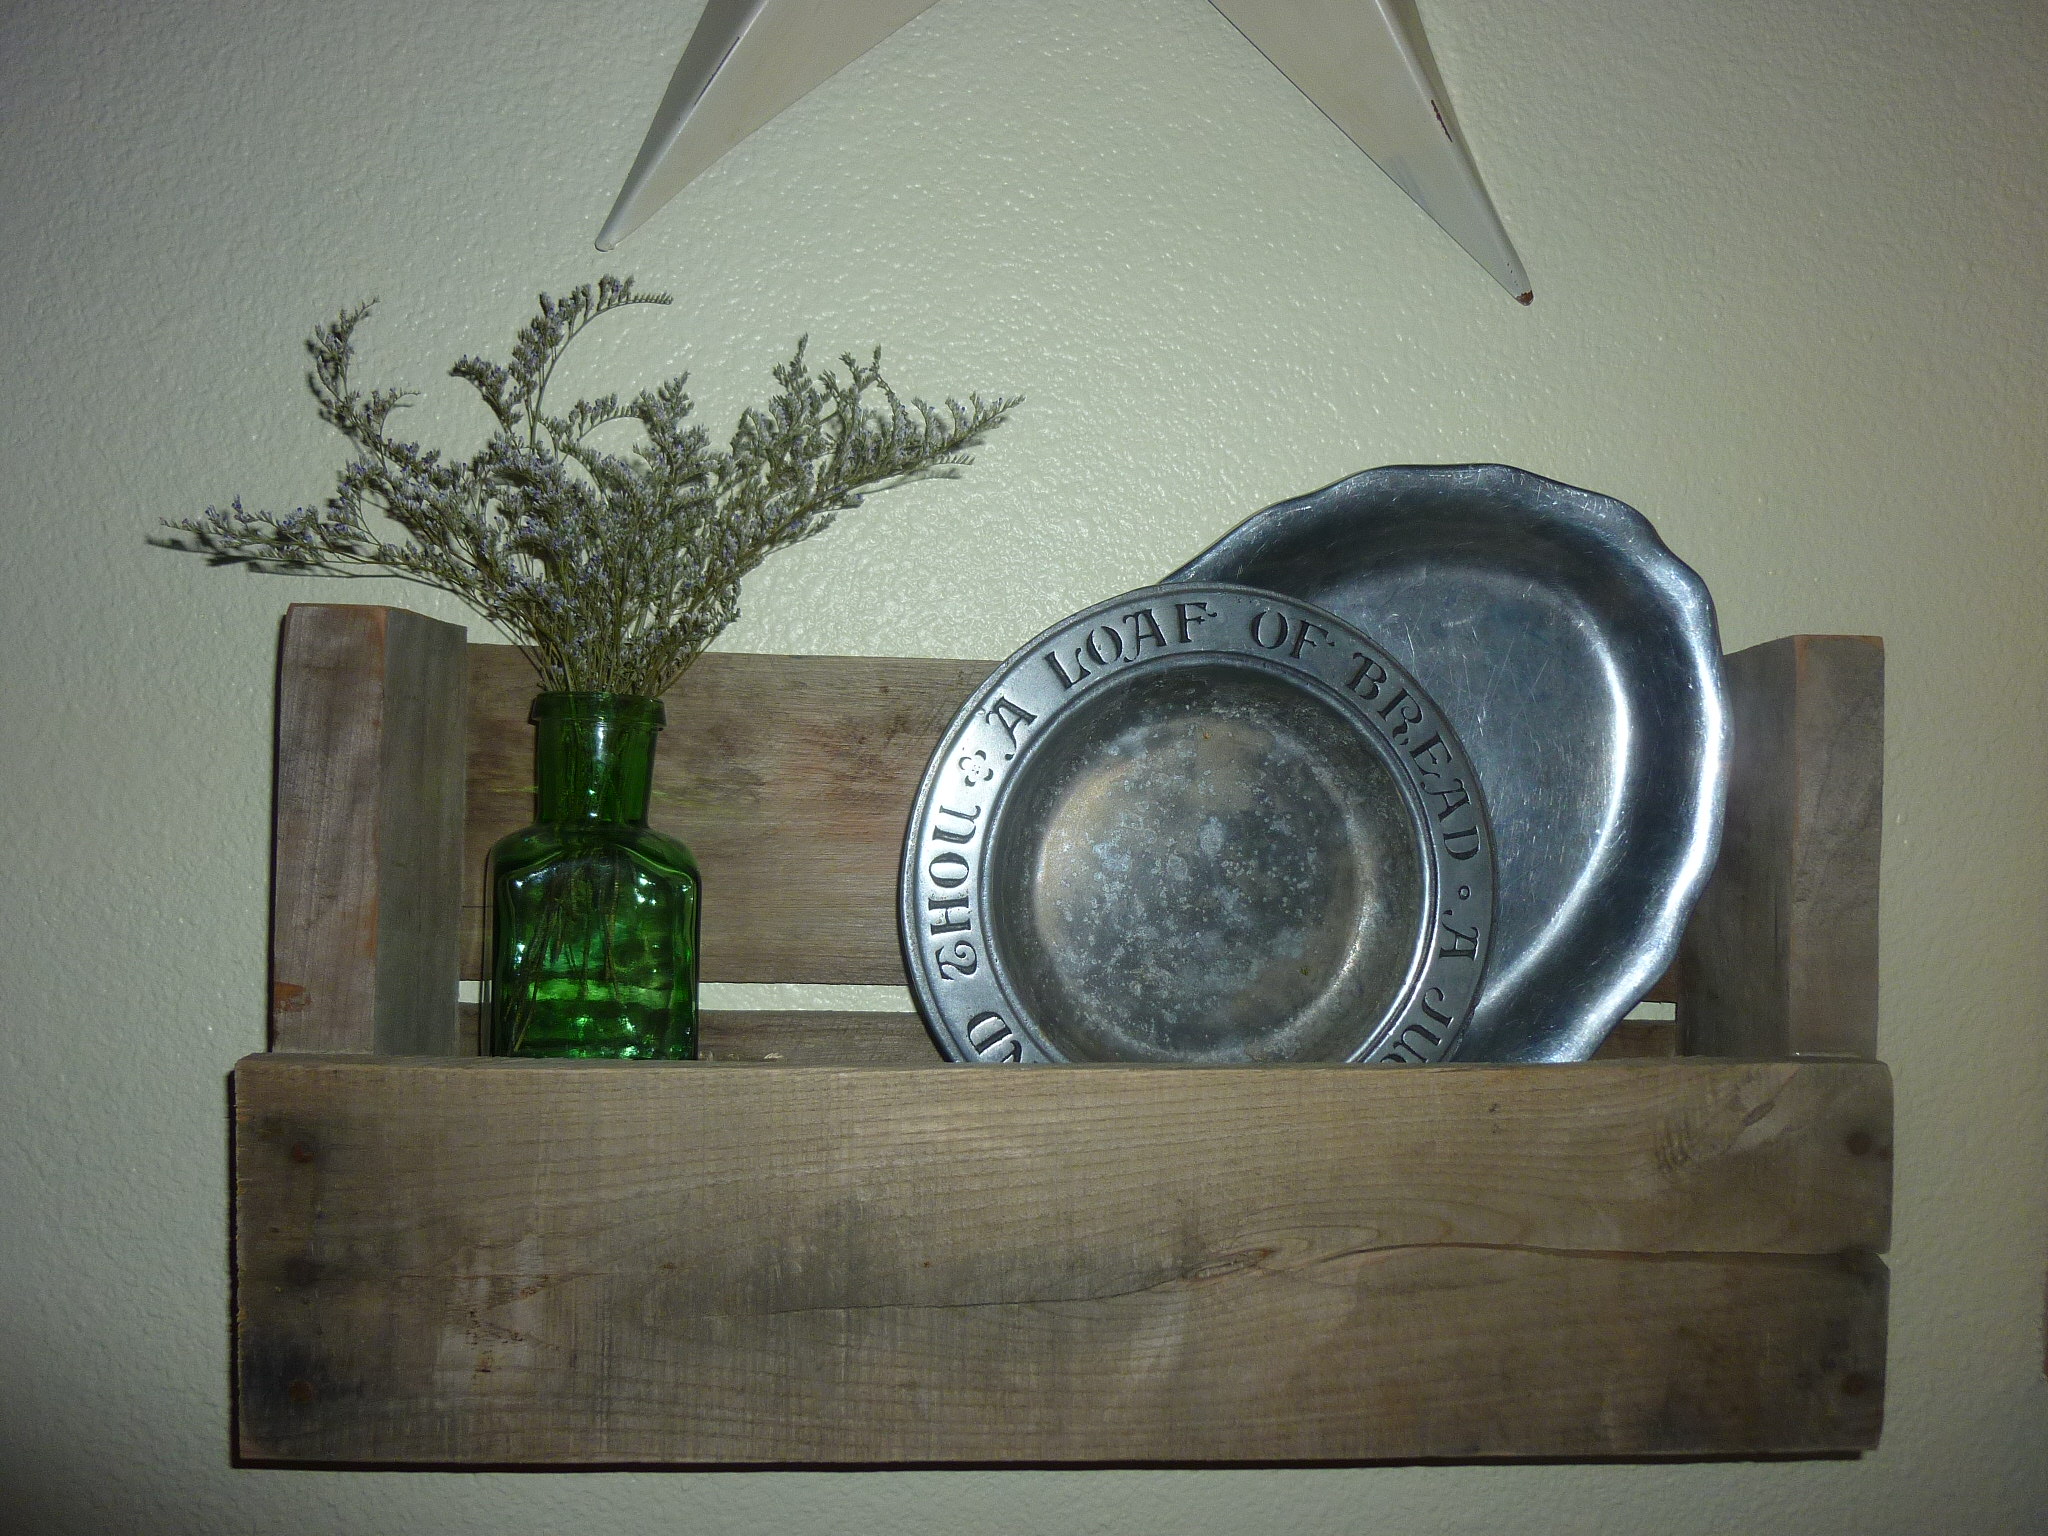
Built from Plan(s)
Estimated Cost
Free
Estimated Time Investment
An Hour or Two (0-2 Hours)
Finish Used
Lightly sanded then sprayed with a light coat of polyurethane.
Recommended Skill Level
Starter Project
Comments

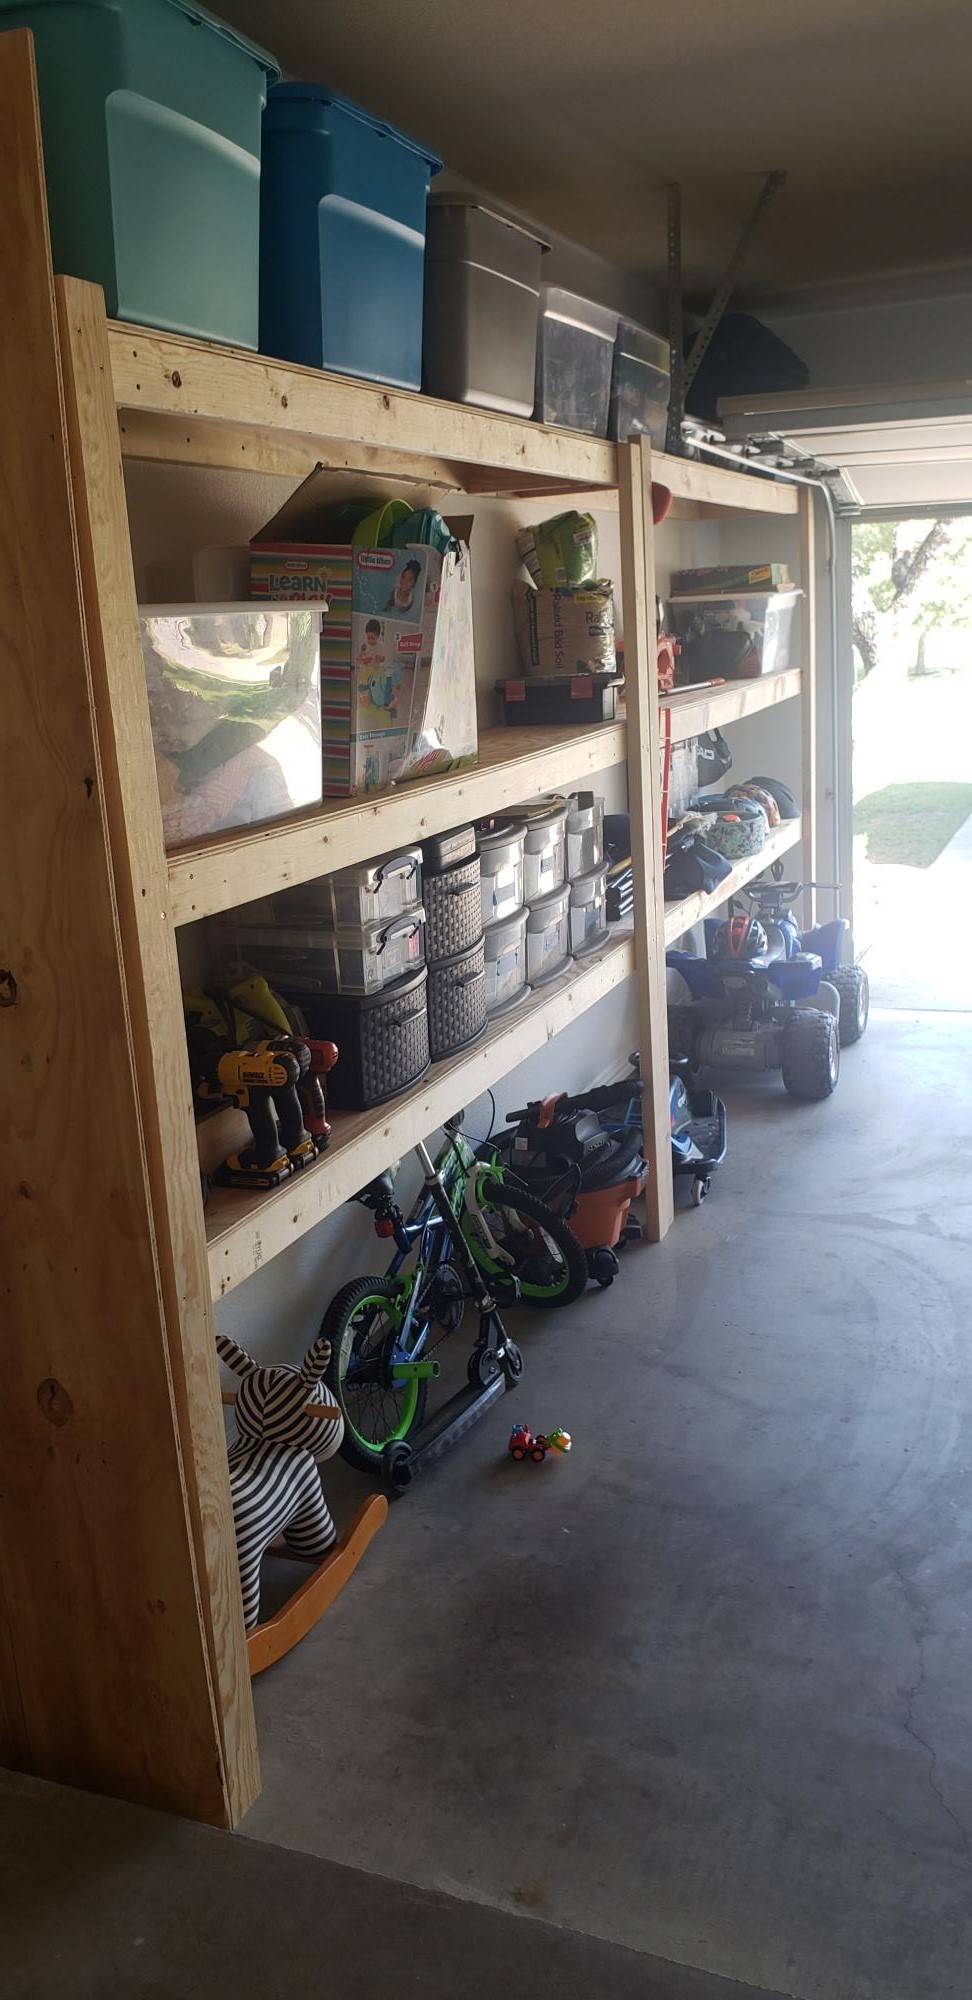
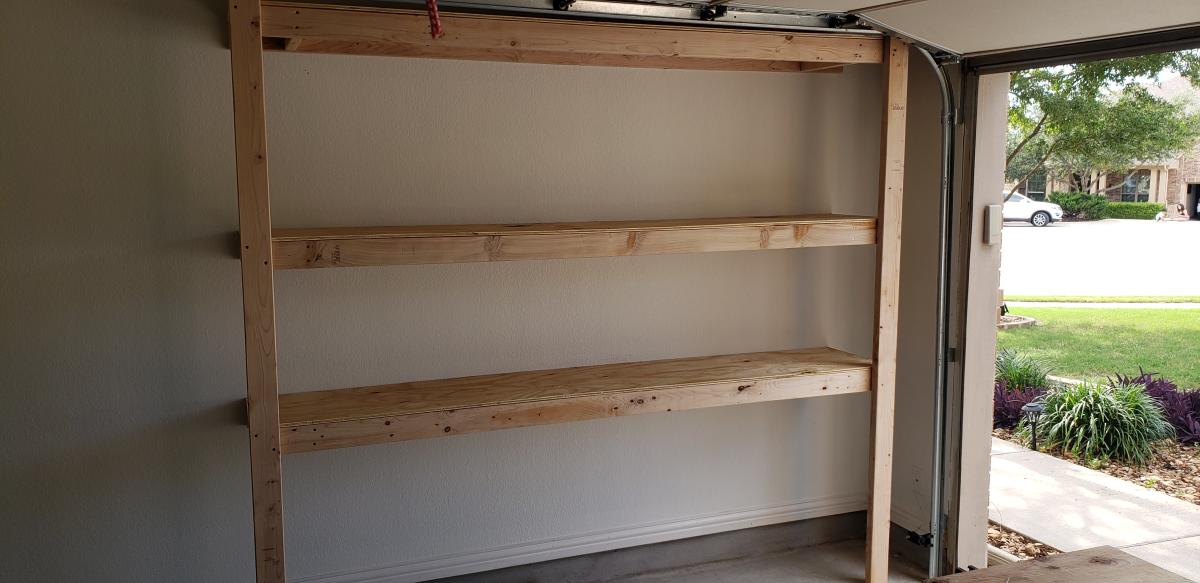
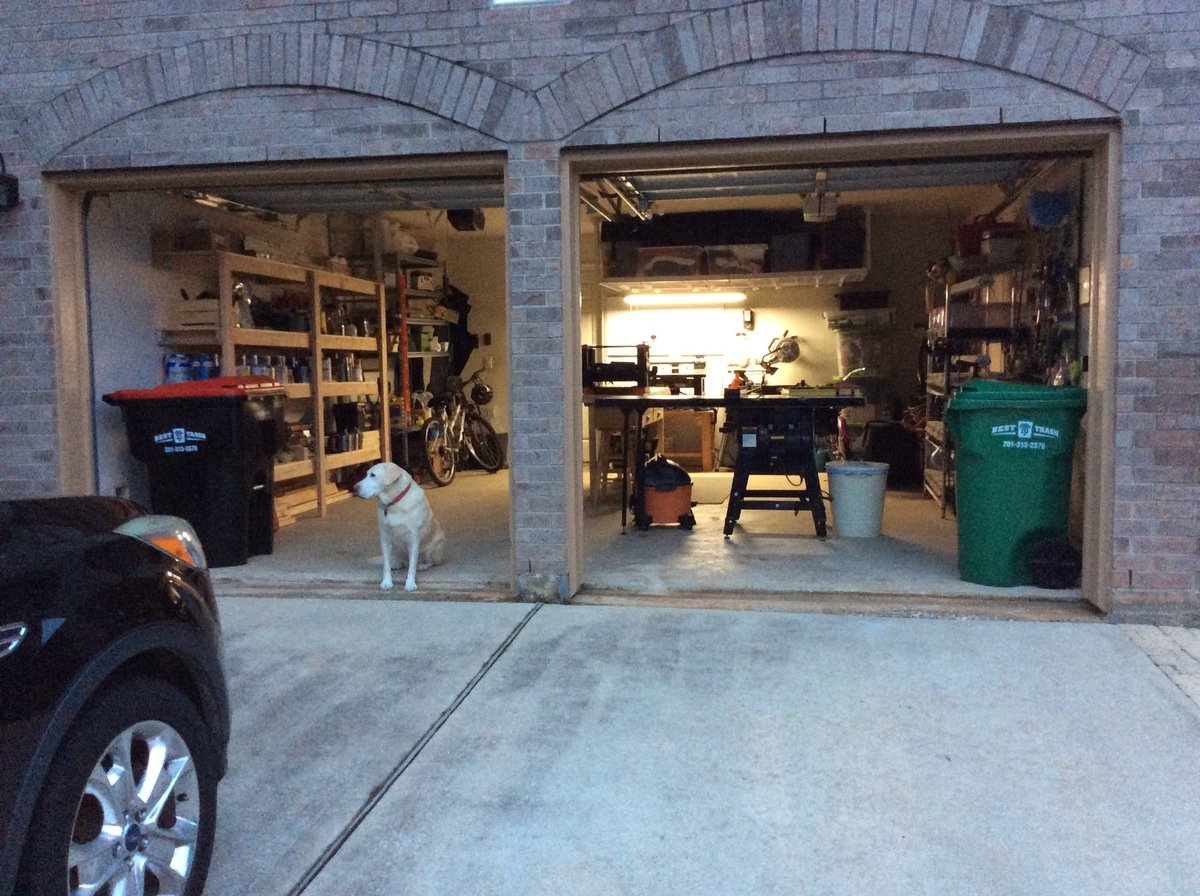
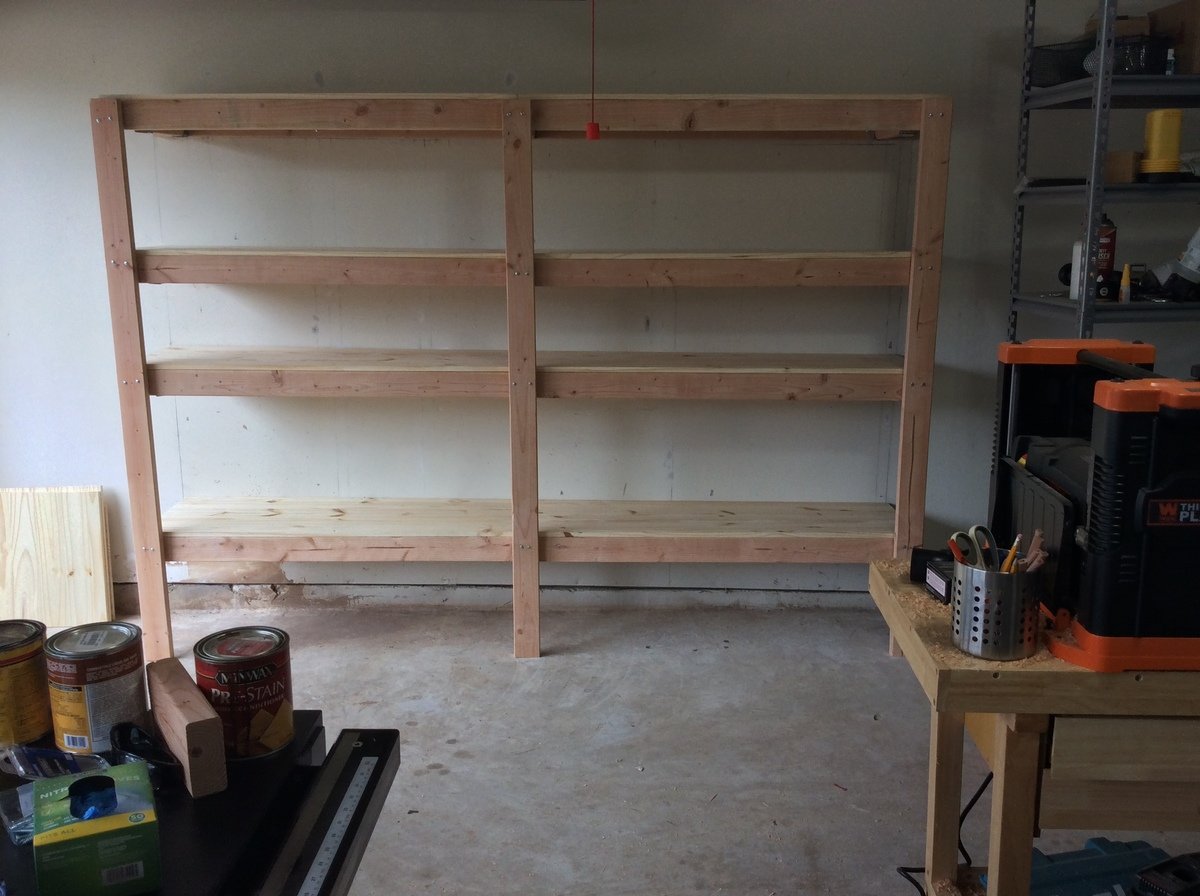
Garage Shelves
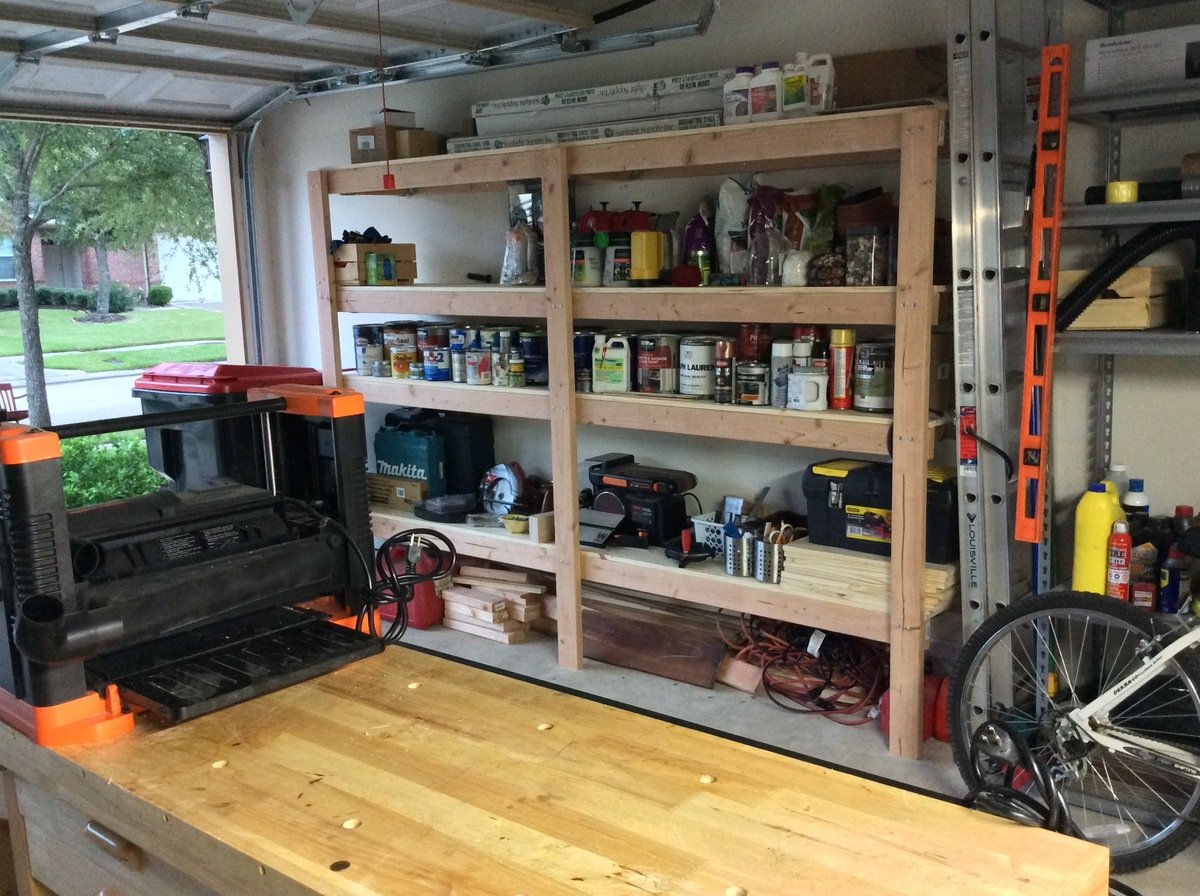
This was a pretty easy project, but I had to adjust the vertical legs to accommodate the sloping garage floor. I drew a horizontal line for the top edge then measured to the floor at the spacing I wanted the vertical legs. I used these measurements to cut the three vertical legs. It’s level and straight, even though my garage is sloped.
Built from Plan(s)
Estimated Cost
$300
Estimated Time Investment
Week Long Project (20 Hours or More)
Finish Used
Garage shelving
Recommended Skill Level
Beginner
Chicken Coop
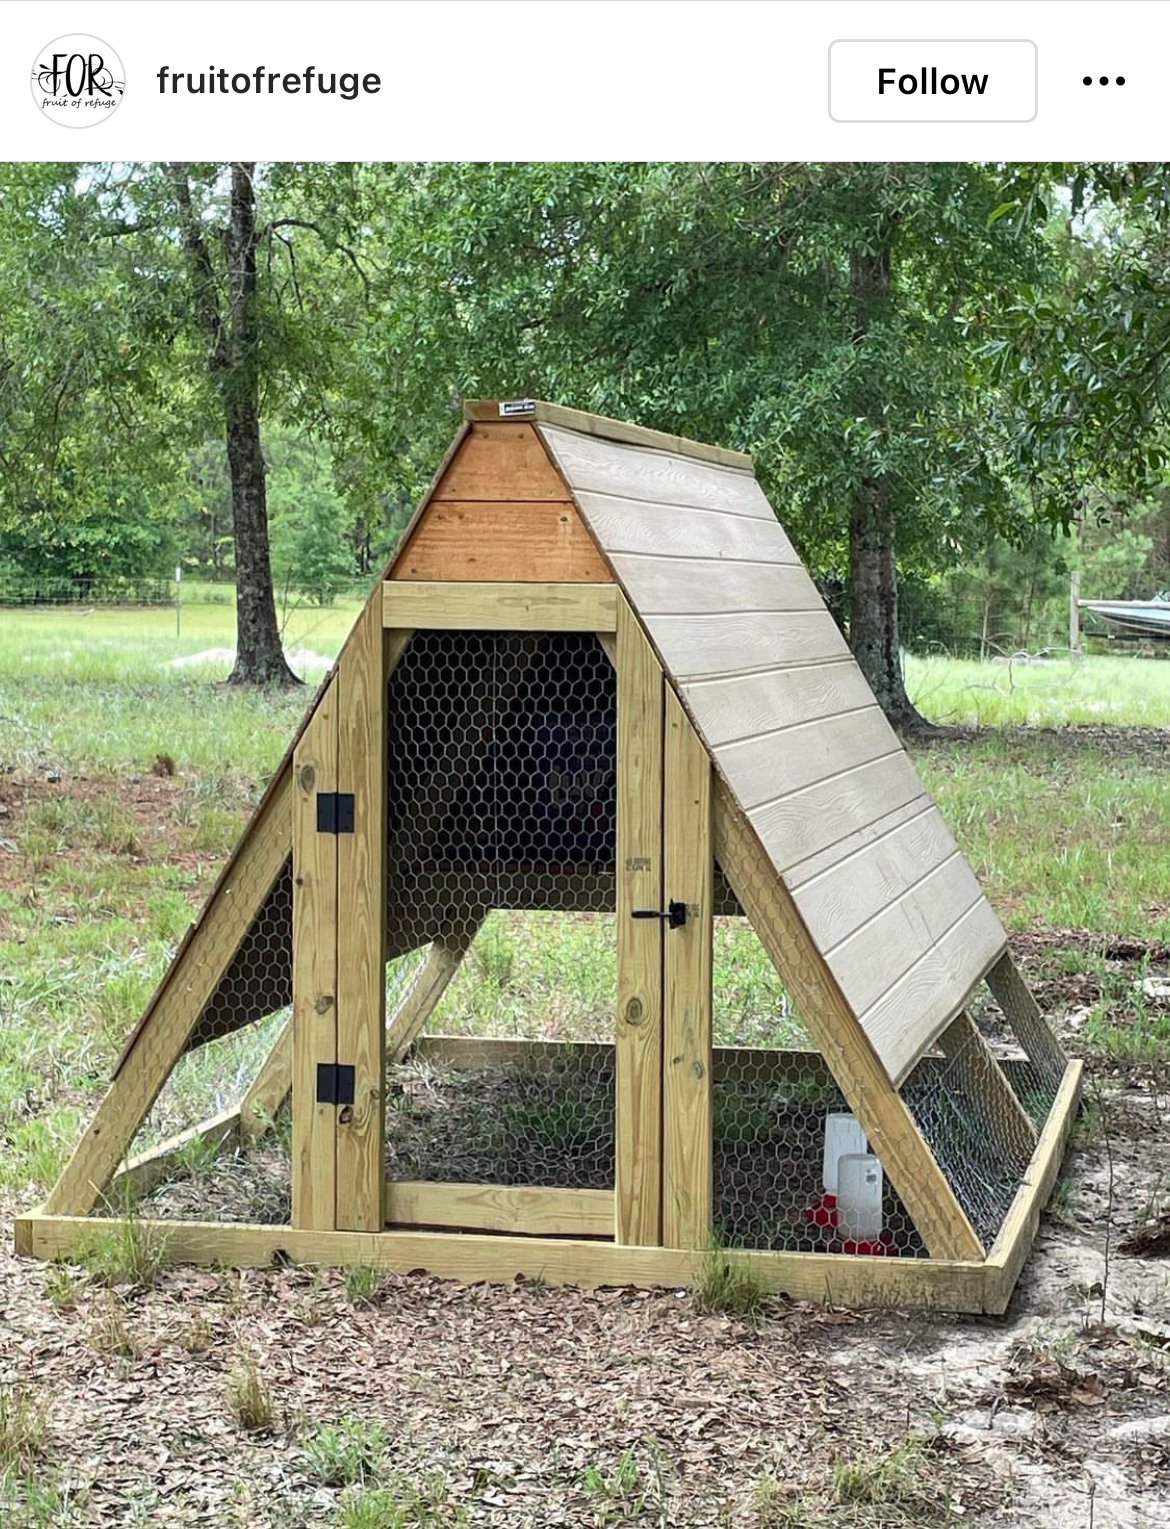
Great for a small flock of 5 or less.
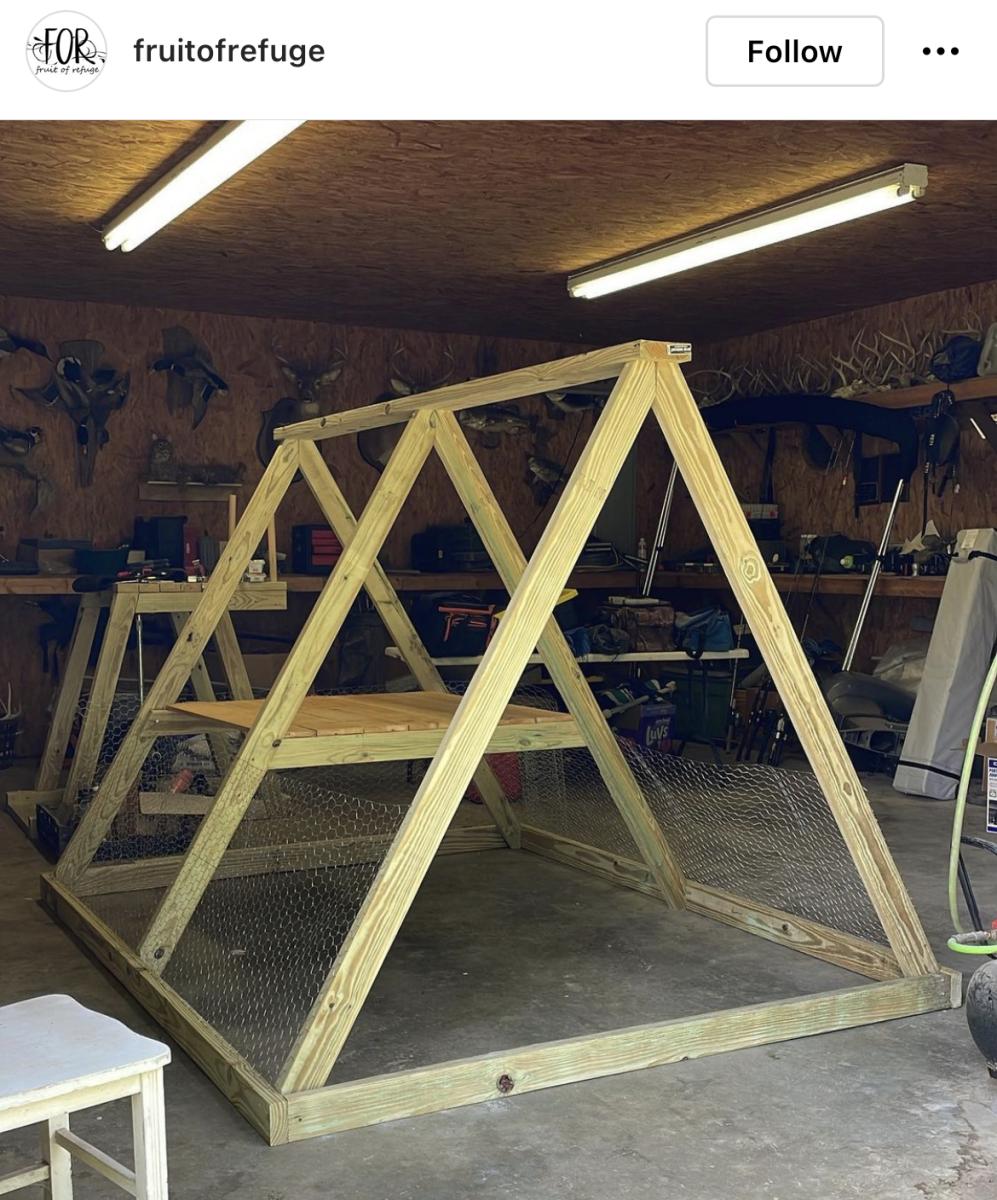
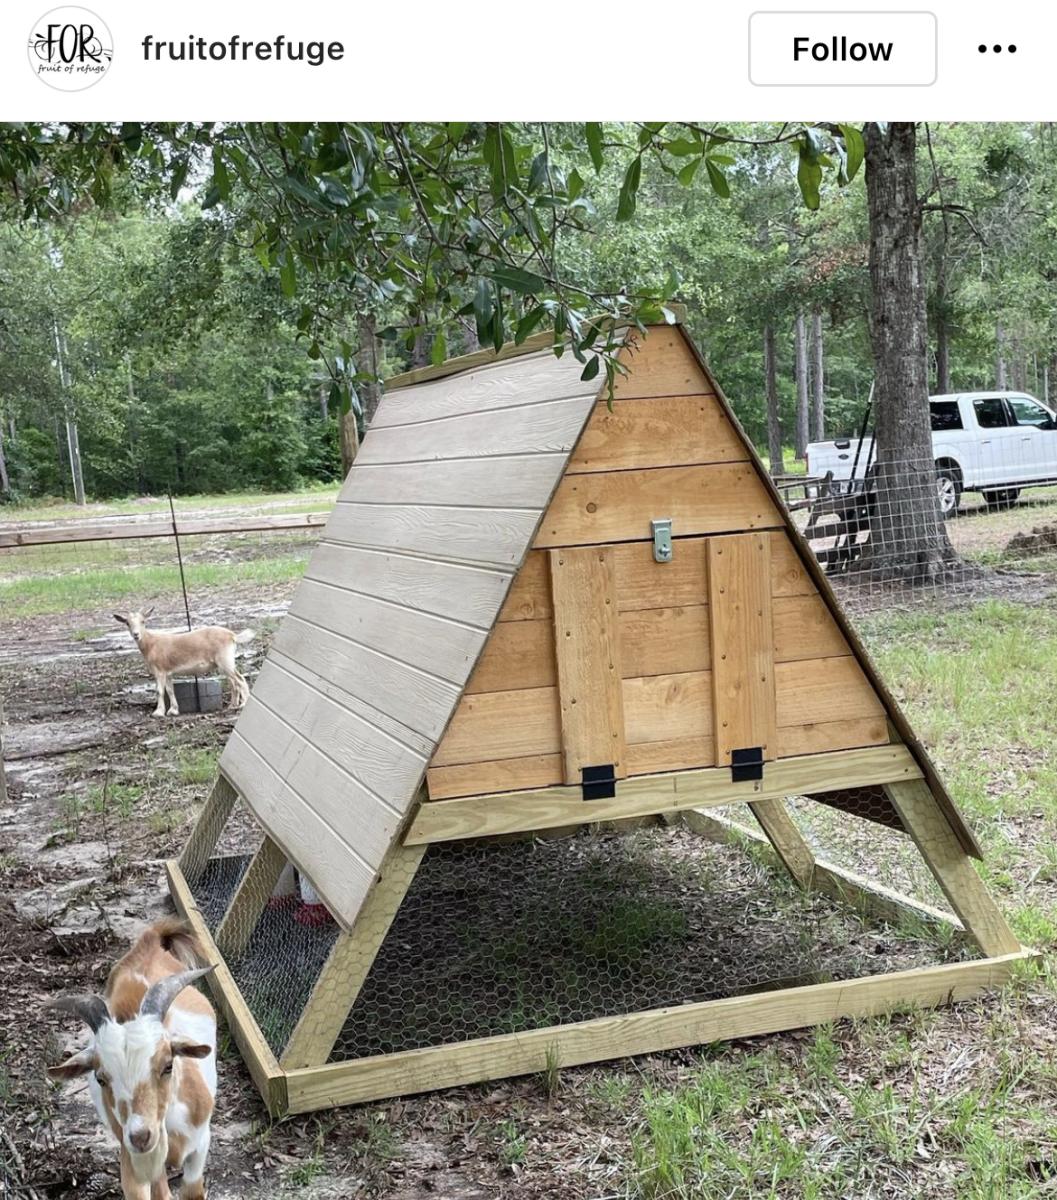

Built from Plan(s)
Comments
Ana White Admin
Sun, 05/29/2022 - 14:00
Awesome storage shelves!
Thanks for sharing, these look great!