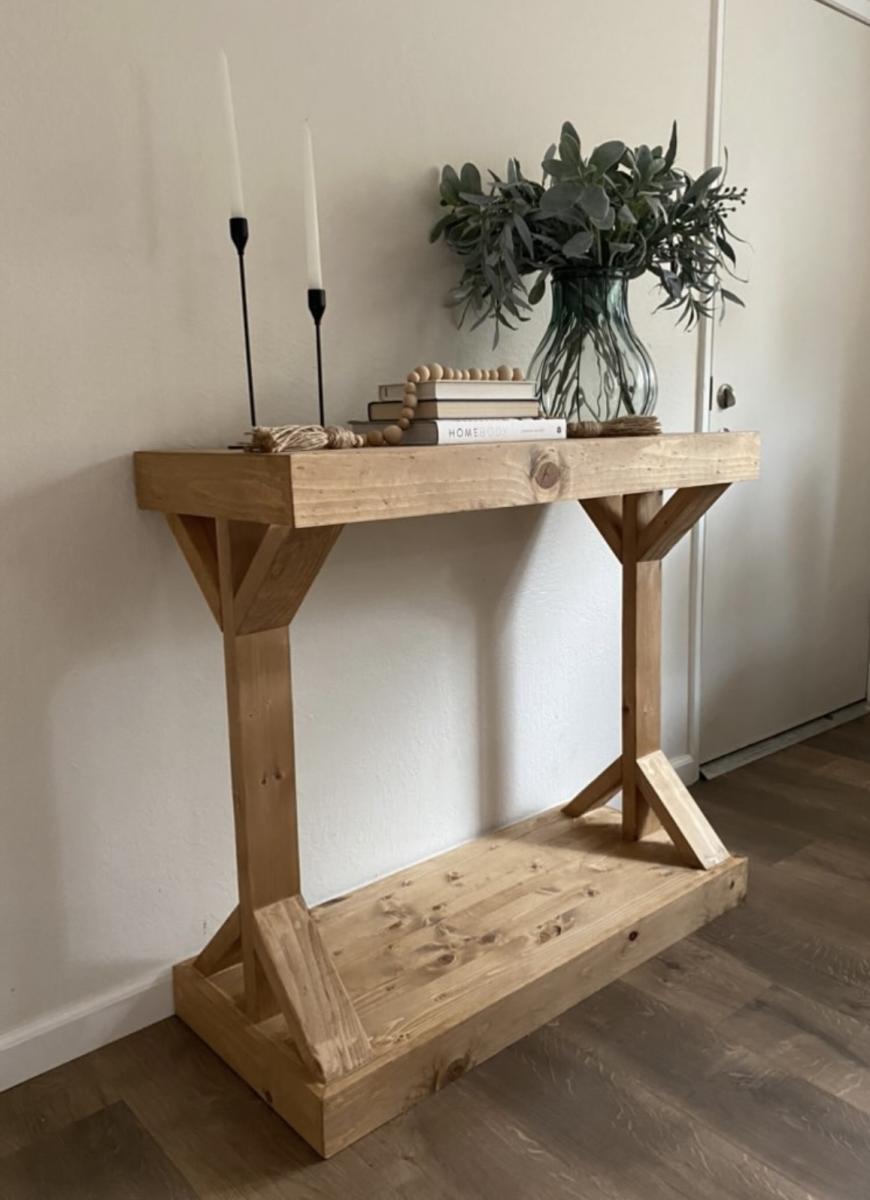
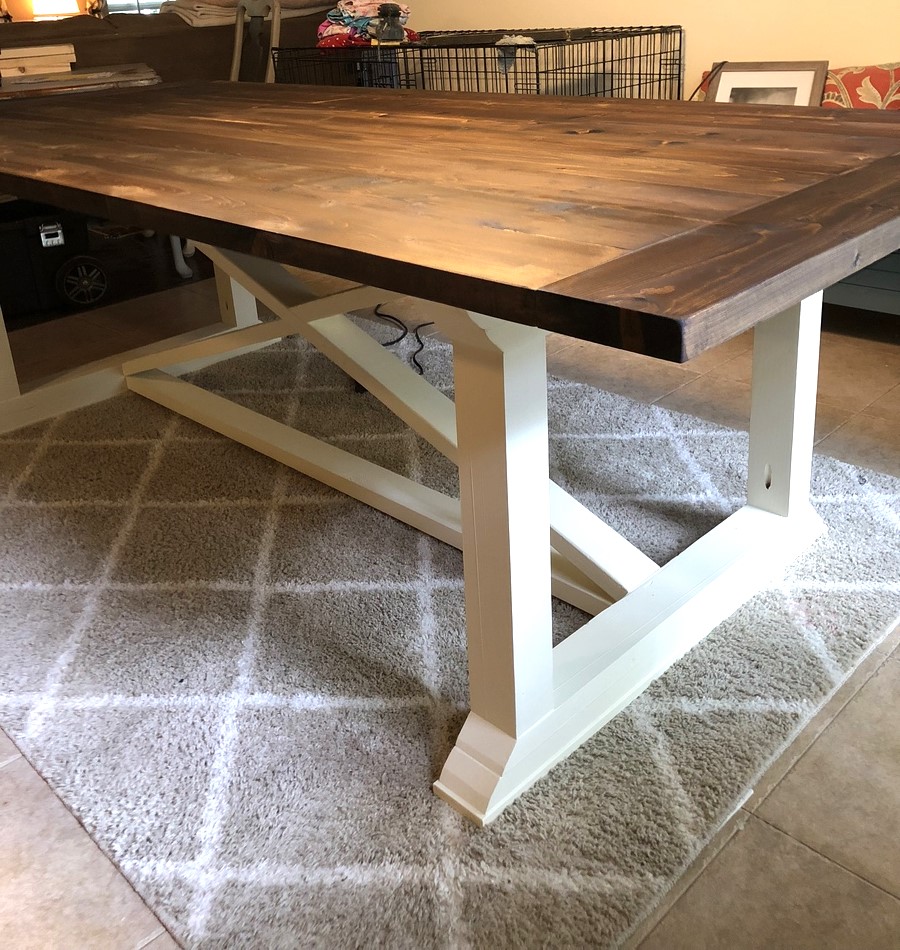
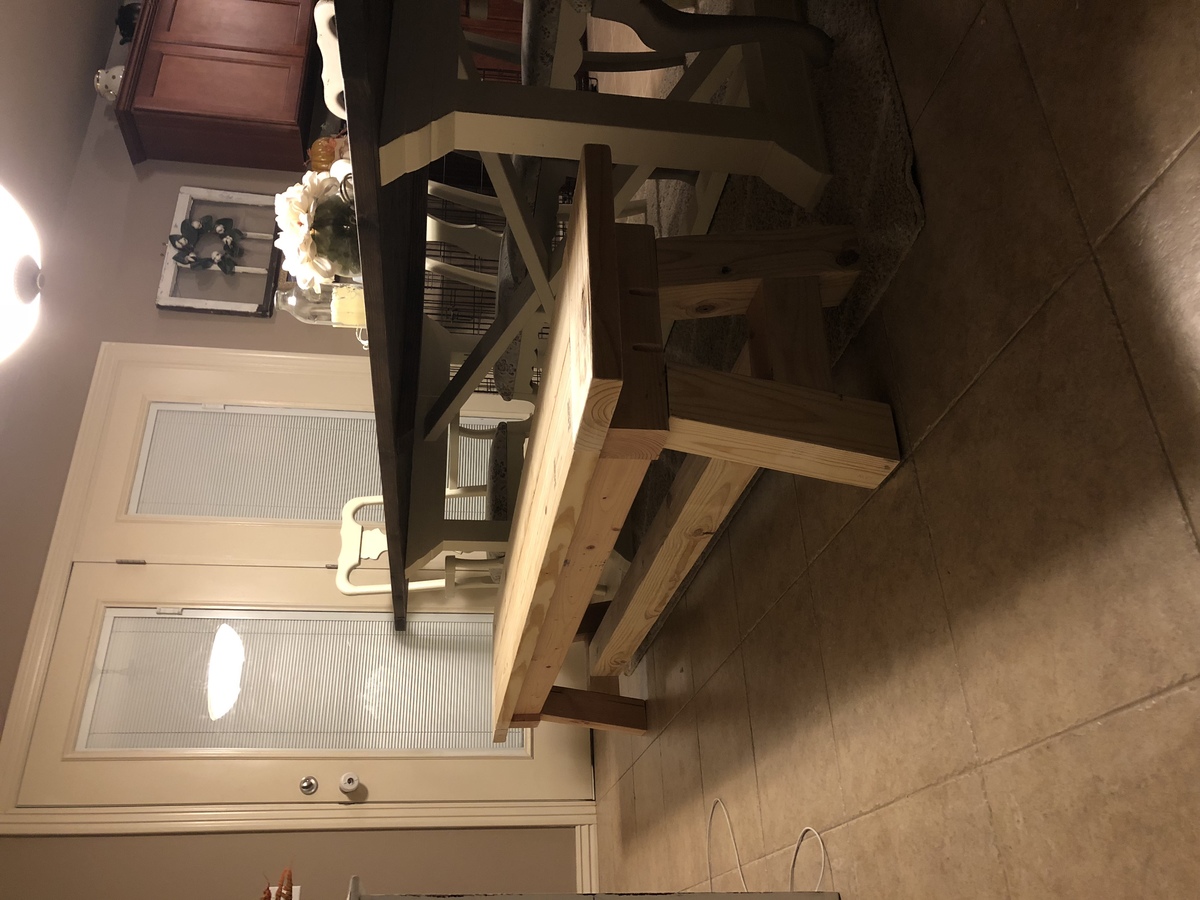
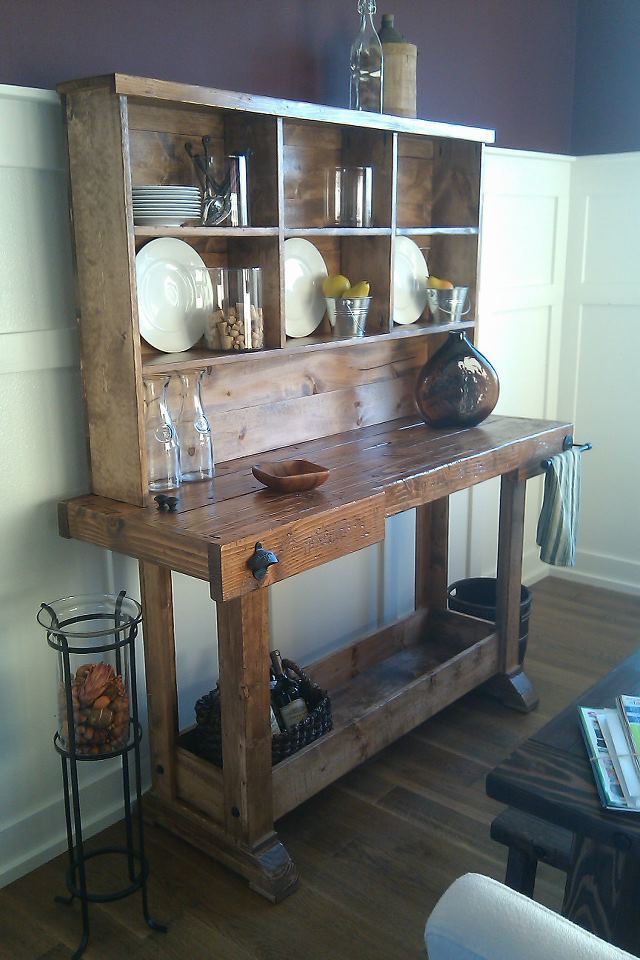
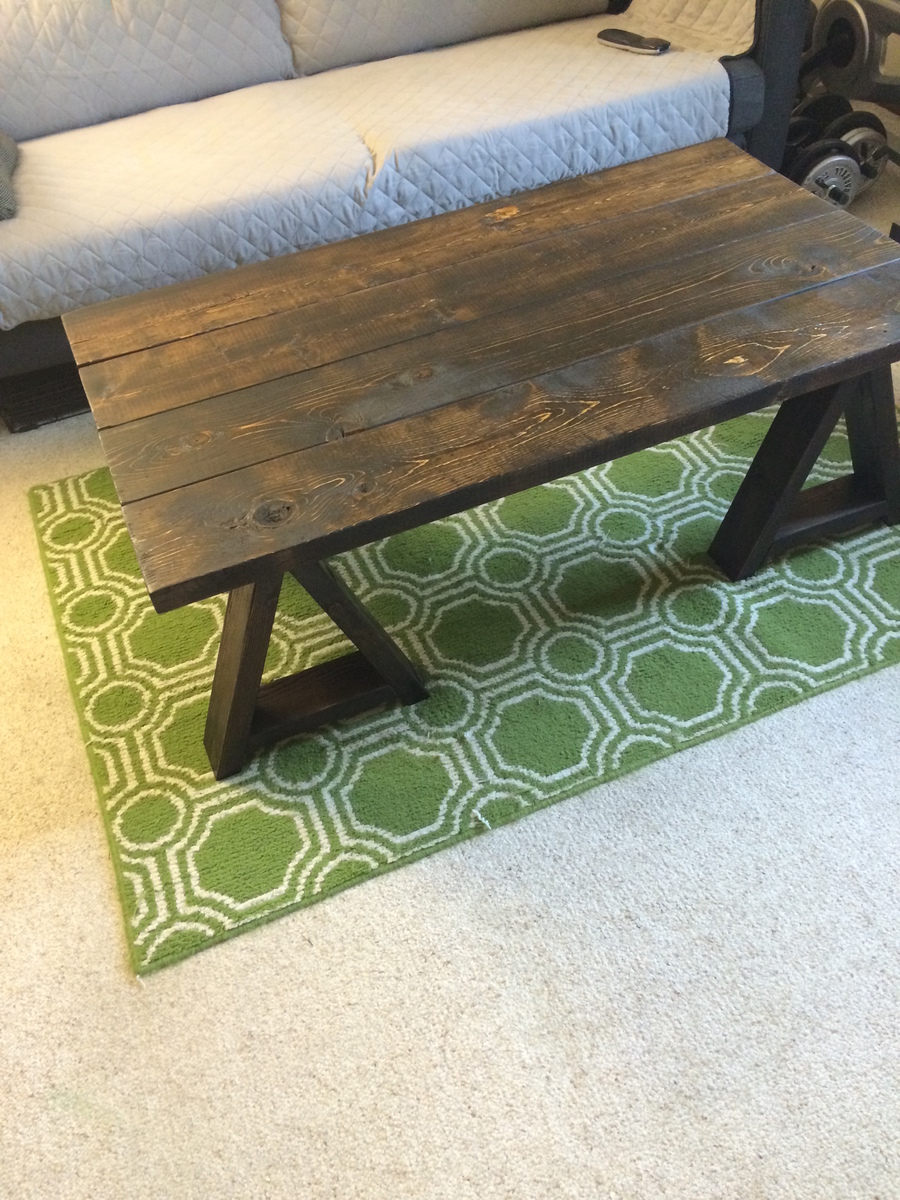
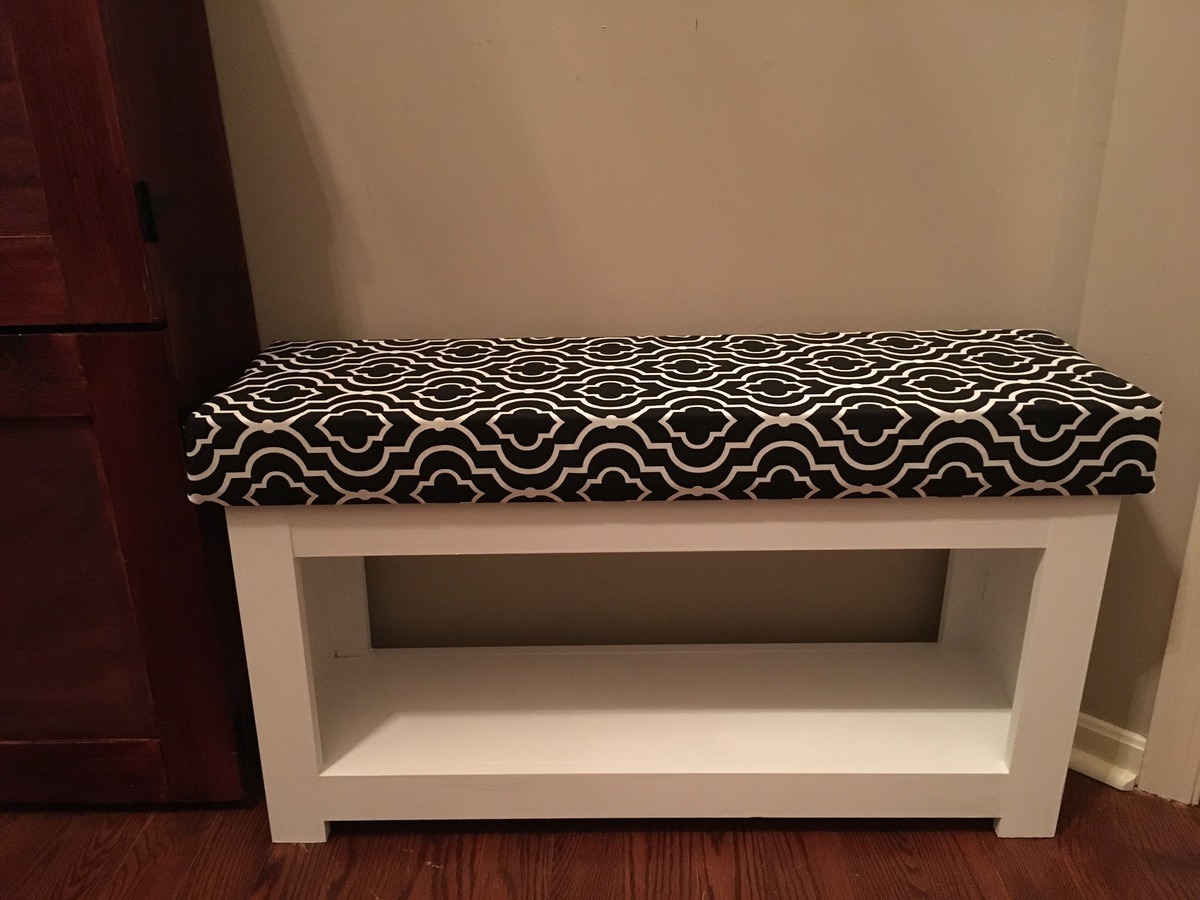
Community Brag Posts

$6 Bench

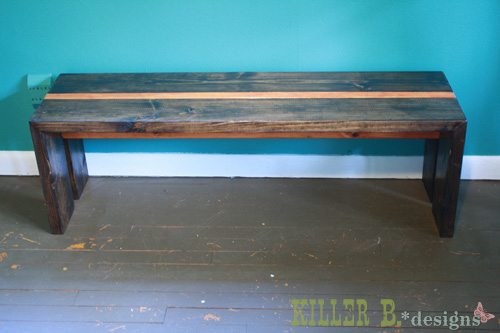
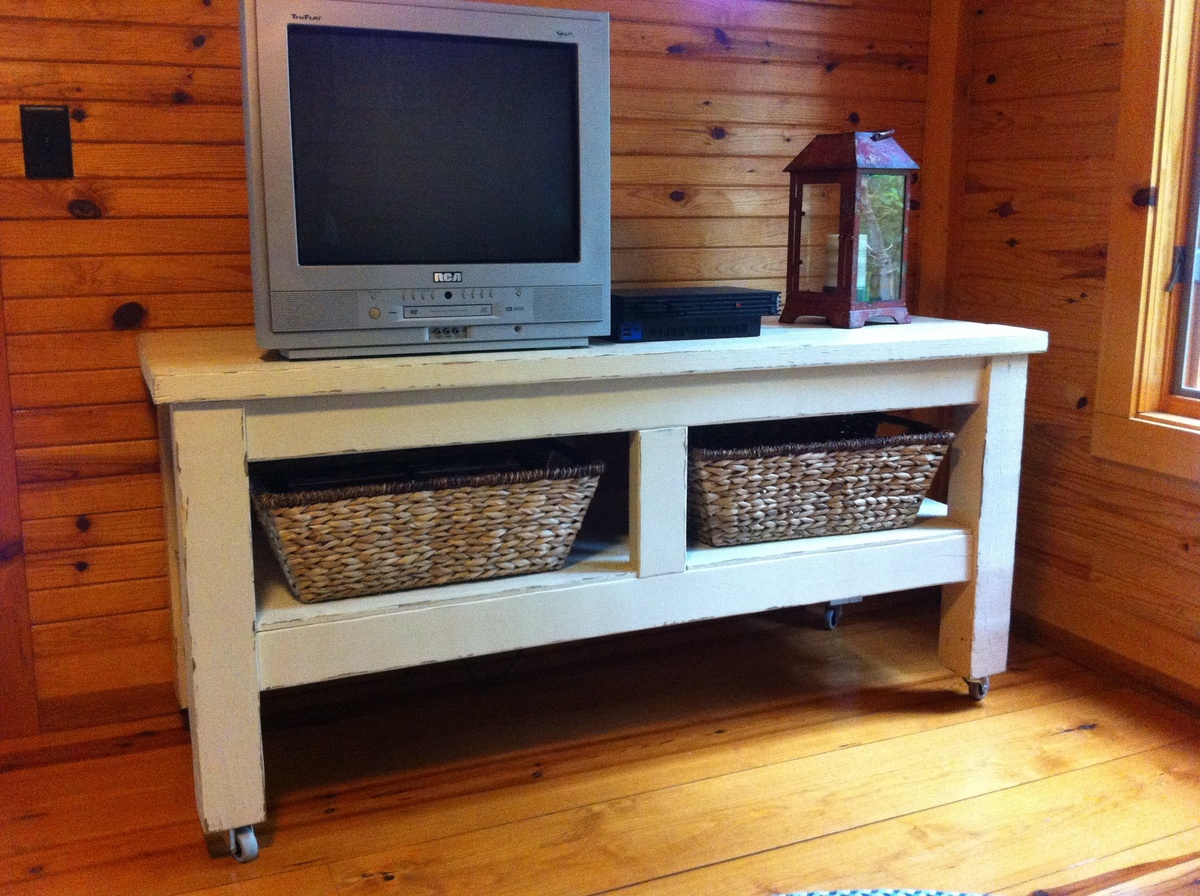
After seeing benches like these on a wedding blog, I really wanted to build my own. It was a super easy project, and really cheap! Here's what you need:

• 2 – 2x6x8′ boards. They cost about $3 each at Home Depot.
• Screws, sandpaper and stain.

Cut List:
3 – 2×6 @ 47″
4 – 2×6 @ 16″

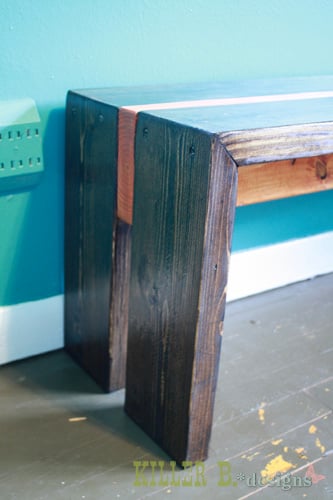
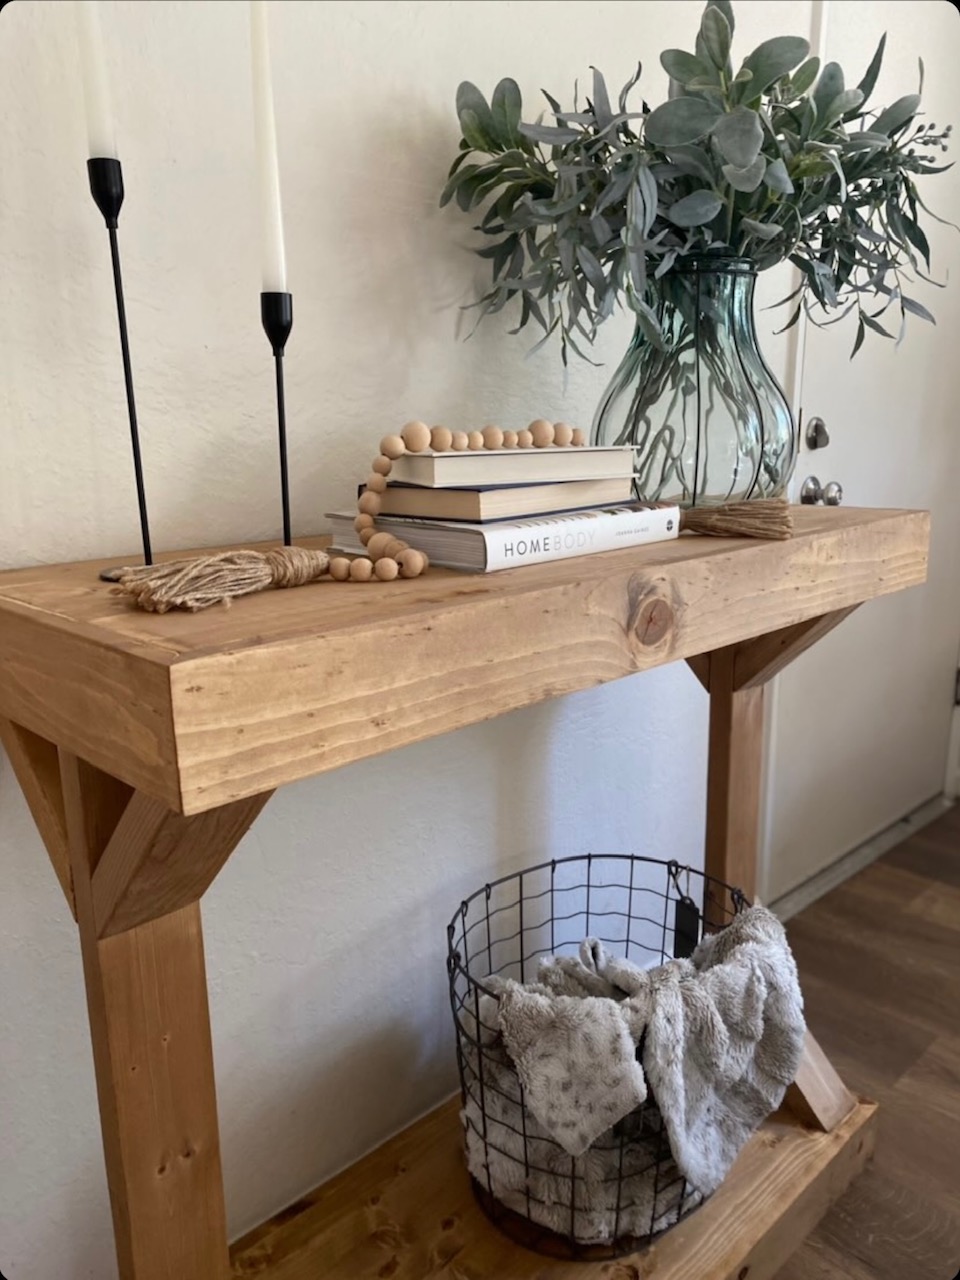
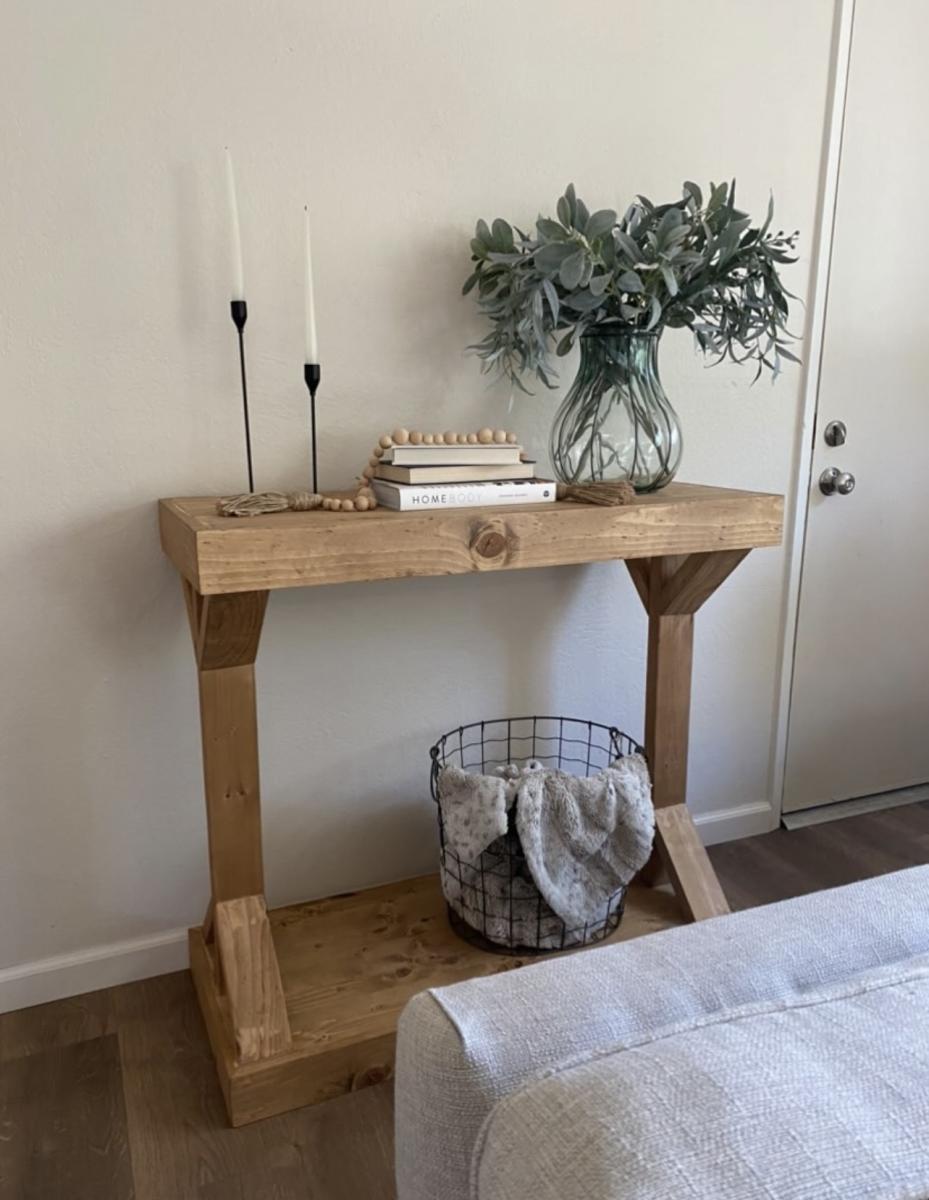
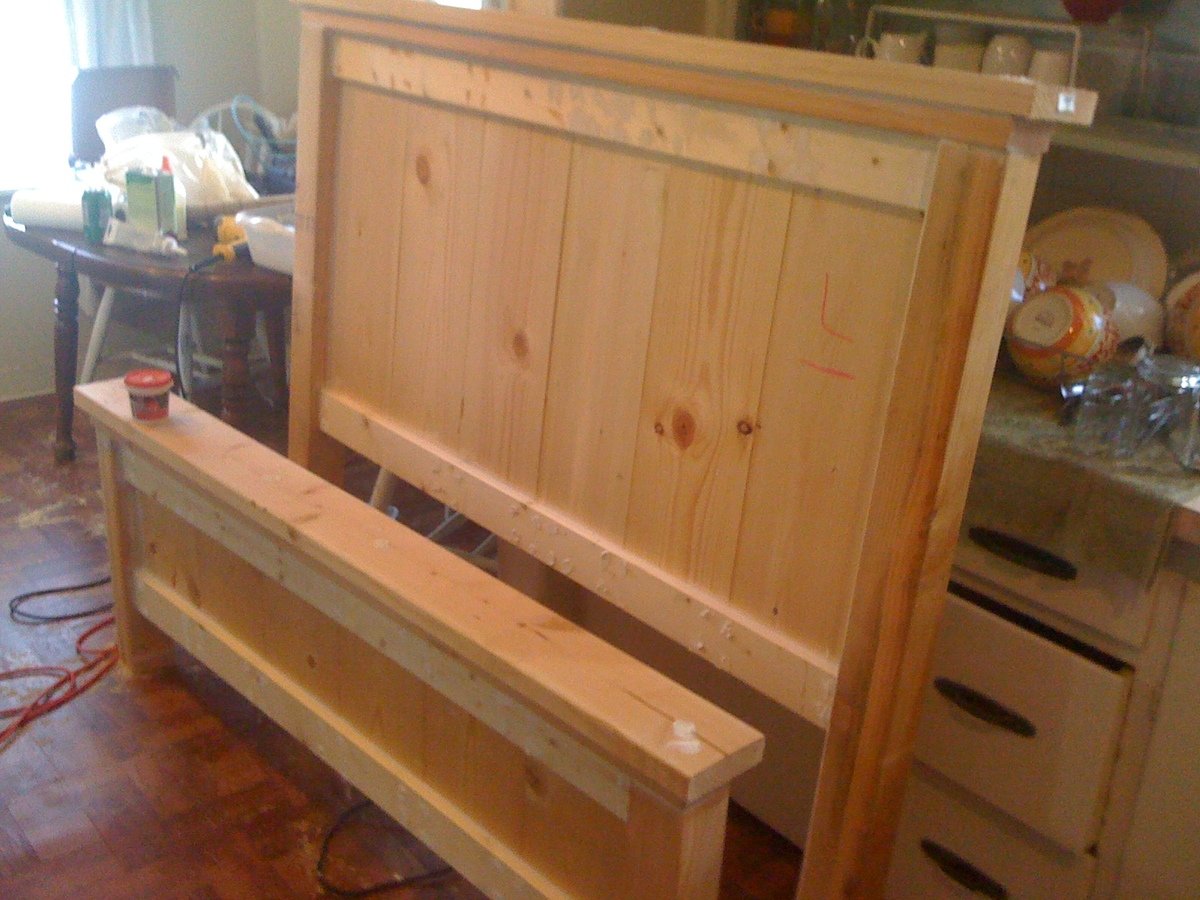
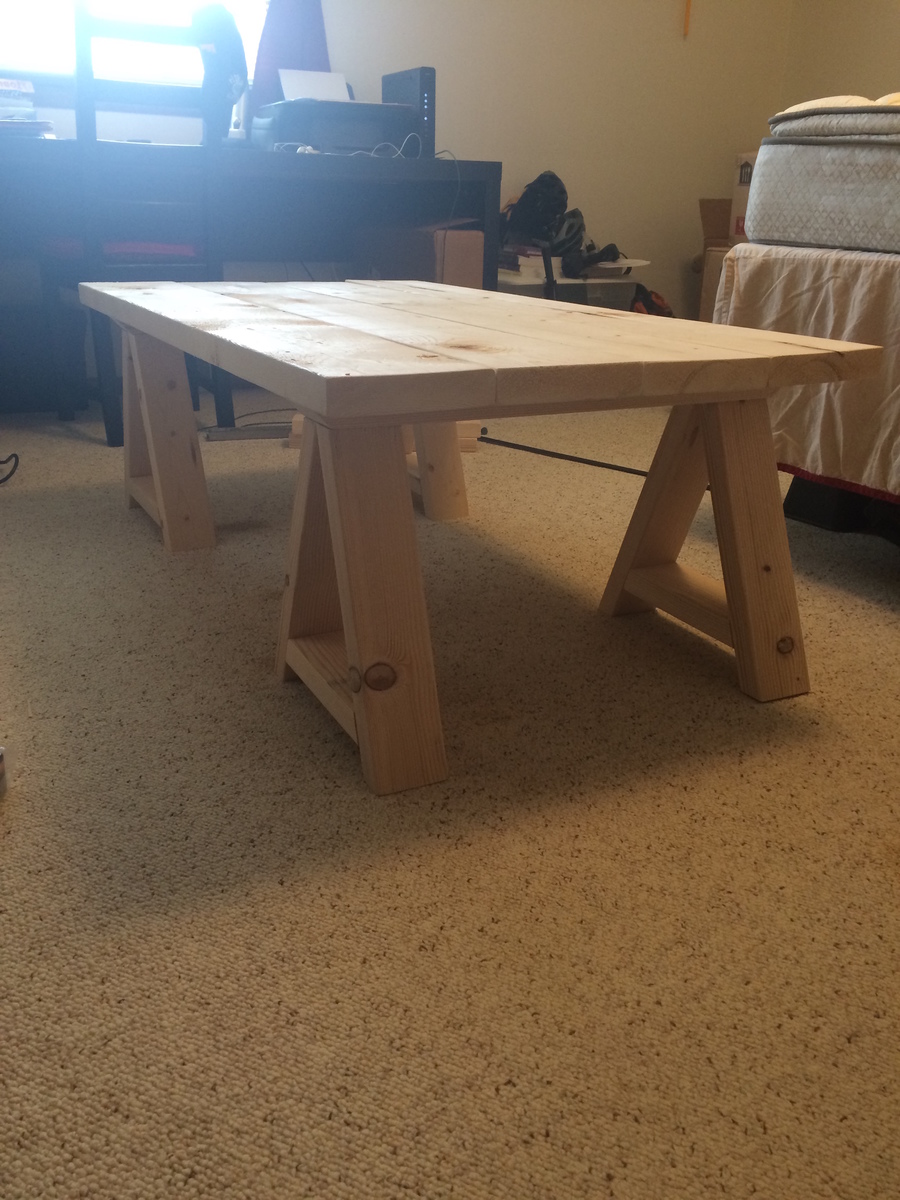
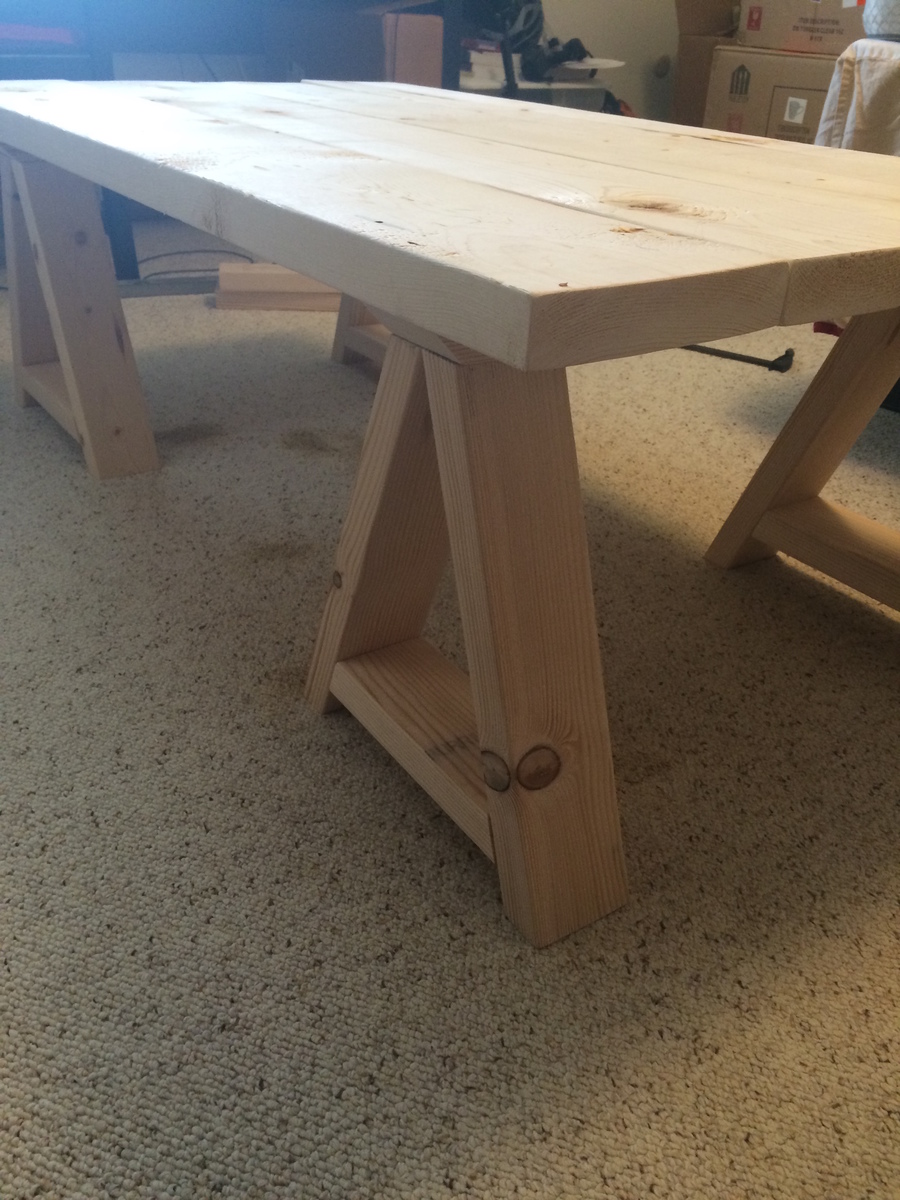
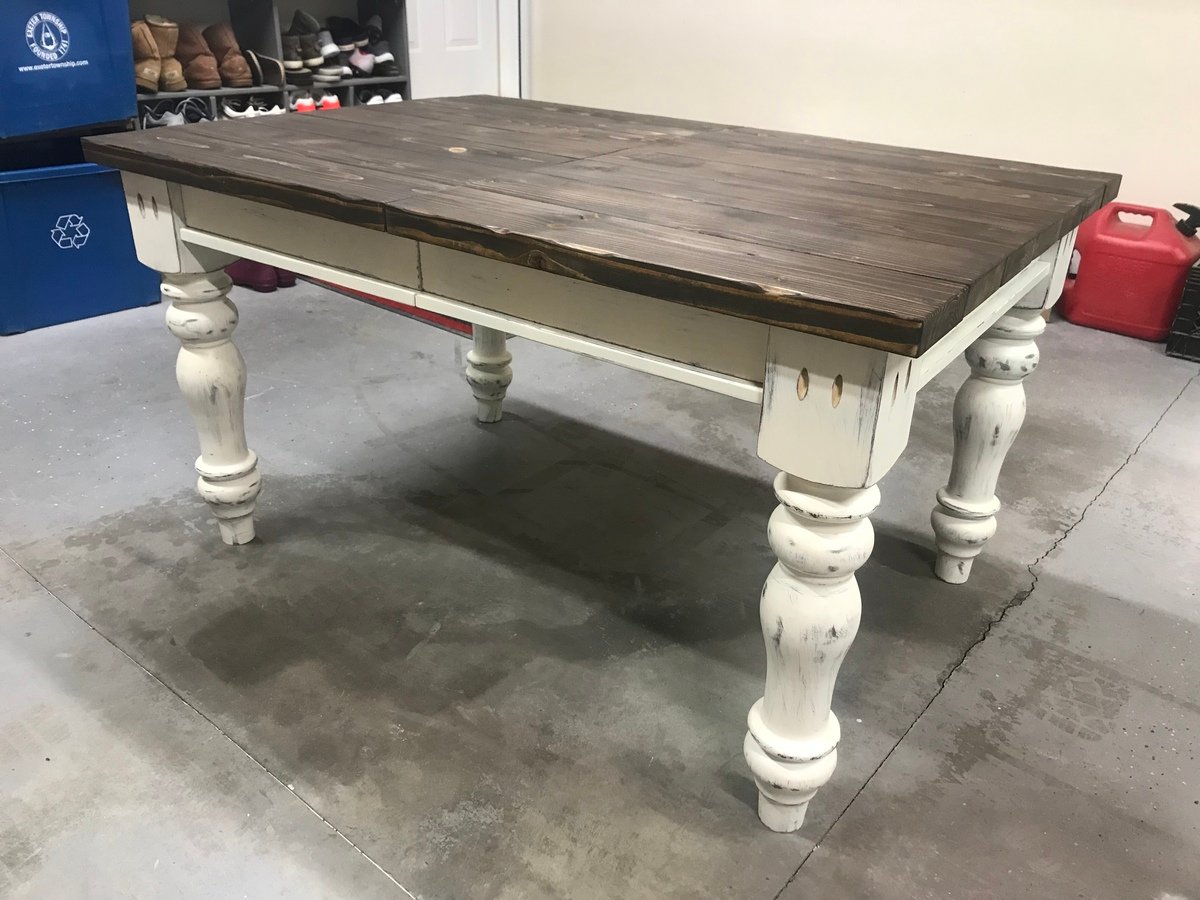
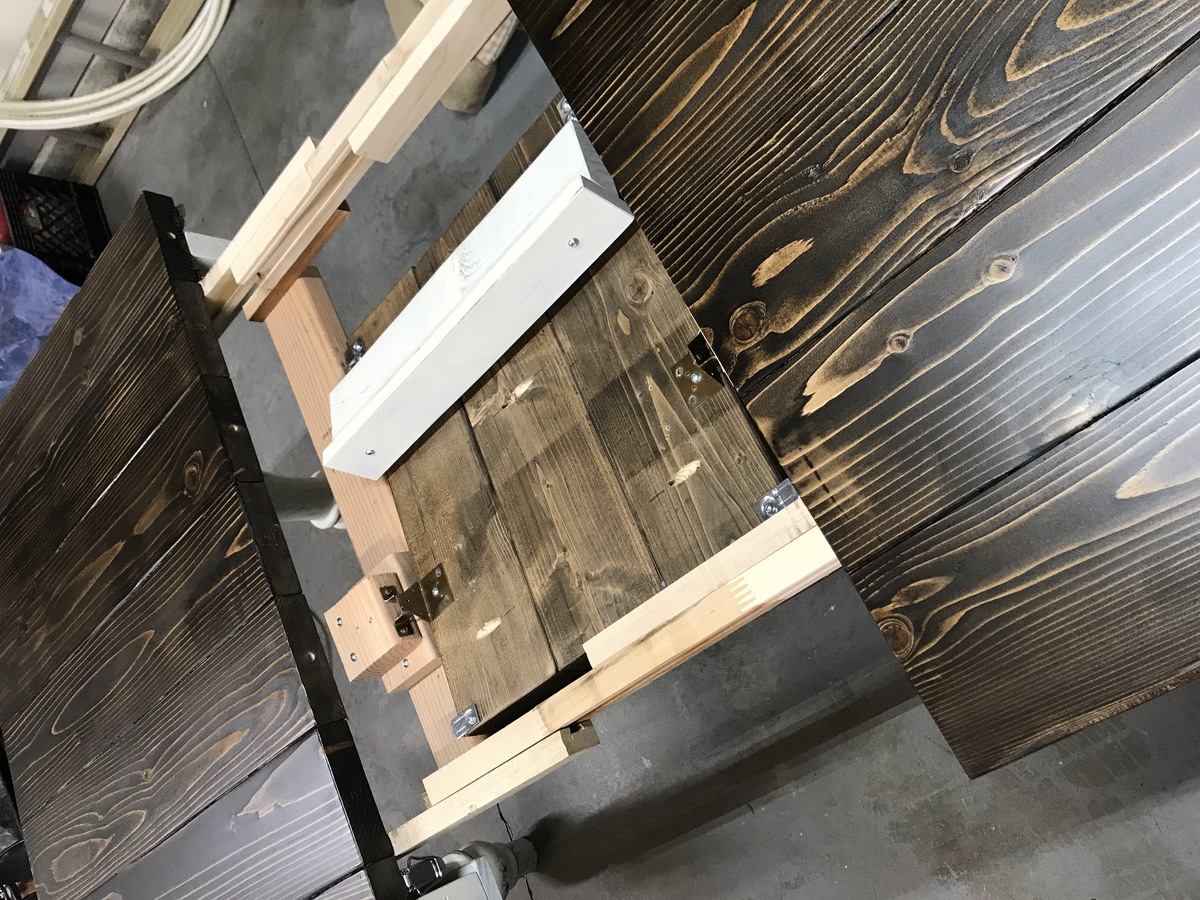
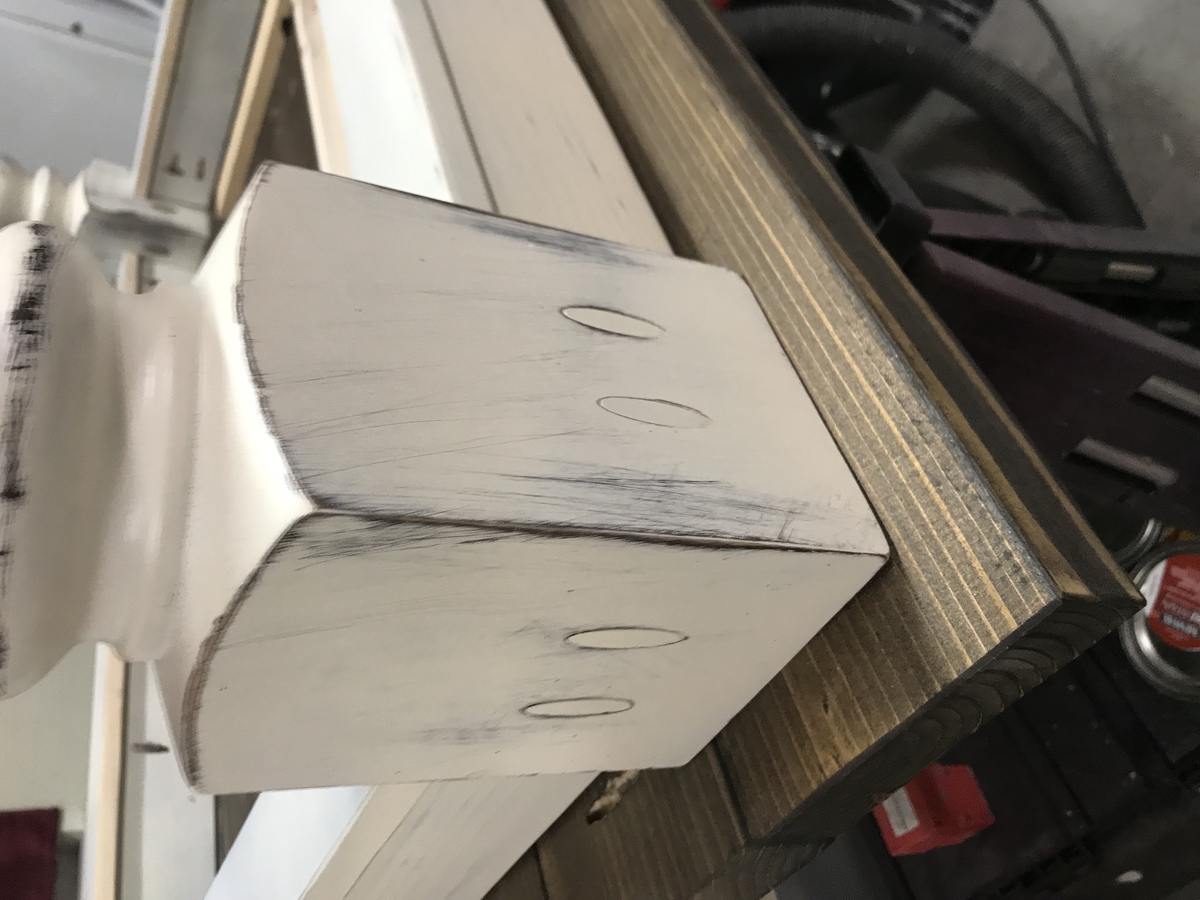
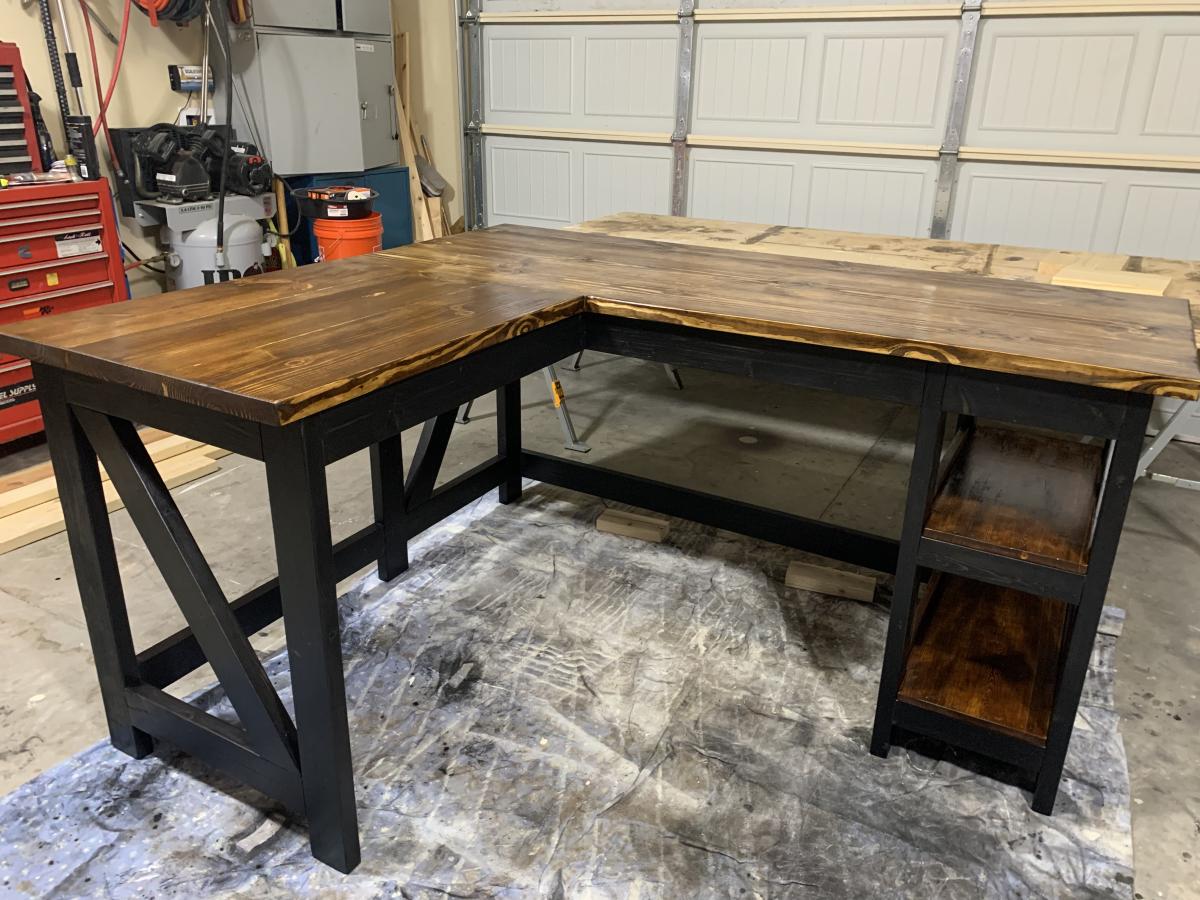
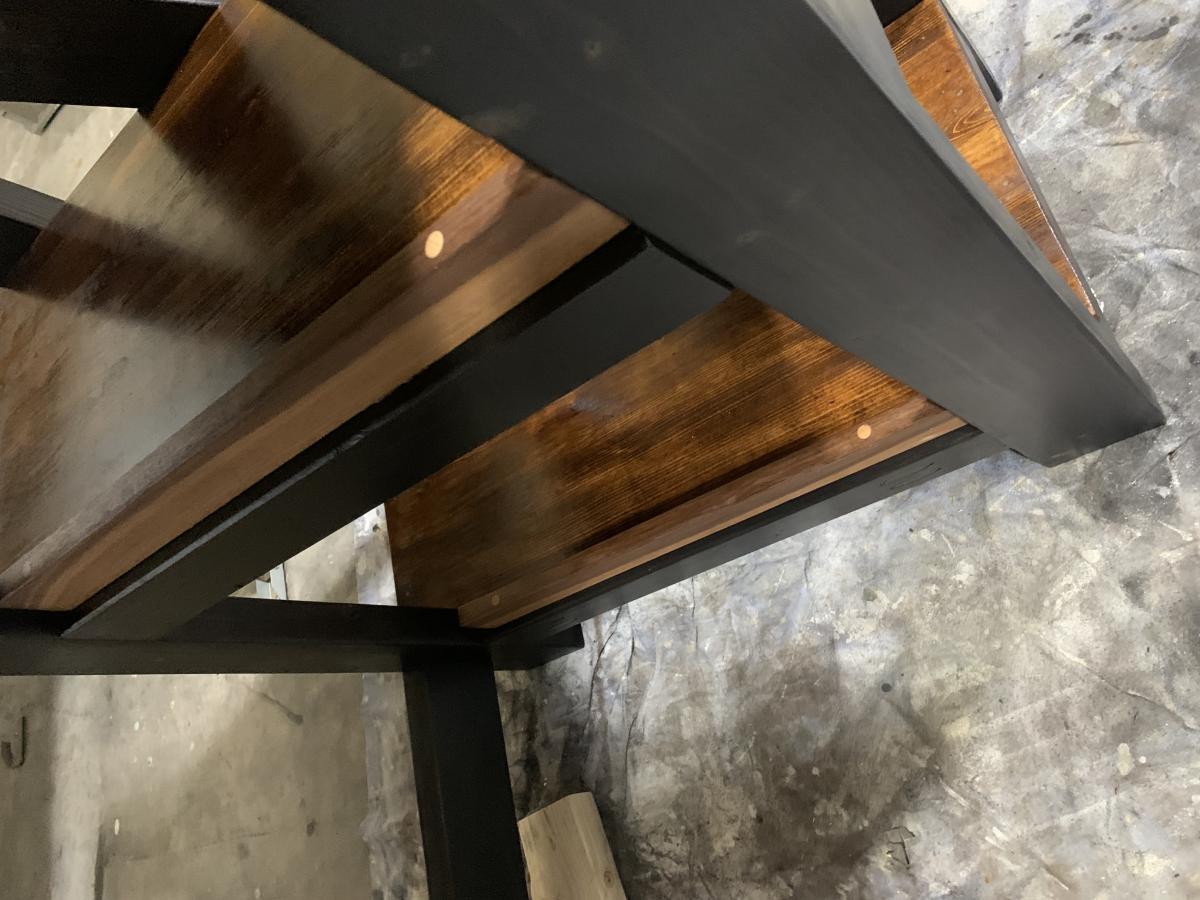
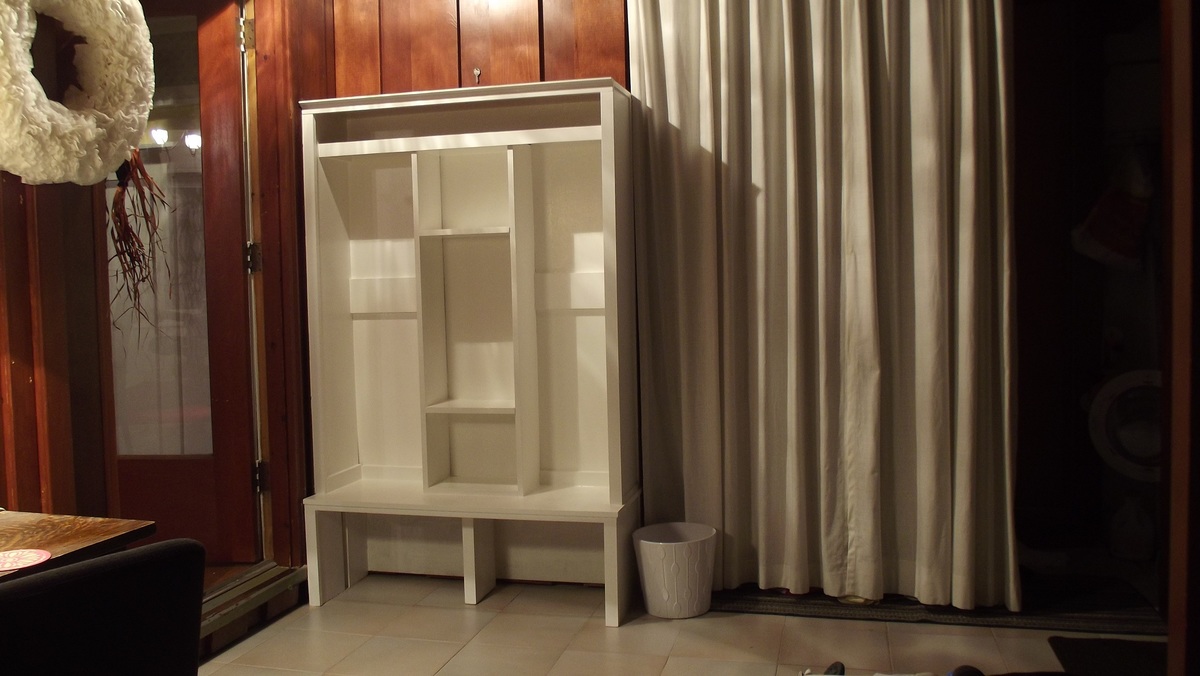
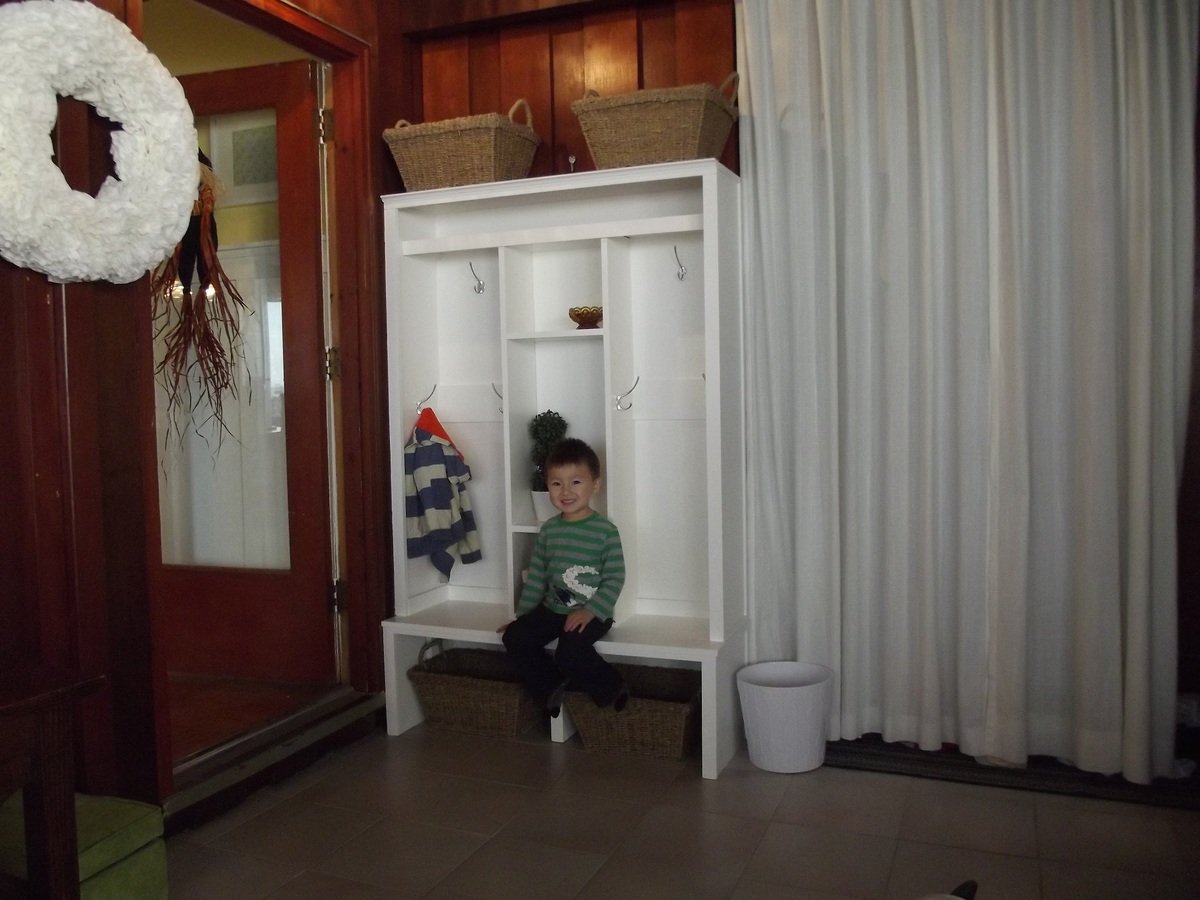
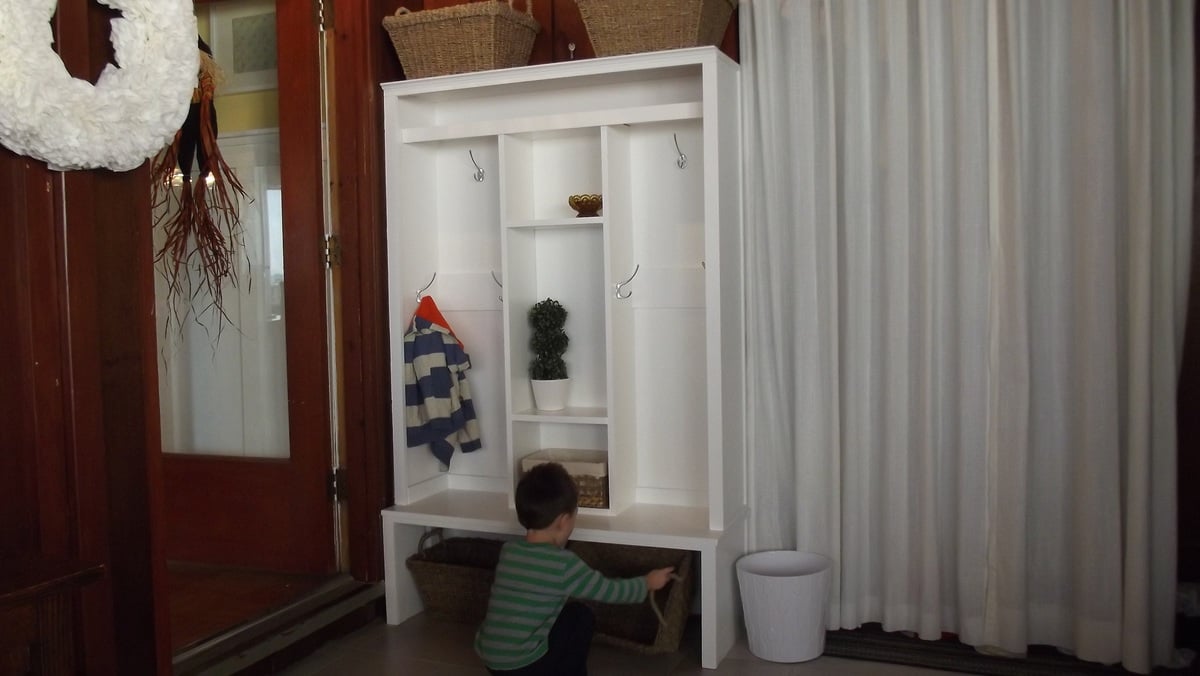
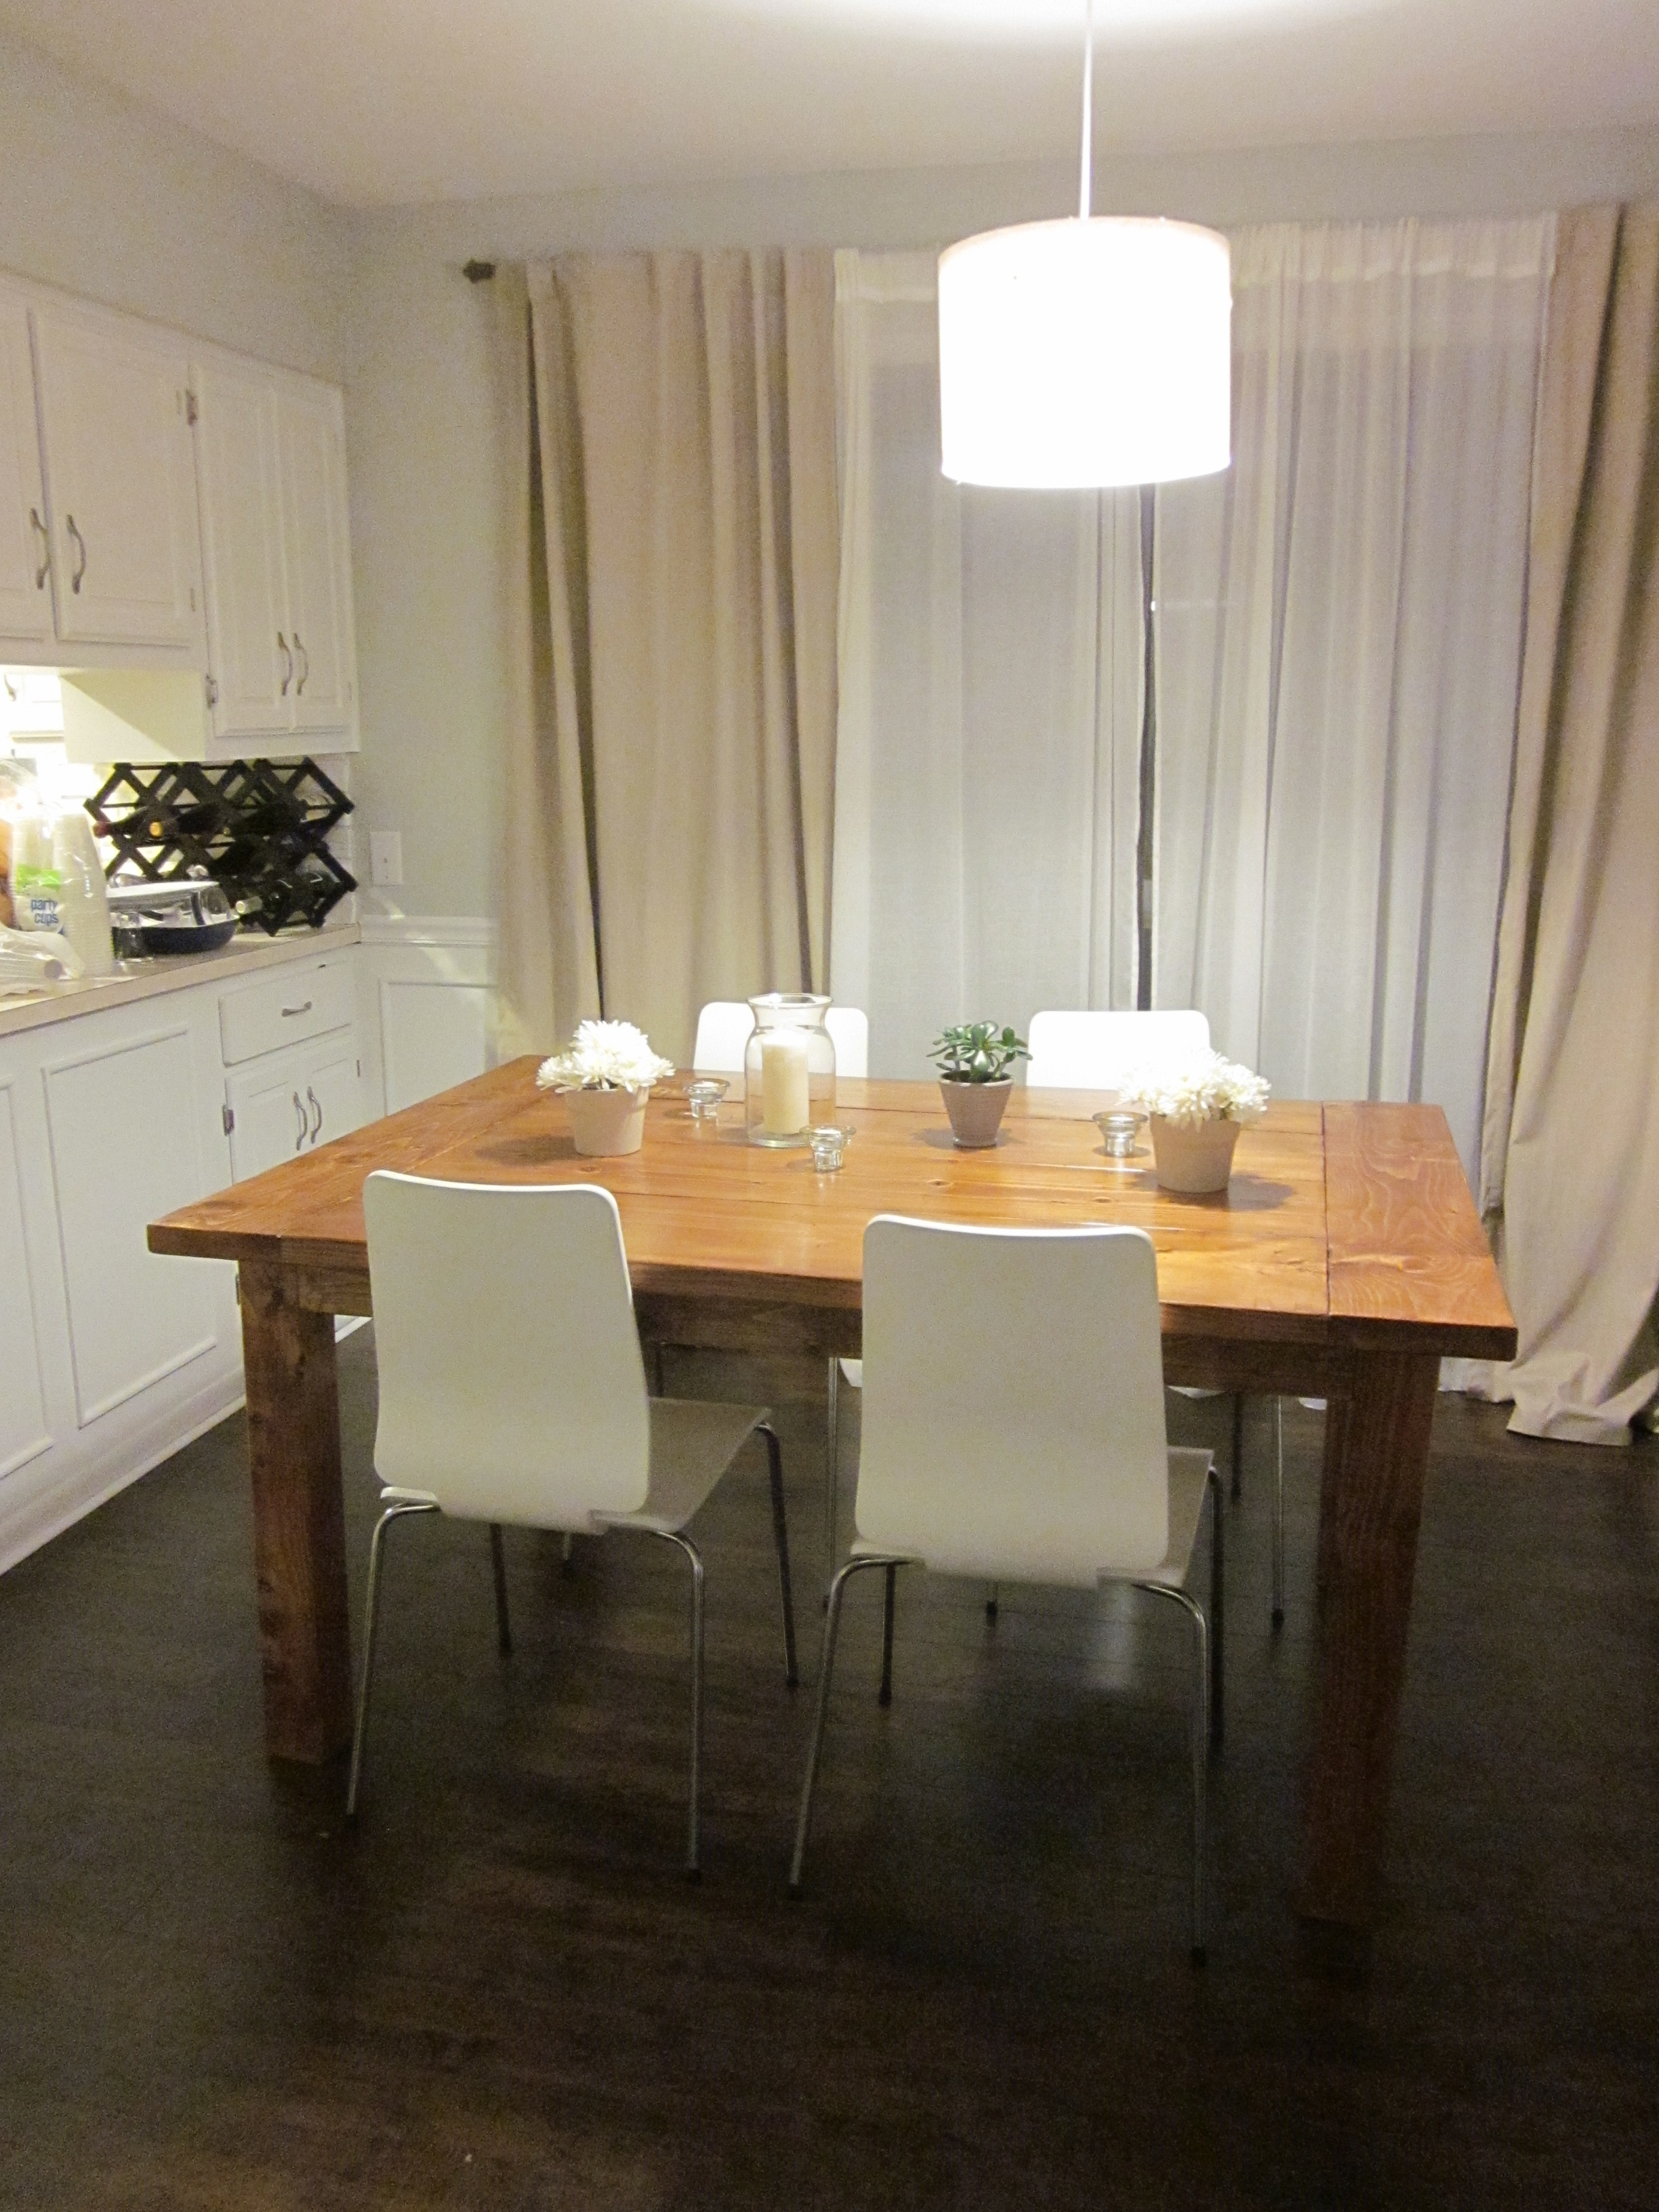
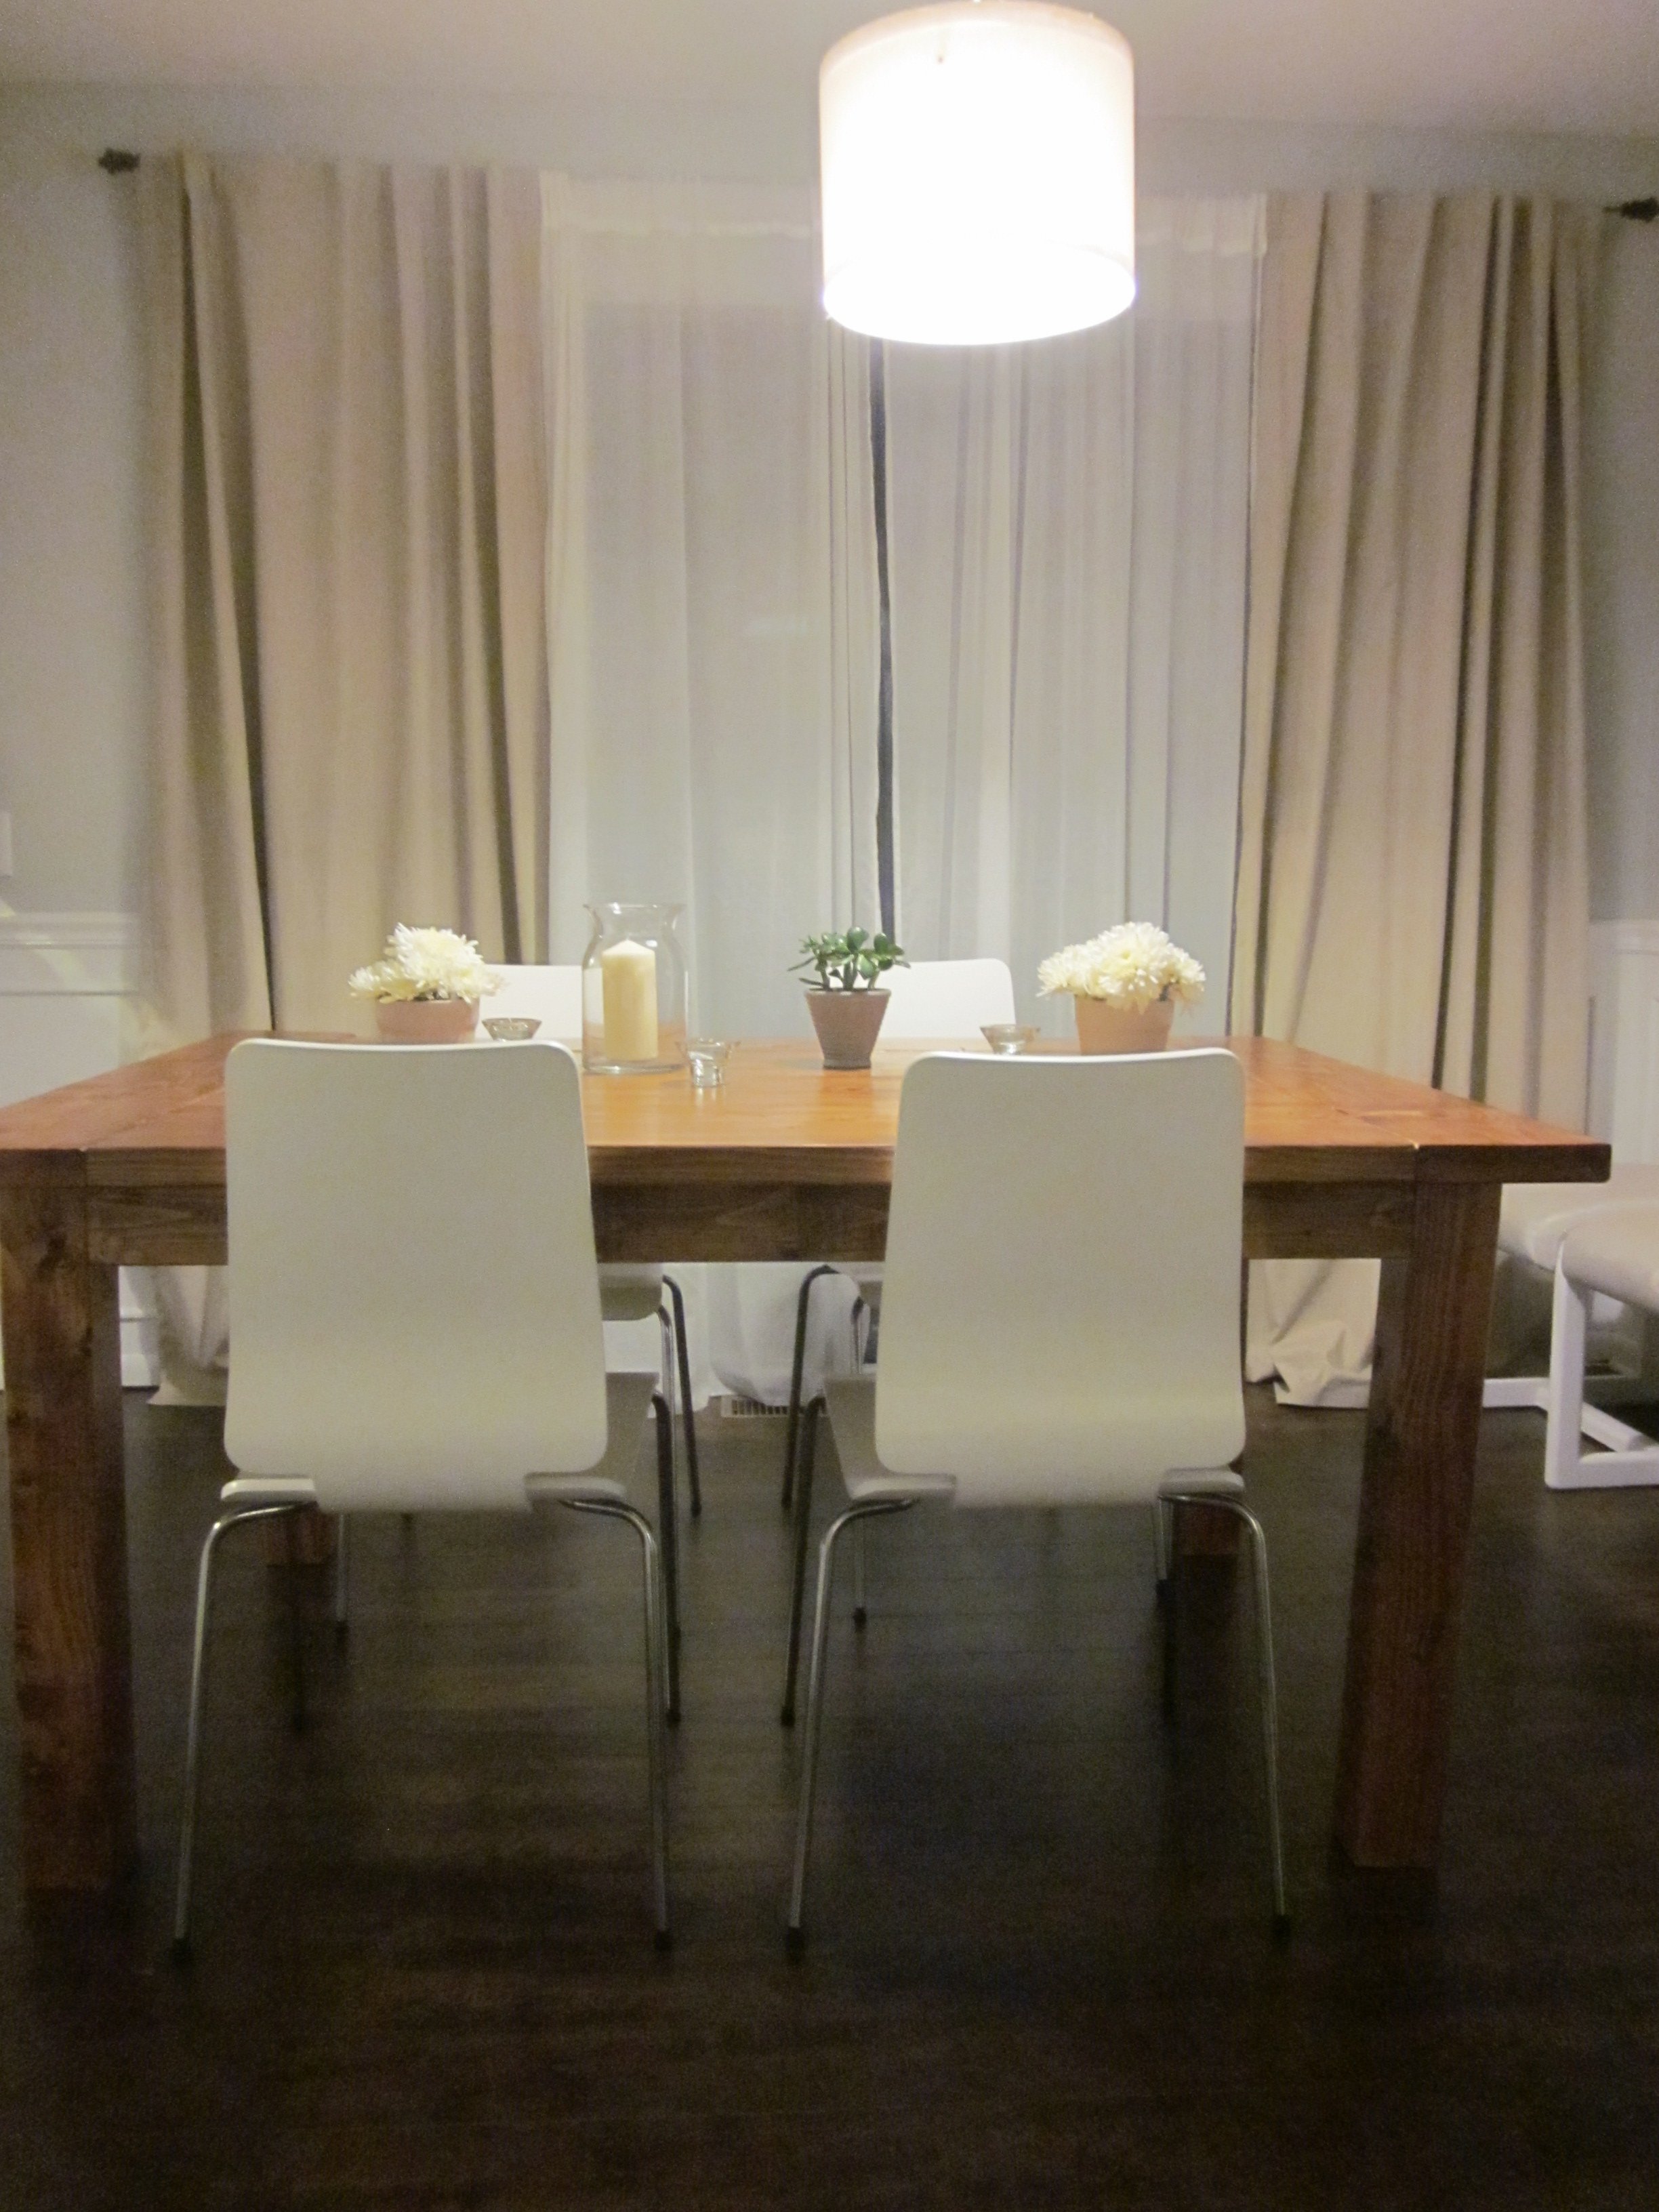
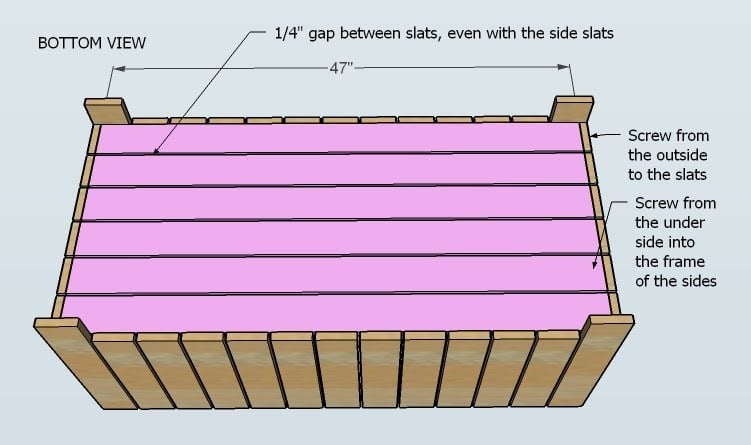
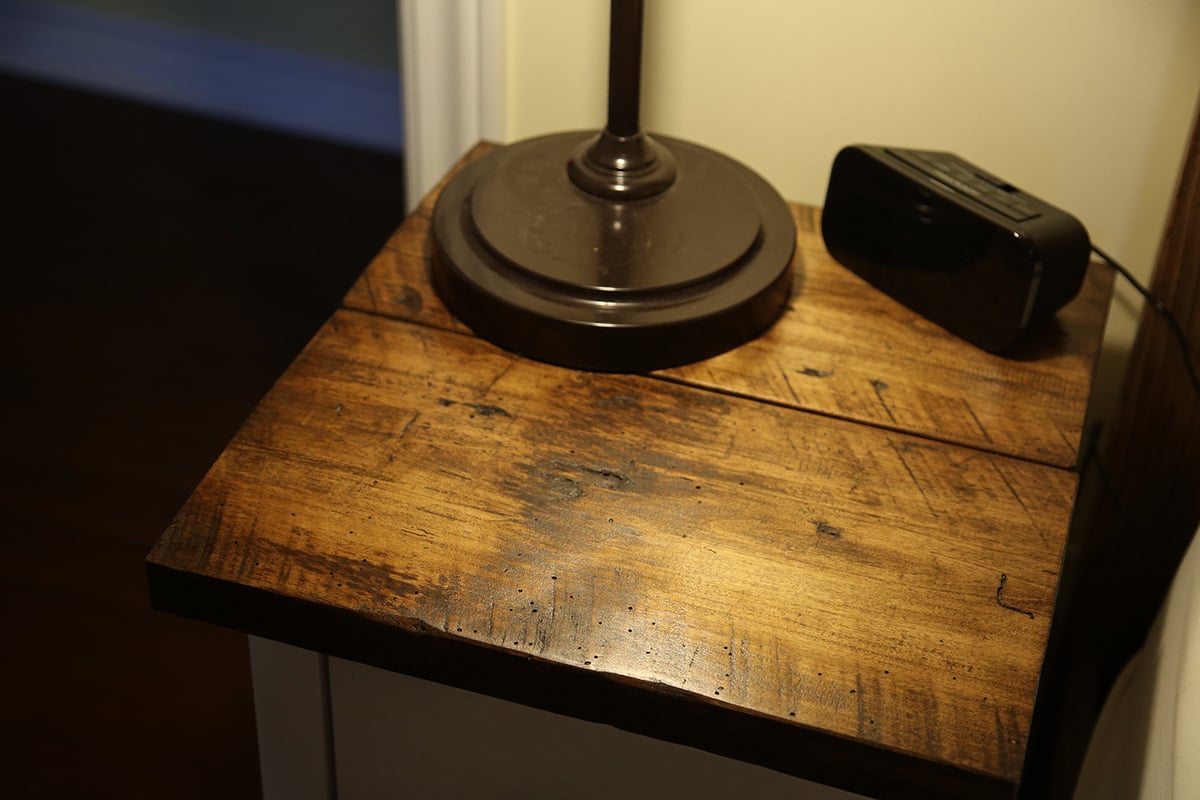
That’s it! I decided how long I wanted my bench to be (which was 47" long by 16" tall). Then, I cut out my pieces. I decided to do 45 degree angle joints on the ends, as opposed to having a flat edge exposed on the sides. I had to use my table saw to get the 45′s on the legs and two flat boards. This was very effin’ scary. Using my Kreg jig, I drilled holes in both of the flat boards that sandwich the tall center one. I offset my holes so that the screws wouldn’t hit each other. You can see in the picture that I accidentally drilled holes in my center piece too. Builder fail. That side will just have to face the back ;)

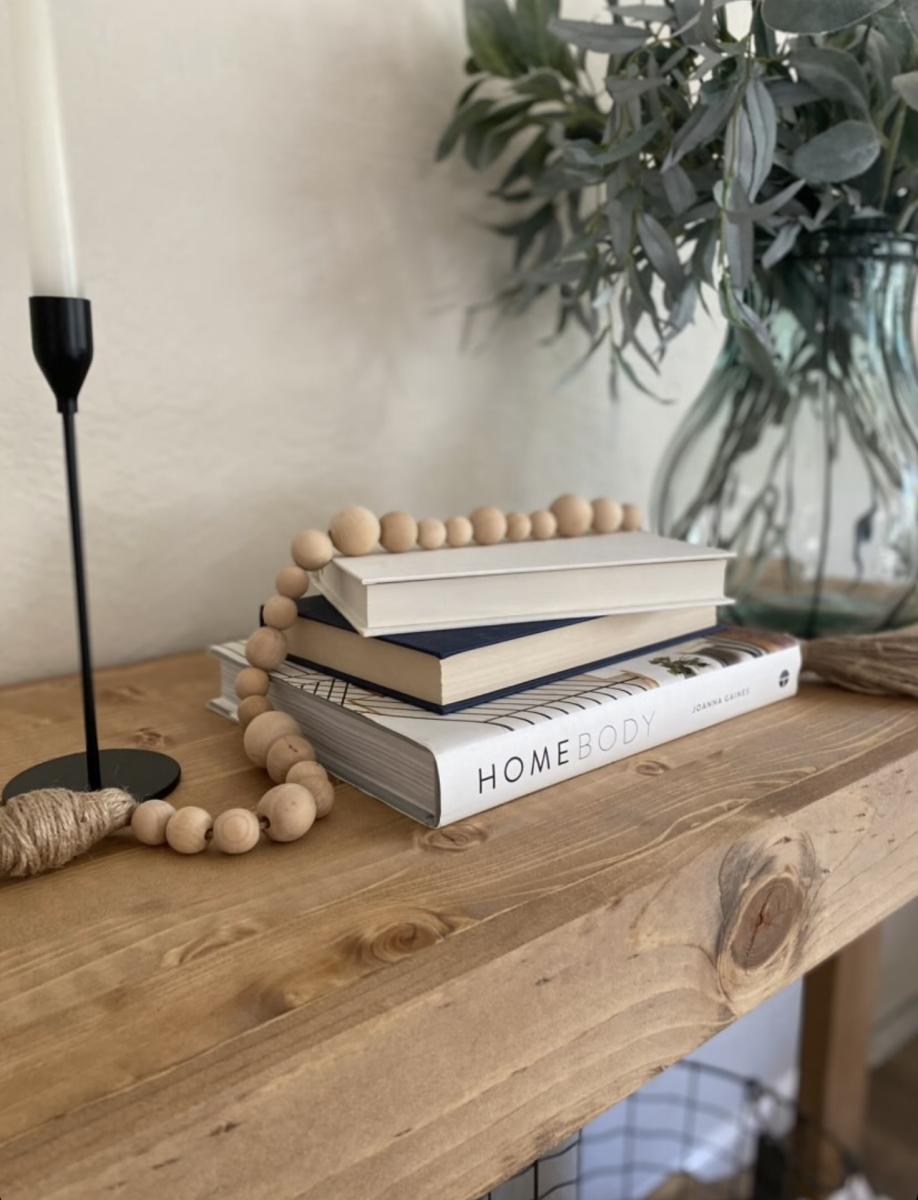
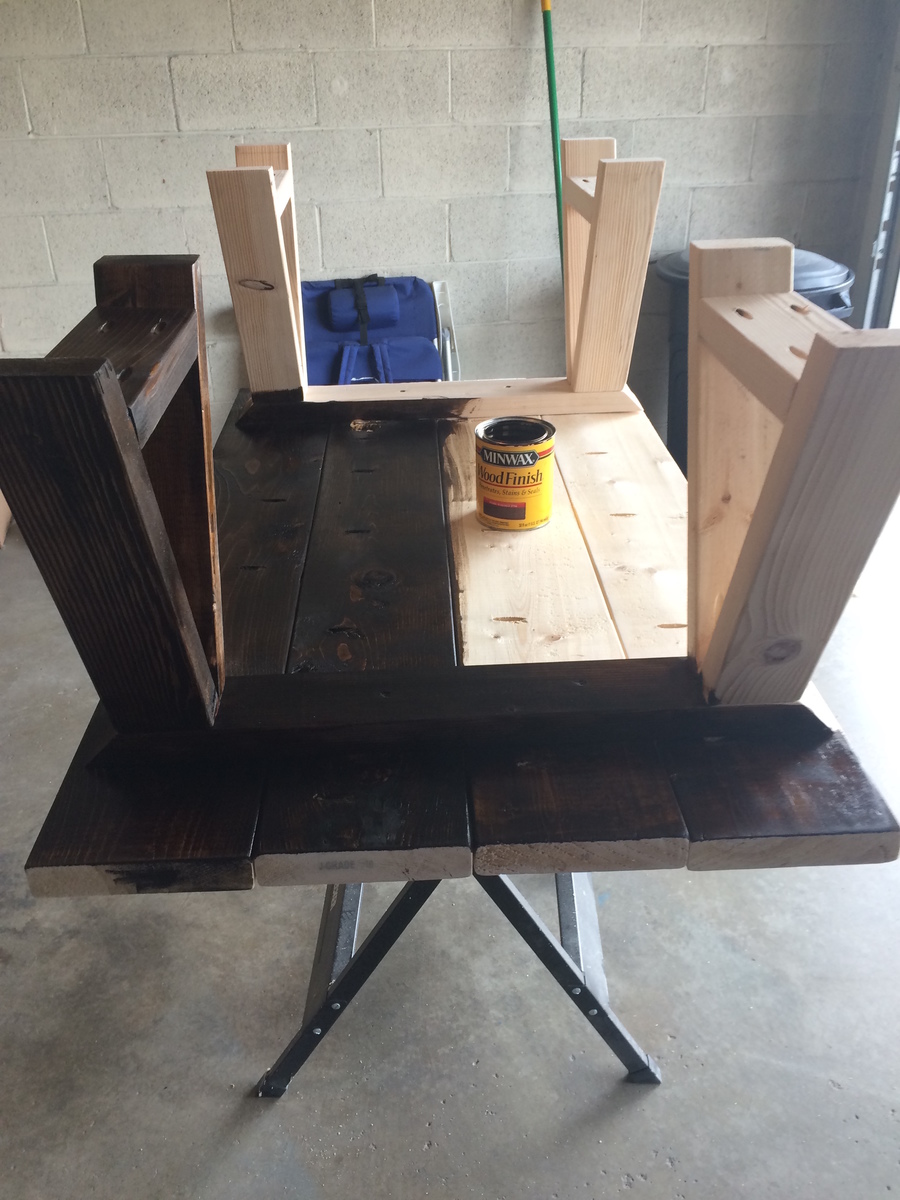
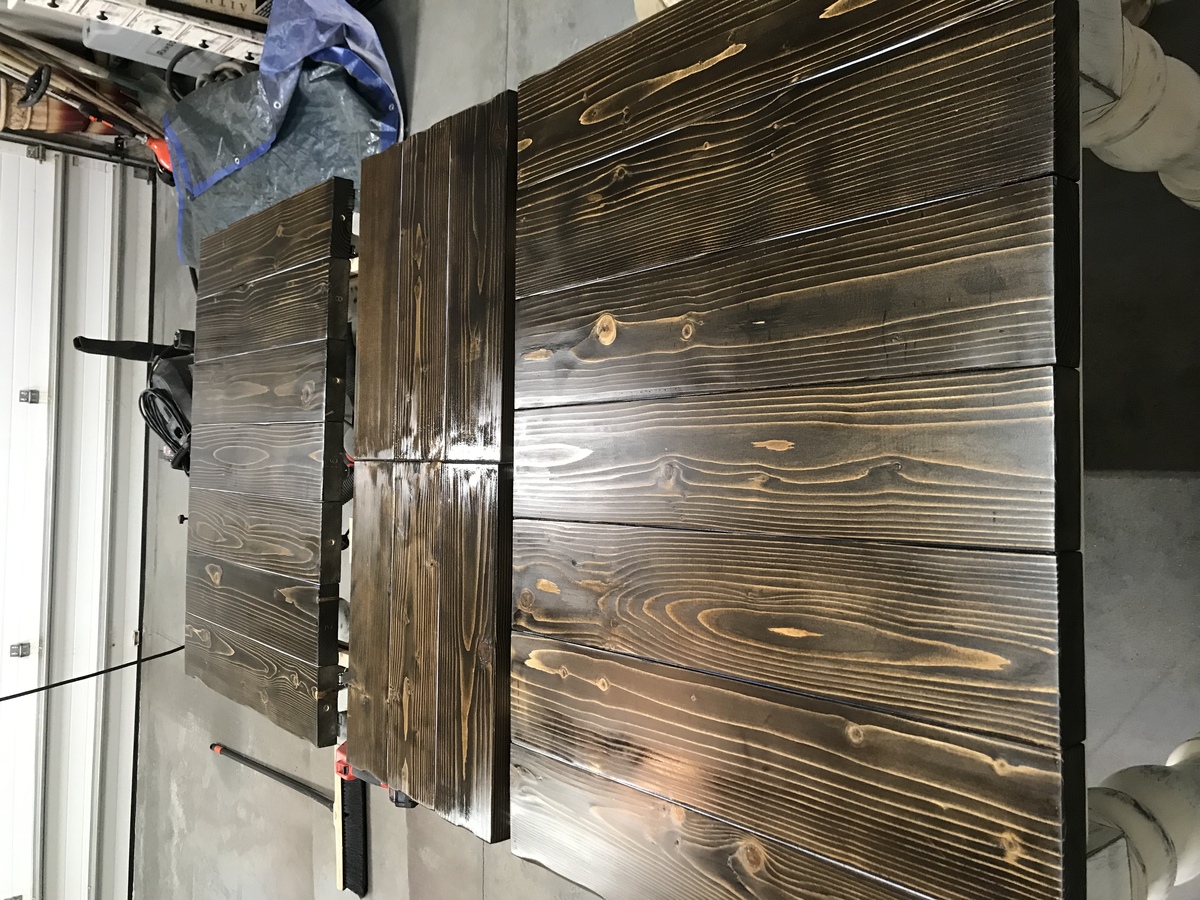
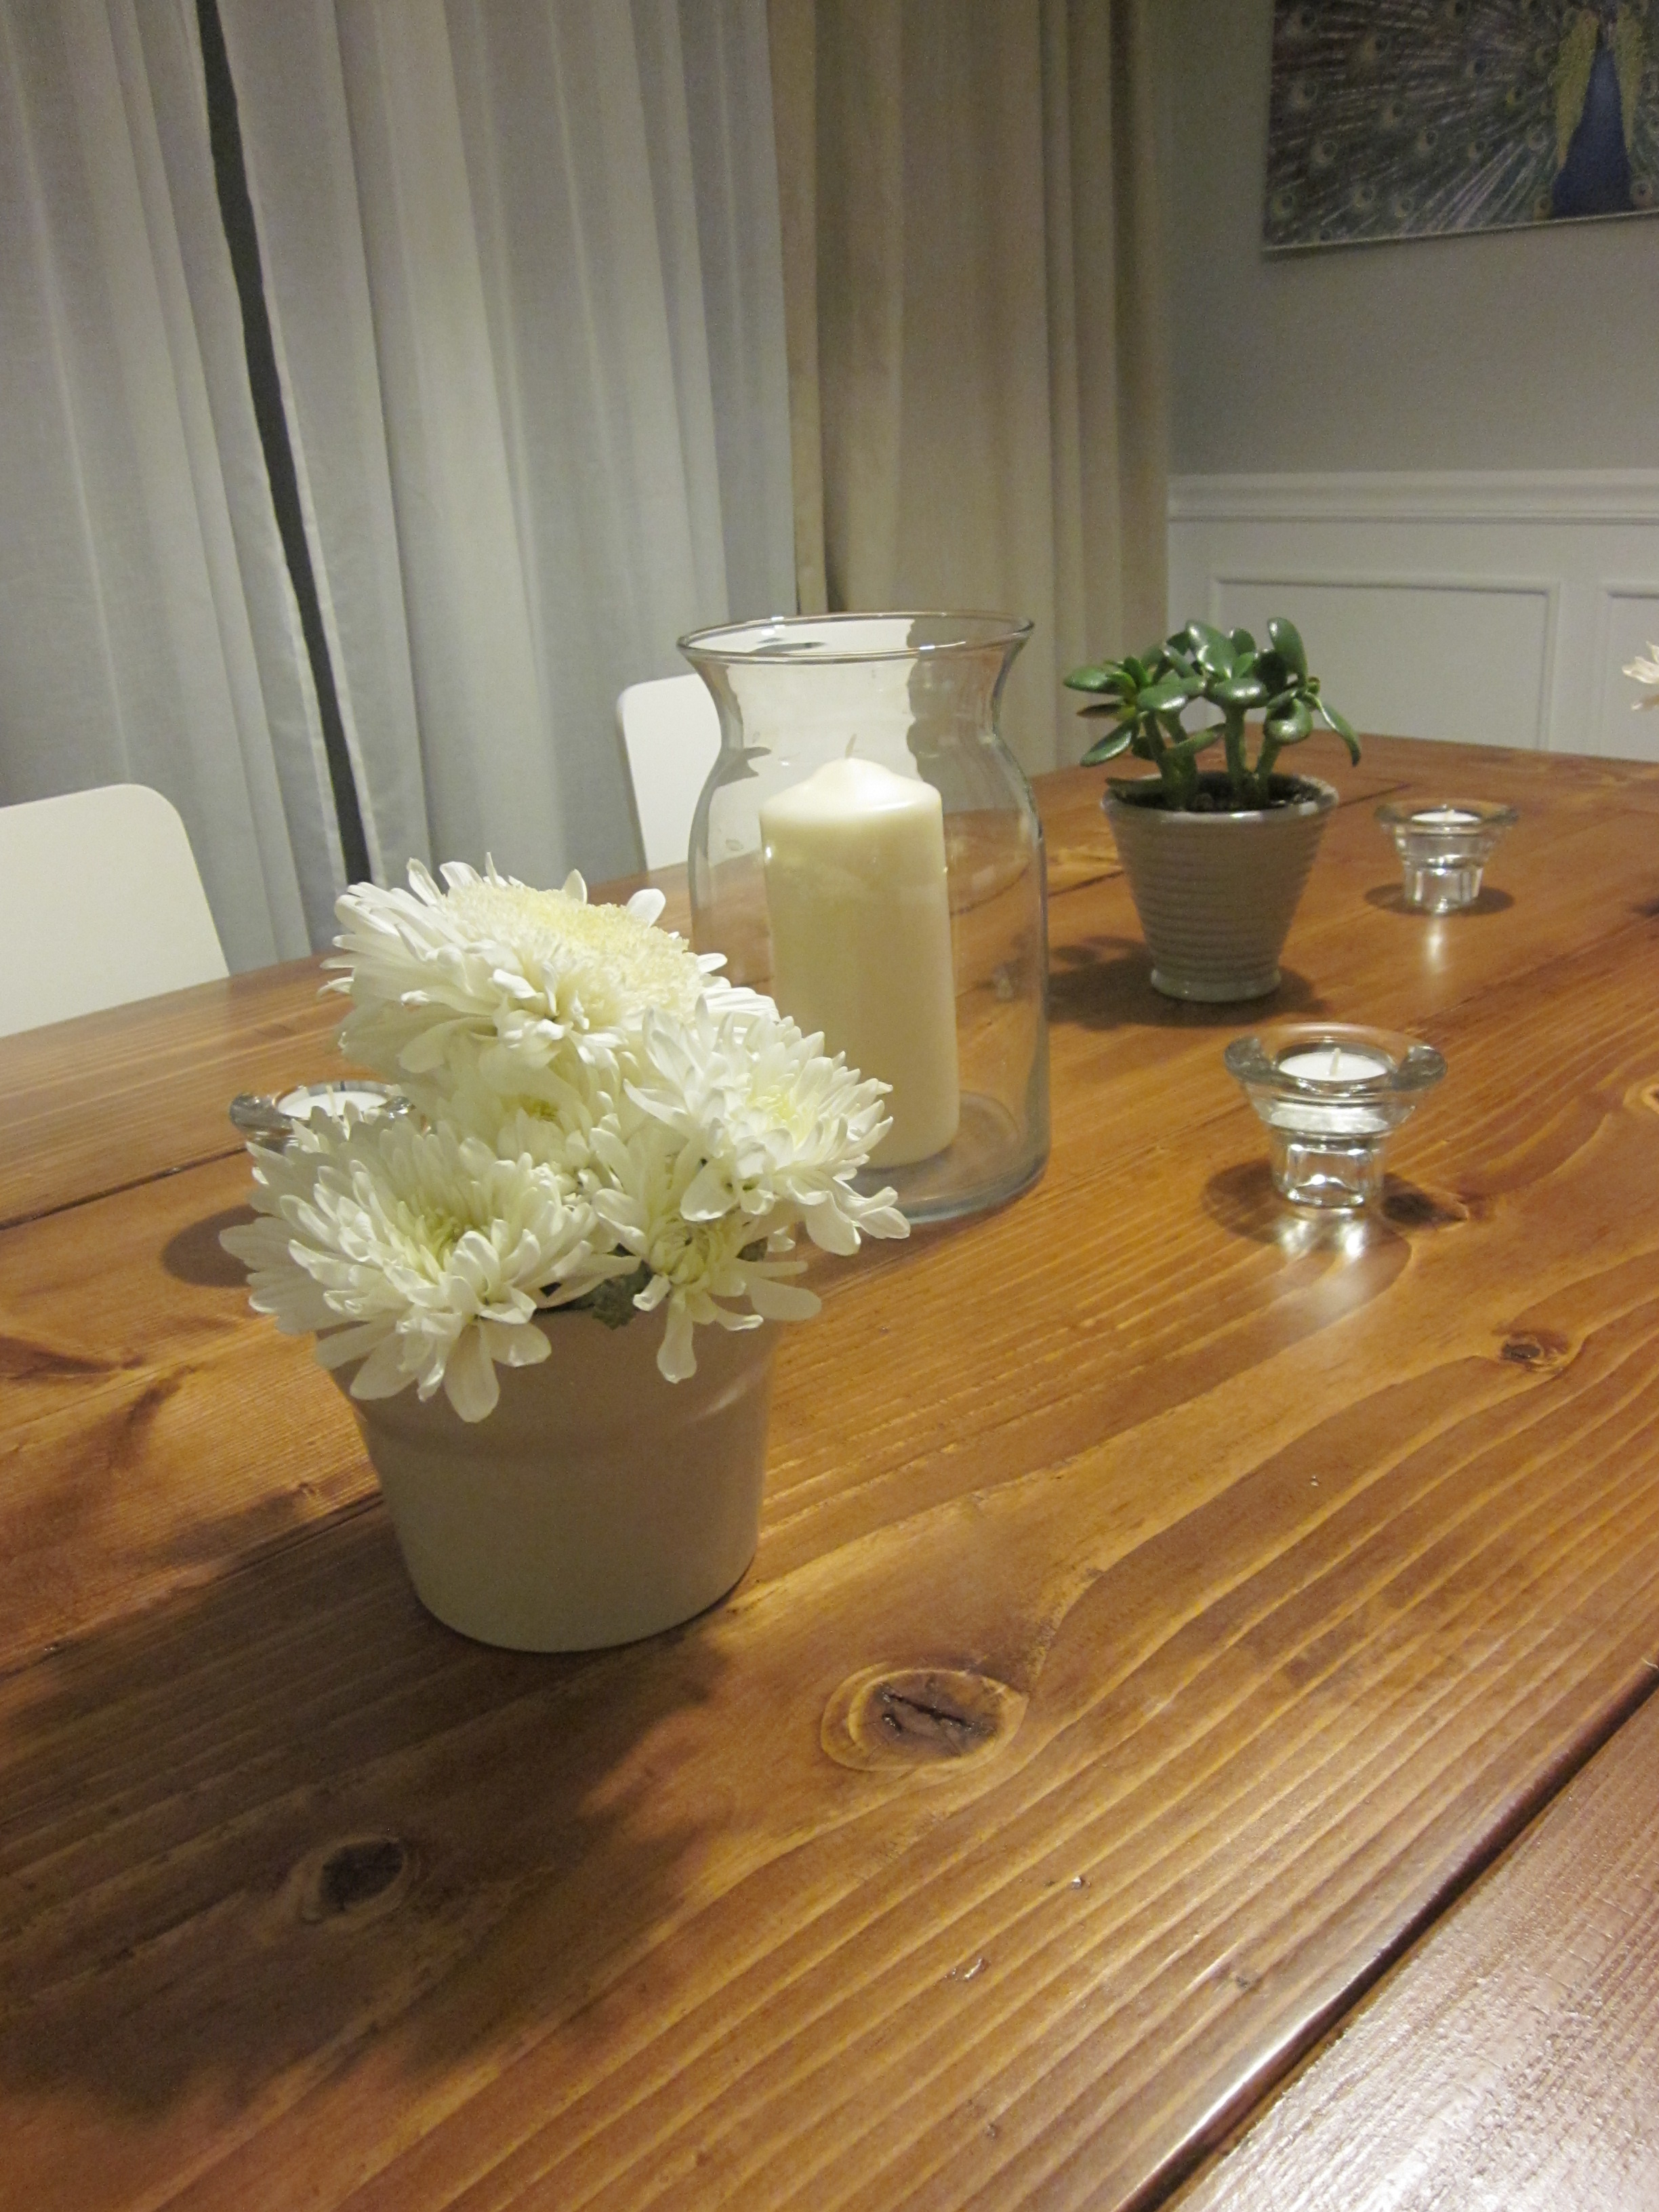
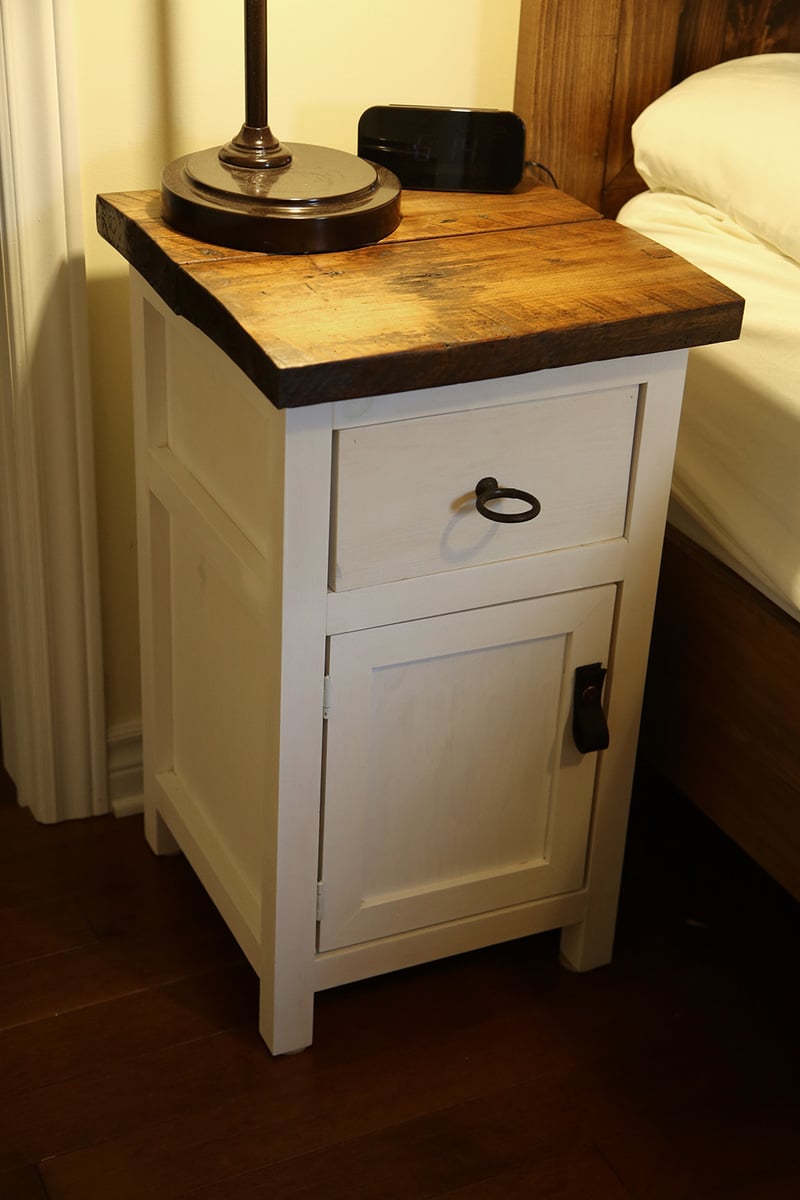
Attach your 3 top boards together. Then screw in your legs. I decided not to countersink and fill, kind of because I like the industrial look, but mostly because I’m lazy. Then you just sand that sucker up and voila! You’ve got a gorgeous bench perfect for any home. I decided to get a little fancy with my finishing and do a two-tone stain. It took about an hour to do the two colors and not drip on everything, as opposed to the 15 minutes one color would take. I think the extra time was definitely worth it!

Estimated Cost
$6
Estimated Time Investment
An Hour or Two (0-2 Hours)
Finish Used
Minwax stain in gunstock and walnut
Recommended Skill Level
Starter Project

Comments

LoriQ (not verified)

Mon, 03/12/2012 - 16:58

How is the center top board attached to the ones on either side? I've never built anything before, so this is probably obvious to everyone else. :-/

LoriQ (not verified)

Mon, 03/12/2012 - 17:00

How is the center top board attached to the other top boards? I've never built anything, so this is probably obvious to everyone else. :-/

Guest (not verified)

Mon, 03/12/2012 - 20:39

I used a kreg jig to join the 3 boards. If you don't have a jig you can "toenail" the screws by drilling them from below at a 45 degree angle. I would join the vertical into one side at a typical 90 degree angle, then toenail the other board. You could add extra security with L brackets

claydowling

Tue, 03/13/2012 - 03:57

The usual solution for cutting a long piece like this on a table saw is to build a crosscut sled first. There are a lot of good guides on the internet for how to build a crosscut sled.

I build something that is a bit oversized, so much so that I had to incorporate a box for some weights so it's stable on my table. But I can easily support a three foot board on this sled with room to spare before it runs off the end.

The sled supports the board and makes it so you aren't fighting your work in a dangerous situation. This sled made my saw completely non-scary to use.

One thing I've noticed about a table saw is that when you buy the saw, that's only the start of the tool. You'll spend a lot of time refining it with add-ons and jigs that you build for it.

Alicia47

Sat, 01/25/2014 - 11:12

I wanted to make this bench, went and bought the supplies, got home to cut it, and the measurements are off. I cannot figure out any possible way to make this bench 47 inches long without running out of wood. Is it possible that the measurements are off? Or can I just not figure out how to cut it so I don't fall short on my wood? Someone please help!

Camp Loft bed - modified

Submitted by Milhouse on Tue, 09/24/2013 - 12:04

I liked the simple design of the camp loft bed, so I took the plan and modified it to fit over top of our existing Ikea daybed. I adjusted the width of the loft bed and made it a little taller, so that I could sit on the bottom bed and read to the kids with out hitting my head on the loft bed all the time.


I built the ladder into the side of the loft bed so that it wouldn't interfere with the drawers on the front of the daybed. This worked out well, as it also gives the girls more room to play!

This build is super easy, but I have to say that I don't like working with 2x4s. They are so rough....I spent a lot of time sanding and filling, and it's still not perfect. But I'm ok with it ;) I may add another cross support because it is a bit wobbly (probably b/c I made it taller).


The finish is a color matched 'All surface enamel' from Sherwin Williams.


Estimated Time Investment
Weekend Project (10-20 Hours)
Recommended Skill Level
Intermediate

Comments

roxanne89

Wed, 08/04/2021 - 06:38

Hello Millhouse. I love the loft bed you created. I have the exact hemnes daybed for my daughter and I beg to build the same loft bed. Do you have the exact modified plan you used with the measurements that fit the bottom bed? This would be super helpful!! Thanks in advance!

Historic Palouse Halltree

Submitted by Anonymous (not verified) on Sat, 01/26/2019 - 09:33

This piece was inspired by Ana’s plans and built as a collaborative project with my son.  The stock was all salvaged from a century+ old railroad depot on the University of Idaho campus that was marked for demolition.  The green and cream boards were the ceiling of the depot, and the unfinished stock came from the flooring, which was 1” tongue and groove red fir.  The first agricultural crops, forest products, and settlers of the region (North Idaho, Eastern Washington) flowed through that terminal.  This piece, therefore, is iconic of the regikn’s rough-hewn beginnings and stands as a reminder of its important past.

Estimated Cost
$60 for glue, hinges, screws, polyurethane. The wood was salvaged for free.
Estimated Time Investment
Weekend Project (10-20 Hours)
Finish Used
After sanding the bare wood and scrubbing the painted surfaces, I sprayed a satin polyurethane (good ol’ rattle can!)
Recommended Skill Level
Intermediate

School papers organized

Now that we've got two kids in school, the previous system of storing school papers just wasn't going to work (see pic below). I used the plans on Ana's site as a guideline and made the letter bin to fit my space. I decided to also make it a holder for the mail and all our keys.

This was made used all leftover wood hanging out in the garage. Luan was used for the letter bin, and strapping (1/2" pine) was used for the mail holder. I spray painted black and then painted it a creamy white, the color of our house trim. I distressed a little bit and then added the hooks. I hope it can stand the test of time.

Estimated Cost
$16 (mainly in the hooks)
Estimated Time Investment
Afternoon Project (3-6 Hours)
Finish Used
Chose not to prime; black spray paint; creamy white; distress
Recommended Skill Level
Intermediate

Comments

StacieM

Fri, 09/09/2011 - 16:42

I just made the PB letter bin and now I wish I would have added the key hanger to the bottom since with 6 cars, we have tons of keys all over the place. Maybe I will make a separate one..

This looks awesome and I live the distressed finish.

Loft bed with bookcase and desk

Submitted by abc1234 on Mon, 12/26/2022 - 08:01

I built this for my daughter and more or less followed the plan without changes. I wasn't able to get hold of 1x3 so had to rip 1x4s which was a little time consuming. In hindsight I would probably increase the depth of the desk as it's a little shallow but not a huge problem.
I primed with two coats of BIN Primer as there were a lot if knots in the wood and I heard this is the best to cover then. It was a lot more expensive but hopefully worth it. Finished with latex semigloss.

Comments

Markham Workbench Console and Rustic Hutch

I first saw this workbench and hutch on Ana's website, but didn't commit to the project until I saw them in person, as part of a model home that had been decorated by local Pottery Barn design services. I was sold. I built this for roughly $1900.00 less than PB charges. It was an easy weekend build for a guy with less than one years' experience in this arena.

Estimated Cost
150.00
Estimated Time Investment
Weekend Project (10-20 Hours)
Finish Used
Before I applied stain, I had my two youngest sons whack away (under my supervision, of course) at the piece with a hammer, hatchet, and chain to give it a distressed look. I took a page from Ana's playbook and used Minwax Early American with a Minwax oil-modifed water-based gloss polyeurethane topcoat. I moved the towel bar to the other end of the facade in order to reduce the depth of the piece and added a stationary bottle opener to the other side. Also, I added four lag screws toward the juncture of the legs and feet (a la PB's version), but these were purely cosmetic. All visible hardware was spray-painted with Rustoleum's textured black spray paint. Finally, I carved a heart with "A+A" inside one of the hutch cubbies to add a truly personalized element to the piece. I plan to build another for my father to use as a functional workbench. By far my favorite build (my wife kind of loves it, too). One last thing - if you don't have a Kreg jig, get one. Now. This was my first build using one and I cannot overstate its worth. Trust me.
Recommended Skill Level
Beginner

Comments

kmatt55

Thu, 09/15/2011 - 16:20

Nice dude! I just finished my console last weekend. Was it worth it making the matching hutch? I haven't decided if I'll do it yet.....Great job though.

anthony alejandre (not verified)

Thu, 09/22/2011 - 11:23

Absolutely. It's minimal time investment, and it really seems to finish the piece off. I went with seven 1x6's (instead of a plywood backing) to give the hutch a planked look.

Jennifer Babjak (not verified)

Sat, 09/17/2011 - 15:19

Very very nice. This has been on my build list for way toooo long. It is beautiful and inspiring! Thanks!!!

gsumarcinko

Fri, 02/24/2012 - 05:43

Great job! I'm starting this same project and just purchased the kreg jig system but I'm stuck on assembling the table legs using pocket holes. I don't want to have visible pocket holes, could you give a quick description on how you assembled the legs and attached them to the feet using pocket holes? Thanks!

Guest (not verified)

Wed, 02/29/2012 - 10:34

Where did you find the cool towel bar?! I am trying to get my boyfriend to make me one of these, but i am having the hardest time finding a towel bar like that online? I appreciate your help!!!
Jenna

Birthday Farmhouse Queen sized Bed

Submitted by ksmith311 on Sun, 09/29/2013 - 12:41

We built this bed way back in April for my birthday, but hadn't gotten the bedding quite right until now. We love this thing and it is sooo sturdy. I wish I would have taken more time on finish work to get the paint just right. I will probably repaint it in the future but for now it is a beautiful and necessary addition to our bedroom.

Thanks so much for the plans Ana, this was our first furniture project besides shelves and boxes. It definitely gave us the confidence to continue building and even to start creating our own plans and furniture designs.

** updated photos on 11/21

Built from Plan(s)
Estimated Time Investment
Weekend Project (10-20 Hours)
Finish Used
Antique white paint in semi-gloss and distressed with Early American Stain.
Recommended Skill Level
Starter Project

Saw Horse Inspired Coffee table

Submitted by Nathan O on Tue, 12/15/2015 - 18:01

I essentially followed the Rogue Engineer plans exactly with the exception of making the table on 50 inches long to help it fit better in my living space. I also opted to not add the lower support struts that would be perpendicular to the table top. I felt like that were bulky and were necessary for support. I may choose to go back and add them though. A miter saw and Kreg Jig are essential to get this project done with ease. I gave it a rough sanding to help keep the rugged texture of the original woodand maintain the reclaimed look. Feel free to post any questions.

Built from Plan(s)
Estimated Cost
$30-$50
Estimated Time Investment
Weekend Project (10-20 Hours)
Finish Used
Mini Wax Dark Walnut and Poly
Recommended Skill Level
Beginner

Husky farmhouse table w/ butterfly leaf

Submitted by Anonymous (not verified) on Wed, 02/06/2019 - 17:43
  • Hand built Husky Farmhouse Table, plans from Ana White adding a hideaway butterfly leaf
Estimated Cost
$350
Estimated Time Investment
Week Long Project (20 Hours or More)
Finish Used
4 coats of Polycrylic Clear Matte
Recommended Skill Level
Intermediate

Comments

L shaped triple x desk

Submitted by Anonymous (not verified) on Sun, 01/01/2023 - 13:24

We built this desk over Christmas break with my son for his bedroom.
Ran all wood through a planer and used pocket hole screws and Tite bond 3 glue. Black stain and satin polyurethane (3 coats) for the frame and my own stain concoction for the shelves and top treated with 2 coats of Odies oil.
He was very pleased and we enjoyed our time working on this project

Comments

Entryway/Mudroom Cabinet

Submitted by wibblee on Mon, 09/19/2011 - 19:37

My most *favoritest* project ever. I modified the Braden plans like crazy to fit my family's needs for the sunroom/mudroom. I kept the bottom open so the it woould allow for baskets to slide it easily (which makes sweeping inside a snap). Also, I added some braces about midway down to hold the coat hooks for my 3 and 5 year-old. I had them show me how high they could reach and I just placed the braces there.

I literally used up whatever I could find in my garage for this project. We had a TON of scrap wood in varying thicknesses and lengths so I just used that. The only thing that I had to buy for this project was some 1x2 to finish off the trim.

Can't wait to get hardware on and style her up pretty! Will post final pics as soon as I do. :) I've been DYING to get something up on Ana's brag board and I can't wait to keep 'em coming.

Estimated Cost
$30+
Estimated Time Investment
Weekend Project (10-20 Hours)
Finish Used
Kilz oil-based primer and 3 coats of Valspar Swiss Coffee in semi gloss.
Recommended Skill Level
Intermediate

Comments

CLee

Thu, 09/22/2011 - 07:48

I love the divided shelf in the middle! And did you make the wreath (I think I made the same one out of unbleached filters!) And your son is adorable!

wibblee

Thu, 09/22/2011 - 15:21

I *did* make the wreath! It's homeless right now while I decide where to put it. That sucker is HUGE. Did yours turn out enormous, too?

Taylors console

We needed TV and game system storage for our vacation cabin and didn't want to spend a lot. This is perfect!

Built from Plan(s)
Estimated Cost
$80
Estimated Time Investment
Weekend Project (10-20 Hours)
Finish Used
Used a mixture of some old darker stains I had on hand over the bare wood, then some Vaseline on edges I wanted to distress. Painted with DIY chalk paint (approx 1 teaspoon of unsanded grout mixed with a little water, stirred into 1 cup of latex paint.) Distressed with sander, then finished with two coats of wax.
Recommended Skill Level
Beginner

Square Farmhouse Table

Submitted by 42jbmayer on Sat, 12/19/2015 - 21:25

This is a square farmhouse table I built for my dining room.  It is just under 5ftx5ft size.  The top is 6 planks that I cut down from 2x12 down to 10inch sized planks.  Then routered each plank with a 1/8 roundover router bit.  I made the bench big and wide since I wanted it safe and stable so my toddlers don't fall off.  Lots of sanding since this is all kiln dried construction lumber.  I sprayed varathane poly, water based, and loved it.  I put 4 coats on of semi gloss, came out perfect.

Estimated Cost
250-300
Estimated Time Investment
Week Long Project (20 Hours or More)
Finish Used
Varathane Dark Walnut
Recommended Skill Level
Intermediate

Comments

Bench with foam padding

Submitted by Anonymous (not verified) on Mon, 02/11/2019 - 16:52

This was a fun little project. I made the bench to be placed in our foyer to sit down and put your shoes on and off. 3” foam and fabric makes for a comfy bench.

Estimated Cost
$100 ($60 lumber, $40 3” foam and fabric)
Estimated Time Investment
Afternoon Project (3-6 Hours)
Finish Used
White paint
Recommended Skill Level
Beginner

Kids Desk

Submitted by kellystern on Mon, 01/09/2023 - 16:03

I modified the plan to allow for wider shelves on the legs. I also made the width of the desk 22” instead of 24” to accommodate the size of the repurposed coffee table I used for the desktop.

Built from Plan(s)

Comments

Modified Farmhouse Table

Submitted by glowcze1 on Mon, 09/26/2011 - 08:52

For this project, we combined plans from the Farmhouse table and also the Tryde coffee table. We have a smaller dining room so we had to modify the plans to fit our ideal size (44"wide x 62"long). I did not want the stretcher underneath as it would take up leg room and it is very sturdy without it. We used 2x12s for the tabletop & 2x8s for the breadboards. We used 4x4 posts for the legs and 2x4 for all the other support pieces. We constructed the table in 2 pieces: the frame and then the table top so it would easier to move into place then do the final assembly. This was our first time building furniture and first time using the Kreg Jig. I think the Kreg was easy to use and worth the investment. Overall, we were surprised at how well it turned out and will look to Ana for more plans in the future!

Estimated Cost
$120
Estimated Time Investment
Weekend Project (10-20 Hours)
Finish Used
Wood conditioner- Rust-Oleum
American Walnut, 1 light coat, applied with a rag- Rust-Oleum
Polyurethane, 4 coats, applied with a foam brush- Min Wax
Recommended Skill Level
Beginner

Comments

ferbit

Thu, 11/17/2011 - 10:04

I'm doing this exact project right now. Just bought the wood and am about to start the cuts today. I'm using the Tryde plan, but making it kitchen table size. I love that you were able to find 2x pine! My store doesn't carry that, only 1x pine. So I had to go with the UBER cheap 2x hemlock. It's ok, but I would have preferred pine.

ANYWAY, I'm wanting to build this in two pieces too. I'm assuming you Kreg Jigged the tabletop pieces together. How did that go? That's what I was planning to do... I bought 2 1/2" pocket screws for this part of the job. Is that what you used? My tabletop is all 2x8 boards. Just curious how it "felt" edge joining boards this size together. Did you use extra screws or just follow Kreg Jig recommendations (2" from ends, then every 6")?

Thanks for your thoughts! My table is going to be so similar to yours! LOVE seeing your picures!!! :) Great job!

Jennifer

glowcze1

Wed, 02/29/2012 - 13:14

Sorry, I wasn't notified there were more comments!

Yes, we used the Kreg Jig, it was our first time and pretty easy to use. We did not drill from the top down on the tabletop, only used the Kreg Jig on the underside and this table is STURDY. On the table boards-Yes, we did the 2" from the ends and every 6" or where we thought they should go. Hope your's turned out well and thank you for the nice comments!

The chairs are Ikea's Gilbert. We've been happy with them. They support some of the 6'4" men in my family, no problem.

Bedside Tables

We love our farmhouse king bed, but that meant that our old side tables didn't fit anymore! (our old bed was a queen)

I really like the mini farmhouse bedside table, but the open storage would be problematic with the dog, so I added full length sides and a door.

The top of the tables is a board we found at my husband's grandparents farm, and the pulls are from some old tack. The metal loops were on some old horse harness, and the leather was cleaned up from the same piece. I was able to drill a hole in the leather and then pre-dill the doors to accept post screws from home depot.

I love these tables!

Built from Plan(s)
Estimated Cost
$125 for both tables
Estimated Time Investment
Weekend Project (10-20 Hours)
Finish Used
The tops are stained with Varathane gel stain in Walnut, and then a wipe on poly.
The sides were done with Kilz primer and then a white paint.
Recommended Skill Level
Beginner

Comments

JoanneS

Wed, 10/02/2013 - 19:11

Love these tables! The wood top is just gorgeous, and I love you you re-purposed other items to make the hardware. That is so creative! Great job!

spiceylg

Thu, 10/03/2013 - 05:24

I concur. Love the tables and love that you re-purposed items for them!

jackiemacrae

Sun, 11/10/2013 - 18:58

Thanks guys!
I'm loving these- they are perfect for the space, and it makes me smile to know that the re-purposed parts come from the cottage.

Black Farm House Bed

Submitted by Anonymous (not verified) on Wed, 12/23/2015 - 06:26

I used Anna's plans, but I wanted to reduce the weight of the bed so I replaced the 2 x 10's with 1 x 8's and I made the cross slats 1 x 4's face up. The 1 x 4's also create a platform to put your bed on so no need for ply wood or box springs. This is still very sturdy, but about half the weight as the original plan.

Thanks Anna for the great ideas and plans! Now I am on to the farm table, wish me luck!

Estimated Cost
I actually spent too much, I bought everything to plan and then bought everything to redo the plan, so all in with paint it was about $300.
Estimated Time Investment
Day Project (6-9 Hours)
Finish Used
I used Killz as a base coat then a flat black paint, looks great but it will take some maintenance.
Recommended Skill Level
Intermediate