Finished the table!
We struggled with the angles because we made the table bigger than this tutorial suggests but all in all, awesome build.
Thanks so much for the plans to build the sweet pea bunk bed.
It was just the ticket.
My little girl loves it, we used glitter paint and used some to replicate the stars and night sky on the lower bunk ceiling
We made a little ladder only because of space (or lack of) and will make the shutters and drawers at a later date.
Many thanks.
Dan, Alena and Leonie
I duplicated this plan from Ann White's Smiling Mudroom Plan. My space was not as deep and was longer than the original plans, so we modified the plans to fit our space. . I liked the idea of a thicker seat that another person used, so we incorporated that. Materials cost us about $200 to make it. Thank you for the inspiration. I love it!
Tue, 02/19/2013 - 16:36
This is a beautiful, yet practical build. The empty space pictured is just begging to be filled. I especially like the wall color and the trim just above the seats that is repeated with the coat hangers. Great work - love it!
Tue, 02/19/2013 - 18:52
Phenomenal !!! Looks great. LOVE the colours too. what wood did you use?
Fun build. Took me a few weeks but enjoyed it. Gave a ton of storage for my sons room.
I made this garden trellis with cheap 6' cedar fence pickets ripped down to 1 1/2" strips. Get the free plans and tutorial at The Handyman's Daughter!
Hubby and I finished our couples project. We combined the plans from the classic storage bed and the farmhouse headboard design. I love the storage aspect and the farmhouse style. We also converted the measurements to a california king size. The build is really sturdy, I know it will last the test of time.
Wed, 02/03/2021 - 10:26
Great job on the modifications, love all the storage too!
From the club house plans. I did go ahead kreg jig all the panels on the front and back walls.
All the art work in the sign and on the steps i used a dremel and dug out and painted everything.
Came out beautiful.
Made so was easy to transports in parts to get up and down stairs in 8 pieces.
Tue, 02/26/2013 - 19:36
This is awesome! My son absolutely loves it, and looks like this is what we will by trying to re-create!
I built this as a Christmas gift. I used Minwax honey oak stain for the top and bottom shelf.
My first Ana project! Different dimension and no drawers but still based off the original plans. Love it!
This plan turned out perfect!! Such a great idea, thank you for the inspiration!
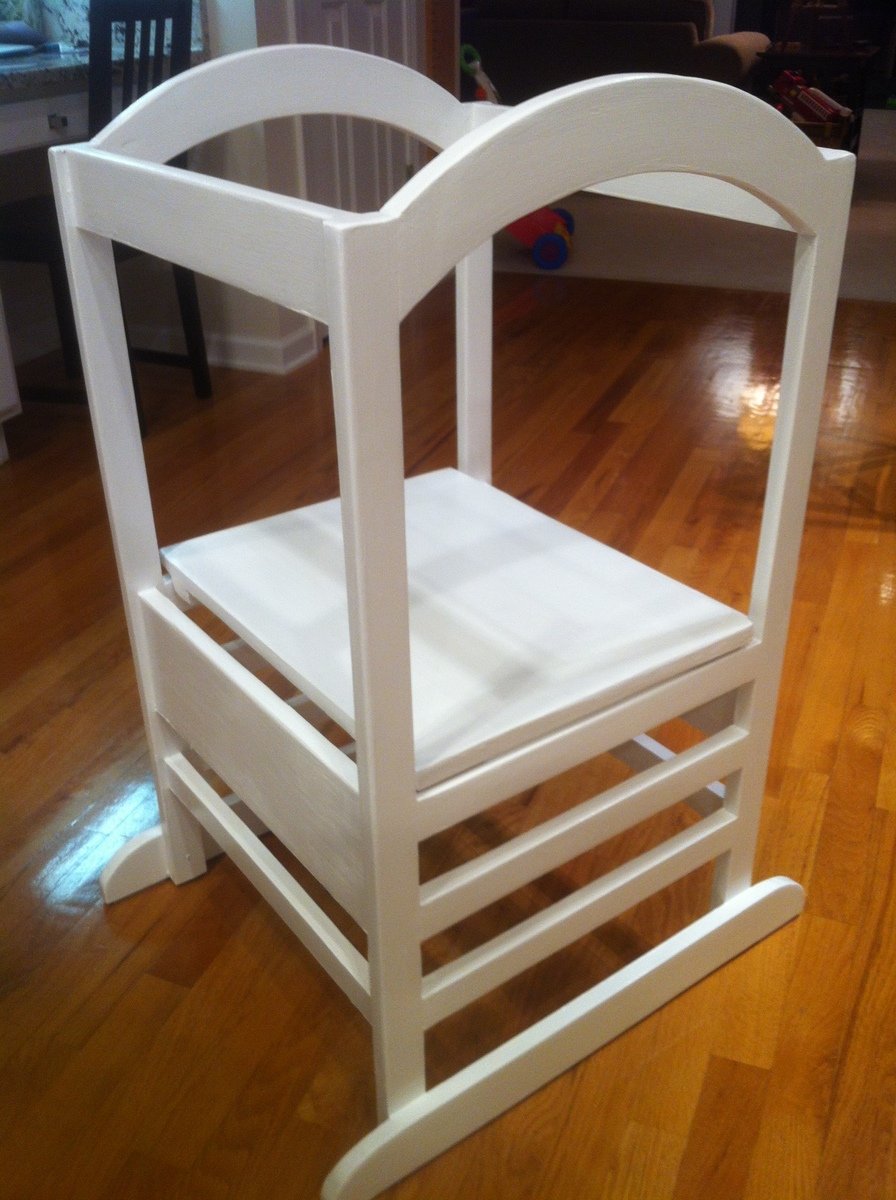
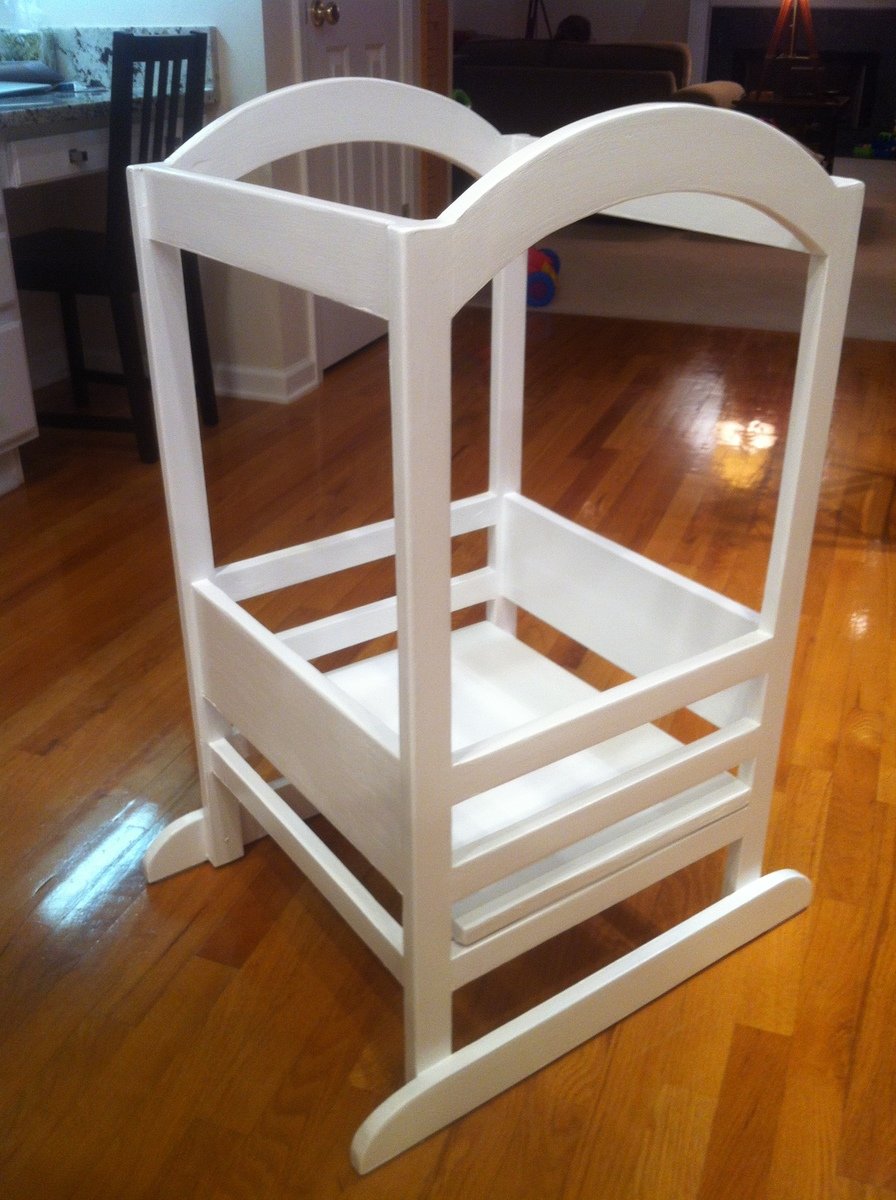
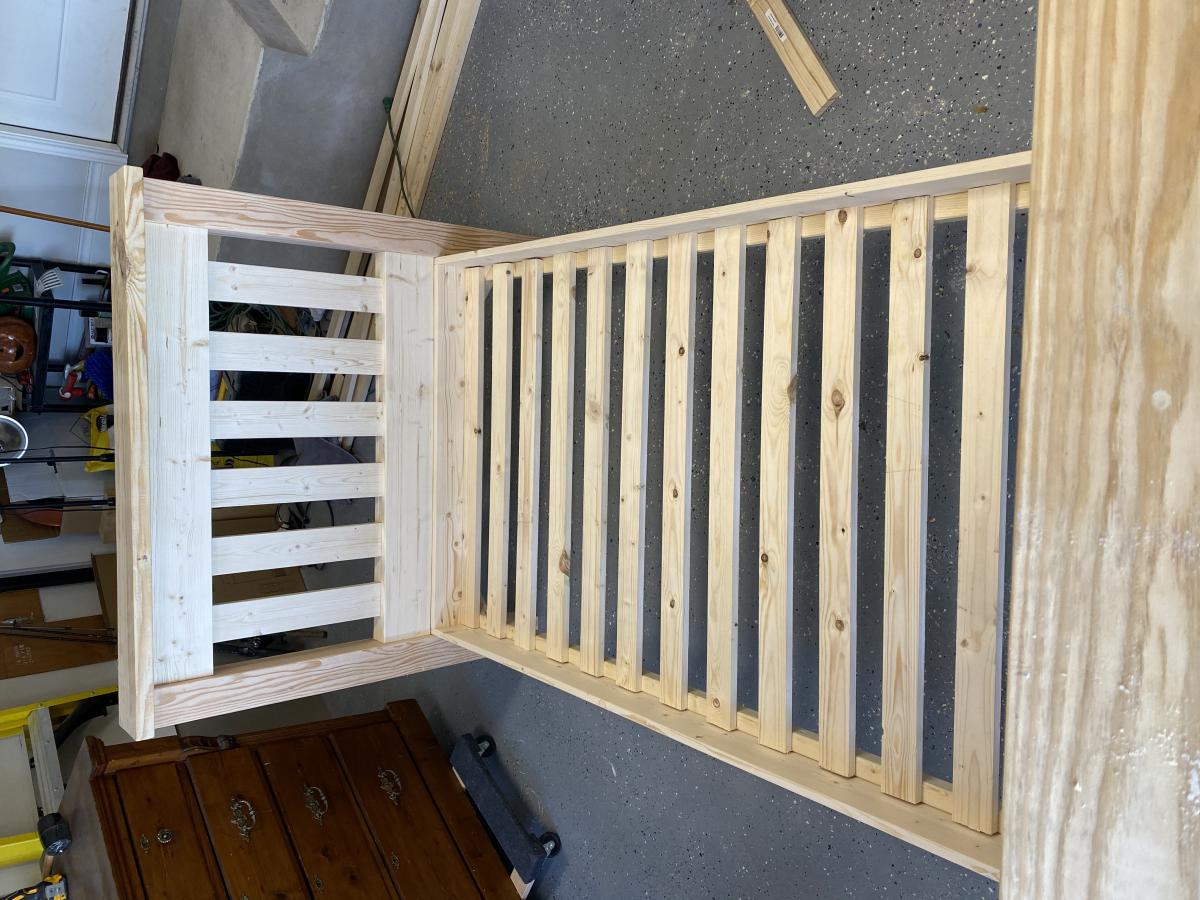
My first woodworking project since building a mug tree in school (I was about 12). This project started in the holiday break after I received a Kreg Jig as a gift, and this seemed like a good first project to tackle. We have a little boy about 20 months old who LOVES to help out, needed something more sturdy than standing on a chair, and this fit the bill perfectly.
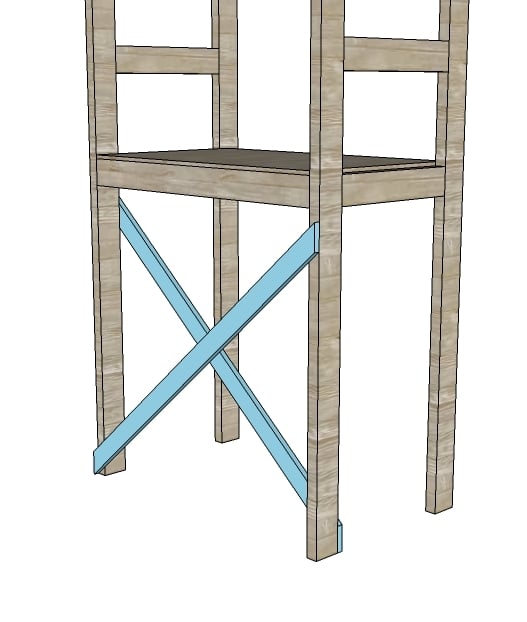
I modified the design very slightly to ensure that the tower fits neatly under our kitchen island so that it stows mostly out of the way. That necessitated removing one of the "levels", and altering the dimensions somewhat to keep it proportional.
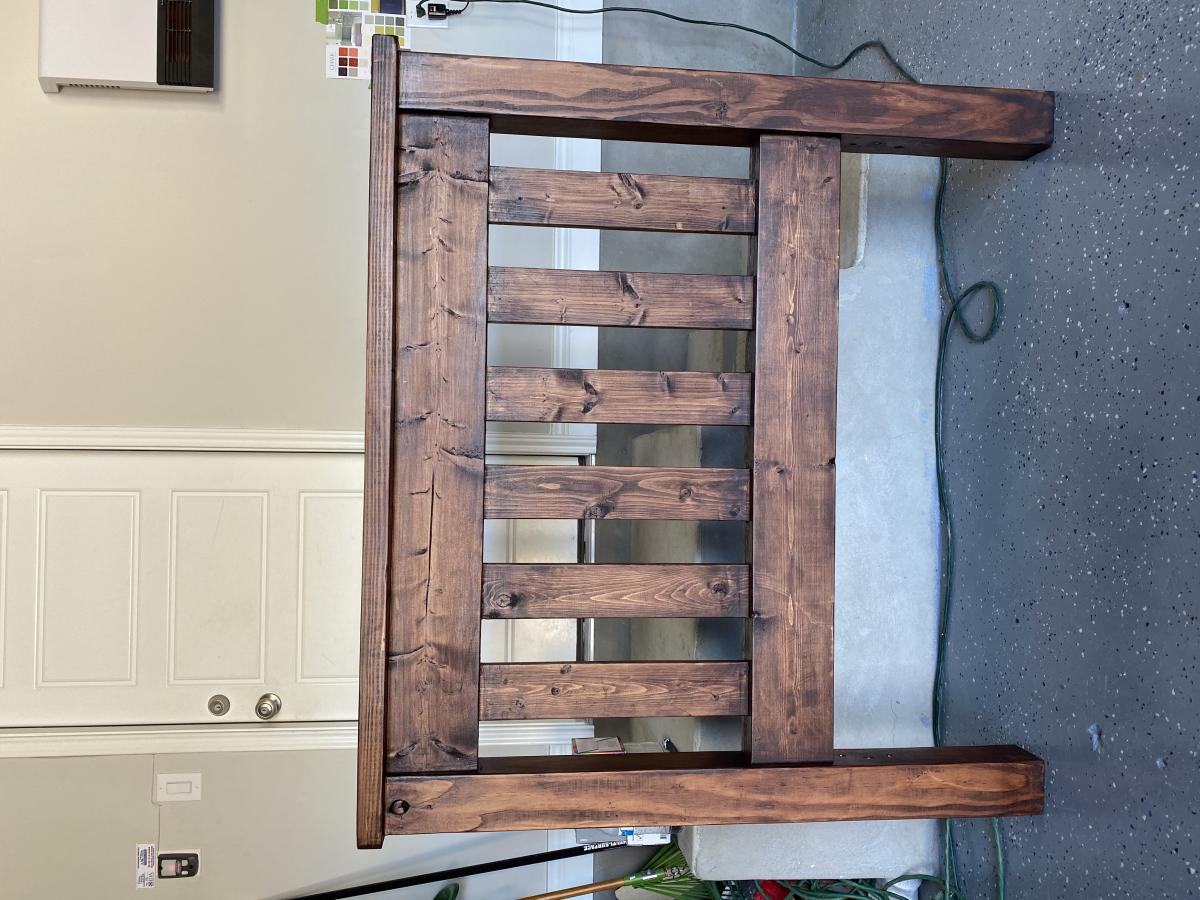
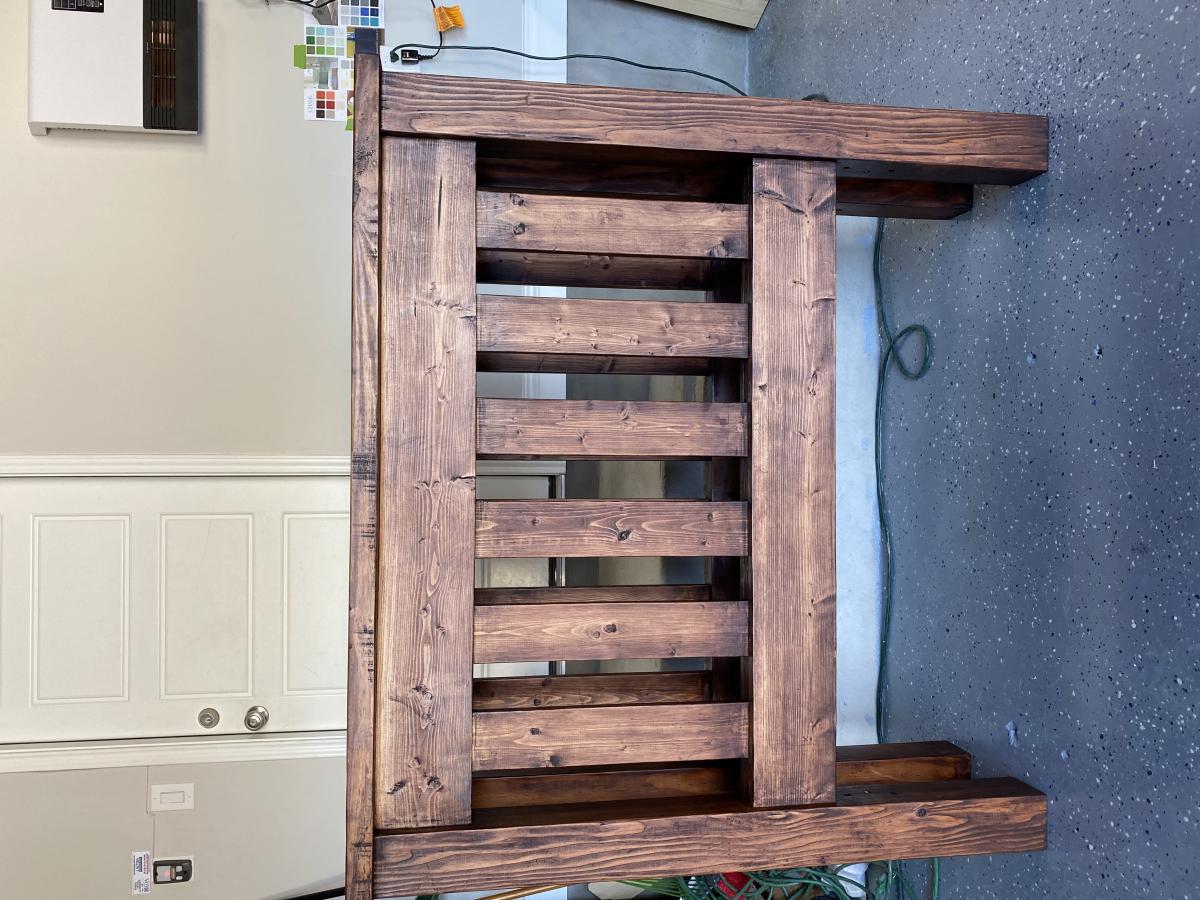
The biggest challenge of all was painting at the end! Made the mistake of using a spray can first, which made the wood fuzzy. So, sanded it all again, added primer (originally it was black), and then a couple of layers of white semi-gloss/enamel. Need to improve my painting technique to avoid brush marks in the future.
I made this little tool caddy in one afternoon from some 1 by various width board scraps. I pretty much followed Ana's 'Give the Gift of Building' plan for construction, while being able to use up some scrap wood. I was making this as a 'just because' gift for my BFF, so I made it to fit three of those free little floral vases, filled it with flowers from my yard, and voilà!
This is a great beginner project, or one for anyone who needs a little something to project during a free afternoon.
I made these for a special order. Used the Simple Twin bed plans but modified them because they want to use the beds as separate twins first, then convert to a bunk bed. In order to make the beds look uniform when separated, the head and foot boards are identical. One bed fits directly on top of the other, secured with 1/2” dowels.
I only was able to complete this project for less than $10 because I happened to have most of the supplies I needed lying around the house already. If this isn't the case for you, it will cost slightly more, but not much.
I had 2 extra 12x12" mirror tiles left over from another project that I've been saving for something creative. When I saw the plans for this picture frame I knew I had a winner. I figured out how much wood I needed and purchased the cheapest type I could that wasn't warped. Since I wanted a bit of the "weathered" look, I didn't mind wood with knots in it. I followed the original plan exactly, the only exception being the specific measurements I knew I needed to fit these mirrors. I also had some extra burlap lying around and made my own stencils for my "M" and "L" monogram letters. After cutting them out, I simply hot glued them directly to the mirrors. Finally, I attached the mirrors to the back of the frames and hung them in place!
I originally wanted more of a rustic look with the paint (similar to the original blue one), but I think the burlap brings that in enough. Overall, I'm very happy with how this turned out!
We used the plans to build the center console piece, and then left off the support shelves under the ends, and instead bolted our desk to a support system directly on the walls. Then we installed a steel support beam under the desk to prevent bowing.
Sun, 01/04/2015 - 18:53
Very nice job on the desk! It almost makes me want to add this project to the to-do list!
My husband built the loft bed and added a side rail on the landing just in case our little one was drowsy during the middle of the night. We added an extra rail to the top (...mommy didn't read the measurements correctly on the website for the mattress but it all worked out). I dont have the picture with her new bed on top with twinkle lights on the bottom but you get the idea. p.s. mommy built the desk on the left :)
These plans were modified slightly from your bathroom storage shelf plans to make a bookshelf for my daughter. Made from cut-offs and spare wood. Fun little project.
This is a twist on the Modular Family Entryway Mudroom System - Pullout Rolling Bench Cart . There have been many posts on the net for a mudroom locker set such as the one I have. In our case we had a mudroom with a closet, not much room to move when sliding the doors open, and as well we have kids that need a place to sit in order to put boots/shoes etc on. I took advantage of my husband's work assignment out of the country to rip back the closet,to 20 inches deep and open it up and added a bench for seating, baskets above for out of season/rarely used stuff, and used rolling cubbies below, but in my case I wanted storage bins instead. My thinking was so that I could make it look clean pretty quickly by just chucking every thing in to the bin... These are tall enough for our boots. In the bottom of the bins I put a piece of outdoor carpeting, then a plastic grid, and over that another layer of outdoor carpeting so if the footwear is wet it will drain and dry-no biggie to vacume or sweep out. Best deal: I can simply roll them out of the way when I want to sweep underneath! I measured cubby space to basket size above, and made the bins below after doing the bench and middle supports, to ensure a good fit. The bench top is an old piece of pine board I sanded, stained and used 4 coats of marine varnish so it would take lots of wear and tear.
Using Ana's plan for the garage shelves I was able to shorten them up and turn my basement storage area into a well-organized storage area. This was my first real wood working project ever. The detailed plans from Ana's site made this a very doable and easy project.
I built this using tongue n groove boards instead of 1x6's and it added some dimension to it. I also made it higher to allow for storage under. Turned out pretty good