Community Brag Posts

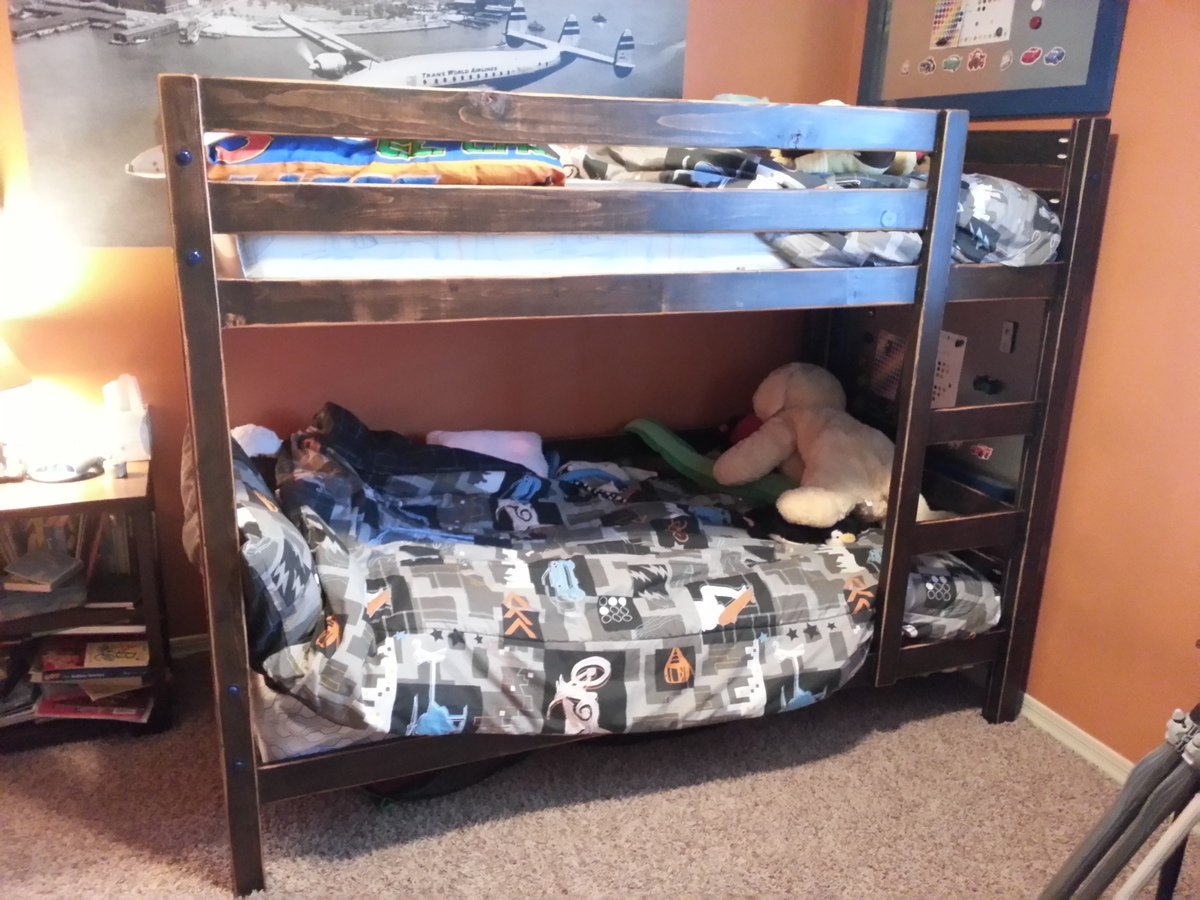
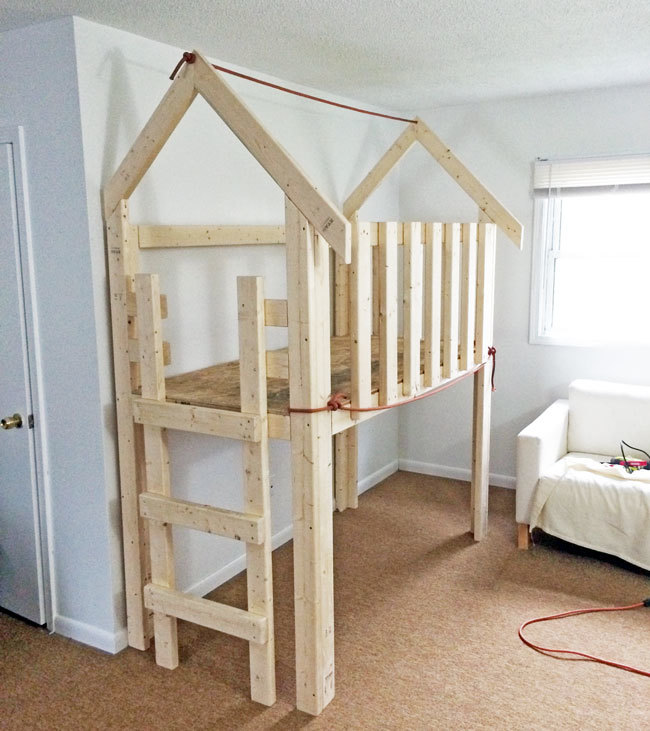
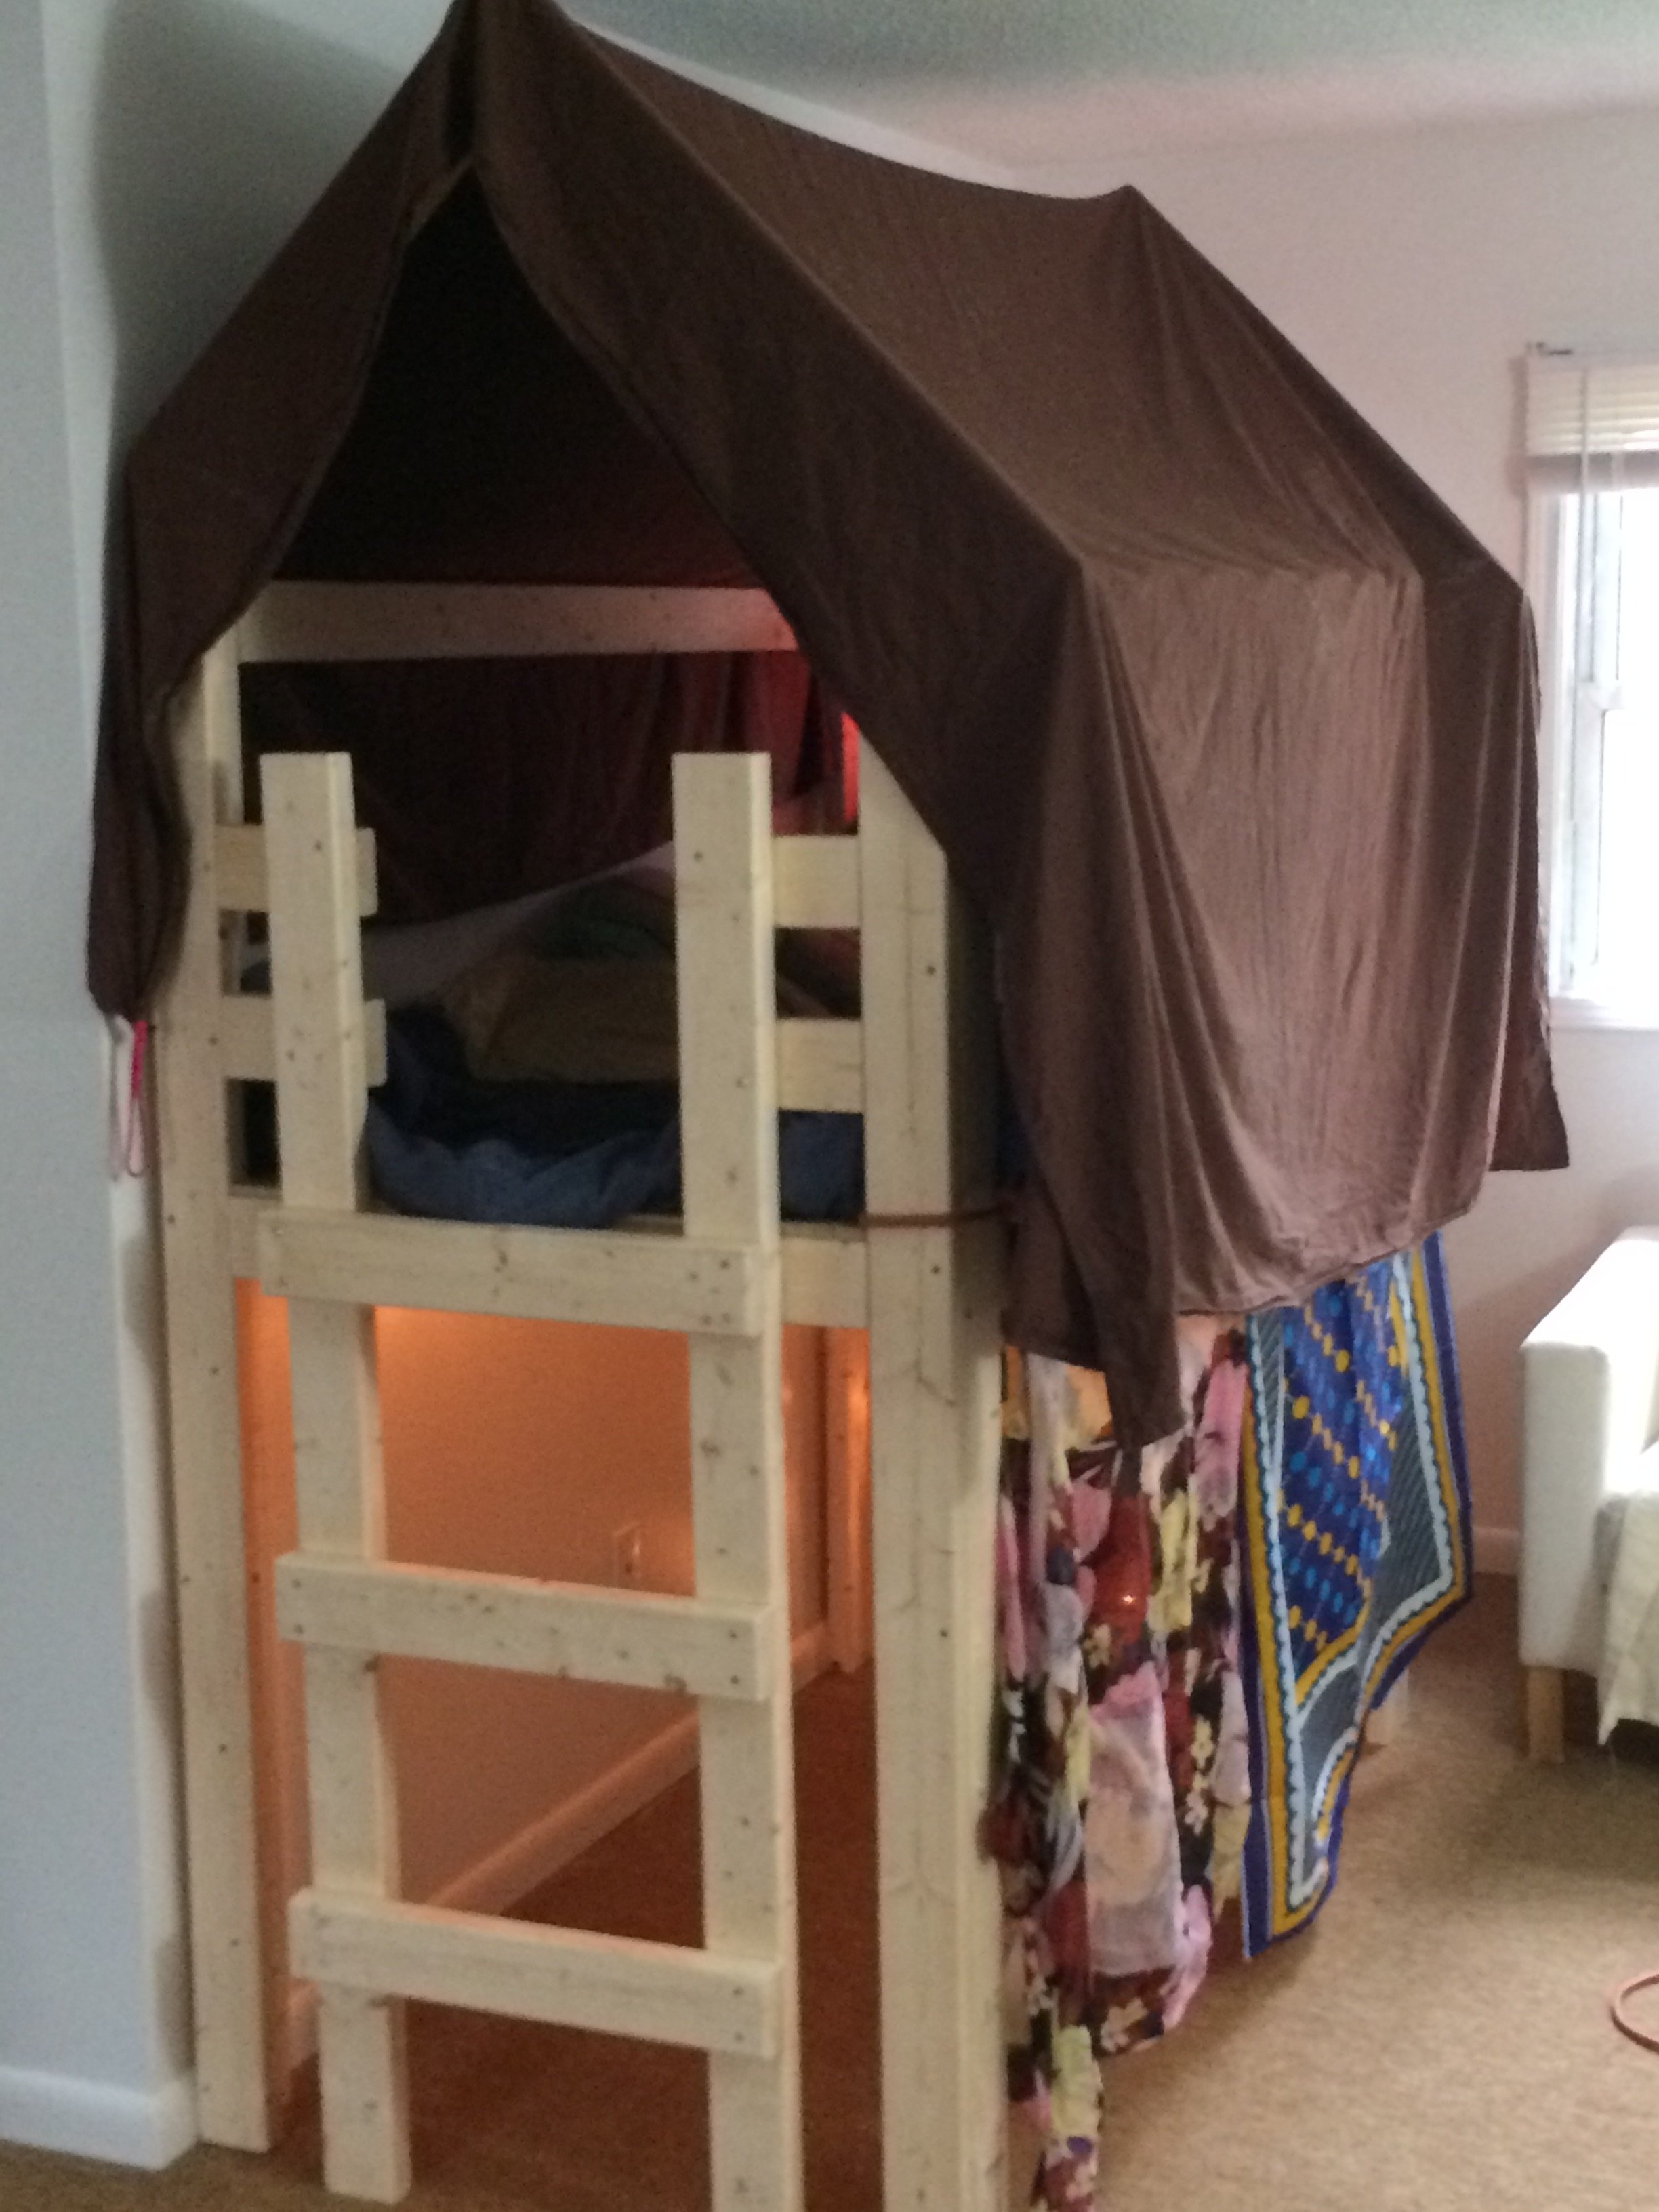
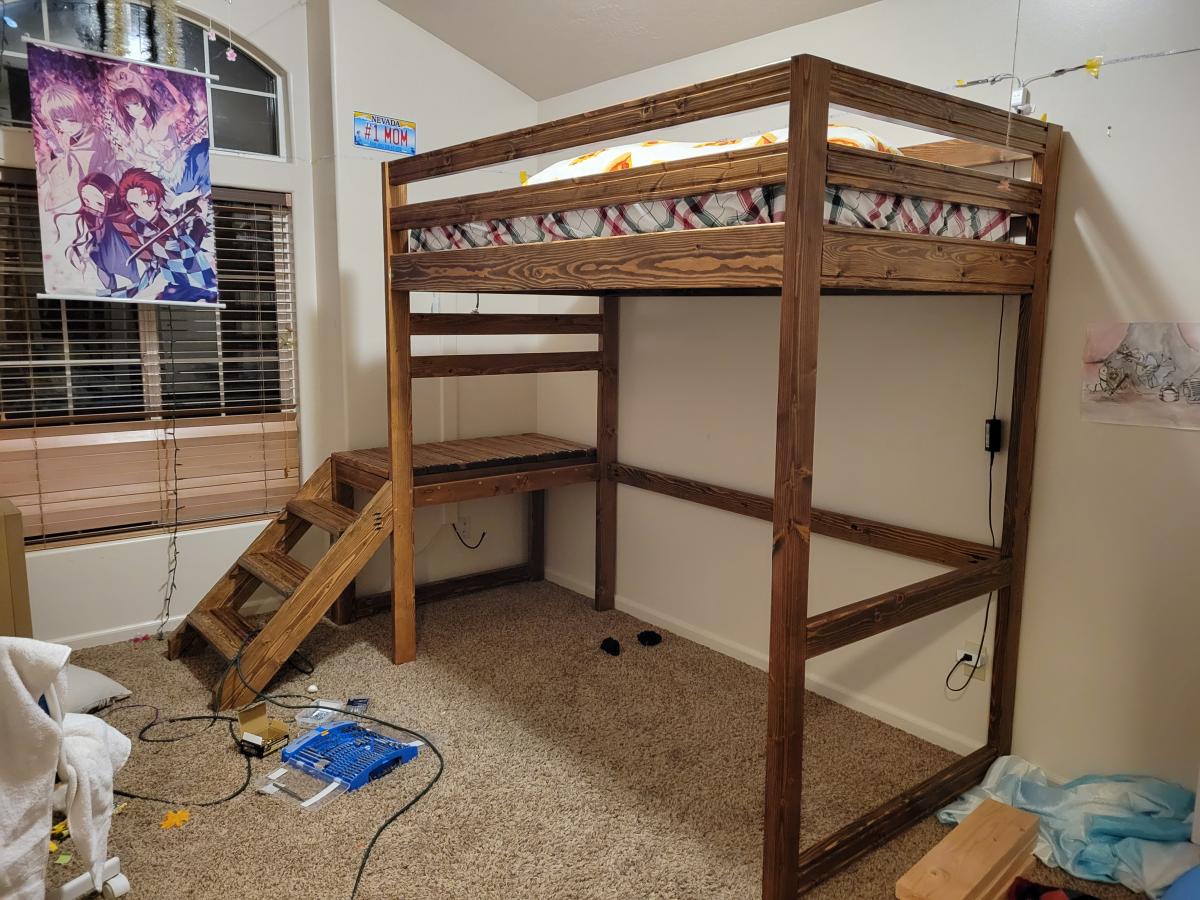
Extra Large Canopy Bed

Submitted by Anonymous (not verified) on Sat, 07/23/2022 - 08:34

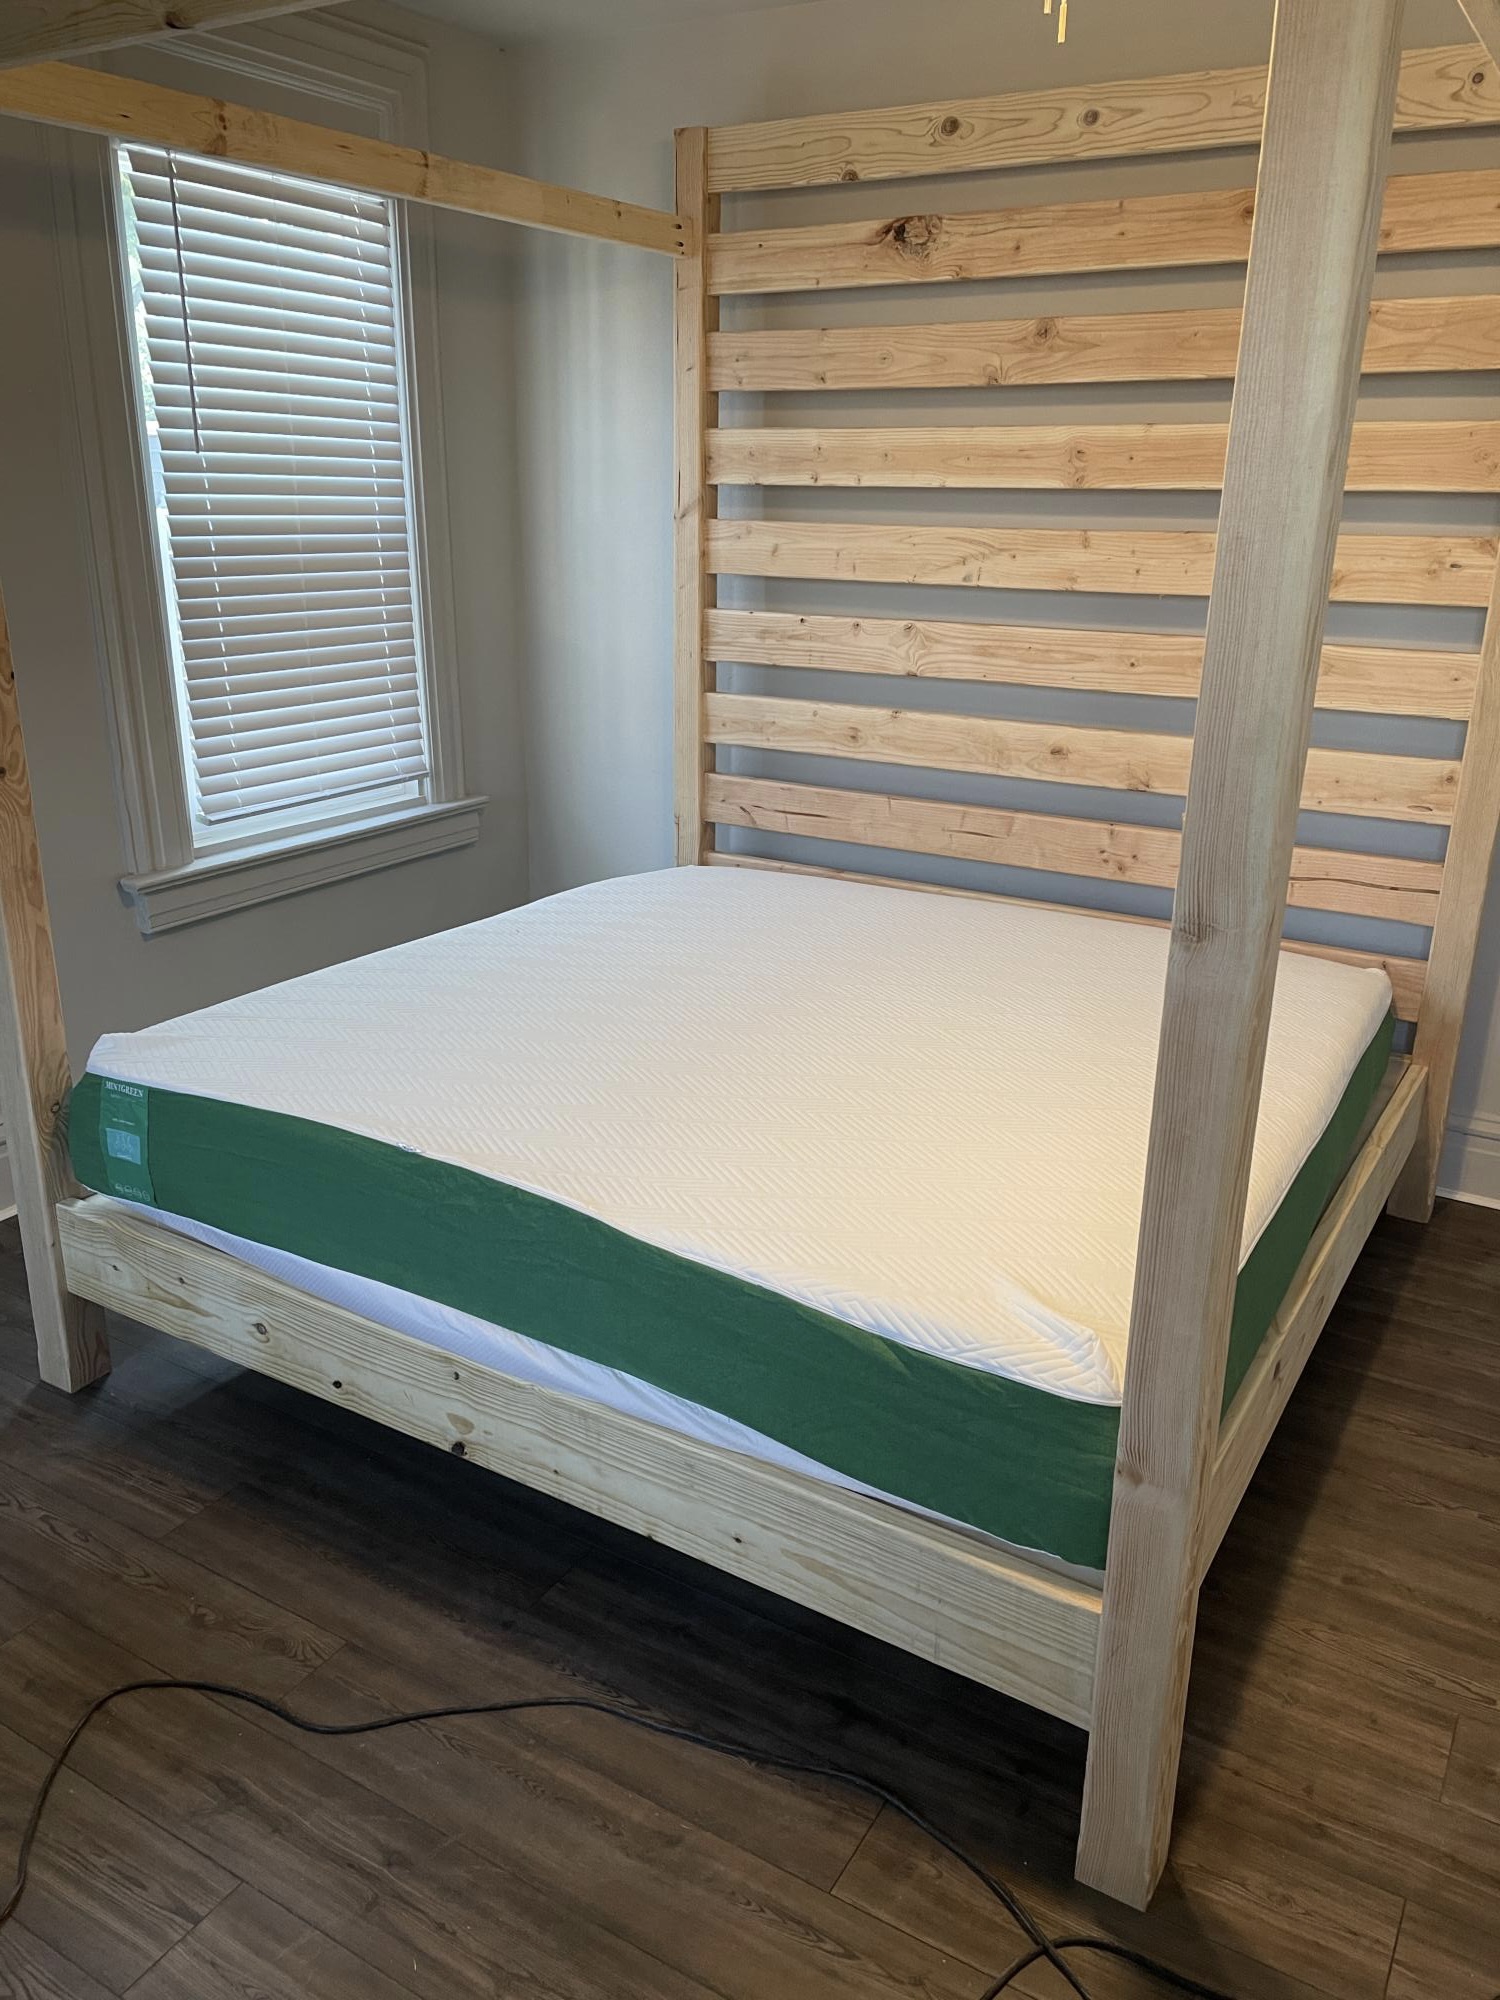
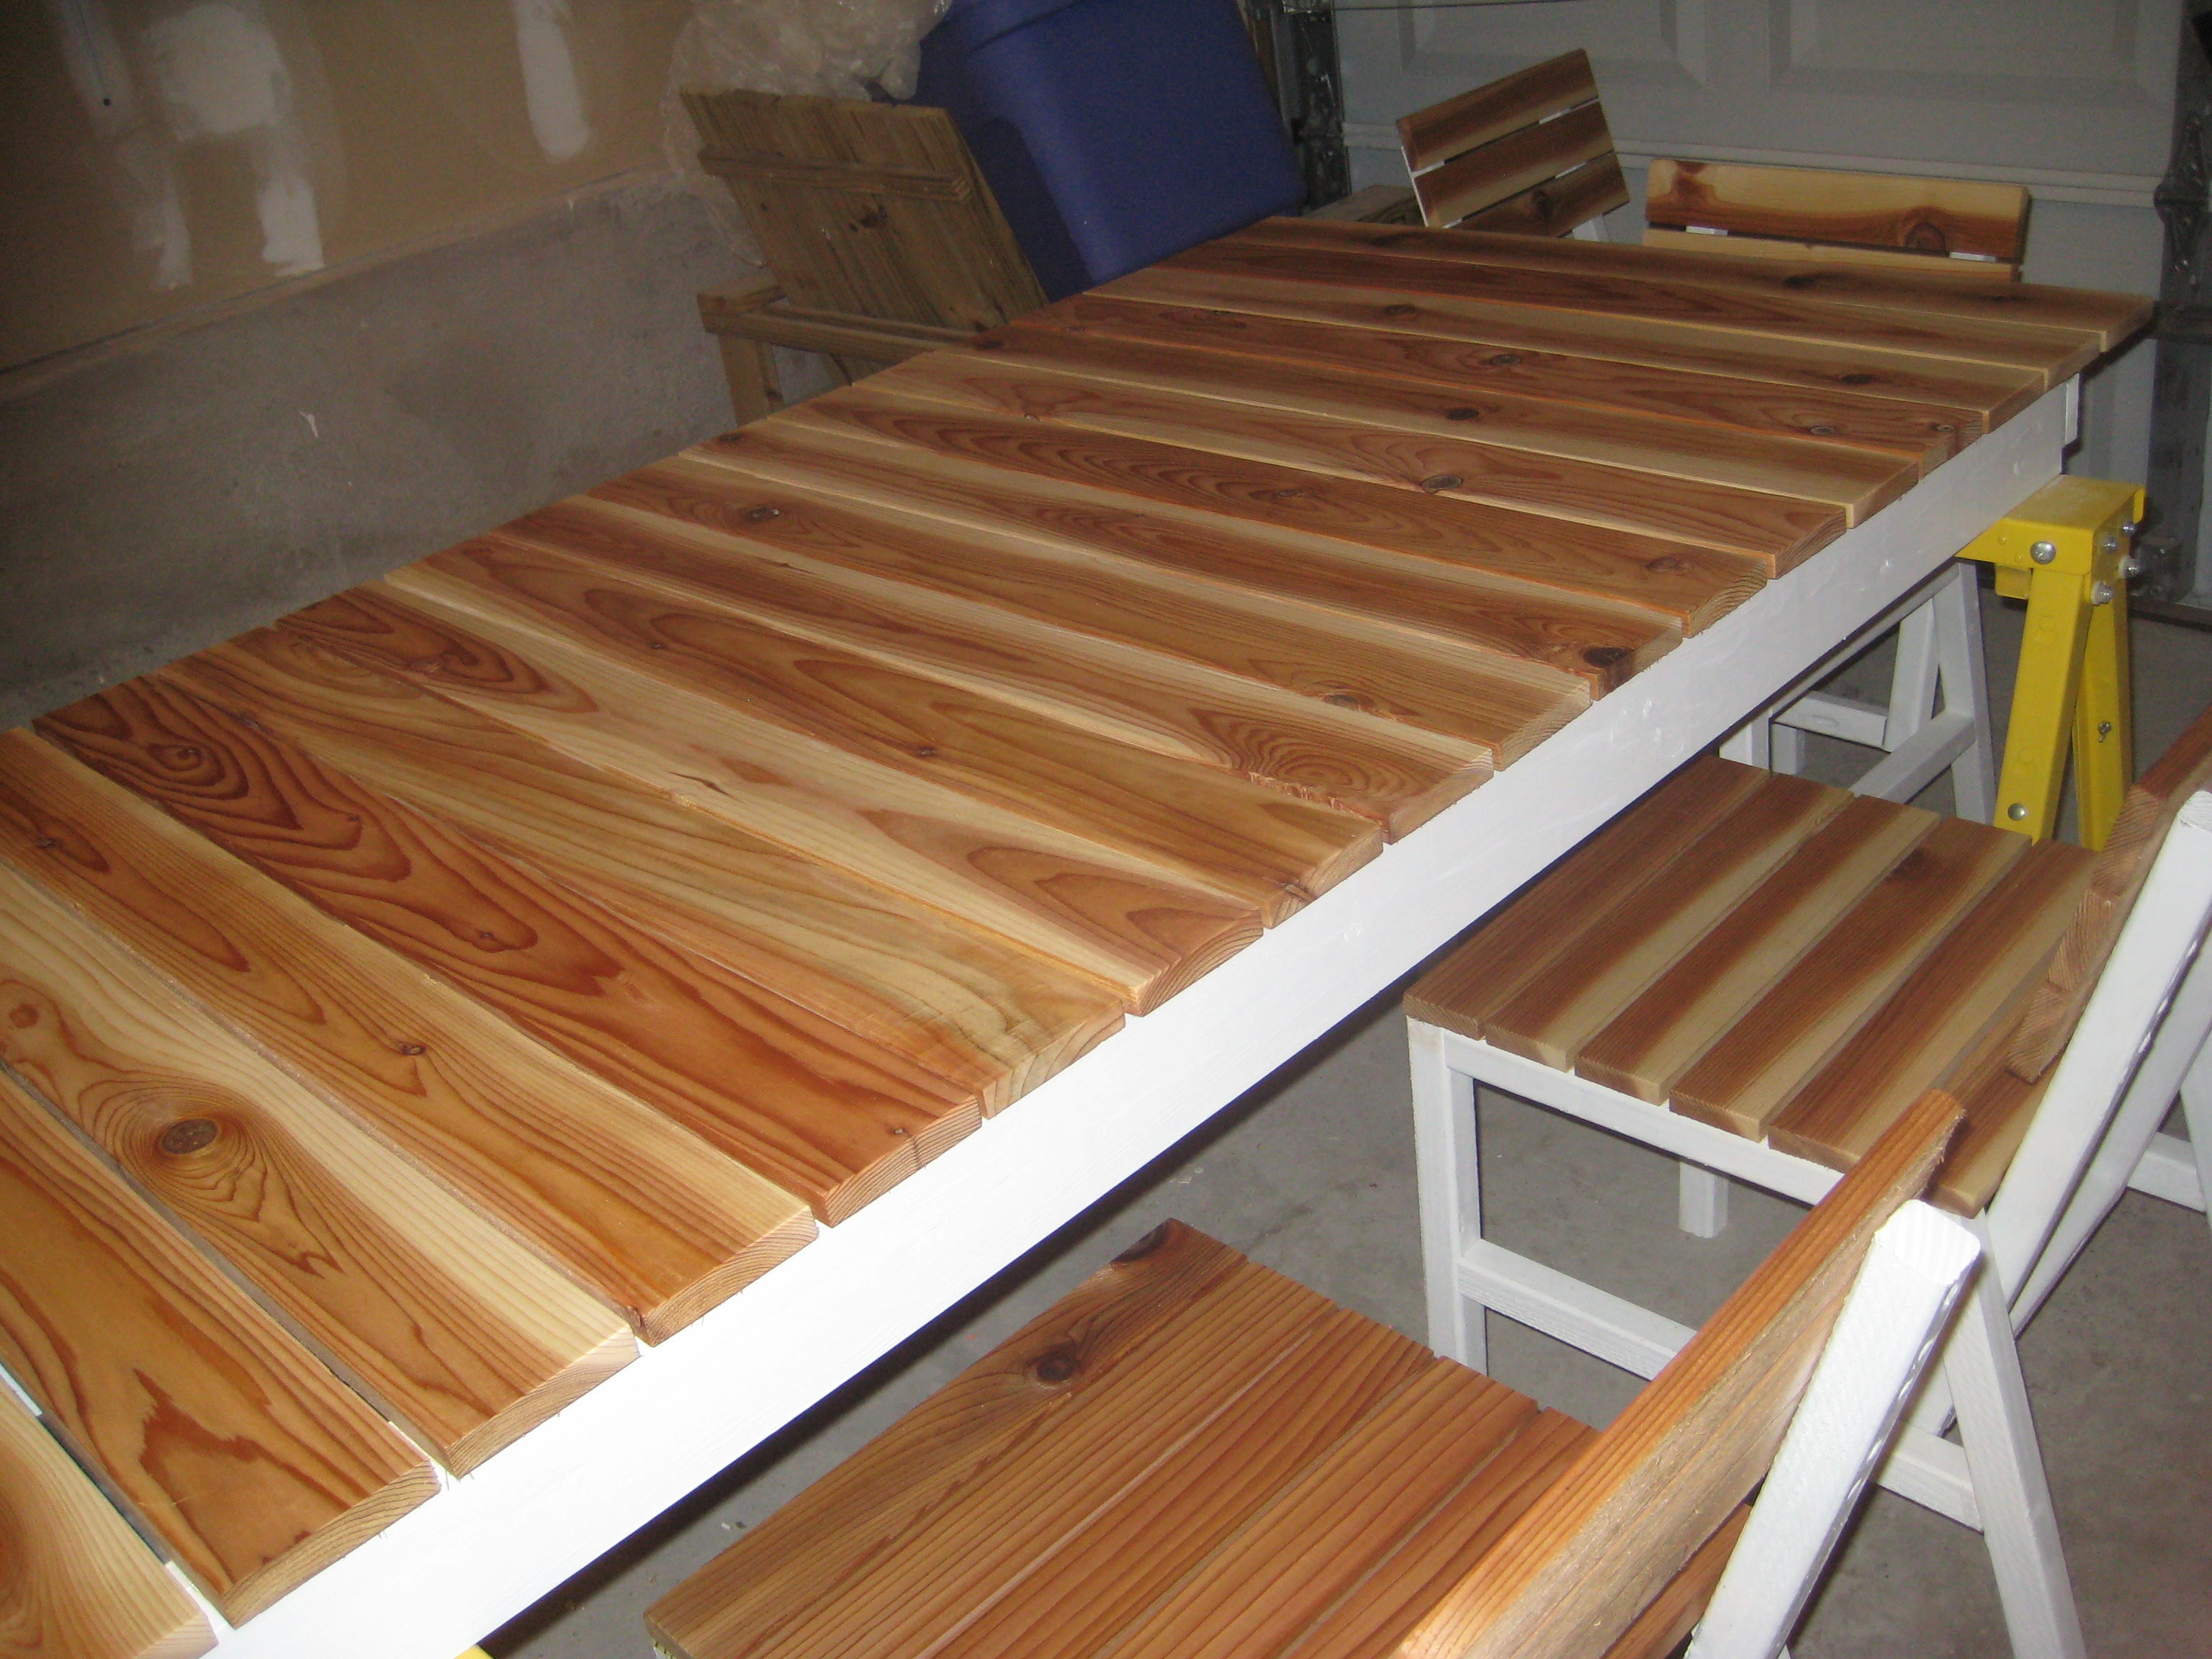
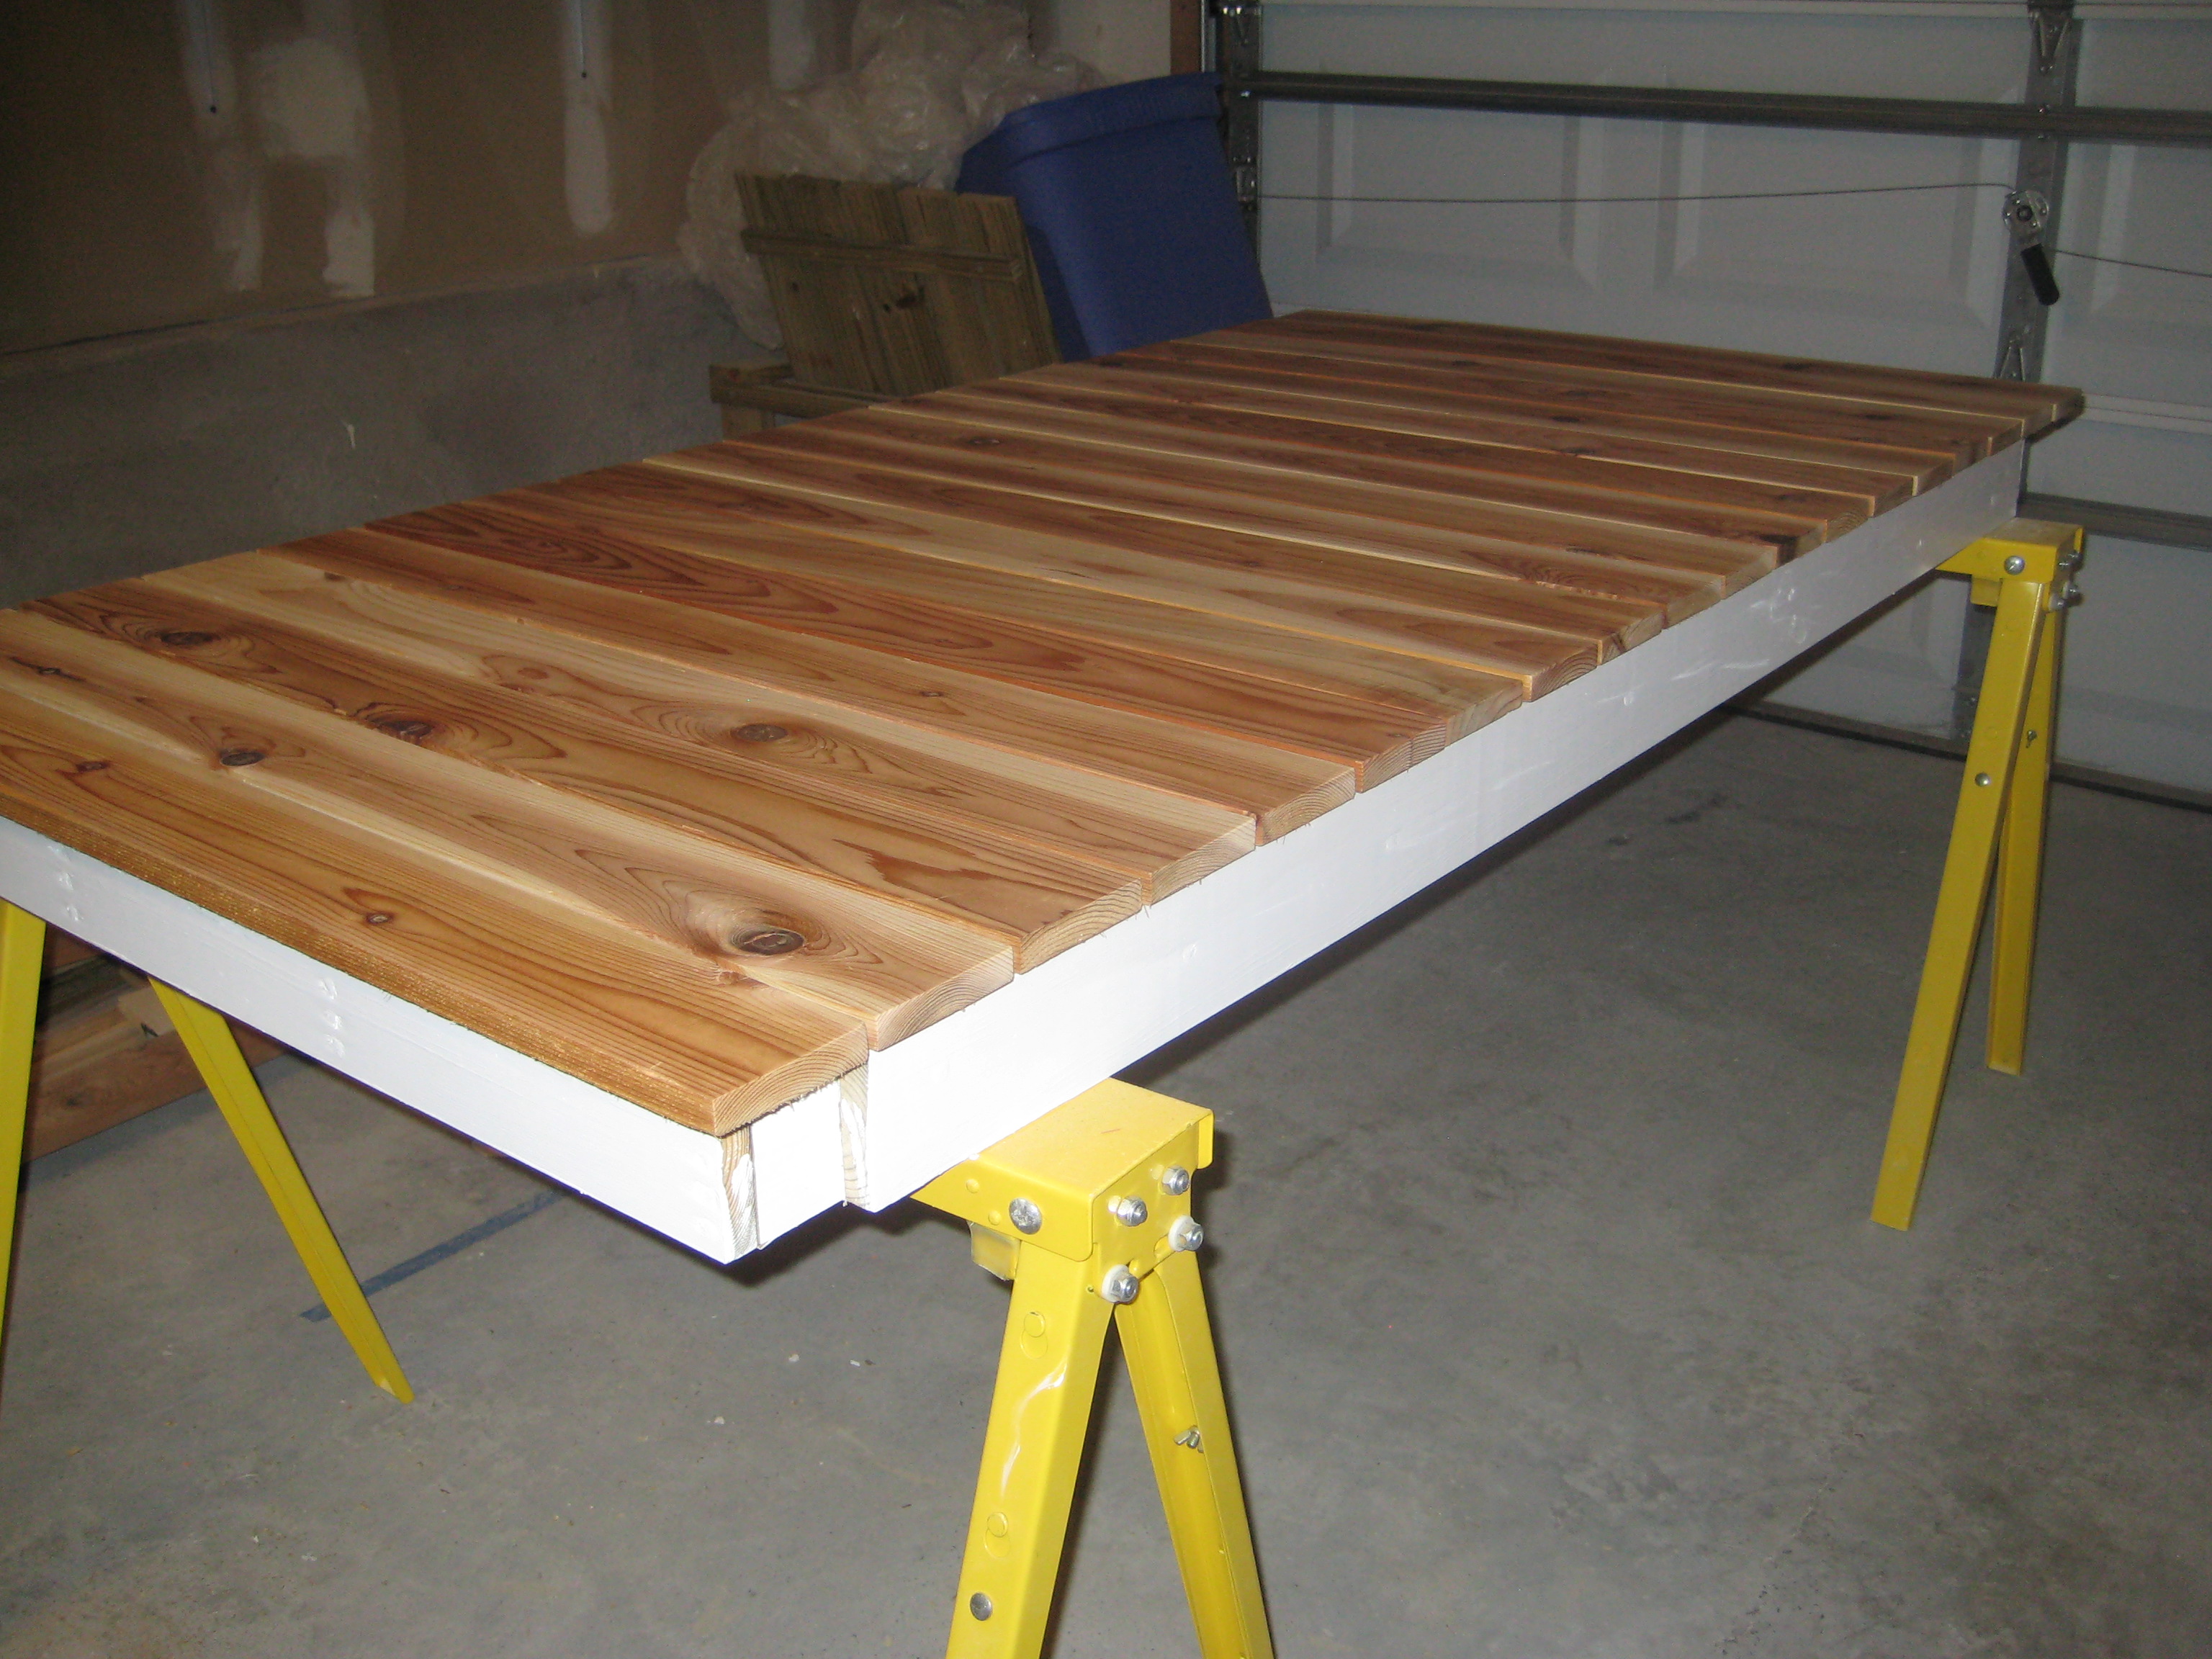
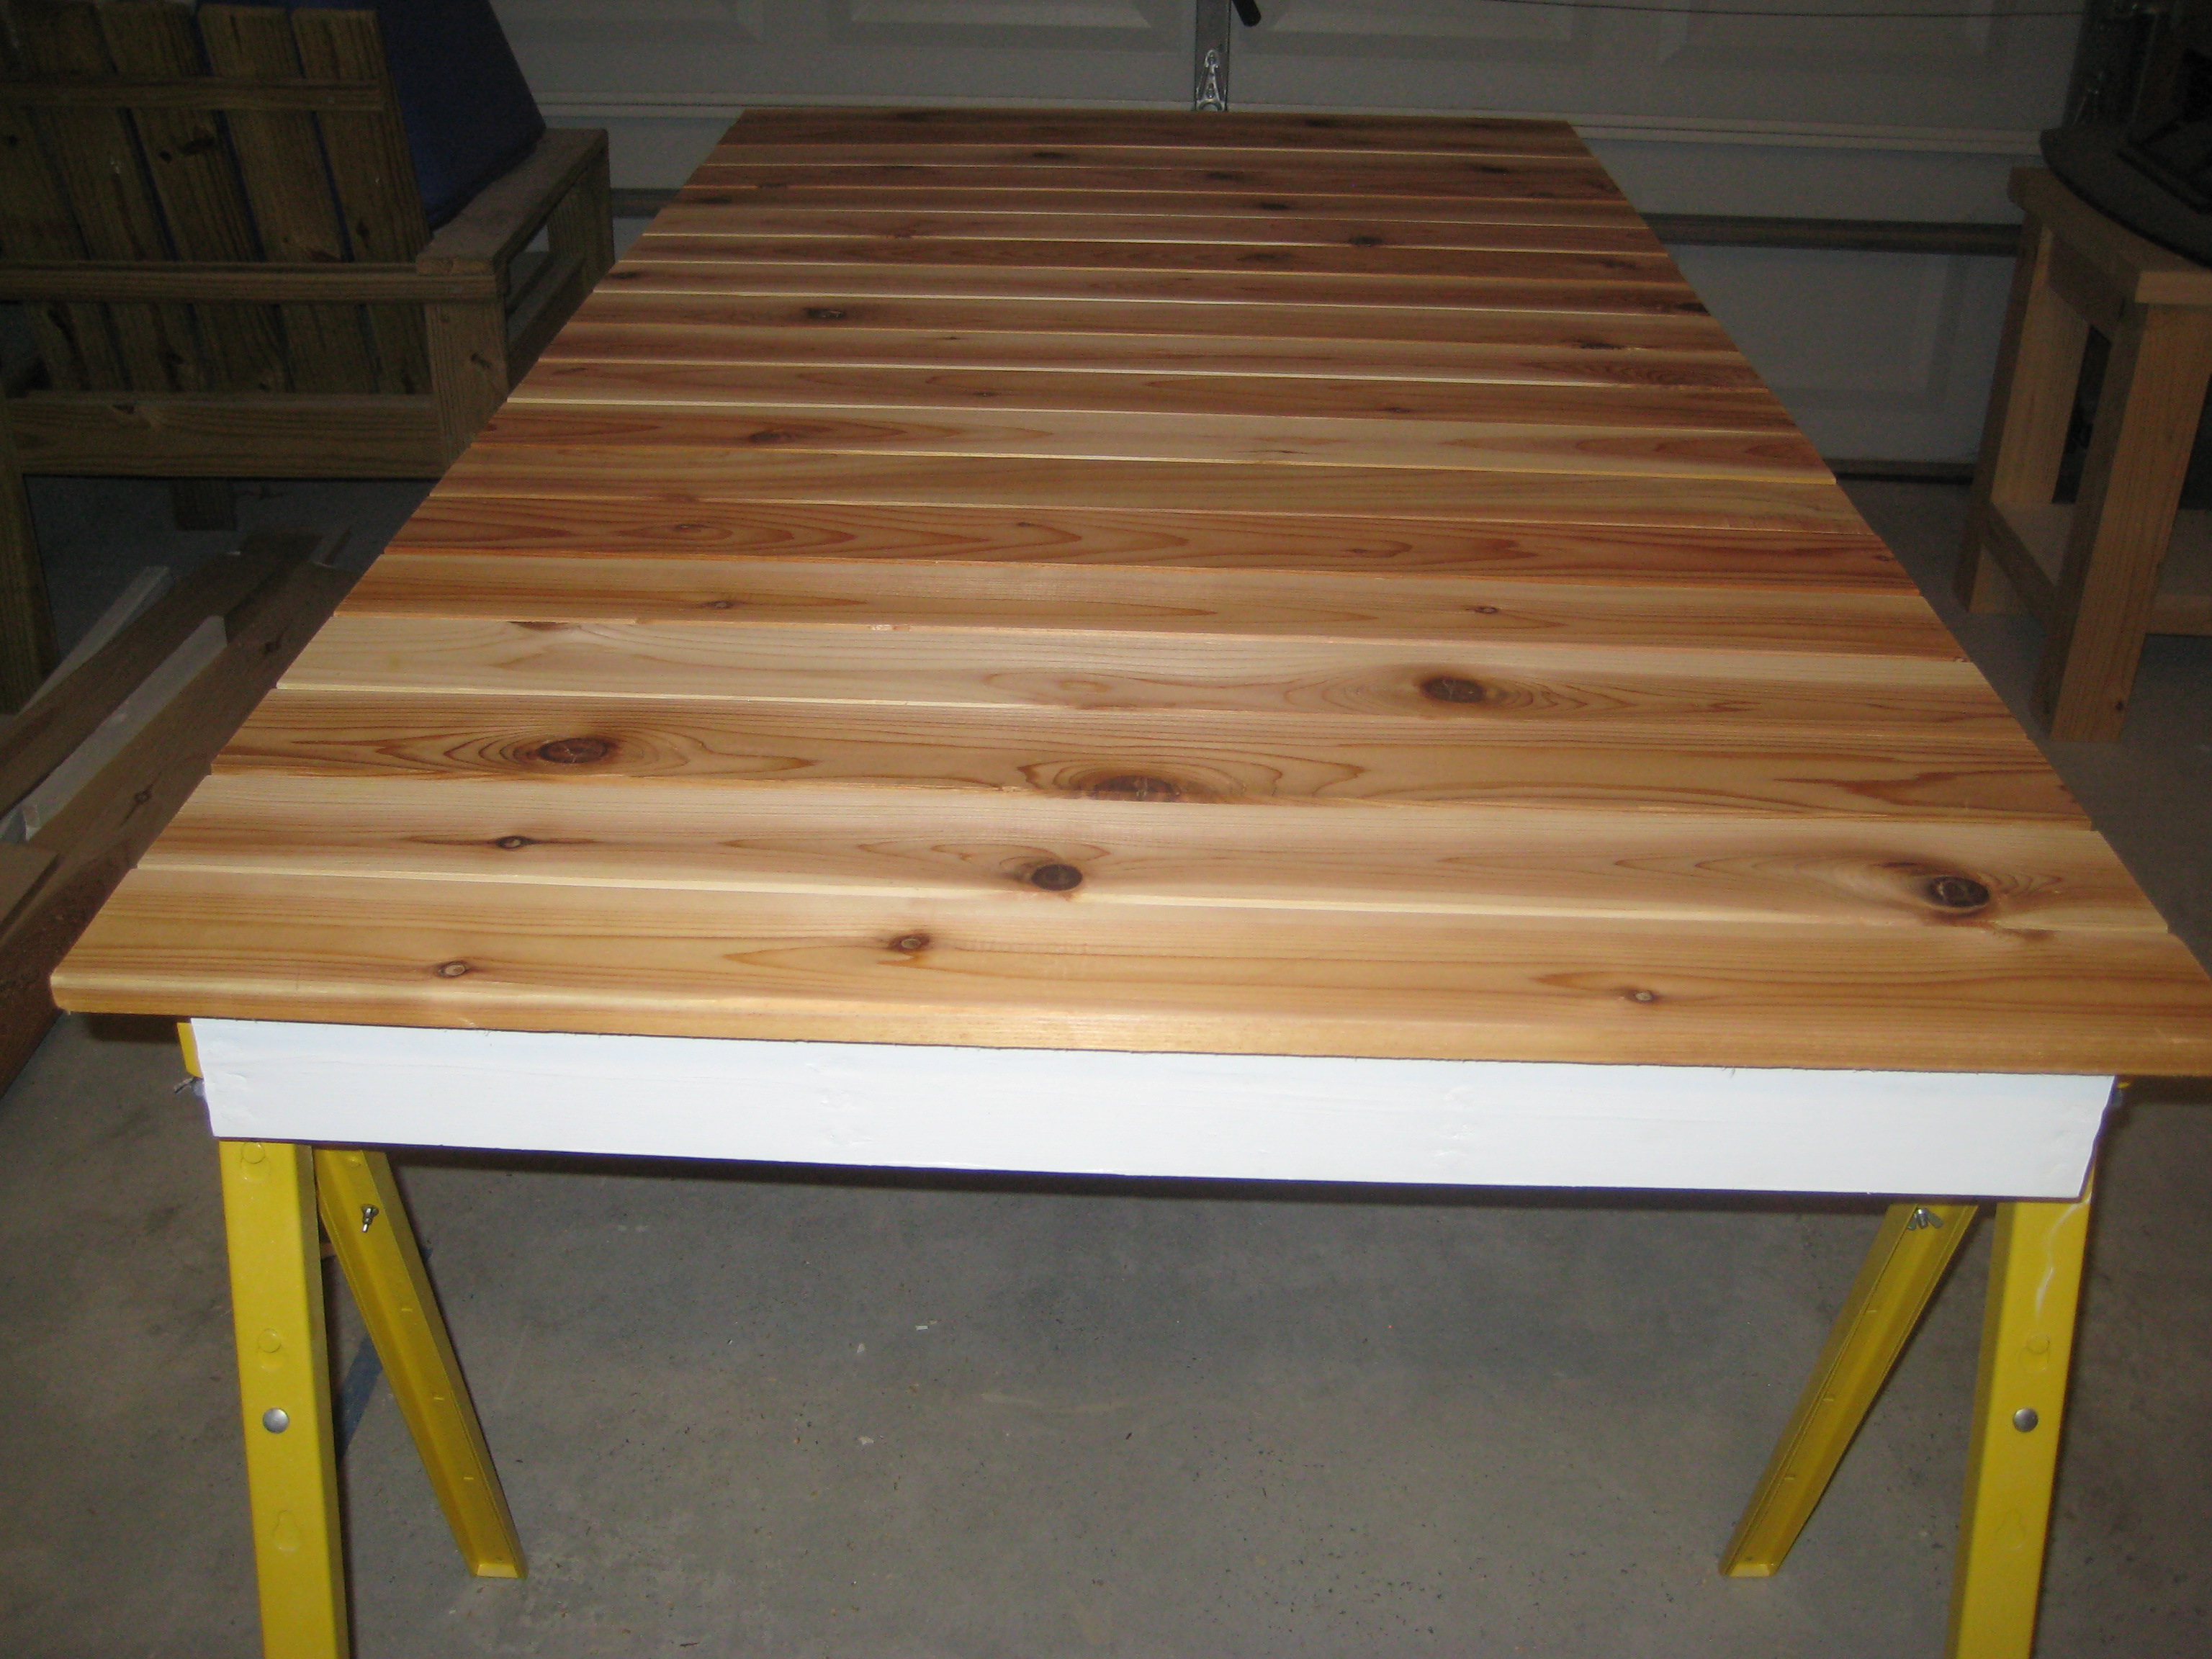
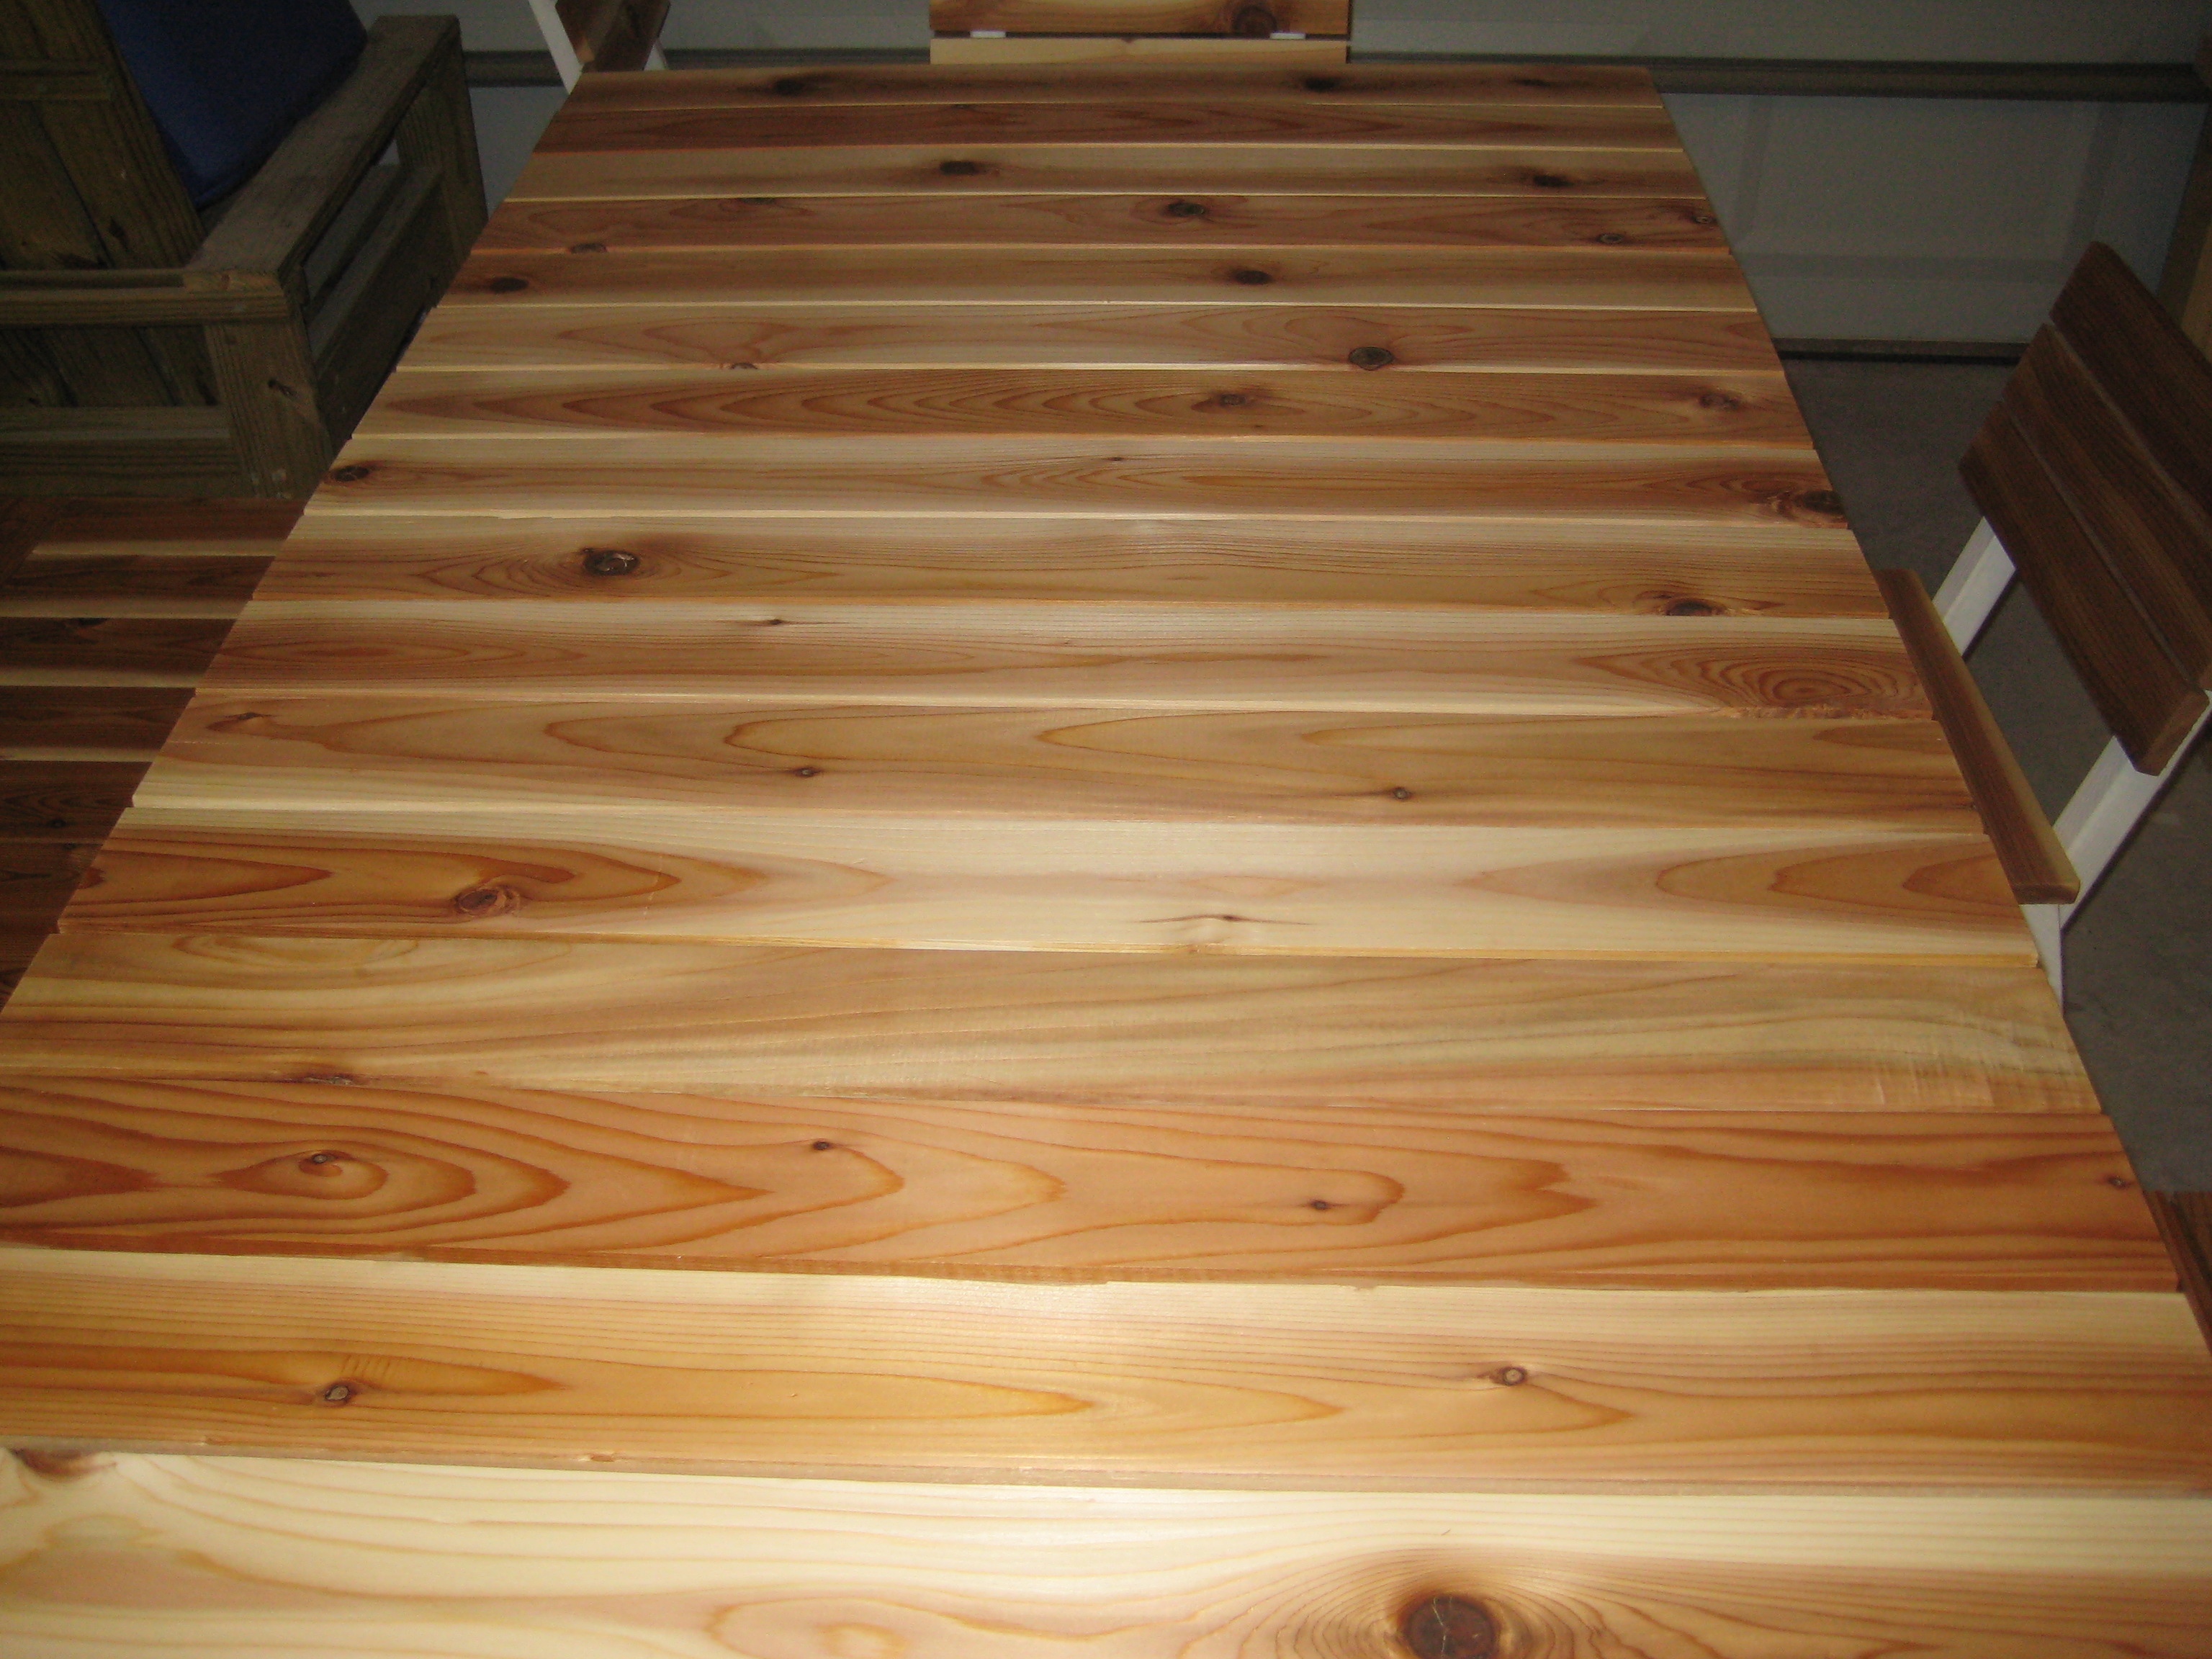
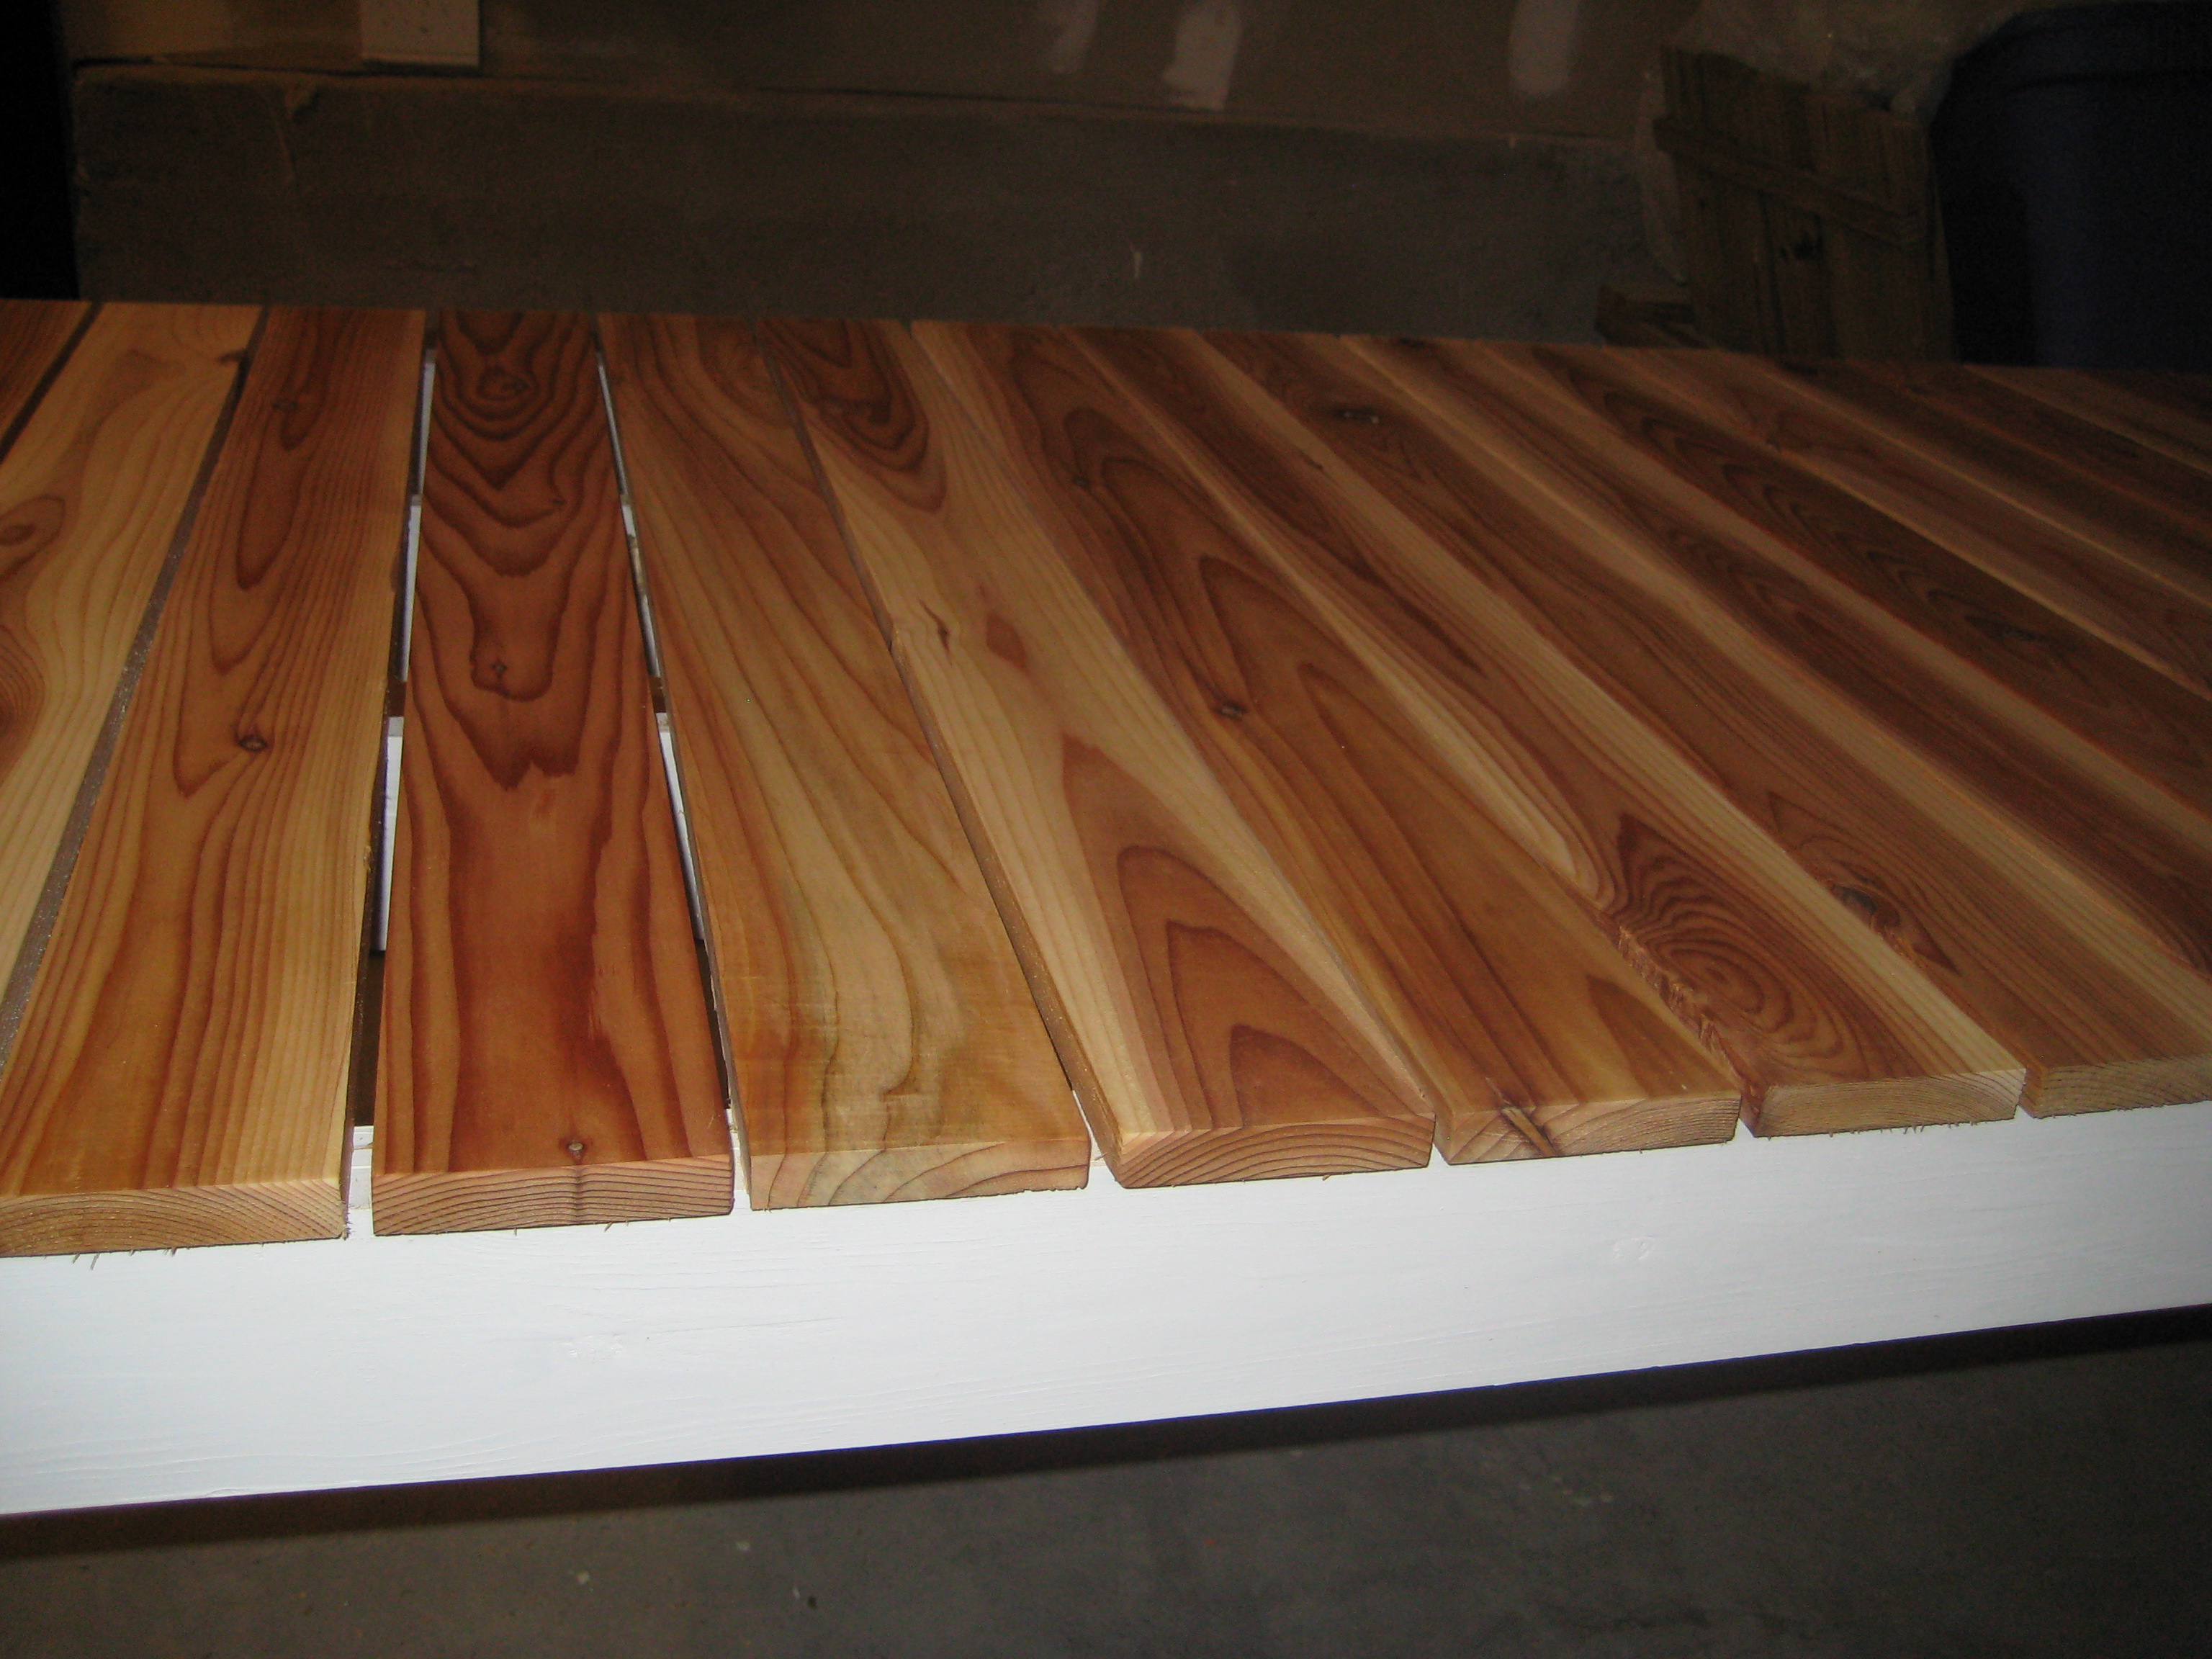
I followed the plans on the site but made the rear posts the full size of an 8 foot 4X4. For the front posts I had to cut down to fit around the fan/light. For the headboard I simply put 2X6's spaced out 3 1/2 inch between, I used scrap 2X4 for spacing. To attach all the piece I use those newer large Kreg screws for large lumber, way bigger and stronger screws. The bed platform is 1/2 plywood, added a 2X4 for support and skipped the support in the middle. Extra screws and metal L brackets hidden and added for support. Used a router to round out all edges and multi-tool to sand the rest.

Comments

Simple Oudoor Dining Table

Submitted by kmatt55 on Wed, 08/03/2011 - 17:15

I know, I know...Where are the legs? Unfortunately, I have to store this until December while our multi-family mountain house is being constructed. This way I can store it up against a wall and save a lot room in storage for more Ana White projects. FYI - The legs will be white 2x4's about 29.5 inches tall. For the top I used 1x4 cedar slats spaced 1/4 inch apart. As for the painted white frame, I used treated pine. Why spend money on nice cedar if I am just going to paint over it, right? The contrast of the white and natural cedar was appealing to me for some reason. I used Thompson's clear wood protector/water sealer on the slats to prolong the natural cedar. BTW, if you can build the simple outdoor bench you can definitely take on this project. The two are not very different. I'll have to take pictures of the finished table with legs when I haul these up to the Blue Ridge Parkway and upload them again. Thanks again Ana!

Built from Plan(s)
Estimated Cost
$100
Estimated Time Investment
Day Project (6-9 Hours)
Finish Used
Semi gloss white, Thompson clear wood protector/water sealer.
Recommended Skill Level
Intermediate

Comments

DIY Storage Lockers {No Mudroom? No problem!}

I love my new lockers, and I am in love with building! I think the Kreg Pocket Jig is my new best friend!

This is my first project, and I made a couple of changes to Ana's awesome plans. I used bead board for the backing instead of ply wood, and I added divider shelves on the bottom shelf. I also added hooks on both sides of each locker so that my kids can hang lots of stuff.

Since I am a total beginner builder, I made a few mistakes as I built these lockers. If you are a beginner, too, please check out my post on OneCreativeMommy.com so that you don't have to make the same mistakes! I included a chart that shows the order I used to put everything together and added instructions for the extra dividers.

I am loving my organized space (and so are my kids)!

See the project now: http://bit.ly/lockers-kids
Pin it for later: http://bit.ly/14FpeHD

Built from Plan(s)
Estimated Cost
$150
Estimated Time Investment
Weekend Project (10-20 Hours)
Finish Used
This project was painted with 2 coats of Bare Wood Primer and finished with two coats of Valspar Rapids in Semi Gloss.

Hint--one quart of paint is not enough! I bought one quart of primer and one quart of paint. I scraped the cans clean and had to leave a few hidden spots with only one coat of paint. I have nothing left for touch up. Splurge and buy the larger can. You can always use it to paint accent pieces to match!
Recommended Skill Level
Beginner

My Julia Nightstand

I decided it was time to use up some of the leftover materials from previous projects.  This little nightstand is a mix of spruce, mdf and plywood.  I constructed the little "feet"  from a stair baluster that I cut up and drilled a hole into the top to add a piece of dowel before gluing to the table leg. 

Built from Plan(s)
Estimated Time Investment
Day Project (6-9 Hours)
Finish Used
Painted a soft white and finished with a clear coat in a satin finish.
Recommended Skill Level
Beginner

Comments

Bath Board

Submitted by tjh4au on Tue, 11/06/2018 - 16:57

Bath Board! My very first woodworking project. It's 2 pieces of 2x6 cut to about 36" inches long each. You will need to measure your bath tub to see what size boards you will need to fit across it. I ripped 1 long side of each board on my table saw so I could join them togther. I used 3 pocket screws and glue to join them. I plugged the pocket screw holes and sanded the plugs down smooth. You can barely tell in the pictures after the stain was applied. I mixed saw dust with the glue when I put the plugs in so it would take the stain better and blend in. I marked up the outline of the areas that I needed to cut out with my router and penciled them in. The areas I cut out are for a wine glass, phone, soap bar, and a candle. You can arrange your board however you want, this is just the order I did mine in. Then, I used my router to cut out those areas free handed. I stained it with a dark wood stain. I used my wife's vinyl cutting machine to cut out the word "Relax". I painted over the vinyl with white chalk paint and pilled it off. Mother-in-law was very happy with her new bath board. Being my first wood project, I thought it turned out fairly nice and exceeded my expectations.

Ask any questions and I'll try to help the best I can.

Estimated Cost
$20
Estimated Time Investment
An Hour or Two (0-2 Hours)
Finish Used
Dark wood Stain
Recommended Skill Level
Starter Project

First Furniture Console

Submitted by cjohnston on Sun, 08/07/2011 - 14:10

This is my version of the Balin Console, presented by Ana White.

I used knotty pine for the wood and finished the piece first in two layers of walnut stain.

Over the stain, I painted two layers of Vast Sky blue by Sherwin Williams.

To finish it off, I used a polyurethane satin finish varnish--two coats.

Built from Plan(s)
Estimated Cost
$200.00
Estimated Time Investment
Week Long Project (20 Hours or More)
Finish Used
Stain the piece with a dark colored oil based stain--2 layers.

Rub a candle on the corners and edges where you plan to sand to give a distressed appearance.

Coat the piece with 2 layers of polyurethane paint.

Use fine grit sandpaper to sand edges to give a distressed vintage look. The candle wax applied to the stain will protect the wood from the sandpaper--sanding will only remove the paint layer and leave the stain layer intact.

Cover with two coats of a satin finish varnish to protect. Make sure there is plenty of drying time between the varnish layers--2 days +
Recommended Skill Level
Beginner

Comments

debandtom25

Fri, 08/12/2011 - 04:38

It's a very impressive looking piece. It would catch my eye if I saw it in someone's house. Great job!

windjamer812

Thu, 03/22/2012 - 23:25

You did a wonderful job on this project. It looks like it came straight from a 1930's country kitchen.

classic bunk beds

Submitted by jenherndon on Sat, 08/31/2013 - 18:30

Easier than I thought!

Estimated Time Investment
Week Long Project (20 Hours or More)
Finish Used
Dark mocha stain, then sanded edges, then restained with natural cedar color, then 3 coats of satin poly.
Recommended Skill Level
Intermediate

My wife's new Craft table

Submitted by MattB on Tue, 08/09/2011 - 23:29

This is actually my third project from your site Ana.

I acctually decided to make this table ten inch wider since my wife has a loooooooot of crafts :)

This project took a little longer then I thought.
It was my own fault!!! I thought I would safe some time and get some of the wood cut buy the clerk at Home Depot. That turned out to be a really bad idea. Most of my cuts were uneven and even after I gave the clerk the exact measurements, a few of the boards were up to 2 inches too long. At the end I had to buy two more boards because I had to cut peaces away to have straight edges.
Lesson learned!!!

I love building wood furniture. And I already got my next plan from your site that I'm going to build.

Built from Plan(s)
Estimated Cost
$160
Estimated Time Investment
Weekend Project (10-20 Hours)
Finish Used
Valspar-Dove tail white(Eggshell)
Behr- Surfer(eggshell)
2 coats of clear Polyurethane Semi-Gloss
Recommended Skill Level
Beginner

Comments

Guest (not verified)

Wed, 09/07/2011 - 04:18

awesome job! im in the middle of making one of these at the moment. but just to be a tad different i have put a small cutout hole on the top, theres a little bin that sits on the shelf under it, so all i have to do when ive finished with all my paper cuts is swipe it down the hole! hehe how nifty. oh and where did your wife get the black cricut machine?? lol

2 Drawer Modern Nightstand (with Charging station)

Submitted by mt51 on Mon, 09/02/2013 - 22:21

I really liked the look of the 2 Drawer Modern Nightstand but I wanted to add a twist to it. Since I can't live without my devices (laptop and phone), I decided to add an open slot to the middle shelf of the nightstand for power cables. It also has a space that I added in the back that can hold a power strip. Embarrassed that I did not paint the back of the nightstand but I was really done at that point after a long weekend's worth of work!


Pin For Later! 

2 Drawer Modern Nightstand (with Charging station)


Estimated Time Investment
Weekend Project (10-20 Hours)
Recommended Skill Level
Intermediate

Mimi's Storage Bench as Toybox

Submitted by ematurne on Sun, 10/25/2015 - 10:34

My husband and I decided to make a personal gift for our new niece.  Everyone loved it, and we are currenly making another one.  The first time took us a LONG time...the second time went much faster!  We used nicer wood than suggested, which raised the cost. I used Sherwin Williams paint colors (buy the samples from Lowes...it was more than enough paint and only $5!) and the stencils came from a craft store. Can't wait to try more projects!!!

Built from Plan(s)
Estimated Cost
$120 for nicer wood, but you can do it cheaper.
Estimated Time Investment
Weekend Project (10-20 Hours)
Finish Used
Sherwin Williams paint (sample cans from the Color Pizzazz card, see below) and I sprayed a polyurethane coating from Michaels to protect the inside painting.

Turquoise- Reflecting Pool
Gray- Accessible Beige (it looks gray)
Yellow- Classic Yellow
Coral- Coral Reef

Michaels- Plain Wooden Letters and Stencils- Birds, Tree, Chevron, Bicycles
Hobby Lobby- You are my sunshine

Stenciling: I got really good at stenciling on the very top of the box (the last thing I did!) and I realized that your roller should have almost NO paint on it. It is cheaper to buy a door roller from Lowes. Also, the thicker stencils work much, much better (the ones from Michaels).
Recommended Skill Level
Beginner

Comments

Pub/Counter Height Table

Submitted by S.far87 on Sat, 12/08/2018 - 22:03

Facebook.com/esfwood


Modified the plans to match size for preexisiting tables in the bar. Table top burned, routed, dremmeled, stained, and finished with glaze coat.

Built from Plan(s)
Estimated Cost
180
Finish Used
Stain and Glaze coat
Recommended Skill Level
Beginner

Camp Loft Bed (slightly higher)

Submitted by Anonymous (not verified) on Fri, 08/26/2022 - 05:53

I made it slightly higher with some extra bracing for additional strength. Added a table underneath and some colored lights. The stain and satin clearcoat finished it off well I think.

Comments

A Home for Some Orchids

I built this with some scrap mdf, and 1x3's. I offset the shelves, and voila! A modern shelf to go with our eclectic, yet very modern decor. It also gives me a nice display for some of my orchids. I love this shelf!

Built from Plan(s)
Estimated Time Investment
Afternoon Project (3-6 Hours)
Finish Used
Kona Brown
Recommended Skill Level
Starter Project

The only glamorous thing in my kitchen...

Submitted by bhoppy on Wed, 09/04/2013 - 16:40

Is this kitchen island with its beautiful marble top:-) I really hate my kitchen because it is so ridiculously from the 80's and small... but it's a rental so it's not forever. The only counter space I had to cook is right there to the right of the sink by the coffee maker. I started building this the night Ana put the plans up. A friend of mine just remodeled her bathroom; and gave me the top since it was just sitting in her garage. I had to modify the plans only slightly to accommodate the top. It's 3 inches wider than the plans and I beefed up the top frame with 2x2's to support the 29 pound slab of stone. I spent less than $20 on the project because I had leftover wood from another project and a whole bunch of 2 x 4's from a project that got trumped for this one:-) I also ripped a piece of plywood to 11 1/4 to use as the sides and added edge banding on the back. I used paste wax for the very first time instead of polyurethane and I'm not sure how I like it yet.

Estimated Time Investment
Weekend Project (10-20 Hours)
Finish Used
Early American, dark walnut and paste wax
Recommended Skill Level
Intermediate

Comments

Rustic Farmhouse Table

Submitted by Sbarker645 on Thu, 10/29/2015 - 07:33

Built this table for our dining room. Neighbors kept coming by to look at it and I now have my first commissioned woodworking project for a table and benches!

Built from Plan(s)
Estimated Cost
$140
Estimated Time Investment
Week Long Project (20 Hours or More)
Recommended Skill Level
Intermediate

8 Foot Rustic X Console

Submitted by Anonymous (not verified) on Wed, 12/26/2018 - 19:17

Was inspired to build this to go behind our sectional.  Next year, it will house our Christmas town.

Built from Plan(s)
Estimated Time Investment
Weekend Project (10-20 Hours)
Finish Used
Red Mahogany
Recommended Skill Level
Intermediate

Farmhouse Table and Stools

Submitted by Anonymous (not verified) on Sat, 09/03/2022 - 15:55

My daughter has a small 1 bedroom appointment and needed a place to eat. I built this table and stools to give her and her friends somewhere to gather. The stools came out darker than expected after I put a harder finish on it. They we’re getting scratched up from the sitting on them. But over all she loves it.

Comments

Kids step stool w/ storage

This stool was made as a b-day present for my nephew Ryder (hence the play on words "free Ryder") . His dad, an avid motorcycle enthusiast, is deployed w/ the army in Afghanistan so I went w/ a patriotic motorcycle theme. Ryder just turned 2 so he is about to start the adventure of potty training si I figured this would be perfect for that and double as bath toy storage. To keep the wood from getting damaged by the humidity of the bathroom, I used pressure treated plywood and further protected it w/ tompsons wood waterproofer. I also drilled 3 rows of drainage holes in the bottom so water wouldn't be sitting in there.

Built from Plan(s)
Estimated Cost
$15
Estimated Time Investment
Afternoon Project (3-6 Hours)
Finish Used
General Finishes black milk paint. And an out door varnish. I also added a non-slip texturizer to the paint on the top stool. It's a little rough on bare knees but I figured scrapped knees were not as bad as a cracked skull
Recommended Skill Level
Beginner

Shed Tool Rack

Submitted by Anonymous (not verified) on Fri, 09/09/2022 - 08:05

The instructions were easy to follow. I didn’t have the exact wood so I improvised with what I had on hand. Thanks Ana!

Comments