Community Brag Posts

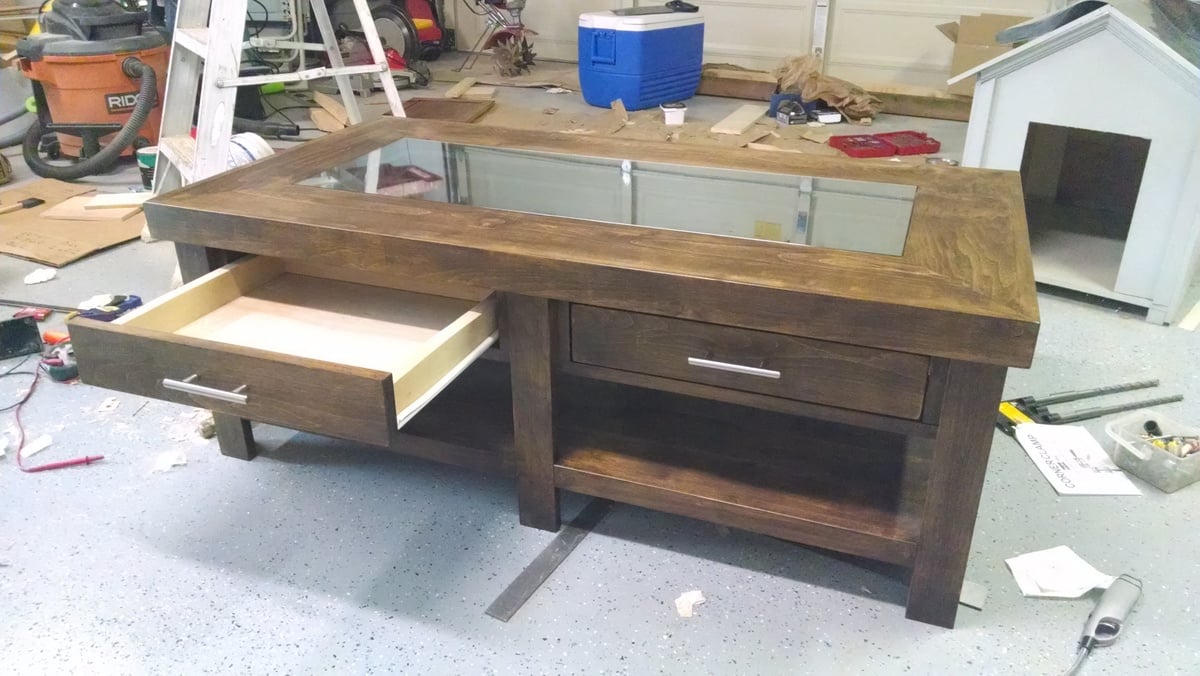
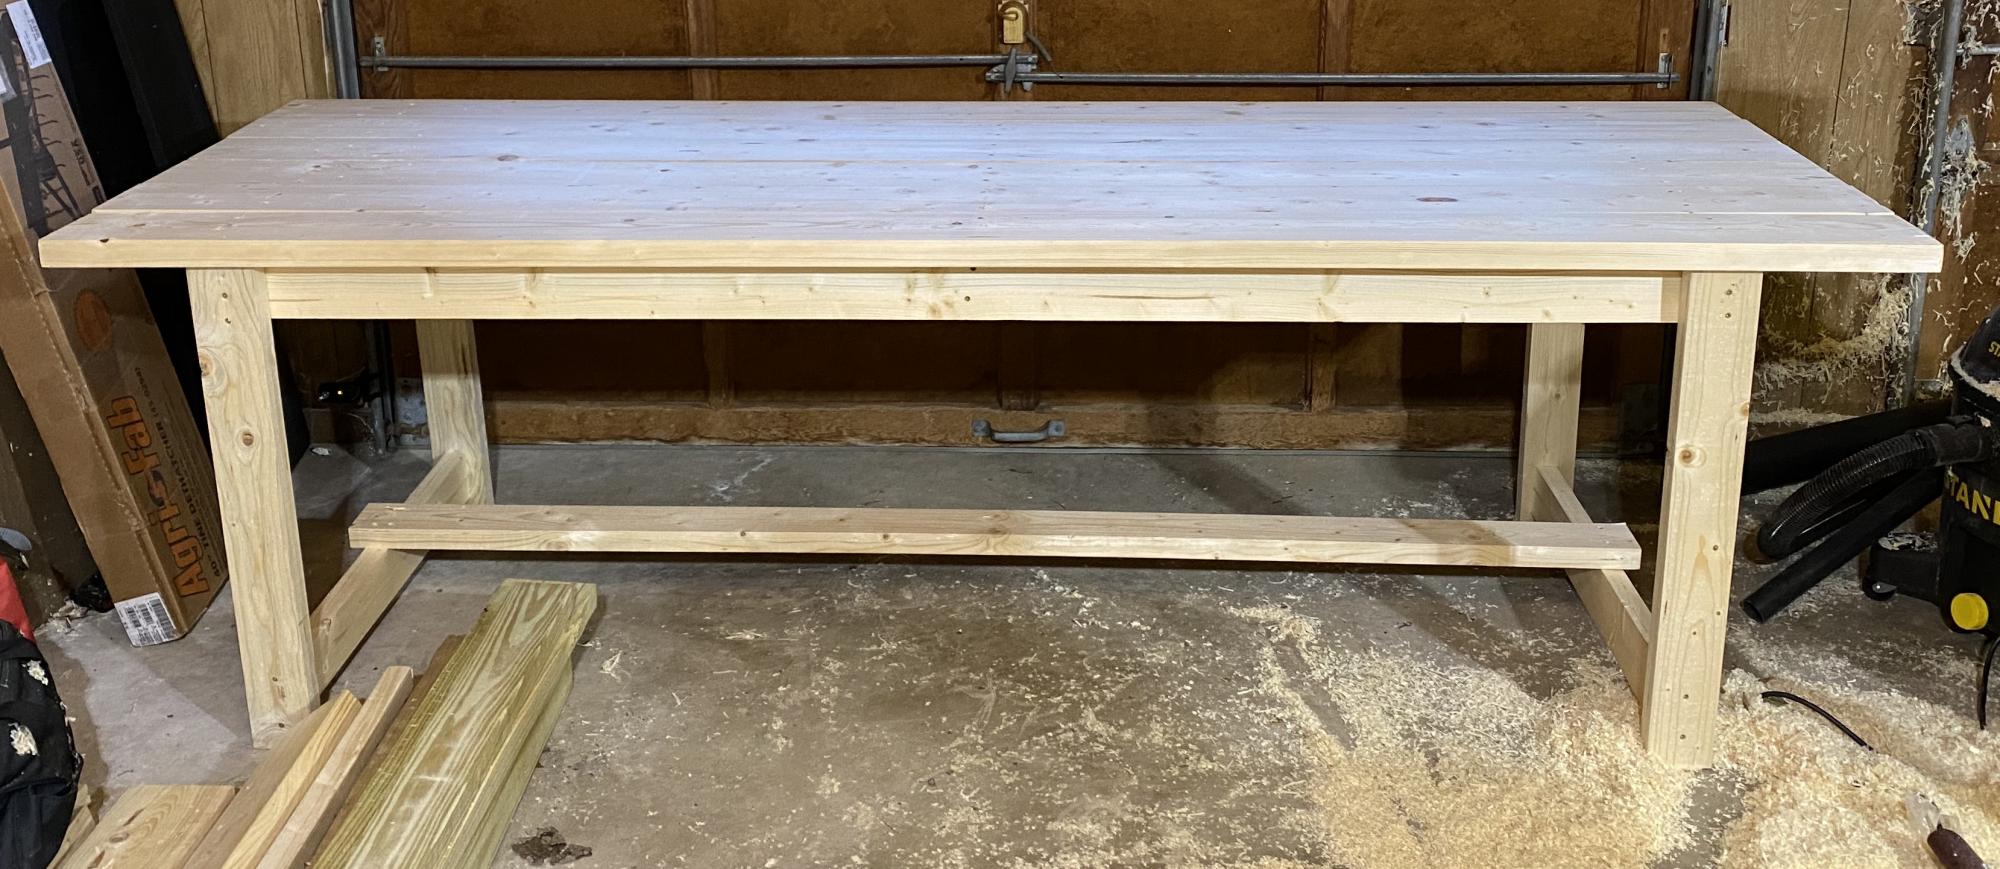
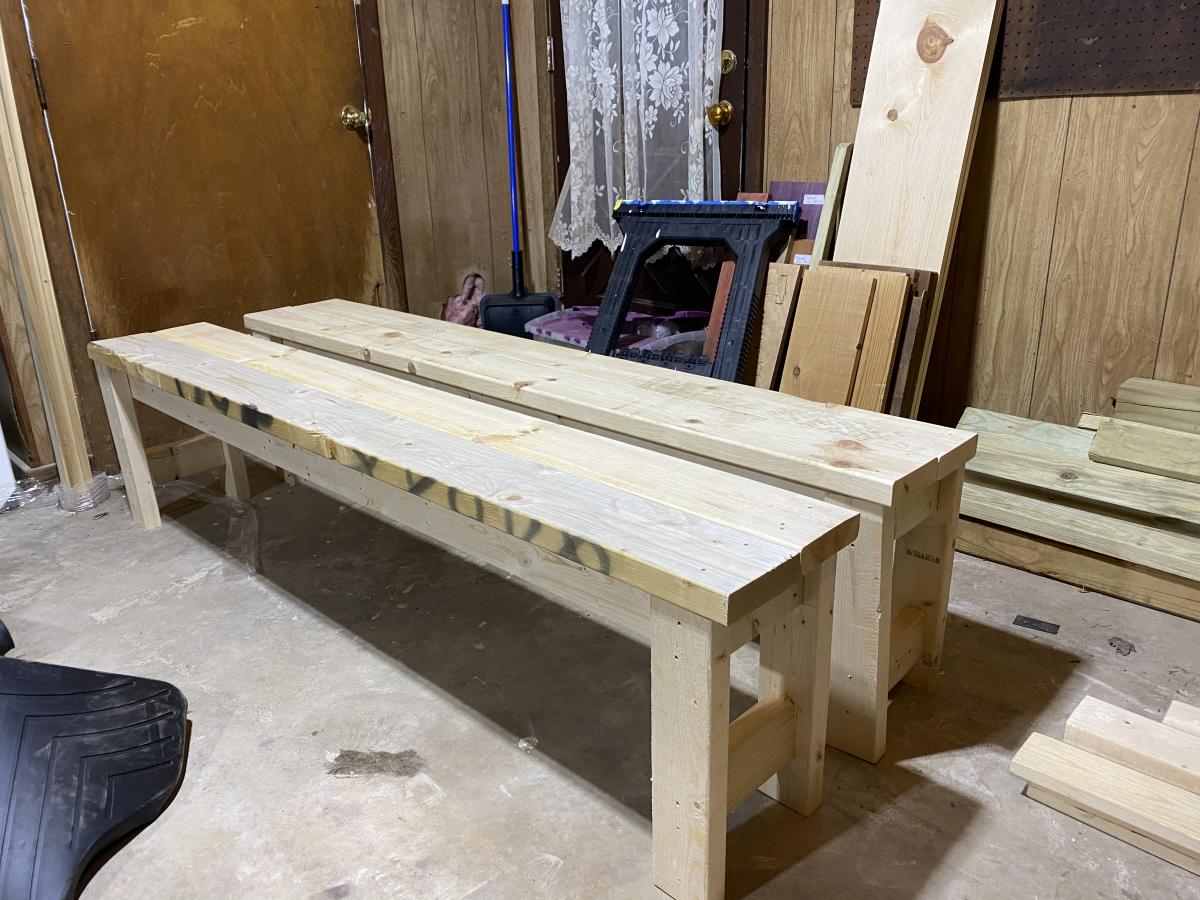
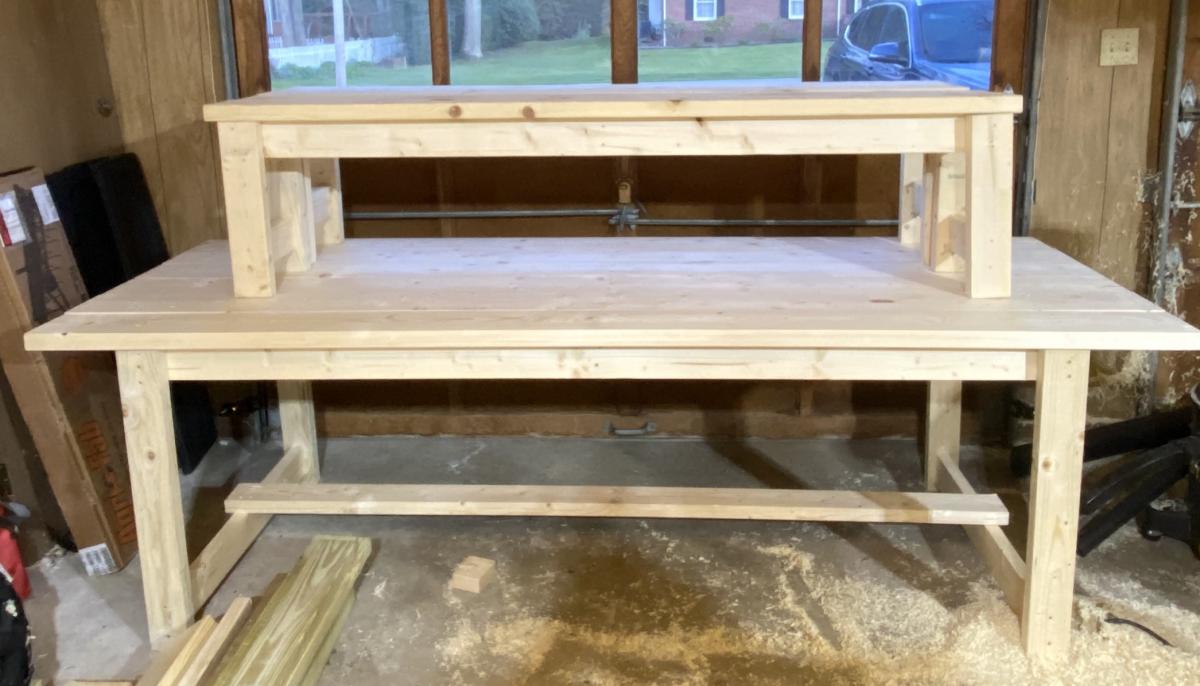
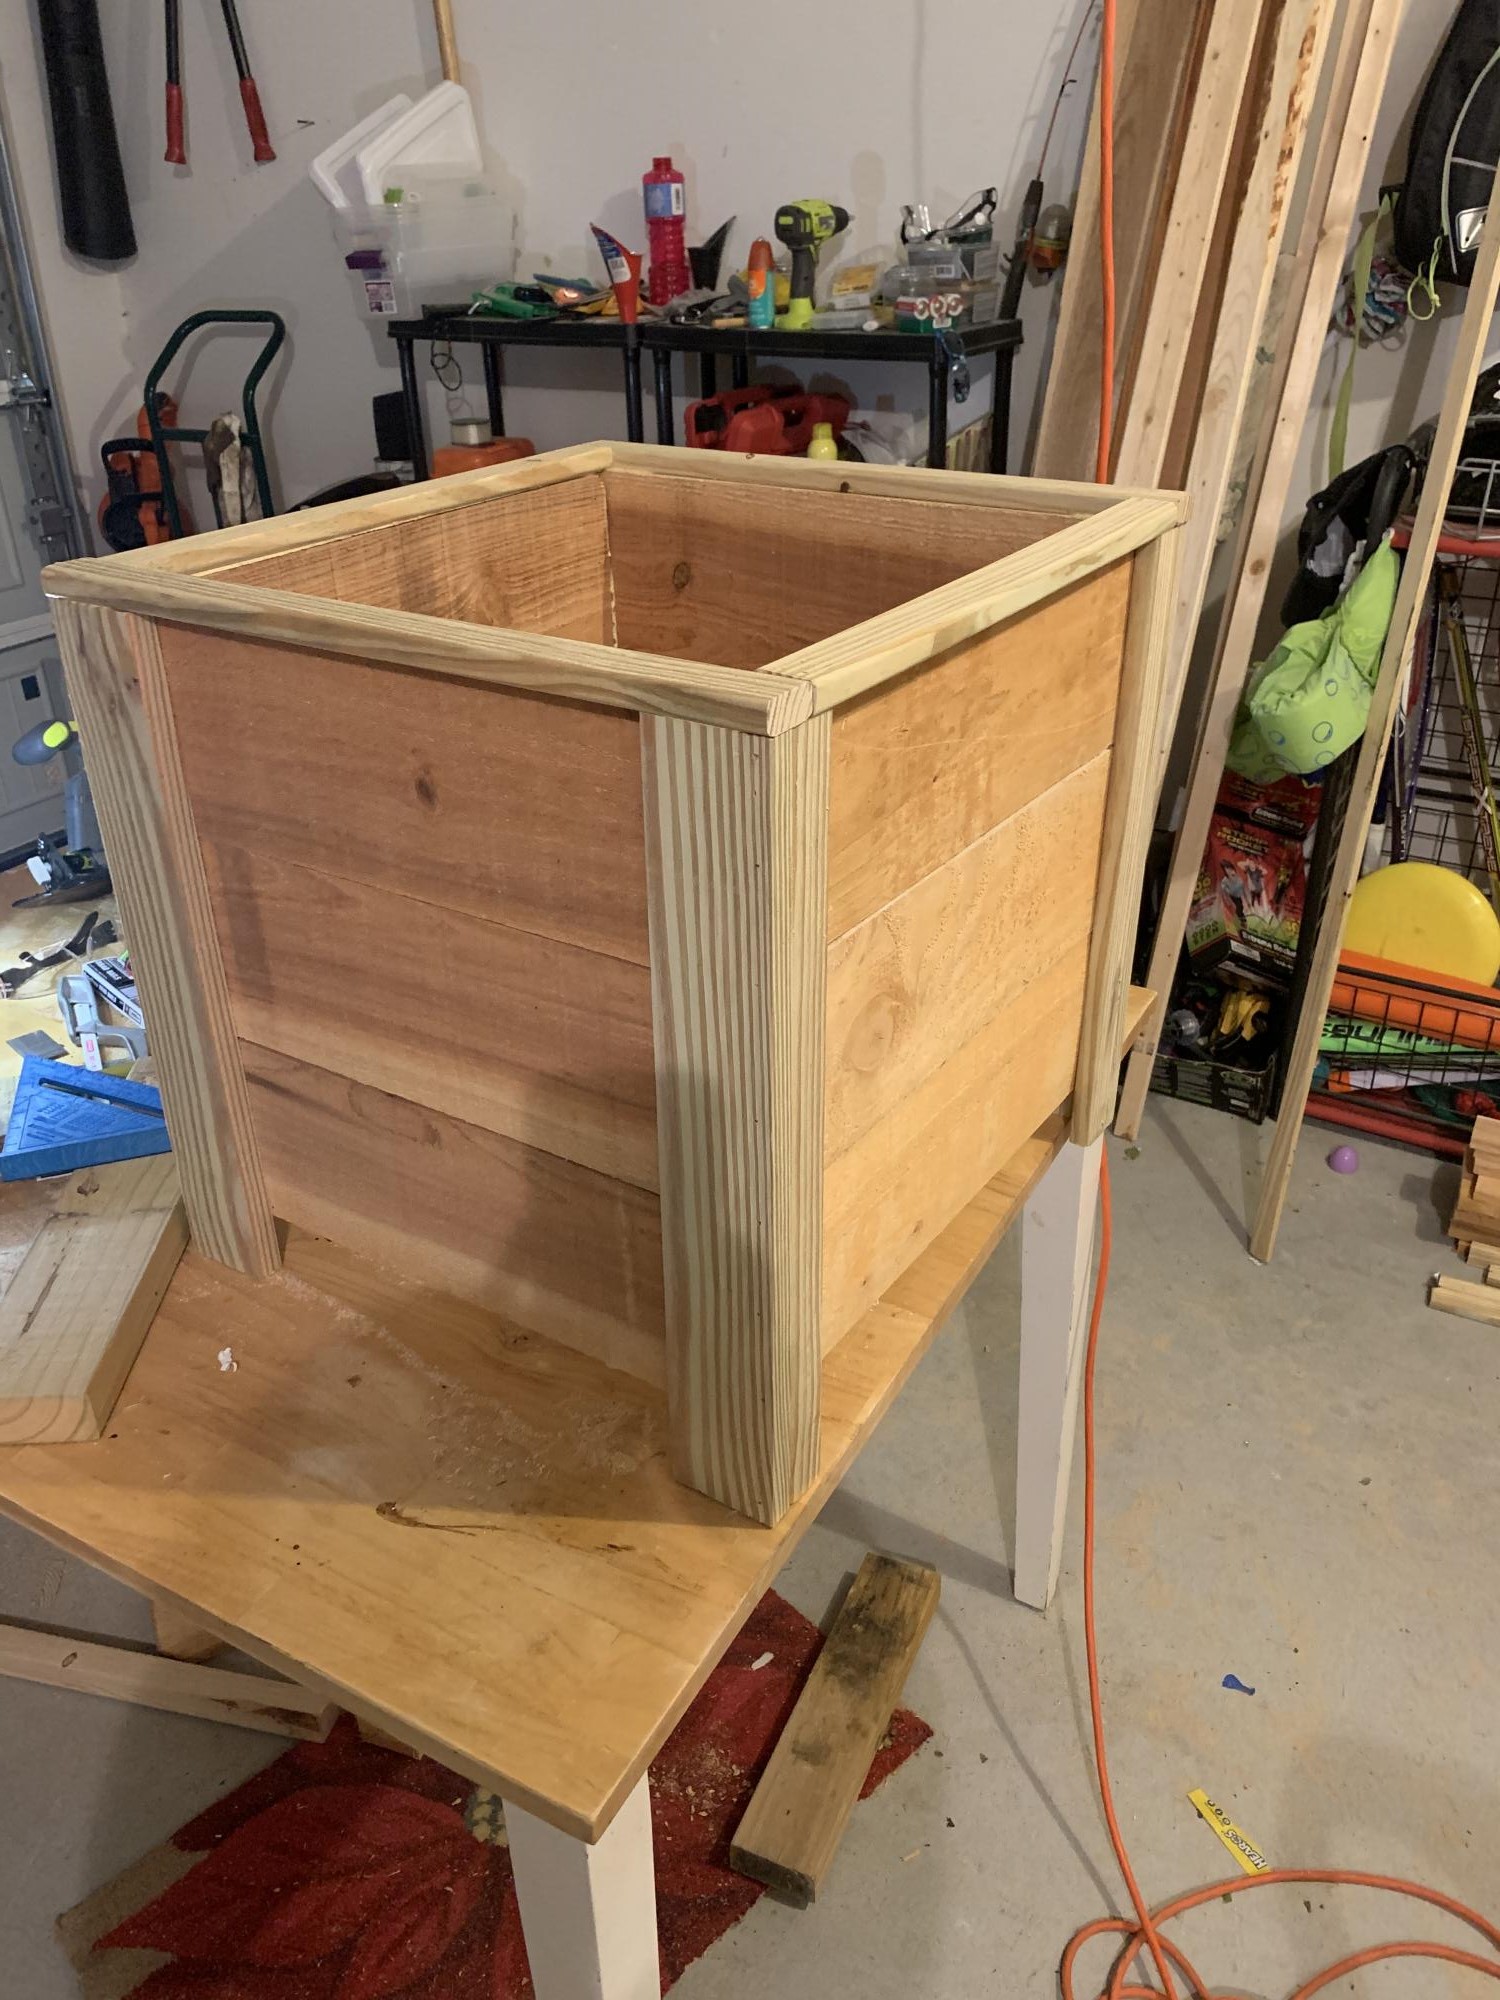
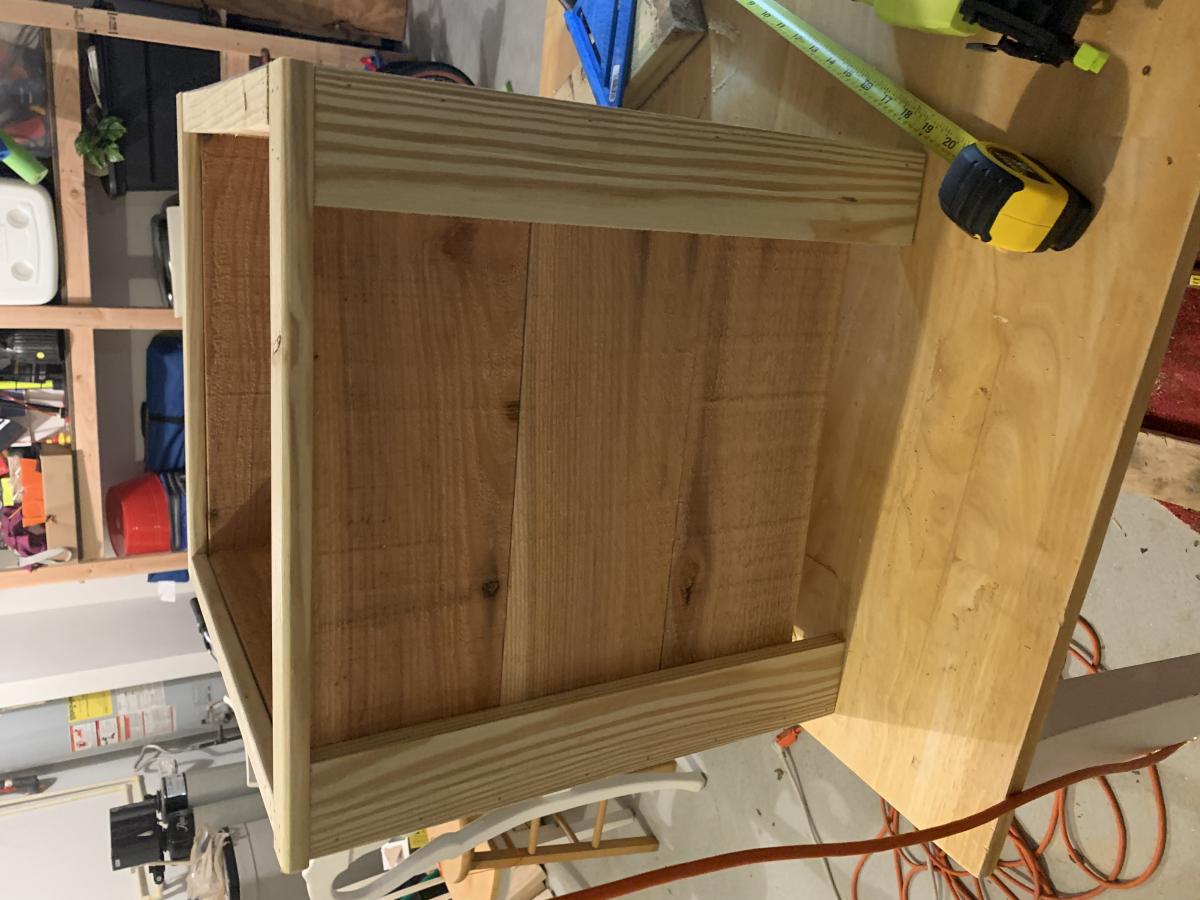
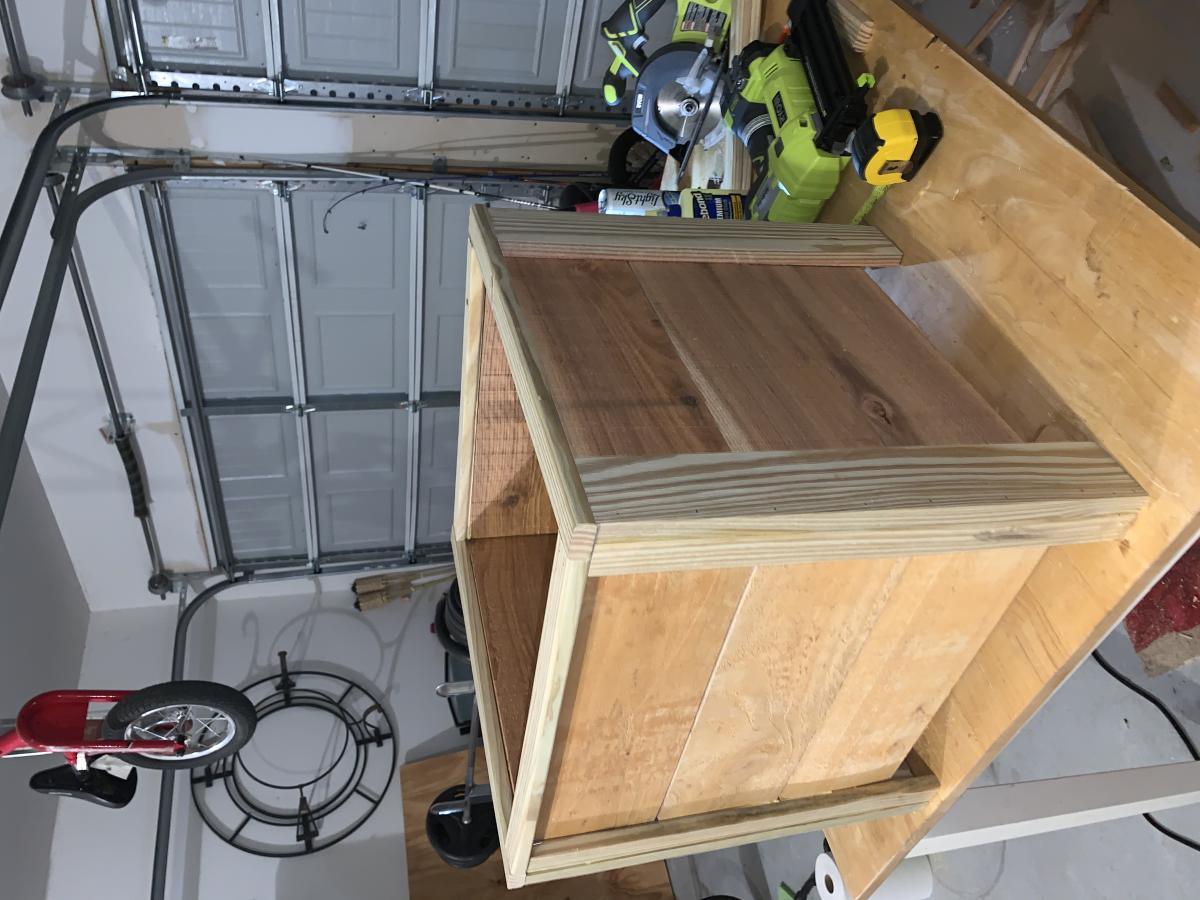
Infinity Mirror Coffee Table

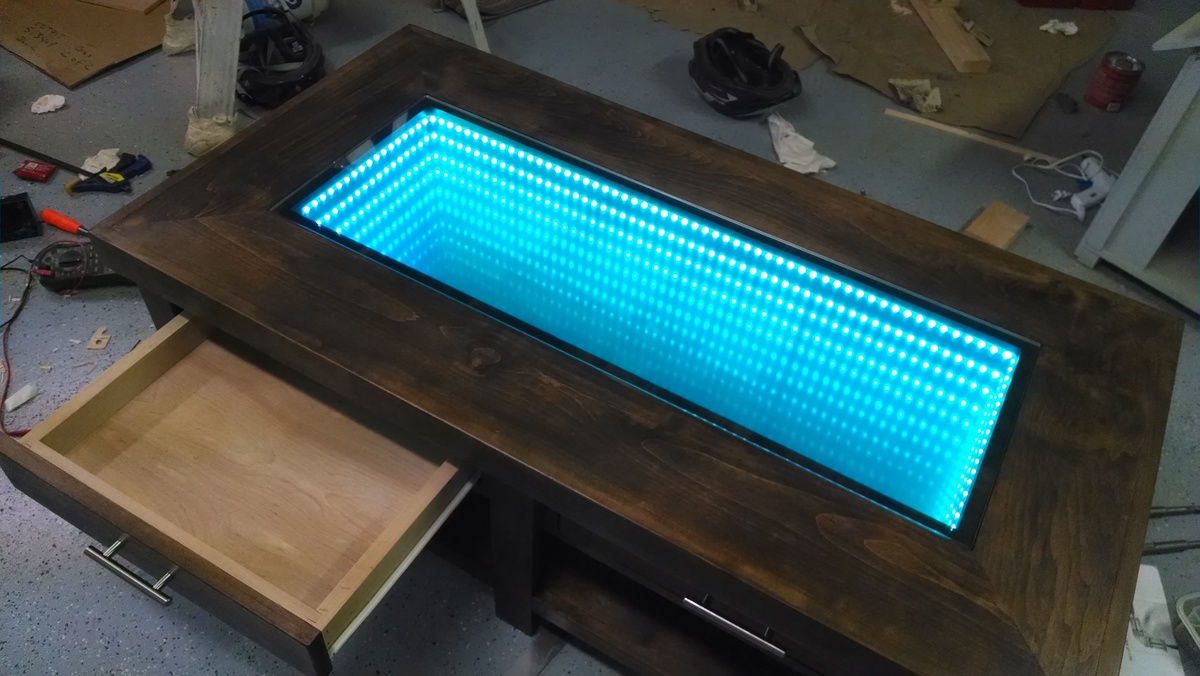
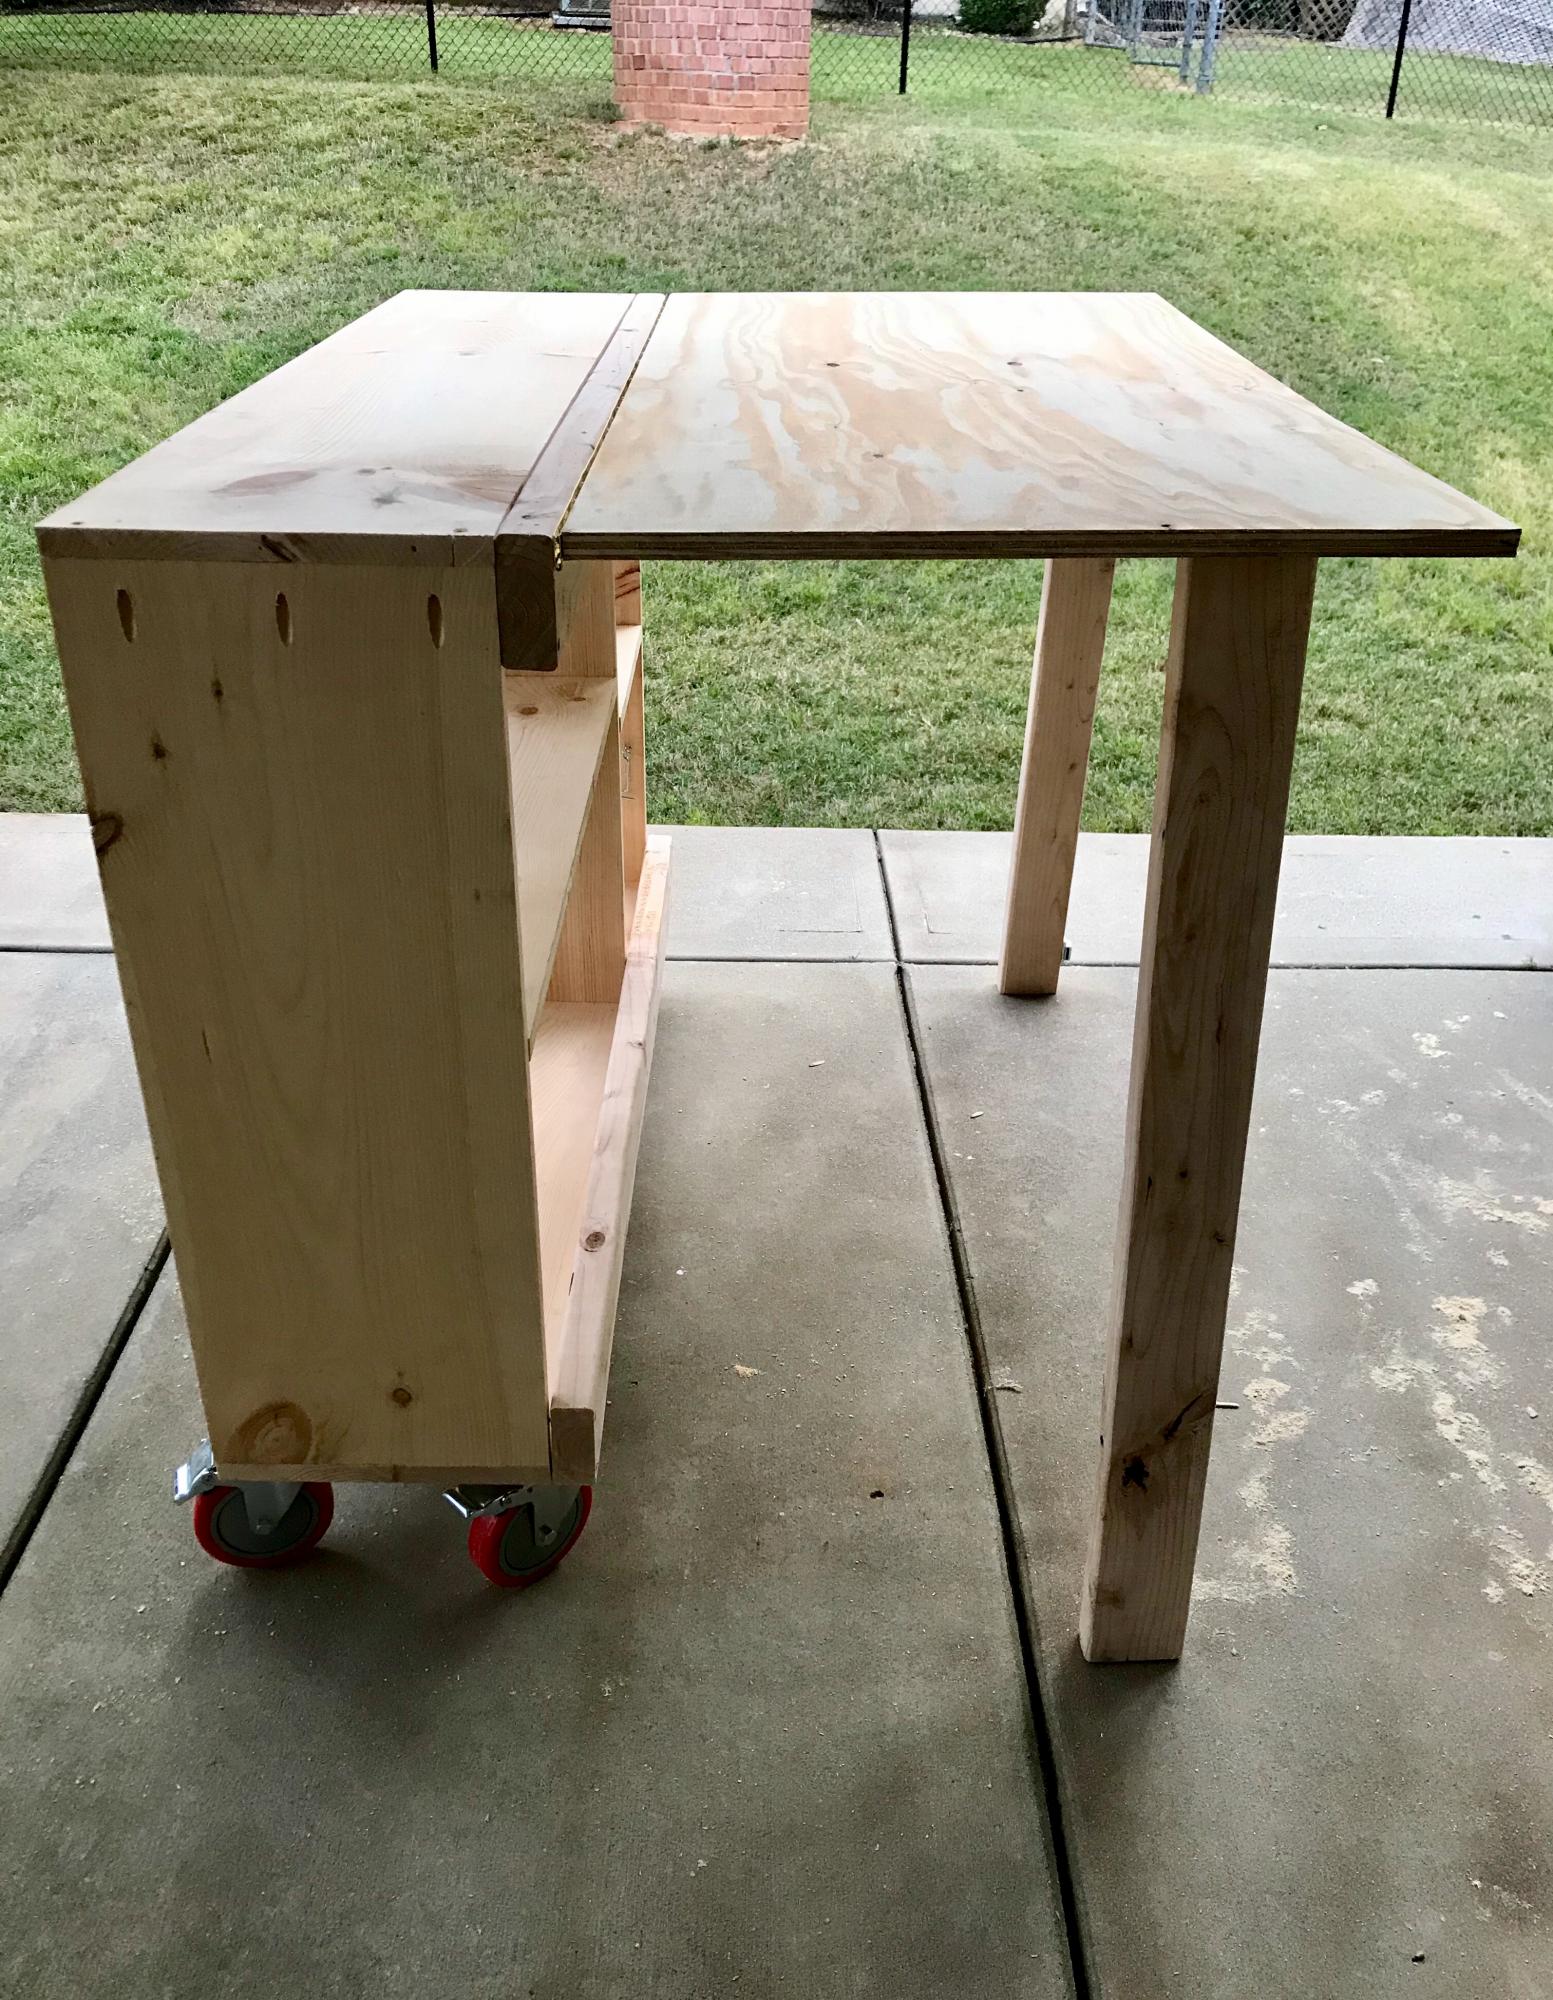
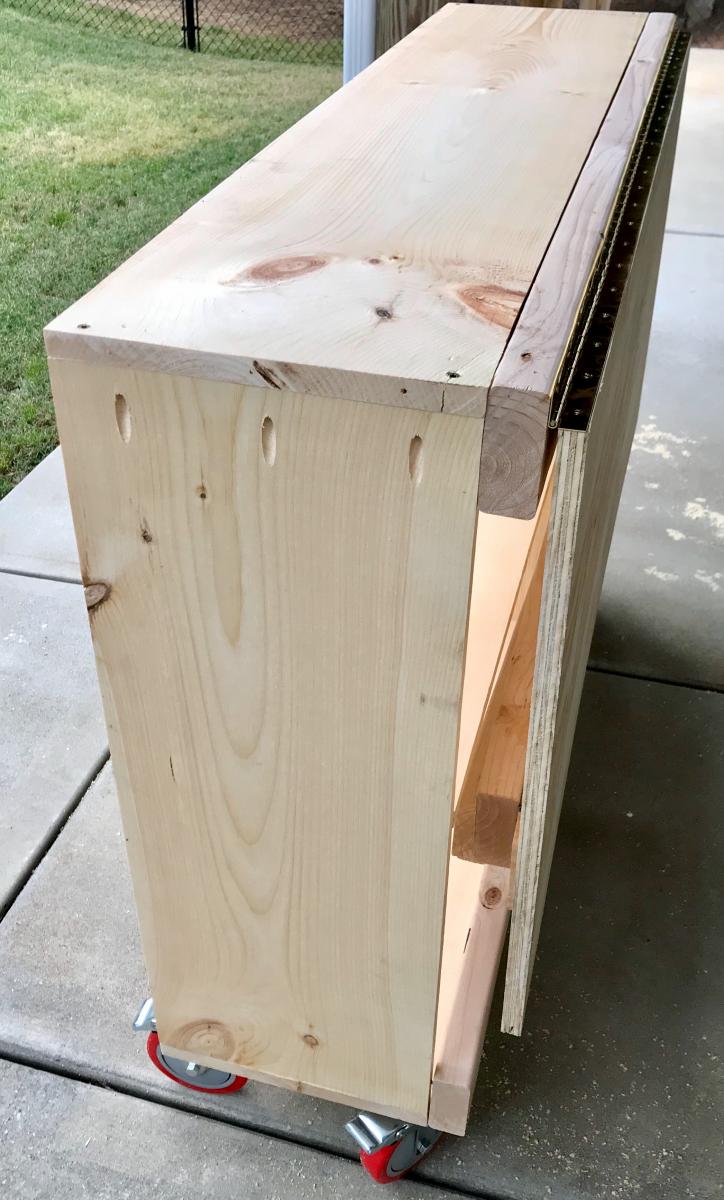
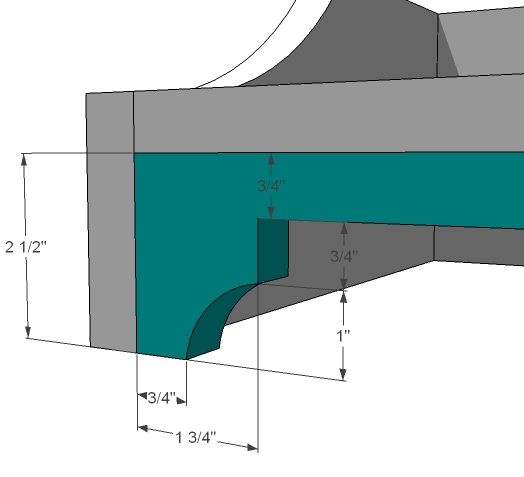
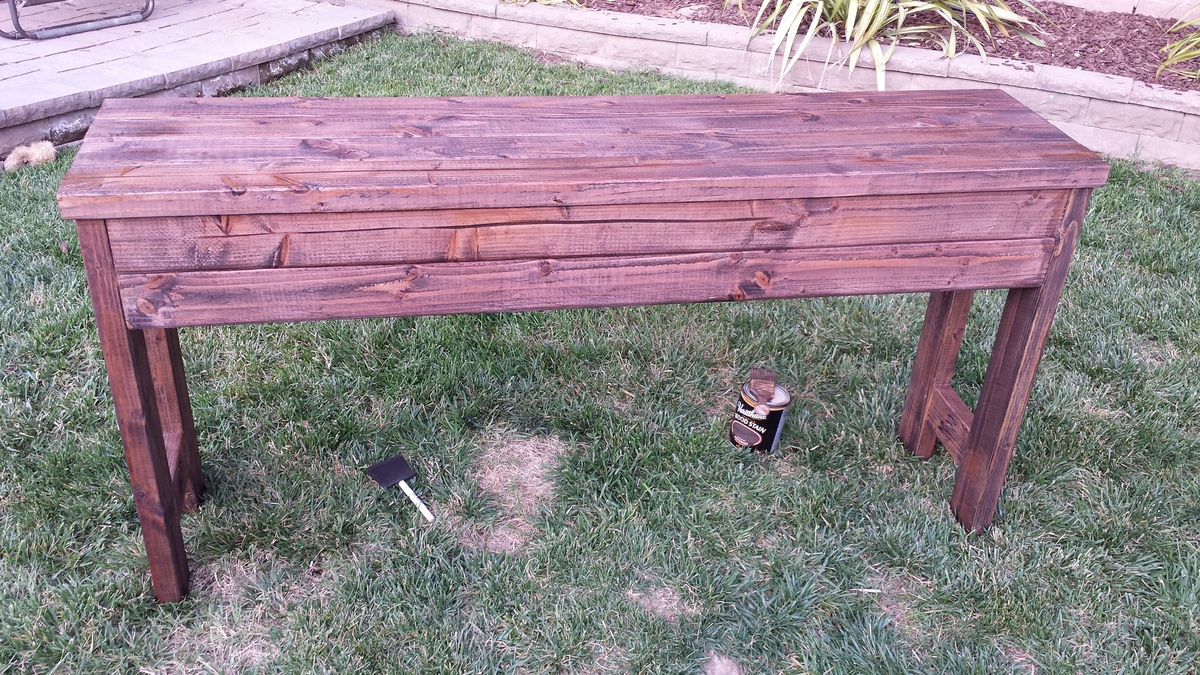
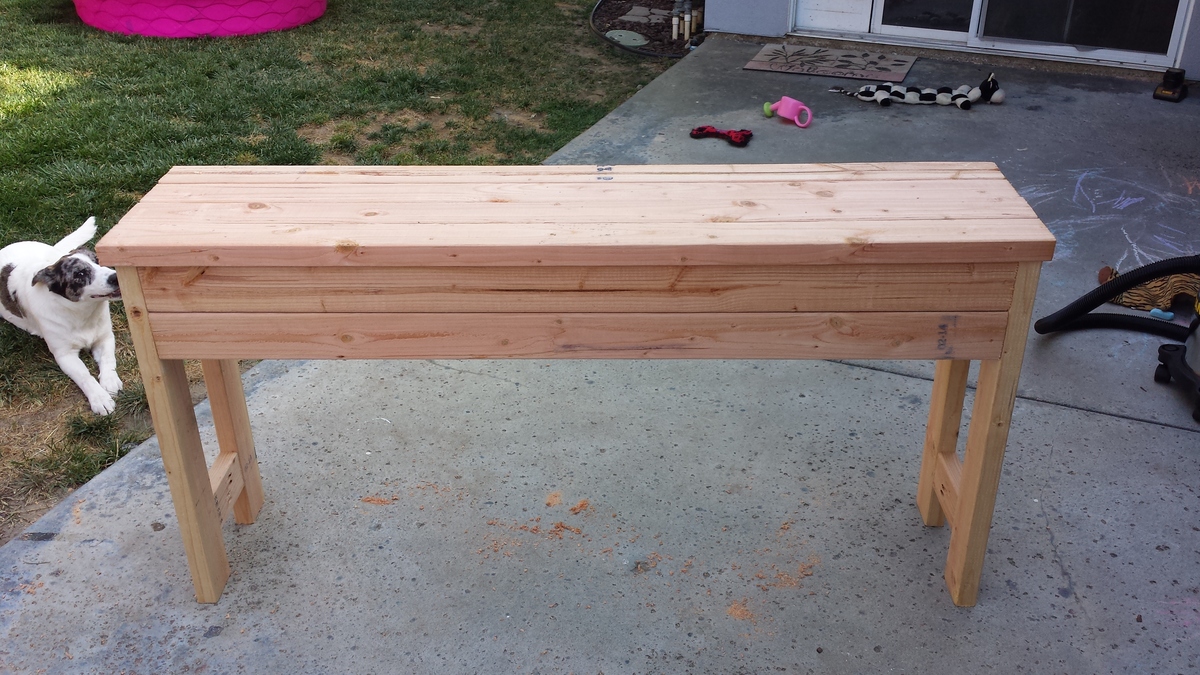
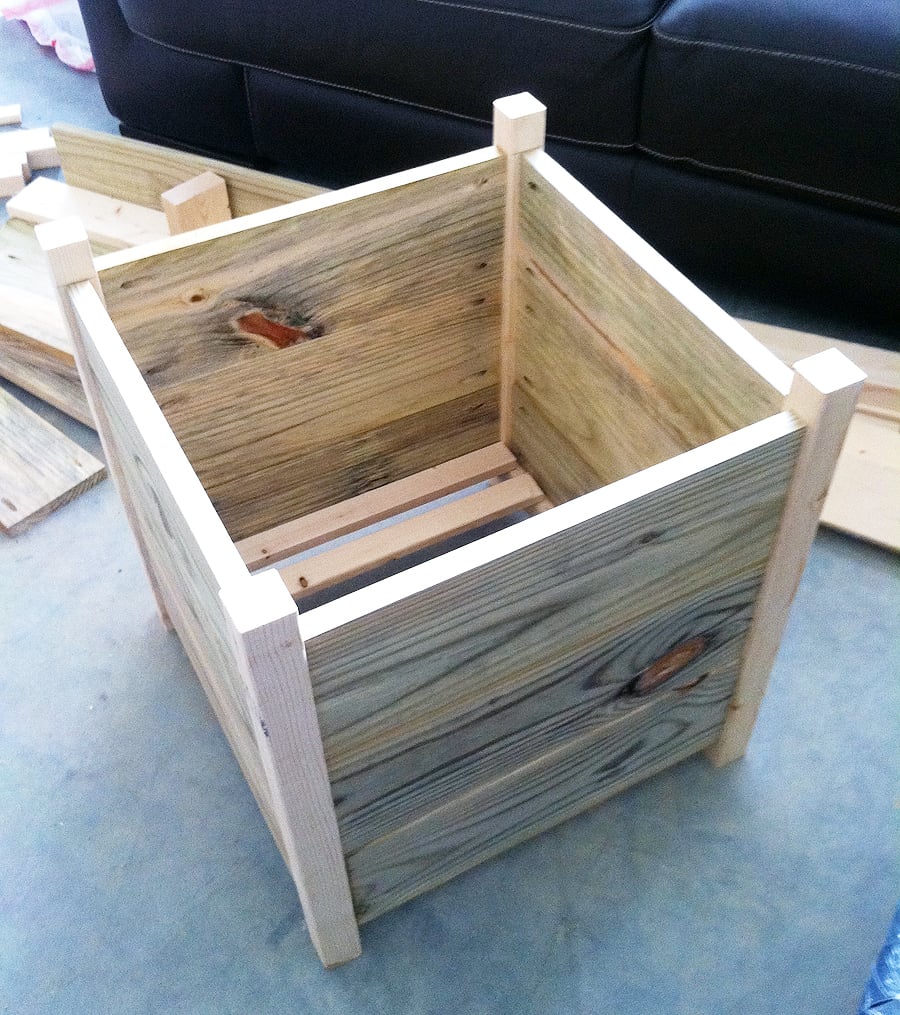
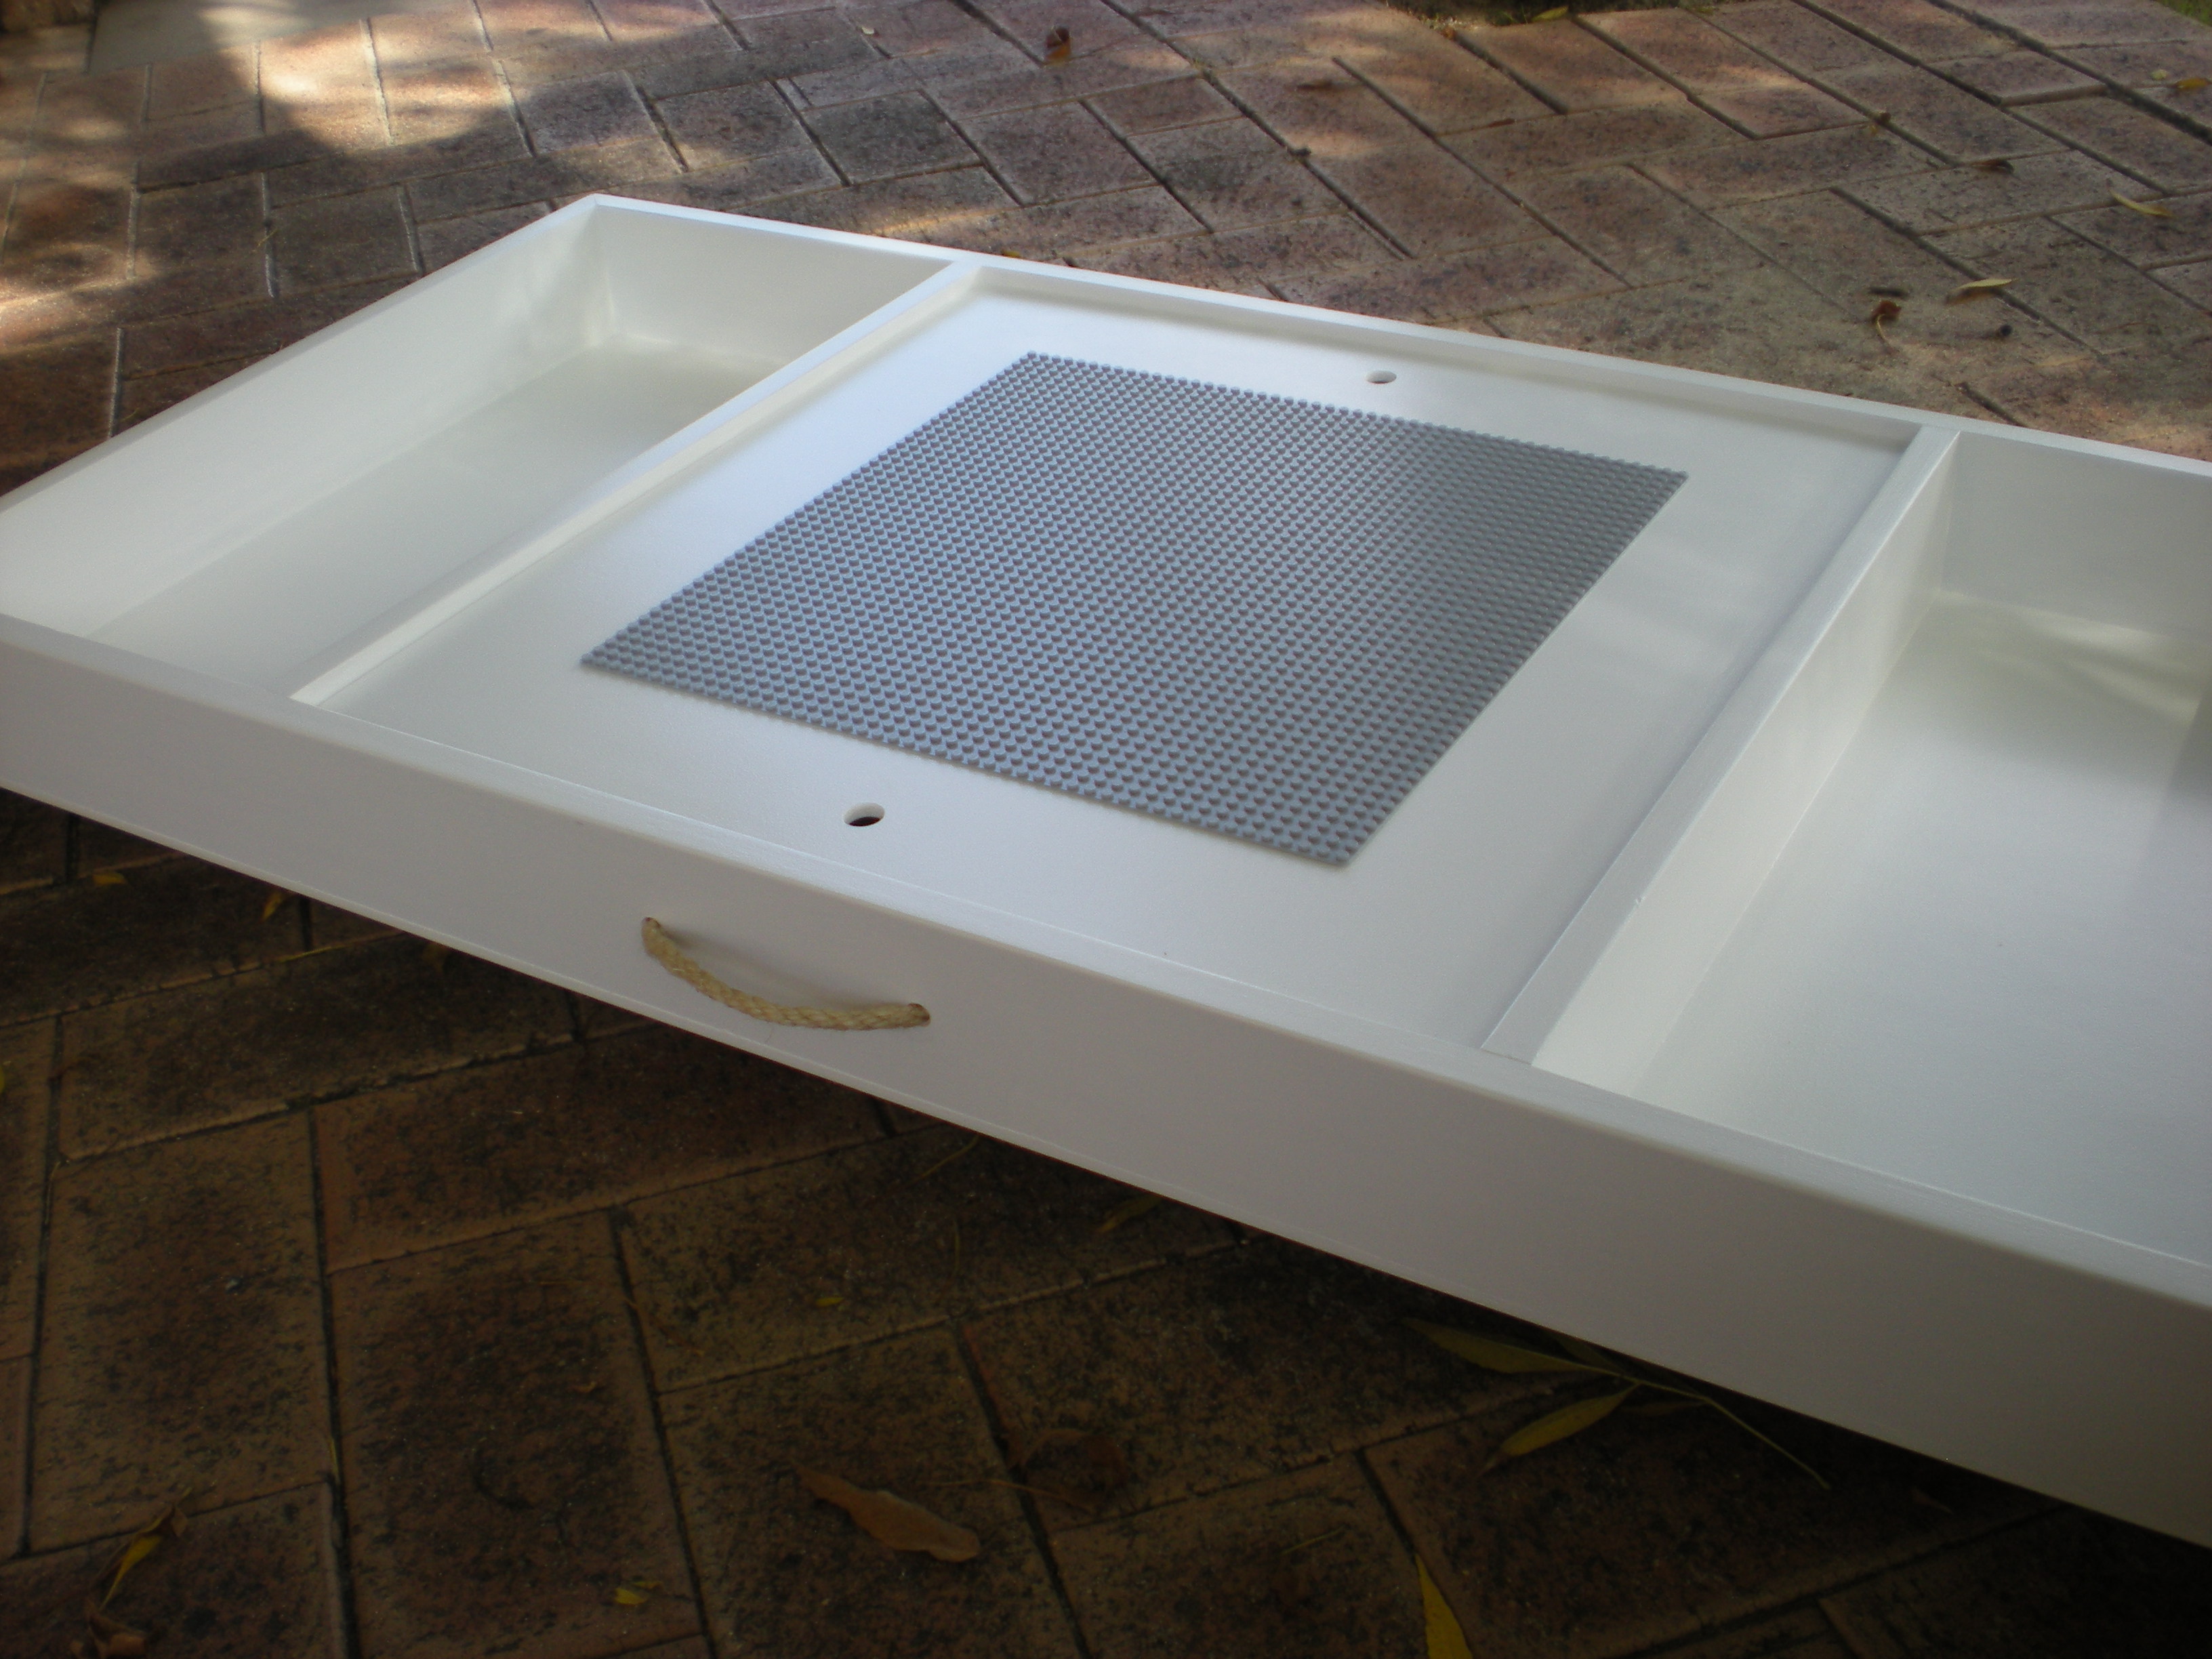
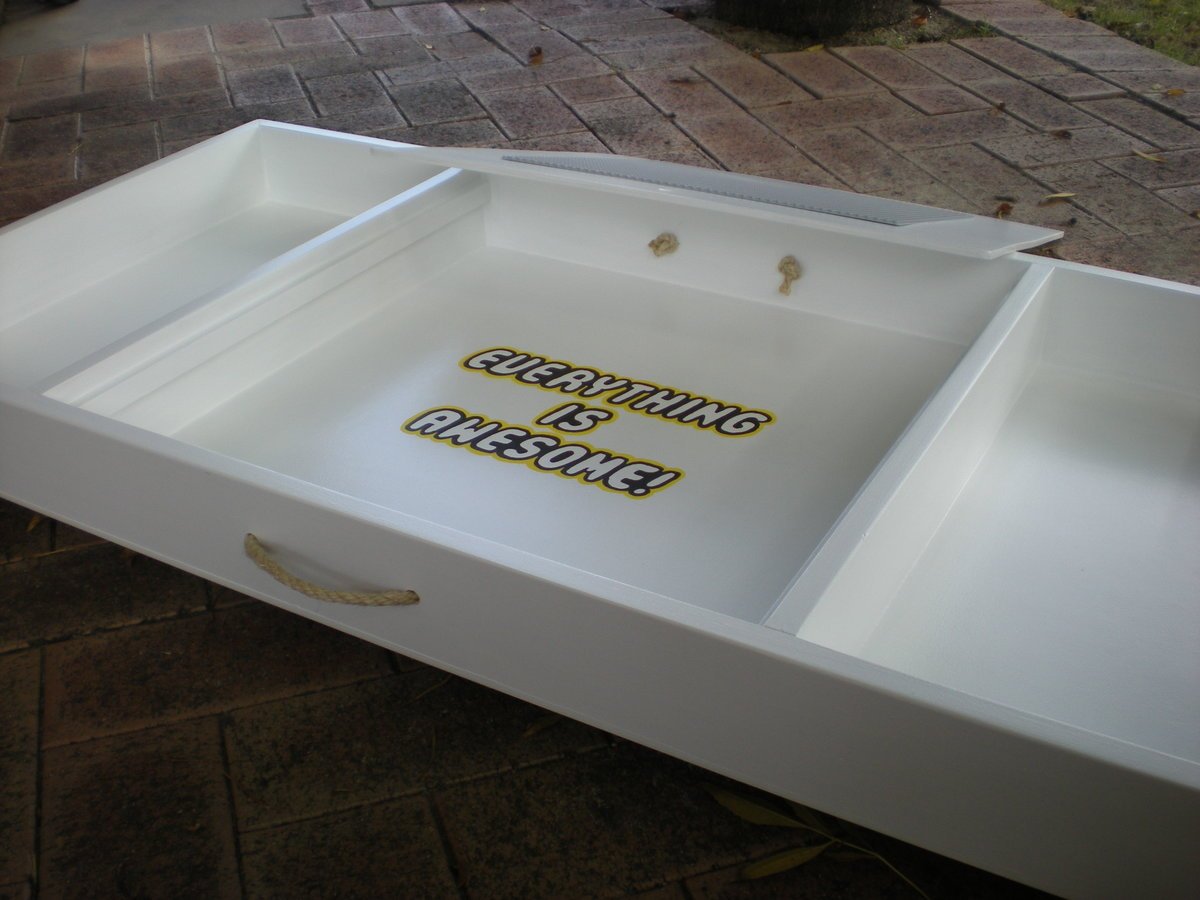
Used the Benchwright Coffee Table for all of the base which was very easy to follow. I used rough cut Alder, which I would not try to do again (way too many linear feet to cut!). I've done drawers before, and I've found that it's easier to attach the slides to the drawer box and the horizontal pieces that attach to the table. After that, attach once of the horizontal pieces first, and shim the other before attaching to the table. The top is 3 boards tall and is comprised of 1 layer of birch plywood, 1 layer of spacers, and the mitered edges on the top. The infinity mirror feature comes from a row of LED's sandwiched between a mirror (base) and glass with a semi-transparent mirror film (also known as one way mirror).

Estimated Cost
$300+
Estimated Time Investment
Week Long Project (20 Hours or More)
Finish Used
Minwax Espresso satin. Finished with spray lacquer
Recommended Skill Level
Intermediate

Comments

Modern Outdoor Bench

Submitted by Anonymous (not verified) on Tue, 08/09/2016 - 16:29

Great plans!  I modified the bench by adding a slanted back (which enabled me to put the slats closer together), extending and curving the front of the arms and extended the seat to the outside of the legs.


Recommended Skill Level
Intermediate

Comments

Portable Workbench

Submitted by atlayank on Mon, 05/25/2020 - 17:27

I have a small workshop so this workbench allows me to bring the work outside. It was my first project and I think it came out great.

Built from Plan(s)
Estimated Cost
$100
Estimated Time Investment
Day Project (6-9 Hours)
Finish Used
None
Recommended Skill Level
Beginner

Wood Vanity

Submitted by Anonymous (not verified) on Tue, 02/13/2024 - 12:21

This is my third time using these lovely and simple plans, this time for a made-to-measure vanity. Grateful for the plans!

Katie

Finished the Simple Bed! (Twin)

Submitted by reyncloud on Thu, 07/19/2012 - 20:53

Just finished this Twin Size Simple Bed direct from the Ana White plans. This is my first project that I've completed, and it went well! The plans were great, and my only advice would be to take your time. I know that some people don't like to paint the wood, but this white just fit the room perfectly. As a side-note, this bed is SOLID and very heavy! Amazing what a difference real wood is to the stuff you get at the furniture store.

Built from Plan(s)
Estimated Cost
$50
Estimated Time Investment
Weekend Project (10-20 Hours)
Finish Used
Menards flat bright white interior paint.
Recommended Skill Level
Beginner

Comments

Amie (not verified)

Wed, 07/25/2012 - 12:49

I am looking into making this bed but into a bunkbed, but I am afraid of doing a bad paint job....any suggestions?? Should I paint prior to putting together? Thank you your detoured out GREAT!!!

reyncloud

Thu, 07/26/2012 - 05:20

Hi Amie! After putting this all together and then sanding and painting, I think this time around (I'm making a 2nd one), I'll cut the pieces according to the cut list, then sand and paint the pieces before putting them together. The painting wasn't too bad to do after putting it together, but the sanding was difficult with some of the angles on the head and footboard. I'll update this after I do it this other way..good luck with your project!! It's very satisfying to see the finished result after you finish!

Ahab (not verified)

Sun, 01/06/2013 - 13:35

I just priced this out and the lumber comes to $130 for decent pine...

reyncloud

Sun, 01/06/2013 - 16:00

Hi Ahab.. One thing I've figured out from reading posts is that the cost of lumber (and pine) varies widely across regions. Each store also has different grades of lumber available. If you take the time to go through lumber piles and choose boards that are straight you can save a fair chunk of change. Just my 2 cents.. Good luck with your project though!

Medickep

Thu, 12/18/2014 - 16:36

I have a question on how the rails connect to the head and foot board. I think the original plans have you make a box out of 2x2's, Do the 2x2's just screw to the headboard and footboard? This seems like the easiest, unless you want to take it apart and move it! Anyone have ant thoughts on this?

2x4 Chunky Console

Submitted by kmh4482 on Sun, 05/11/2014 - 01:45

This is the first thing I have ever made. I had my wood cut at Lowe's, bought a Kreg pocket hole jig and screws. I borrowed a friend's drill, sander and stain. I was amazed at how easy this was and how well it turned out.

Built from Plan(s)
Estimated Cost
$30
Estimated Time Investment
Afternoon Project (3-6 Hours)
Finish Used
Minwax Woodfinish Ebony - One coat
Recommended Skill Level
Beginner

E's scooter

Submitted by Anonymous (not verified) on Sat, 08/13/2016 - 02:54

Fairly easy to make with a jigsaw and sander. I would suggest to whomever makes one of the Charlie scooters to use a hardwood as some of the section in the handlebar area can be fragile when weight is applied. 

Built from Plan(s)
Estimated Time Investment
Weekend Project (10-20 Hours)
Finish Used
Automotive enamel paint and clear coat
Recommended Skill Level
Beginner

Farmhouse Table and Benches

Submitted by pbkolsun on Tue, 05/26/2020 - 19:13

I used the plan available here and was able to create an 8ft farmhouse table with a set of benches.

Estimated Time Investment
Afternoon Project (3-6 Hours)
Recommended Skill Level
Beginner

Small Famhouse

Submitted by Anonymous (not verified) on Thu, 02/15/2024 - 10:19

Nothing with finess but I always loved the look of old farm houses so I built my own.

Georgie

Outdoor Box Planters

Super easy project to do with a Kreg Jig! I made two for my front stoop. The finials add that extra touch! Check out my blog link for more info!

Built from Plan(s)
Estimated Cost
$16.00 per planter
Estimated Time Investment
Afternoon Project (3-6 Hours)
Finish Used
Primed with Zinsser 3-in-1 Primer, painted 2 coats of glossy white interior/exterior paint.
Recommended Skill Level
Starter Project
Seasonal And Holiday

Underbed Lego Storage

Submitted by rosiejane on Tue, 05/13/2014 - 22:28

We were in desperate need of a lego storage solution for our son's small bedroom. I made this for his 7th birthday. I saw a photo of a similar one as a result of a google or pinterest search and decided to draw up some plans.
I recessed the top slightly so that pieces won't fall off. I just glued thin cleats to the inside of the box to hold the lid, (using spacers to get it at the height I wanted) Ideally the top would be reversible however I didn't quite get one of the dividers square so it only fits one way. I used Posca water-based markers to do the text. Make sure you wait until the text is really dry before you try to seal it (don't ask me how I know that...) Turns out that the markers don't react well with the brush on poly so I just left the text unsealed.
I was just going to have one handle on the front but then I made a stupid mistake and wrote the text so it would be upside down when pulled out (I know, dumb right!) So I added another handle on the other side. I used a water-based enamel for the whole box. Not sure if that was worth it of if I should have just used flat and given it a top coat of poly. I used a brush on the inside corners and found it really hard to get an even finish because I rolled the flat surfaces. Painting the pieces before assembly would probably fix this.
Added some castors so it can be pushed under the bed.

Estimated Cost
AUD$39 (plus lego baseplate and paint markers)
Estimated Time Investment
Weekend Project (10-20 Hours)
Finish Used
dulux aquanamel - vivid white, posca water-based poster markers
Recommended Skill Level
Beginner

Comments

jlharrison

Sun, 02/05/2017 - 08:48

This is so awesome. Do you think you could share a more detailed account of build. Dimensions? Supplies? I am a newbie at this! I would greatly appreciate! 

Wood Garage Shelves

Submitted by Anonymous (not verified) on Tue, 02/20/2024 - 08:40

This was made using Ana's "Garage Shelf" plans. I modified it for a corner spot between two exiting cabinets, so it took a bit of thought, but the Ana's technique for the build made it so easy.
AND I used up scrap wood that I'd been hording in the garage for the build.
Thank you Ana!

Book Stand

Submitted by romanweel on Mon, 05/19/2014 - 00:37

This was a project undertaken to facilitate my current pursuit of learning how to cook, but I think it will serve me well as I study, too, holding my textbooks up. It also let me experiment a little with staining and with using milk paint (which has NO VOCs but is kinda weird to work with). And it let me put to use some scrap wood that I think I was unconsciously saving for something special.

Because I had a scrap pile, screws, a few hinges, and the finishing products, this project was Almost free...I had to buy a narrow hinge ($1.50? I think?), and I chose to buy some pretty page weights ($3 including both pendants and the chain). So...not too bad, right? For a solid book stand that has meaningful beauty to me?

Ok, so this is all scrap wood. The stained pieces are maple leftovers from my cabinet project, and the rest is a mix of pine and poplar. See the dimensions in the last photo. The paint is Miss Mustard Seed Milk Paint in Lucketts Green, and the stain is Red Chestnut oil-based stain by Minwax. I finished the whole thing with one coat of wax buffed to a soft sheen (my new favorite finish).

I used a miter saw for my cuts and a router for the kickstand grooves, but really a regular circular saw would've worked just as well (or better, for the grooves). It took me several days to finish this project, but there's no reason it should take (someone other than me) more than an afternoon.

Estimated Cost
$5
Estimated Time Investment
Day Project (6-9 Hours)
Finish Used
Milk paint, Miss Mustard Seed in Lucketts Green in a 1 to 1 ratio, single coat
Minwax oil-based stain in Red Chestnut (I applied mineral oil first as a conditioner, then the stain for a few seconds, then wiped off - it still turned a little blotchy, though)
Regular furniture paste wax, one coat
Recommended Skill Level
Starter Project

leaning bathroom shelf

Submitted by Anonymous (not verified) on Fri, 08/19/2016 - 14:05

This was a pretty easy build, always a plus when you're looking for more storage. I'm not sure about the darkness of the stain though; I usually go with a walnut to match the rest of the house and wanted to try something different. This seems like a bit much. Might be easier to build an entire second set vs re-doing the stain though...

Estimated Cost
$25
Estimated Time Investment
Afternoon Project (3-6 Hours)
Finish Used
Minwax red mahogany
Recommended Skill Level
Beginner

Numbered Cubbies

This was my first project to cut angles. I like the way it turned out! Clamps were a help to hold all the pieces together. Very easy to put together.

Built from Plan(s)
Estimated Cost
$5.00
Estimated Time Investment
Afternoon Project (3-6 Hours)
Finish Used
paint with a stain on top.
Recommended Skill Level
Beginner

My Outdoor Sectional Couch

This was built off Ana's Outdoor Couch plans.  I just made some additional things to it and made it larger.

I added the vertical back supports so the cushions don't slip out the back.  I raised the seat height to 17". 

Estimated Cost
$600-$800 including the cushions.
Estimated Time Investment
Week Long Project (20 Hours or More)
Finish Used
Oil primer and Latex Paint.
Recommended Skill Level
Intermediate

Comments

Codding58

Mon, 08/22/2016 - 13:57

Great job!    I really like the way that your set came out!    This had been on my list to do, but a broken foot put a damper on it this summer!    Great Job!

Love your plans!

Submitted by grhoden on Wed, 06/03/2020 - 14:35

Thanks for posting all of the great plans! Just finished this one after doing a couple of benches and a table. I needs to be sanded and stained but it was a fun project.

Back