Community Brag Posts

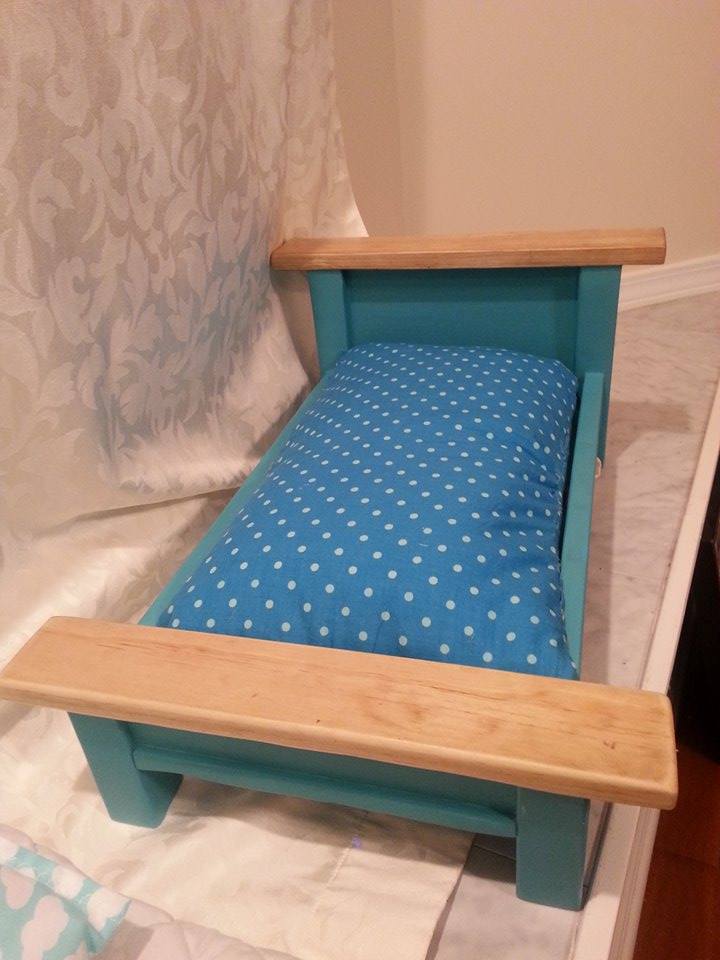
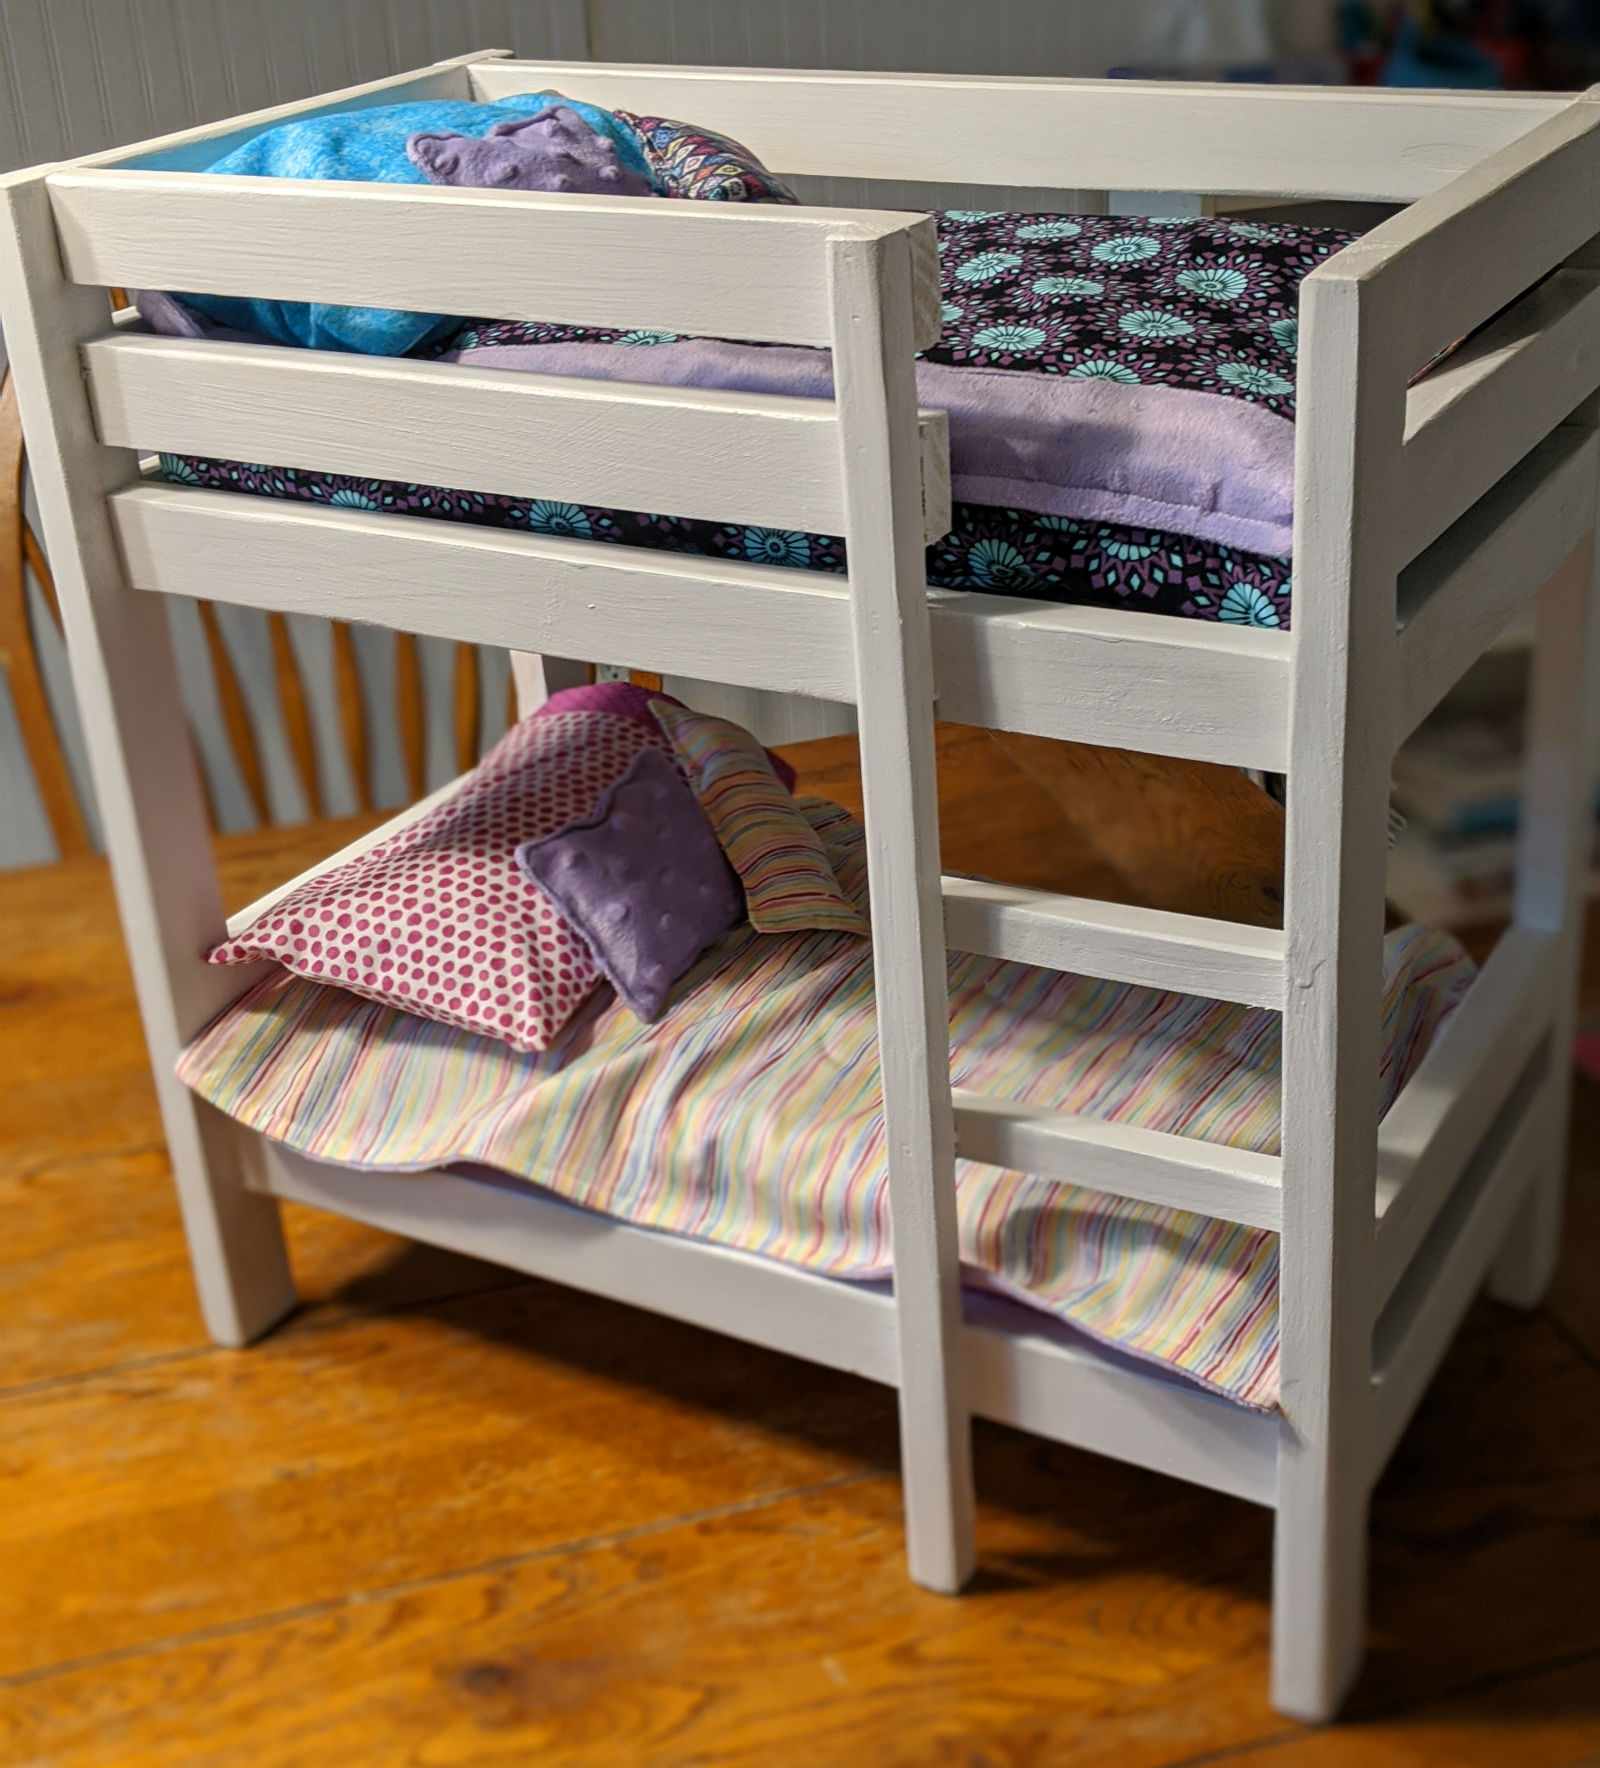
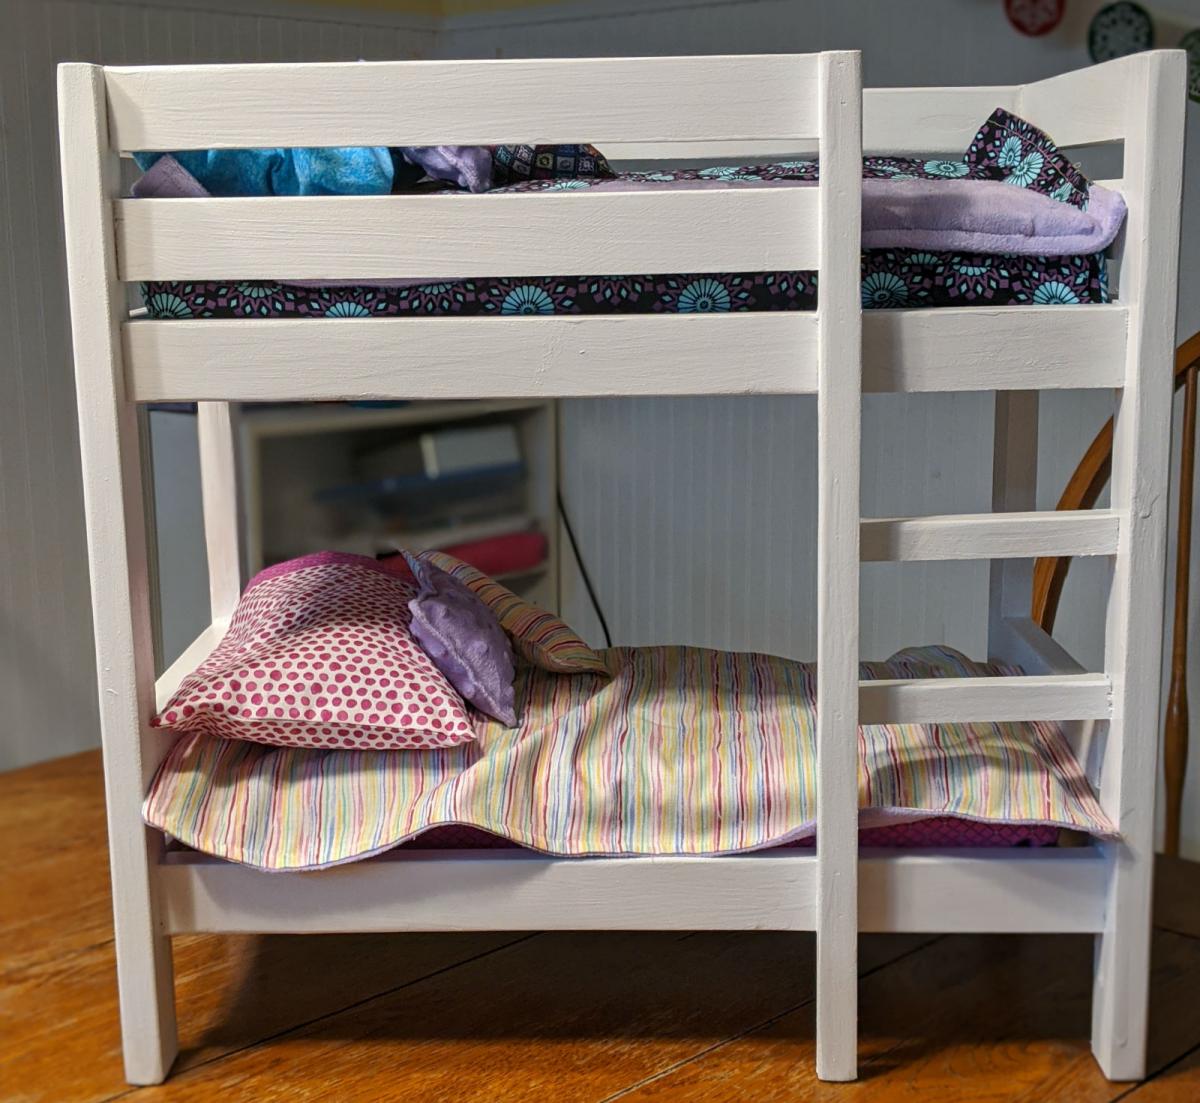
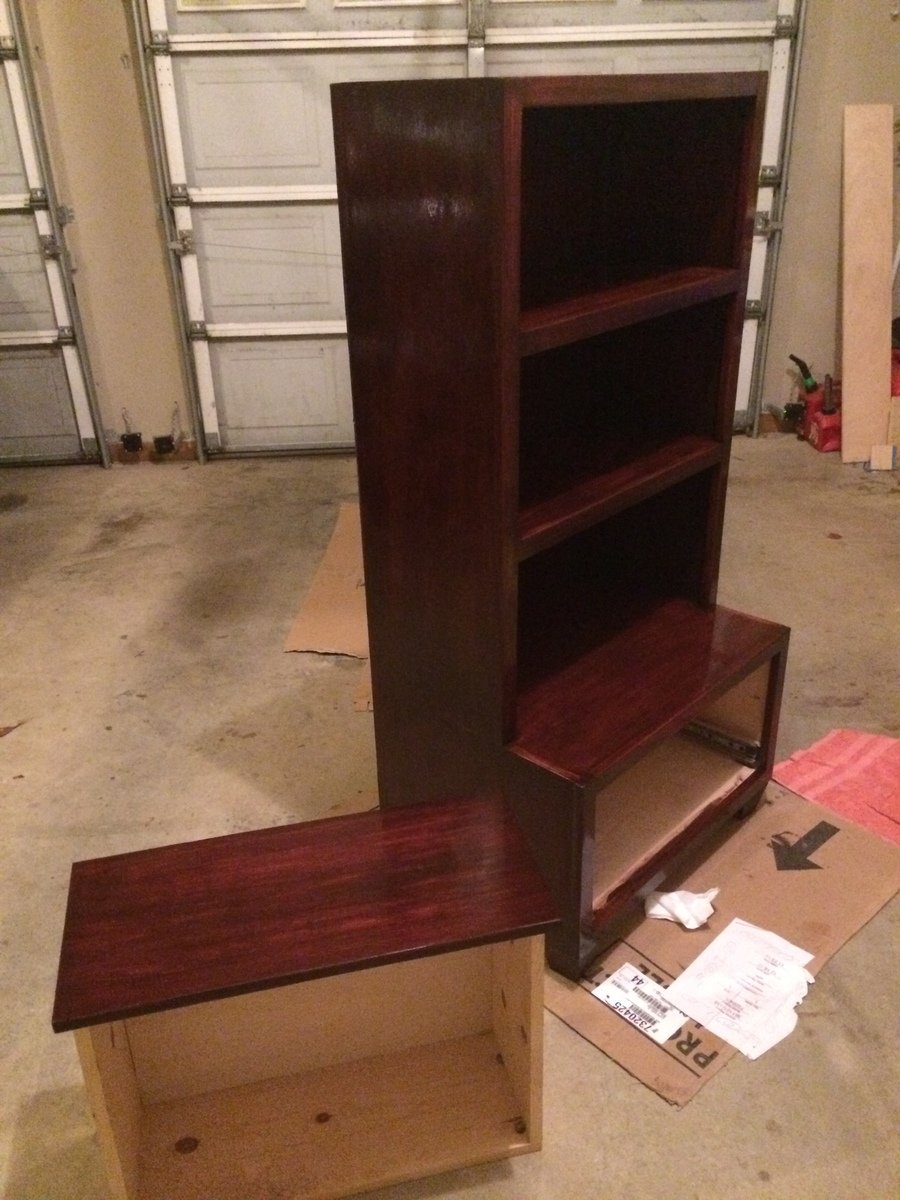
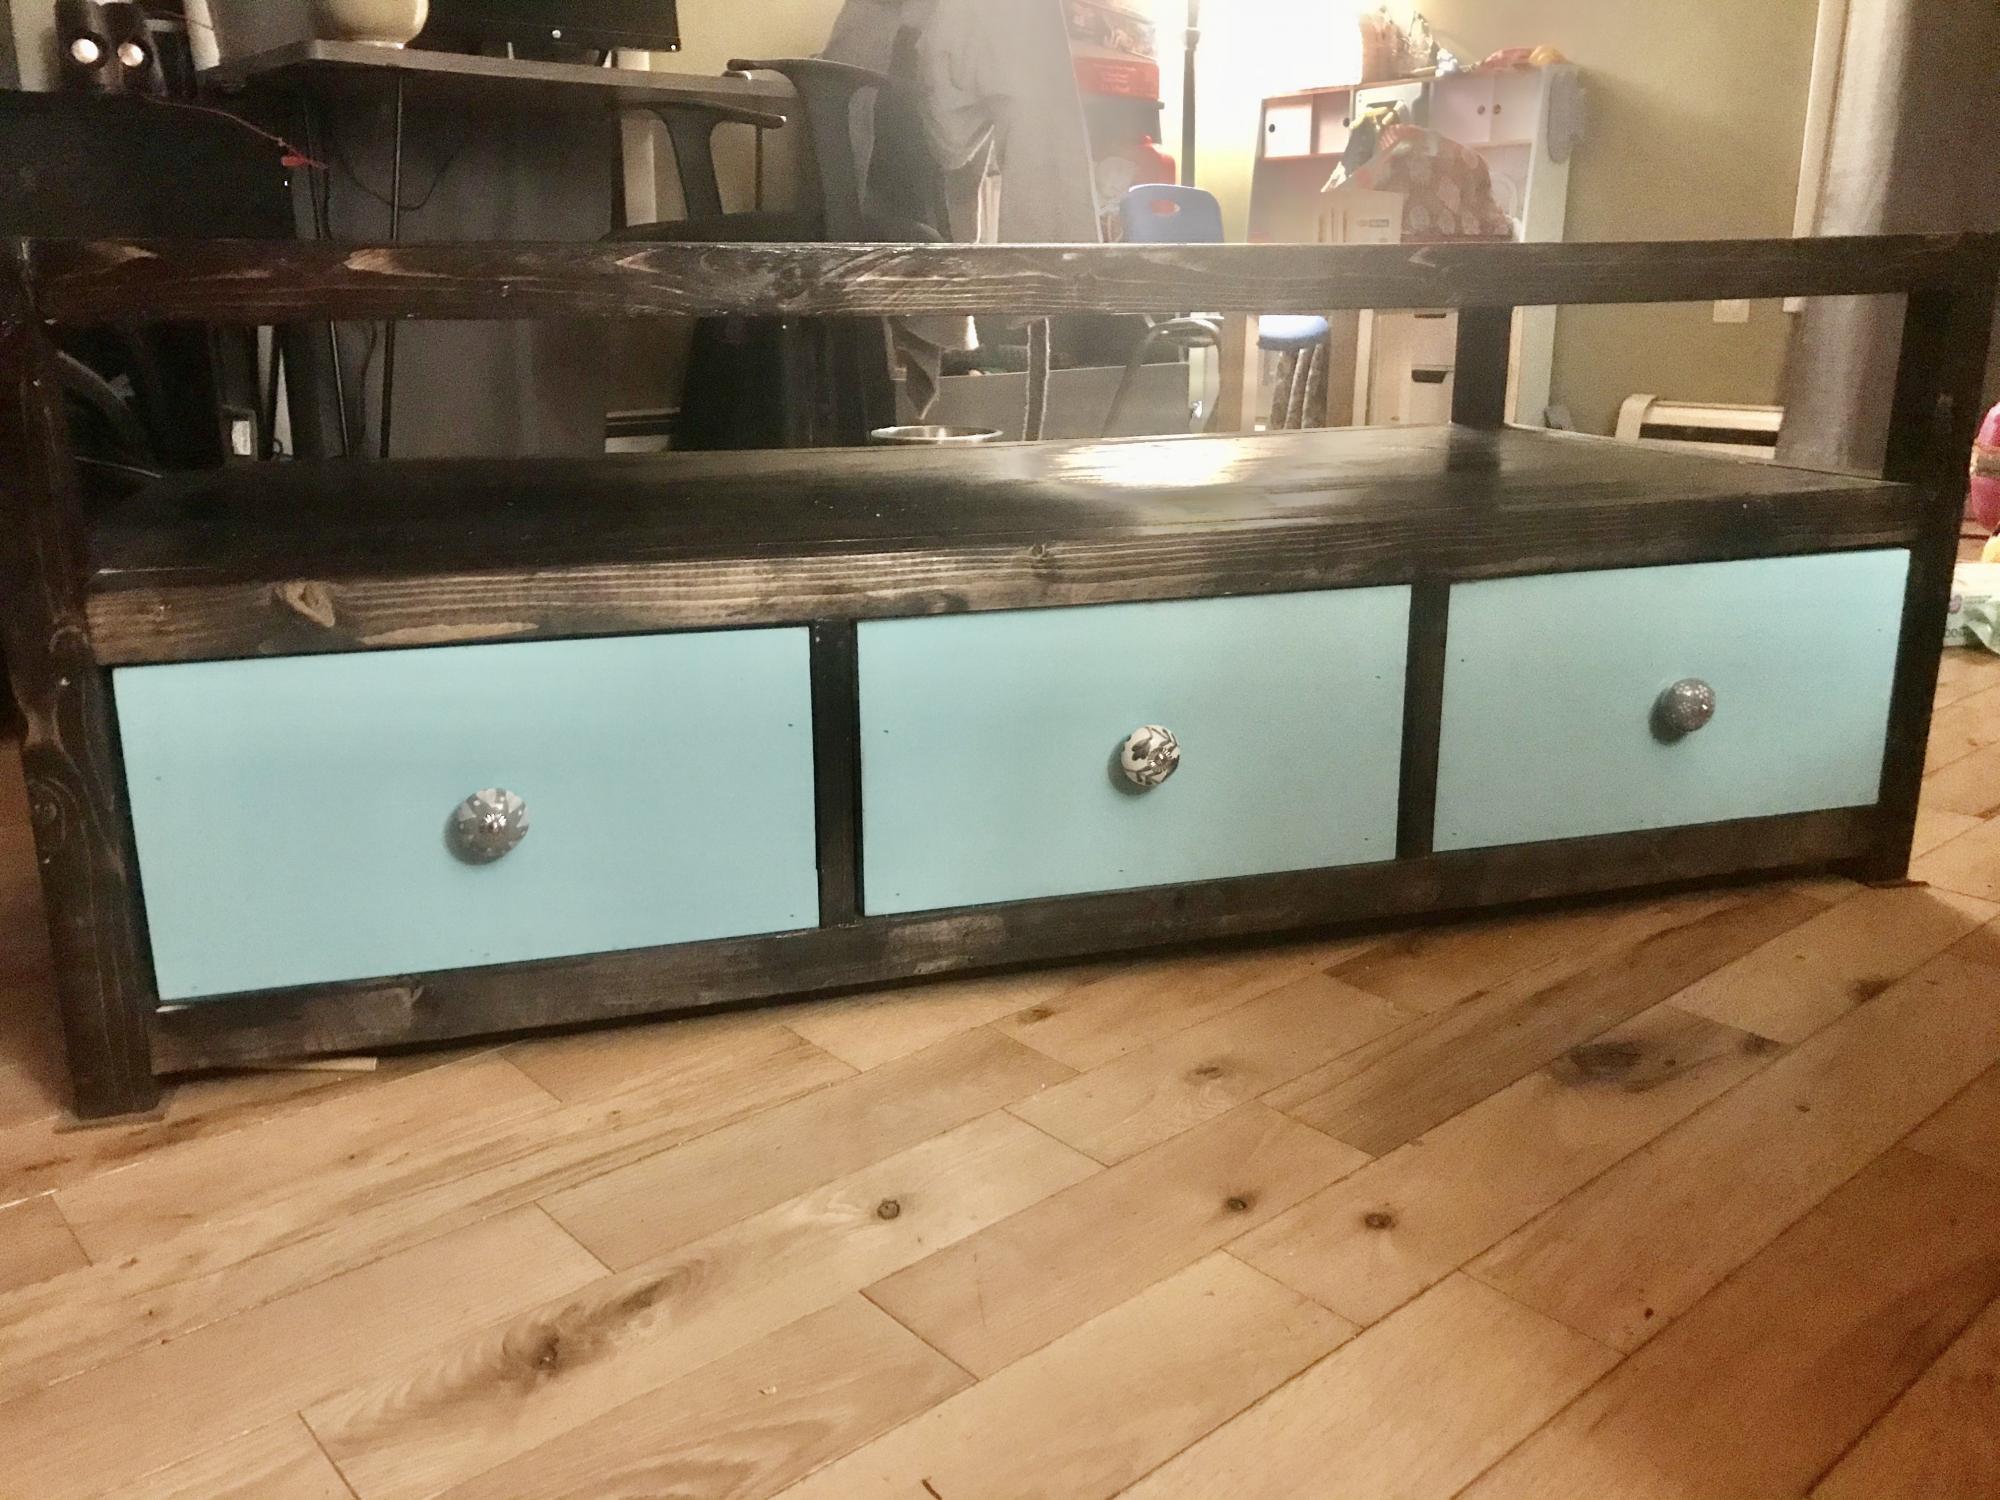
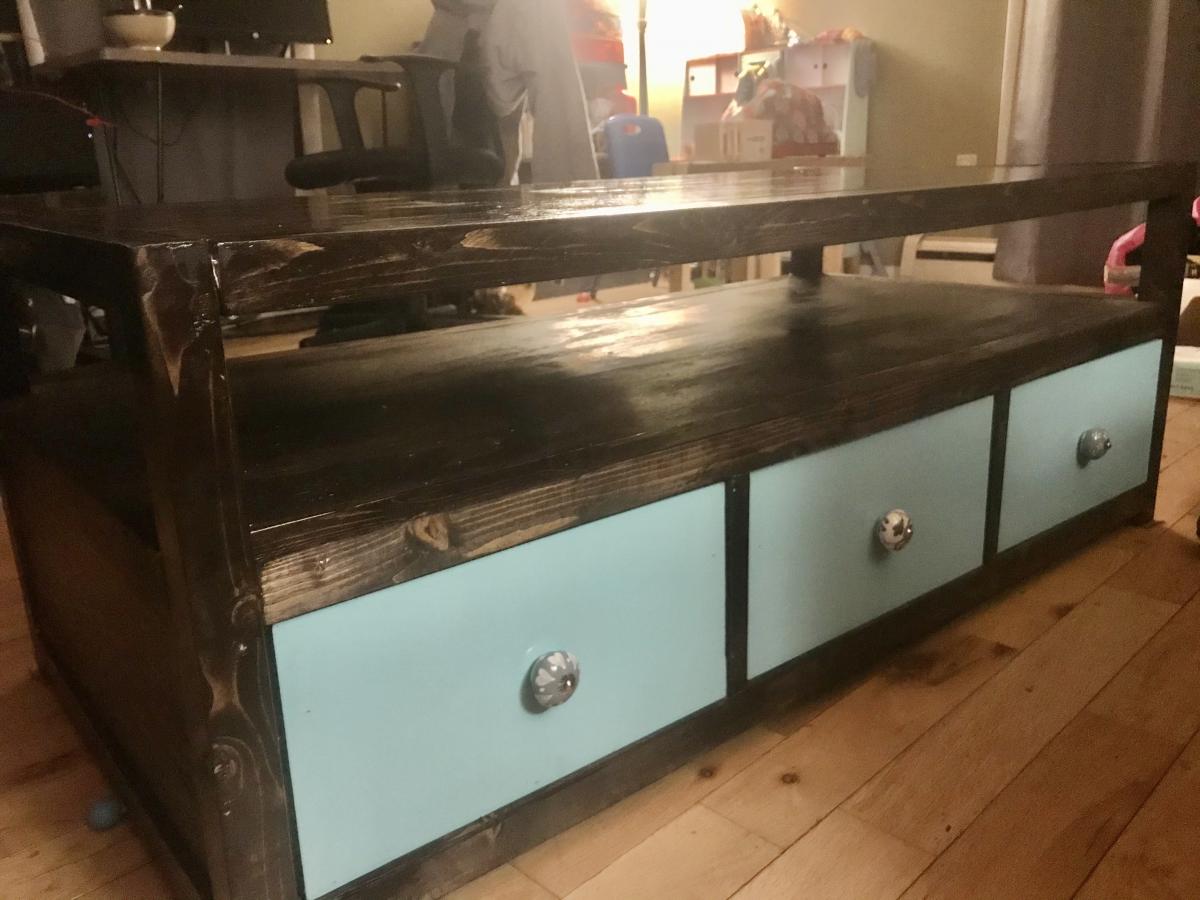
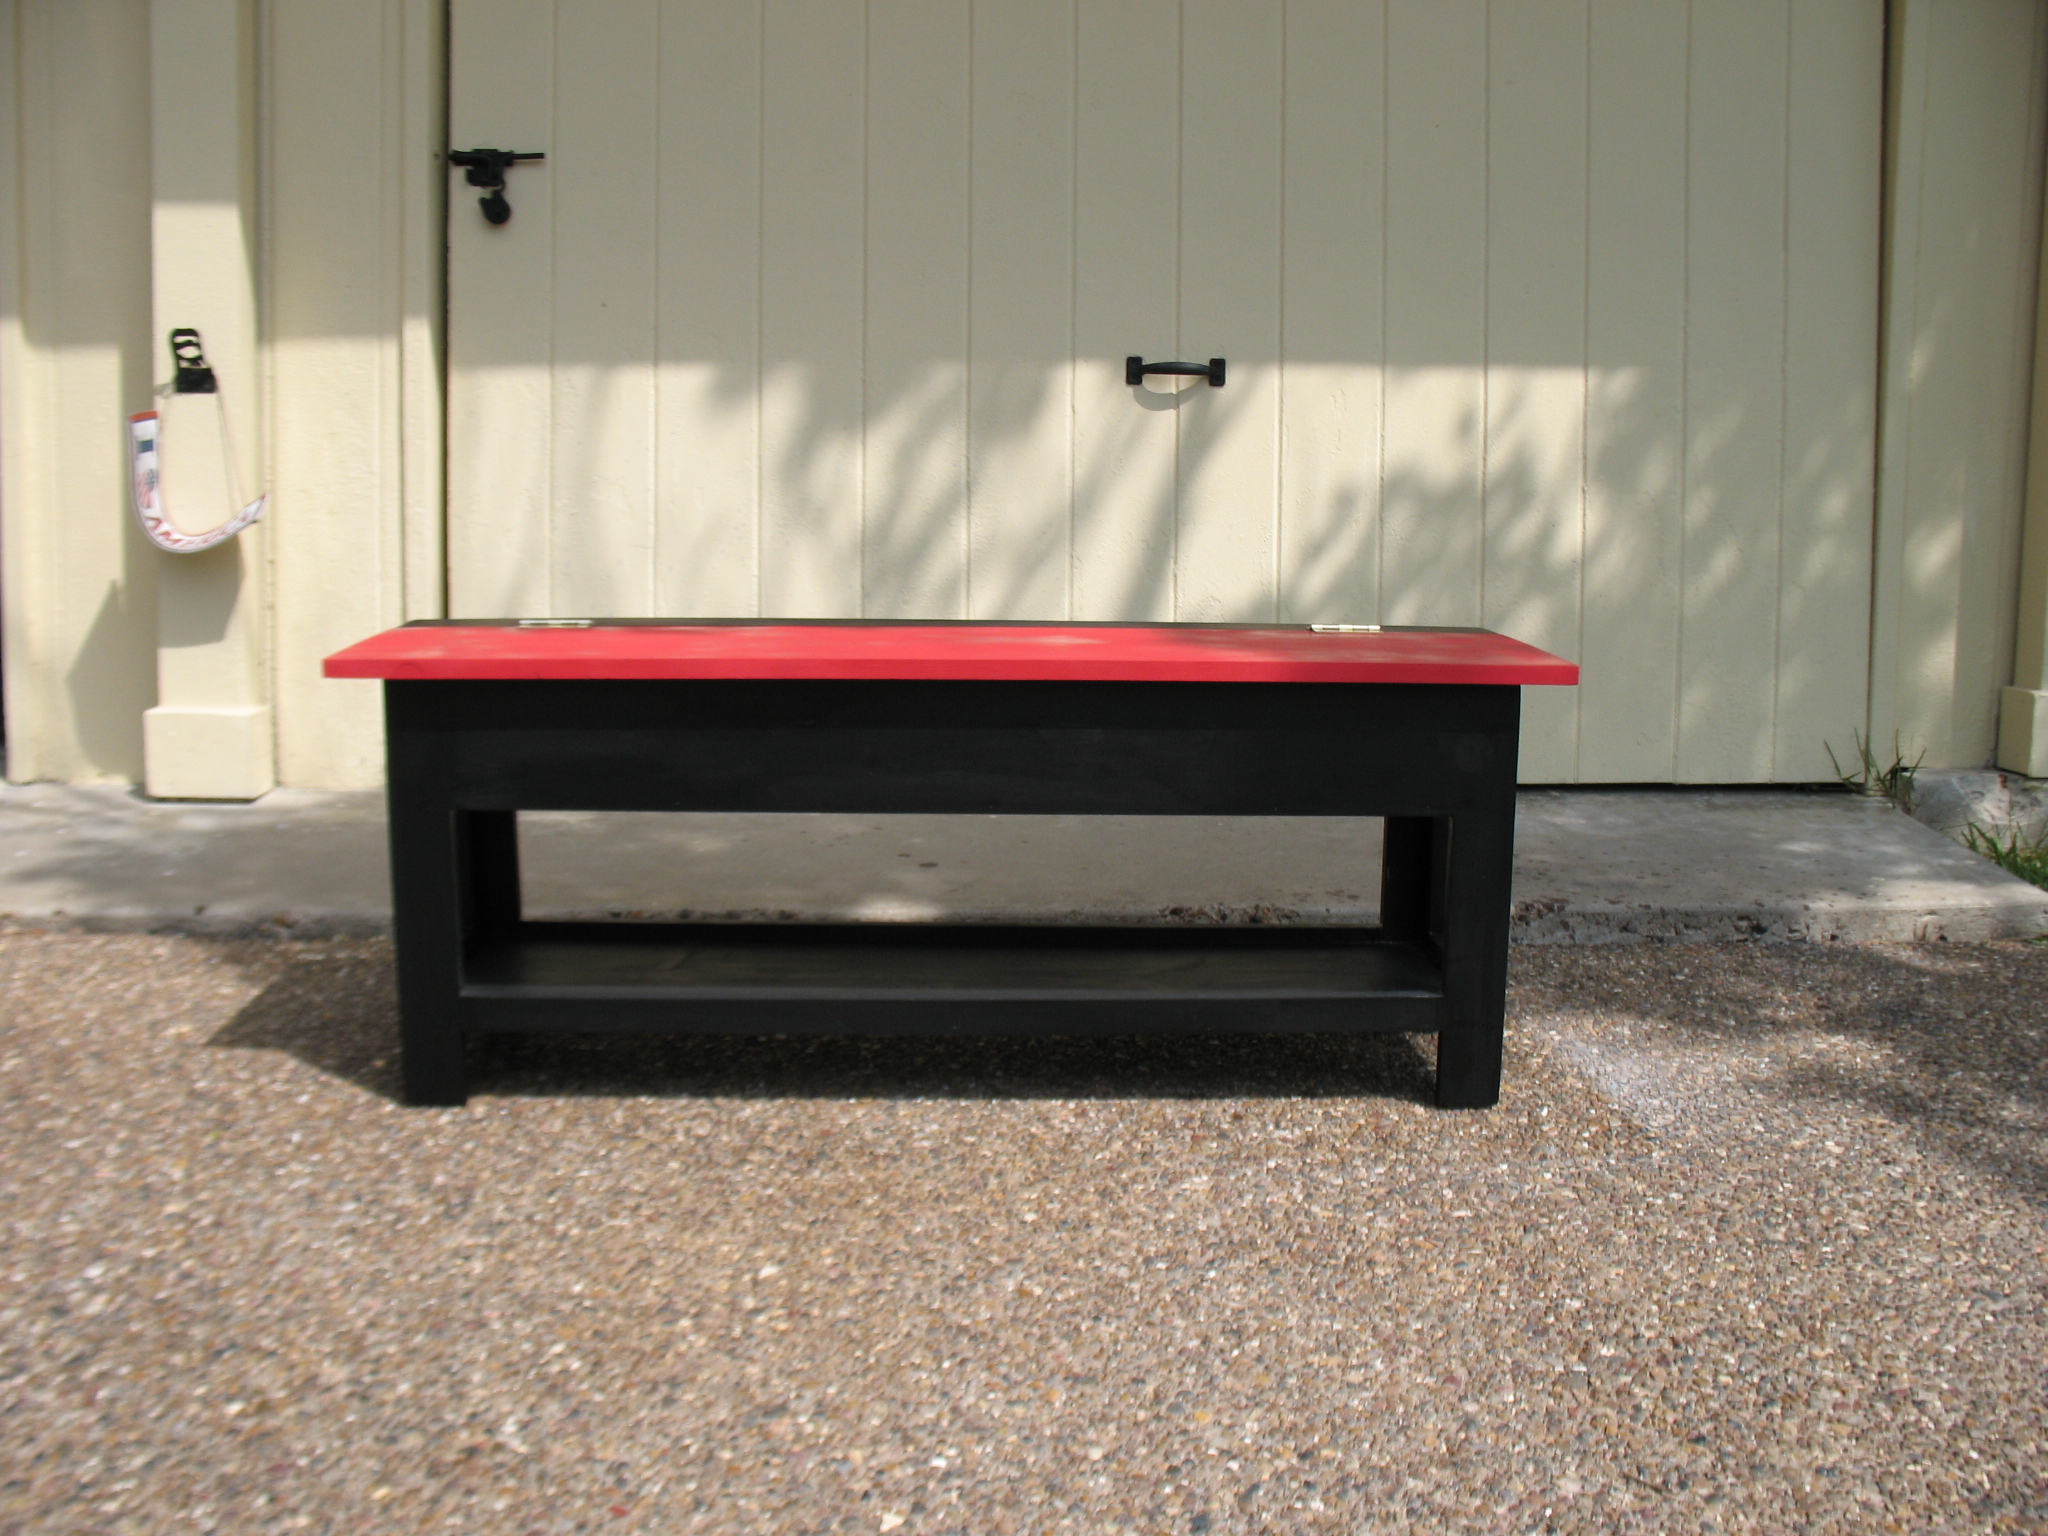
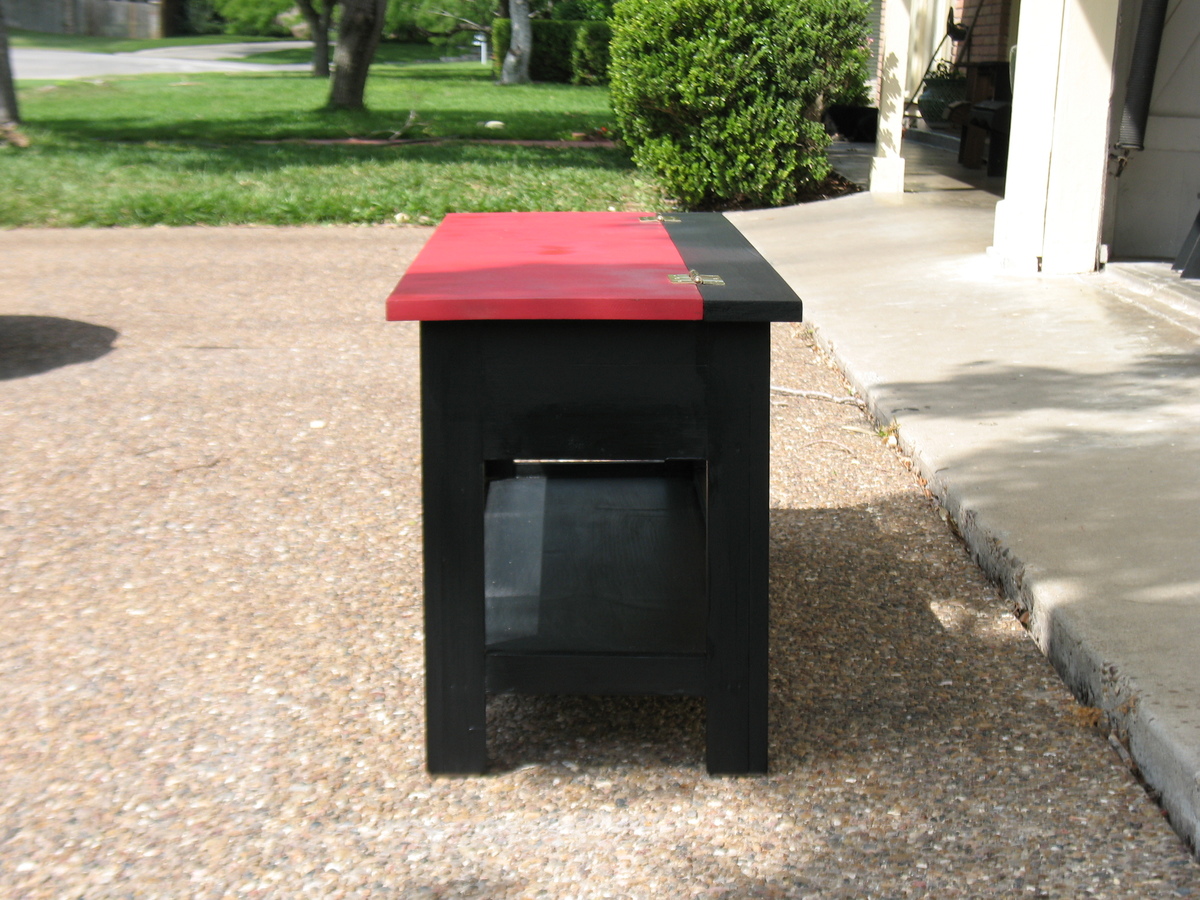
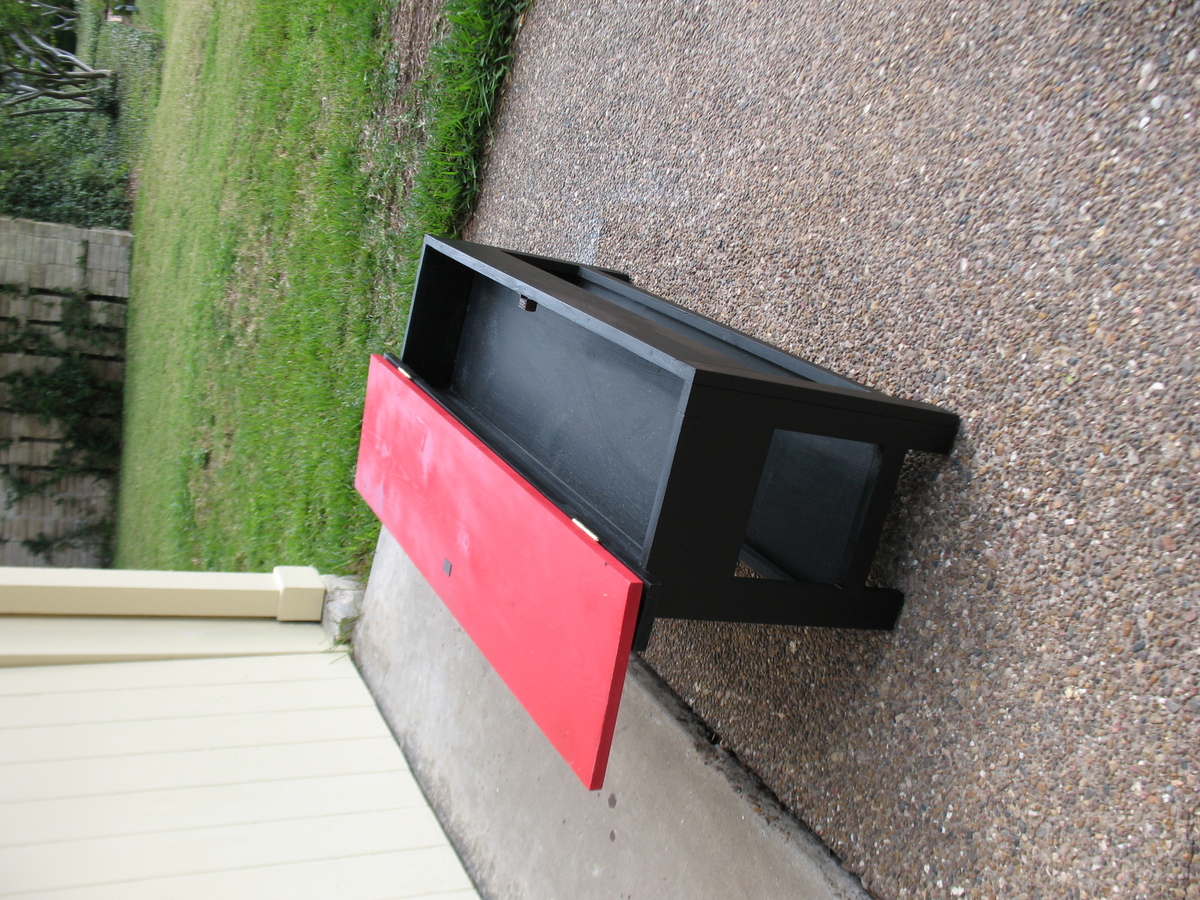
Rosie's Baby Doll Bed

Submitted by nveelover on Sat, 04/21/2012 - 10:13

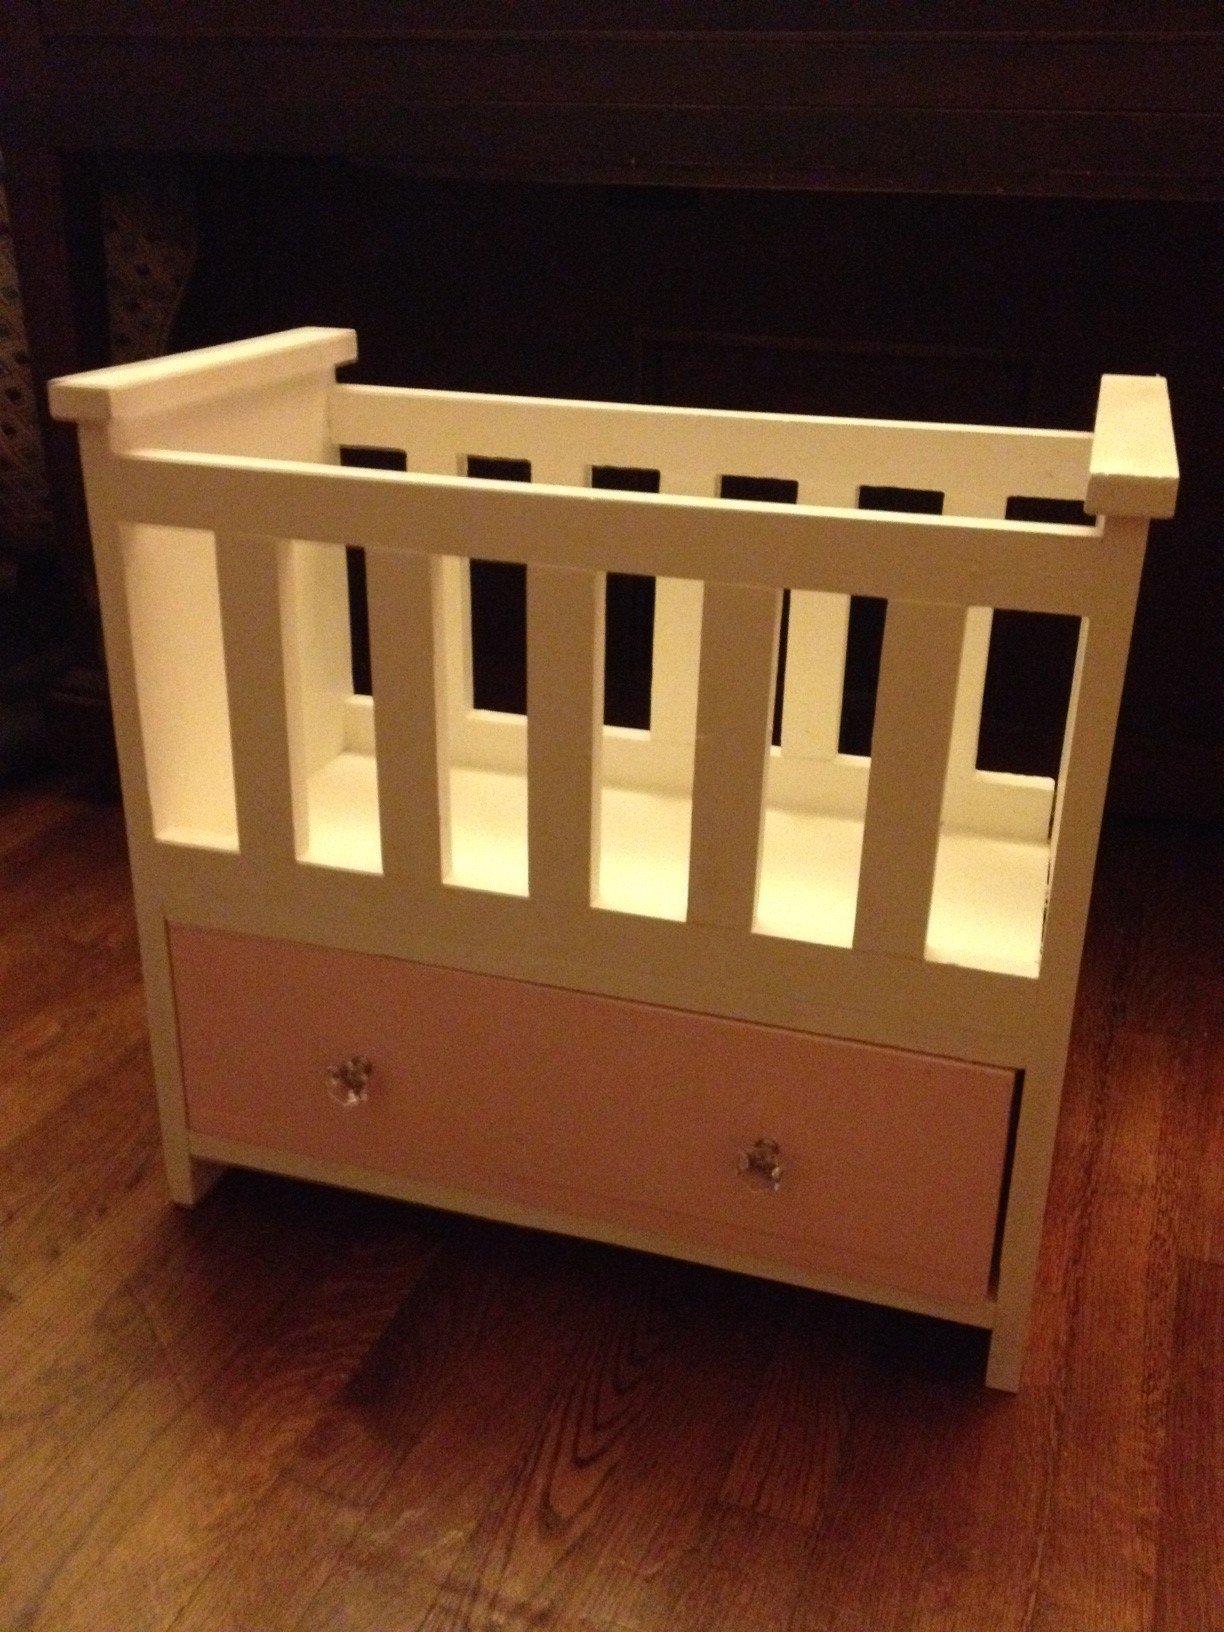
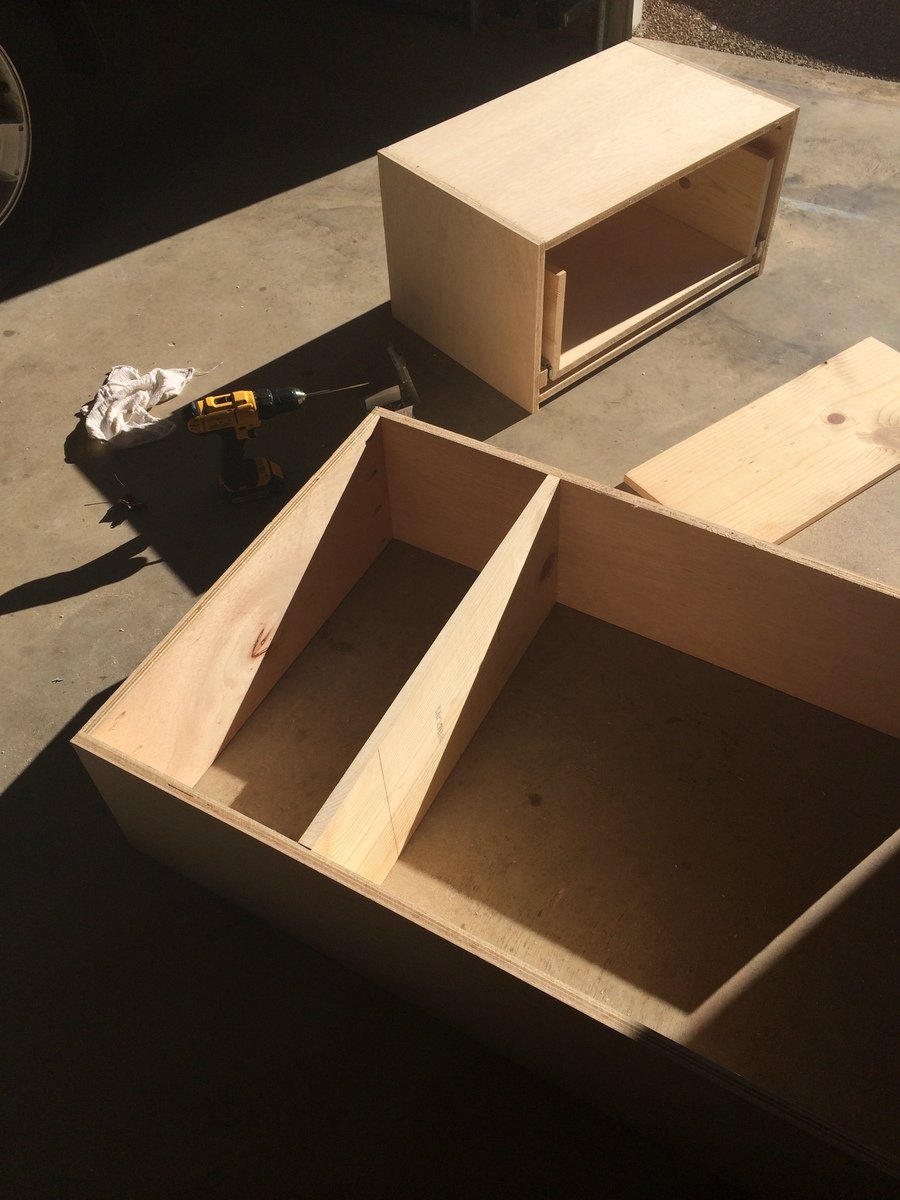
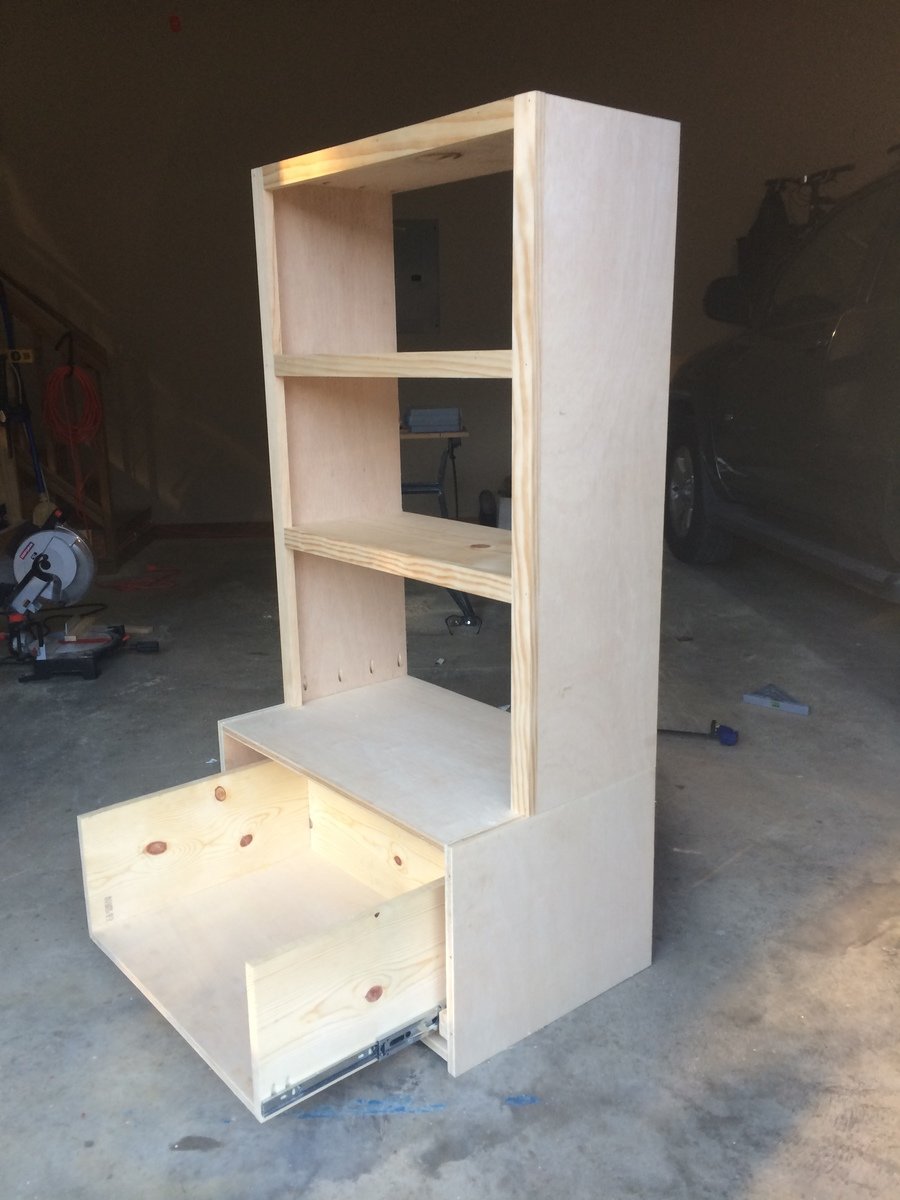
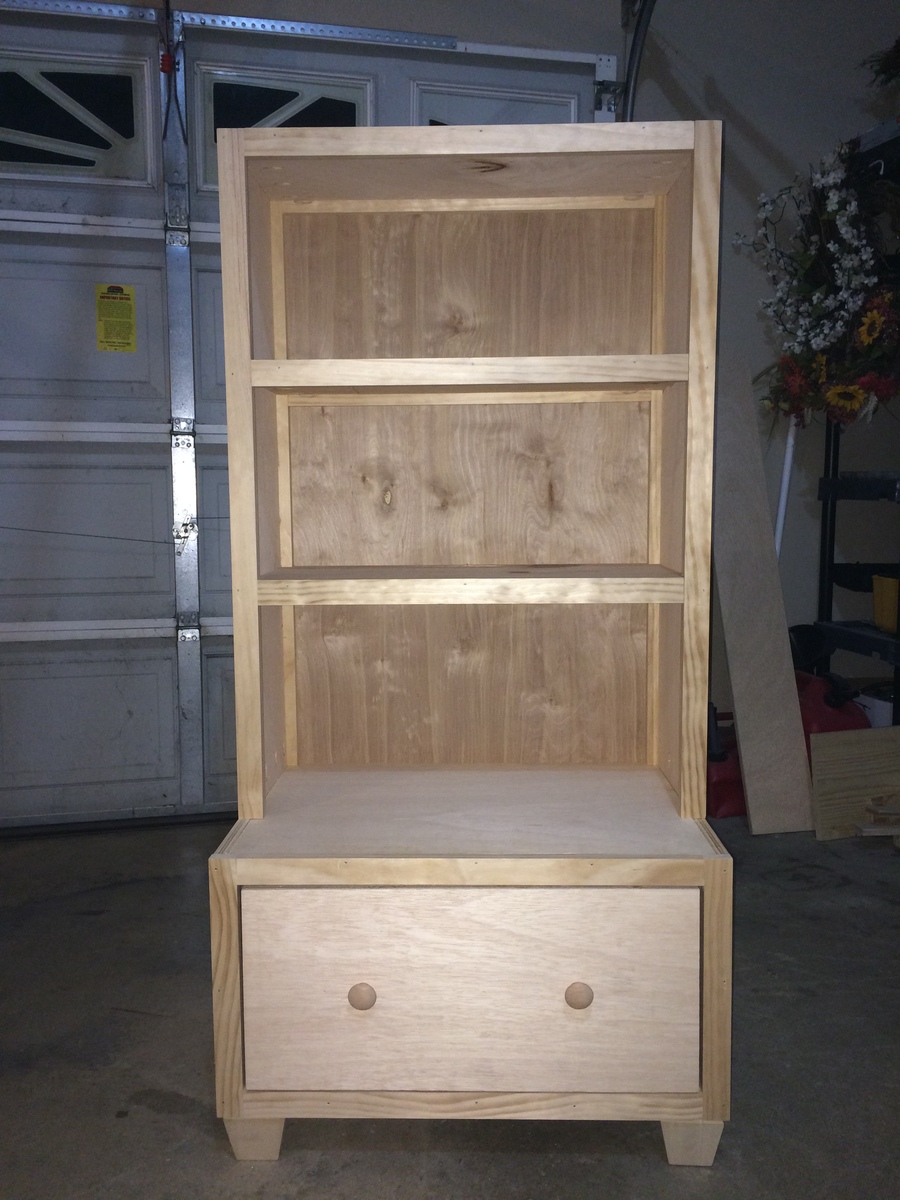
Made this based on the Oliva's Doll Crib plans with changes to the shape of the top of the ends (to better match my daughter's crib), taller end pieces (about 2 inches), and a shelf under the drawer. To keep the drawer from falling out, I built the crib as usual, then turned the crib upside down, and screwed two rubber stoppers to the front of the underside of the crib bottom. I then put the drawer in place, placed the bottom shelf, and then screwd it in through the bottom (which is on top right now because the whole thing is upside down). I also put in some spacers so that the drawer doesn't get stuck, squished between the bottom of the crib and the shelf.

Built from Plan(s)
Estimated Time Investment
Day Project (6-9 Hours)
Recommended Skill Level
Beginner

Comments

kad050209 (not verified)

Mon, 09/10/2012 - 15:49

Can you tell me the measurements of wood you used? Piece by piece?

nveelover

Thu, 11/15/2012 - 16:05

I really did just follow the plan that Anna made. The ends, the tallest solid pieces of wood that I added length to, are about 21 inches long. Ana had them at 18 or 19 inches long. Everything else was the same.

Bedside Table

Submitted by AndyH on Tue, 02/04/2014 - 10:34

This is my third build based on the Kentwood Nightstand plan. Added a shelf this time to use as a charging station at night. Customized the height as well so matches the height of the bed.

Estimated Cost
$100
Finish Used
Minwax English Chestnut (3 coats) and Minwax Satin Poly (3 coats)..
Recommended Skill Level
Beginner

Comments

My version, cheater style

Submitted by januaryMH on Mon, 05/02/2016 - 17:42

I believe I found the orignal quick version on the Finding Aloha site with a link back to Ana's original Farmhouse Bed. I made the blanket and bedding from some cheap FQ's. It was a hit for my neice's 7th birthday.

Estimated Cost
I had about $12 in all - including the fabric and wood.
Estimated Time Investment
Day Project (6-9 Hours)
Recommended Skill Level
Beginner

Baby Boy Nursery Dresser

Submitted by Anonymous (not verified) on Wed, 01/29/2020 - 08:41

My wife had me build this dresser for our baby boy. She took features from a couple different Ana White dressers and combined it into one. We also added to the height of the drawers, adjusting the overall height of the dresser to serve as a baby changing station.

Estimated Cost
$250
Estimated Time Investment
Week Long Project (20 Hours or More)
Finish Used
Valspar satin finish and a poly clear coat
Recommended Skill Level
Advanced

Easy Table Build

Submitted by Anonymous (not verified) on Thu, 09/21/2023 - 12:26

A very simple but very fun build.

Casey C.

Farmhouse Table

Since I am in the middle of a divorce, my ex- took my dining room furniture. I decided instead of buying something new, or getting a hand me down, I would build a new table. The wood top was made of 3 wood planks from my sister in laws hardwood flooring leftovers. It was sooo fun to make this. The stain was a mix of Minwax Providence and Ebony 3 to 1 mix appx. I did not add the bottom wood piece, as I did not think it needed it, it is plenty strong without it. I am working on the bench and chairs now. This has been by far my most fulfilling project ever. Enjoy!

Estimated Cost
$100 for stain, trim, poly etc. I had a lot of the wood, not the breadboards
Estimated Time Investment
Weekend Project (10-20 Hours)
Finish Used
2 coat mix of Minwax Providence and Ebony (3 parts to one part)
4 coats Polysealant

Recommended Skill Level
Beginner

Comments

brookifer86

Tue, 04/24/2012 - 09:55

I think you came up with a great solution to your dining room problem. As a victim of the "ex furniture snatch" myself, I also decided to build my own instead of buying. It was quite the confidence boost! Love the table with the wider boards. I also didn't use a stretcher for my Farmhouse Table, and it's held up perfectly for over a year now.

KellyJo1180

Thu, 09/27/2012 - 08:38

I am looking to do the same design with the larger boards in the middle. What size are the boards running vertically on the ends? 1 x 6?

justjack5454

Fri, 12/12/2014 - 13:59

I love the table you built thanksgiving day my table went
awol, so I need to get going on your design. P. S. I'm lipstick, sawdust, n wheelchair.

Farmhouse Media Console

A Farmhouse Media Console built from ana white's plans. This media console was built out of maple plywood and poplar for the face frame, doors, and top. The design at the bottom was a bit of a trick. I used a bucket for the half circle and a very thin piece of wood for the "wavy" design. The center door is known as a barrister door. I would be happy to answer any questions. Feel free to visit my facebook page www.facebook.com/timberandsoul

Estimated Time Investment
Week Long Project (20 Hours or More)
Finish Used
creme brulee paint by behr and early american stain by minwax with 3 coats of water based varathane
Recommended Skill Level
Advanced

Comments

Wanted to show off our version of your American Girls bunk bed!

Submitted by jdinesen on Mon, 02/03/2020 - 05:53

We had the mattresses and bed covers made !

We did increase the height to 20" which seemed to add a little extra space between the bunks. My daughter were able to help, she is 10. This was a nice and quick build !

Thanks Ana,

Jesper

Estimated Cost
$25.00 - I did not include the cost of the additional tools I had to purchase ;)
Estimated Time Investment
Afternoon Project (3-6 Hours)
Finish Used
White Paint
Recommended Skill Level
Starter Project

Double loft / desk combo with storage ladder

Submitted by sylvialh on Thu, 04/26/2012 - 05:23

Our den is an awkward spot and we wanted to have a usable double bed as well as desk space for two people, but putting in two desks and a futon made it really cluttered and took up a lot of space, plus we were always having to move one of the desks in order to use the futon as a bed. So we combined all three items!

I changed the dimensions of the loft to accomodate the futon frame (I actually just dropped the futon bed support into the top of the loft) and then I used a long counter I already had as a desktop. The desk is sitting on large shelf brackets that are attached to the uprights of the loft, and then at the front there are shelves to hold up the front part of the desk.

It's ideal because most of the time we are not both working and so we can take advantage of the other person's space, but if we are both there there is enough room as well.

The plan I used below is awesome because everything is really firm but you can still take apart the key parts to get it out of the room. So I built it outside but put it together in the room itself.

We call it the sky bed and my friends love it. I also ditched the ladder and built the shelving unit you see that is both a ladder and shelves, and takes advantage of the shape of the room.

Built from Plan(s)
Estimated Time Investment
Day Project (6-9 Hours)
Finish Used
none.
Recommended Skill Level
Intermediate

Bookcase with large drawer beneath for my son's nursery

I built a bookcase with a large drawer beneath for my son's nursery. This build was based on Ana's plans for the Cube Drawer Bench and Hutch, but I changed a few things to make it my own. This was my first real attempt at making any kind of furniture, or anything else, really, and I'm fairly happy with the way it turned out. More importantly, my wife loves it.

I learned a TON from all the resources on this website. Thanks Ana!

Estimated Cost
$200? Maybe a little more.
Estimated Time Investment
Week Long Project (20 Hours or More)
Finish Used
I originally tried staining using a deep mahogany color from Sherwin Williams, but I hated it. It looked nearly purple. I ended up sanding that off and refinishing using General Finishes "Georgian Cherry" Gel Stain - 2 coats. I then applied two coats of Minwax Satin Polyurethane. The gel stain was exactly what I hoped it would be.
Recommended Skill Level
Beginner

Comments

misterwilbur

Mon, 02/10/2014 - 16:54

Thank you!

I attached the hutch to the drawer by drilling 4 pocket holes on the inside of the bookcase where the bottom meets the top of the drawer. I also used wood glue. I was concerned about the hutch moving around, and the possibility of it tipping over, so I decided to go ahead and build the two components as one piece, essentially.

Also, in order to add some additional strength and stability, I combined the frames on both components so that I would have vertical 1x2's going down the entire length of the backside of the piece. I also added horizontal 1x2's on the backside of each shelf. All these things combined really gave it a lot of extra strength.

4x4 Maple Truss table

Submitted by Anonymous (not verified) on Mon, 05/09/2016 - 09:05

Made from large milled maple rough cut Lumber

Estimated Cost
$500.00
Finish Used
Minwax Stain / Polyurithane
Recommended Skill Level
Beginner

Rhyan Coffee Table with painted drawers

Submitted by Anonymous (not verified) on Mon, 02/10/2020 - 06:49

Ended up skipping the drawer slides as I made the drawers too wide. Not as tricky a project as I expected, and we’re thrilled with result!

Built from Plan(s)
Estimated Cost
150
Estimated Time Investment
Weekend Project (10-20 Hours)
Finish Used
Minwax coffee gel stain
Rustoleum gloss sea glass spray paint
Varathane triple thick
Recommended Skill Level
Intermediate

Finally I Finished My Bench

Submitted by Jake on Sat, 04/28/2012 - 14:18

It is a great storage bench. It took me a while to finish it because I made the decision to make the storage area deeper to 4.5 inches without thinking about how that would change the side panels. So I had some adjusting to do. I took my medicine and moved on. I was going to use the bench in the garage to store tools but it came out so well that now I may find a place in the house. Great bench and very sturdy. I was going to paint it entirely black but the idea of the flip top being a different color hit me and I kinda like it. If I do it over I would go with black hinges, which I can still do.

Estimated Cost
$30
Estimated Time Investment
Weekend Project (10-20 Hours)
Finish Used
Valspar flat black and satin red paint..
Recommended Skill Level
Beginner

First Build -- Farmhouse Table

This is my first build!

Had a blast building this and turned out beautiful!

cant wait to start on my next!

Built from Plan(s)
Estimated Cost
100
Estimated Time Investment
Day Project (6-9 Hours)
Finish Used
Light Walnut for the top and semi gloss white for the base
Recommended Skill Level
Beginner

Comments

strotter13

Sun, 02/16/2014 - 22:21

Looks AWESOME! I did something similar with the wood on white, I just posted the build :) I am going to have to copy this though!!!

Rustic X Living Room Set (Console, End, Coffee Tables)

Submitted by Anonymous (not verified) on Thu, 05/12/2016 - 07:20

We made some minor changes to the overall finish from the plans for the coffee and end tables, I had a hard time matching the stain color, as well as omitting the hardware (I painted it but we never got around to attaching it).


We had a console table that we were replacing (we bought it when we first moved in and I've never been overly thrilled with how it looked in the room) and hubby did a GREAT job incorporting the fireplace from that unit into the console table.


Over all, a fun and inexpensive set of living room furniture. Can't wait for our next preoject!! We're planning an "X" inspired dinning room table for 10. I'll be sure to post pictures!

Estimated Cost
$250
Estimated Time Investment
Weekend Project (10-20 Hours)
Finish Used
Minwax Wood Finish - Special Walnut #224 (x 3 coats with sponge brush)
Minwax Fast-Drying Polyurethane - Satin (x2/3 coats with sponge brush)
Recommended Skill Level
Beginner

Kids Cabin Bed with Barn Doors

Submitted by Anonymous (not verified) on Sun, 02/16/2020 - 21:21

Hand made kids fort bed

Estimated Time Investment
Day Project (6-9 Hours)
Recommended Skill Level
Intermediate

Comments

Apothecary Shoe Dresser

I have been planning to build the apothecary media console, but my desire for a new hall table and shoe storage won out. So...I transferred the look, and I love it! I wanted a vintage feel so I added legs, apothecary drawer fronts and knobs, a 2x10 top, and a distressed finish.

Built from Plan(s)
Estimated Cost
$150
Estimated Time Investment
Day Project (6-9 Hours)
Finish Used
Black spray paint, distressed with a sander and finished with varathane.
Recommended Skill Level
Intermediate

Comments

Desk for my little girl's room.

Submitted by kristyzed on Sun, 02/16/2014 - 14:01

I was very excited to make this for my daughter. I made the tops and shelves from MDF. Unfortunately, I made the mistake of buying construction-grade 2 x 2s, instead of select pine, as I didn't know there was a difference at the time. DON'T do this! The select pine looks much better, with crisper edges and cleaner lines.
The assembly was a bit tricky on my own, but I managed to get it done. I really like the general looks of this desk, but I made a few mistakes along the way so I'm probably going to build another, without the mistakes.

Built from Plan(s)
Estimated Cost
$120
Estimated Time Investment
Day Project (6-9 Hours)
Finish Used
I applied 2 coats of Valspar's Cloud White, which was perfect to match with our Plantation shutters and our trim. I then applied a coat of poly, sanded, and applied another coat of poly. Here is where I made another mistake. Please learn from this so you don't make the same one. I ignored the can of poly which states in BOLD to apply THIN coats, and after my two coats dried I was left with a yellow-tinged white colour. In the daylight it's quite obvious and I'm kicking myself for it. Make sure you apply thin coats! :)
Recommended Skill Level
Beginner
Back