Community Brag Posts

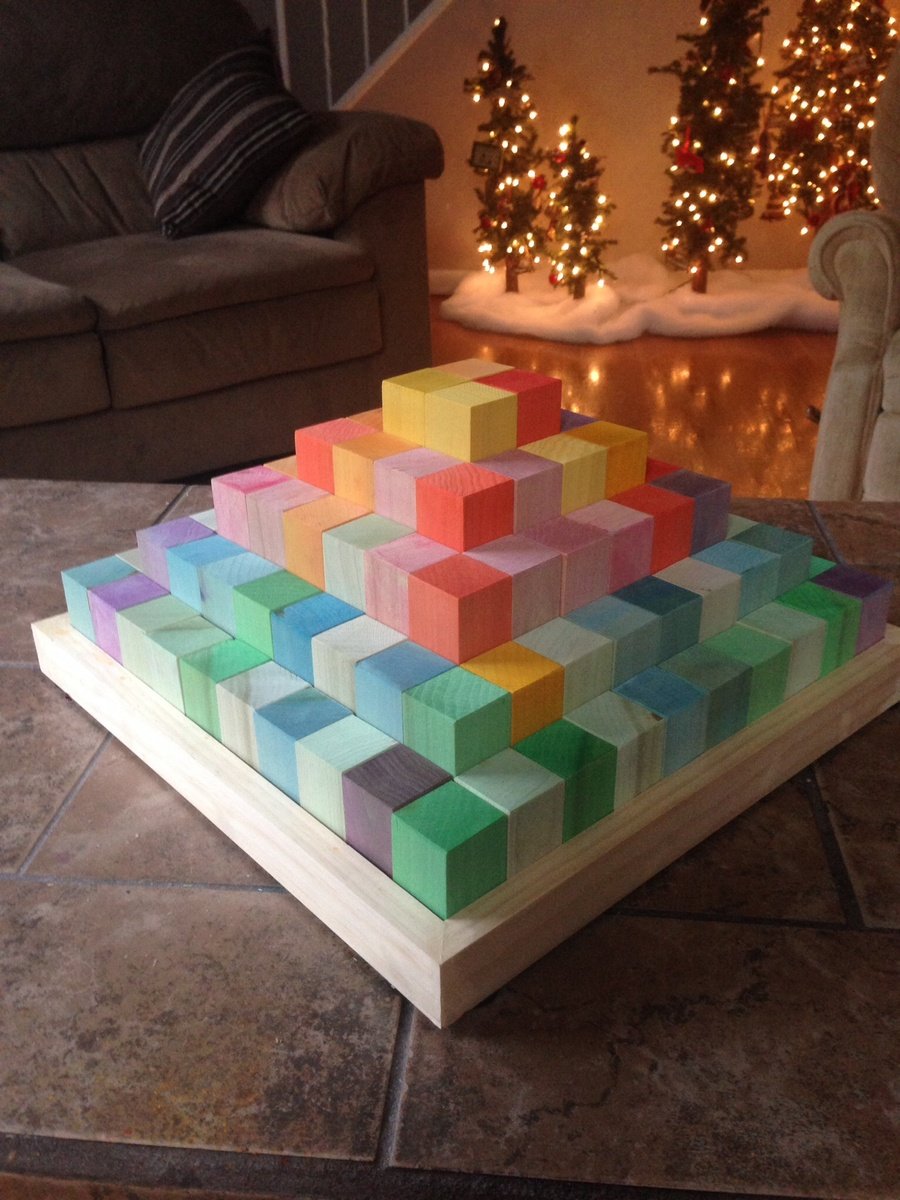
Desk Bling accessory sets for Christmas

Submitted by JoanneS on Tue, 12/17/2013 - 14:28

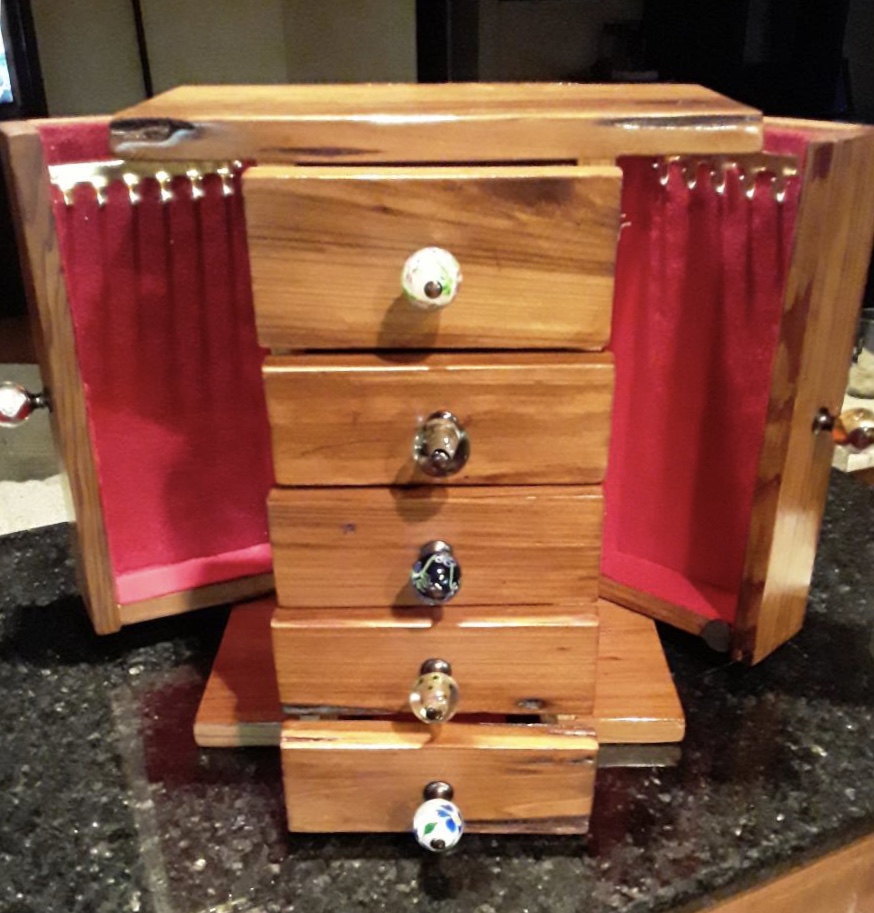
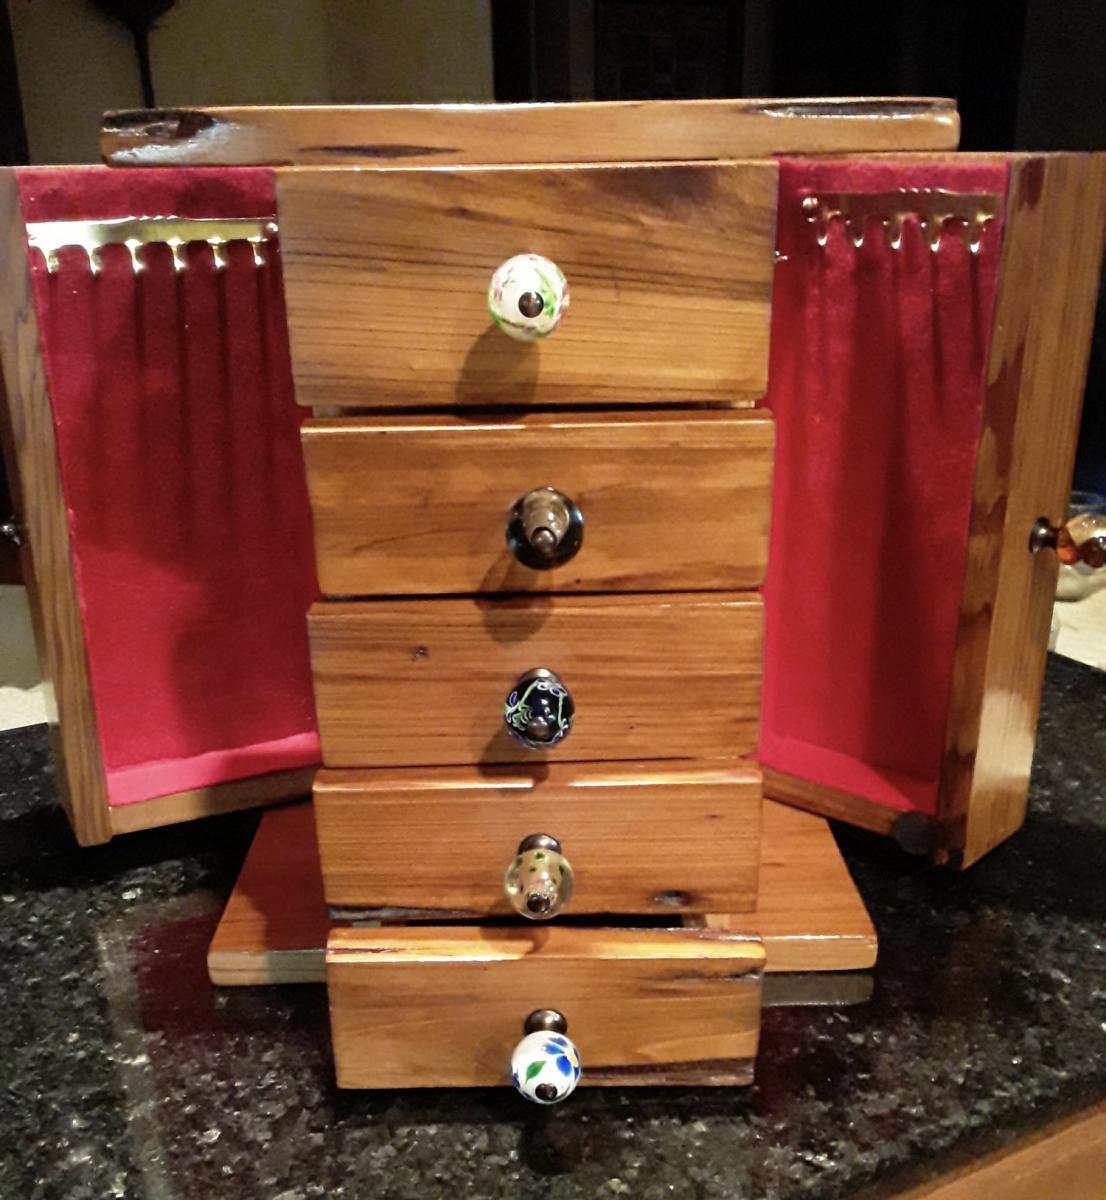
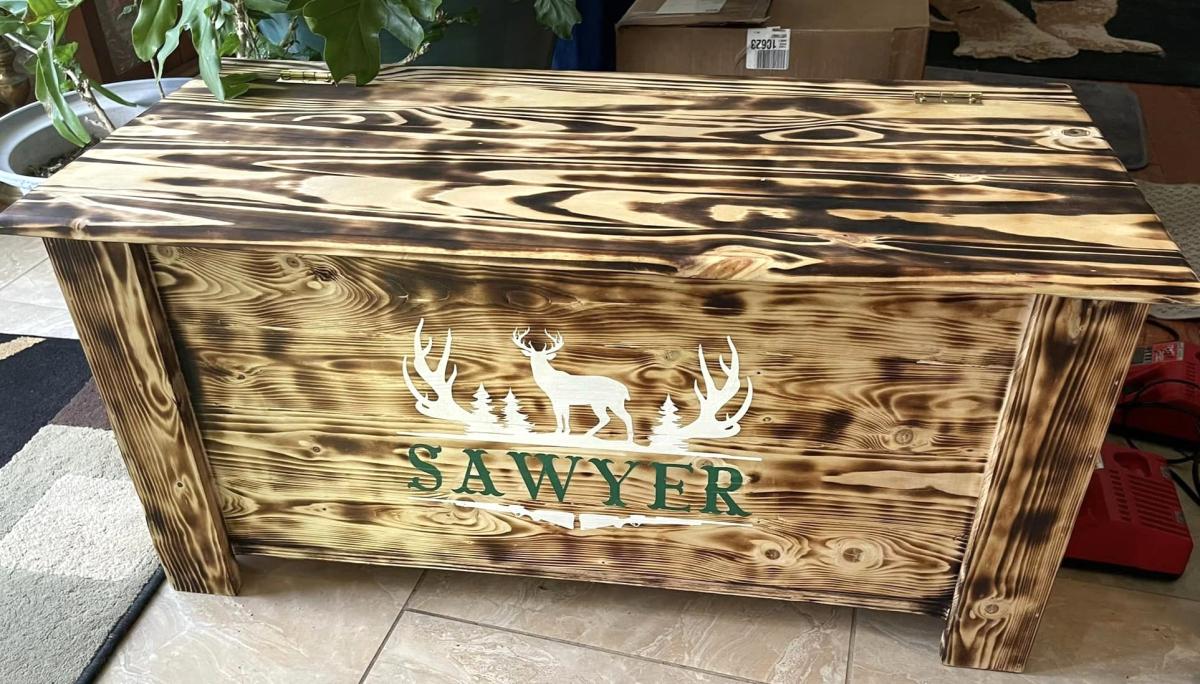
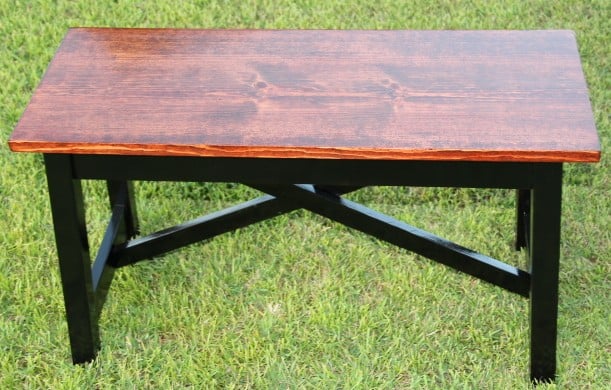
These desk sets were made from scrap wood and left over finishes, and are the inspiration for the desk bling accessory set plan, the cedar 1-board desk accessory set plan, and the 1-board cedar 2 drawer desktop storage cube plan. I had a ball planning and building these 4 sets over the summer, and gave them to the girls at work today as Christmas gifts. They were a big hit!

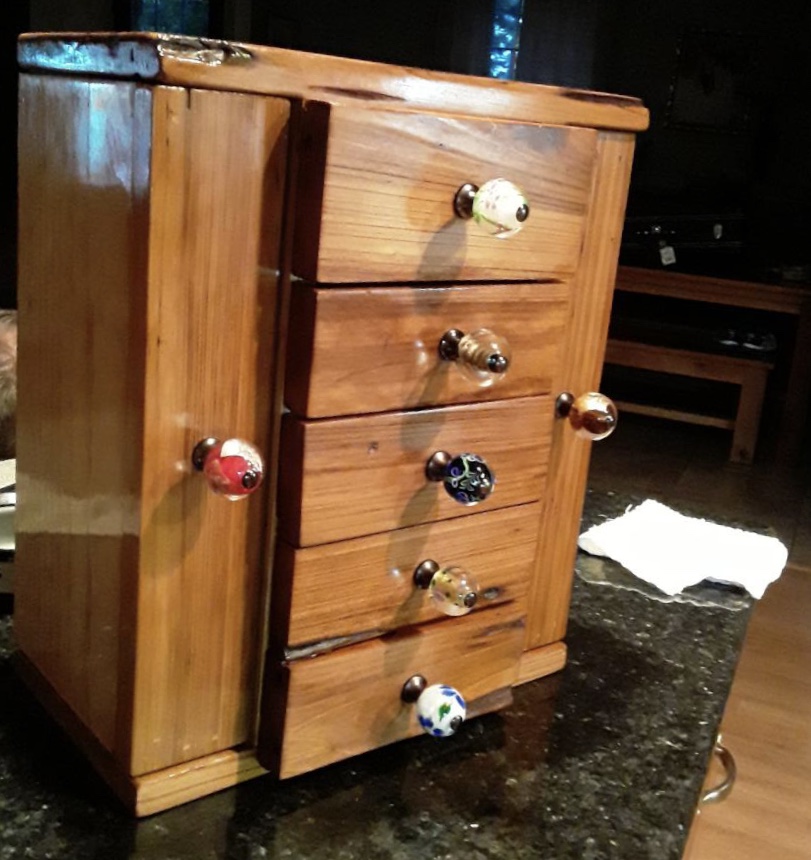
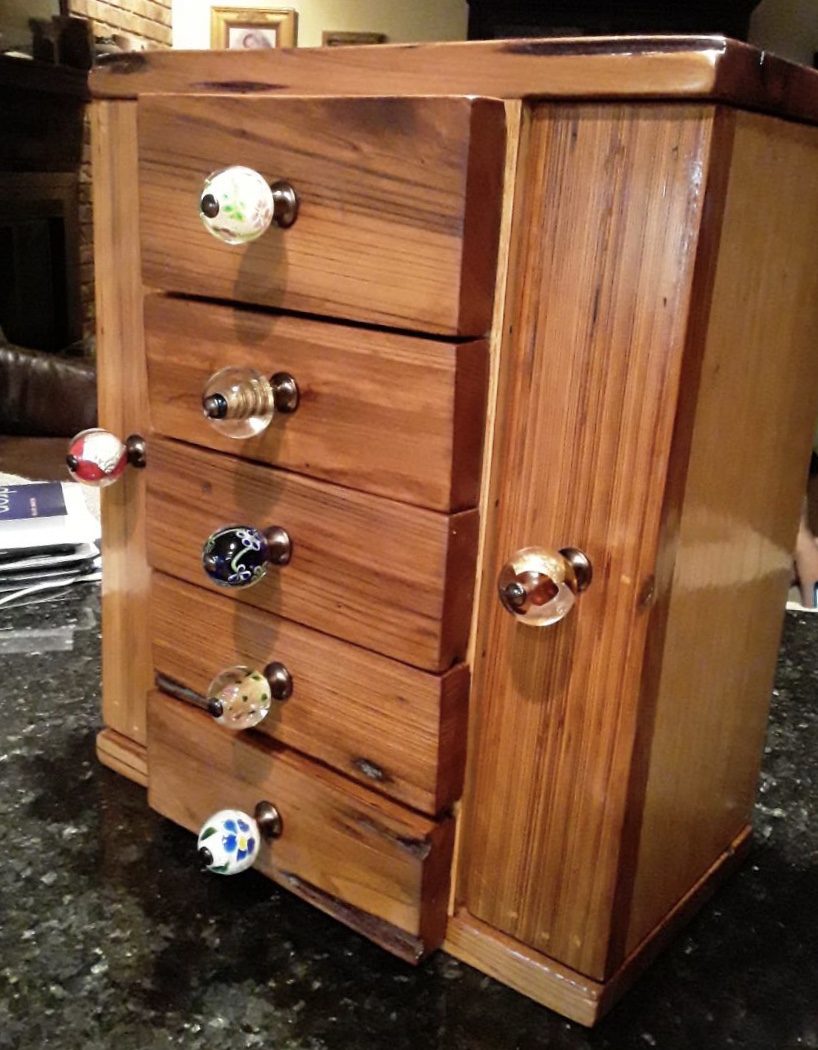
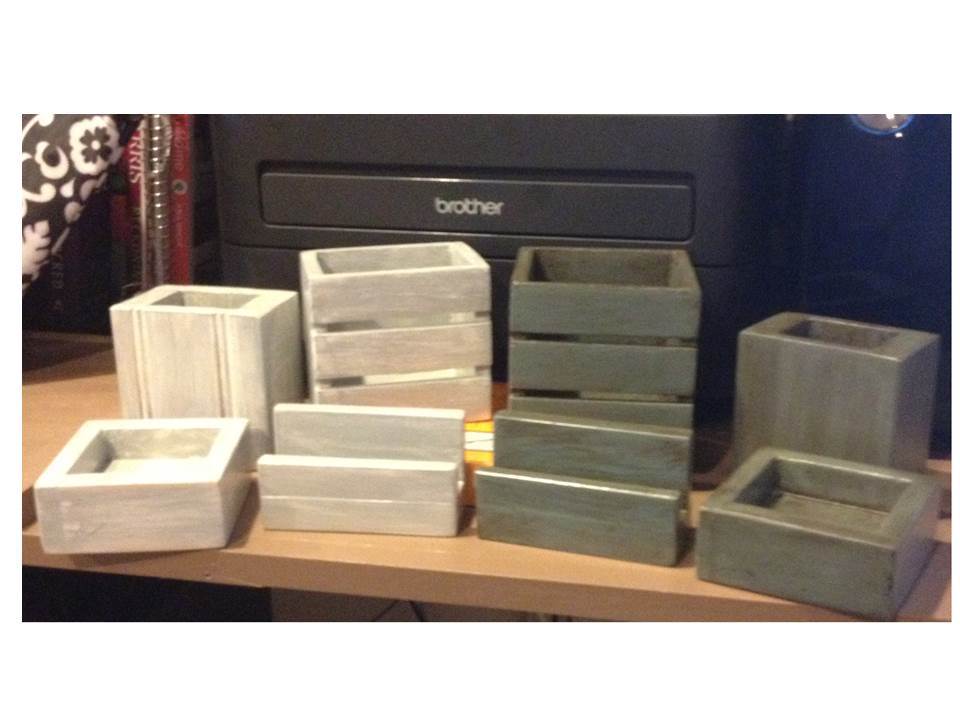
The cube sides and drawer fronts are made from scraps of wainscoat paneling.

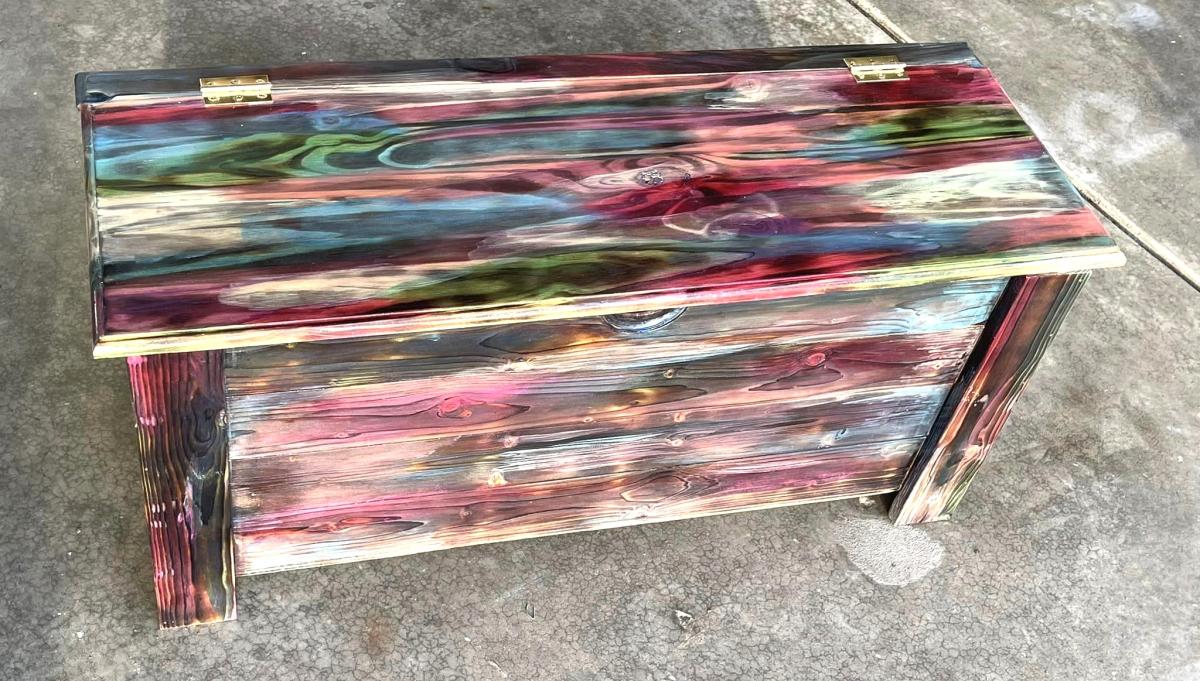
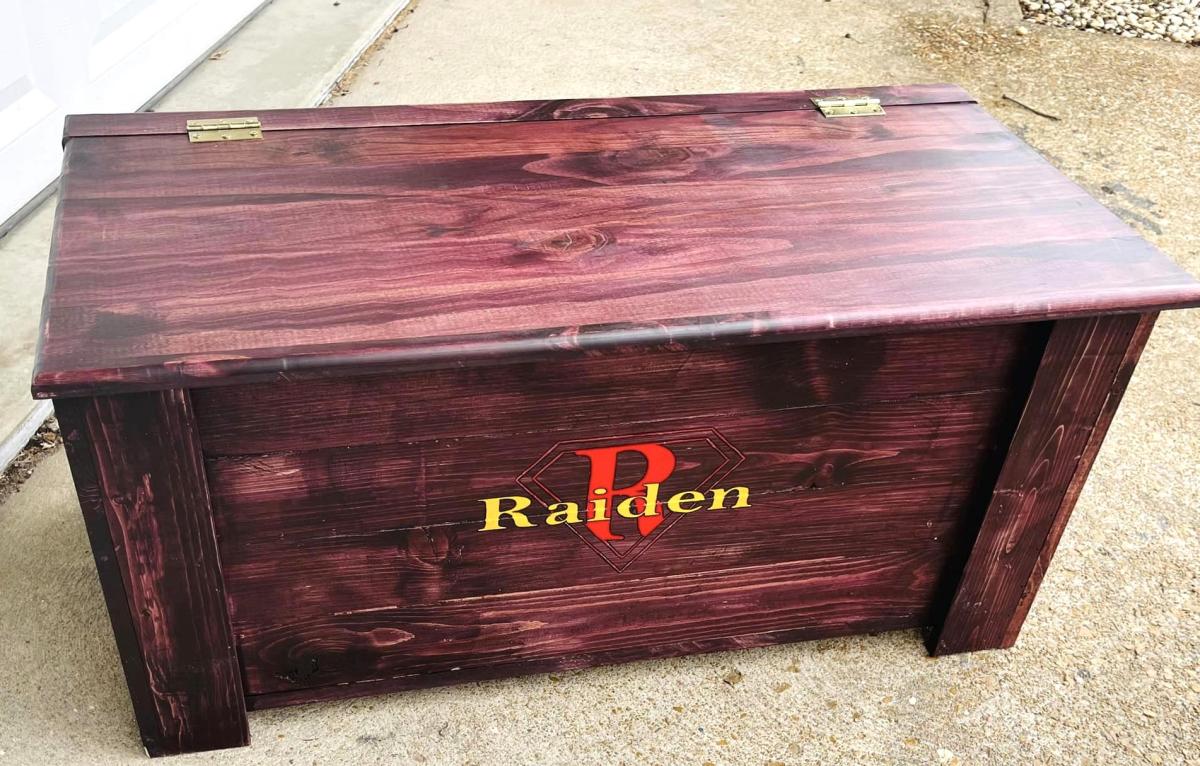
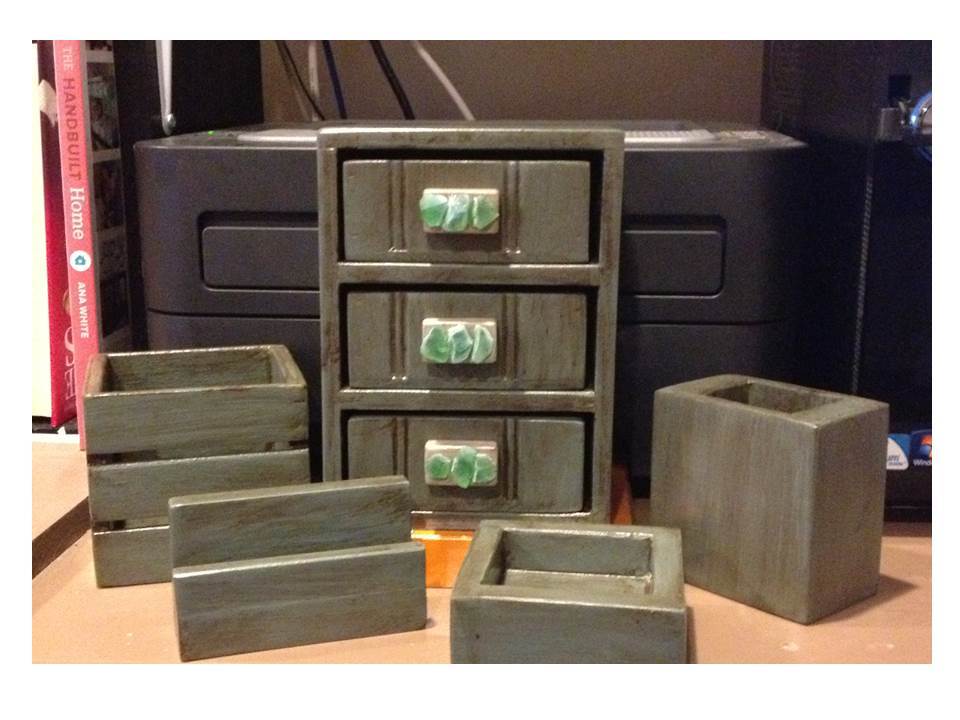
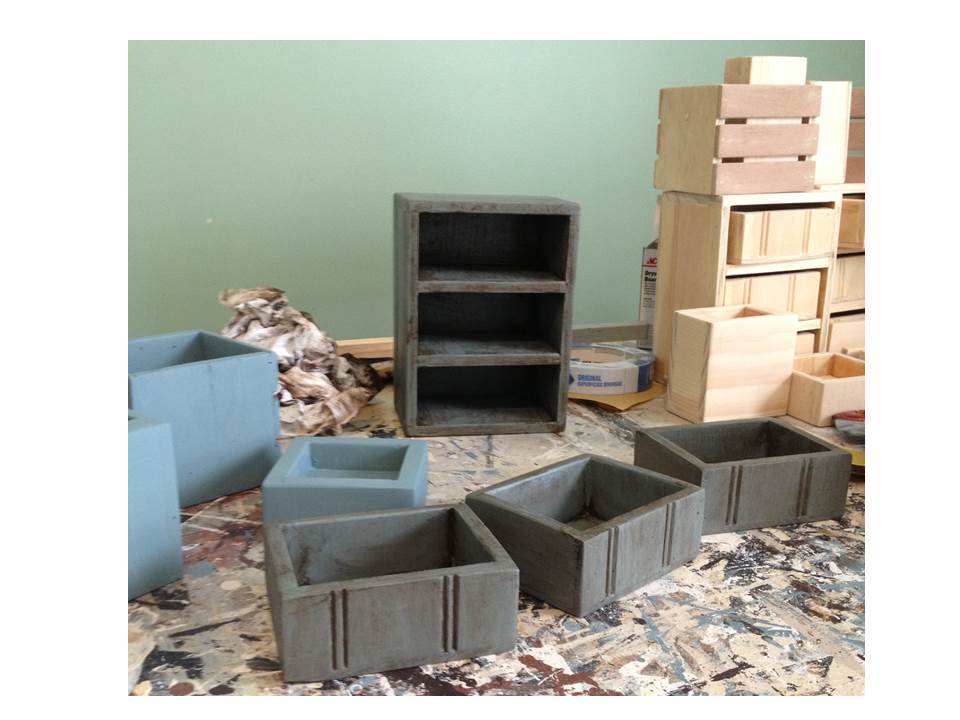
The gray set is a distressed finish (not shown - the matching cube storage included pulls painted in oil rubbed bronze). The Espresso painted set received pulls spray-painted in silver. The Onyx set was stained with Minwax Express color, with pulls spray-painted in silver. The blue set received 2 coats of paint, and a Walnut glaze. Those pulls were done with a gray paint wash, with sea glass pebbles glued on the fronts.

The pulls are all made from pieces of S4S moulding, sanded and then painted. These also received a poly topcoat before attaching with super glue.

Total time for each set is about an afternoon each. Each set received multiple coats for the finishes, but was well worth the effort.

For some added "bling," I raided my stash of sticky-back felt scraps and applied to the bottoms of each piece, along with the drawer bottoms.

Estimated Cost
all materials already on hand, except for the sea glass (purchased at Michael's)
Estimated Time Investment
Afternoon Project (3-6 Hours)
Finish Used
Gray: 1 coat white, 1 coat gray (Ace, Greek Column), distressed with 100-grit sandpaper, 1 coat polycrylic satin.
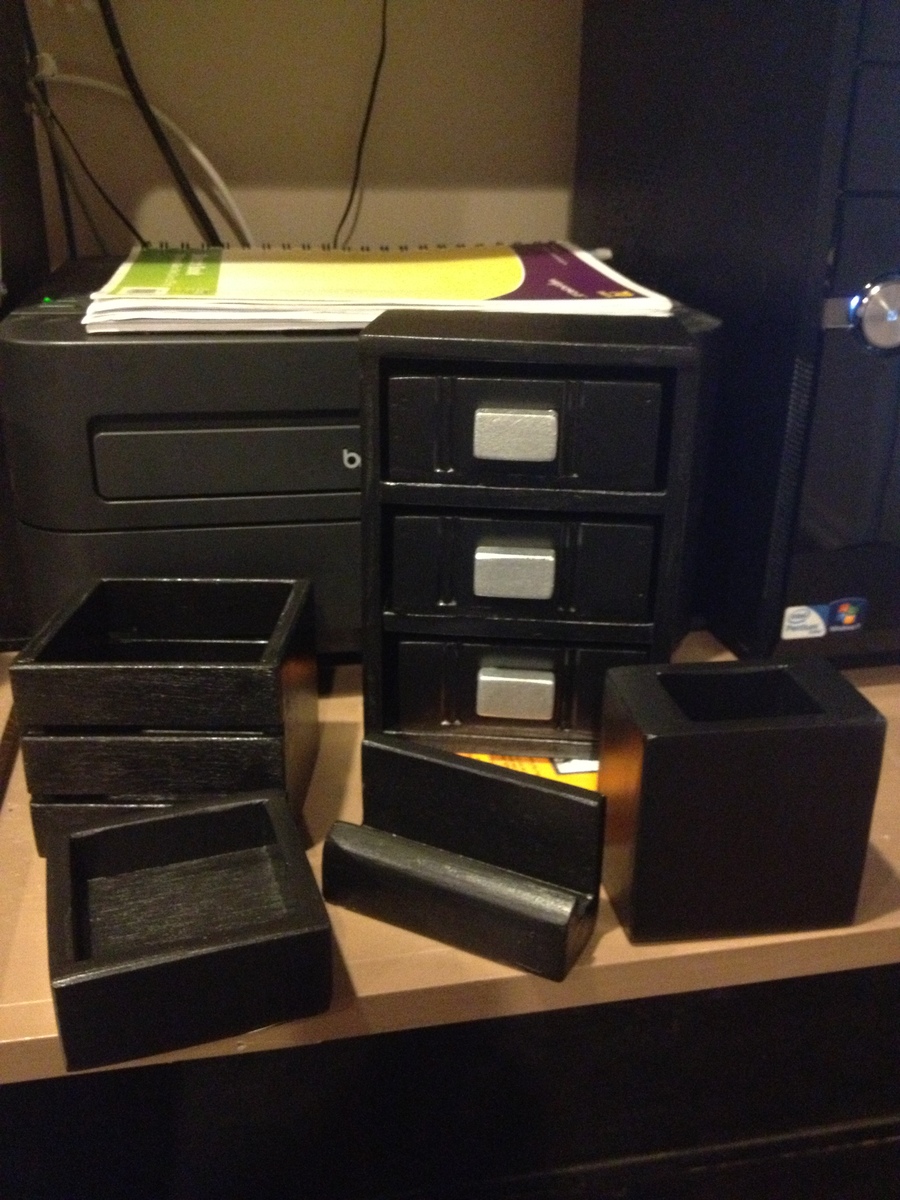
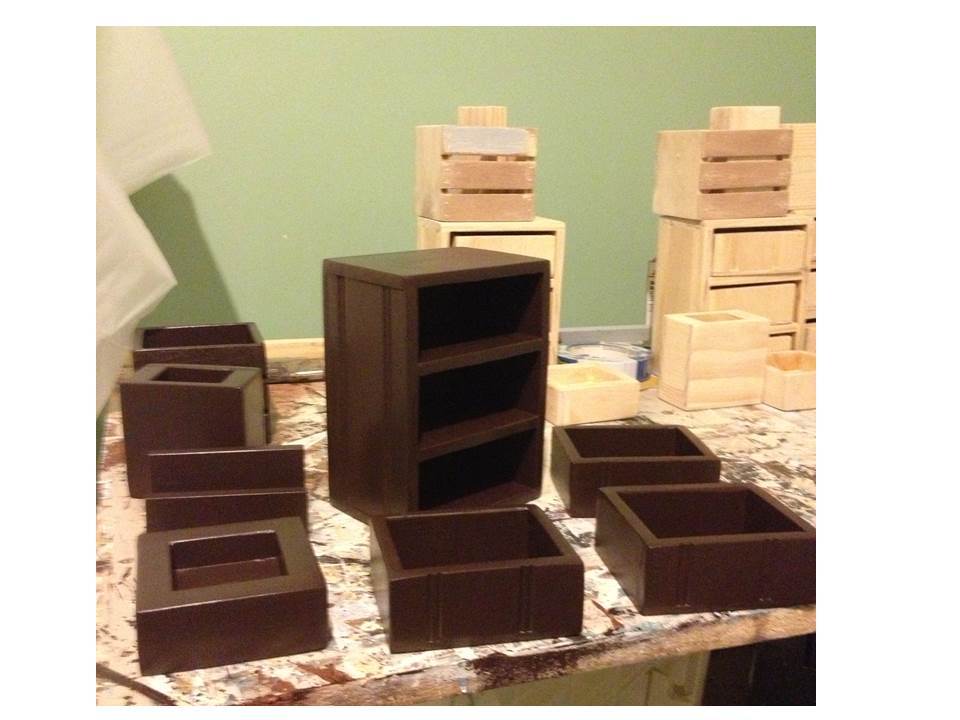
Espresso: 3 coats Benjamin Moore aura paint in Wenge, 1 coat polycrylic satin.
Onyx: 2 coats Minwax Express Color in Onyx (brushed on), 2 coats polycrylic satin.
Blue: 2 coats Clark & Kensington tinted to Benjamin Moore's Blue Echo, glazed with Minwax Express Color in Walnut, top coated with Minwax Oil Modified water based poly in satin.
Recommended Skill Level
Beginner

Rustic x + tryde combo media stand

Submitted by Anonymous (not verified) on Sun, 02/28/2016 - 09:47

I saw someone else make a stand similar to this by combining the rustic x and tryde plans. I just used 1x for the sides instead of the x. Didn't take more than a few hrs to build but finishing took forever bc a couple boards were crowned so I sanded forever. If anyone has aby questions or needs help feel free to email me @ [email protected]

Estimated Cost
100-150
Estimated Time Investment
Afternoon Project (3-6 Hours)
Finish Used
Jacobean minnwax, semi gloss polyurethane
Recommended Skill Level
Beginner

fancy jewelry box

Made this with my brother as a gift for my daughter 20th birthday . Wood is from reclaimed cypress and hand rubbed shellac finish

Built from Plan(s)
Estimated Cost
$100
Estimated Time Investment
Weekend Project (10-20 Hours)
Finish Used
Shellac
Recommended Skill Level
Beginner

Barnwood Frame - Variation

Submitted by Joni on Fri, 02/10/2012 - 08:48

Have you checked out prices at framing stores lately? Since I didn't want to pay $250 for a frame, I decided to make one out of some spare 1x4 Douglas Fir that I had. It's a single board with a router cut at the edge for detailing. I routed a rabbet onto the back, and kreg-jigged it together. I distressed the wood by beating it with a hammer and chain.

Prior to completing the frame, I took a sample piece to the framing store (who would be matting it) to make sure they could work with my rabbet size. I ended up having to make it deeper and wider to accommodate them, so I would advise doing this if you're taking it to a framer.

I never dreamed I could actually make a frame, much less a piece of furniture. Thanks so much to Ana for sparking all of this. I've found my creative calling thanks to her!

Estimated Cost
Free (spare wood!)
Estimated Time Investment
Afternoon Project (3-6 Hours)
Finish Used
1. Minwax water-based wood conditioner. 2. Minwax mix of Onyx & American Walnut water-based stain. 3. General Finishes Glaze in Van Dyke Brown. 4. Bartley's Satin Polyurethane (4 coats).
Recommended Skill Level
Beginner

Comments

Becky Smith (not verified)

Thu, 02/16/2012 - 04:32

That is really beautiful! I've been considering the same build for the same reasons. Framing costs are outragous! I've never used a router before and I guess I'm a little intimidated by them. What do you think? Are they too hard to use? Worth investing in?

Thanks!

Joni

Tue, 02/21/2012 - 08:11

Becky -- thanks for the feedback. The router is hard for me, but I don't think I know all the ins and outs of how to use it. For making the rabbet on the back, I've found out that a table saw works SO MUCH BETTER than trying to use the router. I believe that a dado blade for the table saw could make the decorative cut (and much easier, faster, and cleaner than trying to use the router).

Wood block pyramid

Submitted by Lsh108 on Sat, 12/21/2013 - 06:35

What a great little gift idea and made this in about 4 hours. HD had 2x2 poplar turning blocks that were perfectly straight and pretty smooth to start with. Required minimal sanding. Each board was $1.98 but was 32 inches long. So you have to buy 15. Start with the larger cuts first. The end of each board will produce one or two of the smaller cuts. Used the food coloring and also coconut oil on the blocks.
Great project, had fun doing it.

Estimated Cost
$32
Estimated Time Investment
Afternoon Project (3-6 Hours)
Finish Used
Food coloring and coconut oil
Recommended Skill Level
Starter Project

Comments

Bunk Beds

Submitted by Anonymous (not verified) on Thu, 10/10/2019 - 17:26

A lot of fun to build and not that hard at all. Thank you for the great plans.

Estimated Time Investment
Weekend Project (10-20 Hours)
Finish Used
Minwax Polycrylic Semi gloss
Recommended Skill Level
Beginner

DIY Toyboxes!

Submitted by Anonymous (not verified) on Thu, 06/29/2023 - 09:54

I love the toy box plans!! I've done some woodworking previously, but this was my first larger project. The first one was so simple and easy to make that I decided to make more!

Tiffanni

Built from Plan(s)

x bench

Submitted by sidman on Tue, 02/14/2012 - 02:41

I loved this bench when I saw the plan and had to try it. Thanks Ana!

Estimated Cost
20.00
Estimated Time Investment
Afternoon Project (3-6 Hours)
Finish Used
Red oak stain on top and painted the botton black.
Recommended Skill Level
Starter Project

Comments

Tiny House Ontario

Submitted by Anonymous (not verified) on Fri, 03/04/2016 - 12:43

I looked at all the sofas that people built and took bits out of a lot of them to decide what I needed to fit my needs. I am in a tiny house and I wanted the sofa to be super versatile as well as being good for storage. I decided to build it the size of a double bed, but to divide this into three sections so that it can be used as a sectional, a seating area for meals and a bed for overnight guests. It was a lot easier than I thought it would be.

Thank you for this, I would not have known where to begin.

I decided on brightly printed outdoor fabric because the interior of my tiny house is all wood and I though the bright colours would be a nice addition. The outdoor fabric was chosen so that it would resist water and stains as well as pet hair.

Estimated Cost
$487.
Estimated Time Investment
Day Project (6-9 Hours)
Finish Used
water proof outdoor fabric
Recommended Skill Level
Intermediate

Built in dining bench

Submitted by aahmad79 on Sun, 10/13/2019 - 09:14

I used the mudroom bench plans and modified them slightly to account for the wider space and air registers underneath. Thanks Ana!

Built from Plan(s)
Estimated Cost
$450
Estimated Time Investment
Week Long Project (20 Hours or More)
Recommended Skill Level
Intermediate

Comments

Daybed Mash-up of Plans

Submitted by Anonymous (not verified) on Mon, 07/03/2023 - 12:35

I mashed together several twin bed plans - farmhouse bed, simple twin bed and Hailey Storage bed to create this farmhouse style daybed. It's a very sturdy and heavy piece of furniture.

Built from Plan(s)

Cedar Garden Bed

I made this garden bed in one evening. I love it! I bought 6 6' cedar fence pickets and two cedar 1x2s. I don't have a table saw, and they wouldn't rip a fence picket for me at the store, so I had to buy the cedar 1x2's but the project was still very affordable. I wanted it a little wider than the original plan, so I just cut the 6' pickets in half for the sides.
It is 6' x 3' and I didn't bother to cut the dogears off. You probably wouldn't even be able to tell they are there. I didn't trim the top out because that would add on about $6, and I like it just the way it is.
Now, lets see if I can actually grow some plants in it!!
I'm a beginner, and this project was really easy.

Estimated Cost
$20
Estimated Time Investment
Afternoon Project (3-6 Hours)
Recommended Skill Level
Starter Project

Comments

Lisa P (not verified)

Tue, 04/03/2012 - 08:08

This is exactly how I was going to modify Ana's plans as well. Have you started growing anything yet? Looks great!

Tara Kirkland

Tue, 04/17/2012 - 20:55

Yes, I've started "trying" to grow a few things. I don't usually have much luck, but maybe.... just MAYBE this will be the year!! :)

Lindyer0523 (not verified)

Mon, 04/23/2012 - 07:13

What would you have used for the top trim?

counter raised beds

2 - 2x12x8

2 - 2x3x8

2 - 4x4x8 (cedar, fur is cheaper and will work fine also)

16 - 5/16x4 lag screws 

16 - 5/16 washers

3x10 feet 1/4 hardware wire

20 - 3inch wood screws (outdoor rated, deck screws or the like) 

you will have left overs if you buy extra lags you can make some other boxes depending on how high you want these, or set them on ground without legs. and use the wood screws 

Estimated Cost
$75
Estimated Time Investment
An Hour or Two (0-2 Hours)
Finish Used
no finish
Recommended Skill Level
Beginner

Farmhouse Nesting Tables

Submitted by Anonymous (not verified) on Fri, 10/18/2019 - 08:34

First real furniture project. Used pocket screws for just about everything and added some decorative 2" bread boards.

Built from Plan(s)
Estimated Cost
Under $100
Estimated Time Investment
Day Project (6-9 Hours)
Finish Used
Early American Stain with Polyurethane finish
Recommended Skill Level
Beginner

Square Picnic Table with Umbrella

Submitted by Anonymous (not verified) on Fri, 07/07/2023 - 11:06

Used your plans to make a sturdy, durable hardwood picnic table for a friend. Top is black cherry (1 1/4") and base/seats are white oak (1 1/4"). The seats are one piece, 11" wide from a white oakoy cut and sawed on our property! Sealed with two coats of Spar Urethane.

Chip McCoy

Built from Plan(s)

Cottage style bookcase

I modified the original plans by making the book case low and wide so my 5 year old could reach all of her books. I also added some 1x3's to the back of each shelf to keep the books from falling off the back and everything square. I have quarter round moulding on my baseboards, so it doesn't sit flush against the wall.

Built from Plan(s)
Estimated Cost
$45
Estimated Time Investment
Day Project (6-9 Hours)
Finish Used
Olympic interior satin Scandinavian Sky
Recommended Skill Level
Beginner

Caroline's double loft bed

Submitted by Anonymous (not verified) on Thu, 03/10/2016 - 19:18

We made this a double bed and lowered the height by 3 1/4 inches because we have low ceilings. We added an extra support under the mattress since it's a double. Plan to add the desk and low shelves later. Followed the plans very closely, worked out great. One thing I would suggest is to do the slats after the guardrail. Otherwise you can't stand under the bed and it's hard to get a good angle when screwing it on. Many happy hours of reading Harry Potter up there in the first week :).

Built from Plan(s)
Estimated Cost
$500
Estimated Time Investment
Week Long Project (20 Hours or More)
Finish Used
Gel stain
Recommended Skill Level
Intermediate

Modern Chaise Lounge

Submitted by Anonymous (not verified) on Sat, 07/08/2023 - 10:13

Modified lounger, made from 75mm x 38mm (cls) timber, sealed with 3 coats of exterior varnish.

Had great fun making this one, already on with making my second lounger.

A bit of wood

Back