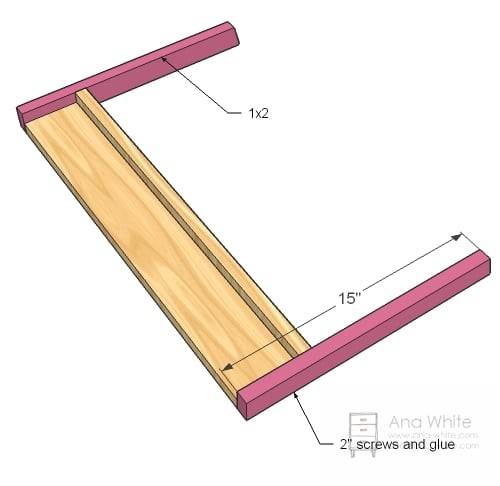
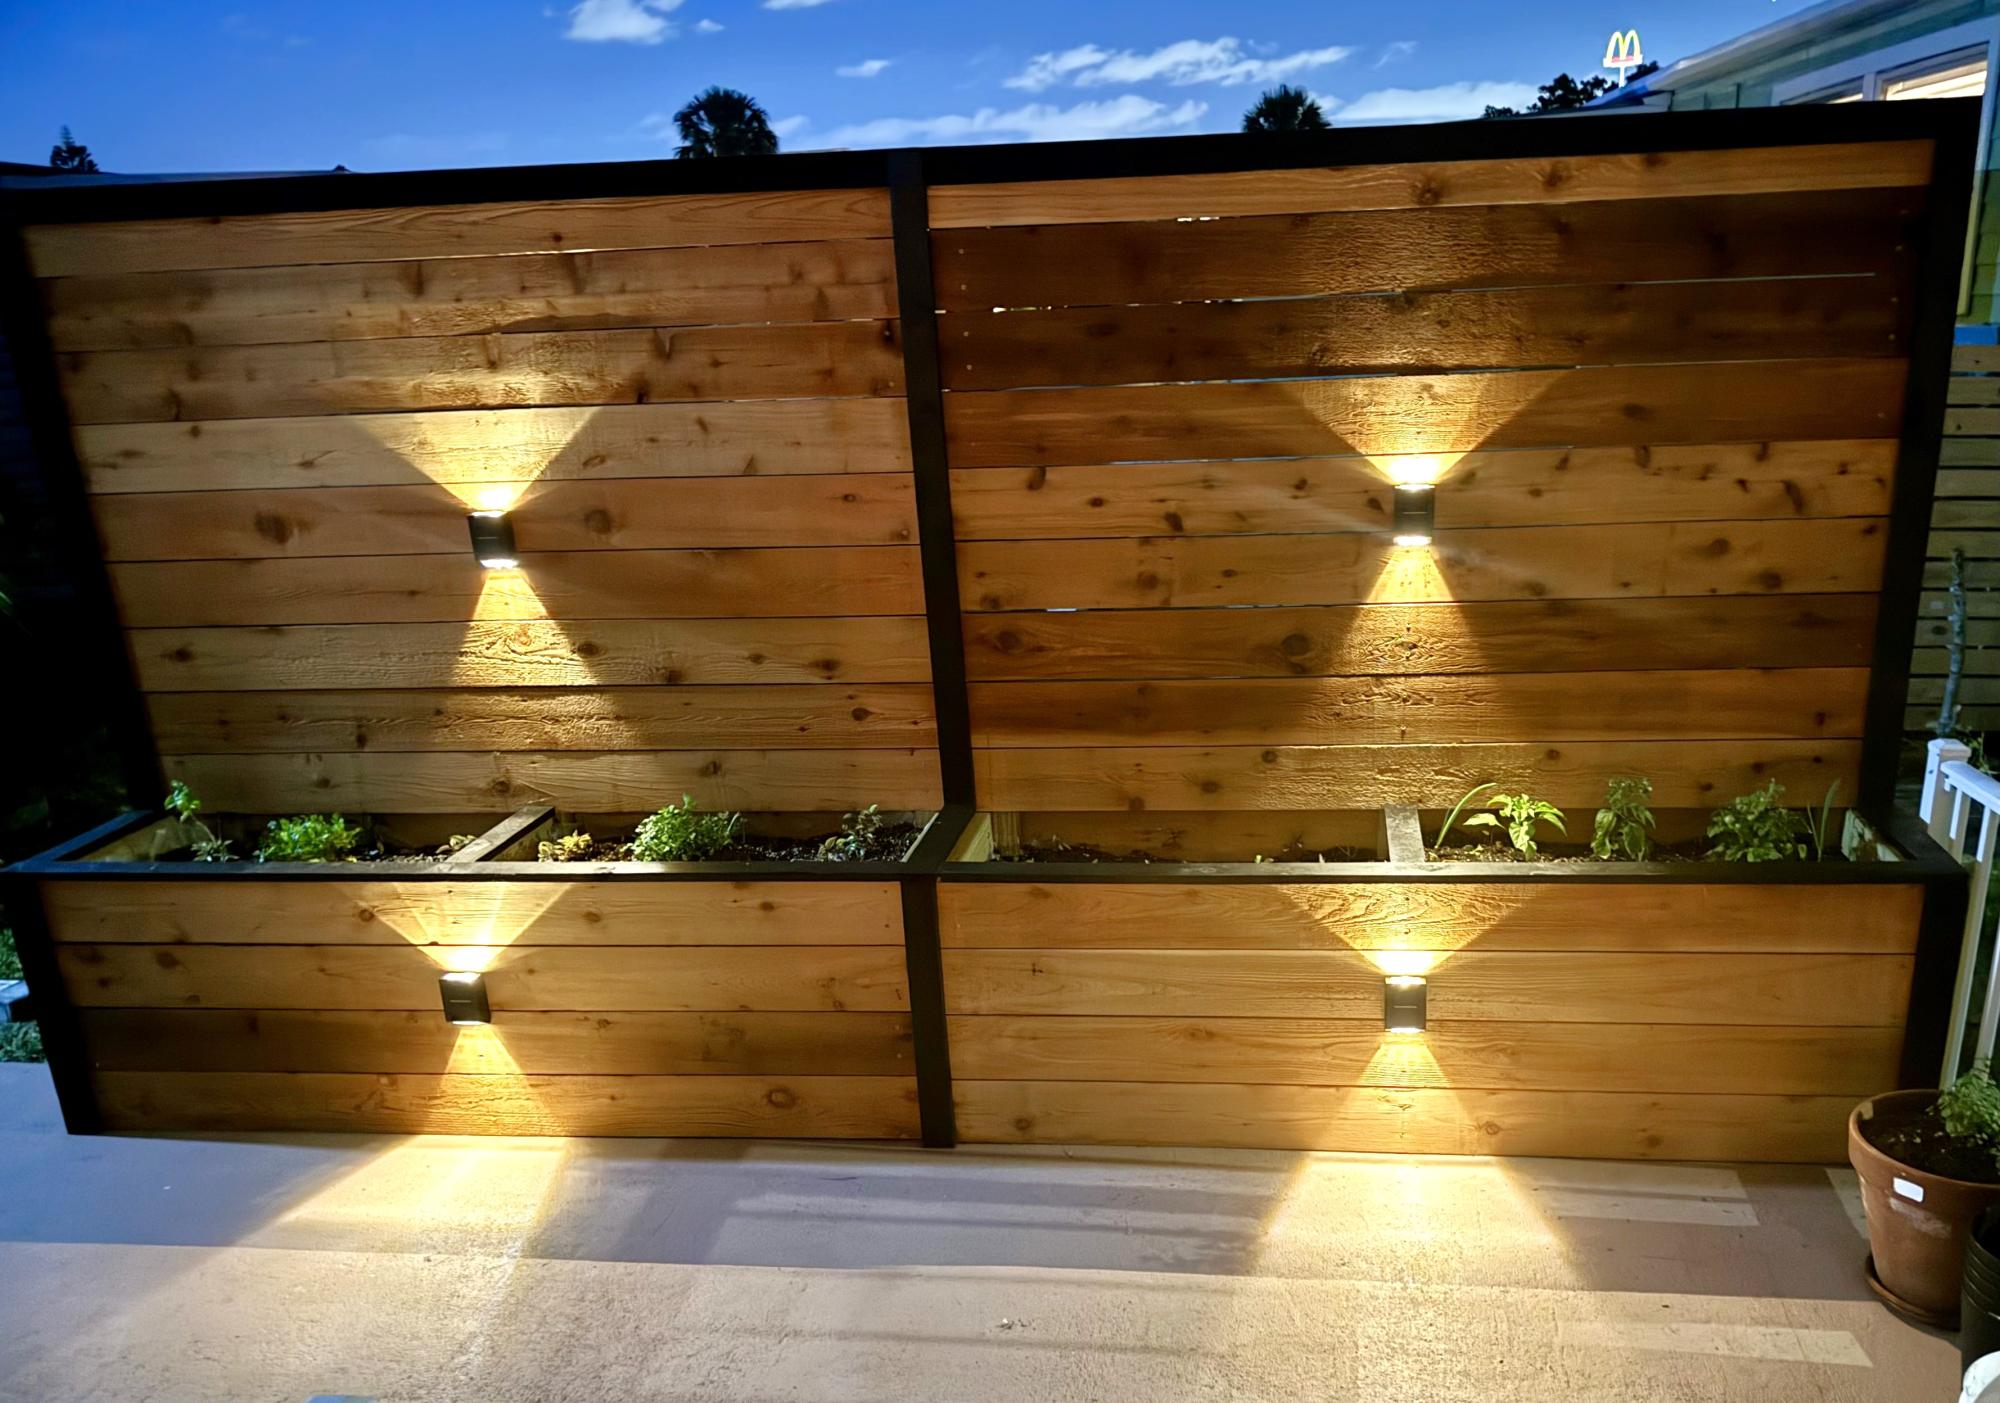
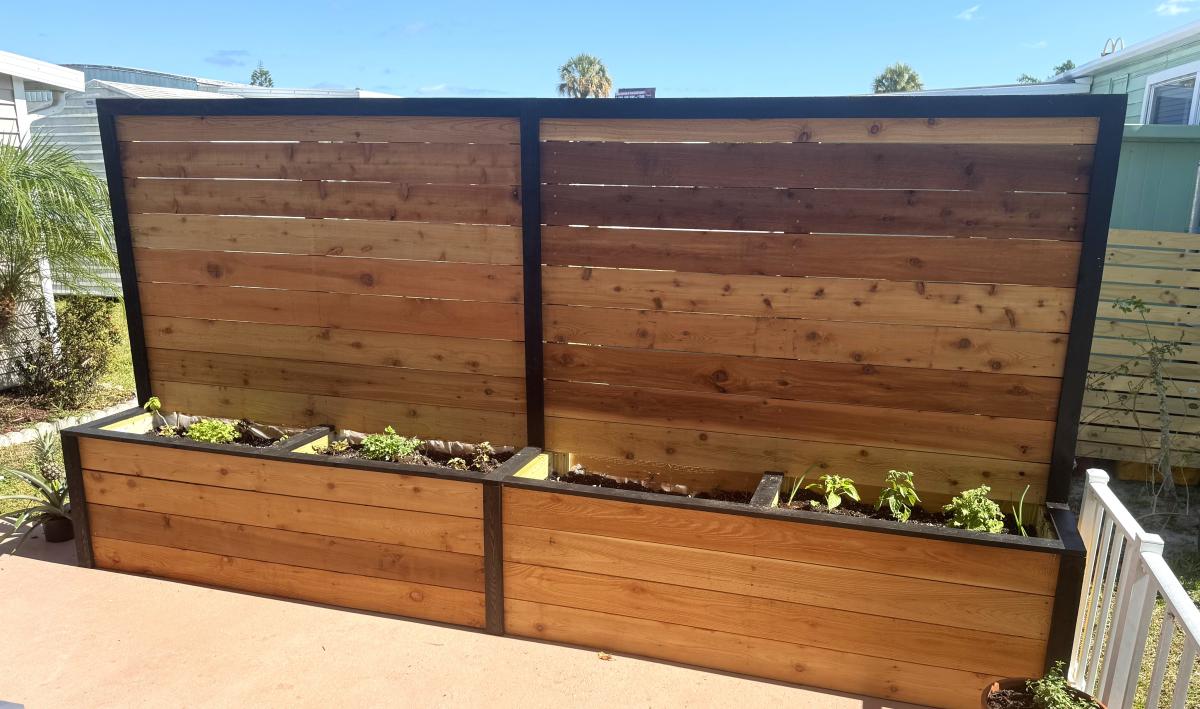
Double Pirvacy Planter
Used your plan as a start and improvised from there. Thanks
Built from Plan(s)
Used your plan as a start and improvised from there. Thanks
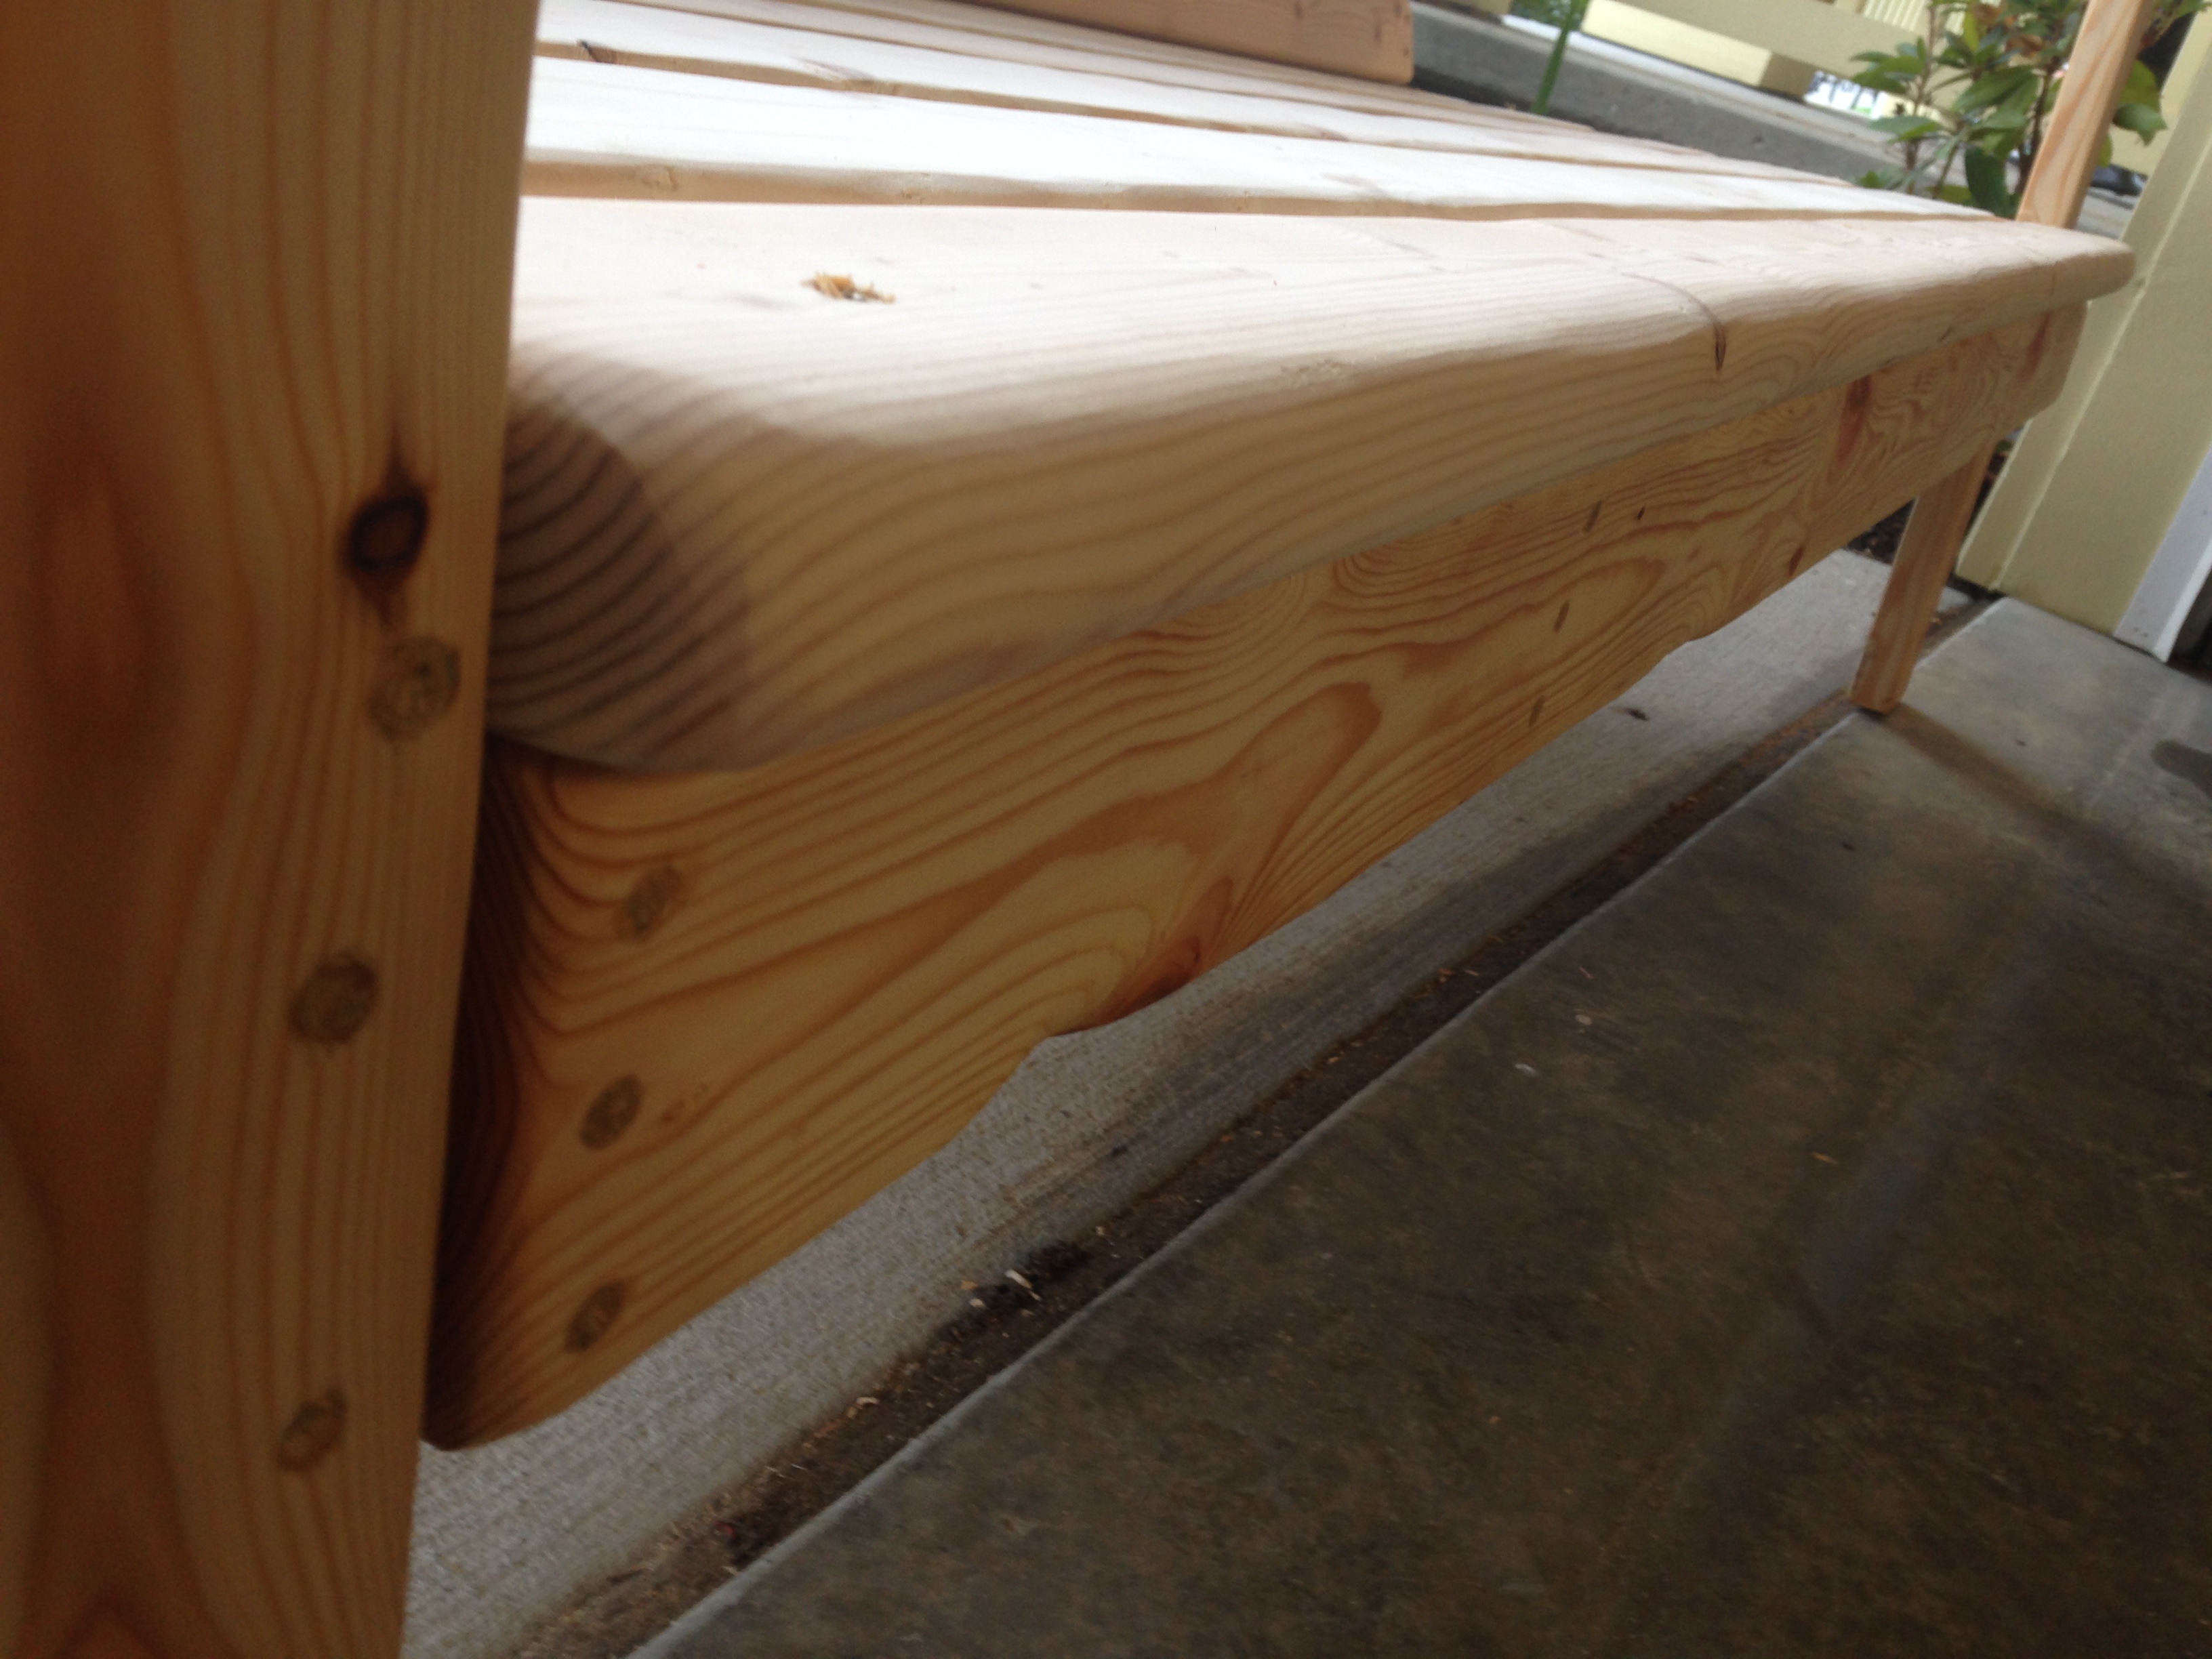
Our daughter's room has built-ins on either side of the window. I always wanted a window seat to sandwich in between, but couldn't find one with the right dimensions.....THANK YOU ANA WHITE! I used her Entryway Bench plan and just changed the length and depth to fit the window. I didn't add the side and back supports on top, but I bullnosed all the edges to make it look more finished.
I built this in one afternoon and even used cedar fence planks (left over from my husband's fence project) for the backing....love the extra charm of those planks!
We also had some molding left over, so I worked that in to the bottom for a little extra detail.
Haven't painted it yet....just enjoying it's usability until I decide on a color. It's super durable. My three year old sits on it (to read), stands on it (to spy on the neighbor's cats) and tosses those baskets in and out all day long.

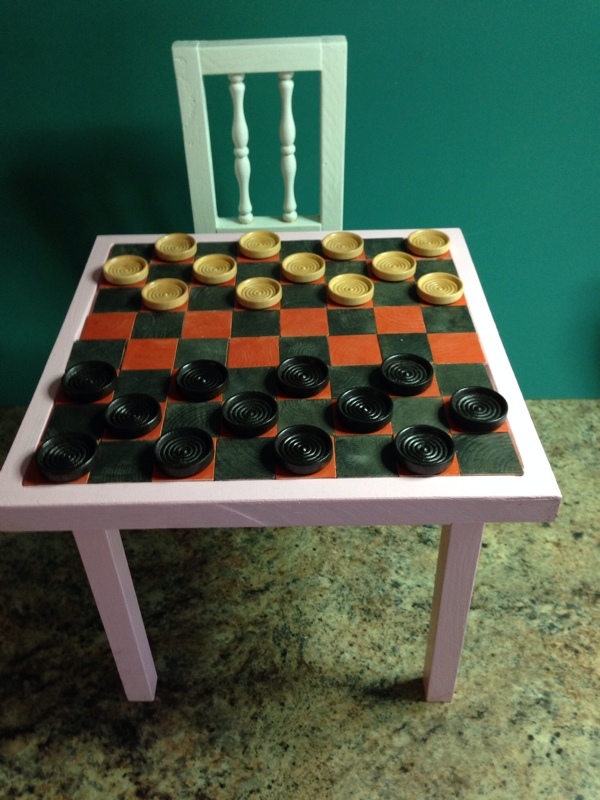
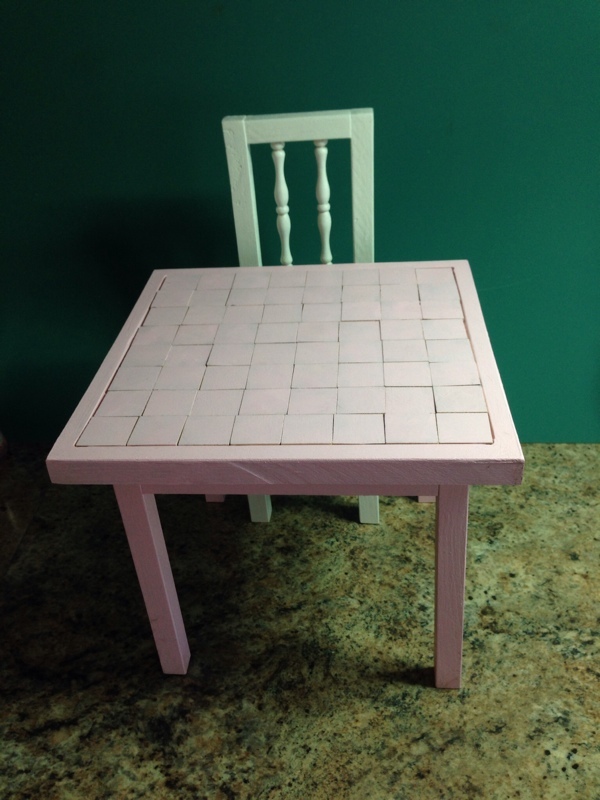
I have come across several tables and chairs for doll furniture and decided I wanted to make something a little different.
I made a basic table and used 64 1 1/8 inch squares.
32/32 painted red/black and the other sides painted pink.
table is pretty popular around town so I decided to test Ebay and my website www.funwithdolls.com and I actually started selling a few.
Wayne
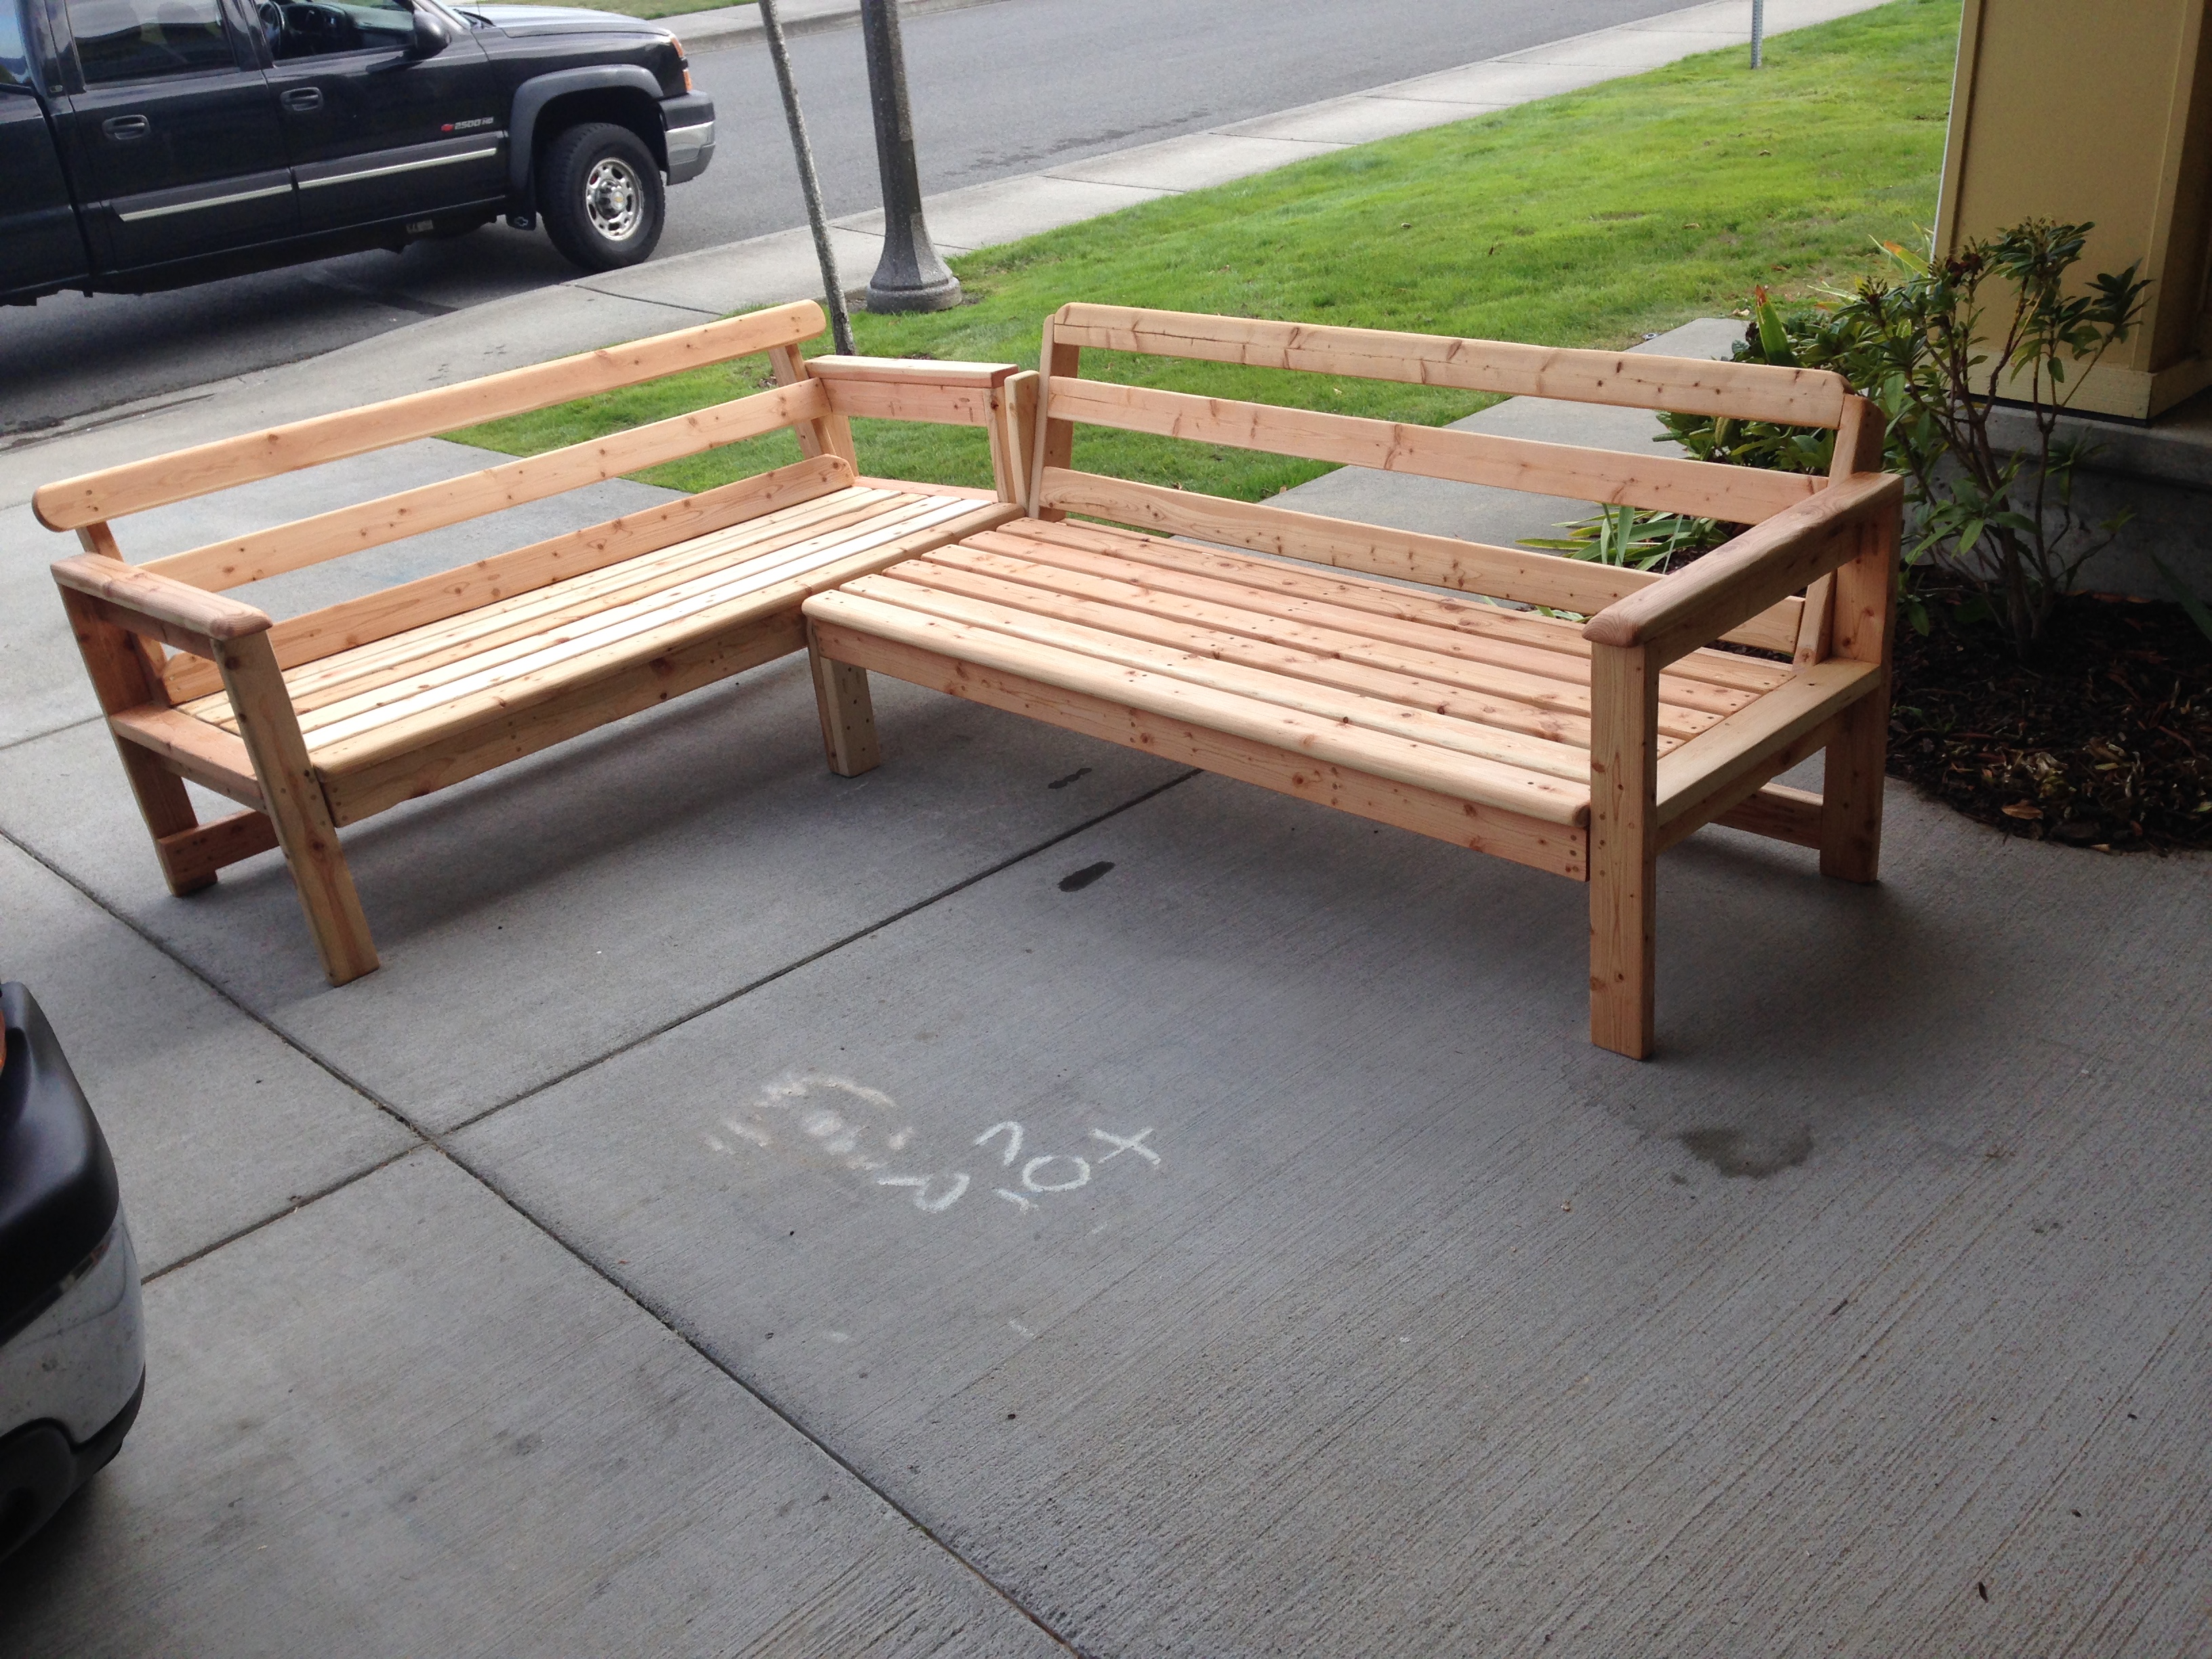
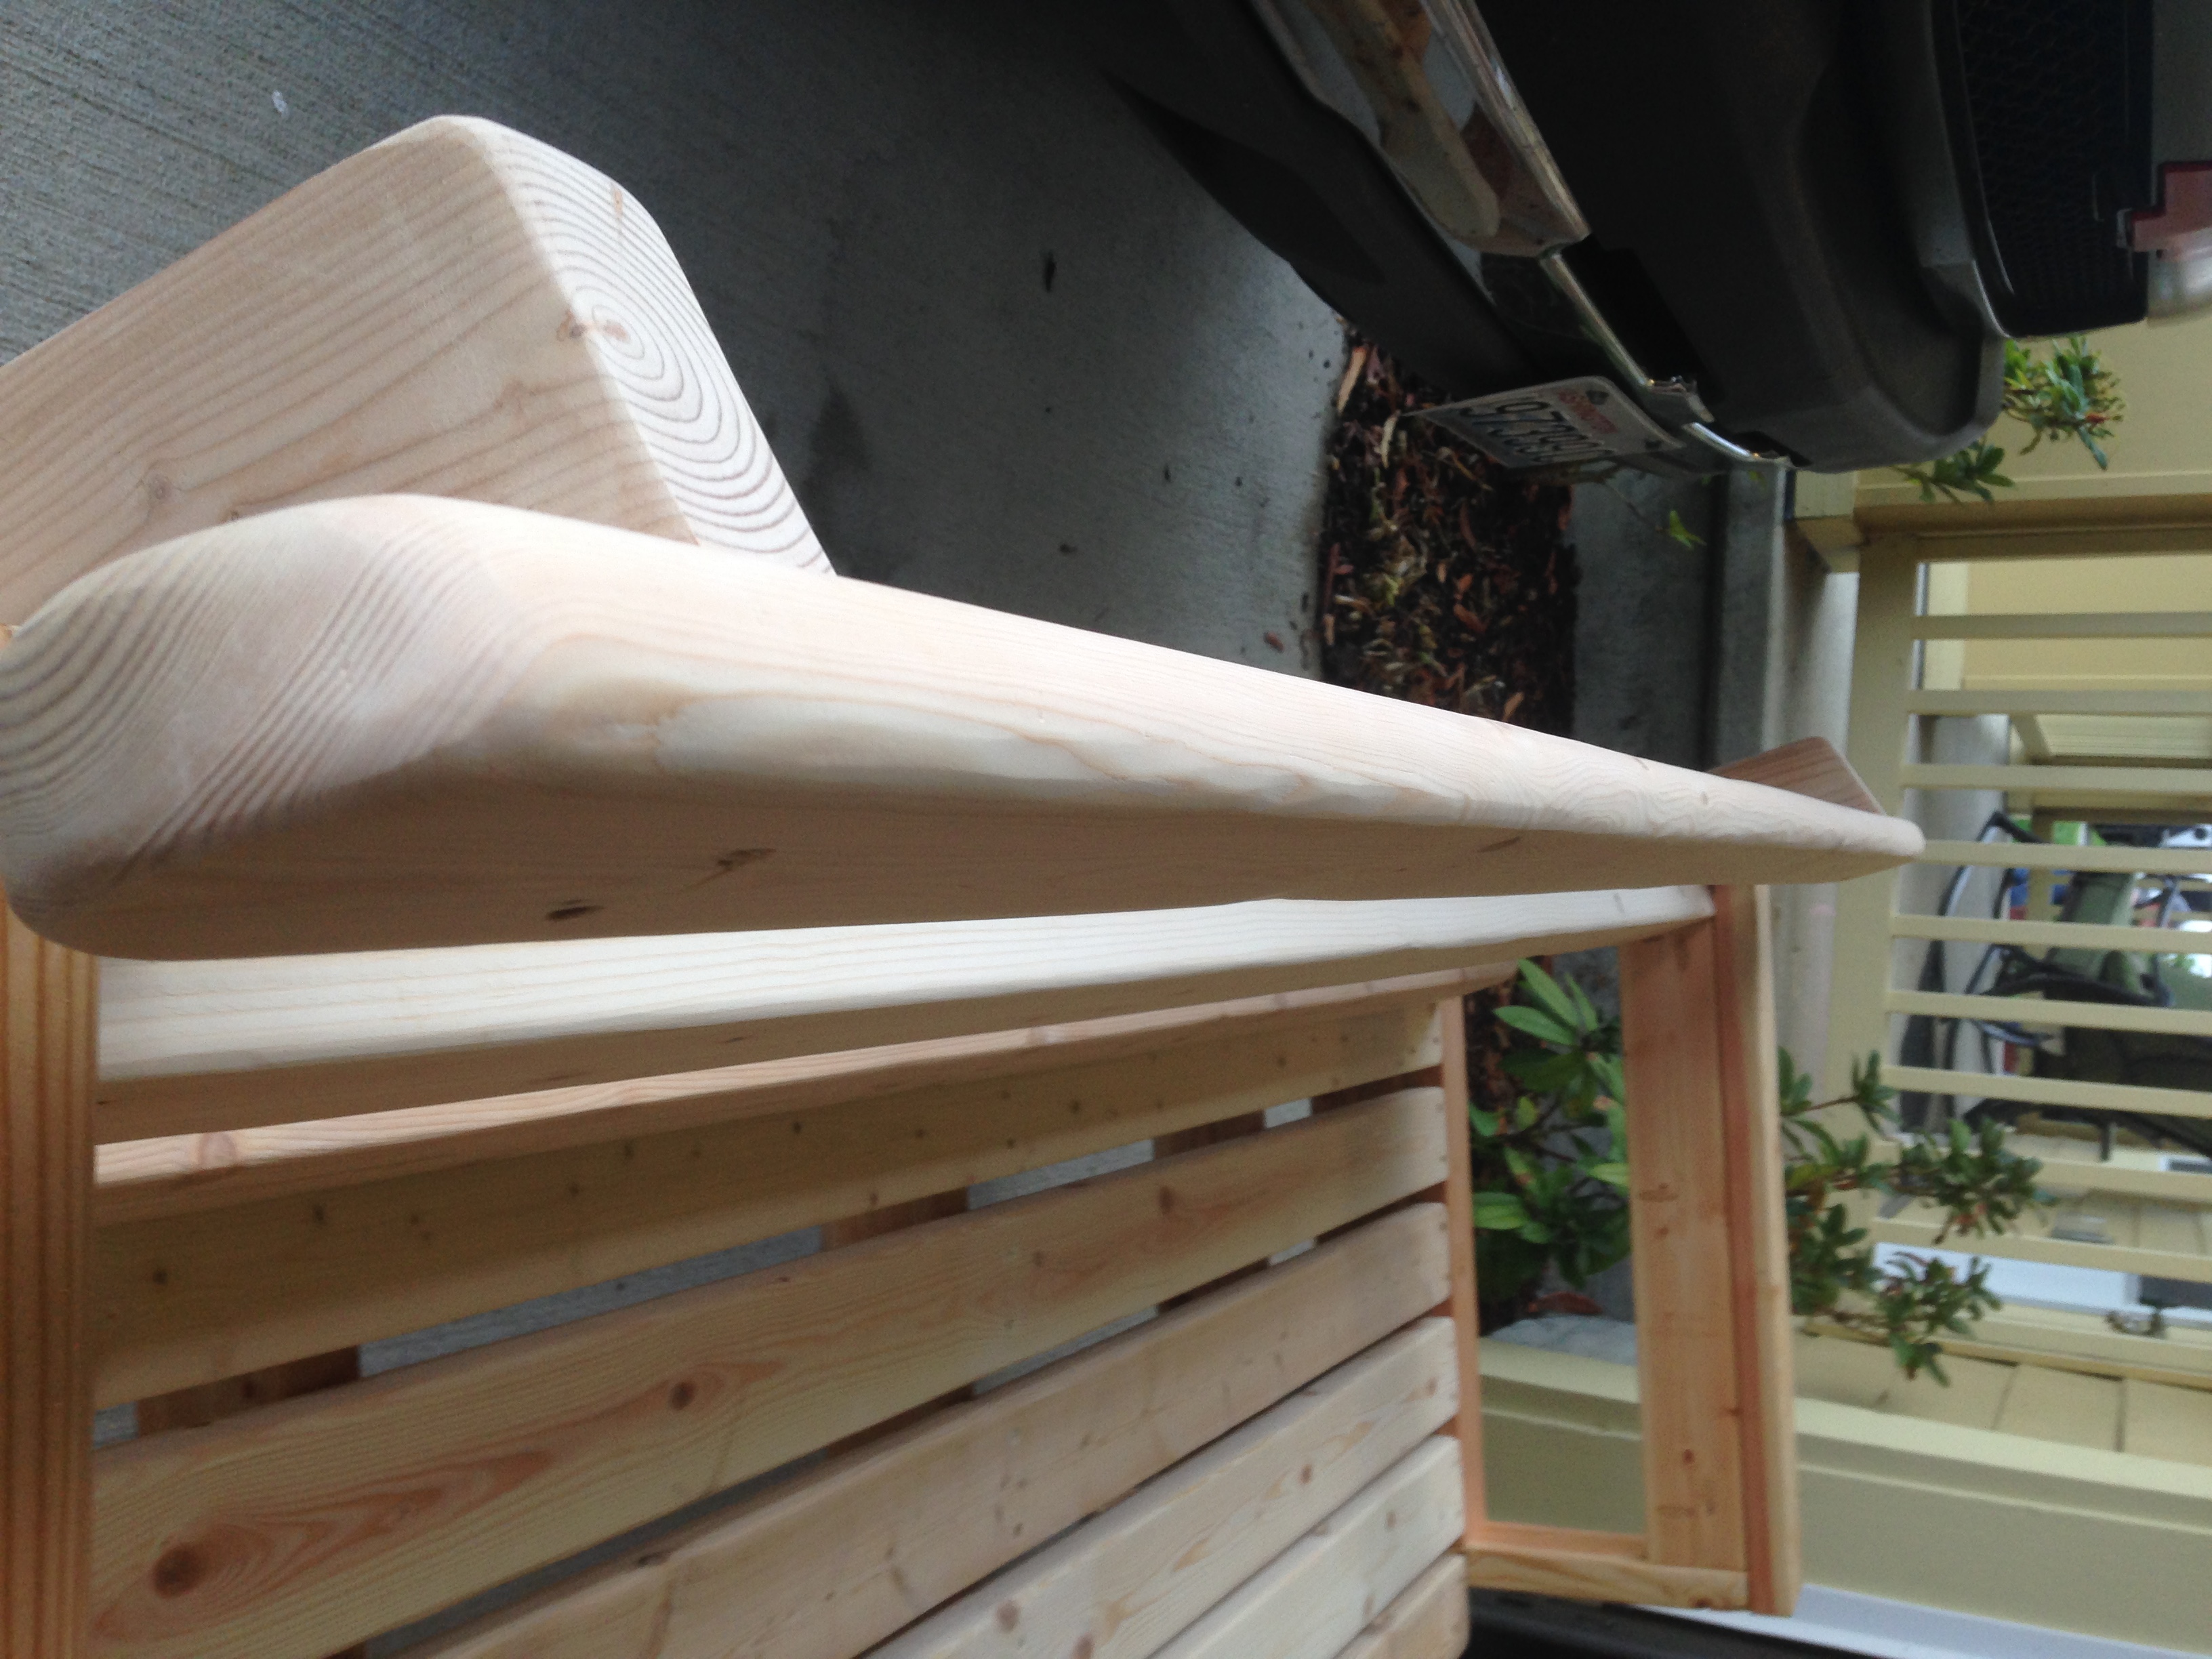
Mostly the same. Made smaller spacing for the seat (used 1x4 for spacing) and gave it a back (18" 15% miter) hand formed the front seat board and a bit of an overhang also hand formed the tops of the seat backs and armrest idea was it would be comfy with or without cushions. Ow and it's all construction grade lumber that I water sealed. Thanks for the idea!


Sun, 09/25/2016 - 09:33
I bet it's super comfy with the leaning back! Great job thanks for bragging!
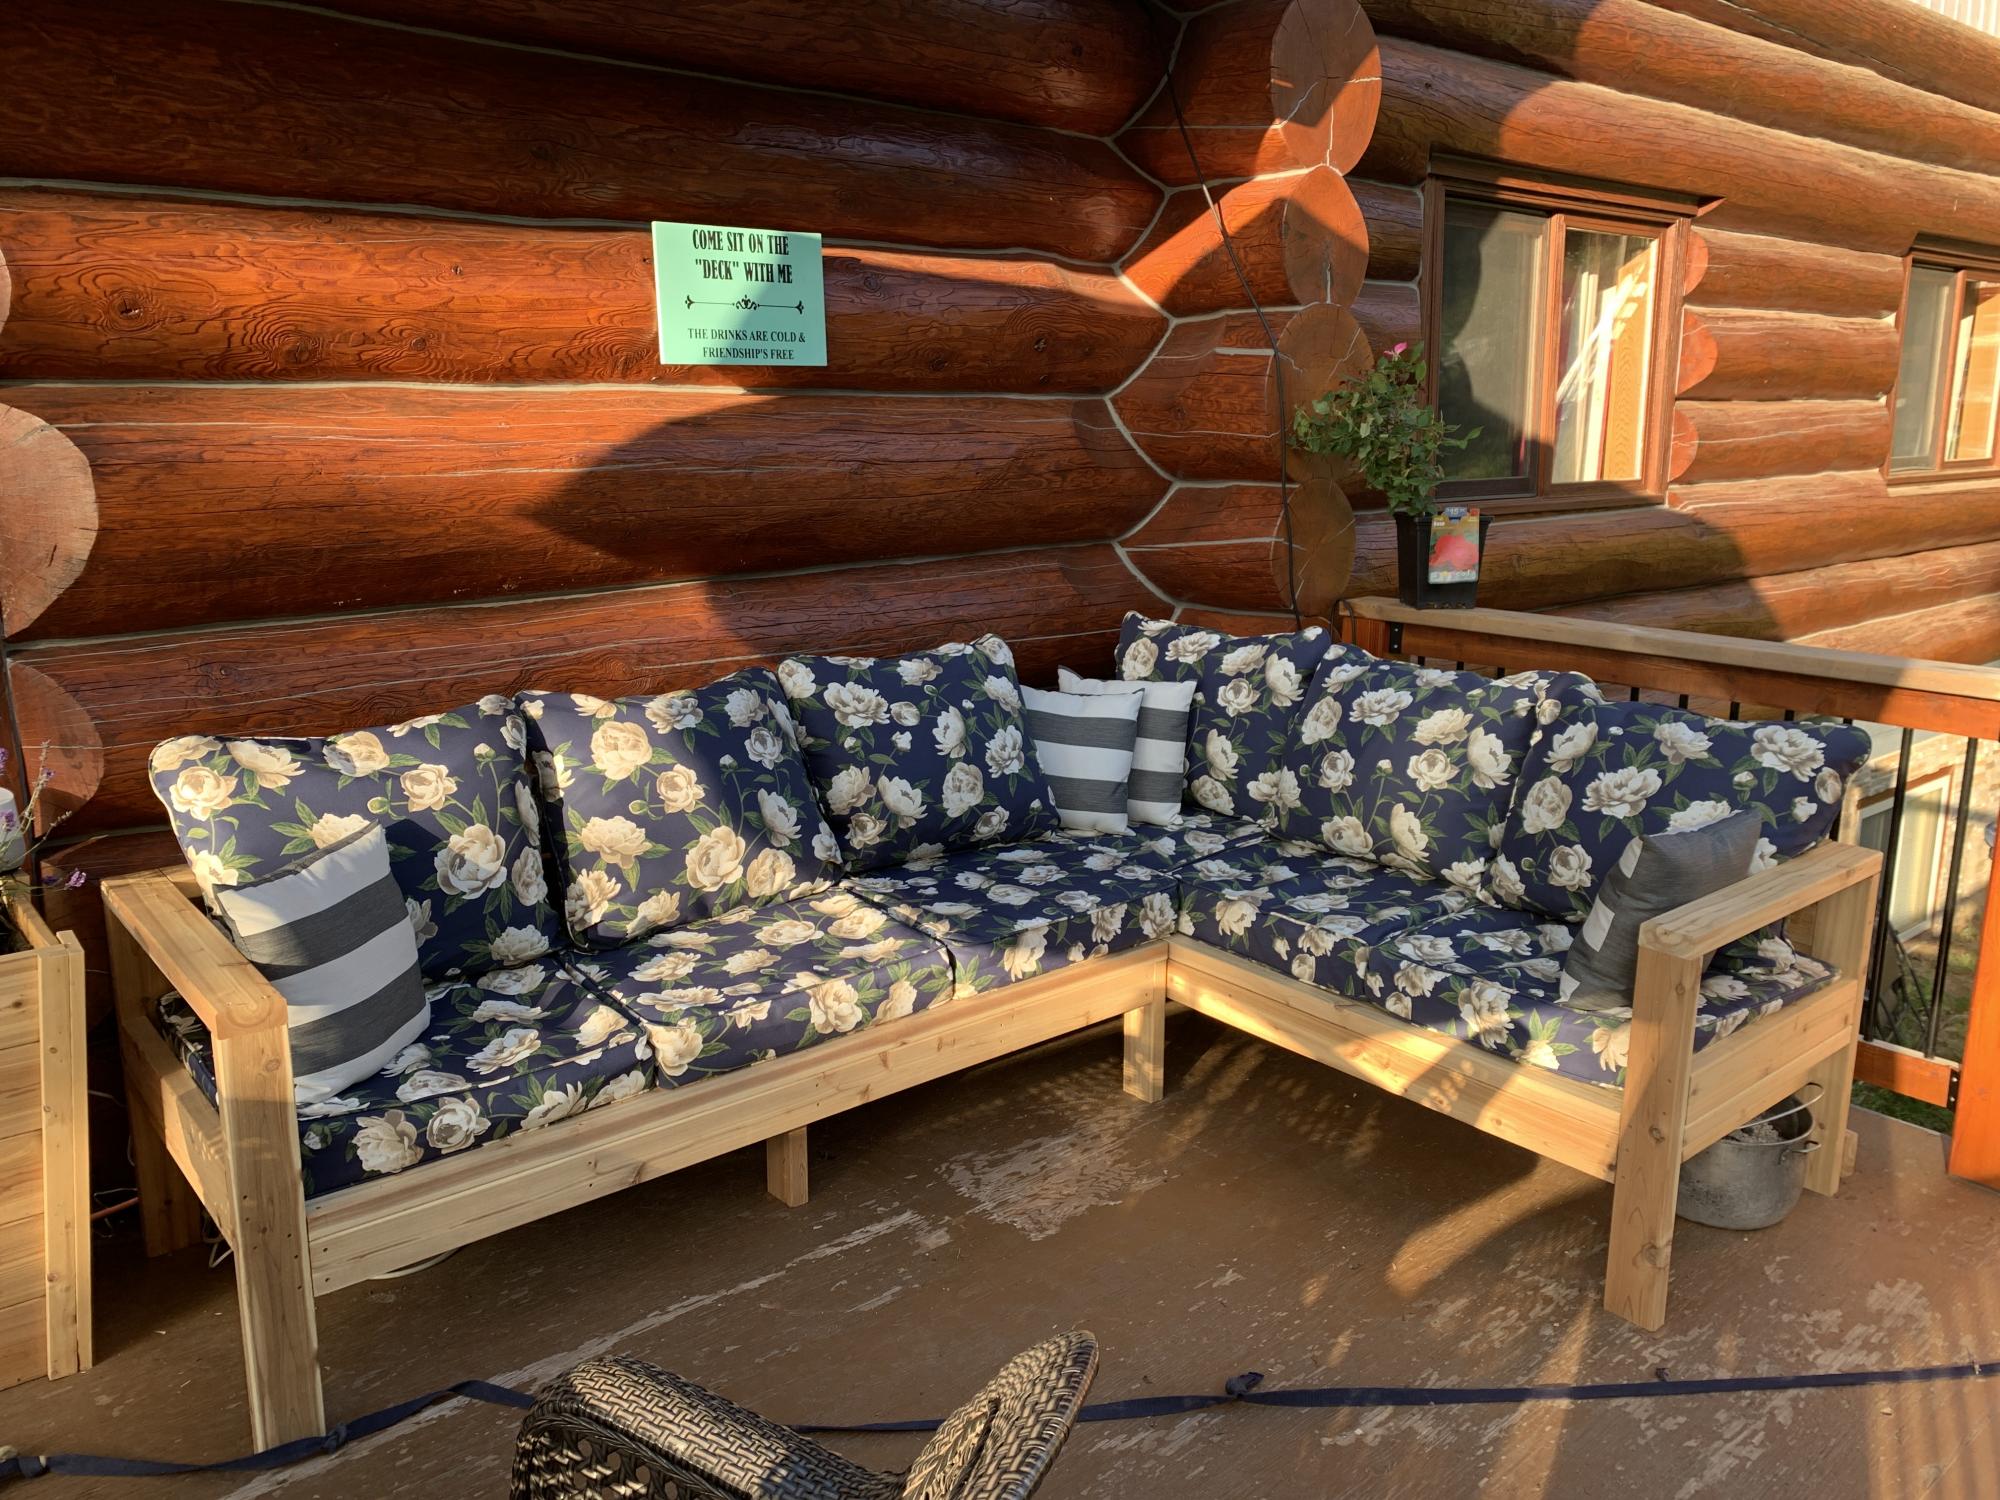
Loved this project. The third one I have completed from Ana’s projects. Took about 3.5 hours to complete both. I used 2x4 cedar. I did add an additional piece on the back of both sectionals as I found the cushions I bought would slip down the back.
Super easy to build ,thanks for the instructions!!!!!!

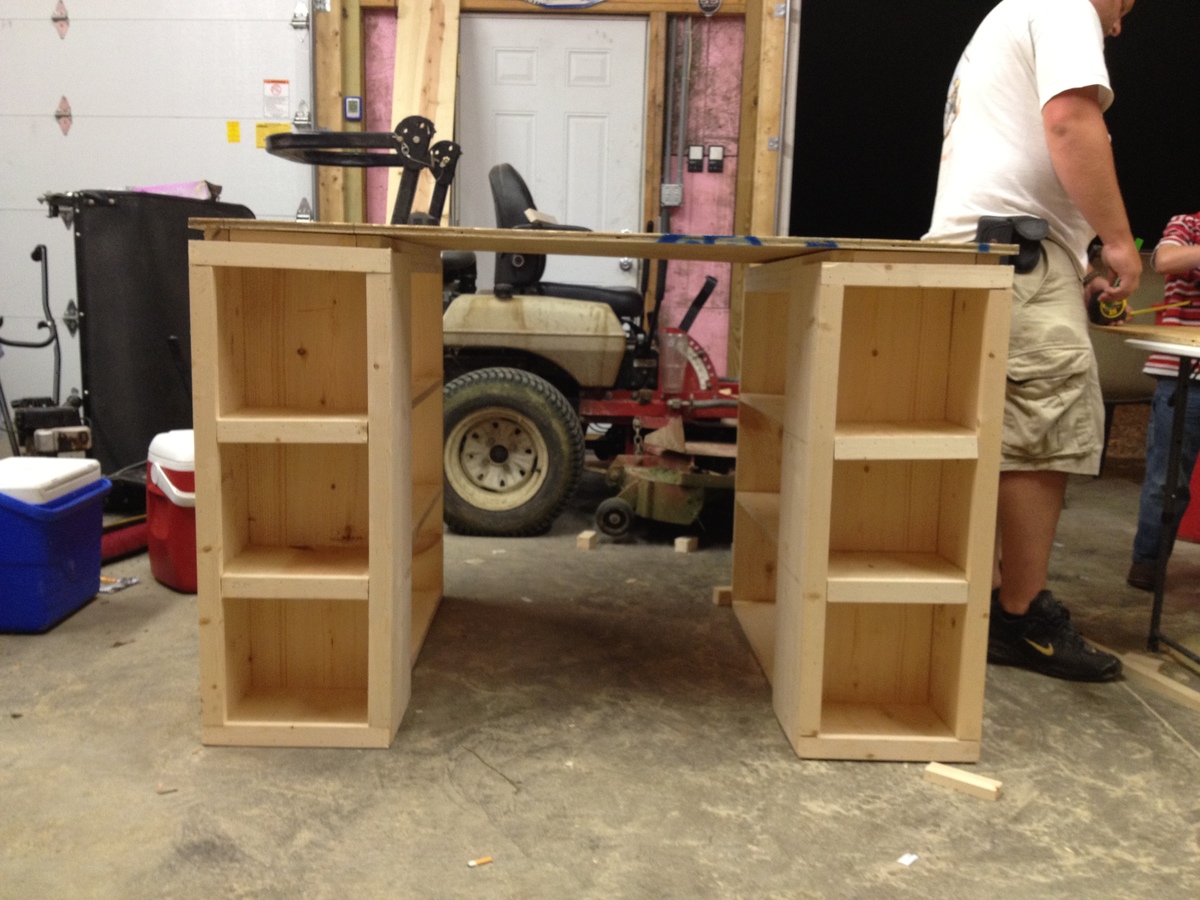
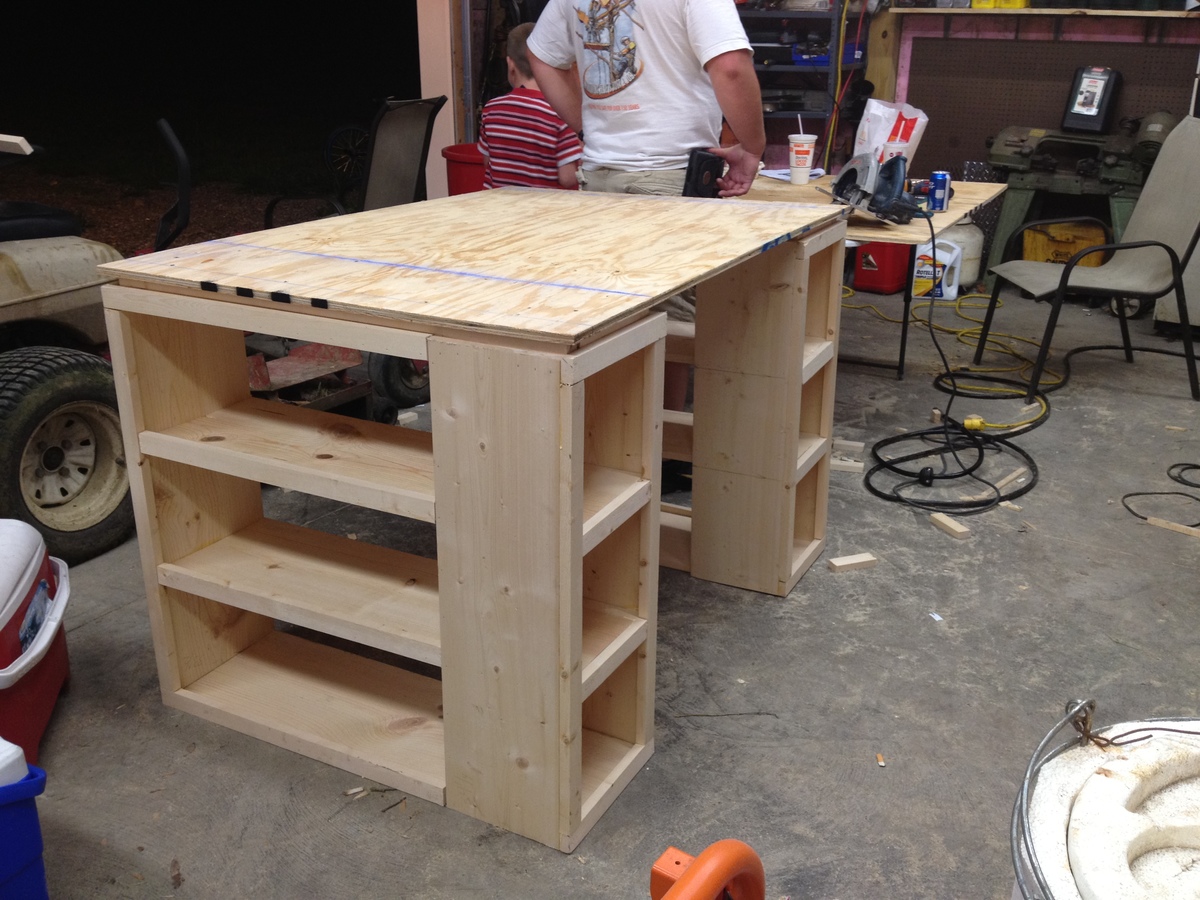
This is my very first Ana White build! I needed a table to go into my craft room and stumbled upon Ana White. What an AMAZING site! After browsing and finding many projects i would like to give a whirl i finally decided on this modern craft table. My husband and I have worked together on many different projects and decided we would try this one. The plans were very easy to follow although we did make a few mistakes along the way. I painted it white and finished with several coats of poly. All in all we love it and have a list of other builds to do next.
Make sure to check us out at SouthernChicLove.Blogspot.com!

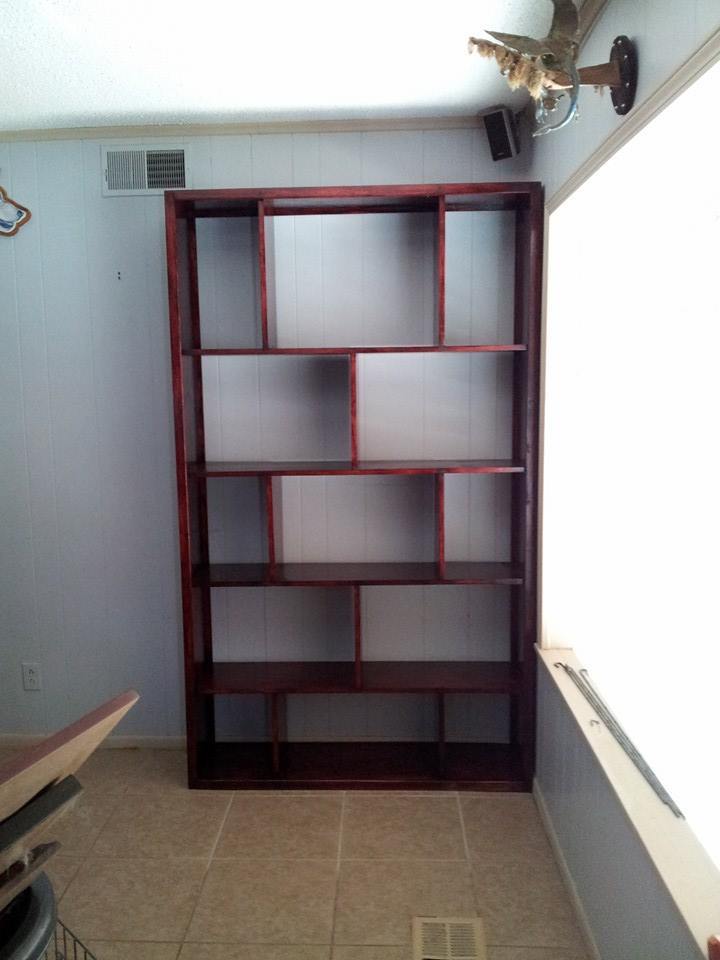
Modified Subway tile bookcase. 7' tall by 4' wide.

This project was for our 4 year old daughter. We wanted to get her a loft bed, but I wanted to make sure the rails were really tall so she didn't fall out. So, I took some inspirtation from loft beds on this website as well as looking at pictures of beds you can buy. I also added the drawers within the stairs because I wanted to utilize the storage potential. That was the most difficult part as I'm not particularly experienced in making and installing drawers. Off to YouTube tutorials I went and it turned out quite nice. I had to build it in three different parts to get it in her room. It's the actual bed portion, the stairs, and the side wall. Once I got it together, I left the screws showing that I connected it with, which I hate, but when we have to move it out of there, I didn't want to go through a ton of trouble. I used Kreg pocket holes for all of the vertical bed slats which caused a ton of work plugging the holes, cutting off the excess, sanding, and then sanding again and again. But, it was well worth it. We have made her a cozy little nook underneath the bed and added a light since these pictures. Overall, it was a fun project


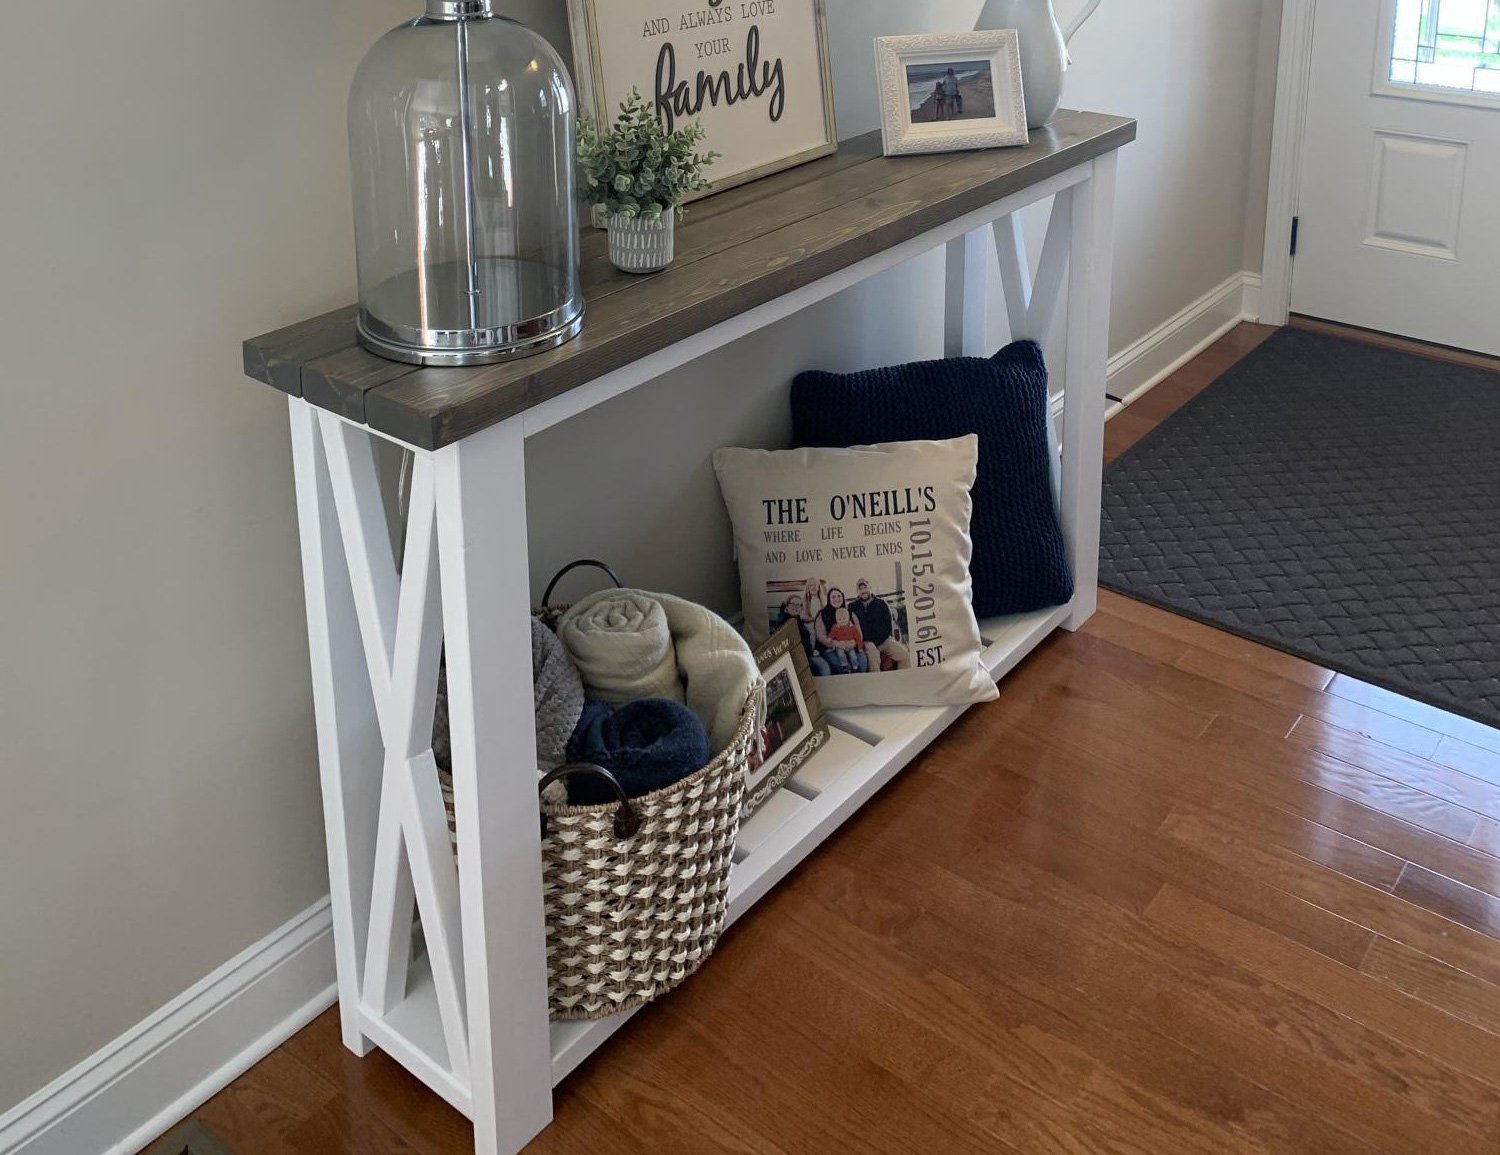
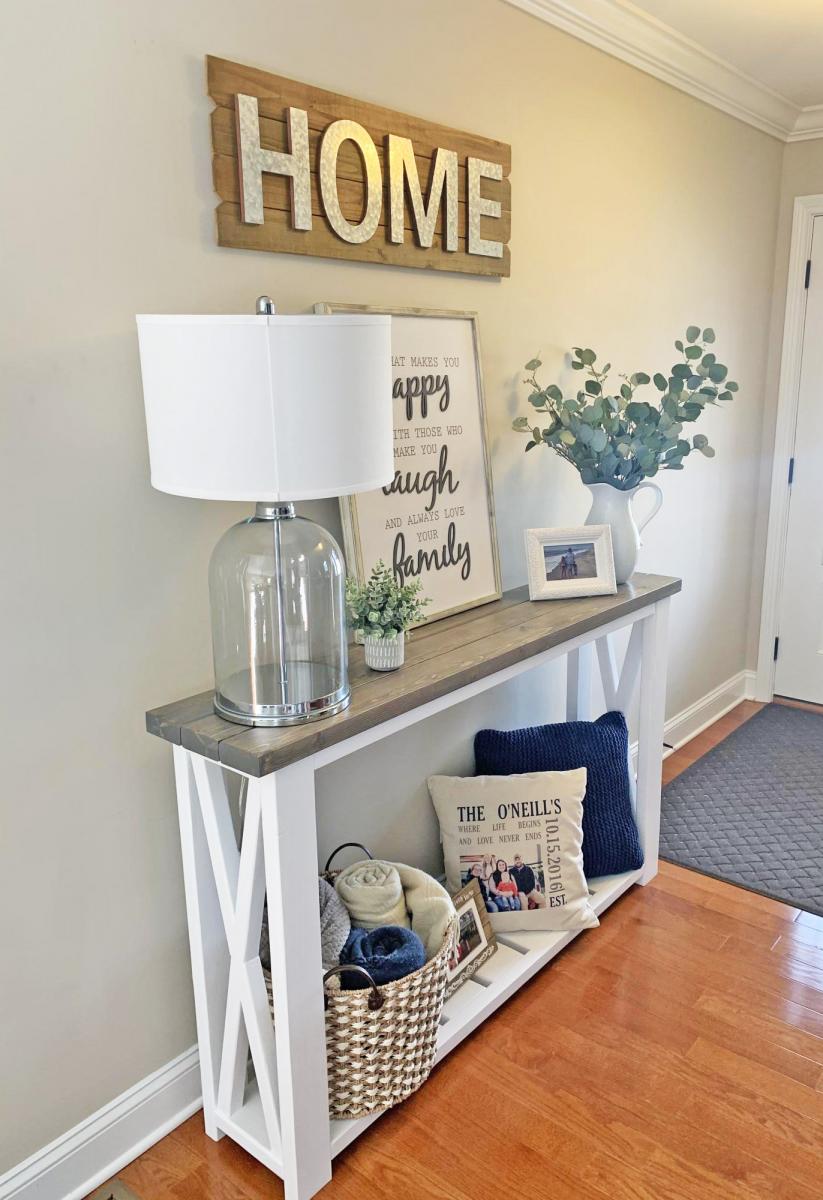
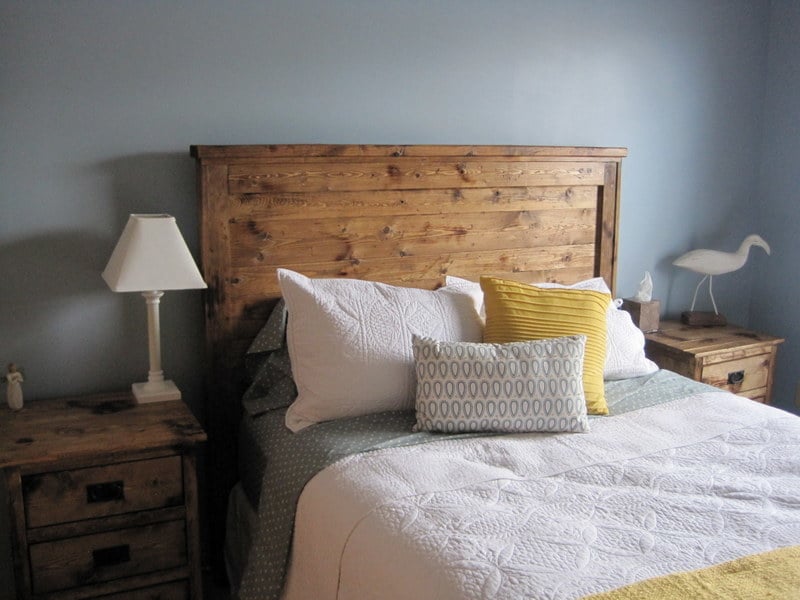
Modified the size to 60” length , 12” depth , 36” height . Went with satin white frame , Minwax classic grey stained top with 3 coats of poly clear coat satin (quick dry).
Mon, 09/07/2020 - 23:07
Do you happen to have a revised shopping/cut list for this table? Thanks!
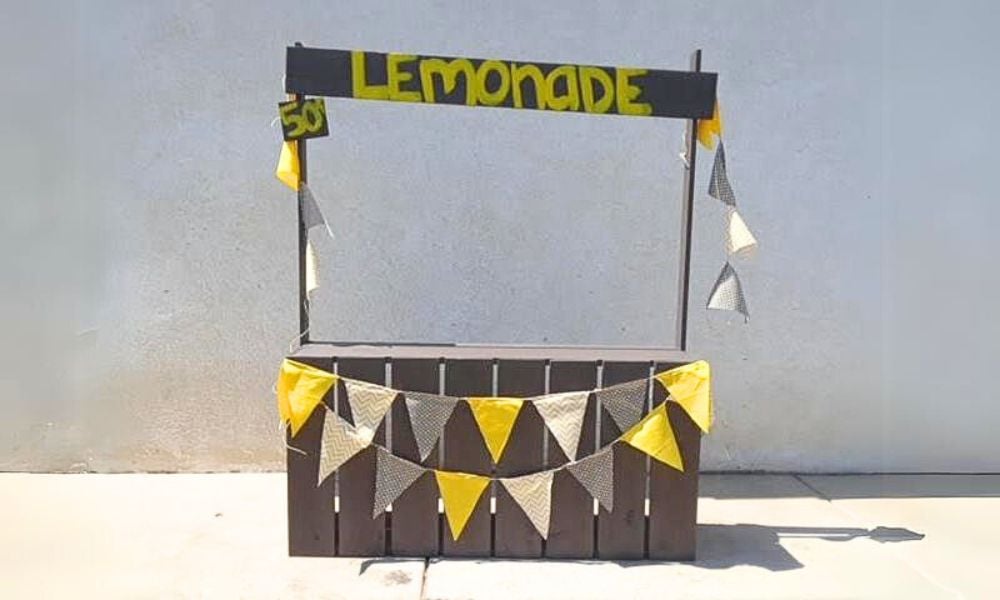
Lemonade stand built from plans here

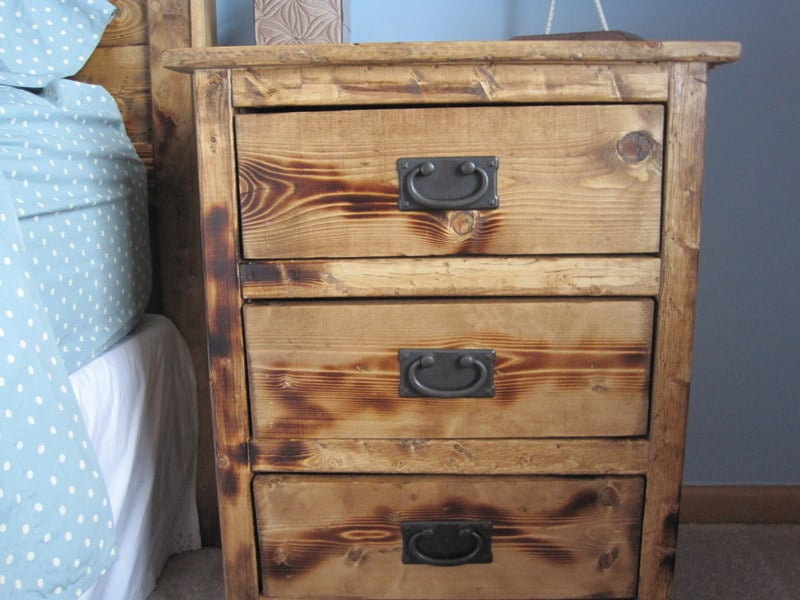
So after my husband and I conquered the headboard, we decided that we were geniuses at furniture making and we would just build the two side tables. Well, the two side tables are much more difficult than the headboard. The side tables are definitely do-able but make sure that you leave plenty of time for them. We built most of them on a Sunday and then finished them up in the evenings the rest of teh week. We do not have a Kreg Jig and were able to build them without it; however, if you have a Kreg Jig it would make thing 1,000 times easier. We did end up buying a miter saw because we were building the Old style Workmen's Bench bar at the same time (crazy, I tell you). It is CRITICAL to make sure that your inside drawer measurements work. If you are off just by a little, your drawer pulls are not going to fit. We ended up buying bottom mount drawer pulls. The drawers are a little less stable and can hold less weight (up to 35 pounds) but it worked for us. I think the real key to finishing this project are choosing the right drawer pulls. I really believe that spending a little bit more on the drawer pulls makes the piece look more expensive. We spent about 6.50 a drawer pull but they look really nice in person. TIPS **Stain drawer faces off, then attach hardware, then attach to drawer base **If you are going to use wood filler (I wouldn't), make sure that you use the least bit possible - the stain does not take to it the same
Tue, 09/11/2012 - 03:15
This plan is what I wanted, but I chickened out. Yours looks fantastic!
Just a little something to go in the dining room. I like the look of it. If I find another need for one I would definitely make this again accept use a different stain and paint the base white and use a semi-gloss or gloss protective finish.
I modified this plan by removing 1/3 of the table so it would fit our dining room. I used the farmhouse bench plans and "upholstered" them. This is the result. I used construction grade pine. Some of the table was altered by mistake, other bits on purpose. This project took me 40+ hours to complete. Weekends, a afterwork.

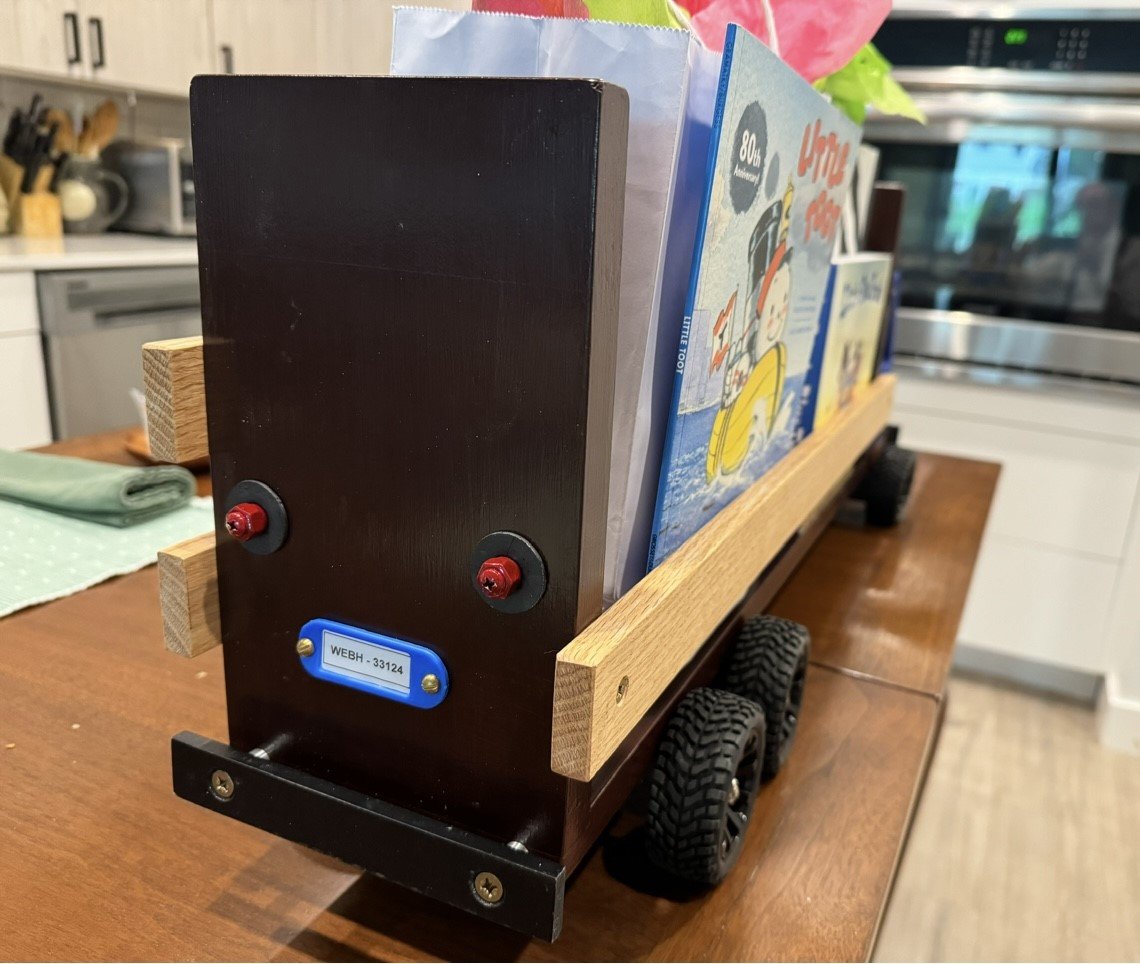
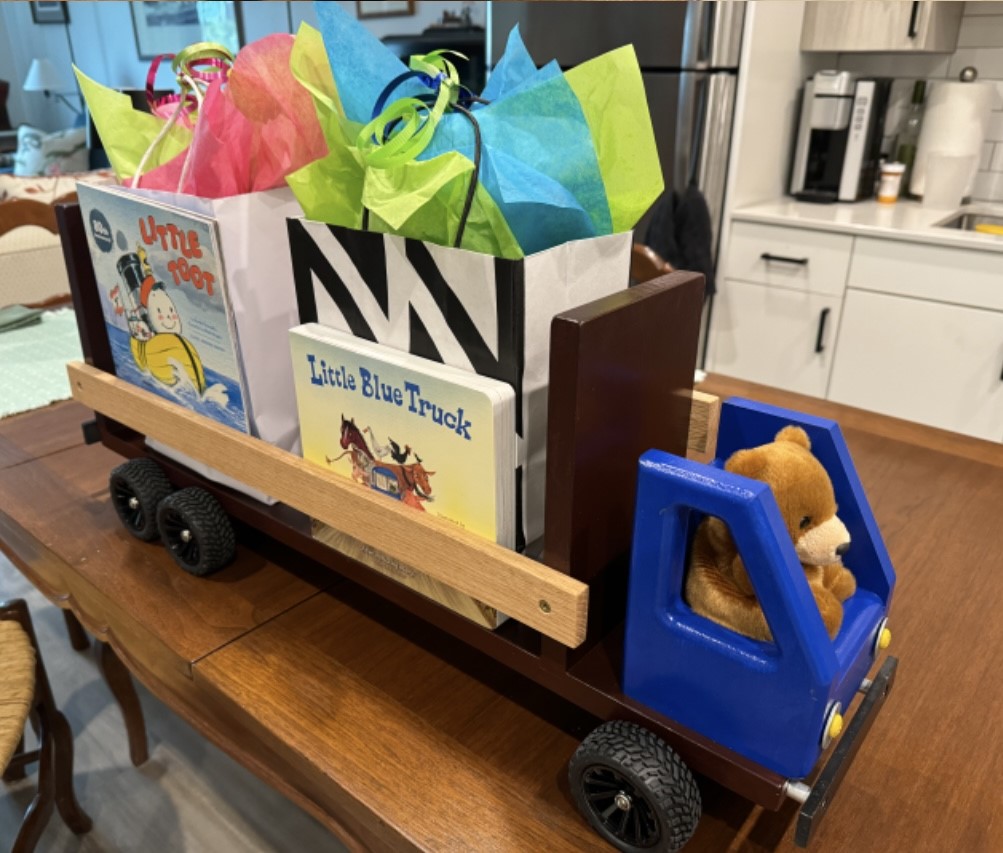
"0th" B-Day present for my "brand new" Great Nephew" born March 31, 2024 - Easter Sunday!
Note: His "vanity" license plate "WEBH-33124"
Grandpa_Dupee
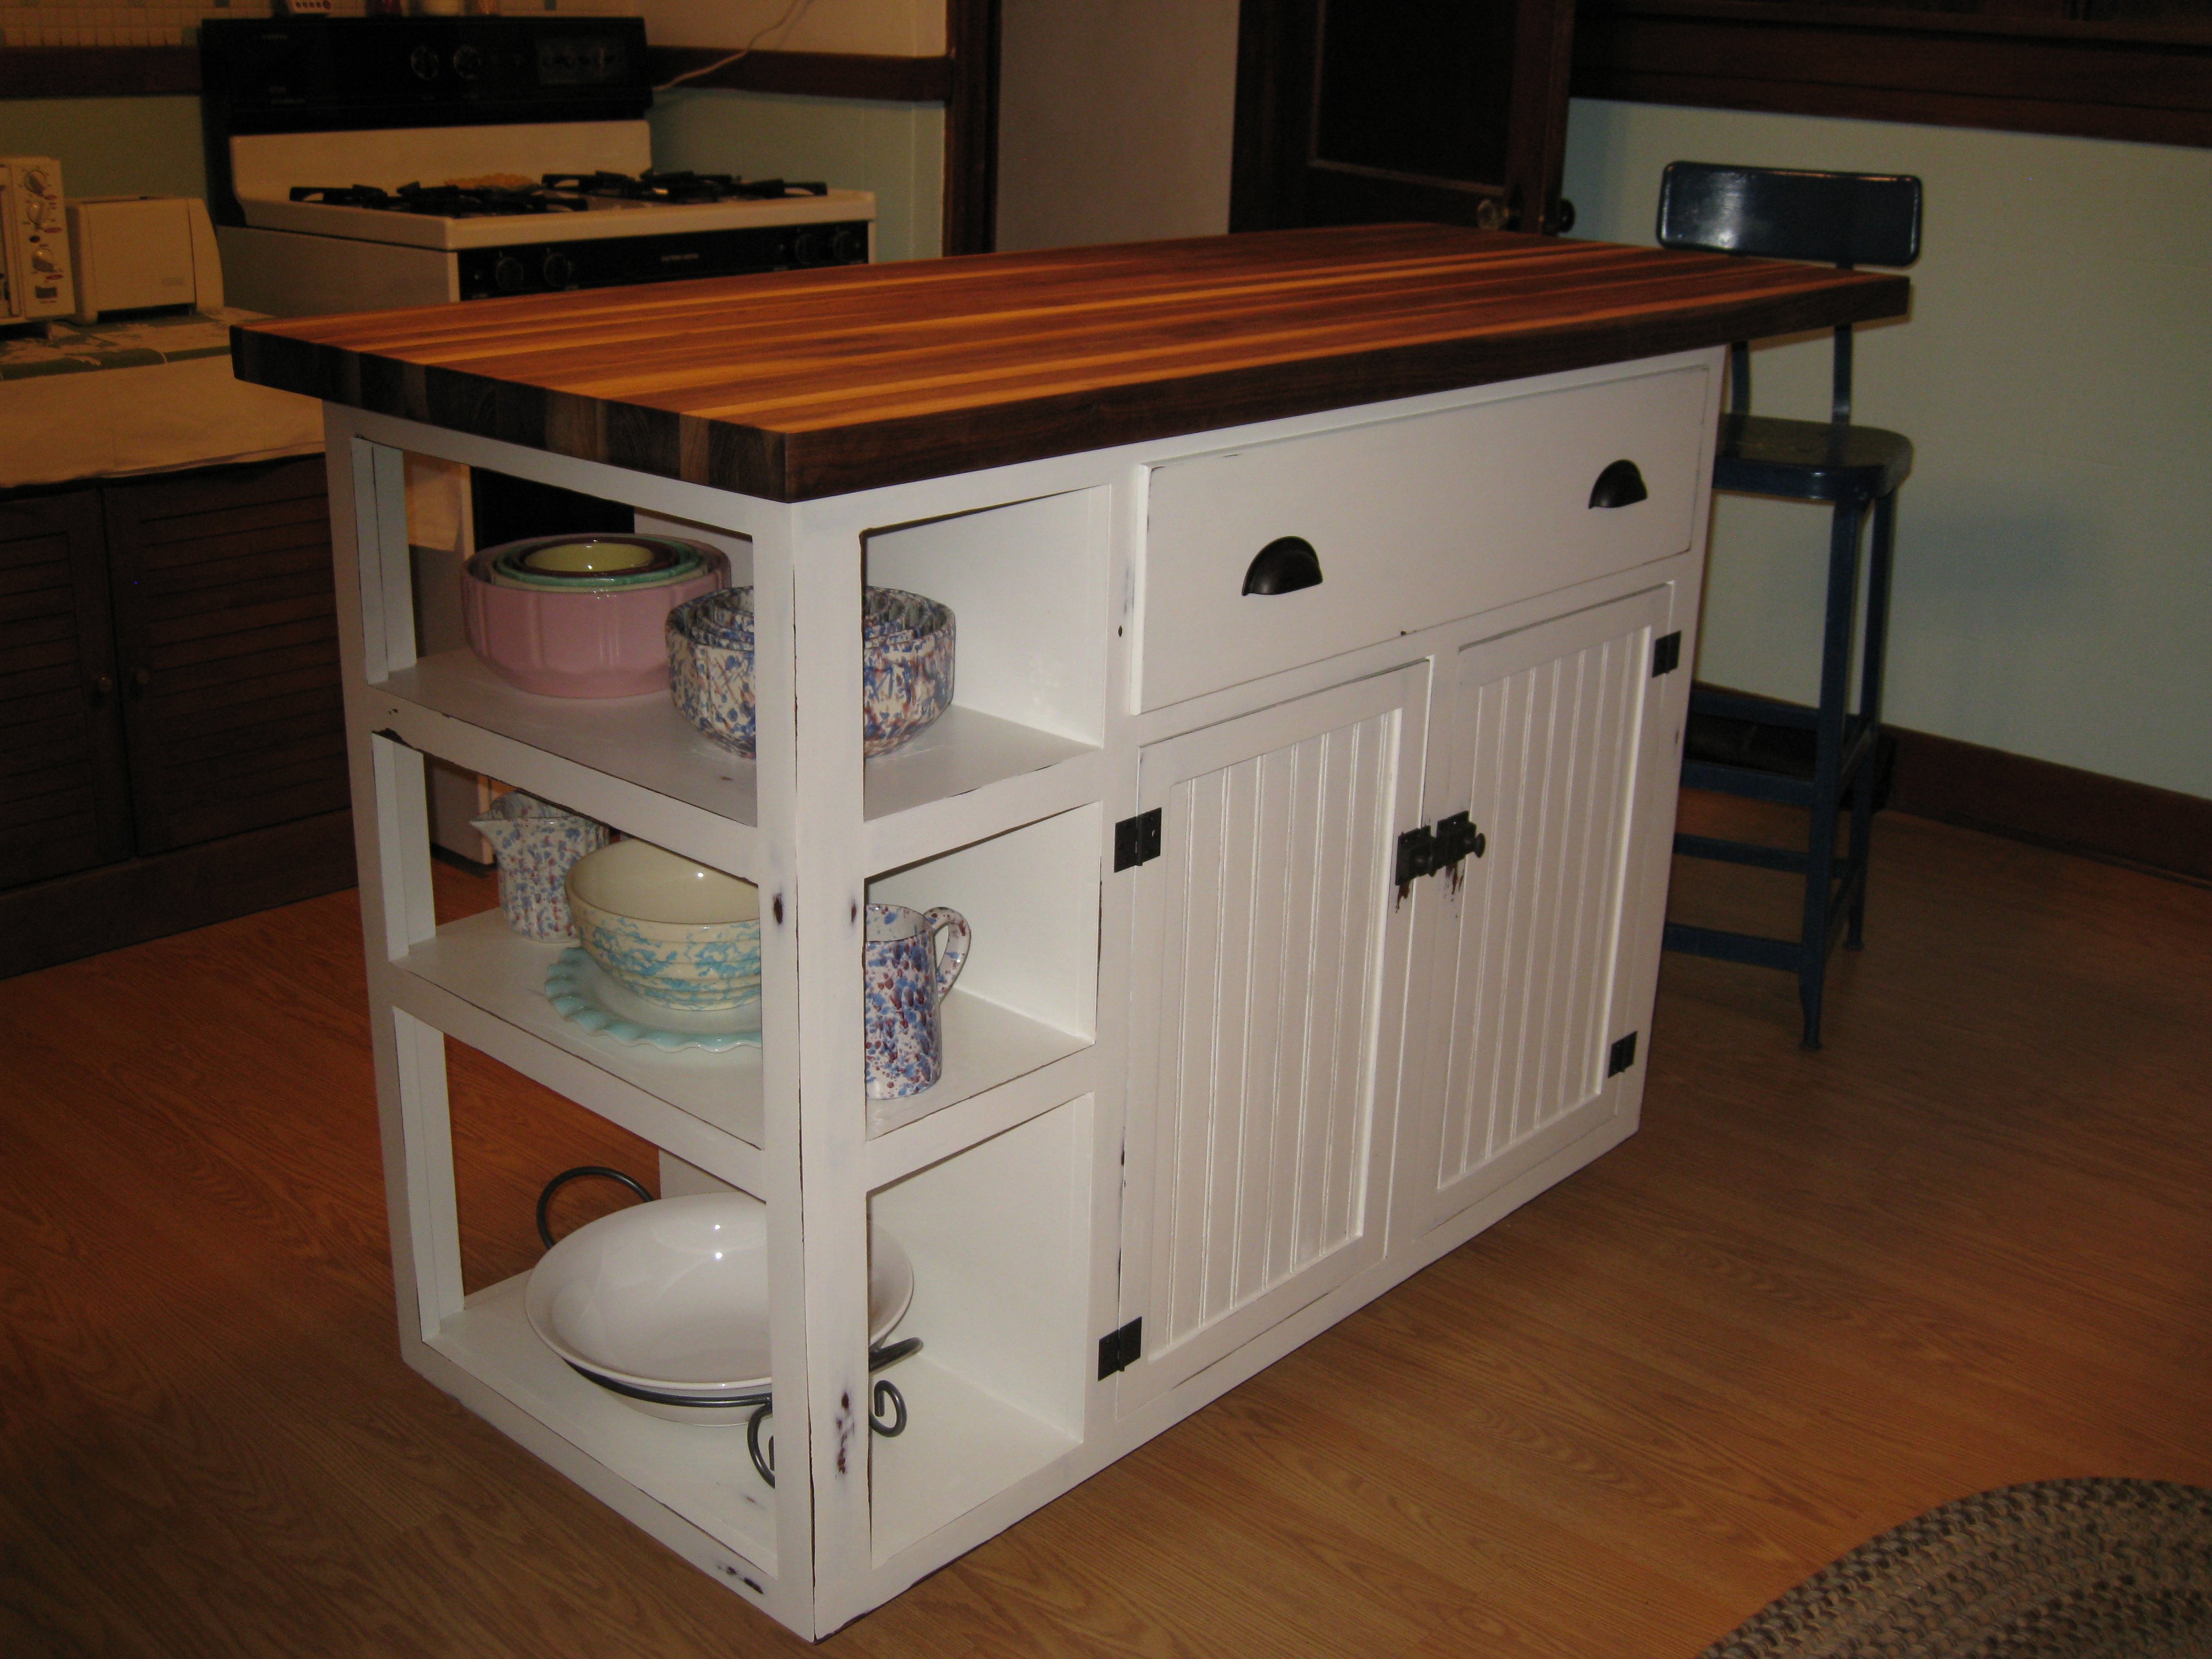
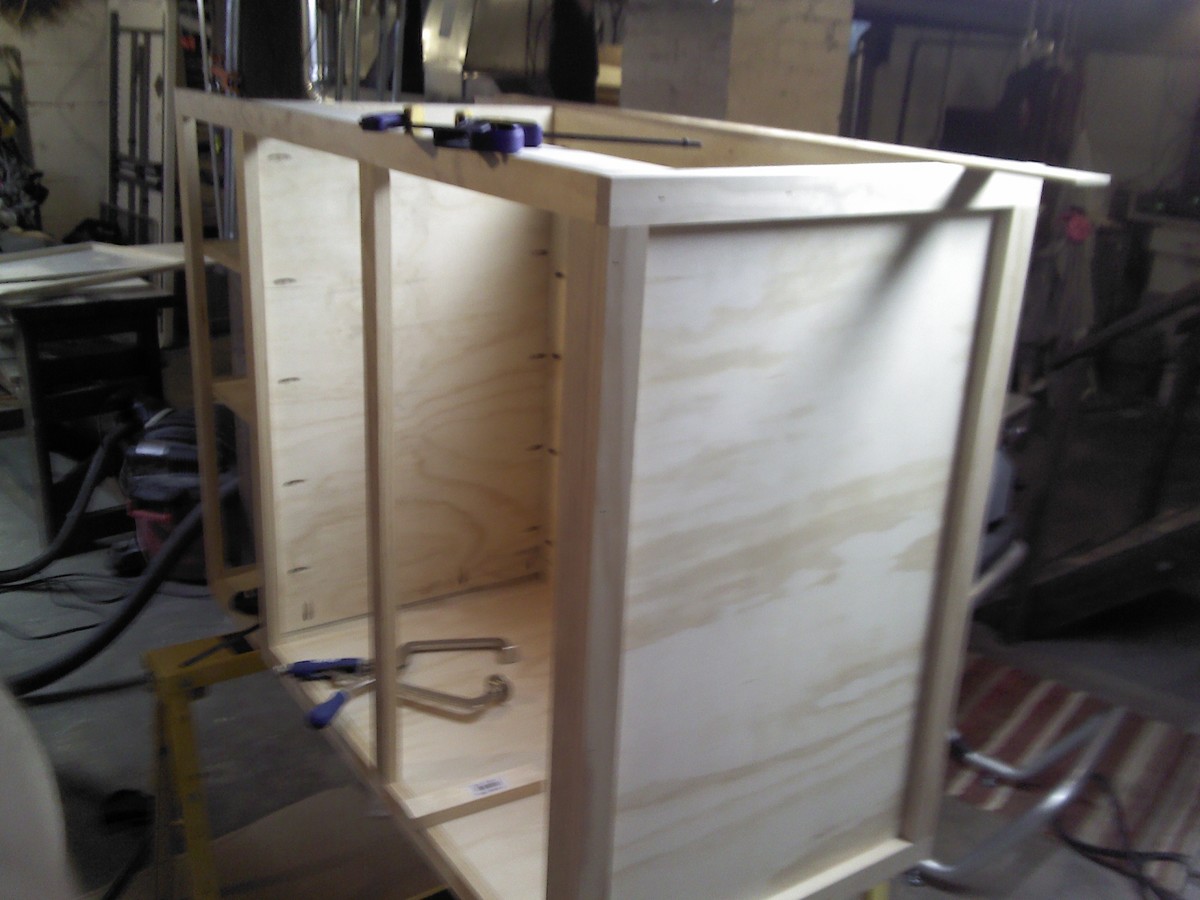
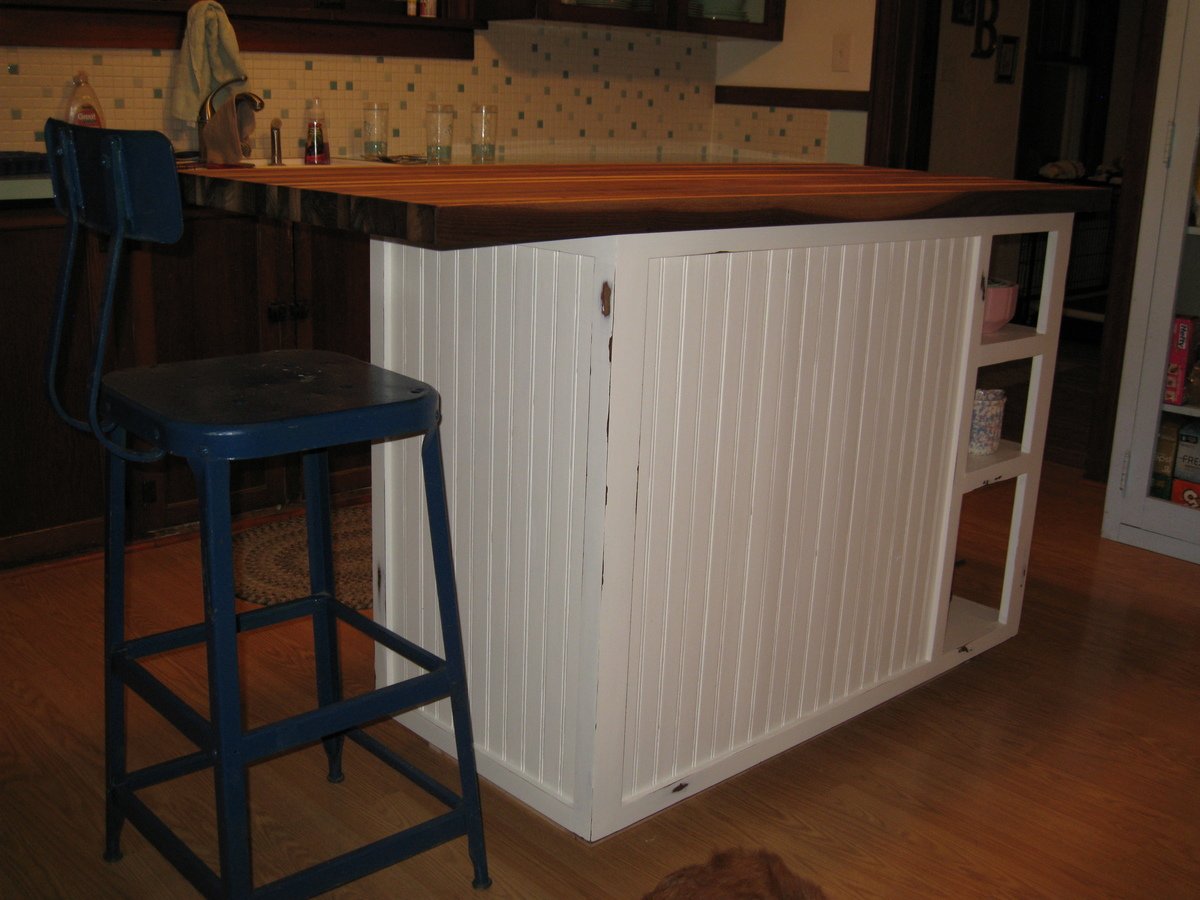
I built this island using Ana's base cabinet plans. I simply added a face frame to all the sides because they are all visible. My wife drew up the plan that includes open storage at one end and an overhang at the other to provide room for a stool. We bought the butcher block top online. It comes unfinished, so we had to sand it down smooth and treat it with mineral oil.


Wed, 09/05/2012 - 09:55
I'm in love....this is gorgeous! You both should be very proud of how it turned out. Now, if only my kitchen weren't so small that I can touch both opposite countertops with my arms spread out.....I would build this in a heartbeat! :P
Thu, 11/06/2014 - 09:25
As Kathy in Pittsburgh said, .."this is gorgeous!" I too would be building this if my kitchen were nearly large enough to accommodate it.
Thanks for posting this, it gives me inspiration.
Mark in Portland, OR

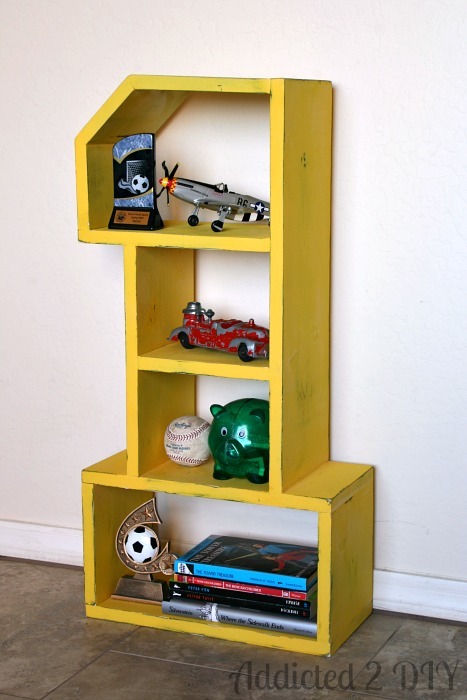
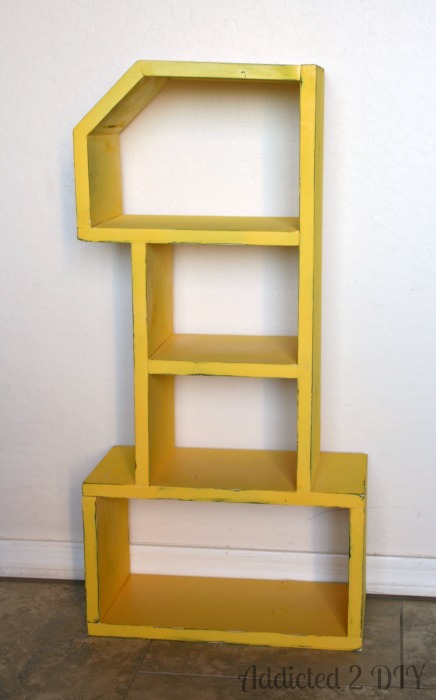
I built this PB Teen-inspired #1 shelf for my oldest son's bedroom. He has an all-star theme going on in there, so I knew this would be perfect for him. I modified the plans a bit and used standard 1" boards, rather than plywood. I am planning to hang it on his wall and I wanted to be able to have a sturdier shelf to do so.
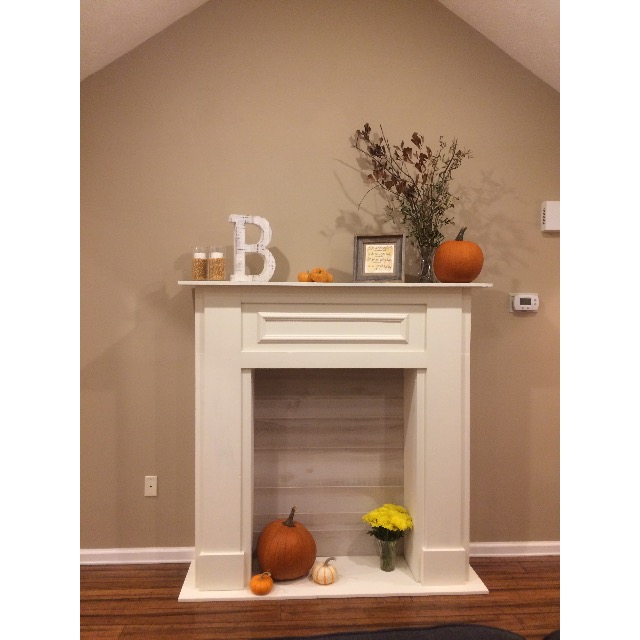
I love how my fireplace turned out!! It took a whole day to make and I did end up scaling the design up to make it a lot bigger. Love how it turned out!!
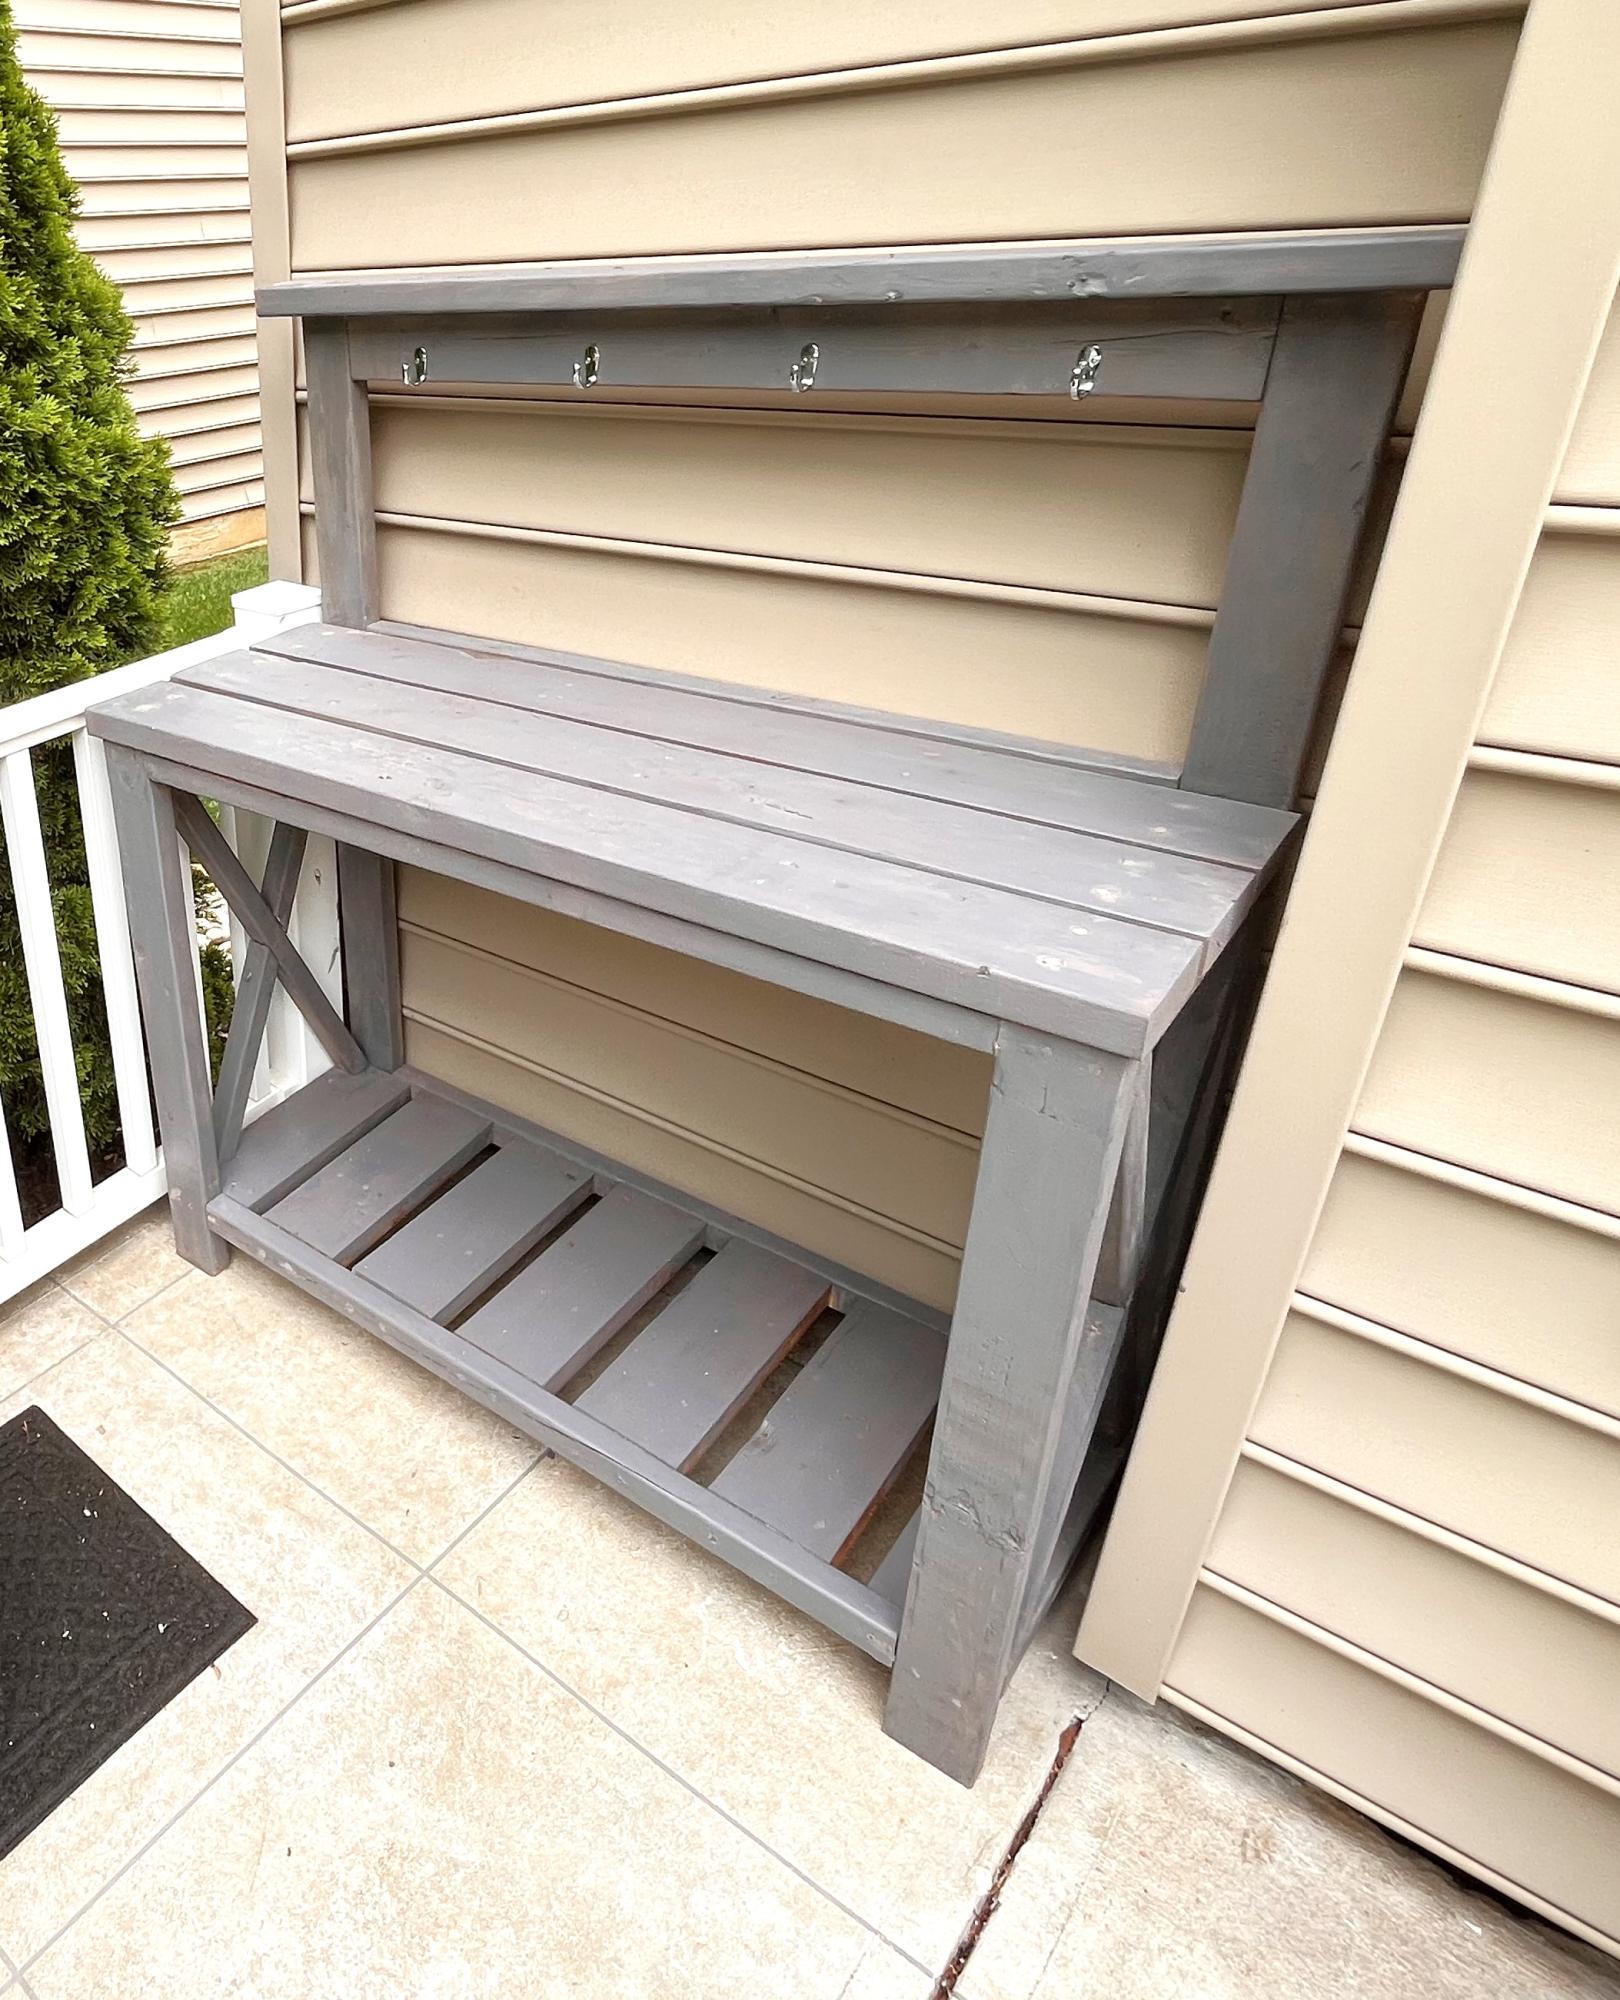
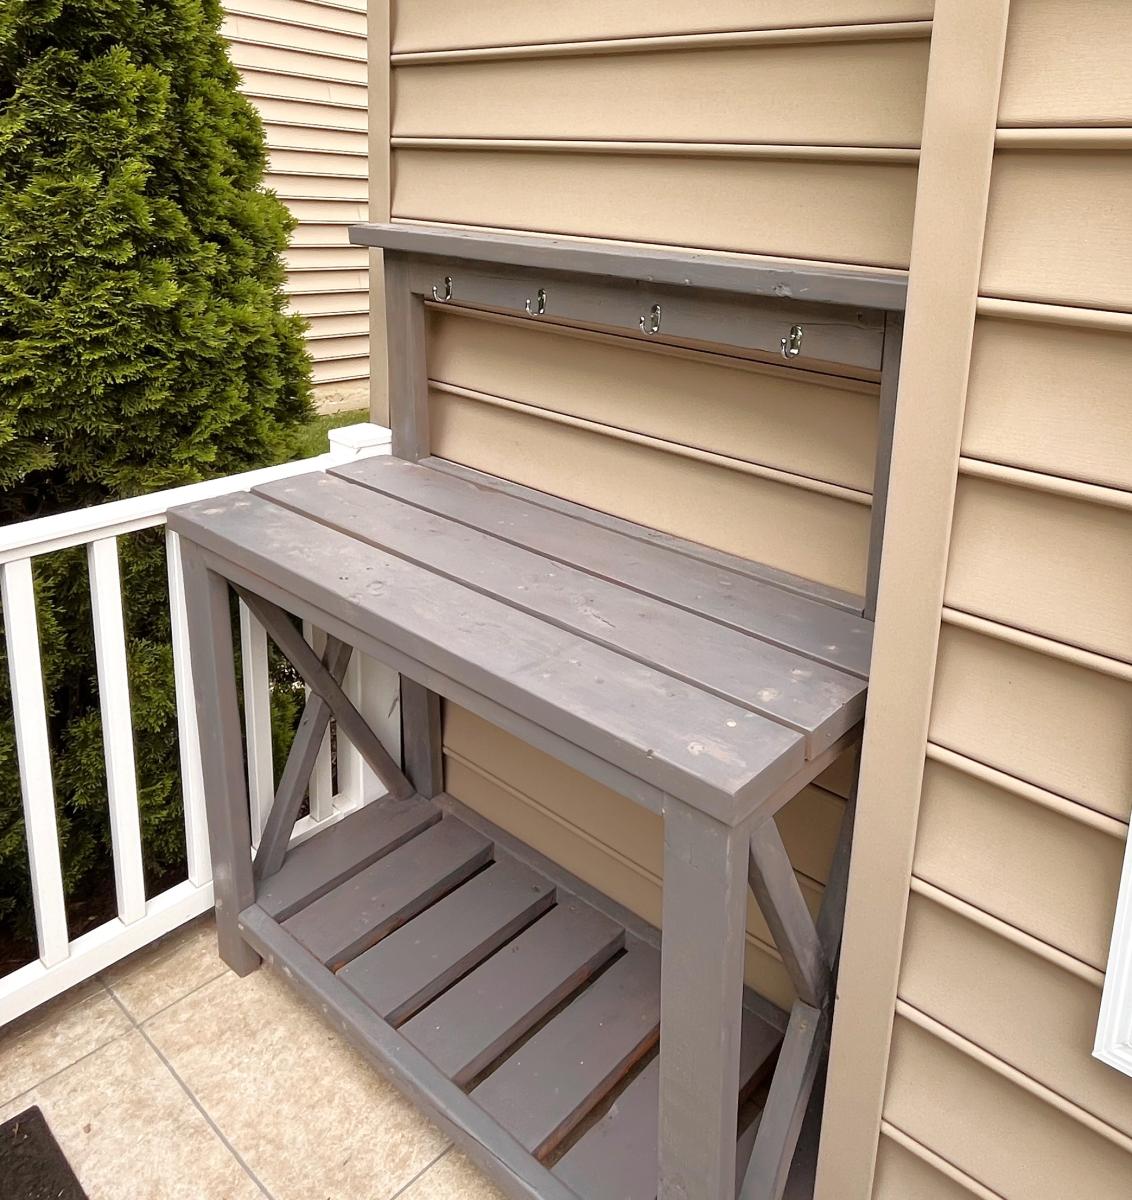
Enjoyed making the potting bench
Thanks for the plans.
Tom Schoeninger
This is not my first build, as I built some tables for my shop using various plans.
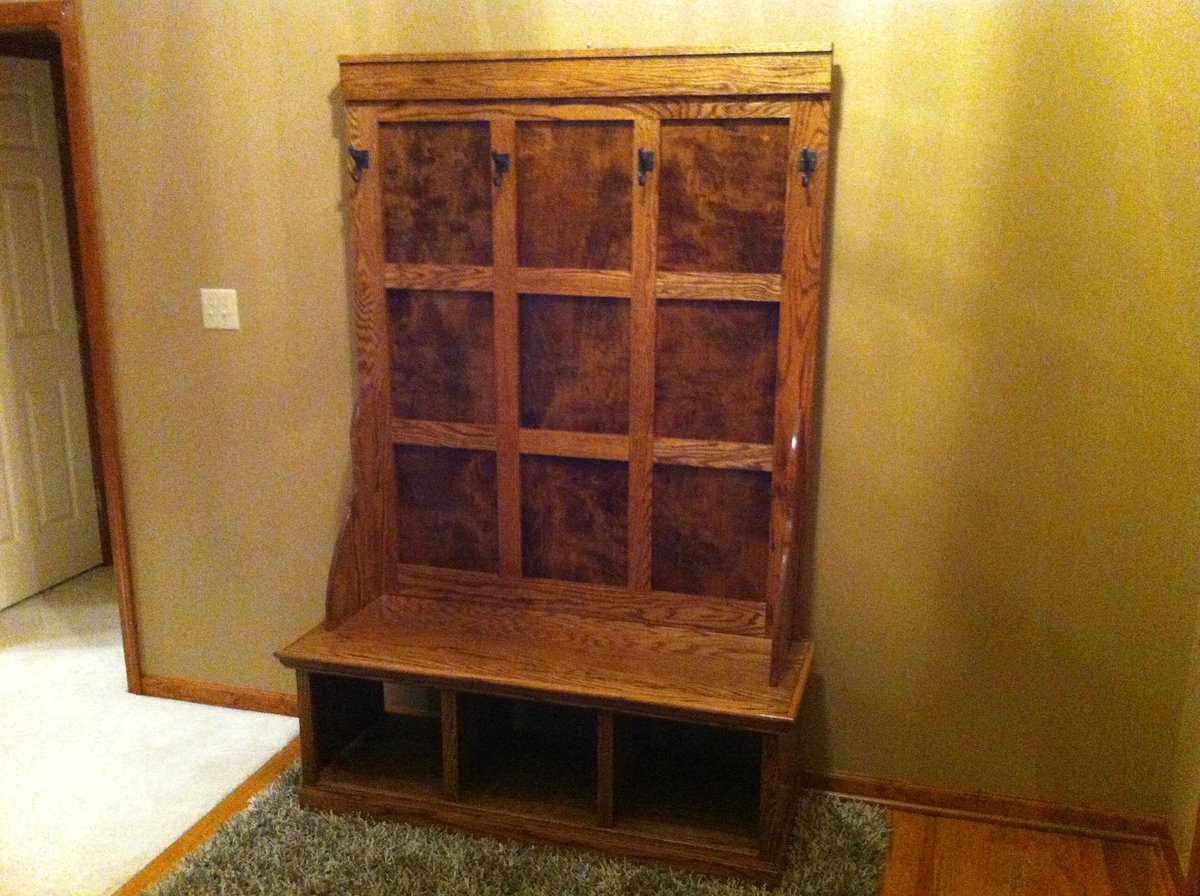
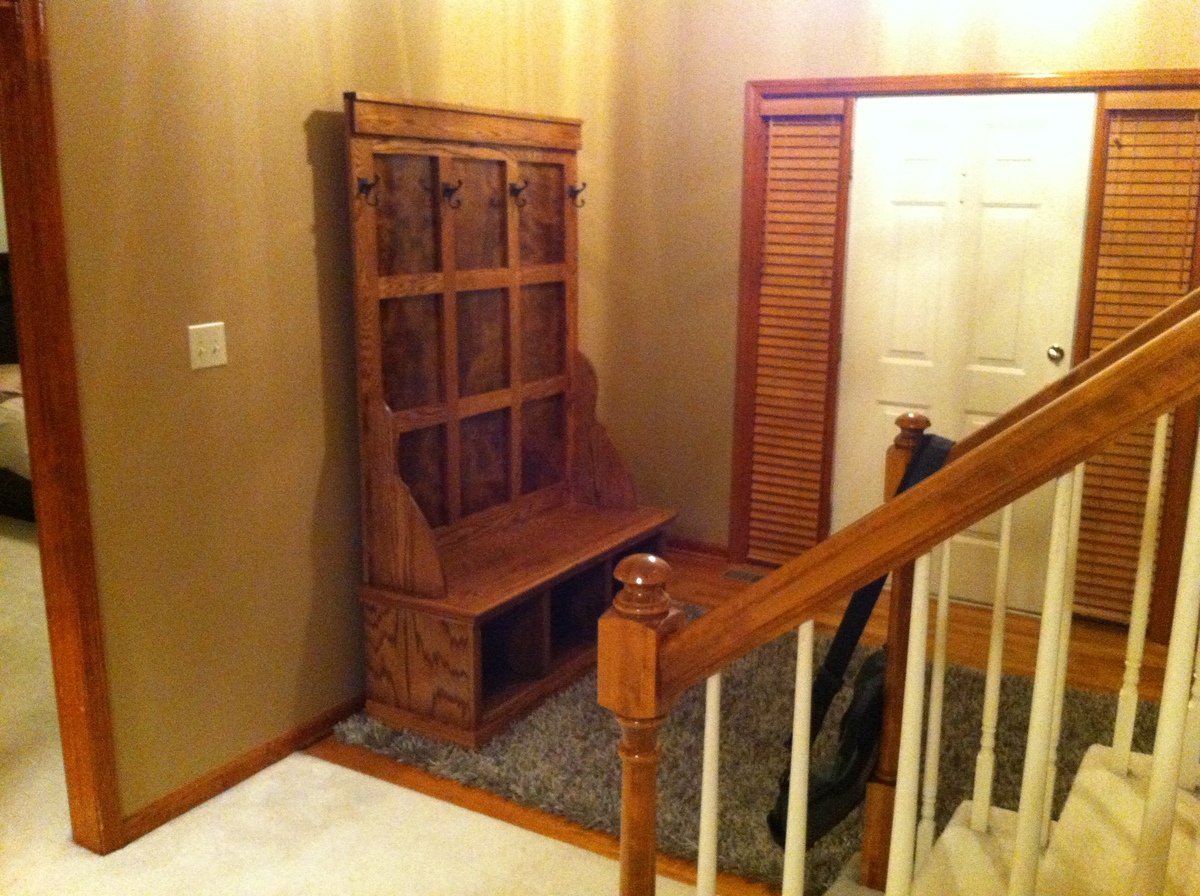
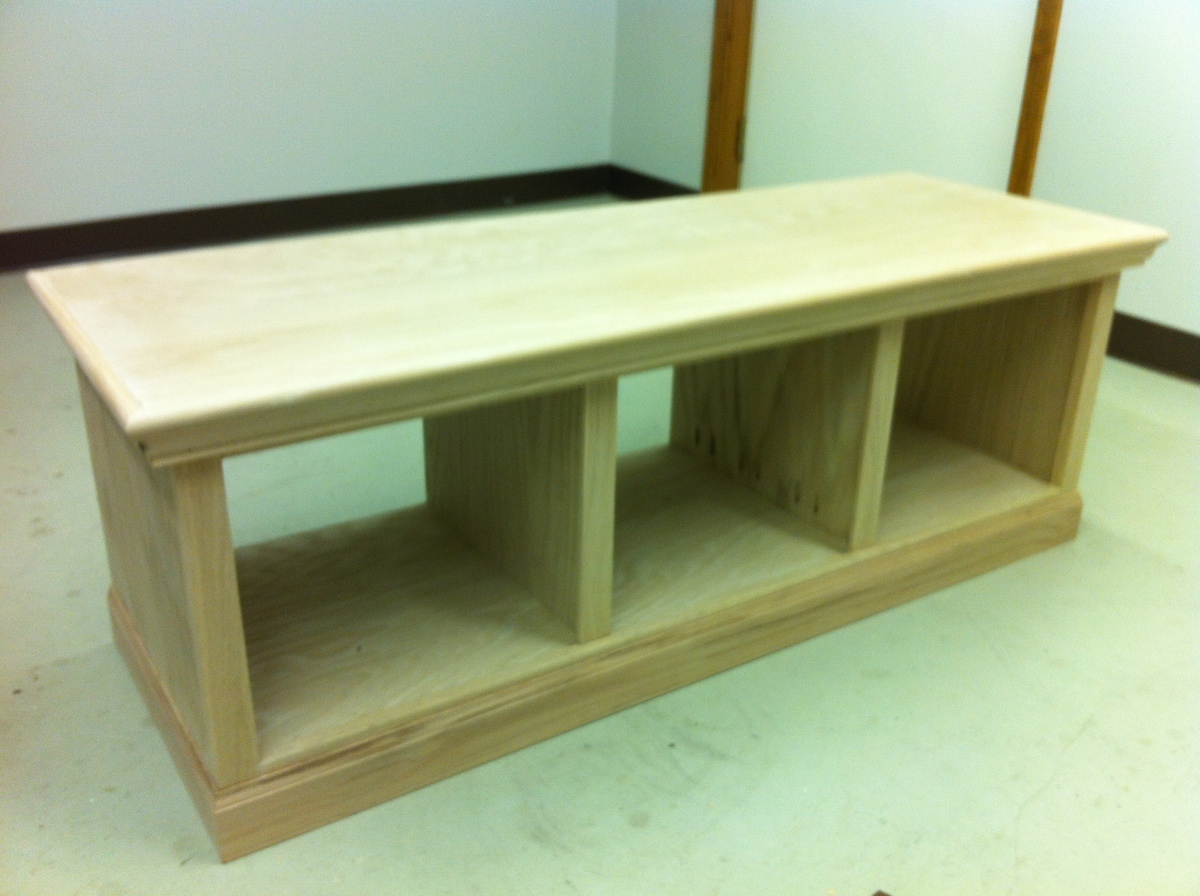
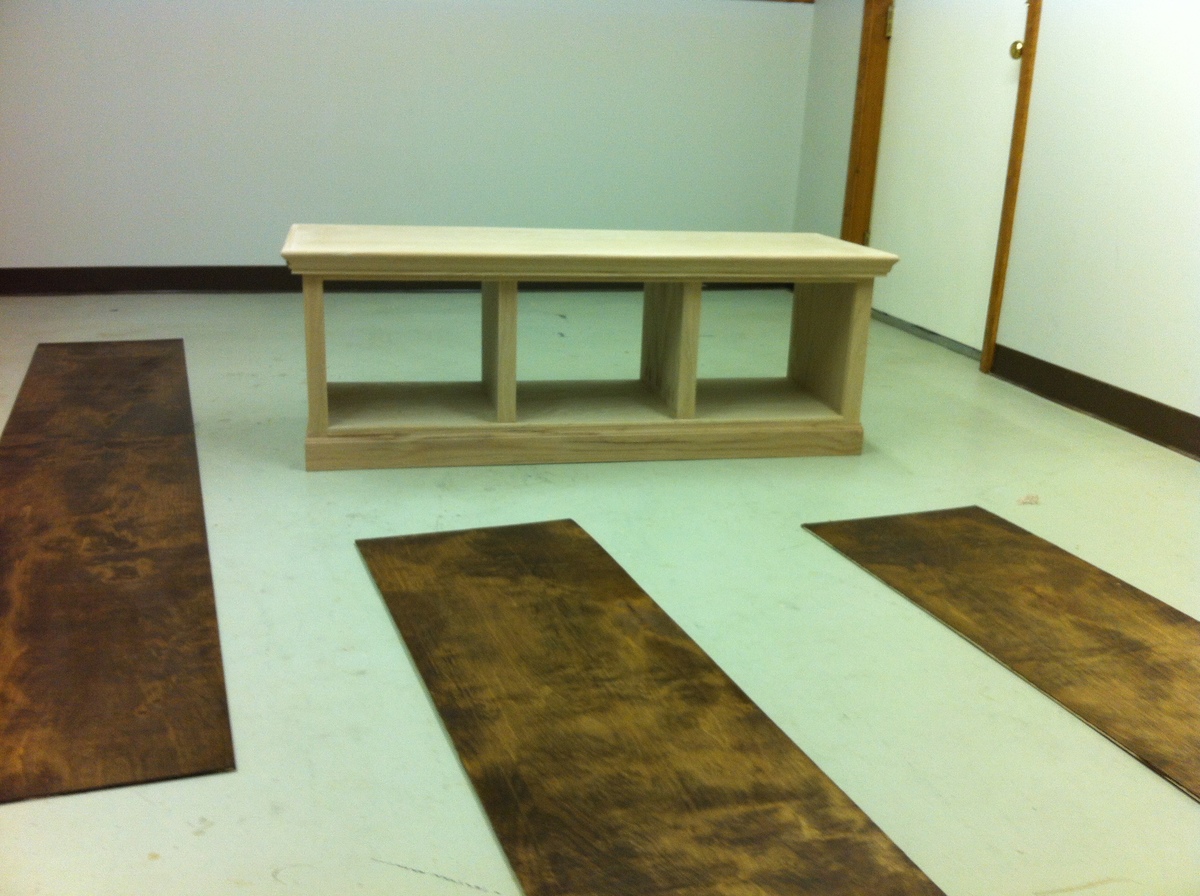
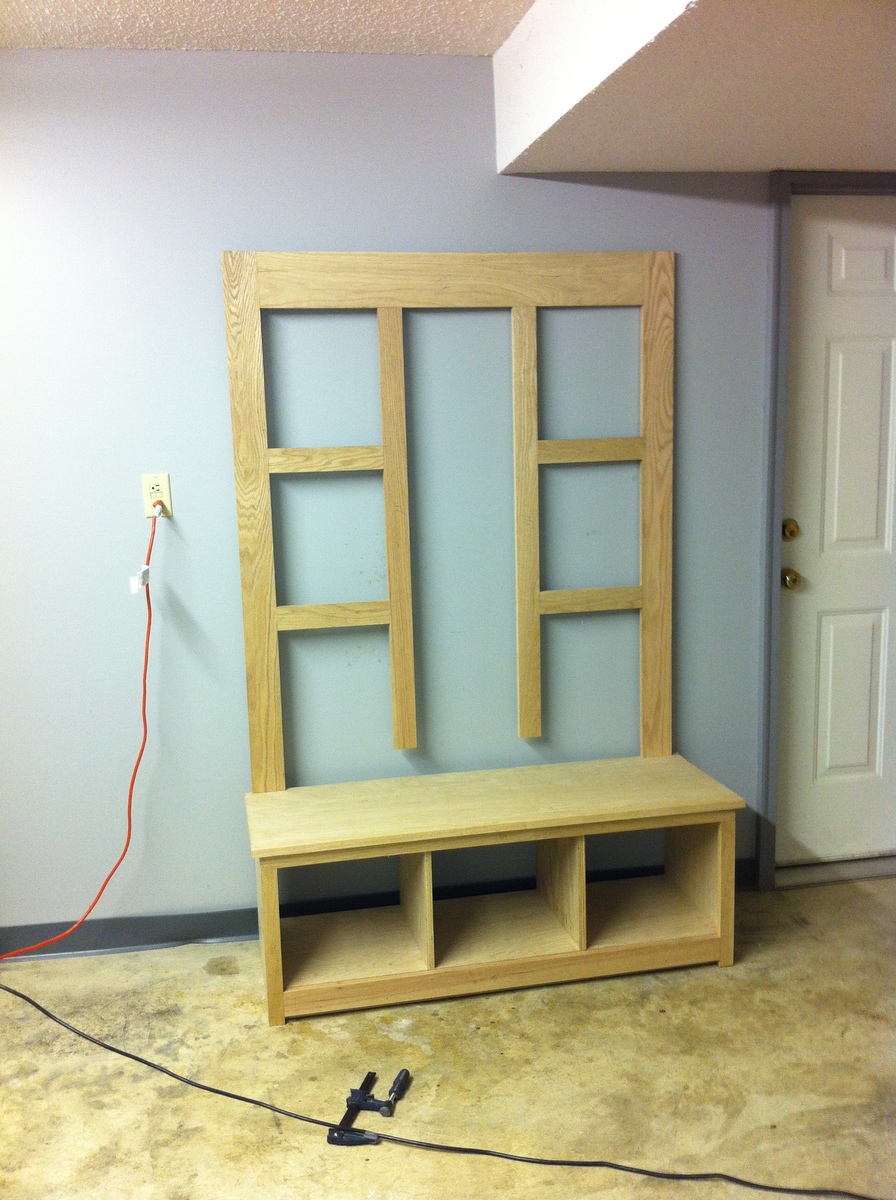
Anyway, here it is, the hall tree! I changed up the trim a bit. So much of me went into this, and a couple of times I pulled out the crowbar and started over on the moulding and on the cross supports on the top because I was a bit of a perfectionist... something I need to learn to control with this new found hobby.
Let me know what you think! Already the picture have about 50 likes on my facebook and people want me to build them one! I think I'll just send them the link... !!!

Sat, 04/06/2013 - 09:03
What did you use for the back plywood panel? Oak? I'm having difficulty finding oak plywood in anything except 3/4", and it looks like there's a contrast between wood types. Is that just a difference in stain or difference in wood?
Thanks!
Thu, 10/16/2014 - 08:35
I love your version. I really like the moulding that you put on the top piece of the bench. Since there is a lip on the top piece (overlaps the bottom section of the bench), how did you attached the moulding so that the top of it lays flat and flush with the top piece? I assume that you made some sort of hidden spacer between the lip and the moulding. Is that correct?
Also, how did you attach the back plywood to the decorative cross beams, finish nails?
Thanks for sharing!