Hi everyone and Happy Monday!
Sorry about getting my latest post out to you so late this weekend (I aim for Friday) - our new smokehouse!
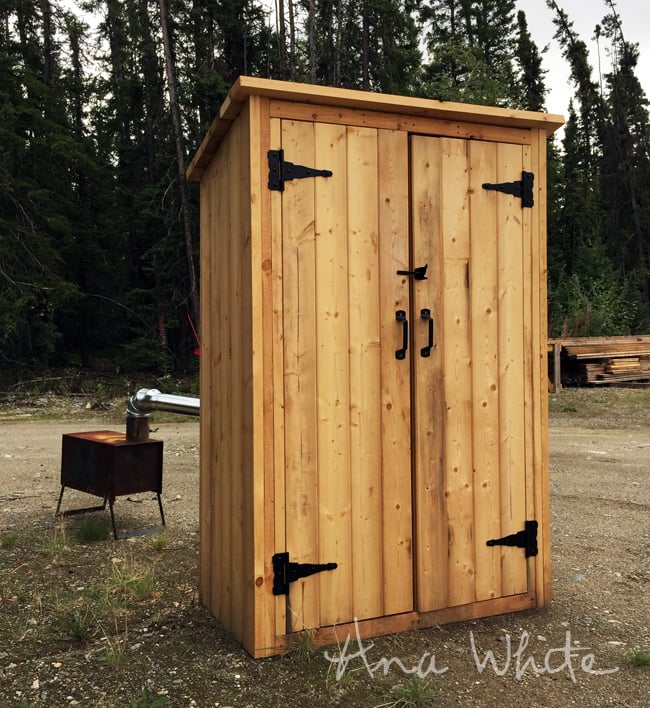
It's just a wood shed or outdoor closet - with a stove pipe plumbed into the back! We've been enjoying authentic smoked salmon strips, and plan on packing school lunches with them. Make sure you check out the smokehouse plans here - even if you don't need to process salmon, it would make a perfect outdoor shed or storage closet.
We are so thankful to live in a place where much of our diet is wild and harvested or gathered.

That's why my post was so late this weekend - the sun was shining down at our cabin on the lake, so we took a few days off to harvest wild Alaska blueberries.
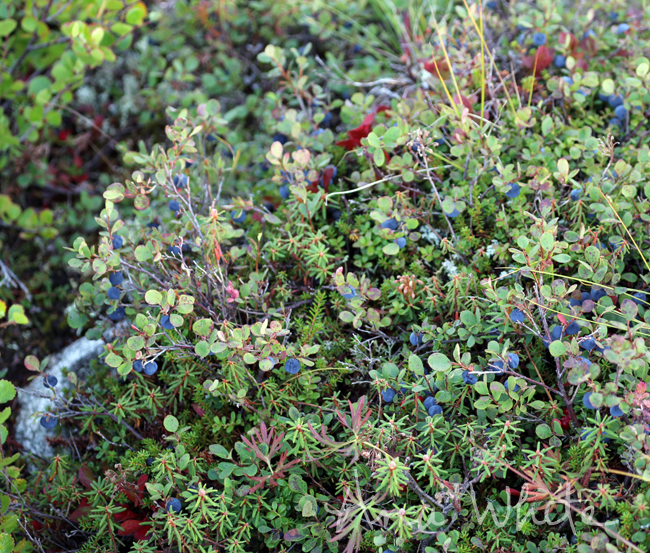
Blueberries have been a little harder to find this year in town, but in the mountains, they are as thick as ever.
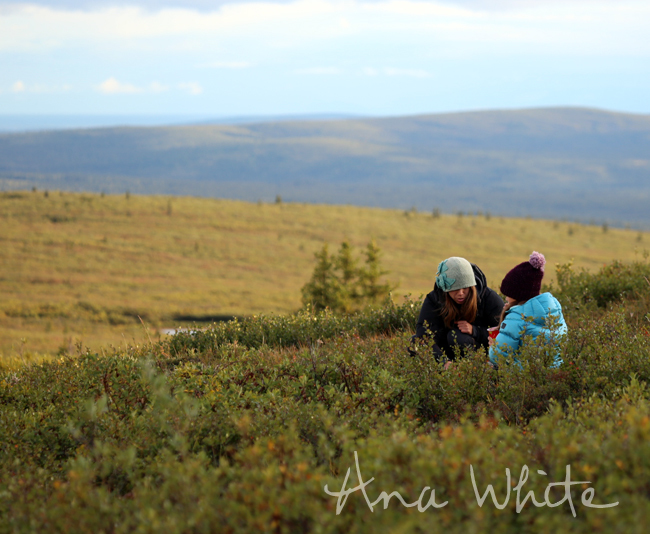
Grace has turned into quite the little berry picker.

It took me a bit to realize why the baby was complaining so much. Apparently, no one took his mittens off so he could pick. That would be me.

Not much hope right now for him adding to the berry bucket,
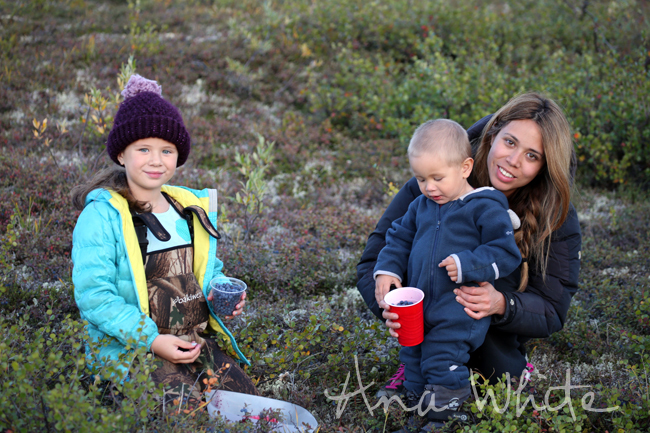
But there will be blue diapers.
It's gotten quite chilly up in the mountains, and we are all bundled up in full down gear. Winter is coming.
After evenings of picking berries in the mountains, we returned to a warm, cozy cabin. We so love our cabin!
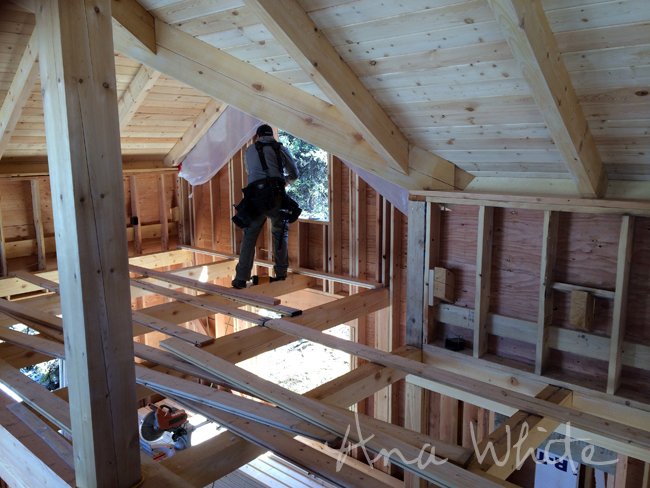
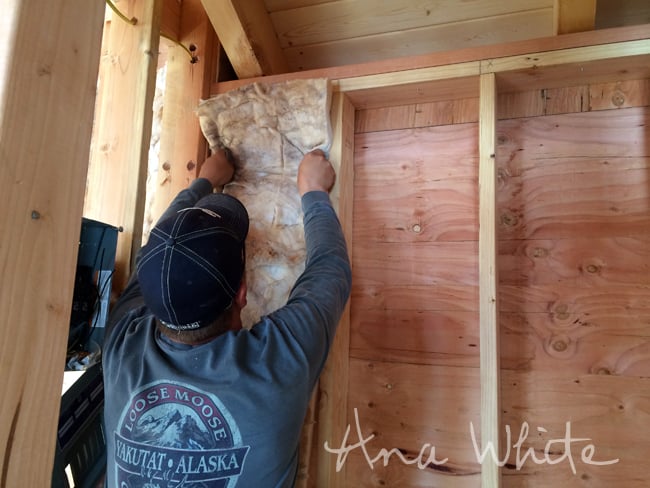
In our last cabin post, we showed you how we finished the upstairs loft floor (which is also the downstairs ceiling). Did you notice those walls? They need insulating!

We opted for 2x6 wall construction, with batts of fiberglass insulation in between the studs. Insulating isn't difficult to do -

If you frame your walls to a standard 16" or 24" on center pattern, the insulation batts come in those widths. So all you have to do is cut the batts down in length to fit the wall cavities (actually, if you frame your walls to a standard 8 foot height, you don't even need to cut the insulation, but our walls are taller).

The batts then just get placed between the studs,

And fluffed out for maximum insulation.

It's important to do a good job insulating. We wired the cabin for lights and some outlets, so there is wiring running through walls. To insulate on either side of the wiring, we split the insulation appart,

And tuck insulation behind the wire,

And then insulate over the wire on the front.

In walls, there's going to be irregular areas, so we cut and stuffed insulation in there -

We even stuffed insulation inside the window headers.

With three people working, it took a couple of hours to insulate the entire cabin.

After insulating, it's time for vapor barrier. We' already vapor barriered the roof, and have brought that vapor barrier down the wall, so the wall vapor barrier will lay over it for a full seal.

We use this nasty tar stuff over the studs in the walls where we apply vapor barrier. It's basically tar that never dries. The idea is when you poke screws or staples through the vapor barrier (for example when you screw drywall to the exterior walls), the tar will seal around the screw or nail and maintain your vapor barrier.

After the tar is applied to the studs, we cut vapor barrier to fit.

And then placed it on the studs in the walls. Where ever there is a seam, red vapor barrier tape is used to maintain the seal.

The vapor barrier is stapled on the walls. On the roof eaves inside, we will go back and spray foam in there.

We are ready for the final wall finish material!!!!
But before we get to that, we have a huge opportunity to do something that will save us a ton of time and work.
Any guess what that might be?
Have a great one!
XO Ana + Crew
Comments
gustavowoltmann@1996
Sun, 03/28/2021 - 03:07
This is a very interesting…
This is a very interesting blog to be read. Yoga Teacher Gustavo Woltmann.