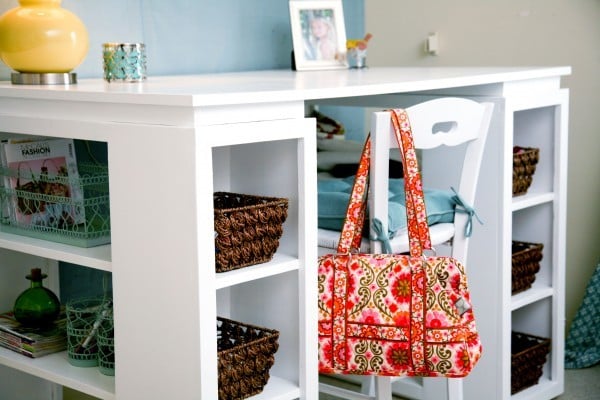


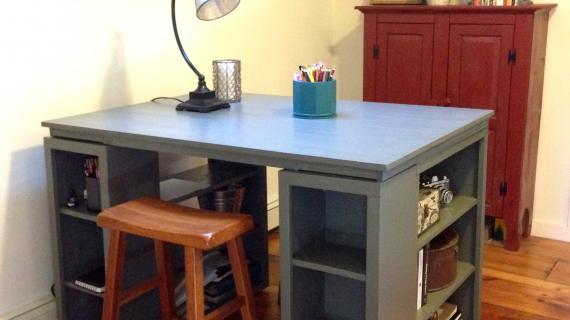
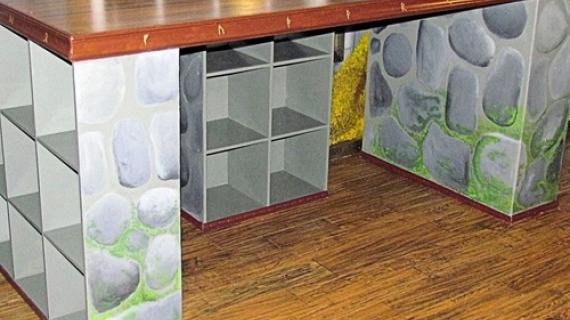
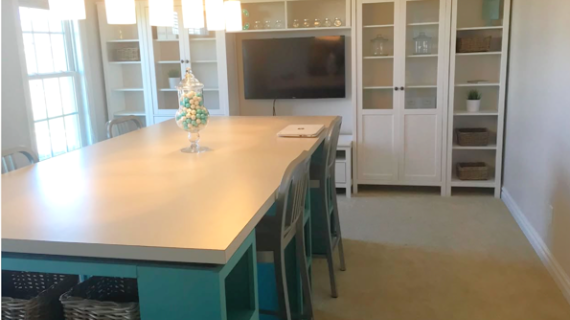
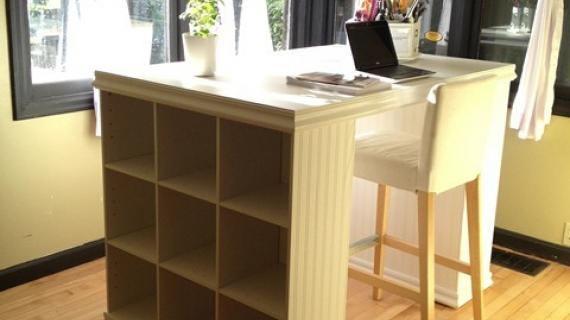
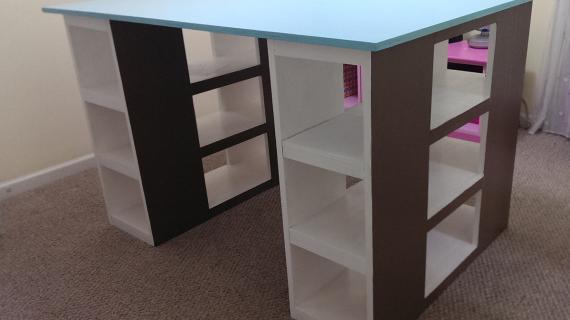
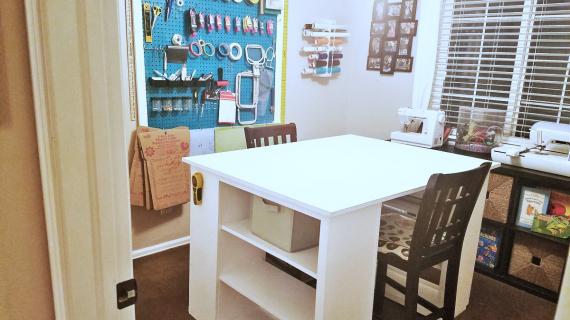
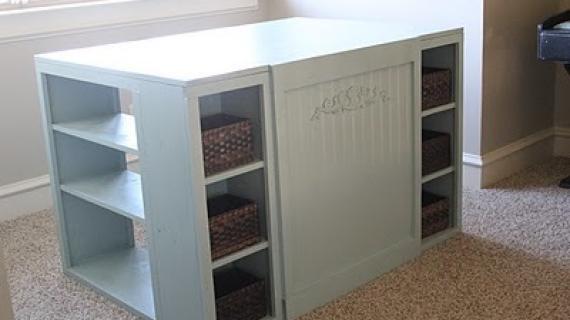
Build your own project table or craft table with free plans from Ana-White.com
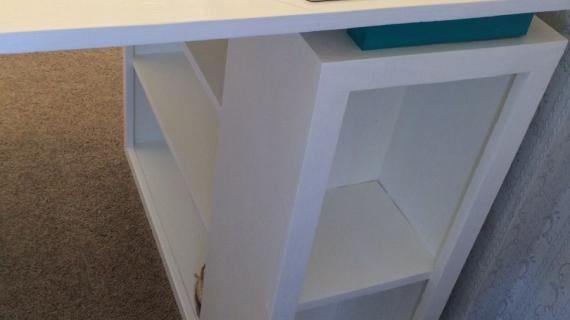
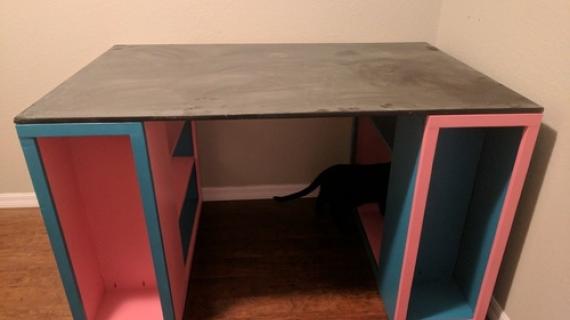
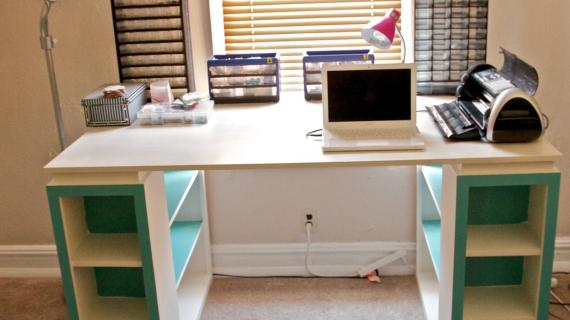
Features lots of open storage, a large desktop perfect for crafts, seating on both sides, and a modern design.
Step by step plans with diagrams, shopping list and cut list, all free!
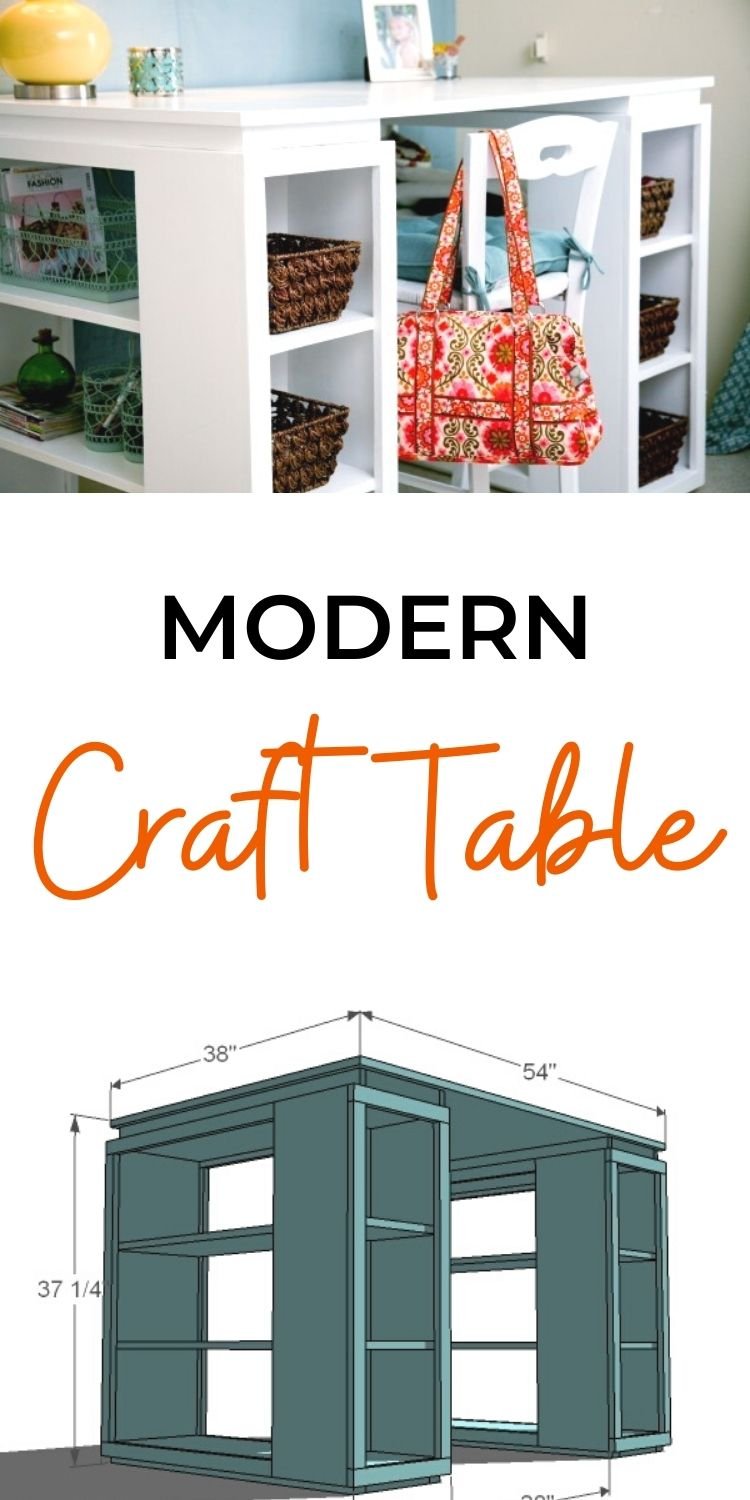
Pin For Later!
Preparation
- 1 – Sheet of 3/4″ Plywood or MDF (Can use 1/2 sheet, tabletop will be 6″ narrower) for the tabletop
- 3- 8′ long 1×12 (Tops and Small Shelves/Two Large Shelves and One Bottom)
- 1 – 12′ long 1×12 (Ends, Dividers)
- 1 – 12′ long 1×10 (Small Bookshelf Sides)
- 7 – 8′ long 1×2
- 2 – 8′ long 2×2
- 1-1/4″ brad nails
- 2″ Screws or 1 1/4″ Pocket Hole Screws
- Wood Glue
- Finishing Supplies
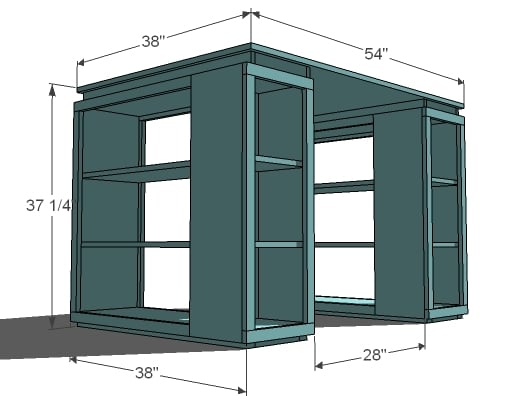
Cut List for Project Table (Two Bookshelf Bases and One Top)
- 2 – 1×12 @ 37 1/4″ (Bookshelf Tops)
- 2 – 1×12 @ 33 1/2″ (Bookshelf Ends)
- 2 – 1×12 @ 32″ (Bookshelf Divider)
- 2 – 1×12 @ 36 1/2″ (Bookshelf Bottom)
- 4 – 1×12 @ 27″ (Large Shelves)
- 4 – 1×10 @ 34 1/4″ (Small Bookshelf Sides)
- 4 – 1×12 @ 8 3/4″ (Small Shelves)
- 8 – 1×2 @ 27 3/4″ (Large Shelf Side Trim)
- 8 – 1×2 @ 31 1/4″ (End Trim)
- 4 – 1×2 @ 13″ (Small Shelf Top and Bottom Trim)
- 4 – 2×2 @ 36 1/2″ (Floating Base Sides)
- 4 – 2×2 @ 8 1/2″ (Floating Base Ends)
- 1 – 3/4″ Plywood or MDF @ 38″ x 54″ (Top) (For 1/2 sheet of plywood, top is 38″ x 48″)
- 4 – 2×2 @ 10″ (Floating Base Ends)
- 4 – 1×2 @ 36 1/2″ (Floating Base Sides)


Instructions
Step 1

Begin by measuring and cutting all your boards. Mark out all joints before any assembly. If you are using pocket holes, drill all pocket holes. If you are using screws, drill pilot holes. Attach the pieces with 2″ screws and glue or 1 1/4″ pocket holes screws and glue. Keep outside edges flush. You can optionally attach the shelves (orange) with shelf pins to create adjustable shelves
Step 2

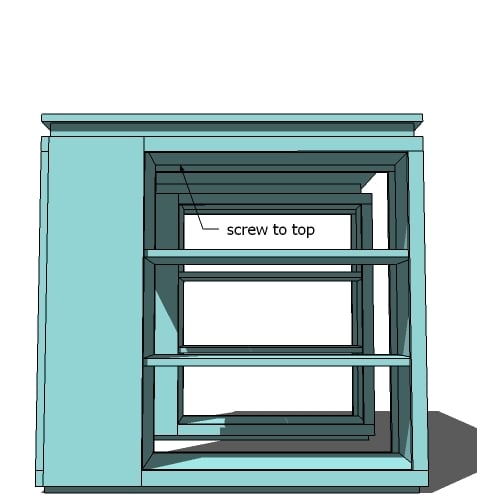
This is where that nailer would be handy. Attach with glue and 2″ finish nails the small bookshelf sides. Leave 3/4″ under the bottom and make sure you also attach to the center divider (Back of small bookshelf).
Step 3
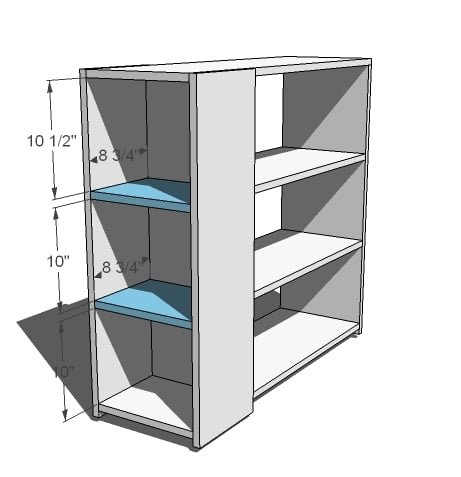
You can either place these shelves with shelf pins or use finish nails and glue to secure in place.
Step 4
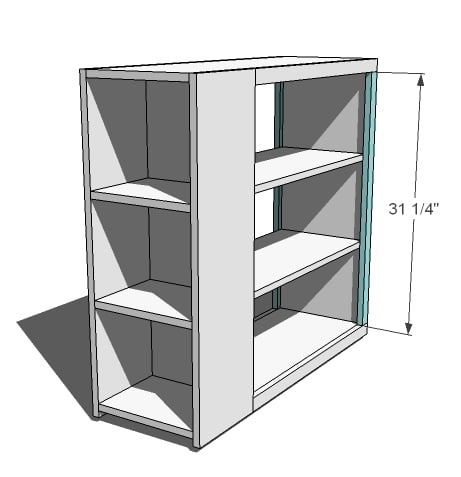
Attach the large shelf trim to the sides, keeping top edges flush, with 2″ finish nails and glue. If you are using a Kreg Jig™, build a face frame separately, then attach with 2″ finish nails and glue.
Step 5
Step 6

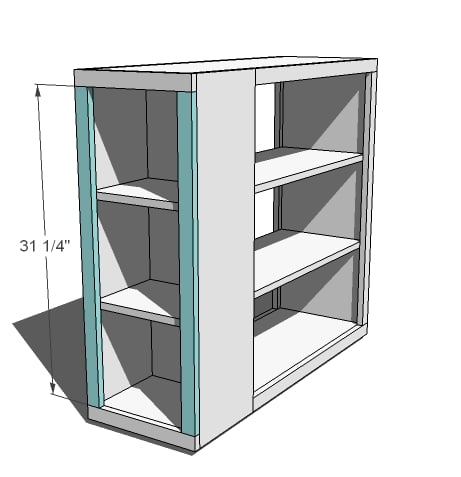
If you are using pocket hole screws, build your face frame separately, then attach with 2″ finish nails and glue. Otherwise, nail the trim on with 2″ finish nails and glue.
Step 7
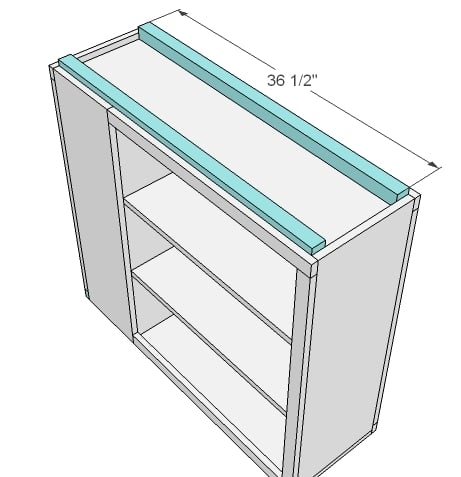
Attach the small shelf side trim with 2″ finish nails and glue.
Step 8
Use 2″ screws and glue to attach the floating base sides to the bottom of the bookshelves.
Step 9
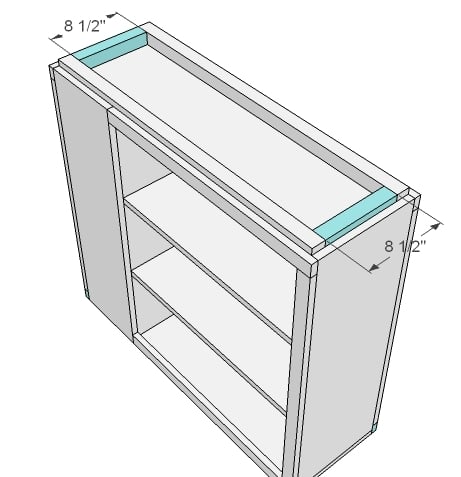
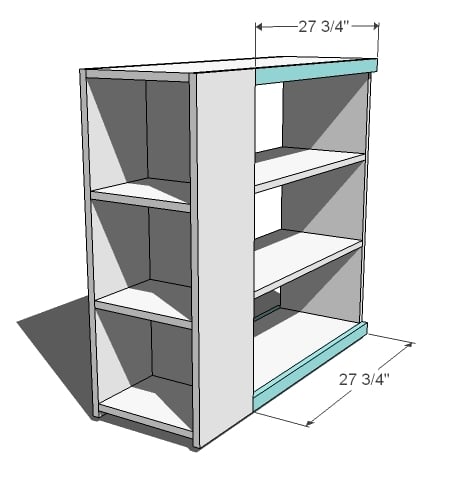
Attach the floating base ends to the bookshelf with 2″ screws and glue.
Step 10

Use 2″ screws and glue to attach the floating base ends to the underside of the tabletop. See measurements above for placement.
Step 11

Attach the floating base sides to the ends with 2″ finish nails and glue.
Step 12
From the underside of the bookshelves, screw into the floating base with 2″ screws. You may wish to finish the edges of the tabletop with edge banding or nosing for a more finished look. Finish as desired.


Comments
svandagriff
Sat, 03/09/2019 - 14:28
PDF LINK NOT WORKING
Here is the error message.
TCPDF ERROR: [Image] Unable to get image: http://ana-white.com/wp-content/uploads/2010/09/Mod-modular-craft-table…
kaprince
Sun, 09/15/2019 - 17:29
Craft Table
Craft Table! Much needed.
Millie76
Tue, 08/18/2020 - 16:40
Love this Craft Table!!
I have wanted a large crafting table for awhile to make laying and cutting out sewing patterns and fabric easier than having to do it on the floor. I just finished this and it is so amazing. I had a great time creating it. I did substitute locking casters instead of the floating base so I can easily move it within my craft room for when I need some extra space. Thank you for sharing your plans. I will be making others as the plans are easy to follow.
Freighter_Tack
Mon, 08/24/2020 - 17:35
Dimensions
I dont understand the shopping list section, I don't know if It's because I use metric, but i cant tell what's quantities and what's dimensions. Sorry to be a bother.
irony07
Tue, 12/08/2020 - 15:00
Cuts don’t match plan
Why is the cuts not matching up to the amount of 1x12x8 foot with 3 of them. What am I missing?
irony07
Tue, 12/08/2020 - 15:00
Cuts don’t match plan
Why is the cuts not matching up to the amount of 1x12x8 foot with 3 of them. What am I missing?
irony07
Tue, 12/08/2020 - 15:00
Cuts don’t match plan
Why is the cuts not matching up to the amount of 1x12x8 foot with 3 of them. What am I missing?
irony07
Tue, 12/08/2020 - 15:00
Cuts don’t match plan
Why is the cuts not matching up to the amount of 1x12x8 foot with 3 of them. What am I missing?
irony07
Tue, 12/08/2020 - 15:00
Cuts don’t match plan
Why is the cuts not matching up to the amount of 1x12x8 foot with 3 of them. What am I missing?
Katie123456
Fri, 02/19/2021 - 11:47
Do your own measurements and cutlist!!
I know this is an old post, but I just want to say BE CAREFUL with the measurements provided in this tutorial - not all of them are correct. For example, the 1x10 boards on the sides of the bookcases would not sit flush with one side or the other as written. She lists 8.75" for the small bookshelves, which works mathematically if you look at the other measurements such as the top and bottom boards. However, f you look at step 2, it says to use a 1x10 to cover the 8.75" space plus the side of the 1x12 divider board (3/4"). The measurement in the post doesn't make sense either way, but the ACTUAL size of a 1x10 is 0.75x9.25, and the ACTUAL size of a 1x12 is 0.75x11.25. So, as written, the 9.25" (1x10) board ends up 1/4 inch short since is has to cover 8.75"+0.75". It will either not sit flush with the outer edge of the small bookshelf or the divider - either way, not good. I double checked all the math on this and later saw that another reviewer had also mentioned this specific issue years ago. To resolve this issue, I am making the top and bottom boards as well as the small shelves 1/4 inch shorter each. I will adjust any other pieces as needed; I will need to work through each step slowly and not cut all my wood at once as I had originally planned.
The opposite is true for the short trim pieces in Step 6 - they are listed as 13". If they are to sit flush, they should measure 12.75". They cover 2 of the skinny sides of 1x10s (0.75" each) and the flat side of a 1x12 (11.25"). 0.75+0.75+11.25=12.75. Luckily this would be a much easier issue to fix than the first one I caught.
You can use a cutlist tool online and/or make your own - I did not attempt to use the original list since I plan to modify these plans somewhat, but several people said they are wrong and at a glance, they look wrong. You will likely end up short on wood if you simply follow directions.
This looks like a beautiful craft table and I can't wait to build it. But, be very careful, do your own measurements, and don't waste valuable lumber. It's at a premium right now!!
zannej
Wed, 06/09/2021 - 00:39
suggestion of modification for sewing machine lift
I have what some may consider a crazy idea for a modification to this table. It would require either eliminating the shelves on the left or only having them more toward the back of the table so you can scoot over more to the left and have leg room). It would also require a thicker top.
The modification would allow people to have a customized sewing machine lift. I haven't sketched out the entire idea yet and figured everything out, but I saw the prices of the lifts and they were insane. But, for $20 you can get yourself an automotive scissor jack. You can get some cheap smooth metal rods to use as guides and make sure the platform (that extends to the sides under the table) has holes that the rods can go through to act as stabilizing guides. An alternative would be to make wooden boxes forming adjustable legs underneath with something to lock them in place. What I'm going for uses a cnc machine rail (metal rod welded to a flat piece with screw holes) and ball bearing glides. The jack can raise things about 14" (well, depending on the jack). You can put the glides on side or back (or both) to make the platform glide up and down smoothly. You can then attach some sort of hand crank to the jack to jack it up. In my case, I'm using an old wooden paper towel holder that broke. It was basically a wooden circle base with a hole in the middle for a 3/4" dowel. The dowel fell out of mine and I realized if I can use the center as the turning point and drill another hole off to the side, I can attach the dowel (after cutting it shorter) to the circle to make it work as a hand wheel crank. I also had a cheap silicone serving spoon with a hollow metal handle. Spoon part fell out and I found that the metal handle fits over the dowel like a sleeve and is loose enough to rotate.
Trying to figure out the best way to attach everything.
As for the sewing machine slot, I would have different insets that could go around the machine. If the machine is the same size at sewing level and at base then there would only need to be one for that. If it's smaller or larger would need a separate one if you wanted machine on top or slightly recessed so the surface lines up with the table. A solid piece could be put over when the machine is lowered all the way down-- leaving room to lay fabric out to cut and fold.
I hope this all made sense.