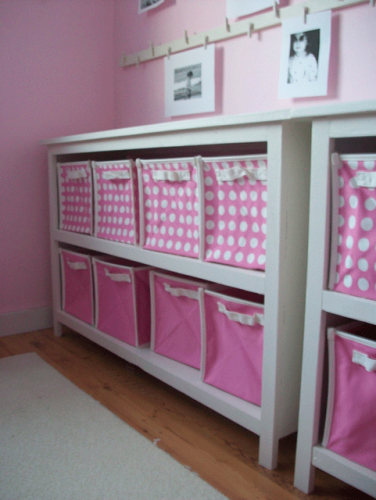
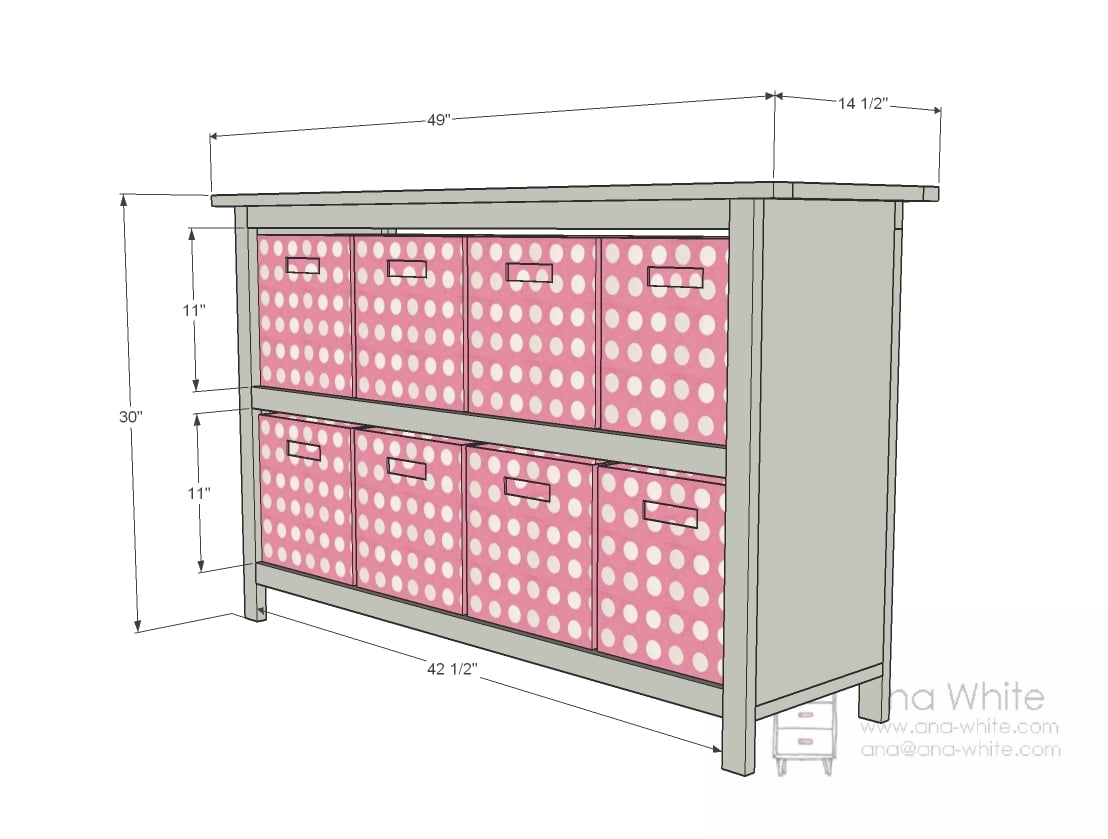
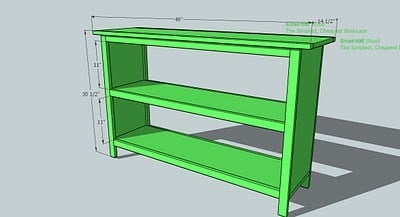
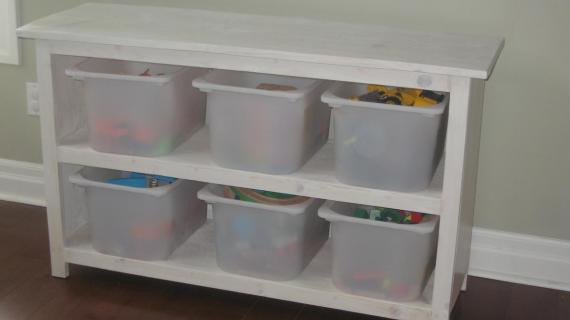
Here's a basic woodworking plan for a bookshelf built using 1x12s. The face frame on the front and back make up the legs and front and back overhangs. Free step by step plans from Ana-White.com
Pin For Later!

Preparation
- 2 - 1×12 pine boards
- 5 - 1×2 pine boards
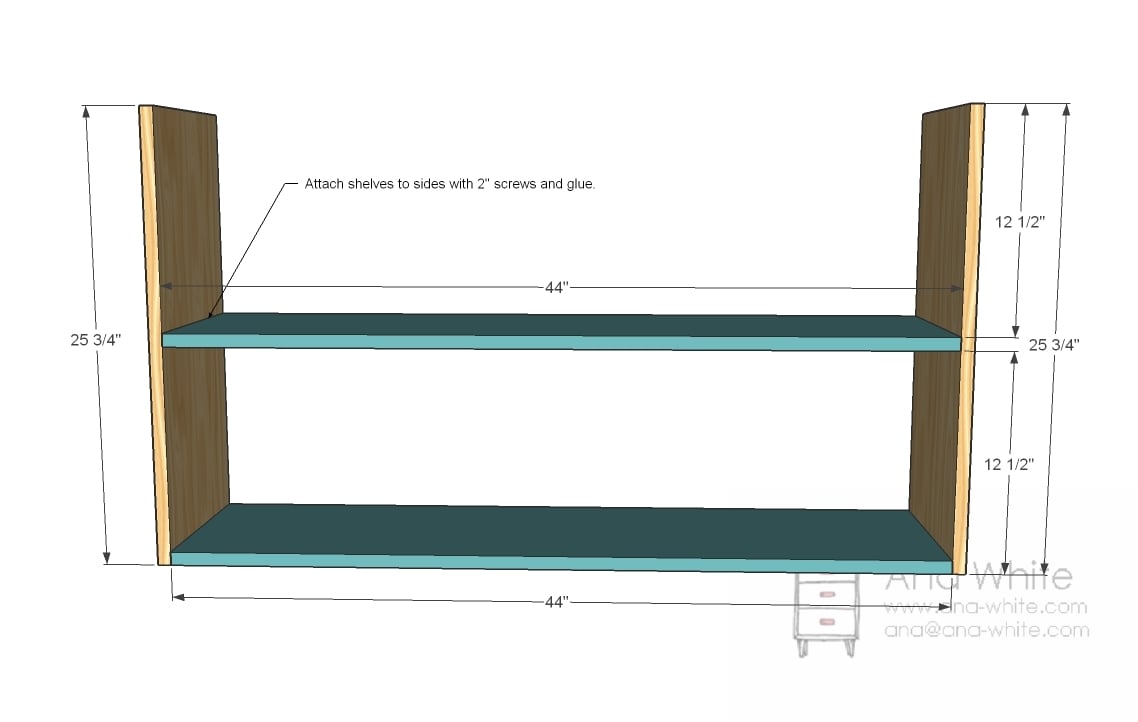
A) 2 – 1x12 @ 44″ (Shelves)
B) 2 – 1x12 @ 25 3/4″ (Sides)
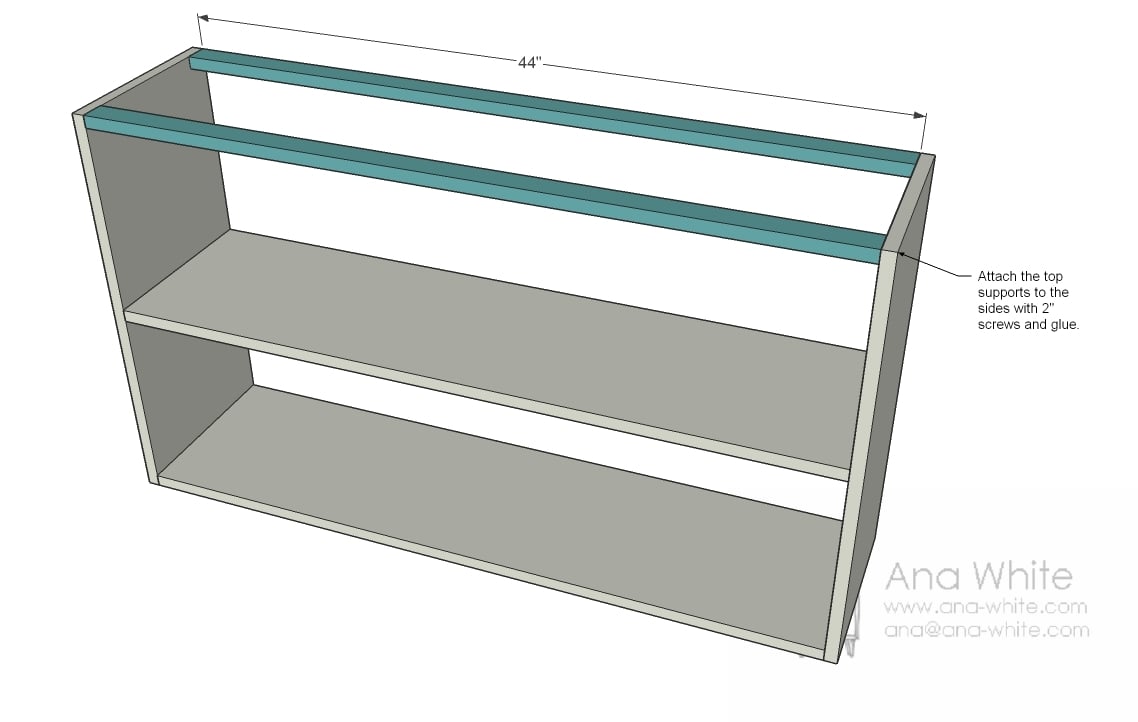
C) 2 – 1×2 @ 44″ (Top Supports)
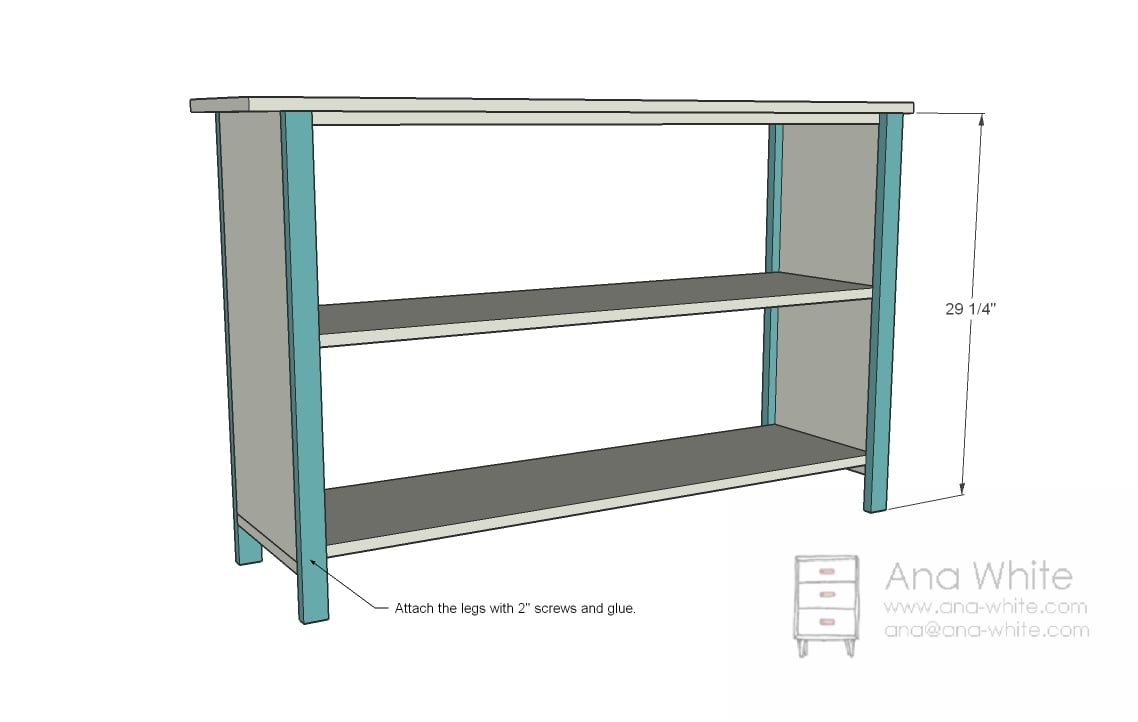
D) 4 – 1×2 @ 29 3/4” (Legs)
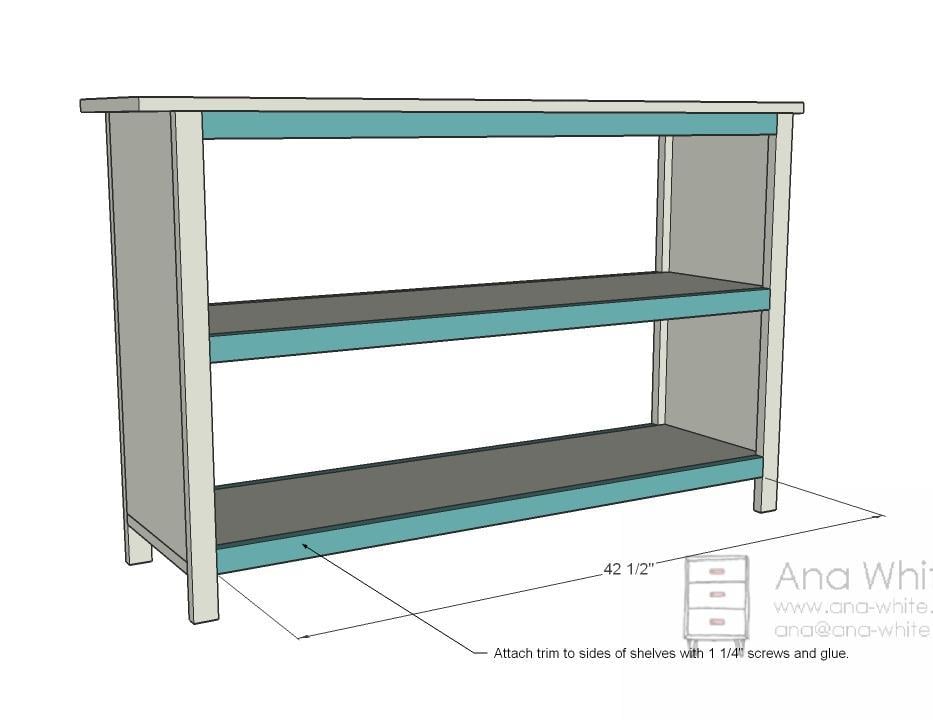
E) 4 – 1×2 @ 42 1/2″ (Shelf Trim)
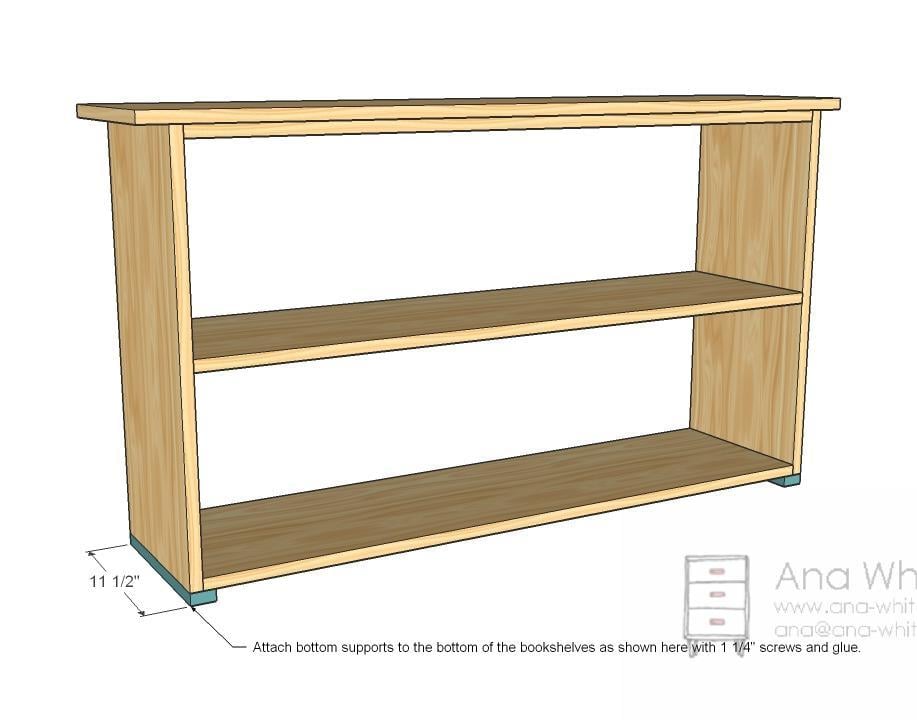
F) 2 – 1×2 @ 11 1/2″ (Bottom Side Trim)
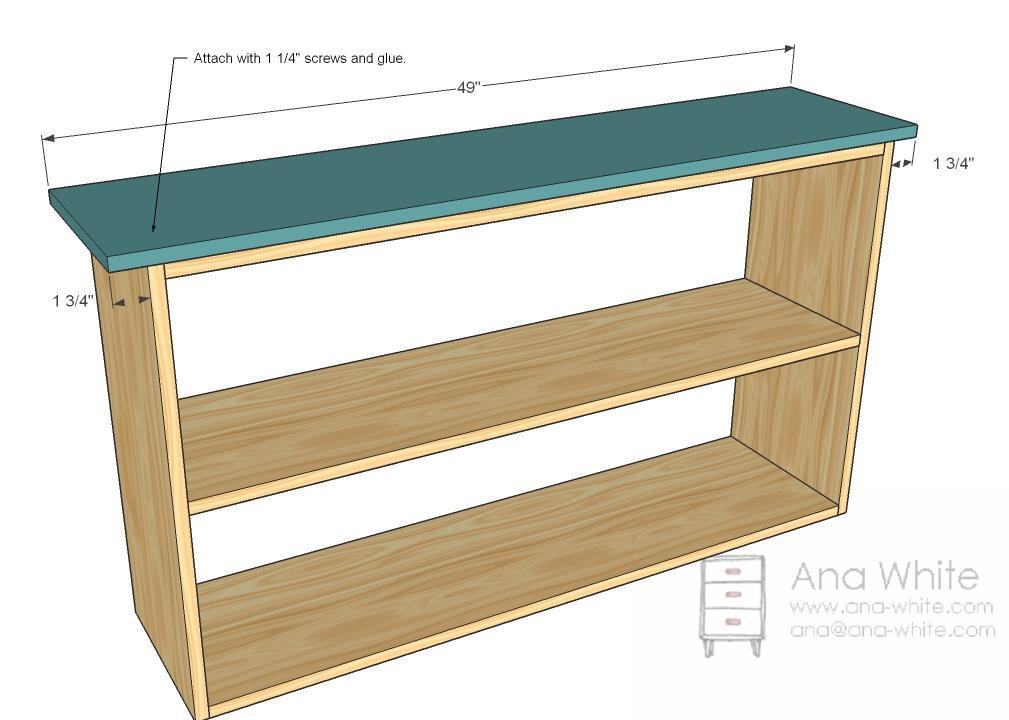
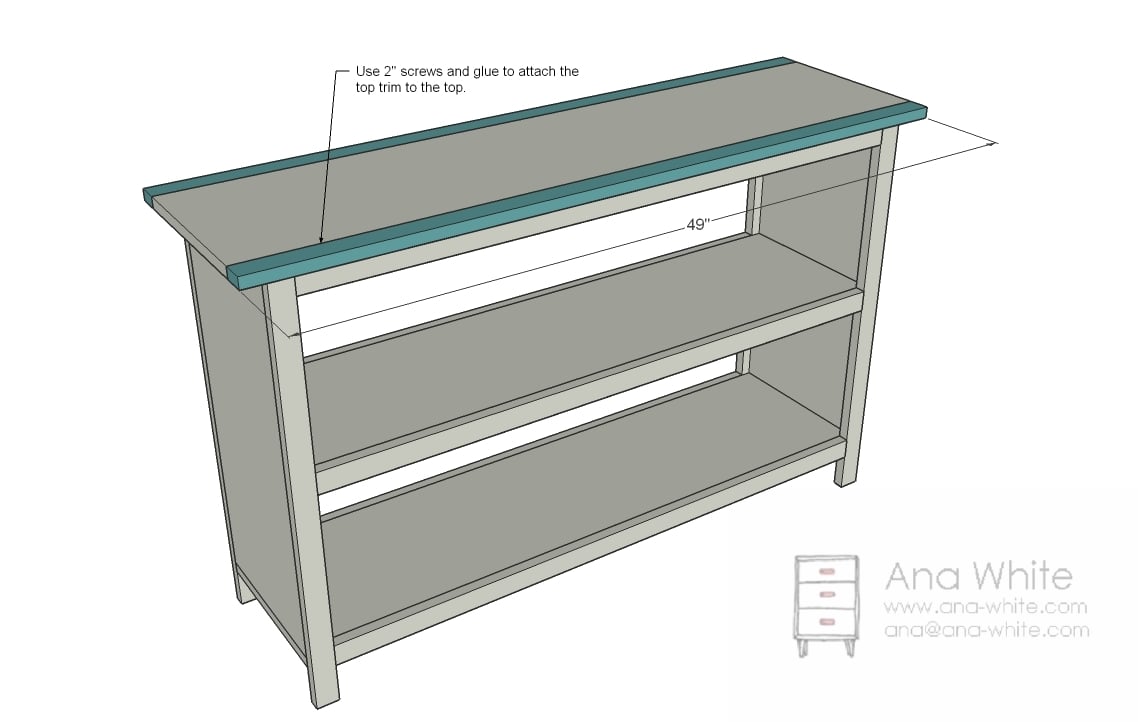
G) 1 – 1x12 @ 49″ (Top)
H) 2 – 1×2 @ 49″ (Top Trim)
THIS PLAN IS FOR 2 BOOKCASES!!! Have Home Depot or Lowes cut your sheet of MDF into 11 1/2″ strips, 8 feet long. Remeber that the saw blade takes up 1/4″ (approximately) so you CANNOT mark the plywood and cut. You must mark one cut, cut, mark the next cut and so forth. General Directions. See the post on choosing your wood type. I built my bookcases out of MDF and had success by not nailing within 1″ of the edges. I used lots of glue. Cut all your boards first and use 2″ nails unless otherwise specified. Always take a square after each step (See HOW-TO section).
Instructions
Step 1
Optional Plywood Ripping Diagram
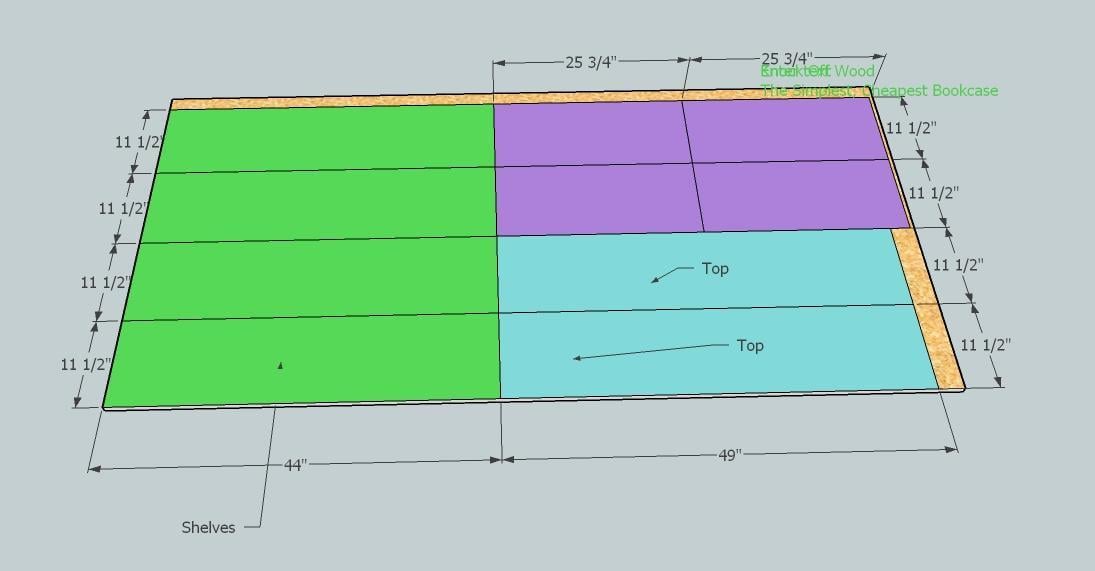
You can also use plywood or MDF to build this bookshelf. One sheet of plywood will build two bookshelves. Here's how to cut the plywood for two bookshelves
Have your plywood or MDF cut into 11 1/2" wide strips to create 1x12 boards. Carefully follow the cutting layout here to conserve boards and get exactly two bookshelves out of 1 sheet of plywood.


Comments
Guest (not verified)
Wed, 03/23/2011 - 21:35
Wonderful!! I'm heading to
Wonderful!! I'm heading to the lumber store first thing in the morning. :D
Thanks a lot! : )
Guest (not verified)
Mon, 04/11/2011 - 20:07
Quick Question
Hey Ana!
Guest (not verified)
Sat, 04/16/2011 - 12:04
Grace's bookshelves
These were the first things my hubby and I built off of your site and unfortunately have had a heck of a time with them. We are not inexperienced builders, have built a home and several pieces of furniture. We ripped 1x2's from 1x8's because furring strips at HD looked terrible. We measured several times, read over the plans and found that the shelf trim pieces were too long by almost an 1 1/2 in. . Rather than 42 1/2 in. we had to cut to 41 in. instead. Also, in our case we found that the top side overhang was 1 1/2 in instead of 1 3/4in. Not really a big deal, but tedious to have to go back and cut every piece again. We ended up making three for our sunroom/library and it was time well spent with my hubby!
upersonal (not verified)
Sun, 04/24/2011 - 16:42
1x2 pine boards
I dont find the length of the 1x2 pine boards i need to buy. Can you let me know how many is really needed? It was mentioned 10, but the sum of all measurements for 1x2s added upto 97.16ft which would require me to find 10 10feet 1x2s. I dont find them in homedepot of lowes and even if we find they are more than 4-5$ per piece. Can you please advice based on what you have done.
reply
upersonal (not verified)
Sun, 04/24/2011 - 16:01
1x2 pines
I dont find the length of the 1x2 pine boards i need to buy. Can you let me know how many is really needed? You mentioned 10, but the sum of all measurements for 1x2s added upto 97.16ft which would require me to find 10 10feet 1x2s. I dont find them in homedepot of lowes and even if we find they are more than 4-5$ per piece. Please advice.
Guest (not verified)
Sat, 05/07/2011 - 10:28
1x2s
I also had problems with this. If you go to their website, Lowes has what are called "furring strips" for less than $1 (in my area). They come in at least 8ft. lengths, so even if you need to buy 13- 8ft lengths, it still should come in under $20 for all materials. Obviously, this would change how you made your cuts if Ana was using 10ft long pieces.
Hope that is helpful.
chesleycathy
Mon, 05/09/2011 - 12:08
Neat plans!!!
I need these. Now just to get them built.
Kirby (not verified)
Fri, 07/15/2011 - 09:22
Does anyone know how much
Does anyone know how much weight these bookcases can hold?
Lindsay (not verified)
Wed, 11/28/2012 - 04:46
wood help
Hi Ana! I'm in the process of my FIRST project and am so excited about it! Quick question: I am wanting to stain my finished project. I am using oak hardwood plywood for the majority of the project. The plans call for 1 x2 pine boards for the trim. Will this look okay in the end, using two different woods, if I'm wanting to stain it a dark espresso?
mamachamp
Sun, 07/14/2013 - 14:14
Kreg Jig?
I want to build this a TV stand for my daughter and am VERY new at this. Could you clarify how it to do it using a kreg jig?
abluefox
Mon, 09/28/2015 - 12:38
Oh, you share a very detailed
Oh, you share a very detailed article. Thank you so much! I think I can do it myself :) a bookcase in my dream ;)