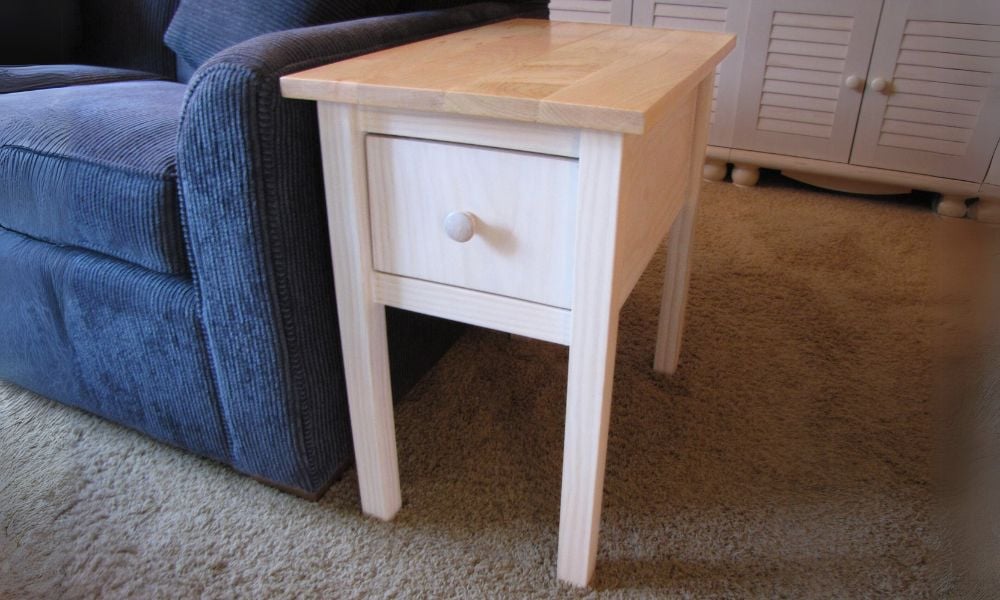


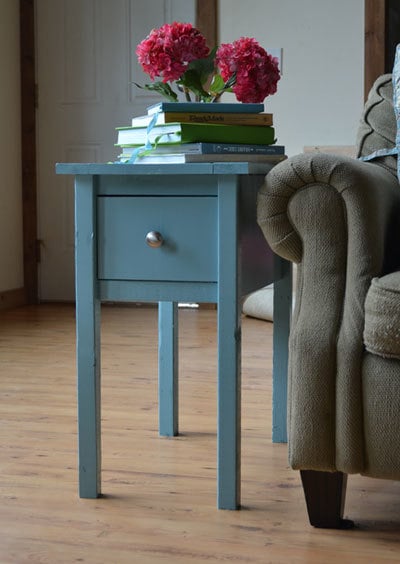
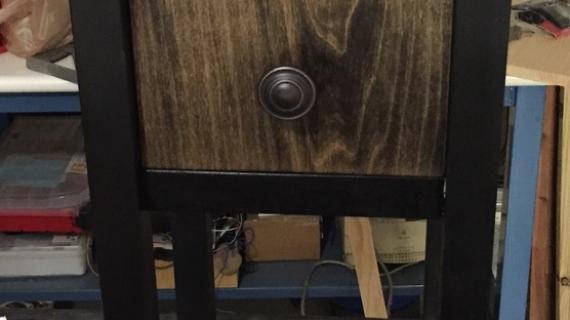
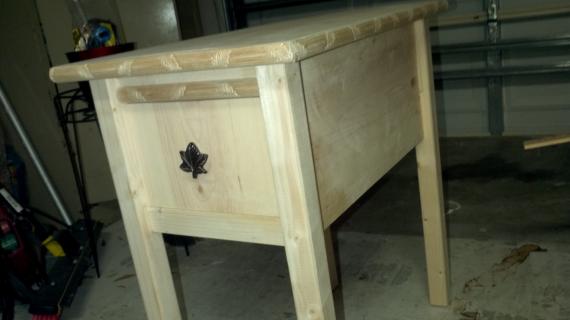
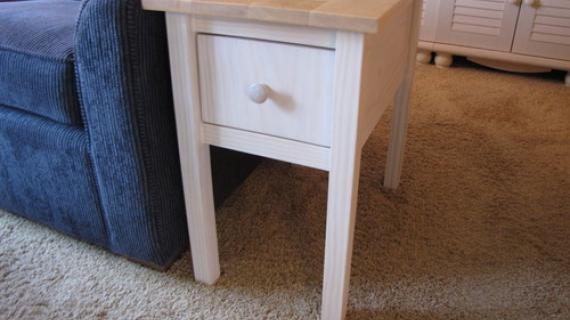
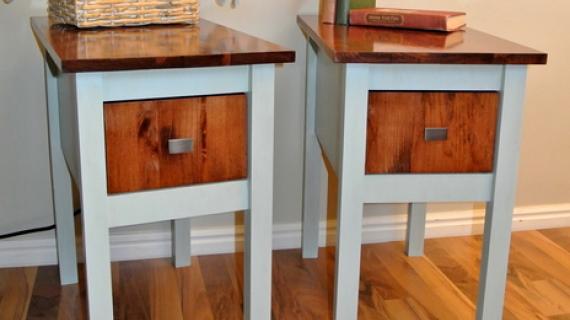
Free do it yourself easy DIY plans to build cottage style end tables. Featuring a narrow design, perfect for fitting in tight spaces, with one large room drawer, this step by step project plan can be made by beginning woodworkers.
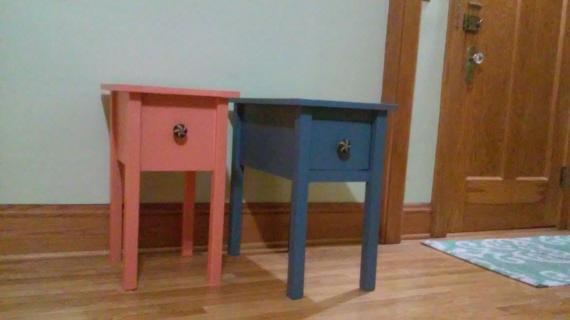
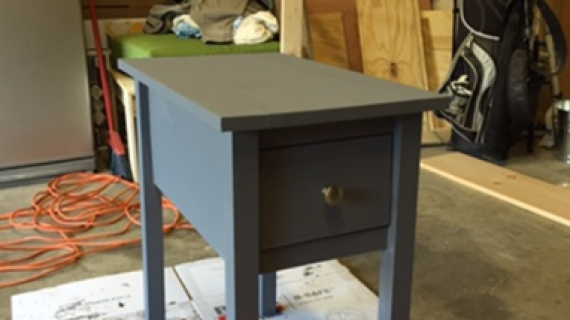
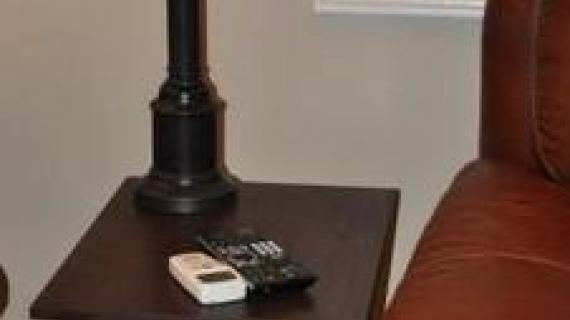
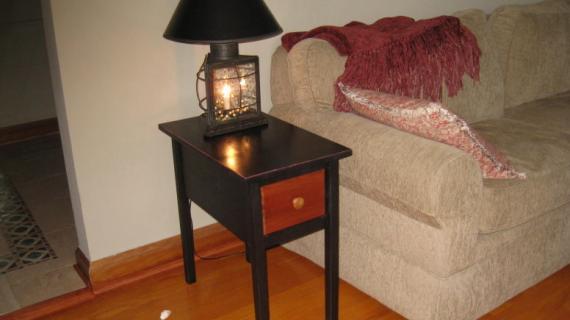
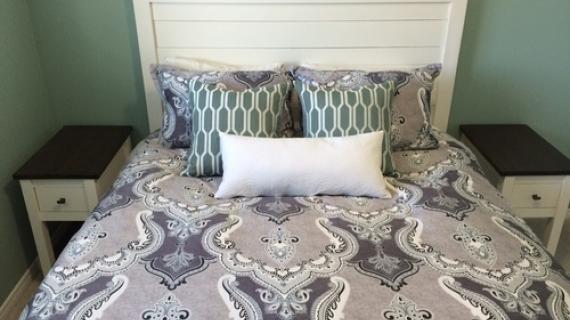
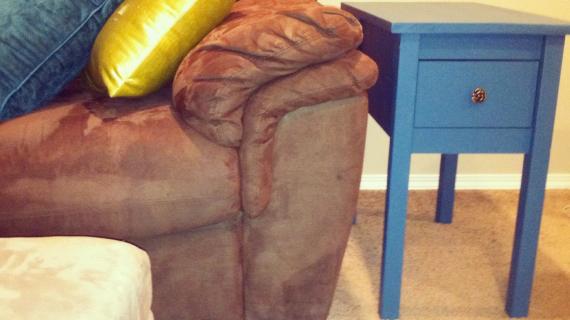
I've been on this quest of late to find and build the perfect end tables for my small home. Requirements - some storage, narrow profile, just right height, and add a little color and charm to my otherwise natural colored living room. I love how this table turned out - a perfect drawer to stash remotes, the perfect height for resting a morning cup of coffee (and laptop) yet a narrow profile that works just right for smaller living spaces.

Preparation
- 1 - 2x2 @ 8 feet long (grab 2 if you don't have a pocket hole jig)
- 1 - 1x10 @ 8 feet long
- 1 - 1x4 @ 4 feet long
- 1 - 1x3 @ 4 feet long
- 1 - 1x2 @ 2 feet long
- 1/4" plywood scrap (for bottom of drawers)
- 1 - knob or handle
- 1 set 16" drawer slides, the white euro ones that fasten on the bottom corners
- 1 - 1x10 @ 24" (Top)
- 2 - 1x3 @ 24" (Top Trim)
- 2 - 1x10 @ 19" (Sides)
- 1 - 1x10 @ 9 1/4" (Width of 1x10)
- 2 - 1x2 @ 9 1/4" (Width of 1x10)
- 4 - 2x2 @ 24" (Legs)
- 3 - 2x2 @ 9 1/4" (Width of legs, use if you do not have a pocket hole jig)
- Drawer cut list given in plan


Please read through the entire plan and all comments before beginning this project. It is also advisable to review the Getting Started Section. Take all necessary precautions to build safely and smartly. Work on a clean level surface, free of imperfections or debris. Always use straight boards. Check for square after each step. Always predrill holes before attaching with screws. Use glue with finish nails for a stronger hold. Wipe excess glue off bare wood for stained projects, as dried glue will not take stain. Be safe, have fun, and ask for help if you need it. Good luck!
Instructions
Step 1

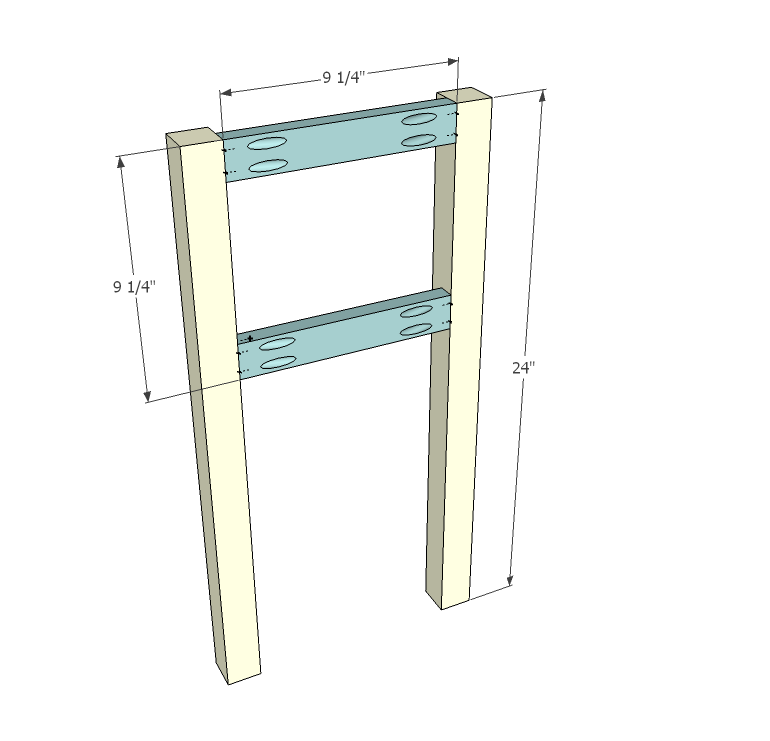
This narrow cottage style end table can be made with either the Kreg Jig or countersunk screws. The great thing about the Kreg Jig is your joints will be precise and square - super important when you are building with drawers. Your drawer won't fit right if your box is not perfectly square, so take great care to check for square after each step.
Build the back first. I did things in this order so you can get your drill in for pocket holes.
Note that the end apron needs to be cut to the width of your 1x10s, expected to be 9 1/4" but dimensional lumber can vary in width.
Step 2
Now build the front, using the 1x2s as shown here. If you are not using pocket holes, you will need to very carefully predrill holes and use 2 1/2" screws and glue, predrilling from the outsides of the legs.
Note these boards need to be cut to the width of your 1x10s.
Step 3
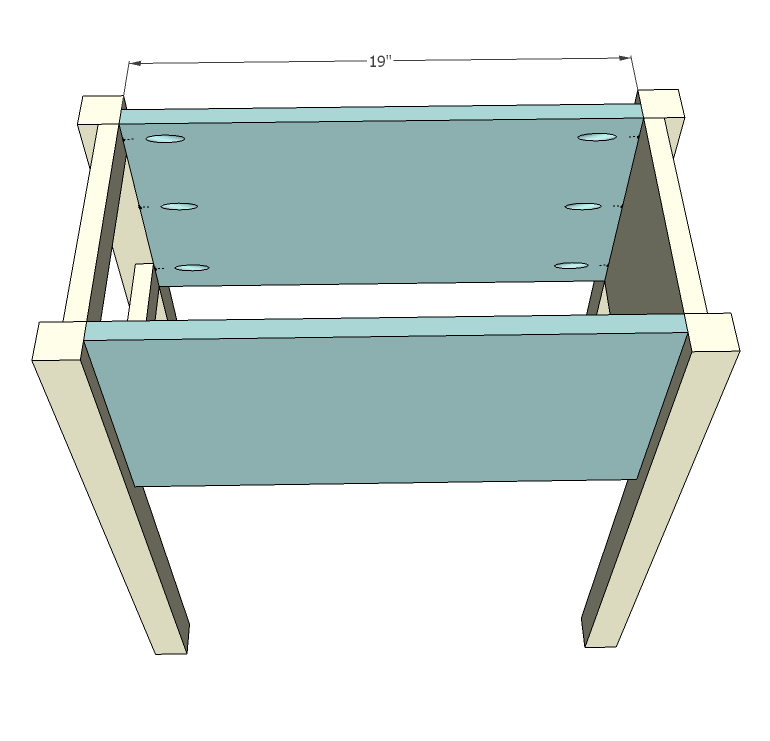
And now attach the sides to the front and back.
NOTE: You may wish to attach drawer slides to side aprons before attaching side aprons to end/front due to lack of clearance for your drill. Slide bottom will sit 2" from bottom of side aprons. See last step.
Step 4

If you have a Kreg Jig, build your top as shown in the diagram. Otherwise, add blocking with 2x2s and attach the top to the blocks with either finish nails from the top, or 2" screws from the underside. The 1x10 will fit in the center, not crossing the side aprons. Put the 1x10 on first, followed by the 1x3 side trim.
Step 5
Step 6

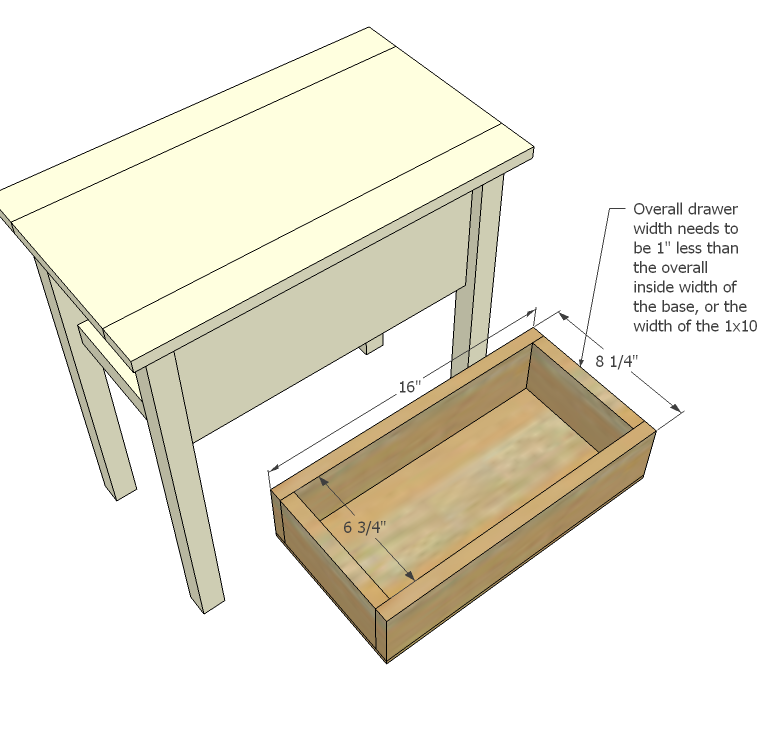
Fit the drawer box in the drawer, with the fronts of slides starting at the legs, and the bottom of the slides (the long flat part of the box members) attached 2" up from the side apron bottoms. Once you are happy with the drawer slides, cut a face for the drawer from the 1x10s, and fit so an even 1/8" gap rests on all sides, and attach with 1 1/4" screws or finish nails from insides.
It is always recommended to apply a test coat on a hidden area or scrap piece to ensure color evenness and adhesion. Use primer or wood conditioner as needed.
Comments
Amanda H. (not verified)
Wed, 06/22/2011 - 13:30
Is that a chorus of Hallelujha in the background?
I've been staring at side, coffee, and console table plans for MONTHS trying to decide which one I could attempt to modify to build that would be perfect. (I'm still pretty much a novice and terrible at math, haha!) In fact I was perusing plans today because I CAN NOT make it any longer with my makeshift one. I'm so happy right now. These plans are perfect. Oh happy day! Thanks Ana!
Lynn P (not verified)
Thu, 06/23/2011 - 03:10
I love these side tables! I
I love these side tables! I am going to be moving soon and looking for a place to build a new home. You have inspired me to want to do the furniture myself! Thank you for all you do!
hook Fam
Thu, 06/23/2011 - 10:12
Hide the remote!!
I love this! Thank you! My youngest son loves to play with the remotes and they very often get stashed in the couch cushions, a high shelf, anywhere that he won't find them. This is a great solution. It's on my To-Do List!
HollyHomemaker (not verified)
Thu, 07/07/2011 - 07:21
It's *perfect*
Thank you for sharing this! My hubby and I have a very small bedroom and have struggled finding bedside tables that are narrow enough that we are able to have one on each side.
I struggled with paying $50 or more for a cheap pre-made hunk of junk that would need altering and strengthening anyway...this is the perfect solution!
I really wish I had found this site MONTHS ago!
Florence Carole (not verified)
Thu, 09/01/2011 - 03:02
My husband will definitely
My husband will definitely love this end table plan. Have been bugging him for weeks to make use of our headboard, and this end table will be perfect in our living room. Thank you so much.
http://www.danielshomecenter.com/living-rooms.html
Jessica Elder (not verified)
Mon, 12/12/2011 - 21:32
Inspired Novice!
I have been looking all over for end tables small enough to fit in the tight spaces of my living room and found that the really inexpensive ones look extremely cheap and would be goners in no time and the really nice ones start at around $150.00! I got the notion to see if this is something I could do on my own and thanks to this project I think it is possible! I've been researching a lot about required tools and things like how a piece of lumber isn't actually the size it's classified as and am just dumbfounded I didn't know this. hahaha. Now that I've got the gist of it and understand the things that made me hesitate I'm going for it. I really hope it turns out as adorable as the picture! Thanks for your details and great design!
bigtimer24
Mon, 04/23/2012 - 18:38
First Time Project
My wife wanted a side table for her books and a place to sit her tea or coffee while reading. I looked around and couldn't find one that was nice and affordable. I saw this plan and shared it with my wife as I said to her that "I will build this for you." Several days later she was stunned as I showed off my completed project. Thanks for the plan!!! I'll post a picture shortly. Cost me around $30.00 bucks as I opted for a 7 dollar decorative drawer pull.
(: Tennessee Teen :) (not verified)
Sun, 08/12/2012 - 13:52
I love this! I'm re-doing my
I love this! I'm re-doing my room and I'm going to make this with my dad for a nightstand and painting it pink!
paulaandmatt2010
Sat, 11/02/2013 - 01:35
Should have checked first...
I just purchased 2 tables from a higher end department store that looked EXACTLY like this (minus color) and paid way more than what I would have if built. Well, now I know...check here first! :)
lionsbluewhite
Sat, 12/26/2020 - 06:12
Narrow cottage end table drawer face
Can somebody please tell me what method or how to attach the drawer face to the drawer? I’m just getting started in woodworking. I love this site!