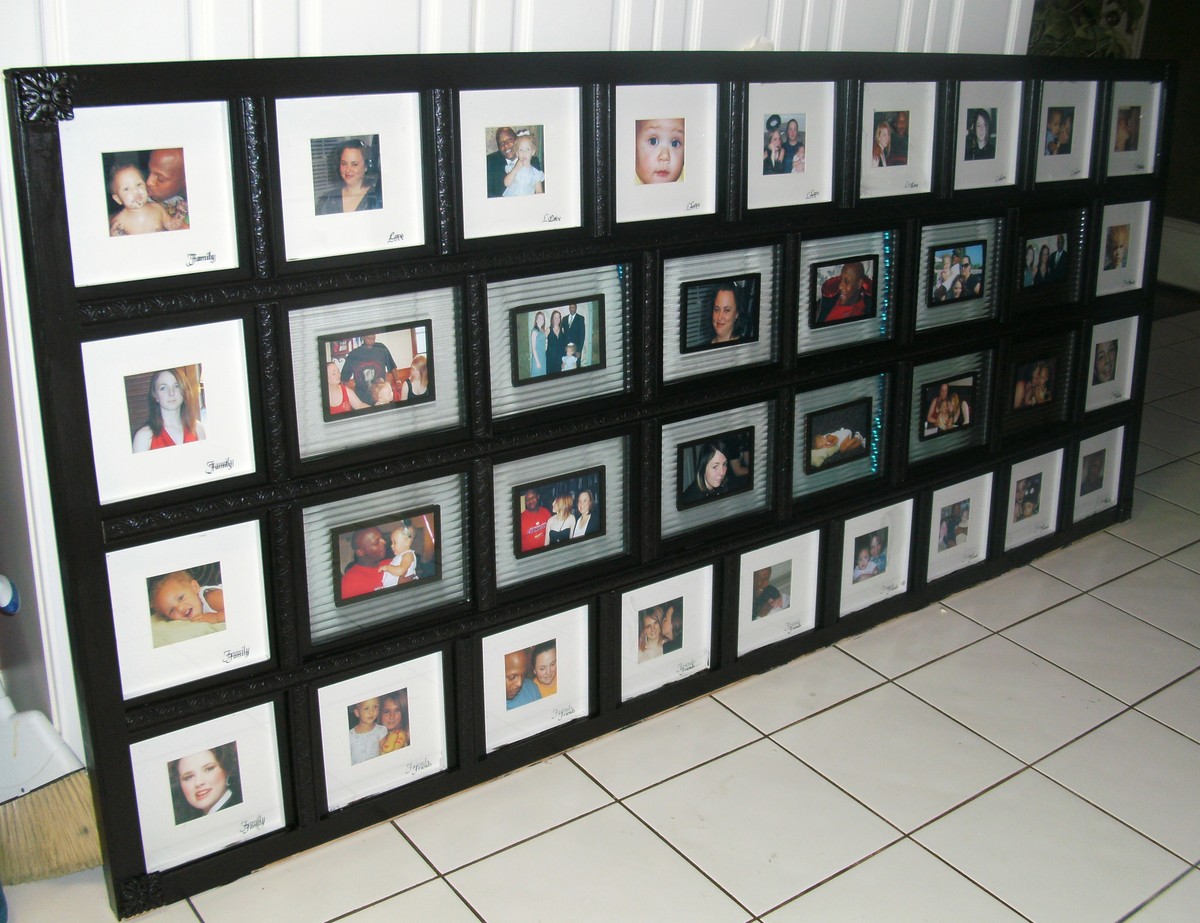
I constructed this generous sized king-size headboard (tagged "Sweet Dreams") from a large number of beautiful deep discounted photo frames (pretty matting, exotic glass, all black purchased from Kroger for $1 each on a clearance rack) and featuring favorite photos of my daughter (for whom the headboard gift was intended) and her husband and children. For little more cost in wood for the framing and rope lighting to provide a soft glow through the channeled glass that surrounded each photo in the center frames made this the perfect gift. When it was hung on the wall with legs for support and mounted on a "french cleat". I coupled the headboard with two beautiful black nightstands I bought from a yardsale and painted to match the headboard. Then we placed wrought iron candlelabras over each nightstand and VOILA! It is a beautiful beadroom! Total cost: approximately $60 Best footnote, the photos can be changed out to keep the headboard fresh and current. (Do know...this is VERY heavy and must be handled with great care because of all the glass in the frames.)
Comments
spiceylg
Mon, 08/01/2011 - 08:36
Resourceful!
What a great idea. Would love to see a photo of all the projects combined for the full effect!
luis cano
Tue, 08/02/2011 - 16:12
Could you add some close ups
could you add some close ups and different angles please i really would like to see how this was done.
Bama Gurl (not verified)
Wed, 10/17/2012 - 14:35
Sweet Dreams King Size Headboard
Unfortunately Luis, I do not have other photos of the headboard...none of the "construction process" nor other angles of the finished piece. The basic process was first knowing the average width of a king sized headbard, then acquiring the inexpensive photo frames and laying out the configuration you like best. Then I took 1"x1" 8 or 10 ft long pieces of unfinished wood and built a "frame" of horizontal pieces..first laying the wood on the floor, then putting the frames in their planned final arrangement by using cut pieces of 1x1 to put vertically between the individual frames to get the spacing correct. Then I put the end 1x1 pieces on to complete the 4 sided "frame". NOTE: I worked with the framing wood "face down" so that once the entire configuration was determined and all wood pieces were cut and in place, they could be joined together. I used glue and small metal plates that spanned the tiny joints and screws that made the joints more "permanent". Once all joints were finished, I used tiny wood screen moulding and glued it in place on two of the four sides of each opening (toward the back, precisely placed so that each photo frame fit flush with the face of the front of the frame). Then I painted the wood frame black (front, back, sides, top, bottom, etc). Once dry, I glued each frame in place in each opening. NOTE: Each frame, accessible from the back,allows for photos to be inserted and changed out. Finally I glued tiny wood medallion wood embellishments in each of the four corners and applied narrow wood trim that appears "carved" and three dimentional (using glue and tiny finishing nails) to the primary vertical and horizontal frame pieces. Then I carefully applied a final 2 coats of black paint. Lastly, on the back side, I took rope lighting "holders" that screw in place and mapped the hidden rope lighting and installed the rope lighting...out of view of the front view but where the soft light could illuminate the headboard. The final puzzle was how to put the headboard in place. First I built a wood rectangle the width of the headboard and the heigth I wanted the overall headboard to be and glued and screwed the base together...and painted it too. Then I made a "french cleat" that is simply a 2x4 cut at an angle so that when one piece is permanently attached to the back of the headboard with screws. Attach the other half to the wall, screwing it into the wall. Then 2 people can lift the heavy headboard onto the wall cleat. The base should rest on the floor and the cleat holds it to the wall. NOTE: You can google "french cleat" an look at photos and note instructions to see how to do this part. Hope all this helps. I will be glad to answer any other questions. Good luck.