I want a junk drawer for my yard.
You know we've been spending the last couple weeks taking care of some loose ends on massive project number #1 (aka our DIY house) that got put on hold when we decided hey, let's take on even more massive project #2 (DIYing our Mom's a duplex dubbed the Momplex).

After we poured the concrete sidewalks and a pad in front of the garage - what a luxury, sidewalks in remotish Alaska!!! - and then filled in around the sidewalks with top soil for new grass, there was one more thing that I desperately wanted.
I want to be able to drive up in my yard and not see any clutter. I want to be able to come home and not feel like I need to hop out of the car and find somewhere to put kid toys and bicycles and garden hoses and wheelbarrows.
Our yard needs a junk drawer!
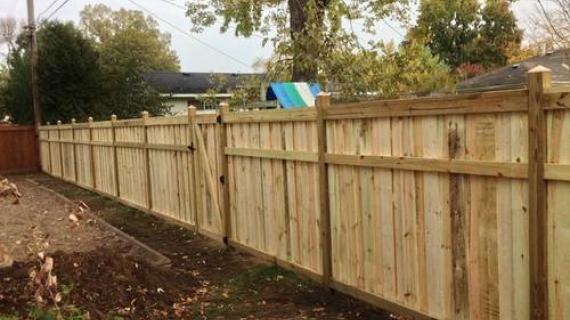
So I thought, what if we built a privacy fence between the garage and house, and then when Mom says "Clean the yard!" it means throw everything over the fence.
Yes, I am the Mom.
I'll be throwing stuff over the fence too.
Now up here in remotish Alaska, there's not a whole lot of privacy fence building. God kinda takes care of that with huge trees and most people own large parcels of land. So this may be old stuff to you - but I'm pretty excited - today, I'm getting a junk drawer for my yard!
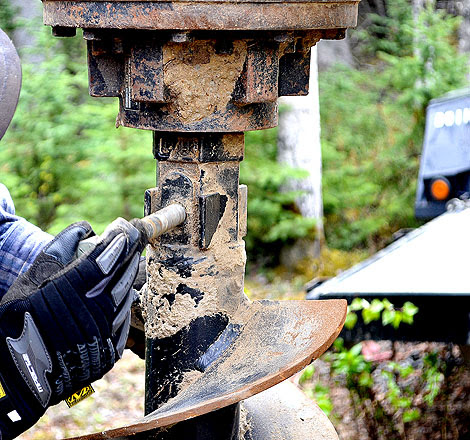
We had rented for $300 a day a skidsteer to help with the landscaping and it came with a huge drill bit that just fits on and gets a pin to hold in place.

We basically found the general spot we wanted each fence post to go. Right about here .....

And then we start drilling!
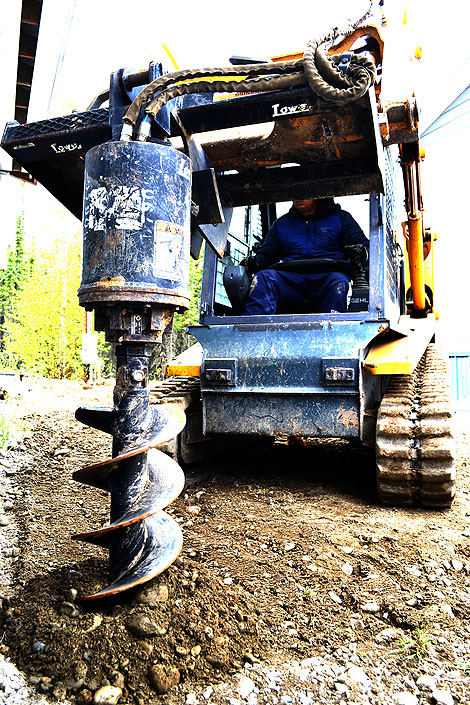
And drilling ...

Now there's definitely going to be some shoveling involved in this operation, but we are going to get our $300 bucks out of that skidsteer.

So the Ram stops drilling and carefully brings the giant drill bit up.

Anyone who has every shoveled gravel will appreciate this .... count the shovel-fulls of gravel we don't have to shovel out ...

And then a little drilling mid air and the gravel is out of the hole!

And then after the holes are drilled, the Ram gets the flu. So Grandpa Tim and I, we are on our own - and I've never built a fence like this. Thankfully Grandpa Tim has.
So first we put the posts in next to the garage and house. And then we attach the side posts plumb and level to the garage walls. This gives us known points for our fence.

And then we run a string line between the posts attached to the house and garage to make sure our fence is straight. Center posts are placed in the ground plumb and square with the outside posts.
We are just using treated 4x4 posts, 10 feet long.

For the posts not being held up by the house or garage, we use scrap 2x4 boards to brace just right so we can backfill.

We backfill the post holes with gravel and they are set in the ground!
Now the fun part ... We get to build now!

We use the laser level to mark all the post to the same height as the shortest post.

And the tops are cut off with a circular saw so all the fence posts now stick out of the ground the same height.

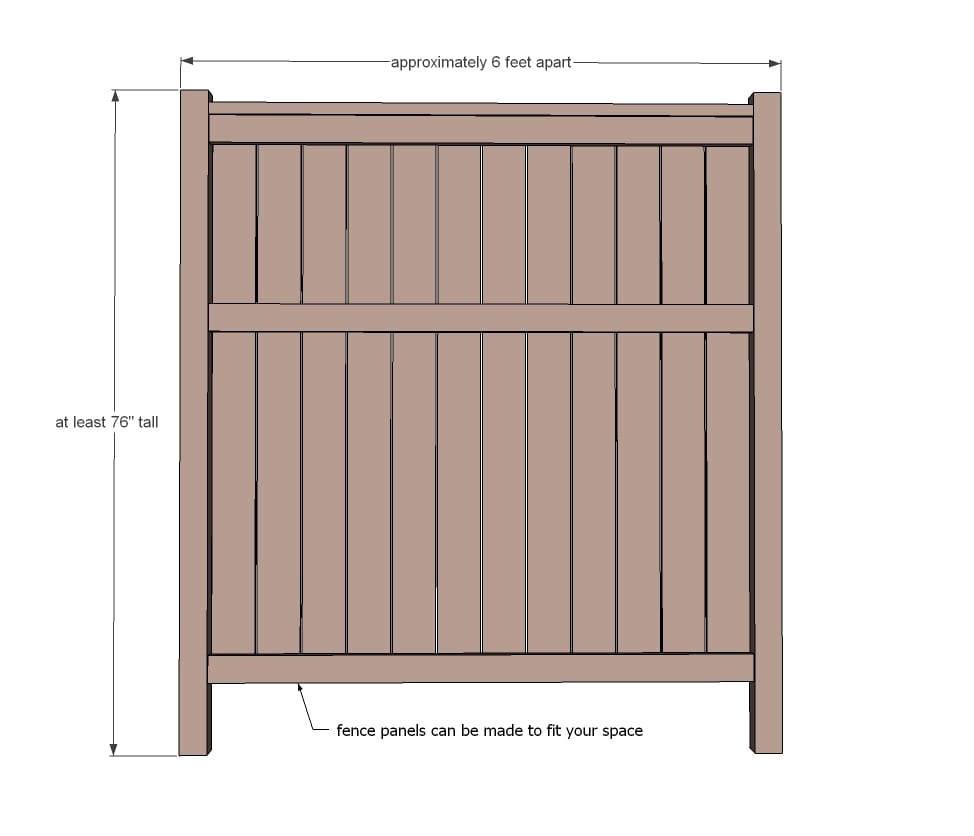
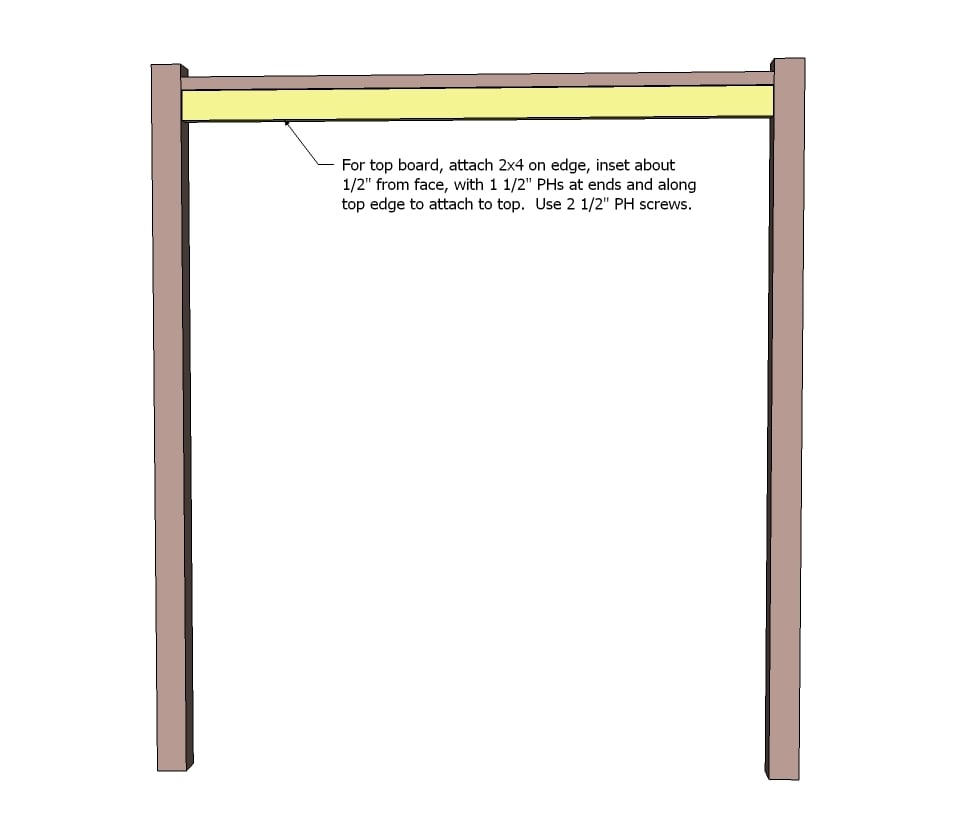
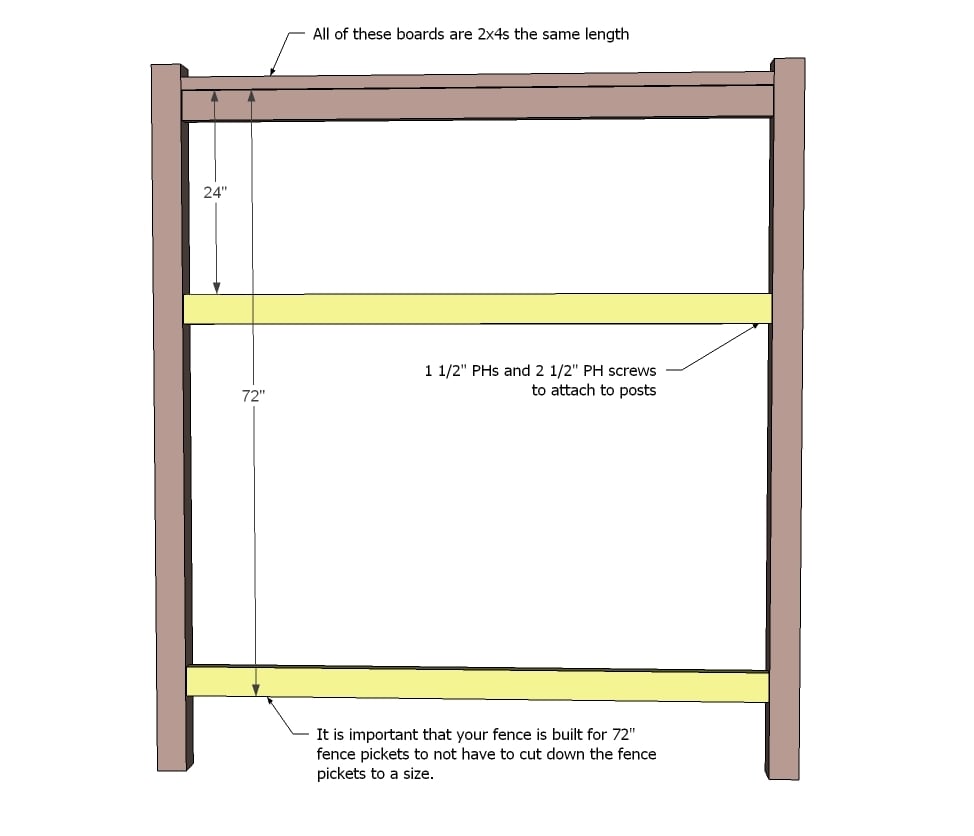
We'll be adding a gate in between the two fence sections, so we are just building two small fences here. For the fences, we simply placed a 2x4 1 1/2" down from the top, attaching with pocket holes to the posts.
Then under the top board, we added a 2x4 on edge to support the top board.
Then we measured down exactly 72" and added the bottom 2x4. The 72" part is important - that's because fence pickets are 72". And I'm not cutting every fence picket down to size.
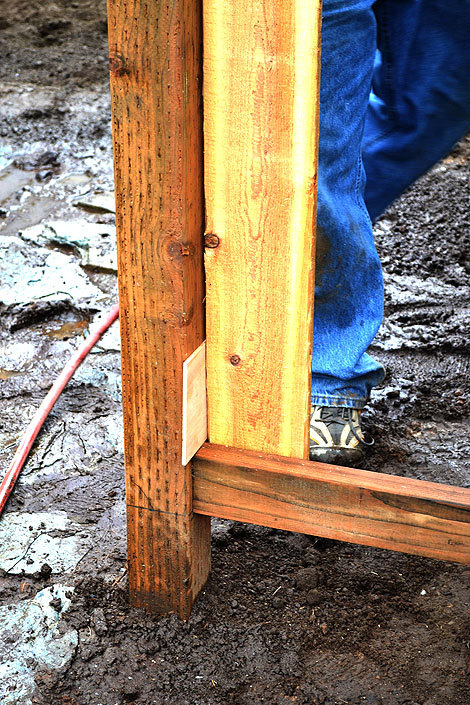
We use a piece of 1/4" plywood as a spacer. Exterior wood will swell when wet, and some of the fence pickets are not quite as square as we'd like, so the little gap will give us a little wiggle room.

We just keep adding fence pickets spaced with the plywood spacers. With three people, this went really fast.
We also added another 2x4 about 2/3 the way up for extra support and just because it looks nice.

And then we did the same on the other side!
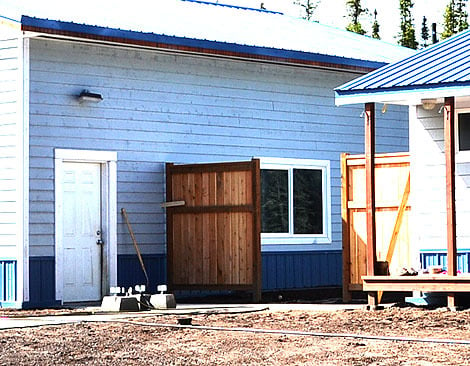
We will be adding a gate in the middle, or closet doors for my yard if you will!

And once the gate is in, I will stain the cedar pickets to match the treated wood, and then seal it all.
I know you can buy those premade fence panels, but they were like $70-$80 each! And you STILL have to put the posts in the ground and buy them ($$$). For each of our fence sections, we used
- 11 fence pickets
- 2 2x4x12 treated
For a grand total of $36 in materials for each fence section. That's about half the cost!!! Multiply that by a long fence, and you can do the math on why DIY is the way to go.
And of course, I've got your back. Here's the step by step plans so you can build your own fence!



Comments
spiceylg
Tue, 06/05/2012 - 11:35
:)
How exciting. I know what you mean, our yard is wide open and I like your thinking. Question. You don't have to put cement in the holes at all, prior to back filling?
Ana White
Tue, 06/05/2012 - 12:08
Hi! We actually bought
Hi! We actually bought cement pier blocks to use and were planning on using, but Grandpa Tim has done alot of fences in our region of Alaska and he said the fence posts that heaved in the winter months were the ones put in with concrete. So he recommended not putting the posts in with concrete for our area. Definitely check what works for your soil/region before putting a fence in.
We did dig down to gravel so the posts are sitting on virgin gravel and then we backfilled with gravel too.
In reply to Hi! We actually bought by Ana White
tracysmith
Thu, 06/14/2012 - 19:24
So, say you want to build a
So, say you want to build a longer fence, how would you go about securing the panels together - assuming you built all the panels before hand... or would you? It's probably an easy answer, but I'm just not getting it at the moment! :-)
Lady Goats
Tue, 06/05/2012 - 21:49
Hope the RAM is feeling better!
The fence looks great, too. This big project is coming together nicely!
I'm happy you are doing for yourselves. Reminds me of the flight attendants telling me that if anything happened, I had to put MY breathing mask on first, before helping the kids... because I need to be "set" before I can tend to others (no matter how instinctual it is to help those we love before ourselves). You are putting your breathing mask on!
birdsandsoap
Tue, 06/05/2012 - 19:59
Looking Good!
I need a fence like that across my driveway so my neighbors don't have to look at my outdoor workshop! lol. We actually plan on building a small fence and gate on the opposite side of our house this summer for deck privacy.
You make it look so easy, then again, the giant auger makes it look so easy too!
whitney_smith
Wed, 06/06/2012 - 04:43
Looks so good!
We have a cheapo 4ft privacy fence in our back yard. Those panels cost $20 each, plus the cost of the posts!! I LOVE this option! Maybe for our next house.
Wendy Jo (not verified)
Wed, 06/06/2012 - 17:16
Fence
I love the idea of this but unfortunately that isn't going to happen. There is no way I would be able do dig for fence posts accross my 200 foot wide lot. Up until a year ago I would have only needed two secitons but my idiot neighbors trimmed the back of my 60 foot tall pine trees up 5 feet so they could play volley ball. Hmmm wonder if I can make him dig the holes! LOL
Cindy from Indiana (not verified)
Mon, 06/11/2012 - 11:33
Where do you buy fence pickets?
Ana - I love how the fence is turning out! Without 'junk drawer' areas in my life, it would be complete and utter chaos around here, too!
I was wondering where everyone buys just the fence pickets? I'm in Indiana. I'm seeing fence panels all over the place, but not the pickets. Maybe I'm just missing them?
Awesome project!
In reply to Where do you buy fence pickets? by Cindy from Indiana (not verified)
tracysmith
Thu, 06/14/2012 - 19:22
Fence pickets
You can buy fence boards at any home improvement store that sells wood. They will usually be in a section that has fencing or decking materials. If all else fails you can always ask. :-) We have a Home Depot here as well as a smaller local lumber yard that sells them. Also fence builders will also sometimes sell materials, but watch out, cause they can cost you more. Happy Building!!!! :-))