

Free plans to DIY umbrella stand inspired by Pottery Barn Chesapeake Umbrella stand.

Hello friends!
I'm at Haven this week, teaching a beginning carpentry class to other DIY Bloggers! One of the very few reasons I'd ever even think about leaving Alaska on the longest day of the year!
And at Haven, I'm also meeting my good friends Ashley and Whitney from Shanty 2 Chic for the first time in person! I am just so excited! Ah, the building tales we will have to share!

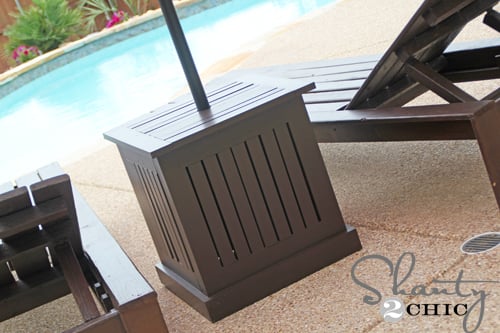
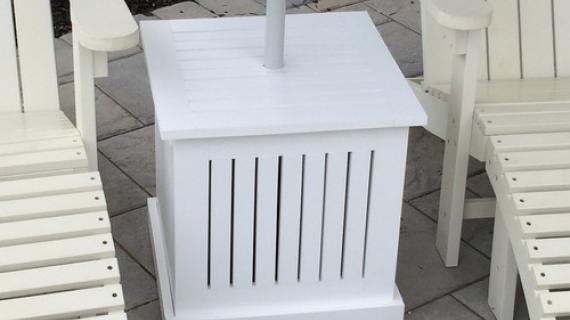
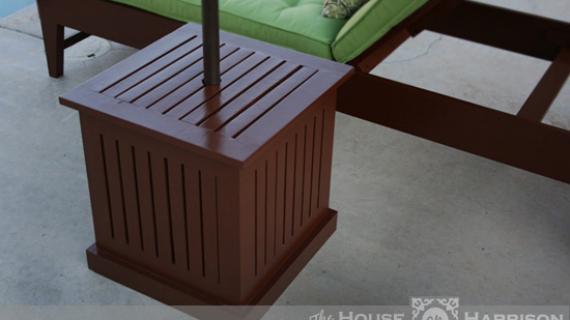
Today, we have a special treat from Ashley - a side table that covers and umbrella! Of course, it's inspired by the Pottery Barn Chesapeake Umbrella side table, and you can DIY it for hundreds less!
Here's from Ashley:
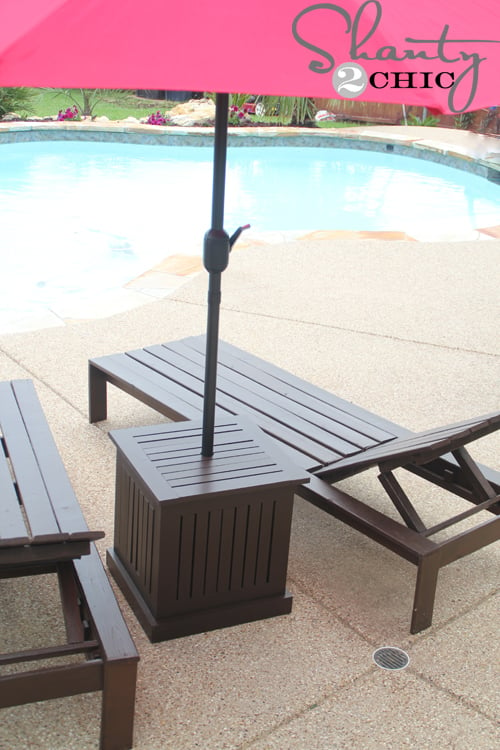
This table was so easy to build and it adds so much to my back yard! With the $250 I saved building it myself, I was able to purchase a great umbrella and still come in under $100!

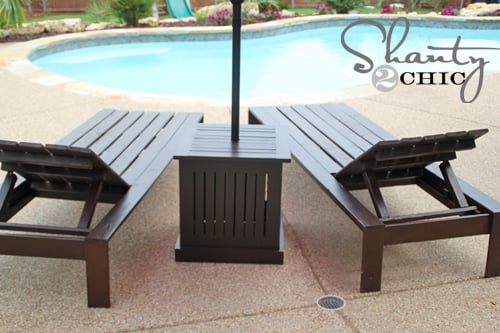
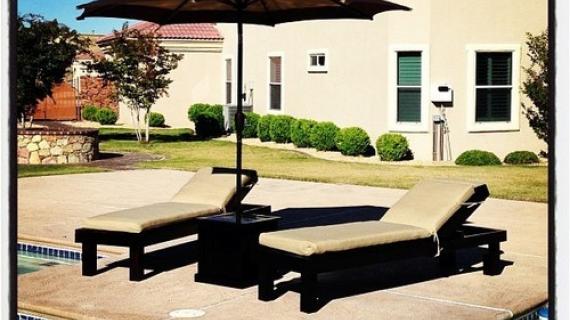
Thanks Ashley! Please stop over and read more about the stain she used and yep - those are DIY chaise lounges too!
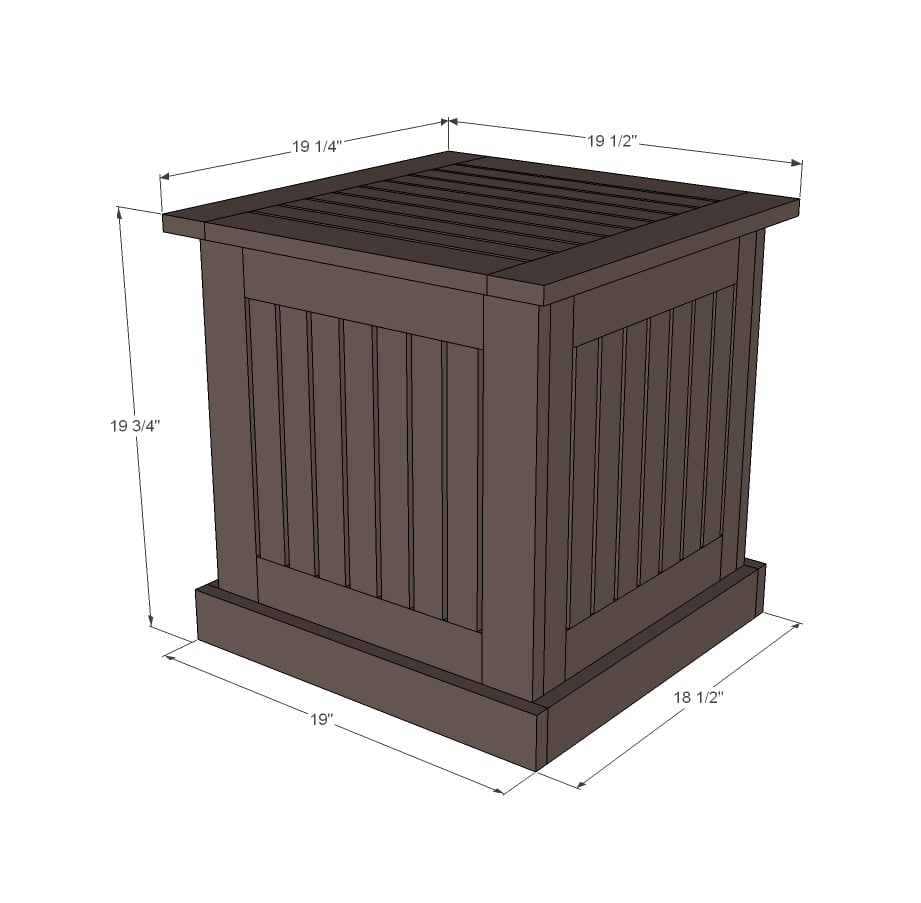
Preparation
6 – 1x2 @ 8 feet long
3 – 1x3 @ 8 feet long
1 ¼” pocket hole screws
1 ¼” finish nails or screws
Wood glue
28 – 1x2 @ 11 ¾”
8- 1x3 @ 12 ½”
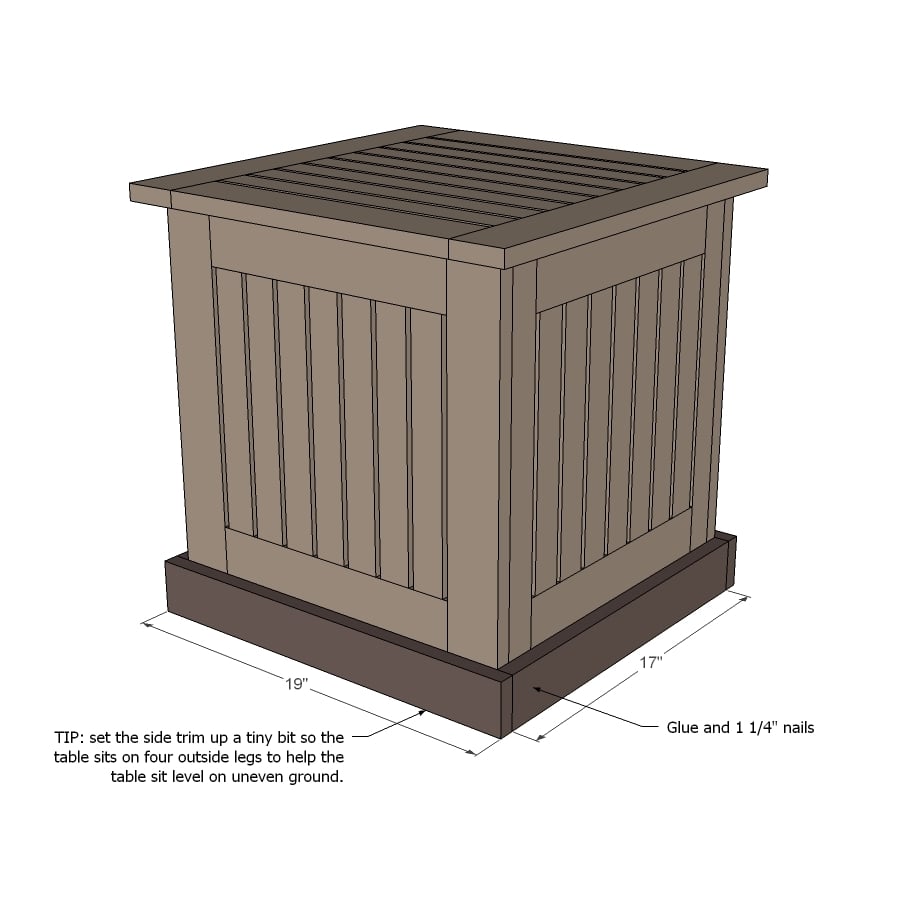
4 – 1x2 @ 19”
4 – 1x3 @ 19”
2 – 1x3 @ 19 ¼”
2 – 1x3 @ 14 ½”
8 – 1x2 @ 14 ½”
2 – 1x3 @ 19”
2 – 1x3 @ 17”


Please read through the entire plan and all comments before beginning this project. It is also advisable to review the Getting Started Section. Take all necessary precautions to build safely and smartly. Work on a clean level surface, free of imperfections or debris. Always use straight boards. Check for square after each step. Always predrill holes before attaching with screws. Use glue with finish nails for a stronger hold. Wipe excess glue off bare wood for stained projects, as dried glue will not take stain. Be safe, have fun, and ask for help if you need it. Good luck!
Instructions
Step 1
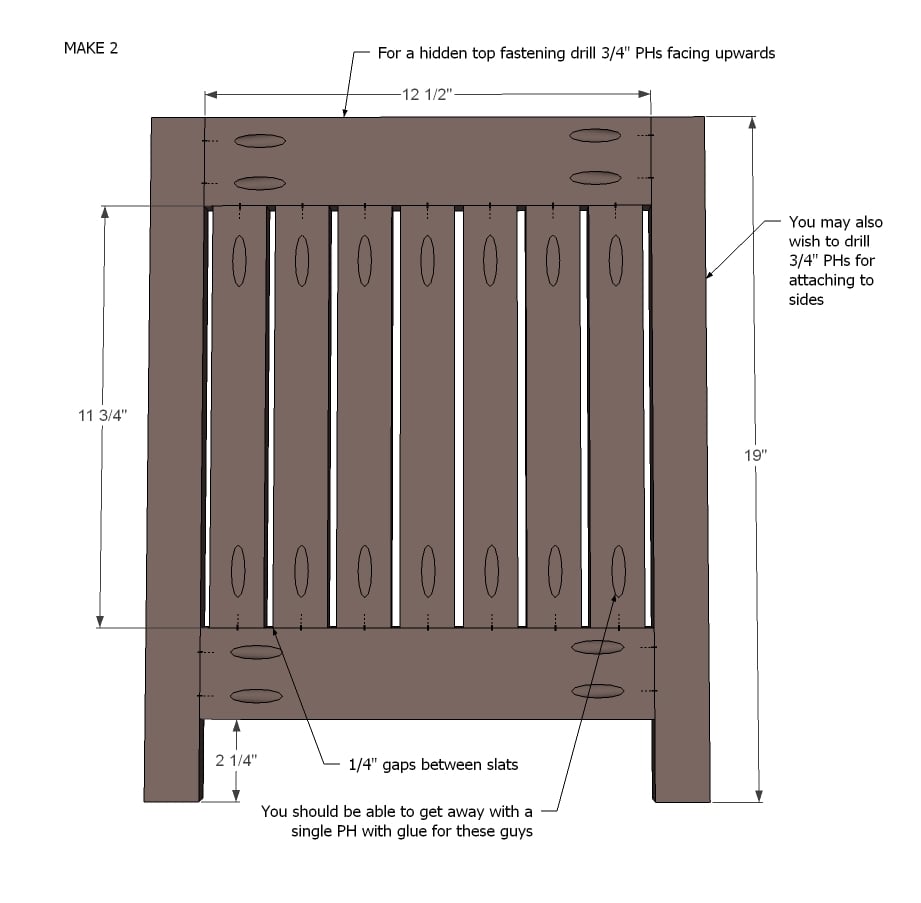
Build two sides as shown in the diagram above. Note that a Kreg Jig is highly recommended here. If you use a single PH just make sure the joint is glued so it doesn't twist out on you later.
TIP: Drill 3/4" PHs along the edges so you can attach the other sides in step 3 with screws all hidden on the insides. Also consider drilling 3/4" PHs facing upward for attaching top in later steps too.
Step 2
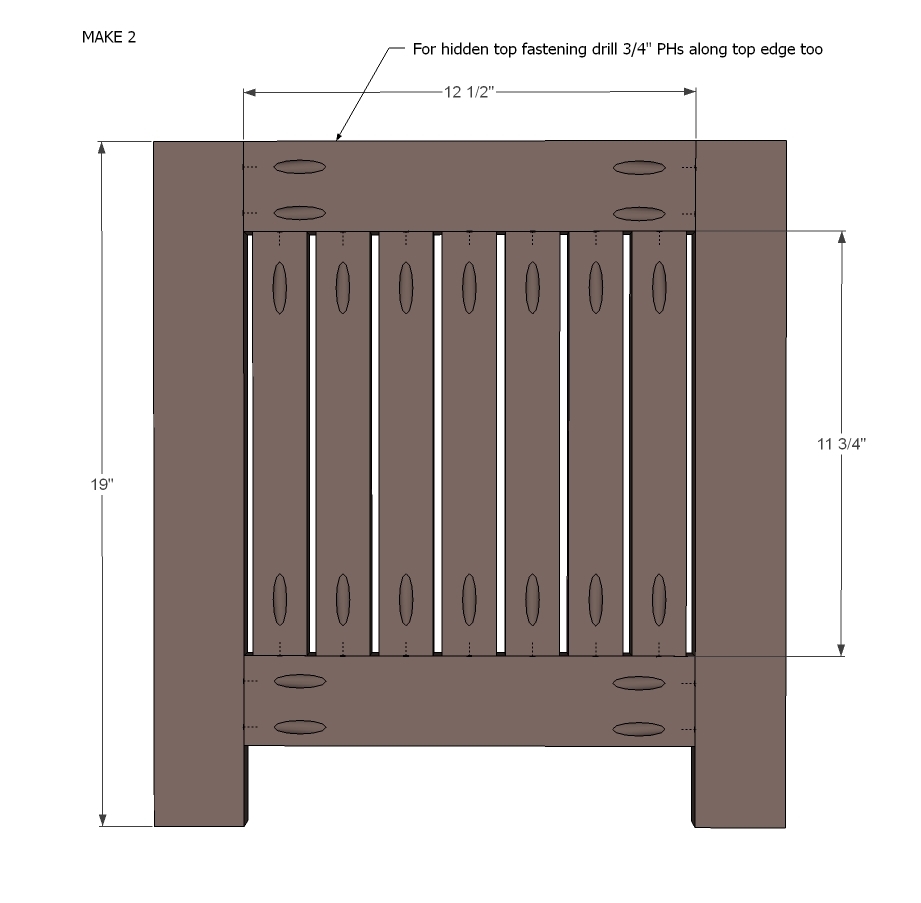
And build two of these guys too.
TIP: Consider drilling 3/4" PHs facing upward for attaching top in later steps.
Step 3
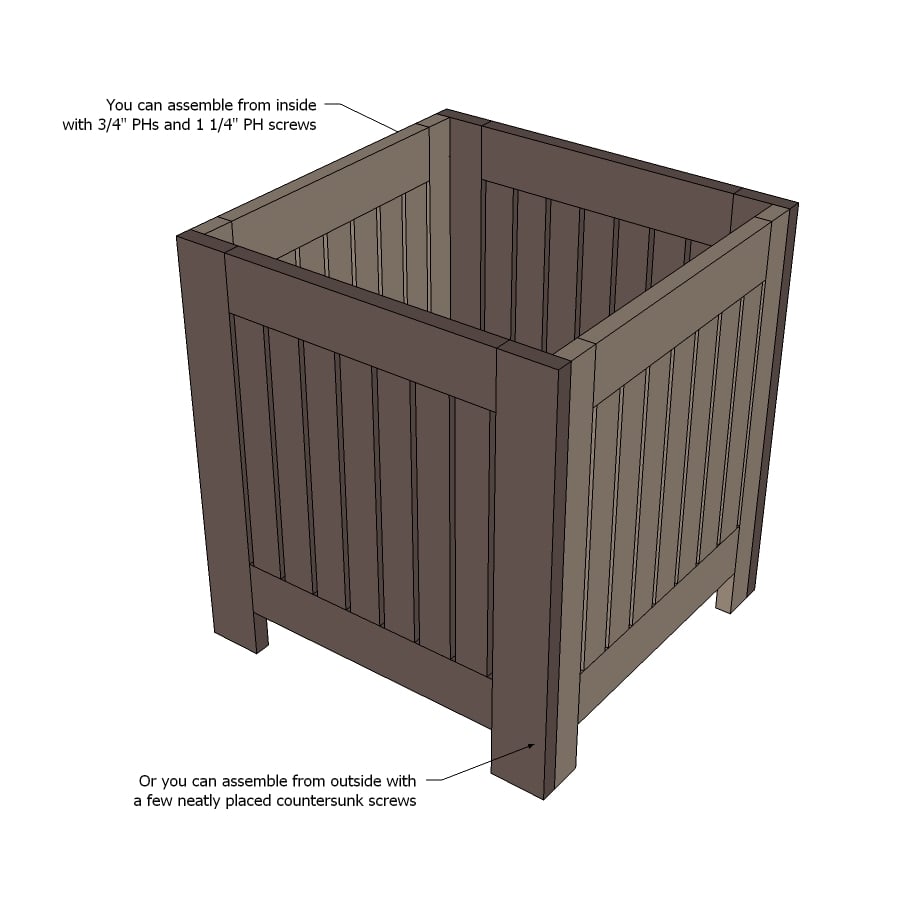
Now attach the four sides.
Step 4
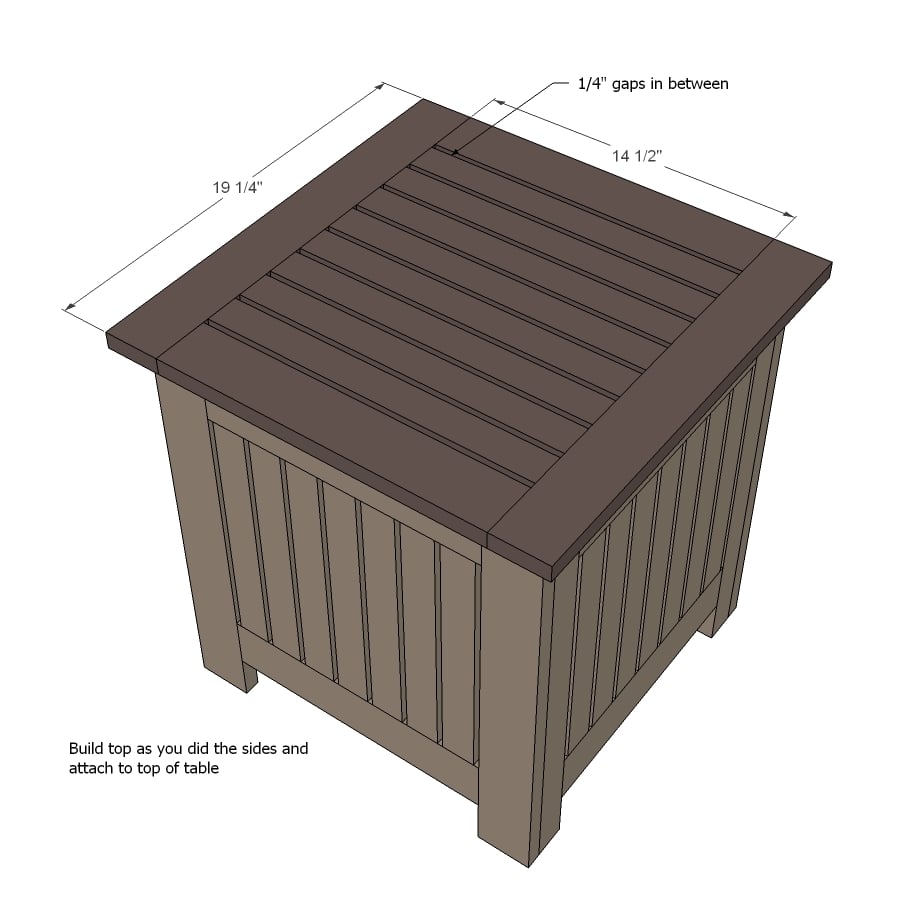
Build the top as shown above. To fit an umbrella through, you notch a half circle out of each of the center 1x2 boards.
Step 5
It is always recommended to apply a test coat on a hidden area or scrap piece to ensure color evenness and adhesion. Use primer or wood conditioner as needed.

Comments
Maren (not verified)
Wed, 06/20/2012 - 15:56
Amazing! I was just pricing
Amazing! I was just pricing umbrella stands and didn't like what I was seeing. This will be perfect. And the cheapo flower pot umbrella weight is so ingenious!!
redhead_61
Thu, 06/21/2012 - 08:45
Perfect
Um, this is awesome. I love things that multitask. What a great idea.
DLee (not verified)
Tue, 07/17/2012 - 11:33
Can't wait to build this.
Can't wait to build this. How do you keep the umbrella from moving around and keep it vertical?
mjc8870
Thu, 12/27/2012 - 07:38
Keep stable
What is secret to keeping umbrella stable?
Campjohn
Sat, 07/23/2016 - 18:44
Great project
this is a great project. Really like how dimensions make best use of common stock. A few suggestions:
mattH
Thu, 07/18/2019 - 13:48
Awesome, but check the shopping list
Great project! Built one this weekend and it was pretty simple. The shopping list will leave you short on 1x3 though. Buy and extra 6' board for the bottom apron. I just skipped that step and it still looks great!
TIP: I used 1/4 in. tile spacers ($2.50 for a bag) to make sure I had the spacing even. Made it super easy.
Thanks to Campjohn for the weighted base idea (5 Gal. bucket, concrete, and PVC pipe). My umbrella fit perfectly into a 2 in. PVC pipe.
Thanks Ana for the great website and awesome projects!