


How to build stairs! Free step by step instructions from Ana-white.com

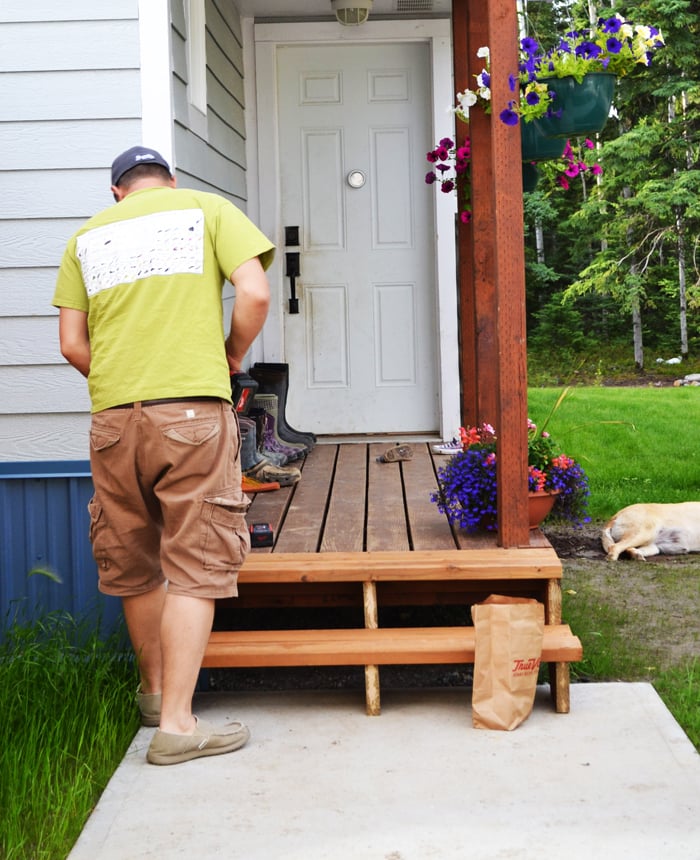


I don't know how or when, but sometime this summer, after a long day working on the Momplex, we decided that we needed to build stairs for our own home front porch.
You see, we've been front porch stairless every since we poured new sidewalks in our front yard - the old stairs won't work because the sidewalks changed the overall stair height.

And for weeks, we've just been getting a little extra exercise every time we step off or on the front porch, and alot of extra exercise when hauling in groceries.
But enough is enough, and one night, we just decided to build the stairs! I grabbed my camera so I can show you how - just in case you need to build stairs too!
And it certainly did not hurt that Grandpa Tim cut our stringers for us!
So how do you build stairs? Do you notch out the tops? Add a bottom plate? Have any secrets to share? Let us know!
Preparation
2x12s for stringers (most likely sometimes 2x10 or 2x8 are used, depending on rise/run)
2x6 for treads or other tread material


Please read through the entire plan and all comments before beginning this project. It is also advisable to review the Getting Started Section. Take all necessary precautions to build safely and smartly. Work on a clean level surface, free of imperfections or debris. Always use straight boards. Check for square after each step. Always predrill holes before attaching with screws. Use glue with finish nails for a stronger hold. Wipe excess glue off bare wood for stained projects, as dried glue will not take stain. Be safe, have fun, and ask for help if you need it. Good luck!
Instructions
Step 1
Measuring
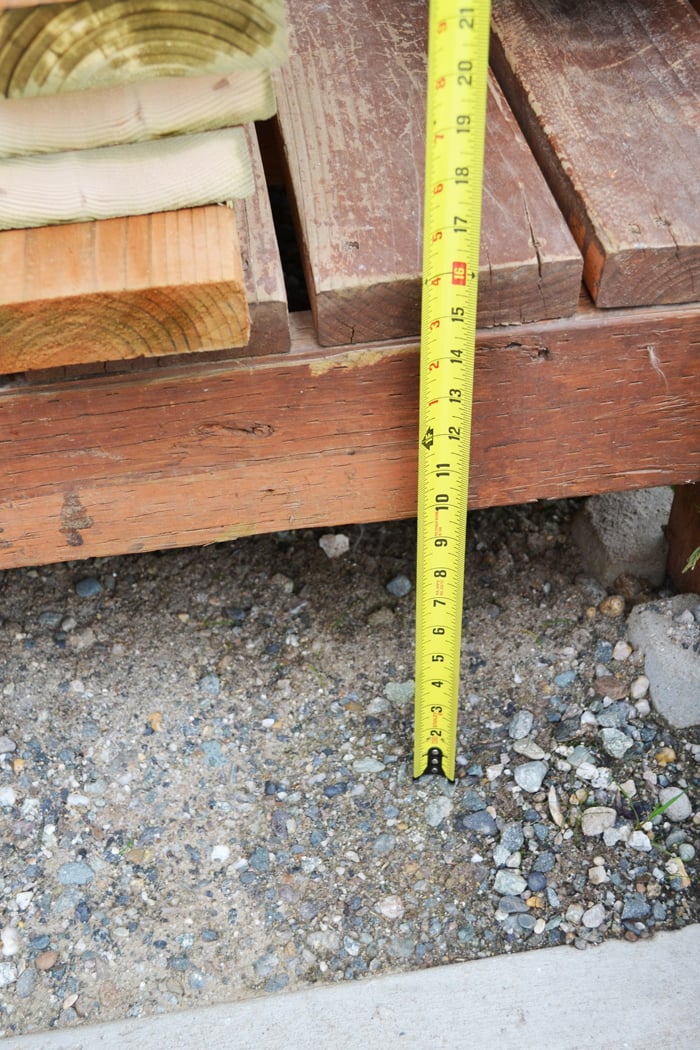
The first thing you do is take an overall measurement. What is the overall height that your stairs will cover? Write this number down.
Also figure the width you want your stairs to be.
Step 2
Calculating
Now some math:
1. Find Number of Rises
Divide Overall Height by 7 (OVERALL HEIGHT / 7 = ????)
Whatever number you come up with will be followed by decimals. Drop the decimals. Keep the whole number. This is your number of RISES.
So in my example, my overall height is 16". 16 / 7 = 2.2857.... I drop the decimals and we know we need 2 rises.
2. Find Height of Rises
Now we know the overall height of all rises and the number of rises, now we just need to find the height of each rise. Take your Overall Height and divide by your number of rises.
In my example, my overall height is 16" and we have two rises. 16 / 2 = 8. Each rise will be 8".
3. Determine Tread Widths.
For us it doesn't matter where the stairs come out, so we pick 11" as our tread width (that's 2 - 2x6s and a little nosing). If your stairs must come out at a certain spot, find your overall desired run length, divide by the number of treads, and that's how you would figure your tread width. Keep in mind what material you will use for your treads.
Step 3
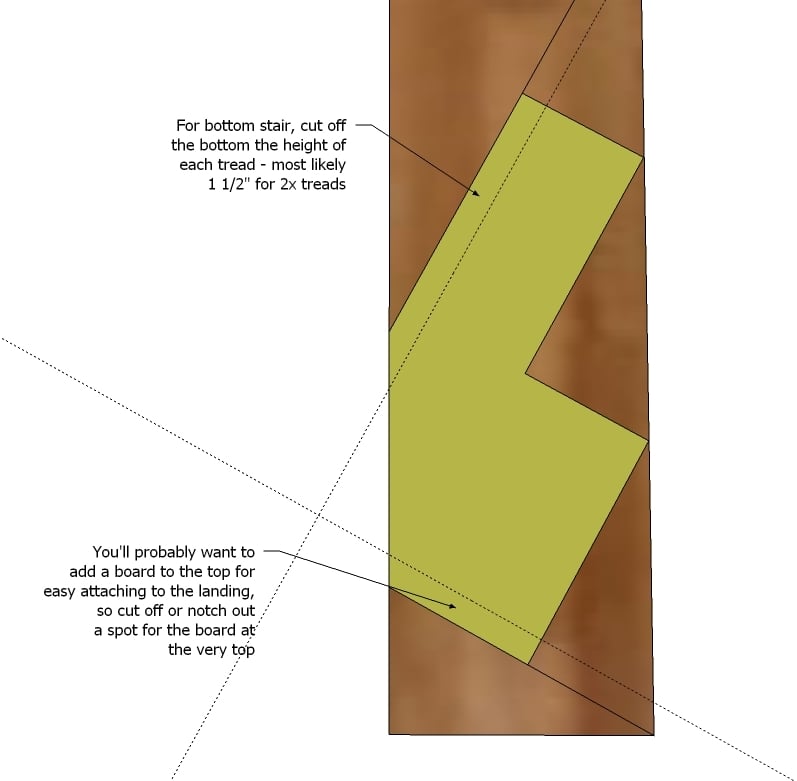
Marking Stair Stringers
You'll need a rafter square, preferably one that has adjustable metal stops on it. Identify on your square your rise and tread run and mark. For me, it's 8 and 11. In the diagrams, I show 7 and 11.
Line the rise and runs up with the edge of the board and mark. Here's how we marked our stringers for the Momplex:
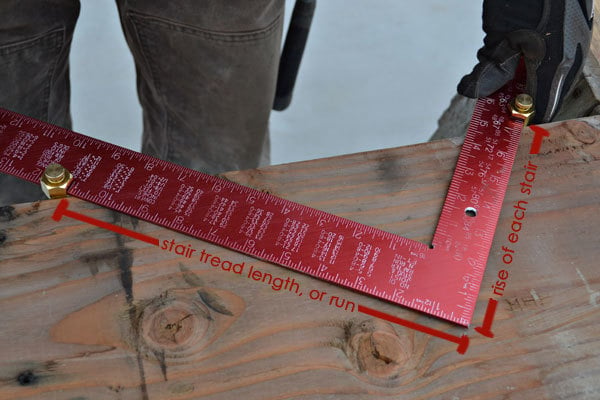
We are using a rafter square with metal stops.
Step 4
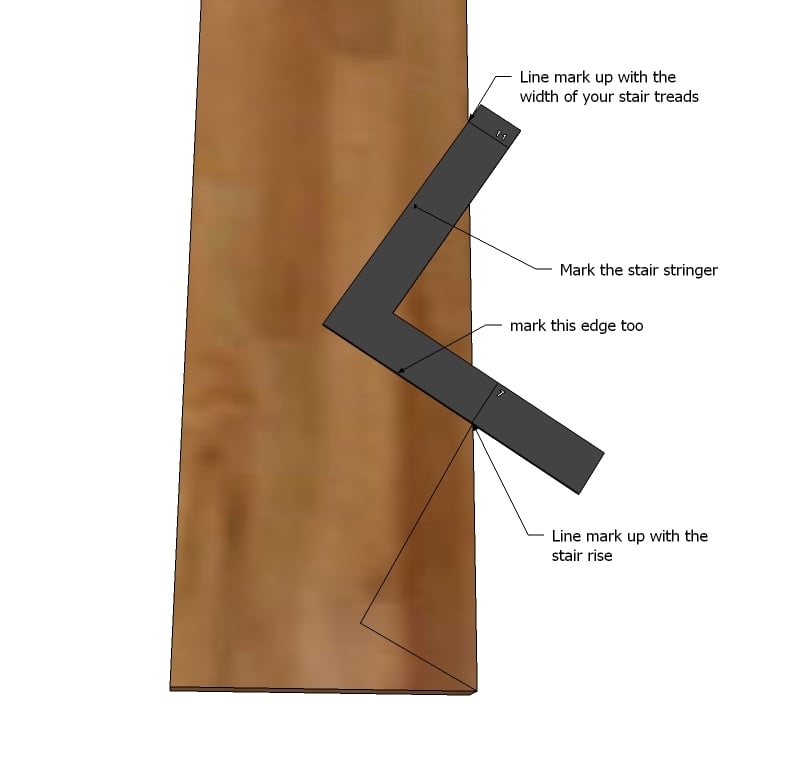
Marking Additional Stairs
And this is easy now - just move down, lining up the square with the previous marks and edge.
Step 5
Step 6

Here's our pretty dinky stringers, but you get the idea.
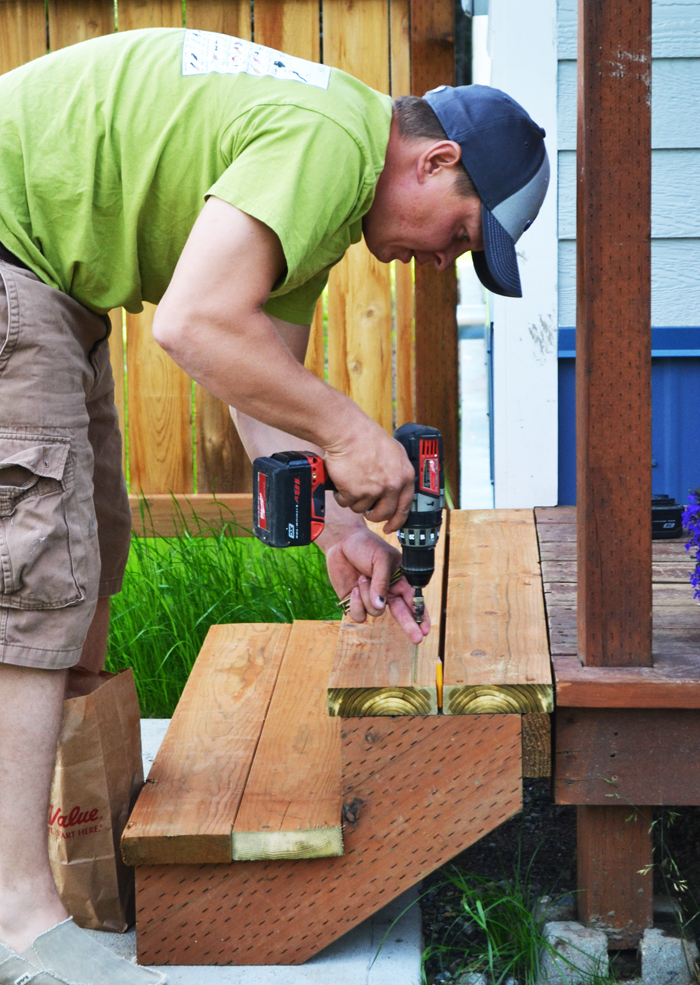
The stringers are cut with a circular saw and the cuts finished with a hand saw.

Step 7
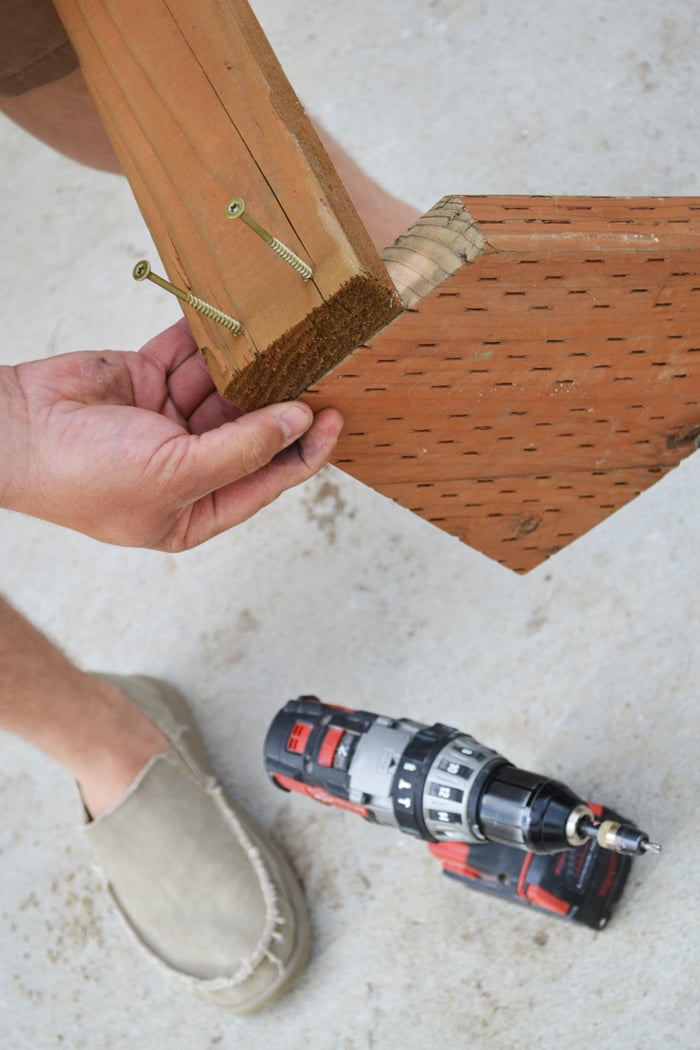
Then we attach a back to the tops of the stringers.
Step 8
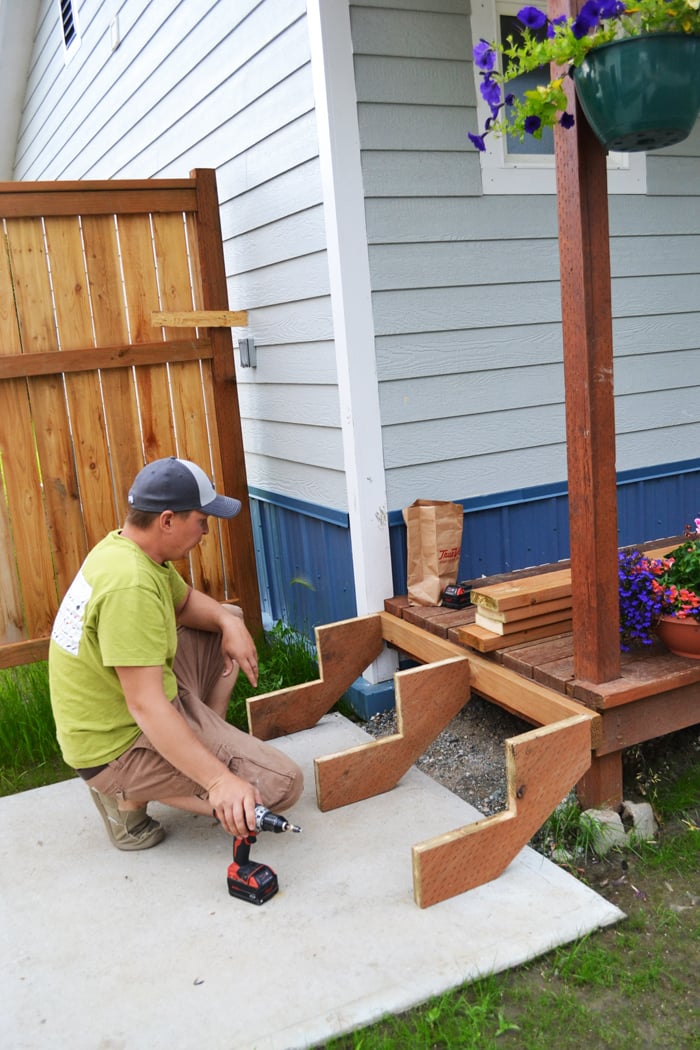
And attach the back then to the landing.
Step 9
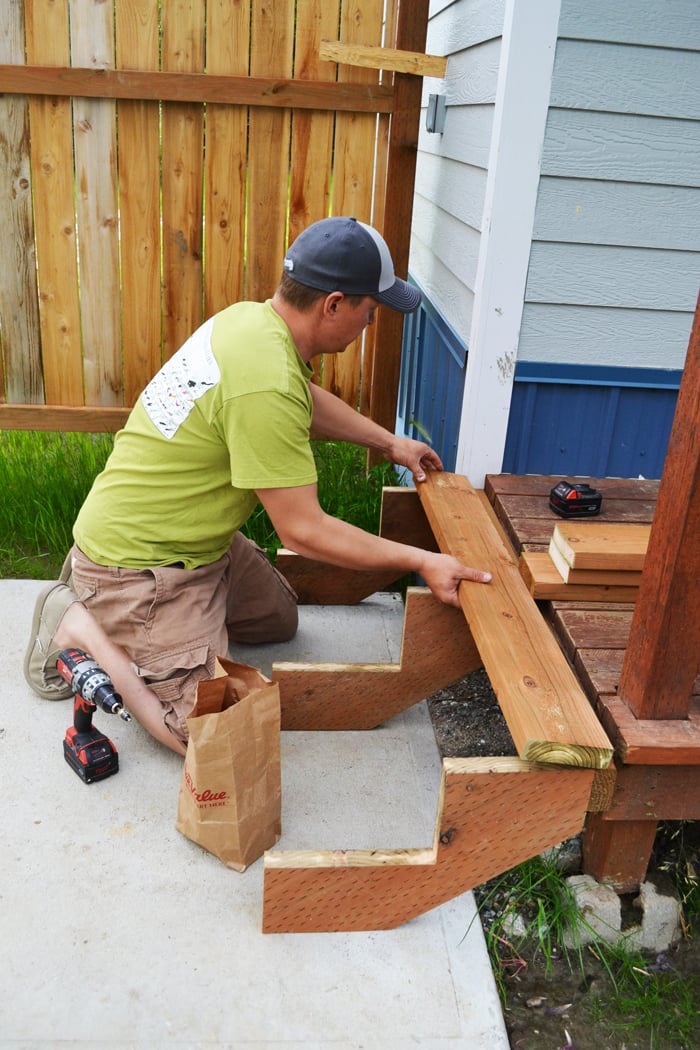
Then we just add the first tread.
Step 10
And then the next treads.
Step 11

We use a carpenter's pencil for a gap between the treads.
Step 12

And just screw all the treads down.
And that's the quick and easy way to build stairs!
It is always recommended to apply a test coat on a hidden area or scrap piece to ensure color evenness and adhesion. Use primer or wood conditioner as needed.
Comments
Lawanna (not verified)
Fri, 09/14/2012 - 12:09
detatched garage
Nice looking stairs. I hadn't noticed that they were missing.
Just curious....why did you guys decide to not attach the garage to the house? Here in the lower-48 where it gets "cold" in the winter, garages are usually attached to the house. I'd think you'd want that in Alaska too.
In reply to detatched garage by Lawanna (not verified)
tracysmith
Sat, 09/15/2012 - 11:13
If I remember correctly...
I believe they built the garage first and actually "lived" in that while they were building the house. I think if they attached it, it would open up their garage to the elements - but I could be wrong. Ana will definitely have to be the last word on that. :-)
Quintin79
Fri, 09/14/2012 - 19:15
Nice idea with the pencil. I
Nice idea with the pencil. I usually use a screw or speed square, but I have such a pain keeping the square in my pouch.
Ana White
Sun, 09/16/2012 - 17:20
Yes, Tracy you are right!
Yes, Tracy you are right! Funny thing is I still feel like we live in the garage haha!
We love that the garage is detached also to keep fumes and sawdust and loud noises (think nailers and saws) away from the house but in our next house, I'm definitely drawing an attached garage in there!
James (not verified)
Mon, 09/17/2012 - 09:06
Just a quick warning about
Just a quick warning about building codes and such. most places there is a maximum height between steps, maximum over hang, maximum variance of distance between steps(1/4 to 1/8 overall is normal), and railing requirements(over 3 steps in most places) and requirements of permits. These are mostly so if the delivery guy trips you don't shell out the money to cover his medical bills... check with the local inspectors office, a $50 permit could save you hundreds of dollars in fines.
BTW Ana i love your site, thanks for making it suck up so much of my time gawking...
Ms Aubrey
Wed, 09/19/2012 - 12:11
Building stringers...
In southeast MI, pre-made stringers are readily available for a decent price, but only for a 5 run [or less] stringer. We needed 7. To custom order them, it would've cost us $200 [needed 3 of course]. So my husband and I did the math and made our own! Take a look at my profile pic. That is our home and my husband and dad built the porch, but my husband and I did the stringers and stairs. I am very proud of the work we have done to our home so far. And there is a lot more to go... It was built in 1906!
April Simpson
Sun, 03/17/2013 - 17:06
Storage Shed
I love this site, I've been creeping for a year trying to get up the nerve to actually make something. I finished turning a closet into a pantry today and was looking on here for my next project. I am going to redo the stairs to our detached storage shed in the back. Thank you so much Anna, I am certain that I can follow the steps that you've laid out here.