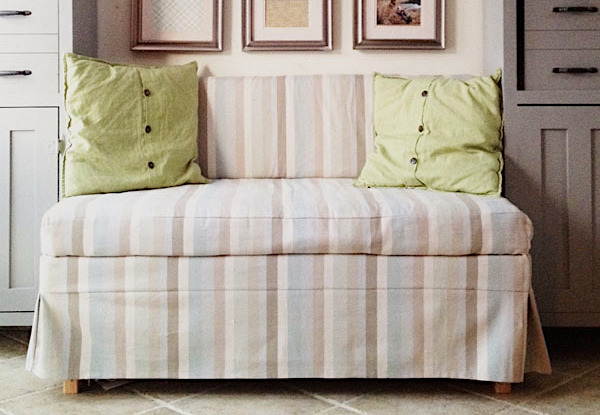
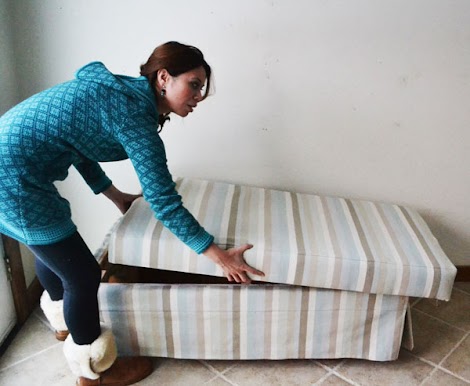
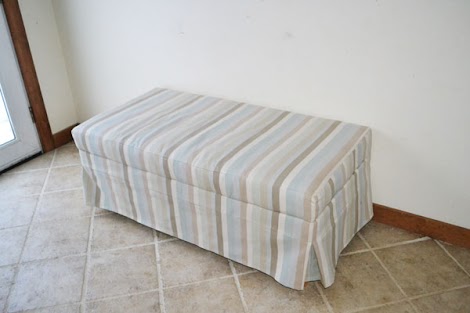
How to build an upholstered banquette seat. Free step by step plans from Ana-White.com
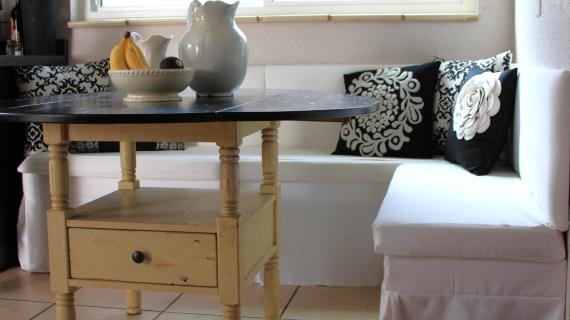
4 feet wide x 2 feet deep back is 12" high
Preparation
Shopping List
- 3 - 2x4 @ 8 feet long
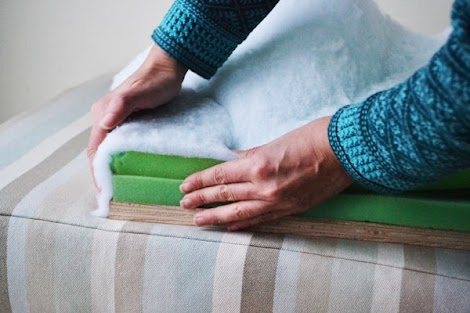
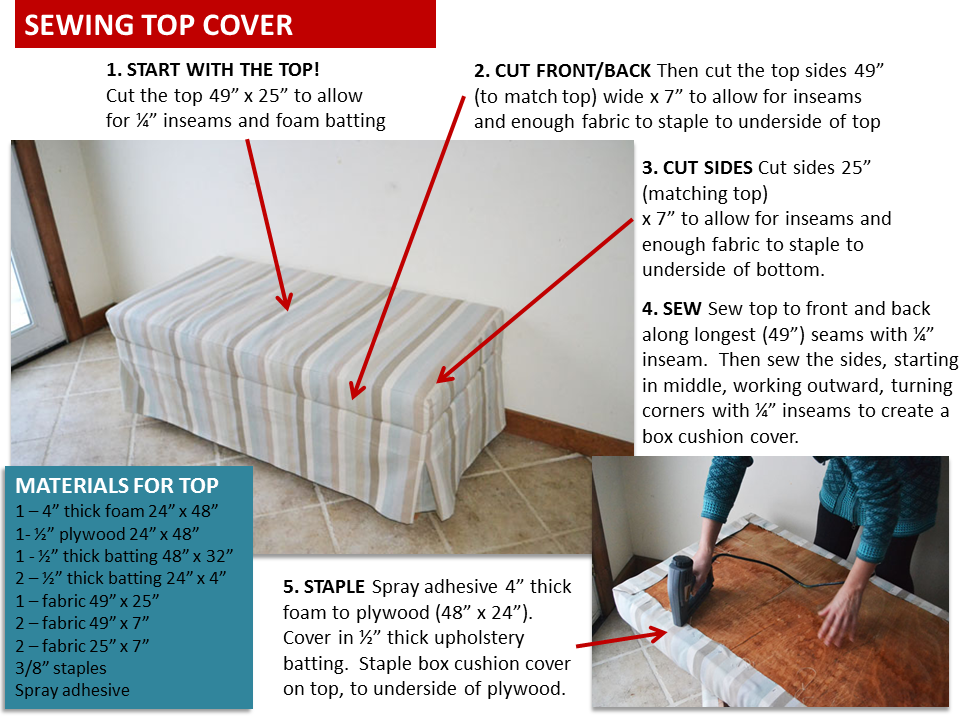
- 4 feet of 4" thick high density foam
- 4 feet of 2" thick high density foam
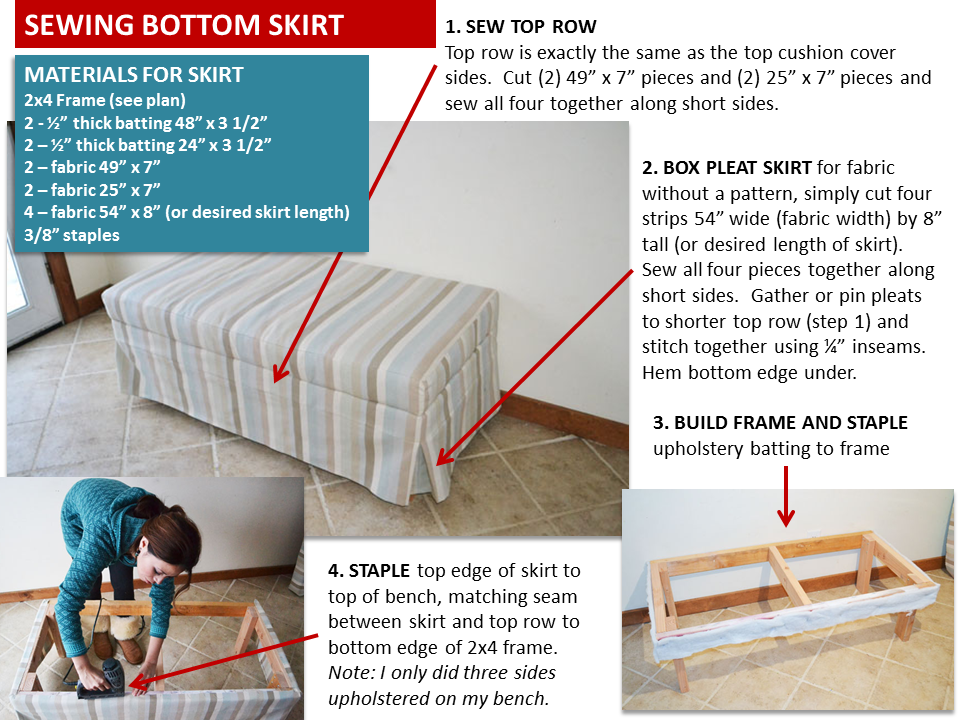
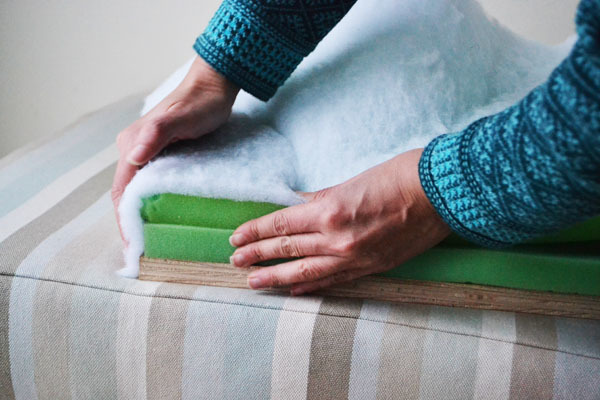
- 2 yards 1/2" thick upholstery batting
- 3 yards 54" wide home dec fabric (for direcitonal or patterned fabric, you may need additional fabric)
- Staple gun and 3/8" staples
- Spray adhesive
- 2 1/2" screws and wood glue for building frame
- 1/2 sheet of 1/2" thick plywood (4 feet x 4 feet)
- Sewing notions and thread
Cut List
FOR BENCH FRAME
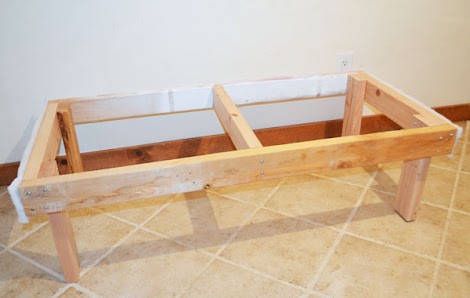
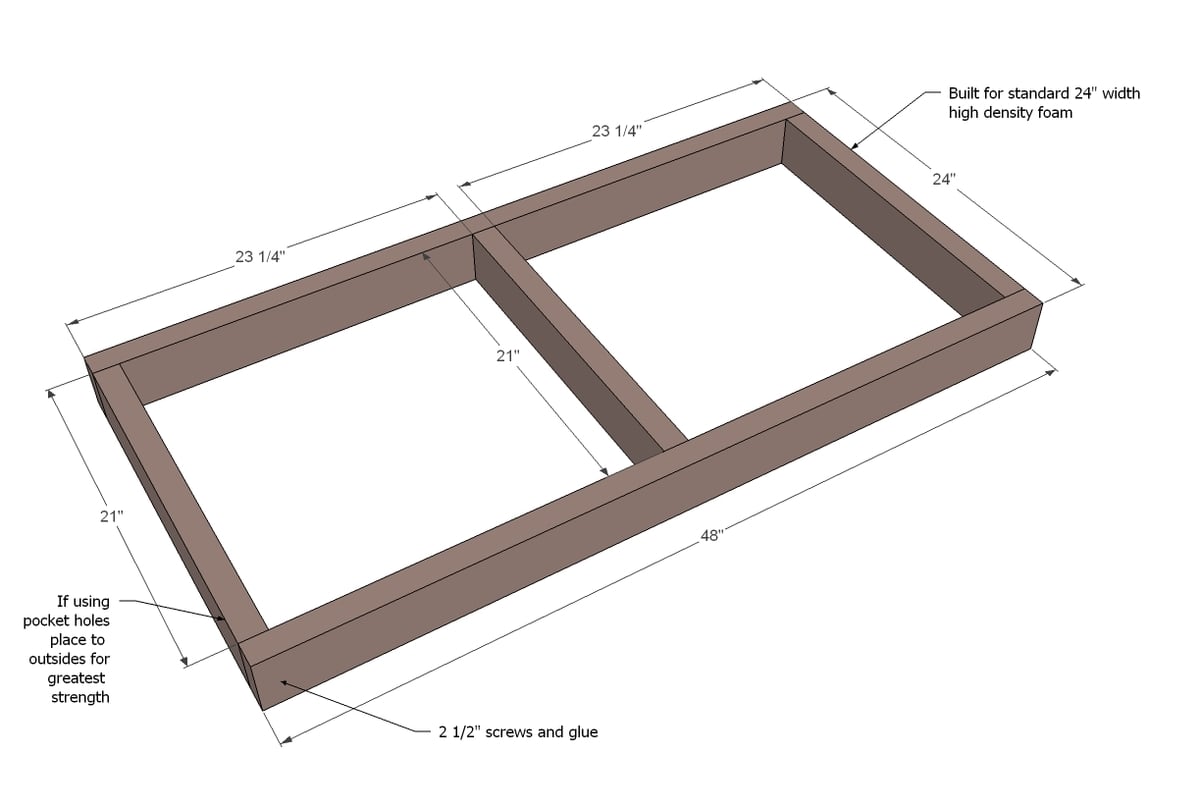
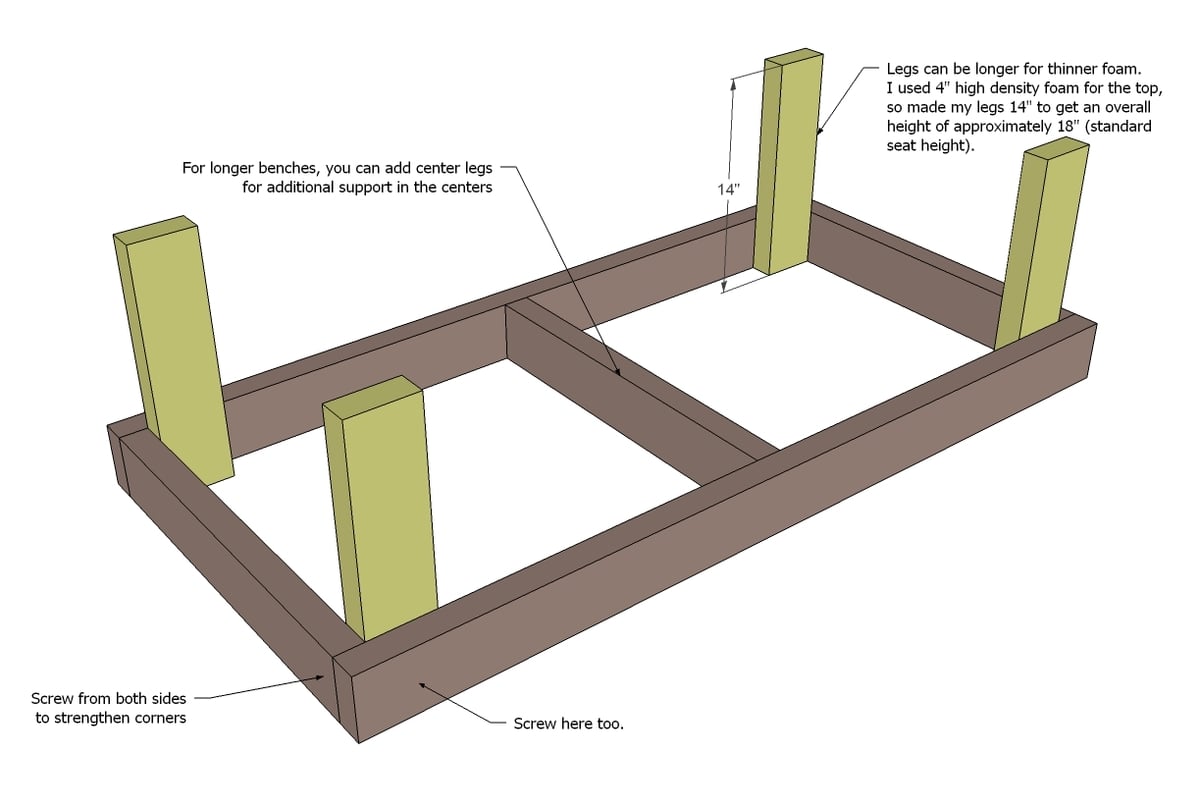
- 2 - 2x4 @ 48"
- 3 - 2x4 @ 21"
- 4 - 2x4 @ 14" (can be made longer or shorter for different height bench seat - standard seat height is 18")
- 1 - 1/2" thick plywood 48" x 24"
- 1 - 1/2" thick plywood 48" x 12"
General Instructions
Please read through the entire plan and all comments before beginning this project. It is also advisable to review the Getting Started Section. Take all necessary precautions to build safely and smartly. Work on a clean level surface, free of imperfections or debris. Always use straight boards. Check for square after each step. Always predrill holes before attaching with screws. Use glue with finish nails for a stronger hold. Wipe excess glue off bare wood for stained projects, as dried glue will not take stain. Be safe, have fun, and ask for help if you need it. Good luck!
Instructions
Step 2
Step 6
Finishing Instructions
Preparation Instructions
Fill all holes with wood filler and let dry. Apply additional coats of wood filler as needed. When wood filler is completely dry, sand the project in the direction of the wood grain with 120 grit sandpaper. Vacuum sanded project to remove sanding residue. Remove all sanding residue on work surfaces as well. Wipe project clean with damp cloth.
It is always recommended to apply a test coat on a hidden area or scrap piece to ensure color evenness and adhesion. Use primer or wood conditioner as needed.
It is always recommended to apply a test coat on a hidden area or scrap piece to ensure color evenness and adhesion. Use primer or wood conditioner as needed.










Comments
MyRepurposedLife (not verified)
Wed, 01/02/2013 - 12:09
sweet banquette!
ohhh Ana! you make it look so easy! how sweet they both are, the kiddo AND the banquette seat!
Love it!
Charmaine (not verified)
Wed, 01/02/2013 - 13:04
back of the banquette
Do you upholster the back the seat too?
Cindy from Indiana (not verified)
Wed, 01/02/2013 - 13:06
I love this idea!
I love this idea! Very creative and I love the use of 2x4s as well. Great job!
Kathleen K (not verified)
Wed, 01/02/2013 - 13:46
Absolutely PERFECT! We have a
Absolutely PERFECT! We have a breakfast room with an angled corner...in desperate need of a banquette. I thought of building a cabinet style one, but that is more time and effort than I have available right now. I'm much more comfortable with upholstering than building furniture, so this would be easy for me. THANK YOU SO MUCH for the PERFECT solution to a problem that's been bugging me for a year! I will make the cushion cover removable so it can be laundered easily. Velcro or zippers will take care of that!
jaimecostiglio
Wed, 01/02/2013 - 15:17
Carhartts & bare feet!!!
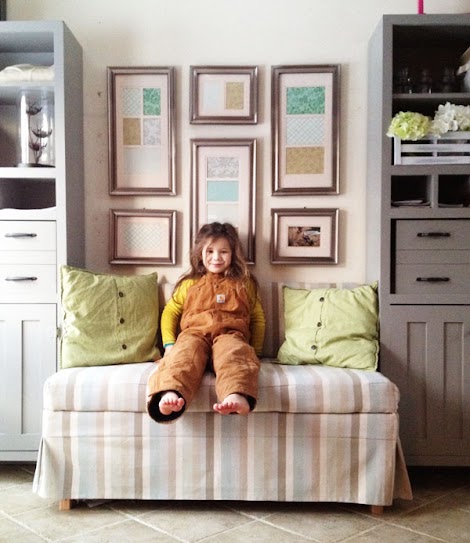
Grace is too funny. She is a true Alaskan with the Carhartt's and bare feet all in one shot. Love the banquette and your sewing skills are right up there, I'm thinking a lumbar pillow is in order - check your mailbox soon!
dreamerpaula (not verified)
Thu, 01/03/2013 - 19:08
Just what I was looking for!
I was just sitting here looking through your cupboard and hutch type plans for something I have planned in my breakfast room... I want to do a storage bench with a narrow pantry/cupboard on either side! Your site is soooo inspiring - thanks!
Kim McGee (not verified)
Fri, 01/04/2013 - 07:12
Love This Project!
This is a great project. I really love the fabric. Can you share the details of the fabric? Thanks!
KellyLynn (not verified)
Sun, 01/06/2013 - 19:36
Fabric "bins" could work, too
I love this project! we don't have a place to use it yet, but I have my eye on this for the breakfast nook we will (eventually) get done.
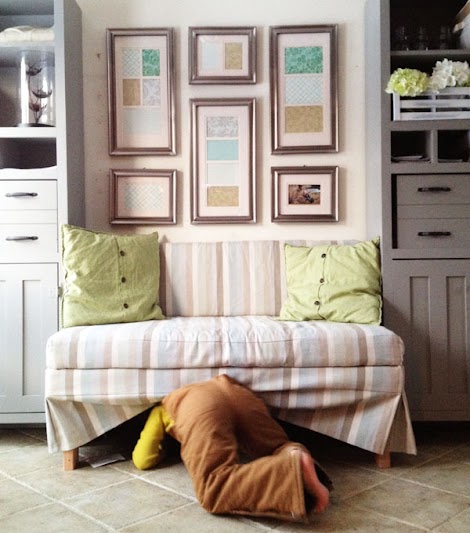
In any case, you could easily sew some fabric "boxes" to create soft storage underneath that won't hurt your heels when you curl your feet under. A squarish fabric box with handles on each side could also be hung from cup hooks installed near the tops of the frame. That way, you'd have easy (and cheap!) storage, and still have room for your daughter to play hide-and-seek.
Setjay (not verified)
Mon, 01/07/2013 - 06:37
Perfect, i know now how i
Perfect, i know now how i will upcycle my babies' mattresses !
Jillian Perrone (not verified)
Wed, 01/09/2013 - 14:01
fabric
my husband built the banquette...love, love,love it. This is our third project of yours, our first was the PBK inspired dress up vanity with mirror, and it came out great!Our next project is going to be the 20 sec tidy table...love this idea! You truly are amazing Ana. And for those who wanted to know the fabric, it's Liz Claiborne Concert Horizon, and Joann's sells it for $34.99/yd, a little pricey even with the coupons for 50% off, but looks AMAZING!
PattyMac (not verified)
Sun, 01/13/2013 - 14:30
Questions about the banquette
I want to be you! I found these plans while researching how to rebuild a couch. I'm in the process of taking mine down to the "studs;" taking off the arms; refinforcing the back; and then replacing all the padding, cushions and fabric. The result will be more of a banquette, so your plans are very timely. I have two questions, though.
Have you had any trouble with an odor from the foam purchased at Joann's? I purchased a small piece of foam last summer to re-do a chair seat and ended up throwing it out because of the chemical odor. I tried leaving it out in the sun and hand washing it with a gentle detergent but the smell (I guess some call it off-gassing) would not go away.
Second, I'm worried about instability with the seat simply resting on the base and the back resting on the seat. Is it possible for the seat and base to slide out from under a little one (or a not so little one for that matter)? Do you have any ideas about how to secure the seat to the base? I read a horrible story about a woman who lost a three-year daughter when a dresser that had not been secured to the wall tipped over on her. Not that this piece would inflict that kind of damage, but the story made me much more aware of everyday hazards.
Thanks for all you do.
Soozan (not verified)
Wed, 01/16/2013 - 06:50
I'm new to the DIY world and
I'm new to the DIY world and haven't made a single thing yet. I'm inspired by your blog! I can't wait to purchase a Kreg Jig and get started and this looks like the perfect project! Is there a way to modify these plans and also be able to make a large ottoman coffee table (without the backing of course)? Thanks, Ana!
Milca (not verified)
Fri, 01/18/2013 - 10:58
Idea to attach back to the wall
You could staple a row of 2" velcro to the wall and glue a strip on the back of your banquette back if you notice that it does budge a bit. Its inexpensive and doesn't leave ugly holes in your walls :) The 3M or velcro brand stick-on velcro sticks very well.
P.S. you don't want to stick the other half to the wall as it will rip off with paint and drywall, much easier to reposition using staples such as T-50 cheapo stapler.