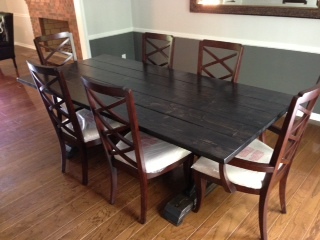
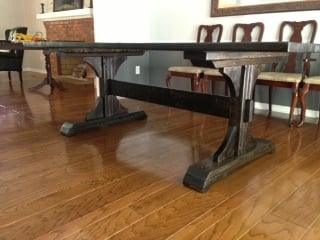
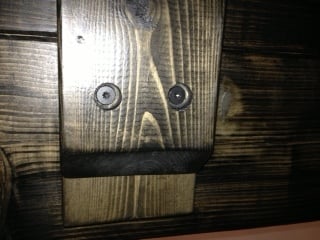
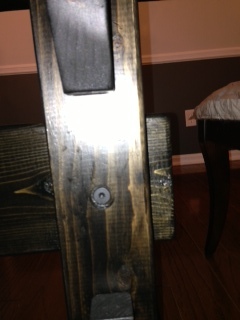
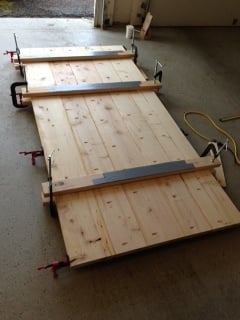
This was my first build and I had a blast! Let me say at the outset that if I can build this table with limited tools and expertise, then so can you! What I lack in know-how, I made up for by not being afraid to try something new. If you do the same, you can sure build this table. This table combines Ana's Triple Pedestal Dining Room Table (pedestals from this plan) and her Farmhouse Table (tabletop modified from this plan). Because Ana's plans are so great and thorough, I will only make note of a few key areas where I either tried something different or where I recommend paying extra close attention. First, on the tabletop, I reduced the length to 90 inches to accommodate our space, and therefore eliminated the center pedestal. As you can see, I alternated 2x10's and 2x8's. I also eliminated the breadboards simply because my wife and I preferred the rustic plank style. I also moved the pedestals in to allow a full 15 inches for a chair to slide underneath. When constructing the tabletop, I used both glue (clamped) and pocket holes on the underside. Don't overdo the glue, as it will tend to drip down (which is the top of the table...I had some drip issues). I also strongly recommend buying/borrowing clamps to keep the top flush or making them from 2x4's as I did. I worked hard on this part, and I'm glad that I did. It was still hard to keep it flush. On the pedestals, I used slightly bulkier decorative pieces (I started the arcs 1.25" from the edge on both ends of the arc). I also attached the top plank directly to the underside of the tabletop rather than to the top of the pedestal in order to both bolster the tabletop and to more easily attach the pedestals precisely where I wanted them. Finally, I drilled shallow flat-bottom holes and used wood bolts to fasten both the pedestals and the crossbeam. This created a nice-looking, low-profile fastener that still enables disassembly should we ever need to move the table (it is HEAVY fully assembled!). The finish is two coats of Minwax Ebony Wood Finish (pre-treated with Minwax Wood Conditioner) and three coats of Minwax Fast-Drying Polyurethane (two coats on pedestals). Thank you, Ana, for the inspiration! Our family has a new table because of it! Thanks to all of you for sharing in our excitement, and I'm happy to share dimensions/details/etc should it be helpful to anyone.
Comments
moosmani
Wed, 05/01/2013 - 09:16
Nice job! I really like all
Nice job! I really like all your modifications. I'm bookmarking this!
Lady Goats
Wed, 05/01/2013 - 12:56
That looks awesome!
I love what you did with the "arcs" (gotta be careful with words synonymous with this - the word "arches" makes me cringe since I had to rip arches out of nearly all the doorways in my house ;-))! Not sure that I'll ever get around to using this idea, but I must say that I love it!
Pabs
Thu, 07/18/2013 - 05:17
Excellent Job!
Beautifully done, I like the modifications. Could you please share the dimensions and any detail info please…much appreciated.
NoviceBuilder
Mon, 08/19/2013 - 10:41
Reply to Pabs
Thanks for the kind words. I think I included all of the measurements that differed from the two plans used, but is there a specific measurement(s) that you are looking for? If so, I'd be happy to provide it. Good luck!
Price0909
Sun, 03/09/2014 - 17:23
Sizes and cuts
Could you give me some sizes on the bottom posts? Cuts of 2x4's for the posts etc..
How far apart did you mount the 2 pedestals? We will be putting it in front of a corner bench.
Thanks
NoviceBuilder
Sun, 03/09/2014 - 18:47
Cuts
The uprights for the pedestals are 22". When you add in the tabletop, the four lateral pieces, and the feet, the table is 30 1/4" tall. As for the spacing of the pedestals, I chose to allow 15" from each end for the chairs to slide all the way under. But it's plenty stable and you really have plenty of freedom here, depending on how many chairs you want to use and how long your table will be.
Lisa A. Harris
Mon, 11/02/2015 - 17:05
Nice!
Very nice job!
FSUJones
Mon, 08/03/2020 - 07:25
Love this plan!
I have used this plan to build 2 tables and they are both awesome!