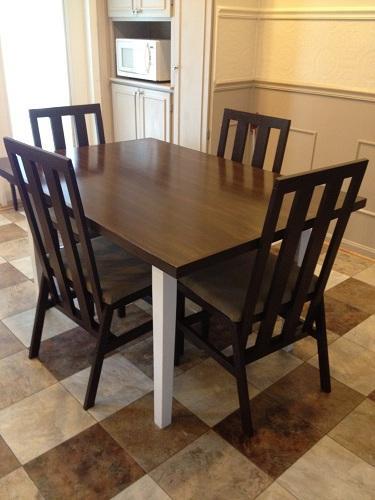
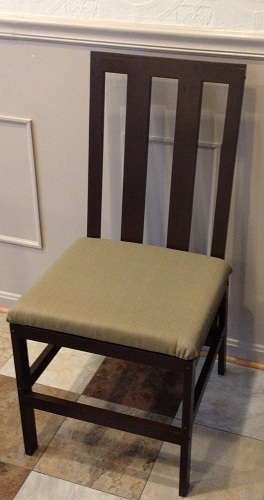
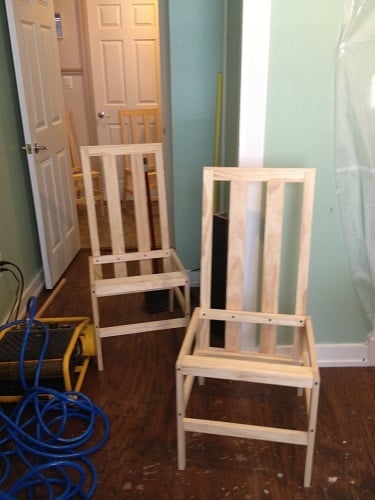
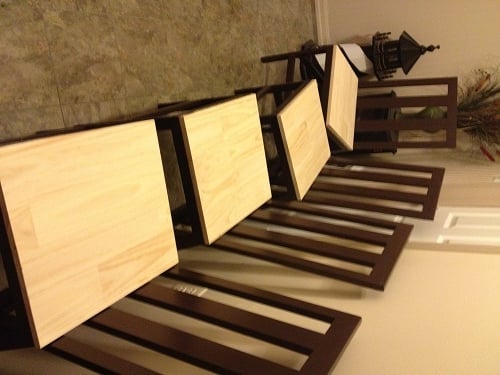
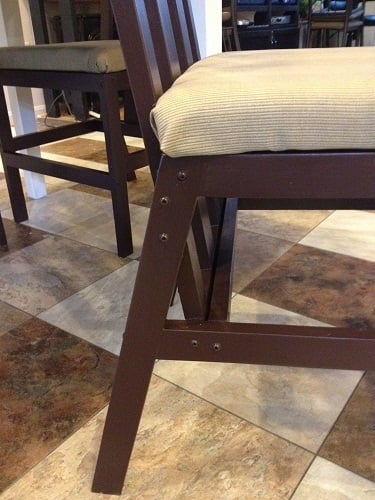
Finally I was able to replace my wobbly little dining chairs with solid wood chairs, thanks to Ana’s Harriet Chair plan. For this build, I made a few mods from Ana’s plan: added a padded seat, made the chair 2” wider, and substituted a slatted back. Used select pine 1x2 instead of 2x2 (really liked that look in the inspiration chair) and used 1x3 for the 2 inner slats on the backs. Also added a few more cross supports. Instead of predrilling pocket holes and hiding the screws, I chose to use the round washer head self-tapping screws and left them visible. This saved time on having to pre-drill and fill screw holes, but also thought the exposed screw heads made a nice decorative element. The seats are covered with 1” thick high density foam, batting, and outdoor fabric. The first of the 4 chairs took longest to make (I made and corrected all my mistakes on that one). The remaining 3 went a lot faster (took about 11 hours total for building the 4 chairs, and 12 hrs total for finishing them). The changes/steps I used are documented in a .pdf file in the second plan post linked above. Ana, thank you for all your wonderful plans. You rock!!!
Comments
alamanda973
Sun, 07/15/2012 - 11:15
Well Done!!
Very nice. Your chairs are very beautiful. I love the modifications. Well done!
JoanneS
Sun, 07/15/2012 - 12:11
Thank you!
Alamanda973, thank you very much for the nice comment! :)
knich827 (not verified)
Sun, 07/15/2012 - 16:00
I would be interested in pdf
I would be interested in pdf file if you wouldn't mind posting it!!! The chairs look awesome.
JoanneS
Sun, 07/15/2012 - 17:26
Thank you! I just posted
Thank you so much! I just posted a plan of the modifications, which includes a .pdf file of the full plan with the steps and photos (still haven't learned sketchup yet). I sure hope it worked! The .pdf file is located about 2/3 of the way down through the plan post, right below General Instructions. Let me know if the .pdf opens for you? :)
Pam the Goatherd
Sun, 07/15/2012 - 21:11
Wow! Those turned out
Wow! Those turned out gorgeous!
JoanneS
Mon, 07/16/2012 - 01:42
Thanks!
Pam, thank you for the nice comment! :)
vabvive
Mon, 07/16/2012 - 08:22
These are GORGEOUS!
You did a great job on these - the modifications you made, the fabric and the paint are all wonderful.
JoanneS
Mon, 07/16/2012 - 14:49
Thanks!!
Vabvive, Thank you for the nice comment! :) J
colsen
Sat, 11/24/2012 - 15:22
Love the backs!
Love the backs!
JoanneS
Mon, 11/26/2012 - 14:57
Thanks very much!
Colsen, thanks very much for the comment! Happy Holidays! :)
yurra-bazain
Tue, 07/09/2013 - 19:11
Love these chairs. :)
Love these chairs. :) They're so nicely done.
JoanneS
Wed, 07/10/2013 - 02:31
Thank you!
Thank you! We still love them and they are holding up great! I made a storage bench to go with these, but it still needs a few tweaks before blogging that one.
AdamR
Mon, 11/11/2013 - 08:50
Love the chairs but...
Did you also make the table? If so how/which plan did you use? The whole set together looks fantastic!
JoanneS
Mon, 11/11/2013 - 10:58
Thank you!
Hi AdamR, Thank you very much for the nice comment! Yes, we did the table also. Here's the brag post:
http://ana-white.com/2011/05/my-new-almost-farmhouse-table
This was done under my original username JES. I had locked myself out of that username and had to create a new one ;)
We used our existing table and painted the legs, and added a new top. The tabletop finished dimensions are 56" long x 38 1/2" wide.
Joanne
AdamR
Mon, 11/11/2013 - 19:38
Perfect!
This is what I have been looking for. I know my wife doesn't want any indents or grooves but it seems like everyone build tables out of boards. I don't have a jointer or planer to even the boards out.
Question 1 - the 1x2 trim...to be clear you attached the 1 inch side to the table right?
Question 2 - how has the 3/4 thickness working out? Thick enough?
Question 3 - anything you would have done differently?
Thank you so much for your help. I build some small custom shelves for my son's room, found this site and now got a major bug to build stuff we have been looking for. I actually joined the site just to ask you about the table so thanks again!
Adam
JoanneS
Tue, 11/12/2013 - 07:07
Thank you!
Thanks again for the nice comments, Adam!
On the 1x2 for trim, I attached with the 2" side to the edges of the plywood (the 1x2's were actually 1 1/2" wide and 3/4" thick). This gives the illusion that the table is 1 1/2" thick. On this one I used finish nails and glue to attach the trim. If I had it to do over again, I'd have attached the trim boards to the plywood edges with pocket holes from under the table, so there would be no nail holes to fill.
3/4" thickness for the table top works fine. Our original table had a top thinner than 3/4", so we attached this new top directly on top of it. I didn't think I could get the leg assembly off that old table without damaging it.
If you wanted a more 'beefy' feel to the whole table top, you could stack 2 pieces of plywood, glued and fastened together from the bottom with screws. The 1x2 for the edges would still cover it.
Once you catch the wood working bug, you'll want to build everything you see! :) I hope you post a brag picture when you build this. I'd love to see pictures! :)
Joanne
AdamR
Wed, 11/13/2013 - 06:02
Thank You!
First off thank you for all the info! I see now why you picked the larger trim, I didn't catch it the first time around that you put the new wood right on top of the old table. My kitchen table has the exact opposite problem the legs are weak (plus my wife hates the top too) hence why I will be doing both top and legs. Still debating on one 3/4, two 1/2 or two 3/4 inches for table thickness.
I am going to build the kids trestle table this weekend first. Just the get a project under my belt besides some book shelves. lol
http://ana-white.com/2011/09/kids-trestle-style-play-table
My Kreg Jig will be here Friday, picking up wood on Sat....hopefully I will have a unfinished kids craft table ready to roll by Sunday then the Kitchen table will be my Thanksgiving weekend project.
Thanks again for all of your help.
Adam