

DIY Desk inspired by Pottery Barn Printer desk - free step by step plans from ana-white.com
Hi everyone!
Meet Elisha from Pneumatic Addict!

I'm Elisha From Pneumatic Addict Furniture. I'm a mom of twins and wife living in sunny Arizona. I started blogging two years ago with the goal to demystify the hardware store for women. I love power tools and am convinced that you don't need a Y-chromosome to build like a boss. I offer in-depth tutorials on topics like, furniture building and refinishing, home improvement, power tools, and home decor. If something inspires you, do your research, then give it a shot!
Build like a boss. I want that t-shirt.
And does Elisha ever! Here's a few of her projects -

Coffee Table with DIY Pulley Wheels (because who can ever afford to buy wheels this big?)

Midcentury Card Catalog Bookshelf

Pretty amazing stuff, yeah?
Well, wait until you see the project that Elisha is sharing with us today!

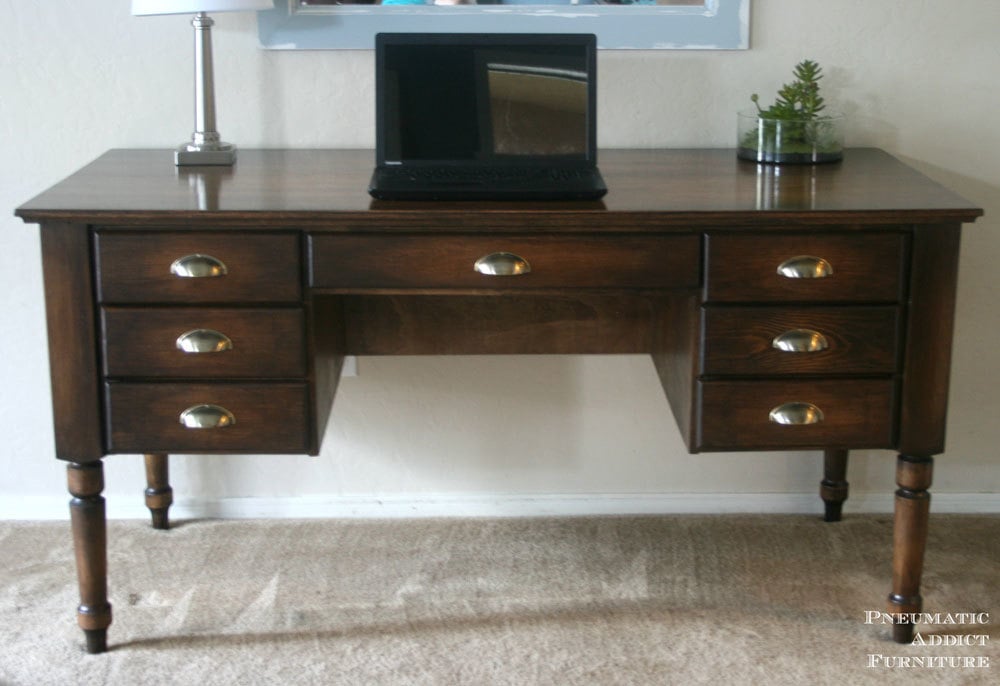
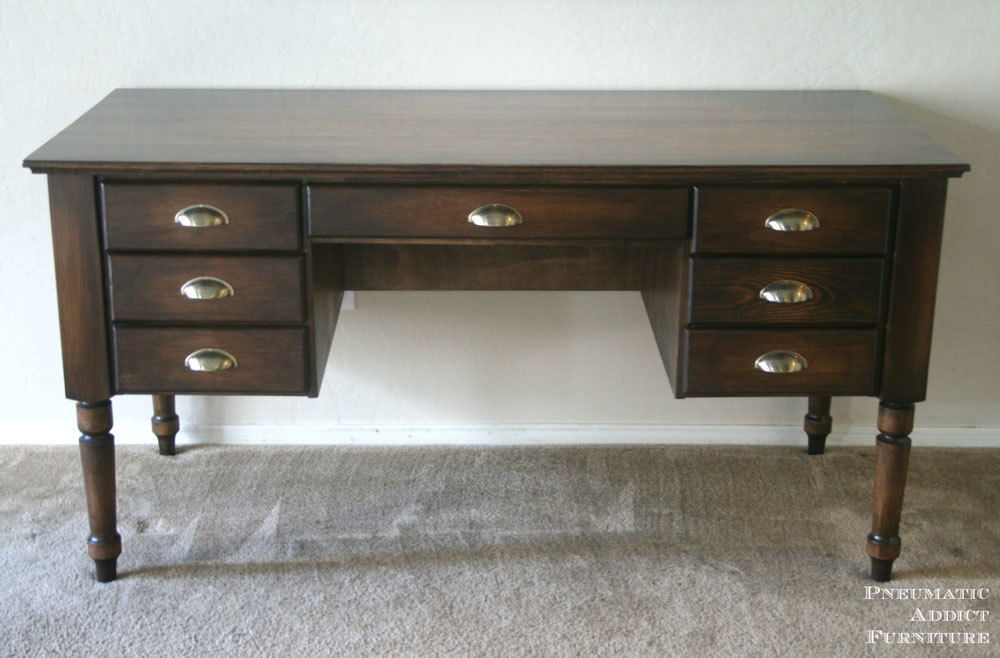
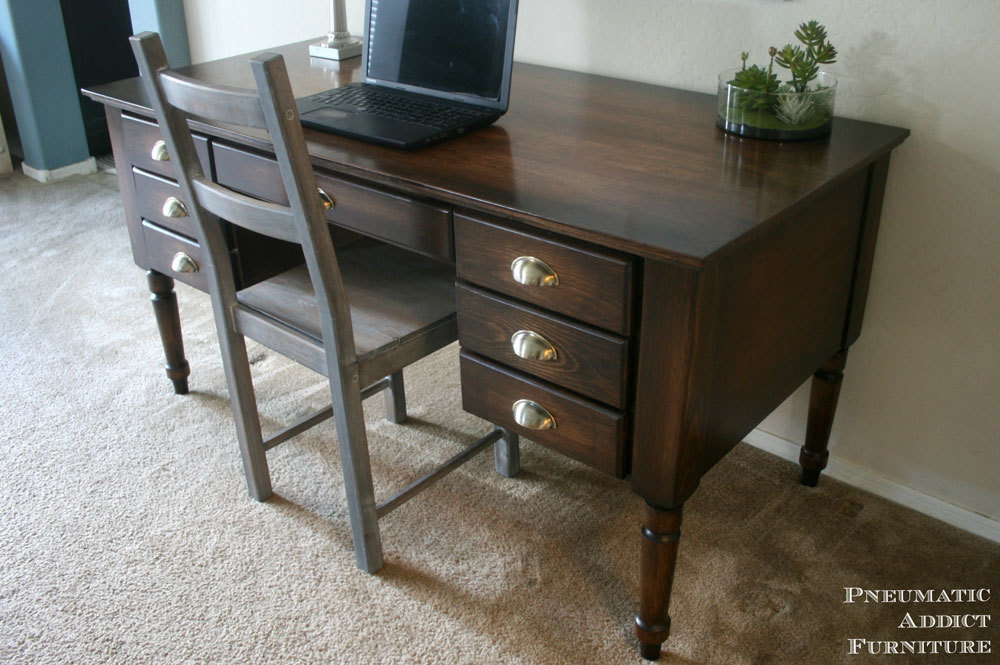
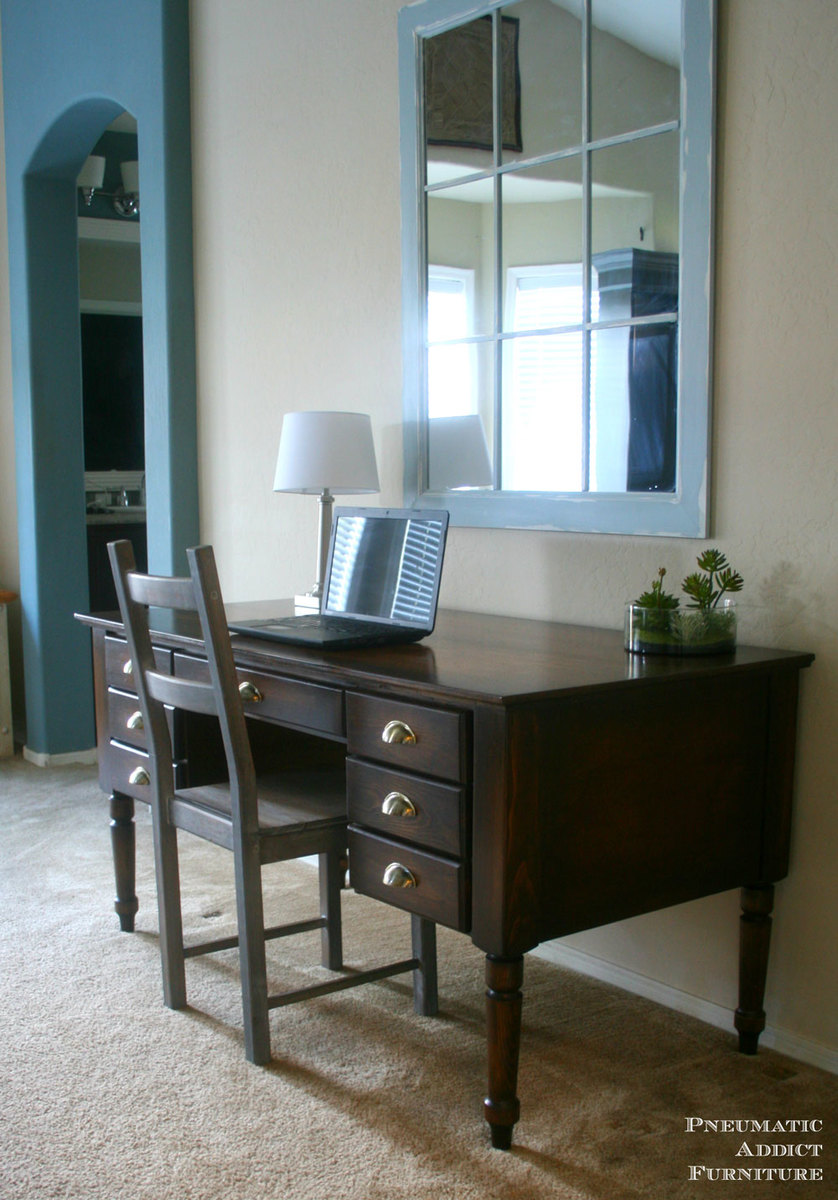
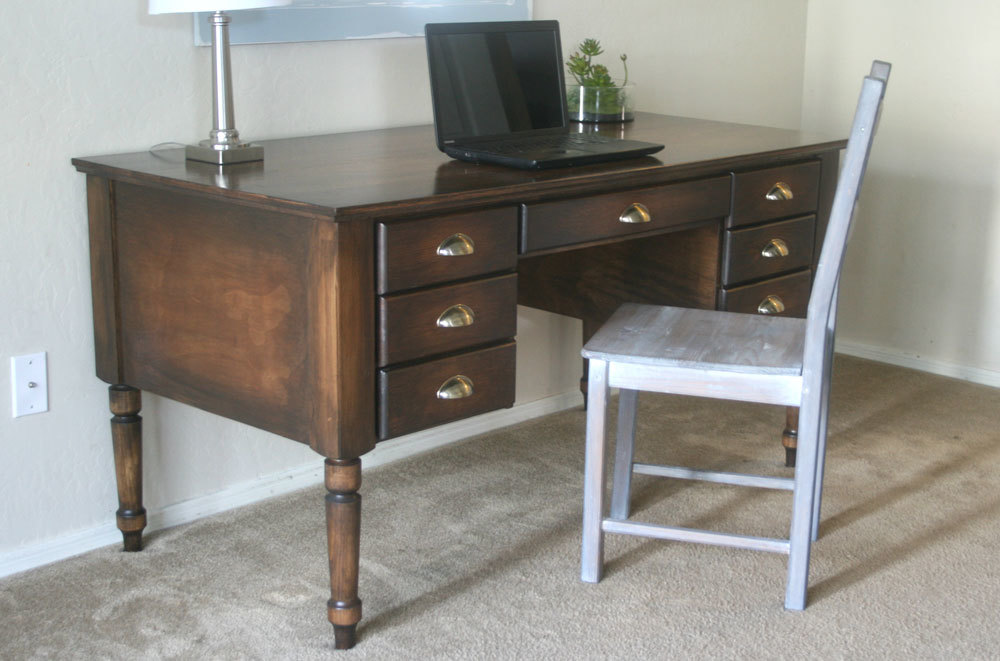
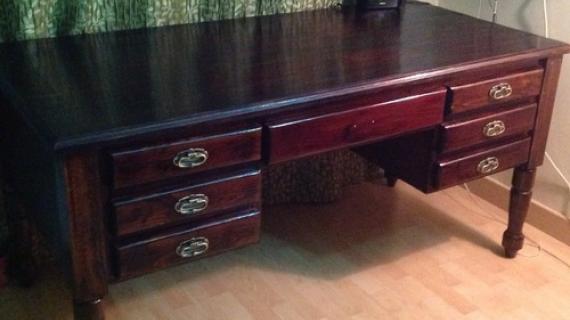
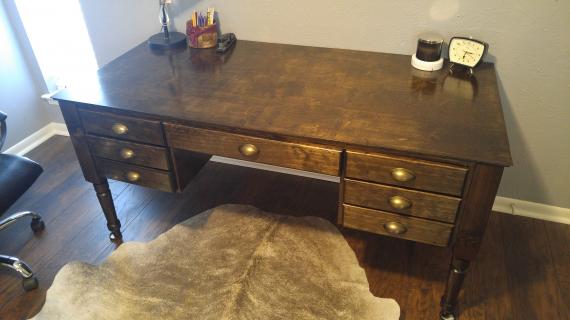
This desk. Yes, this desk is completey DIY.

Here's from Elisha about this desk:
My poor husband has been a full-time student, putting in countless hours of homework for years without a proper desk. For his birthday this year, he asked if I would please build him a study space. After searching the internet and pinning dozens of ideas, I decided I wanted a traditional, stained wood desk that would stand the test of time. I chose the Printer's Keyhole Desk from Pottery Barn as my inspiration. I love what I ended up with! A large, solid wood desk for a fraction of the price as the Pottery Barn version. Although this desk is a little complex to build, it went together very smoothly and wasn't very difficult.
Elisha is sharing more photos, tips and tricks on her blog here, please go visit her now!
And make sure you follow her as well so you can be inspired and learn of new projects she posts -
Preparation
1 - sheet of 3/4" plywood (rip two strips 13-1/2" wide x 8 feet long and save scraps for drawer faces)
4 - turned legs (Elisha used these ones)
4 - 1x2 @ 8 feet long
1 - 1x12 @ 10 feet long
1 - 1x3 @ 8 feet long
1 - 1x4 @ 3 feet long
5 - 1x6 @ 6 feet long
1/4 sheet of 1/4" thick plywood (for drawer bottoms)
3 - 16" Euro Drawer slides (the white cheap ones)
1 - 3/4" plywood @ 13-1/2" x 56" (back)
2 - 3/4" plywood @ 13-1/2" x 24" (sides)
2 - 3/4" plywood @ 13-1/2" x 28-1/4" (inner sides - must notch top out for 1x2 - recommend edge banding front edge)
1 - 1x2 @ 56" (front top)
2 - 1x2 @ 12-1/4" (front side trim)
2 - 1x2 @ 14-3/4" (front bottom trim)
1 - 1x2 @ 25" (front center drawer bottom trim)
2 - 1x2 @ 26-3/4" (drawer slide supports)
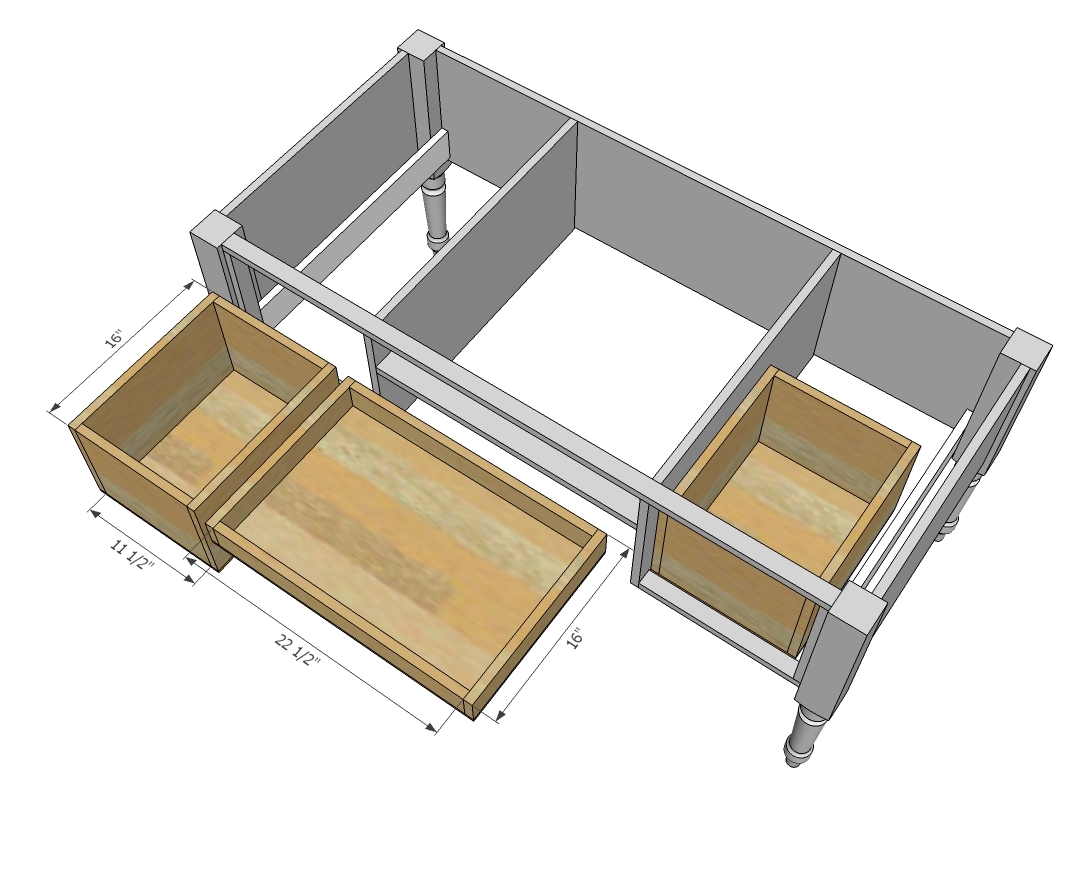
DRAWERS - CUT TO FIT OPENINGS!!!
For the 2 Large Drawers, can also be made from 1x10 or 1x8 boards
4 - 1x12 @ 16" (sides)
4 - 1x12 @ 11-1/2" (front/back)
2 - 1/4" plywood @ 13" x 16" (bottoms)
2 - 3/4" plywood @ 13-3/4" x 12" (faces)
For the 1 smaller drawer
2 - 1x3 @ 16" (sides)
2 - 1x3 @ 22-1/2" (front/back)
1 - 1/4" plywood @ 24" x 16" (bottom)
1 - 1x4 @ 24 - 3/4" (Face)
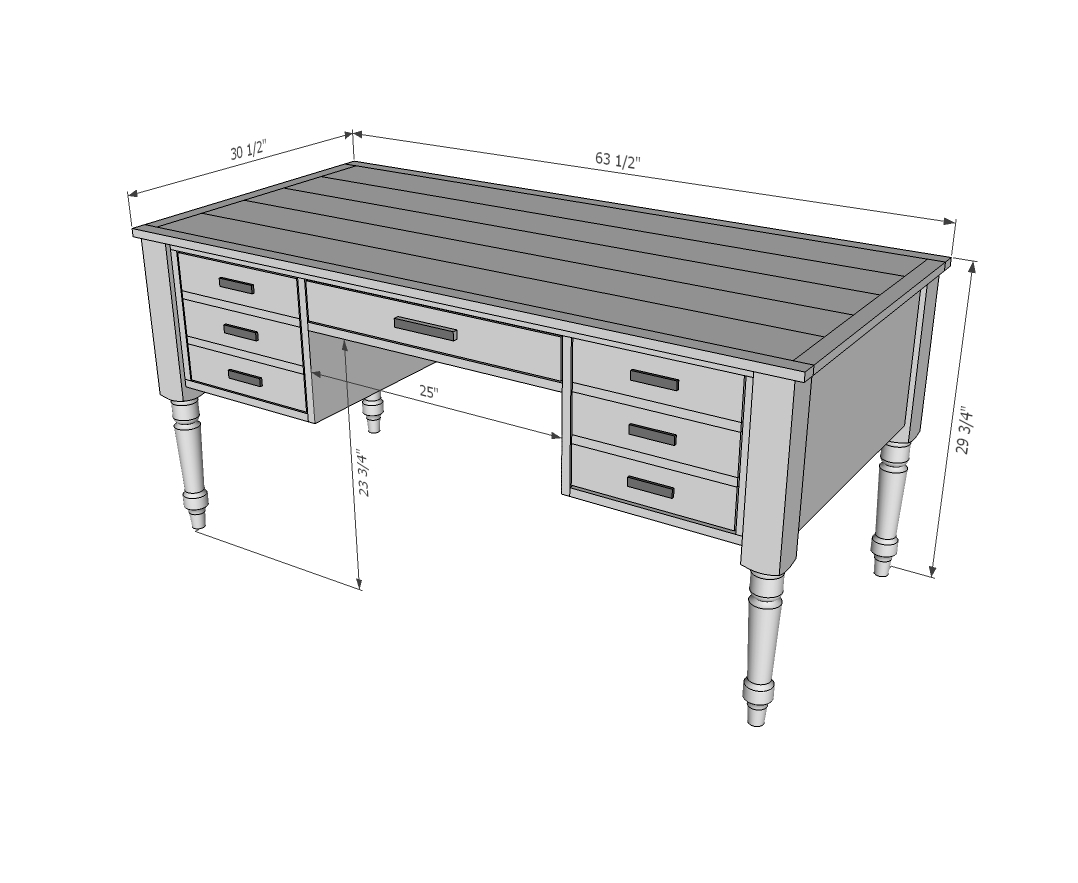
TOP
5 - 1x6 @ 60-1/2"
1x2s cut to fit around top


Please read through the entire plan and all comments before beginning this project. It is also advisable to review the Getting Started Section. Take all necessary precautions to build safely and smartly. Work on a clean level surface, free of imperfections or debris. Always use straight boards. Check for square after each step. Always predrill holes before attaching with screws. Use glue with finish nails for a stronger hold. Wipe excess glue off bare wood for stained projects, as dried glue will not take stain. Be safe, have fun, and ask for help if you need it. Good luck!
Instructions
Step 1
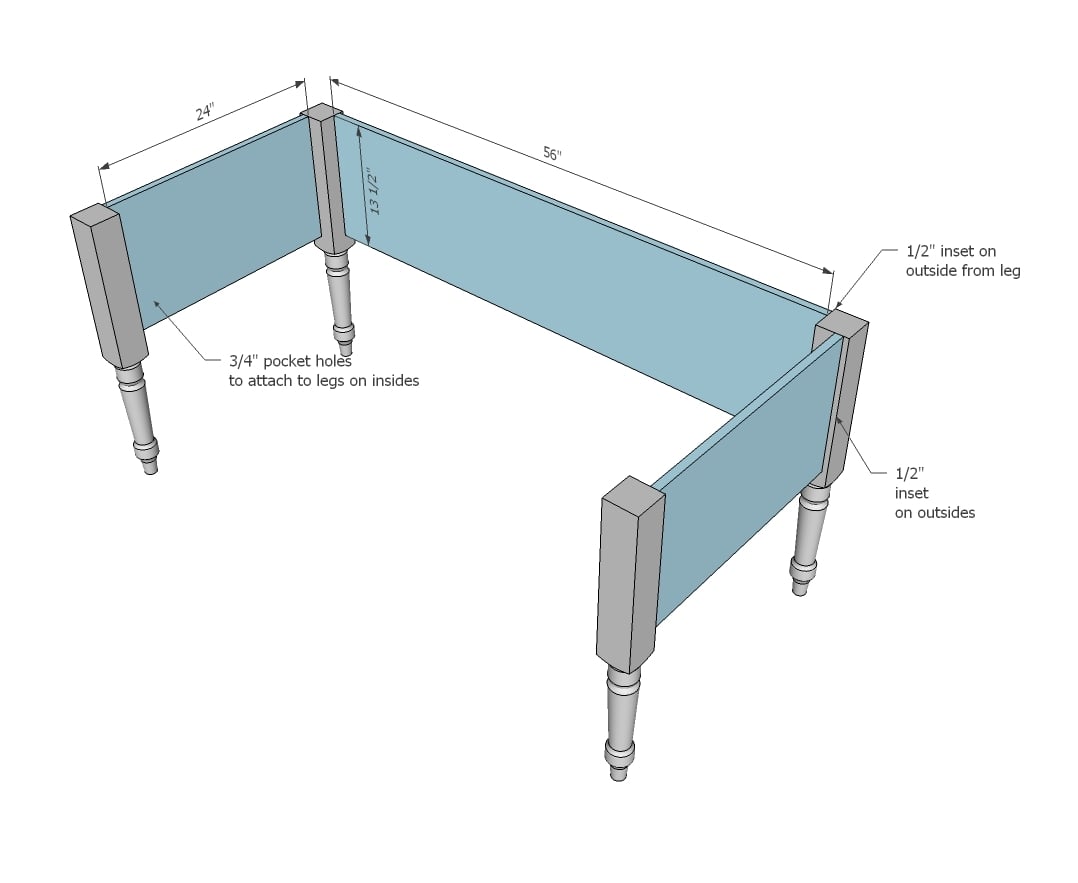
Drill 3/4" pocket holes on inside ends of all side and back plywood pieces. Attach with 1/2" space to legs.
OPTIONAL: Also drill 3/4" pocket holes facing upward in sides to attach to top in later steps
TIP: Use a piece of 1/2" thick plywood as a spacer to help guide you.
Step 2

Attach 1x2 to front of cabinet at top.
Check for square and adjust for square.
Step 3
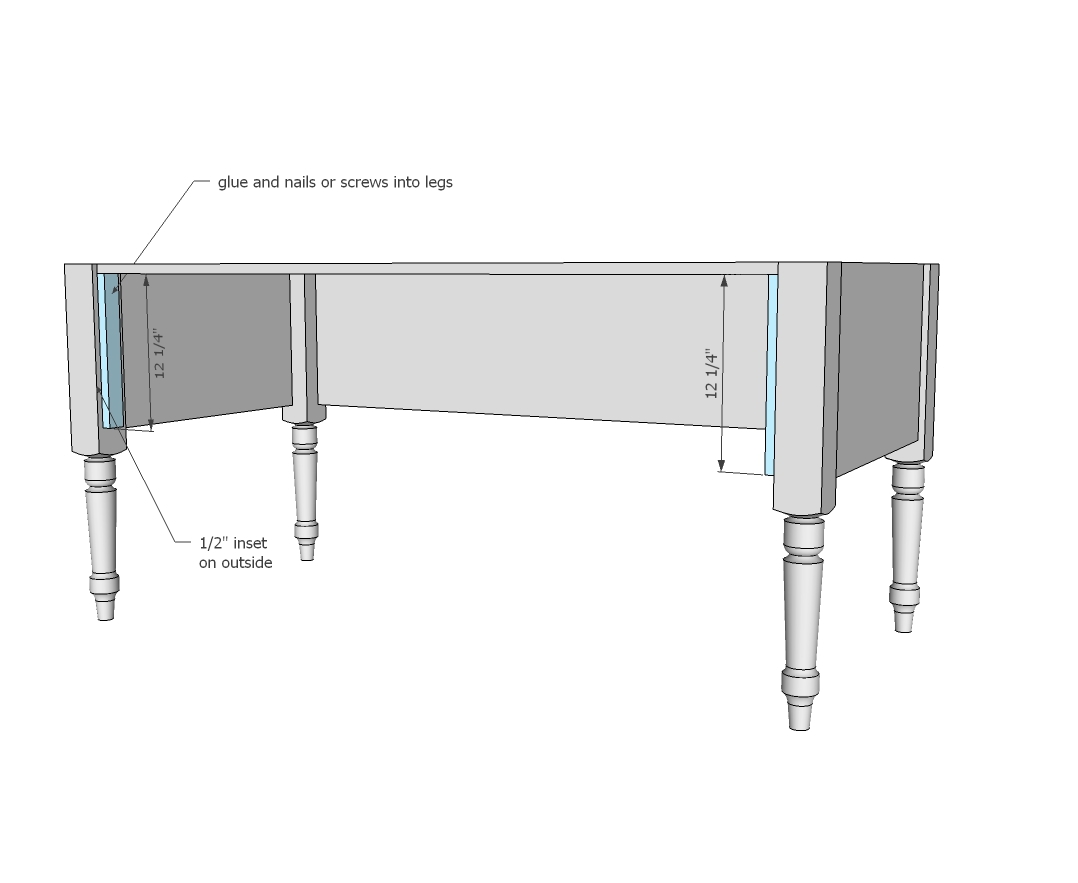
Nail or screw 1x2 trim to the front legs, inset 1/2" from front.
Step 4

Notch drawer area sides out at top front for a 1x2 to pass over top. Edge band the front edge of the plywood piece. Attach with pocket holes on inside to back, 14-3/4" away from nearest leg. Take great care to make sure this piece is attached parallel to the outside plywood piece.
Step 5

Step 6

These boards are used for attaching drawer slides to. You may wish to place after drawers are built and you are installing the drawers. NOTE: For multiple drawers, add more where your drawer slides will need to be attached. See Elisha's post here for more details on how she did multiple smaller drawers.
Step 7
Build your drawers to fit your drawer slides and openings. Install drawers with drawer slides. Adjust by shimming if necessary until drawers slide easily.
IMPORTANT: Drawers should be installed inset 3/4" to allow for drawer faces to be added in next step.
For more details on how Pneumatic Addict installed a printer slide out tray and multiple smaller drawers, please go here for more information.
Step 8
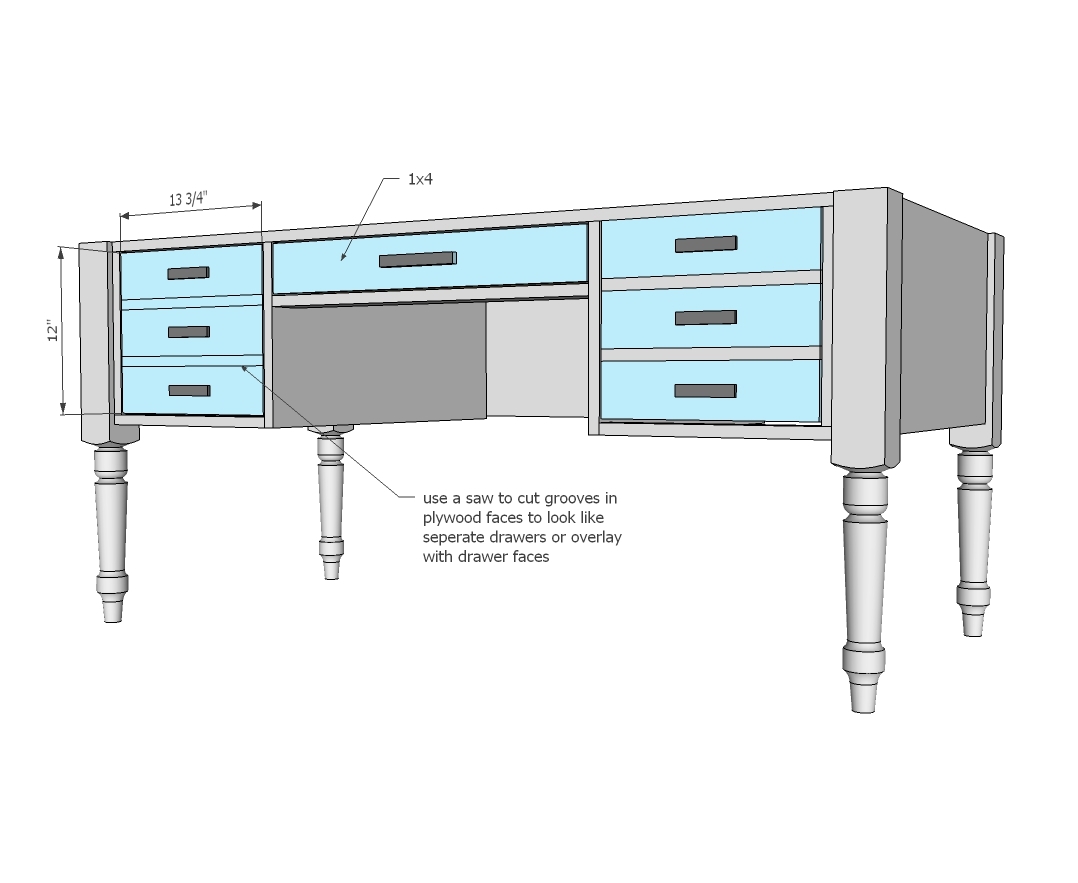
Attach drawer face to front of drawers, 1/8" gap around all sides.
For more information on how Pneumatic Addict added overlay door faces, please go here.
Step 9
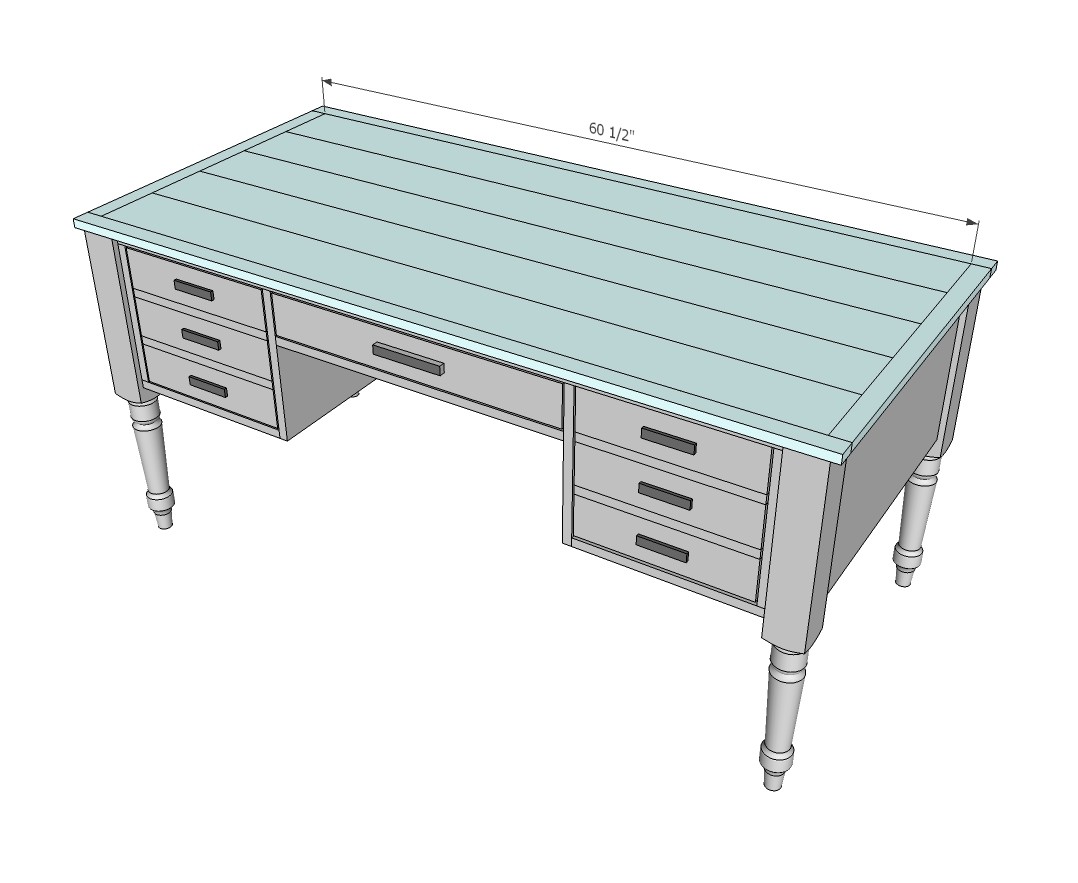
Build top seperately with 3/4" pocket holes and 1-1/4" pocket hole screws. Trim with 1x2s. Attach to desk top.
For more information on how Pneumatic Addict finished her top, please go here.
It is always recommended to apply a test coat on a hidden area or scrap piece to ensure color evenness and adhesion. Use primer or wood conditioner as needed.
Comments
JoanneS
Wed, 10/15/2014 - 16:06
Gorgeous desk!
Gorgeous desk! LOVE LOVE the finish!
brookifer86
Thu, 10/16/2014 - 10:11
Mind blowing!
I'm in awe that this desk is "homemade"! It looks amazing, that finish is just fantastic. I look forward to seeing more PA collaborations in the future! Going to follow all her pages now :)
jaime19861
Thu, 10/16/2014 - 21:23
Amazing!
Great job! I would never have guessed this was DIY. Thank you Ana, for introducing us to these amazing bloggers!
CGCouture
Fri, 02/05/2016 - 11:23
Which leg to match birch?
We feel in love with birch plywood to make this desk, but I have no idea which of the wood options offered on the Osborne website to choose that will stain similarly to the birch. I'm using rustoleum stain in American Walnut, and want the parts to all be cohesive. Which variety of wood should I choose for the leg, since birch isn't an option?
Thanks!