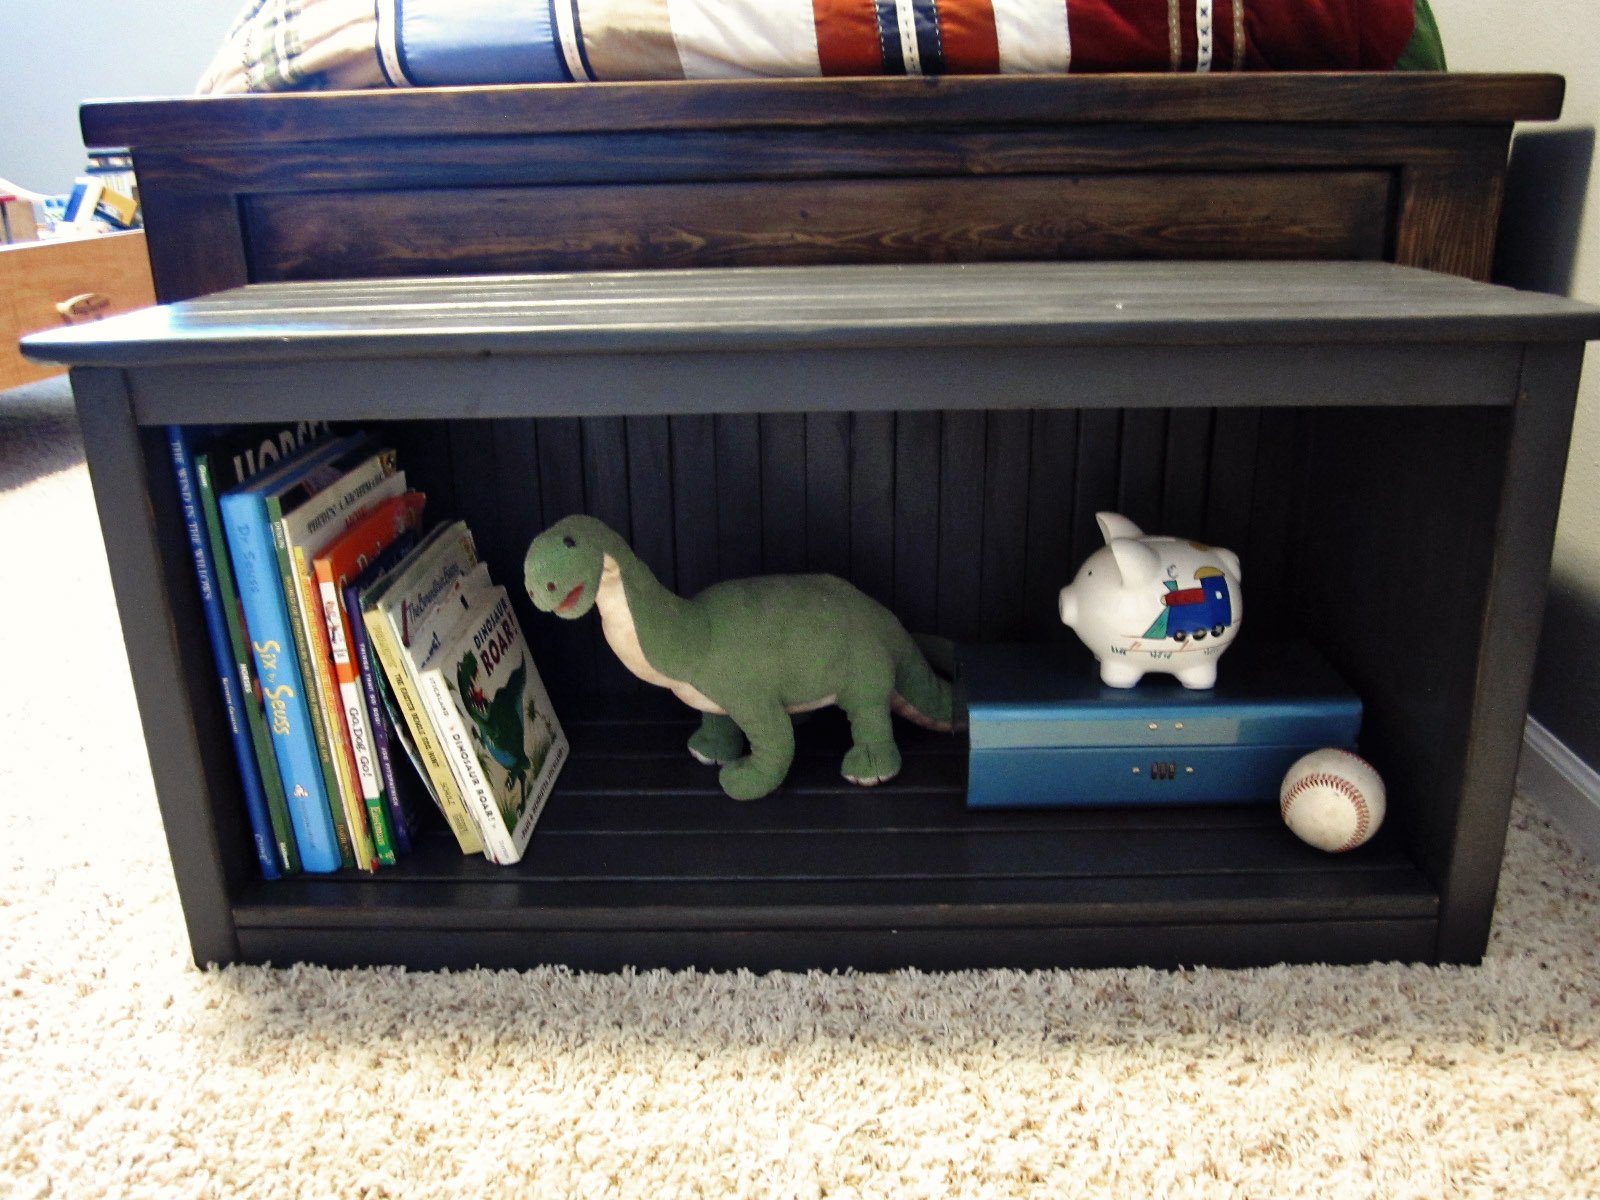


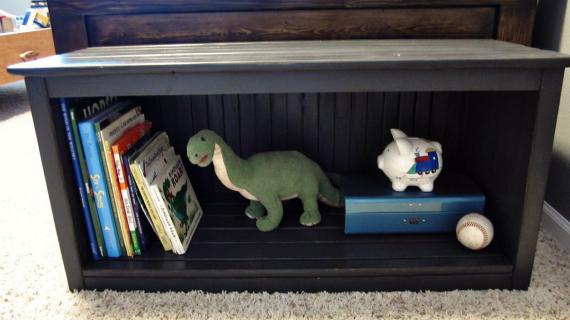
I'd been wanting to add a piece of furniture at the end of my son's bed for awhile, but I had a difficult time deciding on what exactly to do. Not only did I want it to be something he could sit on, but also I wanted to add some extra storage. We had thought of a trunk but the idea of little fingers getting pinched made that idea a little scary. I turned to your website for help. I didn't find exactly what I wanted, but I did get some inspiration from the new Kentwood Bookshelf. It's constructed the same way but with some sizing adjustments.
Preparation
2 - 8 ft 1x2
3 - 8 ft 2x2
6 - 8 ft 1x3
1 - 6 ft 1x12
6 - 1x3 @ 37"
5 - 1x3 @ 32 3/4"
1 - 1x2 @ 32 3/4"
9 - 1x2 @ 11 1/4"
4 - 2x2 @ 32 3/4"
1 - 2x2 @ 11 1/4"
4 - 2x2 @ 17"
2 - 1x12 @ 17"


Please read through the entire plan and all comments before beginning this project. It is also advisable to review the Getting Started Section. Take all necessary precautions to build safely and smartly. Work on a clean level surface, free of imperfections or debris. Always use straight boards. Check for square after each step. Always predrill holes before attaching with screws. Use glue with finish nails for a stronger hold. Wipe excess glue off bare wood for stained projects, as dried glue will not take stain. Be safe, have fun, and ask for help if you need it. Good luck!
Instructions
Step 1
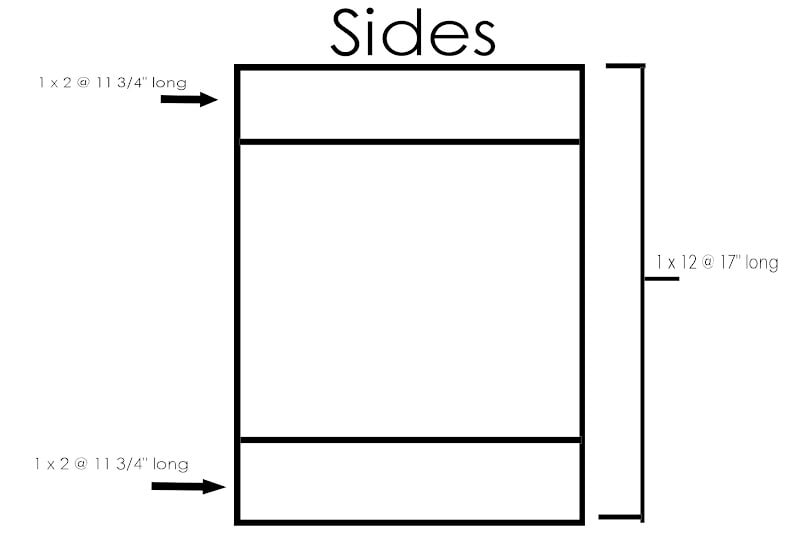
Nail two 11 1/4" 1x2's to the face of each of the 1x12's, one on the top and one on the bottom end. These will become the two sides of the bench.
Step 2
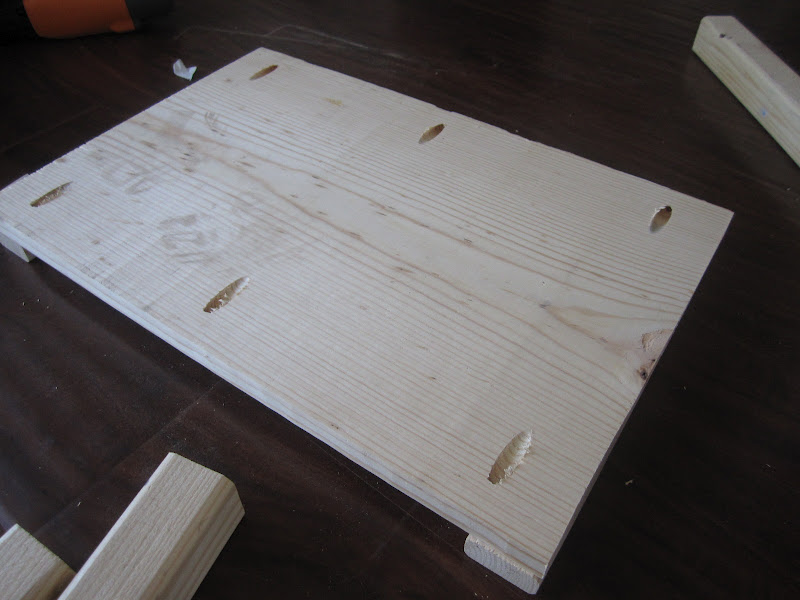
Using a Kreg Jig, create pocket holes in the back of the 1x12.
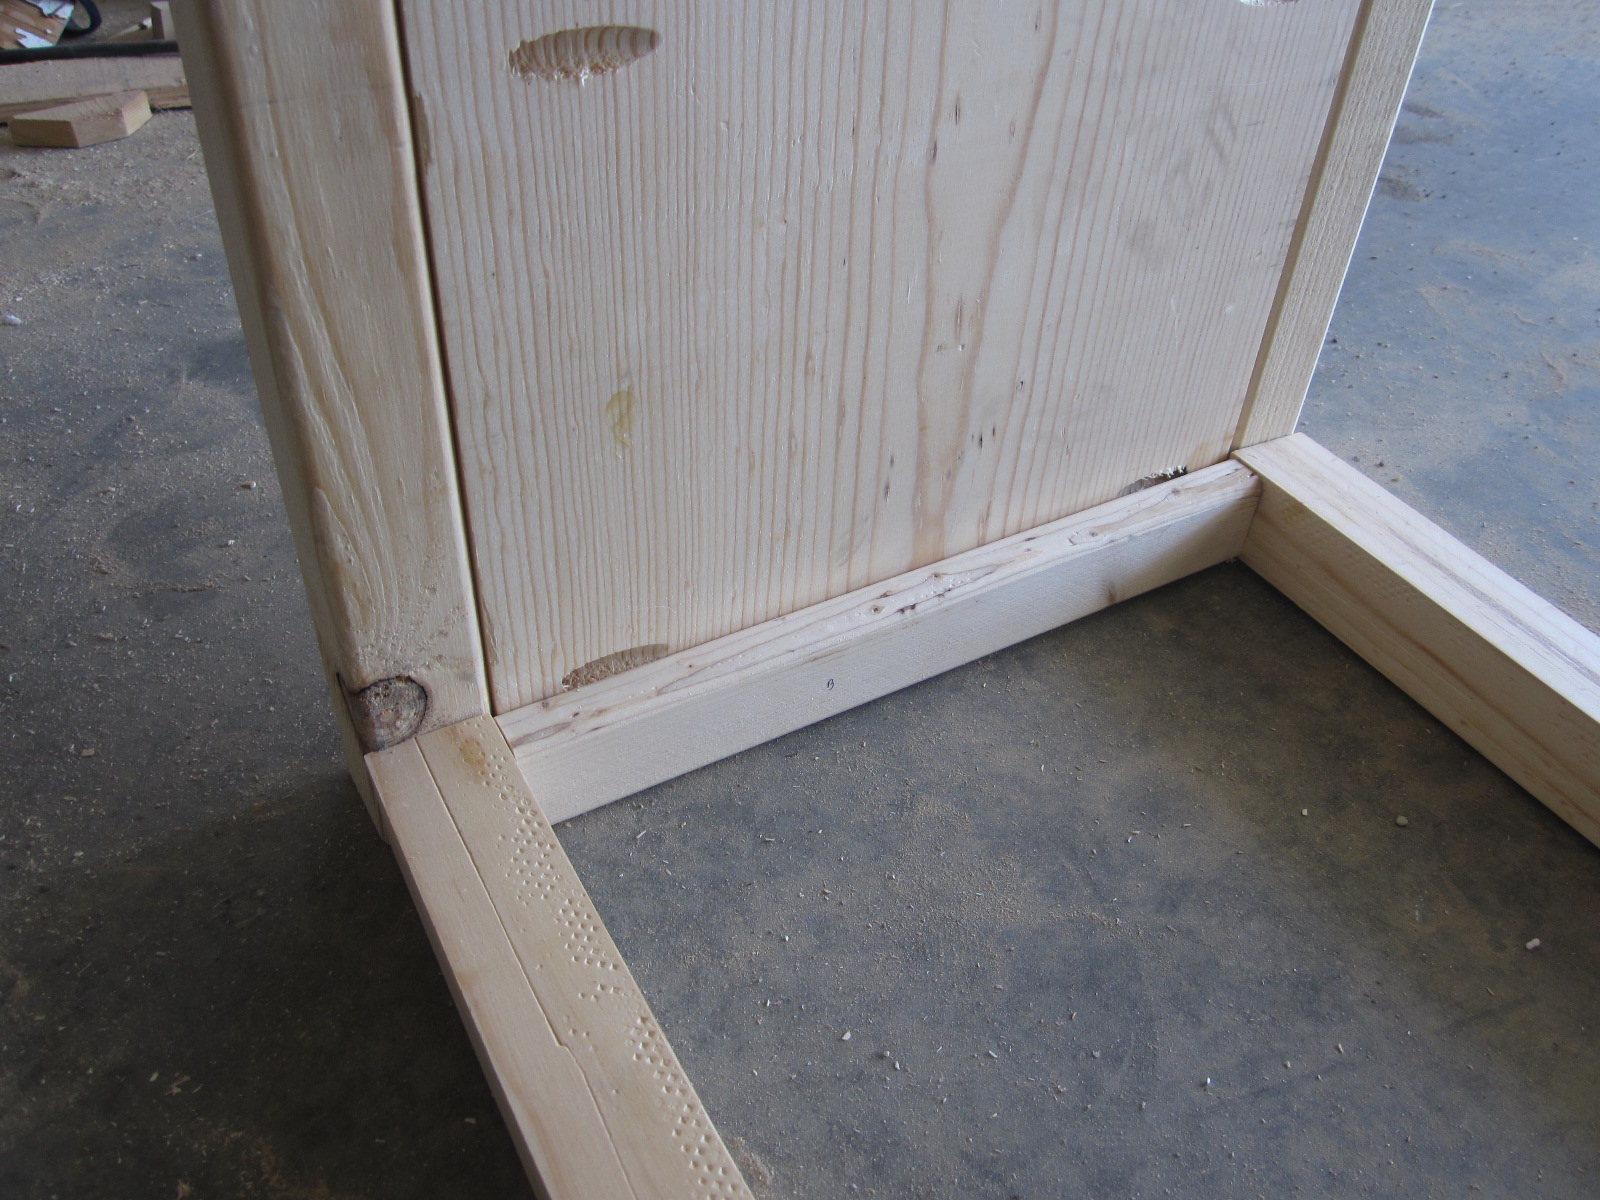
Step 3
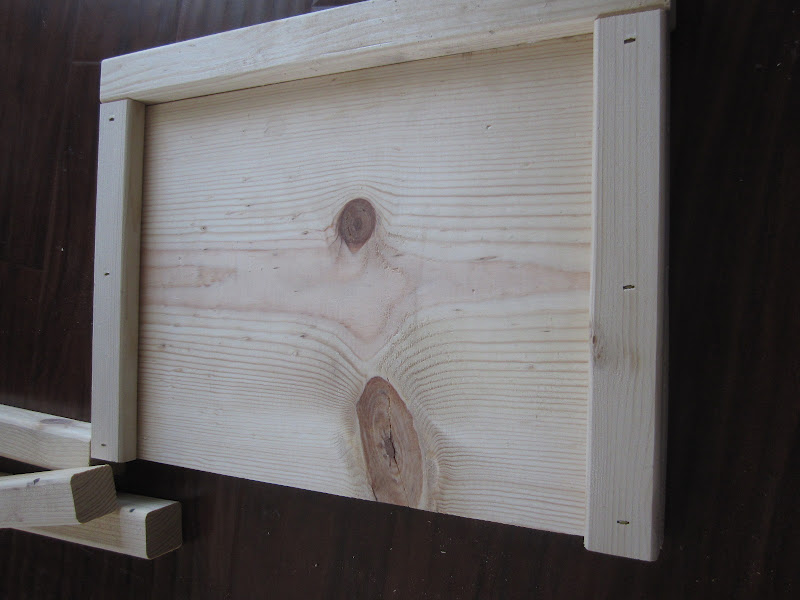
Attach two 17" 2x2's to the sides of each of the 1x12's using screws and the pocket holes. The 2x2's should be flush with the 1x2 trim as shown below.
Step 4
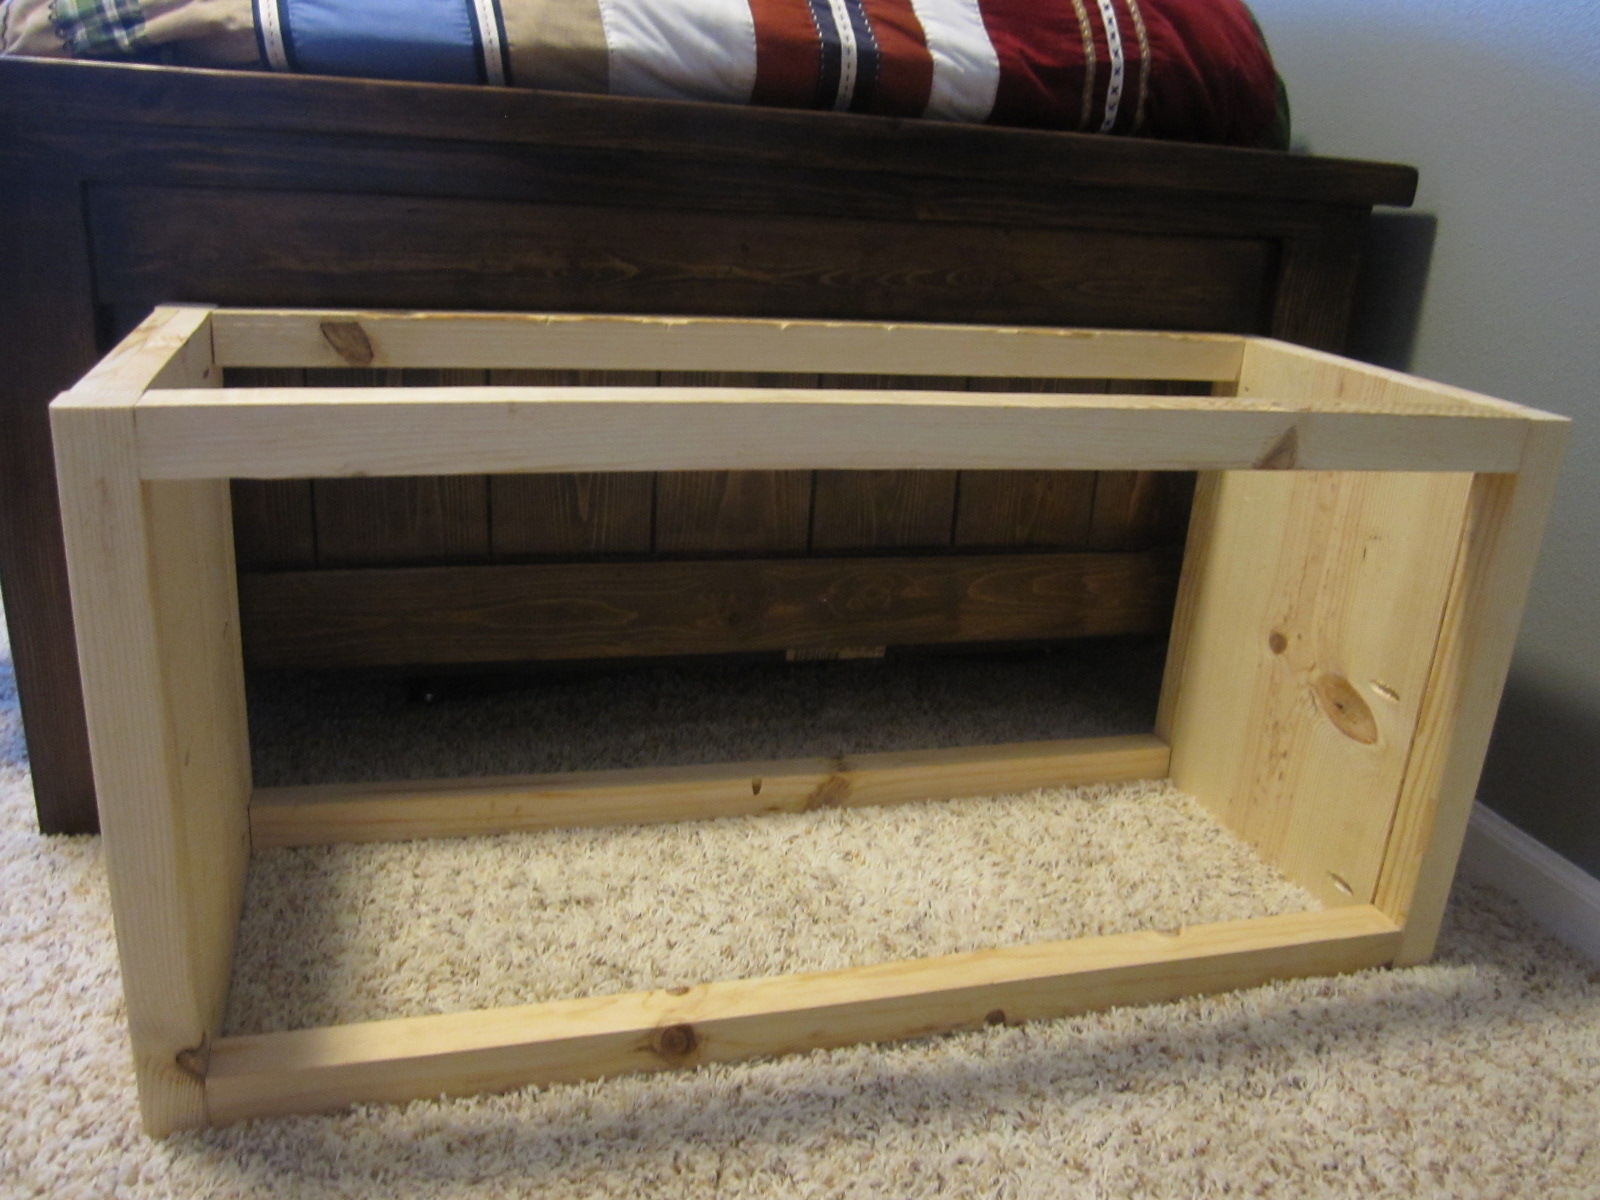
Attach your 32 3/4" 2x2 to each corner, creating the bones for the bench. I again used my Kreg Jig to create pocket holes on each end of the boards.
Step 5
Step 6
Attach the 11 1/4" 2x2 in between the top two 2x2's. Also attach two 11 1/4" 1x2's evenly spaced between the center 2x2 and either end of the bench (the bench is tilted forward in this picture).
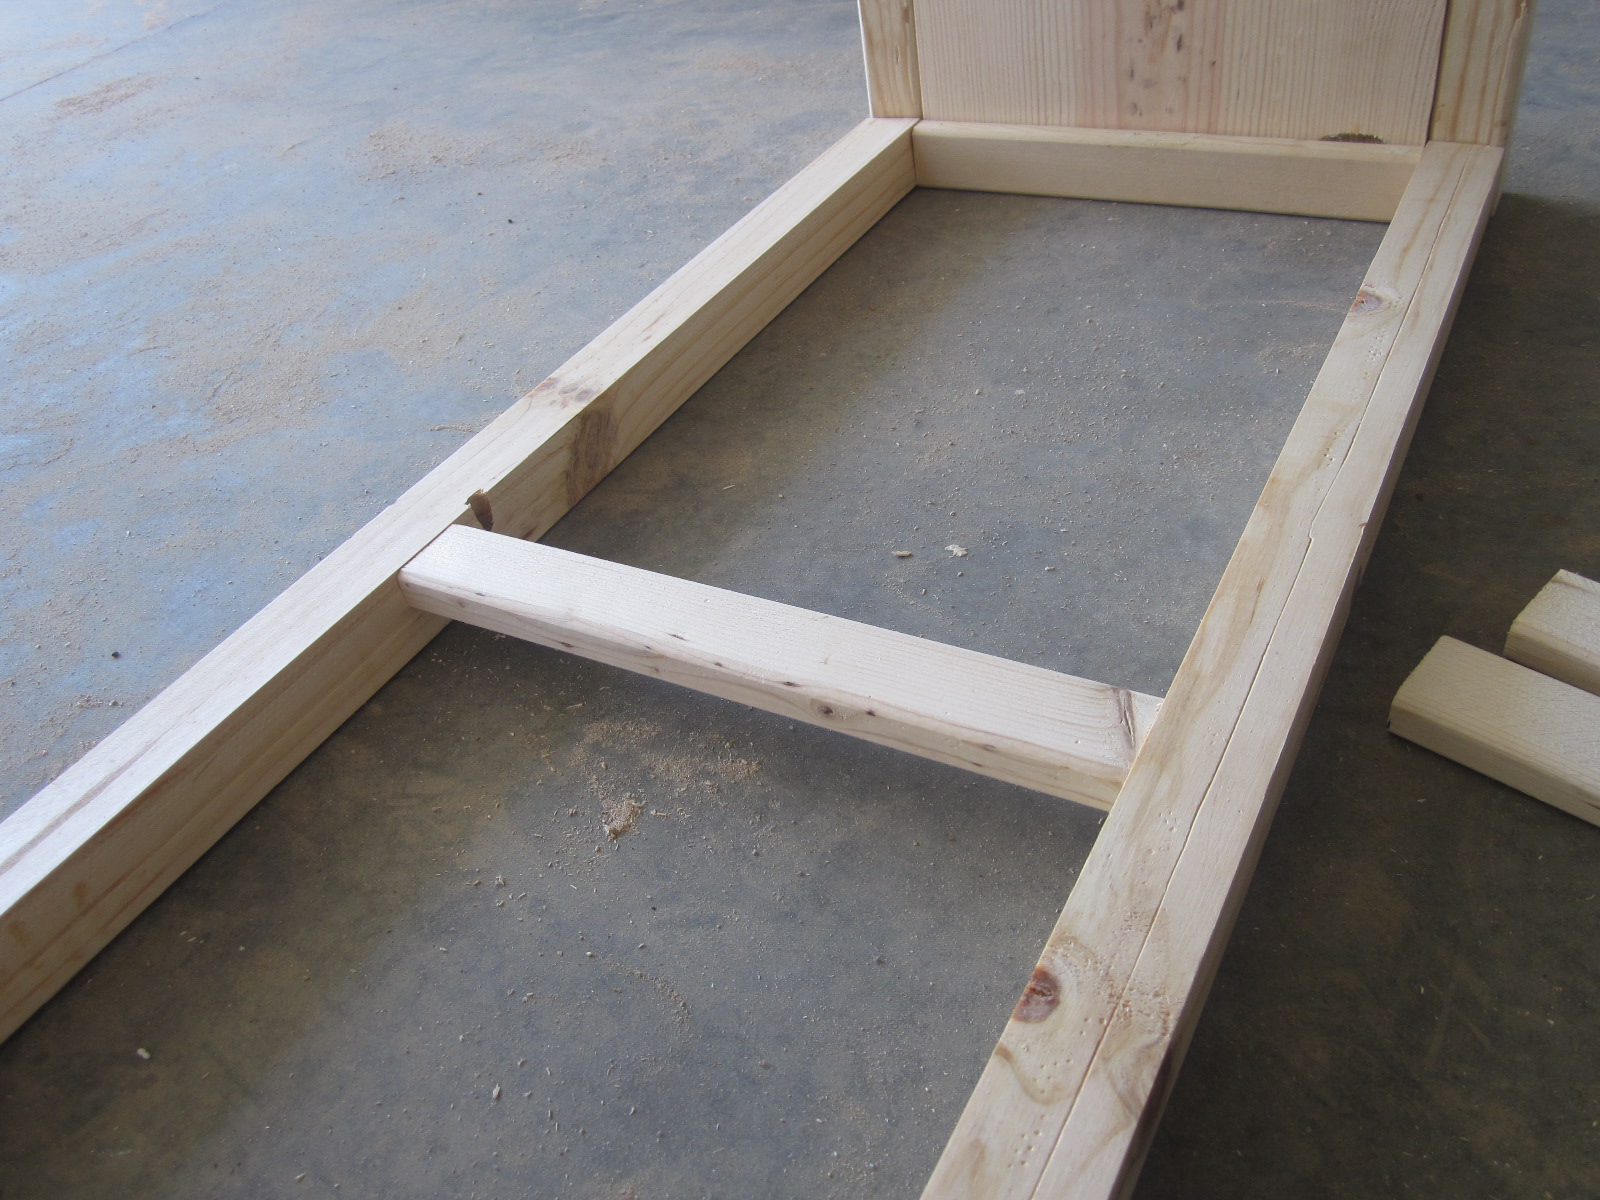
Step 7
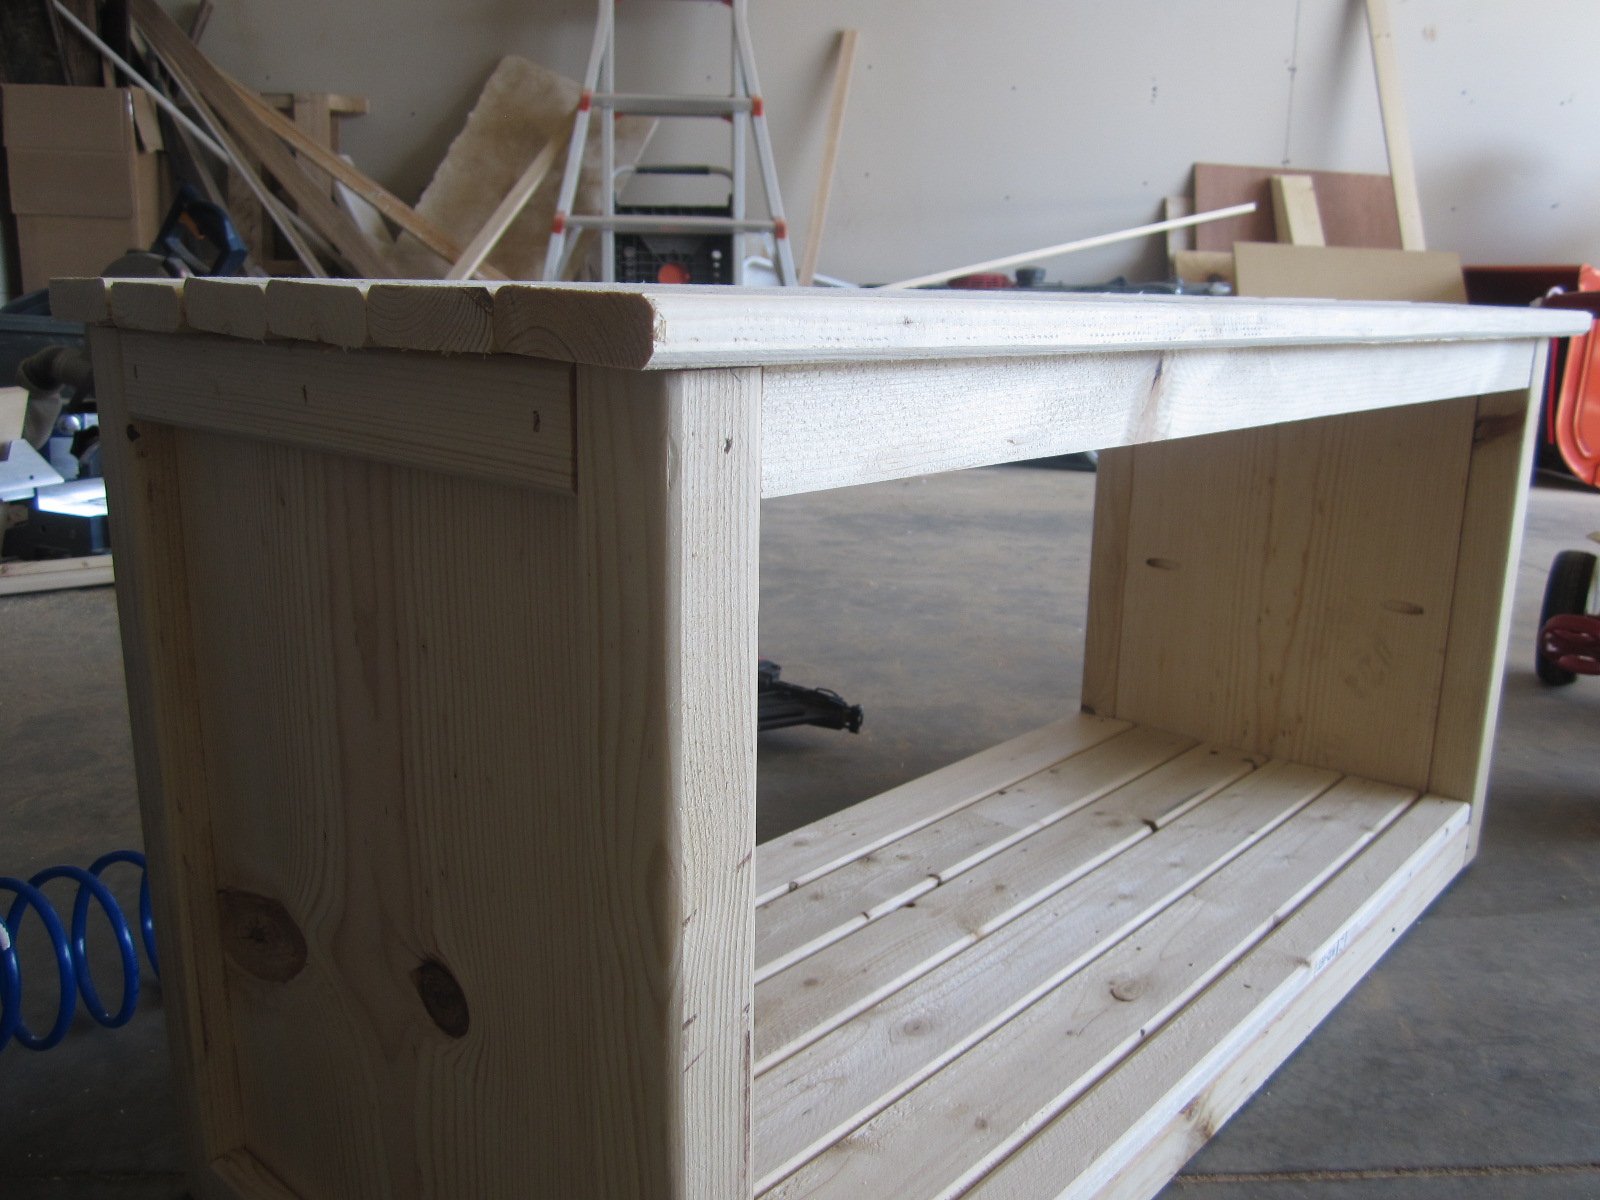
Attach two 11 1/4 1x2's to the inside bottom of the 1x12. This will help support the planks on the bottom shelf/base.
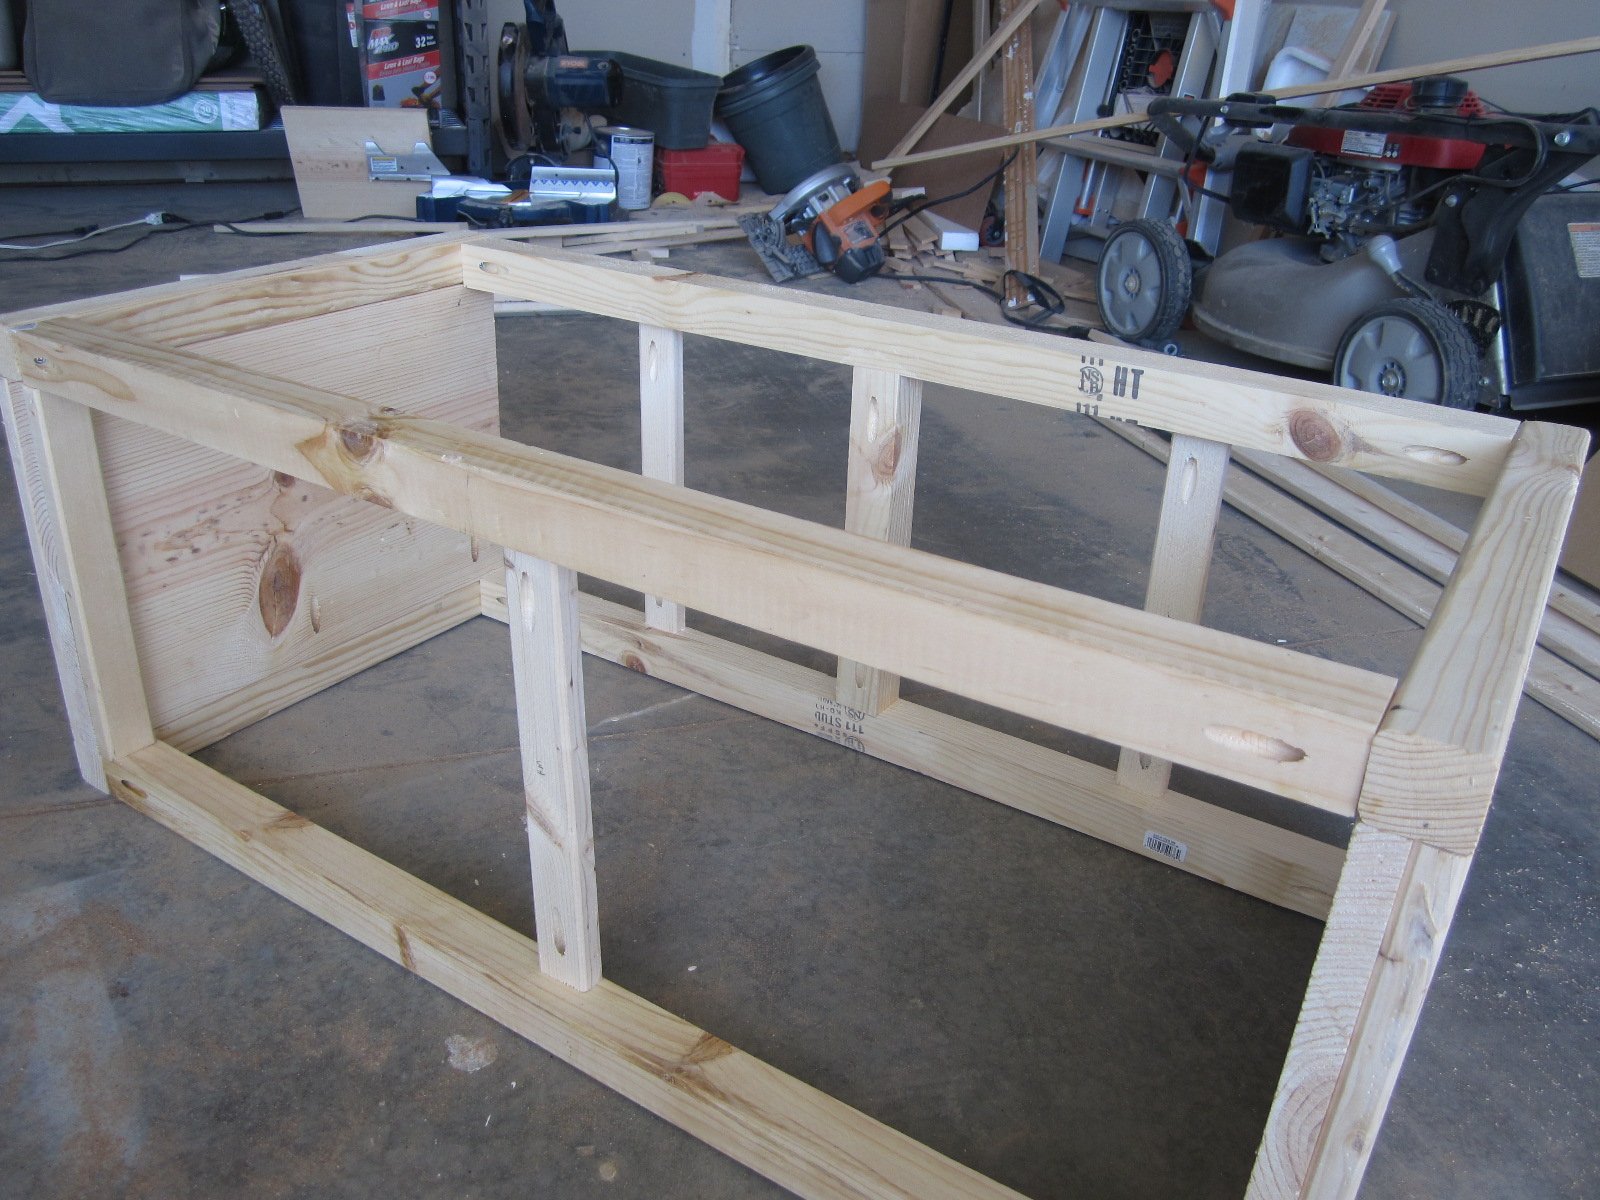
Step 8
Attach five 32 3/4" 1x3's and one 32 3/4" 1x2 to the base of the bench. I put the 1x2 in the front.
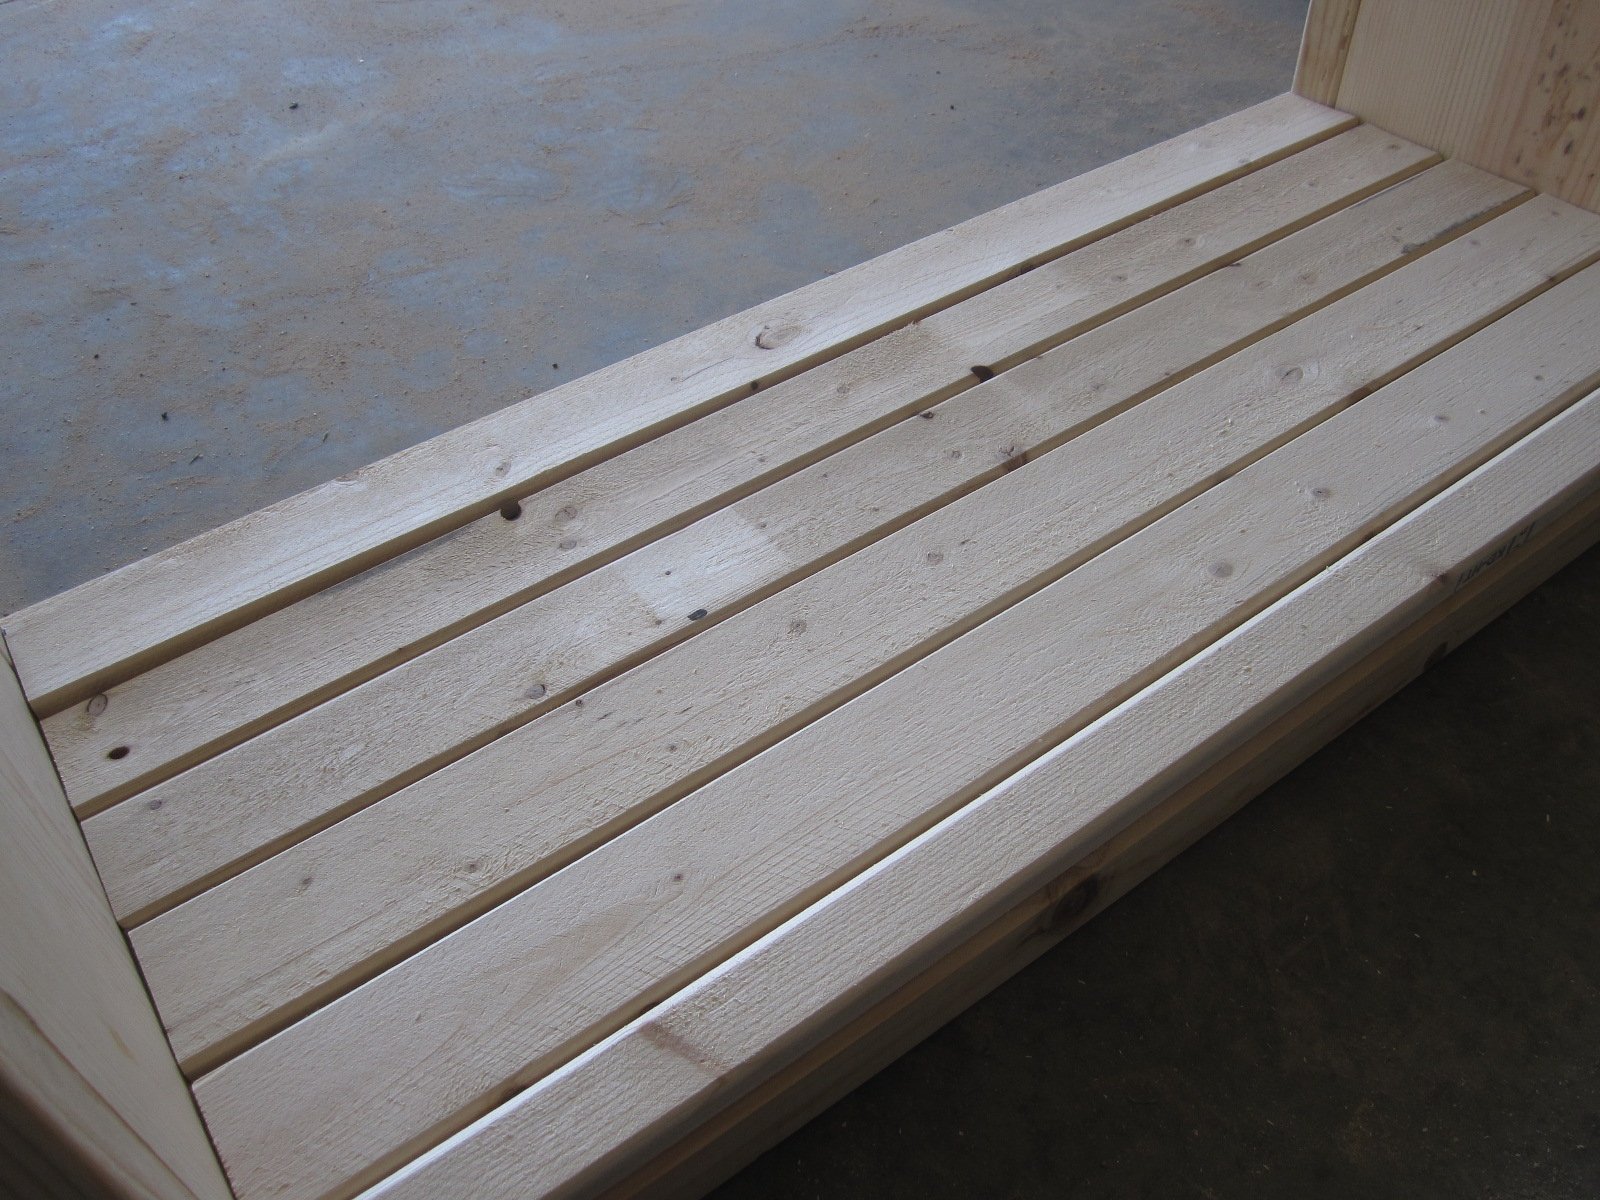
Step 9
Attach six 37" 1x3's to the top. Start from the back and work your way to the front. The back board should be flush with the back of the bench. This will allow for a lip on the front of the bench.
Step 10
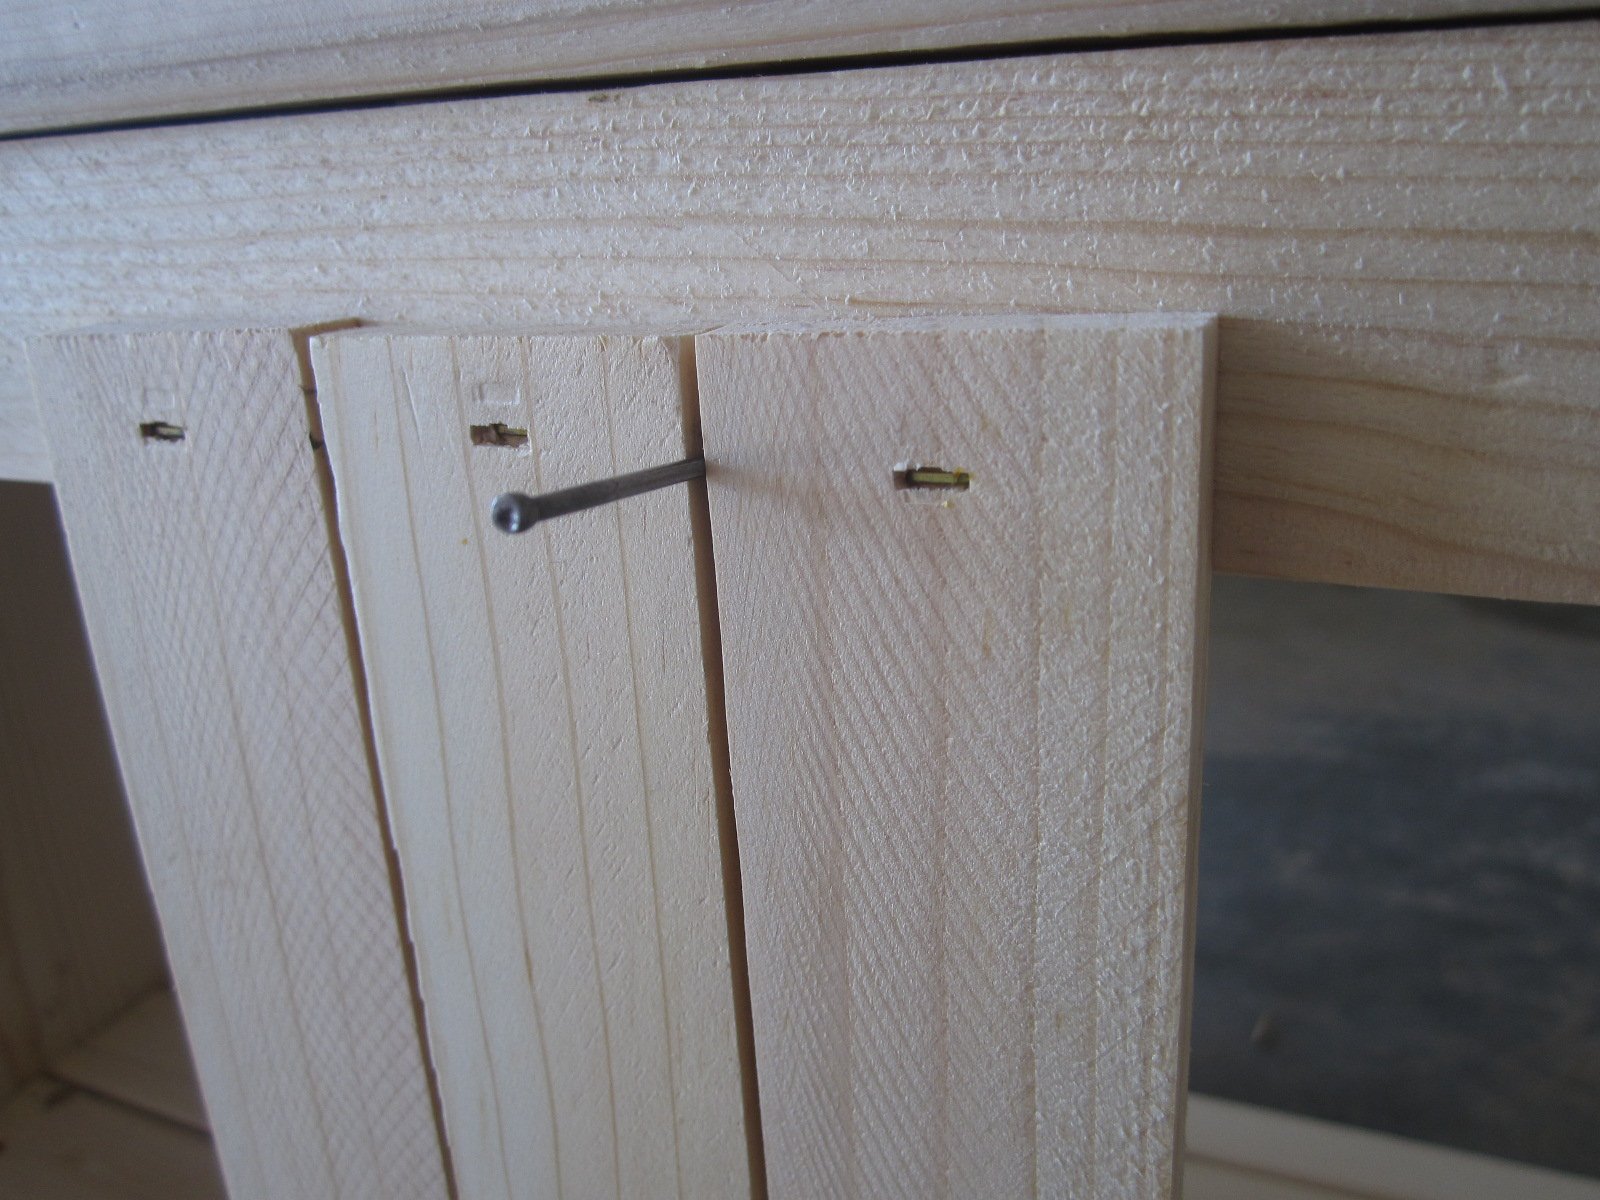
You could leave it as is; it is certainly sturdy enough, but I wanted to add a back. I still had some leftover 1 1/2" x 1/4" wood planks. In order to create an even spacing, I used a small finishing nail to hold the space as I fastened the planks.
It is always recommended to apply a test coat on a hidden area or scrap piece to ensure color evenness and adhesion. Use primer or wood conditioner as needed.

Comments
Guest (not verified)
Thu, 04/05/2012 - 05:48
Interestings pictures and
Interestings pictures and information about,how to make a Footboard bench. Realy like this post
GianaKyle
Fri, 04/06/2012 - 23:23
CLICK THIS LINK
hello there
Lanie (not verified)
Sun, 06/24/2012 - 20:07
love this
Thinking of adapting for a window seat, but will probably use bead board for the back, and solid planks for the seat and shelf.... but I enjoyed seeing the play by play! Thanks!
Winnipeg
Sun, 11/02/2014 - 07:15
materials
I'm assuming where it keeps saying 2x2's this is reallly supposed to be 4x4?
In reply to materials by Winnipeg
Stephen Peters
Sun, 11/02/2014 - 17:54
2 x 2 is correct.
2 x 2 is correct.