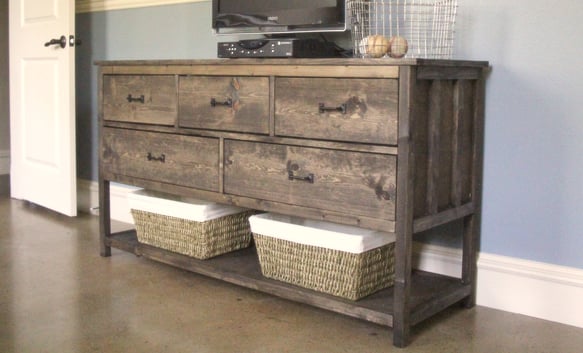
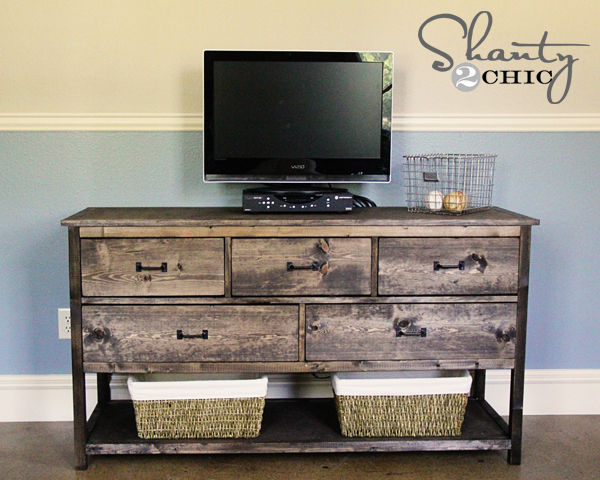
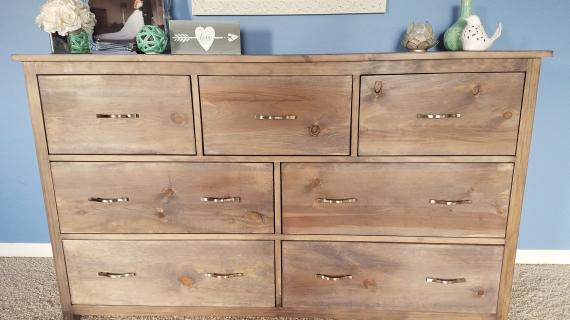
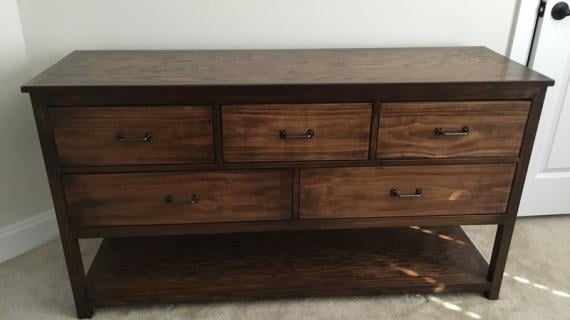
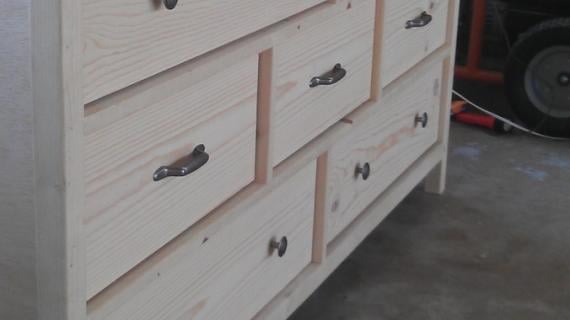
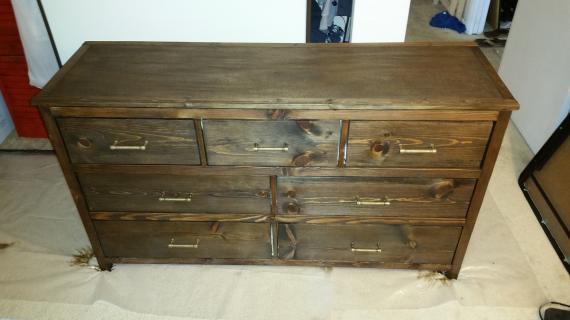
Free plans to build a wide dresser with open bottom shelf. This dresser is the perfect mix of drawers and shelves. Build it yourself with our free step by step dresser plans, with diagrams, shopping and cut list from Ana-White.com
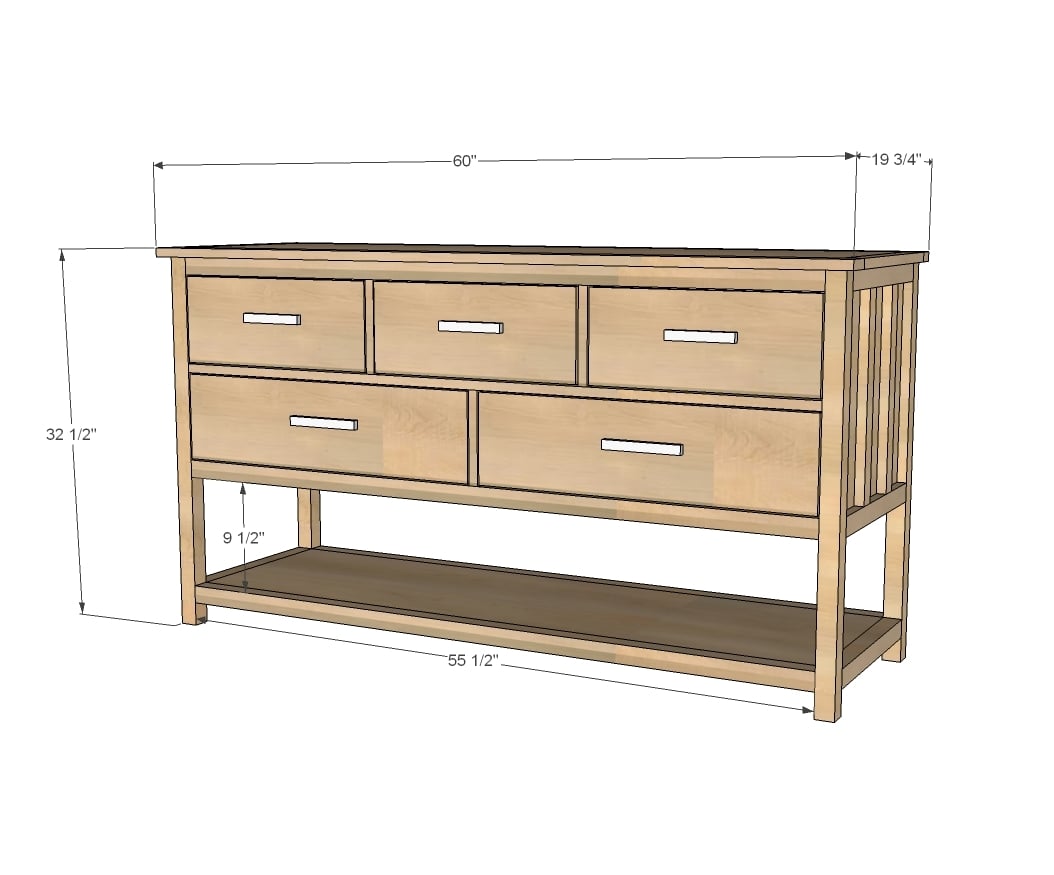
Preparation
- 1 – sheet ¾” plywood cut into strips 15 ¾” wide
- 1 – sheet ¼” plywood
- 5 – 1x2 @ 8 feet long
- 6 – 2x2 @ 8 feet long (consider high grade 2x2s for added strength here)
- 4 – 1x6 @ 8 feet long
- 1 – 1x8 @ 10 feet long
- 5 knobs or handles
- 5 sets of 16” white euro style bottom corner mount drawer slides
- 1 ¼ and 2 ½” pocket hole screws
- 1 ¼” brad nails
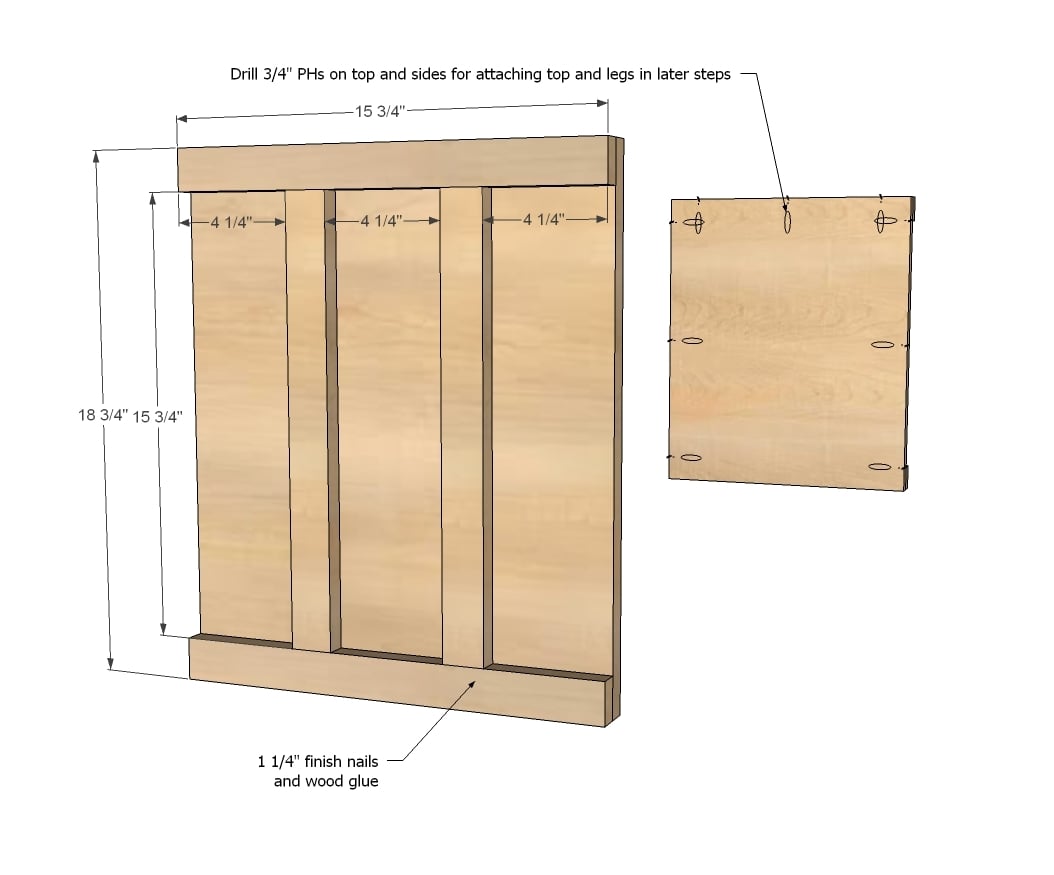
- 2 – 3/4" plywood @ 15-3/4" x 18 ¾” (sides)
- 8 – 1x2 @ 15 ¾”
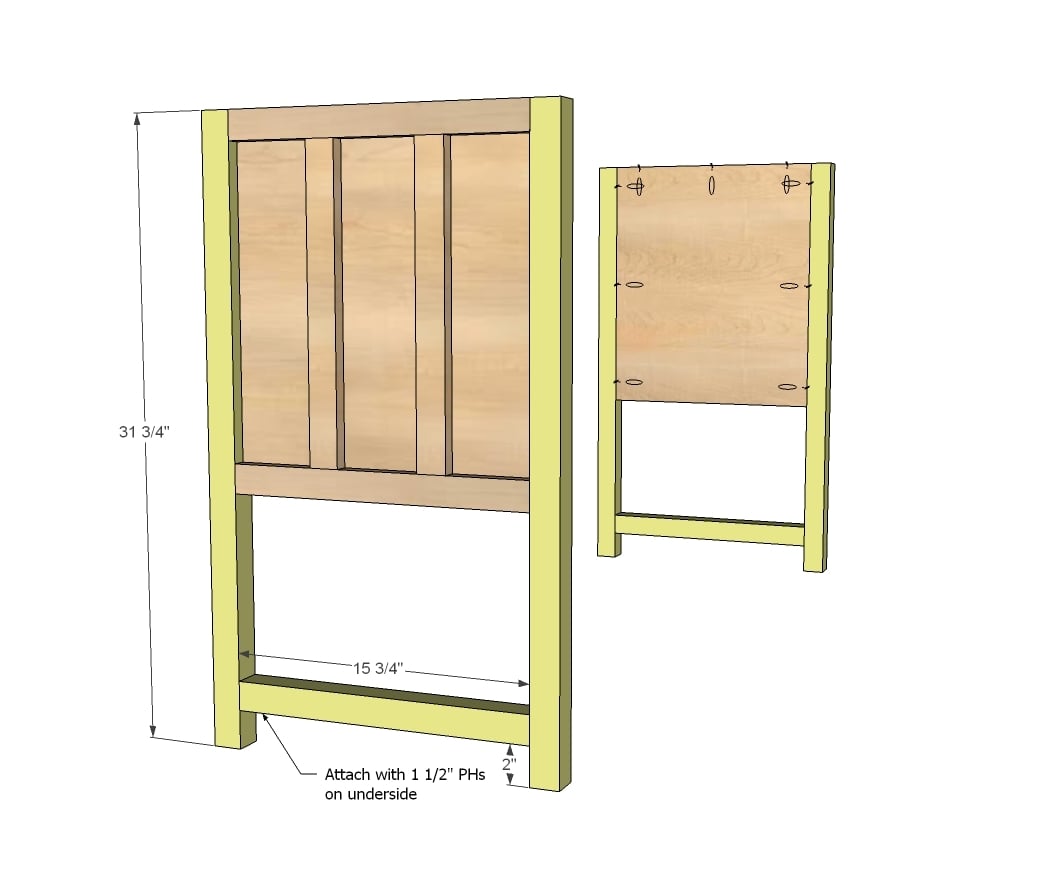
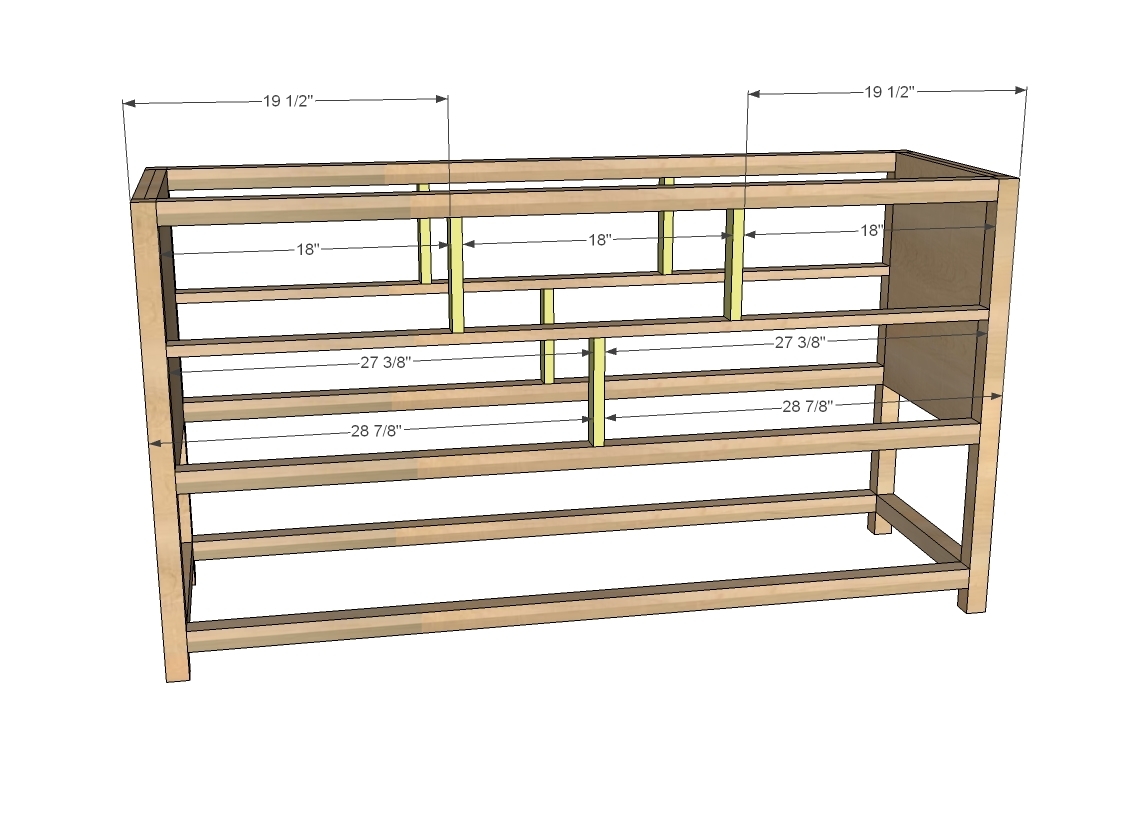
- 4 – 2x2 @ 31 ¾”
- 2 – 2x2 @ 15 ¾”
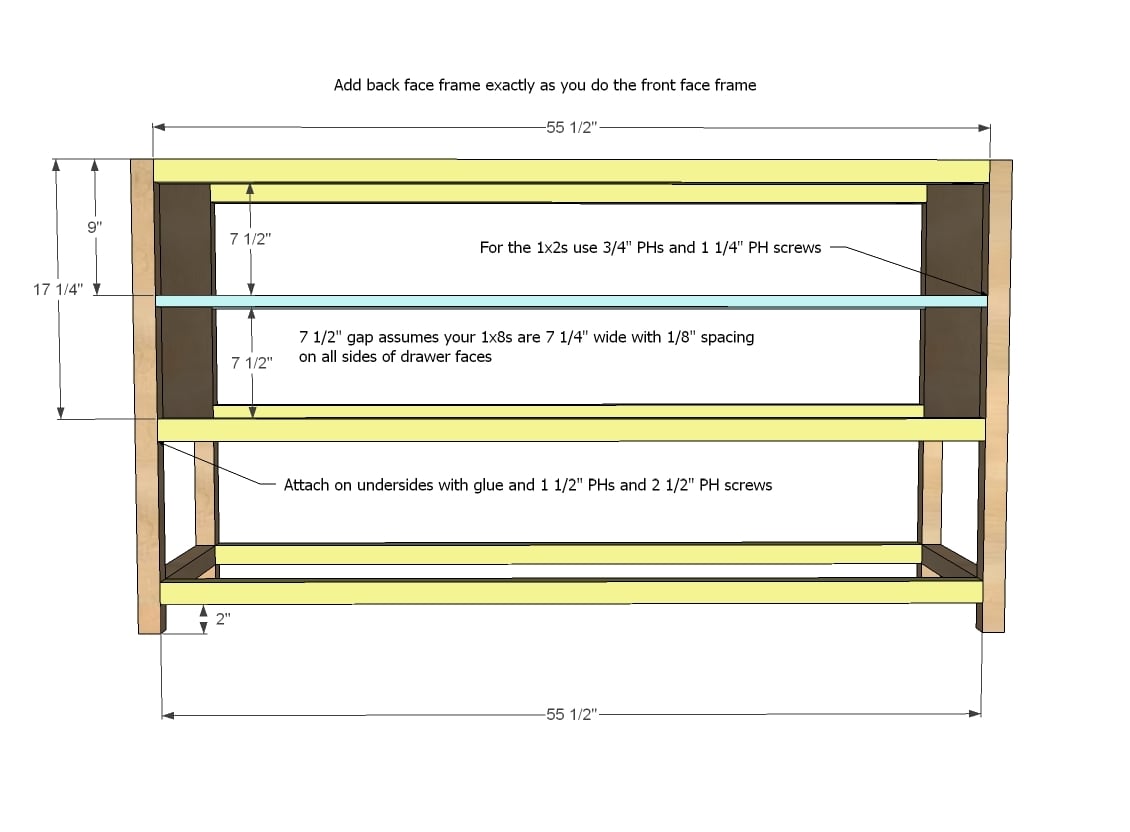
- 6 – 2x2 @ 55 ½”
- 2 – 1x2 @ 55 ½”
- 6 – 1x2 @ 7 ½”
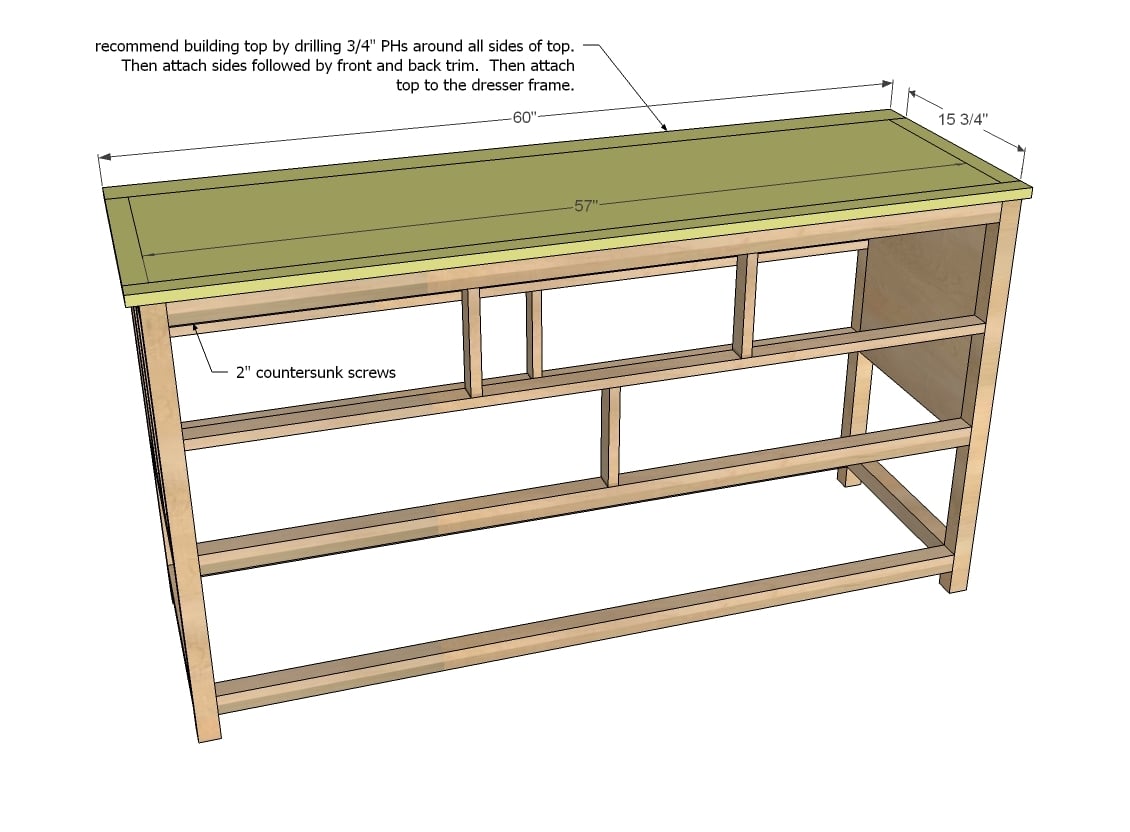
- 1 – 3/4" plywood @ 15-3/4" x @ 57” (top)
- 2 – 1x2 @ 15 ¾”
- 2 – 1x2 @ 60”
- 1 - 3/4" plywood @ 15-3/4" x 55 ½” (shelf)
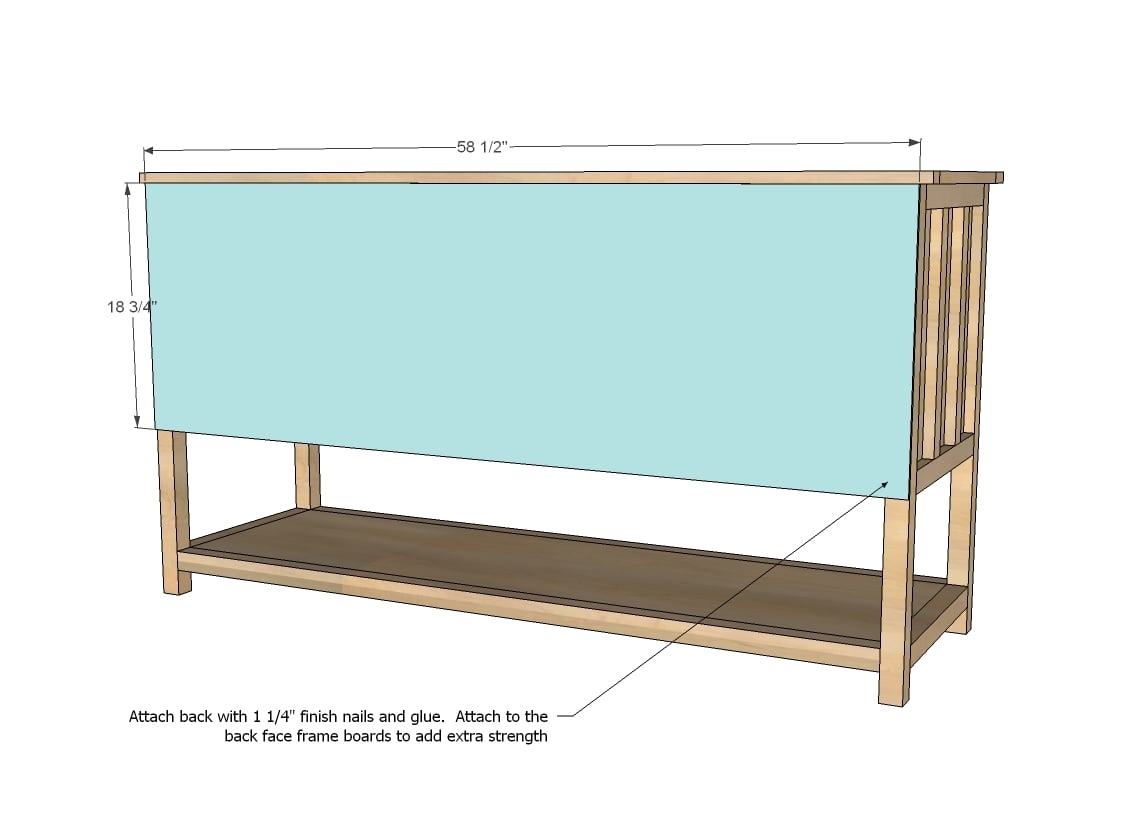
- 1 – ¼” plywood @ 58 ½” x 18 ¾” (back)
SMALL DRAWERS
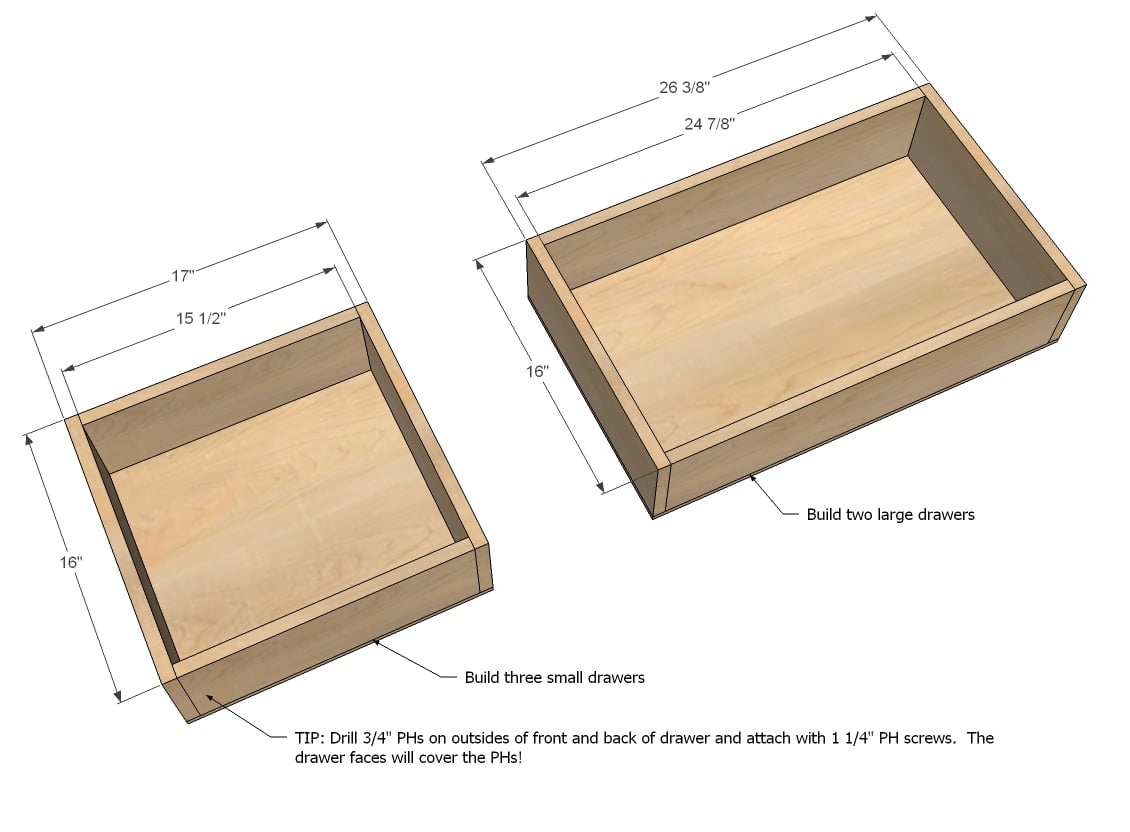
- 6 – 1x6 @ 16”
- 6 – 1x6 @ 15 ½”
- 3 – ¼” plywood @ 17” x 16”
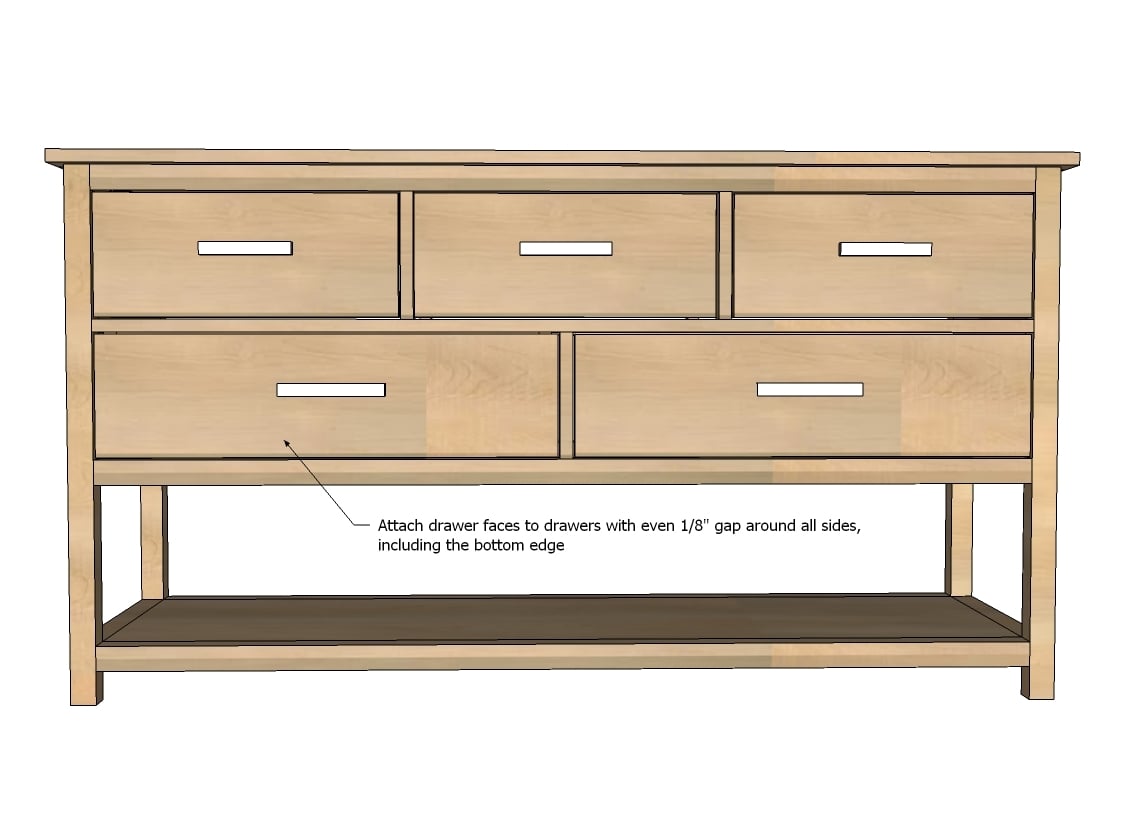
- 3 – 1x8 @ 17 3/4"
LARGE DRAWERS
- 4 – 1x6 @ 16”
- 4 – 1x6 @ 24 7/8”
- 2 – ¼” plywood @ 16” x 26 3/8”
- 2 – 1x8 @ 27 1/8”
Please read through the entire plan and all comments before beginning this project. It is also advisable to review the Getting Started Section. Take all necessary precautions to build safely and smartly. Work on a clean level surface, free of imperfections or debris. Always use straight boards. Check for square after each step. Always predrill holes before attaching with screws. Use glue with finish nails for a stronger hold. Wipe excess glue off bare wood for stained projects, as dried glue will not take stain. Be safe, have fun, and ask for help if you need it. Good luck!
Instructions
Step 1
Step 2
Step 3
Step 4
Step 5
Step 6
Step 7
Step 9
It is always recommended to apply a test coat on a hidden area or scrap piece to ensure color evenness and adhesion. Use primer or wood conditioner as needed.






Comments
Bettie (not verified)
Fri, 06/29/2012 - 13:53
Momplex
Have I missed a Momplex posting, or has nothing been posted since the well?
JenWoodhouse.com (not verified)
Fri, 06/29/2012 - 20:11
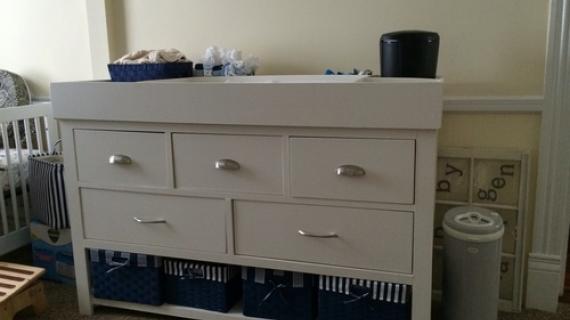
Even better than the Pottery Barn Kids version!
Great job ladies! Your dresser looks so much better than the Pottery Barn one! I love how wide it is. I'm putting this on my to-do list! Thanks for the plans, Ana! All 3 of you ladies inspire me! AMAZING JOB!
fethiye
Mon, 07/02/2012 - 14:31
how about more drawers?
Is it possible to publish a plan for a similar dresser but with drawers on the bottom, instead of that open space?
Angelafree (not verified)
Wed, 01/02/2013 - 15:02
I agree. Could we please have
I agree. Could we please have more drawers? :)
Nel1333
Fri, 07/27/2012 - 16:03
Finish?
How did you obtain this finish? What did you use?
Daniel (not verified)
Thu, 11/22/2012 - 15:48
Front to back width
Hi-
I really like the plans and am outlining plans to make a similar one to this. I was wondering about the front to back width of the top of the dresser. In the image, it seems like there is overhang between it and the bottom piece but the numbers seem to suggest that there will be no overhang. Am I misunderstanding something?
Thanks!
dkdk
Tue, 12/24/2013 - 07:20
Issue with plans
My only issue with these plans is that it doesnt specify which board size goes where (ie the legs, front supports, bottom rails arent labeled). I can figure it out if i match the sizes up, but just a tip to make these plans easier for anyone who is a bit on the newer side of building.
Ellie S
Sun, 02/22/2015 - 20:23
Help with Drawer Slides!?
Can anyone please help me figure out when/how to install the drawer slides? any tips/advice/or even WHEN to install using these plans? I'm too confused by this part and am nervous to start my project til I clarify these steps (I have all the lumber just hesitant to start until I get a better grasp on these plans). Thanks in advance, I'm excited to get started and finish our bedroom set!!!
Papu5477
Thu, 01/25/2018 - 18:32
DRAWER PLANS
Are there plans available with the additional drawers?? Can’t seem to find them anywhere.