Wall Shelf Organizer with Hooks and Mail Slot - Back2School 2015

The free plans on this website are made possible with advertising and affiliate links.  Thank you for helping us keep plans free.


backpack file organizer kids
Difficulty
Starter Projects
| Print this plan

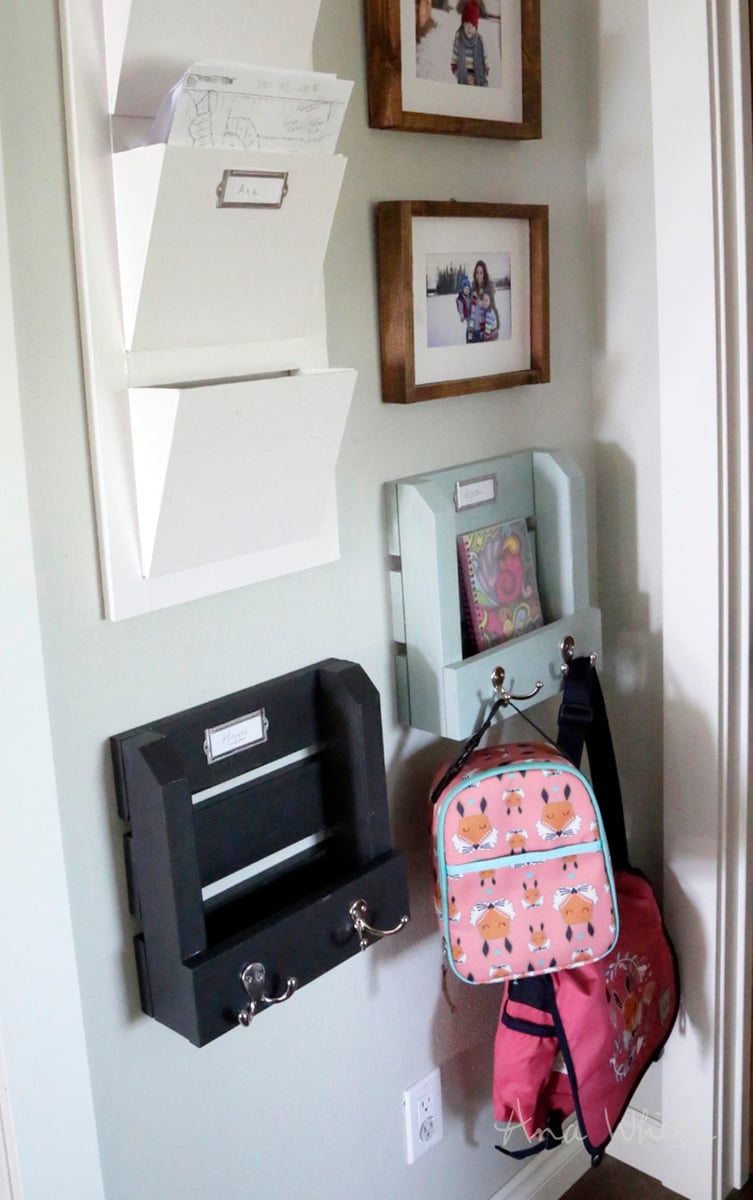
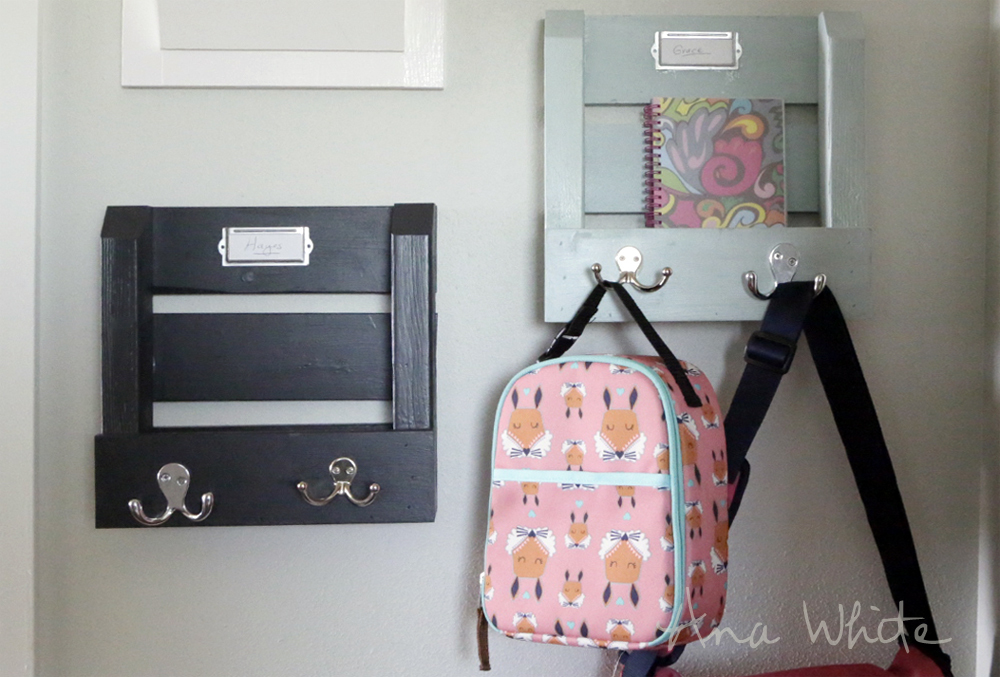
Perfect for back to school!  Sized to hold folder or homework, hooks for backpack and lunchbox.  DIY plans by Ana-White.com
backpack file organizer kids

Hi there!  

Back to school for us in just around the corner!  My daughter starts third grade in just under two weeks.  Can you believe she's this big already?

Just ask any parent of a school aged kid about the stuff that comes with going to school - the backpacks, lunch boxes, the folders, the library books, the homework.  The handouts and schedules and sports programs .... I've only got one in school right now, and am always looking for that paper, or that library book - I can't imagine having several kids in school and trying to keep track of all the stuff!

So this year, I thought I'd make a wall shelf just for back to school.  I wanted the project to be simple, with just the right amount of storage for school needs.  

So I came up with this -

It's just a little spot for a file folder or a libary book, and then hooks for back packs and lunch boxes.

This project was so fast and fun and easy.

I let my daughter pick her paint color (Serenity Blue by Chalked Rustoleum), and went with Charcoal by Chalked Rustoleum for my son's organizer.

The colors really made these projects fun!  I kinda wish I had more kids to make more of them in different colors.

This is a great beginner project!  If you want to try your hand at woodmaking (and most likely get addicted and furnish your whole house, just warning you!) this is a perfect project to start with!

Here's all the steps in the video -

Can't wait to see how yours comes out too!

XO Ana

PS - If you love this, please pin and share!

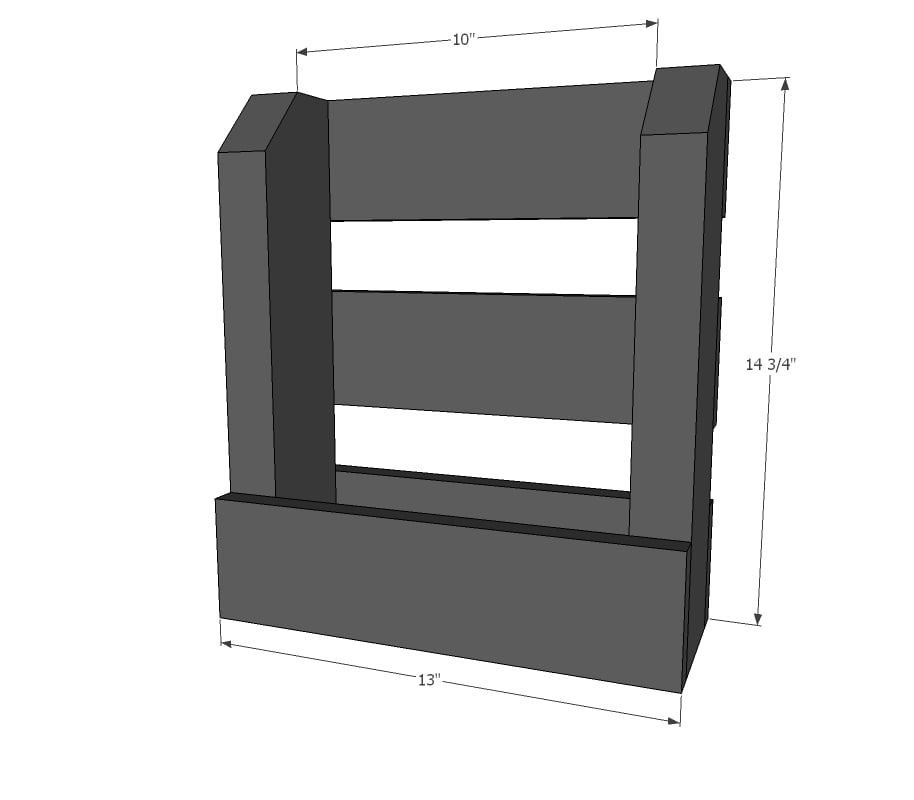
Dimensions
backpack file organizer kids
Dimensions shown above

Preparation

Shopping List

1 - 1x4 @ 6 feet long

1 - 2x4 @ 30" long

Common Materials
1 1/4 inch finish nails
120 grit sandpaper
Cut List

2 - 2x4 @ 14-3/4" (sides)*

4 - 1x4 @ 13" (front and back)

1 - 1x4 @ 10" (bottom)*

*can be subsituted for x3 or x6 width boards to change depth of shelf

General Instructions

Please read through the entire plan and all comments before beginning this project. It is also advisable to review the Getting Started Section. Take all necessary precautions to build safely and smartly. Work on a clean level surface, free of imperfections or debris. Always use straight boards. Check for square after each step. Always predrill holes before attaching with screws. Use glue with finish nails for a stronger hold. Wipe excess glue off bare wood for stained projects, as dried glue will not take stain. Be safe, have fun, and ask for help if you need it. Good luck!

Instructions

Step 1

I cut the top front corners off just to soften the edges.  I did this with my mitersaw set at a 45 degree angle.


I choose to use 2x4s for the sides because there's a wide edge to nail into.  You could also use a 1x board.  Another suggestion is using a x3 or x6 board for the sides and bottom.  I actually did the x3 option since this project is in a small hallway.

Step 2

On the back side, use glue and nails to attach the back boards.  Attach the top and bottom ones first, keeping outside edges flush.  Then add the middle one, centering between the top and bottom boards.  I used 1-1/4" nails.

Step 3

Repeat the same steps on the front.  Use ample glue and nails.

Step 4

Apply glue to the edges of the bottom and fit in the bottom.  Nail from outsides with 1-1/4" nails.


From here you can fill nail holes with wood filler, sand and finish.  Then add your hardware and hang on the wall.  I hung mine to studs in the wall with screws.

Finishing Instructions
Preparation Instructions
Fill all holes with wood filler and let dry. Apply additional coats of wood filler as needed. When wood filler is completely dry, sand the project in the direction of the wood grain with 120 grit sandpaper. Vacuum sanded project to remove sanding residue. Remove all sanding residue on work surfaces as well. Wipe project clean with damp cloth.

It is always recommended to apply a test coat on a hidden area or scrap piece to ensure color evenness and adhesion. Use primer or wood conditioner as needed.

Comments