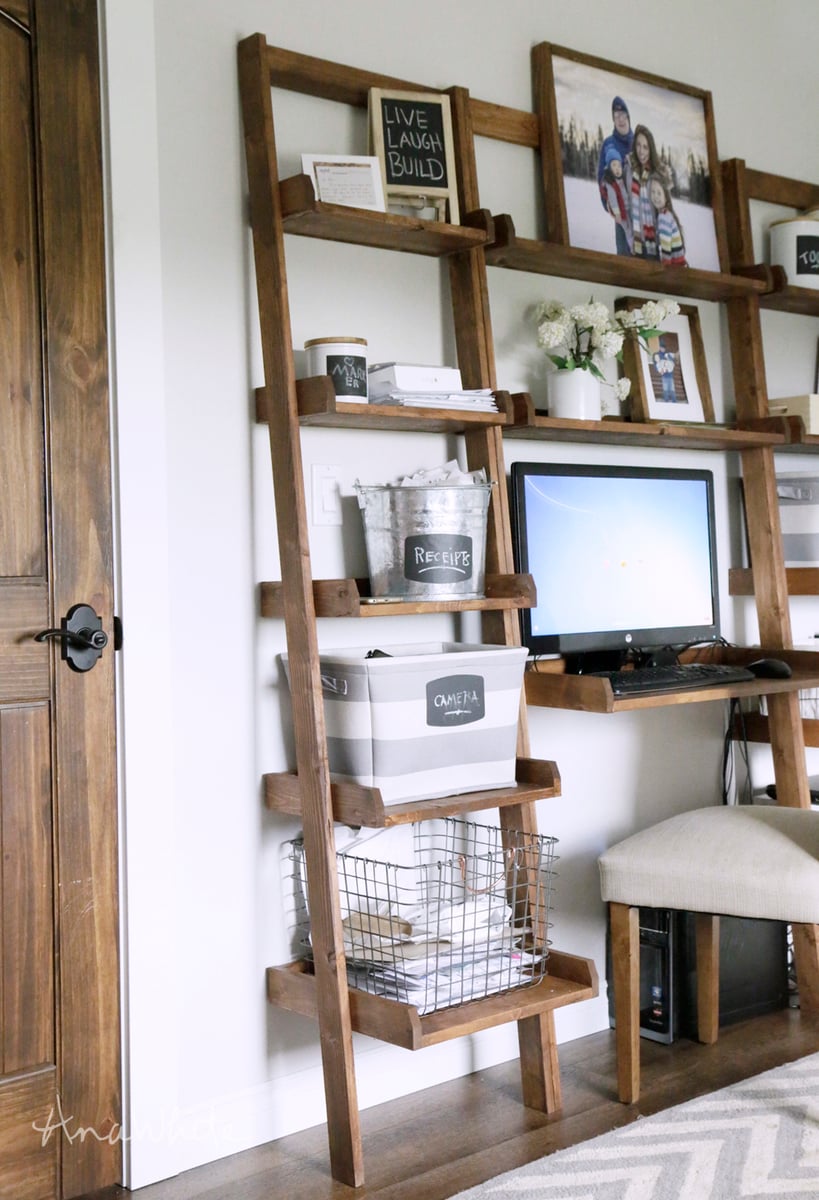
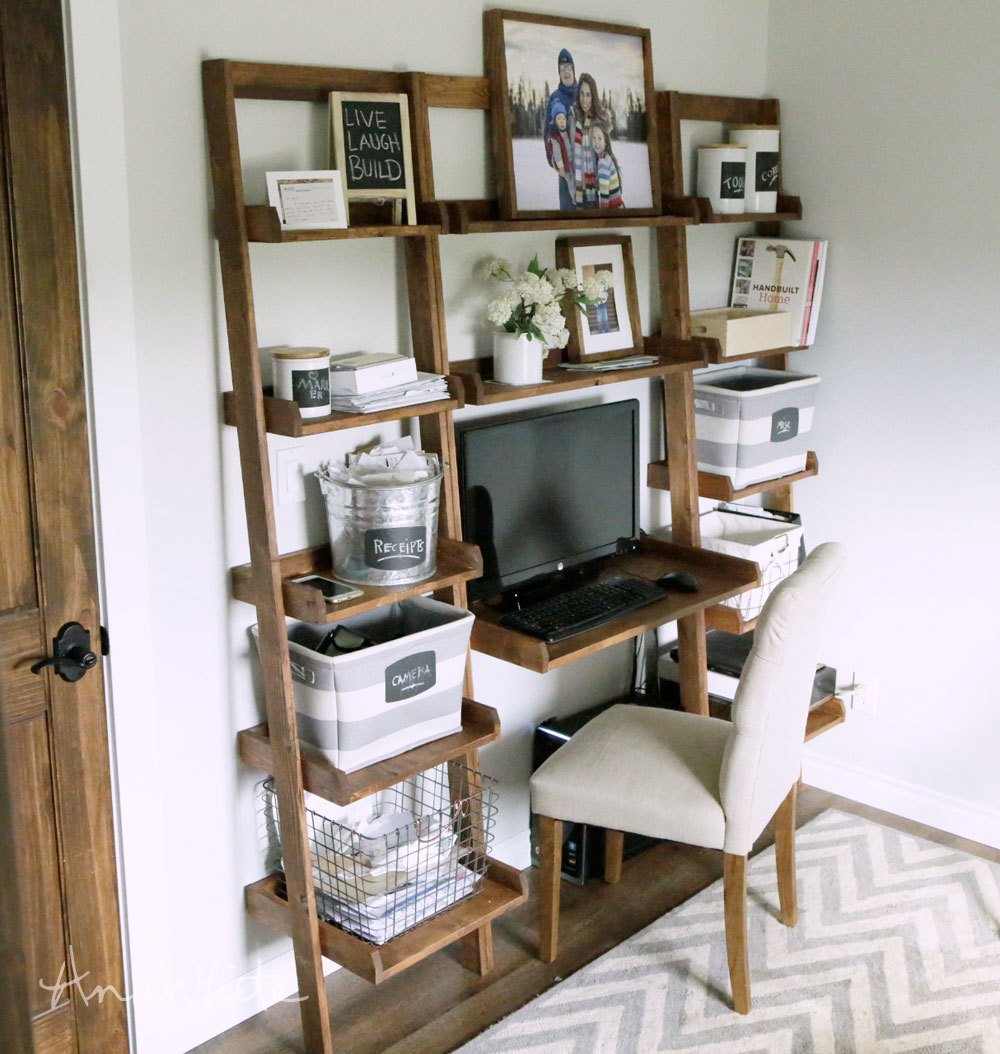
Use 1x board to build a leaning ladder wall bookshelf! Easy plans by ANA-WHITE.com
Preparation
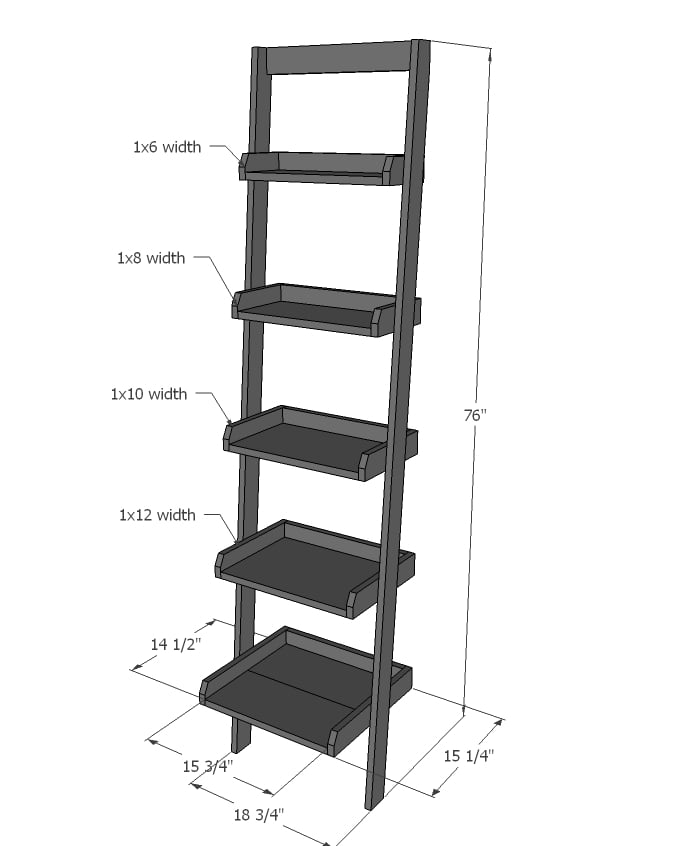
SHOPPING LIST FOR 1 BOOKSHELF
- 4 - 1x3 @ 8 feet long
- 1 - 1x6 @ 16" long
- 1 - 1x8 @ 4 feet long
- 1 - 1x10 @ 16" long
- 1 - 1x12 @ 16" long
CUT LIST FOR ONE BOOKSHELF
FRAME
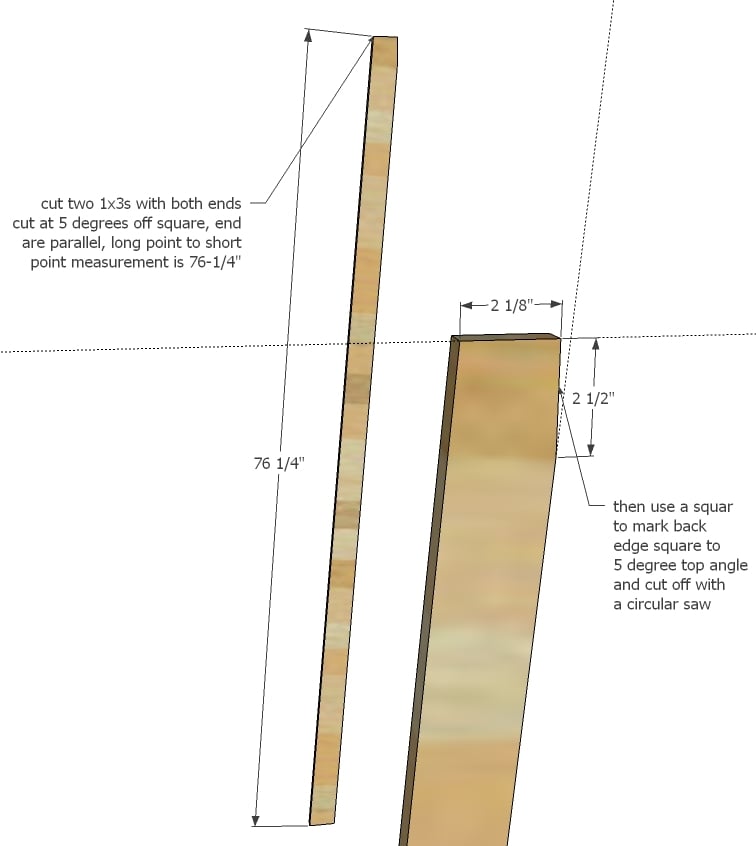
- 2 - 1x3 @ 76-1/4" - both ends cut at 5 degrees, parallel, long point to short point measurement
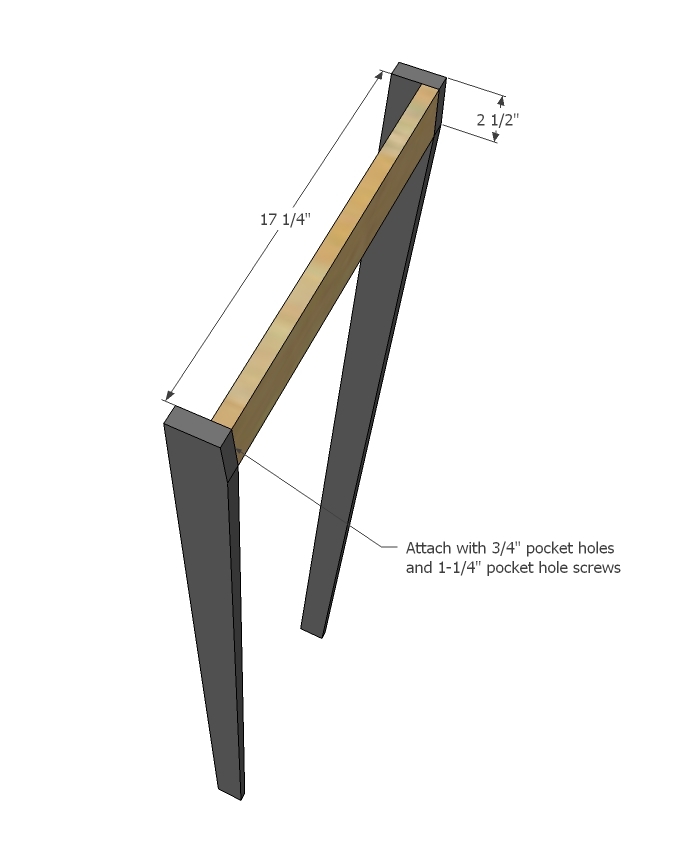
- 1 - 1x3 @ 17-1/4" - back support
SHELVES
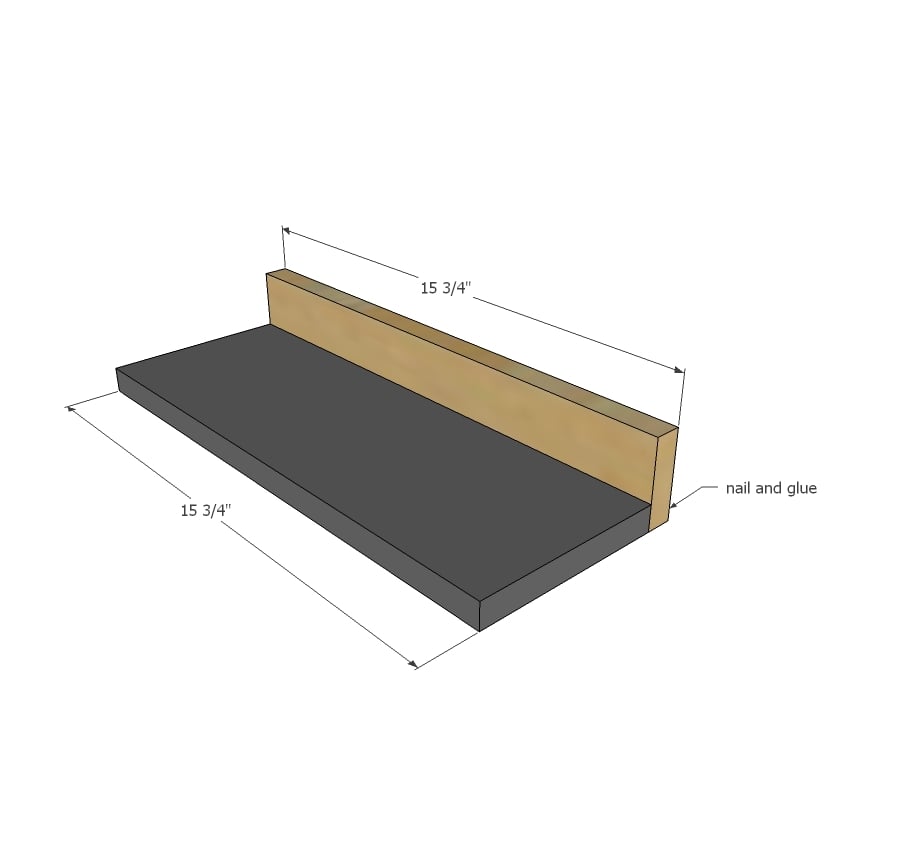
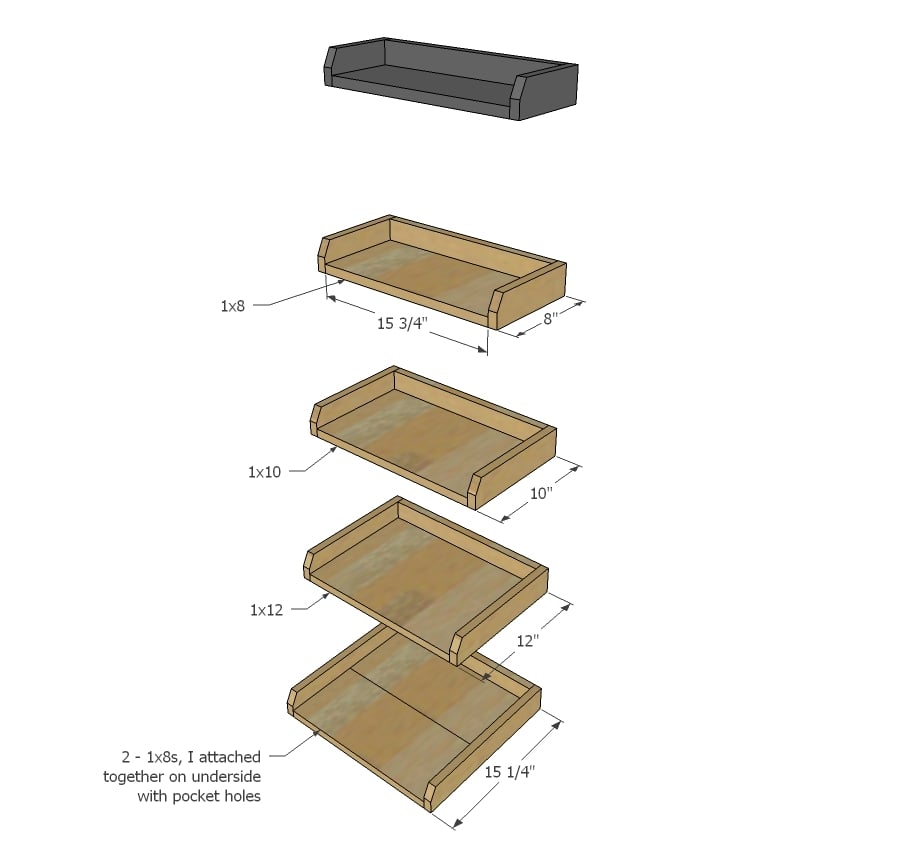
- 5 - 1x3 @ 15-3/4"
- 1 - 1x6 @ 15-3/4"
- 3 - 1x8 @ 15-3/4"
- 1 - 1x10 @ 15-3/4"
- 1 - 1x12 @ 15-3/4"
- 2 - 1x3 @ 6-1/4"
- 2 - 1x3 @ 8"
- 2 - 1x3 @ 10"
- 2 - 1x3 @ 12"
- 2 - 1x3 @ 15-3/4"
It is important to cut the backs and shelves to the same length. To do this quickly and accurately, consider a stop block on your saw, spaced out the shelf width from the saw blade, and clamped or screwed down (depending on your set up). Some saw stands have this functionality built in.
Please read through the entire plan and all comments before beginning this project. It is also advisable to review the Getting Started Section. Take all necessary precautions to build safely and smartly. Work on a clean level surface, free of imperfections or debris. Always use straight boards. Check for square after each step. Always predrill holes before attaching with screws. Use glue with finish nails for a stronger hold. Wipe excess glue off bare wood for stained projects, as dried glue will not take stain. Be safe, have fun, and ask for help if you need it. Good luck!
Instructions
Step 1
Step 3
Step 4
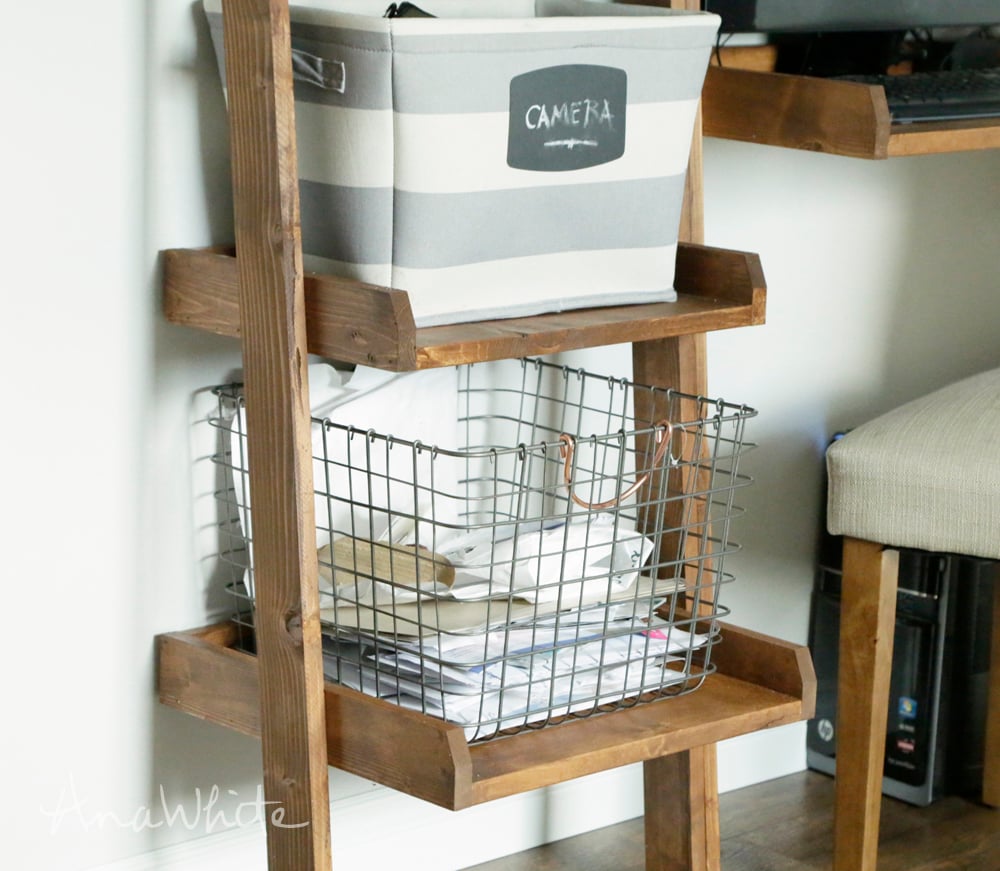
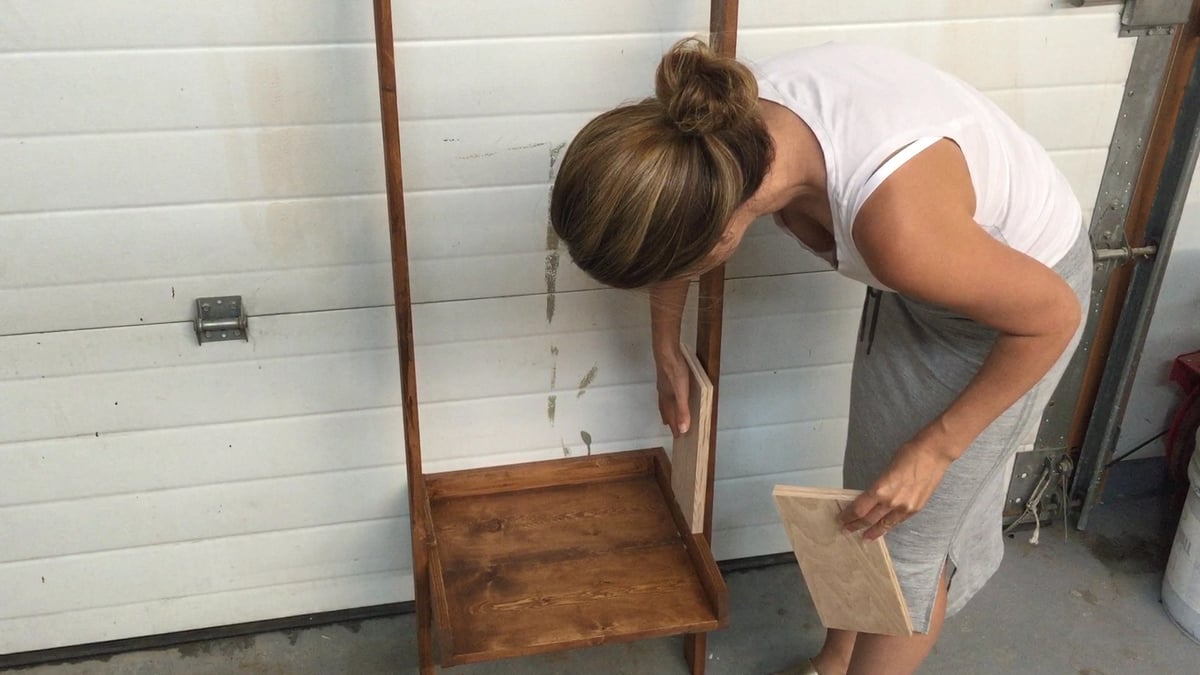
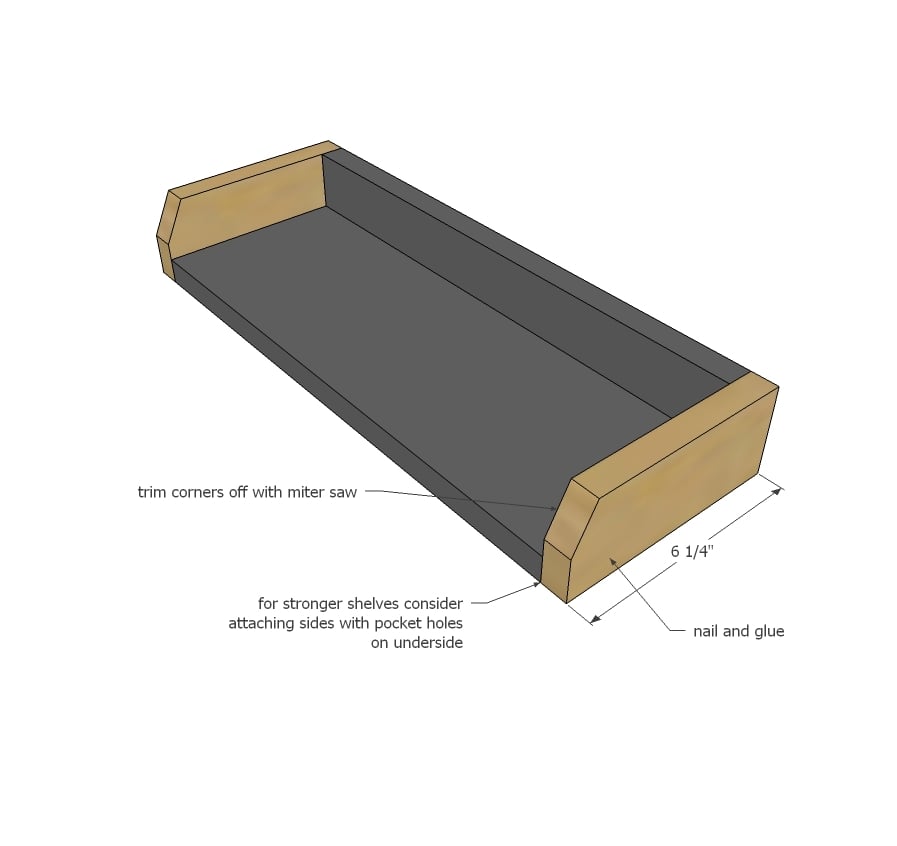
Add sides as you did the back.
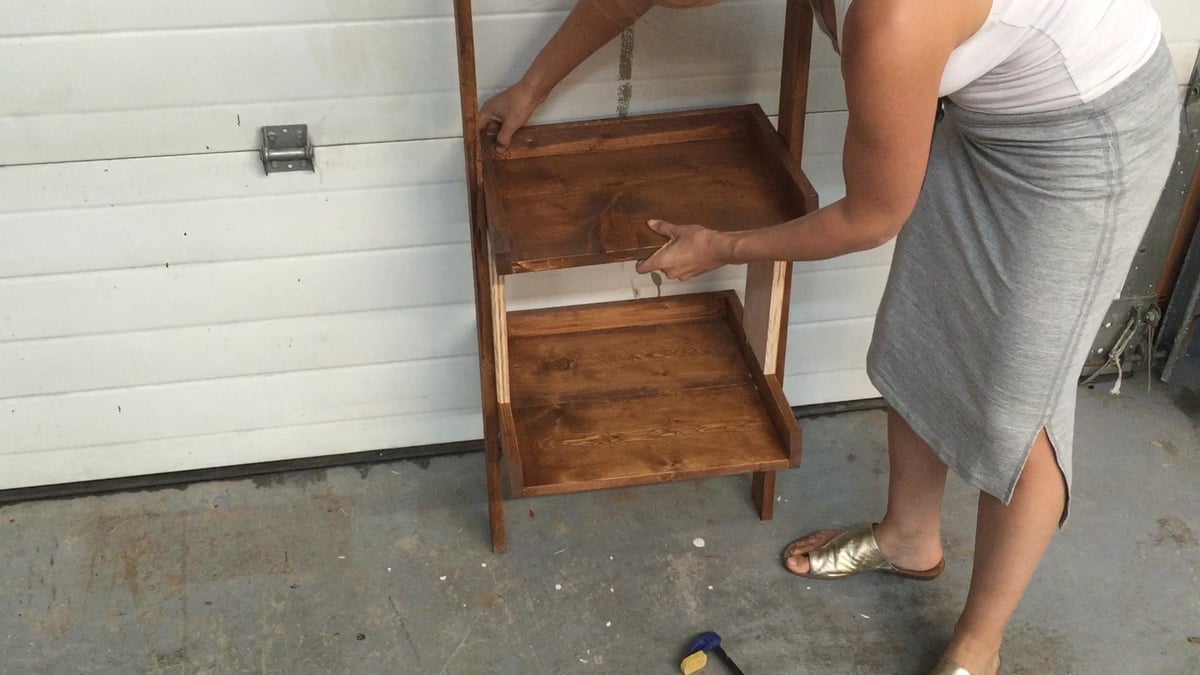
For a stronger shelf, you can also pocket hole the sides on from underneath.
I cut the corners on my sides at 22-1/2" degrees (I choose this number because it is a setpoint on my saw, the exact degree can differ). To do this quickly, I made a small mark on my saw with a pencil, when I had the board in the position I wanted to cut it at. Then after cutting, I just took the next side, lined it up with my marks, and cut. No measuring needed.
Step 6
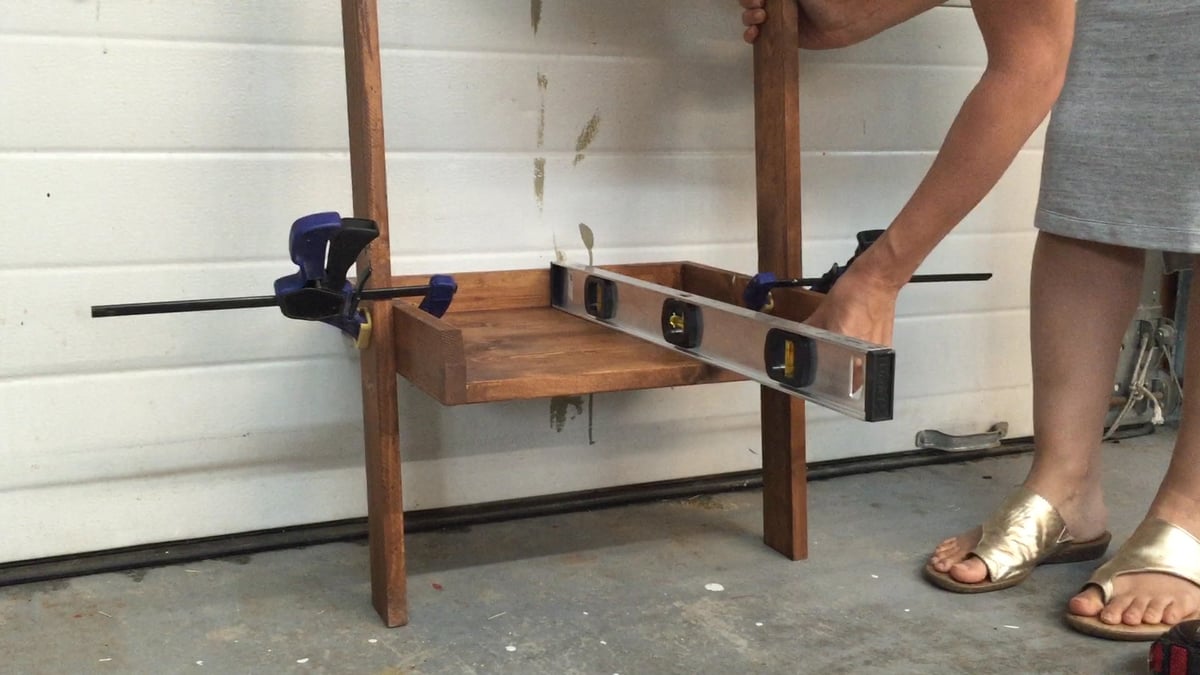
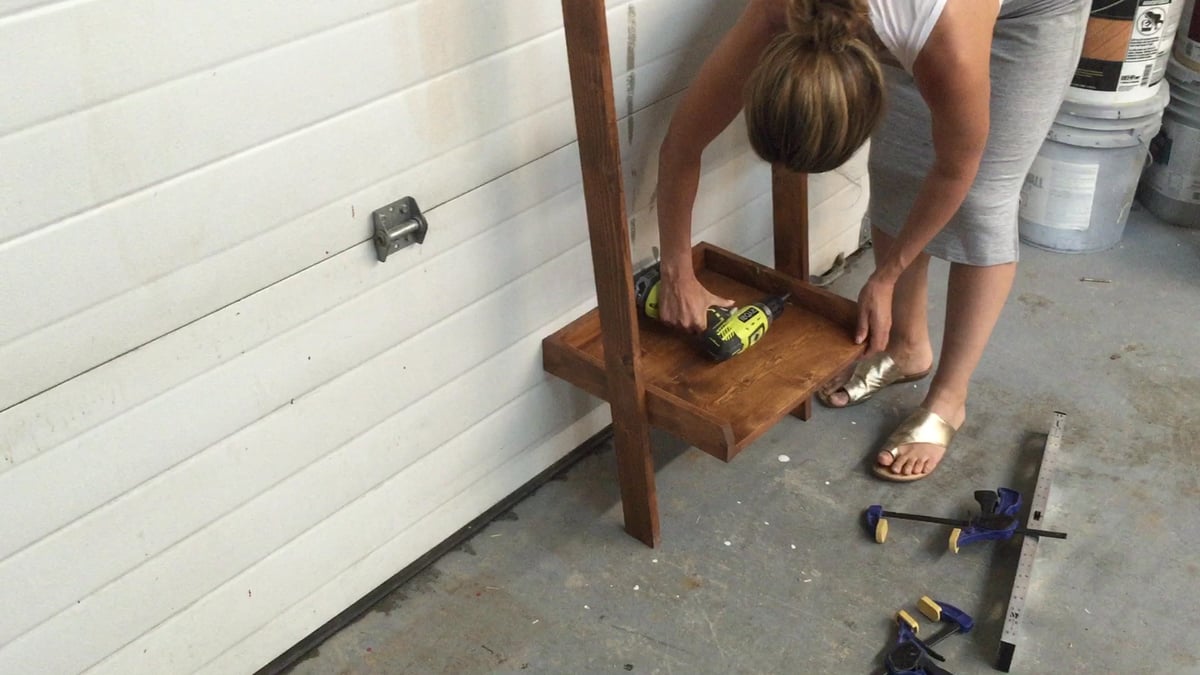
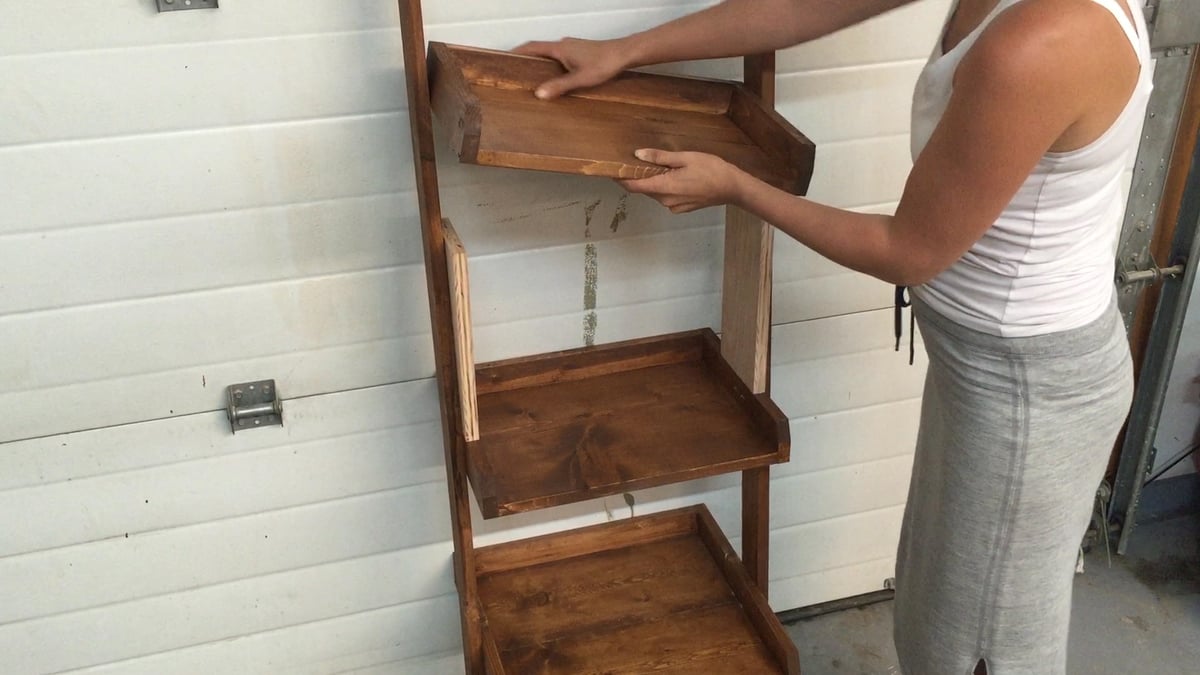
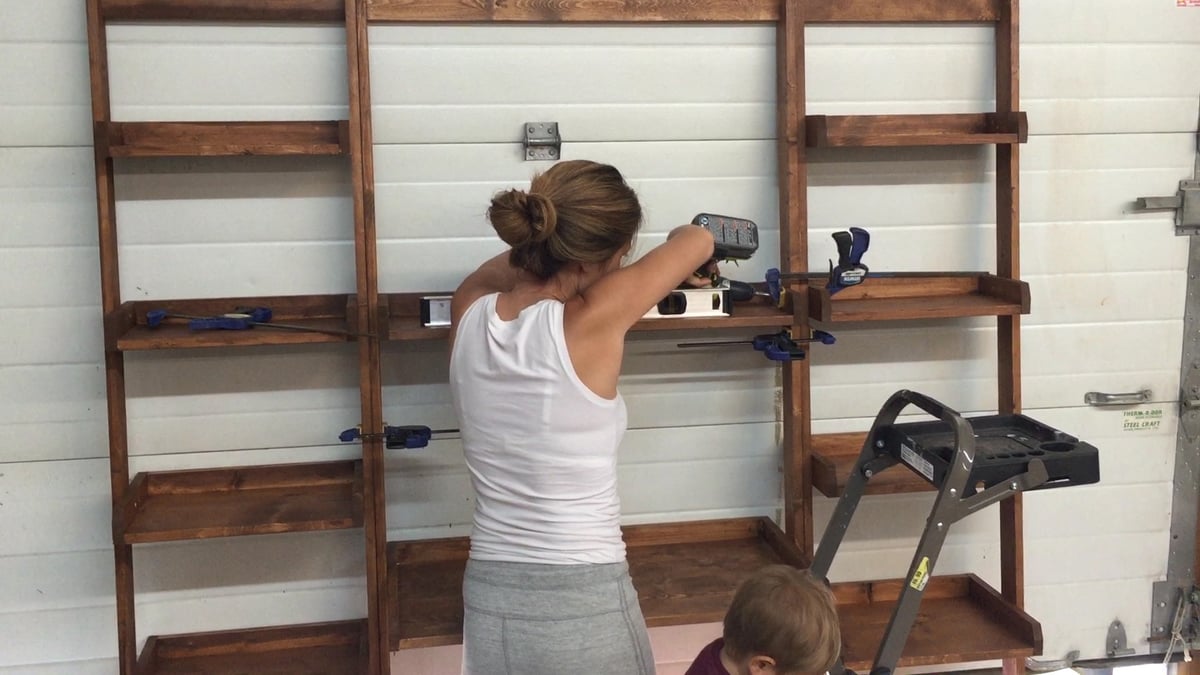
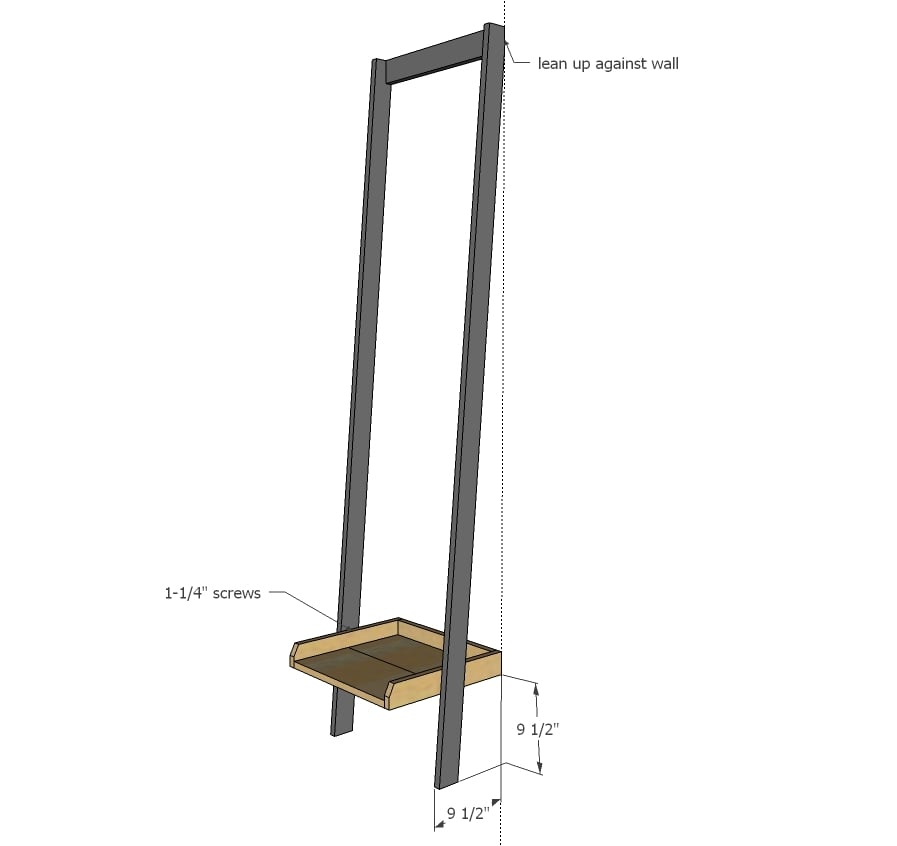
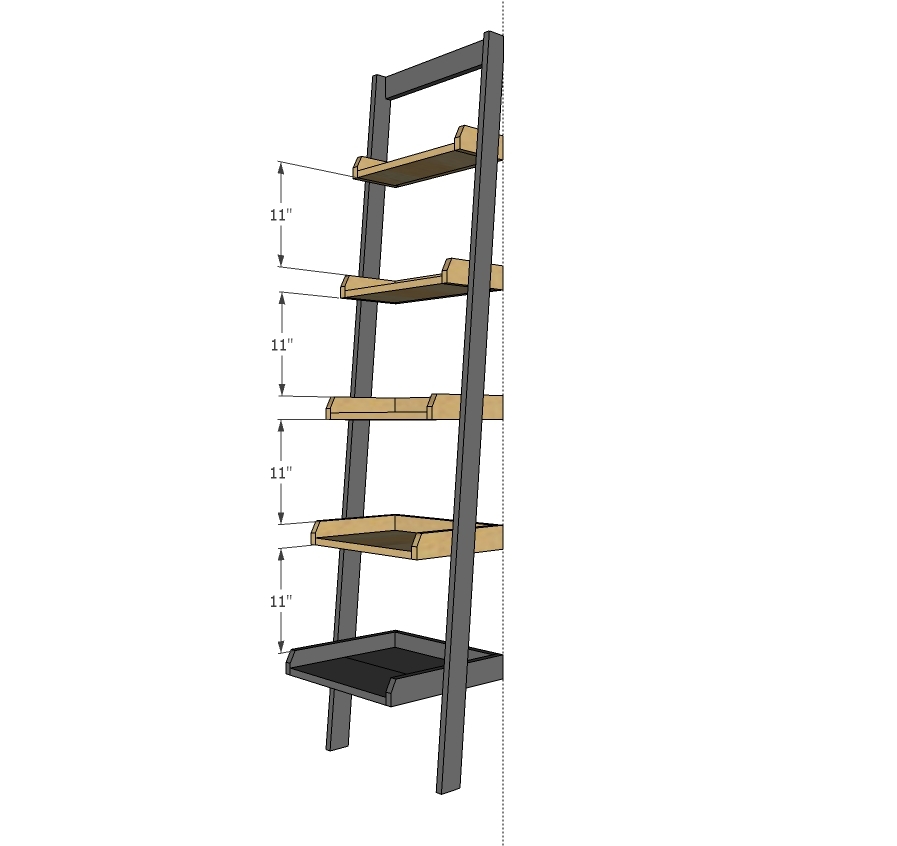
To get the bottom shelf in place, I first positioned the frame against a wall, making sure legs were 9-1/2" out from the wall. I then measured up 9-1/2" and added the shelf with clamps and used a level to ensure it was level. Then I screwed it on with 1-1/4" screws (you can use pocket hole screws here).
It is always recommended to apply a test coat on a hidden area or scrap piece to ensure color evenness and adhesion. Use primer or wood conditioner as needed.








Comments
RogueEngineer
Thu, 08/13/2015 - 03:45
Great job!
I had the exact same plan in mind to build. Awesome job! It turned out great.
Jodi W
Wed, 10/28/2015 - 14:59
Correction
For the bottom shelf, I believe the side cuts should be 15 1/4", not 15 3/4". My 1 x 8's were actually 7 1/4" wide x 2 = 14 1/2" + 3/4" back shelf lip = 15 1/4".
So the last item on the cut list should be 2 - 1x3 @ 15-1/4".
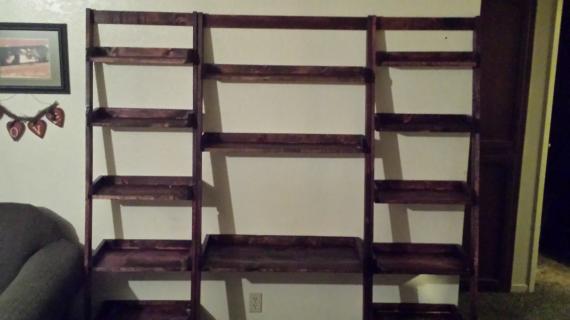
I'm building these with my son for his room. So far, so good! After I go cut 1/2" from the side boards and glue/nail those on, we'll be ready for some sanding and staining. I'm excited to see how this will turn out! We expanded the shelves to 24" wide and are making 2 shelf units to go side by side. I think it will look awesome!
Luckysme
Wed, 11/30/2016 - 13:57
Beautiful
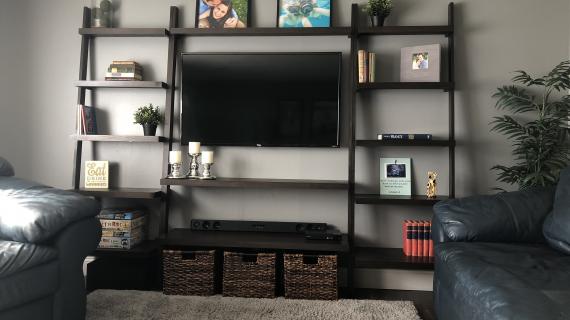
Beautiful plans. By chance do you recall where you bought the herringbone rug!
phwatt
Thu, 01/12/2017 - 06:46
grade of wood?
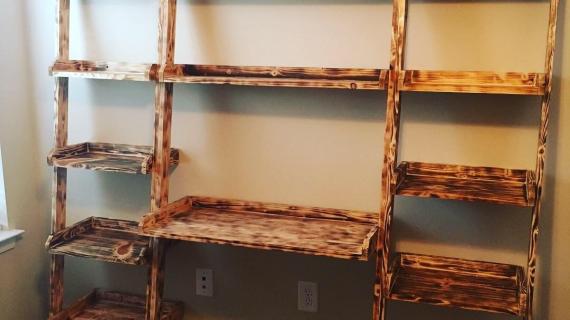
Can you tell me if you used common or premium grade pine boards for this project? I like the finish you show so I would like to recreate it.
brenleyransome
Wed, 01/18/2017 - 16:50
Diving in Deep
A friend turned me on to your work and plans. I ended up buying a miter saw and he loaned me the rest. This is my first project and boy, what a way to start. It's been relatively easy, but I really struggled with the five-degree cuts to assist the leaning. I haven't completed the assembliy because the pocket holes have me in fear. Just wanted to thank you for the plans and empowerment. You make this so anyone that is willing can replicate!
In reply to Diving in Deep by brenleyransome
Ana White
Wed, 01/18/2017 - 18:00
AWESOME!
AWESOME!
predlsu
Sun, 07/21/2019 - 20:55
5 degree cuts
Hi Ana! You say to cut at 5 degrees off square at the top and bottom of the 1x3s and that the cuts should be parallel.
I can visualize the top 5º cut but I'm not sure I understand where or how to make the bottom 5º cut, or if even a bottom cut is required? Only one cut is shown in the video and diagrams.
agley1cb
Sat, 06/20/2020 - 17:38
Did you ever find an answer…
Did you ever find an answer for this? Also stuck here!