

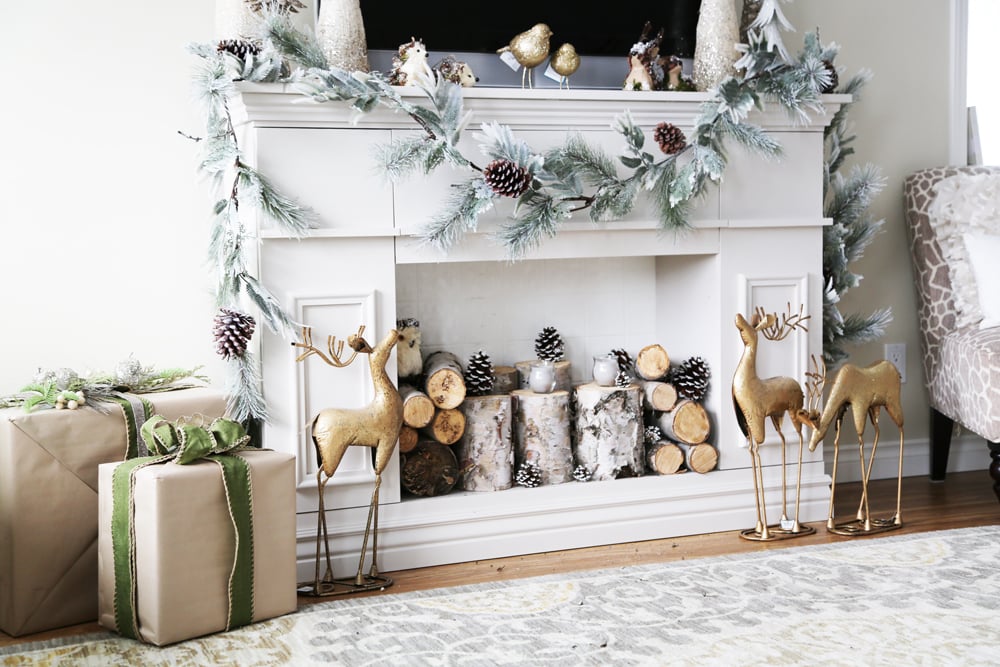
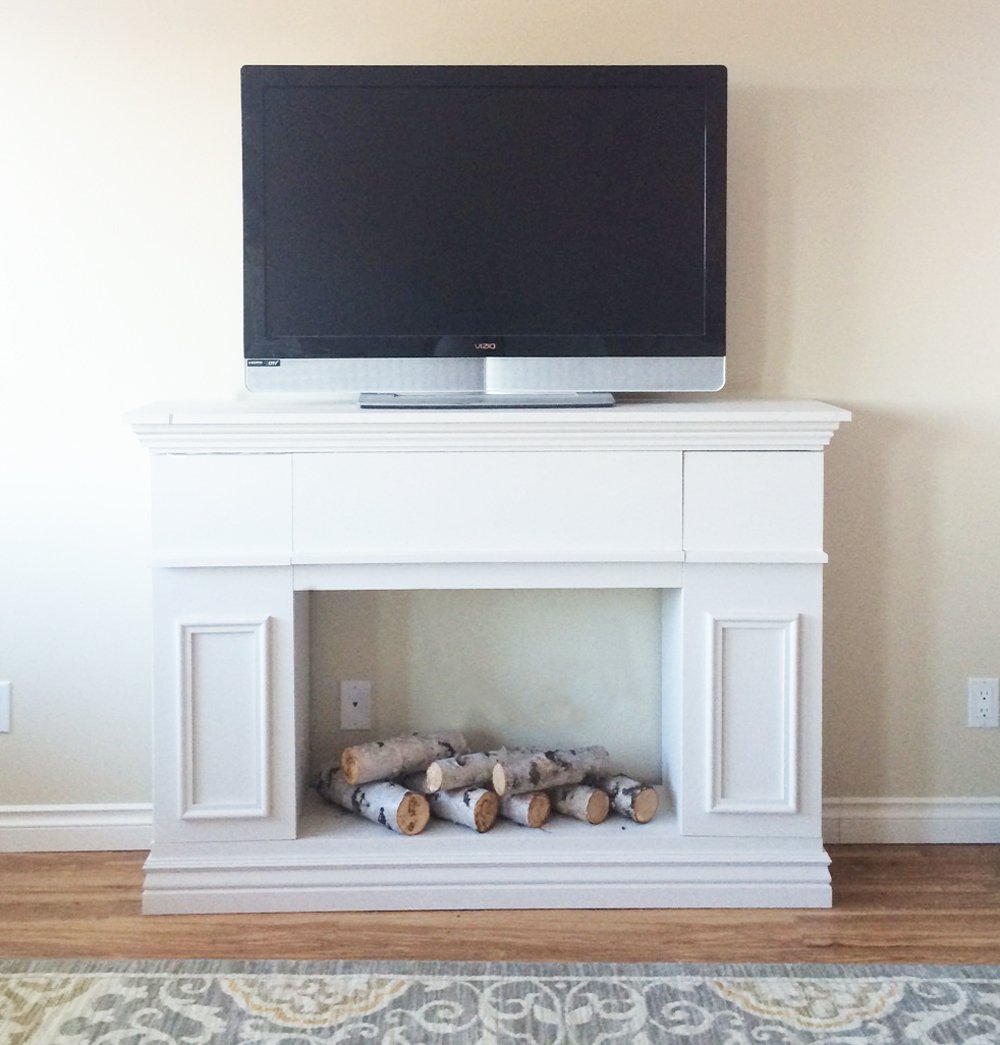
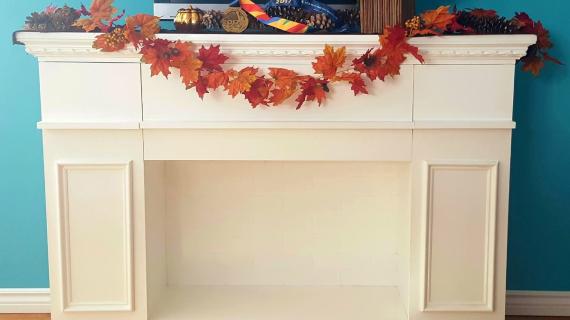
No fireplace? No problem! Build your own faux fireplace with our free plans. Includes LOTS OF STORAGE for tv controllers, board games, and more!
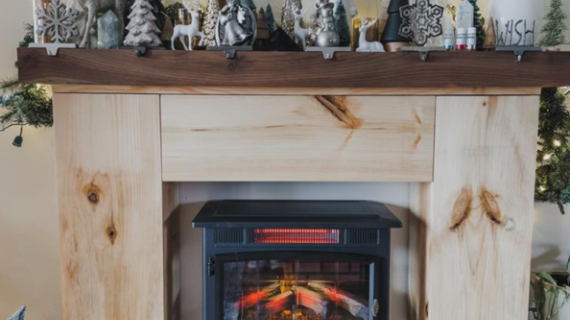
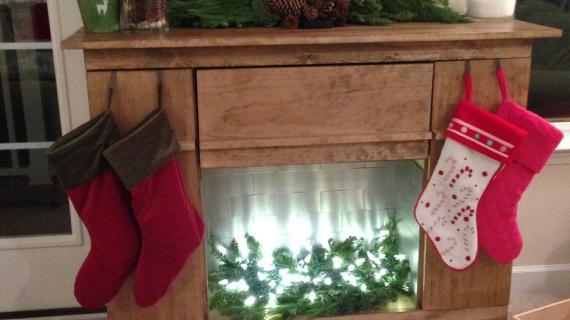
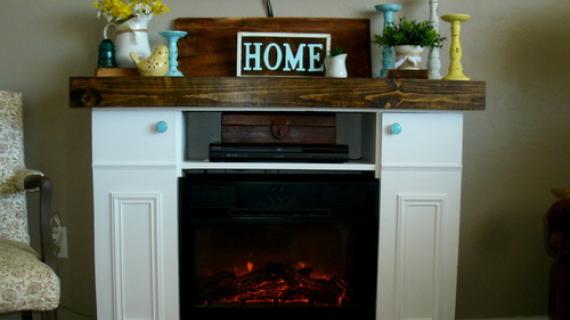
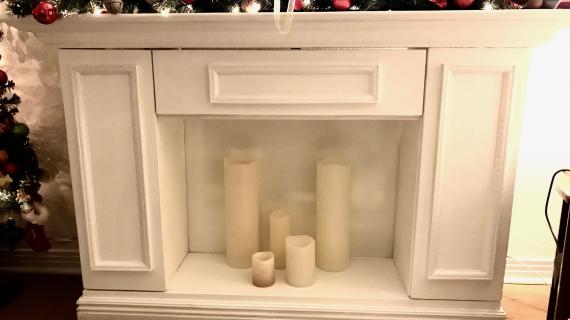
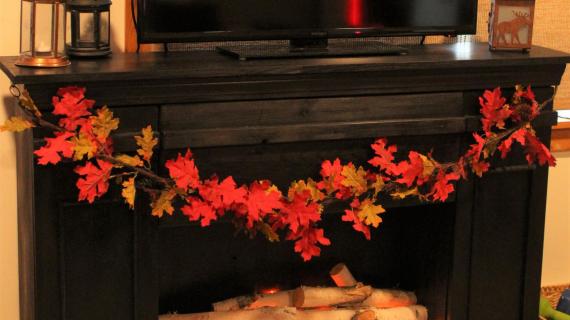
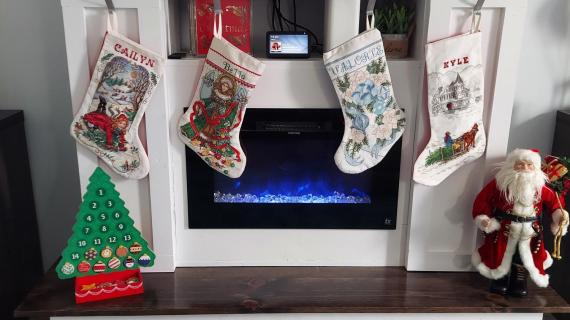
Add an electric insert or save money and fill the opening with LED candles, logs with orange Christmas lights, or an electric fireplace log kit!
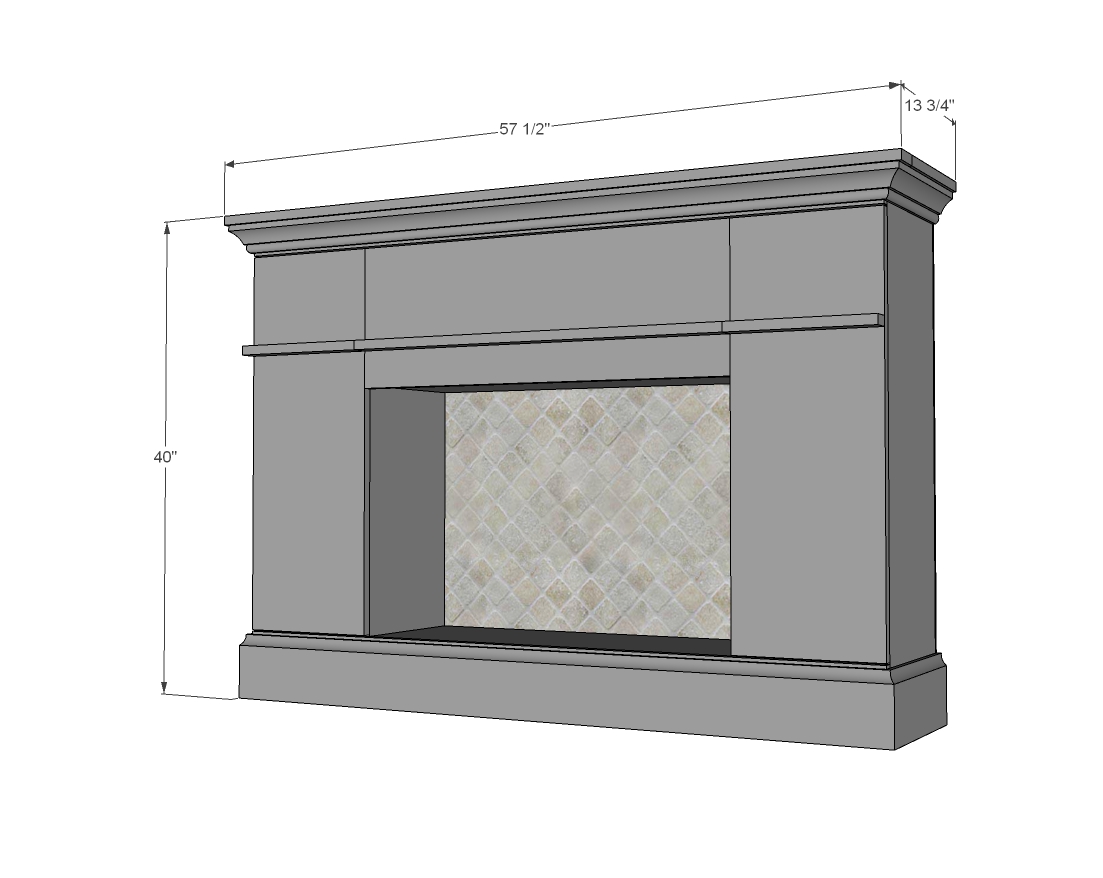
Free step by step plans with diagrams, shopping and cut list from Ana-White.com
Fireplace TV Stand Features
- All in one design - just build and move into place
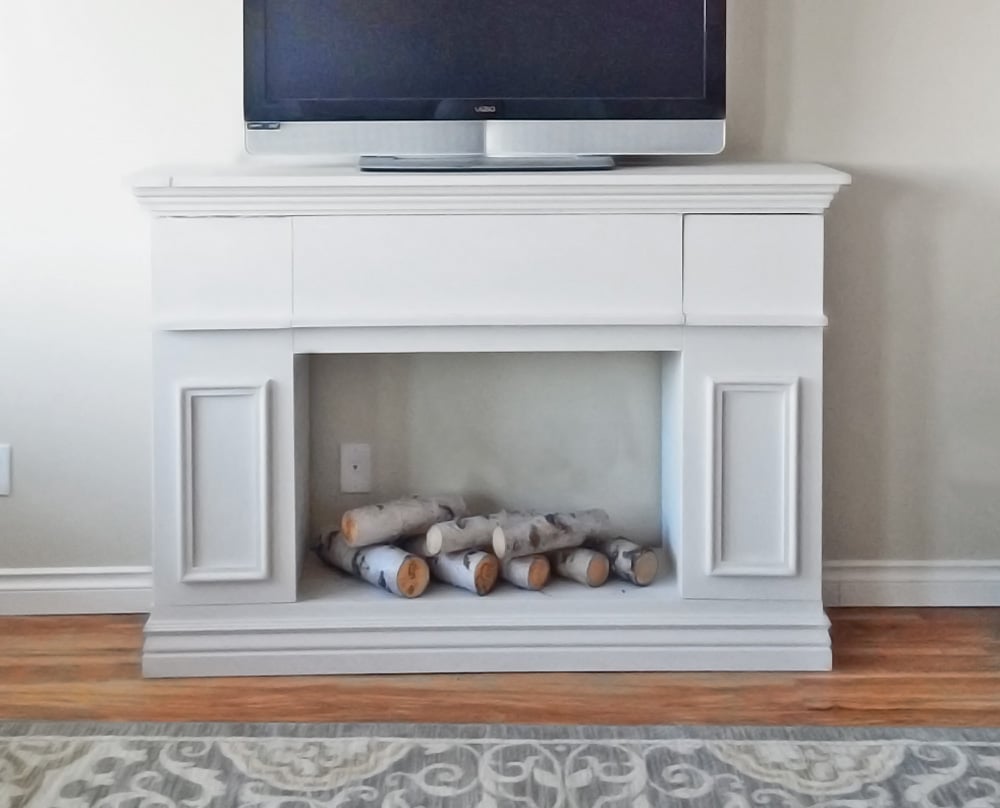
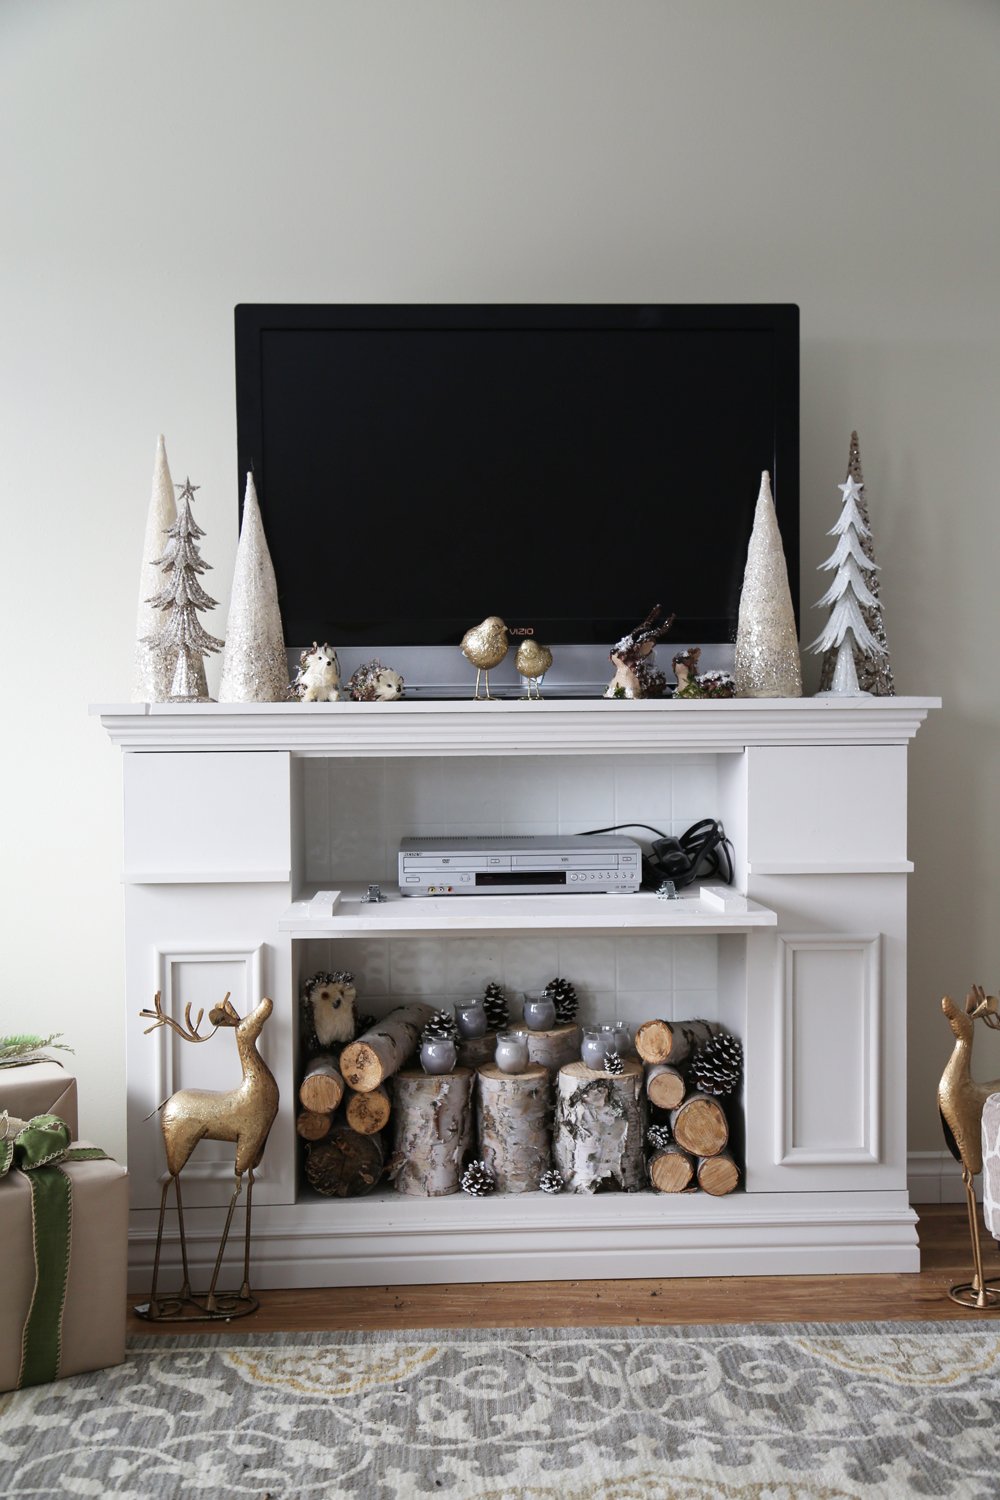
- Perfect sized faux fireplace for use as an entertainment console
- Build using all off the shelf materials and minimal tools
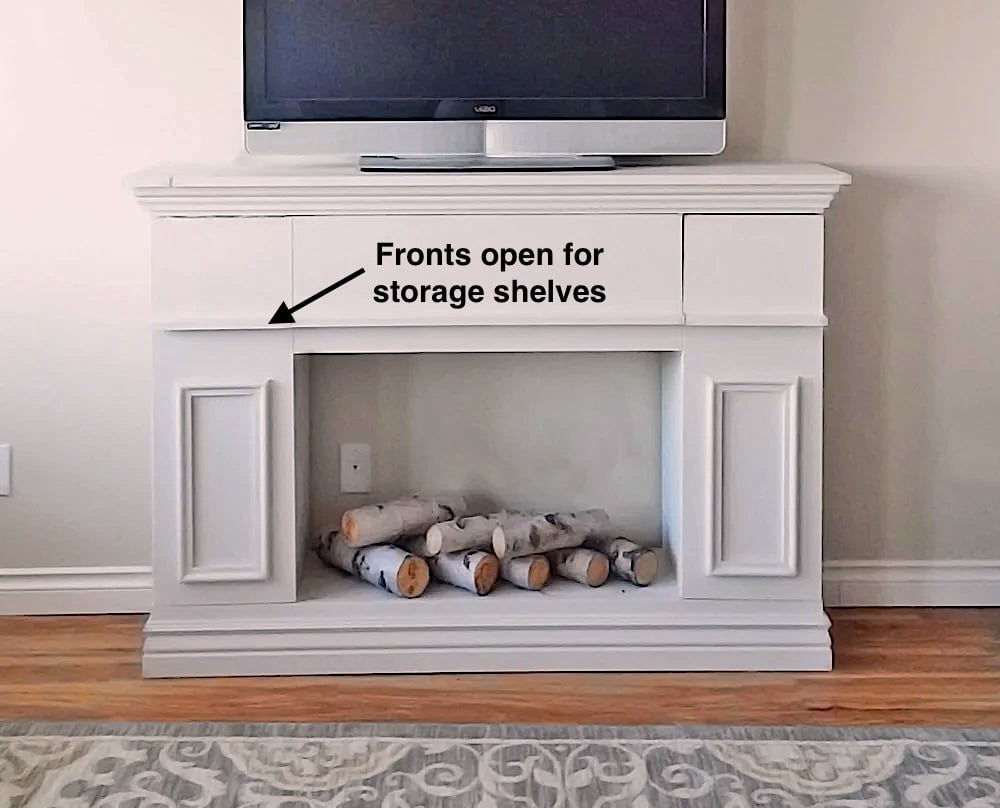
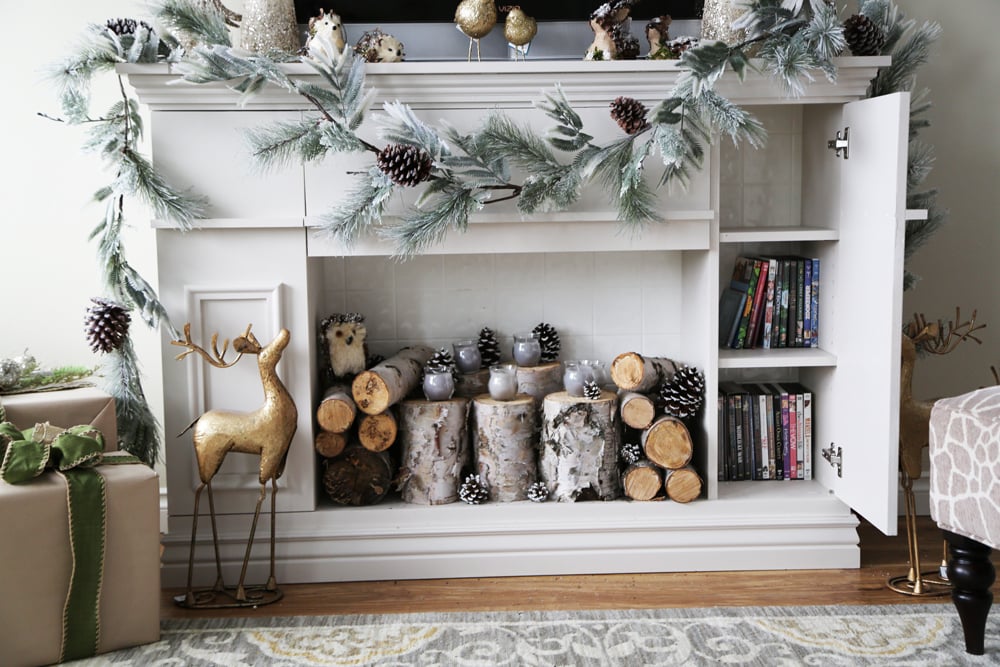
- Hidden storage for controllers, books, DVDs and more
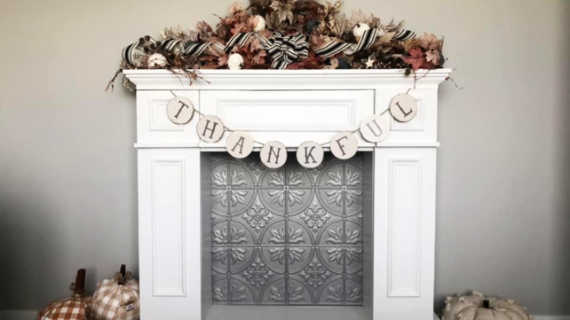
- Easy to build "doors"
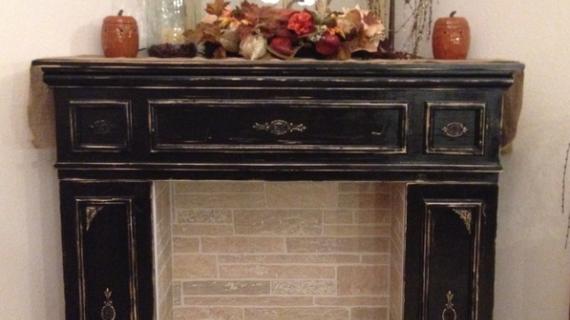
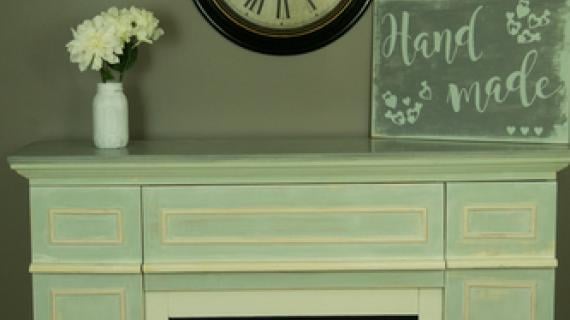
- Customize to suit easily
- Inexpensive option for a fireplace tv stand - no need for an expensive electric insert, just use flameless candles, a lighted log set, or make your own using firewood pieces and LED lights.
Video Tutorial - How I Built My Own Fireplace TV Stand with Hidden Storage
To help you build this faux fireplace, we put together a video tutorial.
How I Built My Own Fireplace TV Stand with Storage
The plans for this faux fireplace are below (just scroll down), but I wanted to add a few more photos of the build -
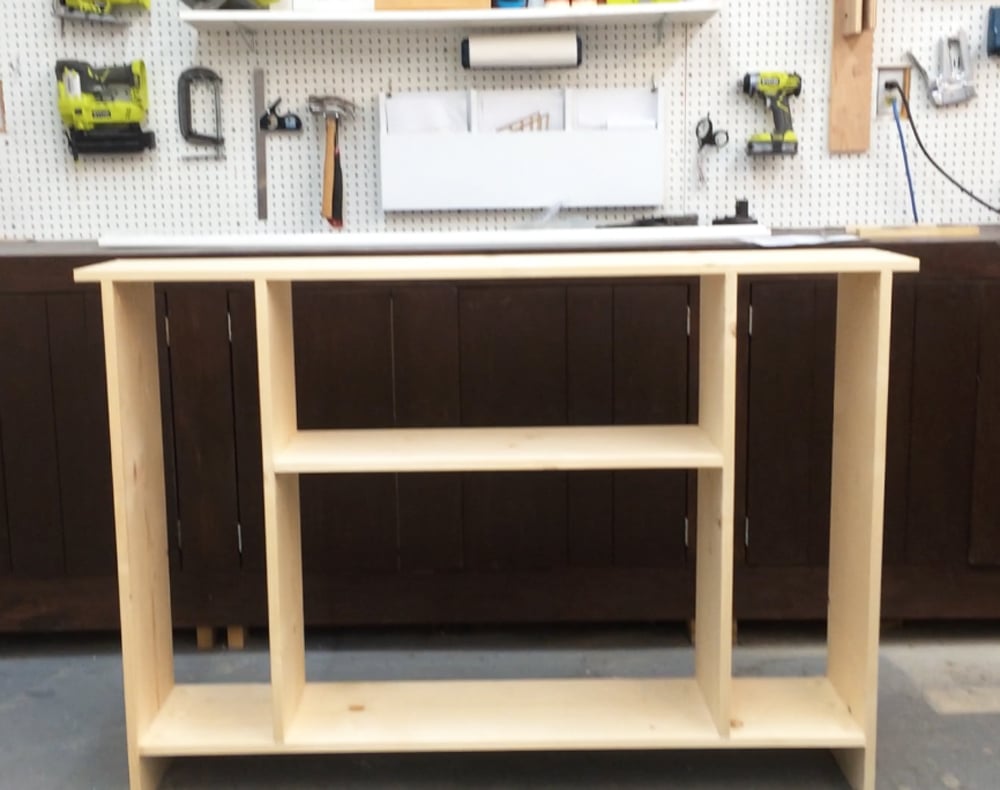
First I just built a bookshelf with 1x12 boards. I used a Kreg Jig (recommended) but not essential. You can also use 2" screws or brad nails and glue.
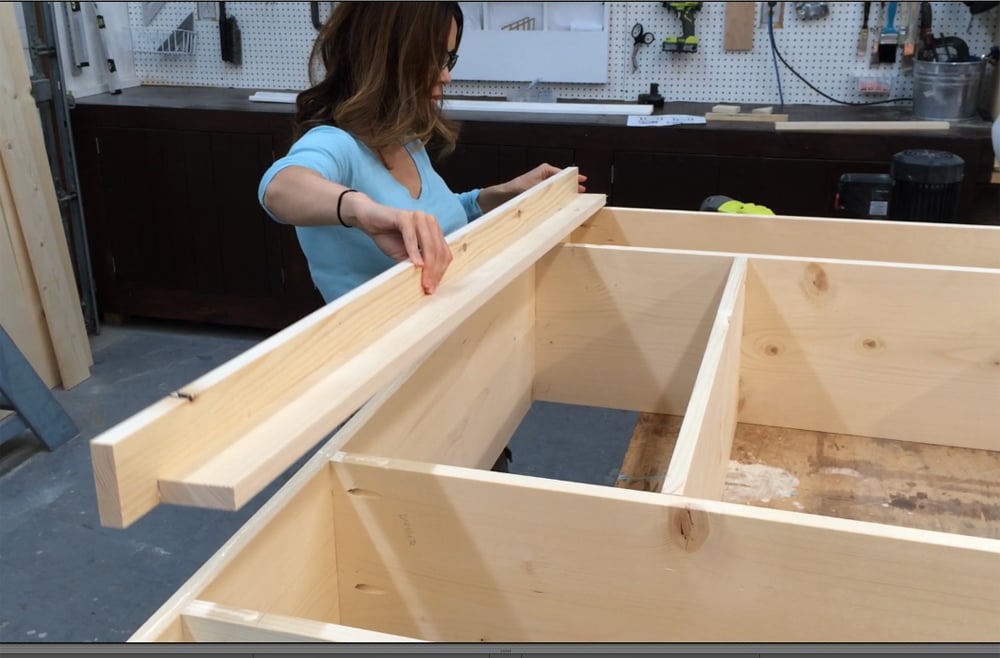
Then I added the top trim - just 1x boards
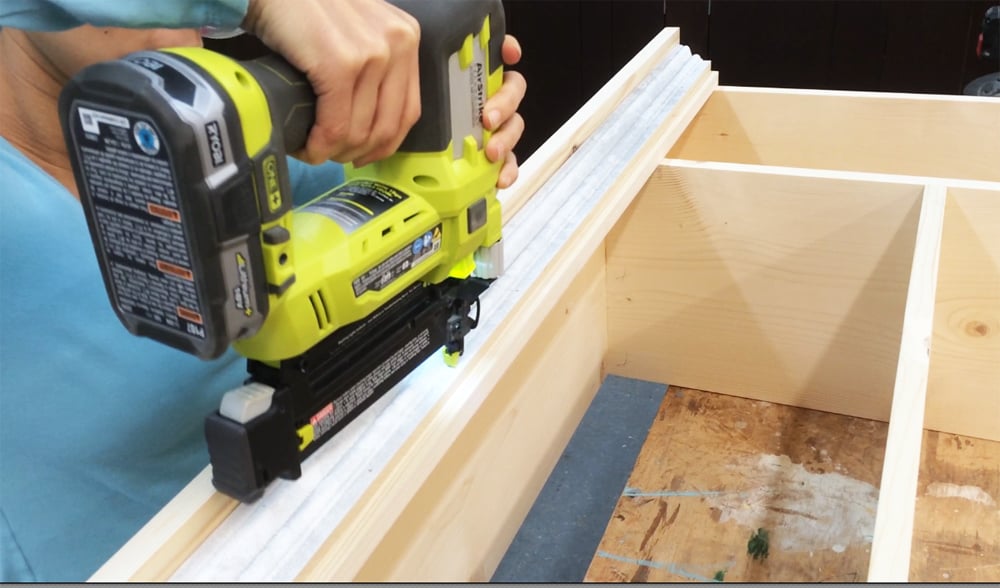
To fancy up the top, I added some off the shelf moulding.
I did the same for the base, I added off the shelf base moulding.
From there, it's just doors!
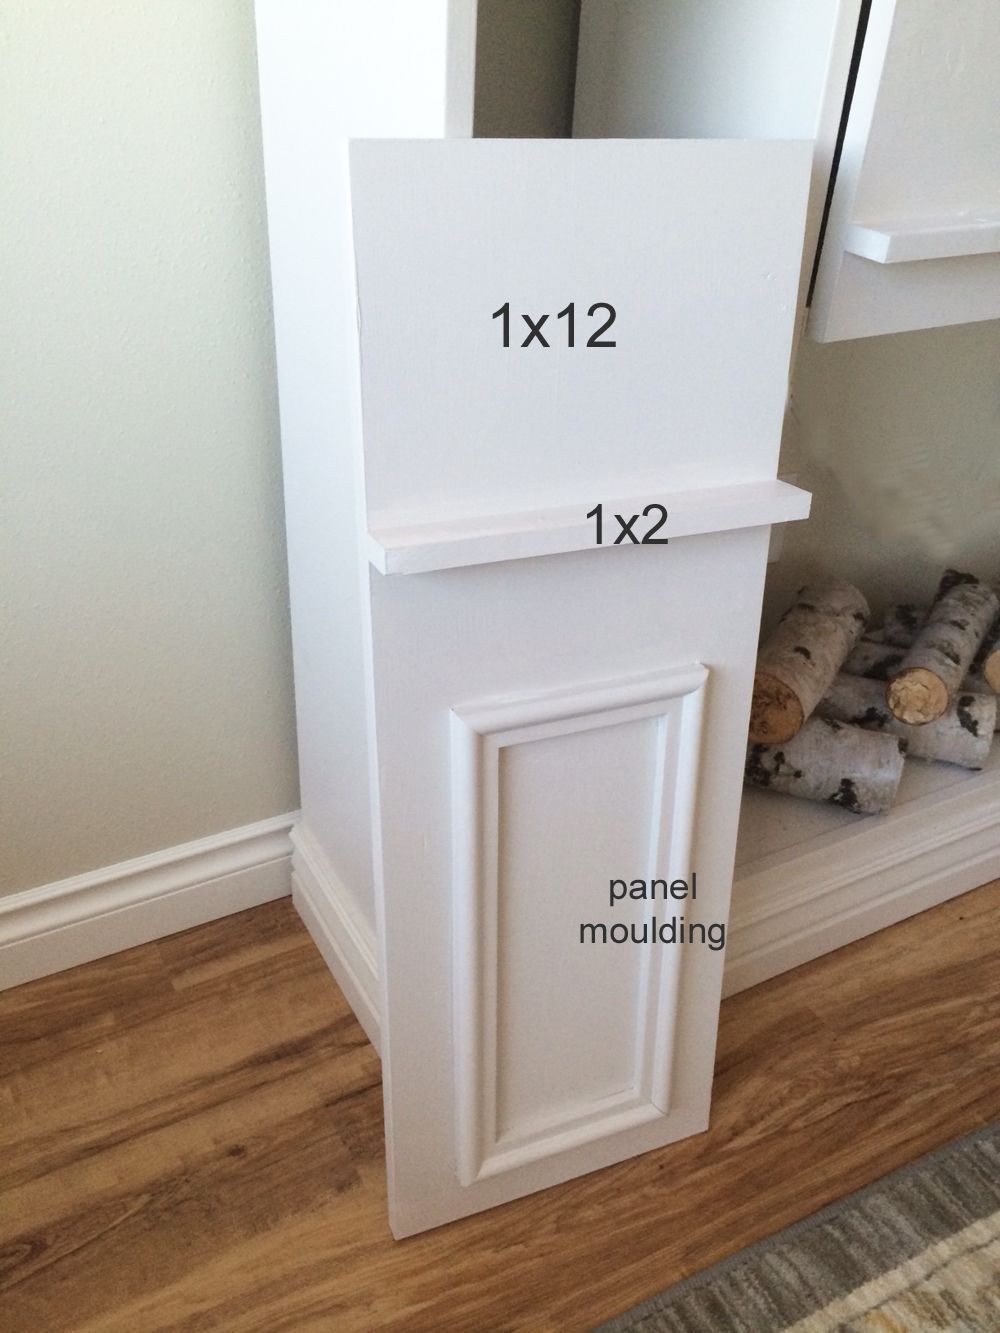
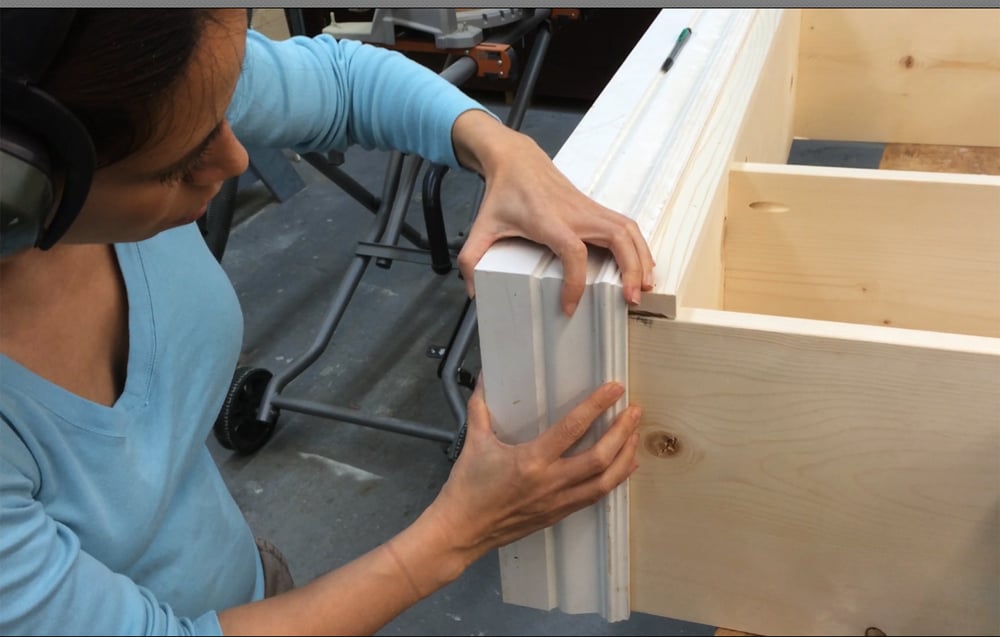
The side doors are just 1x12s with moulding nailed to the front.
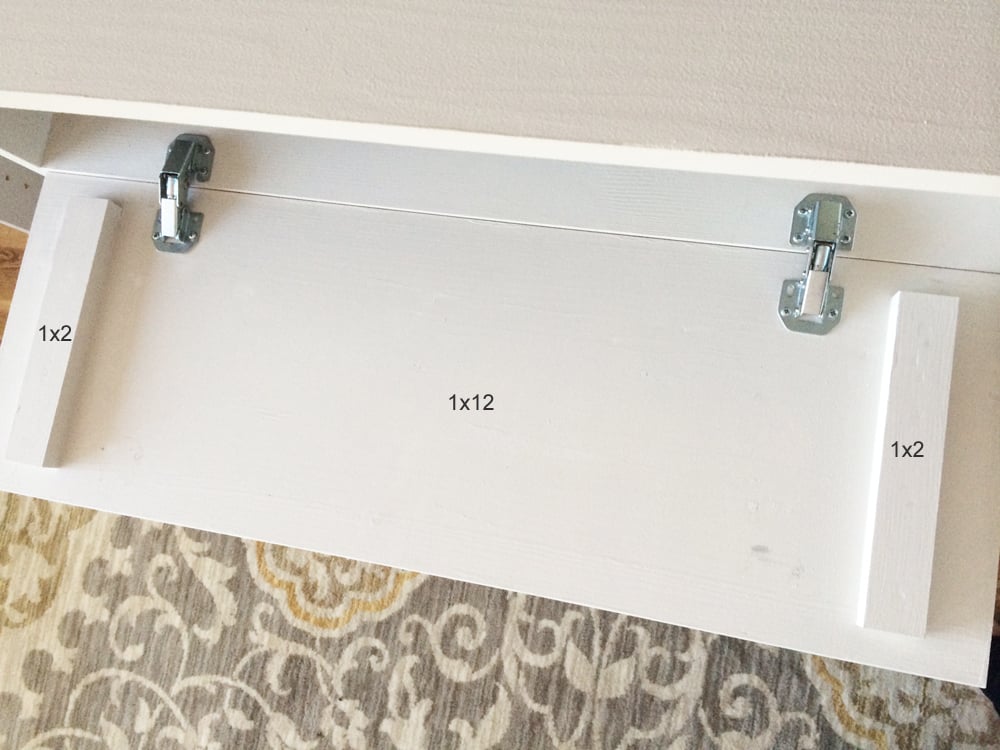
The final flip down door is also a 1x12. I added the 1x2s just to strengthen it up.
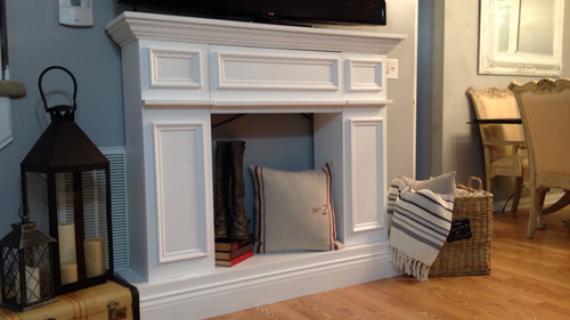
Here's what it looks like with all the doors on.
Hearth Modification Ideas
We love how some of our readers have added hearths below
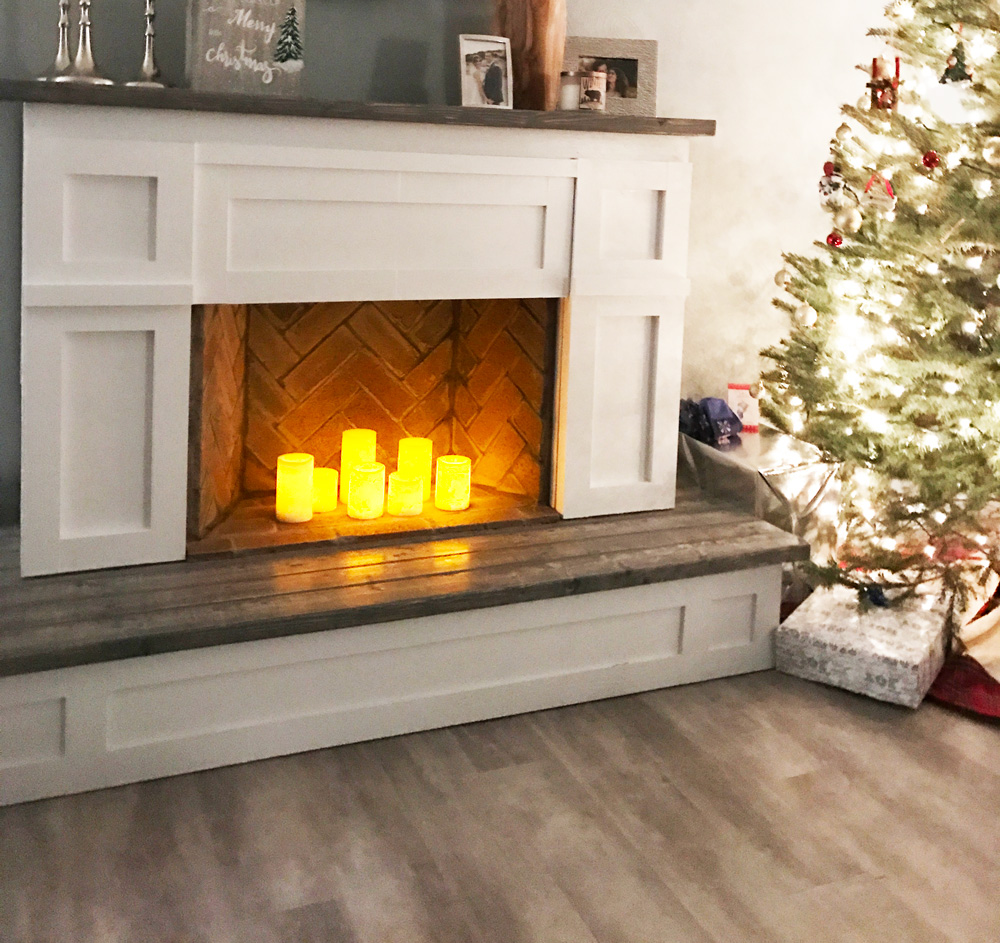
The easiest way to do this is to build a platform with 1x8s to build up the base, 2x6s on top. You'll also want to omit the base on the cabinet. Let me know if you are interested in seeing a full plan tutorial - I'd love to help you out if the interest is there.
Fireplace TV Stand with Storage Plans
The plans for this faux fireplace follow. If you build, please share and tag us - we love seeing how your projects turn out!
Preparation
- 3 – 1x12 @ 8 feet long
- 1 – 1x12 @ 10 feet long
- 1 – 1x3 @ 10 feet long
- 1 – 1x6 @ 5 feet long
- 1 – 1x2 @ 8 feet long
- 8 feet of medium sized crown moulding (less than 1-3/4” finished width and 2-1/2” finished height)
- 8 feet of 5-1/4” base moulding
- 1-1/4” pocket hole screws
- 1-1/4” and 1” brad nails
- Wood glue
- Optional back – 4x8 sheet of ¼” plywood or paneling
- 3 sets of Euro Style concealed hinges, non-mortise surface mount
- 1 – 1x12 @ 57-1/2” (Top)
- 2 – 1x12 @ 39-1/4” (Sides)
- 1 – 1x12 @ 52-1/2” (Bottom)
- 2- 1x12 @ 33-3/4” (Dividers)
- 1 – 1x12 @ 31-1/2” (Center Divider)
- 1 – 1x3 @ 57-1/2” (Top Header)
- 1 – 1x3 @ 54” (Bottom Header)
- 1 – 1x6 @ 54” (Footer)
- 2 – 1x12 @ 31” (Side Doors)
- 1 – 1x12 @ 31-1/4” (Middle Door)
- 2 – 1x2 @ 11-1/4” (Side Door Trim)
- 1– 1x2 @ 31-1/4” (Middle Door Trim)
- Crown Moulding and Base Moulding cut to fit
- Optional back is 54” x 40”


Instructions
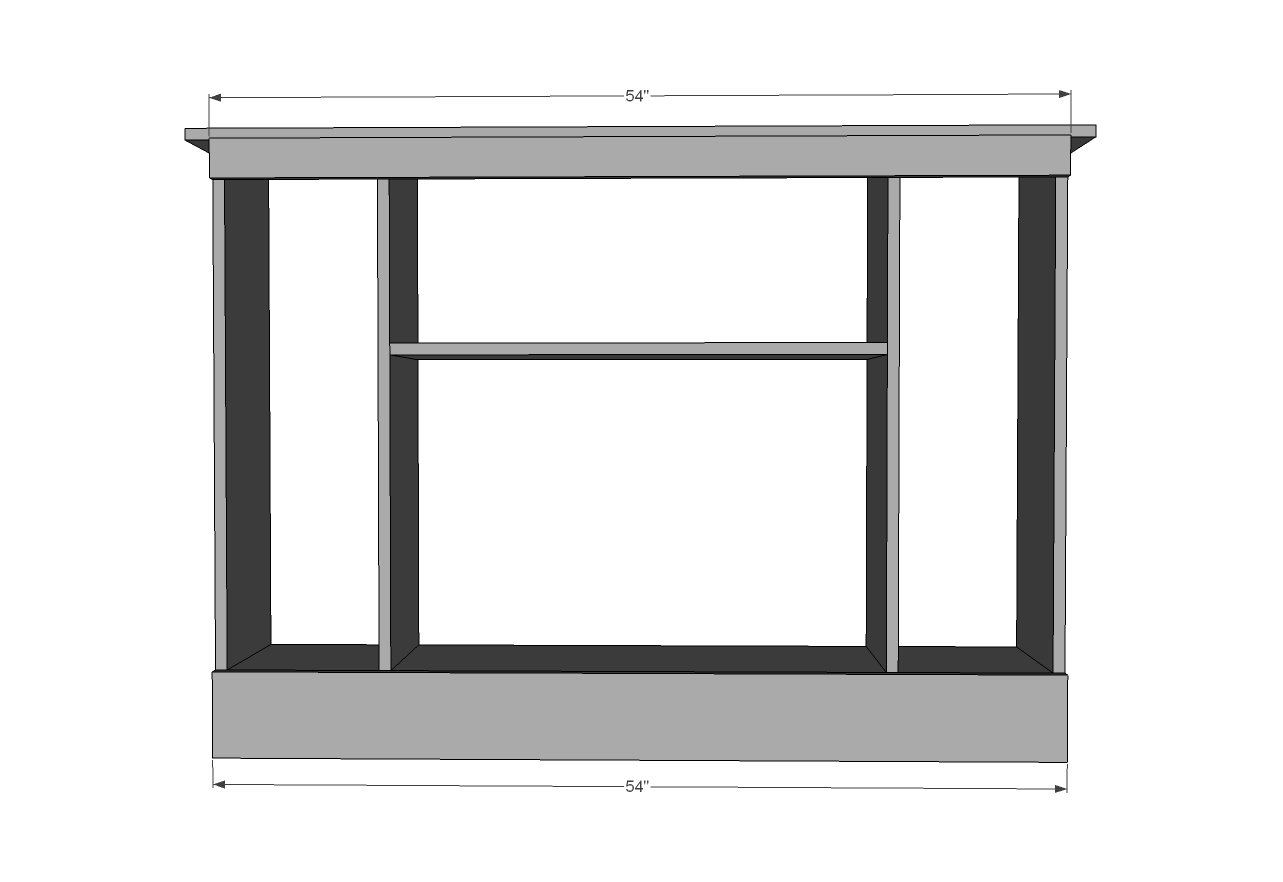
Step 1
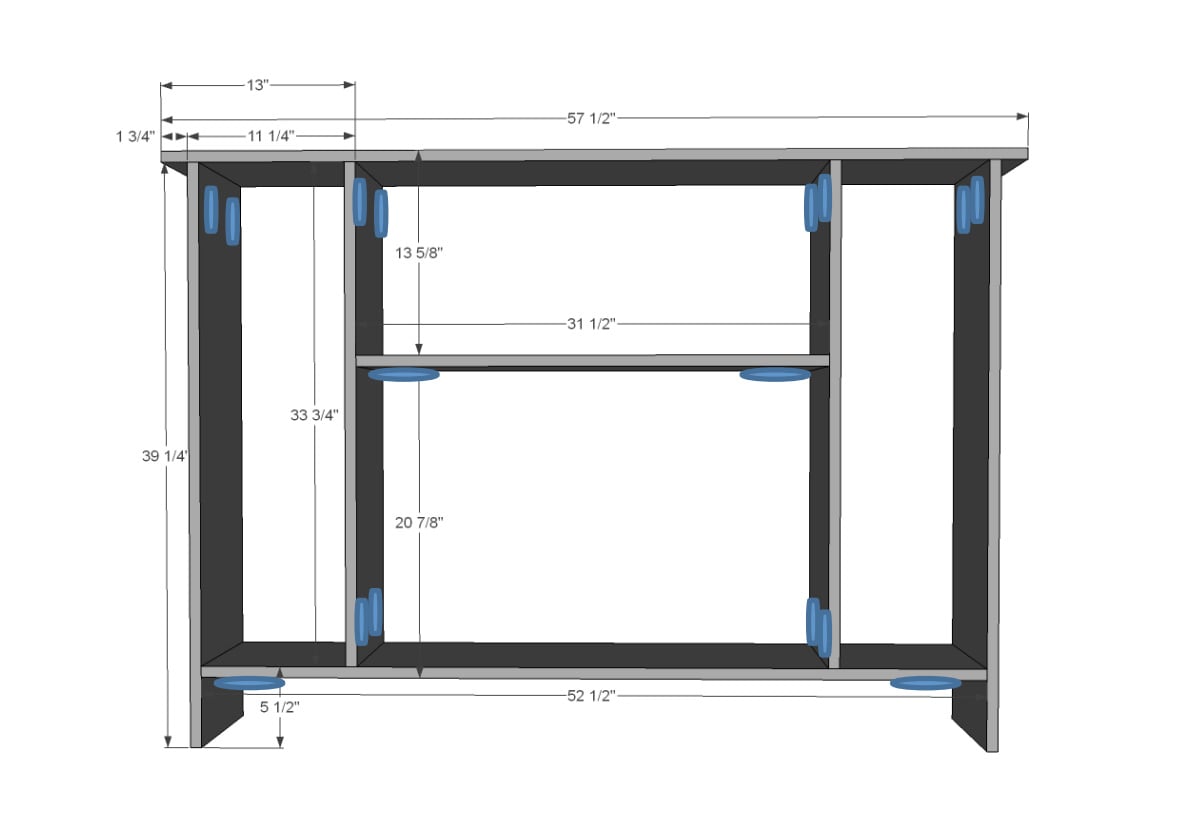
Build the bookshelf as shown with the 1x12s.
Pocket hole locations shown for your convenience, but pocket holes are not required - you can use 2" trim screws or 1-1/4" brad nails and glue.
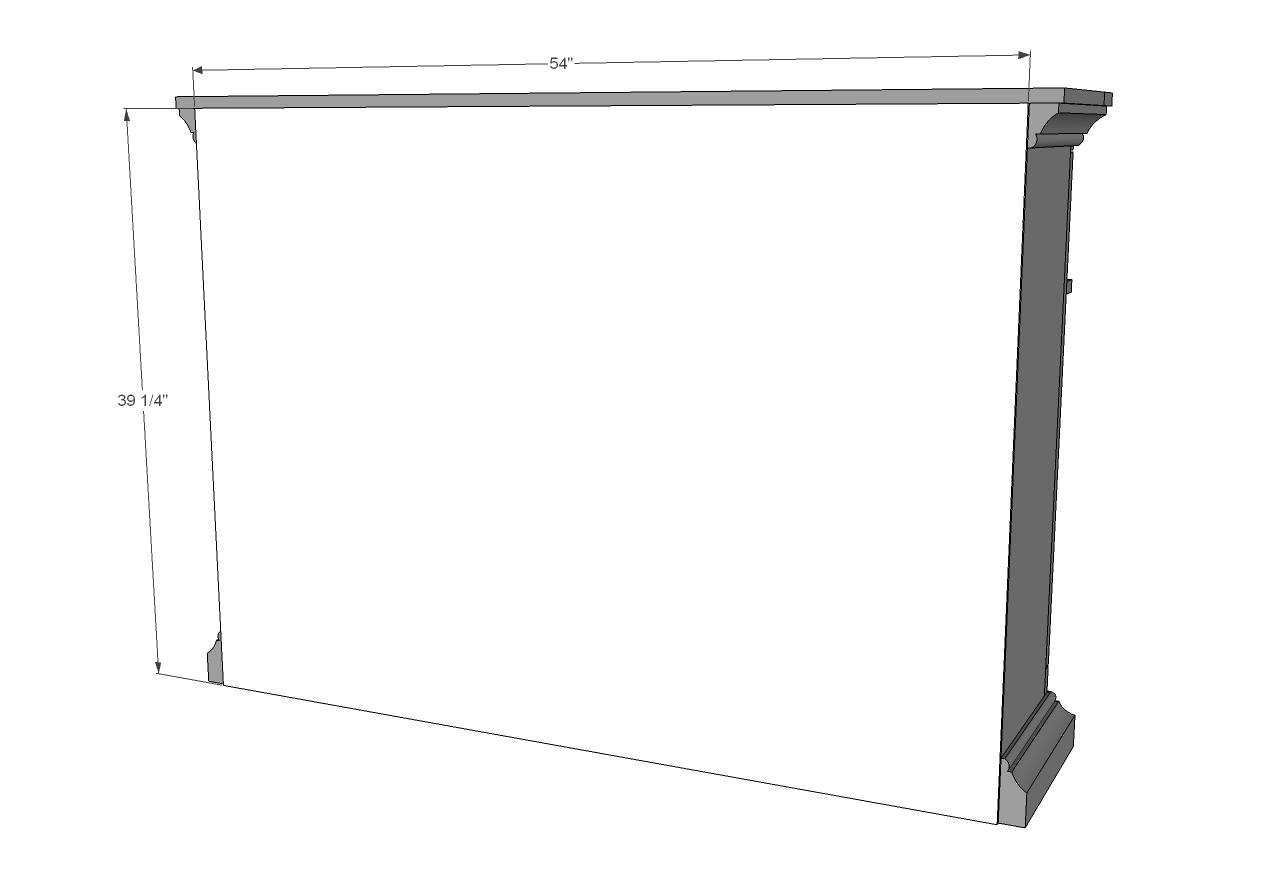
Step 2
Add the trim pieces.
I highly recommend building the top trim piece first (see next step), then attaching all at once, to get the top perfectly lined up.
Step 3

Top piece can be attached first to the bottom piece from step 2, the attached as a whole.
Step 4
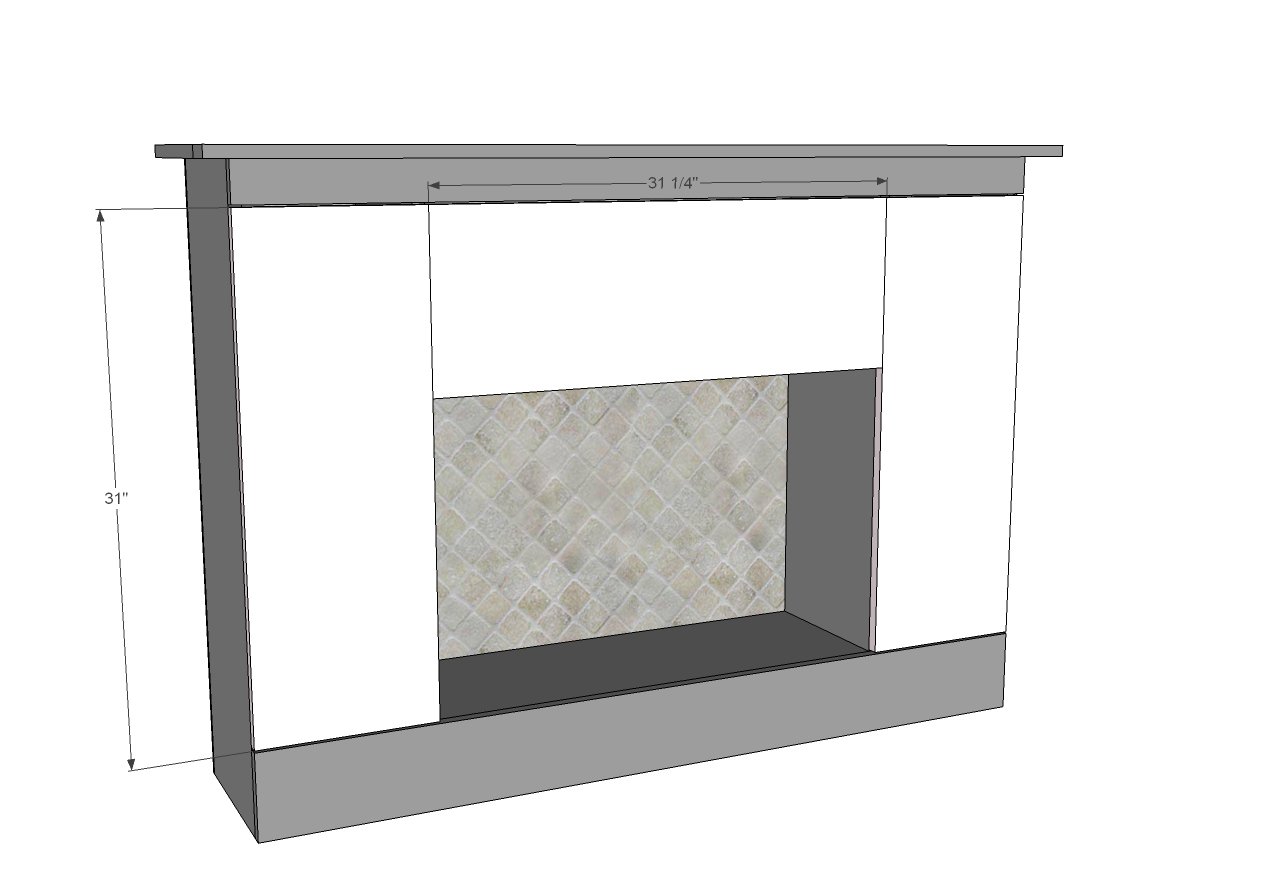
Cut doors to fit. Install on the euro hinges.
Step 5

Add 1x2 trim to complete the fireplace "look" but also the 1x2s act as handles.
Step 6
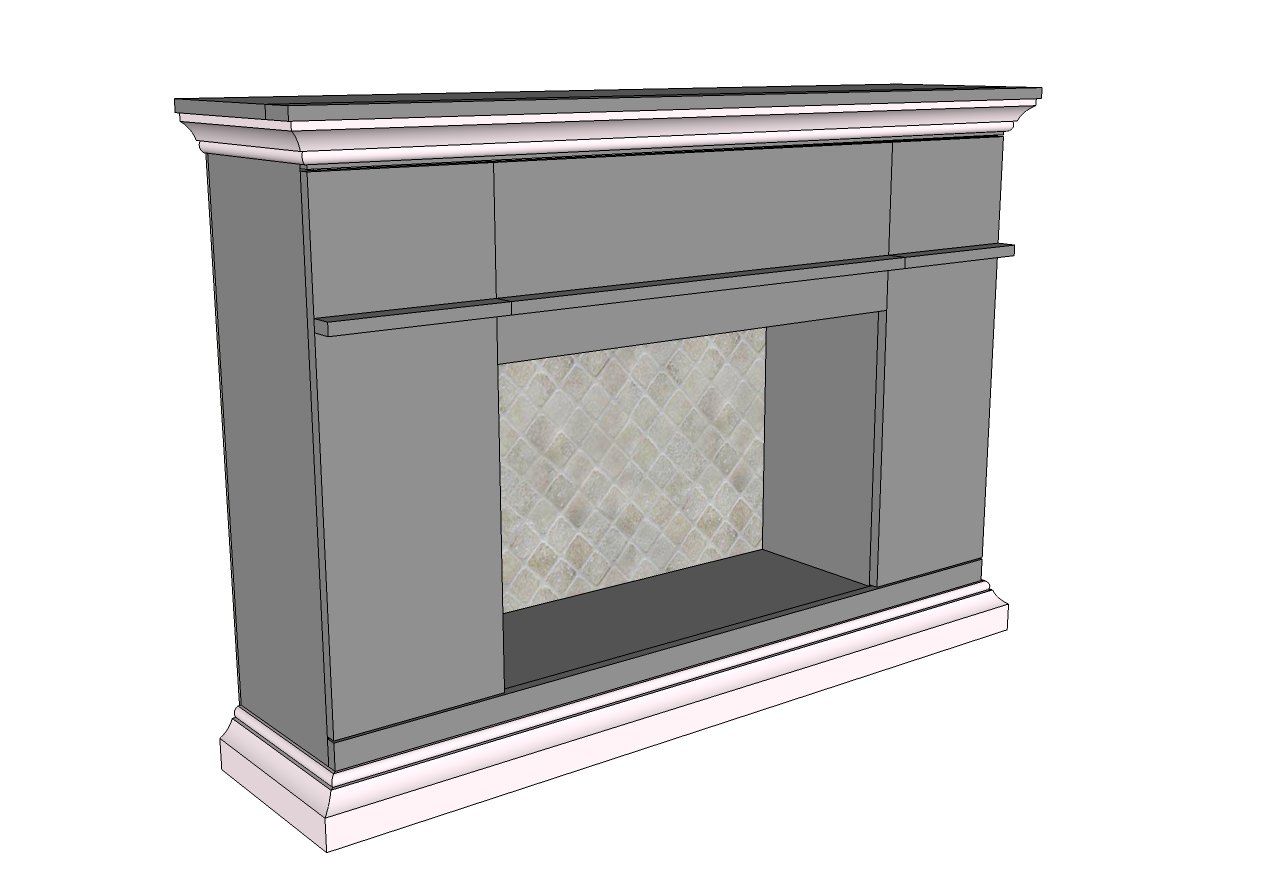
Moulding can be used to improve the look. Miter corners and attach with 1-1/4" brad nails and glue.
Step 7
Cut back plywood with a circular saw or table saw.
Attach to all shelves, dividers and sides of the faux fireplace with glue and 3/4" brad nails.
It is always recommended to apply a test coat on a hidden area or scrap piece to ensure color evenness and adhesion. Use primer or wood conditioner as needed.

Comments
TaylorMade1205
Wed, 11/05/2014 - 12:21
Stunning
Anna, This is beautiful beyond words. I don't know how you think of all the things you build, but keep them coming girl. I live in Florida and this Faux Fireplace may have just found a new home.
birvine
Wed, 11/05/2014 - 17:01
Another project!
I have built quite a few of your projects. I think I will build one for us and one to give to a charity to raffle as a fundraiser. I always look forward to your projects. Thanks so much... helps the winter months seem shorter! Three feet of white stuff within the next week!
B
brookifer86
Thu, 11/06/2014 - 08:32
You Are Ridiculously Awesome!
This is so incredible! I love that you took a problem and made such a clever solution. Who would have thought of a "fireplace" tv stand? Genius!
spiceylg
Thu, 11/06/2014 - 08:40
Love it!
Love the build, what a great idea! You are so resourceful! The icing on the cake is the staging! It is so beautifully done!!!
Subject change. Question for you Ana. Unless I missed it, I don't believe you ever showed us the completed bathrooms in either side of the Momplex and the kitchen of the one you are living in. Would love to see them, pretty please! :D
In reply to Love it! by spiceylg
Ana White
Thu, 11/06/2014 - 09:31
Thanks!!! Okay - we haven't
Thanks!!! Okay - we haven't been able to do much yet - this baby keeps us busy! - but things are getting better and we will be trying to return to more personal blogging soon! Thanks for not giving up on us yet! Ana
In reply to Thanks!!! Okay - we haven't by Ana White
spiceylg
Tue, 11/11/2014 - 17:19
No worries!
I totally understand. Give up on you? Never! :)
kmetter
Fri, 11/07/2014 - 11:18
Instructions not there
Ana,
I think this looks great, but when I am looking at the page I can't see any of the step by step instructions how to build it. Am I doing something wrong? thanks, Kevin
All I see is:
Cut List:
- See more at: http://ana-white.com/node/13348#comment-form
In reply to Instructions not there by kmetter
TaylorMade1205
Fri, 11/07/2014 - 12:53
Instructions
Hi Kmetter,
The instructions can be found on Roybi's site here: https://www.ryobitools.com/nation/projects/3193. HTH
redhead_61
Thu, 12/18/2014 - 16:11
hmmm
I am IN LOVE with this!
Megan.Booth.
Fri, 01/02/2015 - 12:14
Mantle
In your picture, is the TV wall mounted? Or would a 40" tv be safe to put on the top of the mantle?
jordankyleet
Wed, 07/08/2015 - 06:10
Could you use an electric
Could you use an electric fireplace insert for this project?
Loripetnut
Sat, 04/03/2021 - 09:42
I did.....it has with…
I did.....it has with/without heat, with/without crackle sound effect. Looks wonderful in my version of this fireplace. It can heat half of my small house. Houses my big screen tv, my dvd player, my cd player, remotes, cds, books. Very nice focal point for the entire room.
Emilynhok
Tue, 11/10/2015 - 12:41
Molding
Where did you get your molding at? I love it! Beautiful!
Emilynhok
Tue, 11/10/2015 - 12:42
And also, what is your
And also, what is your backing made of? I was thinking of getting some kind of fake brick backing . Not too sure what to use
waack.rebecca
Tue, 02/23/2016 - 04:49
size of unit
Good Morning!
As of today I am officially a stay at home mom of two beatiful little girls. So my project list keeps growing now that I won't be away from home 50 hours a week! I am LOVING this unit and we really need a TV stand. My only issue is the only place we have to put our TV is in a corner. Is there a way to modify this to fit into a corner space? I thought about doing the tall media console, but I like this unit a lot better.
Briggs sawdust…
Tue, 12/06/2016 - 20:26
ISO 1/4 decorative paneling
I am looking for the decorative panel you used for the fireplace insert. Could u tel me where you got it, and or what it's called. Thank you!
Freelightdaisy
Sat, 12/30/2017 - 19:21
Electric Fireplace
Hello Ana!
I am curious if it would be safe to put an electric fireplace into this. I love your design and I would love to build it with an electric fireplace in it. Any thoughts?
Thank you in adavance,
Mindy
Char1960
Sun, 01/14/2018 - 18:49
Fireplace insert
I am planning on building this fireplace this spring. What would I need to do to be able to use aa electric fireplace insert?
windeater
Tue, 02/13/2018 - 14:40
Love this mantle -- questions about hinges
At wife's request, I've bumped this up to top of my project list.
Can you tell me what hinges you used for it?
Thanks!
Jnrbigler
Wed, 11/13/2019 - 06:52
Do you have plans for the…
Do you have plans for the big base of the fireplace. I love the original one but because I have a small house need extra storage and love the fact that you could sit on it or even use it for storage. I would love the plans!
In reply to Do you have plans for the… by Jnrbigler
Ana White
Wed, 11/13/2019 - 10:54
Thanks for requesting! Yes,…
Thanks for requesting! Yes, I can help you out with that.
Ill work on getting some plans out with the hearth!
dmjuneau
Sun, 11/17/2019 - 06:16
Love this project and am…
Love this project and am going to get started with it. Would love to have info on the hearth base. Thank you! Love your projects!⁹
chaffin75409
Mon, 07/13/2020 - 20:00
Faux Fireplace with Hidden Storage ( Hearth)
I'm new to your blog/vlog but I was homing if you have any input on the hearth. I'd like to build the Faux Fireplace with storage using this mantle.
Loripetnut
Fri, 04/02/2021 - 13:57
What I did with your plans.....
I made this and thank you for providing the plans I used as a launching point. I made a couple modifications: I extended the hearth a bit, extended the firebox with a 1x4 for added depth, used 2 1x12 boards for the mantle, and added a chimney with 1x12 boards. The firebox is lined with thick styrofoam covered in brick textured wallpaper. That insulated the mantle and sides from the heat.
Loripetnut
Sat, 04/03/2021 - 00:39
pictures of my version of the fireplace
I hope these links work that show my fireplace: https://scontent-msp1-1.xx.fbcdn.net/v/t1.6435-9/74607641_4155667160593…
https://scontent-msp1-1.xx.fbcdn.net/v/t1.6435-9/75317384_4155664427260…