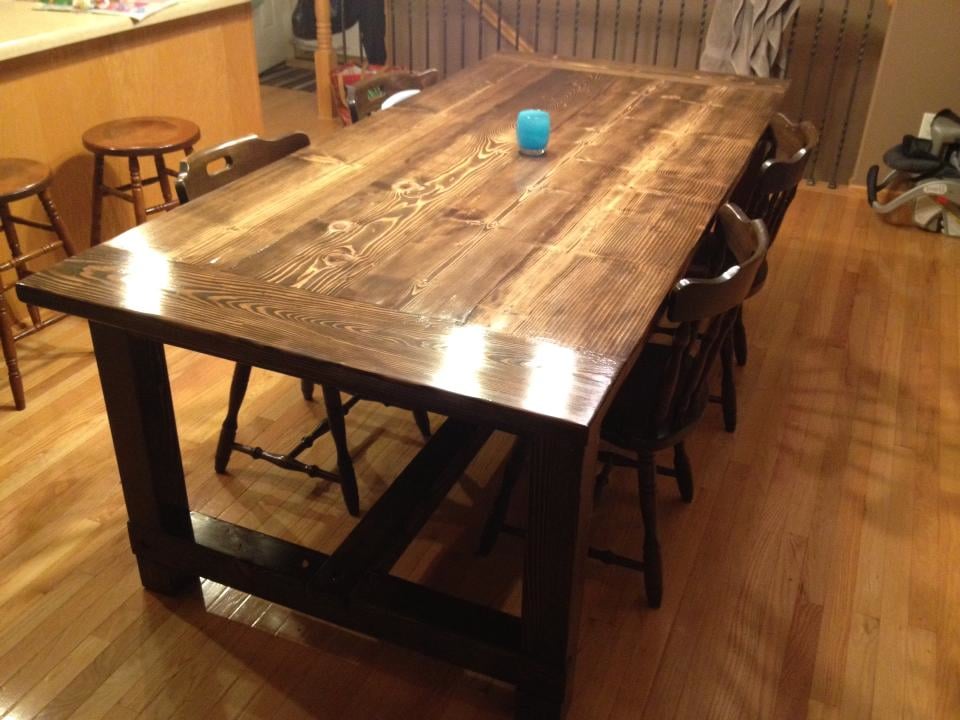
Inspiration for this project came from the original Restoration Hardware table's price, which was way out of our budget. We found the plans on this site, and then the brag post from http://tommyandellie.com/?p=2582, which convinced me to give it a try when we moved to our new house.
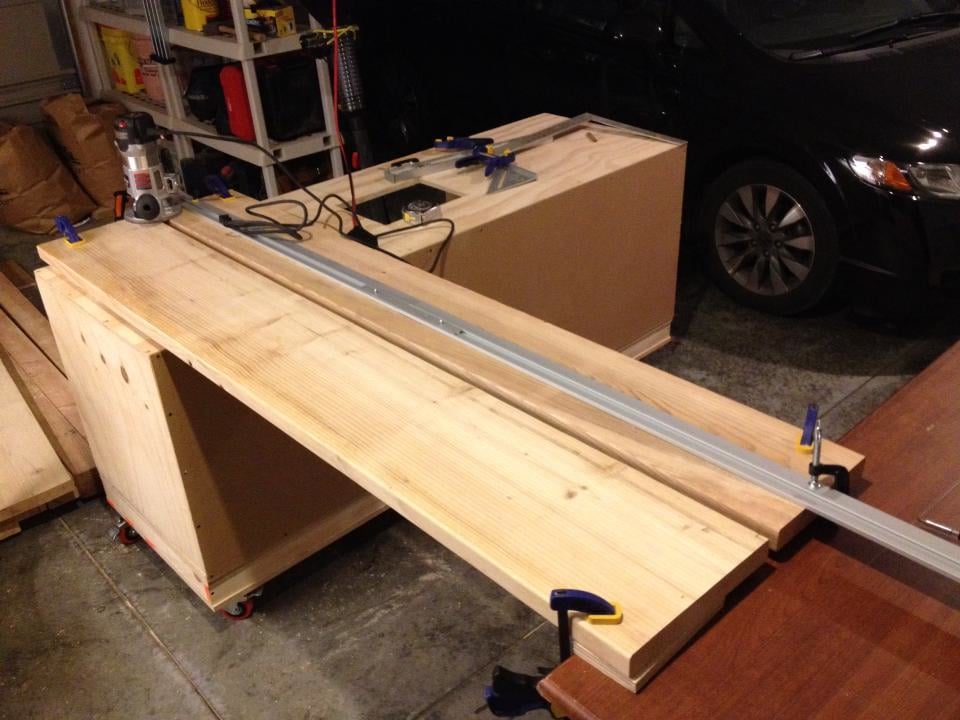
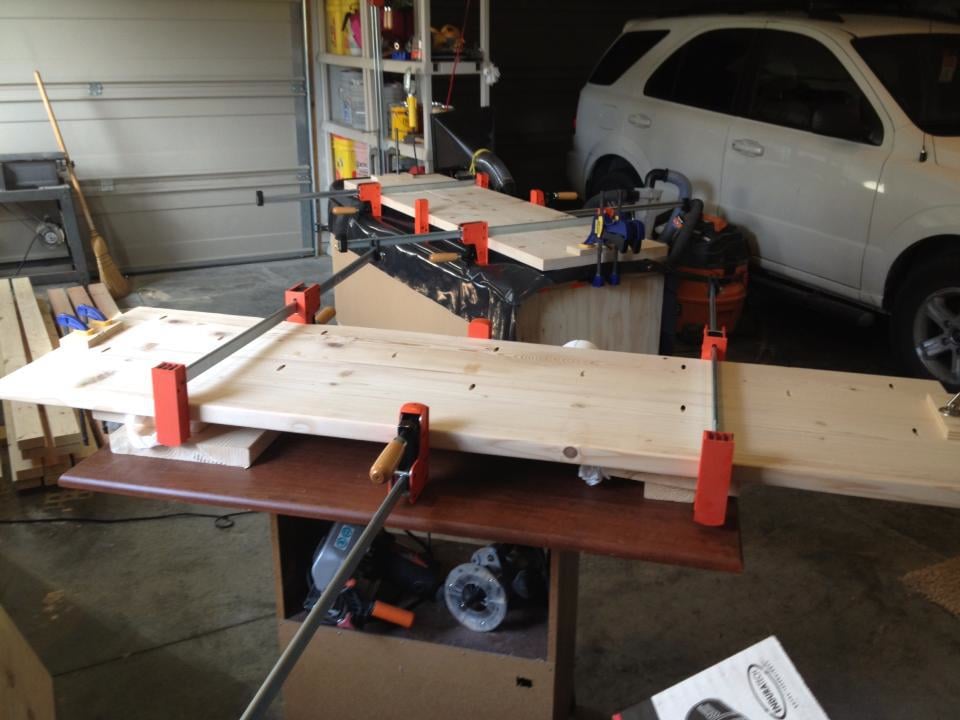
I pulled some ideas and techniques from a couple of different areas - one was the idea from American Woodworker to use a straight-edge and a router to joint the edges of adjacent boards so they match perfectly, or as close to perfect as possible (see one of the pictures). After a few false starts it worked out very well.
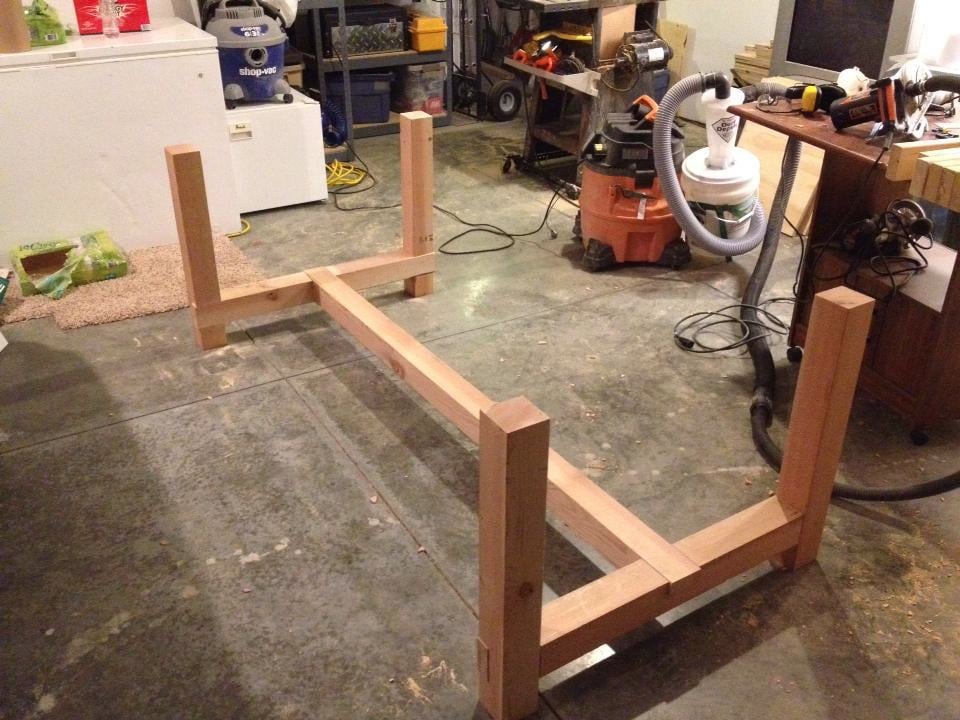
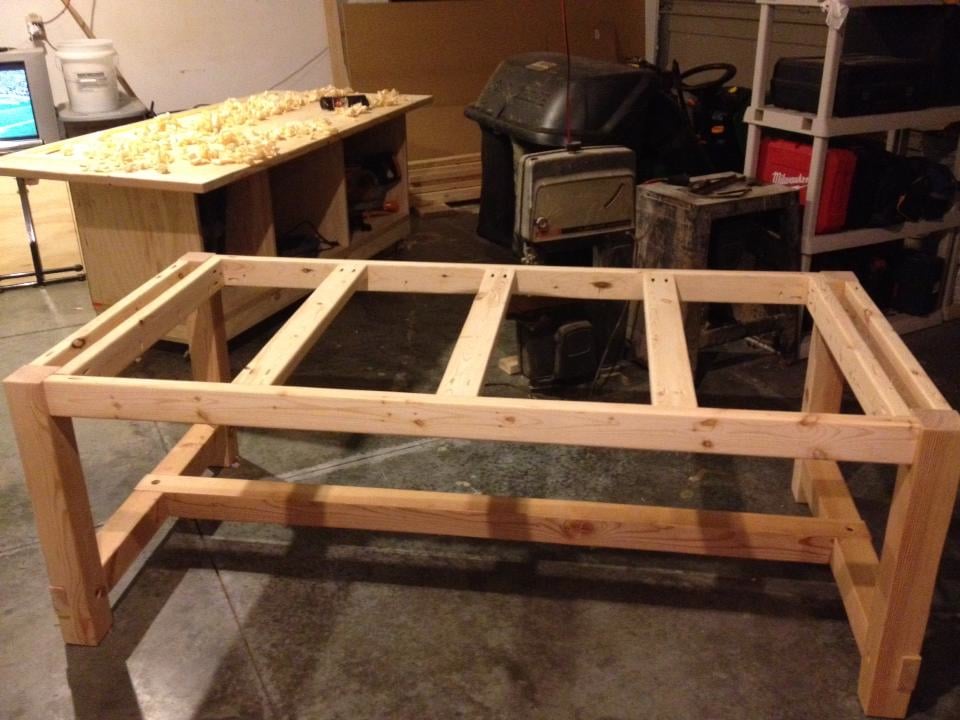
One other big change was to use 4x4 pieces for the legs and cross-braces - especially on the long cross-brace. With two kids (6 and 3) and a third on the way, I knew they would want to crawl under the table to play, and sit on the beams - and I was afraid a 2x4 wouldn't hold up to their weights. I've VERY happy with the result - that base is not moving or flexing at all.
Finally, I learned a TON about what NOT to do! Apparently after doing the dry fit and having everything fit well, you should not sand the parts of the boards that fit together or suddenly they will be loose! Also, wiping off the stain after the suggested amount of time IS a good idea, after all! Finally, we ended up using pine boards with fir 4x4's, and I wish we had used all fir as I think the grain pattern was nicer.
All in all, though, it was a great experience and I can't wait to tackle another project!

Comments
Rob Dunham
Mon, 08/05/2013 - 07:13
Excellent
Excellent work. I am purchasing lumber today to build a table for my family as well. Thanks for the tip of routing the joint edges, I will give that a go for sure.
Cheers!
Fred KLauke
Mon, 08/05/2013 - 14:52
Thanks, & link to router technique
Thanks Rob, good luck! Below is the link to the original source for the technique I used (#8 in the list). Just be VERY sure you have the boards (and the straightedge) clamped tightly so there's no wiggling. The first time I did it I didn't have the straightedge tight enough and it wiggled loose at one end, so the router started biting into one board more than the other, making a curve. Once I got the layout figured out, however, it worked very well and I was very pleased with it - I even did it again with the ends of the long boards (after they were glued/screwed together) and the inside edge of the breadboards before attaching them.
http://americanwoodworker.com/blogs/techniques/archive/2009/08/26/10-tr…
Nathan1342
Fri, 08/09/2013 - 07:11
Good call on using 4x4's.
Good call on using 4x4's. They look much better then a builders grade 2x4. Looks great!
AKite
Thu, 08/15/2013 - 19:38
Planer
Did you use a planer on your Fir 2x's?
I'm thinking I need a planer to level out some of the 2x10's and 2x12's at my lumber store.
In reply to Planer by AKite
Nathan1342
Fri, 08/16/2013 - 08:05
If your using a hand planer
If your using a hand planer your going to get more of a worn uneven look, it's nearly impossible to get a perfect straight board after using a hand planer. IF you run it through a floor standing planer whatever bend in the board will still be there since it follows the contour of the board. If you want a straight board regardless of size you need to straighten it with a tablesaw. I am sure you can find a million how to's by just googling "how to straighten a board with a tablesaw". When your using building lumber you will always have an issue with things not being straight and looking "rough". It may be easier to just goto a actual lumber store and buy something that isn't Pine. Pine is a soft wood which is likely to dent easily after being used. But regardless, if you want a straight board use a tablesaw. I bought a bosch table saw at lowes and its awesome. folds up against my wall and is probably the best tool i have bought. Decent ones run about 400 bucks but its well worth it with what it allows you to do.
Fred KLauke
Fri, 08/16/2013 - 07:53
Re: Planer
Not beforehand... (just to be clear, my 2x's were all white pine, only the 4x4's were Fir - unfortunately, the local Menards only had pine 2x's and fir 4x's) - I spent a lot of time at the store picking out the straightest, least cupped/curved boards I could find, and then spent more time at home arranging them to make sure the boards with the longest straightness (is that a term?) were used for the long pieces. Once the top was put together, I used a straightedge to find the humps and valleys in the top and used a hand plane to level them out a bit (see the background of the picture with the completed base, you can see the shavings on the top). I would suggest, if you do the hand plane route and aren't familiar with the tool or don't own one, to either borrow a well-tuned one from someone who would show you how to use it, or prepare to spend money to get a good one. You probably don't want to do what I did, which was buy a cheapo Stanley from Menards and then spend probably 8-10 hours over the course of a week or so trying to get it setup properly. I finally got it useable, but it was a very frustrating process and it didn't take long before the newly-sharpened edge was dull again. I did finally get it smooth enough so that it was easy to slide a plate or dish from one side of the table to the other without it rocking or hitting an edge/bump, but if I had it to do over again I would have saved the time and spent the money on a good older Stanley or a newer Lie-Nielsen or Lee Valley, etc., and then spent a lot less time getting the plane ready to go.
One thing that helped my mind-set as I went through the process was to remember that the beauty of this style is that it is not supposed to be perfect - a farmhouse table is supposed to look a little rough and worn, and the little defects are part of it's charm. It's an important point to remember especially if you are a bit of a perfectionist as I am!