Community Brag Posts

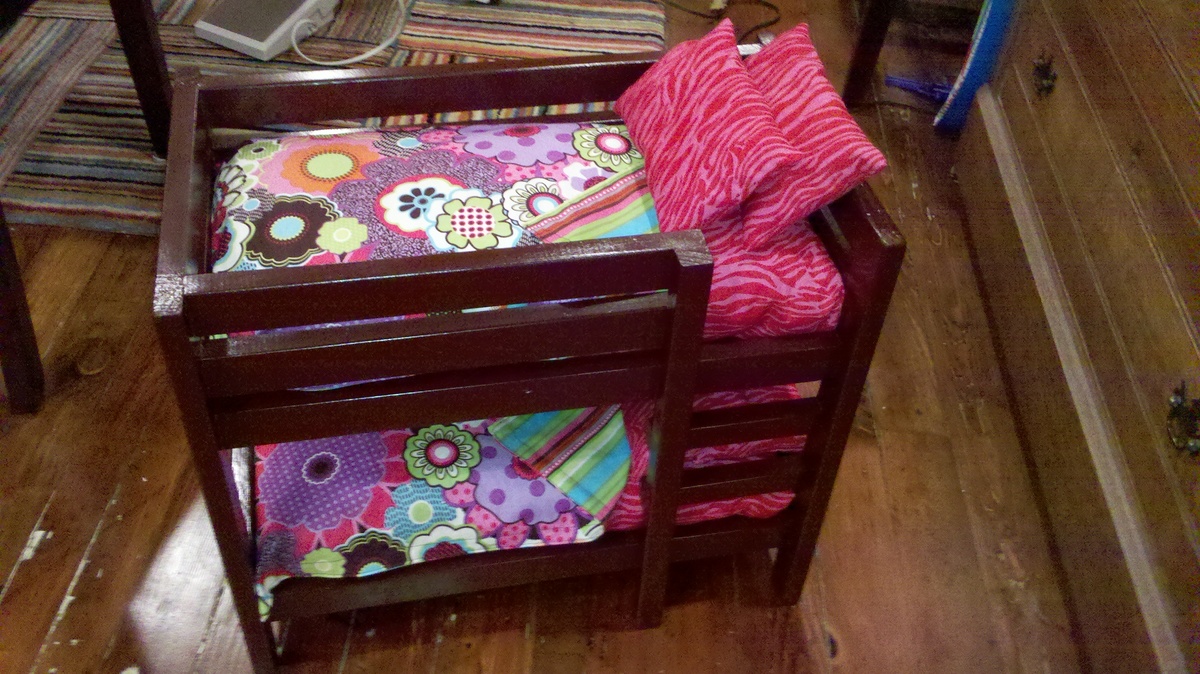
Doll Bunk Beds

Submitted by jmr977 on Tue, 10/04/2011 - 06:51

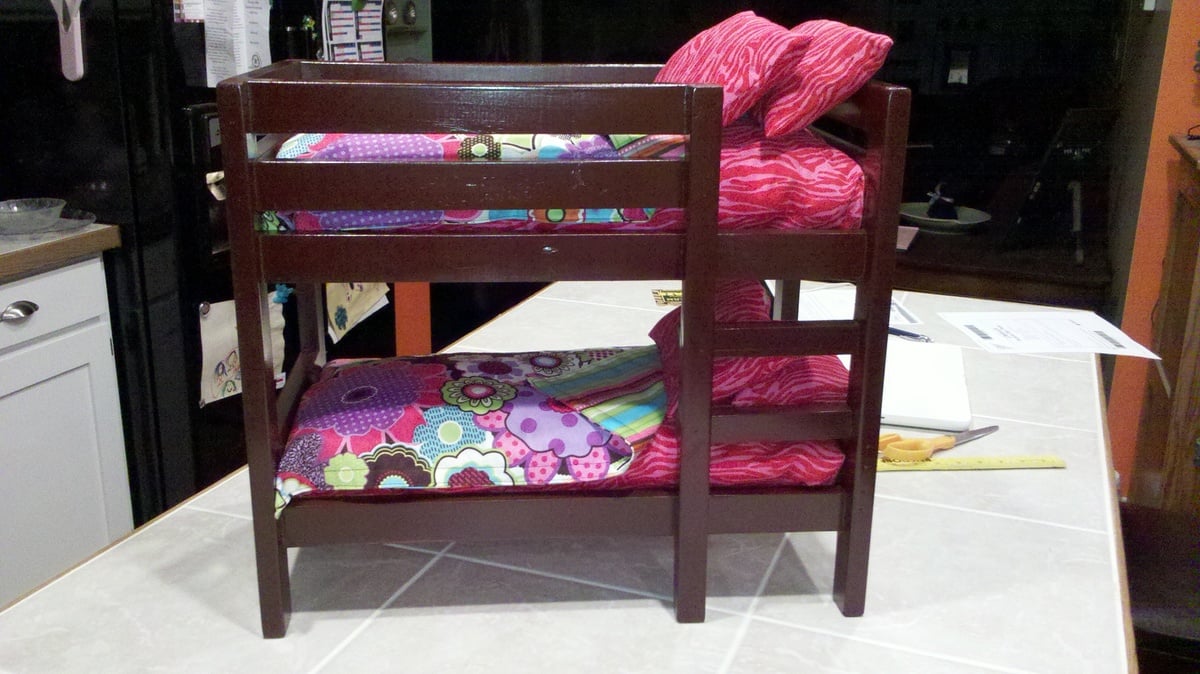
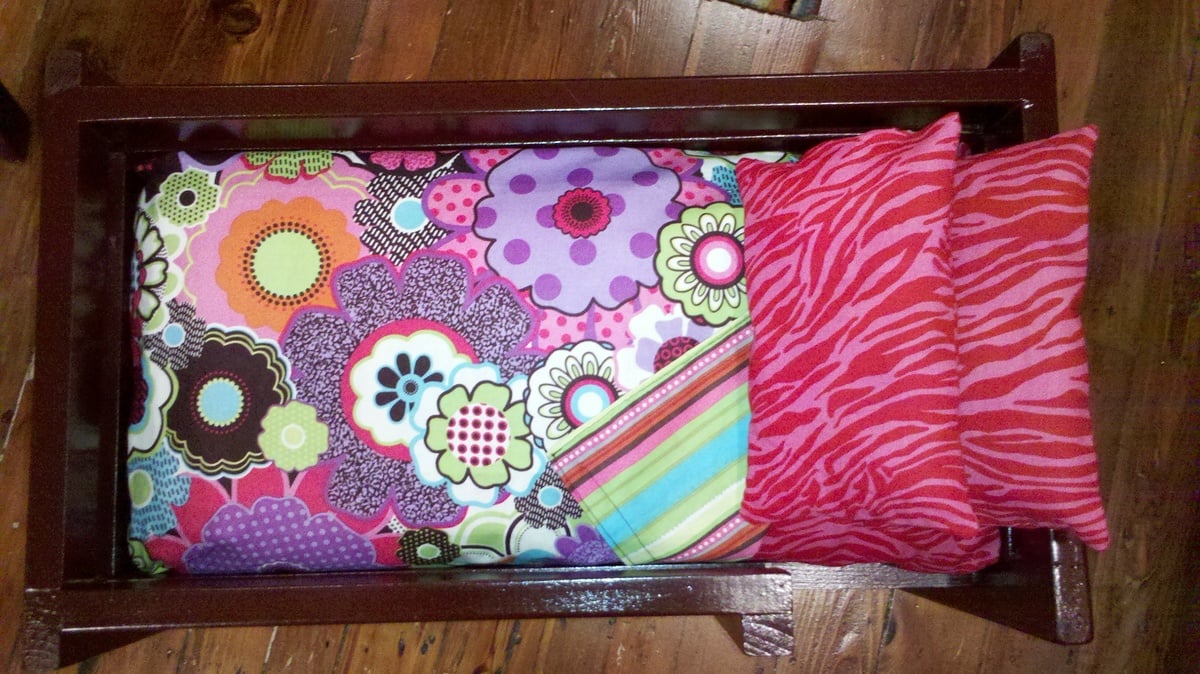
My daughter has really been getting into American Girl Dolls so I went on the official website to see if I could find some accessories for them for her birthday and YIKES - that stuff is expensive! So I went on Ana's site and found plans to make bunk beds. My daughter has four dolls so I figured we could build two sets at a fraction of the cost we could buy them at.

This was our first furniture project so we had to buy everything, which makes the project more expensive than if you have scraps laying around, but still totally worth it. My husband and I built two of these in about 3 hours. Sewing four of everything probably took another 2-3 hours.

I made the blankets reversable - flowers on one side, strips on the other so she could mix and match as she liked. I think I am going to make a reversable pillow for each bed with the blanket fabric, but I haven't gotten that far yet. I totally misunderstood how much fabric to buy - I thought it was 1/2 yard for mattress and then another 1/2 yard for the blanket, but it's not, it's 1/2 yard for both so needless to say I have a TON of fabric left over. Since this project went so well we are going to build a doll table and chairs for Christmas so I figure I can use the left overs for placemats, etc. and carry the theme through the set.

I love the way they turned out and I can't wait to give them to her for her birthday!!!
Estimated Cost
$20 per bunk bed (roughly)
Estimated Time Investment
Afternoon Project (3-6 Hours)
Finish Used
Primed with a sandable brown spray primer and finished with a high gloss spray brown.
Recommended Skill Level
Beginner

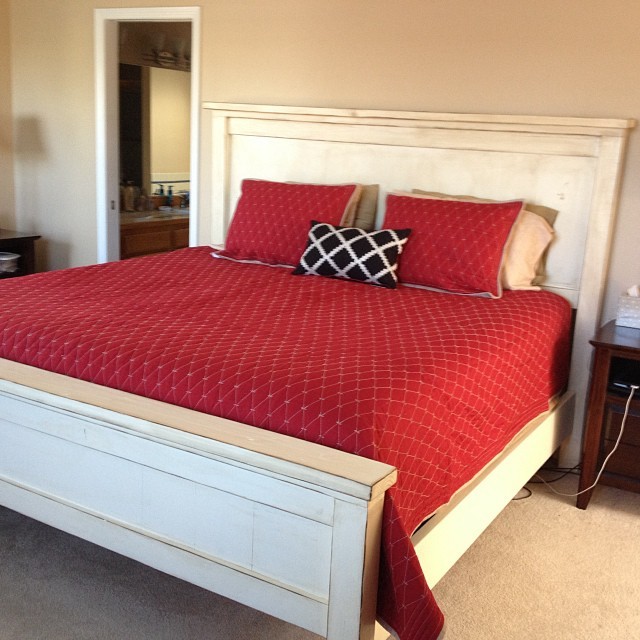
King Size Farm House Bed

Submitted by Pembat on Sun, 10/06/2013 - 20:29

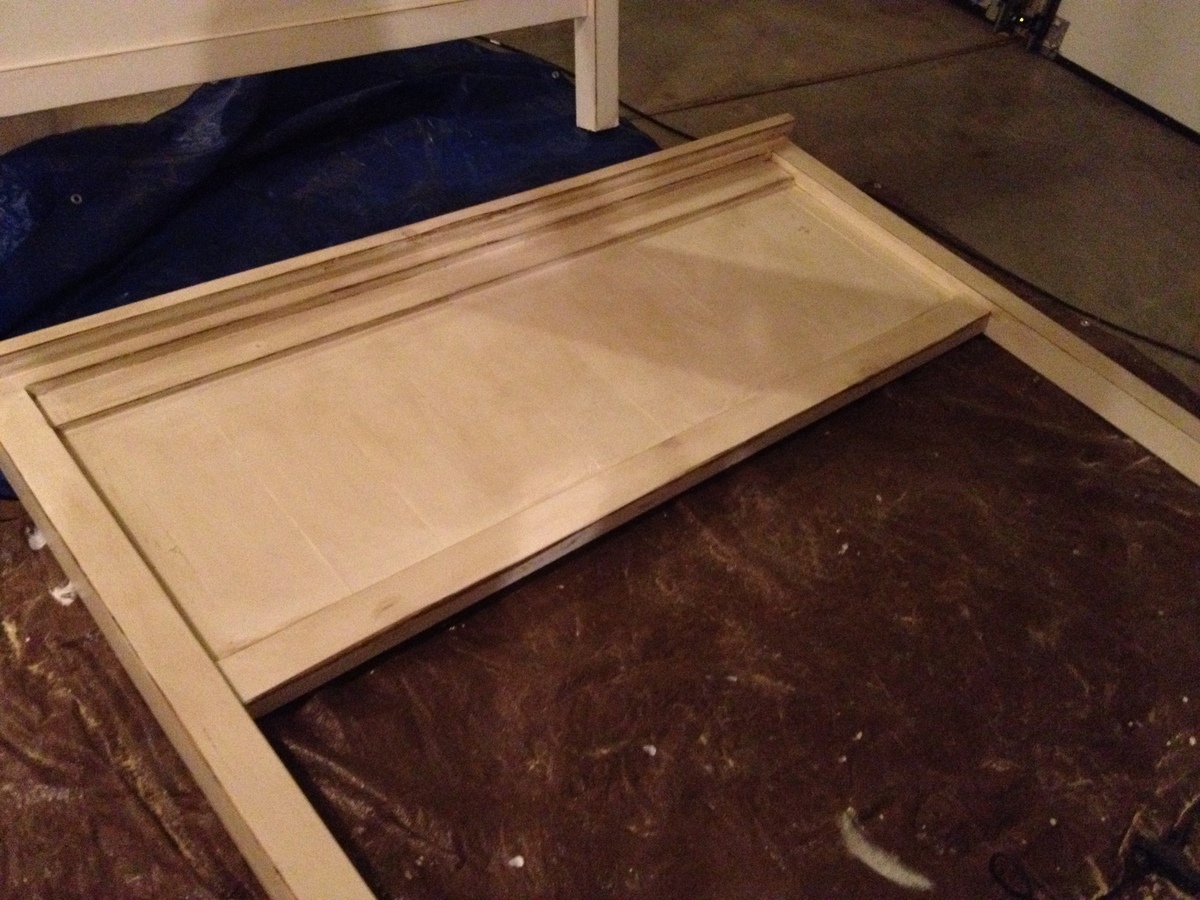
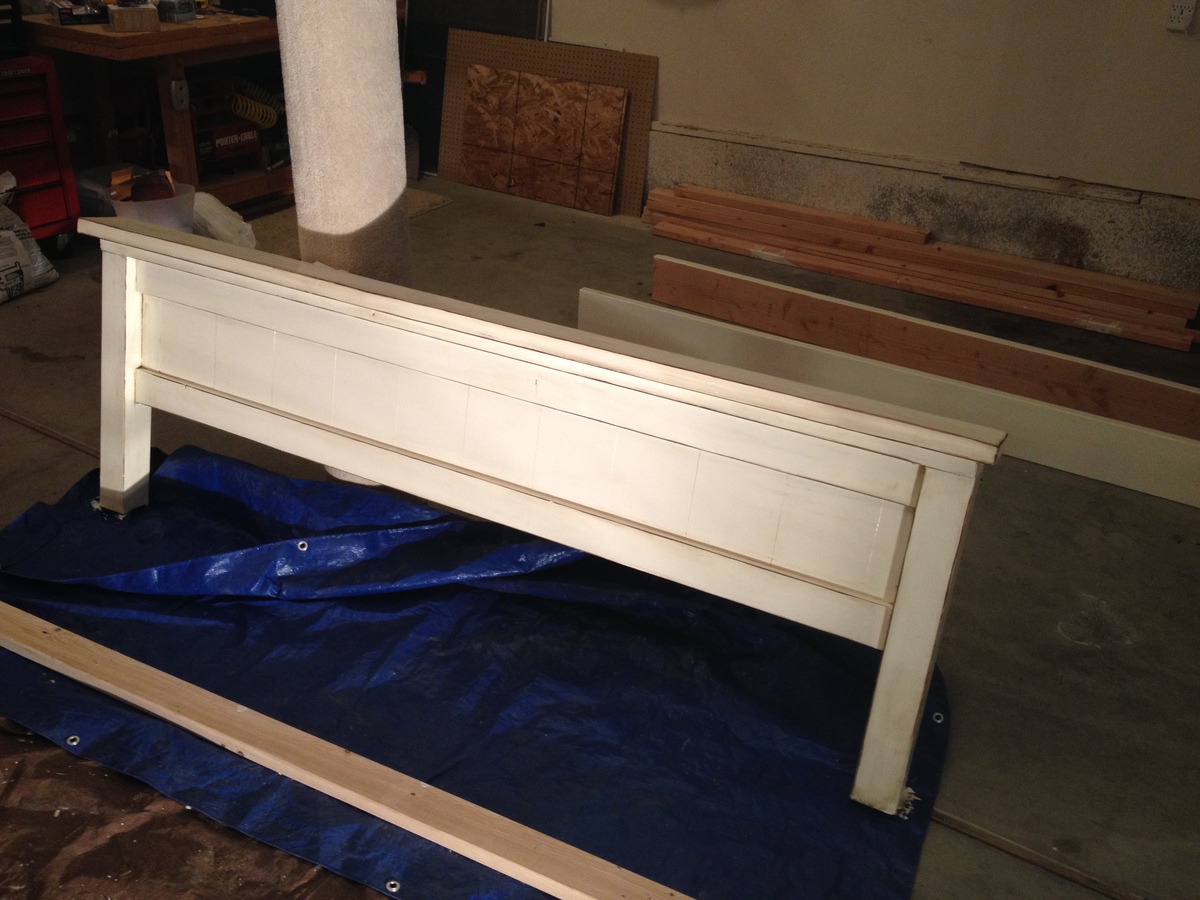
After searching for several months for bed frames in stores and seeing the garbage that costs way too much, we found this site and built the King Farmhouse Bed.

Primered with Kilz paint. Finished with two coats of Behr White Linen. Then we distressed the edges with a palm sander, and knocked down some of the paint in areas, and applied a brown glaze. After we achieved the look we liked we did two coats of polycrylic.

Recommended Skill Level
Beginner

Comments

Dream dollhouse for Lila

Submitted by ambro on Sun, 12/27/2015 - 17:42

I built this for my daughter's Christmas present this year. It was a fun project that you can do in a weekend if you hustle. The size a girth of this dollhouse is surprising.  Do yourself a favor and take measurements of doorways and hallways to make sure it will fit. It is nearly the size of a Lazyboy chair when finished. The best part of this project is the unlimited number of ways it can be customized.  Scrapbookpaper for walls , painted walls, carpet for floors, tile flooring,  stained flooring and so on. My daughter loves it and yours will too.

Estimated Cost
$100
Estimated Time Investment
Weekend Project (10-20 Hours)
Finish Used
Stain was a light oak from minwax. I bought rough Lumber and sanded it down to 220. I recommend anyone to spend extra money and get better quality or even oak 2x2's. It would have made this dollhouse pop. I bought paper from a craft store. They carried the paper that looks like wood paneling and bricks. I simply added a mantle made from a 1x1 by glueing and nailing it into place. I placed a piece of carpet from a bath mat on the bottom floor with heavy glue. The roof is a piece of luan paneling that I cut out and painted. I made the stairs a little different in that I angled the ends of some 1x2's and added 4 steps to each one. I predrilled holes and put in a finish nail and added glue to make them nice and tight. My daughter loves it. You have no idea how big this dollhouse is and how heavy it is until you get started. If you have small doorways you should consider assembly in the room it will be in.
Recommended Skill Level
Beginner

Laundry room copy

Submitted by rpagan24 on Fri, 01/27/2023 - 02:27

Version of your laundry room make-over !

Comments

Farmhouse Bedside Table

Finished Ana White's farmhouse bedside table. I used antique drawer pulls from old furniture. I used table top clips to attached the top to give the wood room to breathe as seasons change. I also put in two blocks as drawer stoppers so the drawer didn't go too far in.

Built from Plan(s)
Estimated Cost
$16
Estimated Time Investment
Week Long Project (20 Hours or More)
Finish Used
Paint (Color Belle Grove..can't remember company), used Orange Beeswax on the sides of drawer and inside of table to make gliding easier. The stained wood is Minwax Provincial.
Recommended Skill Level
Beginner

Surprise Birthday Bunks

Submitted by bigguygonz on Tue, 10/08/2013 - 17:35

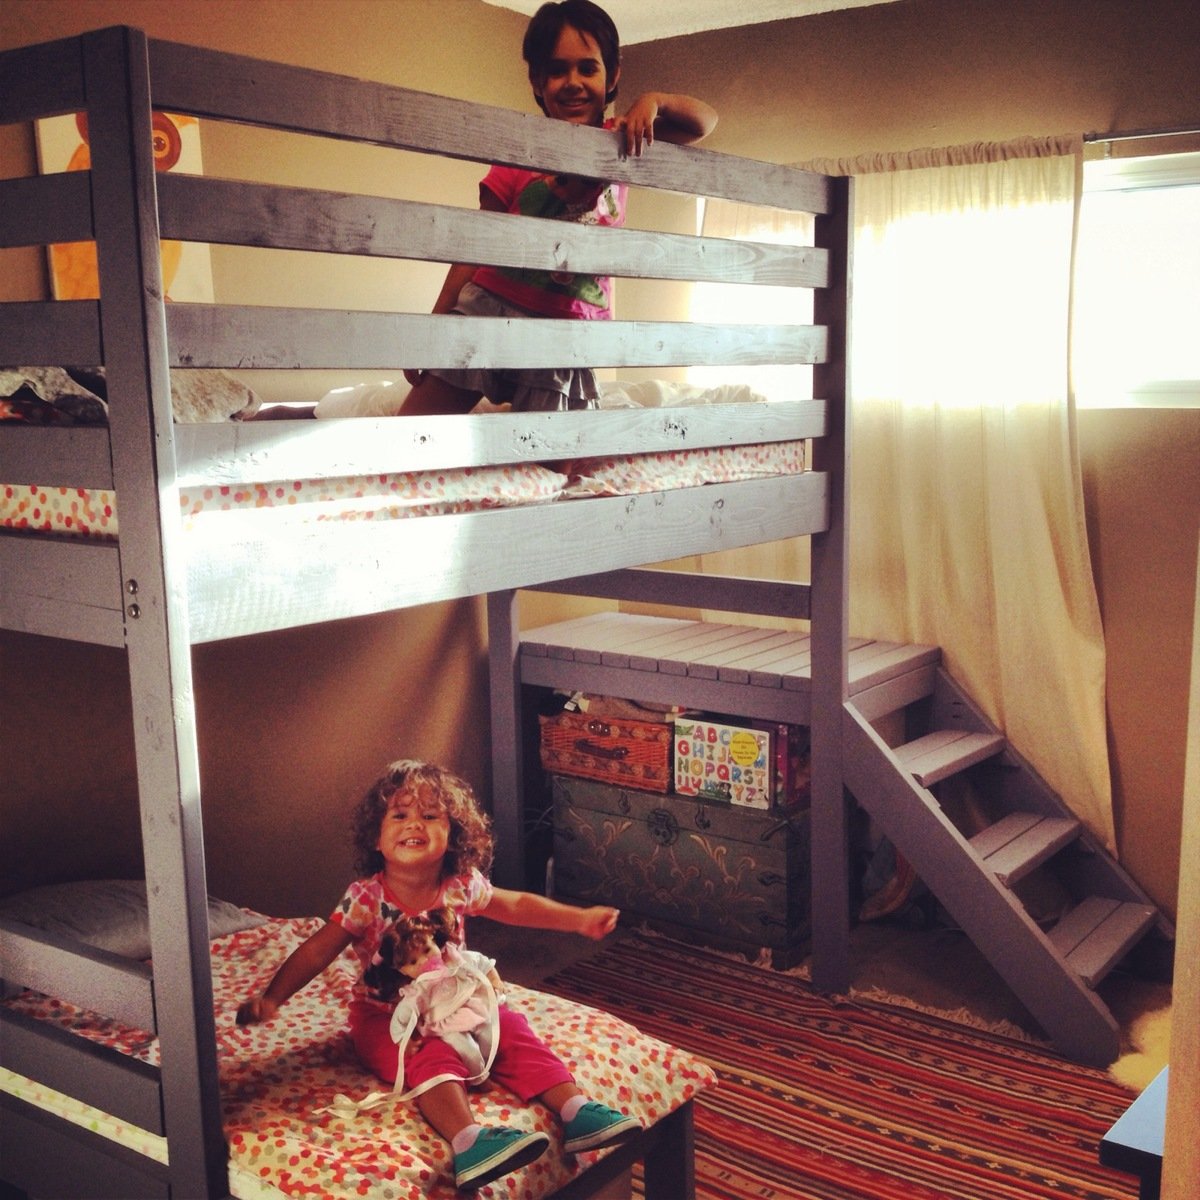
As our youngest daughter's 2nd birthday was fast approaching, we were looking for options to eliminate the crib + twin setup we had in the girls room. I had always been a fan of the L-Shaped Bunks Arnold and Willis shared in "Diff'rent Strokes." The problem was that all the comparable beds at furniture stores were pushing $1000 for that sort of set-up, we didn't really need a twin bed for the 2 year old, and were a little worried with the two year old on ladders and falling off the top bunk while playing/sleeping with her 7 year old sister.

And so in doing my search I came across the junior loft plan from this site. At first, I disregarded it, since I had never taken on a project like this before, plus with only one bed and short railings, it didn't fit our needs. I kept going back because i loved the design. Then I recalled my father and I doing something similar when I was a young teen building a loft bed around a bookshelf/desk combo that my uncle had made. I figured if he could do it, so could I.

So I started tweaking with the plans. Flipping the stairs to the other side... easy. Increasing the rail height to double... no problem. Adding a toddler bed frame based on some mattress sizes I got off amazon... just some simple math...

Then $150 in wood, fasteners, paint, etc. another investment of about $250 in tools, and I was good to go. Over the next 3 nights, I slaved in the garage by myself, measuring, cutting, measuring again, PH drilling, then started sanding and assembly on Sat. By Sunday, I was ready to move the pieces up to the room for final assembly and paint, and about 20 man hours later, we had this beautiful beast and just in time for her birthday.

We had dropped our daughters off with their aunt for a few hours to get it set up, and when they came home the look on their face was priceless. Sure I could have spent less time and a little more money, but I have to tell you the feeling of accomplishment and our daughter's collective excitement made the whole thing worth it.

I'm super grateful to Ann White and her amazing site, and I'm looking forward to my next project, since my wife is now working on a list of stuff for me to make...

-JG

NOTE: The assembled bed came out incredibly sturdy with 2.5" PH screws & glue, however since it's carrying precious cargo, I added two 4" lag bolts (3/8) into each of the posts for a little added stability.

Estimated Cost
$150 in materials + $250 investment costs for tools
Estimated Time Investment
Weekend Project (10-20 Hours)
Finish Used
Behr Paint - Milestone Color
Recommended Skill Level
Beginner

Comments

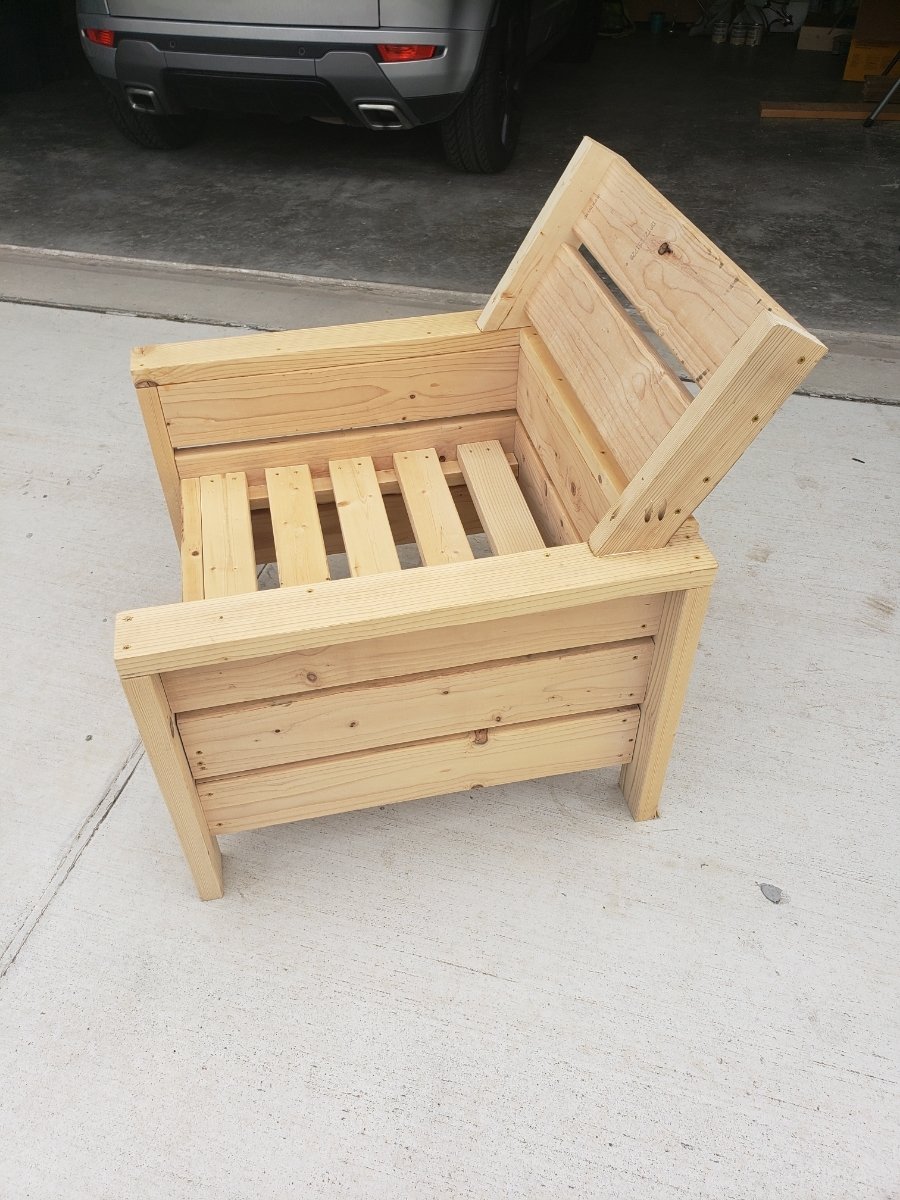
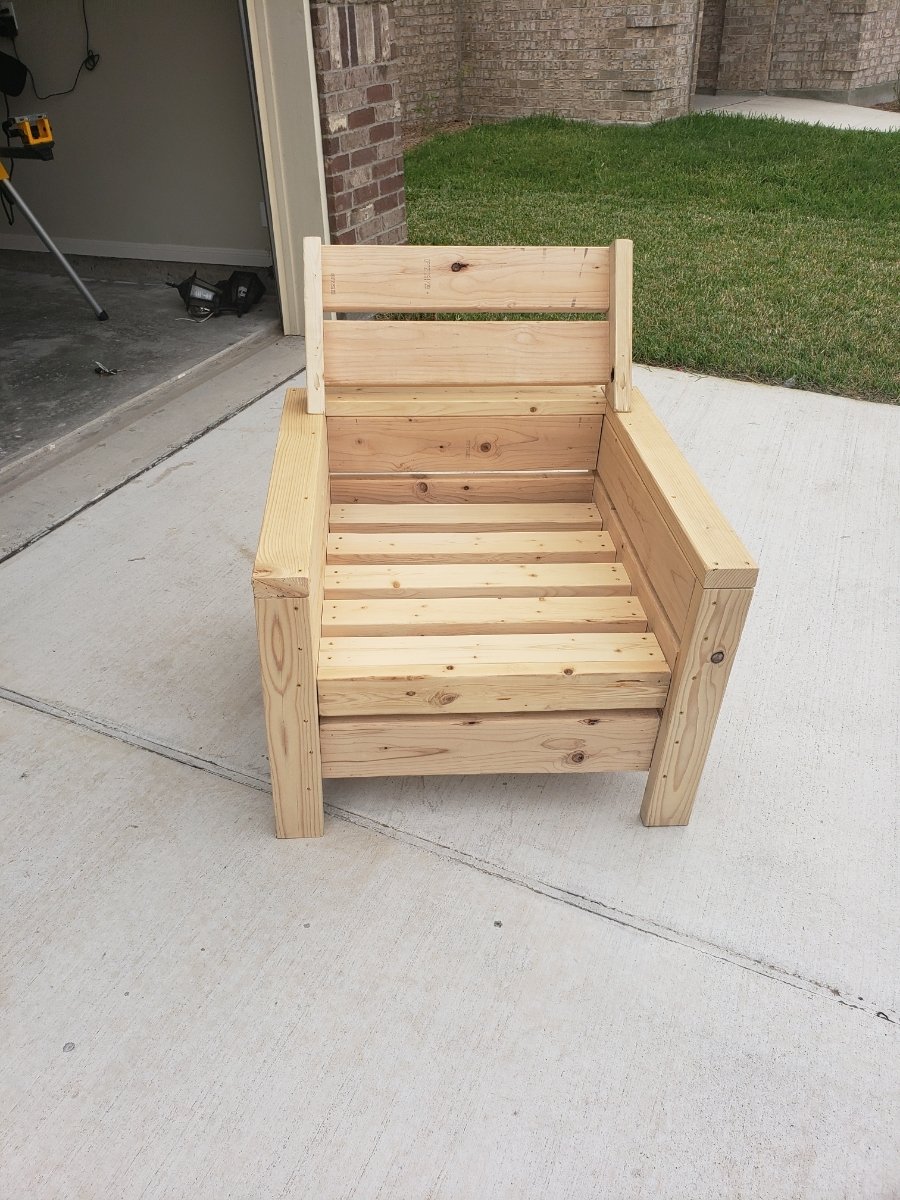
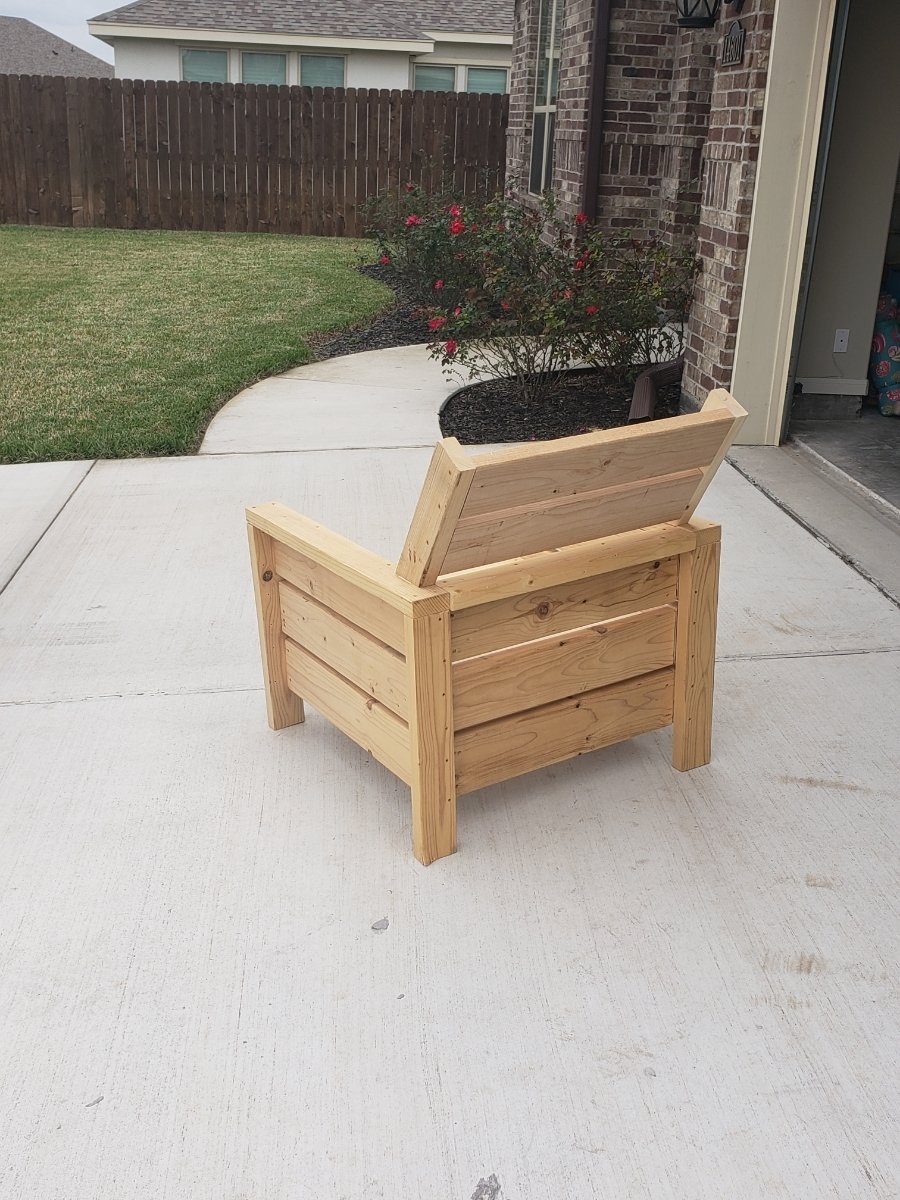
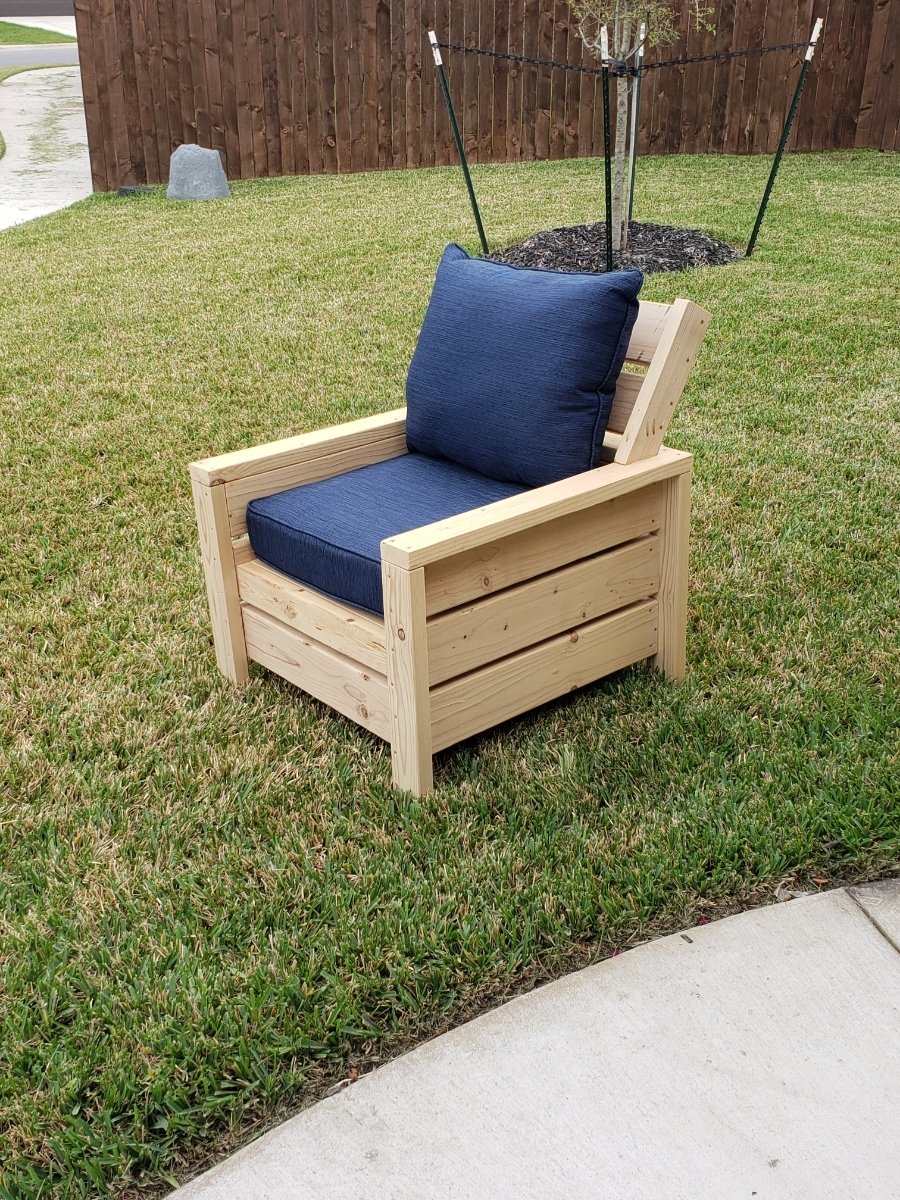
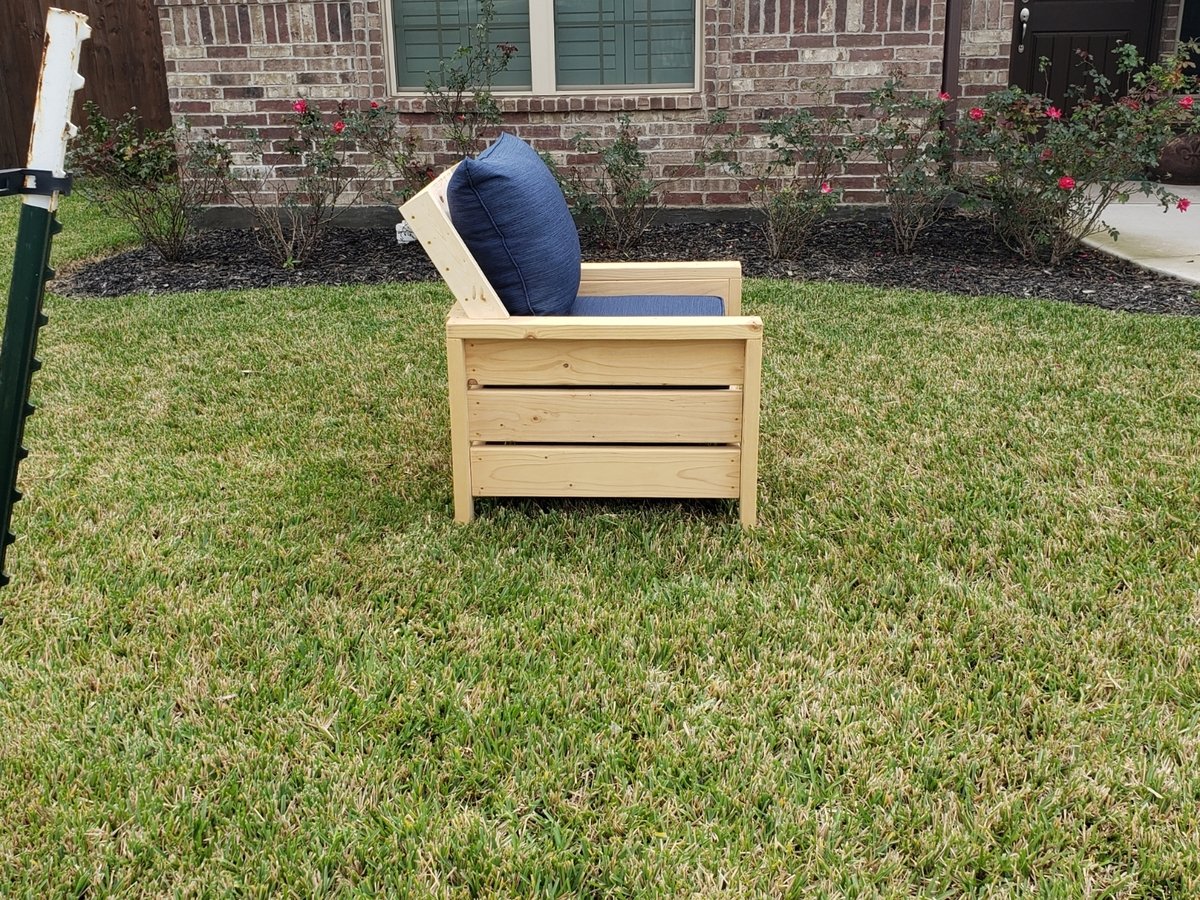
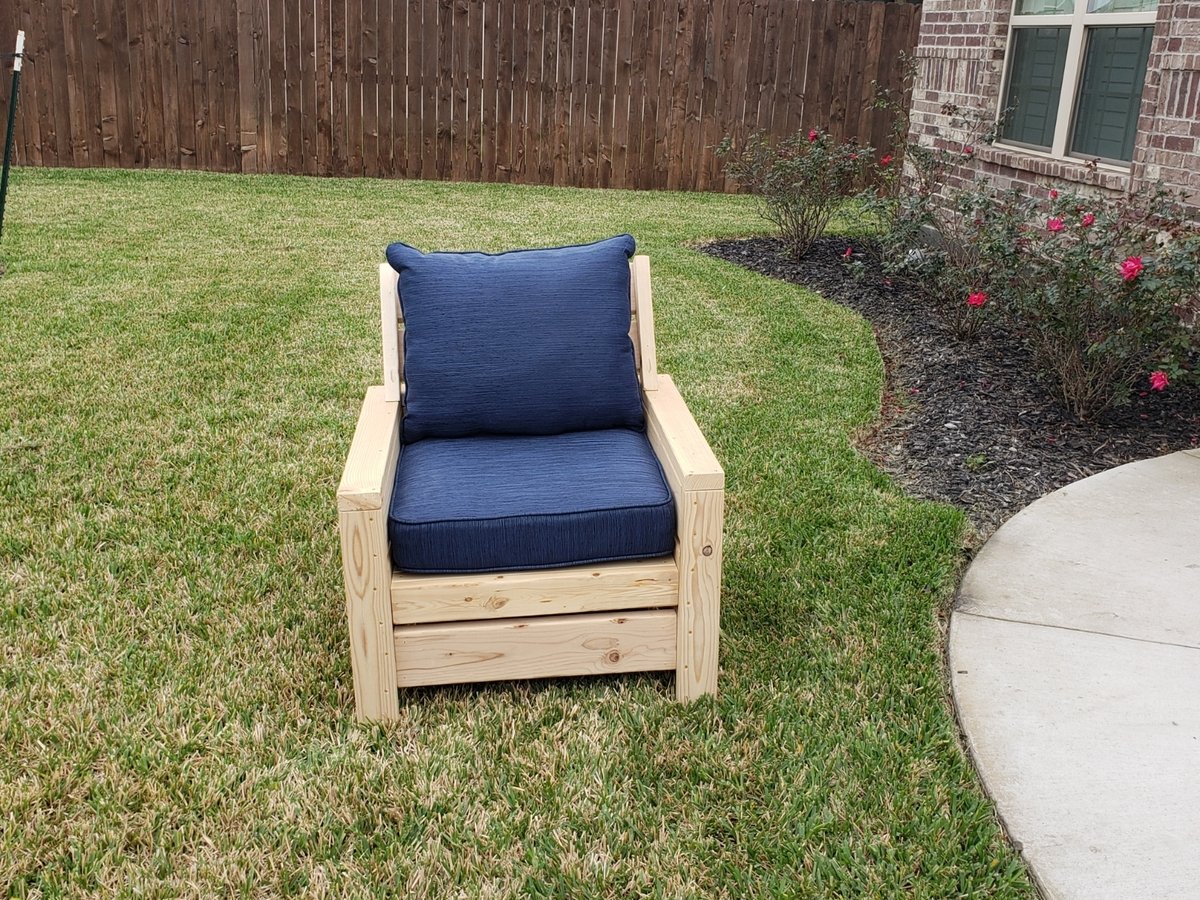
Modern outdoor 2x4 chair with modification

Submitted by Anonymous (not verified) on Fri, 03/08/2019 - 13:31

This chair was made off Ana white'smodern outdoor chair with modification to add back support. Without the back support the back pillow would keep falling off.  The cushion are 25x25 but very thick for comfort.

Estimated Time Investment
Afternoon Project (3-6 Hours)
Recommended Skill Level
Beginner

Comments

Brittsiana

Sun, 08/16/2020 - 10:03

Does anyone know what degree angle this is for the back support?
I would like to add it to my newly finished chairs I made over the weekend. The pillow keeps falling down.

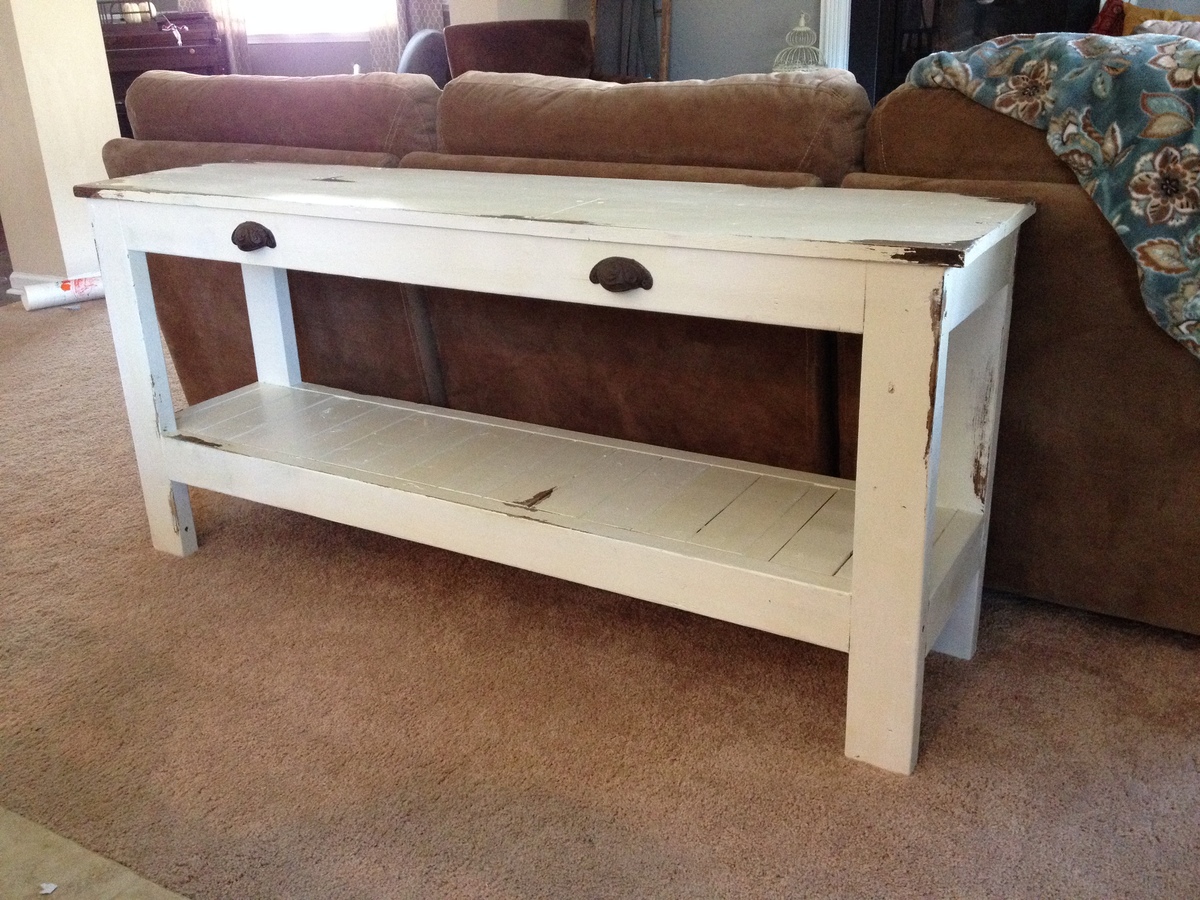
My version of TAYLORS CONSOLE

Submitted by mis1246 on Thu, 10/10/2013 - 16:53

I love this table! It is perfect for a sectional sofa. I decided to antique it and leave off the wheels. I also added pulls to give it more of a finished look. Now time to decorate!

Estimated Time Investment
Afternoon Project (3-6 Hours)
Finish Used
off white paint, with dark walnut stain. Finished with a sealer
Recommended Skill Level
Intermediate

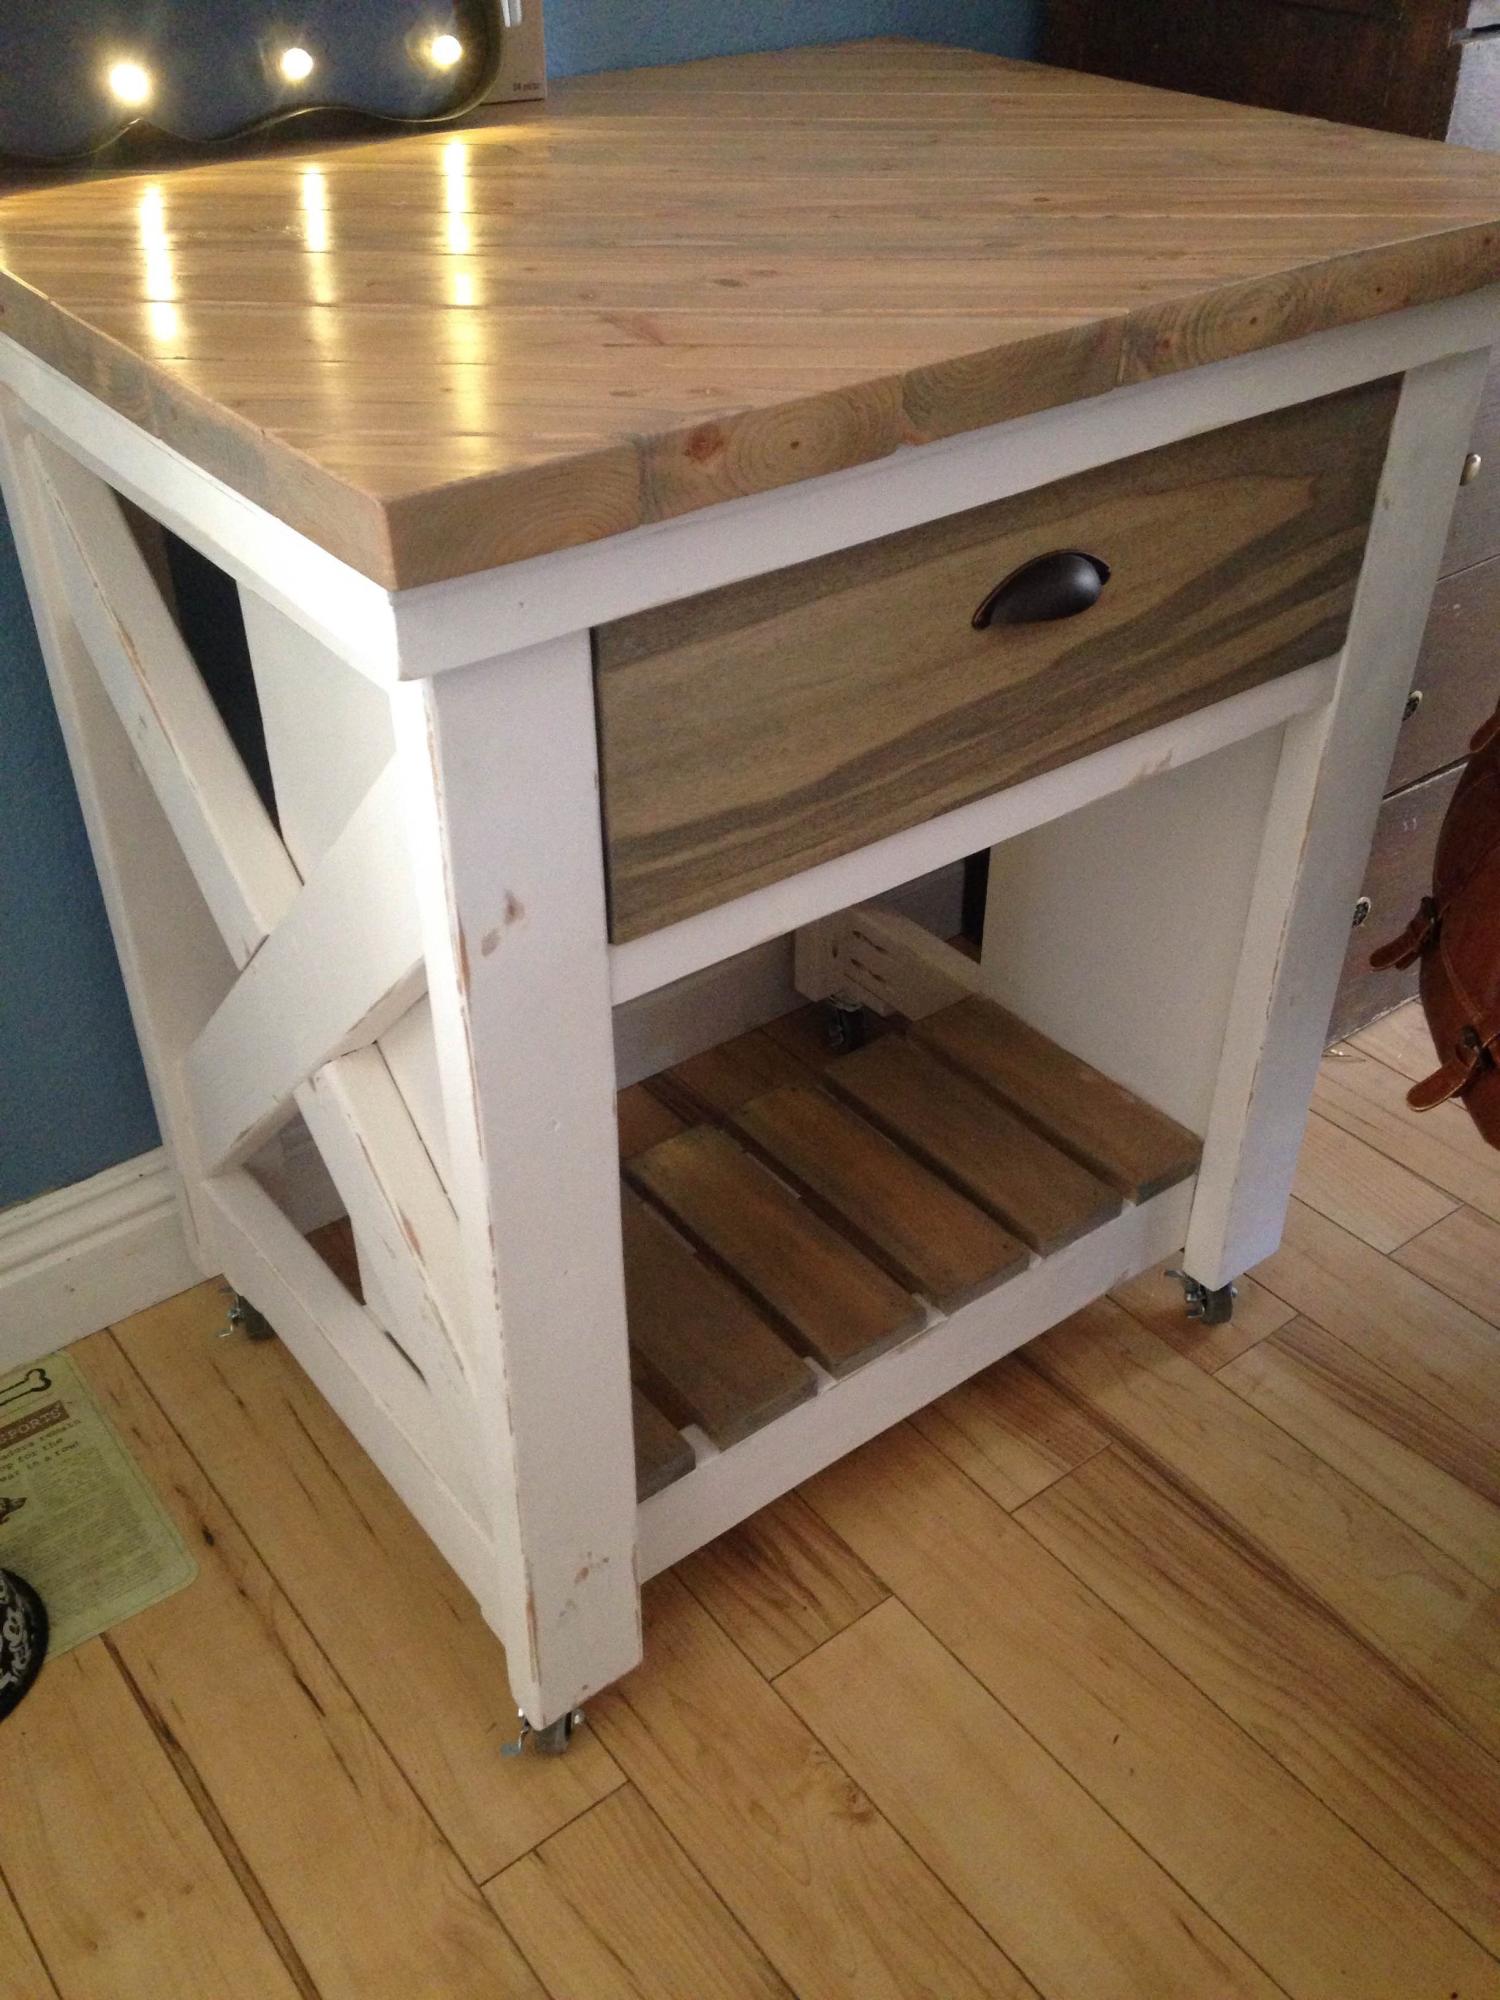
Rustic X Small Rolling Kitchen Island

Submitted by Anonymous (not verified) on Thu, 12/31/2015 - 11:46

Good tips from everyone. We added a 2x4 (hidden under the top) to have added saftey feature to ensure my kids wouldnt pull out the drawer.

Estimated Cost
$150
Estimated Time Investment
Weekend Project (10-20 Hours)
Finish Used
weathered walnut and poly clear
Recommended Skill Level
Beginner

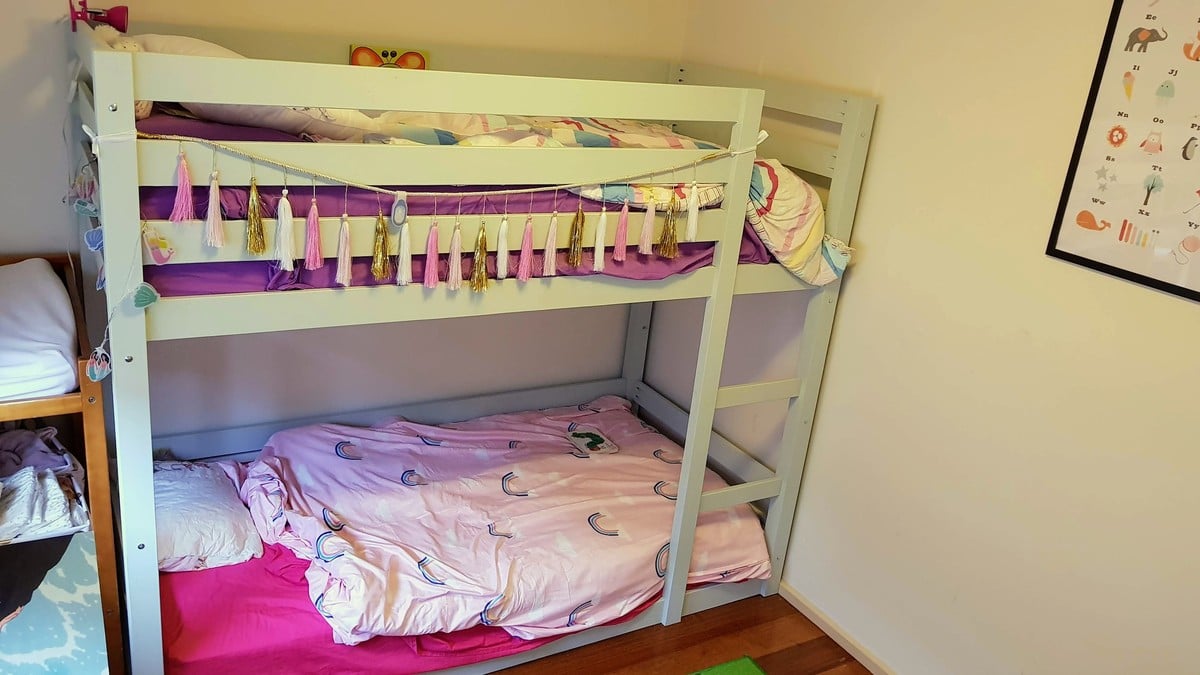
Class bunk bed

Submitted by Anonymous (not verified) on Tue, 03/12/2019 - 17:47

We removed the legs and added an extra piece to the top to bring the mattress height down.

Built from Plan(s)
Estimated Time Investment
Weekend Project (10-20 Hours)
Recommended Skill Level
Intermediate

Modern Adirondack Chairs

Submitted by 2RiversFP on Sat, 02/04/2023 - 18:35

I have wanted to make Adirondack chairs for some time and loved finding these plans. I use exclusively reclaimed or salvaged lumber for all my projects. The lumber for these came from a fire station being torn down to make way for a newer more modern one. These are now home on the patio of the new station. Love how you make plans that are easy to follow and headache free. Thank you!

Comments

Console Table

Submitted by amil04 on Tue, 10/18/2011 - 11:17

I followed the instructions Ana provided, but added a small crown molding to the front and sides and added a solid top that I stained. I also added the lower shelf with leftover pieces and a knob for decoration. I love this new table in my entryway!! I built it in about 3 hours and had it all painted and stained by the next day! Thanks Ana!
Estimated Time Investment
Afternoon Project (3-6 Hours)
Recommended Skill Level
Beginner

Reclaimed Wood-look Headboard

Submitted by mom of 4 on Mon, 10/14/2013 - 08:38

Pretty much followed the plans for the reclaimed wood-look headboard, but without legs. I built it of pine and topped it with a purchased piece of moulding. I hung it from screws into studs with D-rings on the back. Super easy to put together with the Kreg Jig!

Estimated Cost
$30-$50
Estimated Time Investment
Afternoon Project (3-6 Hours)
Finish Used
I sanded the bejeebers out of the rough 2X4's on the sides, top and bottom. Everything else got sanded before and after assembly. I punched down the nails on the trim and then filled the holes. Primed everything and then put on two coats of a dove-white trim and cabinet paint.
Recommended Skill Level
Beginner

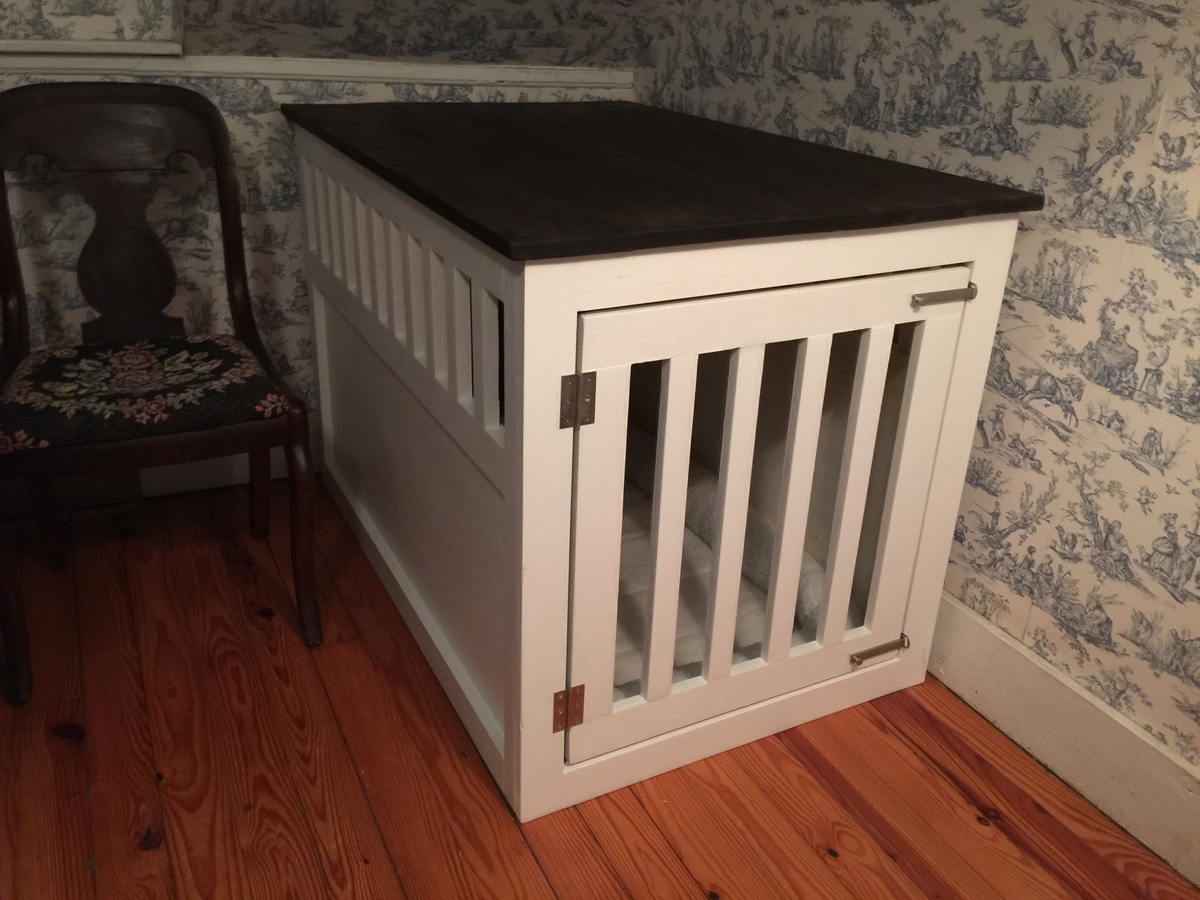
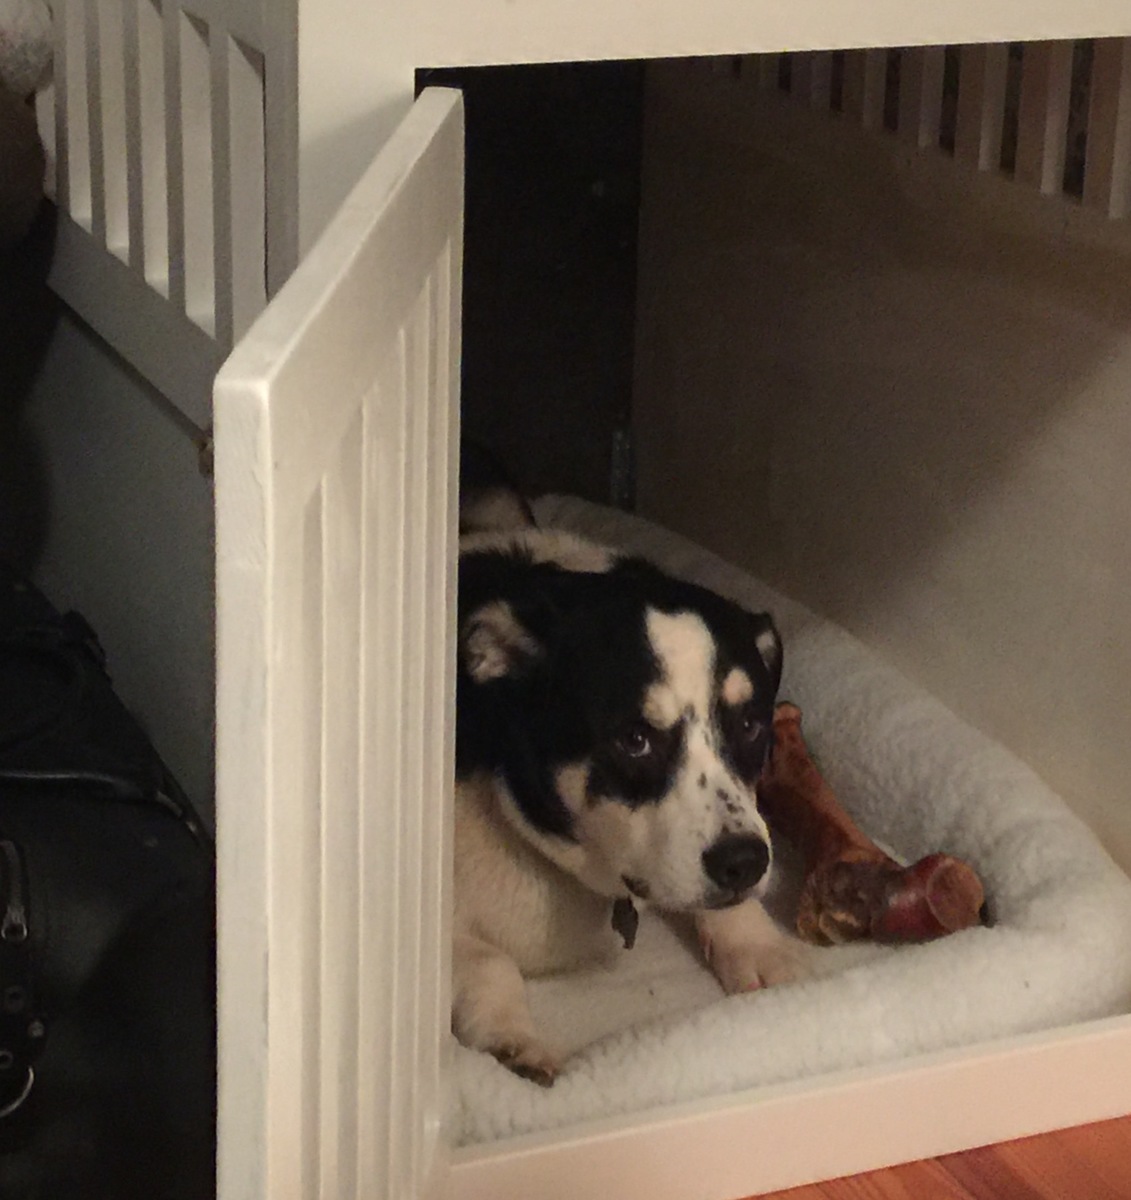
Extra-Large Wood Pet Kennel End Table

Submitted by Anonymous (not verified) on Sat, 01/02/2016 - 17:24

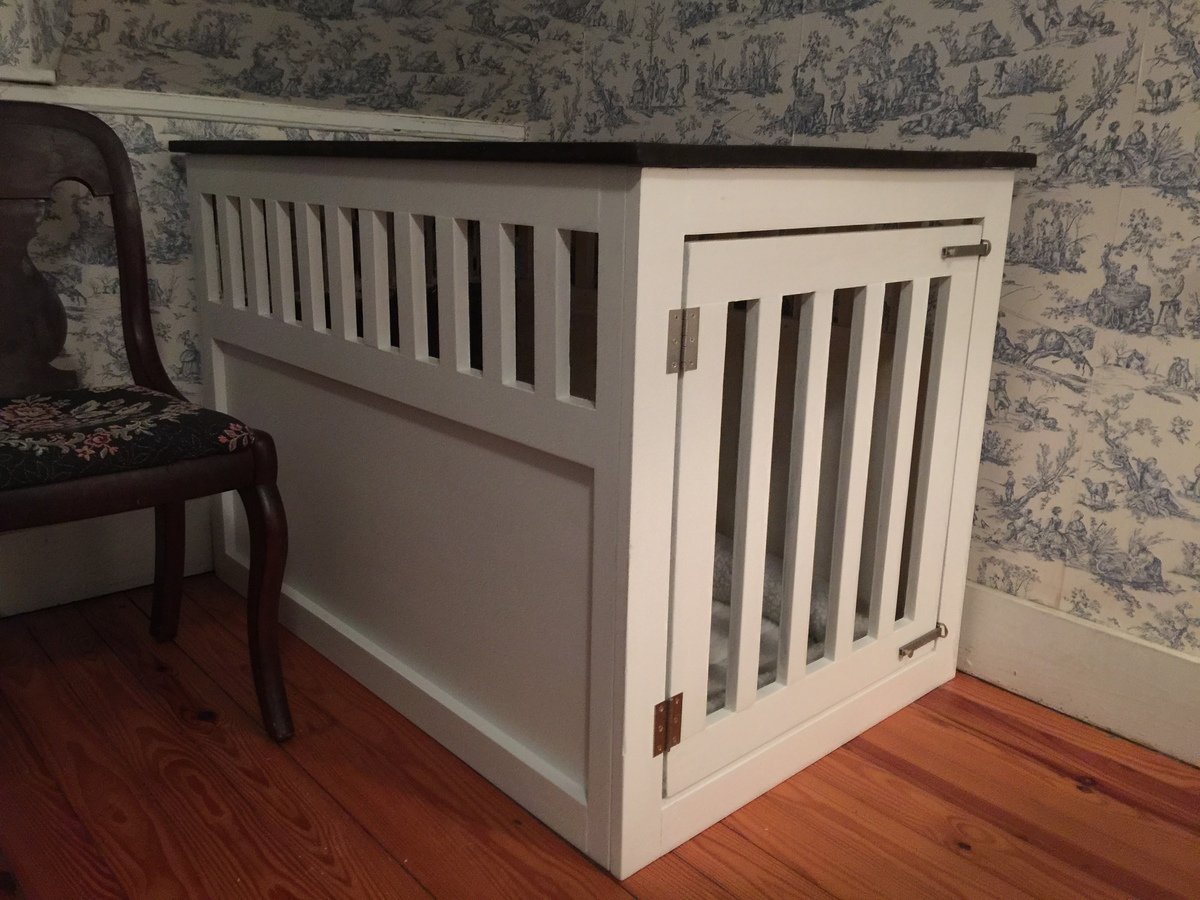
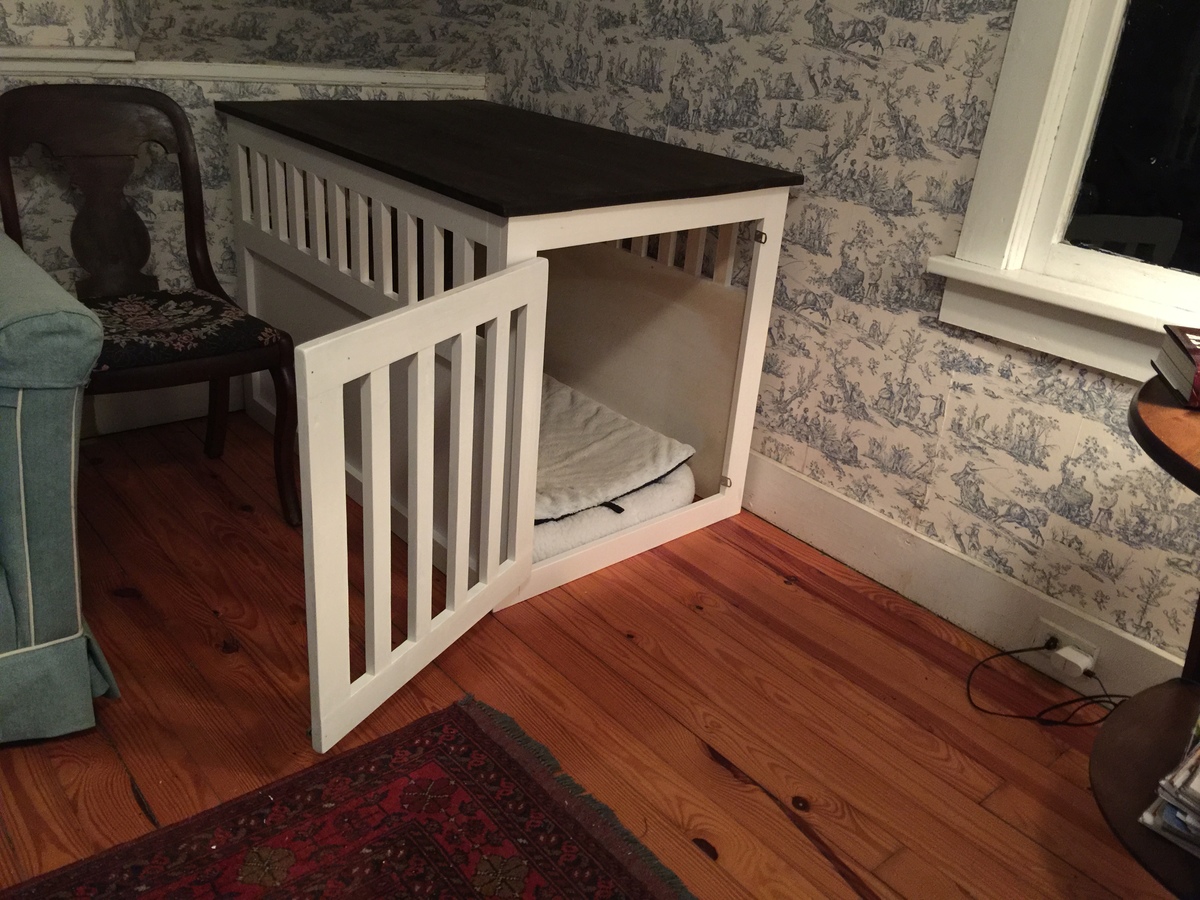
I followed Ana's plan exactly, but increased the dimensions to the standard XL crate size (42L x 28W). The base is painted gloss white and the top is stained espresso.

Built from Plan(s)
Estimated Time Investment
Week Long Project (20 Hours or More)
Finish Used
Gloss latex for the base and Minwax espresso stain on the top.
Recommended Skill Level
Intermediate

Kitchen Sideboard

Submitted by Anonymous (not verified) on Tue, 03/19/2019 - 15:32

Made this sideboard cabinet for my kitchen using the plans for the barn door cabinet. Just modified a bit by hanging the door instead of doing the sliding barn door. Turned out great and I love the look of it. Provides lots of extra storage and counter space in my kitchen. 

Estimated Cost
$130
Estimated Time Investment
Day Project (6-9 Hours)
Recommended Skill Level
Beginner

We have BEDS!

Submitted by kgranger on Fri, 10/21/2011 - 19:59

This is the storage bed. We having matching ones! I am so proud of my hubby!

Estimated Time Investment
Week Long Project (20 Hours or More)
Finish Used
Paint
Recommended Skill Level
Beginner