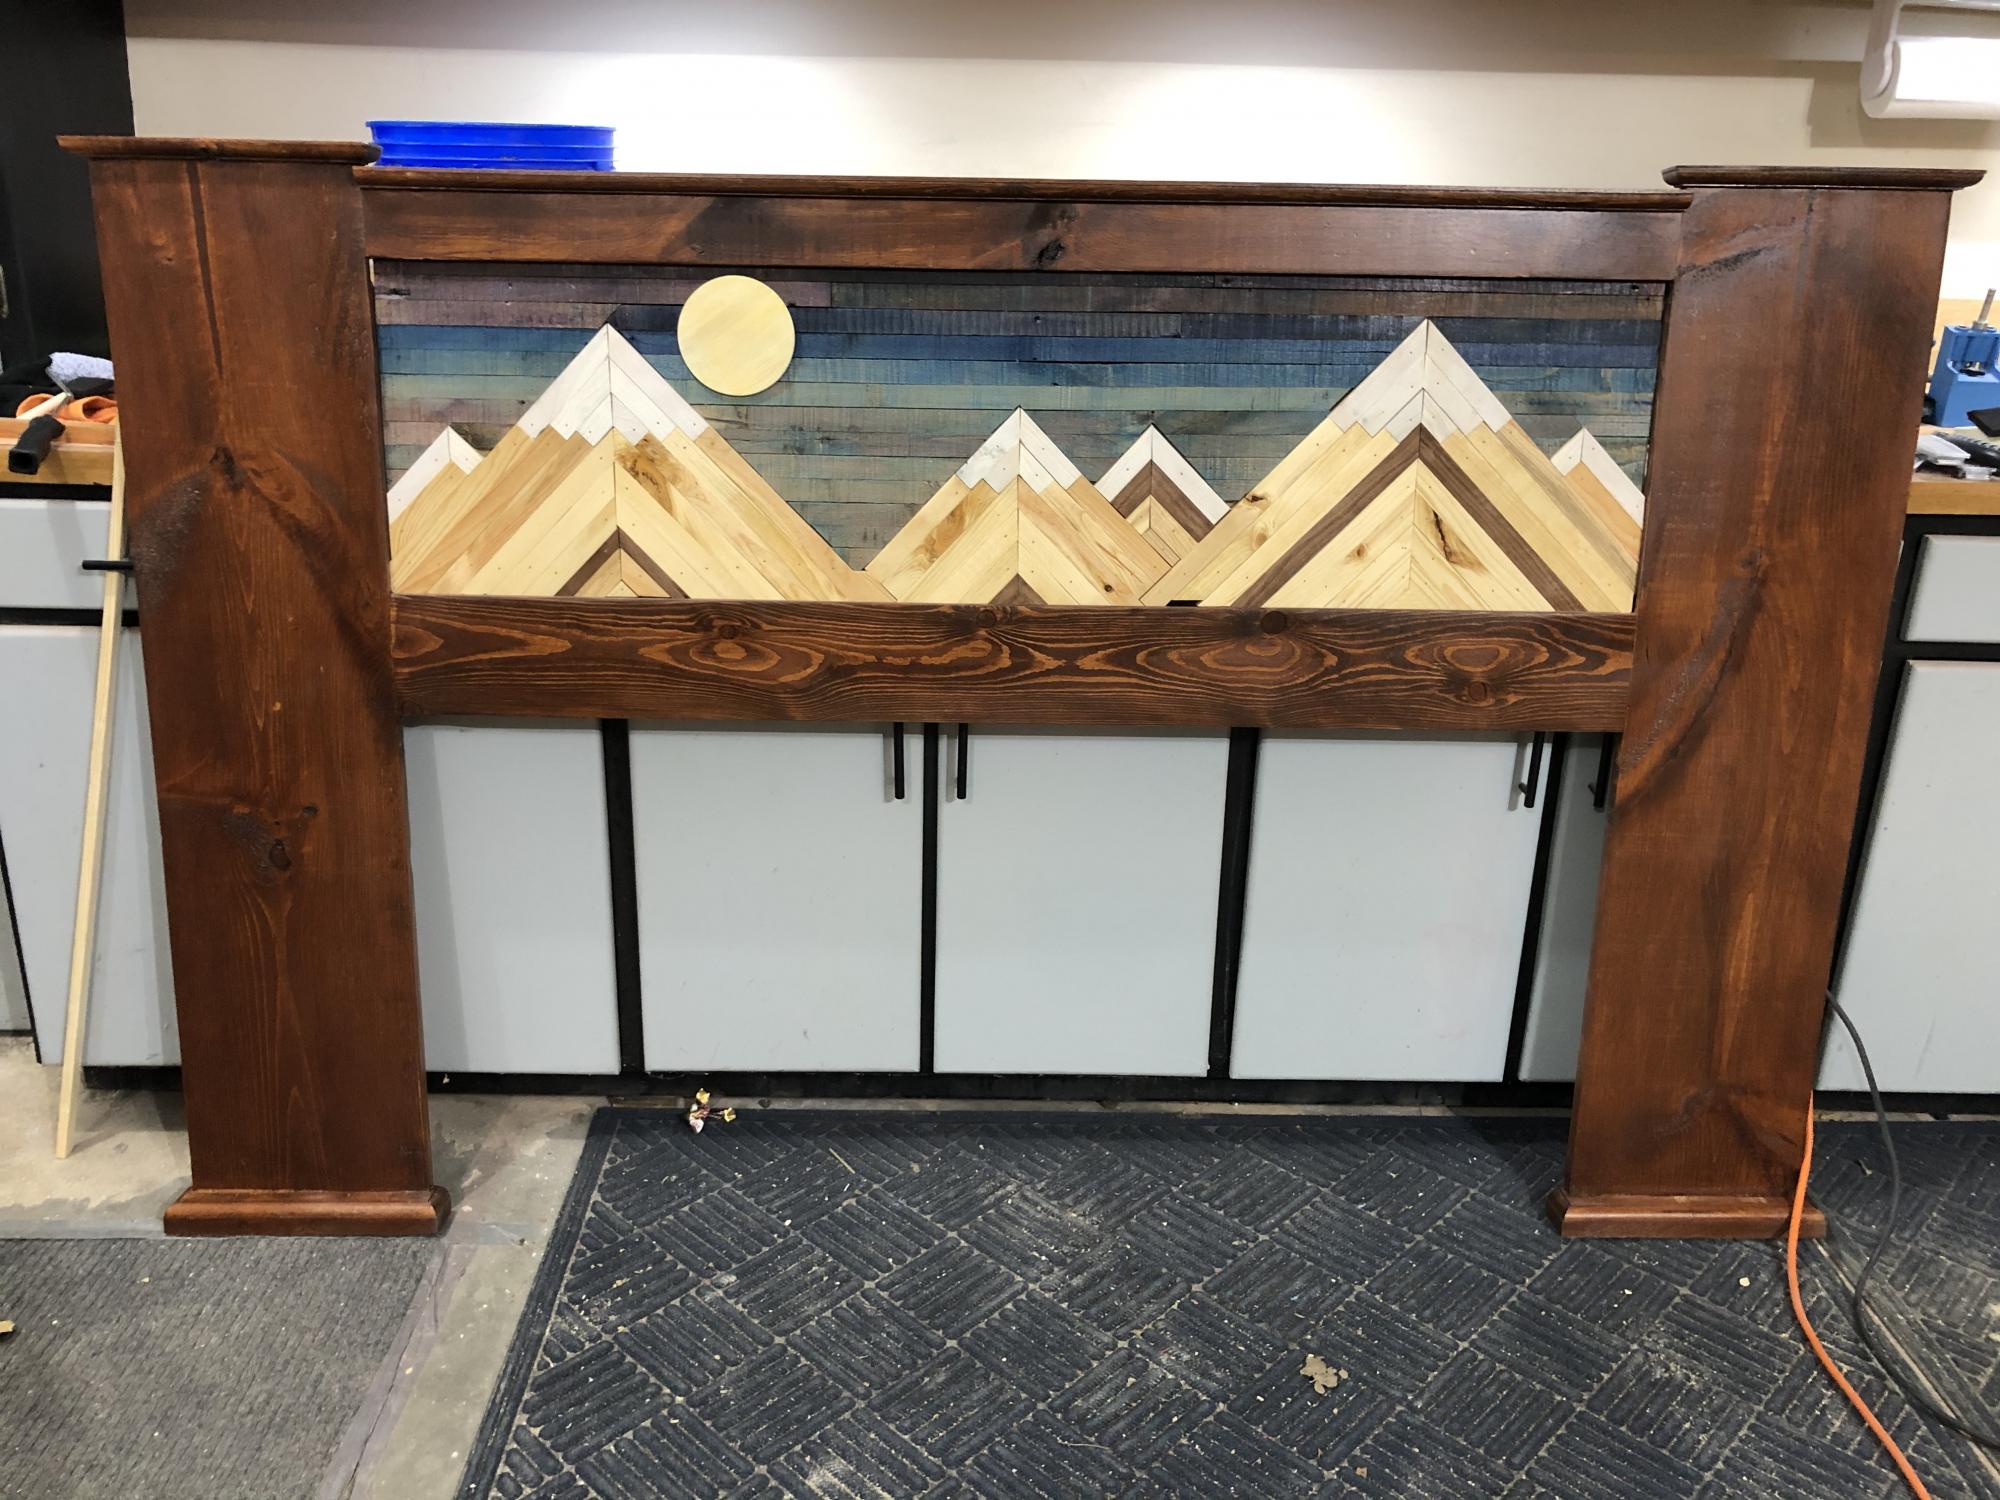
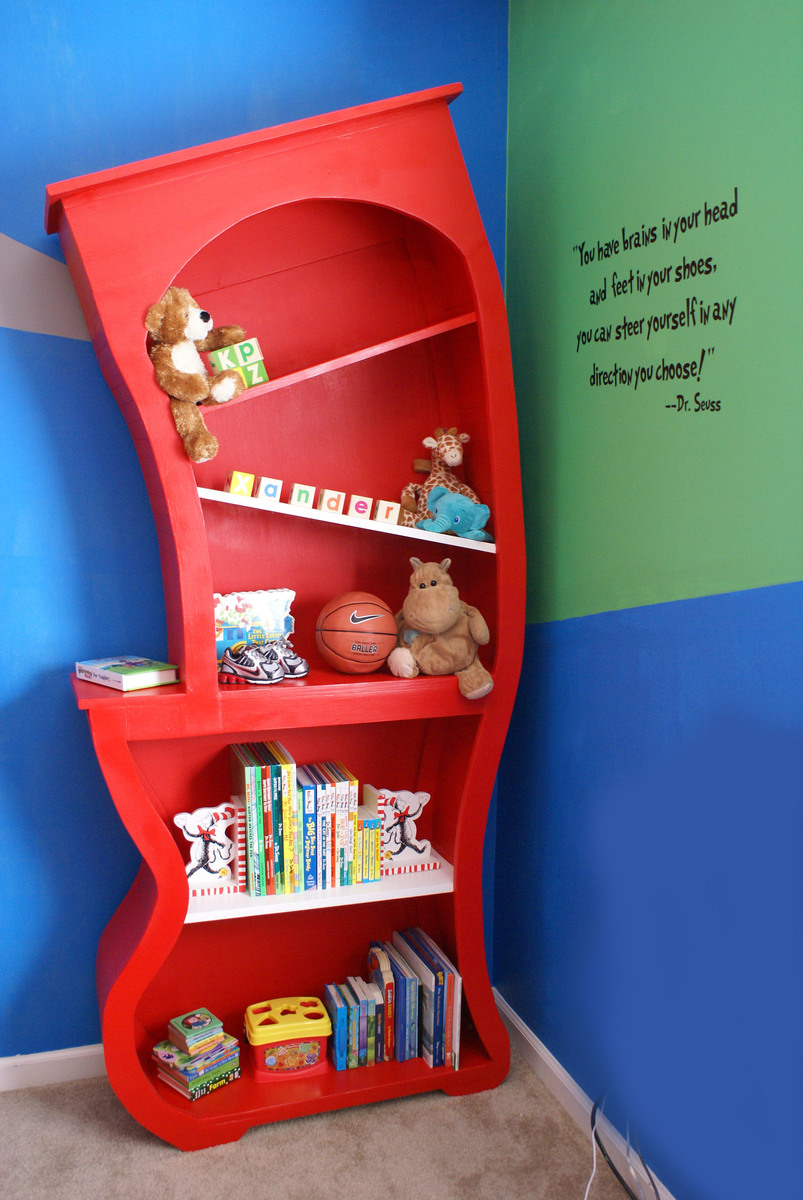
Nativity Centrepiece
My wife asked for a table top Nativity Centrepiece as we were hosting Christmas. Was fun and quick to make it small!
Beautiful Farmhouse Desk by Leila Adams
Loved making this for our girls...Selah & Annaleah. We have 9 ft walls so I made it extra tall. Love it so much!!! Used 4 in boards for the walls b/c they were so much cheaper. The shutters ended up my favorite part.
Mon, 08/06/2012 - 14:26
I really like the paint colors that you used on the bed and the ones on the walls. What paint brand(s) and colors did you use? I really love your room. Additionally, where is your fabric from? Your room is amazing. I know a little girl in TX who would like one just like it :)
Mon, 05/23/2016 - 18:52
Hi! I really like the taller version for my daughter's room, would you be able to share the new measurements, or what you did differently? Thank you! !!
I feel in love with the Pottery Barn Media Suite and new immediately I wanted to build it. I couldn't justify paying close to $2,000 on an entertainment center. I knew Ana would have the plans to help me out. I modified the plans a little bit and instead of building 6 cabinets, I decided to make the inner 4 cabinets one piece, and the 2 outer cabinets removable. This will give me options for when I have to place the Christmas Tree or if we move and cannot fit this huge piece. I also wanted to have as much strength in the middle for our plasma TV. It's about 4 years old and isn't as light at the new TV's are. I loved every minute of building this project and couldn't be more happier! Feel free to search PB website to compare their media suite to my version (savings of $1,700). Feel free to ask any questions!
Wed, 07/08/2015 - 08:35
Love how you did yours Christina
I too would like to make one larger unit rather than say 6 of the individual cabinets. Looking at your pictures, it looks like you still made them individually but I'm assuming you attached them (screwed) together? Is that the case? Did you have any issues with the main piece and two ends being different heights when finished?
Am wanting to make a total length of around 104". Means I'll have to tweak some measurements.. In addition, I would like to have one side be a lift top so we can put in a record player and simply lift the top face to access. That wont be too big of a deal.
How did you find the doors were to make? No big deal? i've been curious how the dimensions all play out with the hinges and doors opening etc.
Sat, 01/30/2016 - 13:58
I cannot find these instructions anywhere! The PDF does not include the instructions :(
In reply to Instructions by LBlakesley87
Sat, 01/30/2016 - 14:42
This is a brag post (a beautiful one, might I add!!). The links to the instructions are included above. Here's to the main base http://www.ana-white.com/2010/08/plans/open-base-basic-collection
This was my first woodworking project in a couple years. I modified the size to make it about 60" on each side. Now that I am working from home now due to COVID-19 for the foreseeable future this has been perfect to use in order to have two monitors and enough room on the sides for other work.
Sun, 05/31/2020 - 19:39
Looks awesome! What stain did you use for the top?
Mon, 12/14/2020 - 14:08
can you tell me how you attached the two desk together? I have a lady wanting me to build an L shaped Fancy X desk, but I'm not sure how to attach without it sagging.
We were looking for a way to better utilize our cabinet space. Previously, our cans were all pushed in and we couldn't see what we had without moving things around. I Found Ana's tier can organizer and knew it was exactly what we needed. We repurposed a piece of stained plywood we already had and a couple of 2x4 pieces from previous projects. We did buy a 2x4x8 because we wanted to make it a 4-tier shelf. We stained it dark walnut and added felt pads to the bottom. Measures 22" D x 21.5" W. We love it and it makes our space so much more effective.
J Daughenbaugh
A twin version of "Mom's Fancy Farmhouse Bed" that includes a matching footboard. Kreg jig used all around. The bed takes about 6-7 hours to cut everything and put it together. Staining takes quite a bit more because of the dry times needed.
Sun, 05/27/2012 - 15:09
What a lucky little girl to have such a beautiful bed!
Simple, easy to build and oh-so functional. Loved these plans because of the ease of building and the budget friendly supply list.
The frame for the bunk beds were completed over the course of a weekend and the next week was spent sanding and painting.
The plan allows you to build a strong, sturdy bed that can be easily disassembled/reassembled as necessary. It worked great being able to carry the 4 separate panels into my daughter's small room and then screw everything together. I also liked that feature along with the ladder integrated into the bed.
An Important Tip (one Ana recommends all the time) - Be sure to read the comments section on the original plan. Lots of important information there, especially if you need to buy 8' boards instead of the 10' listed in the plan (like I had to) and a few of the missing cuts are noted in the comments.
You can read more about my build experience here... http://radcrafter.com/2014/03/adding-the-bunk-bed-bedroom-makeover-pt-2/
Built from this plan: Classic Bunk Beds: http://ana-white.com/2010/09/classic-bunk-beds-cleverly-designed.html
love Ana! We moved from the city to a late 1800's Victorian farm house with no closets, no basement, no storage! This was a great Woodshop 101 project for my husband and me, and gave us extra space in the kitchen. Can't wait to do another Ana project.
Wed, 08/28/2019 - 11:03
This is awesome!!! Thanks so much for sending in a brag post!
I built this table from the Farmhouse coffee table plans. I did a couple things different from the original plans though. I used Cherry 1x6 planks that I epoxied together for the top and I epoxy finished it as well. For the framing I still used regular construction pine and the golden oak stain. I also pre-drilled all screw holes that would show and plugged them. We also found baskets that look nice for decor and storage. This is the first piece of furniture that I have made and I am very happy with how it turned out! Small disclaimer this project did cost a bit more because of the epoxy and the cherry planks and it also too a considerable more amount of time because off hole plugging and epoxy process/ plank fitting.
King bed. Easy to build. I love it. -
F. Sellers
Total cost was under $200. The wood was a combination of select pine, Douglas fir. I used Minwax clear finish. Instead of slats I used plywood. This is going into the spare bedroom. We are quite pleased.
Mon, 05/28/2012 - 19:51
We chose to go with a 1 x 6 instead of a 2 x 4 for the top of the head and foot boards.
Tue, 05/29/2012 - 16:29
Can you take the bed apart in case you move? You did a great job.
Fri, 06/01/2012 - 20:45
Yes it comes apart. A total of four pieces. Headboard, footboard, and the two sides. Also a fith piece if you count the plywood base for the mattress. The sides are screwed in at each of the corners of the head and footboards.
Mon, 05/12/2014 - 19:01
Thinking of building this for my son as we move from crib to bed. Just curious how sturdy and strong the bed is? From the pictures it doesn't look like there's much wood where the rails attach to the head and footboard. Did you use pocket holes and screws? Any comments on how it's held up, what you might do differently? Also any idea if it'll hold a kid and parent for nightly story time?
Thanks...nice work!
Wed, 05/14/2014 - 15:22
It is in our guest room and does not get much use. However, it is screwed in at the corners not with pocket screws because the rails were too close to the edges. I chose to screw them in starting farther back and at a 45 degree angle to send the screw deeper towards the center of the four posts. It is very strong. Another suggestion would to purchase bed hardware. Hardware can be found online or in a hardware stores for attaching rails to bed posts. I've used such hardware for fixing commercial beds I've purchased.
Hope this helps.
Tue, 01/20/2015 - 15:25
Sorry it took so long to answer. Where I put the screws depended on how the bed was going to be placed in the room. In our case, the headboard was going to up against a wall. Therefore the screws were on the wall side of the headboard. The footboard of the bed had the screws on the mattress side. Kreg sells pocket hole plugs that work very well. Glue them in after you screw the head and foot boards together and sand them before finishing.
The sides of the bed that are attached to the head and foot boards and screwed in too. I had to screw them in at a sharper angle to get enough sideboard material but deep enough into the head and foot boards in. Use the longest screws possible for strength without going all the way through the four corner posts.
Tue, 01/20/2015 - 15:50
Either way described above will work. See added photos of plugged finished pocket holes and underside attachment to foot-board.
Thanks for the plans! The beds turned out great. I just made everything about 6 inches higher for more storage space.
Thanks SOOOOOOO much for the Plans. I had fun building this and my Mother will be so happy to have it.
I'm sure she will be spending more time on the deck this summer.
Cheers, from Toronto
Chris,
I built this sandbox for my kiddo's because we have cats! It was great. Easy to build, great plans for it.
I made four of these wood Christmas trees from Ana White pattern. I am polished them by adding a cup hook at the top hanging a Christmas ornament and then gluing on these cute little presents. I gave them to each of my four grown children and their spouses. Beth Belflower
This was my second project......it came out of necessity. We had a dining room with no furniture. I wanted a table that would stand the test of time. A place where we could eat, do homework and enjoy making memories. We have 4 little ones so a sturdy table was a must! All the tables I looked at were cheaply made or WAY over our budget. I found a wonderful couple in Ann Arbor where I purchased my wood. I had them assemble the top, (8 1x6's) since I do not have the equipment to plane and sand a top that large. The rest I did a little at a time.
I am very pleased with the result!
I modified the plans to fit our needs.......the changes are as follows: I did not make bread board ends, and my width is 44.5 in.
My next phase of this dining room is to build a buffet and hutch......I always juggle about three projects at a time so my realistic goal will be Thanksgiving!
Coffe table to match the console and end table
Had just watched the new Peanuts movie.Kind of liked it.
Great Plan! Loved how easy it was to build and how little the cost was.
Tue, 07/28/2020 - 09:52
Did you use decking screws or pocket holes for the visible portion of the couch?
Sun, 08/01/2021 - 18:40
Looks amazing! What method did you use (pocket holes, dowels, deck screws, etc) to join the visible portions like the arms?