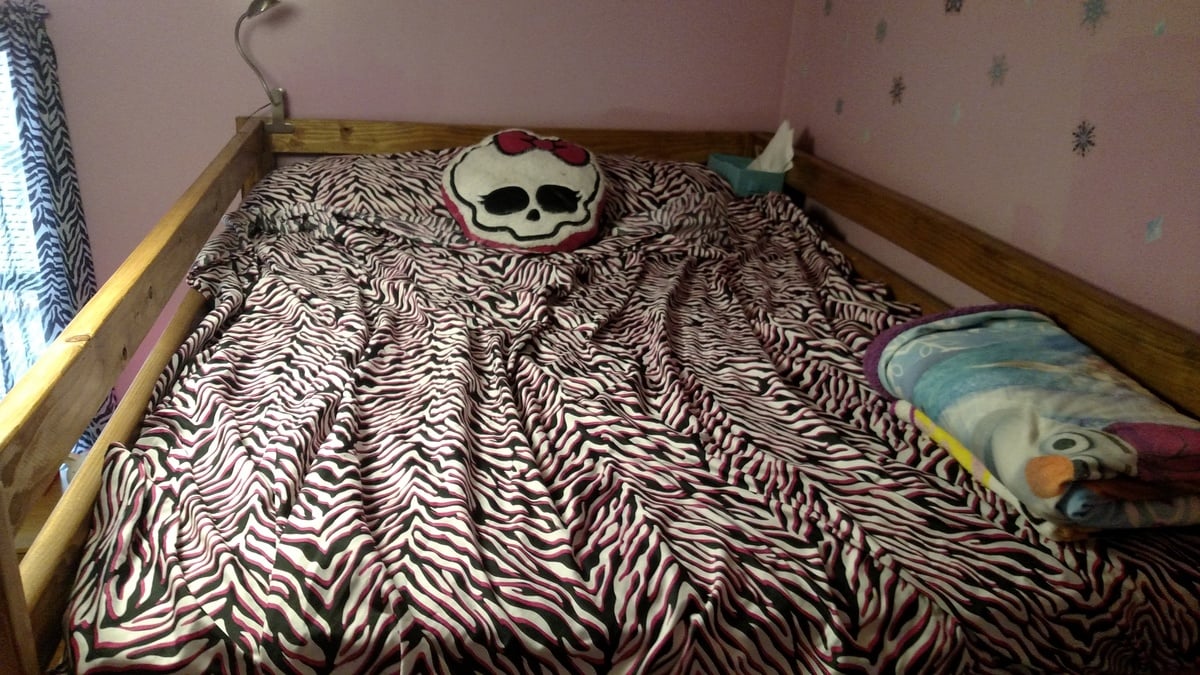
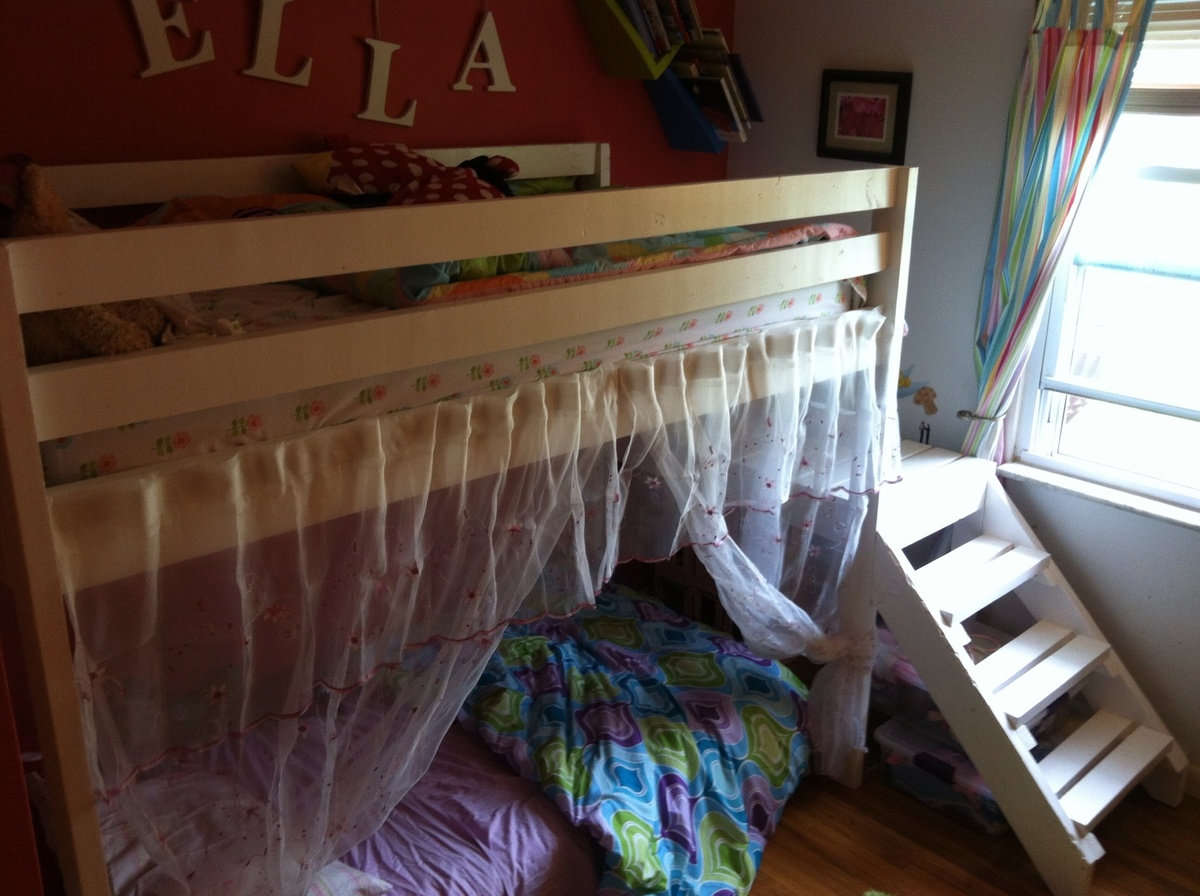
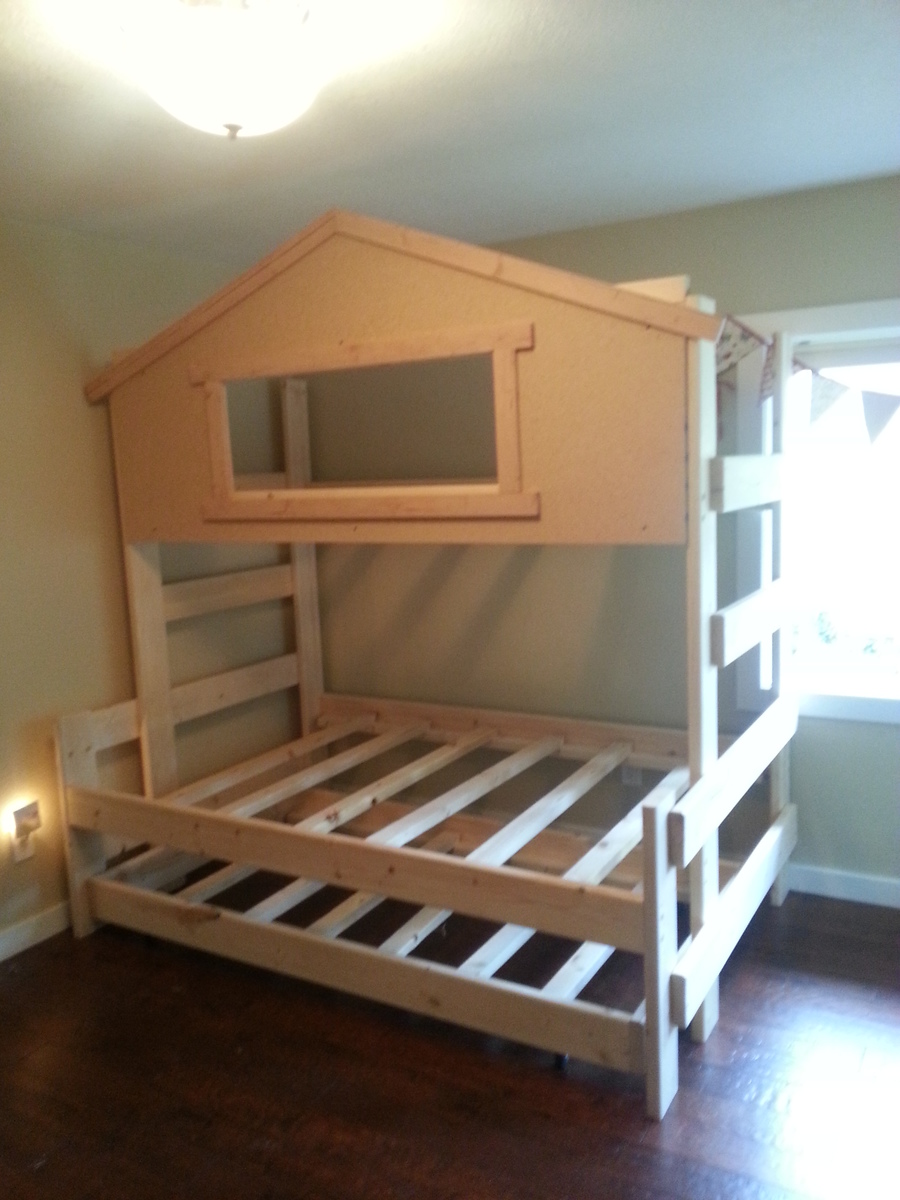
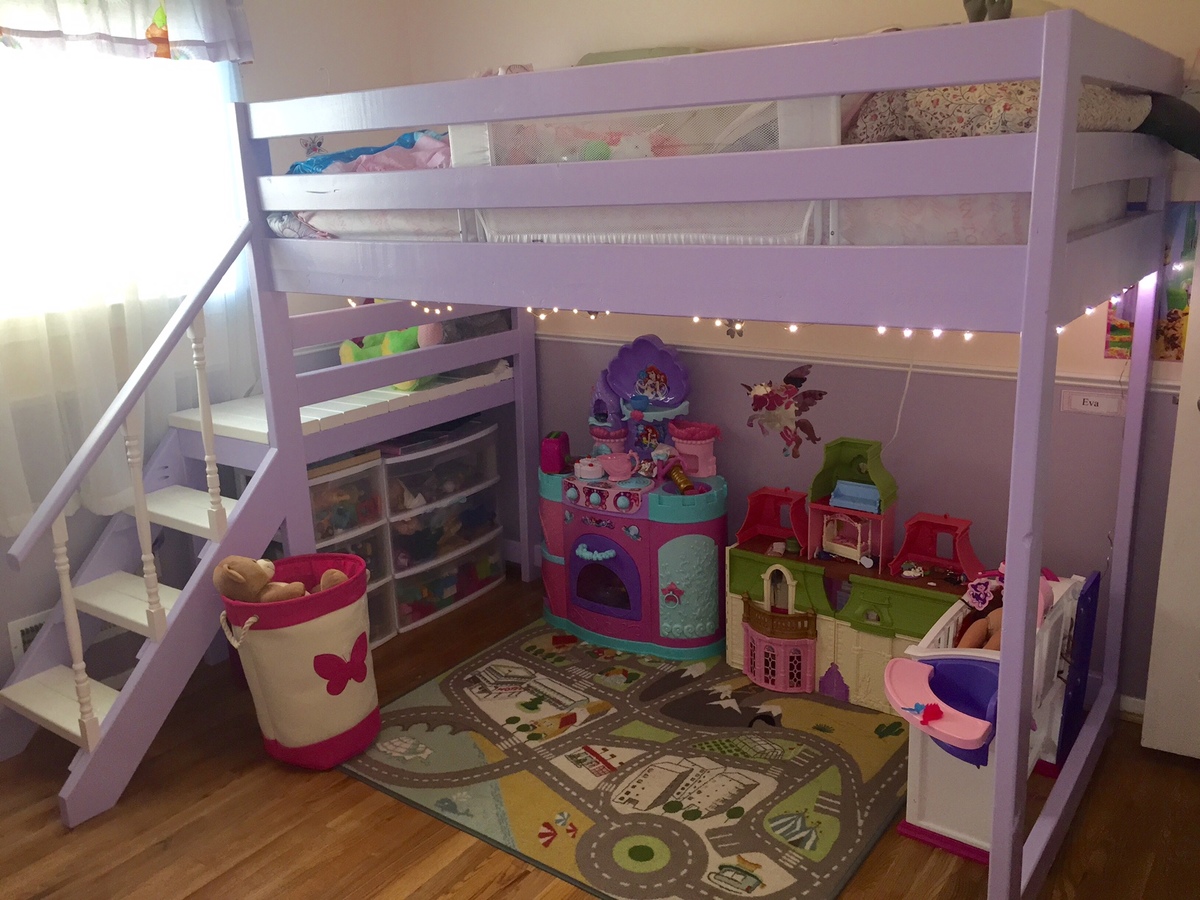
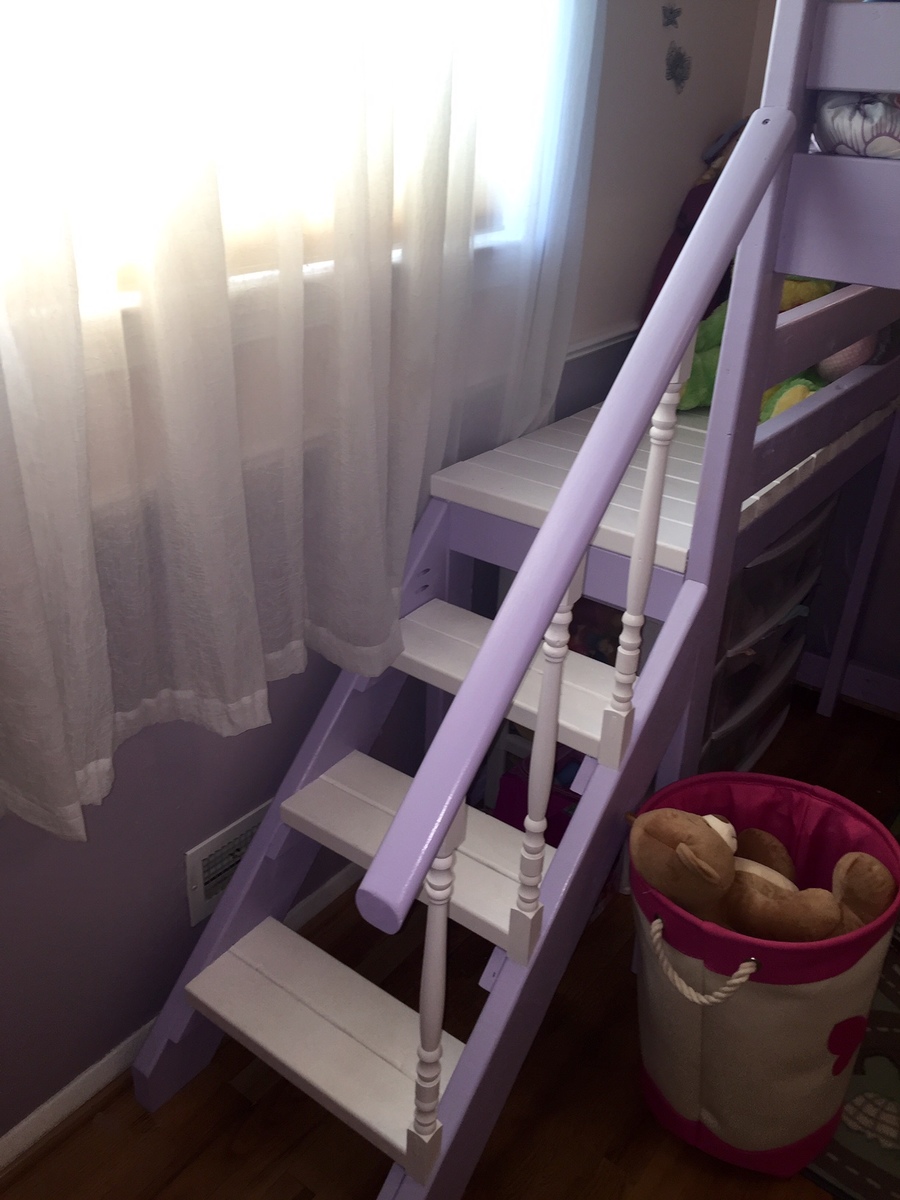
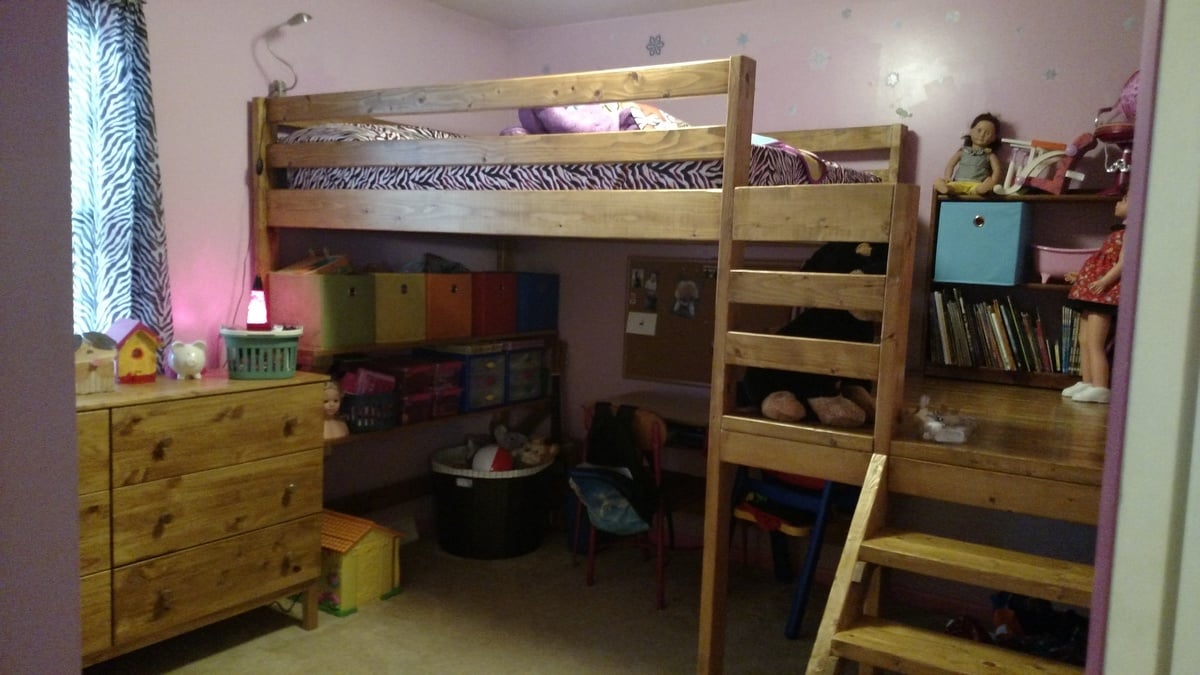
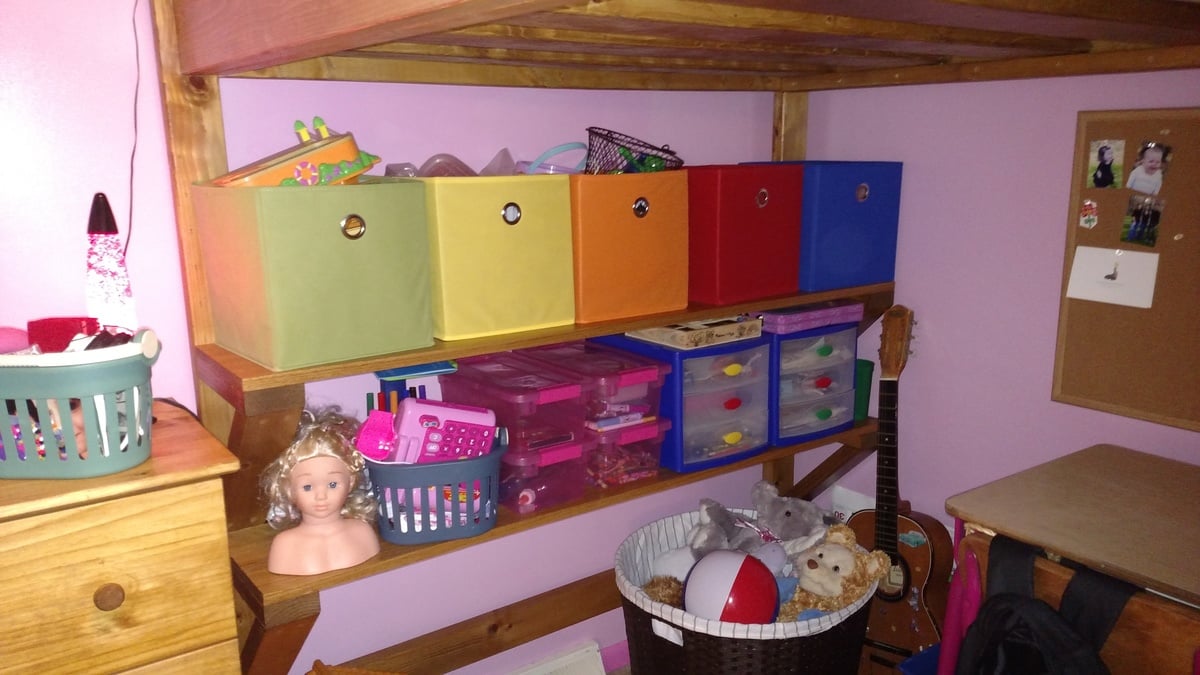
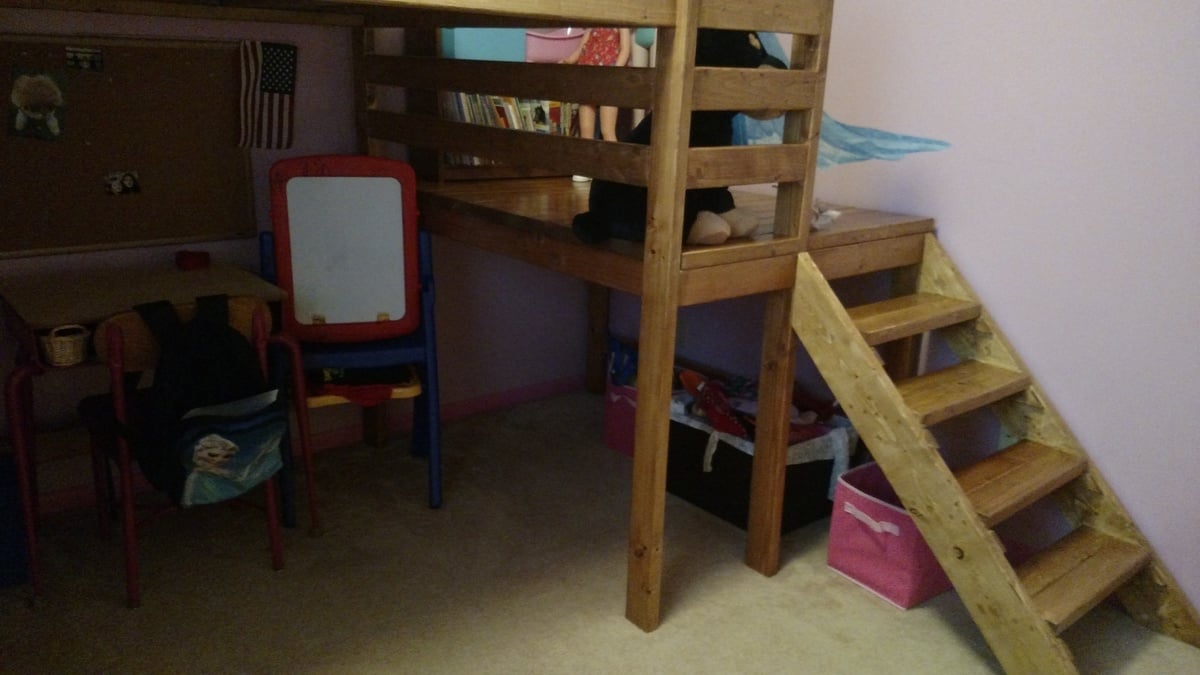
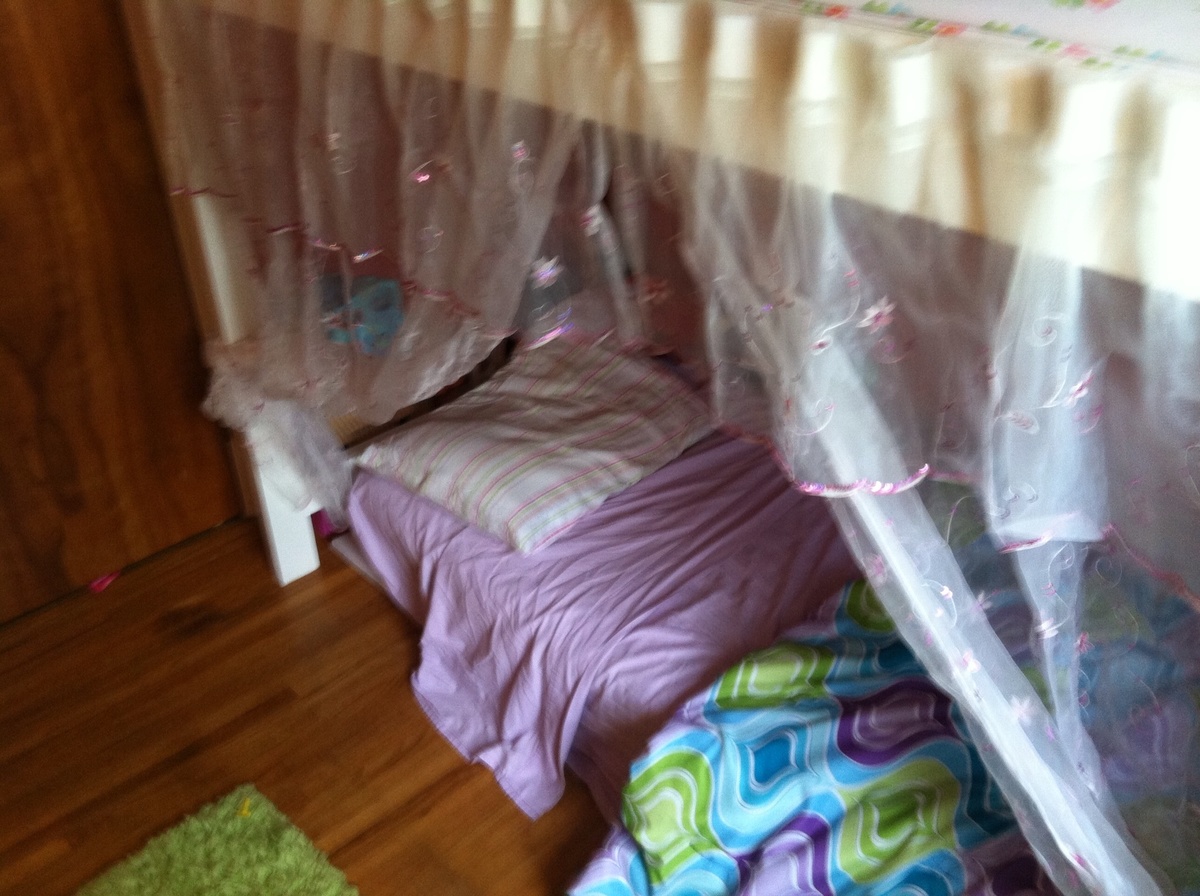
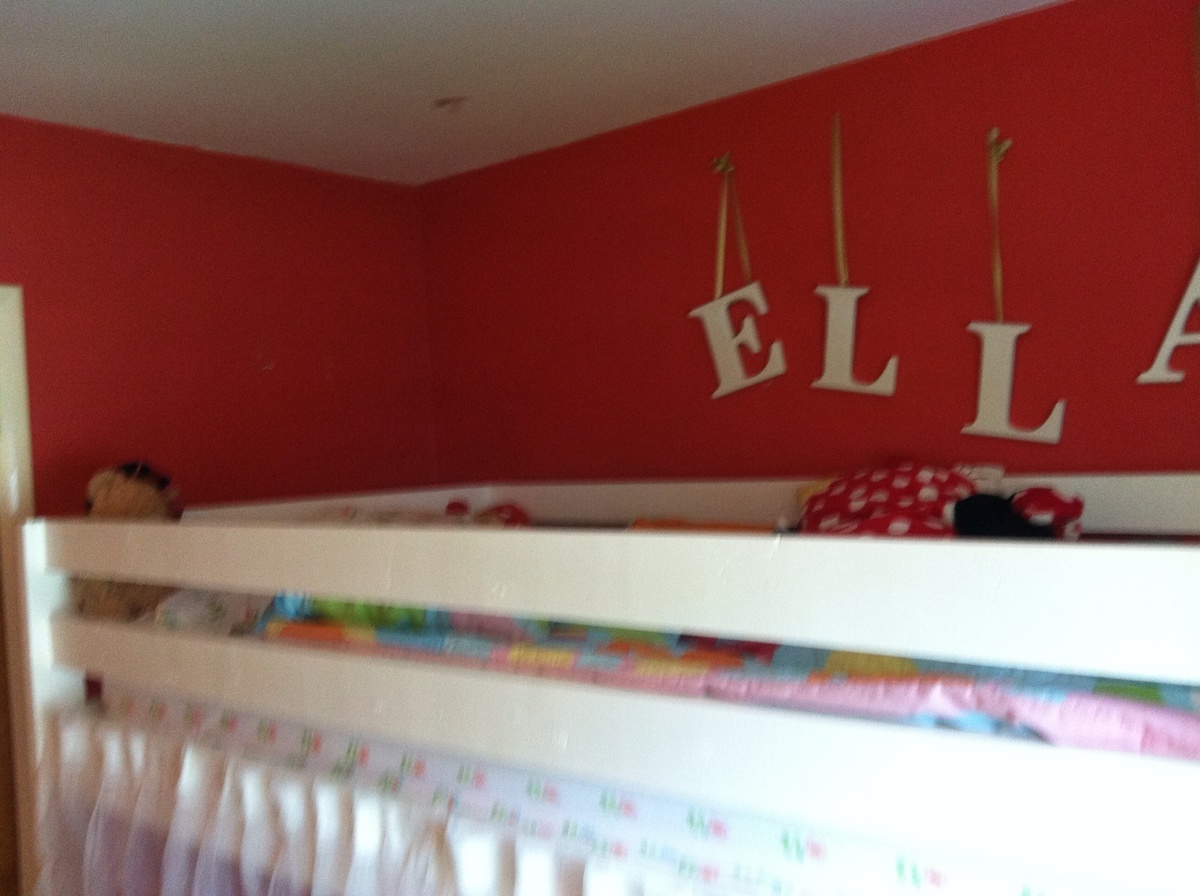
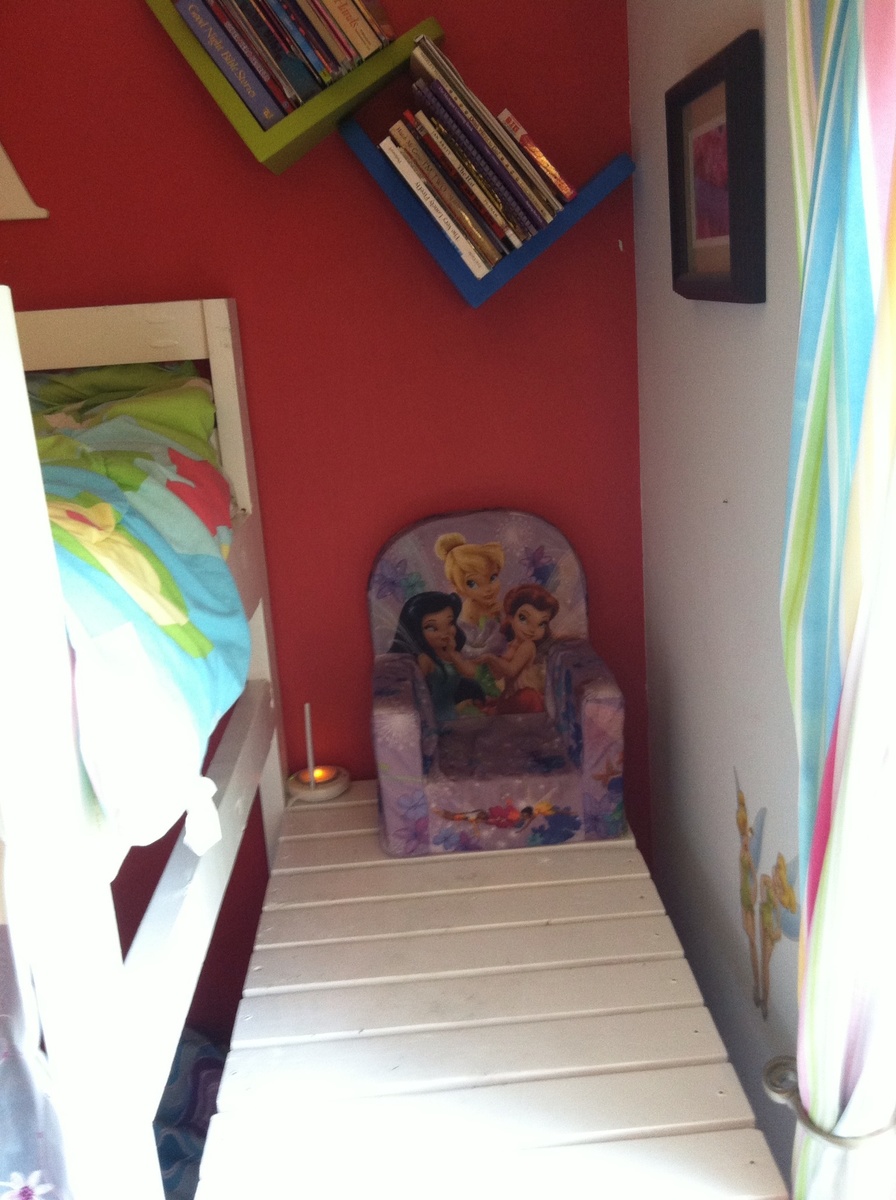
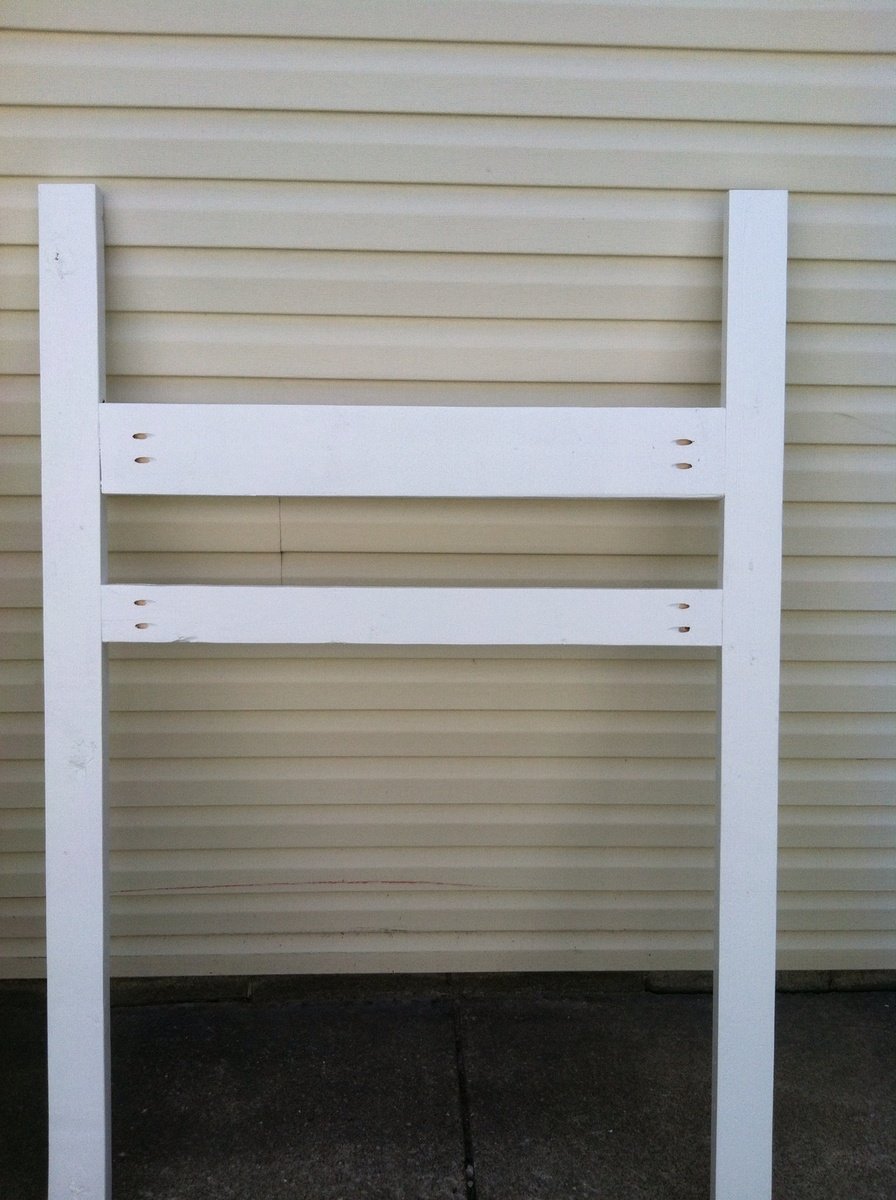
Kentwood Nightstand
Great nightstand/chest made form the Kentwood Nightstand plans on Ana-white.com. Thanks for the great instructions! I would have to add that I needed 5 1x3's to make the top, instead of the noted 4 in the plans.
Thanks again!
Great nightstand/chest made form the Kentwood Nightstand plans on Ana-white.com. Thanks for the great instructions! I would have to add that I needed 5 1x3's to make the top, instead of the noted 4 in the plans.
Thanks again!
Not as easy as everyone else said online. I had never used a kreg jig and it takes a bit more practice than I had patience for. one thing to note is the instructions screw lengths are for if you are NOT using a kreg. If you use a kreg, use the screw lengths they suggest. I used a deck stain and purchased the cushions on sale at Ikea ($22.50 per cushion)
I built this bed to replace one of the kids twin bed. I wanted a solid wooden bed that would be around for a while and I did not wanted to pay Thousands of dollars.
Hi Ana Chris Burt, Belmont NSW Australia
Well, was inspired from your plans on sand pits, so I made a custom one for my first Grandson Brax, it's around 2 meters square. With larger seats etc., was made completely out of recycled pine timber pallets. used waterproof glue, stainless screws and hinges as we live in Belmont NSW which we have lake Macquarie one side ocean on the other so it a battle with salt air. Finished it with a marine clear lacquer. Still lots to do like a pool fence keeps the dogs out and a shade over it. Love your site has great ideas and projects.
After years of pining (HA made of pine) for a farm style plank table, my husband and I worked together to build one. Thank goodness for Ana White. The plans were easy to follow, and with the help of a friend it didn't take long to build at all. This is the first time we have built anything. We have also altered the plans a bit, and my husband built a smaller one for a friend.
I used the Julia Nightstand plans but added textured wallpaper to the side panels and also decoupaged scrapbook paper on the inside of the drawer. The back was wainscoting which was painted the same color as the nightstand (this was a chalk paint). I added a thin support piece of wood above each side of the drawer to prevent it from flipping downward while it was open
When my wife and I moved we sold our old table and was in need of a new one. We've shopped around and didn't like anything we were seeing. She insisted that I build one but I never had any time due to my job. In the past it would've been easy because that's what I did was woodworking. So she researched and came across ana's plan and she loved it. Keeping the wife happy I made time. I made my material list & cutlist but was concerned with using construction grade lumber for the tabletop due to over time it likes to cup and warp in the right conditions. Instead I went with 8/4 Poplar which will make a solid tabletop and last forever. I was only able to work weekends on the project so it was finished in a month which I added the total hours & it equaled 1 week. She loves her new table and is now shopping for 5 canvas chairs to go with it. With her posting on social media I now have requests to build more. Where will I find the time?
Saw plans on here and my girls loved the bed so we got rid of the bunk beds and now they have their own beds. The original plans were for a king or Queen so had to redraw the project out for twin size beds. I had never made drawers before so that was fun. Learned a lot and now onto the next project.
My wife and I built this fireplace wall using Anna White’s plans. We get complements by all that see it!
Keith
I built this storage unit for a bathroom in our new home from Ana White plans in her book, The Handbuilt Home. I had most material on hand, only having to purchase some trim. It was very doable and not difficult.
I decided to make longboards as birthday gifts for some of my other nephews. I had made a regular skateboard prior, but I decided to try longboards this time and I'll probably make one for myself down the road since I'm a bit of a child myself :)
More details and photos on my blog:
http://www.woodworkingfourdummies.com/blog/diy-longboard
Cheers,
Ian
Had a little bit of time to do it
Upsized to a king. Couple of changes:
Mitered all the trim. Routed a rabbet in the back for the plywood panel. I mount to the wall with an offset to clear the baseboard (I attach wood blocks on the back and use adjustable furniture feet for leveling and floor protection.
We purchased an unloved Victorian Farmhouse in 2008 and have been working on it ever since. The latest project is the main bathroom. It started out really small and dark. Like most rooms in the house we had to gut the room and start from scratch and like most projects the cost was much more than we anticipated. We had to come up with some creative ways to get what we wanted on a shoestring budget. Part of that creativity involved building our own bathroom vanity. I knew I wanted marble to compliment the marble floor we installed. I took to Craigslist and found a marble slab for 75 bucks. Then we scoured for plans and made modifications that would work with our ideas and dimensions. We still need to install the vessel sink and the wall-mount faucet to complete the vanity, but we are really happy with what we've created, and I don't think we could have found exactly what we were looking for anyway. I'm so grateful for this site and for the support everyone here offers!
We created the legs out of 3 - 1x3's that we glued and clamped together. We decided on a slat bottom shelf to help with any moisture issues that might happen in a bathroom. The drawers were probably the trickiest part of the build, but my husband says even those were not overly challenging. We just primed and painted to match the custom beadboard my husband also created in the garage. He also replicated and created period moldings for around the windows and doors. Finally, we built a custom built-in medicine cabinet that I will be posting in another brag post.
The bathroom really turned out better than I could have imagined and it was all built using materials from Home Depot - no special orders here!
I combined a bunch of different table plans to come up with this. But essentially I used 4x4 cedar legs, 1x4 pine for the aprons, and 1x10 and 1x4 pine for the top.
My Father and I worked on this table together and had a blast! I was searching for something that I could customize for a long wall in our Family Room and these plans and resulting table were perfect.
Thank you for these really easy, step by step instructions. This was my first ever wood project and did it with borrowed mitre saw and few other tools I had at home. I'm now hooked and already planning my next project, twin beds for my kids.
am thrilled with my new headboard. The plans made every thing about this project FUN and DOABLE. I'm a 70 year old Granma who loves to DIY. SO fun to show my photos of what I did ALL BY MYSELF! THANK YOU FOR YOUR WONDERFUL PLANS! With out them my pretty new headboard would never have happened. WHAT FUN. I mounted an LED picture light fixture on the top for reading in bed and mounted the corded on off extension cord switch to the side of the leg for easy on off ! Again, THANK YOU!
Cheryl King
We modified the Weatherly Sofa plans to fit the 29" cushion covers we found on sale at Pottery Barn, and we filled the cushions with the DIY inserts from Cushion Source. Instead of using 1x2's for the X's, we used 1x3's and my husband spent the better part of an afternoon trying to figure out the angles!
The wood and paint came to about $100, and the cushions were $500 for the inserts and covers (6 cushions and 14 pillows) when all was said and done. A bit expensive, but we love it!
Tue, 07/31/2012 - 08:49
I am surprised at how good white cusions look on white wood. Where did you get the cusions and how did you build the feet?
Thu, 08/02/2012 - 17:03
We got the cushion covers from Pottery Barn during their summer sale and used a 20% off coupon, then filled them with inserts from Cushion Source (DIY section)
The feet were just feet from Lowe's - we just screwed them on!
Thu, 04/11/2013 - 13:07
I'm gearing up to build my own sectional and I'm wondering if you changed any other dimensions besides the ones for the X's. I think it looks amazing and I'd like to know what size lumber you used for yours. Thanks!
Wed, 03/12/2014 - 16:03
I would REALLY like to get these new measurements from you. I like the way this looks better with the 1x3's and I don't trust myself to be able to figure out those new angles. Could you please give me the measurements you used to make these X's out of 1x3's? Also, it looks like you used 3x3's for the posts? And maybe 2x3's for the sides and bottoms of the x's. I'm not sure and I'm dying to know because this is beautiful. I'd like to make it soon. I really appreciate your help. Thanks!
I have been trying to attract more birds. I built and put up some more birdhouses, added a bird bath, and wanted to add some more feeders. I found this quick and easy plan and I had to build it.
This took me less than an hour to build. I bought my picket from Menards when it was on sale for $1.18. That's not a bad price for a bird feeder!
You can see the steps I took to build this on my blog.
http://jaimeofalltrades.blogspot.com/2014/05/make-bird-feeder-for-under…
Sun, 03/01/2020 - 17:05
I can tell just from looking at this wood it was treated with a copper based chemical (note the green/blue blotches) while cedar is a good natural resistant wood these can sometimes be treated a well check for those greenish blotches around the Heartwood lines, chemical won't penetrate the tree sap in the wood and builds up along these lines. *I've worked in the pressure treated industry as a chemical tech for 3 years, and industry as a whole for more than 7.
Comments
mollythebrave
Fri, 05/10/2013 - 21:45
attaching the top?
The instructions I found for this are pretty vague as to what to do with attaching the top-- do the 4 (or 5 as it seems) boards somehow link onto eachother kreg-style? or...? Thanks!