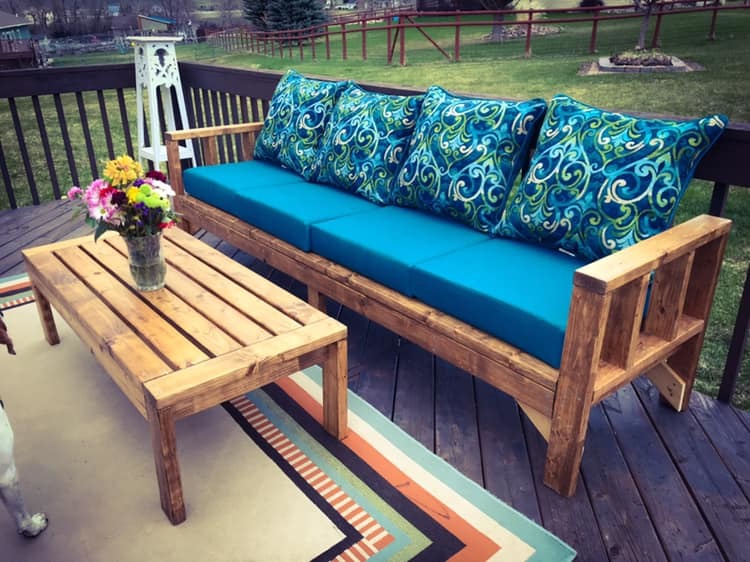
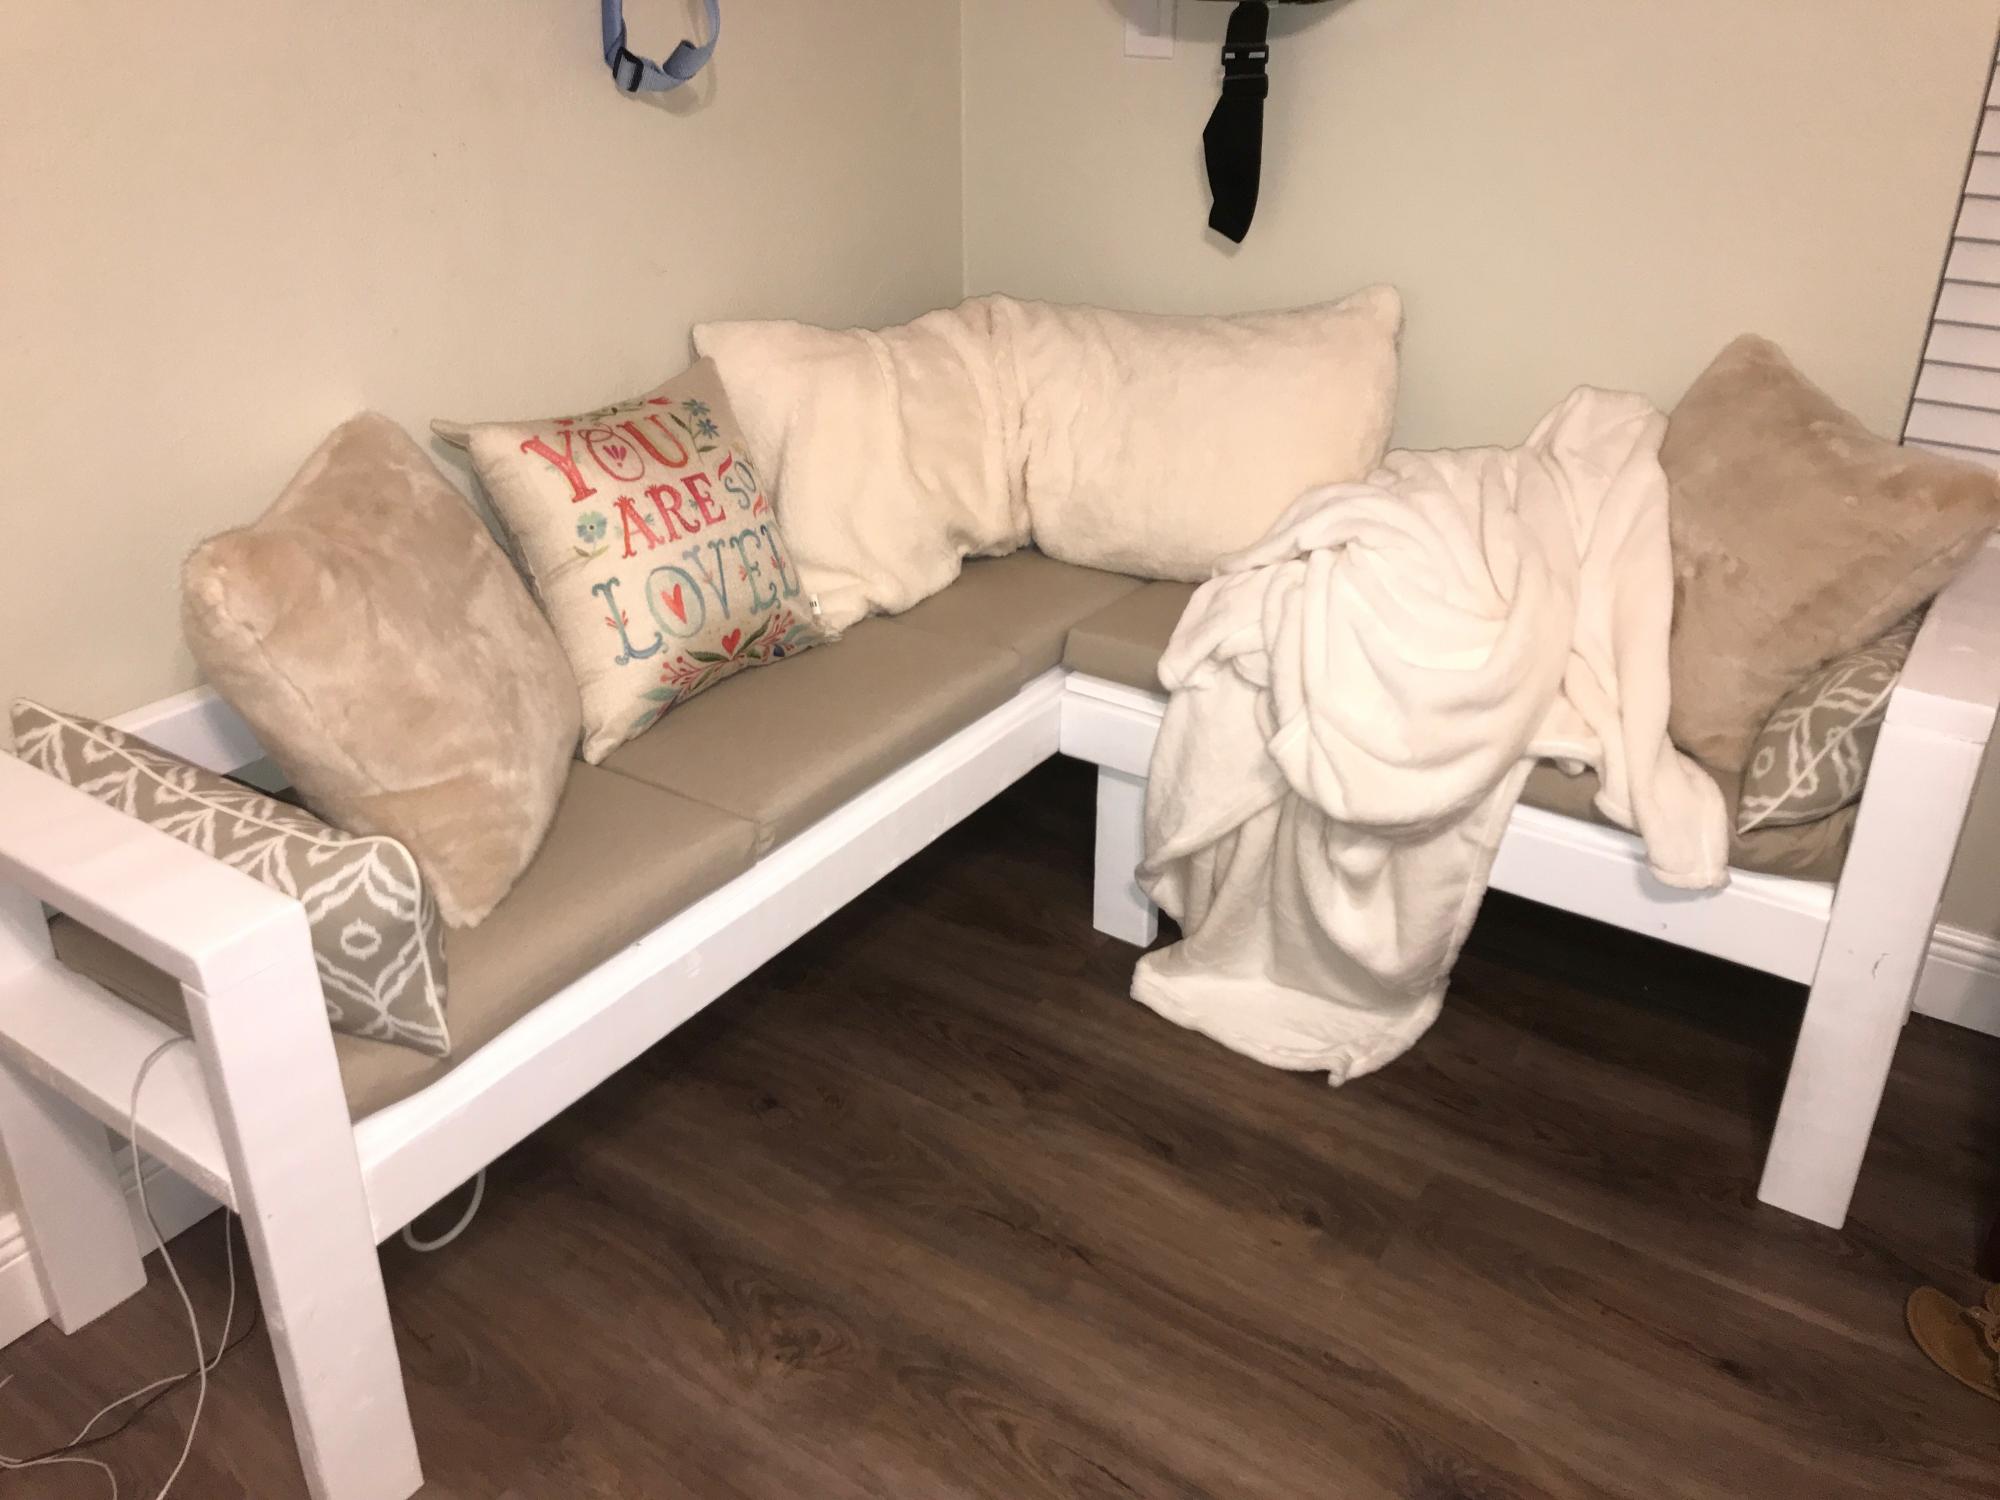
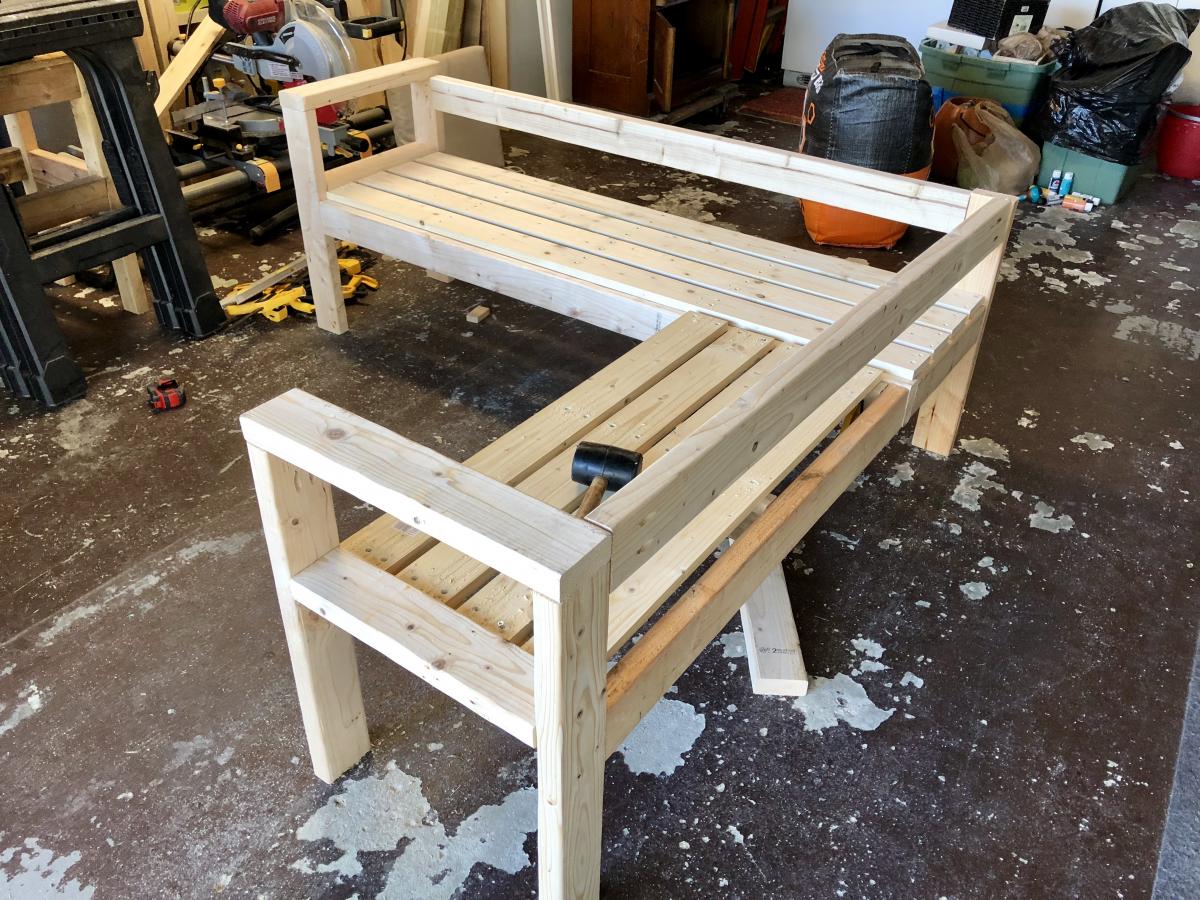
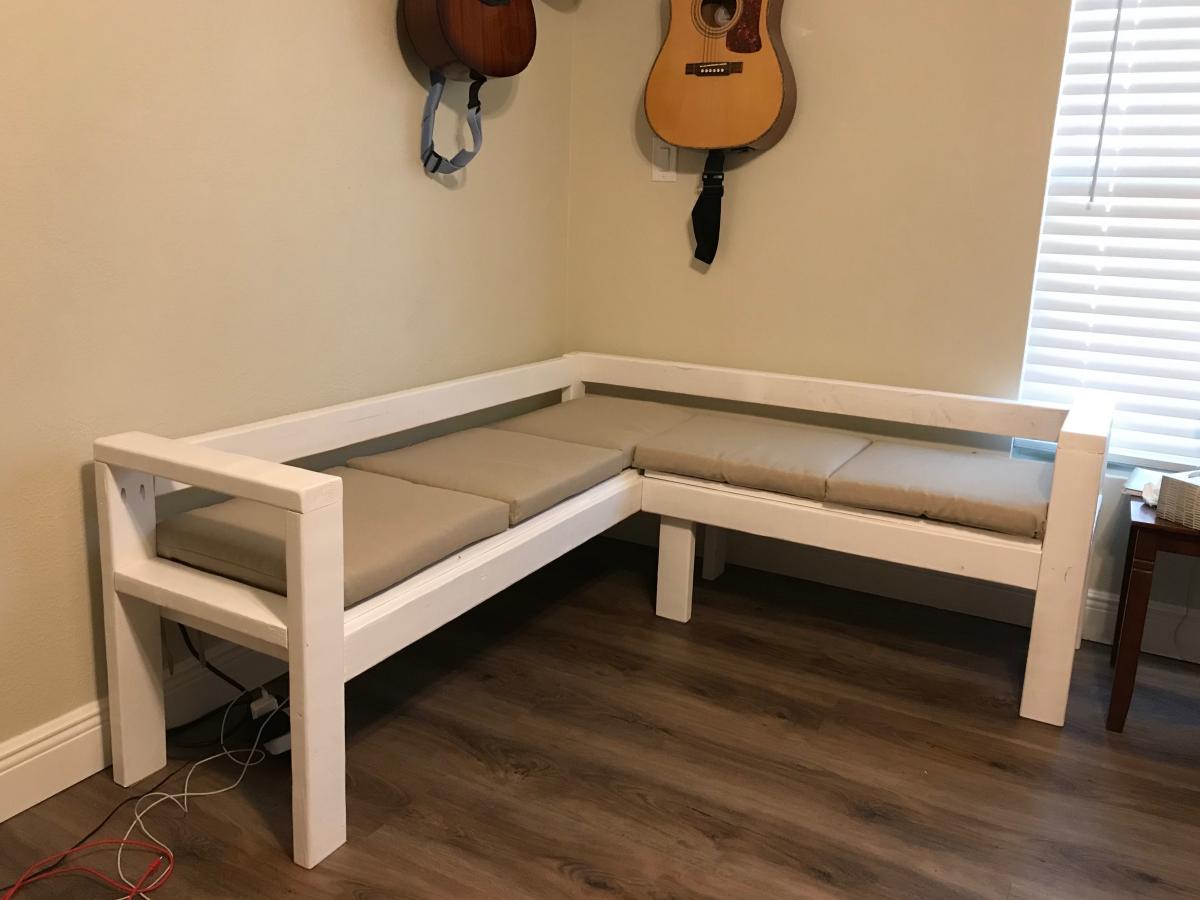
Community Brag Posts

Miter Saw Cart

Submitted by Anonymous (not verified) on Wed, 11/16/2022 - 07:16

I had my mitre saw on a stand I had purchased and it was ok. Hard to move around, but it supported the saw ok. Frustrated over having to drag it around every time I was using it. This cart is smaller than the old stand and easier to move around.

Built from Plan(s)

Comments

Built in bookcase with lights

Submitted by AndyH on Sat, 12/12/2015 - 14:19

Built in bookcase with lighting and power outlets in cupboards for audio and DVD equipment to feed to the wall mounted tv (to the left).

The photo with the lights is when it was unfinished and I also decided that I didn't like the inset doors and so made new overlay ones. Now I have four doors I need to use on another project...

Estimated Cost
$1000
Estimated Time Investment
Week Long Project (20 Hours or More)
Finish Used
Sherwin Williams Pro Classic Extra White Satin.
Recommended Skill Level
Intermediate

Comments

Ana White

Mon, 12/14/2015 - 05:43

Inspiring to see such amazing work!  Love the attention to detail and precision.  Ana

Bown

Sun, 09/10/2017 - 18:45

Did you go by a plan? I'd like to do this but I definitely need a step by step plan.

Twisty Table

Submitted by stacynabby on Sun, 12/20/2015 - 11:48

Saw this clever side table on Pinterest. It's made out of 1 1x8x8. I was able to figure out how to build a jig for the table saw to suit the project and then it was easy peasy lemon squeezy from there.

Estimated Cost
$20
Estimated Time Investment
An Hour or Two (0-2 Hours)
Finish Used
Minwax Light Walnut
Recommended Skill Level
Intermediate

Comments

Seal

Fri, 10/28/2016 - 08:40

I would love to build this unique table, but can't seem to find some actual plans with dimensions and jigs


Seal

Fri, 10/28/2016 - 08:45

Would you please email me the plans for this table. Thanks so much

Simple Farm Table

My mom and o completed this weekend project together! It was so fun to complete! The table is customized to 7ft and the benches made smaller than the original plans so they slide under the table when we’re not using it. We made it for our homeschool room. The kids are excited for this space already and we all have the room we need to get our work done! Under $200 start to finish! I used a prestain to prep the wood and then stained with watco danish oil in a natural finish.

Comments

Work table / desk

Submitted by julkrist on Thu, 05/16/2019 - 13:01

I created this work table by modifying the Beginner Farm Table.  I made it counter height and added a shelf underneath.  It is 5 feet long and the top is five 2x6 boards.  The shelf is 1x6 boards.

I purchased 4@ 2x4s and 3 @ 2x6x10 - I got the store to cut those in half (5' lengths).  I cut the 2x4s on a miter saw.

This is my first project.  It probably took a bit more than 6 hours given I was learning to use the saw and trying to find the tools to do the job.

Estimated Cost
$100 for lumber, screws and Varathane stain & polyurethane.
Estimated Time Investment
Afternoon Project (3-6 Hours)
Finish Used
Varathane Stain and Polyurethane(Mission Oak finish). I sanded the boards by hand and painted the finish with a paintbrush. It was a bit messy and difficult the get an even coat, but that didn't bother me too much as it is meant to be rustic. In future I think I'd prefer a two step process as I think it may be less messy.
Recommended Skill Level
Starter Project

My fireplace

Submitted by Anonymous (not verified) on Fri, 03/24/2023 - 12:59

My wife wanted a fireplace in our main living room, then we added the shelving on each side

Comments

Modern Park Bench

Submitted by Ecorn on Fri, 06/28/2019 - 21:15

This is my second project using Ana's plan. Plans were easy to follow. 

Built from Plan(s)
Estimated Cost
$40 CDN
Estimated Time Investment
Afternoon Project (3-6 Hours)
Finish Used
double boiled linseed oil on bench and milk cans. I lightly sanded the milk cans to keep the patina.
Recommended Skill Level
Beginner
Seasonal And Holiday

Modern Console Table

Submitted by DCecil43 on Mon, 07/08/2019 - 18:48

I built this for one of my friends that gave me the dimensions he needed.  He gave me complete control with the only caviat of needing 2 drawers.  I used Premium Pine from Menards, Minwax True Black stain and Minwax Satin Polyurethane.  This one came out better than I expected!

Estimated Cost
$225
Estimated Time Investment
Weekend Project (10-20 Hours)
Finish Used
Minwax True Black Stain and Minwax Satin Polyurethane
Recommended Skill Level
Intermediate

Pedestal farmhouse table

Submitted by Towboatjs on Wed, 12/04/2013 - 01:33

My wife wanted a farmhouse dining room table for our new house, I wanted to get into woodworking so these plans were a perfect fit. Bonus was adding a few tools to my collection! Revised plans to two pedestals and shortened about 2 feet. If I were to do over I would have stained and poly'd separately, but I tried to save steps because I was finishing inside the house and didn't have time for separate steps before leaving town. Ran into a few hiccups along the way but both my wife and I are happy with the end results.

Built from Plan(s)
Estimated Cost
150
Estimated Time Investment
Weekend Project (10-20 Hours)
Finish Used
Poly shades stain and poly in one, sanded Down to "distress" and then a few coats of wipe on satin polyurethane on table top to resist stains and for easier cleanup
Recommended Skill Level
Intermediate

Comments

Modified Essential Entryway Bench

Submitted by Anonymous (not verified) on Mon, 06/05/2023 - 13:56

Worked with a client to create a boot bench with adjustable shelves. The Essential Entryway Bench was a perfect starting point! I extended the top trim to home the 4” cushion. I love Ana’s plans! Thank you!!!

Built from Plan(s)

Comments

Coffee table and console table

Submitted by Anonymous (not verified) on Mon, 10/07/2019 - 14:07

Made for daughter from your plans,made console longer and a little higher.

Estimated Cost
$80 for coffee table,$60 for console table
Estimated Time Investment
Weekend Project (10-20 Hours)
Finish Used
VarathaneBriarsmoke and wax Cloth application one coat then finishing wax
Recommended Skill Level
Beginner

Farmhouse King Bed - knotty alder and grey stain

This was my first building project! I had so much fun with it ... for a guy that can't even hang a photo on the wall! My dad helped and he had all the tools. I spent a few weekends with him so not only was a good father/son project we had something to show off at the end. I think I've caught the woodworking fever.

Estimated Time Investment
Week Long Project (20 Hours or More)
Finish Used
prestain, weathered oak stain, danish oil finish
Recommended Skill Level
Intermediate

Comments

dentalba

Mon, 12/23/2013 - 12:10

I really like the look of the stain. I would be interested to know what changes you made to the original to achieve this look. Also, where did you find the lumber? I can't find knotty alder around here.

locke1103

Thu, 10/23/2014 - 06:32

Is there a way to find the materials needed and specific instructions on how to make this bed? I LOVE IT!

winnsamuel

Tue, 11/25/2014 - 19:22

Hello,

This is awesome, I've been looking to build a bed frame for my new apartment.  Does anyone know where I can find the plans for this project.

Similar to the person above me, I am new to this and not quite sure what to do.  If anyone can provide me with a little insight to this project I would really appreciate it!


Thanks!

Refreshment center console with barn door

Submitted by calcowoods on Sat, 10/19/2019 - 07:10

My wife and I built this Refreshment Console as a birthday present for our daughter. She had previously purchased a beverage refrigerator and wanted us to adapt it inspired by your barn door console project. Thus, we modified your plan to accommodate the height of the refrigerator. Also, she wanted three shelves with a closed back on the right side of the cabinet. Simply plan adjustments were all that was needed.

Using your plans, material list and excellent video we were able to construct the barn door rails and hangers using 1 ½ inch fender washers which sandwiched three 1-inch fender washers.  The metal bar was sized to fit the top of the cabinet and connected to the top trim board using spacers, washers and bolts.  As we decided to place a middle support for the bar, we added a t-nut into a center plywood partition so that we could use the same bolts, spacers and washers to support the rail.   

As we were following a rustic theme, we decided to add the X Braces to the barn door and used a project panel board as the top. The barn door is guided at the bottom using a simple U shaped metal bracket that we lined with felt for a smooth glide.

Estimated Cost
$100
Estimated Time Investment
Weekend Project (10-20 Hours)
Finish Used
Top, barn Door and Bottom Trim treated with one coat of Varathane Aged Wood Accelerator using a rag to create a rustic brown look.
Cabinet carcass and surrounding trim painted with one coat of Behr Premium Plus Ultra Satin Finish Metropolis Grey.
Entire cabinet finished using MinWax Paste Finishing Wax Natural applied with a rag and buffed for a durable finish.
Recommended Skill Level
Intermediate

Mario Castle Bunk

Submitted by jlholmes80 on Wed, 01/01/2014 - 00:30

So my son needed a bunk bed and we came upon the sweet pea bed. It was too girly for him so we decided to go with a theme that would be timeless, something he wouldn't mind having when he is 18 (or older, he is 10 now). What is better than Mario! (We are a house full of gamers, my 17 year old is super jealous of this bed lol). The build was fairly easy and the plans were straight forward enough, the time consuming part was the painting (without all the painting we could have probably build this in a long weekend). We changed a few things, like not arching the top windows, adding the 4 inch 2x4 squares to the top to give the castle look and stairs are made to look like stairs from the side so we stepped out the banister instead of angling it.

Estimated Cost
500
Estimated Time Investment
Week Long Project (20 Hours or More)
Finish Used
Paint colors were all Behr paint+ primer (mostly eggshell or flat):
New Brick, Black, Polar Bear White, Green Crush, Green Acres, Lemon Zest, Windjammer, and French Silver. Some of the colors (like pinkish tone on the stairs) we created on our own mixing the New Brick and the Polar Bear.

Polyurethane. I mixed regular oil based polyurethane (gloss) with mineral spirits (50/50) and wiped it on. It was remarkably simple and gave it a nice seal/finish. Last coat I used Satin Polyurethane because I didn't want the gloss finish. I opted not to sand between coats because this is a kids bed and I wasn't looking for that "perfect" finish, just wanted some added protection.
Recommended Skill Level
Intermediate

Comments

Mrswhetstone1

Wed, 01/01/2014 - 06:11

This is the coolest bed I have ever seen! I wish I could make this for my youngest. I could probably build it, but I 'm pretty sure it would go downhill when I started painting it. You did an amazing job and your son is a very lucky boy!

jlholmes80

Wed, 01/01/2014 - 16:10

You can totally do it! I am a horrible painter (I'm too impatient) and you can't tell with this because of how forgiving the design ends up being. There is so much going on it's hard to pinpoint the mistakes. :)

jlholmes80

Wed, 01/01/2014 - 16:07

Thanks so much! This was the first thing we ever built (although my husband did a lot of building stuff in his youth we have never done anything together and I was a total beginner) so we are very happy with it. :D I appreciate all the kind words.

amercpina

Fri, 05/03/2019 - 22:00

We are super excited to build this for our 9 year old son. To make this a Full size bed am I correct in thinking that I only need to alter the side panels by adding 15inches? I am paranoid about building it and the mattress not fitting. Thanks so much!

Garage shelves

Submitted by papadog on Thu, 10/31/2019 - 11:46

Added some storage to the garage. Wife got some more room for her canning. Looks much better than older metal shelving. Thanks for the ideas, again!

Estimated Cost
240
Estimated Time Investment
Day Project (6-9 Hours)
Finish Used
None
Recommended Skill Level
Beginner

Poker table with hiding beverage holder

Submitted by jasonr on Mon, 04/02/2012 - 12:48

*I did not have any plans to work from*
the cost really depends on how much you can get your wood for. I had a lot left over from previous projects, so $500 is only a low guess.

This is the second of 3 poker tables built.
Each side is 24"
the table measures 58" across
Some of the accompanying photos of the build were from my first table, but thought they might help.

I purchased a foam pad and "speed cloth" from a local poker supply store. The slide away bev. holders are kept in place with rare earth magnets

If you need any specifics, I'll try to help

Estimated Cost
500+
Estimated Time Investment
Week Long Project (20 Hours or More)
Finish Used
tung oil-
start with a 50/50 mix of turpentine and tung oil and rub into the wood. It will dry fast and absorb quickly. Wipe off excess after 15 minutes (if any). Allow 24 hours between coats. Sand with 220 grit and rub in tung oil with a few drops of japan drier. I add 1ml of japan drier to 40ml of tung oil. Allow oil to sit for 15-20 minutes before wiping off oil. Buff with cloth and allow another 24hrs. Sand with 0000 steel wool and repeat application process. Continue everyday until the desired finish achieved
Recommended Skill Level
Intermediate

Comments

carcreek

Tue, 02/25/2014 - 10:12

If you have plans for this poker table I would love to see them! Beautiful table.

Outdoor Daybed with Canopy

Submitted by Anonymous (not verified) on Sat, 08/26/2023 - 12:27

I built this slightly modified Daybed using 4x4’s for the legs instead of 2x4’s. I really like the solid look the 4x4’s provide. Can’t wait for the weather to get cool enough in the south to sit outside.

Braden Turner

Built from Plan(s)

Live Edge Cubby Bench

Submitted by Anonymous (not verified) on Sun, 09/03/2023 - 20:34

Entry way bench. The top is made from a cherry tree off our property. It was milled into slabs then I had it dry for approx.2 years before the moisture level was appropriate to build this project. I applied resin to the live edge to protect the edge from breaking off and to provide a smooth finish. I applied Walrus furniture oil to complete the top. The base is made from pine wood and the shelving is made out of MDF board.

Mark Gilles

Built from Plan(s)
Back