

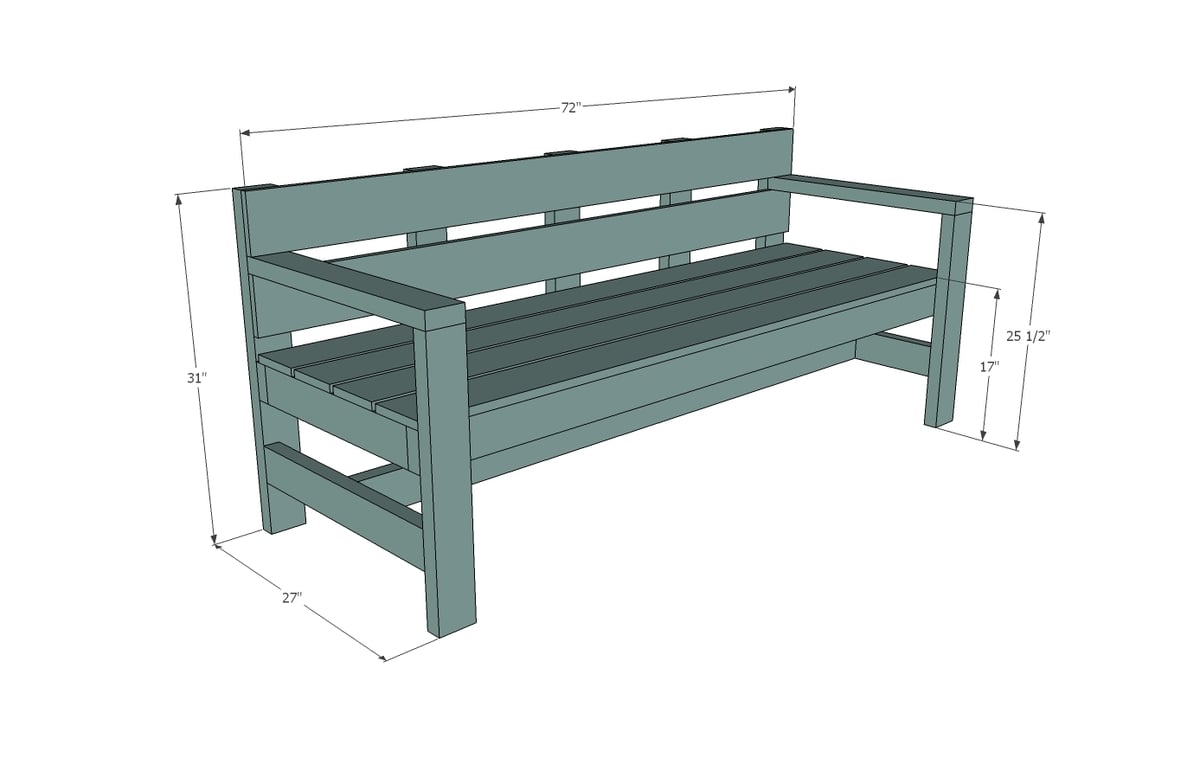
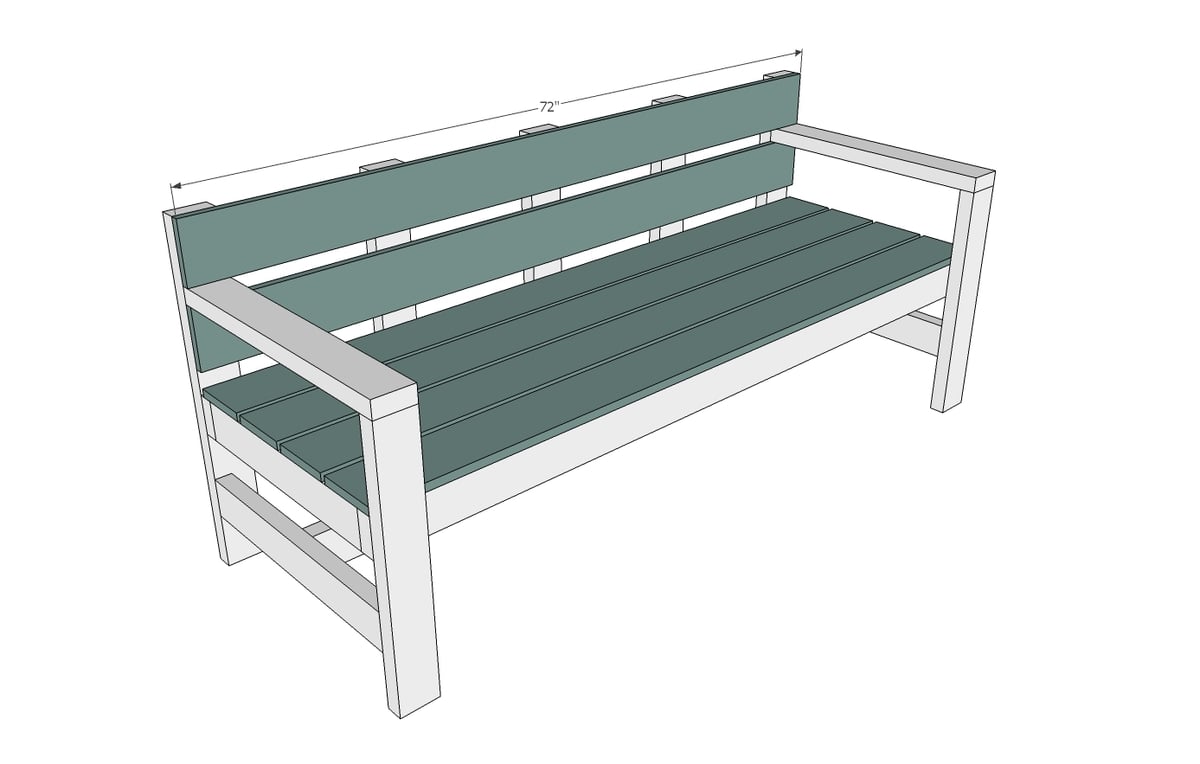
Build your own modern style park bench. Sturdy 2x4 frame, easy to build design using off the shelf materials and basic tools. Free plans from Ana-White.com
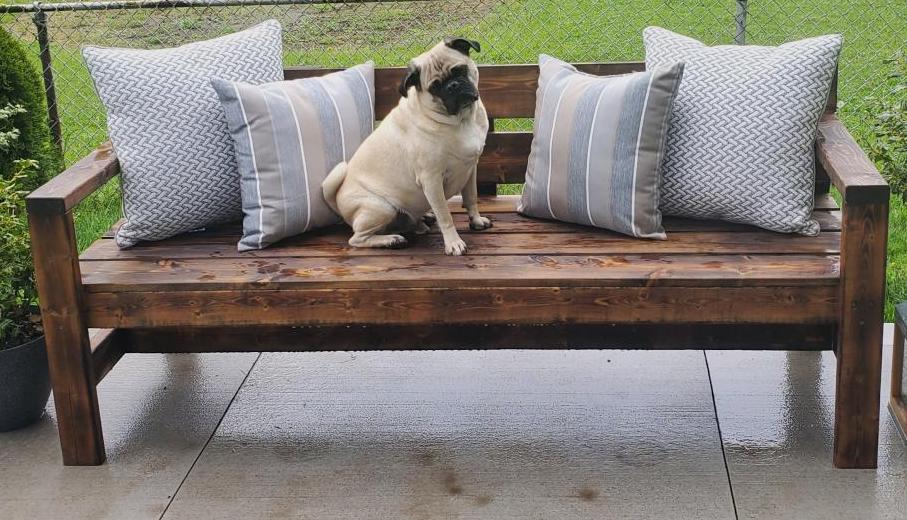
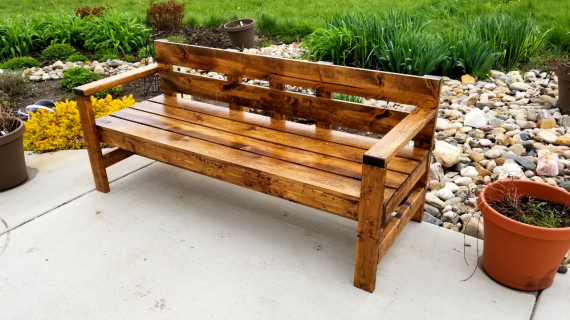
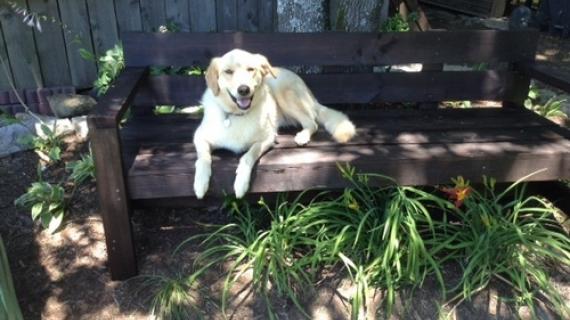
Reader submitted photo by VLCINDIASNY
Modern Park Bench Features
- Simple to build design
- Stylish modern look
- Easy to customize to different lengths and back heights
- Sturdy 2x4 frame
- Ours has held up for 8 years now and we are still using it!

Preparation
- 6 - 1x6 @ 6 feet long
- 7 - 2x4 @ 8 feet long
- 60 - 2-1/2" to 3" long exterior self tapping screws (look for the star bit ones)
- 60 - 1-1/2" to 2" long exterior self tapping screws (look for the star bit ones)
- 2 - 2x4 @ 72"
- 5 - 2x4 @ 21"
- 2 - 2x4 @ 31"
- 4 - 2x4 @ 24"
- 2 - 2x4 @ 25-1/2"
- 1 - 2x4 @ 69"
- 3 - 2x4 @ 18-1/4"
- 6 - 1x6 @ 72"


Please read through the entire plan and all comments before beginning this project. It is also advisable to review the Getting Started Section. Take all necessary precautions to build safely and smartly. Work on a clean level surface, free of imperfections or debris. Always use straight boards. Check for square after each step. Always predrill holes before attaching with screws. Use glue with finish nails for a stronger hold. Wipe excess glue off bare wood for stained projects, as dried glue will not take stain. Be safe, have fun, and ask for help if you need it. Good luck!
Instructions
Step 1
Wood glue is recommended at all joints.
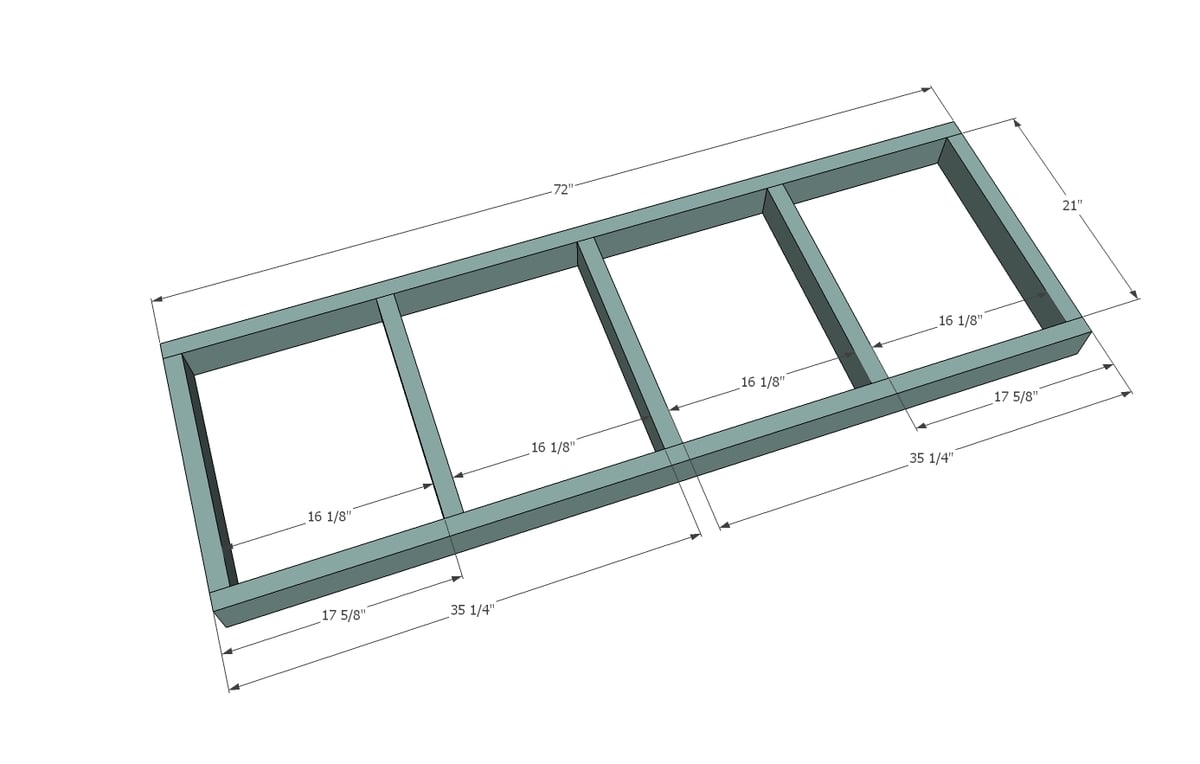
Build the basic seat frame of the swing first, using the longer screws, two screws per joint.
Step 2

Next, add the legs to the seat frame using the longer screws, three screws per joint.
Step 3
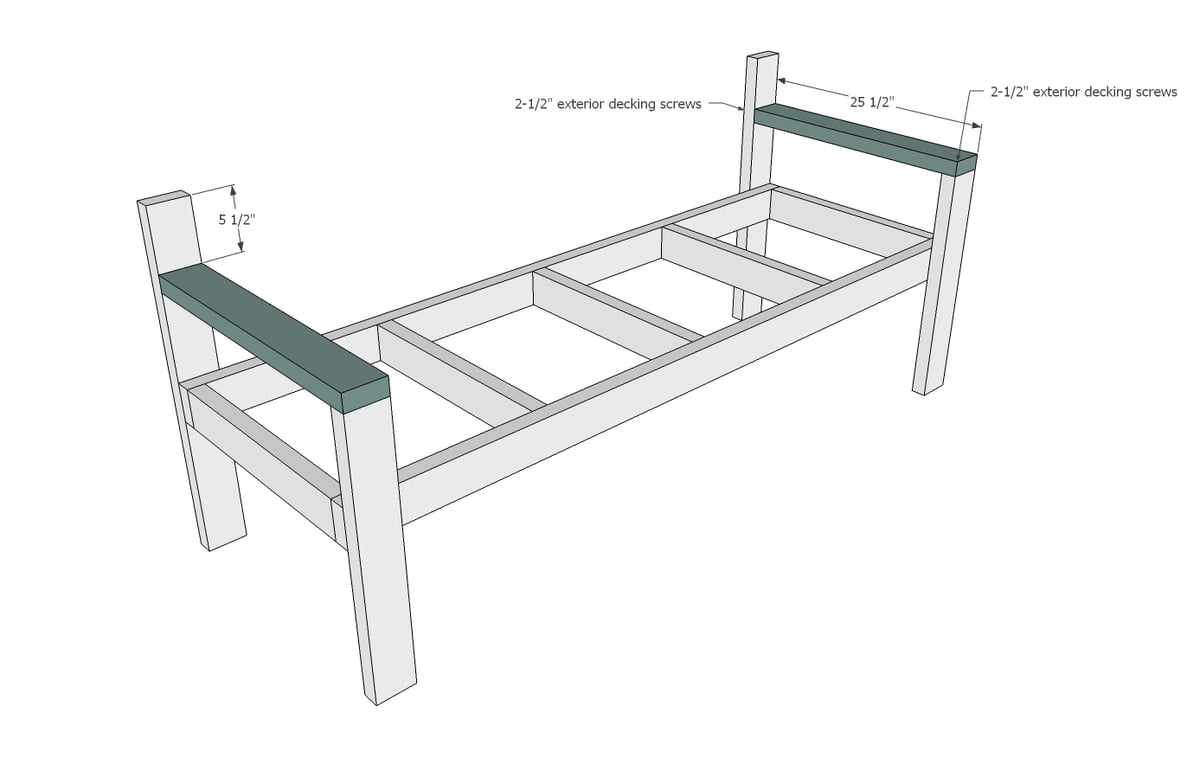
Then add the arms on top of the shorter legs, and then tie into longer back legs, using the longer screws, two screws per joint.
Step 4
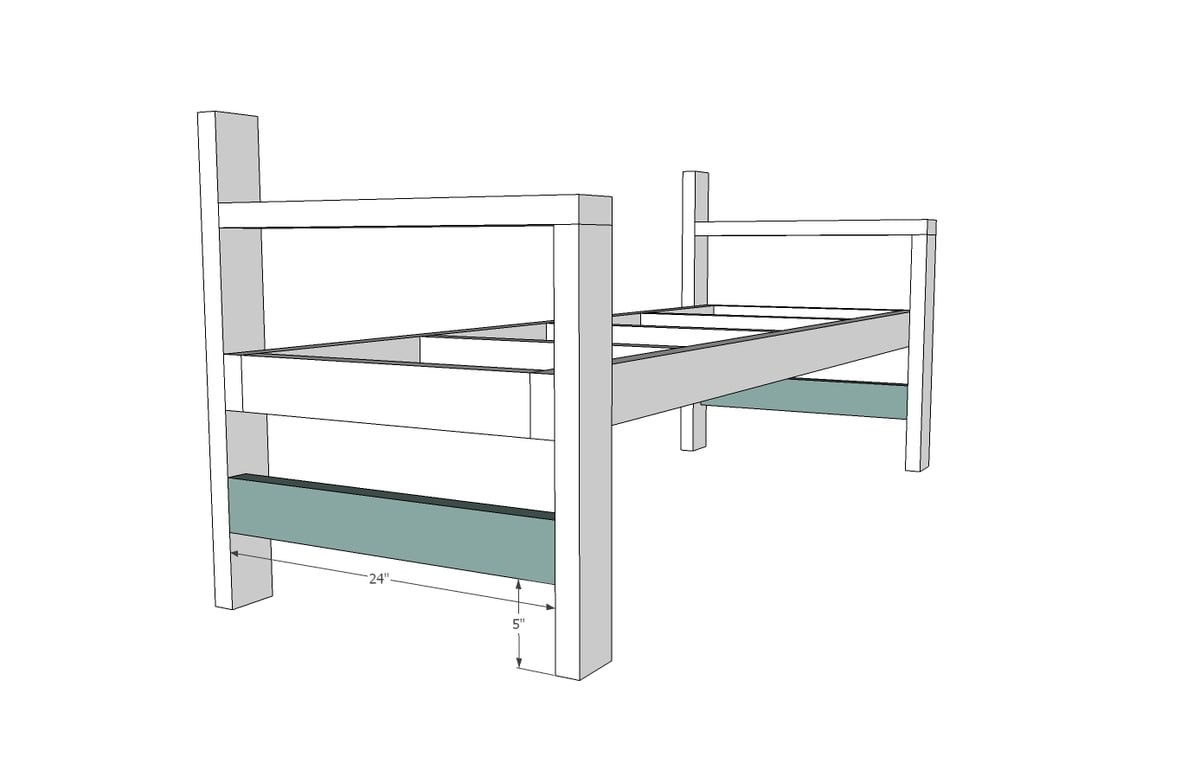
Add the shorter stretchers between the bottom legs - this will help keep the legs from splaying out. Use the longer screws, two screws per joint.
Step 5
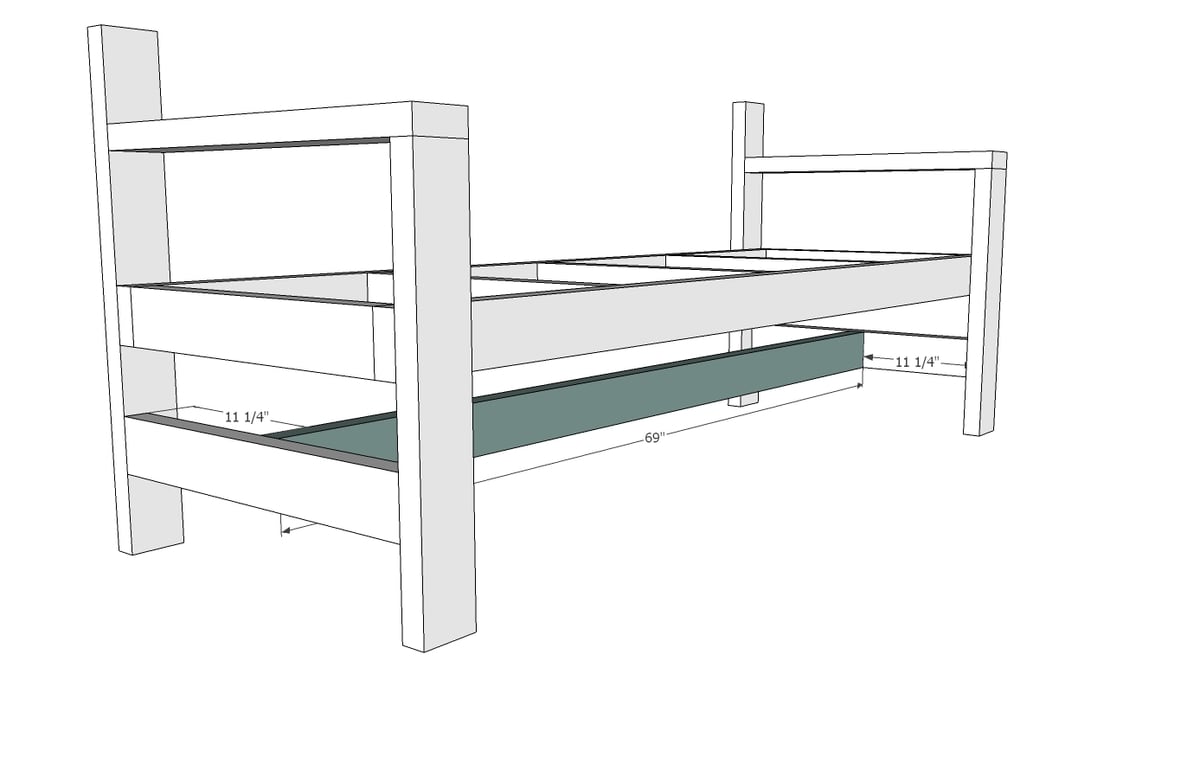
Attach bottom stretcher between legs, centered, and attach with two screws per end, using the longer screws.
Step 6
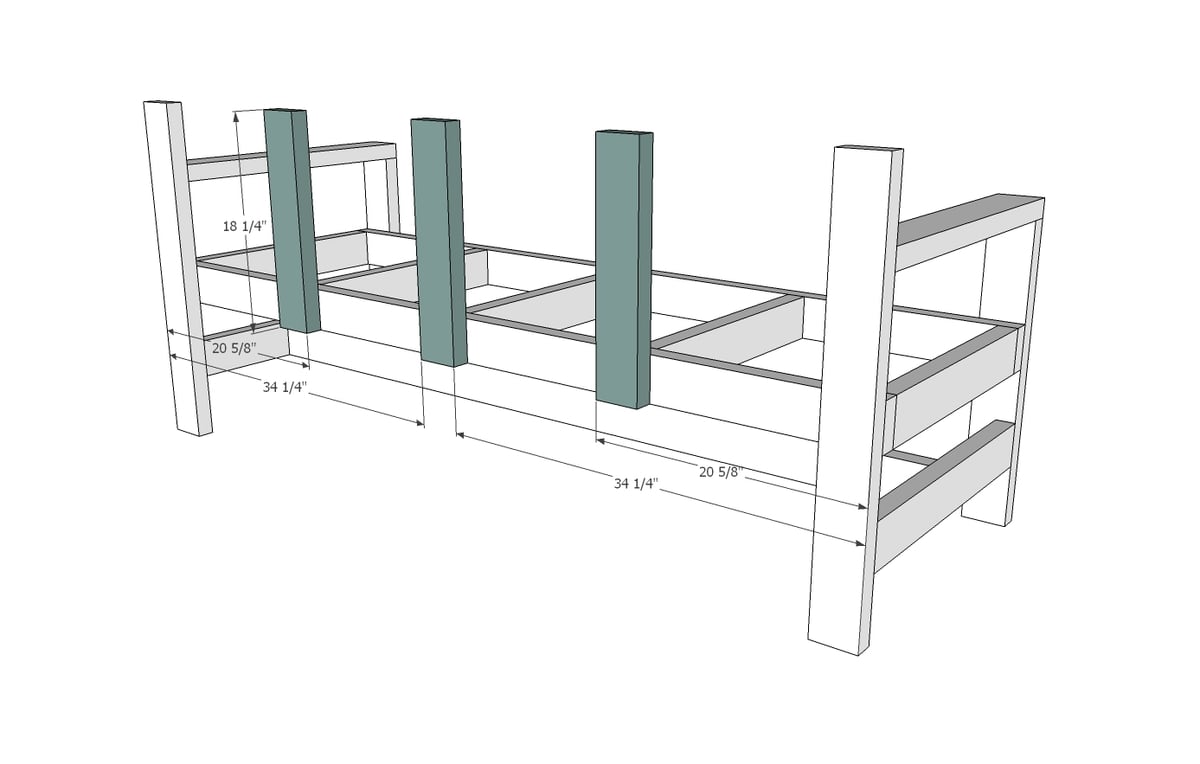
Attach backrest supports with the longer screws, two screws per joint.
Step 7
Lay out the seat boards on top of the bench and attach with the shorter screws, two screws per joint.
It is always recommended to apply a test coat on a hidden area or scrap piece to ensure color evenness and adhesion. Use primer or wood conditioner as needed.
Comments
potterbrock0131
Mon, 06/02/2014 - 15:08
bench
Love the plans.. just have one question if u don't mind, I know its kind of off subject but where or what software do u use to make these plans in the form of step by step as u do... I have a few plans I would like to post to u but just don't know how to get them from paper to the format u use... I am just a little computer illiterate lol!!!!
Ana White
Mon, 06/02/2014 - 15:13
Hi Brock - I use Google
Hi Brock - I use Google Sketchup for plans. It's free and pretty easy to pick up. Can't wait to see your plans! Thank you. Ana
spacesculpt
Thu, 06/05/2014 - 11:46
Love it
Ana, we love your posts! The plans are always easy to follow and the designs are for creative and useful items for the home! Keep it up!
shmuel
Wed, 07/30/2014 - 11:30
Paint
Hi,
This is the second bench i am building based on your plans. Great work.
How do i place the screws in the frame in order for me to have room to put in screws to connect the 1x6 to the frame?
What do you recommend for painting cedar wood?
Thanks,
Shmuel
TISCH
Tue, 03/23/2021 - 04:47
Your name
Shmuel, my name is Steve but my Hebrew name is Shmuel. Are you Israeli? Just curious. I’ve never met anyone else with that name before.
NATASHASALAZAR
Thu, 01/22/2015 - 14:00
cut list
In the cut list, it states to cut 5 - 2x5 @ 21"
Am I safe to assume that it was supposed to read "2x4" .... since I did not see any "2x5" in the shopping list.
Ana White Admin
Thu, 01/22/2015 - 17:55
Yes
Yes 2 x 4's, thanks for bringing this to our attention, fixed now.
pjune
Mon, 04/06/2015 - 11:19
What type of wood did you use
What type of wood did you use? Pressure treated or pine?
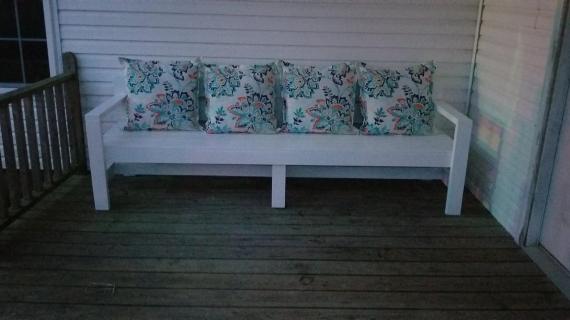
Caren_bluejeans
Mon, 05/11/2015 - 09:10
Nice, big bench
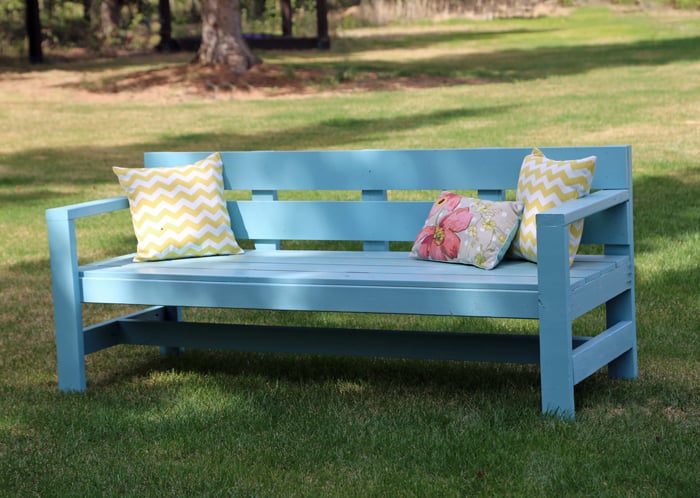
I built this lovely, modern park bench the weekend. The only adjustment I made was to make the legs out of 4x4s. I like this plan because it's all straight, right angle cuts, a one day project, which I tackled by myself. I'm definitely getting more comfortable with the miter saw. The wood cost under $50. I plan to paint it with primer, then white exterior paint, both of which I have around the house. Stain would be beautiful, too. If I had to do it over again, I would paint all the pieces before assembling. And I wish I had a brad nailer; it would make attaching all the slats go much faster, and would have to fill as many screw holes.
clntemp
Tue, 01/24/2017 - 03:02
Alternative design
Hi,
Thanks, this looks great.
Can this be built without the arm rests? This would mean the 24" front legs would only go up to the height of the seat frame. Would this alternative design work or would the back rest and front legs start to splay out?
I could add small 90 degree metal brackets for support unless you have an alternative suggestion?
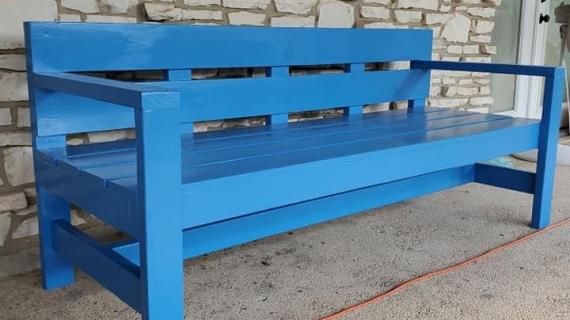
kuipers adventures
Sun, 06/02/2019 - 09:23
Just got done with this…
Just got done with this bench looks great and is super solid!
https://www.youtube.com/watch?v=gWBqzHsbDMc
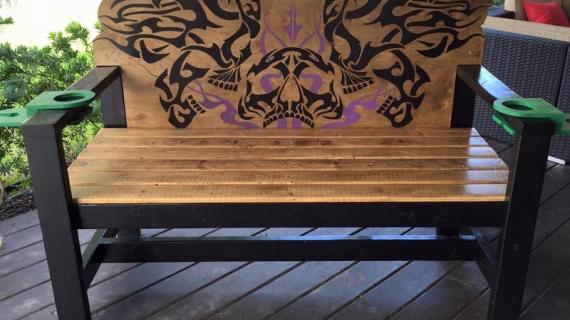
ethan.schorer
Tue, 07/14/2020 - 23:24
Widen the Armrests
I had built something similar to this. My main change to such plans is to widen the armrests. I used a 2x6.
This gives enough space to put down a tea pot, a small plate with cookies, and more - without anything falling off. I highly recommend this.
See the picture at: https://pin.it/14IeK9n
dmj0301
Wed, 09/23/2020 - 07:40
Garden Bench
Completed this project and love the sturdiness of this bench.
heats82
Fri, 02/26/2021 - 06:40
Hi Ana, How wide are your 1…
Hi Ana, How wide are your 1 by 6? I've seen ones that are 140mm and 150mm. Thank you!
Casual@5467
Fri, 03/05/2021 - 12:22
Hi Ana. I just have a…
Hi Ana. I just have a question. What is the spacing between the seat boards? I'm guessing a 1/4inch?