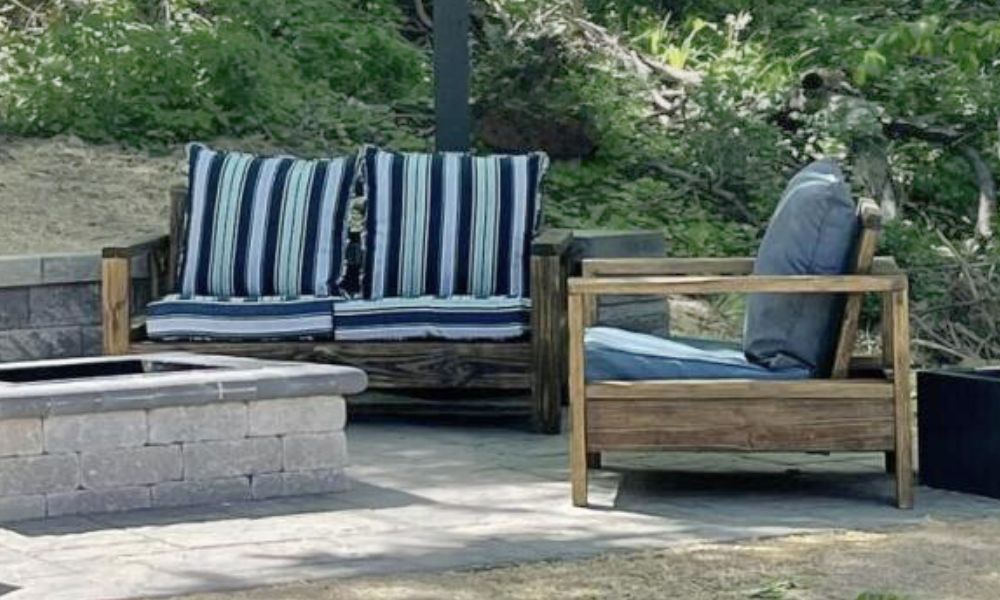


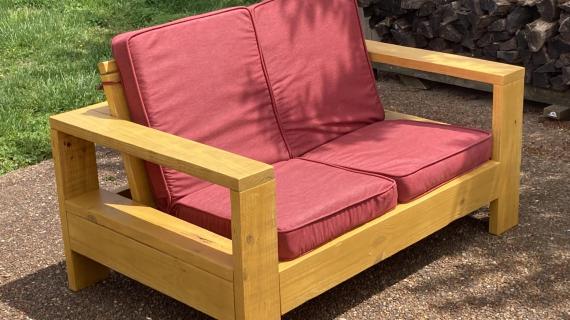
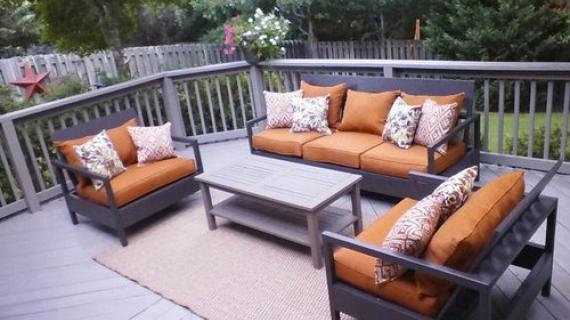
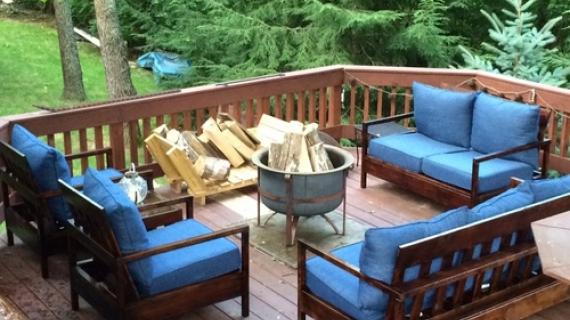
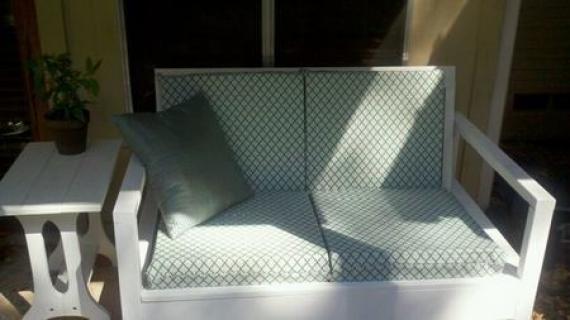
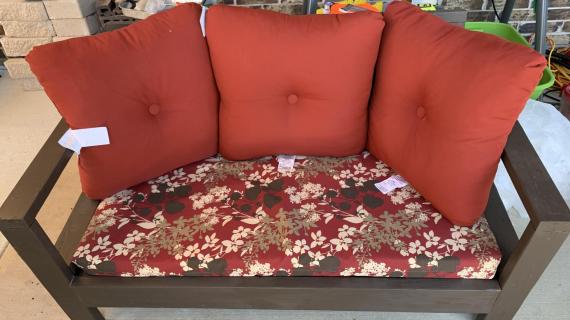
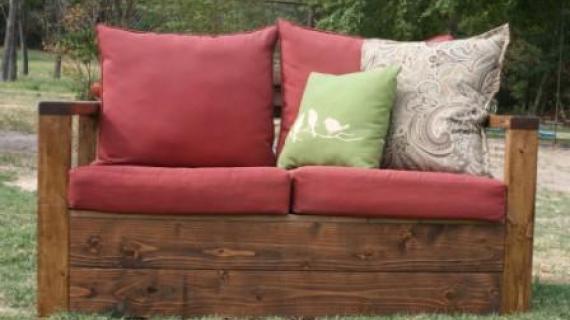
Build your own outdoor loveseat. Our free plans make it easy!
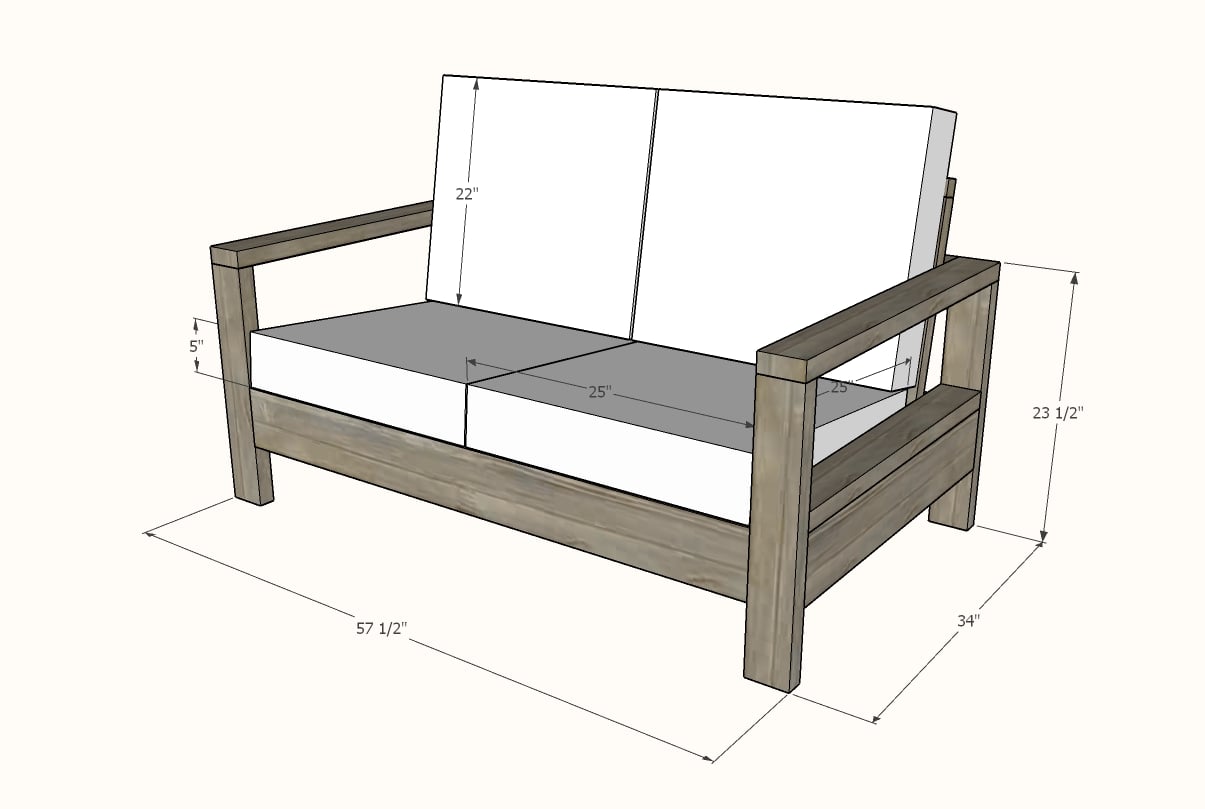
Loveseat has a reclined seat and back and wide armrests for ultimate outdoor comfort. Sturdy 2x construction. Works with standard 25" x 25" deep seat cushions.
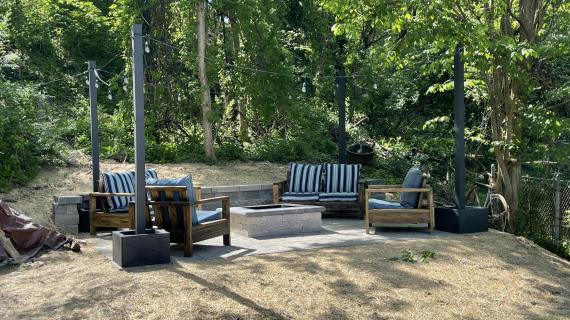
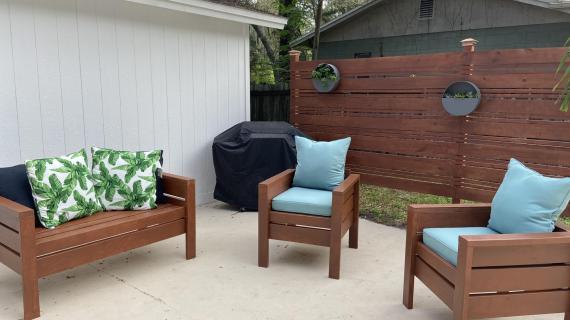
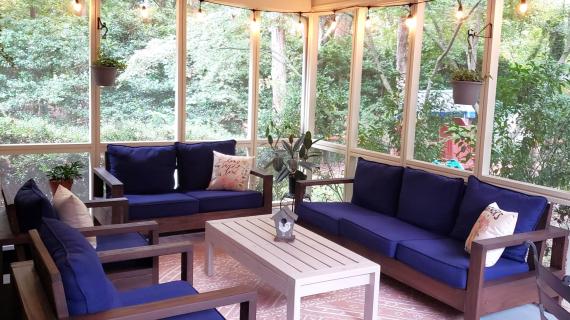
Also check out our matching Outdoor Chair and our matching Outdoor Sofa.
Preparation
- 5 - 2x4 @ 8 feet long
- 3 - 2x6 @ 8 feet long
- 3 - 2x2 @ 5 feet long
- 2 - 1x4 @ 8 feet long
- About 50 - 2-1/2" self tapping exterior wood screws
- About 50 - 2-1/2" Kreg Screws, exterior grade
- About 20 - 1-1/2" self tapping exterior screws
- 4 - 2x4 @ 22" - legs
- 2 - 2x4 @ 34" - arm rests
- 2 - 2x4 @ 31" - arm supports
- 2 - 2x6 @ 31" - arm supports
- 2 - 2x6 @ 50-1/2" - bases
- 1 - 2x4 @ 50-1/2" - back
- 1 - 2x2 @ 50-1/2" - back rest top
- 6 - 2x4 @ 23-3/4" - back slats
- 1 - 2x6 @ 54-1/2" - back base
- 2 - 2x2 @ 54-1/2" - seat slat cleats
- 8 - 1x4 @ 23-1/2" - seat slats


Instructions
Step 1

Drill two 1-1/2" pocket holes on top of each of the legs.
Attach to the arm rest from underneath with 2-1/2" pocket hole screws.
Leg is shown upside down.
Step 2
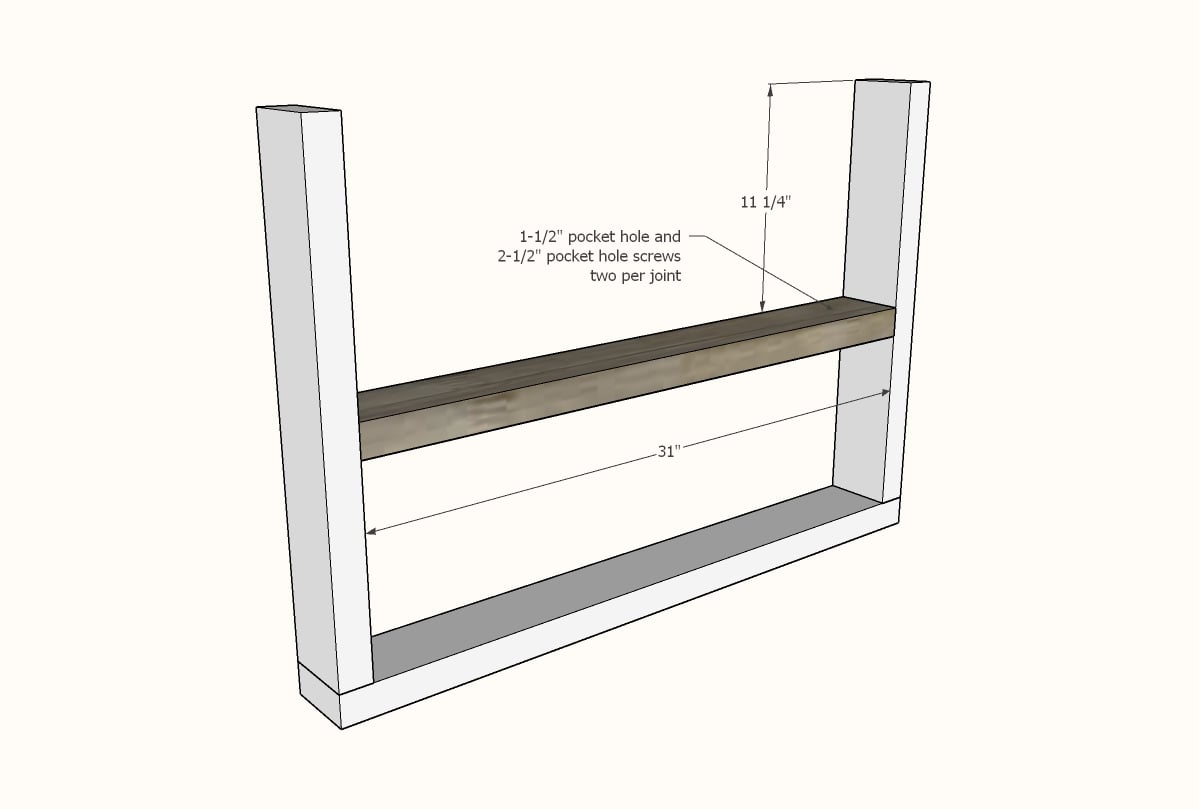
Drill two 1-1/2" pocket holes on each end of the 2x4 side supports.
Attach to the insides of the legs with 2-1/2" pocket hole screws.
Leg is shown upside down.
Step 3
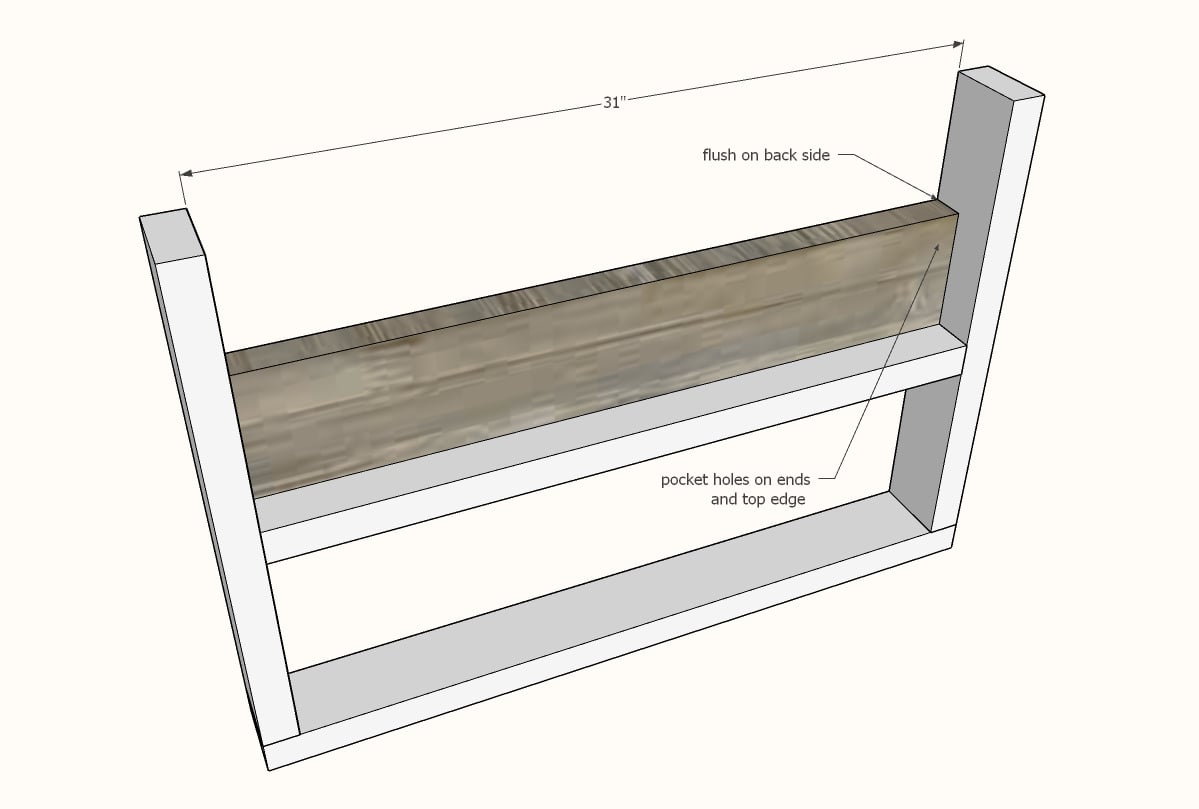
Drill two 1-1/2" pocket holes on each end of the 2x6 end aprons. Also drill two 1-1/2" pocket holes along one edge.
Attach inside the leg, flush to the outside, pocket holes hidden on insides, with 2-1/2" pocket hole screws.
Leg is shown upside down.
Step 4

Drill two 1-1/2" pocket holes on each end of the 2x6 and 2x4s shown.
Attach with 2-1/2" pocket hole screws to the legs, all pocket holes are on the insides, or facing downward.
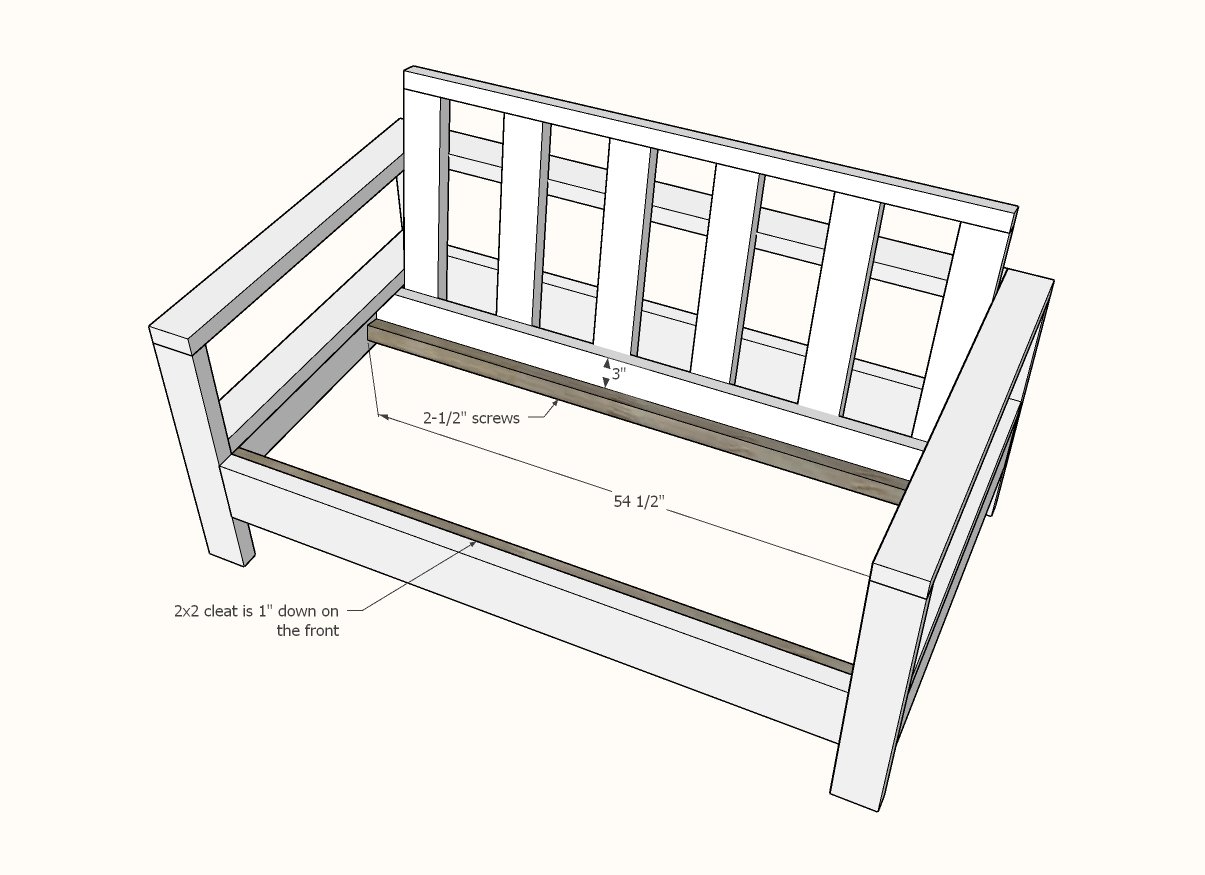
Step 5

Attach the back slats to the top 2x2, spaced evenly in between. Start on the outside and work inward. Attach with 2-1/2" self tapping wood screws.
Attach to base with 2" overhangs on each end, keeping spacing same and slats paralllel.
Step 6
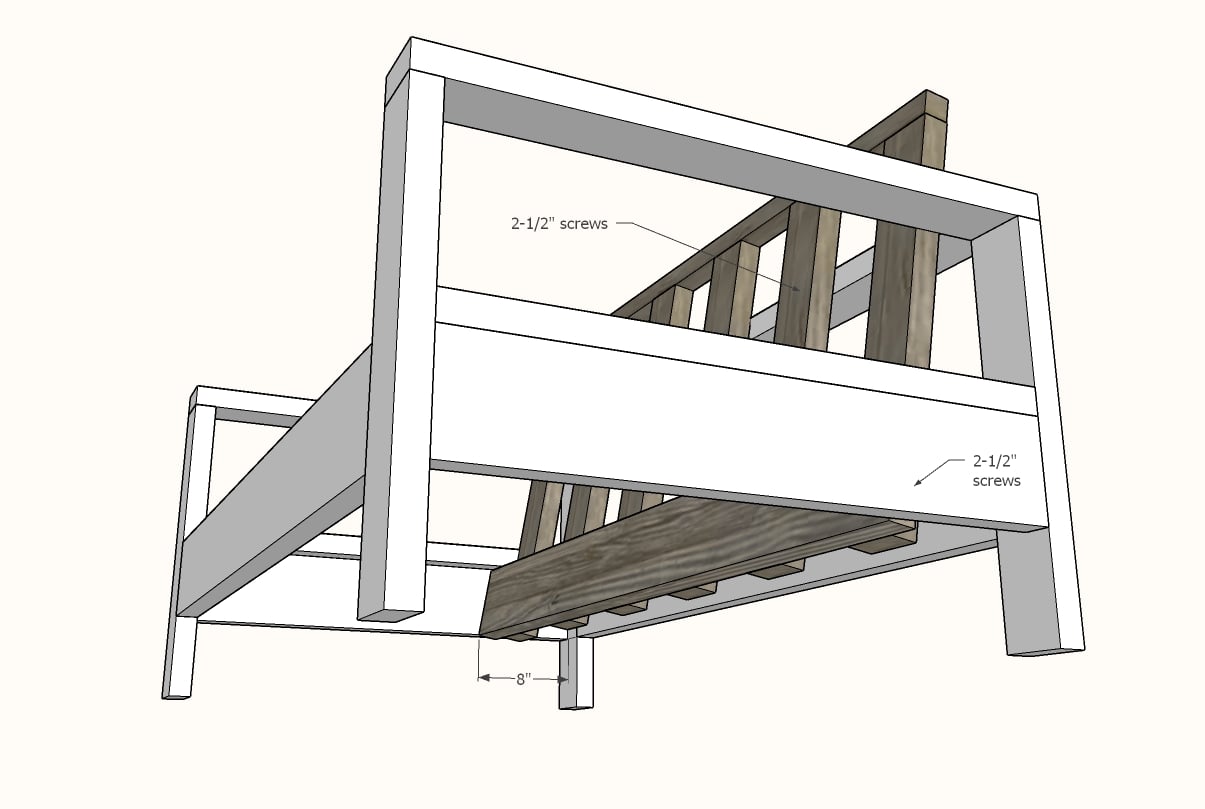
Place back inside seat frame and attach to sides and the back with 2-1/2" screws.
Step 7
Add 2x2 cleats inside the seat frame with 2-1/2" self tapping screws.
Step 8

Place seat slats inside the loveseat and screw down with 1-1/2" screws. Only one screw is needed per joint.

Comments
emmarosemc
Thu, 06/09/2011 - 07:37
Too hot to make this right
Too hot to make this right now, I vow to have the entire set built by next summer though, I might wanna learn how to sew too...
Ana you always know how to fill up my to do list! And thank you for that, Im much more useful than Ive ever been
Chair
Thu, 06/09/2011 - 11:53
Two Words:
HELL YES.
ferbit
Mon, 06/20/2011 - 14:27
Love the 2x3's on this
I think it looks really great with 2x3's! Thanks for the modification! Heading down to a cedar lumber place to see how much it's going to cost! :) I'm going to start with a the chair (using 2x3's for the arms) and see how it goes! :) I'd love to make the whole set... if I can afford it!
Thank you Ana!!!
Rolando Pimentel
Sun, 07/31/2011 - 05:12
Simply brilliant
The Kreg Jig would realy make joining easier and true.Gotta have it.
louiety
Wed, 08/24/2011 - 16:35
IM GOING TO BUILD THE WHOLE
IM GOING TO BUILD THE WHOLE SET FROM THE CHAIR TO THE COFFEE TABLE
Guest (not verified)
Fri, 09/02/2011 - 09:13
Question on Modifying
I am hoping to attempt at modifying slightly into a small sectional (building 2 of these and L shaping them together) one side of each will not have an arm rest so they will join together in an L - if that makes sense lol.
I also want it a little more simple and was thinking of not doing the back rest portion w/ the slats(step 9)...Do you think I need to modify the height of the arms? Or should the back be fine at 23.5" in height? I wasn't sure if it was high enough to support sitting comfortably. I think once cushions are on it will work, but wanted to ask. Sorry if I don't make sense.
Thanks so much! LOVE all your stuff on here and have a list of things I want to make :)
Abigail Bowne (not verified)
Thu, 10/27/2011 - 13:53
Question for Ana in mid-build
Hi! I have this half built and have a question on attaching the last step. How exactly does the back of the loveseat get attached to the base? I can't seem to find that in the plans. I must be missing it somehow.
thanks! abs
In reply to Question for Ana in mid-build by Abigail Bowne (not verified)
herzo1852
Tue, 04/09/2013 - 19:13
When printing the Loveseat plans, go to the Sofa plan too!
And print out the last page telling you how to attach the back part!
sgilly
Thu, 10/27/2011 - 14:36
Plans for the sofa
Hi: I checked for the sofa plans and sure enough, the steps to attach the back are shown in those plans. I think if I were making this, I might also put a cleat for the back to rest on, in addition to being screwed in.
http://ana-white.com/2011/06/simple-white-outdoor-sofa
Abigail Bowne (not verified)
Thu, 10/27/2011 - 15:01
Thanks! I'll look there
Just a side note for anyone else making this- the "cuts" list the back piece as 48 inches across but the diagram (and I believe the final correct length)is 46 1/2 inches.
Great to put together- enjoyable project!
-abs
In reply to Thanks! I'll look there by Abigail Bowne (not verified)
herzo1852
Tue, 04/09/2013 - 19:15
48 inches is the correct size.
The 46.5 refers to the width up to the final inch and a half if you look at the diagram closely. If you made it 1.5 inches narrower it would barely notice anyway!
Craig Gooing (not verified)
Sat, 10/13/2012 - 13:33
Just Built This
My wife and I picked out a cushion for our back porch loveseat before we even knew what we wanted to build and I just figured I'd design something around the cushion. Fortunately I found this design and it was the exact size of the cushion anyway! I modified it by changing the outside 2x3's to 2x4's for a wider armrest and I used 1x4's instead of 1x3's because Home Depot and Lowe's didn't have much in the way of 1x3's in PT pine. I picked up a pocket hold jig at Harbor Freight (instead of the Kreg brand) and it was all metal and $30 cheaper. It worked great! I have never used pocket-hole joinery before but now I am hooked! Total build time for me was about 5 hours and I really enjoyed it. I'll stain in when the lumber dries out a bit in three weeks or so. I'm also making decorative side panels with a scroll saw pattern soon to fill the gap between the armrest and the apron on the sides. Thanks for a really great pattern, it was fun and fairly easy to build and it fit our needs exactly!
Virginia (not verified)
Sun, 01/13/2013 - 17:17
Hi, I just discovered your
Hi, I just discovered your website and love all of your furniture plans. My husband and I are planning on making this loveseat this weekend and were wondering if it is possible to make it without a kreg jig? This will be the first piece of furniture either of us has ever made, so we're not even sure what a kreg jig is or how it works.
In reply to Hi, I just discovered your by Virginia (not verified)
herzo1852
Tue, 04/09/2013 - 19:17
Did you ever make the loveseat?
I was wondering if you made it with screws of the Kreg and how it turned out. I'm just about to start making it tomorrow!
herzo1852
Tue, 04/09/2013 - 19:10
Just made the coffee table in 4 hours today!
Wow, the Kreg Jig Master System is AWESOME - got mine from Lowes - it's online too just google the name. Well worth the money - had no idea what it was but the way it joins things is genius. The best part from the matching coffee table perspective is the whole of the slatted top section is screwed from underneath, so the tabletop has no ugly screws. Will post a photo once the sofa is done - making 2 of them in loveseat size - going to be dark brown and red cushions. You can make all of this with screws etc. But the Kreg jig means no pilot holes, just line up once the holes are in the joining piece and join together strongly, with ease. Seriously, I should get paid by Kreg, but go to their website and watch some of the videos or watch on Youtube. The ways you could use this thing are endless! The 4 hours to make the coffee table includes going to Lowes to buy the wood, cutting it, using the Kreg jig for the first time to drill the holes, assembling it and sanding it. I don't include the painting part, haven't done that yet!
herzo1852
Tue, 08/13/2013 - 14:16
Finally got around to building it all!
I built 2 love seats and then 2 tables - first table I built way back in April at the 2x3 ft size, but decided it was too small. Then got hung up with other work so didn't start again until late July - so now have 3x3 ft coffee table and 2 4ft love seats and they are great! Thanks so much Ana, all up this cost me around $300 - the set I saw that was similar was $1500 - you saved me 80% and I had fun building all of it too! (Can't say the staining and polyurethaning was fun - it was NOT!).
wishingbee
Sun, 09/01/2013 - 12:46
1x4, 1x6 missing from shopping List
For those of you embarking on this build, be aware that the 1x4 and 1x6 are not listed in the shopping list, so you'll want to be sure to pick those up. Happy building!
neile66
Mon, 02/29/2016 - 22:32
Question about angle of slats
Hi. First of all, I love your site! I have made the helping tower and the stackable chairs and am a very beginner wood worker. Your plans and explanations are perfection, so thank you!
Now, I made the love seat, but have a question about the angle of the bottom slats. From the front cleat to the 2x4 seat brace, it's quite an angle down. Is that supposed to be that way? I don't want to glue and screw without knowing if maybe I installed the cleat or the brace wrong.
Thank you again!
Neile
cjay120
Sat, 03/07/2020 - 18:39
Help
Hi, I literally started building this from the old plans and last weekend while this plan was updated. Can you share the link to the old plans? I just finished making my cuts.
Thanks
rboz83
Tue, 04/06/2021 - 08:12
Couch done. Happy with the result
We finished our couch with your blueprints as a starting point.
Finished product:
https://ibb.co/jDsXVD8
There were e a few alterations, mainly we used seatbelt material for the bed of the couch, to do it I built a rim around the the interior. For the far side of the rim I used a 2 x 6, and the back is attached to that with door hinges. I think this really simplified the one part of your blue prints I found confusing/tricky.
There were a couple other tweeks I made - rotating the back 2x4 to be vertical to save the 3/4 inch - my couch will be against a fence so it won't be visible. I also have the back on backwards to save space. If I were to do it again I would not do that, but the wood is gnarly on the flip side so turning it isn't an option.
All in all this was a fun project that was not overly difficult. Took me a saturday to build the frame and one coat of stain, we did coat 2 and the seatbelt on Sunday.
Thanks!!!