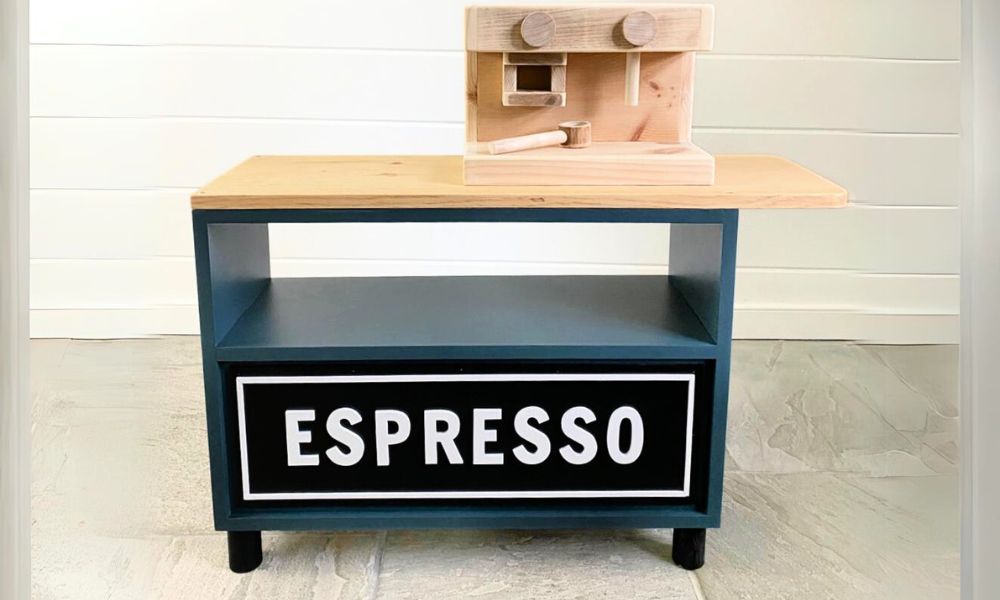


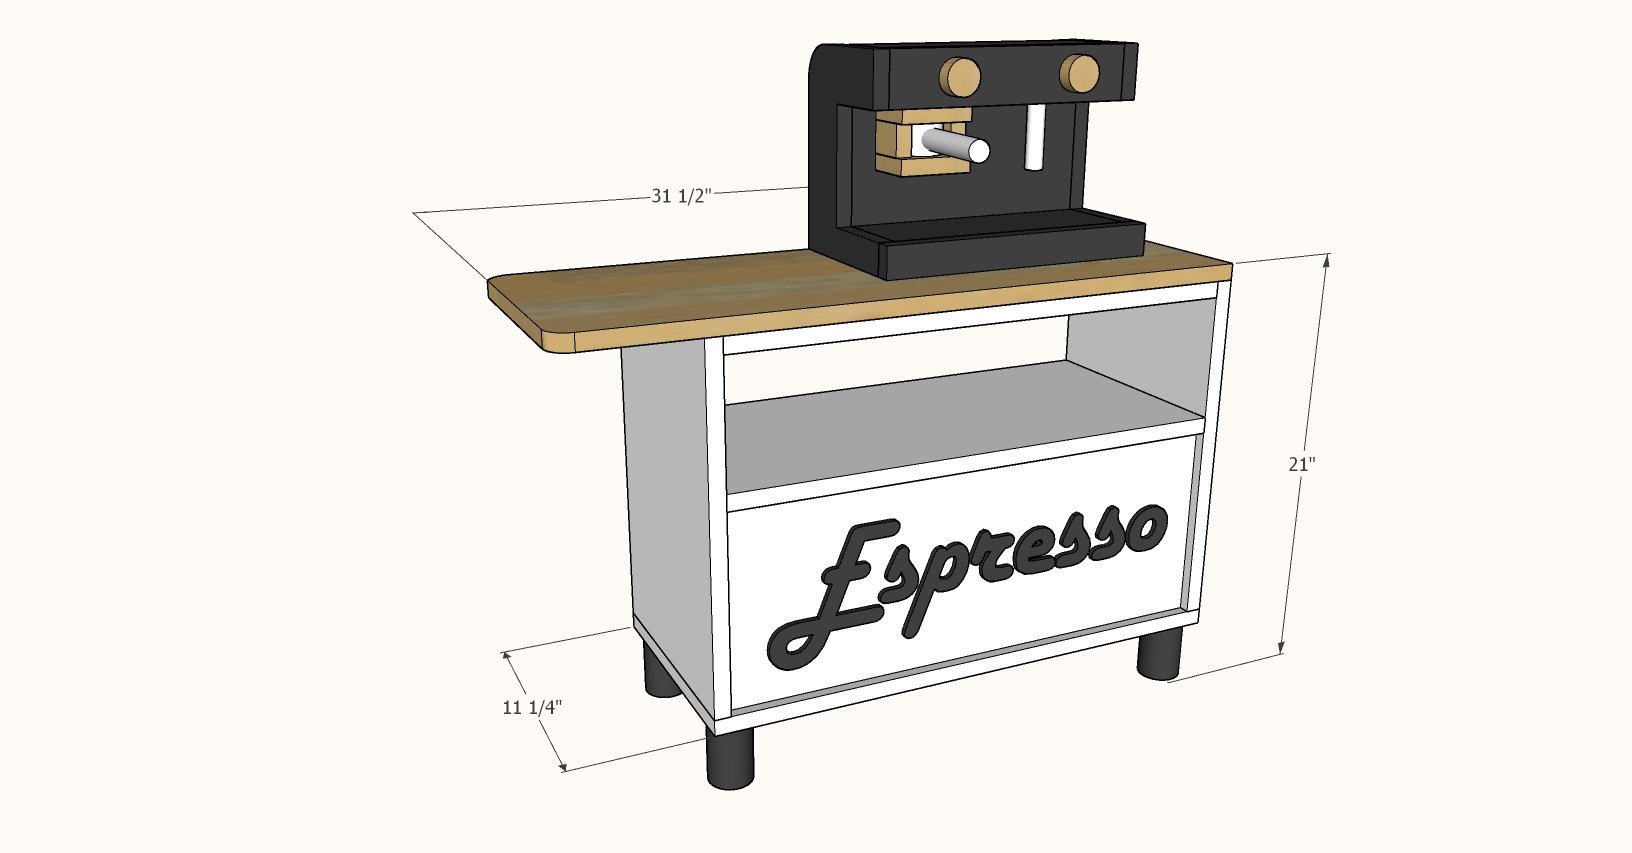
Free project plans to build a pretend play Coffee stand with wood espresso machine toy.
Built by Jaime Costiglio for Handbuilt Holiday 2021.
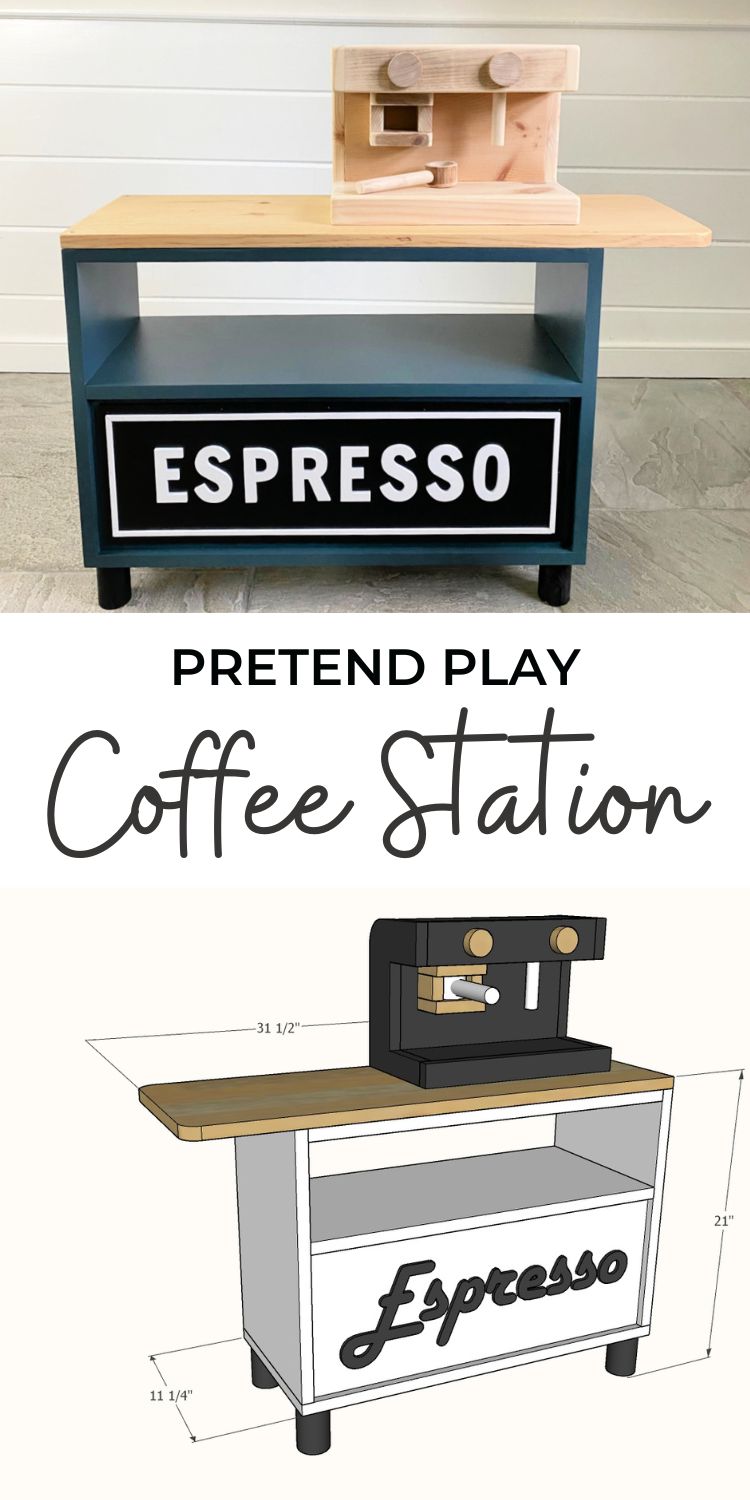
Pin For Later!
Preparation
- 1 - 1x12 @ 10 feet long
- 1 - 1x10 @ 2 feet long
- 1 - 1x2 @ 4 feet long
- 1 - 1x8 @ 4 feet long
- 1 - 1x3 @ 2 feet long
- 1 - 1x4 @ 1 foot long
- 1 - 2" diameter dowel, 2 feet long
- 1 - 3/4" diameter dowel, 12" long
- 8 - 2" self tapping wood screws
- 1-1/4" and 5/8" brad nails
- wood glue
Cart Cut List
- 1 - 1x12 @ 25-1/2" - bottom
- 2 - 1x12 @ 17-1/2" - sides
- 1 - 1x10 @ 24"
- 1 - 1x12 @ 24"
- 1 - 1x2 @ 26-1/2"
- 1 - 1x12 @ 32-1/2"
- 4 - 2" dowels @ 3"
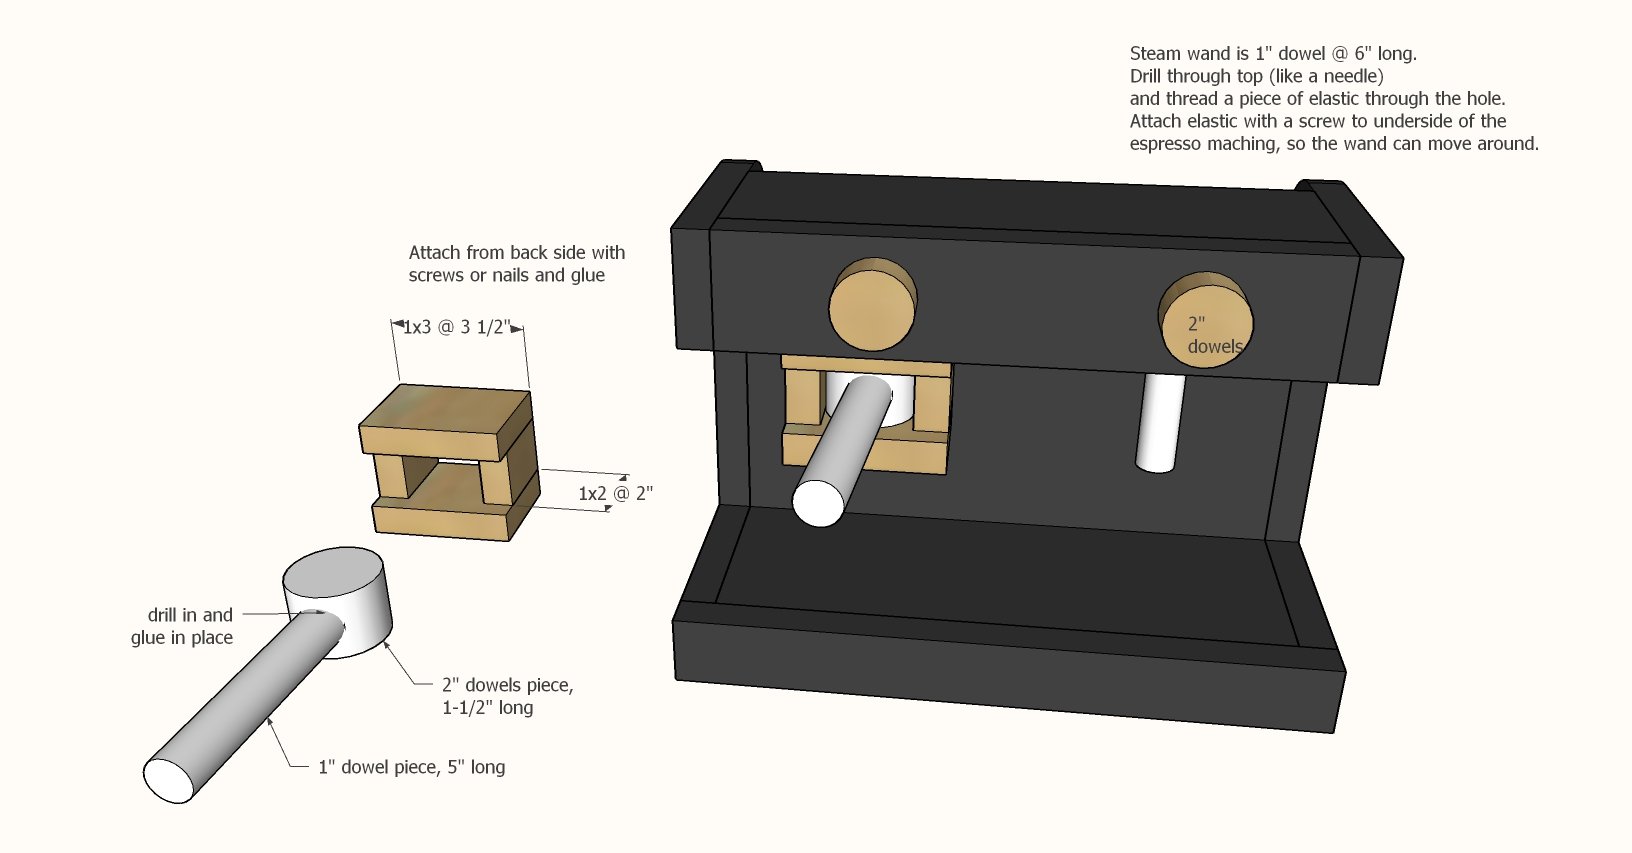
Espresso Machine Cut List
- 2 - 1x8 @ 9-1/2"
- 2 - 1x8 @ 12"
- 1 - 1x2 @ 13-1/2"
- 1 - 1x3 @ 12"
- 1 - 1x4 @ 12"
- 2 - 1x3 @ 3-1/2"
- 2 - 1x2 @ 2"
- 1 - 2" dowel @ 1-1/2" - espresso holder
- 1 - 3/4" dowel @ 5" - handle
- 2 - 2" dowels @ 1/2" - knobs on machine
- 1 - 3/4" dowel @ 6" long - steam wand


You can also use screws to build the project - use 1-5/8" trim screws.
Instructions
Step 1
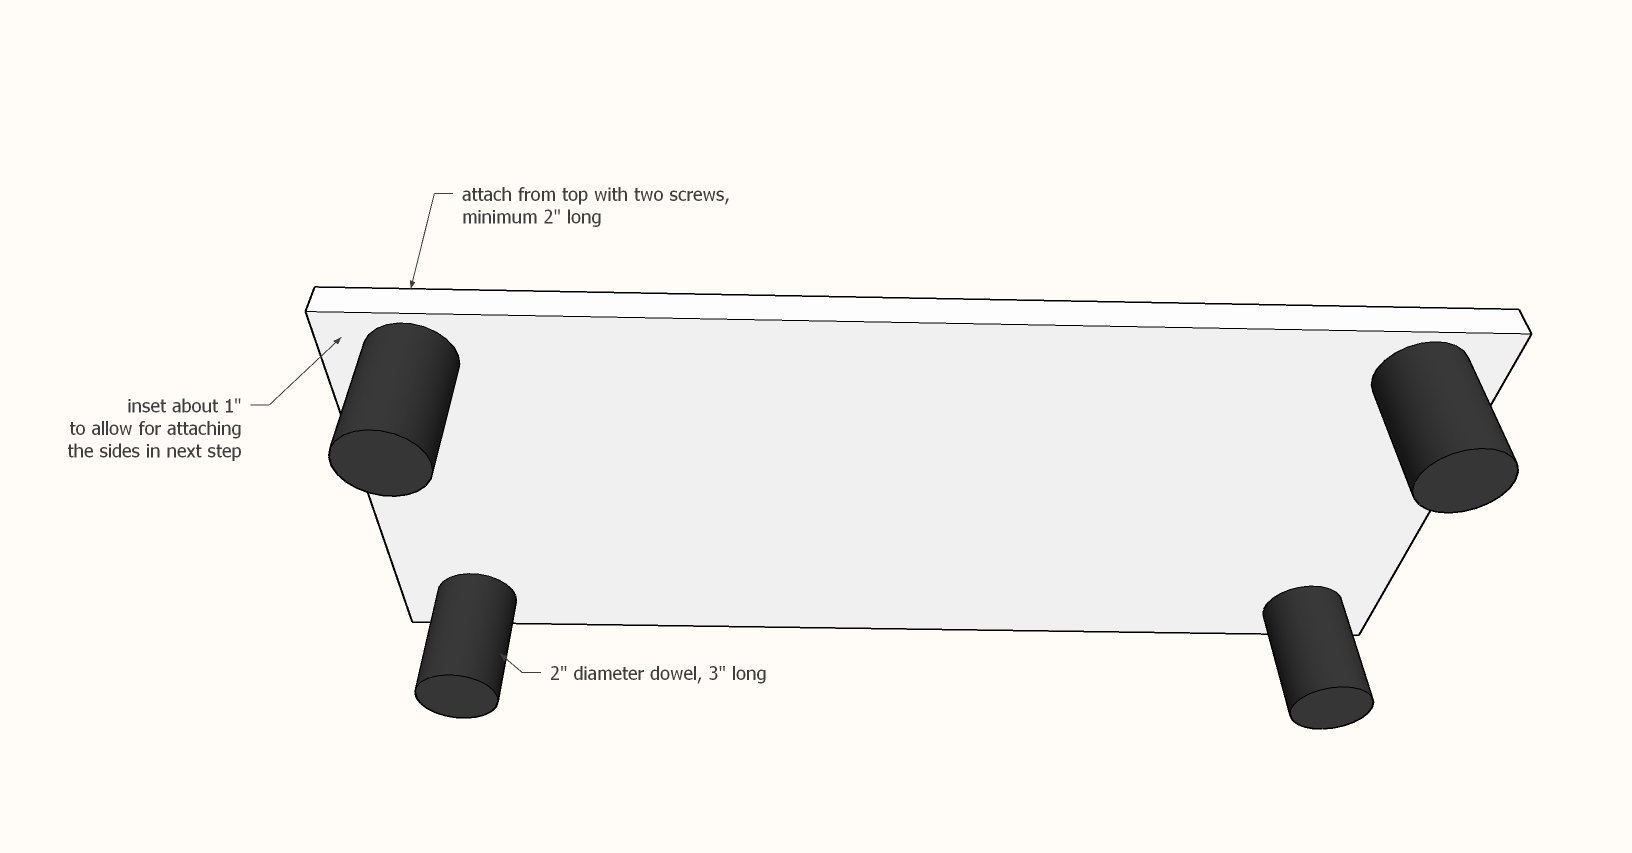
Attach legs to bottom shelf with screws. Use screws about 2" long, two screws per leg.
Step 2
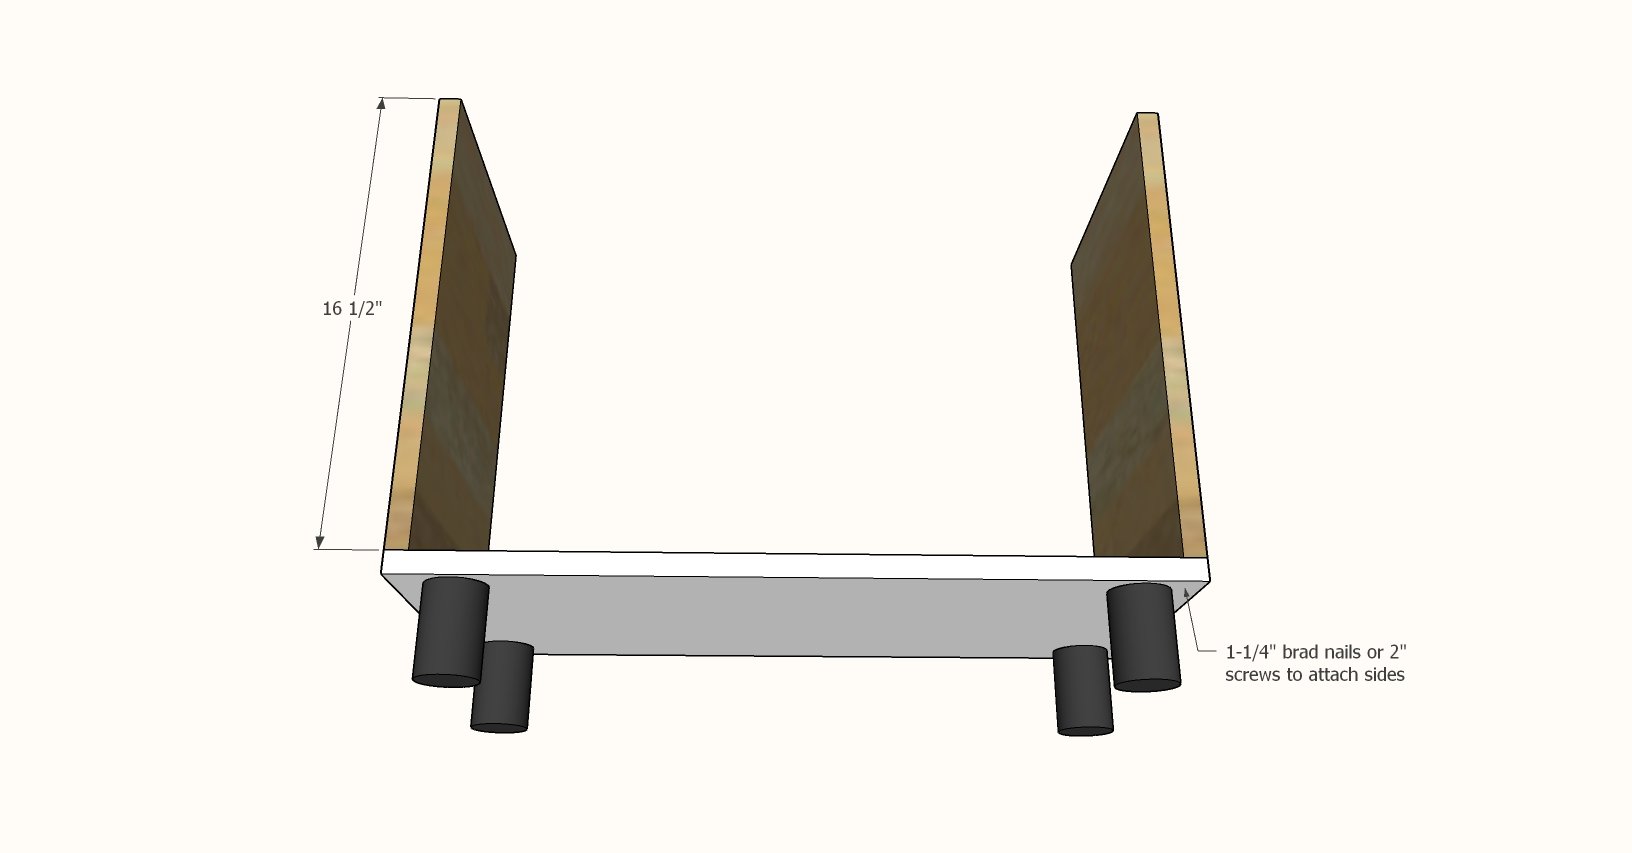
Attach sides to the bottom.
You can use nails and glue here as everything will be reinforced by the center panel.
Step 3
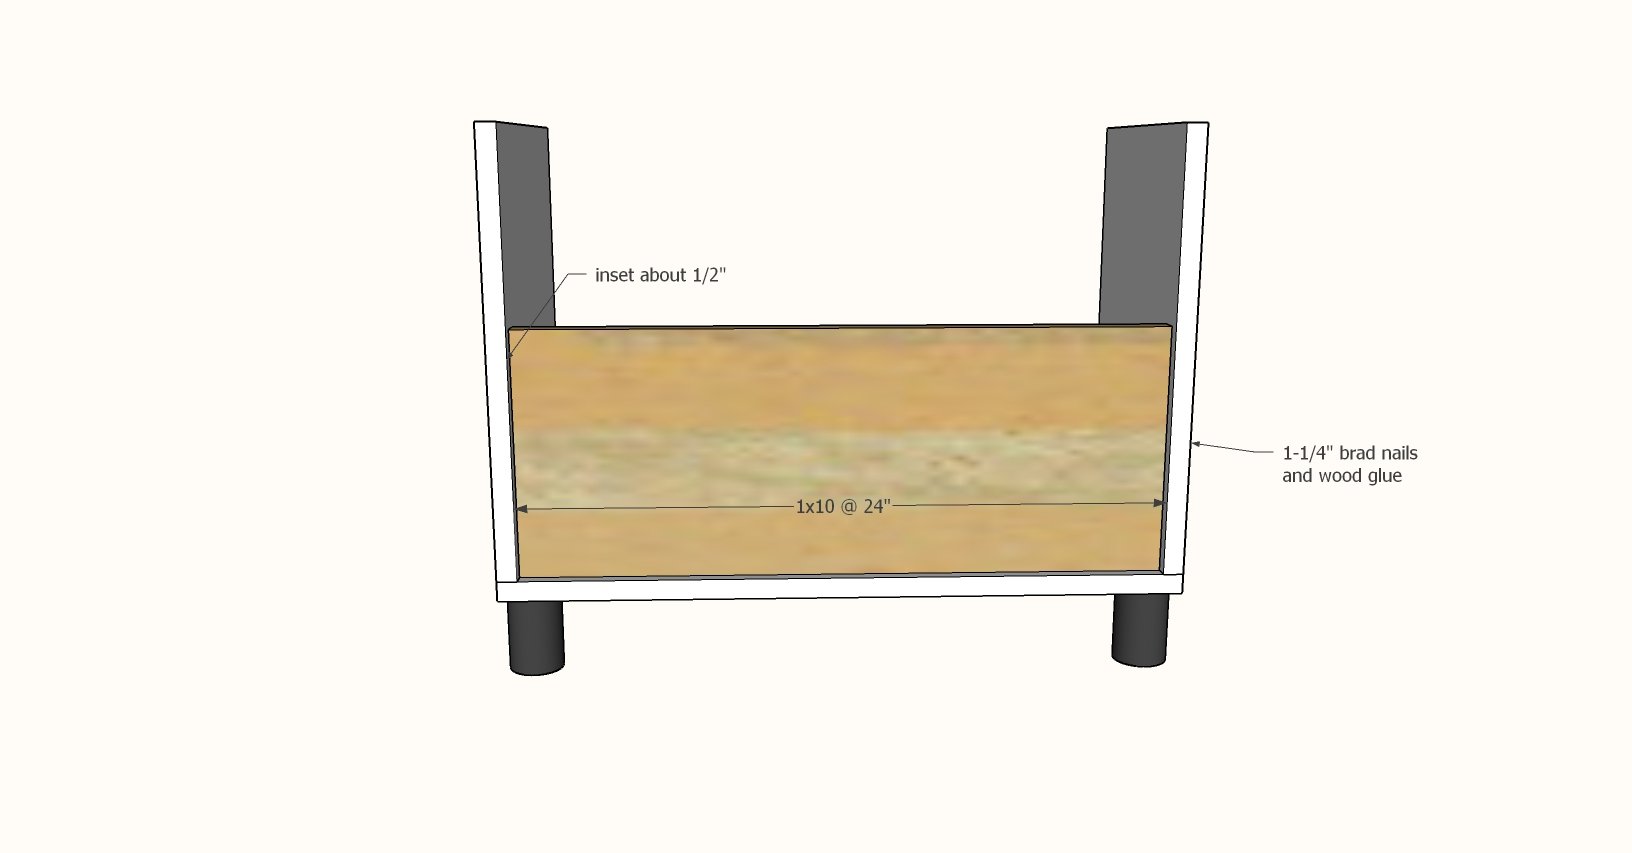
Attach center panel with nails and glue.
Step 4
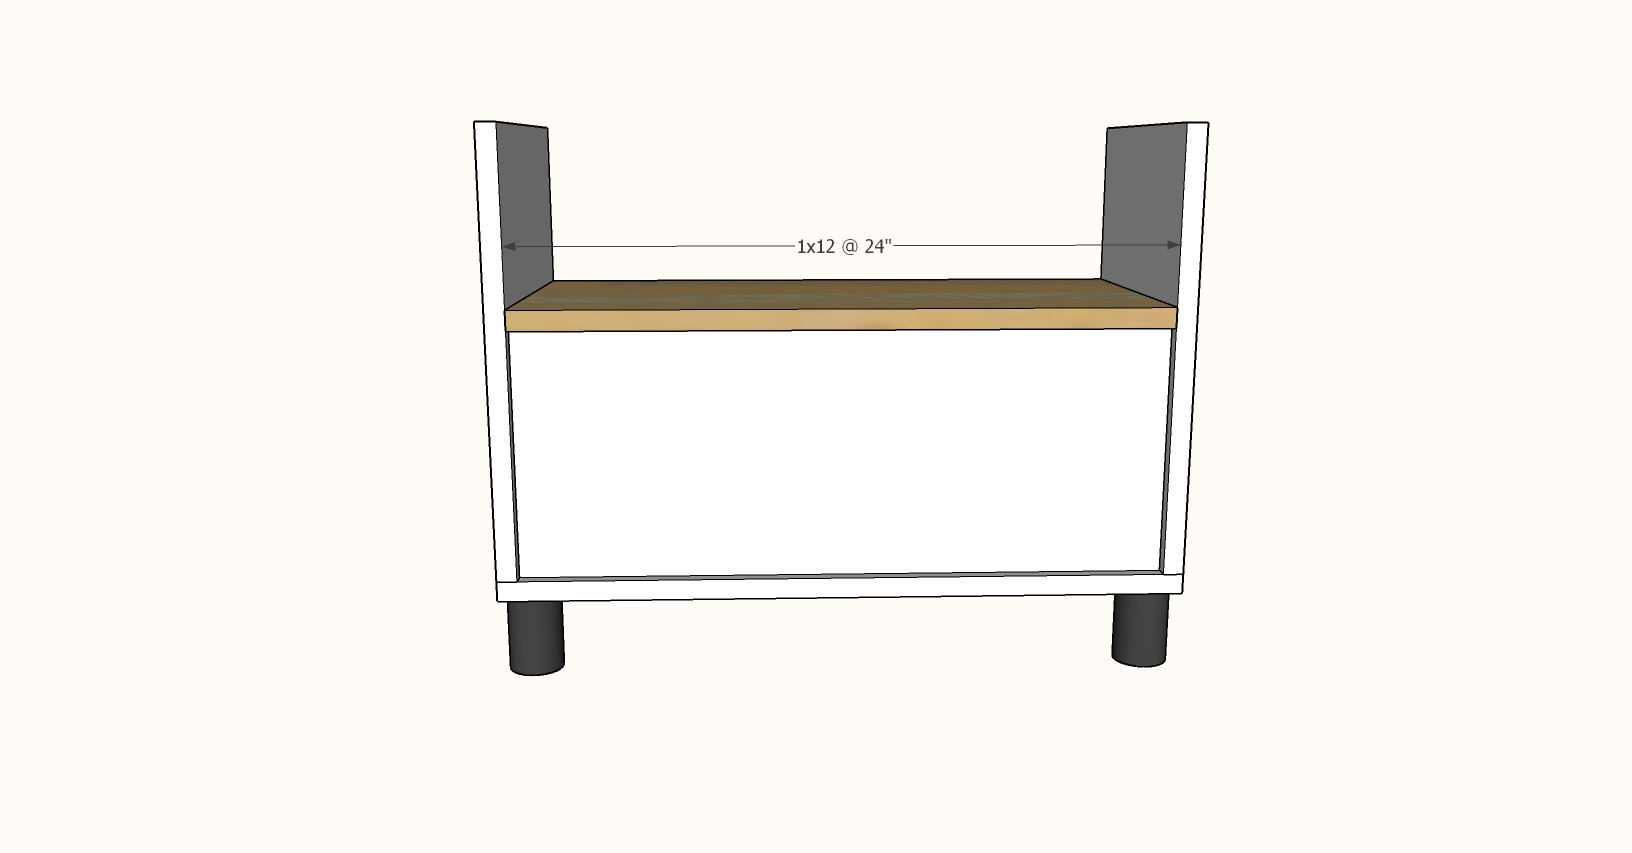
Place shelf on top and attach with nails and glue.
Step 5

Attach top support piece with nails and glue.
Step 6

Attach top with nails and glue.
Step 7
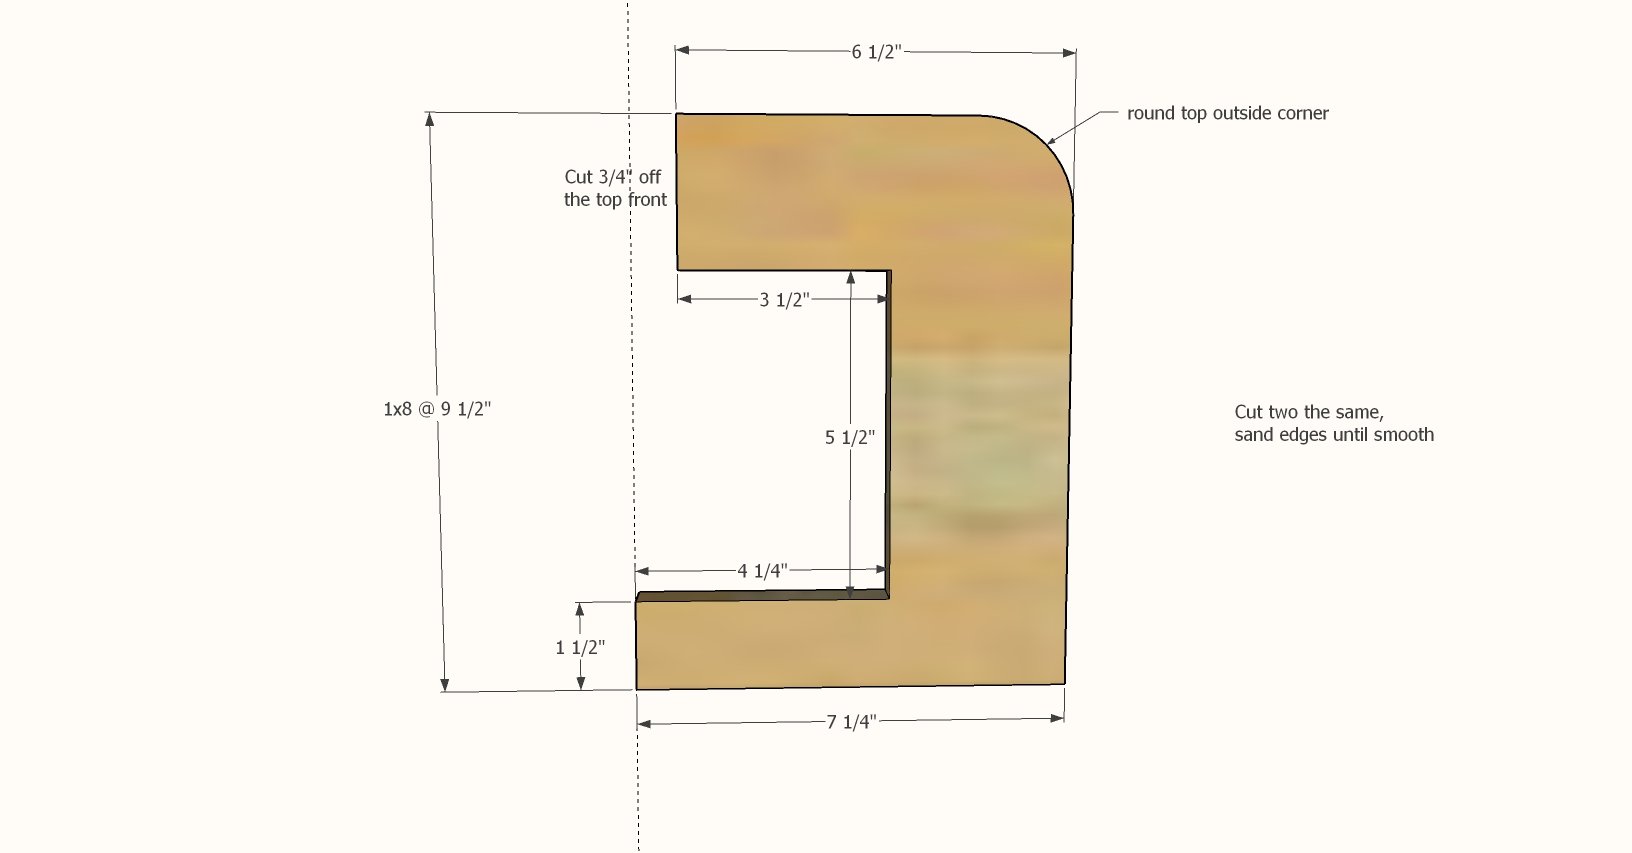
Cut out the sides of the espresso machine with jigsaw. Cut two identical. Sand smooth.
Step 8
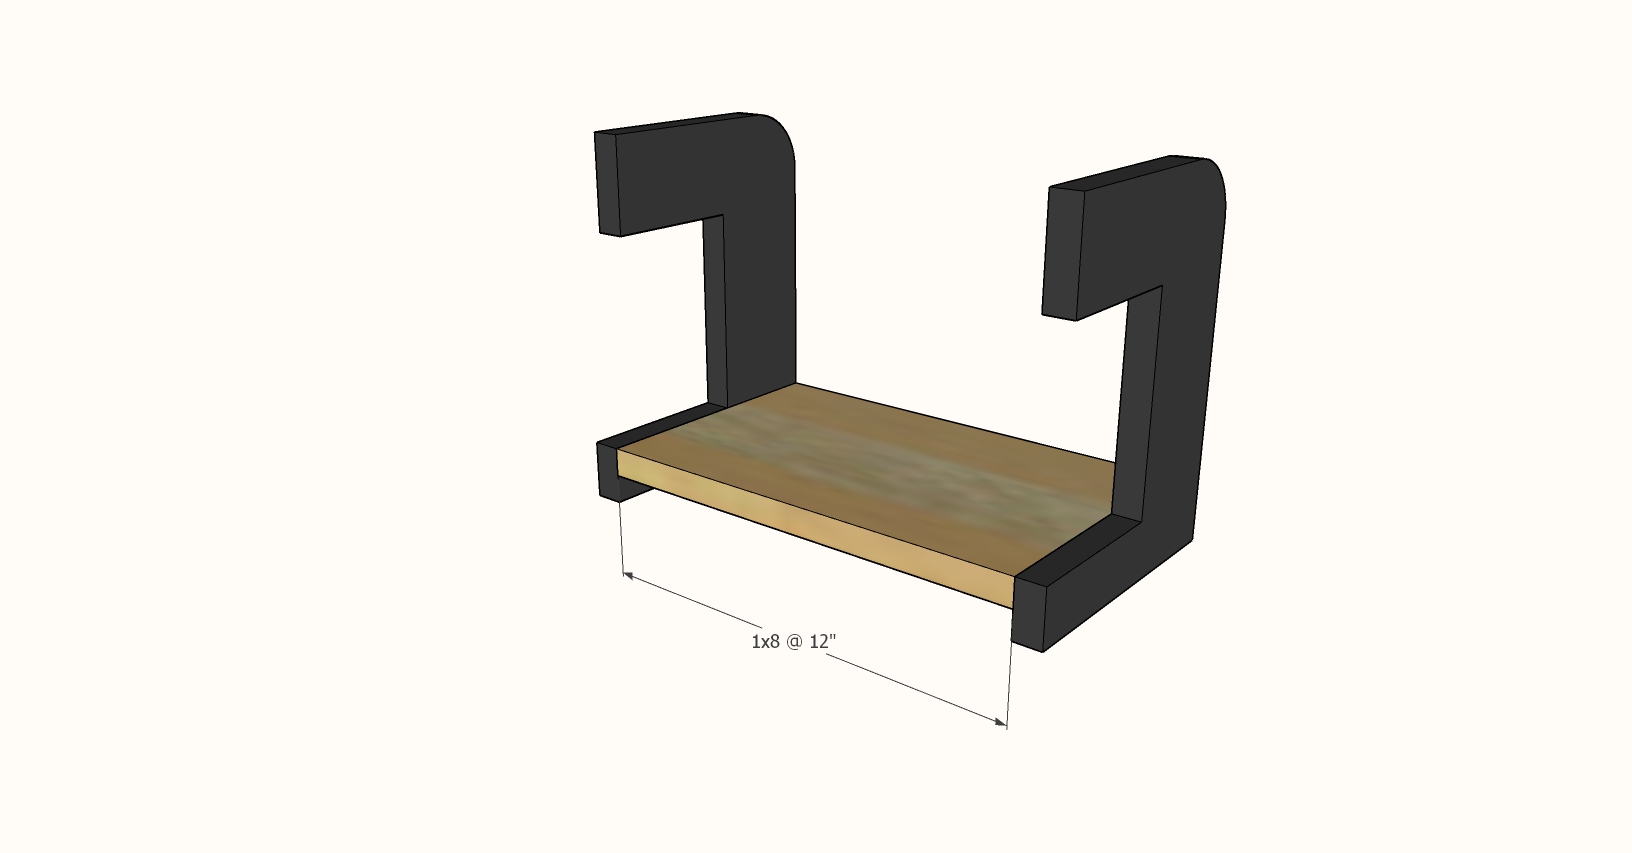
Attach bottom with 1-1/4" brad nails and glue.
Step 9
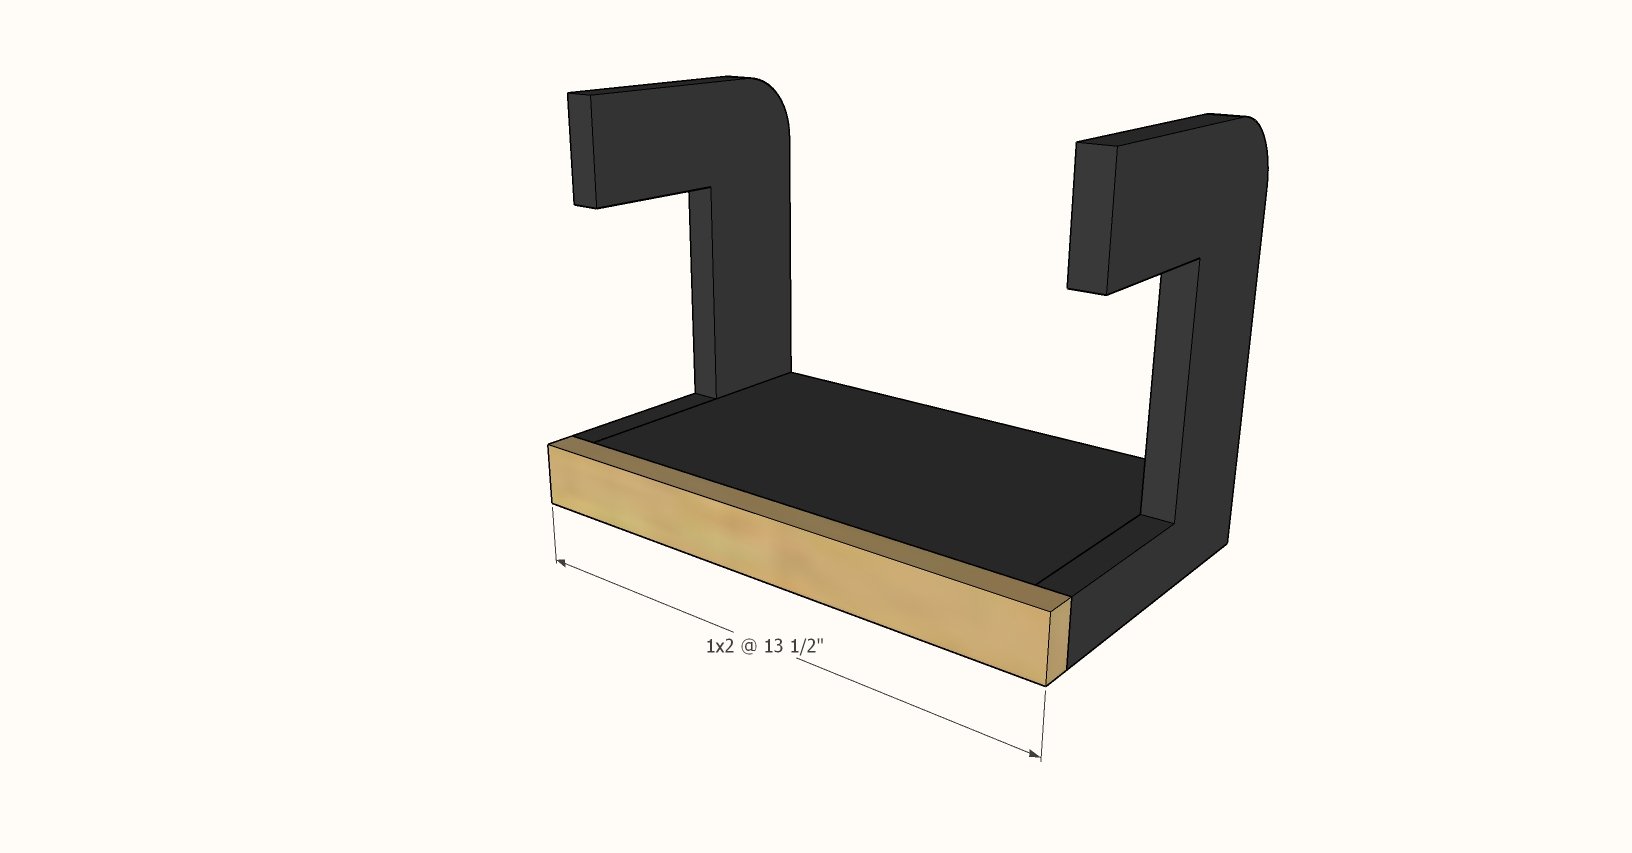
Attach front with 1-1/4" brad nails and glue.
Step 10
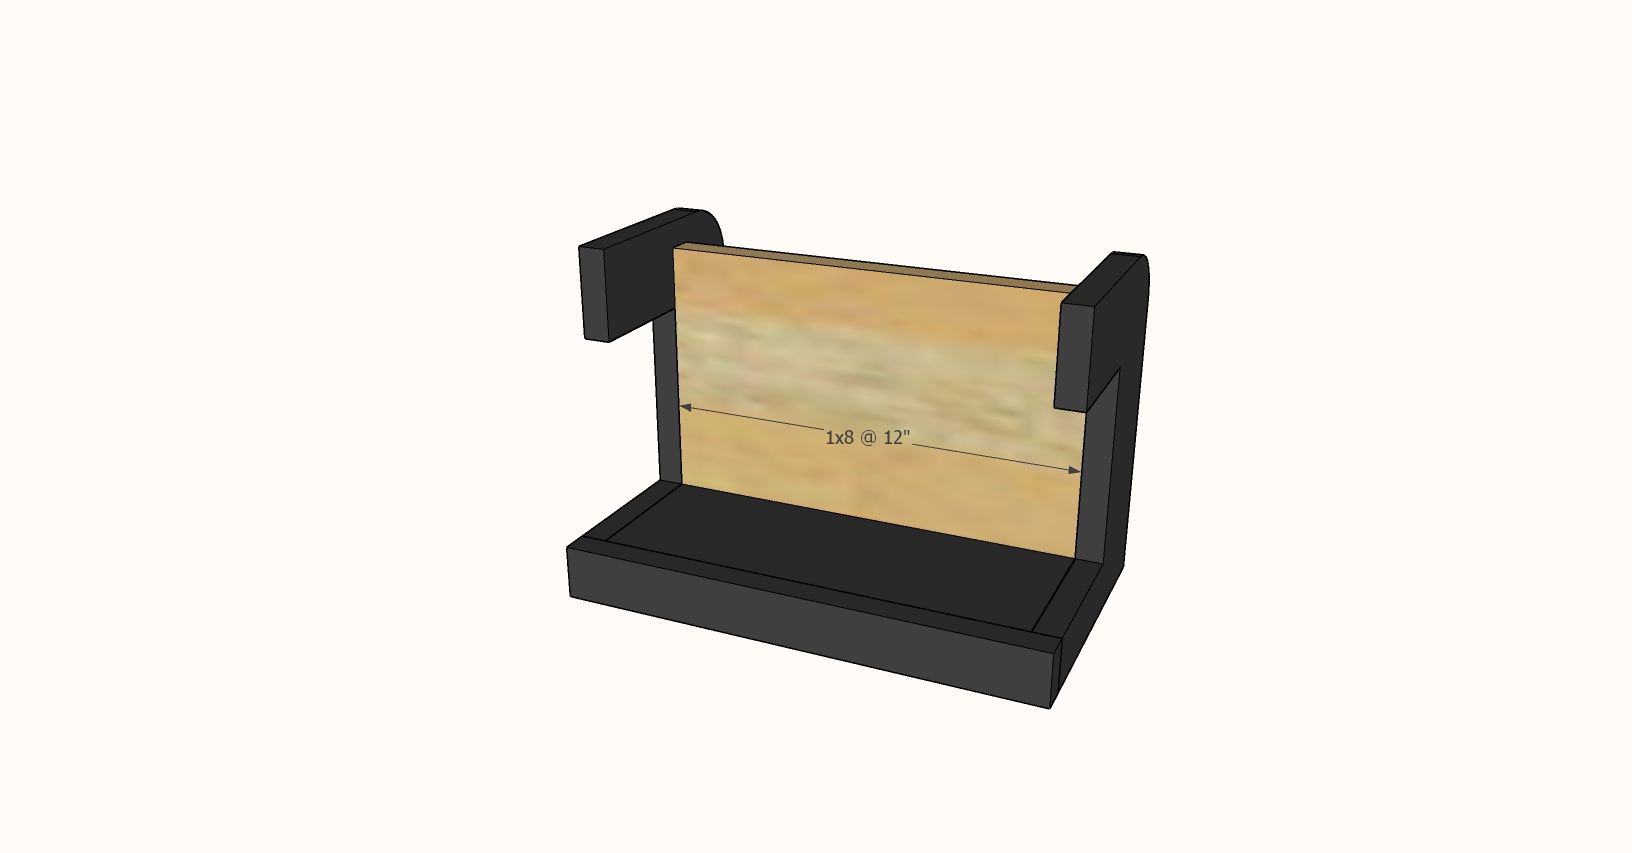
1-1/4" brad nails and glue.
Step 11
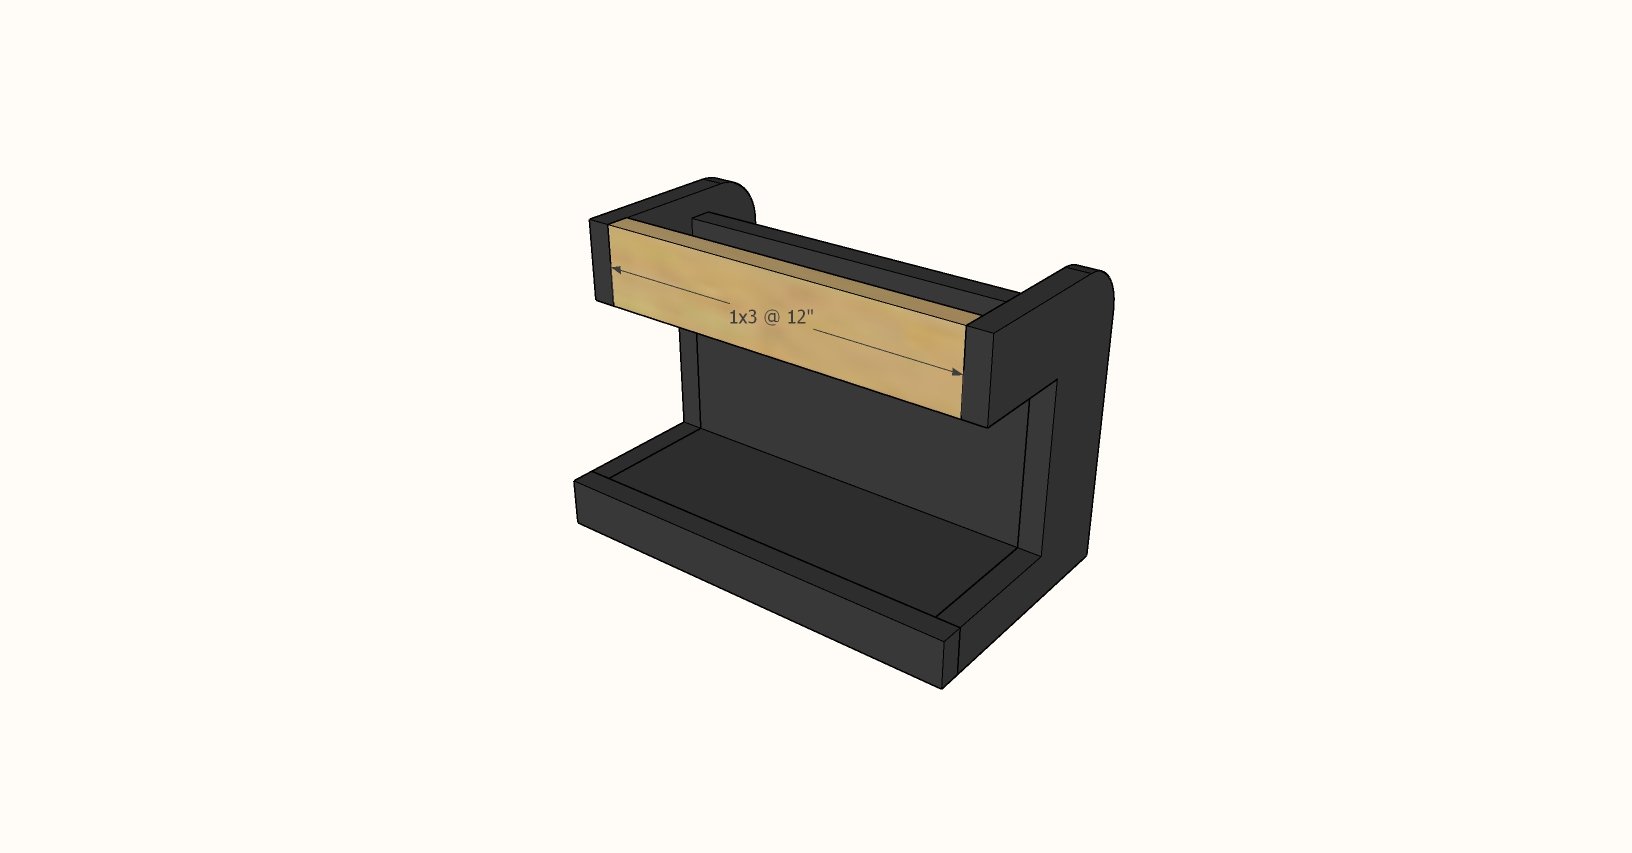
1-1/4" brad nails and glue.
Step 12

1-1/4" brad nails and glue from all sides.
Step 13
Step 14
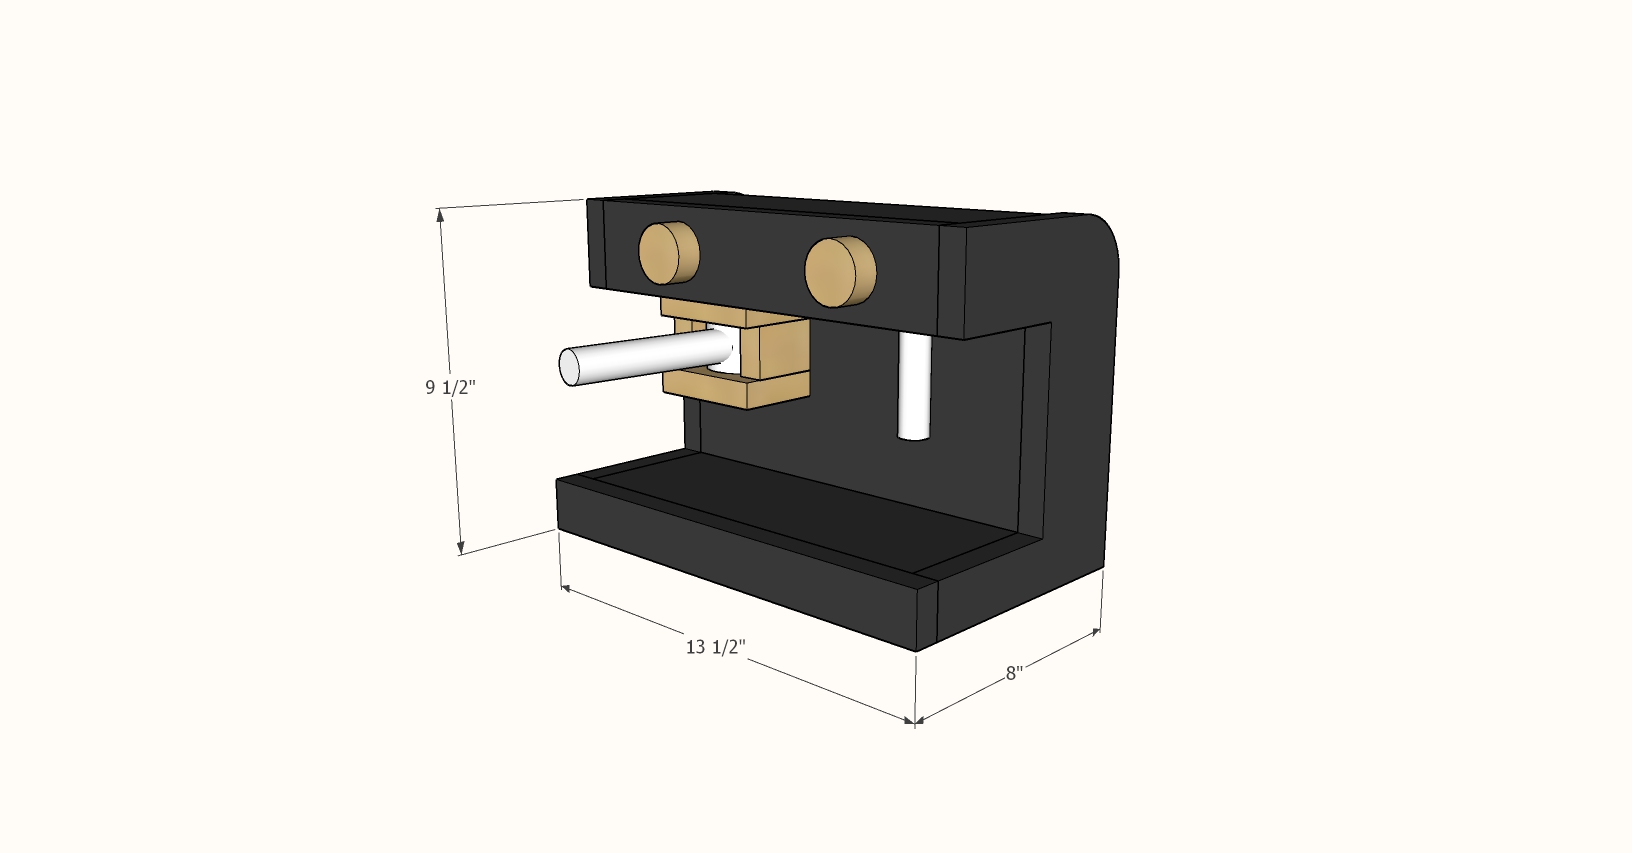
Dimensions for the toy espresso machine.
