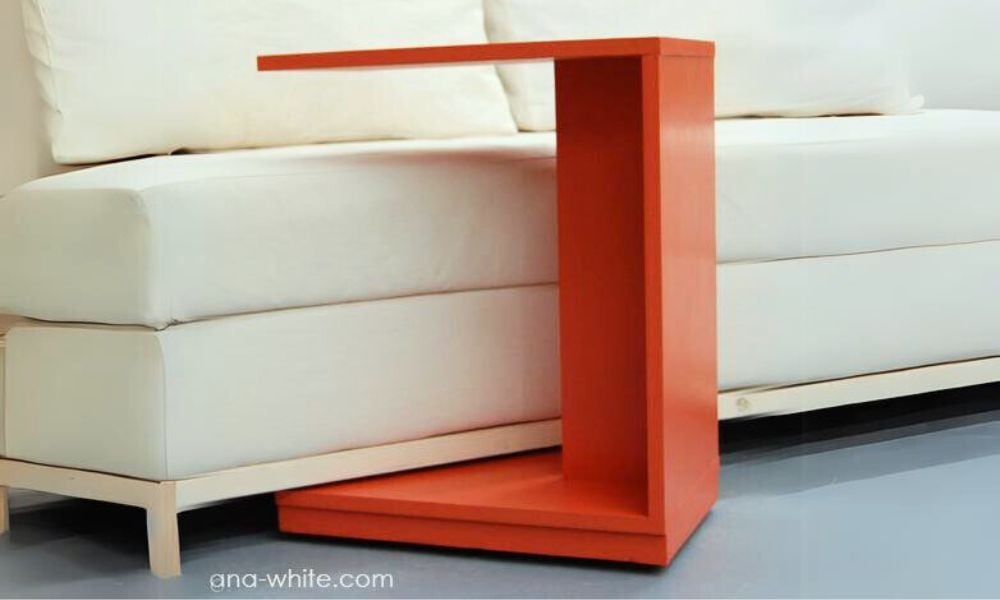


This simple little C table makes a modern nightstand or a quick snack table. Rolls under the couch to put a laptop in your lap.
This is a free project plan to build your own C table with step by step diagrams, shopping and cut list from Ana-White.com

Preparation
- 1 – 1×12, 6 feet long
- 1 – 1×6, 2 feet long
- 1 – 1×2, 6 feet long
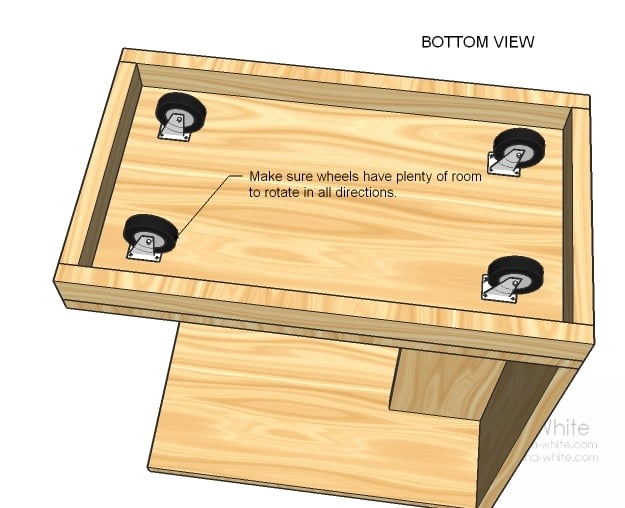
- 4 – 1 1/2″ caster wheels (wheel diameter is 1 1/2″)
- 2″ wood screws OR 1 1/4″ pocket hole screws for pocket holes
- wood glue
- paint and primer
- 120 grit sandpaper
- wood filler
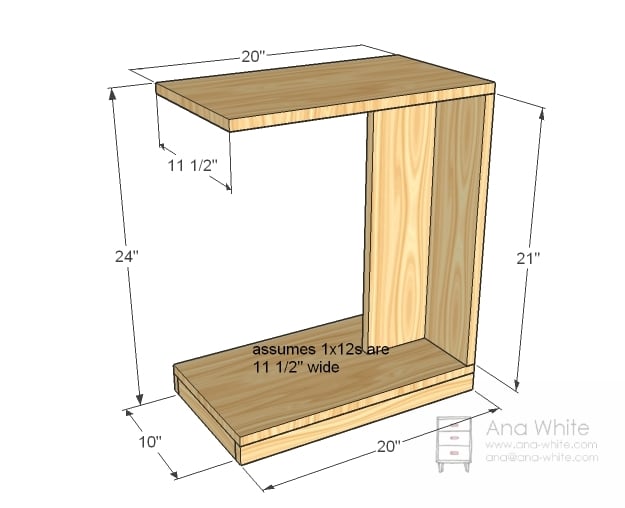
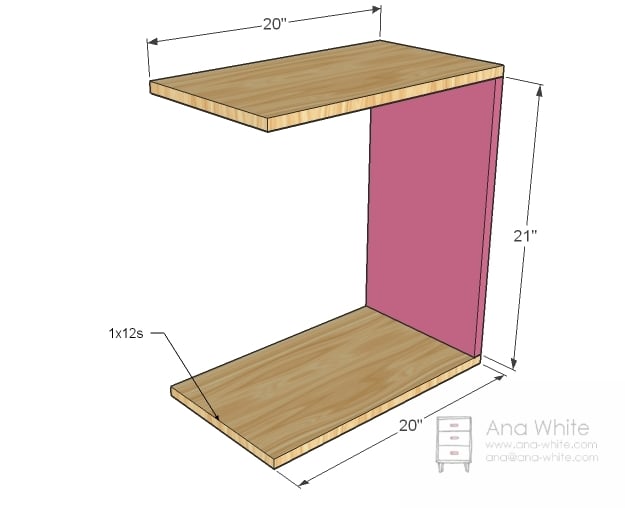
- 2 – 1×12 @ 20″ (Top and Bottom)
- 1 – 1×12 @ 21″ (Back)
- 1 – 1×6 @ 21″ (Center)
- 2 – 1×2 @ 20″ (Side Footer)
- 2 – 1×2 @ 10″ (End Footer)


Instructions
Step 1
Box
After you have cut all your boards, predrill either pocket holes or countersinking holes and build the box as shown above. Keep outside edges flush. Use glue.
Step 2
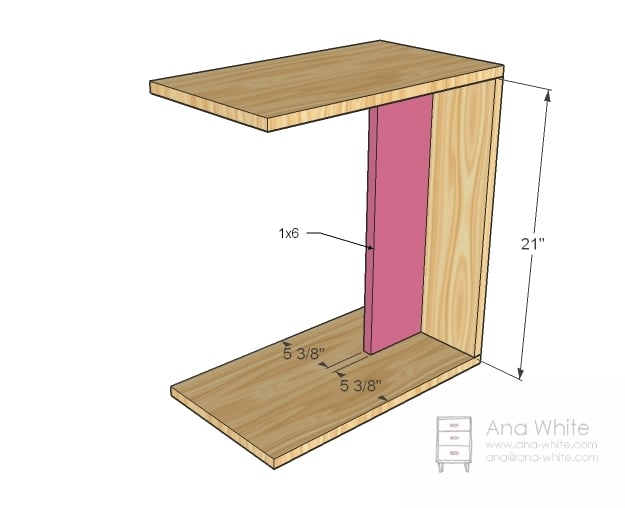
Center
Now measure at the top, middle, and bottom as shown in the diagram and mark. Position 1×6 and screw through predrilled holes to secure in place. Use glue
Step 3
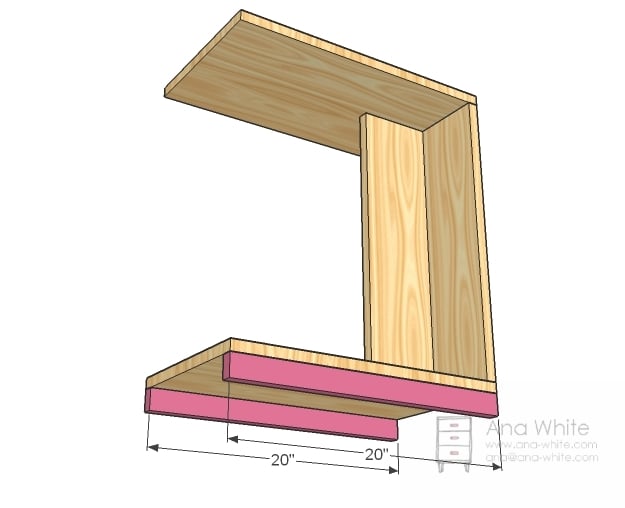
Footer
The footer on this one is purely decorative. You can use finish nails or screws, and glue. Attach to the bottom.
Step 4
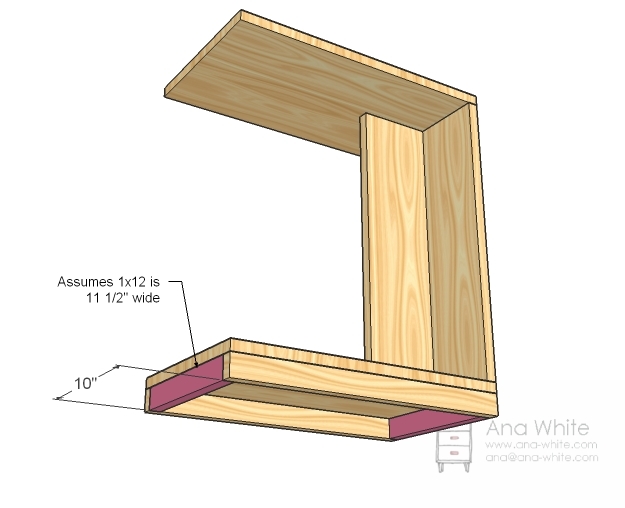
Footer Ends
Attach the footer ends to the bottom and the side footer. You may not be able to reach a direct screw into the back footer – don’t worry. This piece is purely decorative, and glue and screws to the side footer will be plenty.
Step 5
Comments
Jess carpenter
Sat, 06/04/2016 - 04:22
Okay so I dont know how to
Okay so I dont know how to edit these comments lol. But ment to type ... if I build the box with an in. of space on the outside of the center, I can put the X there.