Rustic Storage, or The 1x2 Dresser

The free plans on this website are made possible with advertising and affiliate links.  Thank you for helping us keep plans free.


Difficulty
Intermediate
| Print this plan

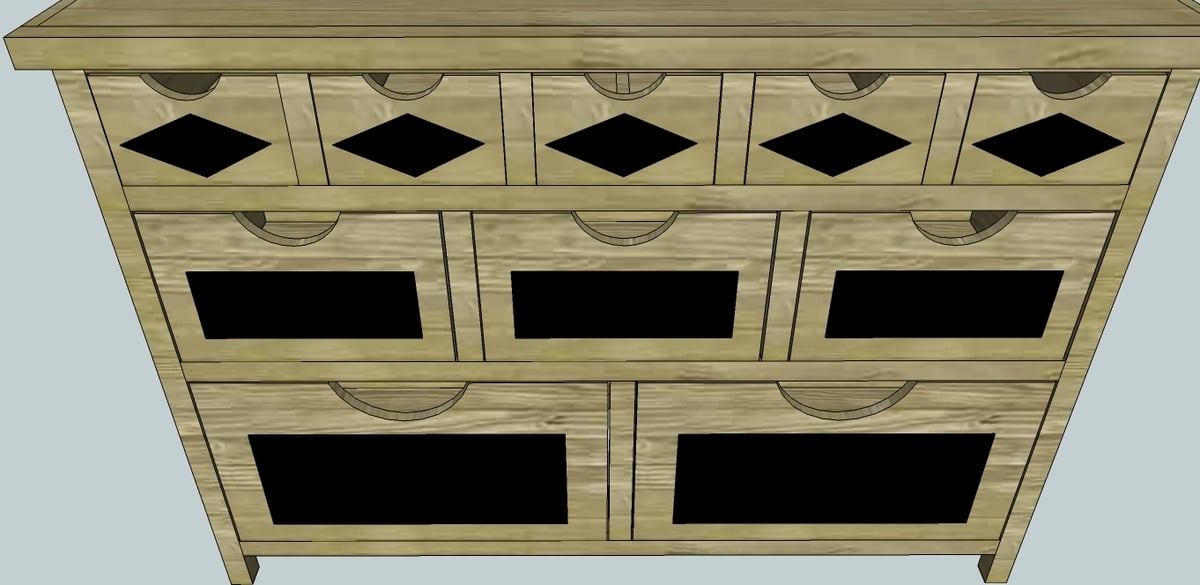
Build a handsome, rustic storage dresser! Free plans.
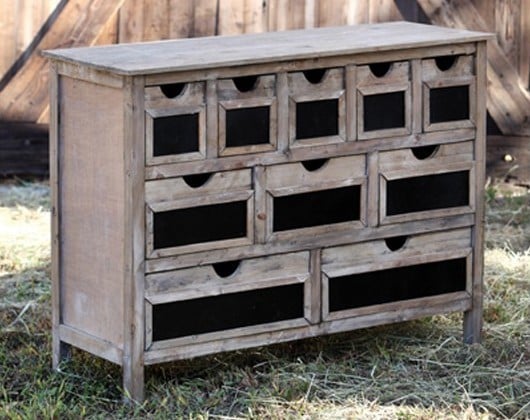
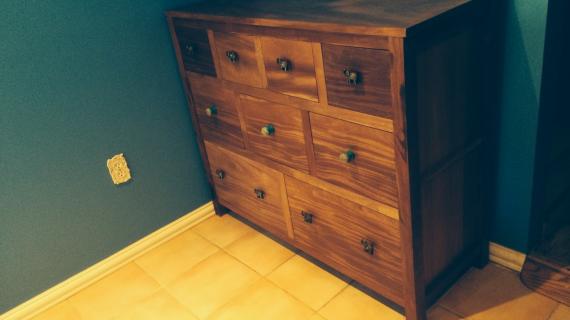
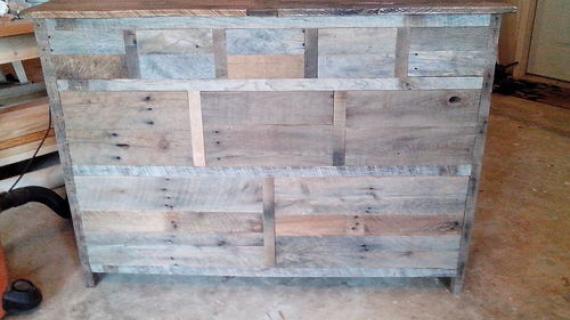
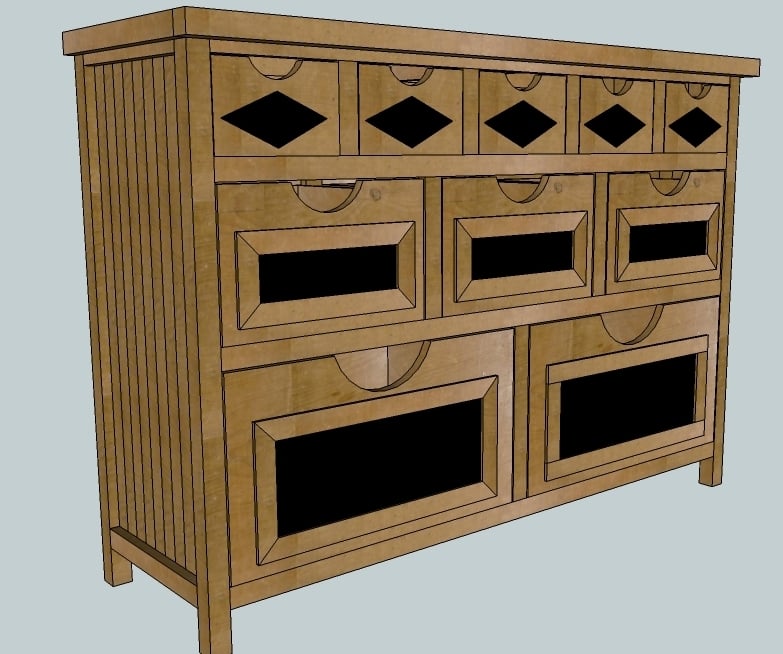
Hey, y'all! I was browsing around and came across a picture of this great storage dresser from Antique Farmhouse with a whitewash finish and framed out chalkboard labels on each drawer. How wonderful for craft storage or for a child's room! And such beautiful, strong, clean lines! But with no budget for such a thing (and lots of time on my hands), I decided I'd just have to sketch up some knock-off plans myself. This is probably an intermediate plan, but I think thoughtful, cautious beginners could take it on, too. I priced every bit of material (through the orange store), and it came to $226 (which includes things like screws, paint, tape, etc, and assumes no scrap will be used); but I've got a lot of scrap, and I figure it will cost right around $100 for me.

Now, this plan is untested. It has lots of ideas that I think (but don't KNOW) will work, so proceed with caution and please tell us how you improved (or would improve) the plan! It's made almost entirely of 1x2's...but of course everything here is up to you ;)

Dimensions
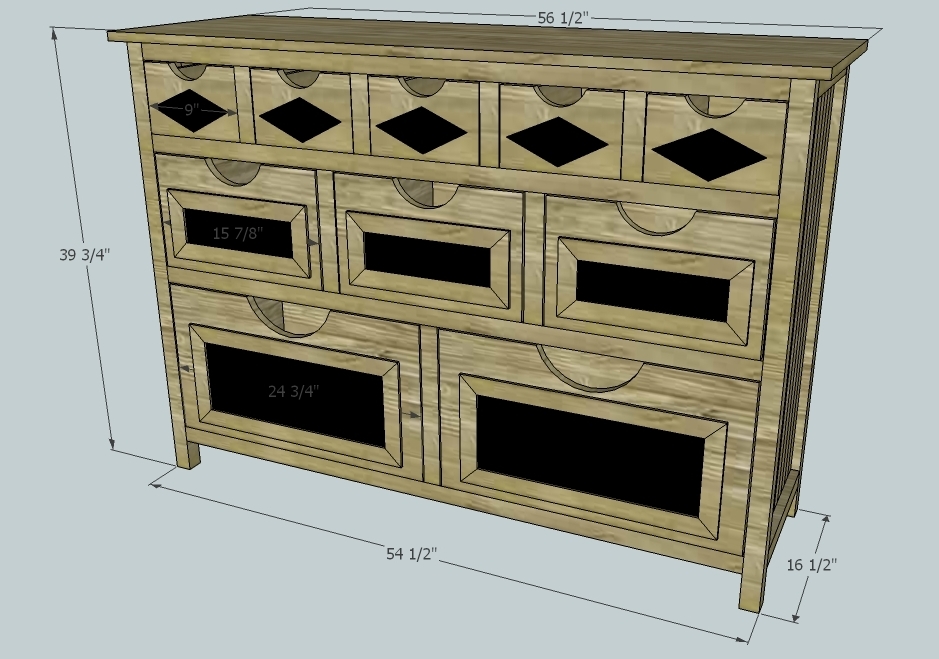
54 1/2" x 18" x 39 3/4"

Preparation

Shopping List

3 2x2@8'
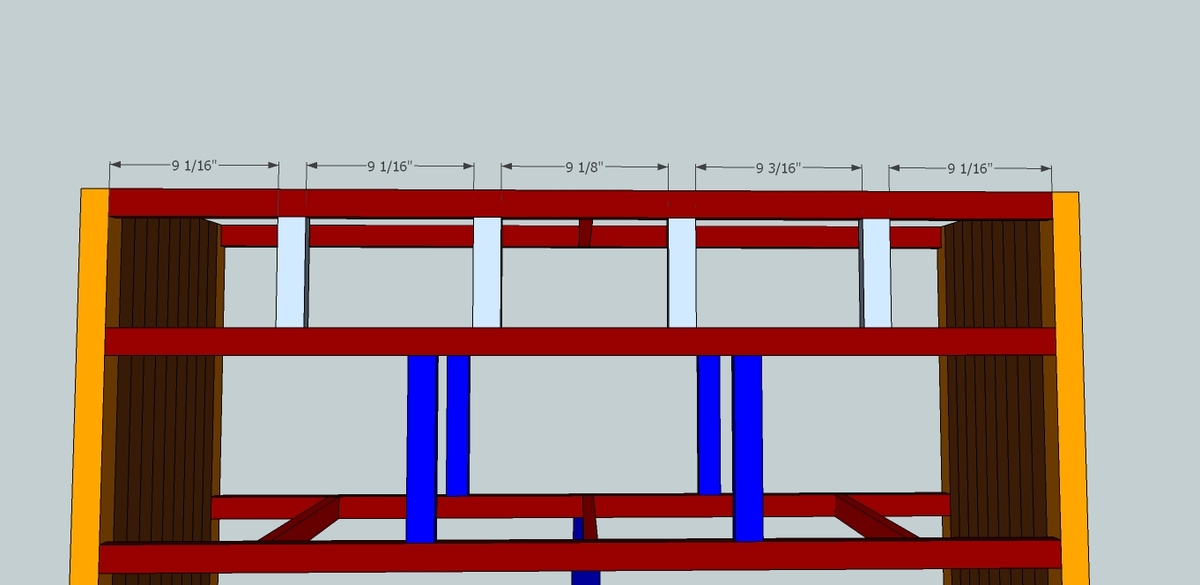
17 1x2@8'
3 1x6@6' (optional fancy top)
1 sheet 3/4" ply
2 sheets 1/2" ply (you'll have a LOT left over)
1 sheet 1/4" ply (optional for back)

18 linear feet of pine lattice moulding (optional) - or 2 sticks @10' (plus nails, if using)

Chalkboard paint (or chalk paint like ASCP)
Painter's tape
Finish of choice

Common Materials
1 inch screws
3/4 inch finish nails
Cut List

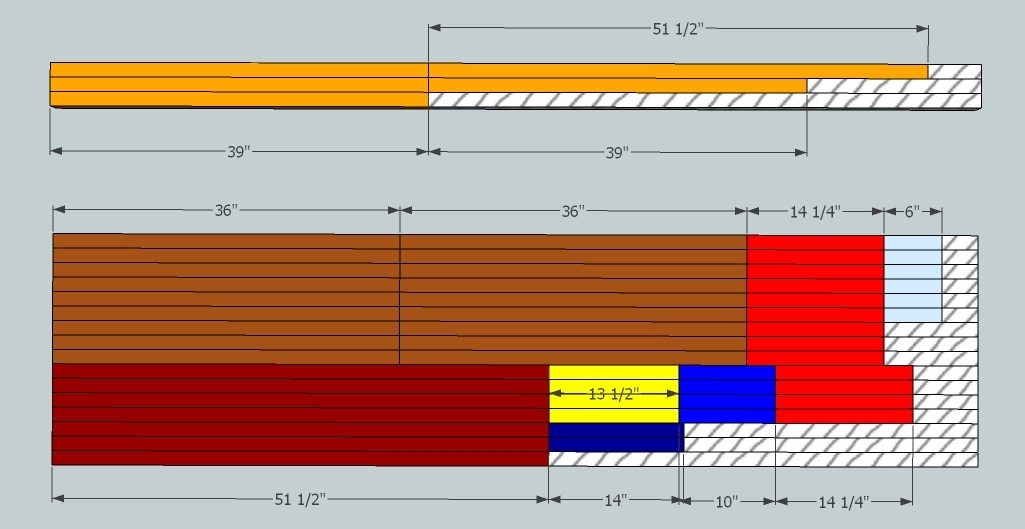
See pics in steps 1, 2, and 18

Carcass
4 2x2 @ 39" (orange legs)
1 2x2 @ 51 1/2" (orange back bottom stretcher)
7 1x2 @ 51 1/2" (dark red stretchers...or are they aprons?)
13 1x2@ 14 1/4" (bright red stretchers)
18 1x2@ 36" (brown side panels edge glued, but you could also use ply, panels, or other boards)
4 1x2 @ 13 1/2" (gold side trim pieces)
2 1x2 @ 14" (dark blue vertical spacers)
4 1x2 @ 10" (mid-blue vertical spacers)
6 1x2 @ 6" (light blue vertical spacers)
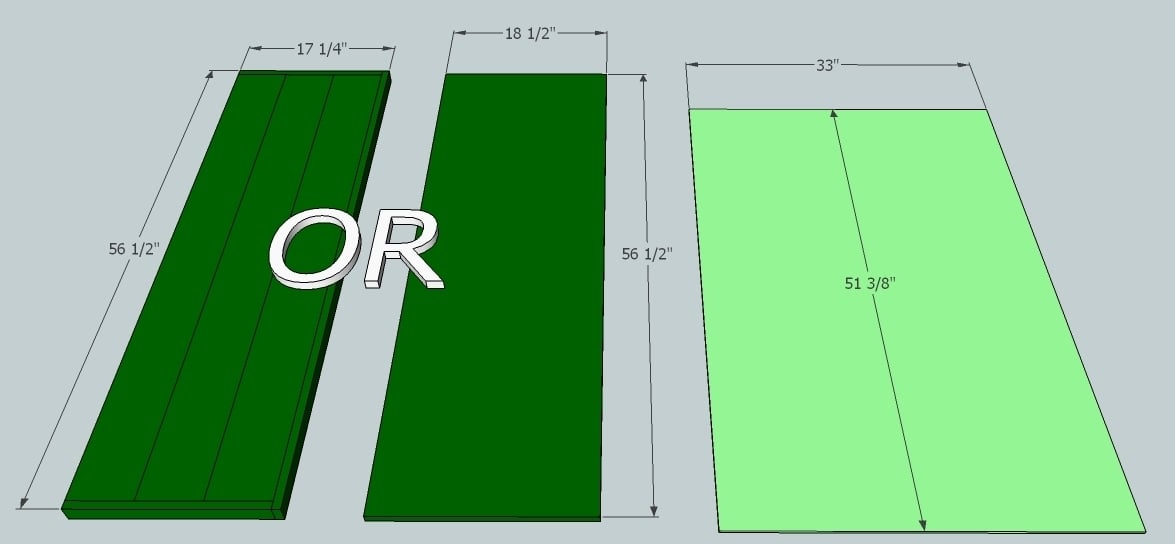
1 1/4" ply at 33" x 51 3/8" (back, optional)

Top
EITHER 3/4" ply at 56 1/2" x 18 1/2"
OR
(3) 1x6 @ 55"
(1) 1x2 @ 56 1/2"
(2) 1x2 @ 16 1/2"

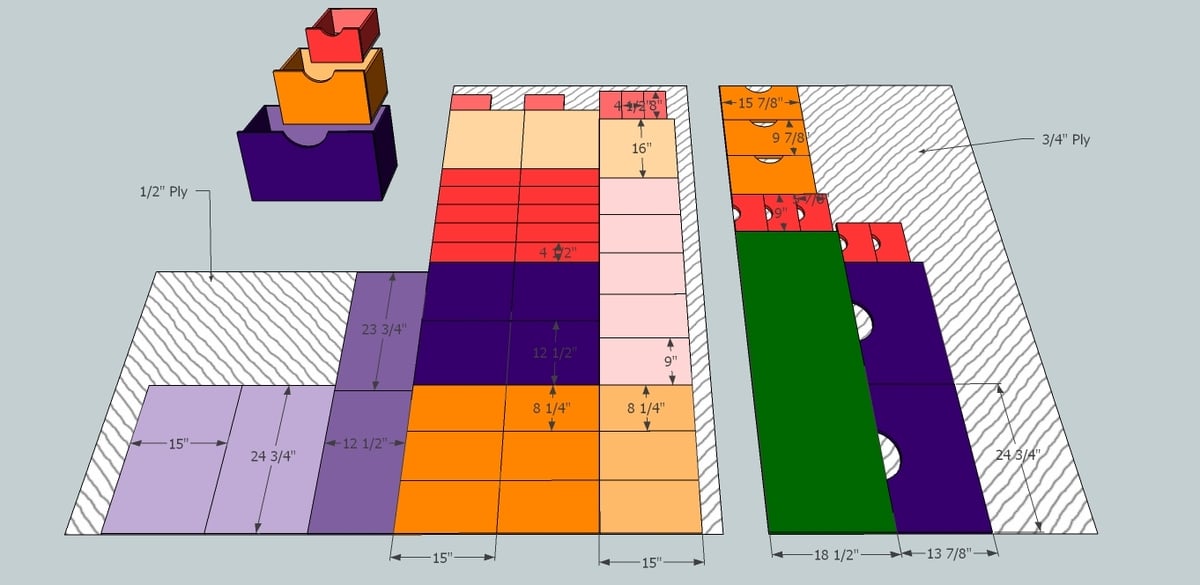
Bottom Drawers (Do NOT cut until carcass has been assembled and measurements checked)
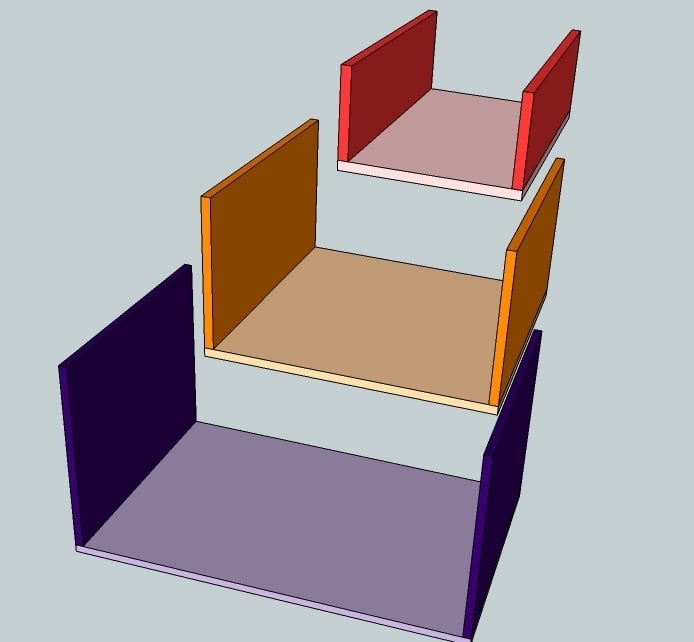
Faces - (2) 3/4" ply at 13 7/8" x 24 3/4"
Sides - (4) 1/2" ply at 12 1/2" x 15"
Backs - (2) 1/2" ply at 12 1/2" x 23 3/4"
Bottoms - (2) 1/2" ply at 15" x 24 3/4"

Middle Drawers
Faces - (3) 3/4" ply at 15 7/8" x 9 7/8"
Sides - (6) 1/2" ply at 8 1/4" x 15"
Backs - (3) 1/2" ply at 8 1/4" x 15"
Bottoms - (3) 1/2" ply at 16" x 15"

Top Drawers
Faces - (5) 3/4" ply at 9" x 5 7/8"
Sides - (10) 1/2" ply at 4 1/2" x 15"
Backs - (5) 1/2" ply at 4 1/2" x 8"
Bottoms - (5) 1/2" ply at 9" x 15"

Framing of chalkboards is optional; see last step.

Cutting Instructions

Cut and assemble the carcass before cutting pieces for the drawers...you will want them to fit exactly, so base your drawer dimensions on the final measurements of the openings you build in the carcass. Also, you may choose to use up scrap on the drawers...double check that the thicknesses you choose are the same as the plan, or else modify the plan to accommodate a change in thickness.

See steps 1, 2, and 18.

Tools
Tape Measure
Speed Square
Pencil
Safety Glasses
Hearing Protection
Kreg Jig
Drill
Circular Saw
Jigsaw
Level
Drill Bit Set
General Instructions

Please read through the entire plan and all comments before beginning this project. It is also advisable to review the Getting Started Section. Take all necessary precautions to build safely and smartly. Work on a clean level surface, free of imperfections or debris. Always use straight boards. Check for square after each step. Always predrill holes before attaching with screws. Use glue with finish nails for a stronger hold. Wipe excess glue off bare wood for stained projects, as dried glue will not take stain. Be safe, have fun, and ask for help if you need it. Good luck!

Instructions

Step 1

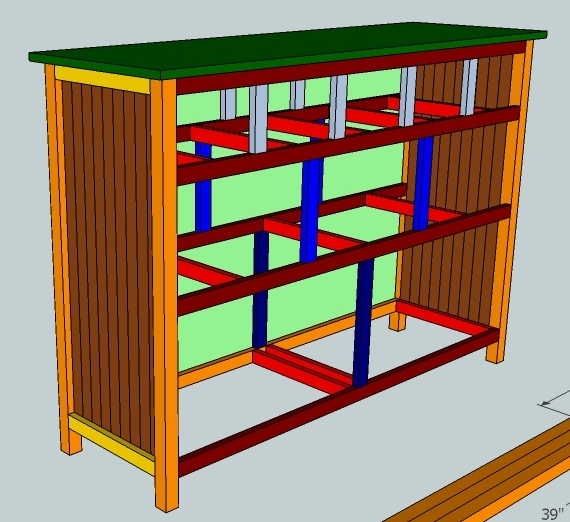
This is the carcass color code for cutting reference. See next step.

Step 2

As you can see, there's quite a bit of waste. I think this is the most effective use of the pieces, however, and it allows a lot of gang cutting of identical lengths (just be careful!). If your store carries 1x2x6's and 2x2x6's, you don't have to buy all 8 footers.

Step 3

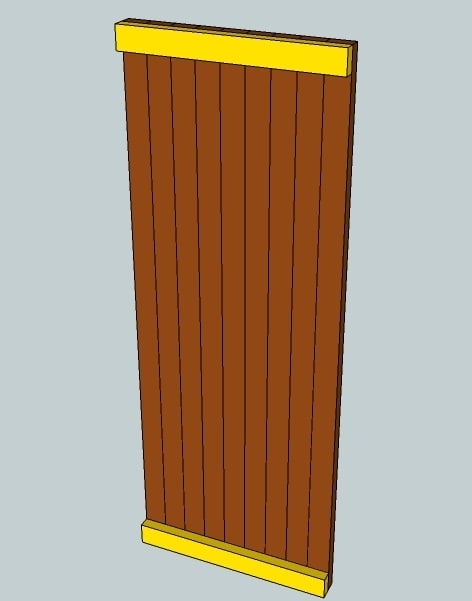
Edge glue your side panel 1x2s and clamp well. Then attach the top and bottom trim pieces as shown. Make two of these.

Step 4

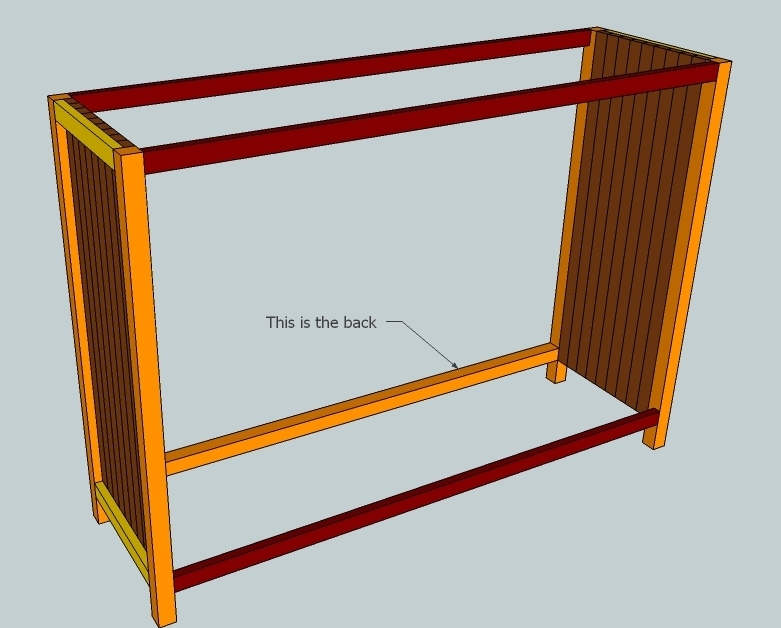
With pocket hole screws and glue, attach your 2x2 legs to each side panel as shown. There should be a 3" gap between the floor and the bottom of your side panel piece.

Step 5

Step 6

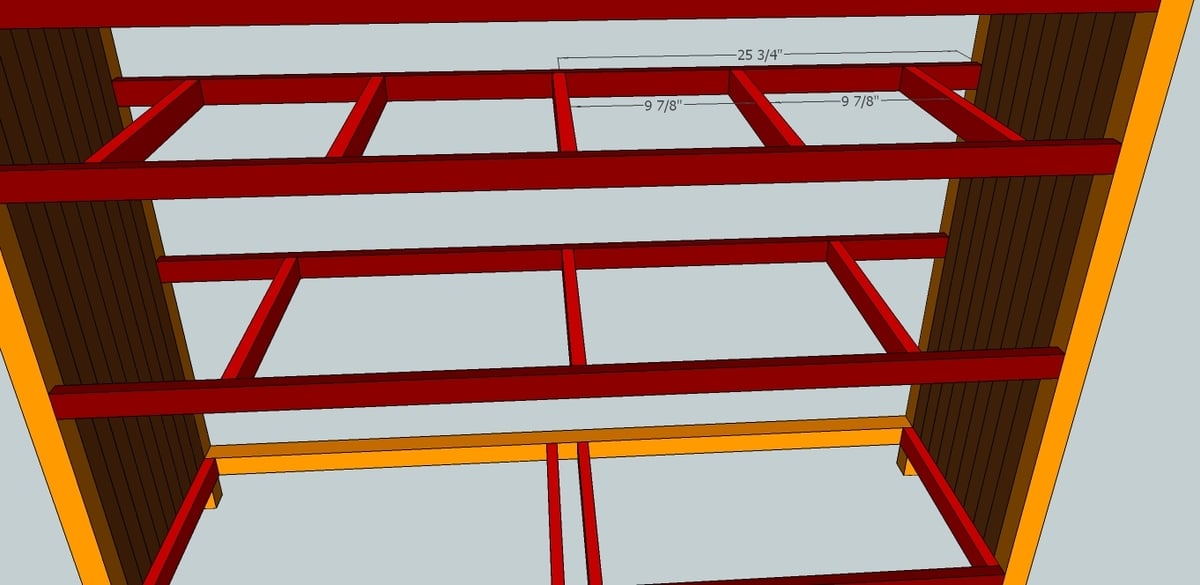
Now attach the rest of those stretchers using the spacing shown above. Front stretcher positions match back stretcher positions. Check for level from front to back across each set of stretchers. I sure hope those things are really called stretchers.

Step 7

Now we begin adding the millions of short sticks you had to cut. Beginning with the bottom shelf, use the spacing shown in the diagram, and attach with glue and pocket hole screws.

Step 8

Attach with glue and pocket hole screws, spacing is shown.

Step 9

Attach with glue and pocket hole screws. Careful! The spacing on these is close. You may find this set more easily accomplished with countersunk screws from the outside, if you don't mind the look of them.

Step 10

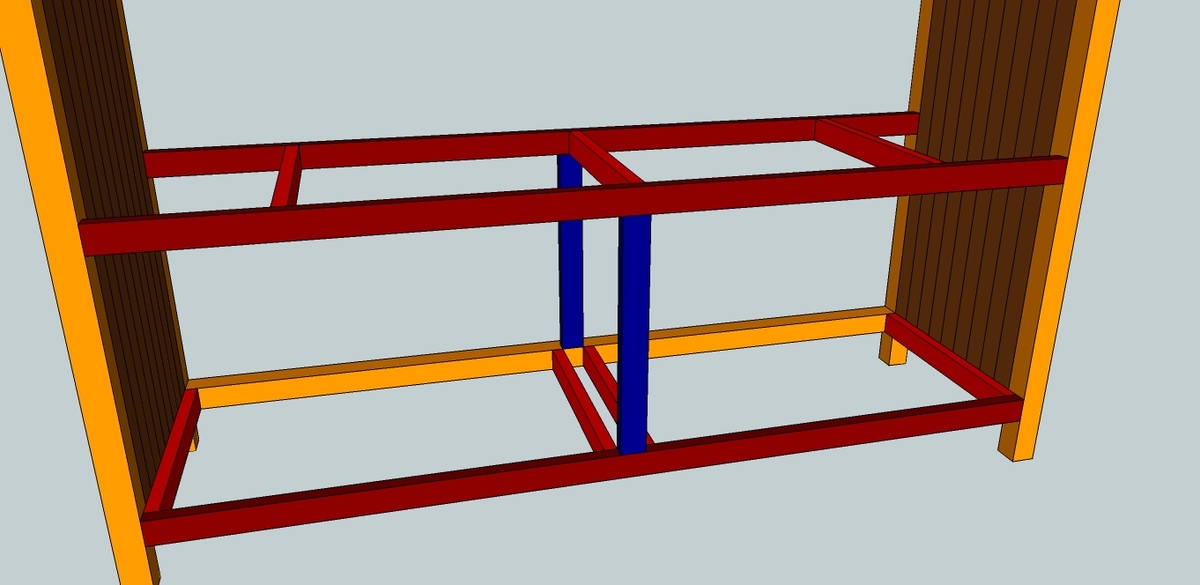
The final stretcher is attached at mid-point on the top.

Step 11

Next come the vertical spacers. Begin on the bottom row, one in front and one in back at mid-point. Make sure the one in back is positioned flush with the inner edge of the 2x2 stretcher...you will want that 2x2 to extrude a bit in order to inset your backing later on. Check for square.

Step 12

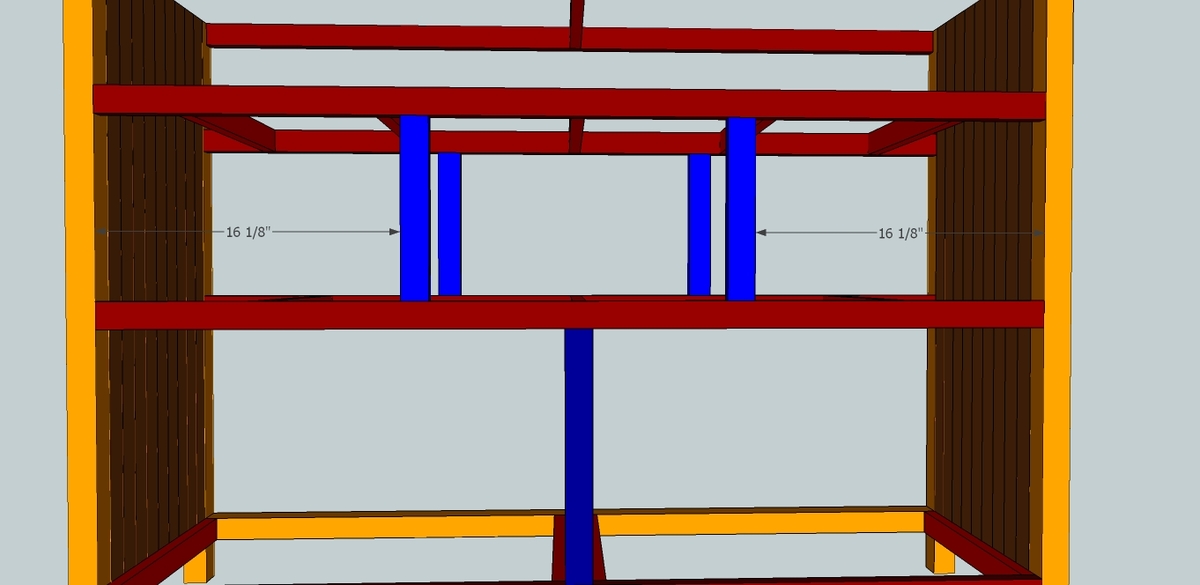
Second row of verticals, two in front, two in rear, using the spacing shown. Check for square.

Step 13

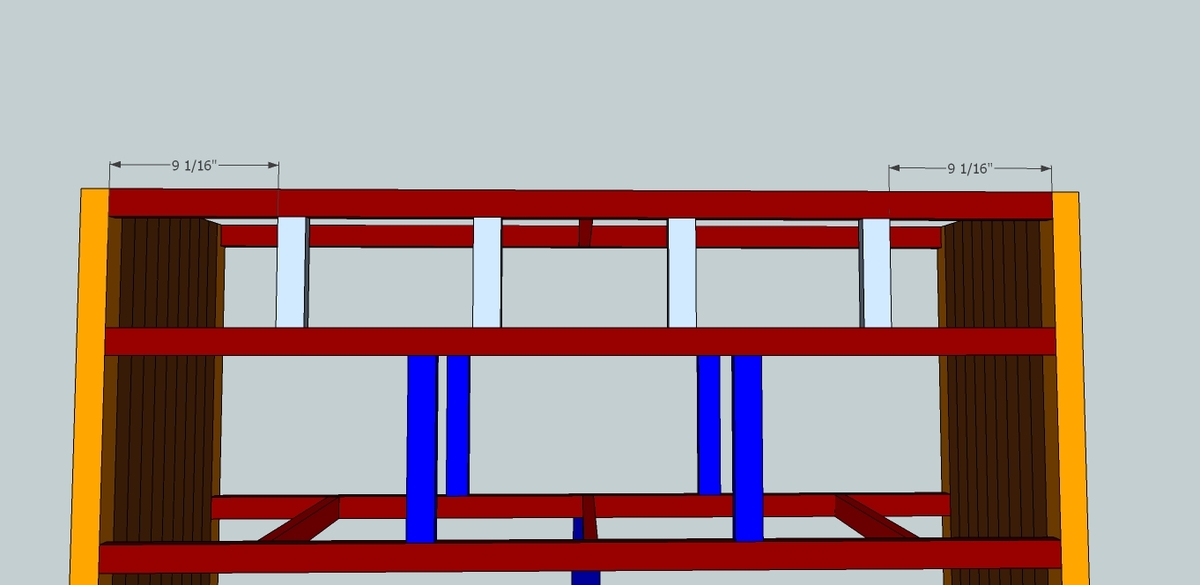
In a perfect world, all four of these verticals would attach at even spacing...but I don't want to bog you down with measurements to the 3/65ths. The first two may be spaced as shown, but for the middle two...

Step 14

...the spacing gets wonky. In a miniscule sense. Do your best to space them out pleasingly.

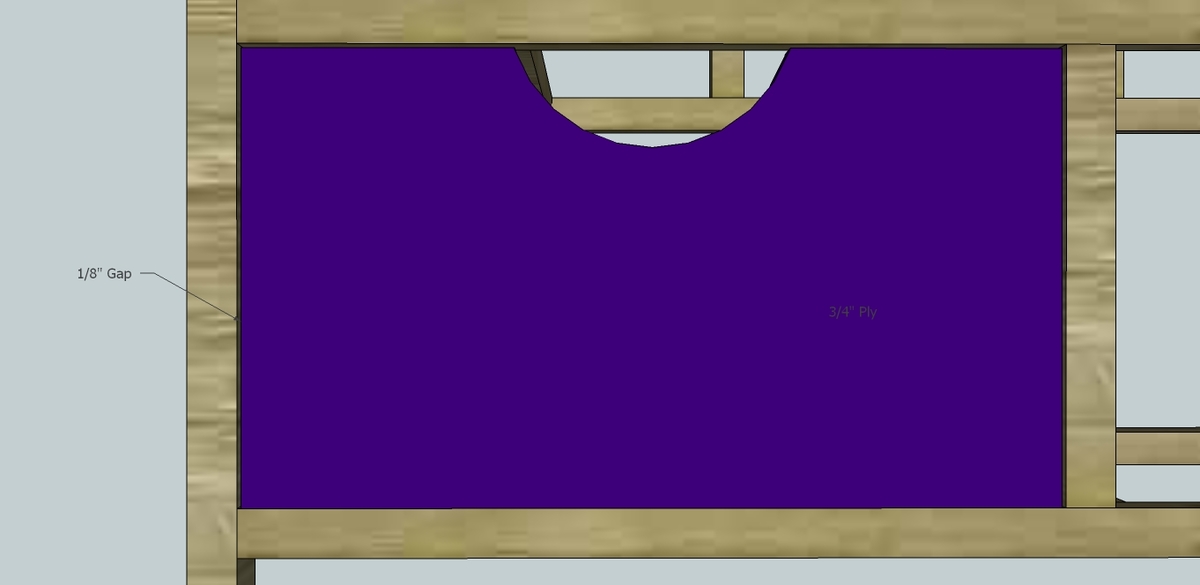
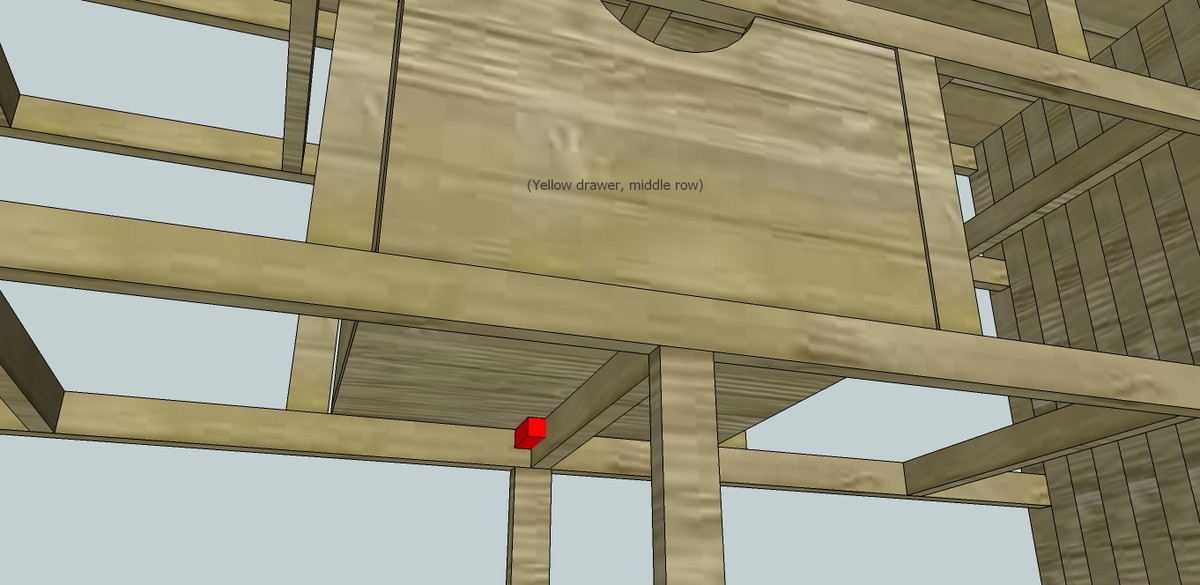
THIS is why you must not cut drawers before the dresser is assembled! (You haven't, have you?) Take your measurements from the finished cubby before you begin cutting drawer faces. Remember you will want 1/8" gap (or close to it) on each side.

Step 15

Cut the back, if using, as shown on the right. For the top, you have the option of a plain 3/4" ply, or my preferred design on the left. The following is for that design:

Step 16

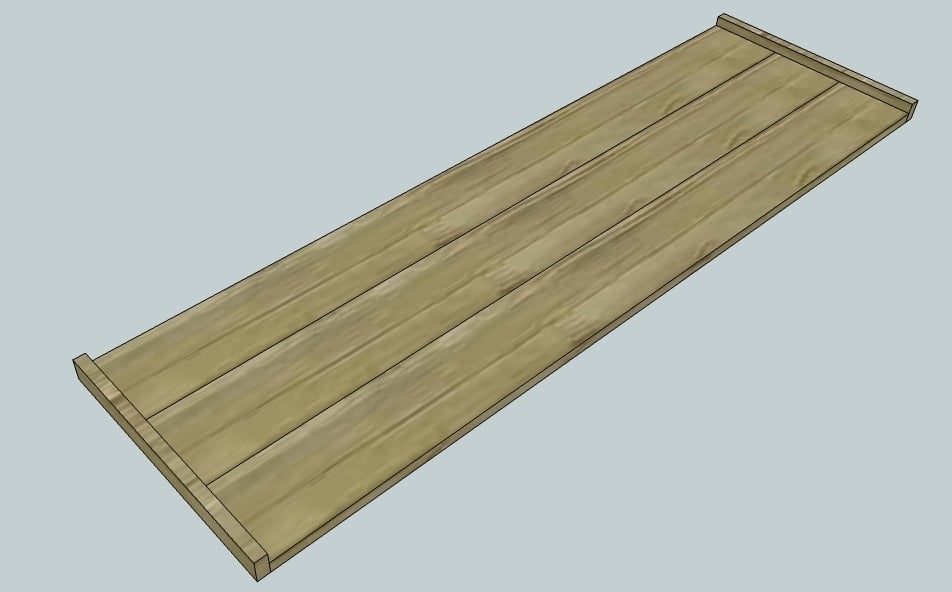
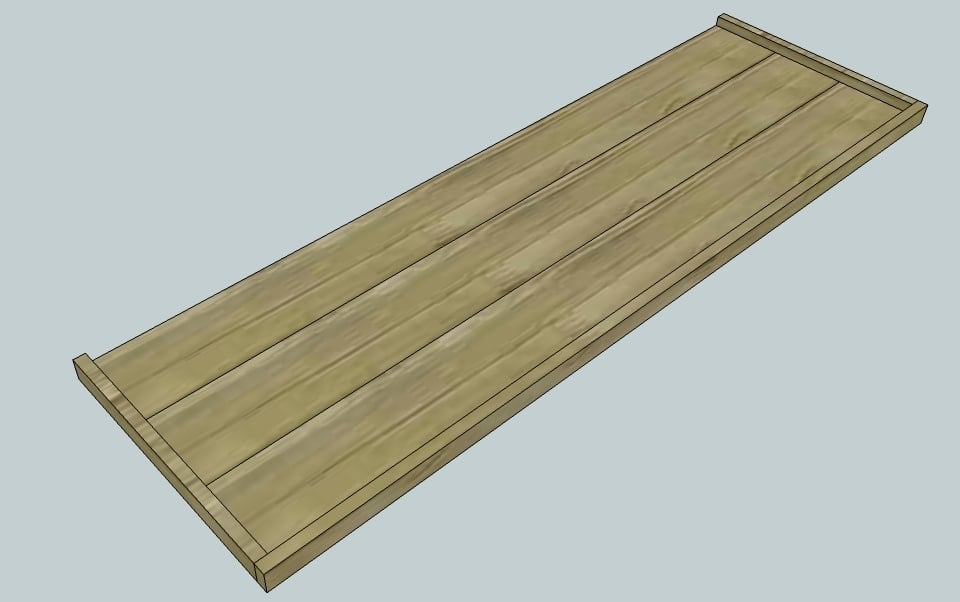
Edge glue your 1x6's and clamp well, finishing with pocket hole screws. Attach the 1x2 trim pieces as shown (pic shows top lying on its face).

Step 17

Attach front trim piece as shown. Check for square. Flip this over and attach to the carcass (it should be a pretty tight fit).

Step 18

NOW we can cut the drawer pieces (did you double check the actual cubby measurements?). Rip one sheet of 1/2" ply into two 15" strips and one 18". You may gang cut a lot of this, just be very careful to make your cuts square and precise. Use up some scrap, if you can. If you like, make the two large drawers out of 3/4" ply and eliminate that second half-sheet of 1/2".

Use a router or jig saw to cut the arcs in the face pieces. They do not all have to match each other, but the ones across a row should match as closely as possible. But! This is rustic and primitive, right? So imperfection will just add a little character!

Step 19

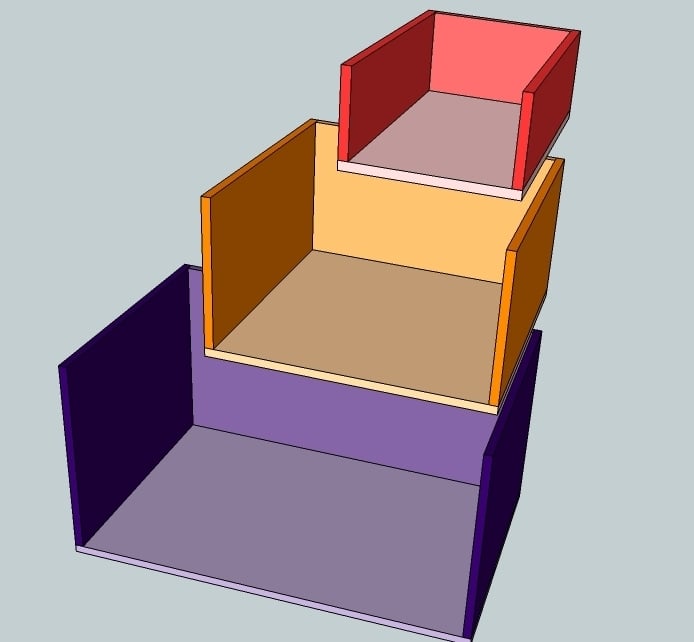
The drawers are just simple boxes. Attach the sides to the bottoms using glue and 1" pocket hole screws. Check for square.

Step 20

Attach the backs, again checking for square.

Step 21

Attach your face using pocket hole screws from the underside of the drawer bottom. Check the drawer in position (there should be about 1/8" gap on each side).

Step 22

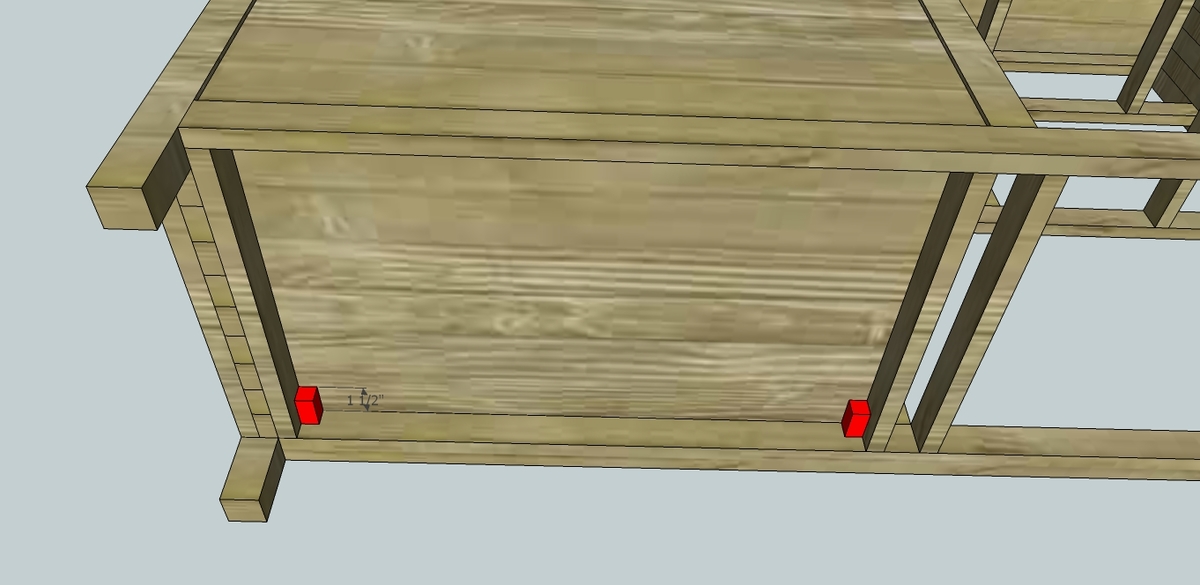
Now here's something I'd like to try. Instead of regular drawer slides, take two 1 1/2" pieces of scrap...from the underside of the well-positioned drawer, attach your scrap with glue and screw or nail as shown. This acts as a primitive drawer guide, keeping it straight as it slides in and out. It will also stop the drawer from sliding out too far and falling on the floor.

An alternative would be to attach a piece of 2x2 between the two vertical spacers to guide the drawer along its side.

Step 23

For the middle and top drawers, the "primitive guides" should sandwich the 1x2 upon which they are centered. Remove the lower drawers, place the drawer you're working on, and then attach the scrap guides from underneath.

We are now structurally complete. Attach the back, if using.

Step 24

Using painter's tape, give yourself some generous area to paint a chalkboard surface. For my top drawers, I got creative since I'm not going to frame them out anyway. If you ARE going to frame, don't worry too much about perfect lines....they'll be covered by the trim.

Step 25

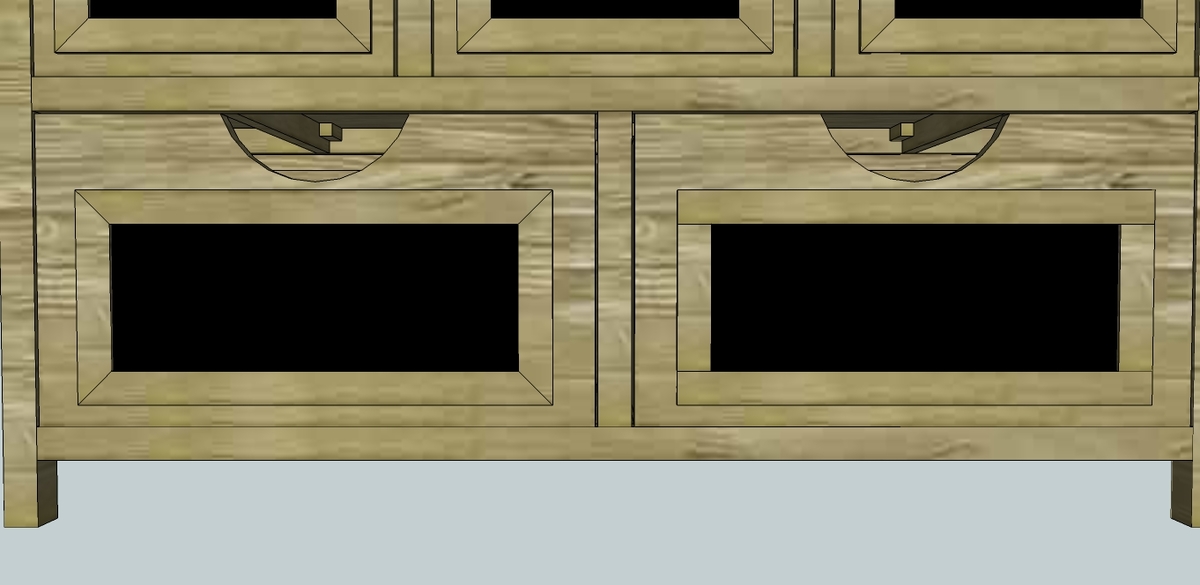
If you have a miter saw, by all means get fancy with the framing of the chalkboard (left). If not, I think a plain frame with butt joints (on the right) looks just as nice.

Step 26

That's it, functionally. For this piece, I would love a plain look like a whitewash or tung oil finish, but it would also be stunning in white or red paint or a rich cherry stain.

Thanks for reading through!

Step 27

(This inspiration, in case you didn't know what I was talking about :)

Finishing Instructions
Preparation Instructions
Fill all holes with wood filler and let dry. Apply additional coats of wood filler as needed. When wood filler is completely dry, sand the project in the direction of the wood grain with 120 grit sandpaper. Vacuum sanded project to remove sanding residue. Remove all sanding residue on work surfaces as well. Wipe project clean with damp cloth.
It is always recommended to apply a test coat on a hidden area or scrap piece to ensure color evenness and adhesion. Use primer or wood conditioner as needed.