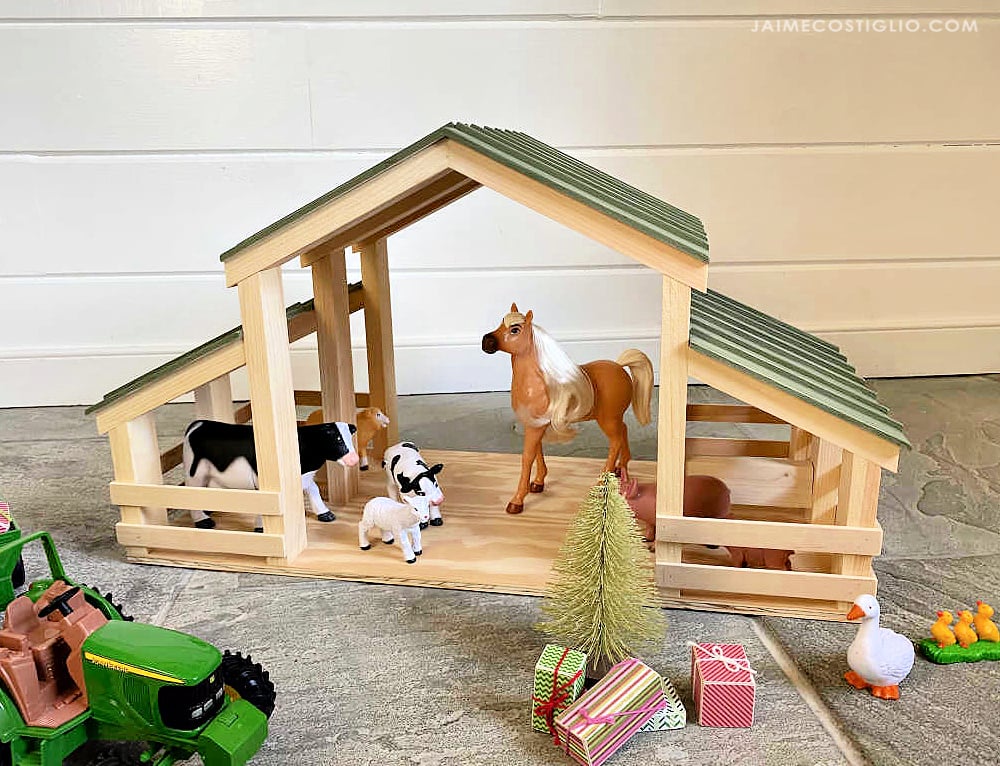


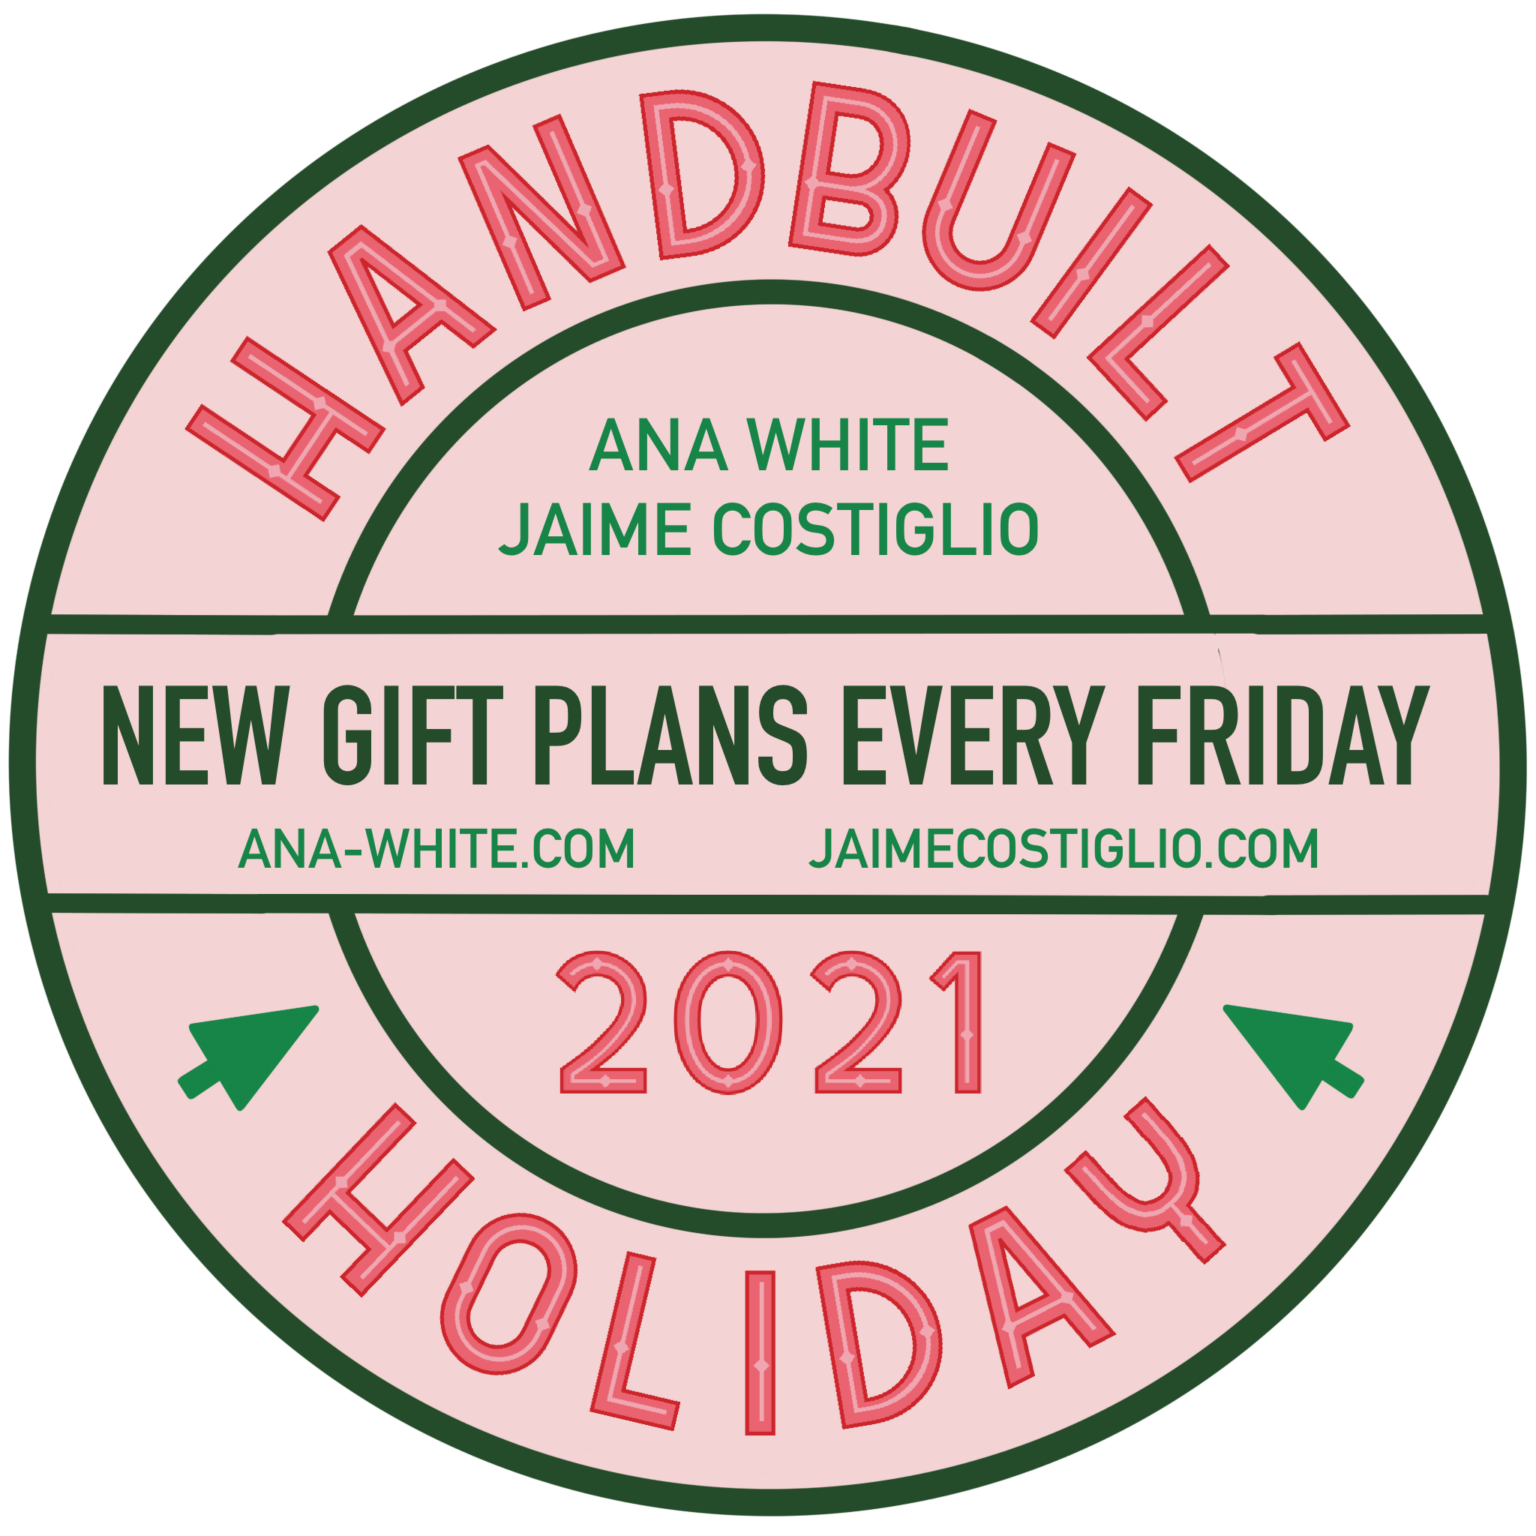
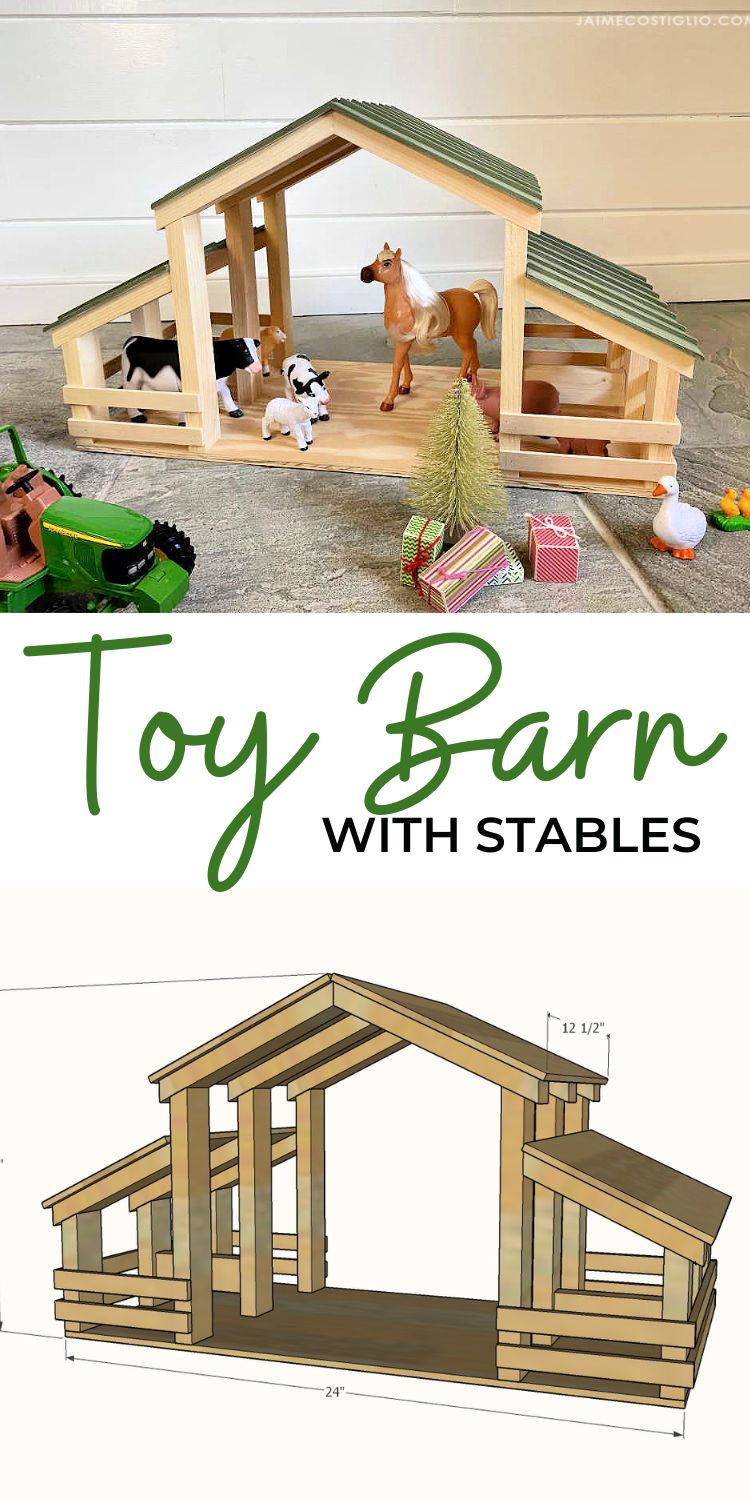
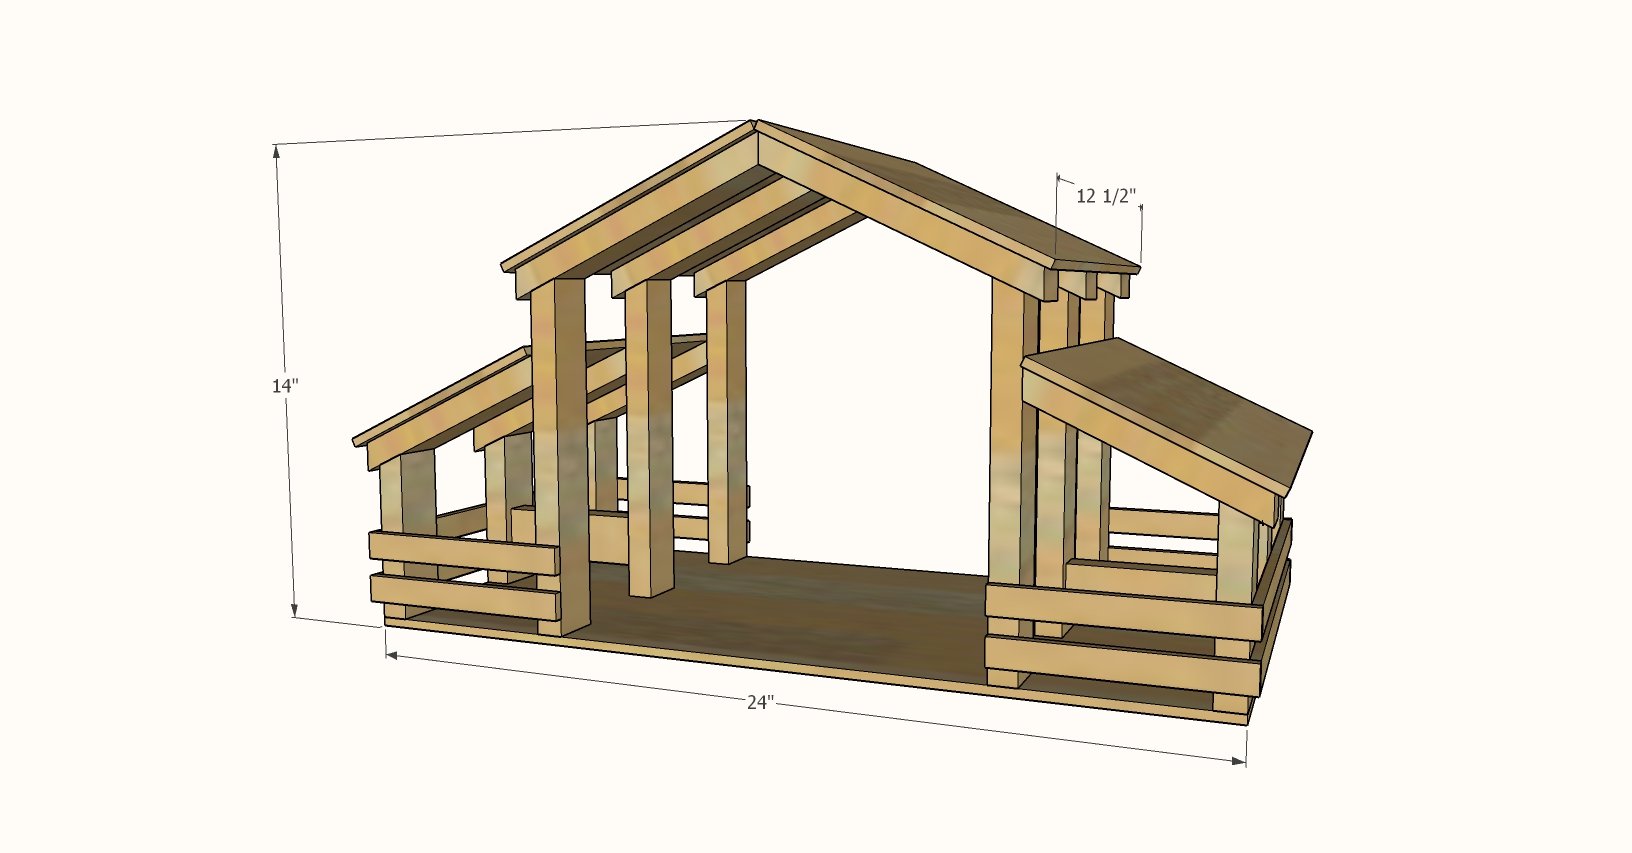
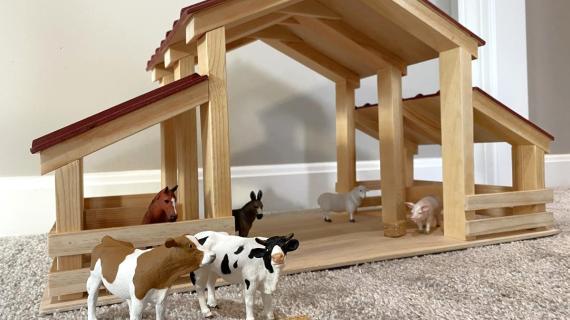
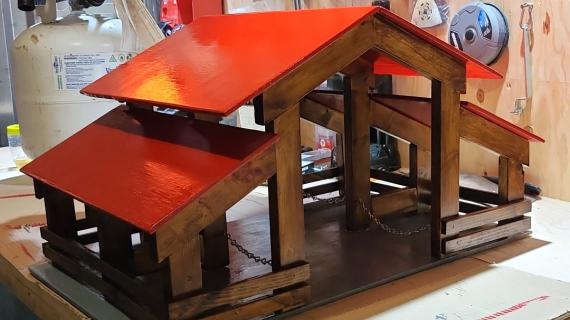
Free plans to build your own toy barn! This toy barn features an open style, so it's easy to play with horses or farm animals. This is an easy build and makes a great gift.
Handbuilt Holiday 2021
It's the season of giving! I partnered up with Jaime Costiglio to bring you a brand new free gift plan, every Friday in the 12 weeks leading up to Christmas! Over the years, we've gifted hundreds of plans, many that you can make with scrap wood. Check out the entire Handbuilt Holiday Collection here.
Toy Barn that You Can Build!
We wanted to add toy barn to our collection of free build plans - as children love playing with horses and farm animals.
There are many different styles of toy barns. For this plan, we went for a less expensive and open option!
Why We Love this Toy Barn Plan
- Inexpensive to build with 1x2s and 1/4" plywood
- Open style that is easy to play with from all sides
- Drive through center for tractors and horse trailers
- Good for children's imaginations to pretend play
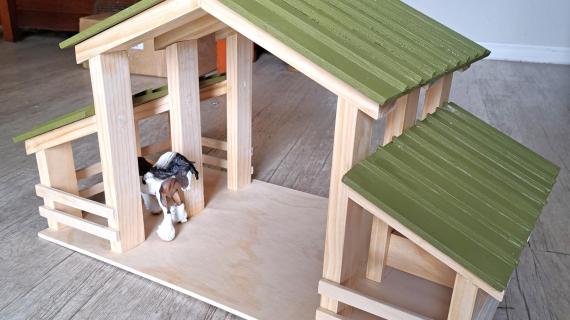
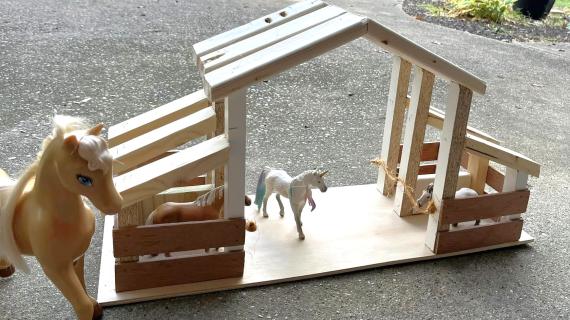
- Fun to customize
- Great way to use up scrap wood
- Beautiful and designed to look like a real barn
More Photos and Build Tips
This toy barn was built by Jaime Costiglio for our Handbuilt Holiday series. Jaime shares lots more photos and build tips in her build post. Please take a second to pop over and read her post before tackling this plan.
Pin for Later!
Preparation
- 1 - 1/4" plywood panel, 24" x 48"
- 2 - 1x2 @ 8 feet long (can also use 3/4" x 3/4" square dowels)
- 1-1/4" and 5/8" brad nails
- wood glue
- 6 - 1x2 @ 9-3/4" - one end cut at 25 degrees off square, long point measurement
- 6 - 1x2 @ 6-1/4" - both ends cut at 25 degrees off square, long point to short point measurement, ends are parallel
- 6 - 1x2 @ 4-3/4" - one end cut at 25 degrees off square, long point measurement
- 6 - 1x2 @ 8" - both ends cut at 25 degrees off square, long point to short point measurement, ends are parallel
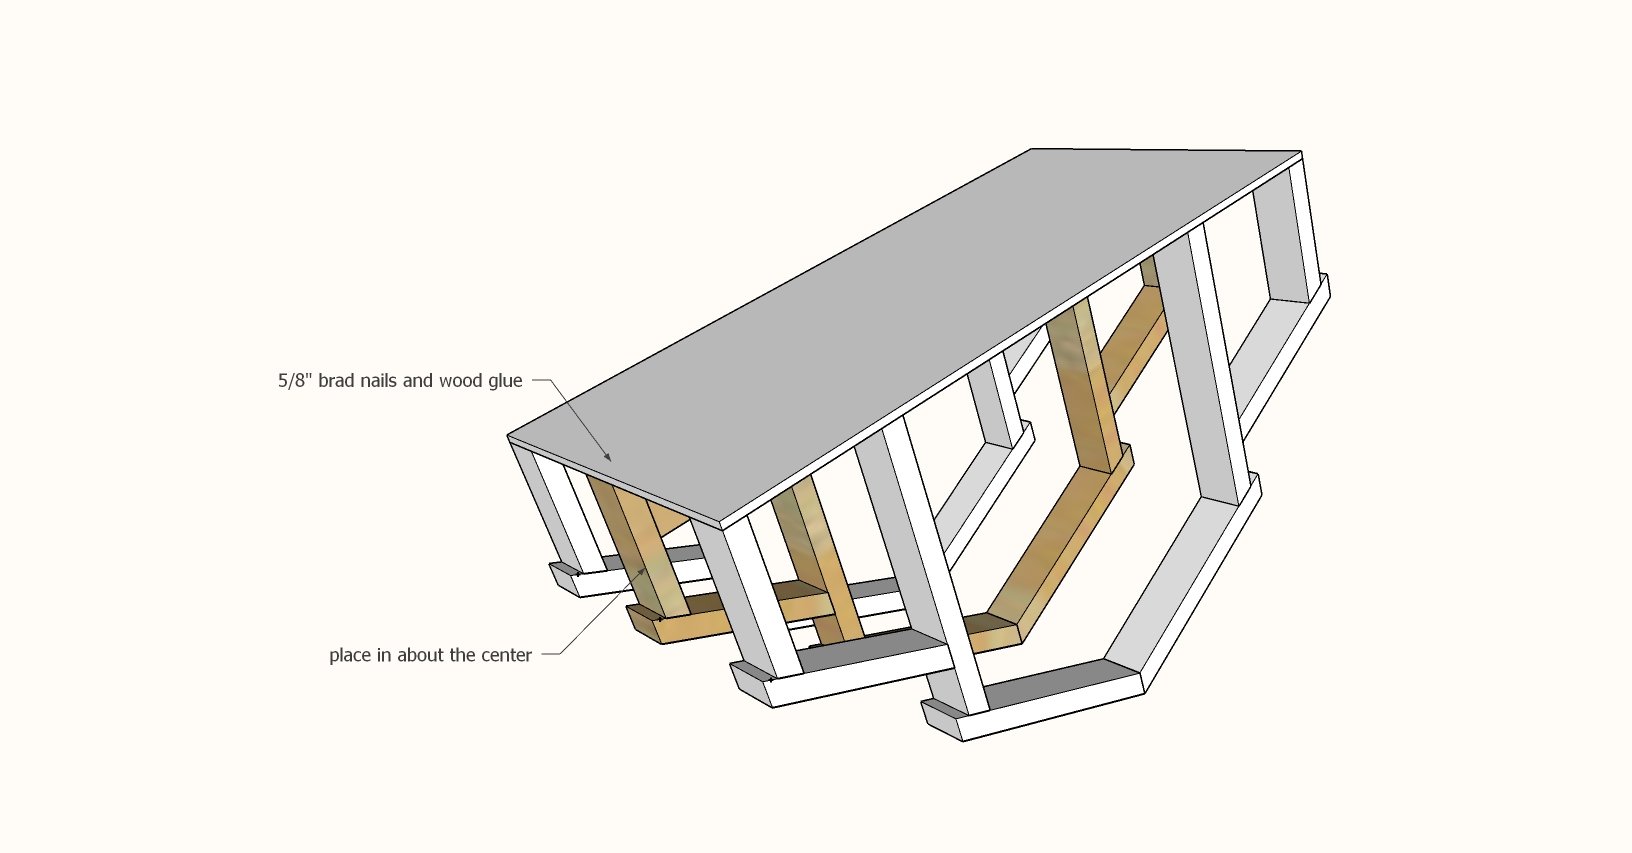
- 2 - 1x2 @ 4-1/2" - center stall divider
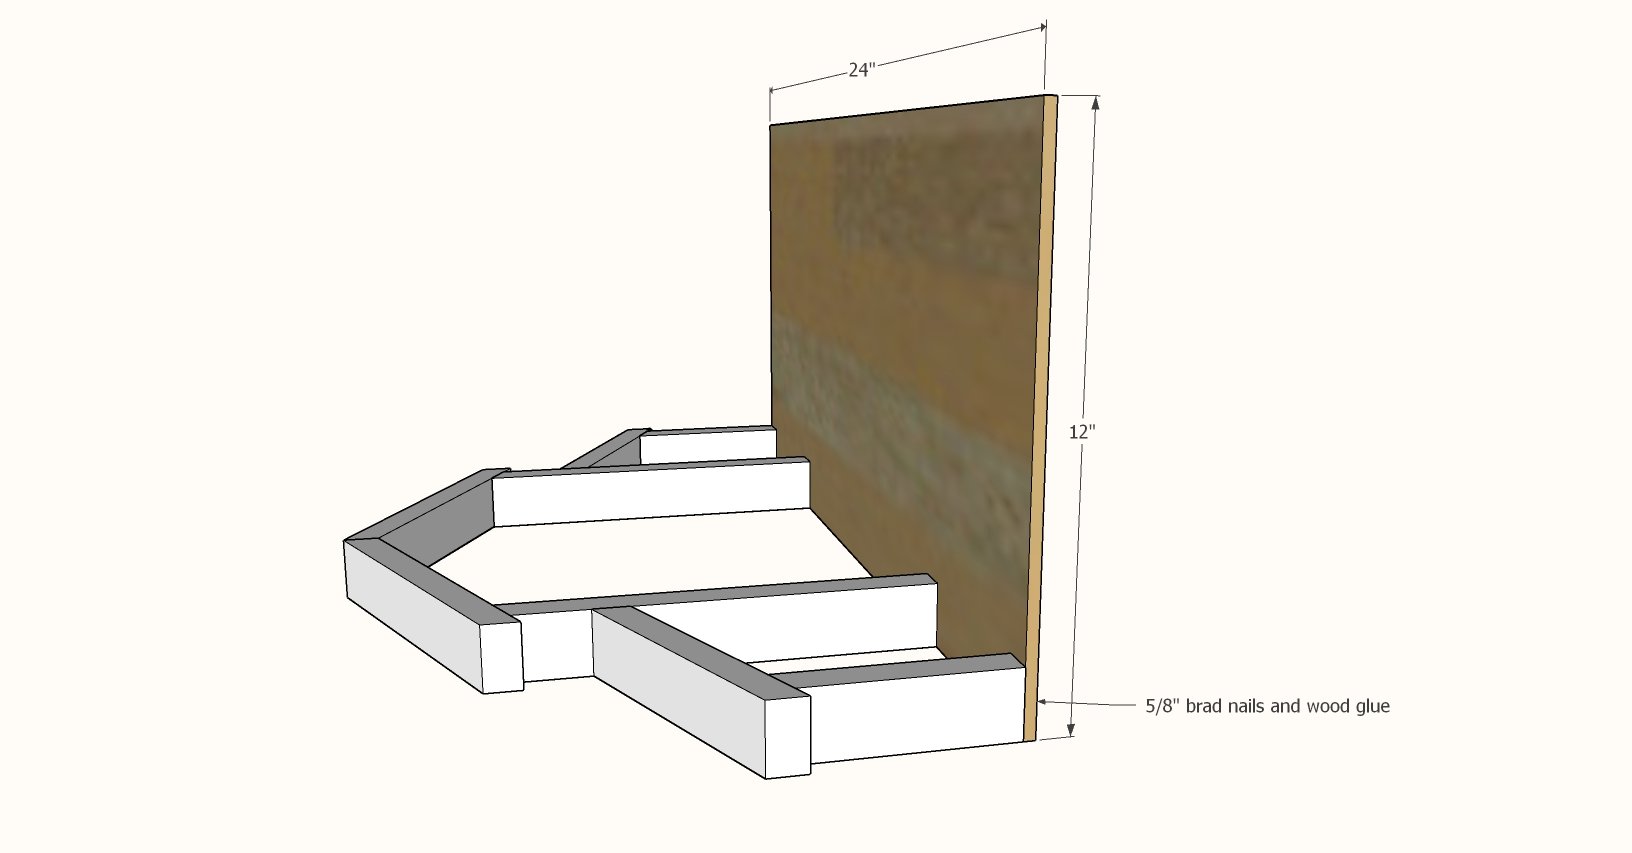
- 1 - 1/4" plywood @ 12" x 24" - bottom
- 4 - 1/4" plywood @ 3/4" x 12" - railing
- 8 - 1/4" plywood @ 3/4" x 6-1/4" - railing
- 2 - 1/4" plywood @ 8" x 12-1/2" - top roof
- 2 - 1/4" plywood @ 6-1/2" x 12-1/2" - side roof


Instructions
Step 1
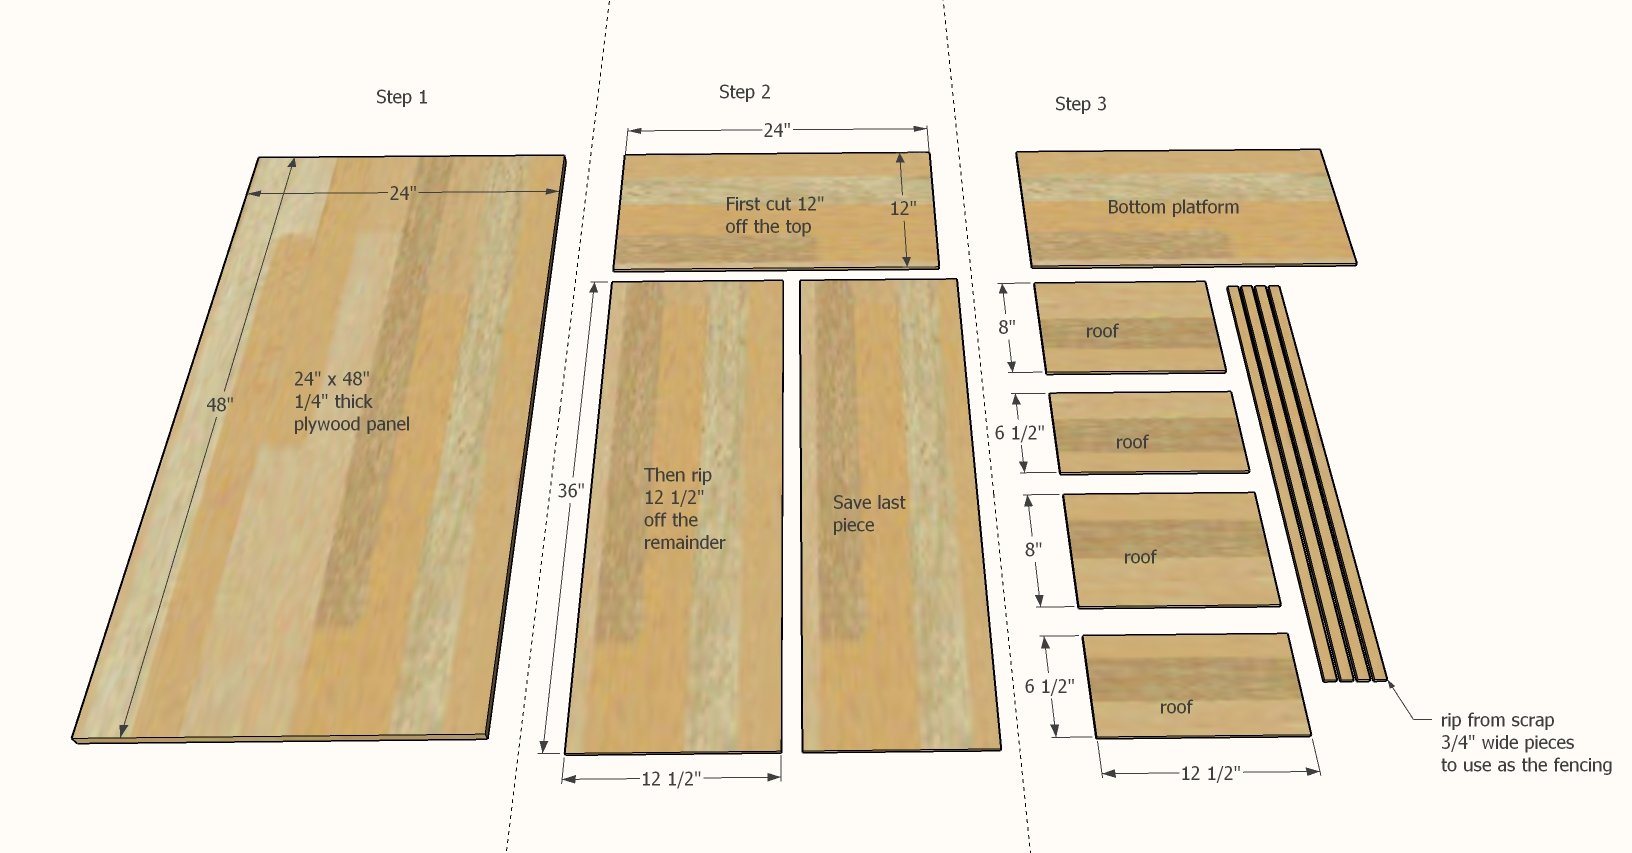
Break the 24" x 48" plywood panel down by cutting the floor piece off first, then the roof panel piece. Save the scrap.
Then cut the roof panel piece down into the smaller roof pieces.
Rip some strips of 1/4" plywood for the railing (or you can use craft wood pieces for the railing if you can't rip this small).
Step 2
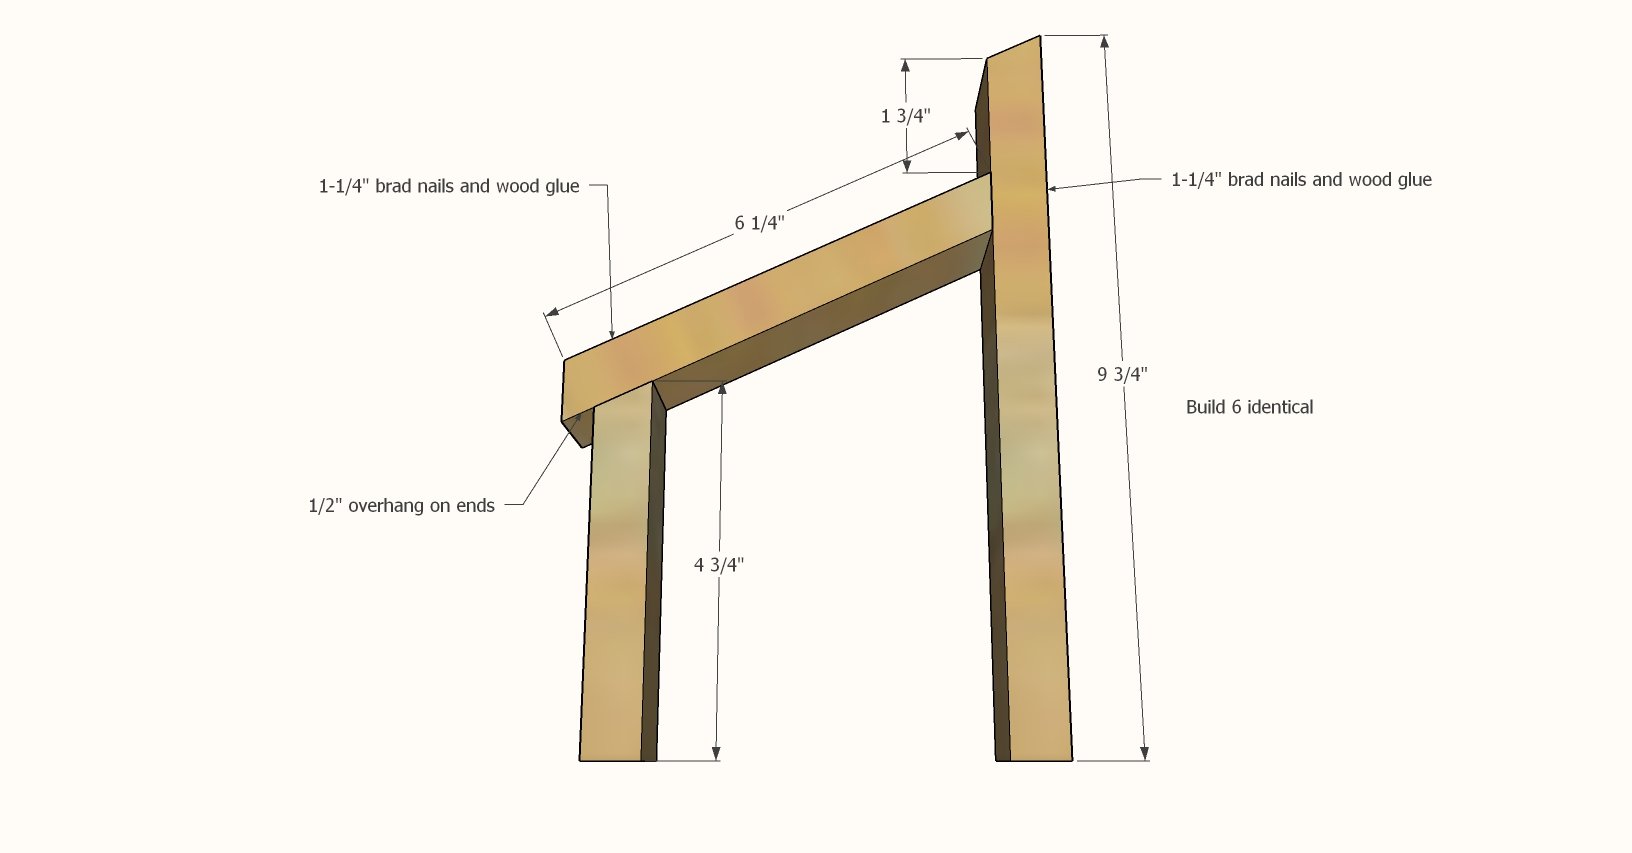
Build the outer wall sections first. Build six identical.
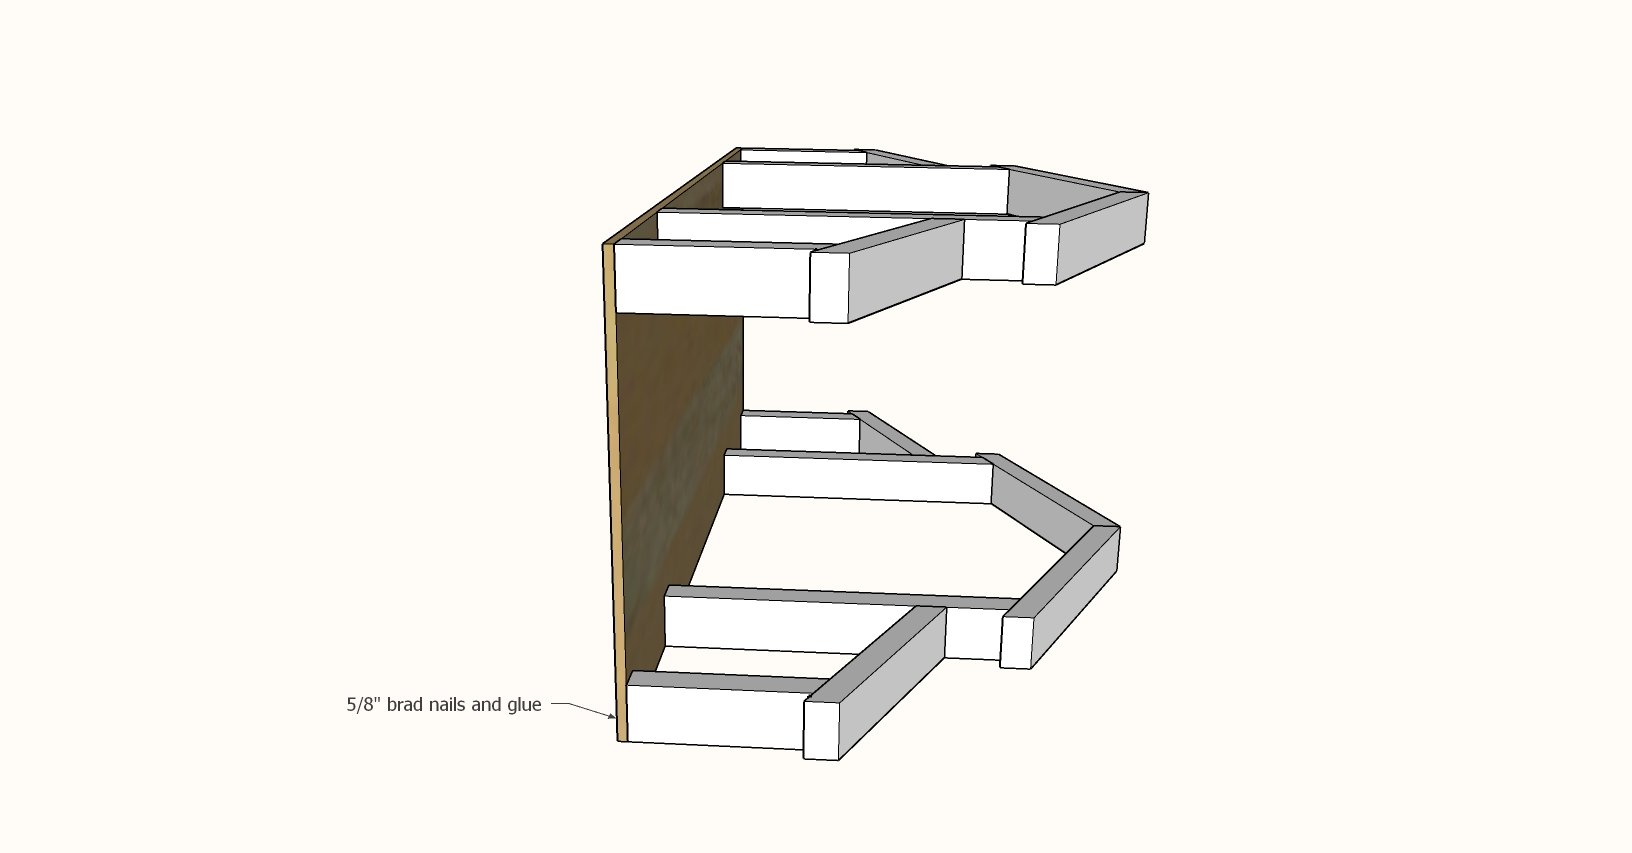
Step 3
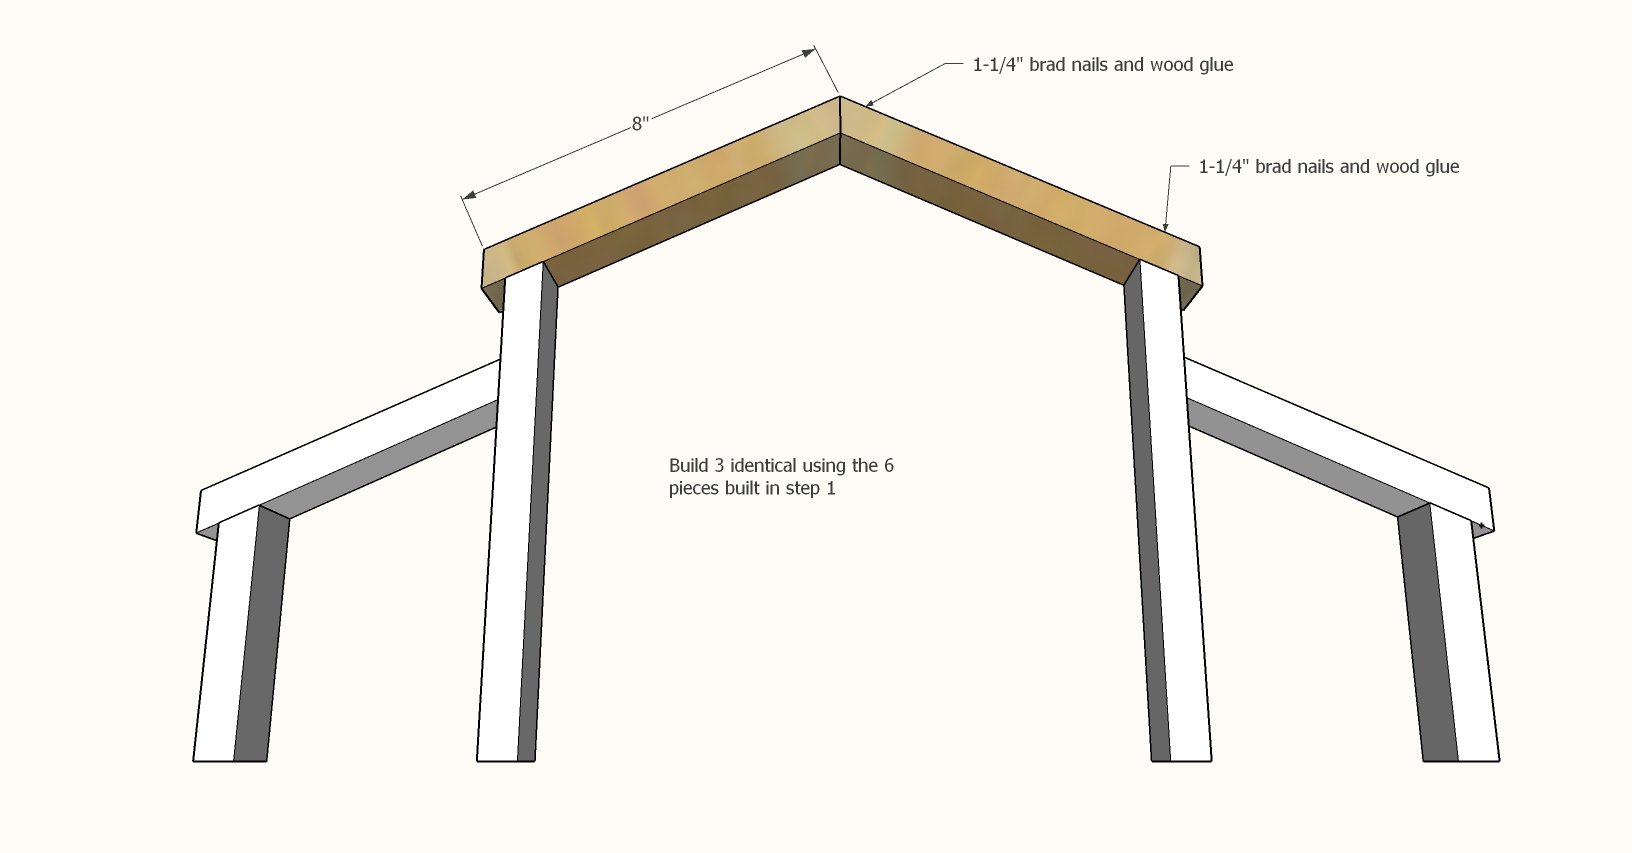
Add the roof pieces to the outer walls to make three.
Step 4

For the center walls, if you want to add a divider between stalls, do this now.
Step 5
Attach floor to one wall.
Step 6
Attach other outside wall.
Step 7
Position the remaining wall in the center and attach.
Step 8

Add railing to the outside.
Step 9

Add railing to the front and back.
Step 10
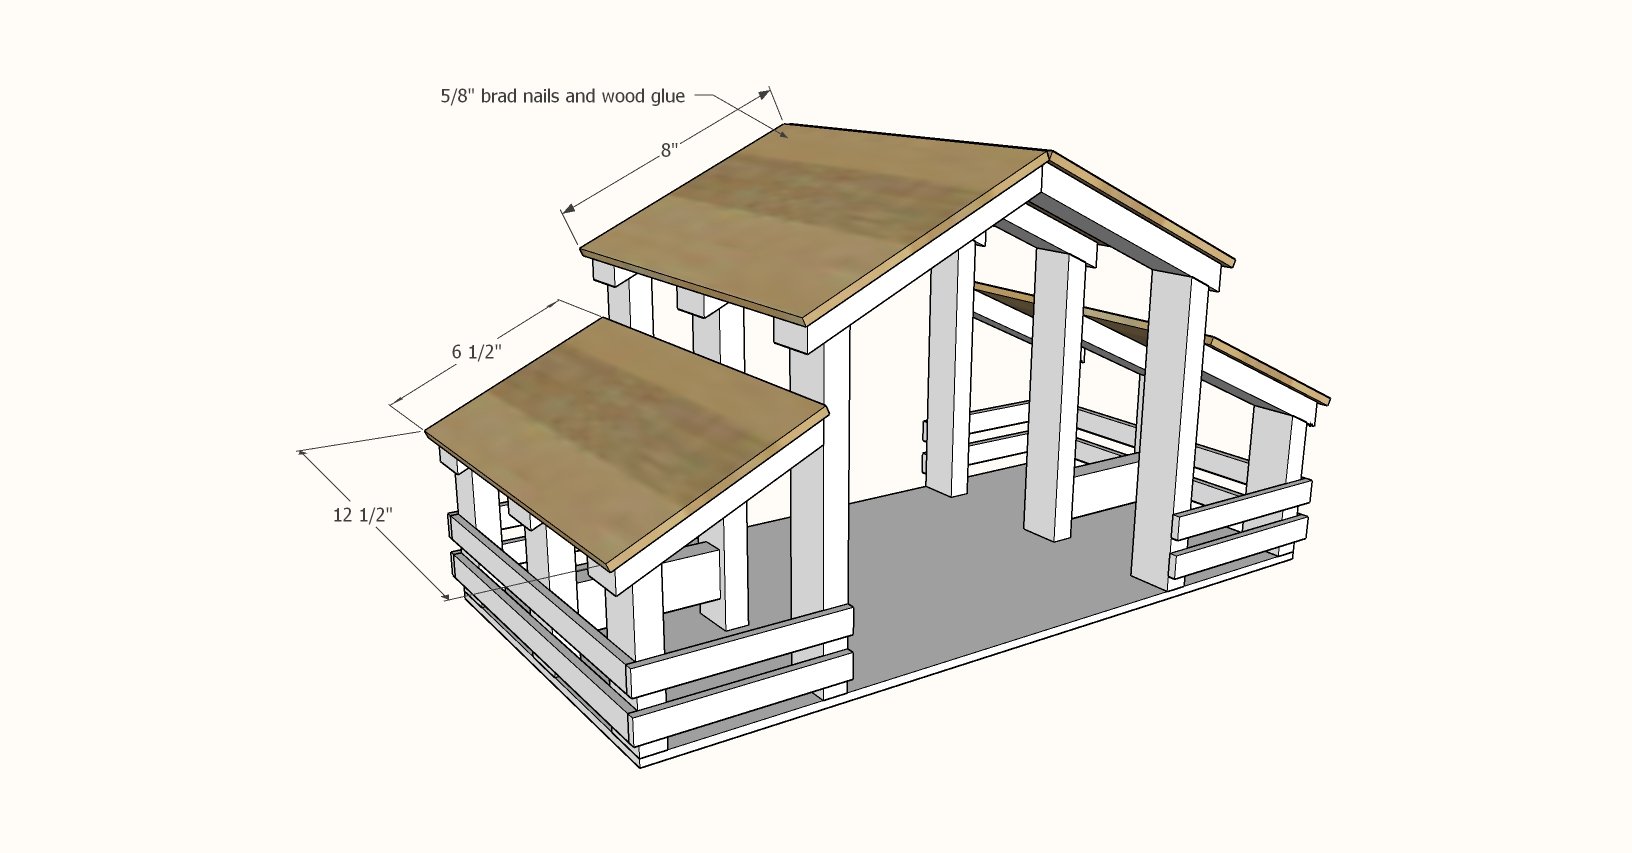
Attach roof panels, there will be a slight overhang on ends.


Comments
MJB2003
Sat, 11/20/2021 - 04:30
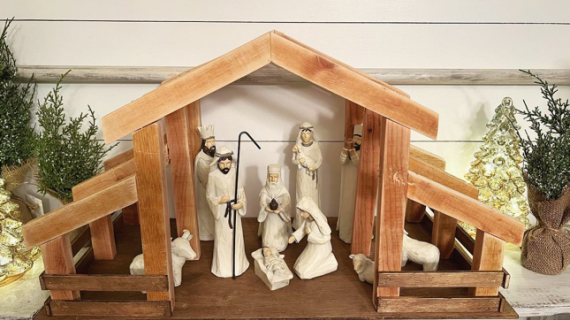
This would be a great stable…
This would be a great stable for a nativity scene also!