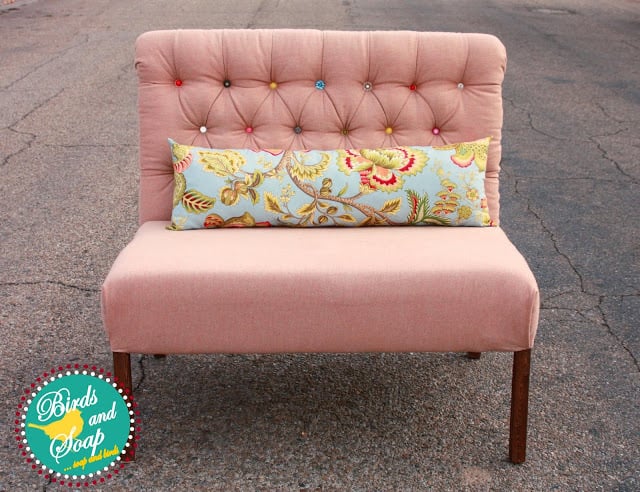
Free plans to build a upholstered settee or dining room banquette bench
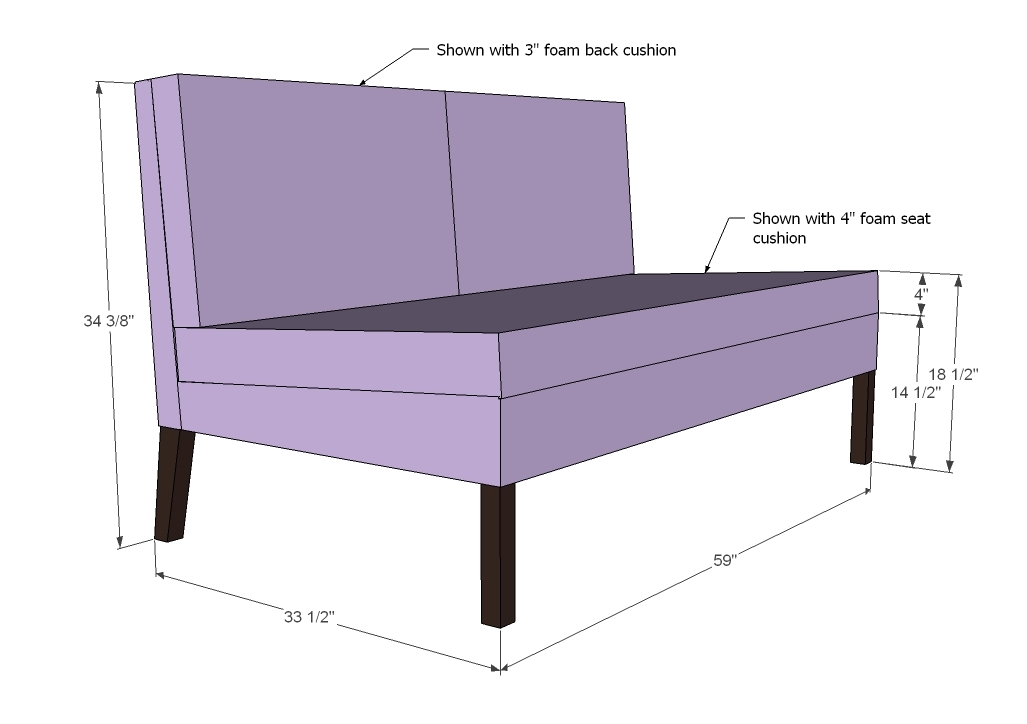
Preparation
2 – 2x4 @ 8 feet long
1 – 1x2 @ 8 feet long
4 – 2x2 @ 8 feet long
2 – 2x6 @ 8 feet long
2 – sheets 1/8” plywood or other backing material (firm cardboard could work for back but probably not seat or upholstery webbing)
12 – 4” ¼” diameter bolts with nuts and washers
2 ½” PH screws
Spray adhesive
4 – 5 yards upholstery batting
4-5 yards (depending on fabric direction/print and width maybe even more) fabric
½” staples
THIS LIST DOES NOT INCLUDE PILLOW SUPPLIES
FRAME
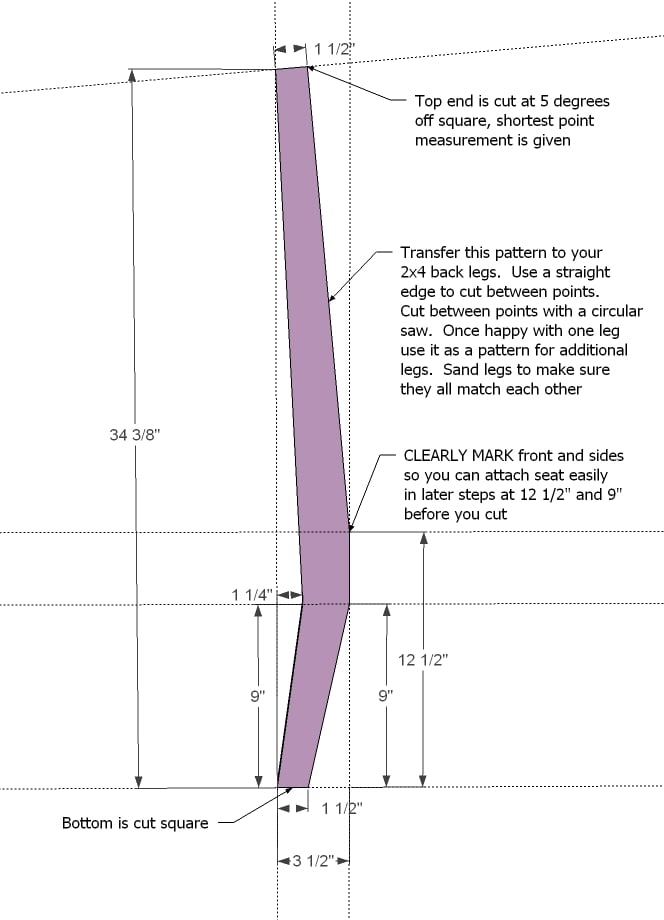
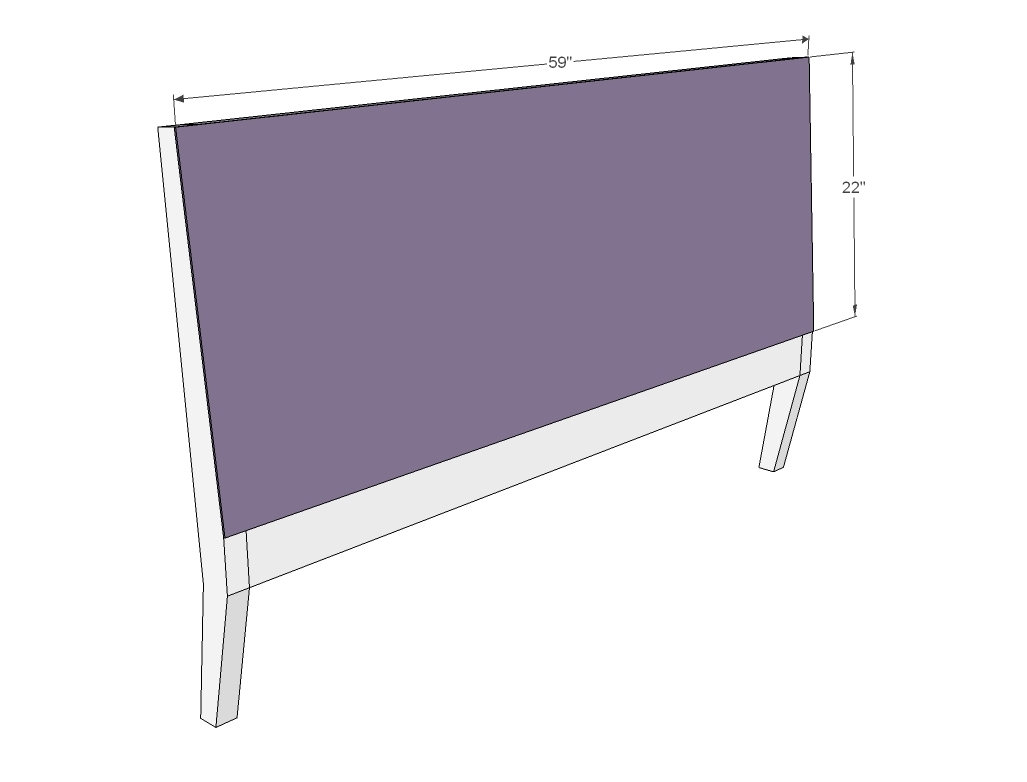
2 – 2x4 @ 34 3/8” (top end cut at 5 degrees off square, shortest point measurement)
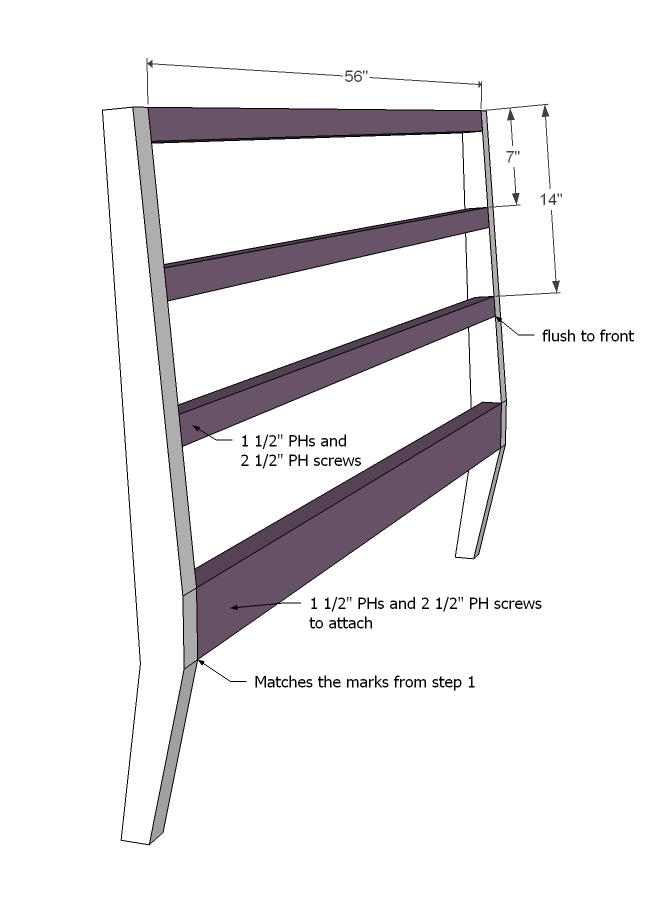
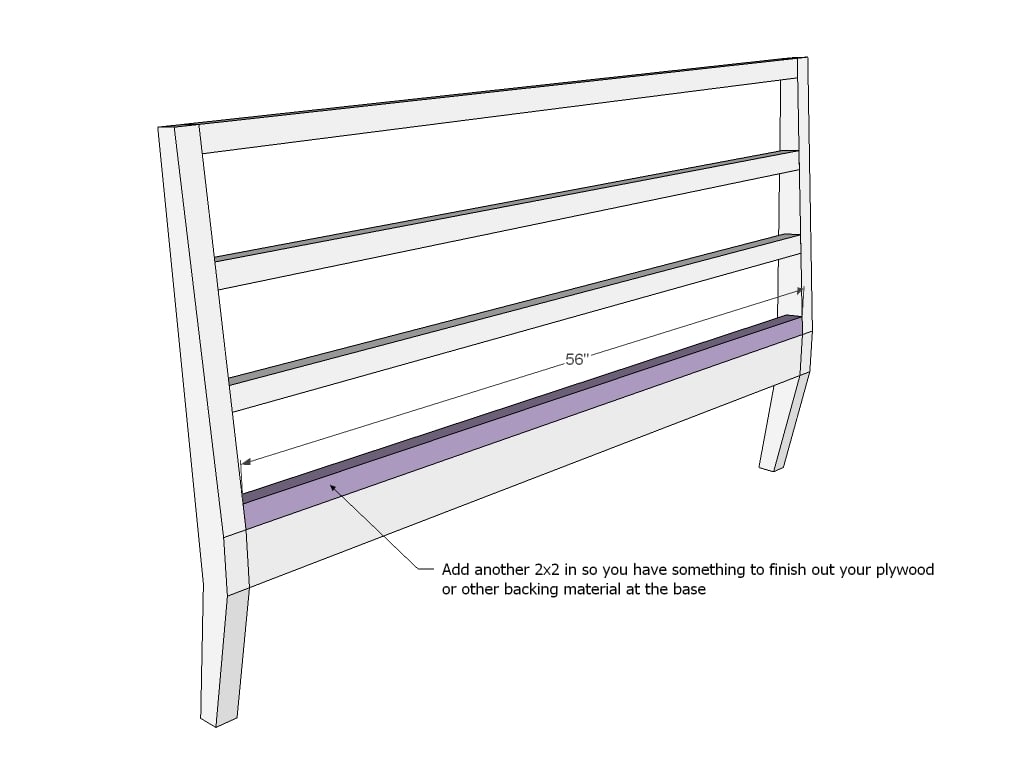
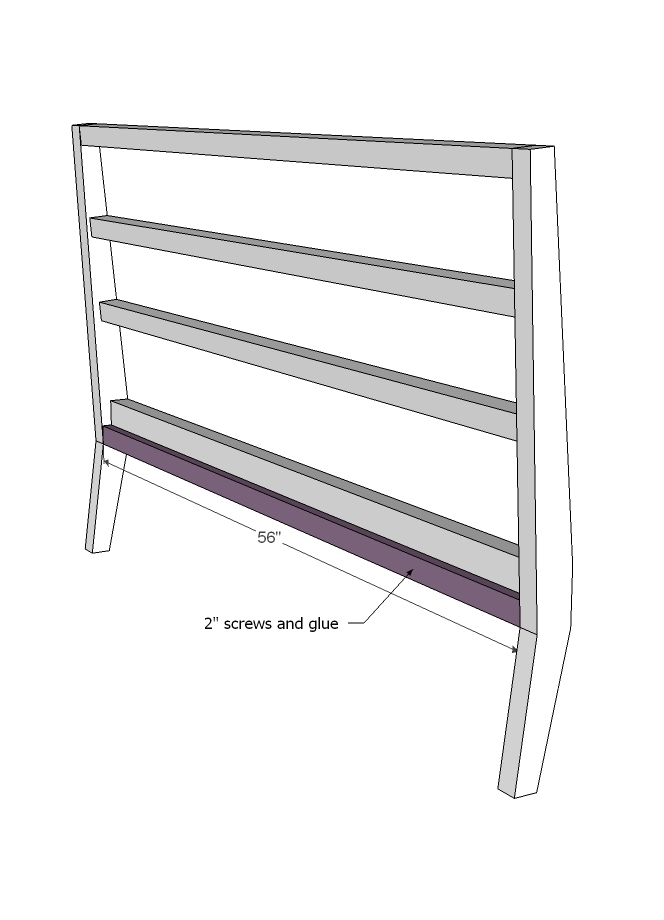
4 – 2x2 @ 56” (back supports)
1 – 2x4 @ 56” (back supports)
1 – 1x2 @ 56” (back support cleat)
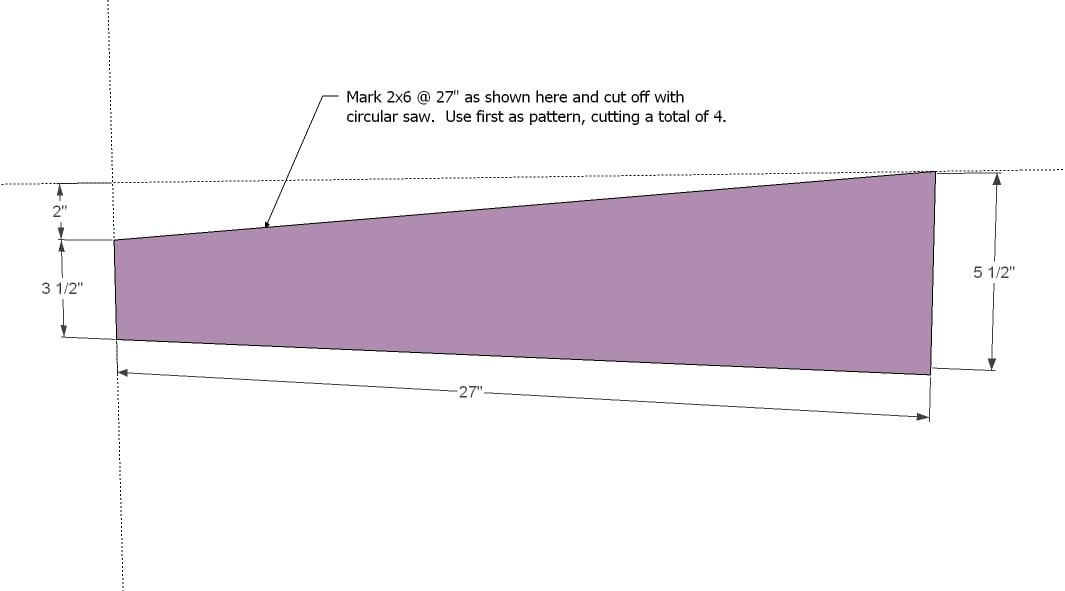
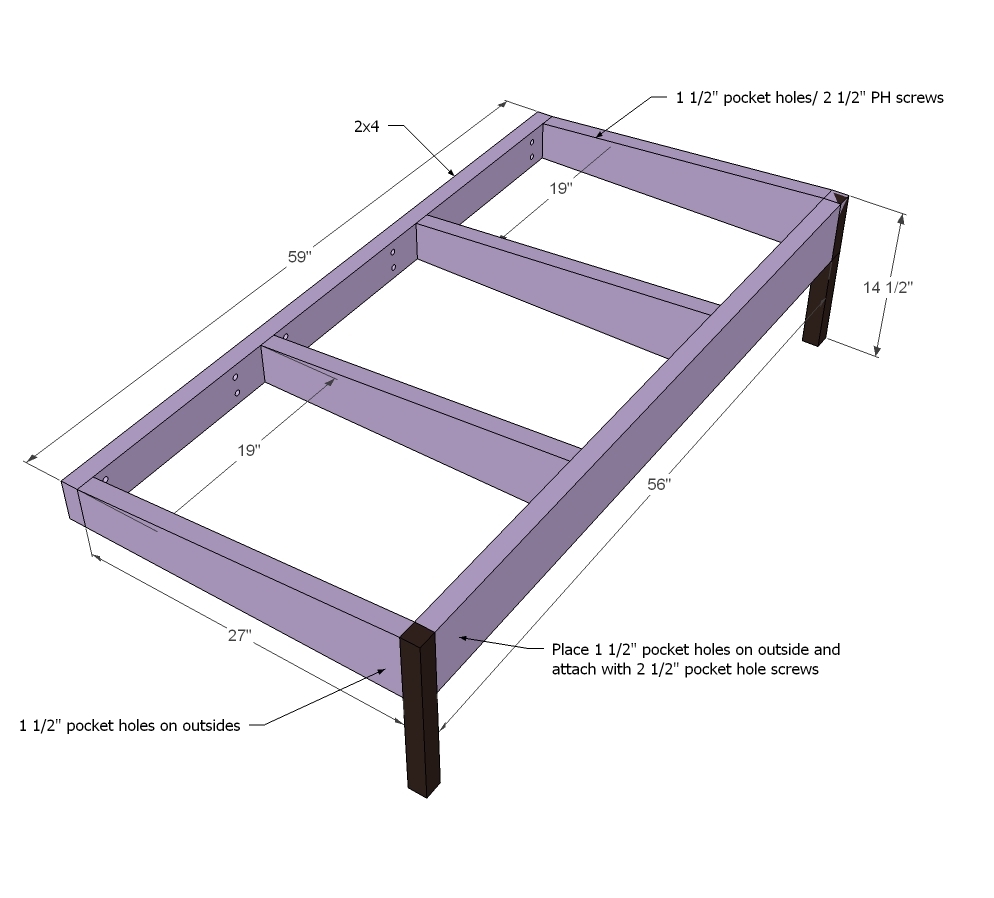
4 – 2x6 @ 27” (seat supports/side aprons)
1 – 2x4 @ 59” (back)
1 – 2x6 @ 56” (front)
1 – 1/8” plywood @ 59” x 22” (back covering if not using webbing)
1 – 1/8” plywood @ 59 x 30” ((seat covering if not using webbing)
*** Jenny actually modified this bench so the seat is 24" deep to accommodate standard sized foam. To make this modification, you will need to cut seat supports/side aprons to 21" length instead of 27".
NOTE that is this plan, Jenny has made some modifications and I highly recommend you stopping over to get more details.
Please read through the entire plan and all comments before beginning this project. It is also advisable to review the Getting Started Section. Take all necessary precautions to build safely and smartly. Work on a clean level surface, free of imperfections or debris. Always use straight boards. Check for square after each step. Always predrill holes before attaching with screws. Use glue with finish nails for a stronger hold. Wipe excess glue off bare wood for stained projects, as dried glue will not take stain. Be safe, have fun, and ask for help if you need it. Good luck!
Instructions
Step 1
First, cut your legs for the back. Jenny actually made her legs longer for a taller seat - you can see how she did that here.
Step 3
Step 6
Step 7
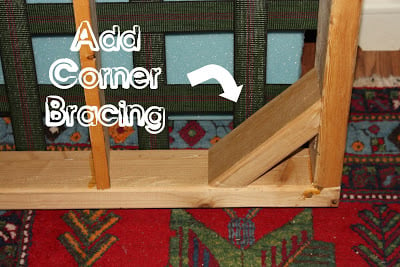
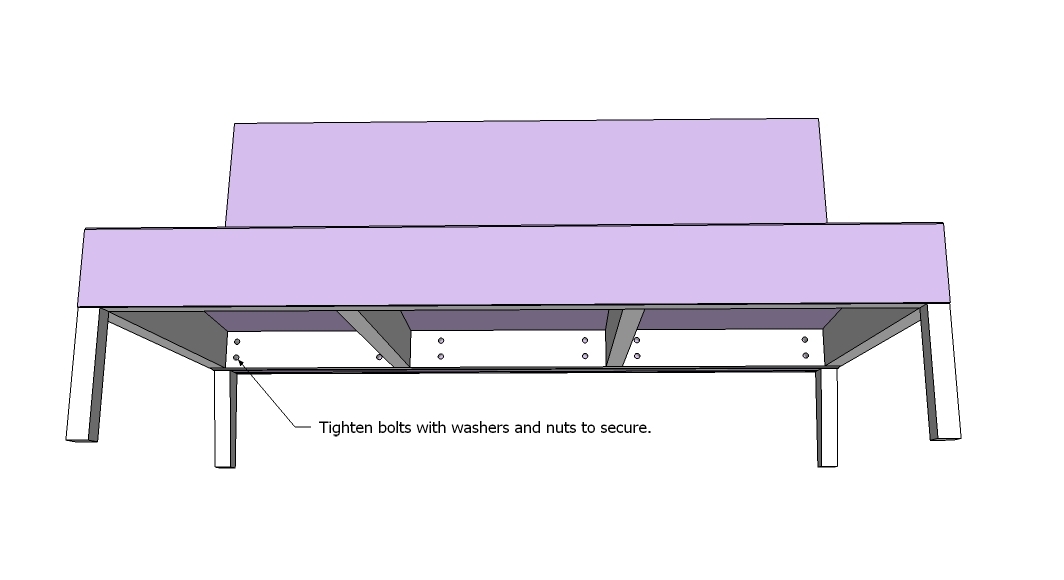
Now build your frame as shown above. Note that we did change things up and integrate the front legs into the frame for better support. Jenny also recommends adding corner supports to keep the frame square and stronger.
Step 8
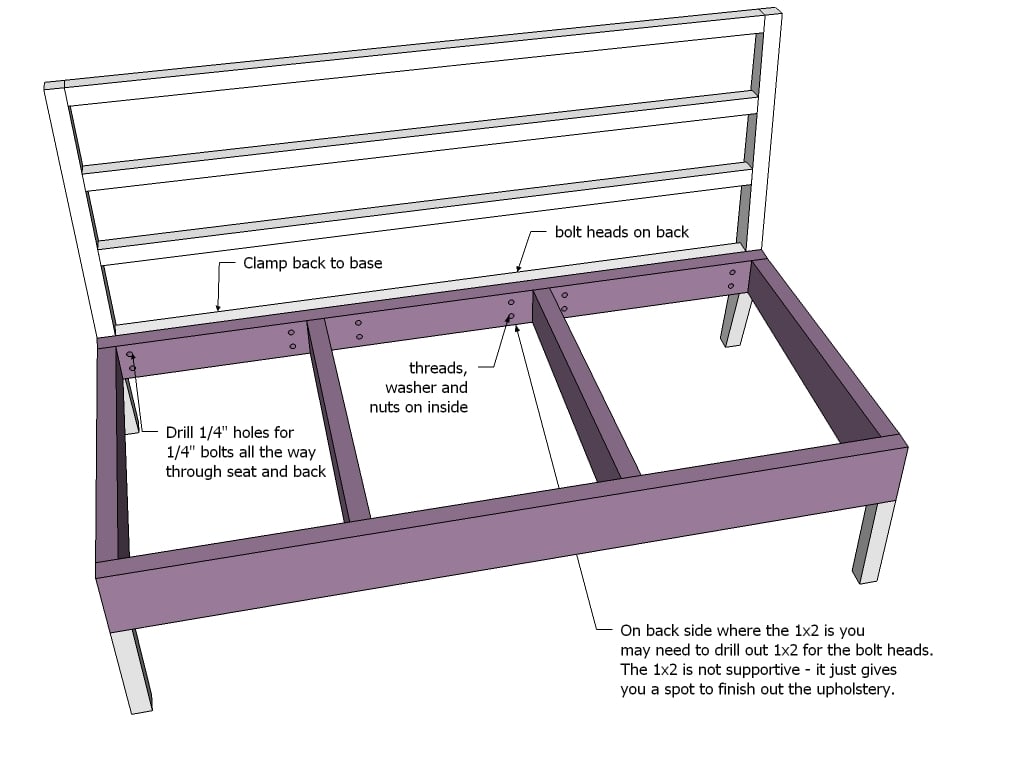
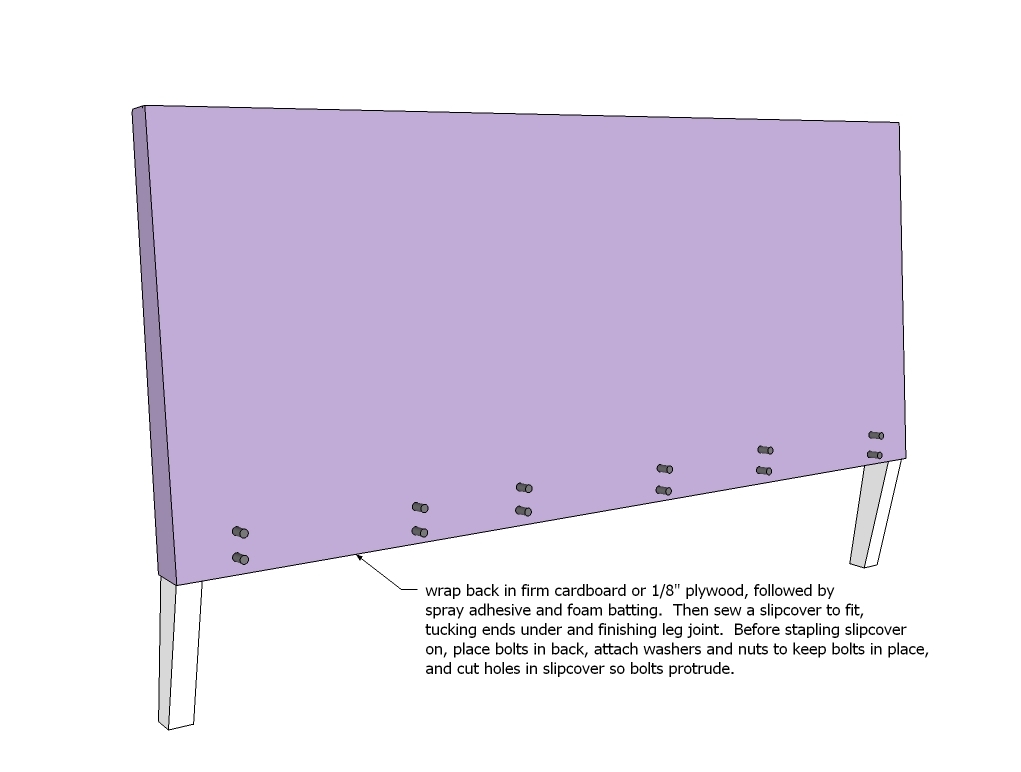
Next, it's time to make sure the frame fits with the back. Also, here you can drill bolt holes to later attach the two upholstered sections together. Fit the back and seat together with bolts and test out to make sure everything fits and is solid. Then take the two pieces apart to upholster individually.
NOTE that you can permanently attach the seat to back here, but you will most likely have to do a lot more sewing - that's why bolts are recommended.
Step 9
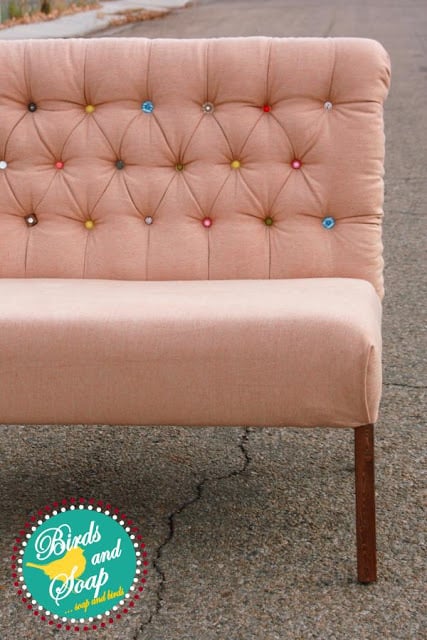
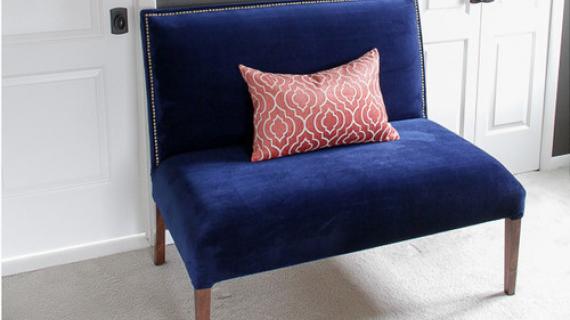
Cover the back in foam and batting, followed by fabric slipcovered and stapled on the bottom. For more details from Jenny on how she upholstered her bench, you can go here.
Step 10
It is always recommended to apply a test coat on a hidden area or scrap piece to ensure color evenness and adhesion. Use primer or wood conditioner as needed.






Comments
spiceylg
Tue, 02/05/2013 - 06:37
!!!
Wow, that is really nice, Jenny! Please don't apologize to us Ana. You all have so much on your plate and your priorities are right. You take as much time as you need and we all will be anxiously waiting the posts, plans, and pictures! Thanx for all you do!
redhead_61
Tue, 02/05/2013 - 15:30
so fun
This is so cute. It would be so fun in a kids size too! Those upholstered chairs are CRAZY expensive for kids.