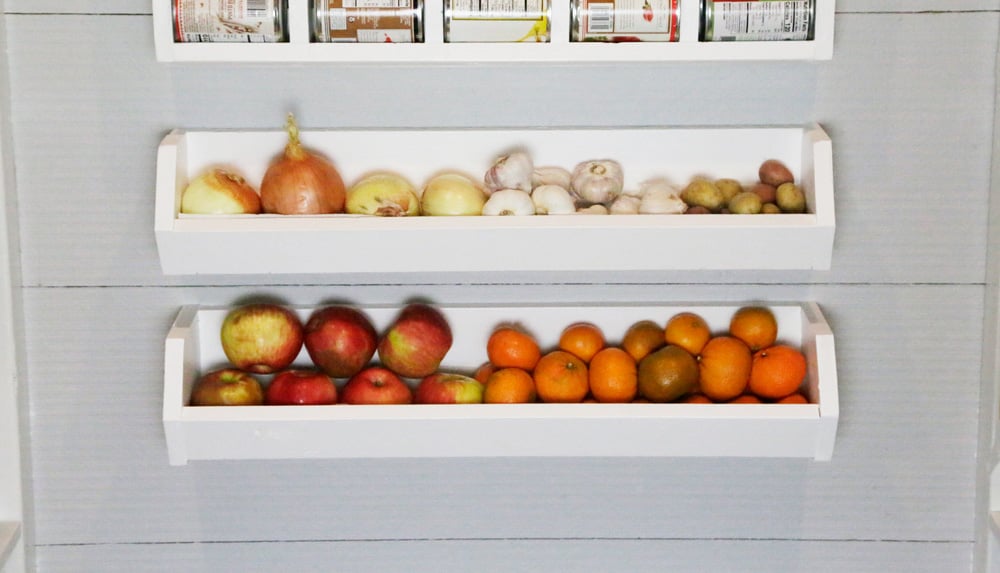
Produce Bin Wall Shelf

The free plans on this website are made possible with advertising and affiliate links.  Thank you for helping us keep plans free.


vegetable storage - potato and onion bin
Difficulty
Beginner Projects
| Print this plan

Good vegetable storage that actually works is essential!

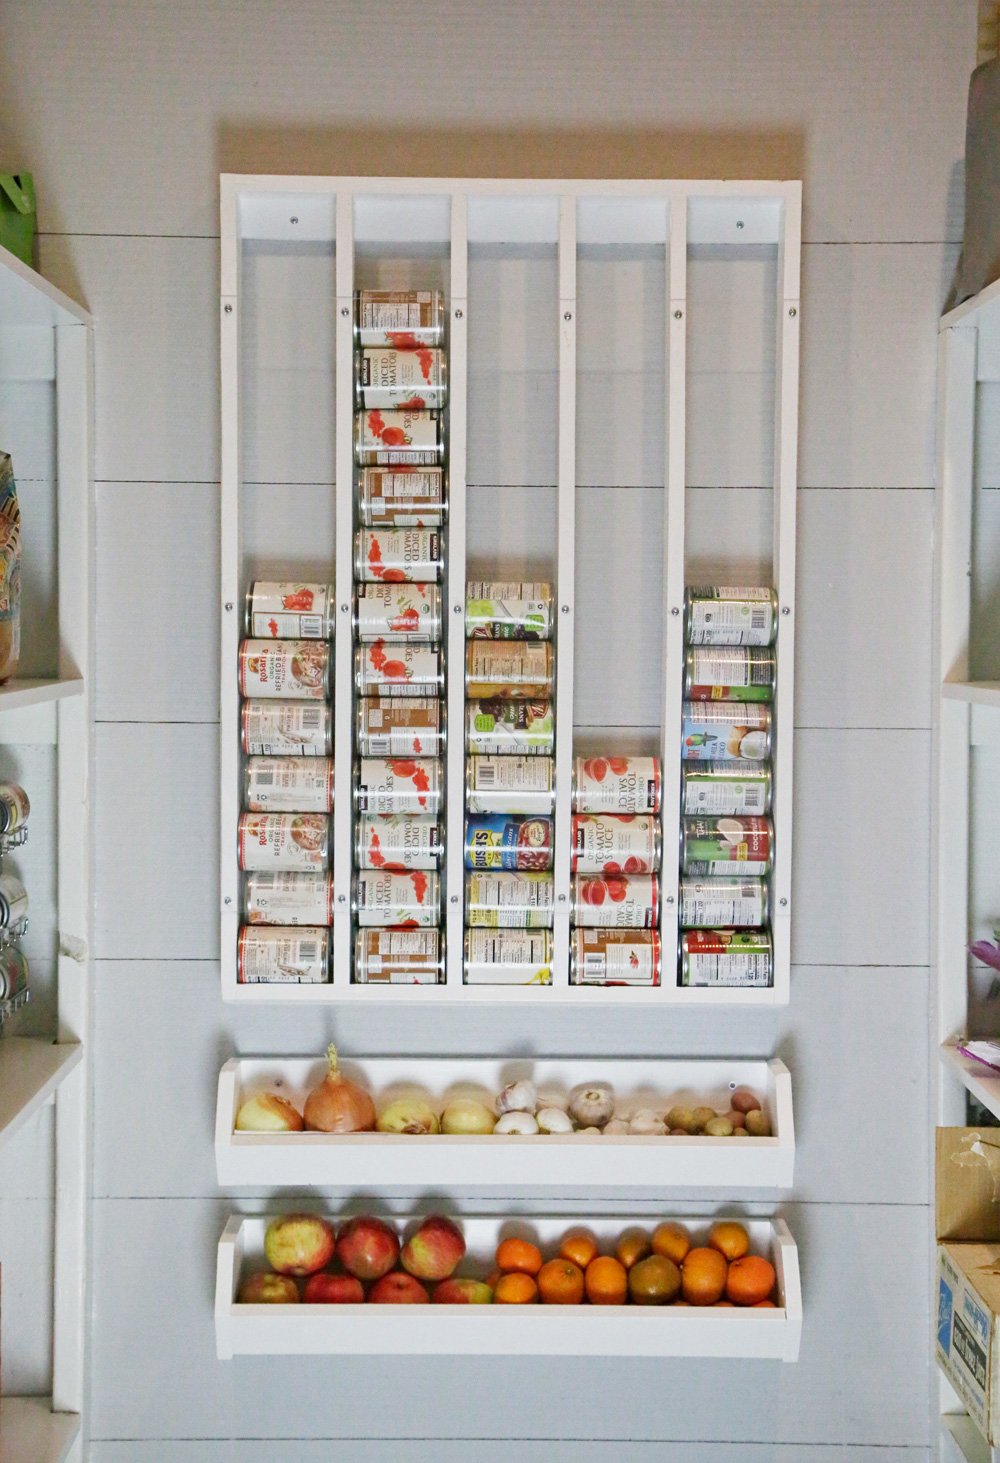
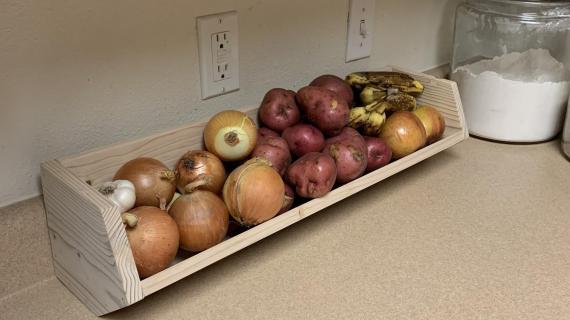
I built these wall mounted potato and onion bins out of a few off the shelf pine boards and am sharing the free plans with step by step diagrams, shopping and cut list.

WHY have I not done this sooner?

vegetable storage potato and onion bin

Last week, I tackled our canned food situation by building a DIY Can Organizer, and it was life changing.  But I still had one more pantry problems to solve.

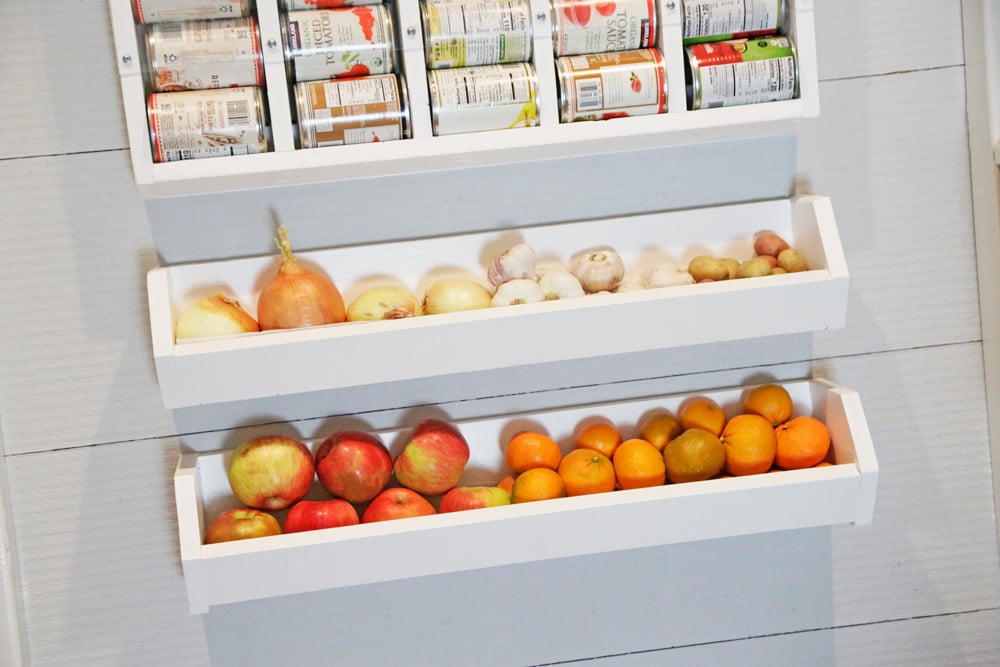
We go through a lot of produce in our household, so having good vegetable storage is a big deal to keeping our household running.  I've tried all sorts of things - baskets, canisters with "breathing" holes, wood bin cabinets - we've tried it all.  I think I've finally found the PERFECT produce storage system - wall mounted bins!!!

vegetable storage - potato and onion bin

Wall Mounted Vegetable Storage Bin Features

  • Off the floor so easy to sweep under and clean around
  • Low profile design can work in a kitchen above countertops or on empty walls
  • Fully accessible - so you can grab the most ripe produce first
  • Simplifies shopping - it's easy to see what you are running low on
  • Can be used for fruits, vegetables, or for storage throughout the home
  • Beginner project plan uses basic tools and off the shelf common pine boards
  • Easy to hang with screws right through the back of the bin


Vegetable Storage - Potato and Onion Bin Plans

Build your own with our VERY easy plans.  We even created a video tutorial -

And the free plans with diagrams follow.

Please share if you build - we love seeing how your project turns out!

Dimensions
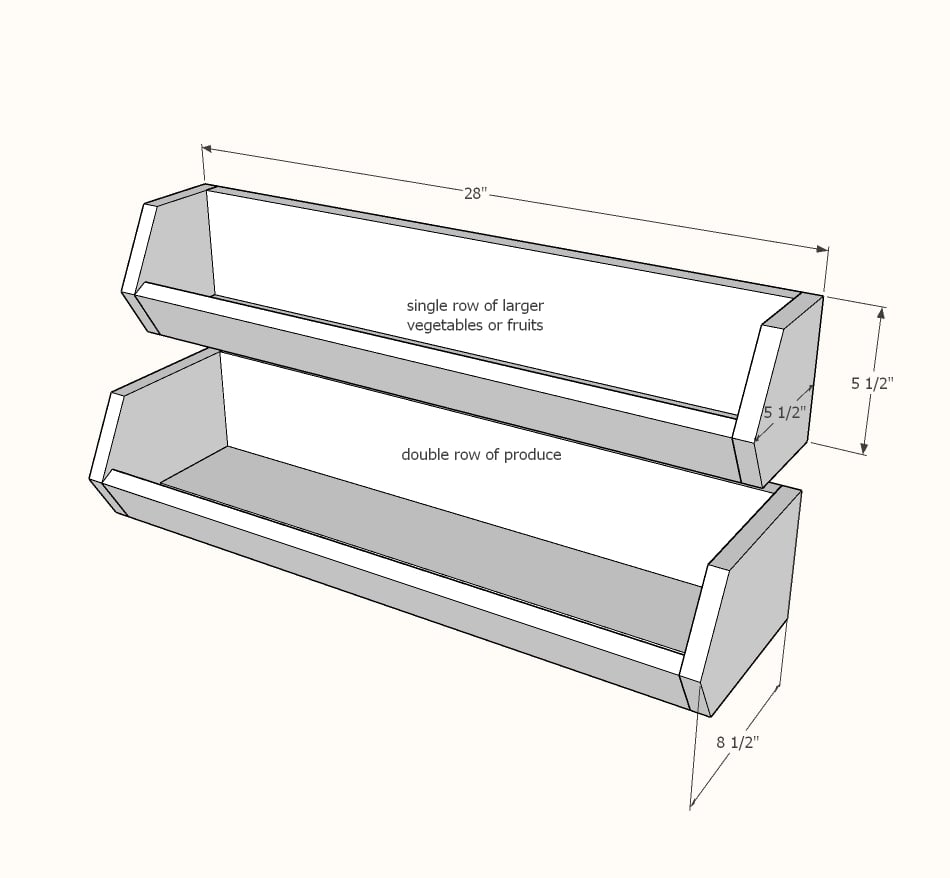
Vegetable Storage  - Potato and Onion bin dimensions
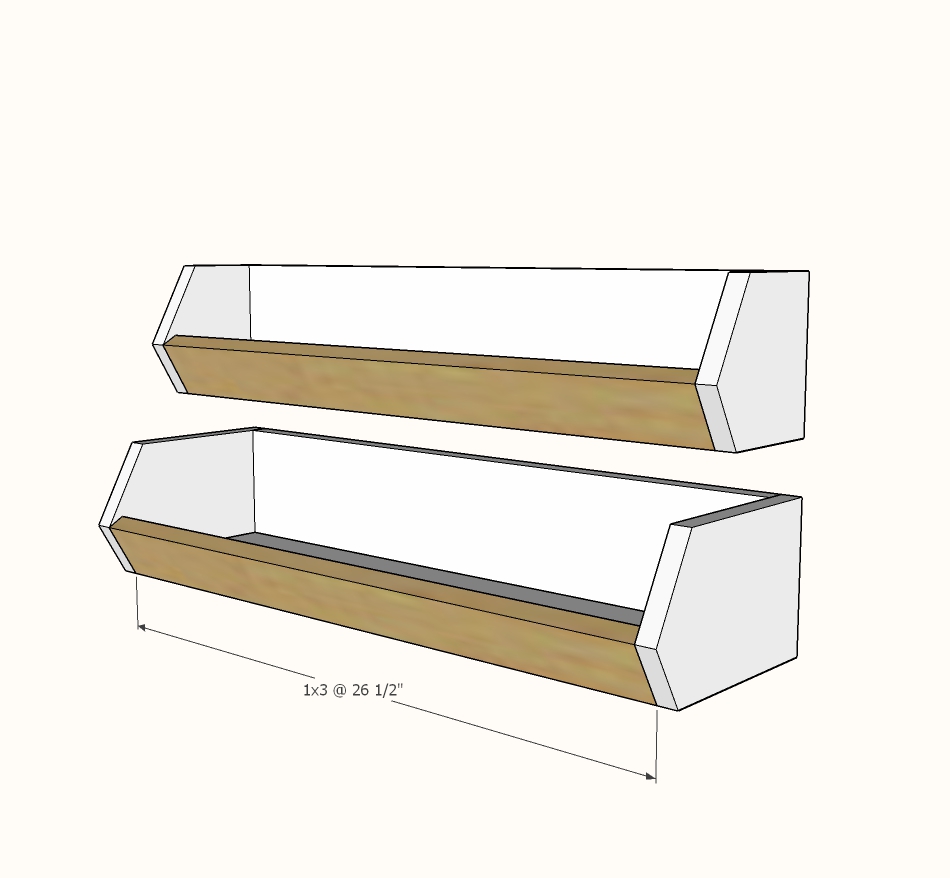
Vegetable Storage - Potato and Onion bin dimensions, Smaller bin fits a single row of produce, larger bin can fit two rows of average sized produce on bottom

Preparation

Shopping List

Smaller Bin (for one bin)

  • 37" of 1x6 board
  • 54" of 1x3 board
  • 1-1/4" brad nails and wood glue
  • 2-1/2" self tapping screws for hanging (just need a couple)

Larger Bin (for one bin)

  • 72" of 1x6 board
  • 26-1/2" of 1x3 board
  • 1-1/4" brad nails and wood glue
  • 2-1/2" self tapping screws for hanging (just need a couple)

I used common pine boards and 1x3 furring strips to build this project.

Cut List

Smaller Bin

  • 2 - 1x6 @ 5-1/2"
  • 1 - 1x6 @ 26-1/2"
  • 2 - 1x3 @ 26-1/2"

Larger Bin

  • 2 - 1x6 @ 8-1/2"
  • 2 - 1x6 @ 26-1/2"
  • 1 - 1x3 @ 26-1/2"
Tools
Tape Measure
Speed Square
Pencil
Safety Glasses
Hearing Protection
Drill
Miter Saw
Brad Nailer
Power Sander

Instructions

Step 1

Nail the back 1x6 to the bottom 1x3 or 1x6 with 1-1/4" brad nails and wood glue.  Nail about every 4".

Step 2

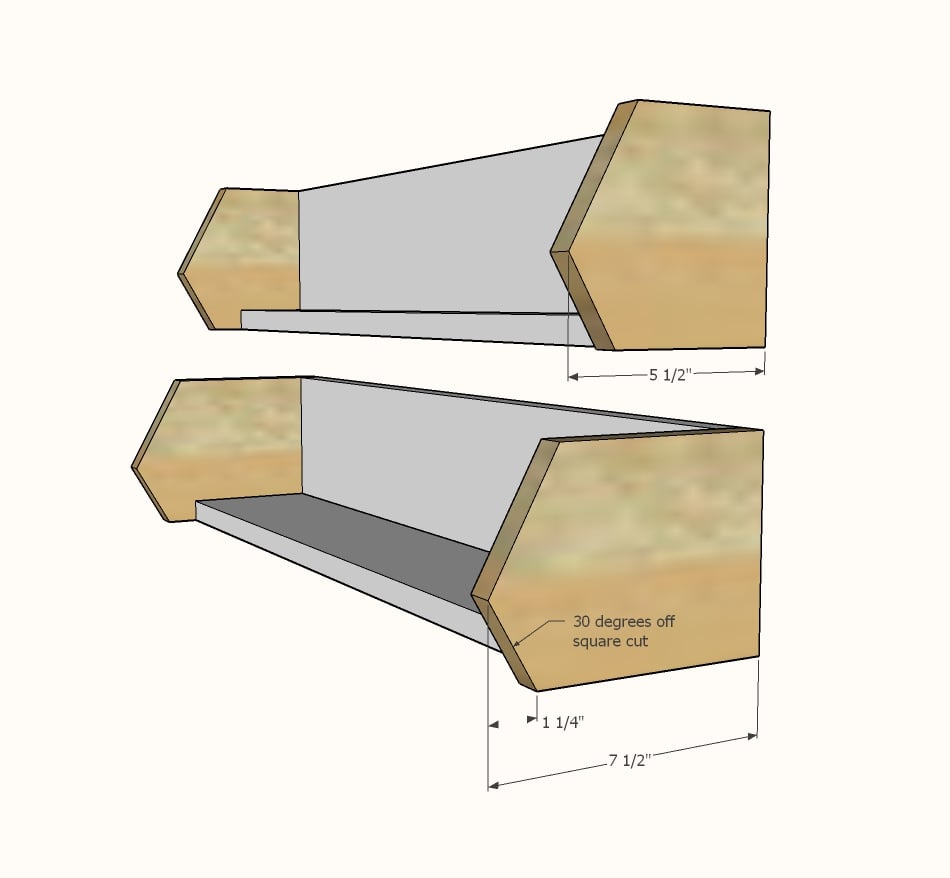
Cut sides as shown in video at 30 degree angles.

You can also use a circular saw or jigsaw to make the angled cuts.

Attach to the shelf bottom and back with 1-1/4" brad nails and wood glue.

Step 3

Nail front piece to the sides with 1-1/4" brad nails and wood glue.

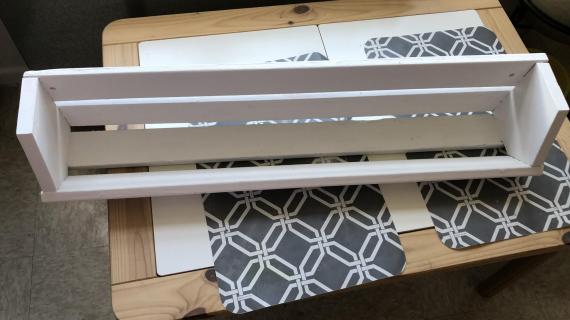
There will be a gap between the bottom and the front to allow for air flow.

Step 4

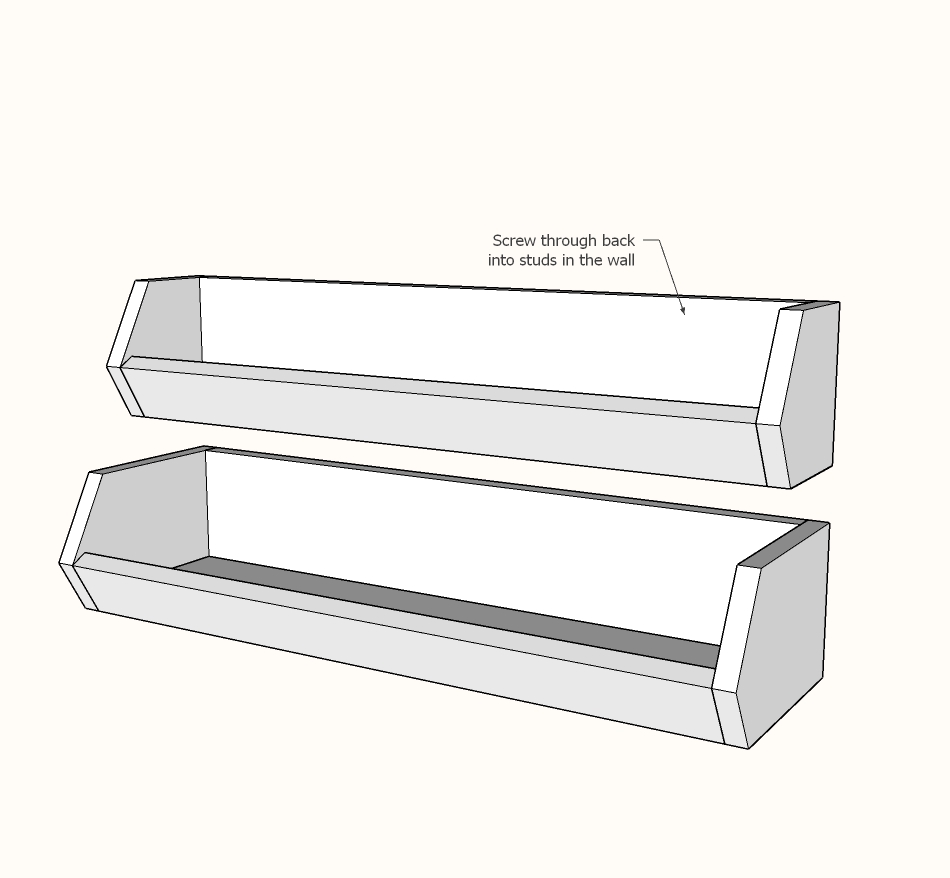
Locate studs in the wall and hang the shelves to the studs with 2-1/2" self tapping screws.