Community Brag Posts

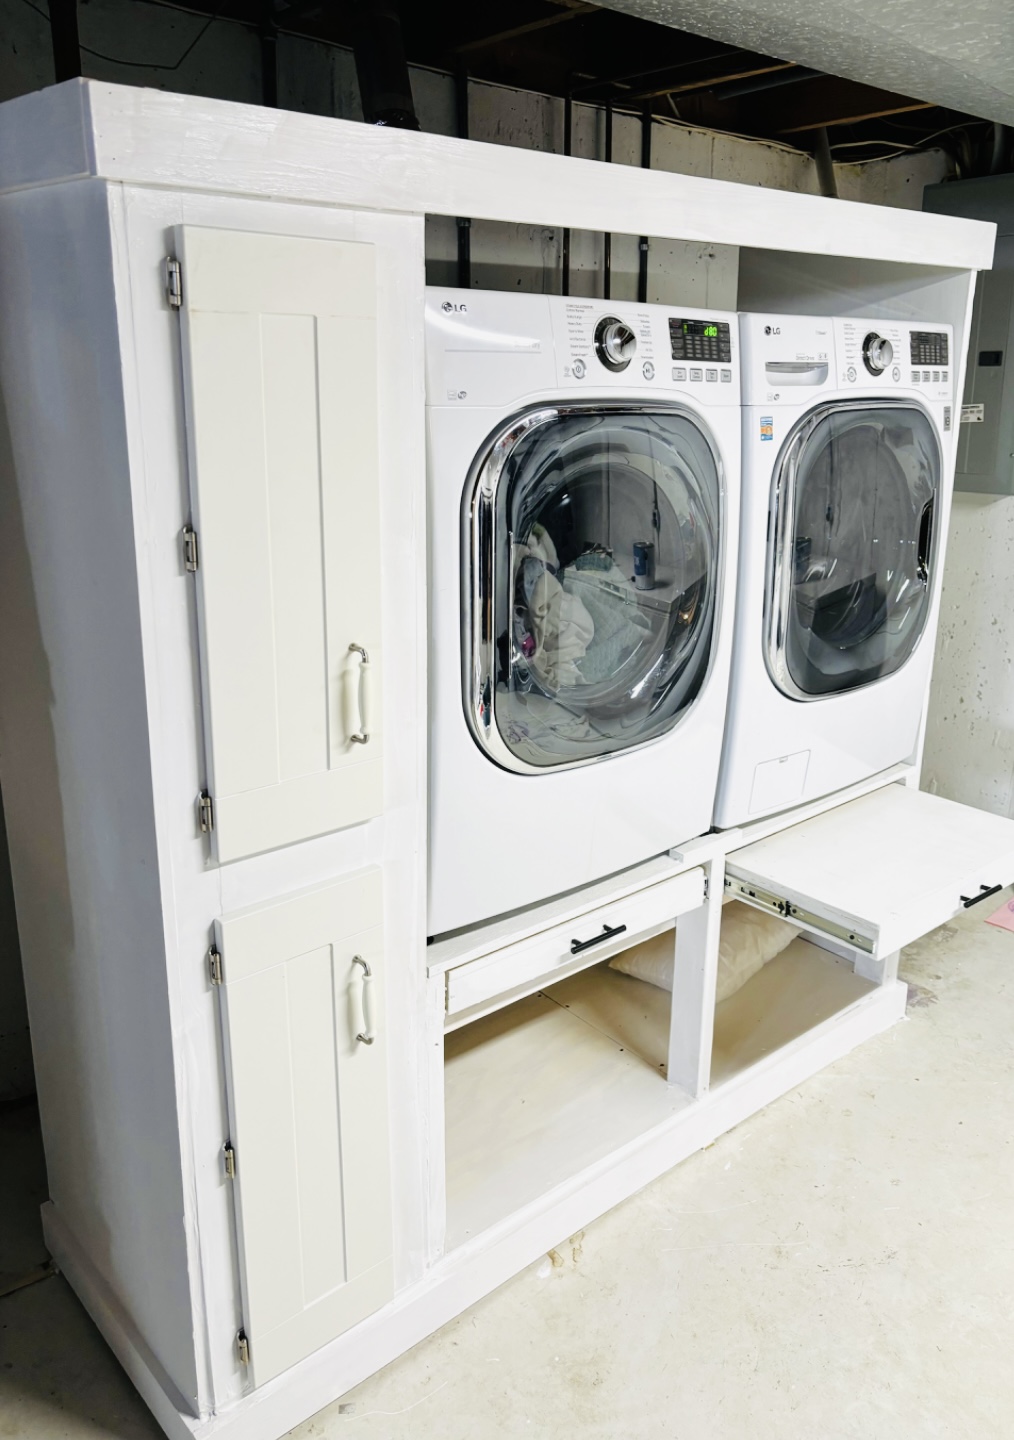
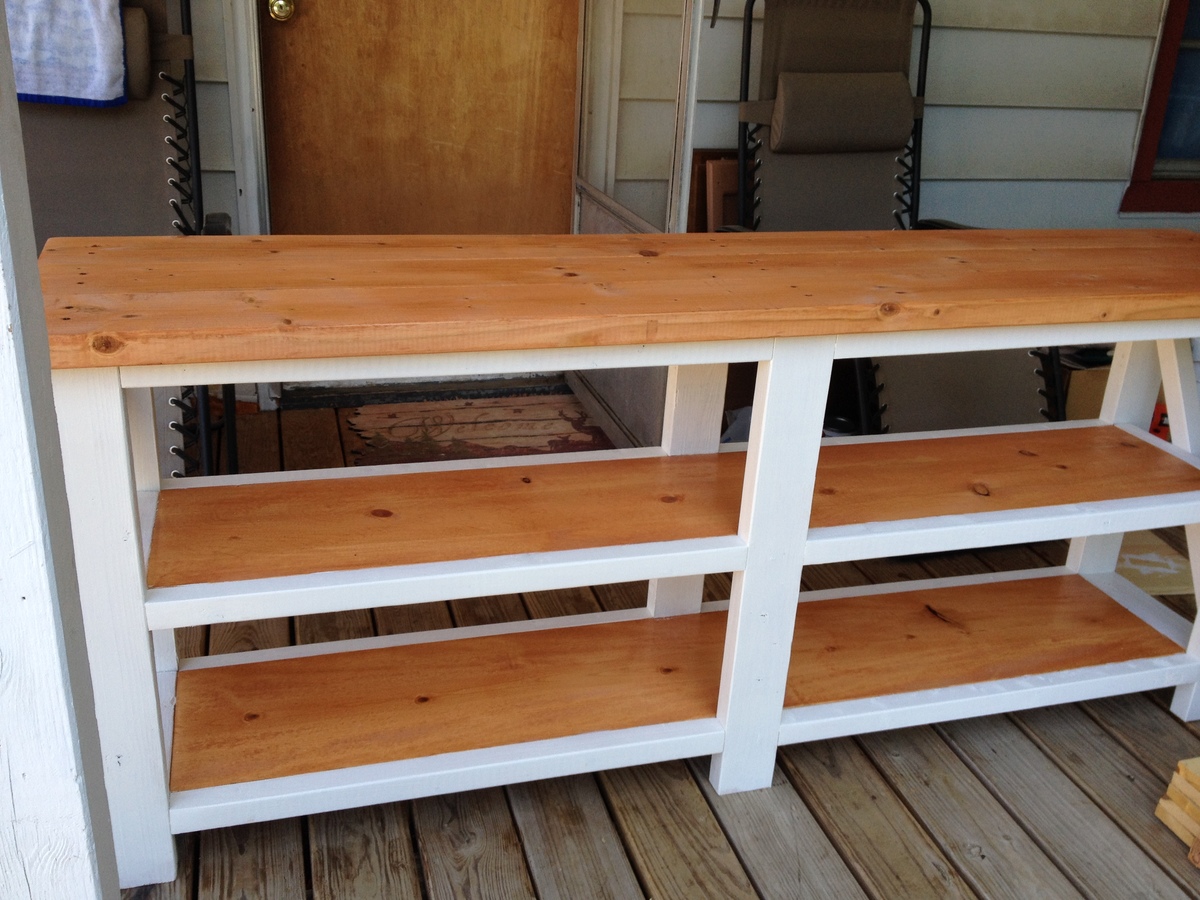
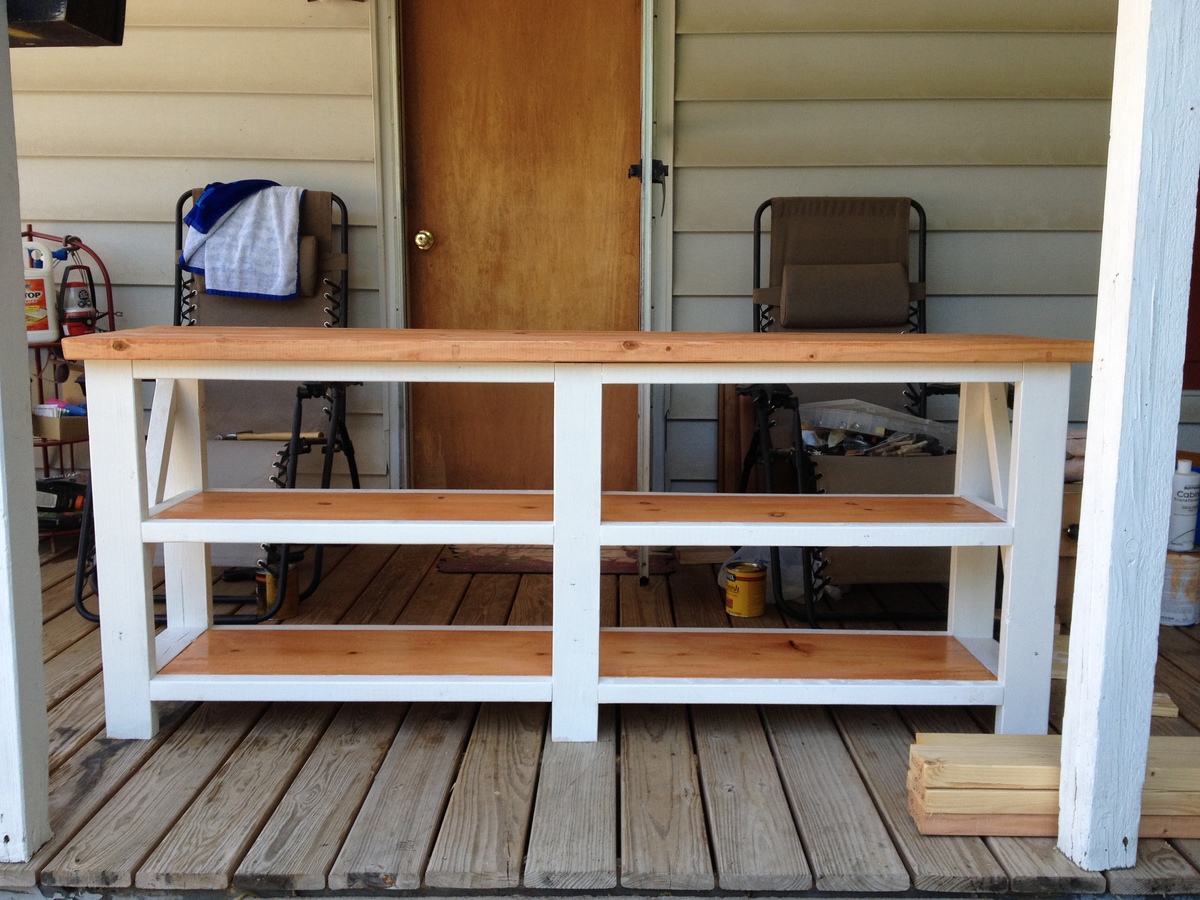
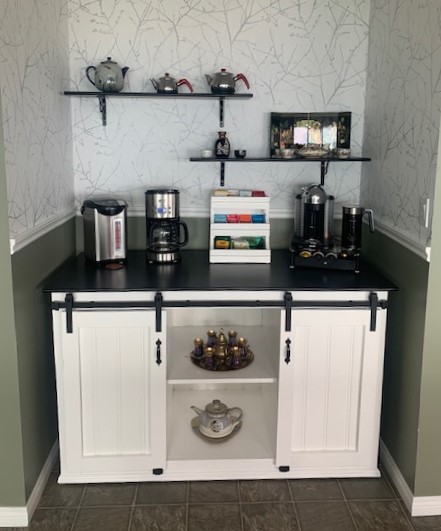
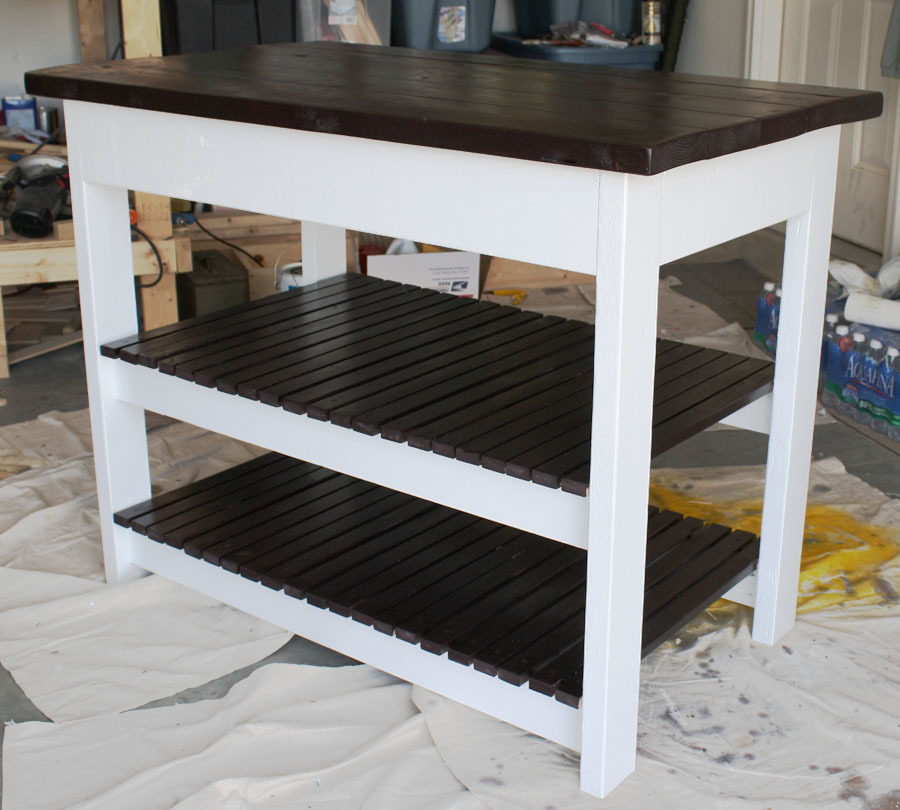
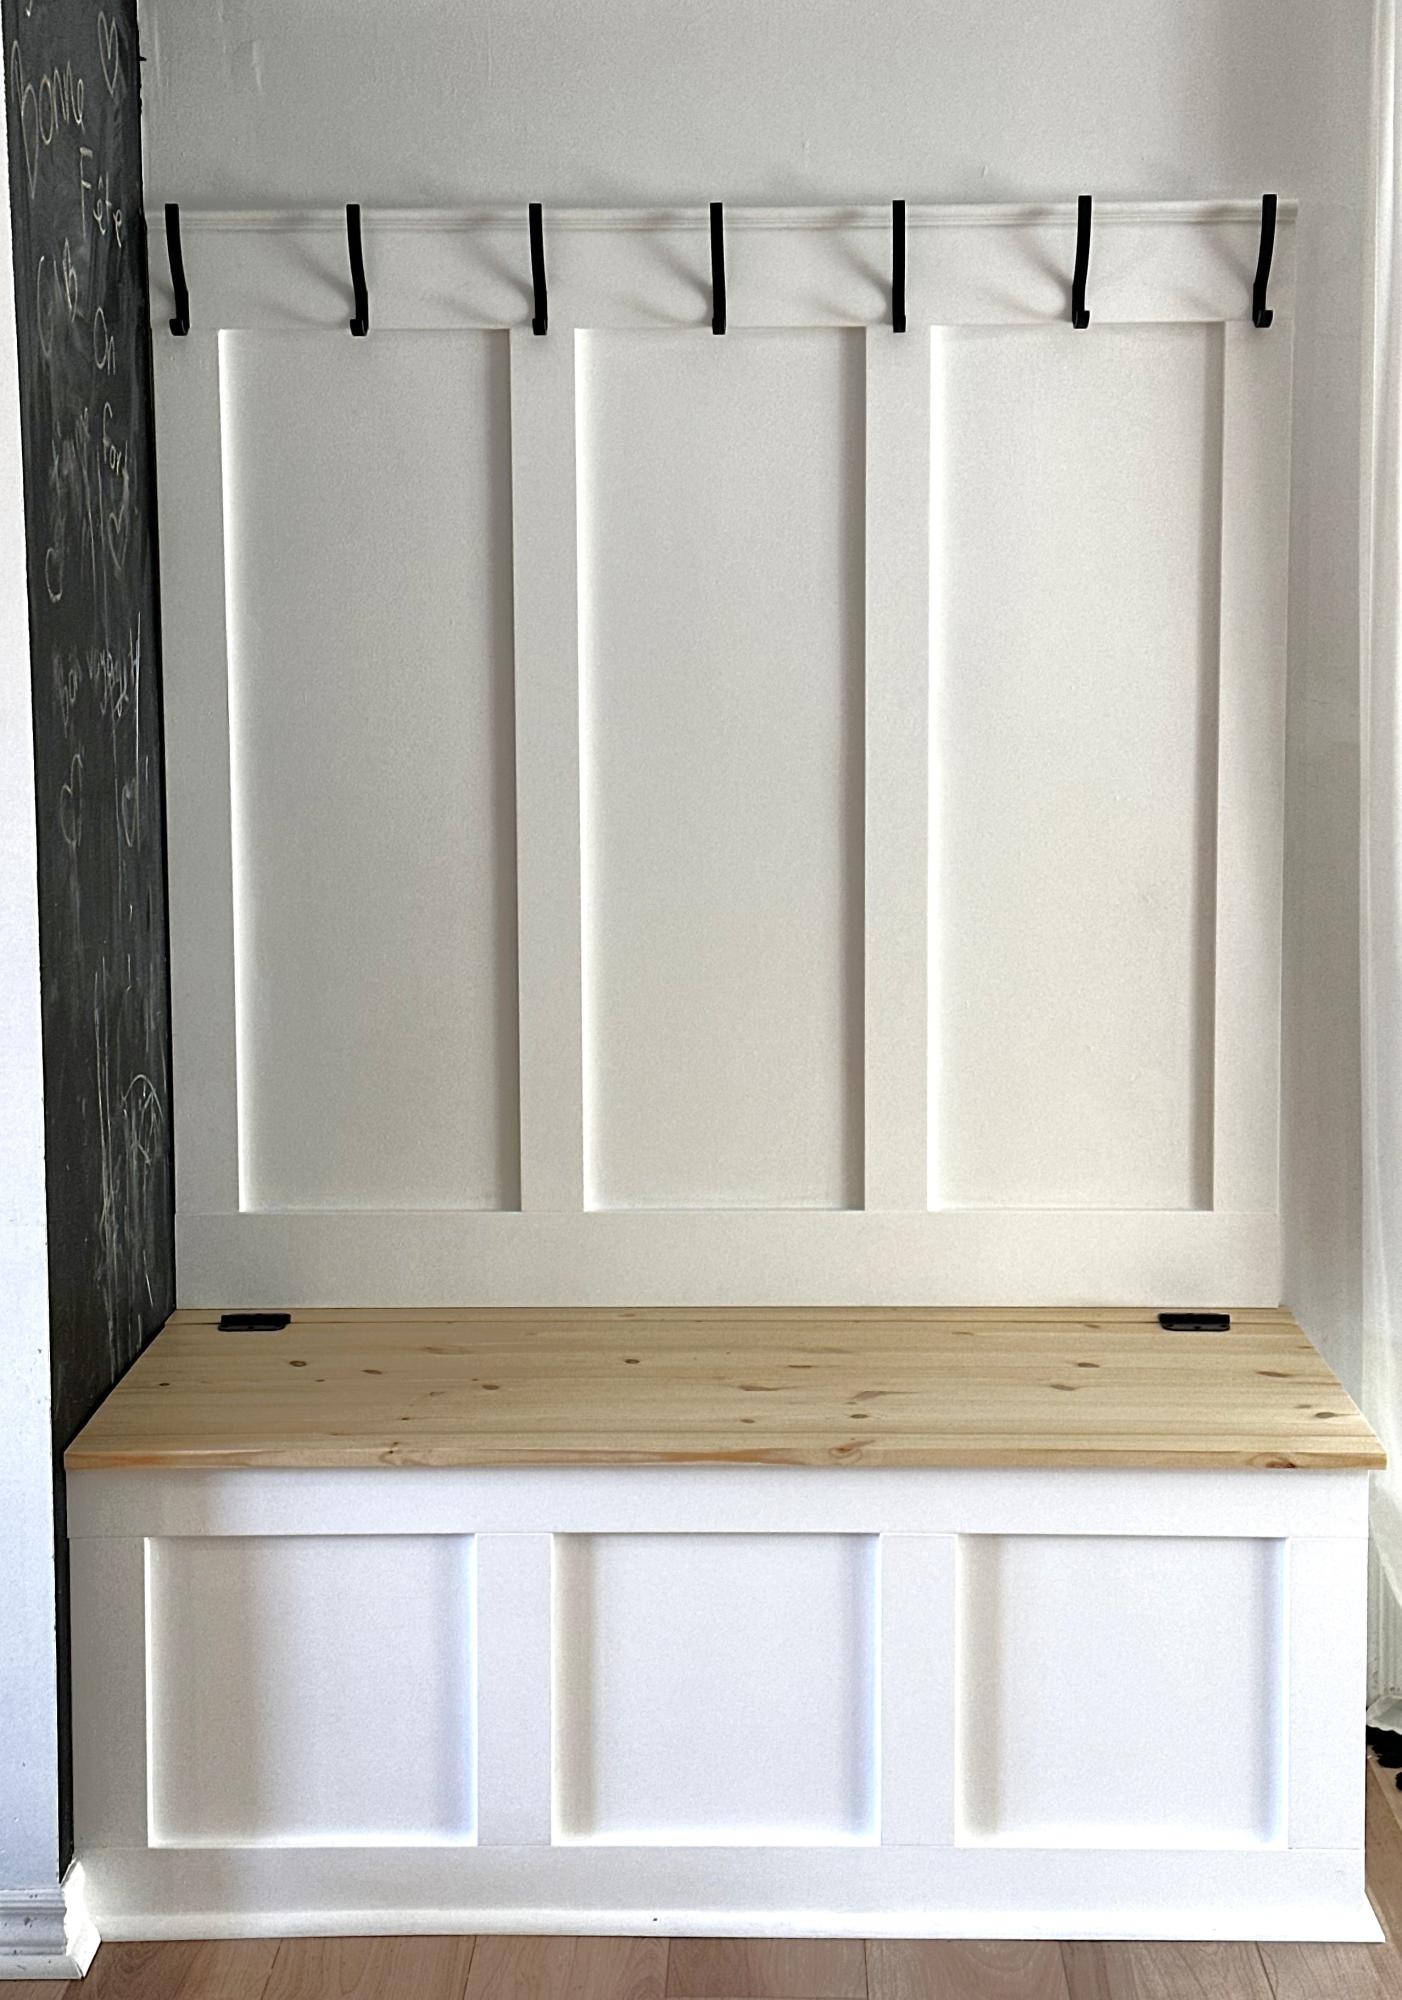
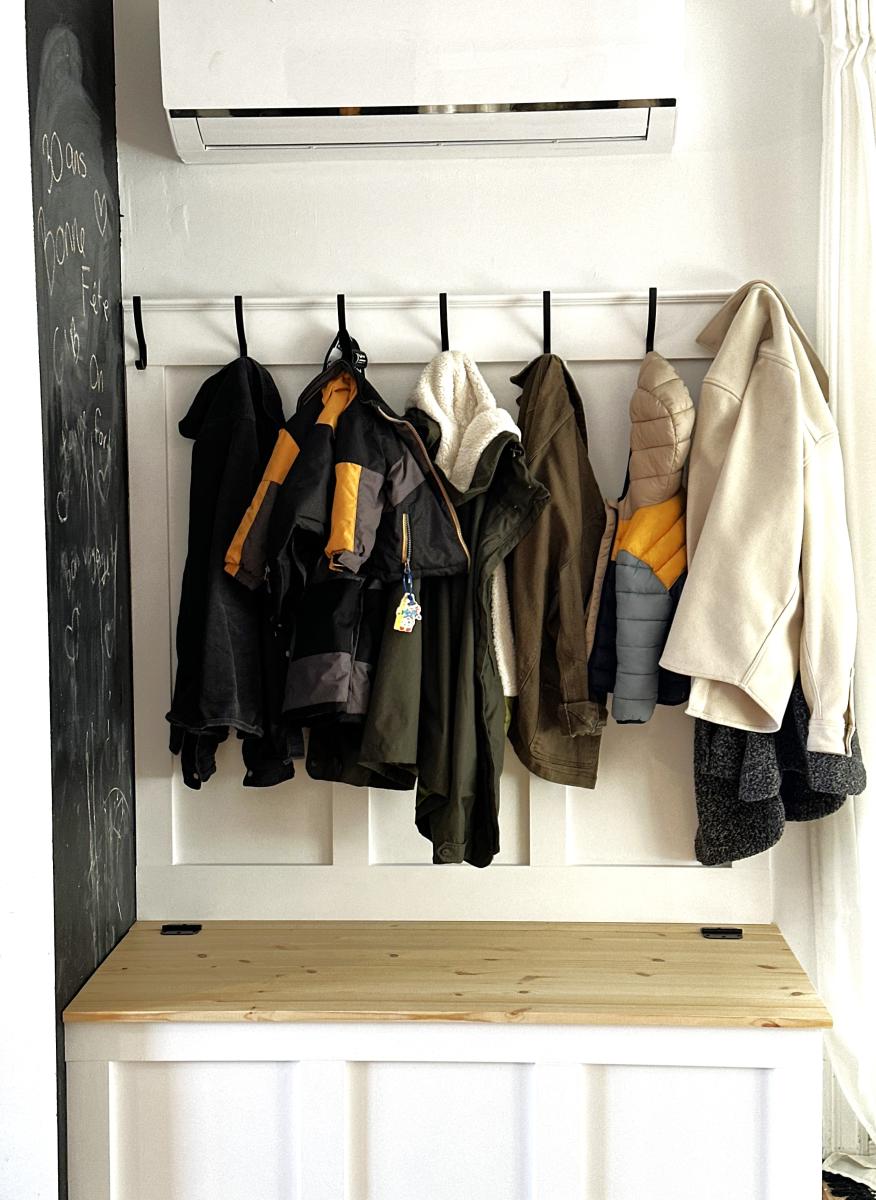
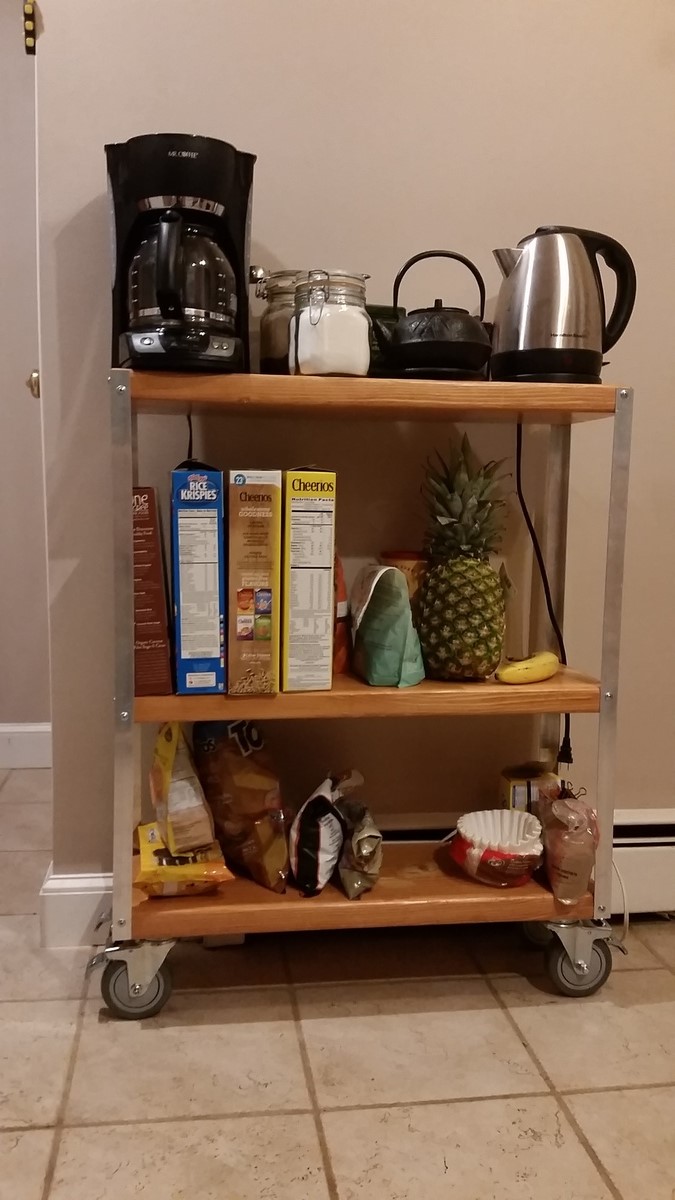
Washer/Dryer Storage Pedestal

Submitted by jsquires3 on Mon, 07/30/2012 - 10:12

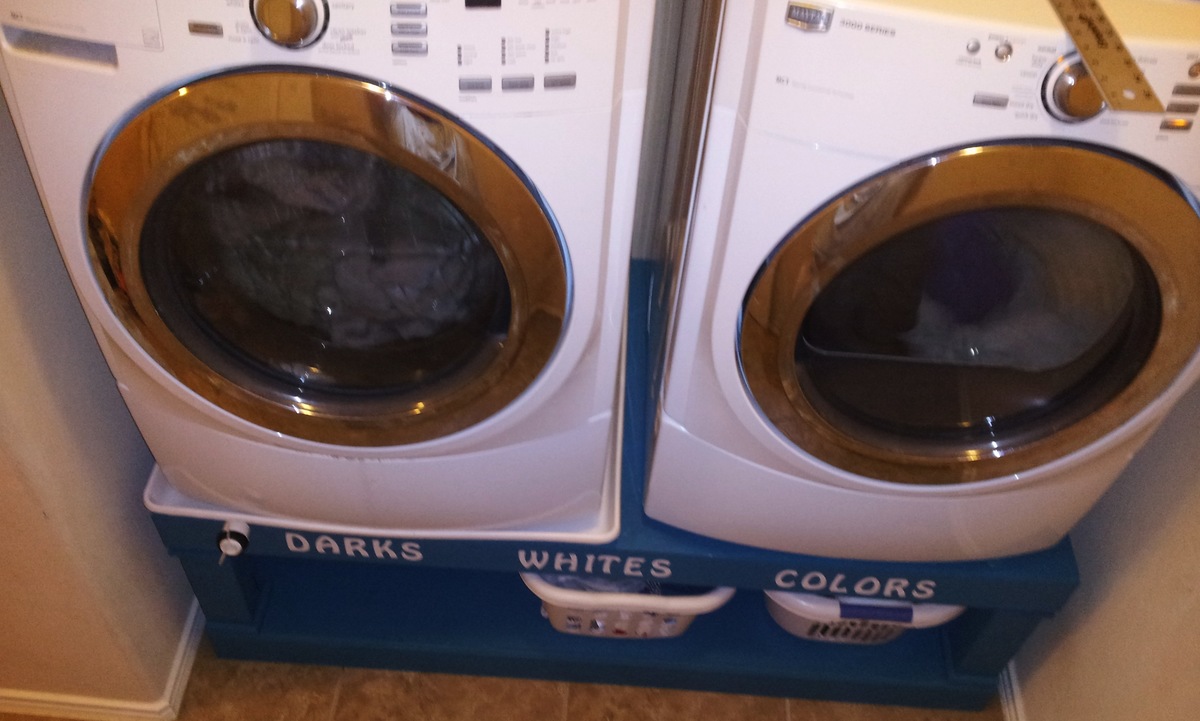
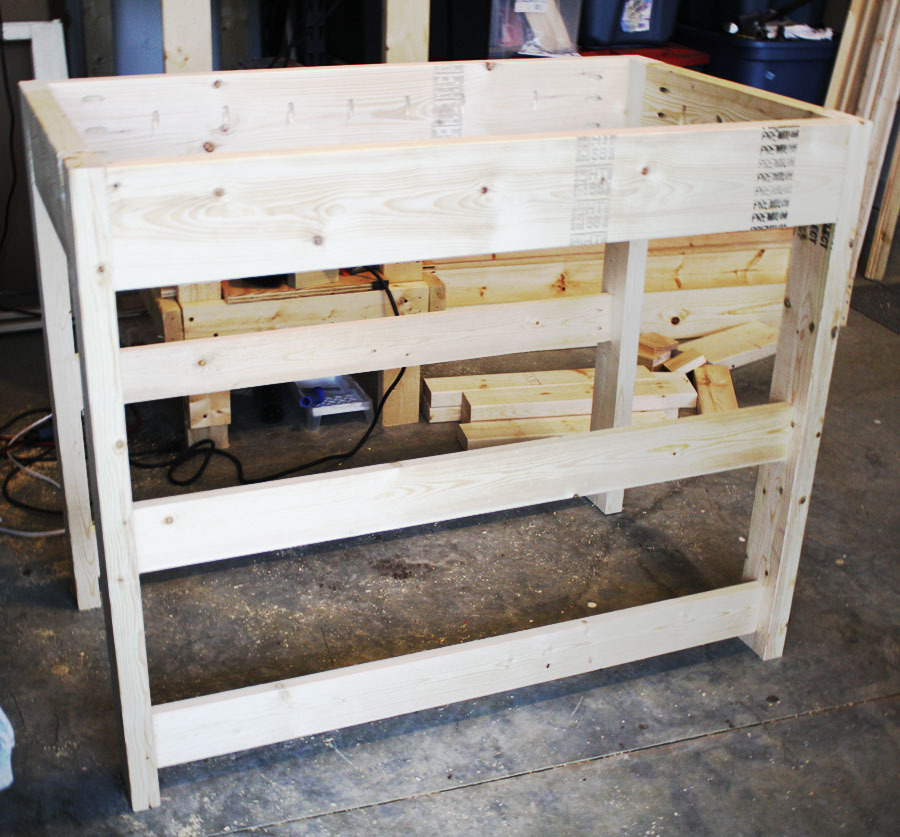
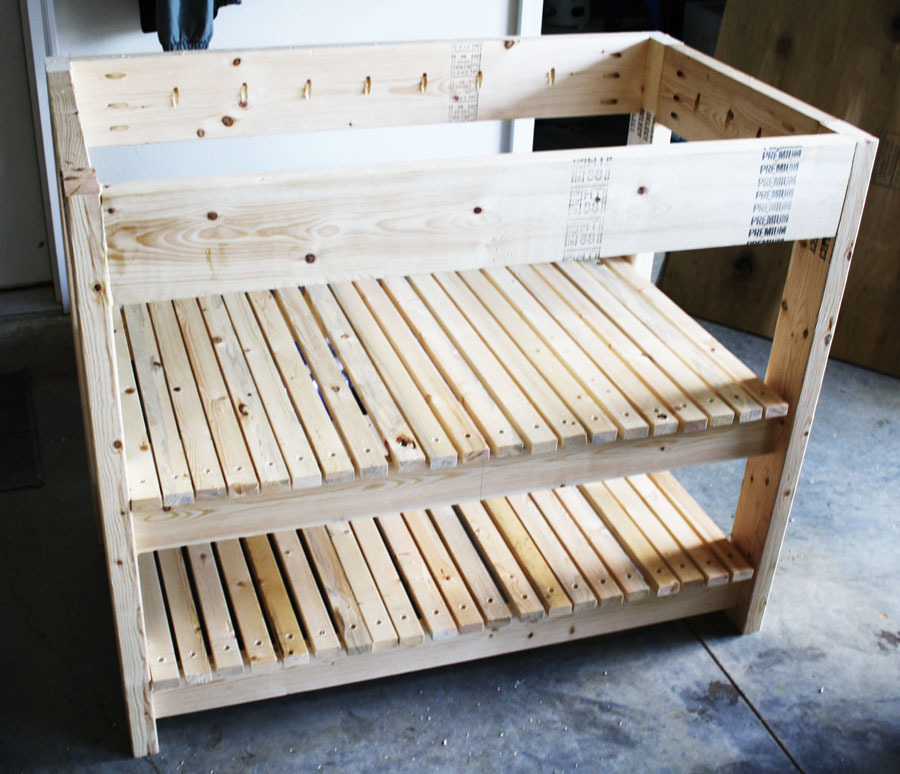
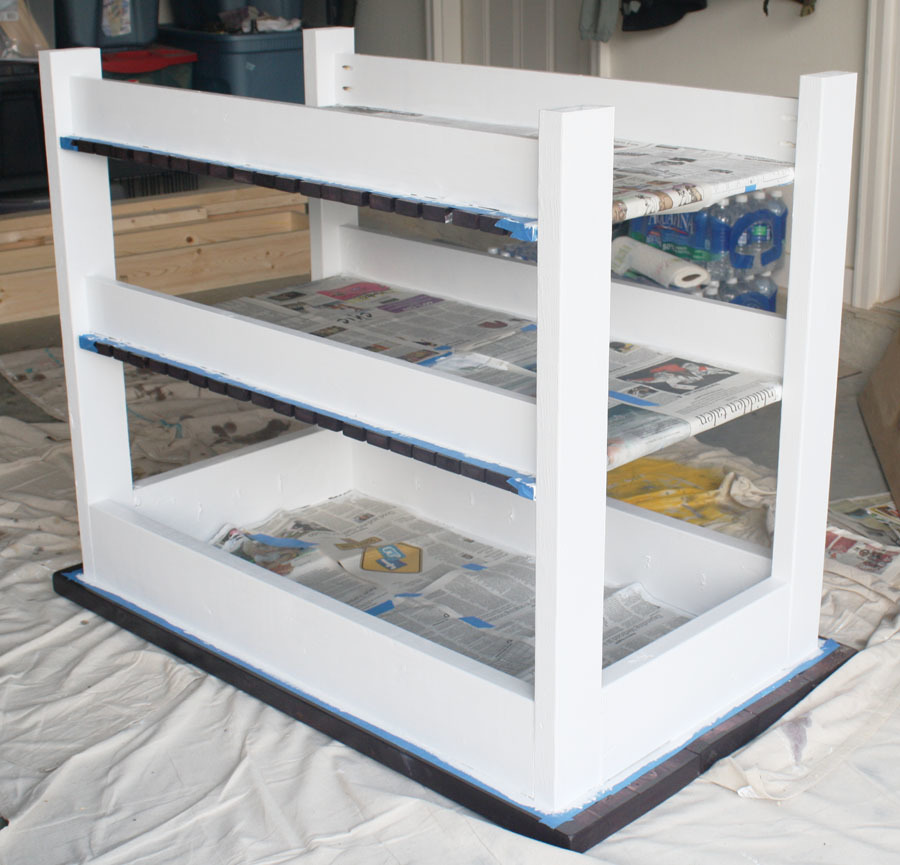
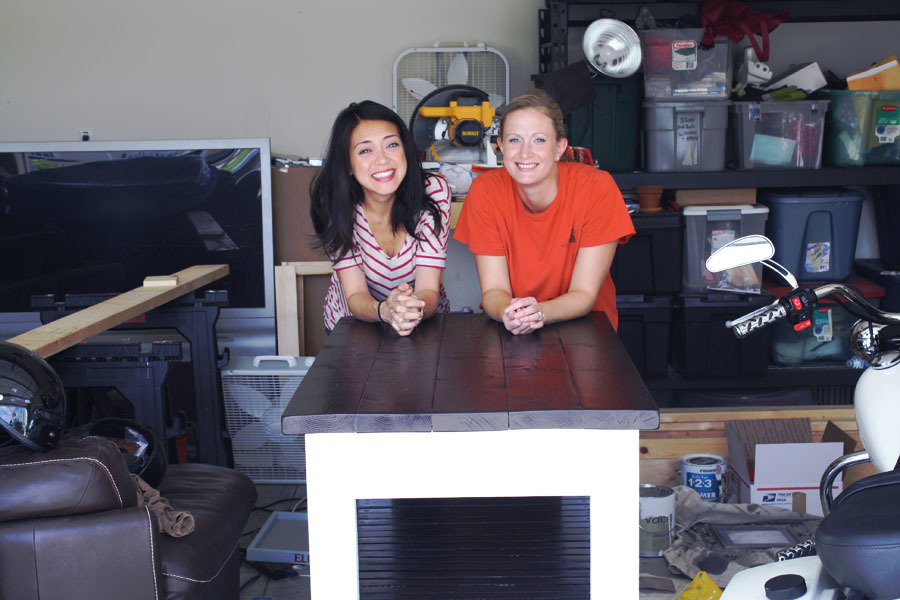
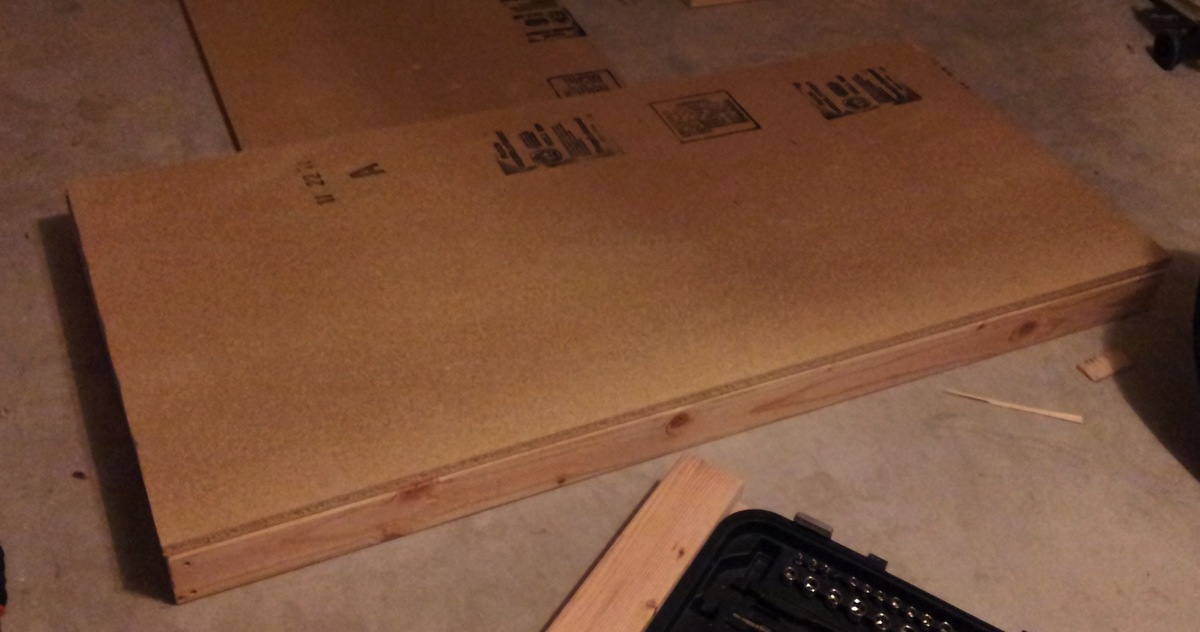
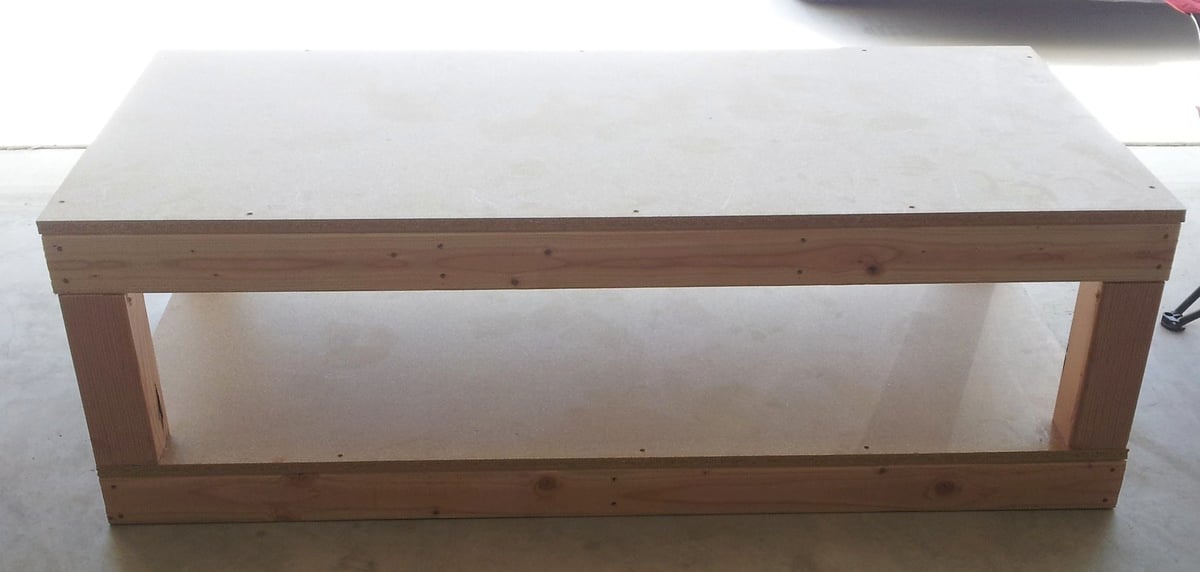
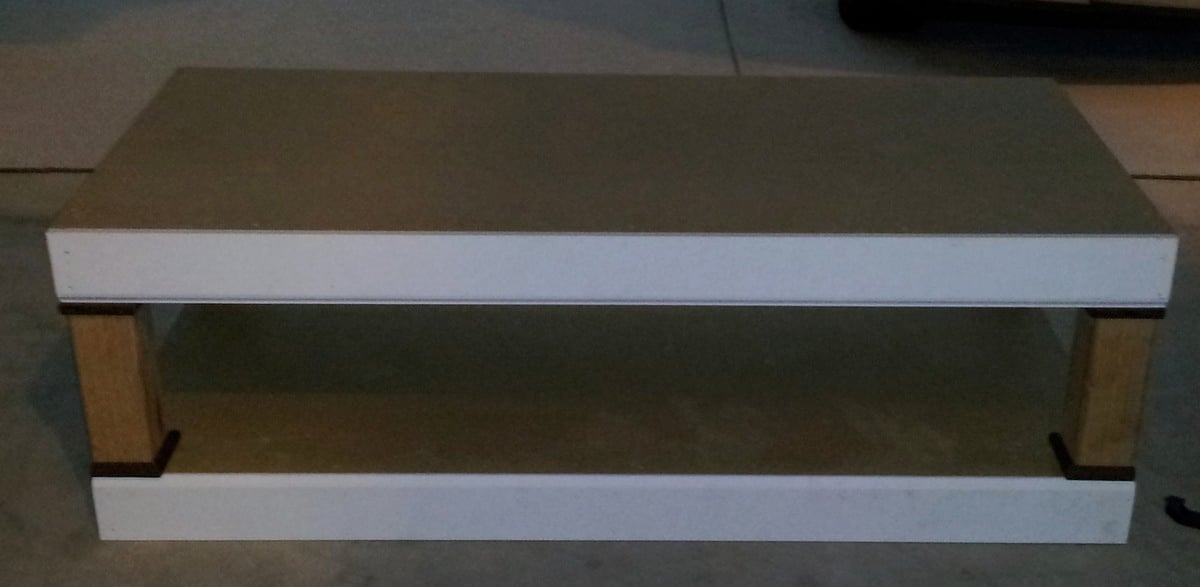
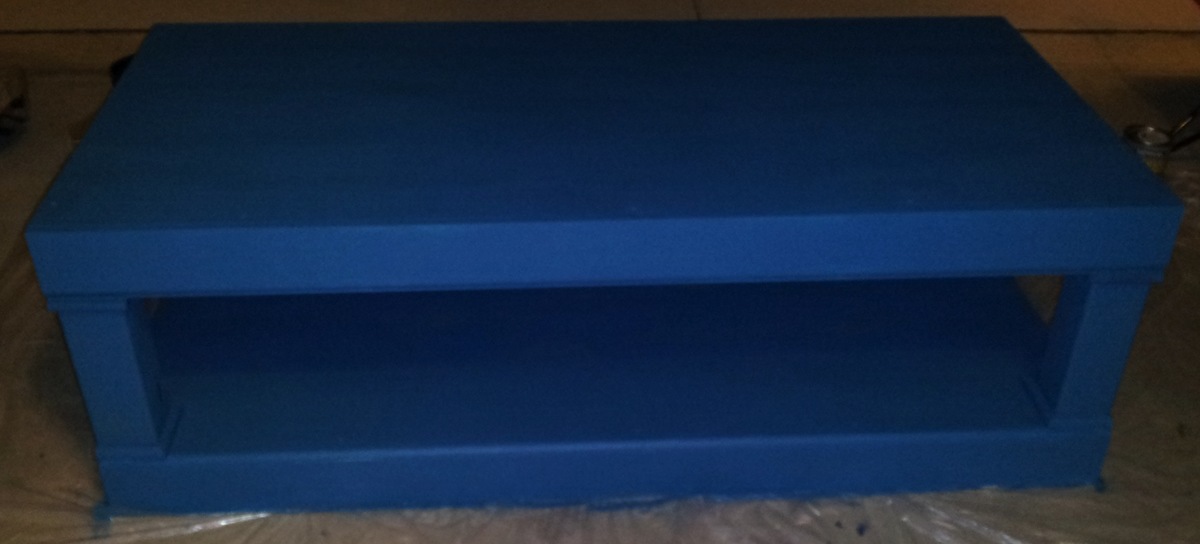
After I built my work bench I was ready to get started with my first real projets from the site. My wife requested that I make this pedestal first so that she could get a little more organized. I would say total there was about 8 hours of cutting and building and then another hour of painting. I did make one modification to this project and that was to add extra trim to the bottom and top of this pedestal. With everything included (wood, trim, paint, screws) this probably costs me right around $115. Much less than two of the standard medal pedestals that don't add much as far as aesthetics to the laundry room.

Estimated Cost
$115
Estimated Time Investment
Day Project (6-9 Hours)
Finish Used
Leftover blue/green paint from my son's room, white vinyl letter appliques
Recommended Skill Level
Beginner

Farmhouse Table

Im sure this wont be the only one of these I make! Thanks for the awesome plans!

Estimated Time Investment
Weekend Project (10-20 Hours)
Recommended Skill Level
Intermediate

Grandly TV stand

Submitted by Anonymous (not verified) on Thu, 08/25/2016 - 06:09

I used replacement screen door wheels and 1" by 1/4" Aluminum bar to make the hardware. 

Built from Plan(s)
Estimated Cost
$250
Estimated Time Investment
Day Project (6-9 Hours)
Finish Used
Polyshade American Chestnut
Recommended Skill Level
Beginner

Laundry Cabinet for Washer and Dryer

Submitted by Anonymous (not verified) on Mon, 03/04/2024 - 11:57

My daughter wanted a way to hold her machines higher, so as to not have to bend over, and a place to store laundry aids. We added pull out shelves to hold the basket while loading, and her empty baskets fit in the botton openings.

Rob Gassel

Western Saloon doors

Submitted by tracysmith on Thu, 08/02/2012 - 00:44

I built these doors for a very good friend of mine who actually helped me get started turning my new love for building (after finding Ana's site) into a way for our family to make some extra money.

It took me a little while to wrap my brain around building something without using my Kreg Jig. I used a router table set up with some raised panels bits and put the whole thing together with glue and nails! Wonderful experience!

For the finish, I used a vinegar solution to give the cedar wood an old barn look. I think the final result turned out great and the final step was a clear coat sprayed on out of a rattle can.

Estimated Cost
Lumber cost was about $80
Estimated Time Investment
Week Long Project (20 Hours or More)
Finish Used
Vinegar solution and a clear coat put on.
Recommended Skill Level
Advanced

Comments

birdsandsoap

Thu, 08/02/2012 - 10:51

These turned out great! I haven't seen this style of door in forever! They used to be really popular, I remember my Aunt and Uncle having these in the entry to their kitchen. They were the coolest thing ever when I was a kid! Maybe they are a making a comeback?
I'm really impressed with your routing skills, that's a task I have yet to tackle, but I've got the bits laying around waiting.

Nice job!

tracysmith

Thu, 08/02/2012 - 21:10

Thanks a bunch! My friend is replacing an old set of louvered doors that went into her laundry room. Her family are farmers and rodeo people so the western decor really fits in their house. Great western stuff there. They made a chandelier out of a wagon wheel! Really cool!

This was my first attempt at routing so I really appreciate your compliment! It's really simple if you can get the basics of it. I'm sure you'll do just fine when you get to that point. If I can do it, anyone can do it! Thanks again!!

laneal1987

Mon, 01/23/2017 - 09:32

I really want to try and build this for a closet.  Are there any instructions for this?  This is the first door of this style that I have come across that I absolutely love.

First Buffet

Submitted by Samdr33 on Tue, 05/27/2014 - 12:52

I took the plans from the Fancy X Console table and made all but the end "X's". I painted the legs and trim with a vanilla white, and stained the top and shelves with a golden pecan. Turned out great and looked amazing in the house of the woman I made it for......AKA my mother.

Built from Plan(s)
Estimated Cost
$70
Estimated Time Investment
Day Project (6-9 Hours)
Finish Used
HGTV Vanilla White paint
Minwax Golden Pecan stain
Minwax Fast Drying Polyurethane
Recommended Skill Level
Intermediate

Rustic X coffee and end tables

Submitted by Anonymous (not verified) on Sun, 08/28/2016 - 12:04

I really appreciated the build article.  I customized the sizes and used plywood for the bottom shelves.  I oxidized but painted with milk paint then sanded to distress.  I also only painted one coat to still see some grain.  I top coated with water based poly.

Built from Plan(s)
Estimated Cost
$100
Estimated Time Investment
Weekend Project (10-20 Hours)
Finish Used
Milk paint
Recommended Skill Level
Beginner

Work Bench

Submitted by vrsantana on Tue, 06/09/2020 - 16:09

I have been tinkering with a few projects for months doing most of my work on a foldout 6 foot table. Needless to say, this table was not the ideal work space or level surface for that matter. Decided to go ahead and make myself this work bench. I opted to use MDF rather than plywood for my top. All the plans were right on and everything came together without a hitch. The bench height is perfect and my back is thankful for it. Thank you and keep up the great work, Ana.

Estimated Cost
$65
Estimated Time Investment
Afternoon Project (3-6 Hours)
Finish Used
None
Recommended Skill Level
Beginner

A Bittersweet Building Project

I built this table for my friend who is moving away in a couple days :( She's going to use it as a coffee bar in her new home. Visit my blog link for the complete play-by-play!

Built from Plan(s)
Estimated Cost
$125
Estimated Time Investment
Weekend Project (10-20 Hours)
Finish Used
Rustoleum Ultimate Wood Stain in Black Cherry and White High Gloss Paint
Recommended Skill Level
Intermediate

Mail Sorter

Submitted by abaxter2 on Thu, 05/29/2014 - 13:23

Threw this together in a couple hours with scrap wood that I had from an Ana White project I did over spring break. Had to buy some hooks and the hanging brackets and that was it. Very simple! Not sure how I'm going to finish it. I don't have time for the finishing right now anyways so I'm going to use it as is and finish it later!

Built from Plan(s)
Estimated Time Investment
An Hour or Two (0-2 Hours)
Recommended Skill Level
Starter Project

Paoli Patio Furniture Made Easy

Submitted by Anonymous (not verified) on Tue, 08/30/2016 - 13:48

A huge thanks to Ana, her inspirational blog, and her clear and easy-to-follow plans for convincing me that I could take on and complete this project. I had lots of fun doing it!

Estimated Cost
$500 with pillows
Estimated Time Investment
Week Long Project (20 Hours or More)
Finish Used
2-in-1 stain and sealer (natural cedar color)
Recommended Skill Level
Beginner

DIY Kids Seesaw on the Cheap!

The seesaw is like a dinosaur: the extinct relic of the playground, still held in awe by kids the world over. No longer available to the public in its original form, the original seesaw is the perfect DIY project. My older daughter had been asking for one for a couple of years, and after finding the plans on Ana White’s website I was able to build one cheaply for about $50 in wood and screws. This was the perfect weekend project, and I was able to use up some leftover paint and fabric to create this nice addition to our yard.

Check out my blog post about this seesaw here:
http://sandiegocountypropertymanagement.com/diy-kids-seesaw/

Built from Plan(s)
Estimated Cost
$50-$75
Estimated Time Investment
Weekend Project (10-20 Hours)
Finish Used
Behr exterior flat paints.
Recommended Skill Level
Intermediate

Comments

Play Deck/Fort

Submitted by seeca13 on Sun, 06/01/2014 - 10:06

I wanted to build a structure for the kids to play in, but not include a playhouse. I used the playhouse deck design and made it slightly smaller (6 feet by 8 feet). The "roof" is removable to provide shade when it's sunny. It's just PVC and a tarp - pretty simple, but it does the job. I used treated posts and untreated lumber for the rest of it. I painted everything in my garage before assembling it. Once all of the wood at been painted, but came together pretty quickly!

Estimated Cost
$300 (including screws and paint)
Estimated Time Investment
Weekend Project (10-20 Hours)
Finish Used
Thompsons deck stain
Recommended Skill Level
Intermediate

Industr

Submitted by Anonymous (not verified) on Fri, 09/02/2016 - 18:29

I followed the basic Industrial Cart plans, but made it 36" high instead of 24"ish. We wanted a countertop type of space for tea/coffee and a shelf big enough for cereal boxes.

Lessons learned: Treatign (sanding/staining/sealing) the wood takes the most time, and regular wood fill is ugly - next time I will try to find transparent fill or leave the suface uneven.

Built from Plan(s)
Estimated Cost
$110. More than half of it was nice casters, and I had to use 4 pieces of 48" aluminum to get the heigh twe wanted
Estimated Time Investment
Weekend Project (10-20 Hours)
Finish Used
Golden Oak + Spar Urethane
Recommended Skill Level
Starter Project

Workbench with Drawers and Carts on Casters

Submitted by vendo on Tue, 03/19/2024 - 07:38

Using Ana's Ultimate Workbench Plan and her easy drawer method I built this. I decided to do storage carts that roll in and out for small scrap lumber storage. The Kreg Foreman got it's own cart, I made it so the deck of the machine was at the same height as the work surface. I added a drawer so all of my kreg bits and screws can be in one place. I had batteries and chargers laying all over my small shop, so I incorporated a battery charging drawer. I'm excited for the projects to come using my new set up!

Back