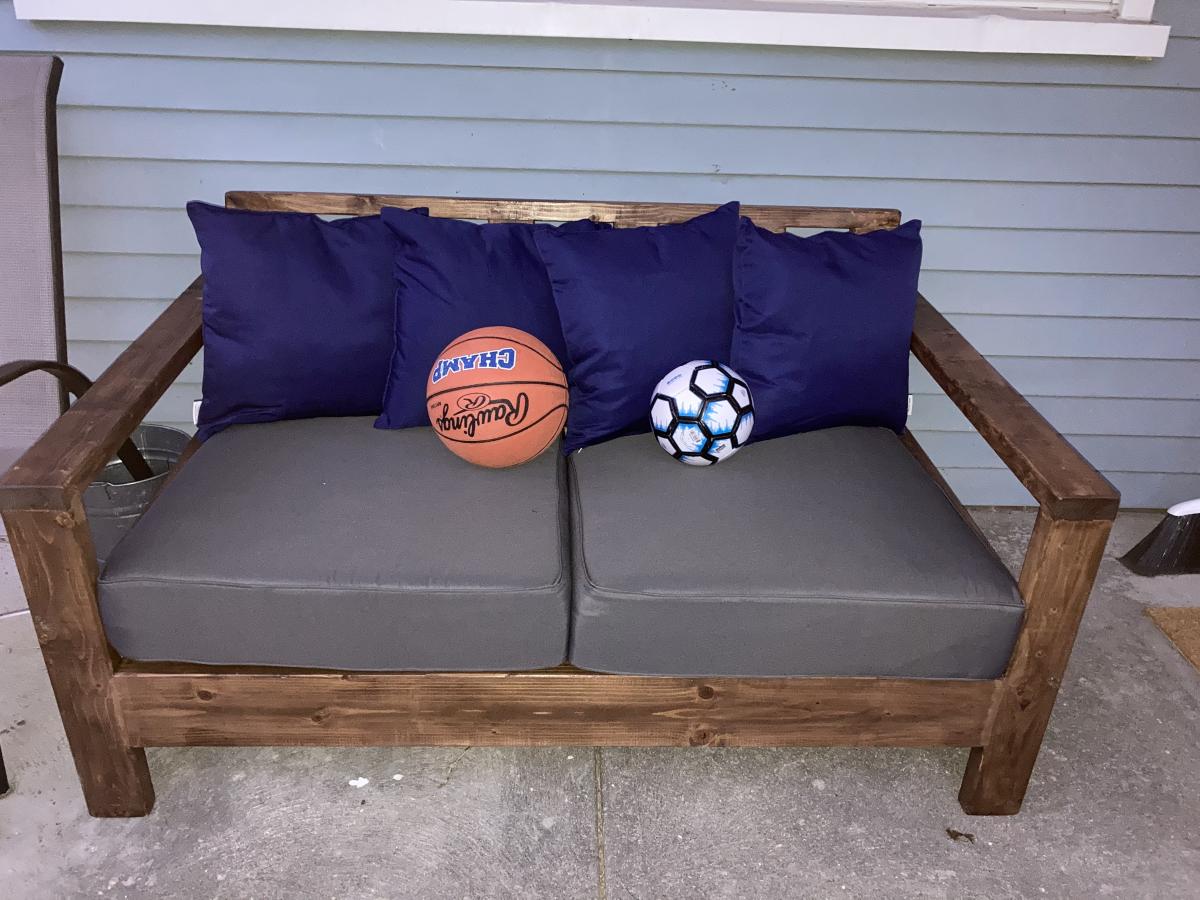
Outdoor loveseat
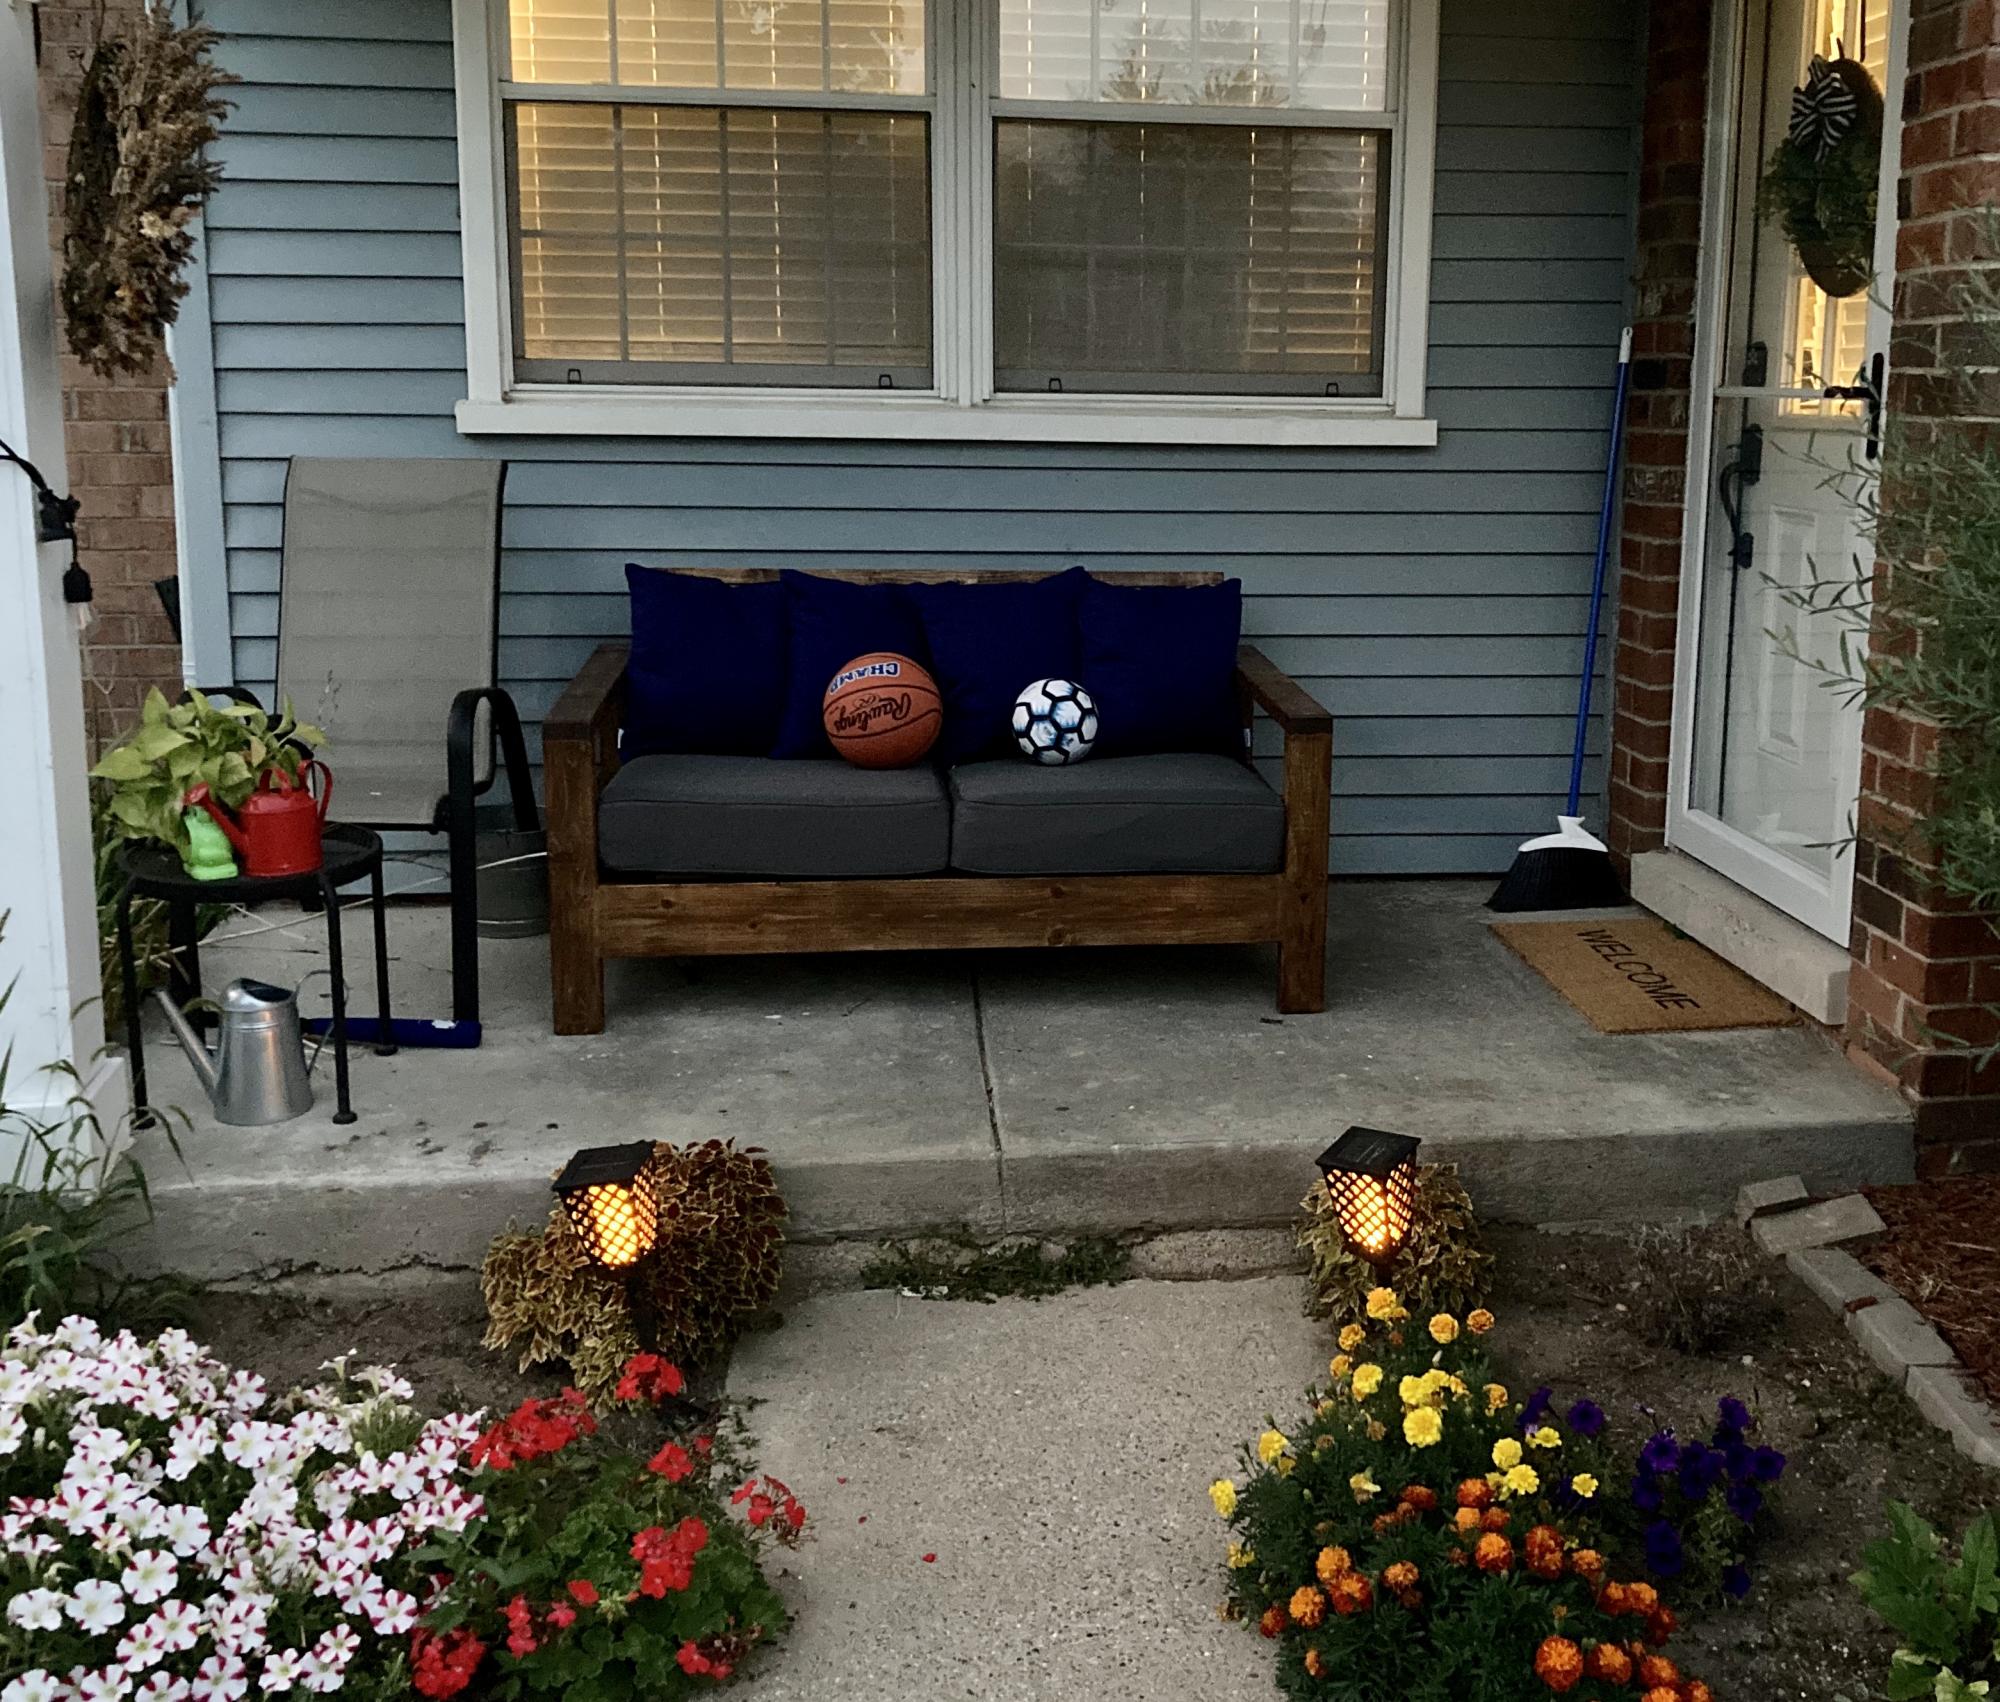
Just wanted a nice looking bench to seat at the porch! This turned out great!
Built from Plan(s)
Finish Used
Special Walnut and oil based polyurethane
Just wanted a nice looking bench to seat at the porch! This turned out great!

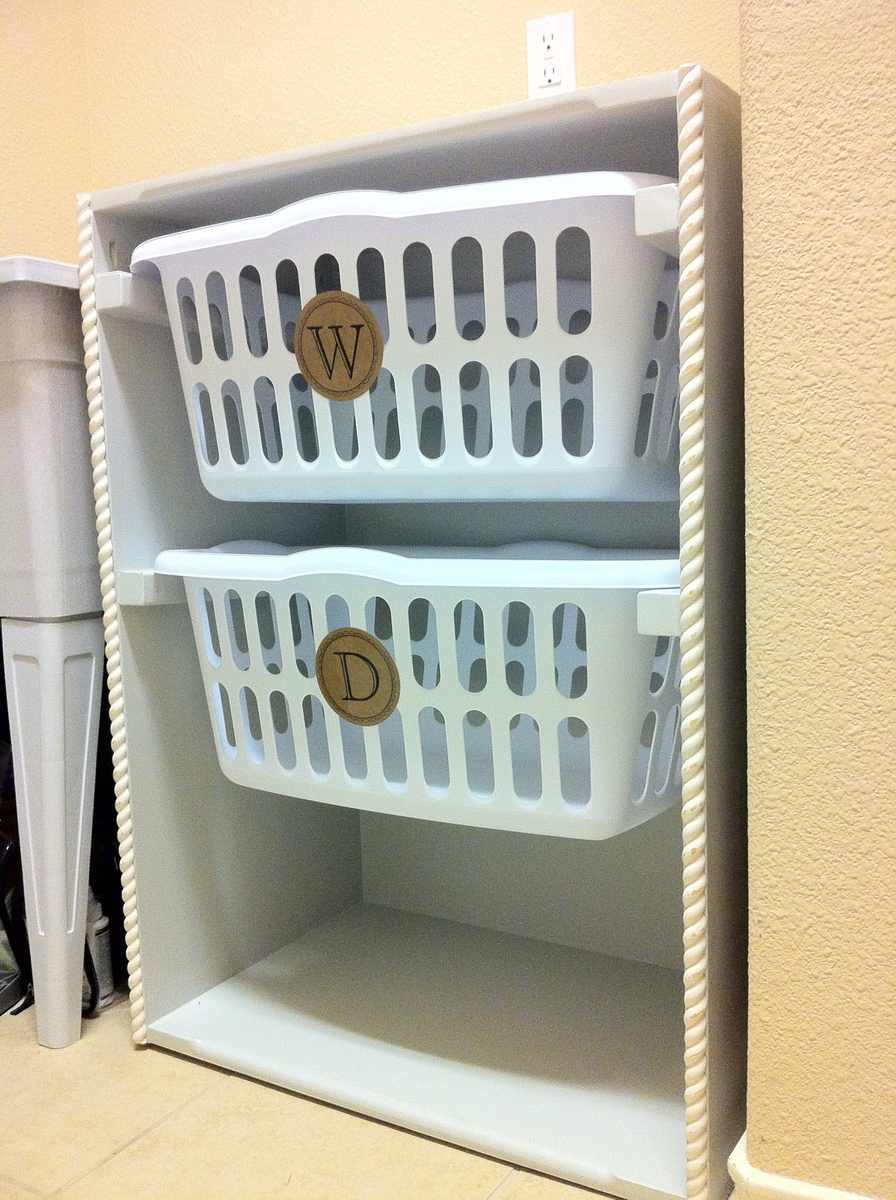
My very first build inspired by the Ana-White.com website. I would declare this as a success. Decided to make two laundry drawers and keep the bottom open for extra supplies. Perfect for our household.
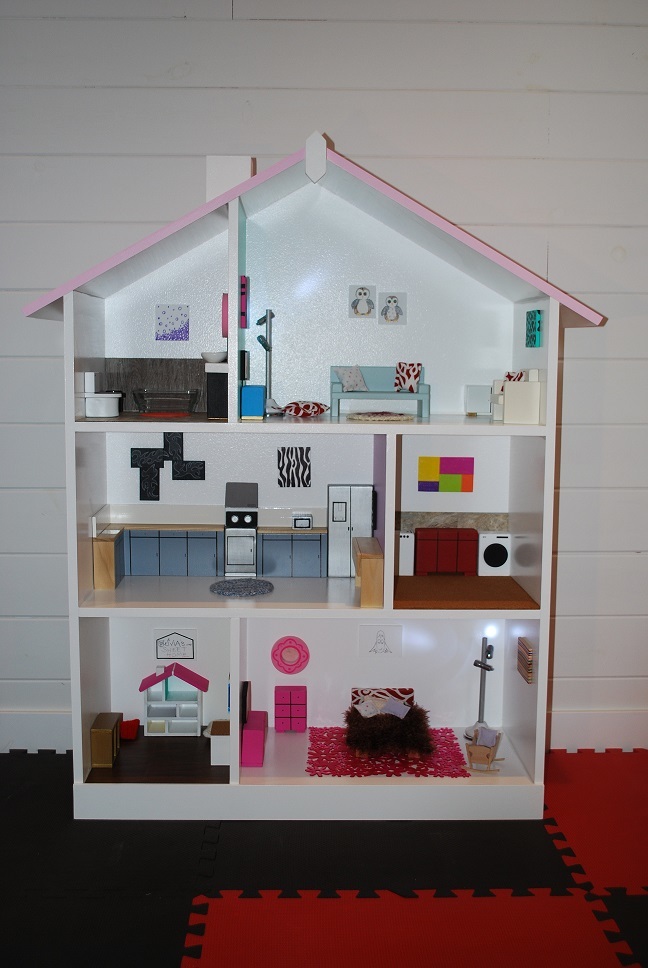
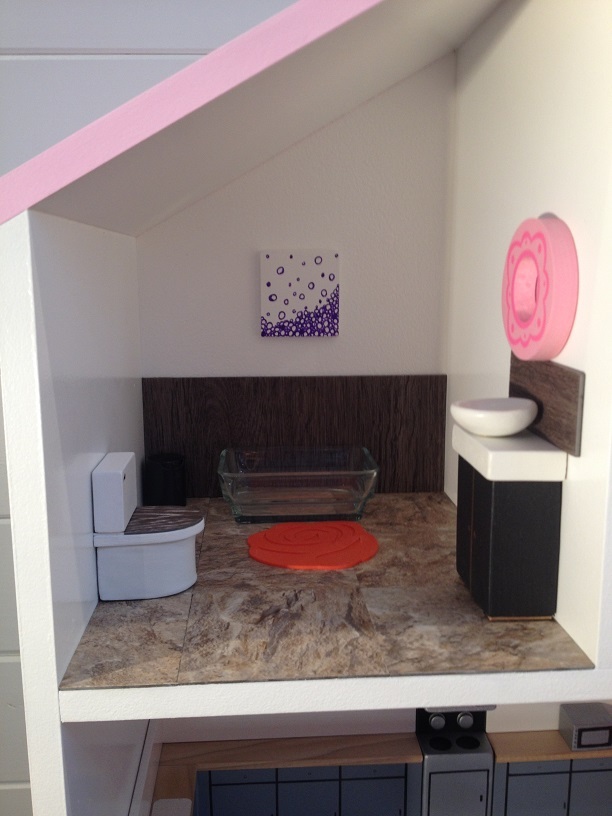
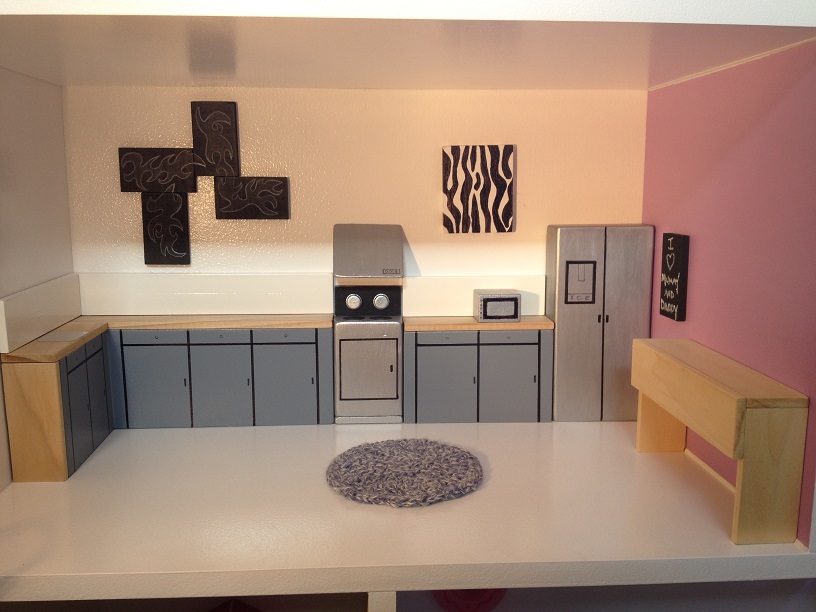
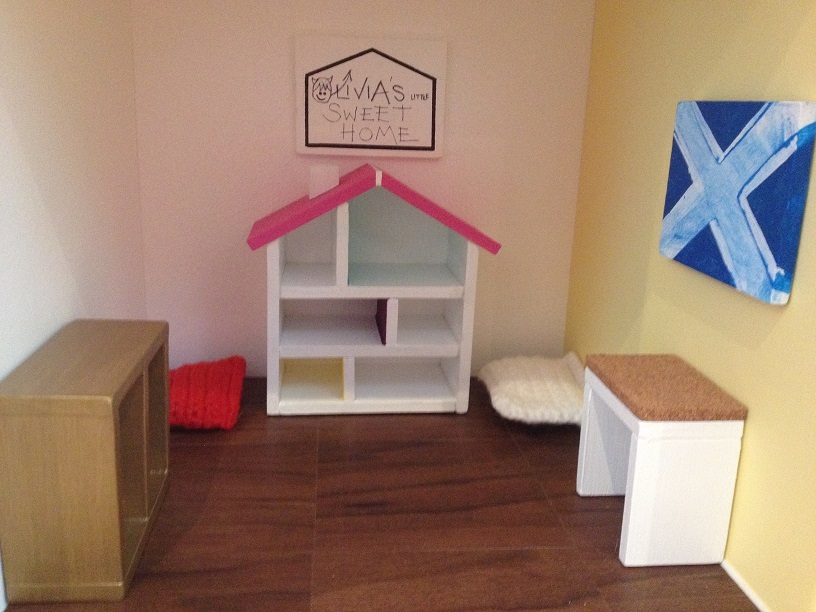
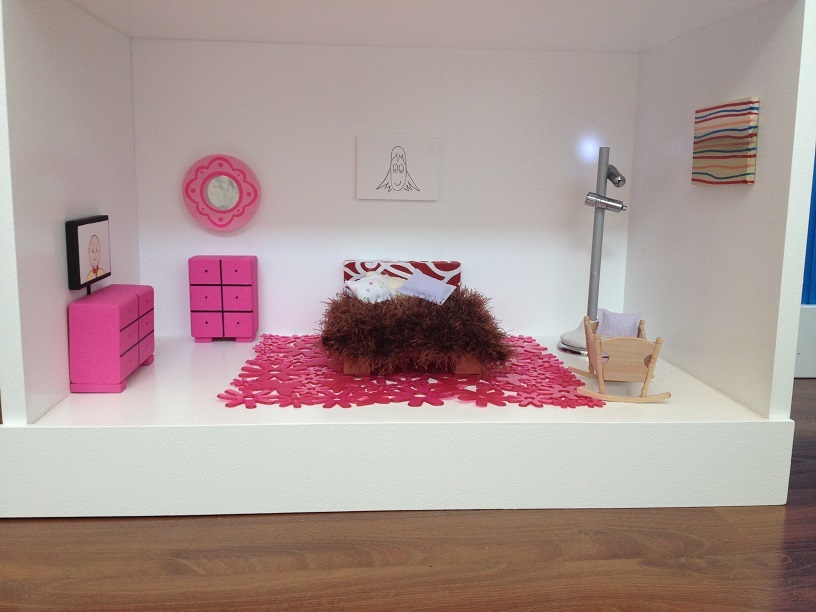
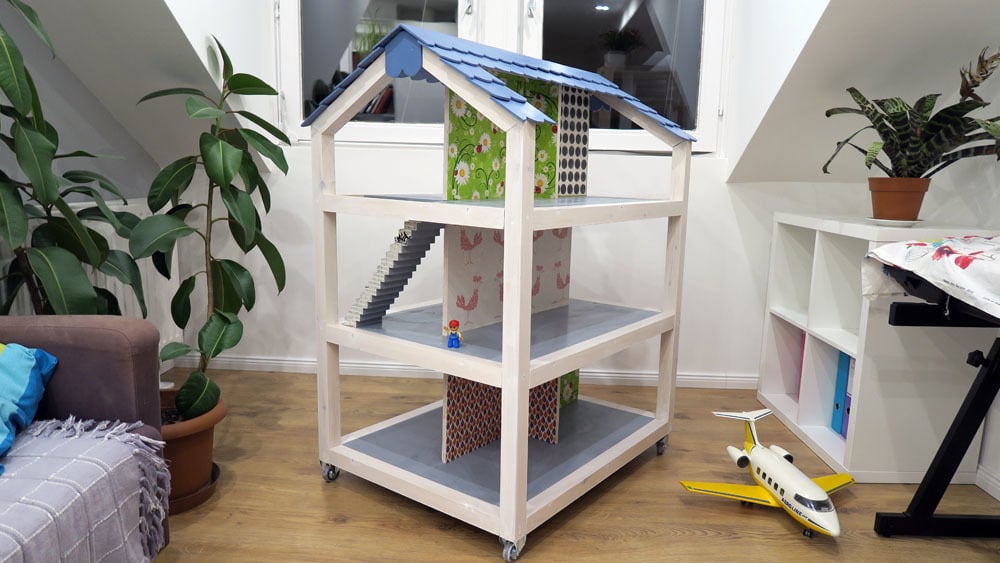
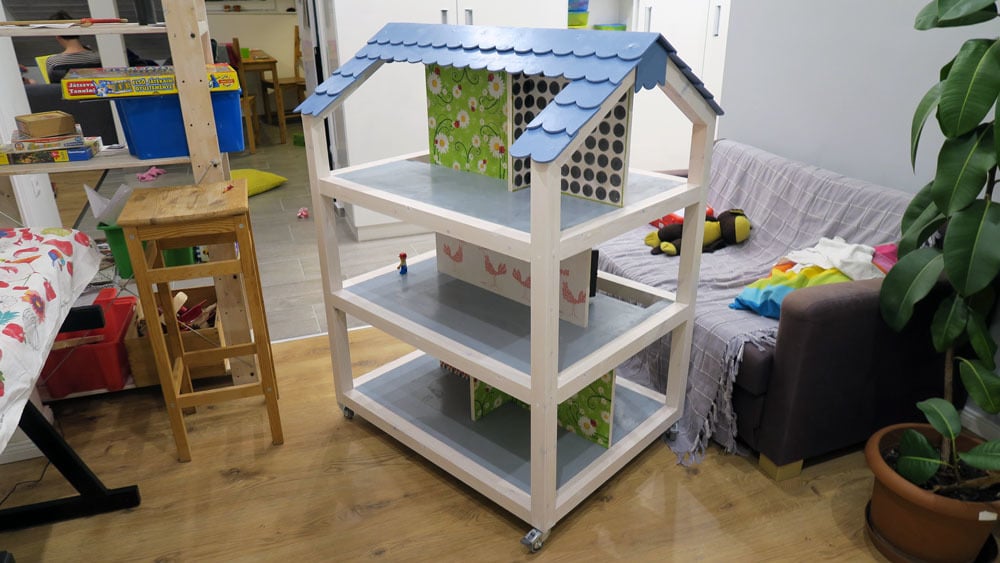
When my daughter was born I promised that I would make her a dollhouse. A few weeks ago I found these plans, and absolutely loved the visual layout of the rooms. I stuck with this layout and tweeked the dimensions according to what worked best for the space it would proudly sit in. It is 46 inches high and 31 inches wide at the walls, and is made from 12 inch wide MDF which I primed with a latex primer and then finished off with a semi-gloss white on the majority of the walls. I also mixed the colors for the roof and also the 3 accent walls to give it an extra wee shot of color.
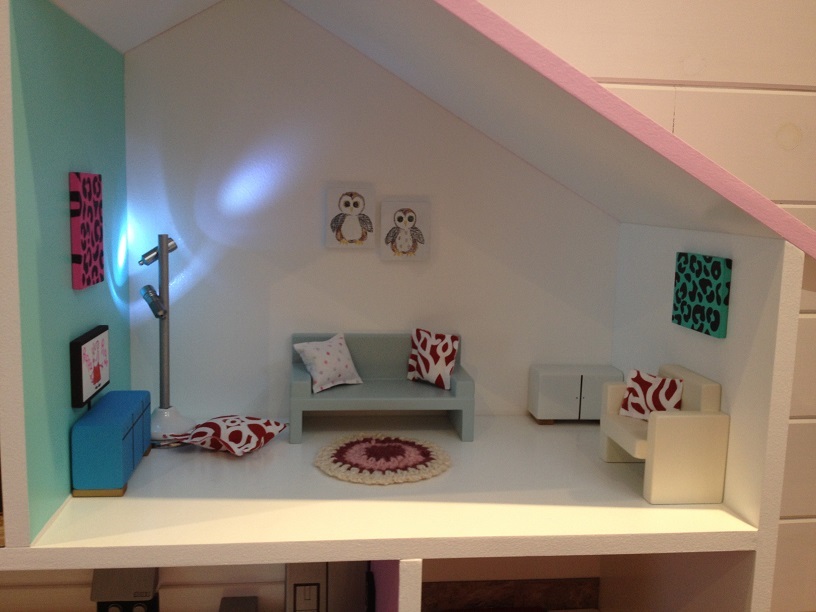
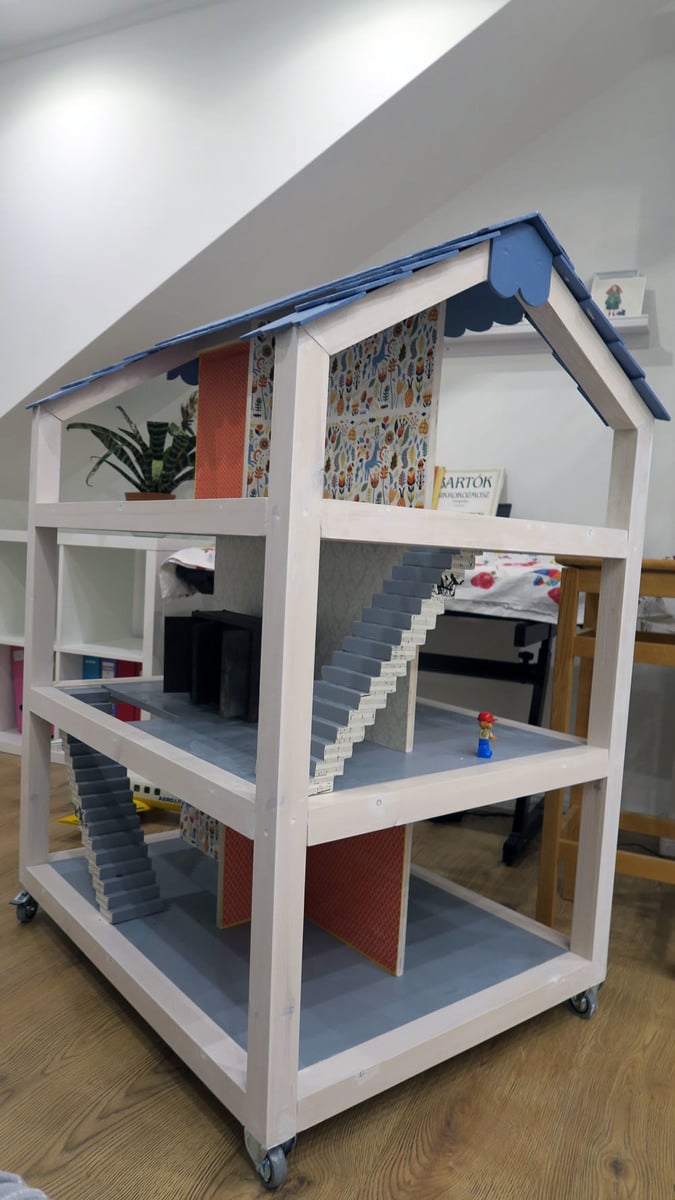
I was very, very happy with the end result, and haviong caught what I now know as the "dollhouse bug" I though "what about if I added a chimney ?". So I added it. I then thought what about adding a roof ridge and something to cover my dodgy gable on the roof front . The house looked even better. Progressing onto full-blown "dollhouse-flu", I then decided to make a chair for what would later be the living room. That was it, fully addicted now I couldn't stop and found myself obsessively planning, designing, messing up, re-designing, cutting, building and painting until I reached the point where last night I attended my first "DA" meeting.
I found Dollhouse Annonymous very helpful and although not cured, I realise that it is perfectly acceptable for a 44 year old Scotsman to build a dollhouse for the daughter (naughty 2 1/2 year old daughter) that is the love of his life. If she is happy when she unwraps it on Christmas morning, then all of the work shall be worth it.
This site is top of my bookmark list and I love it. !
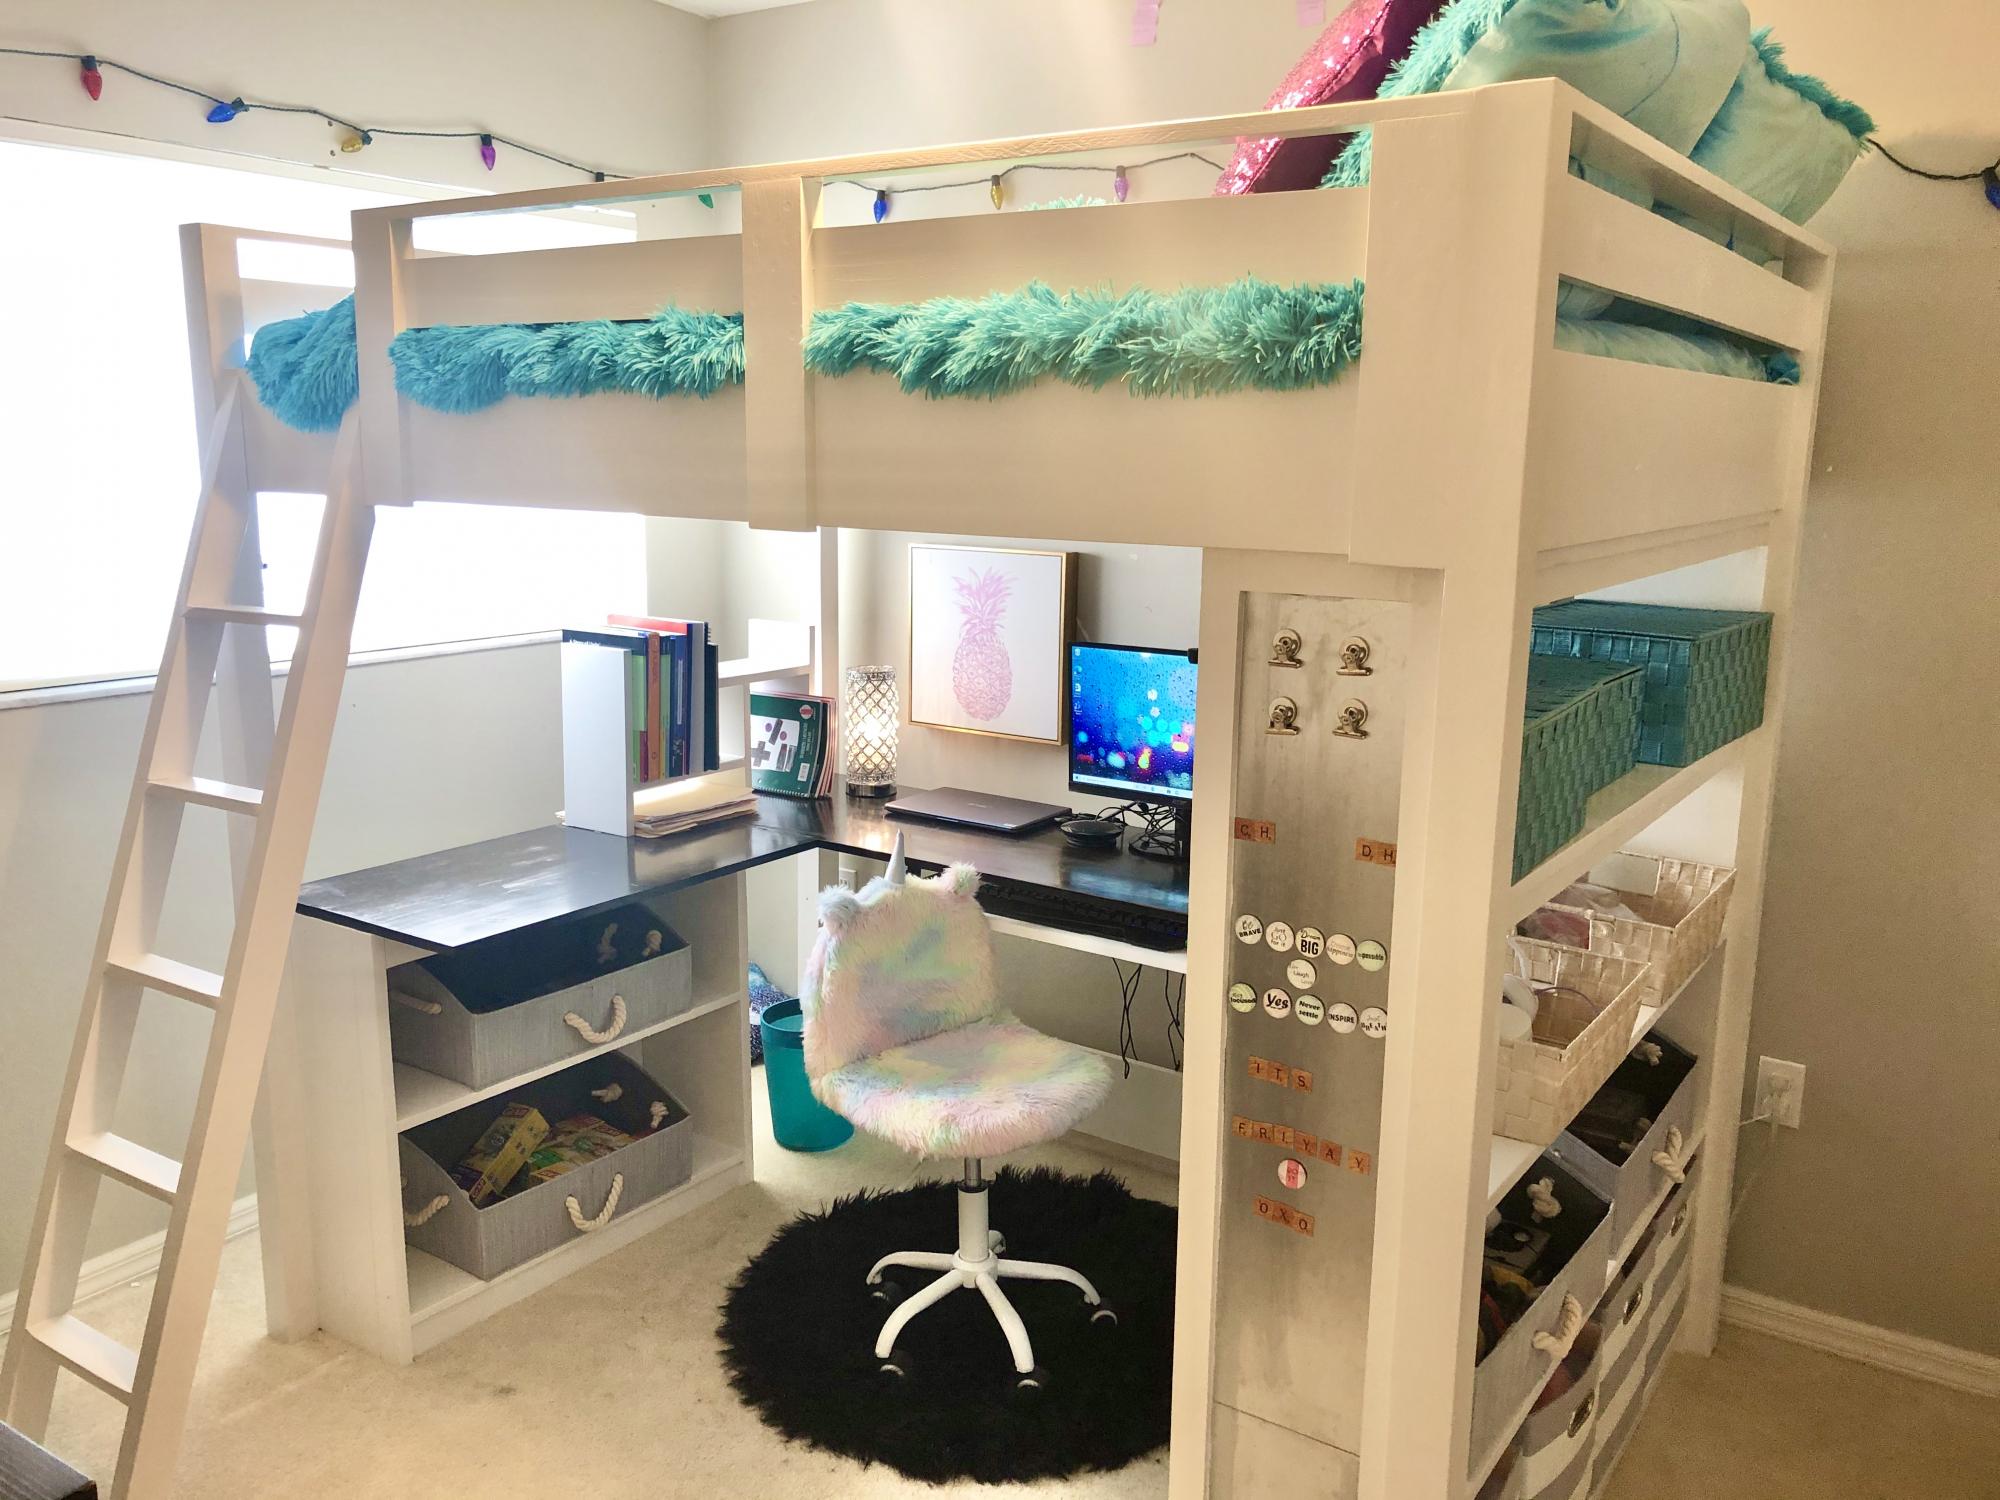
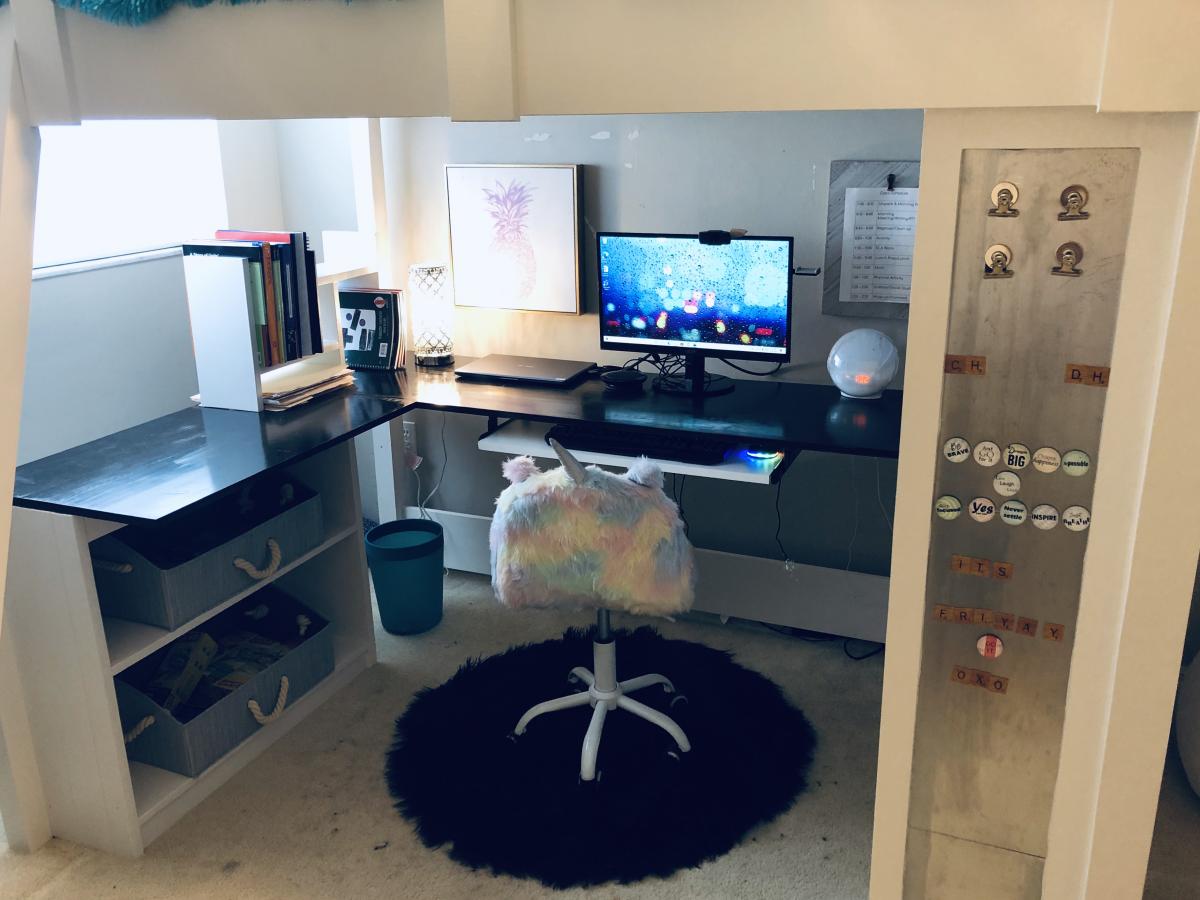
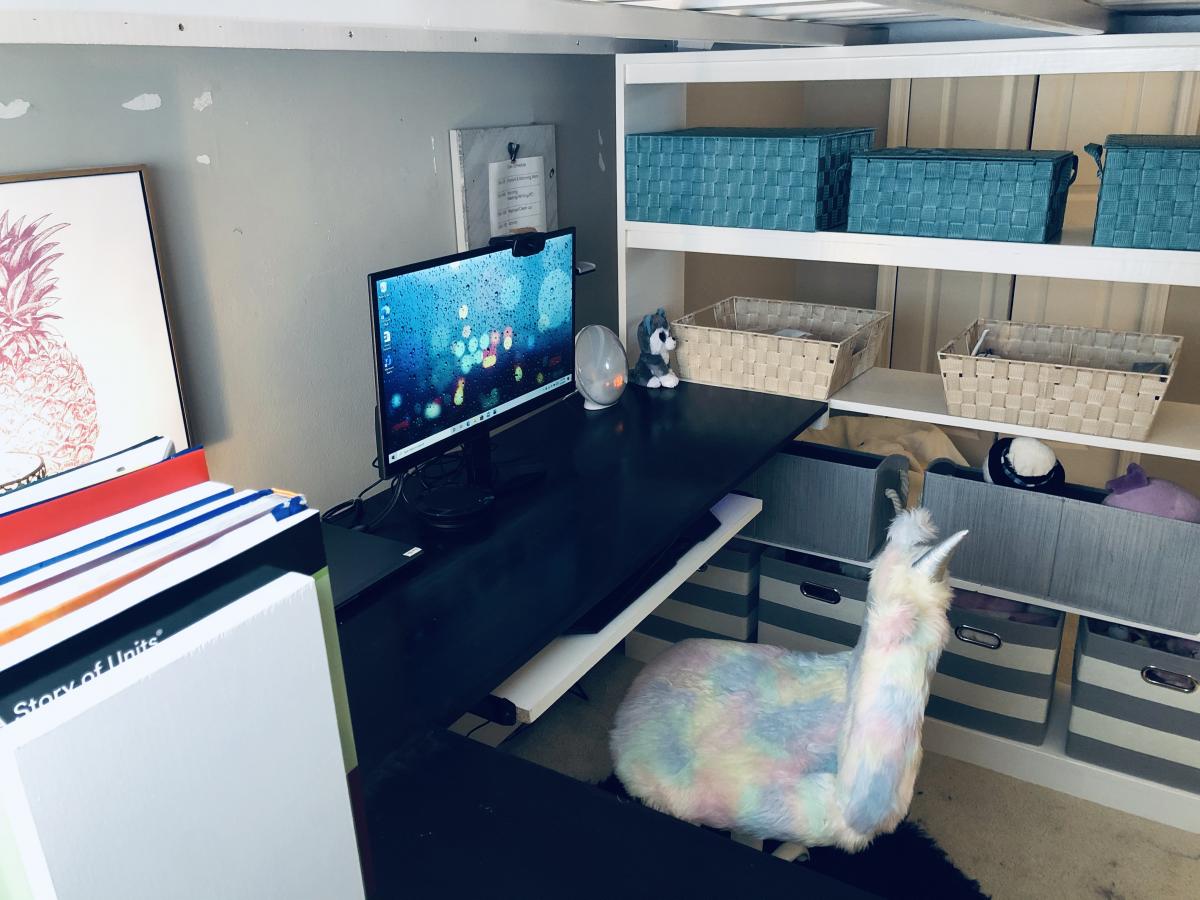
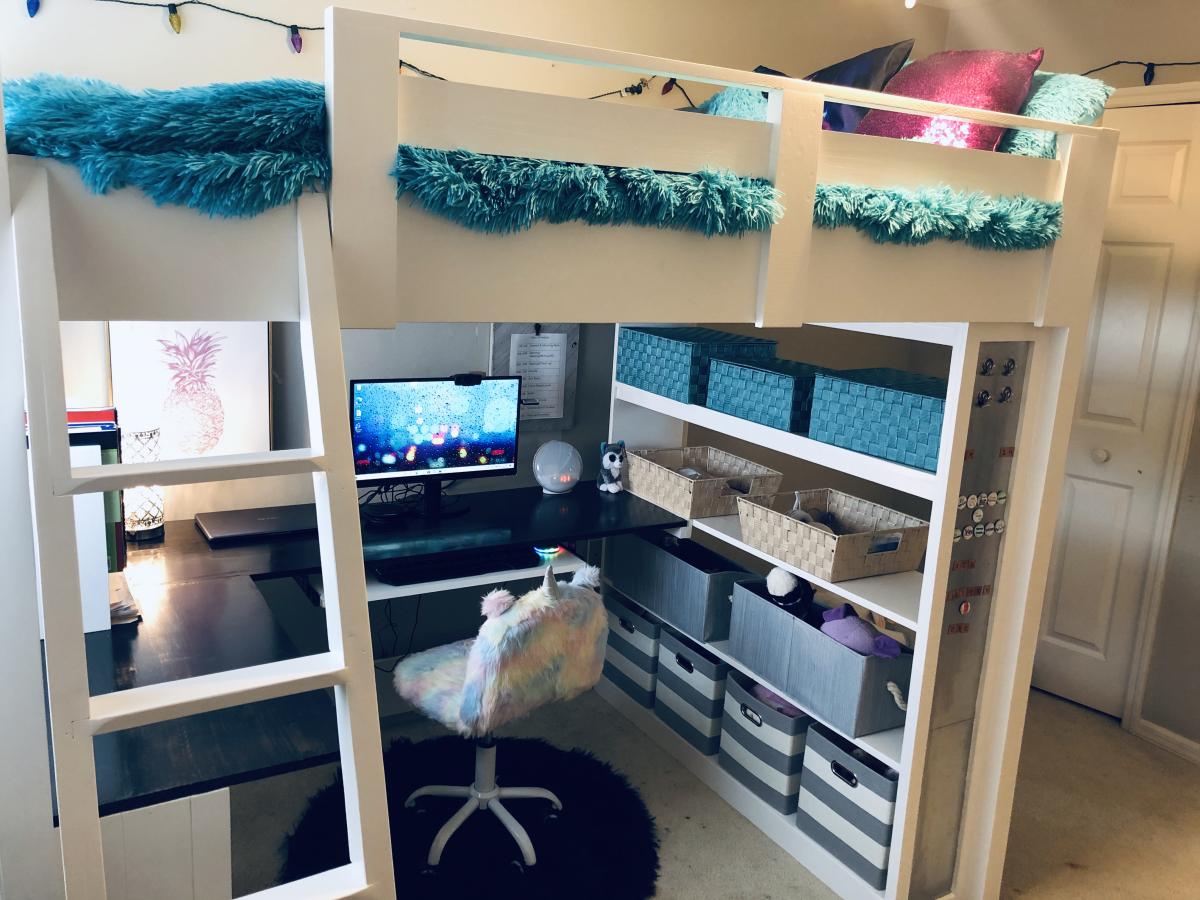
Our daughter has been asking us to build her a bed for months now. When eLearning became a reality for our household, we knew it was time to get to work. We usually do two to three big DIY projects a year, and have built from many of Ana White's plans. We often refer our the time together DIYing as "couples therapy".
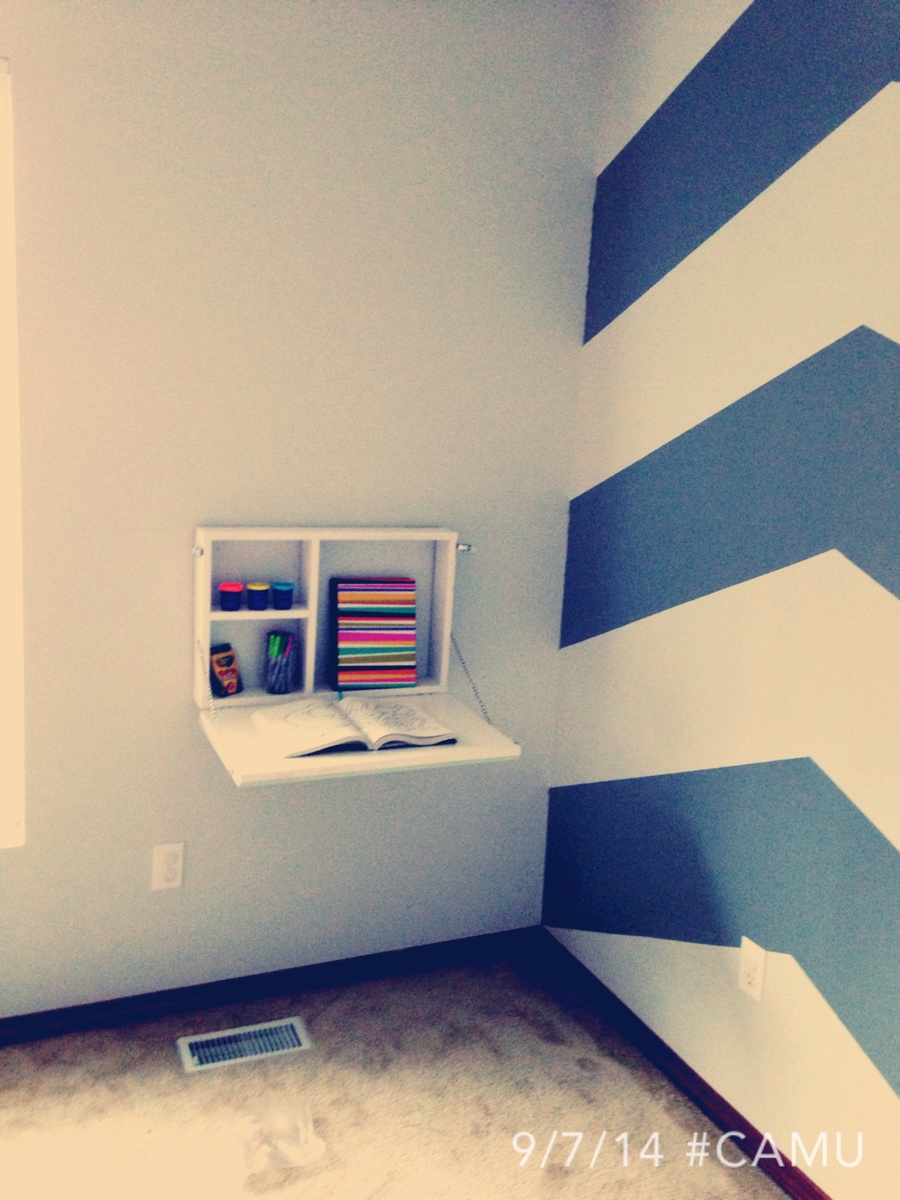
We used Ana's plans for the Loft Bed and included the tall bookcase and desk system, with a few of our own modifiations and personal touches, such as:
- elimated the plywood backing on the bottom shelves of the tall bookcase
- only used one (1) bookshelf for desk system
- used toungue and groove paneling for back of small bookshelf, adding it to the sides as well
- made the desktop 19" wide
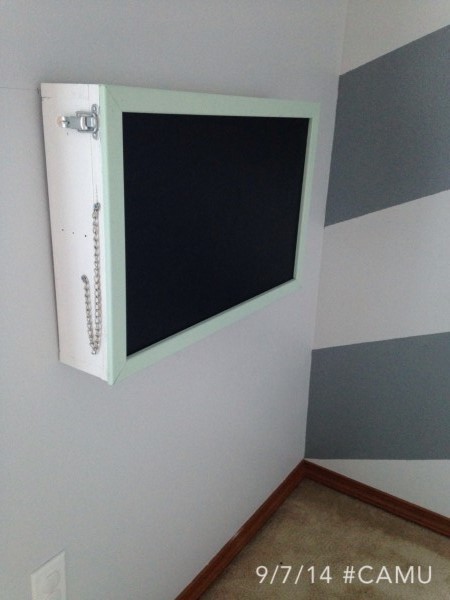
- added a framed magnet board
- added a sliding keyboard tray

I adjusted the dimensions to fit my space and added a shelf on the bottom. I built it using my Kreg Jig.
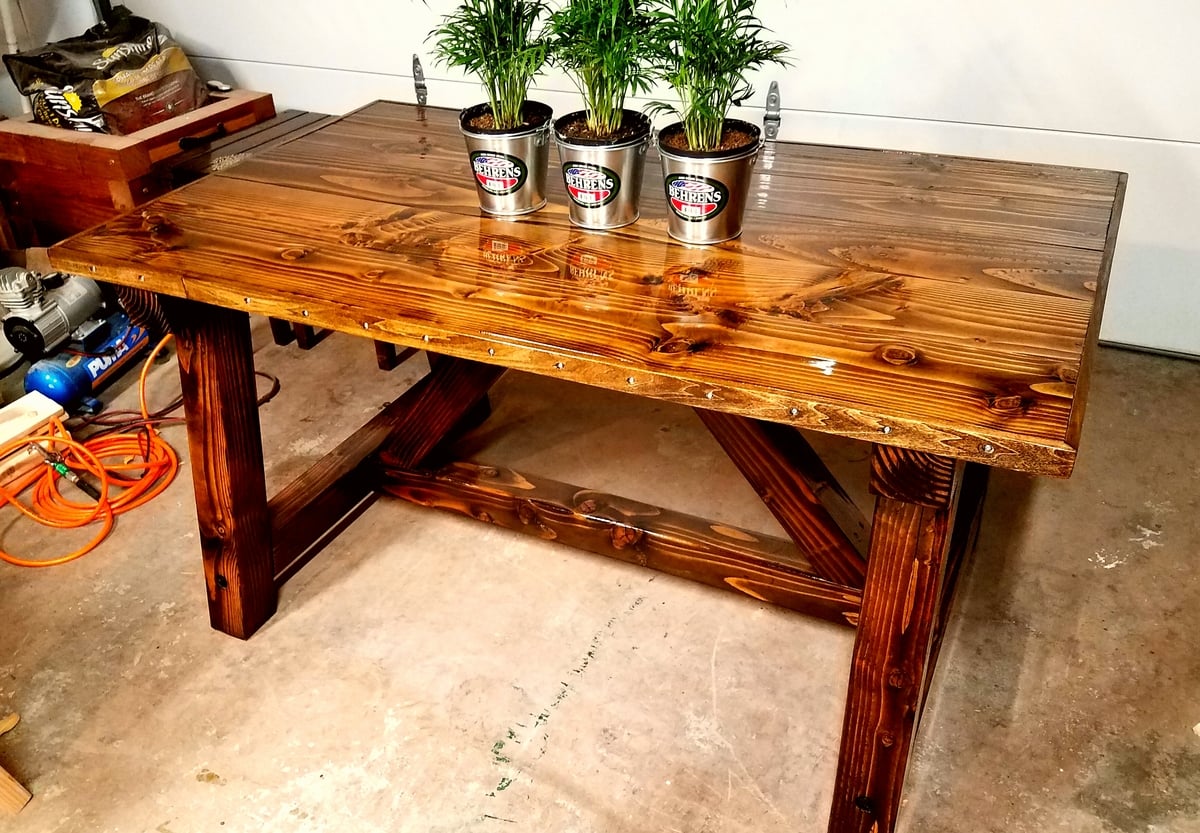
Truss Beam Table size 35x60
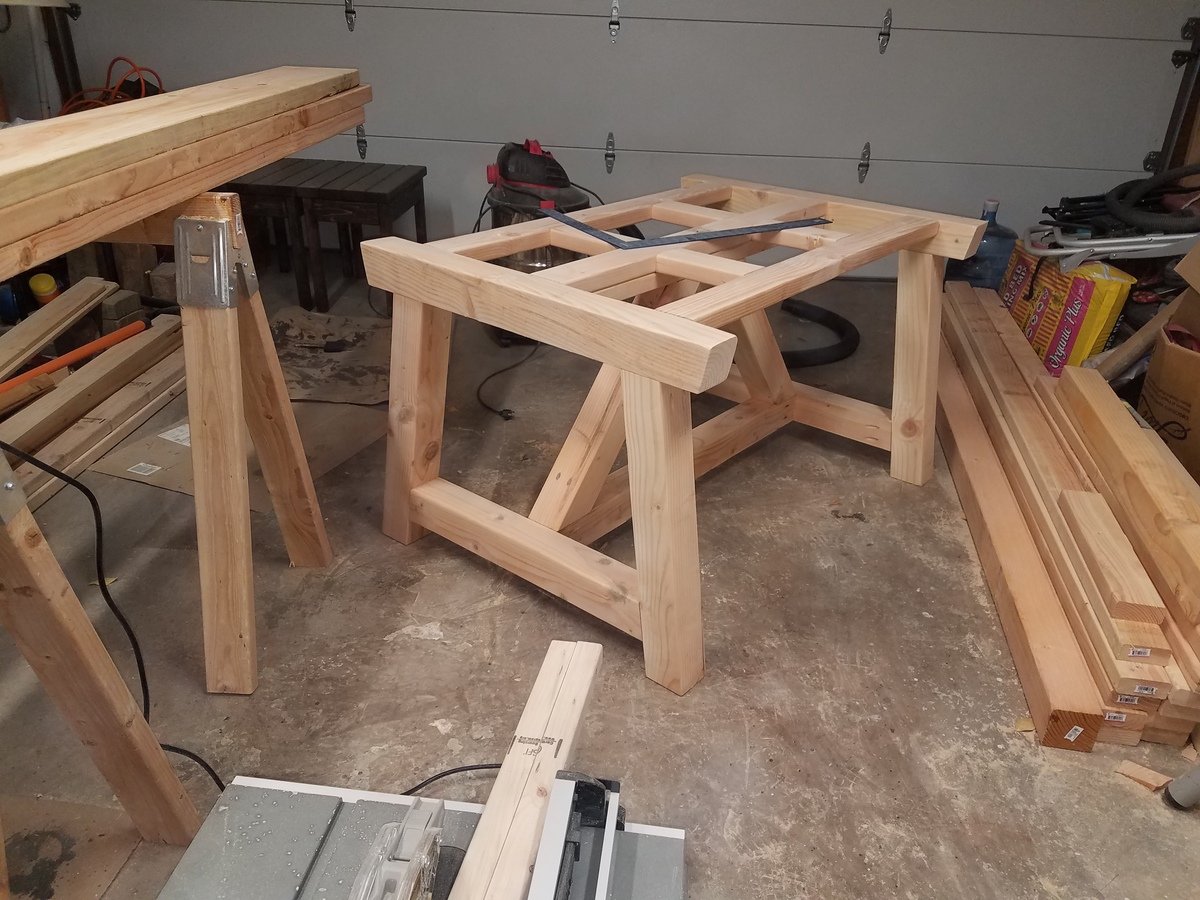
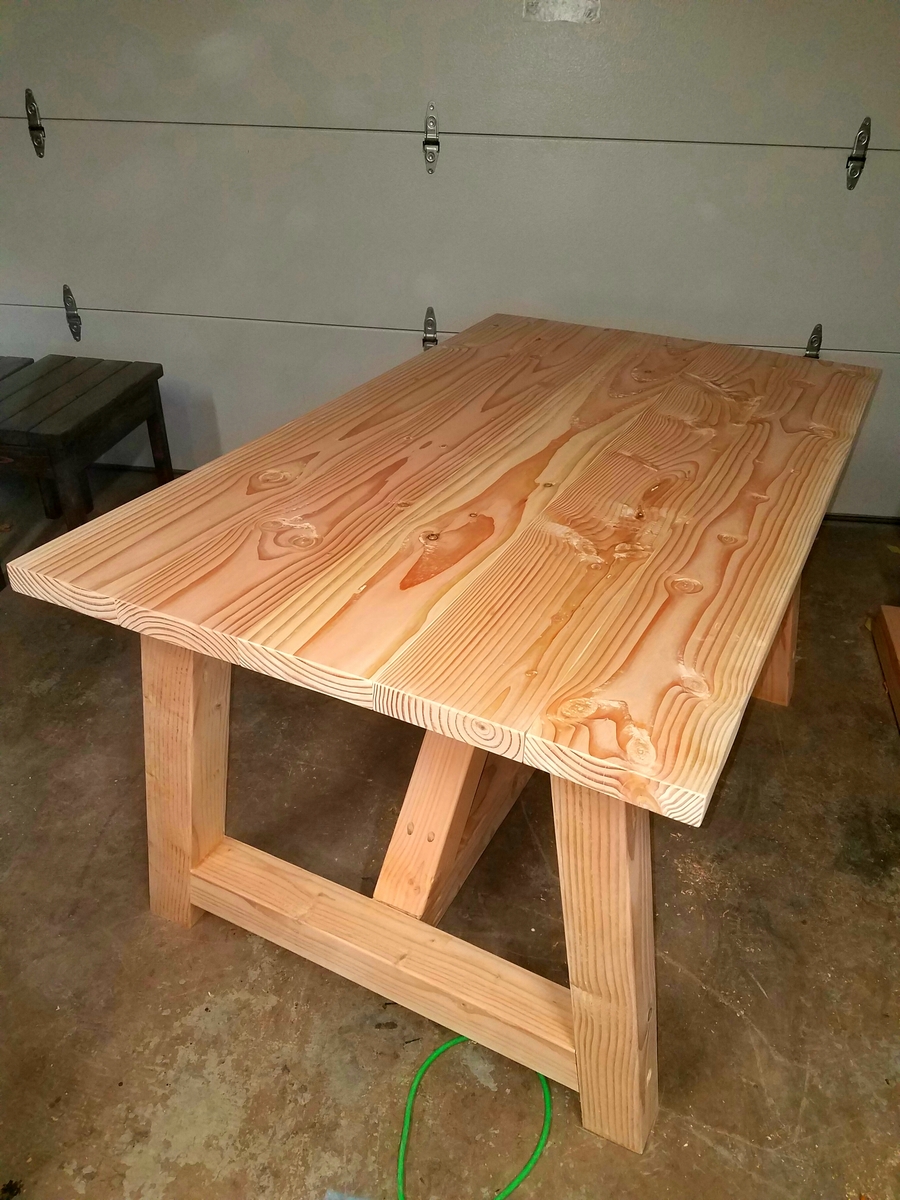
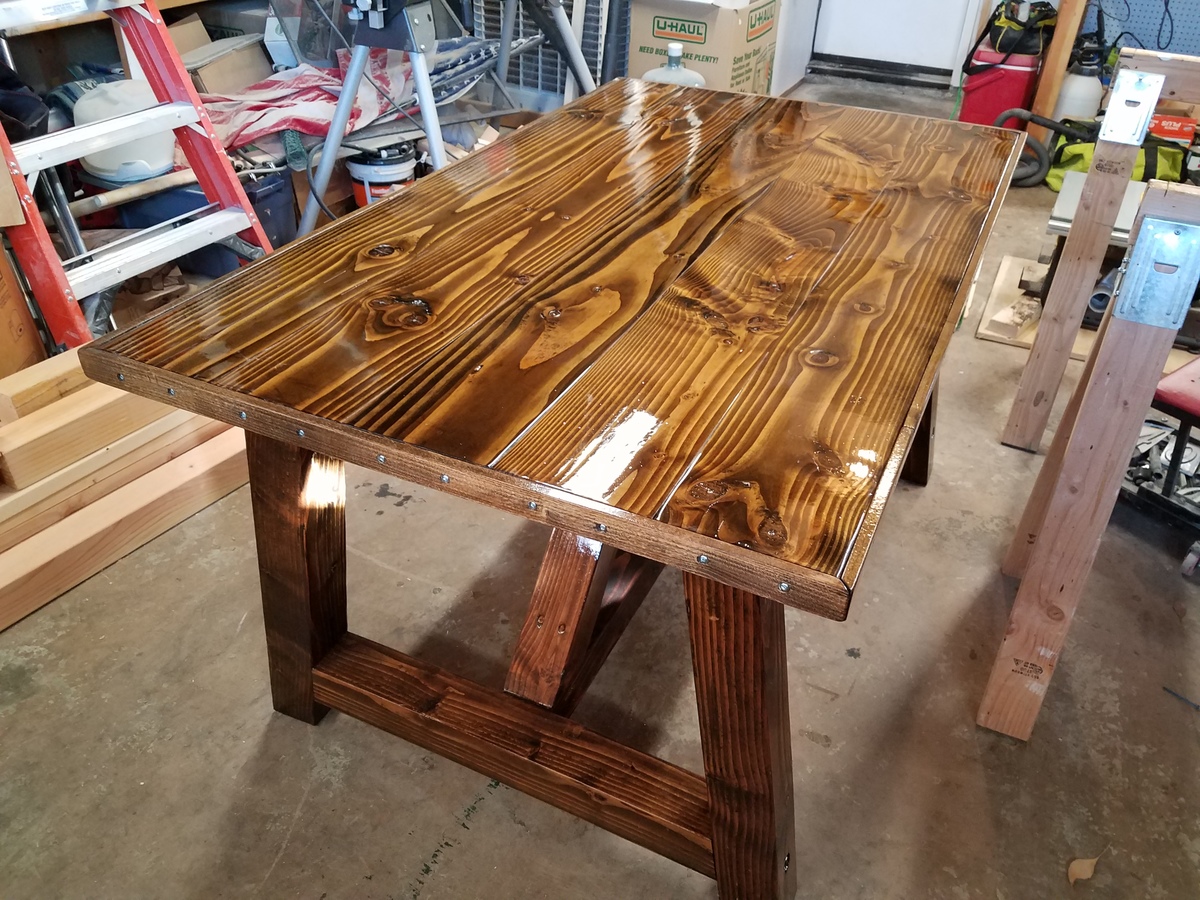
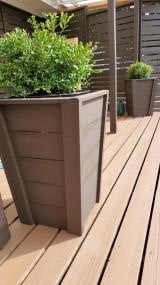
Very easy fun build. I laid out the fence boards and marked the 5 degree angle but cut them with a miter saw as I was not confident to use the hand saw. Also numbered each section to easily put the sections back together. Miter saw was set to 5 degree angle also. I initially built with 7 boards and then took off two of them as it was really tall.
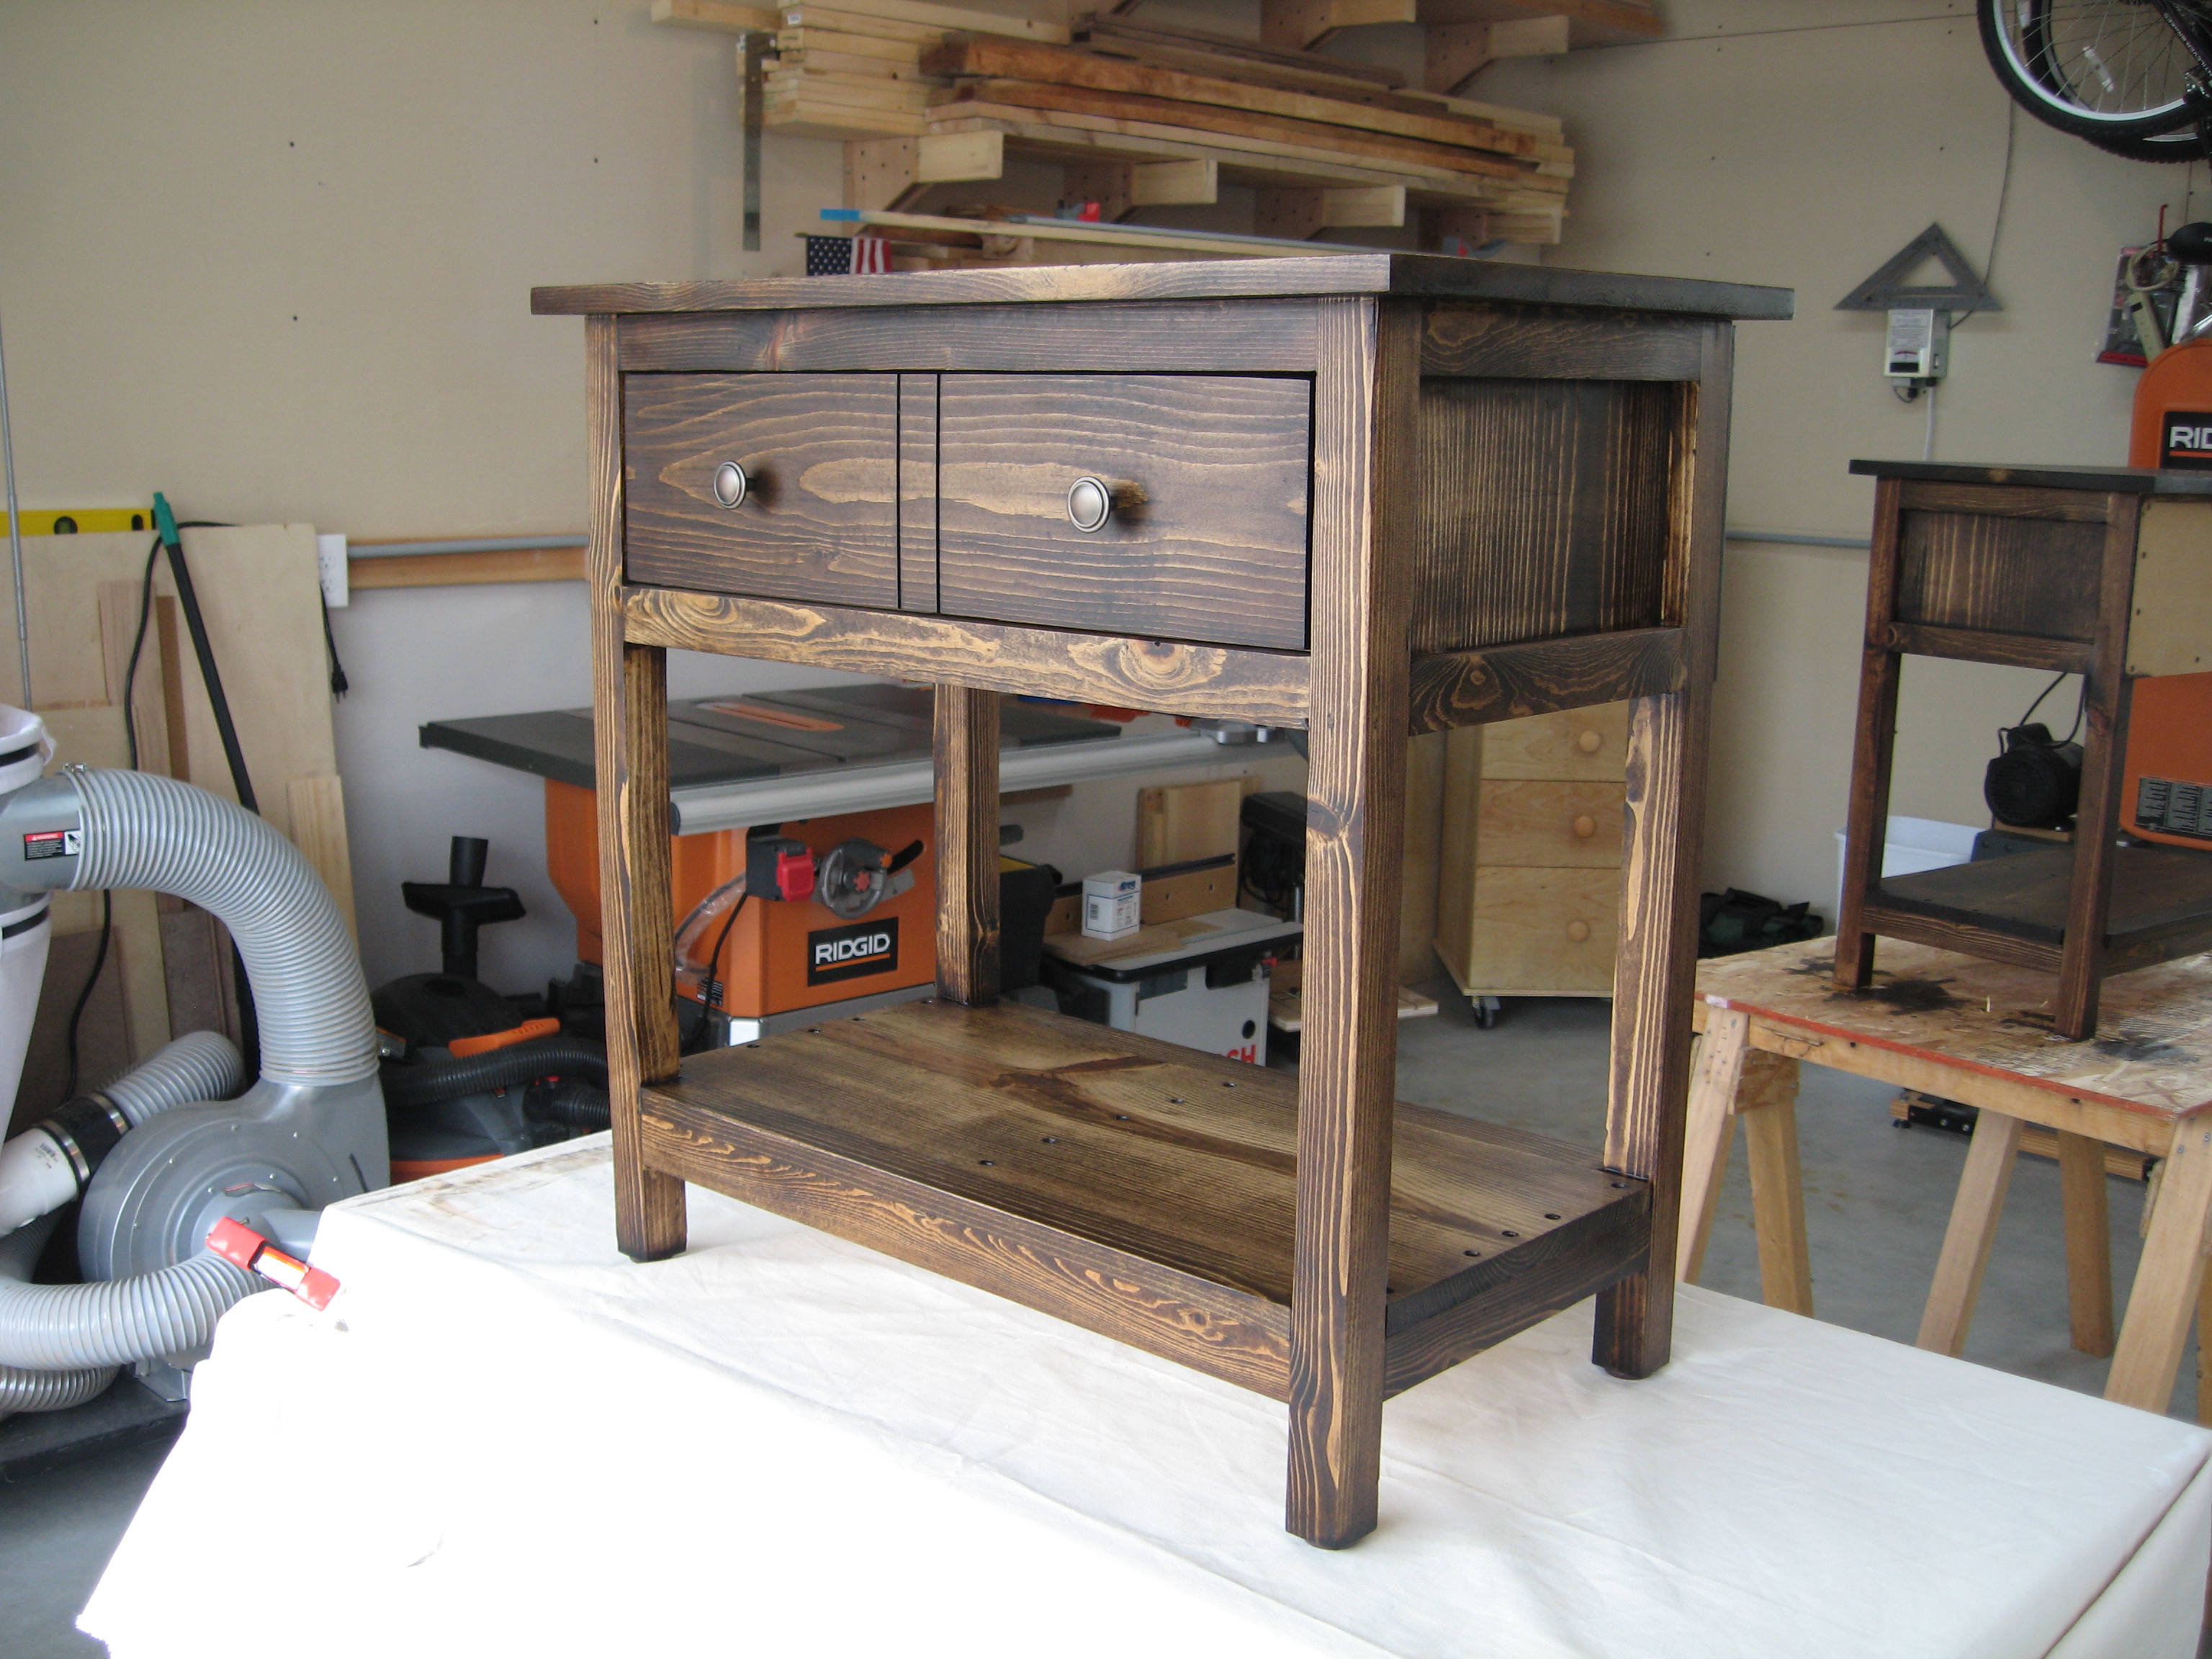
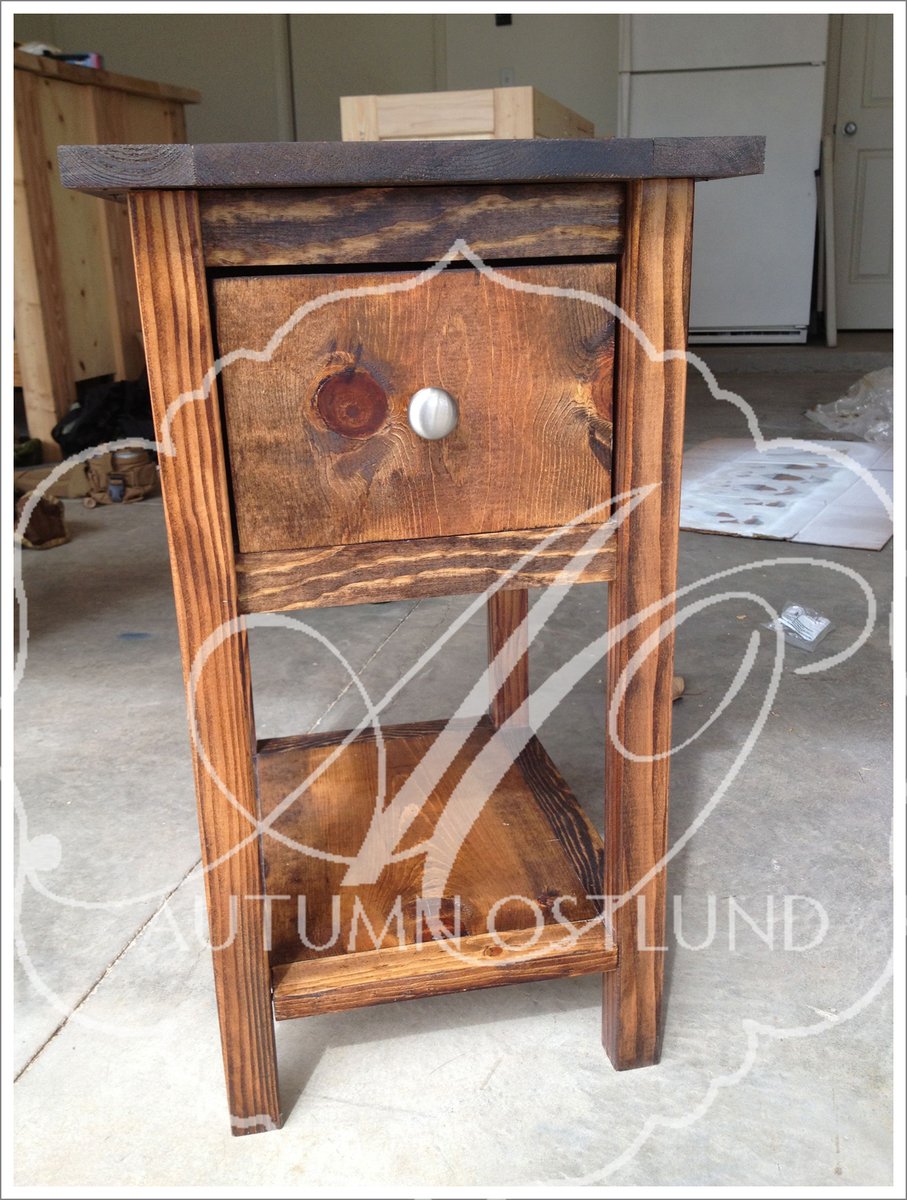
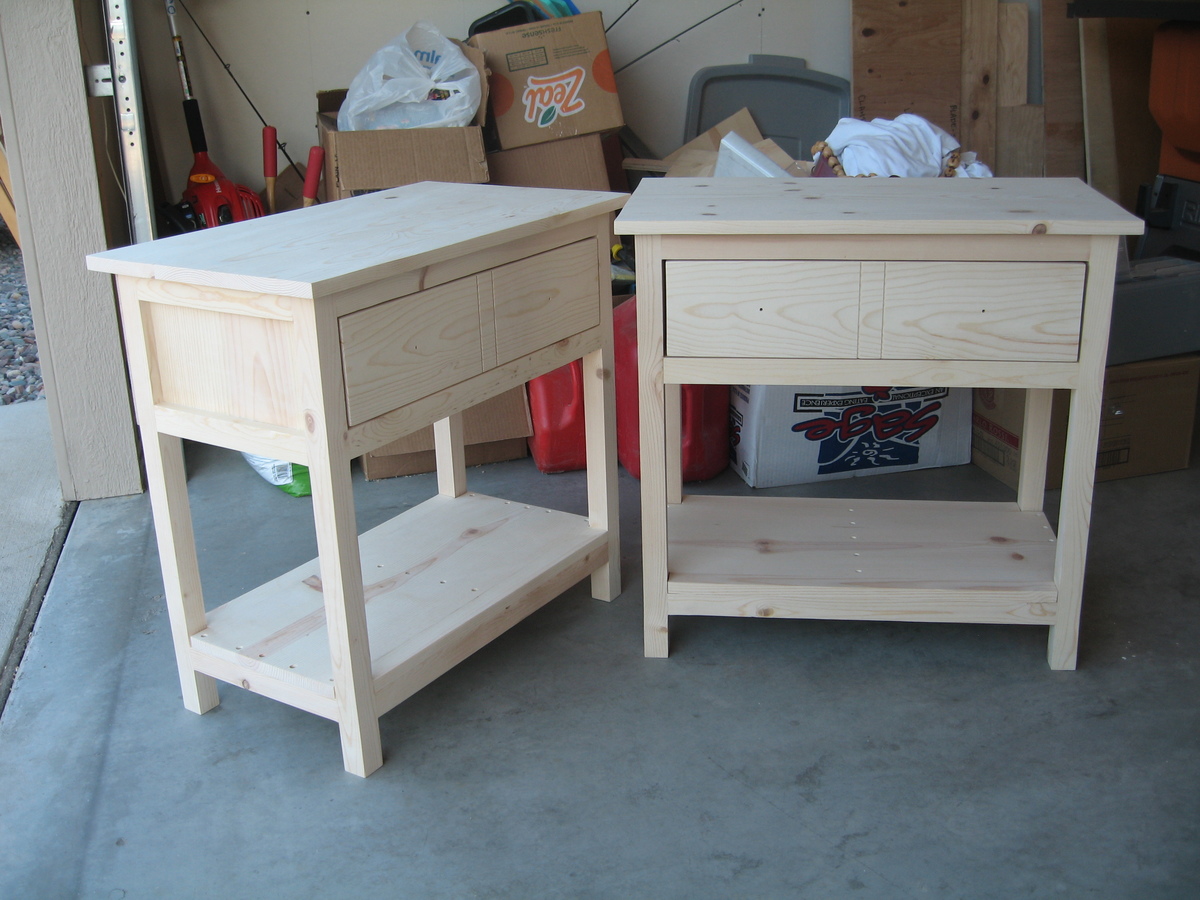
For the 7 years I have been married to my lovely wife we have used an old 70's bedside table and some Rubbermaid boxes as our nightstands. It was time to give my wife a nightstand that she would love. With the help of the Kreg Jig, a new table saw and some trials and tribulations in staining, I have given her a special treat. Best part: She loves them!


Sat, 11/17/2012 - 09:42
LOVE the nightstands, but the story behind them is even better.
Mon, 11/19/2012 - 11:39
These look great. I think I can see a satiny sheen on them that is really pretty!
Tue, 11/20/2012 - 02:11
You did a great job on the night stands. What did you use for the legs? They look like 2x2s but where did you get them?
Wed, 01/02/2013 - 01:47
Funny enough the legs are ripped down to 2x2's but they started as 2x3's. The 2x3's were cheaper at my local big box joint. What was nice about ripping them down on the table saw was that I could get a nice square edge on everything unlike just throwing a off-the-shelf 2x2 on there with their inconsistent rounded edges.
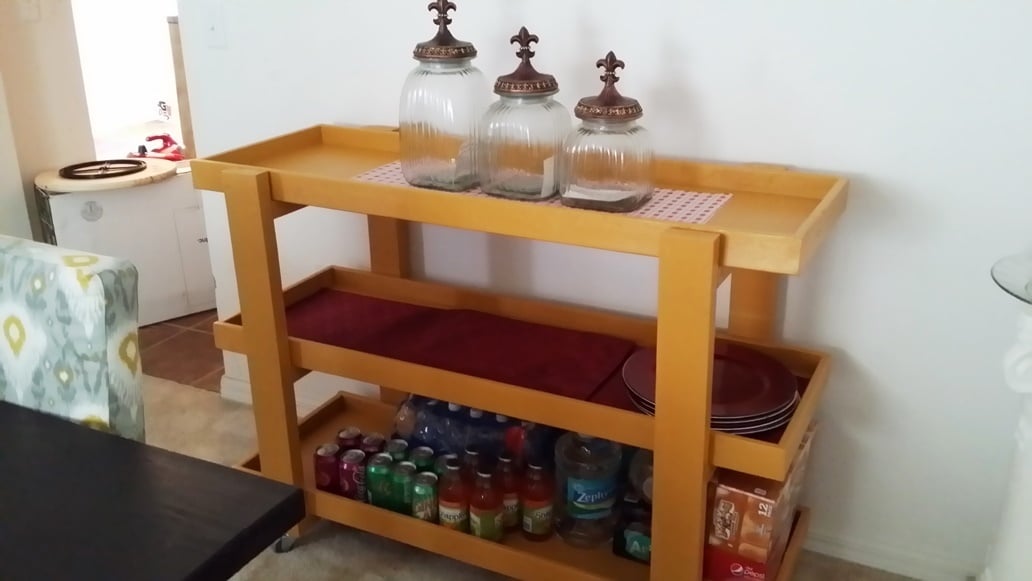
So I went to the DIH Workshop held at my local Home Depot and finished my cart over the weekend. I had the guy at HD cut my plywood down, won't make that mistake again. He made each one about a inch shorter than I asked for so I had to make my adjustments for everything else based on that. Next time I will take a tape measure with me to make sure instead of lugging everything to my car, taking it home and then measuring.
All-in-all I like the way it came out even with the minor adjustments still a fantastic cart.
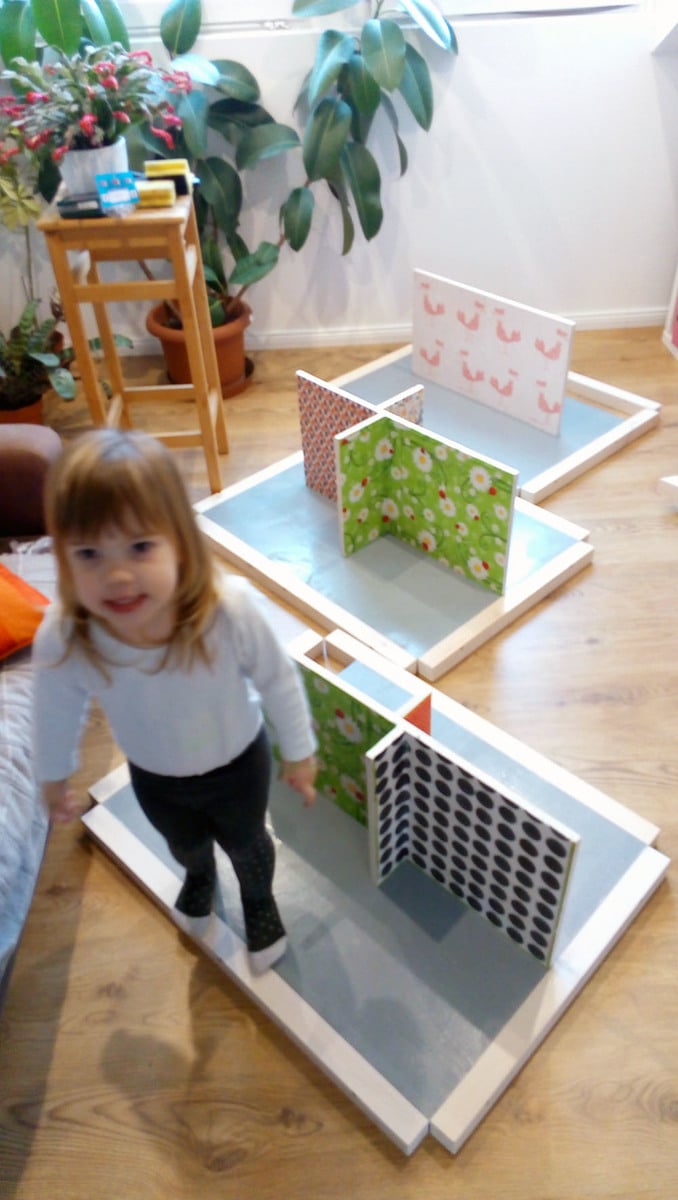
Thanks Ana for the plans, it was big fun to build! Had to do it while babysitting after work hours in our Budapest appartment, so all our neighbors had a lots of fun too while sawing and drilling in the night!
At the start I had some difficulties with your inches and feet, but at the end I had to realize that milimeters weren't my thing either... but it looks good from the distance. Still needs to be filled with furnitures and dolls, but that will be the task of Rozika.
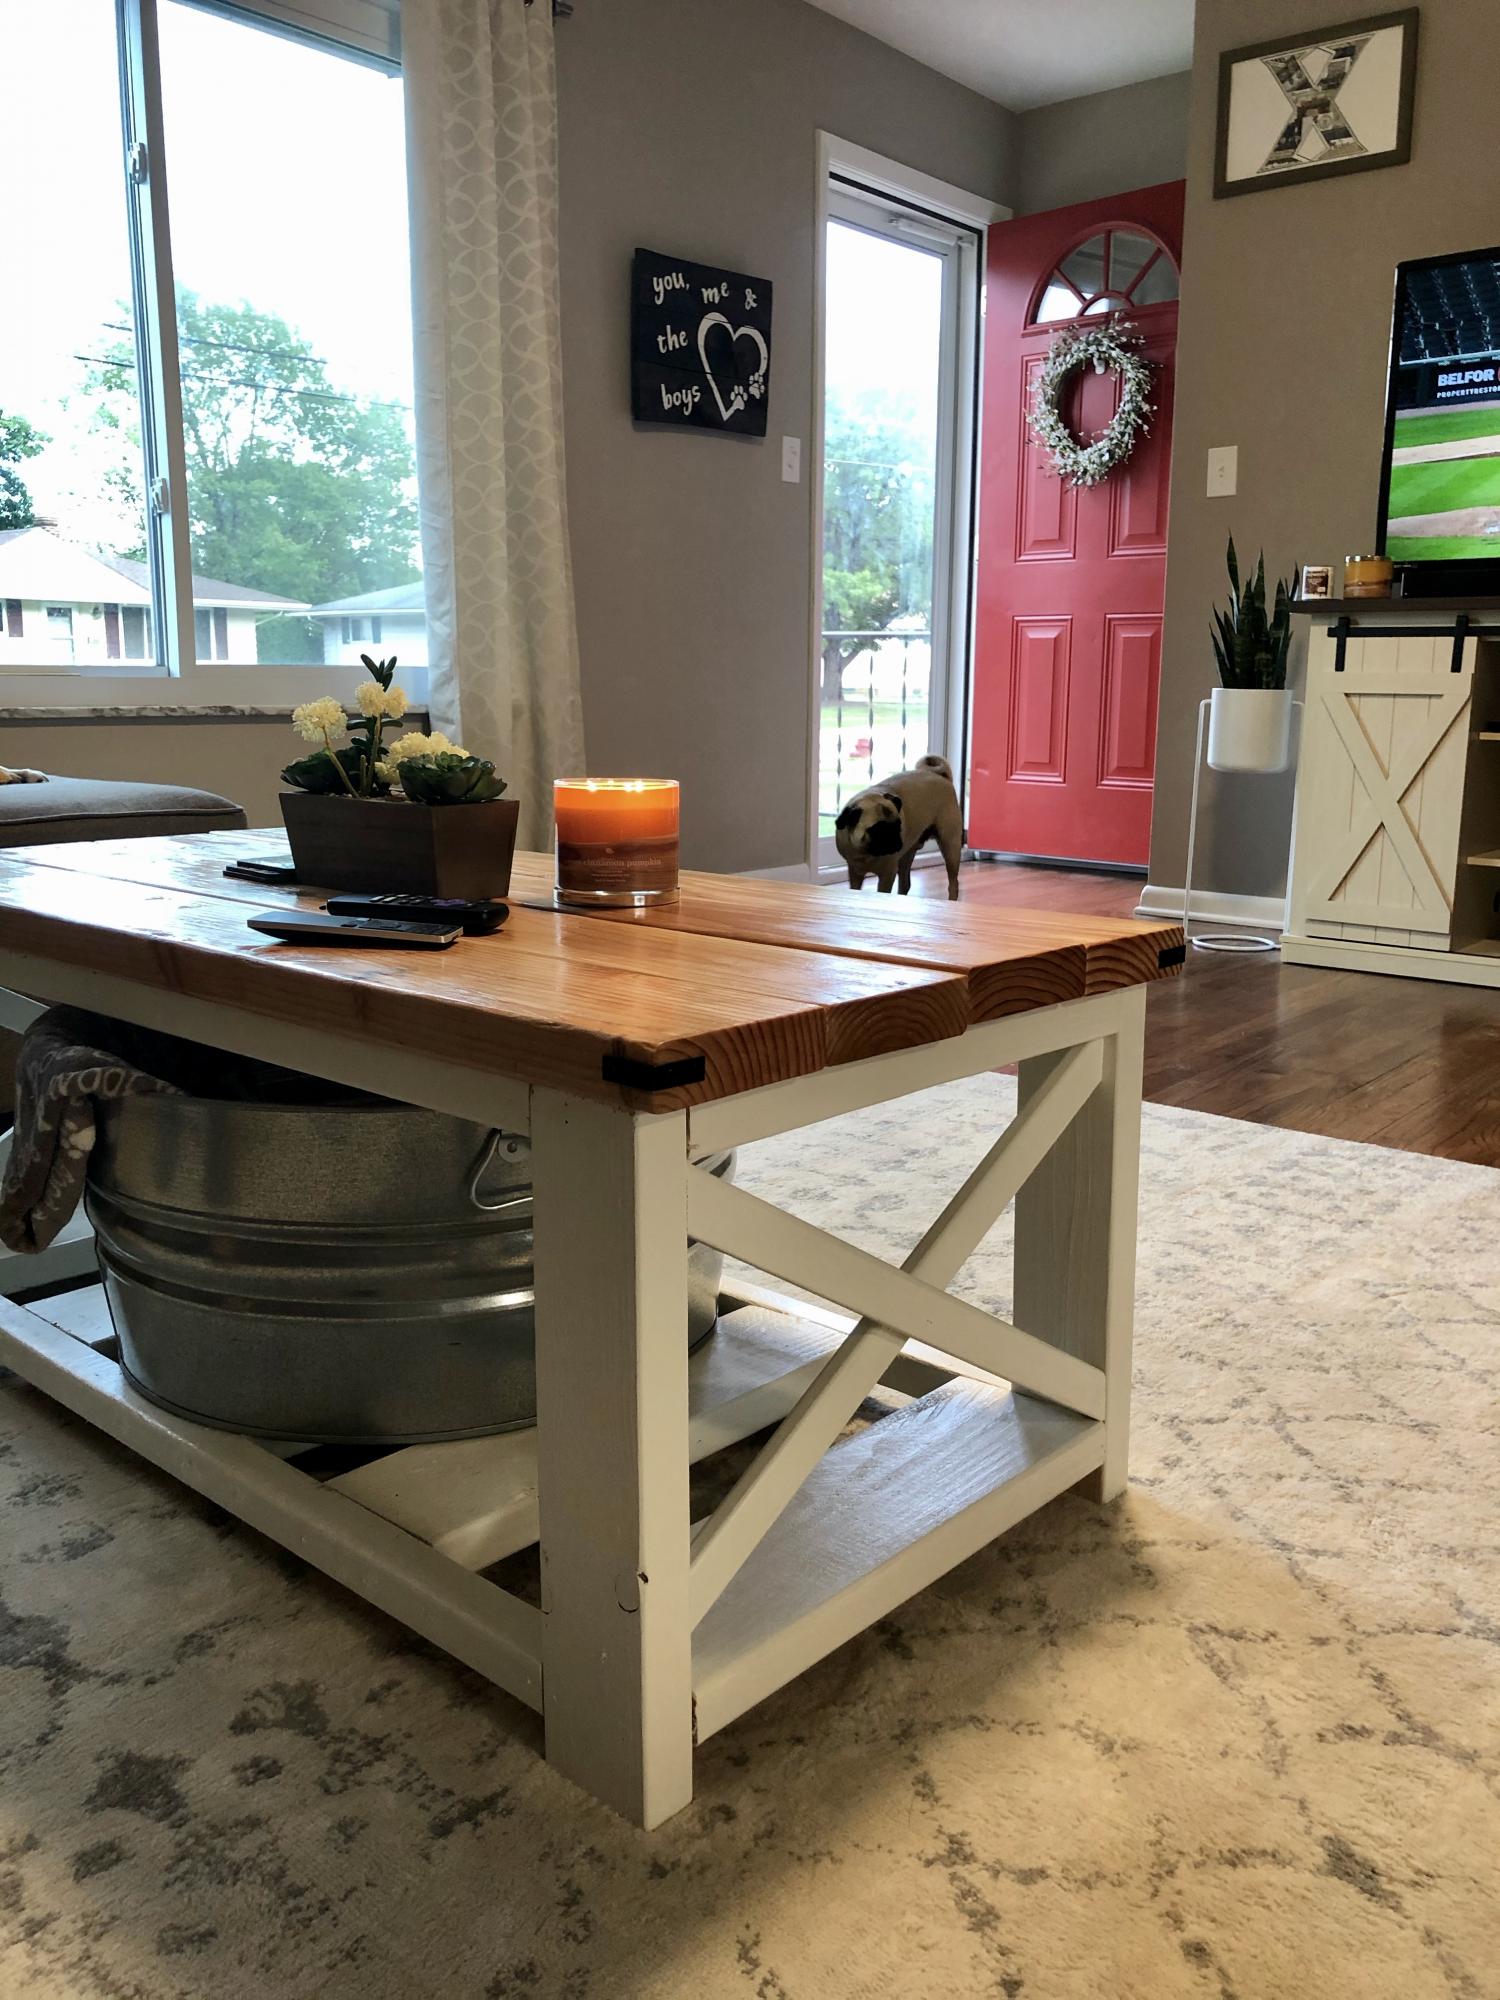
Farmhouse coffee table with an oak stain. It turned out well!
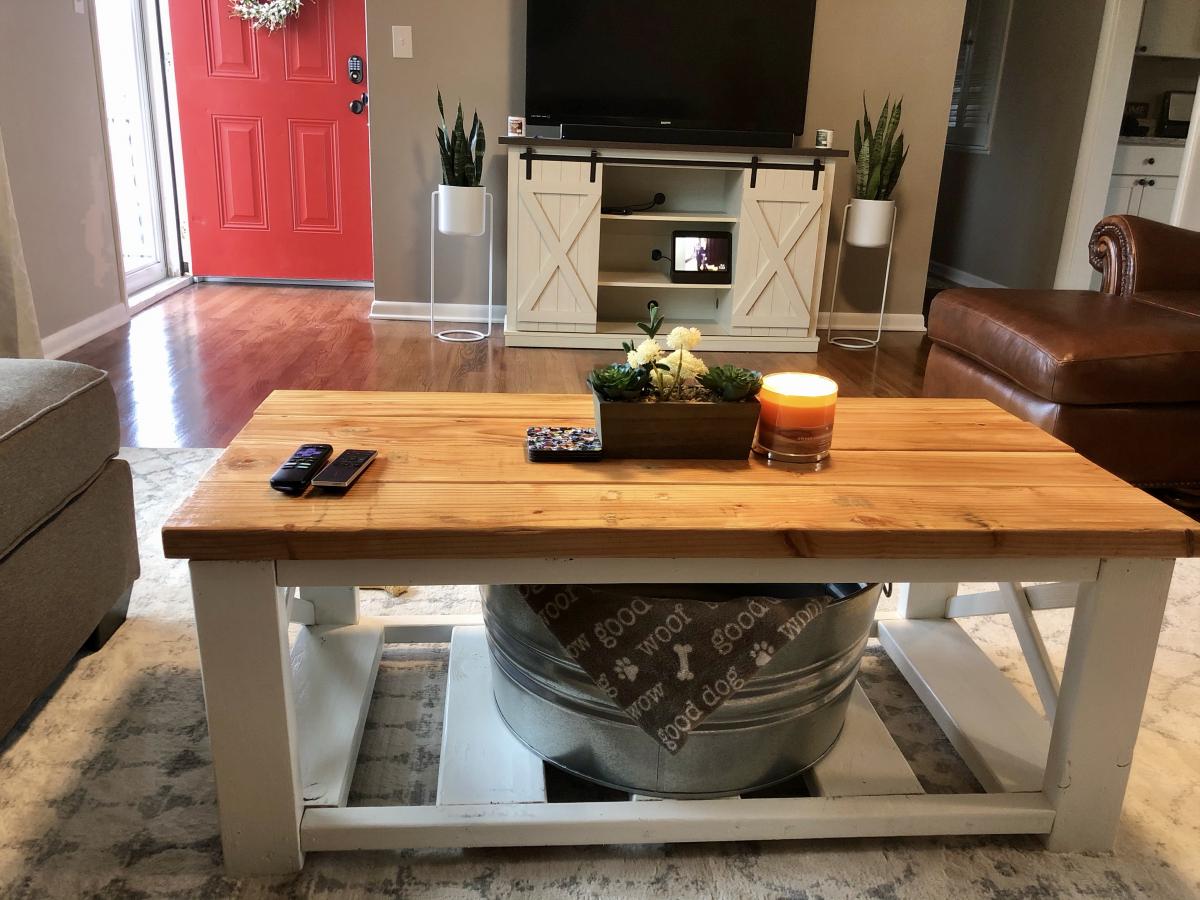
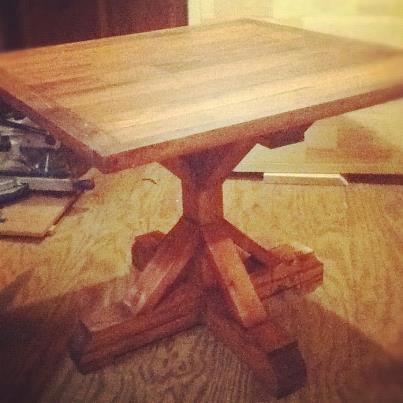
Inspired by the Fancy X Table plans, this table was made from scraps of thresholds and door frames. The table legs were made from the runners and deck board from shipping pallets.
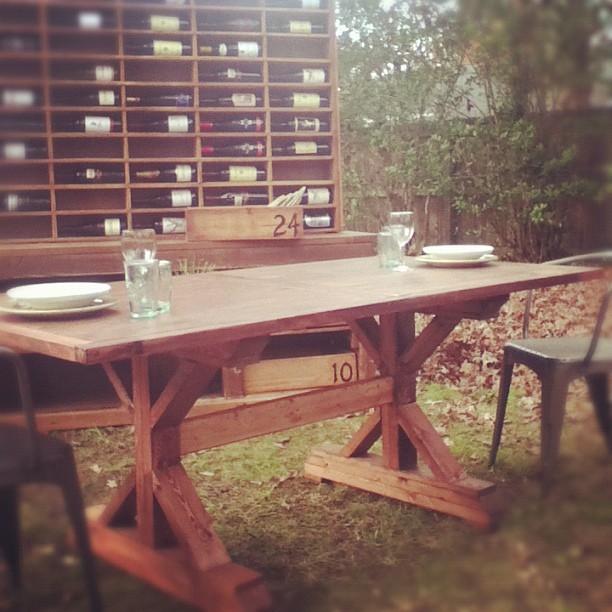
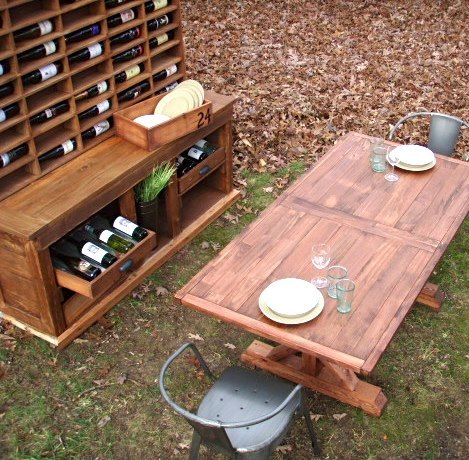
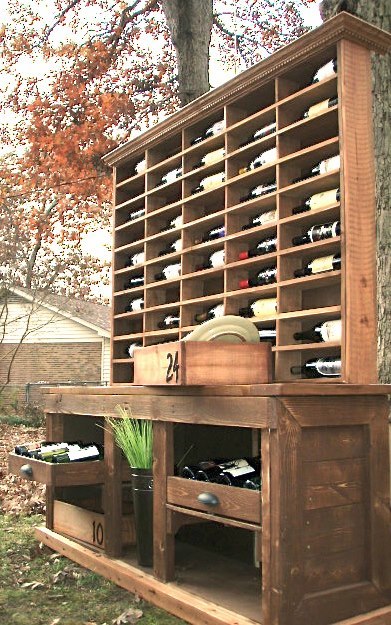
The Vintner's Hutch was created by re-purposing fencing for the wine rack, decking for the buffet top & pallets for the buffet itself.
The little guy featured in the additional pics is a twin to another accent table. All three tables can now be joined to make one 12' long table for the ultimate family feast. Magnets are used to make the connections!
It is an honor to post these on the Brag Board since I was inspired by the old "Knock-off Wood" to start building furniture 18 months ago as a way to bring in income and help pay for my wife's MS medicine. A humble and sincere "thank you, Anna" for reminding me that , even if I can't do much, I will never be accused of not doing what I can. You've inspired me to stop feeling sorry for myself when money was tight and collectors were calling. Now I proudly own Chucked Wood; where old pallets go to live!
Here's to life...
Cheers!

Thu, 11/22/2012 - 05:54
You are very talented. These pieces are beautiful. I would never have guessed they were all made by "upcycling" old wood. Your story is very inspiring. Keep up the good work!
Thu, 11/22/2012 - 20:08
Goodness Pam, I really appreciate your kind words. I am always floored by your brag posts!
Cheers!
CP
Thu, 11/22/2012 - 19:09
Makes me want to sit down there and enjoy the company of great friends and some wine, cheese and some fresh crusty bread. amazing!!! Your wife is very lucky to have you!
Fri, 11/23/2012 - 02:08
Makes me want to sit down there and enjoy the company of great friends and some wine, cheese and some fresh crusty bread. amazing!!! Your wife is very lucky to have you!
This was so fun to build! Finished with Steelwool & vinegar.
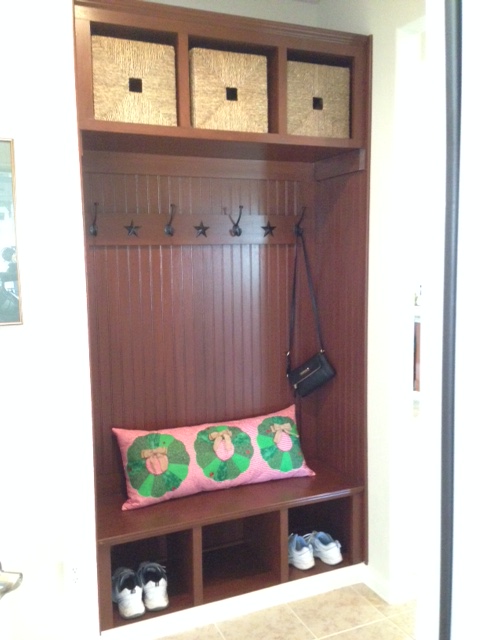
I started with your Hall Tree plan and added some upper storage. The only trick there was to make two of the lower storage units and I turned one upside down to create the upper storage. The extra space makes for double the storage. Instead of using the pine for a back wall I substituted Wanescoting on the back and side walls. I added 1-1/2' base moulding and a 1" moulding to finish off the seat edge and the top of the Cabinet. Also had to put moulding on the sides of the Wanescoting tofinish off the exposed edge. I applied Rustoleums Cabinet Finishing kit to the bare wood. This is a 3 step process and is similar to antiquing with a polycrylic finish. The finish took as long as the build process but was well worth the time. Finally I added the coat hooks that are black with brushed copper highlights. I picked up some stamped rustic stars on-line for $3.50 for a set of 5 and painted them black and applied them with a hot melt glue gun. Feedback from the family and our friends has been great and they all love the finished project.

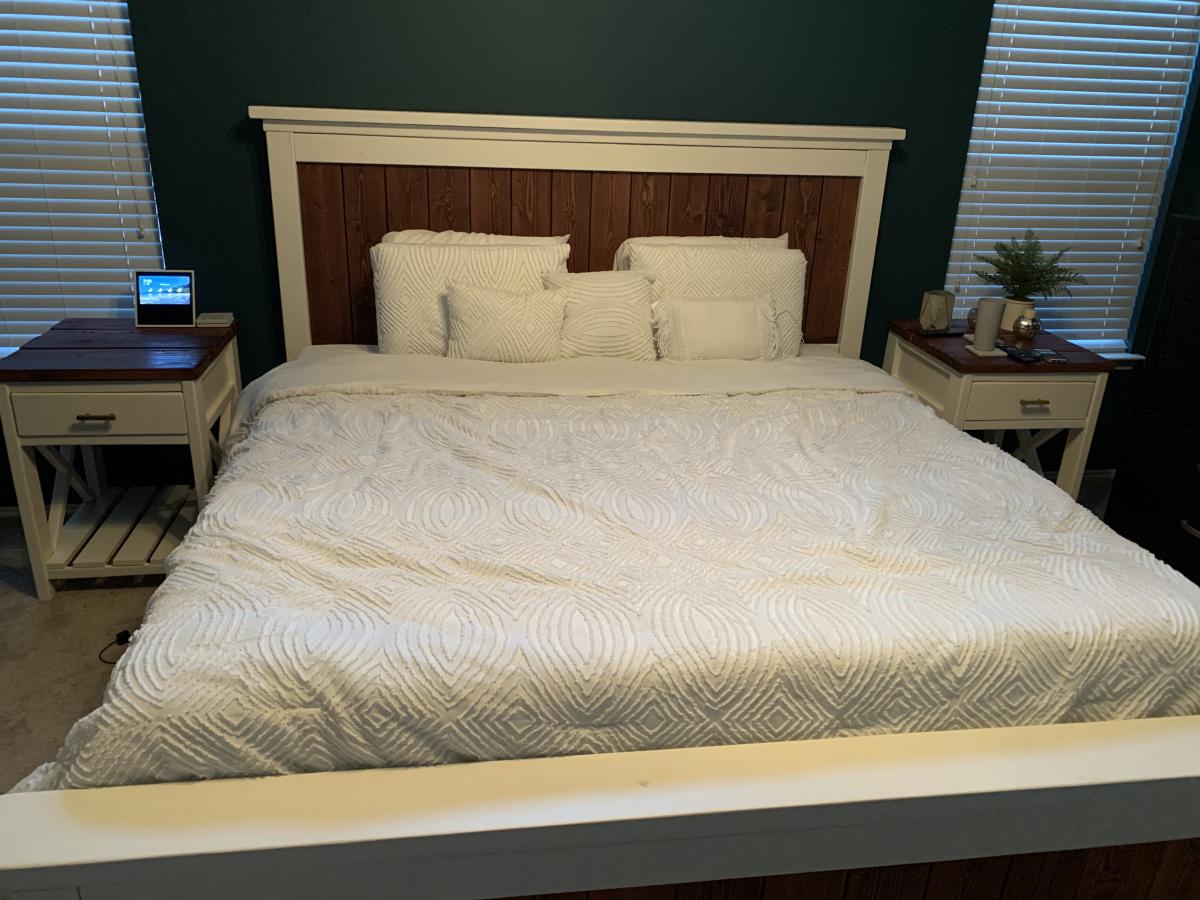
The bed frame was actually pretty easy. I had an adjustable bed frame so I actually need to make the connecting pieces a little bigger so the frame could go up and down. It’s actually extremely sturdy so I’m happy with it. Anyone can build the bed frame.
The bedside table was way harder. The 1x2s were super frustrating and the drawers were annoying. I’m about to finish a second one and I wasn’t nearly as particular about the measurements and I think it looks just as good and I got way less frustrated. This was tougher than the frame for sure.
Cost and time are including the stain. I built the white furniture, plan on eventually building stuff to replace all the black furniture.
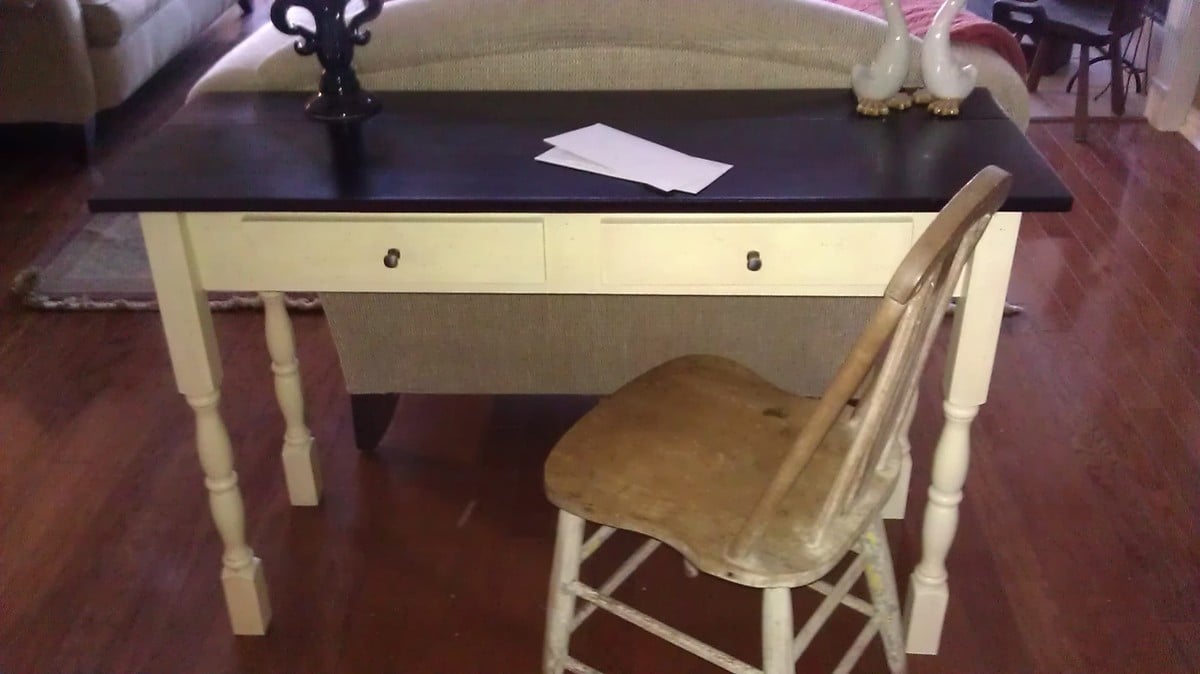
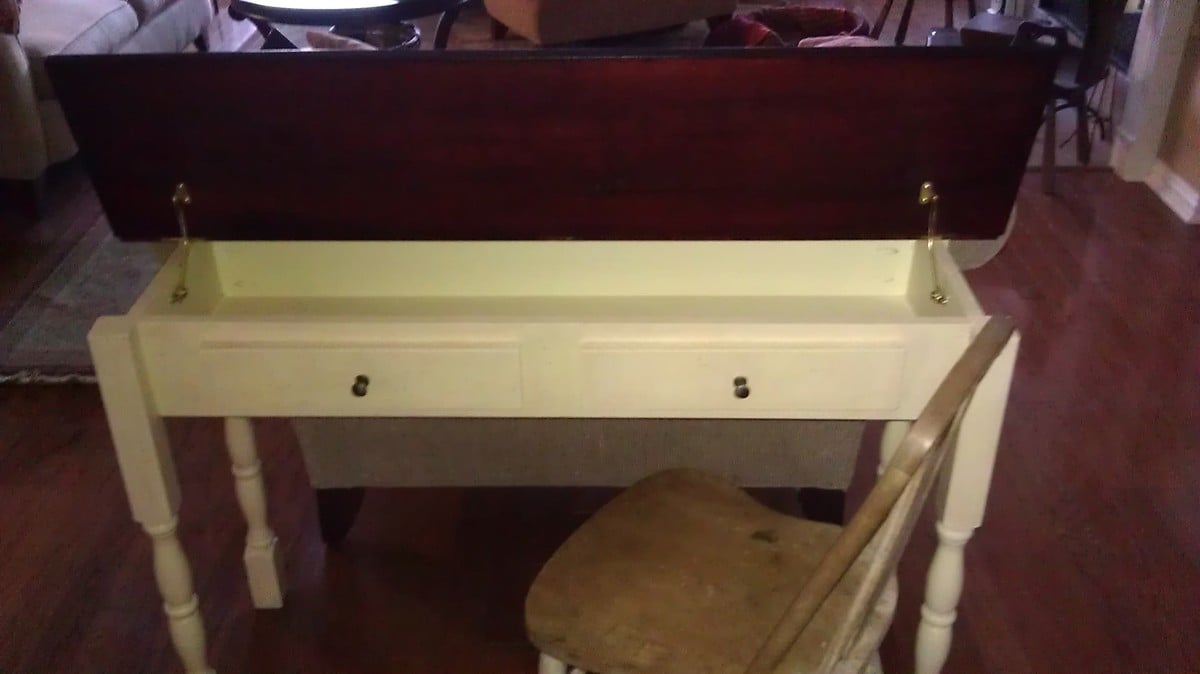
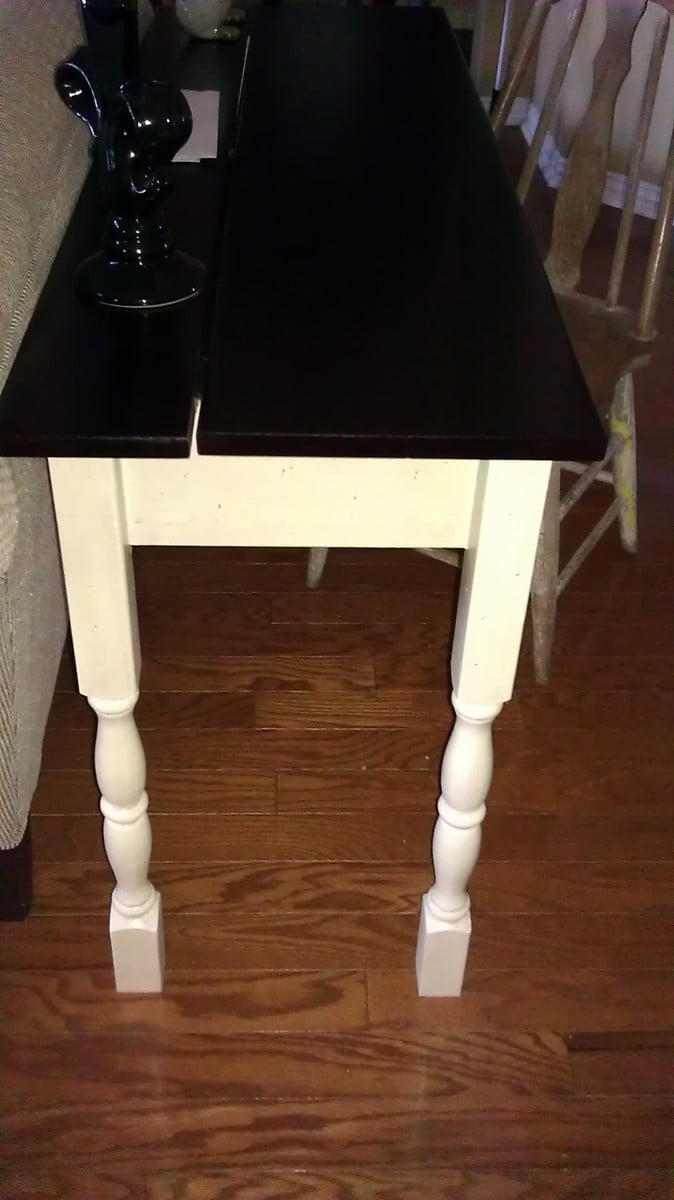
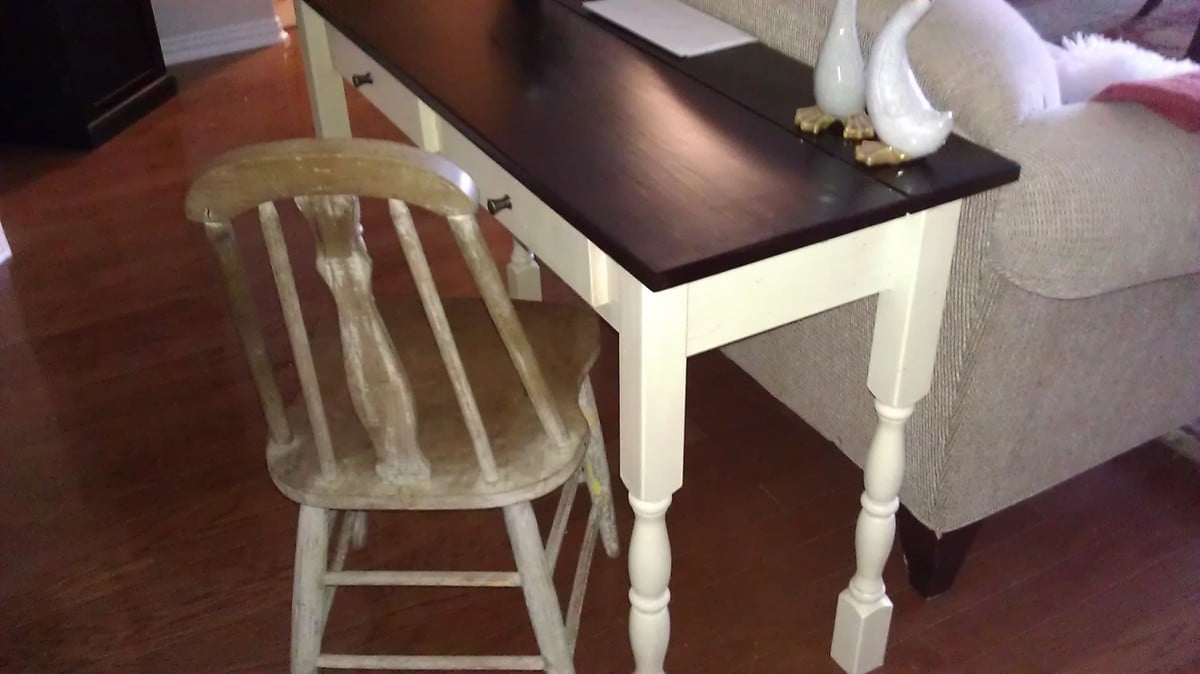
What a fantastic fun project. I spent more time on the finish than I did building this piece. I used outdoor rail posts for my legs because it's all I could find. These rails were larger than the 2x2 required so the back top board had to be a 1x6 to accommodate for this size leg. Besides the narrow hinges I also used some supports under the top so the top would stay up when opened. I didn't want any tiny fingers getting smashed.
I am thinking of doing this one again but altering it to be a sewing machine table. I'll post a picture if I am successful.
Thank so much for the fun project.
Janet
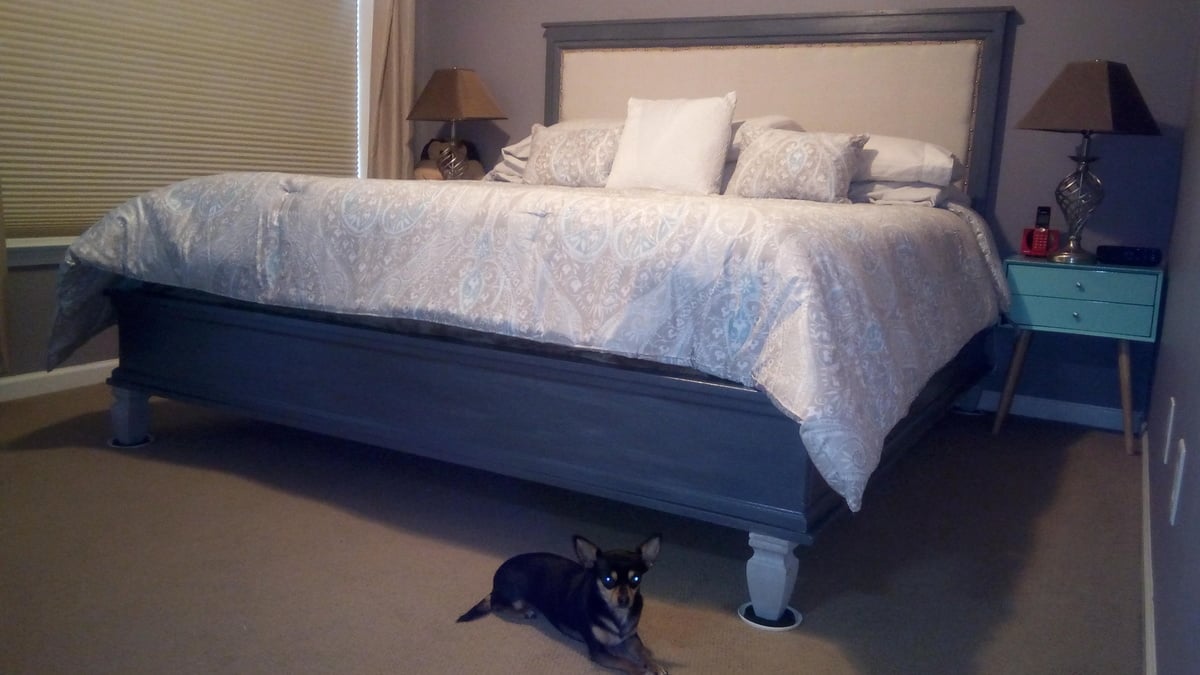
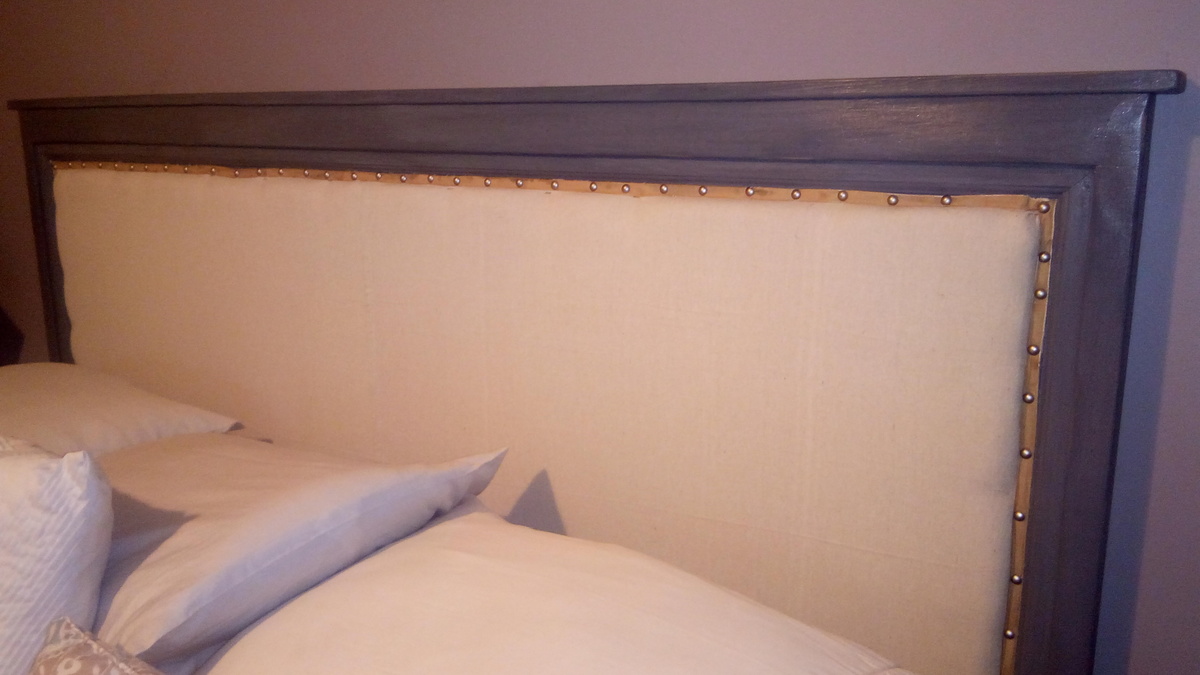
This project was a task! The bed is huge so we brought it into the room in pieces and put it together inside. Pretty happy with the outcome
Thu, 10/11/2018 - 11:16
So sorry my response is so overdue, I didn't get a notification. The headboard is actually mounted to the wall with https://www.homedepot.com/p/Hangman-42-in-Heavy-Duty-Mirror-and-Picture…
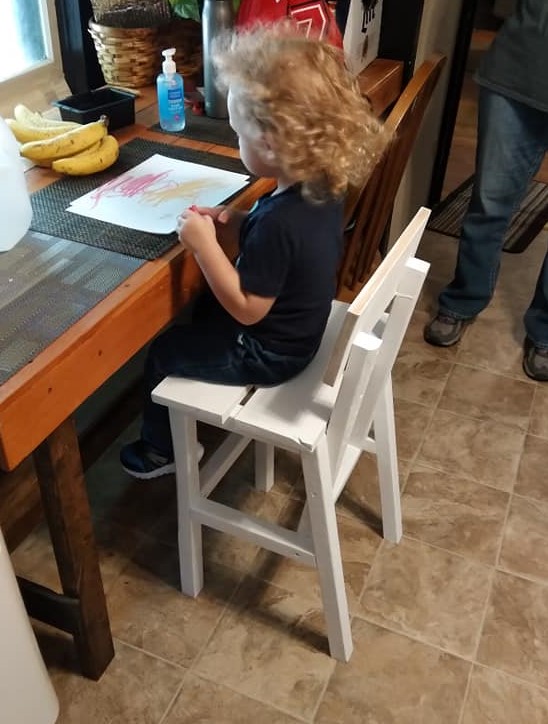
Made this chair in two days - very hot TX days, so only worked a few hours outside each day. paint was dry as they arrived for a Sunday visit. The Mom is going to paint, decorate it at their home. The white is a mold primer paint, that should hold up nicely. I did add an extra cross piece at the back, after the back rest was attached. The seat seemed to need more attachment points. I also used two 1x6 boards for the seat, flush at the back with a slight overhang at the front and cut the seat to 17" with an overhang to the sides. this gave the seat a small gap for a grip to assist with the climb up. Grandson is 2.5 yrs old. He was excited to have a big boy chair.
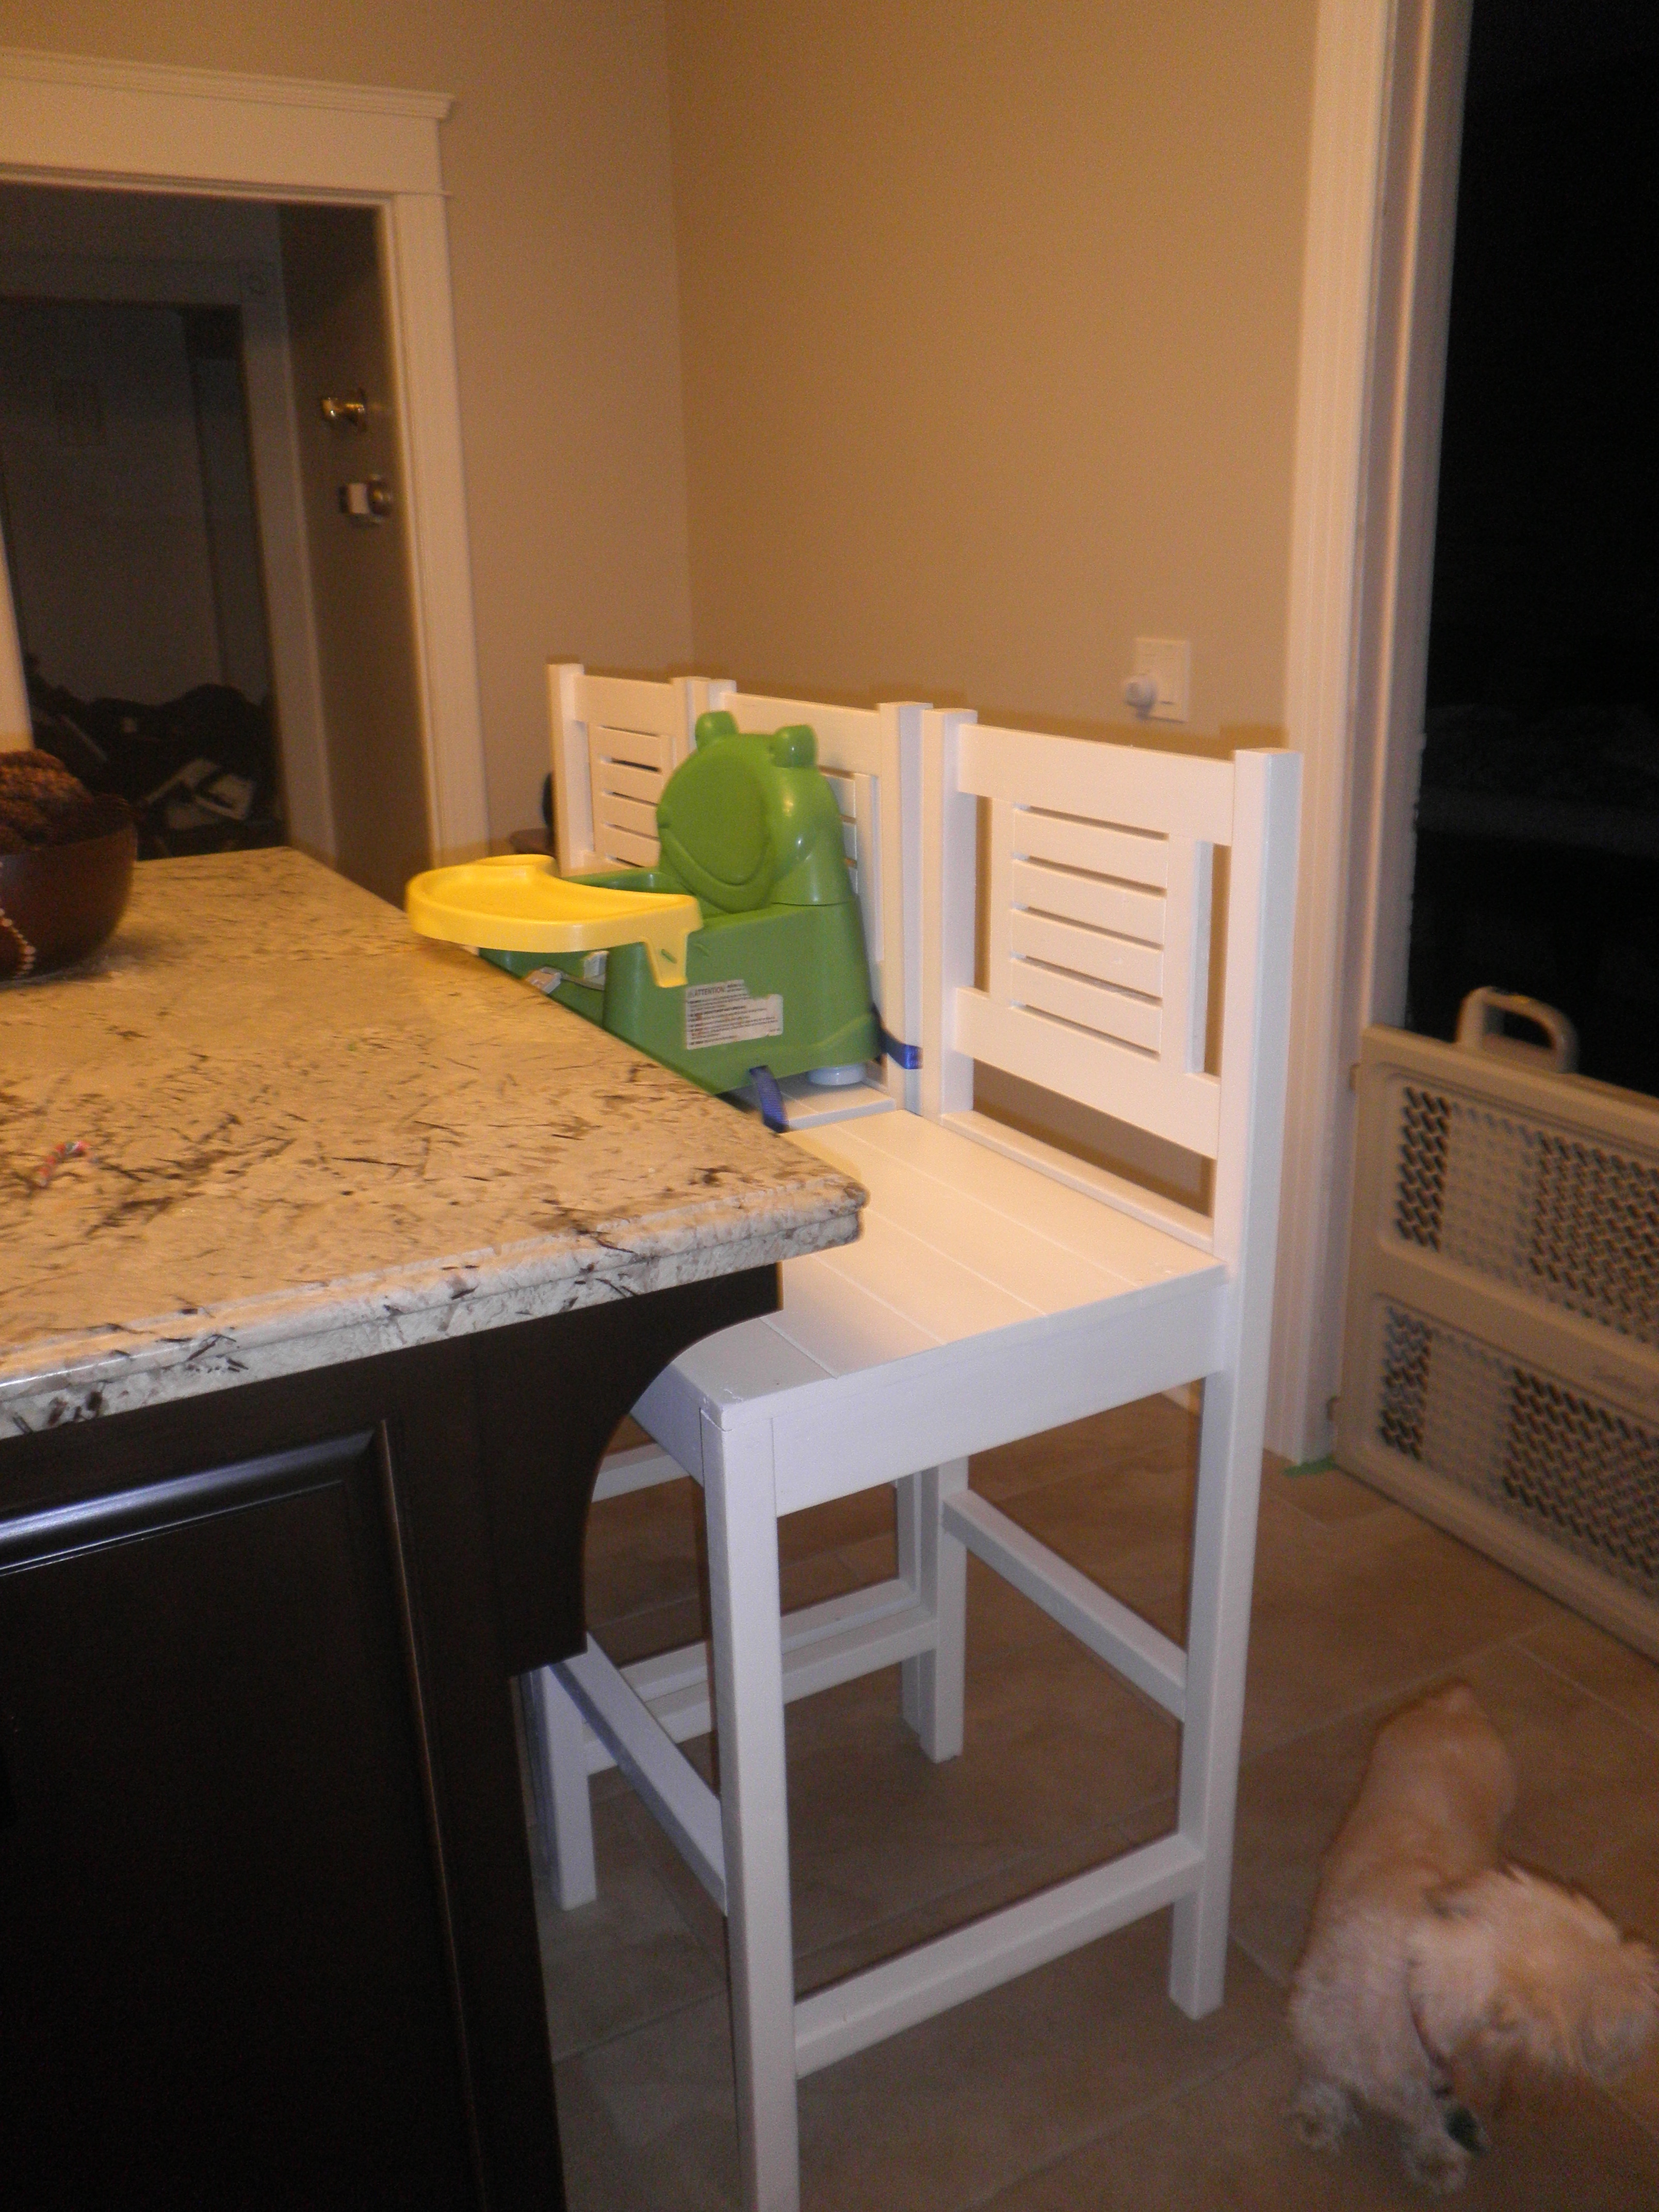
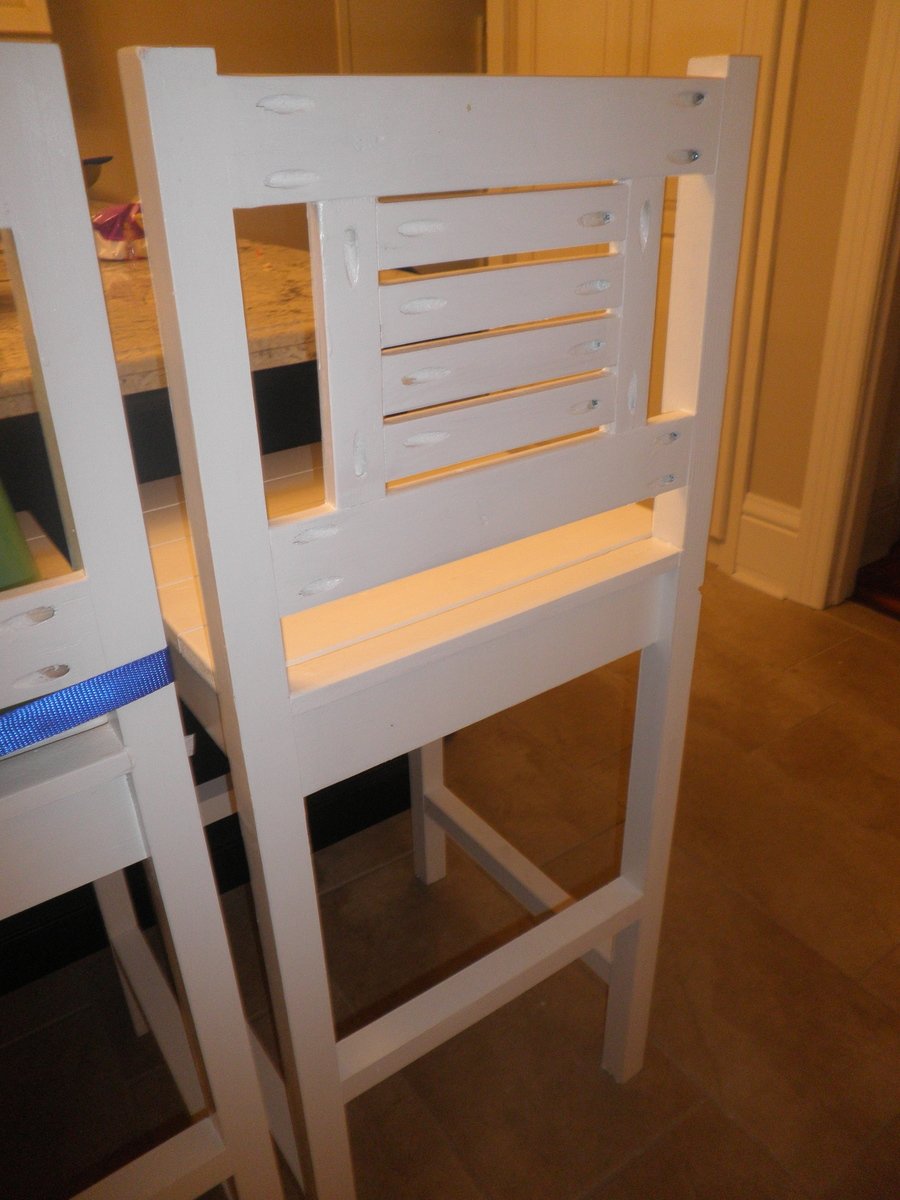
Vintage bars stools made for our kids ages 4.5,2.5, 1 (hence the reason they are high) the kids love them and I love the price tag! Around $15-20 each to make.
I left off the decorative corners.
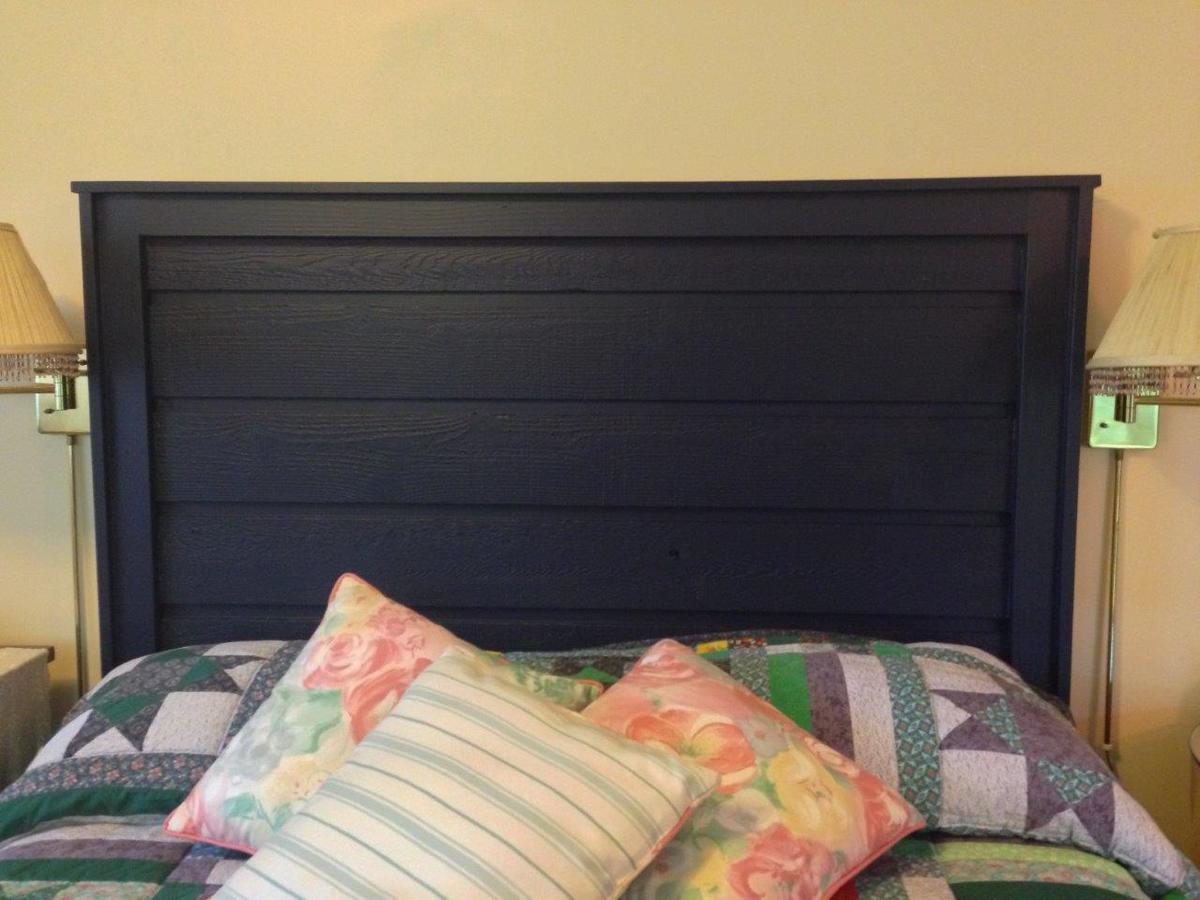
Made with leftover lapped cedar siding from our woodshed, plus a few pieces of reclaimed 1x4 and some new 1x3. Wanted it to be navy, and it is.