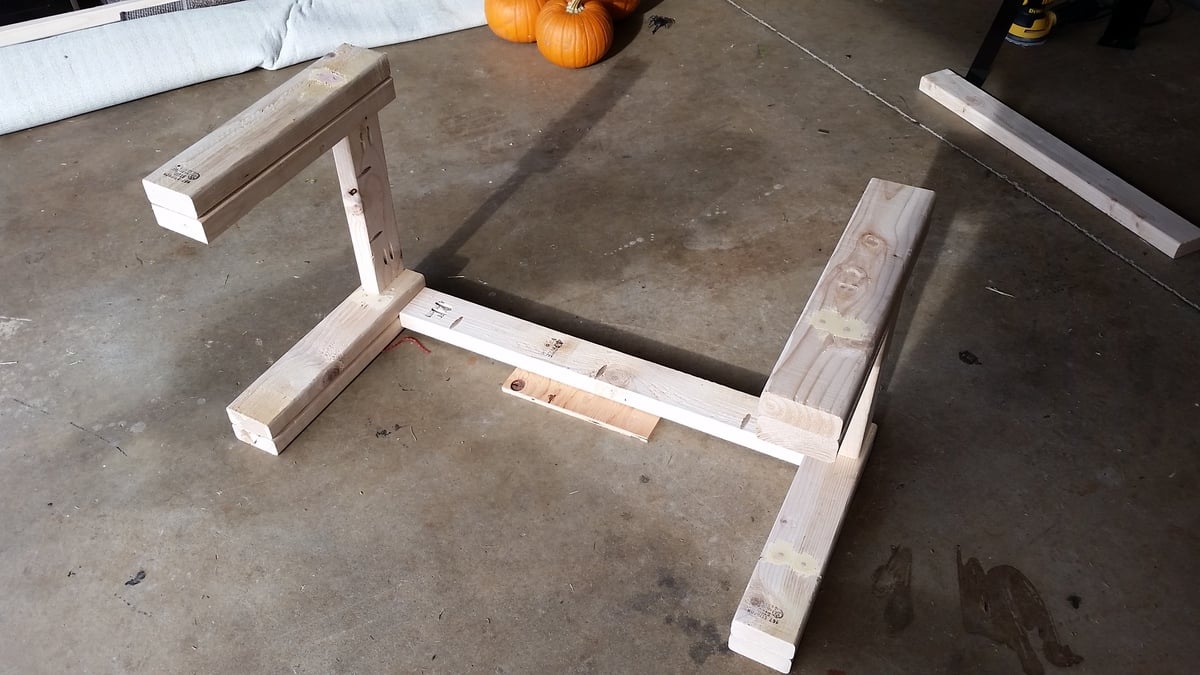
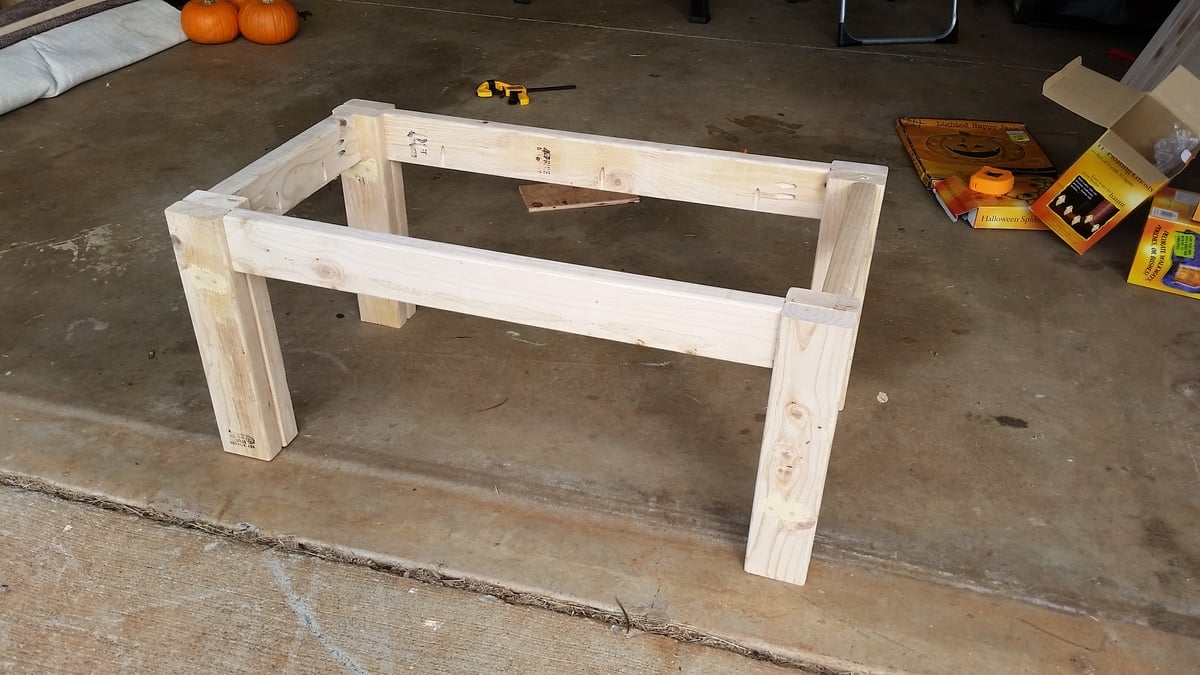
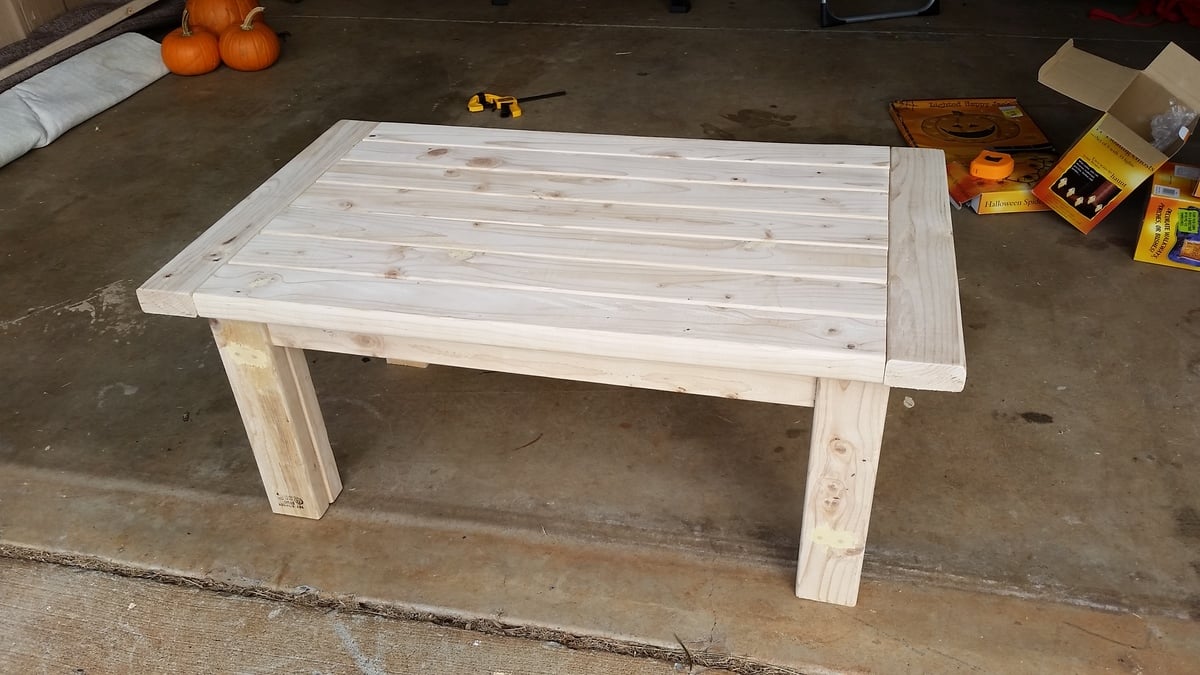
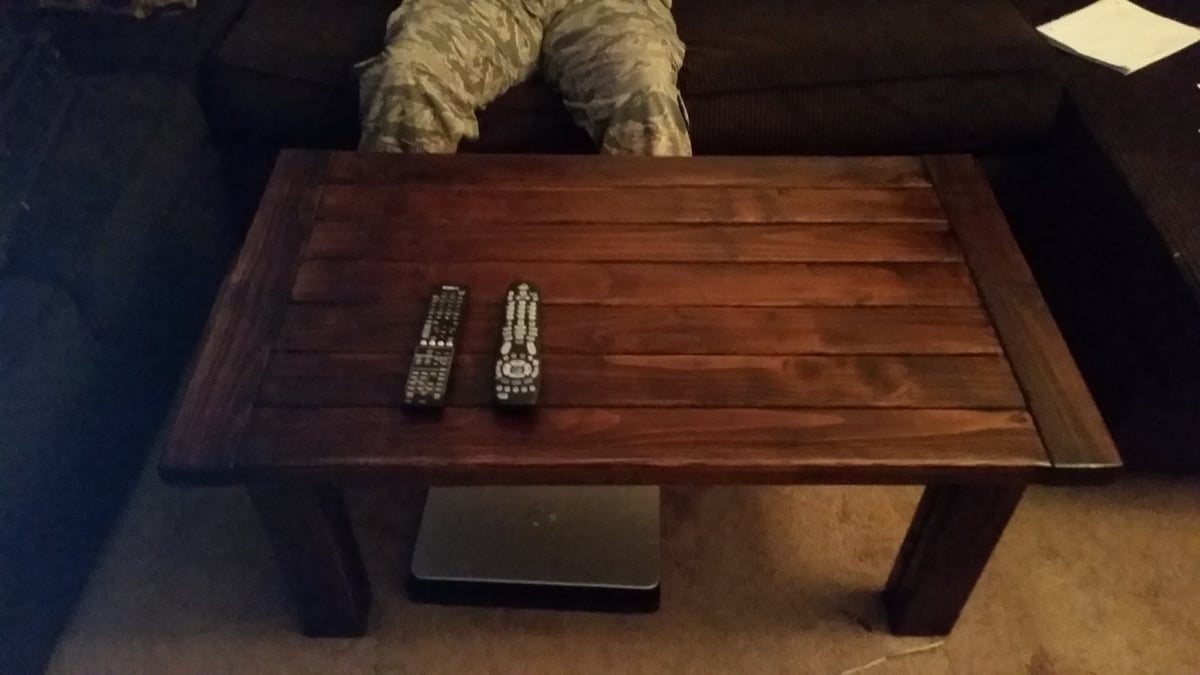
Pallet Coffee Table
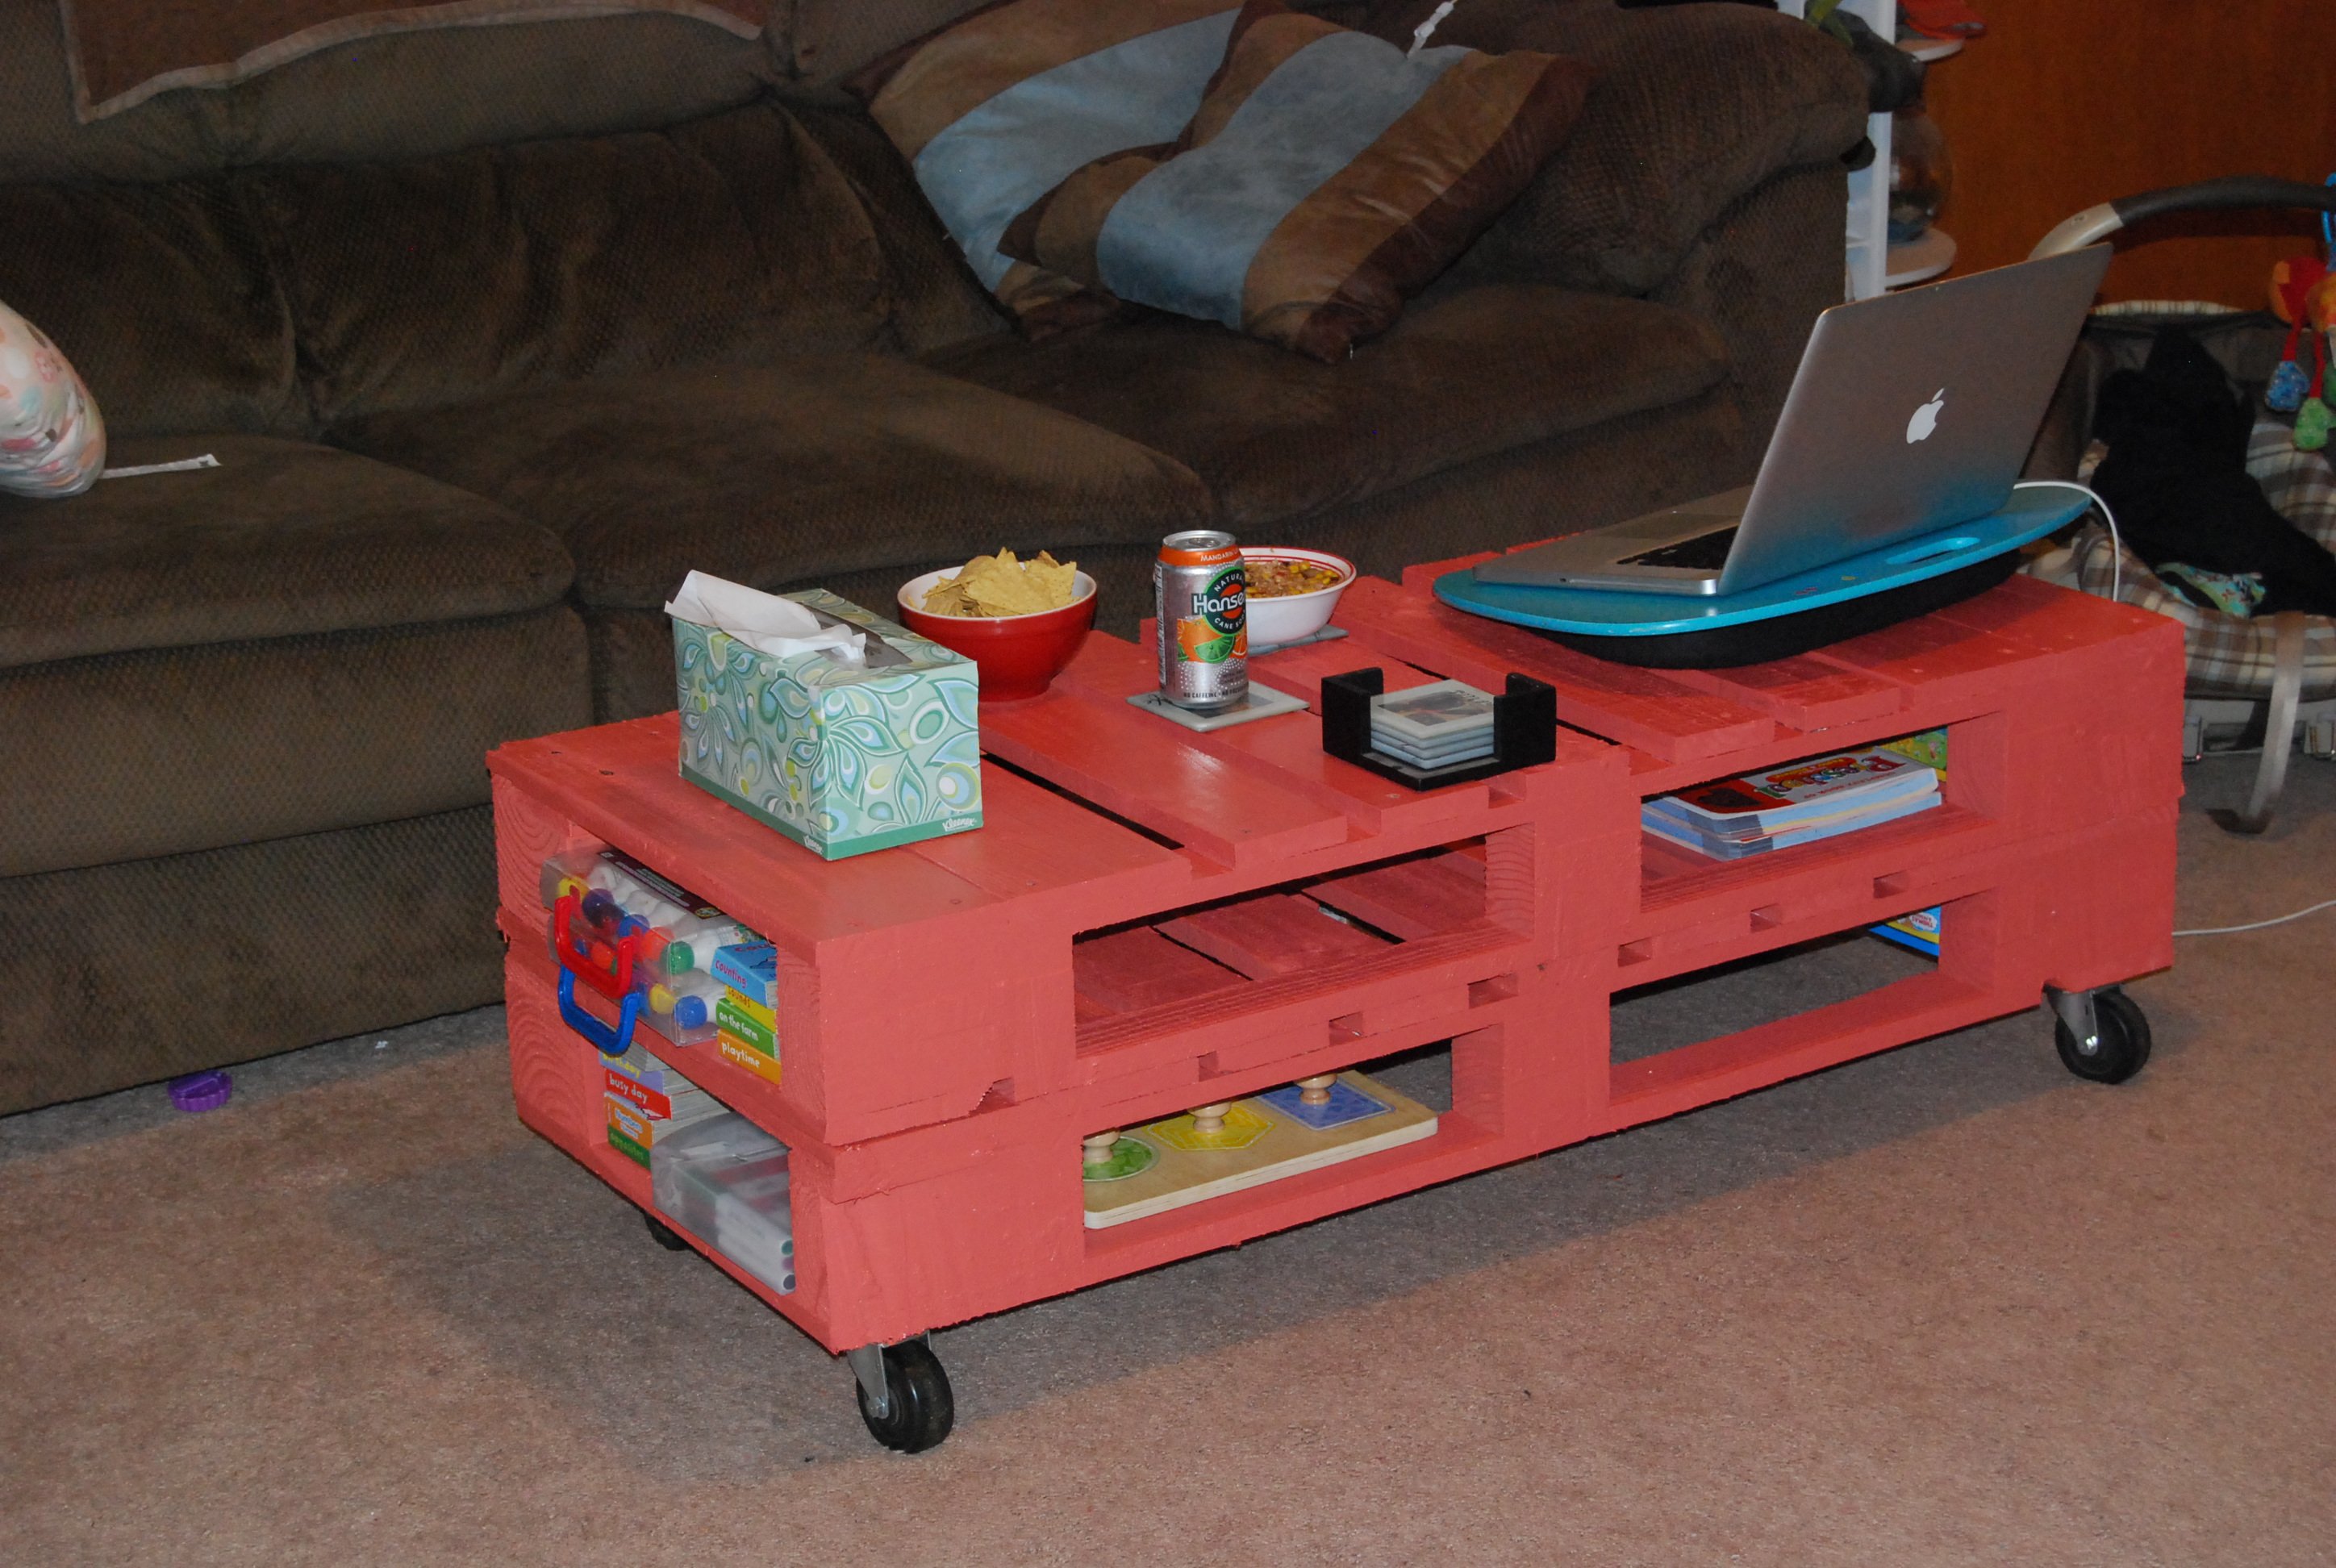
We love our new coffee table! Thanks for the idea!!
Built from Plan(s)
Recommended Skill Level
Beginner
We love our new coffee table! Thanks for the idea!!
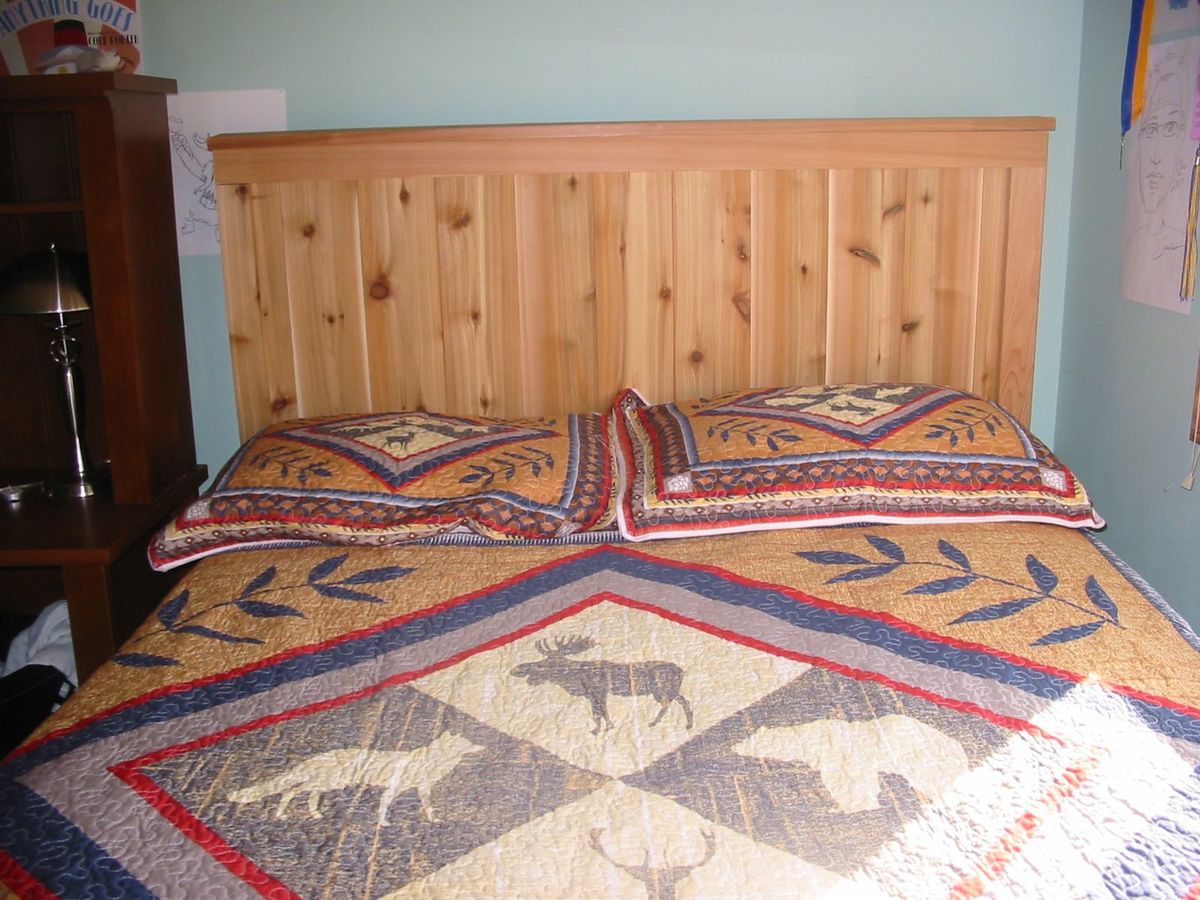
Hello,
I made the head board from the farm house bed project. I used western red cedar for this project and I bolted it to a standard metal bed frame. It came out really well and I'm very pleased with the plans and the results.
Thank you,
V. Woodcock
Minnesota
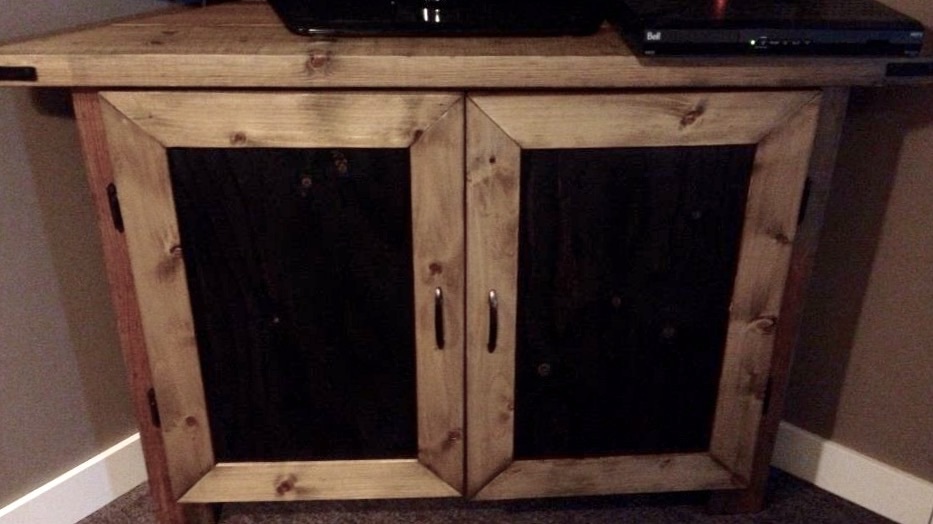
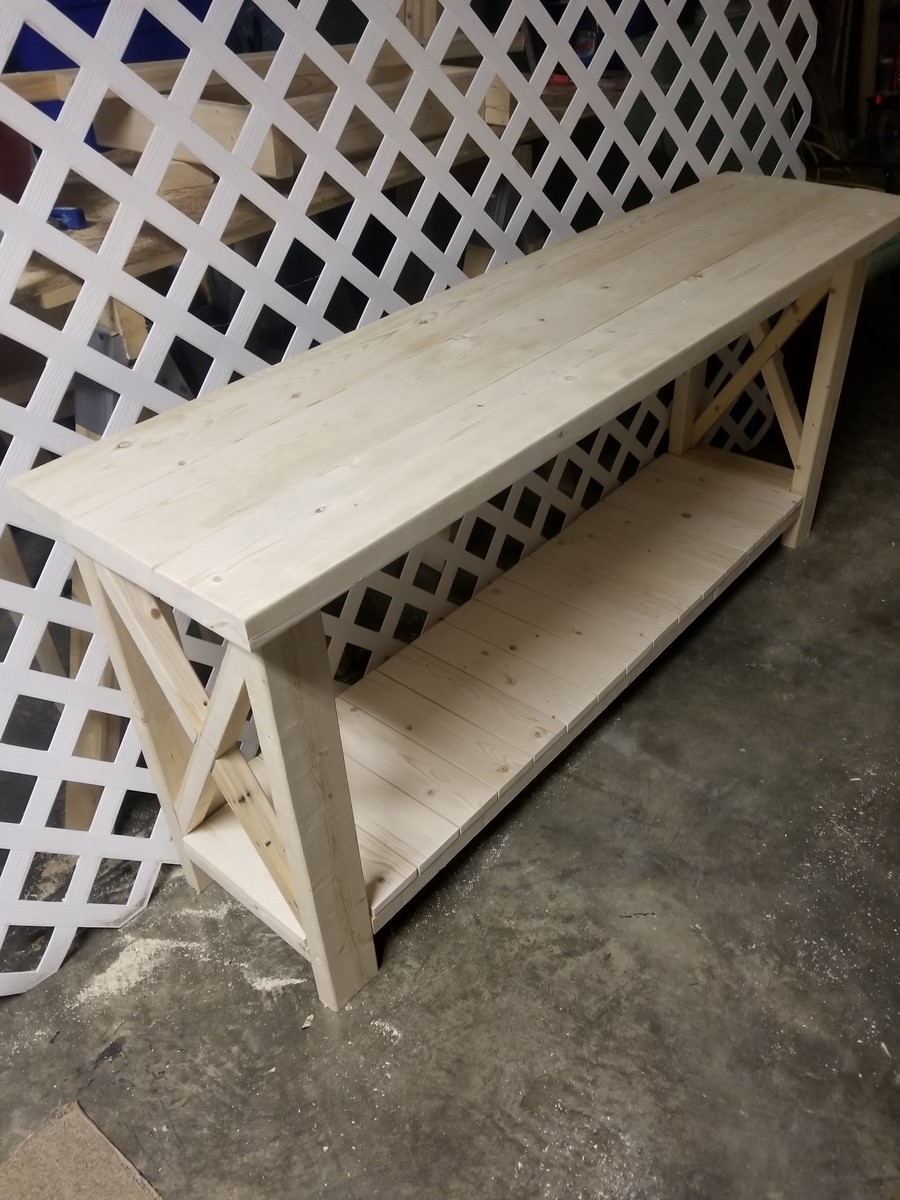
I used the Rustic x console table plans and modified them to make this corner media console. I closed the sides with plywood instead of leaving them open with the X detail. Then I closed it in further with doors to keep all our video game systems hidden and dust free. It's a good addition to the Man Cave.
Tue, 04/27/2021 - 21:42
Does it fit all the way into the corner is it squared up?
I made a simplified version without the arches, worked out great! Thanks for the plans! I used oak so cost was a little higher than necessary. :)
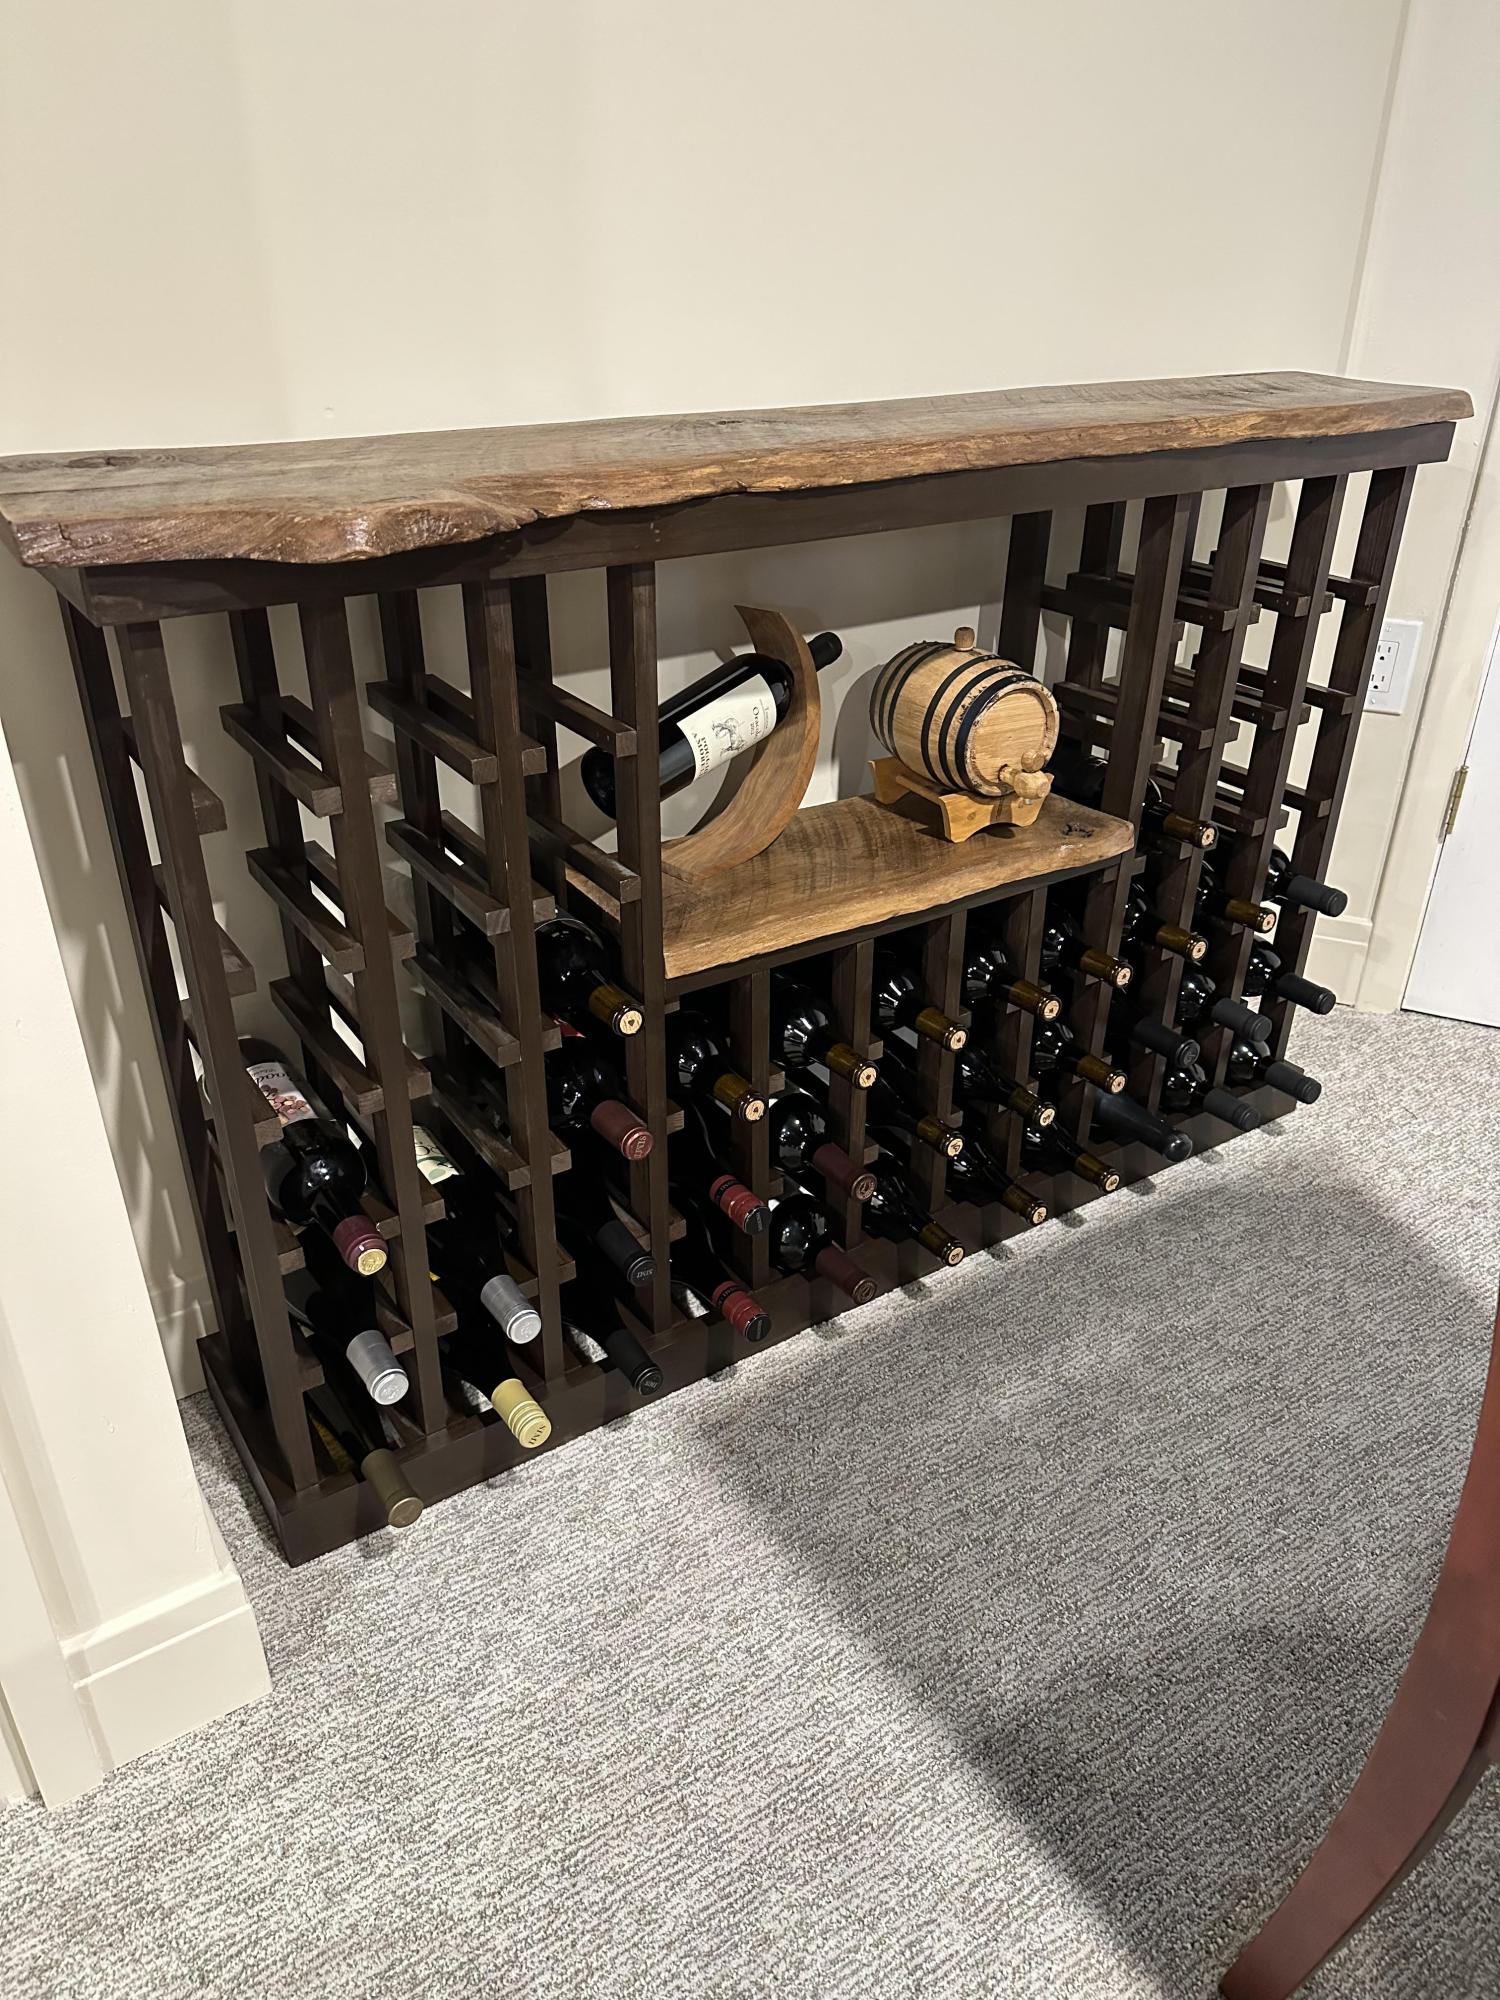
Made this wine rack for our basement rec room using live edge wood, 1x2s, and 3/4in wood dowels. Full dimensions and write up at the link below!
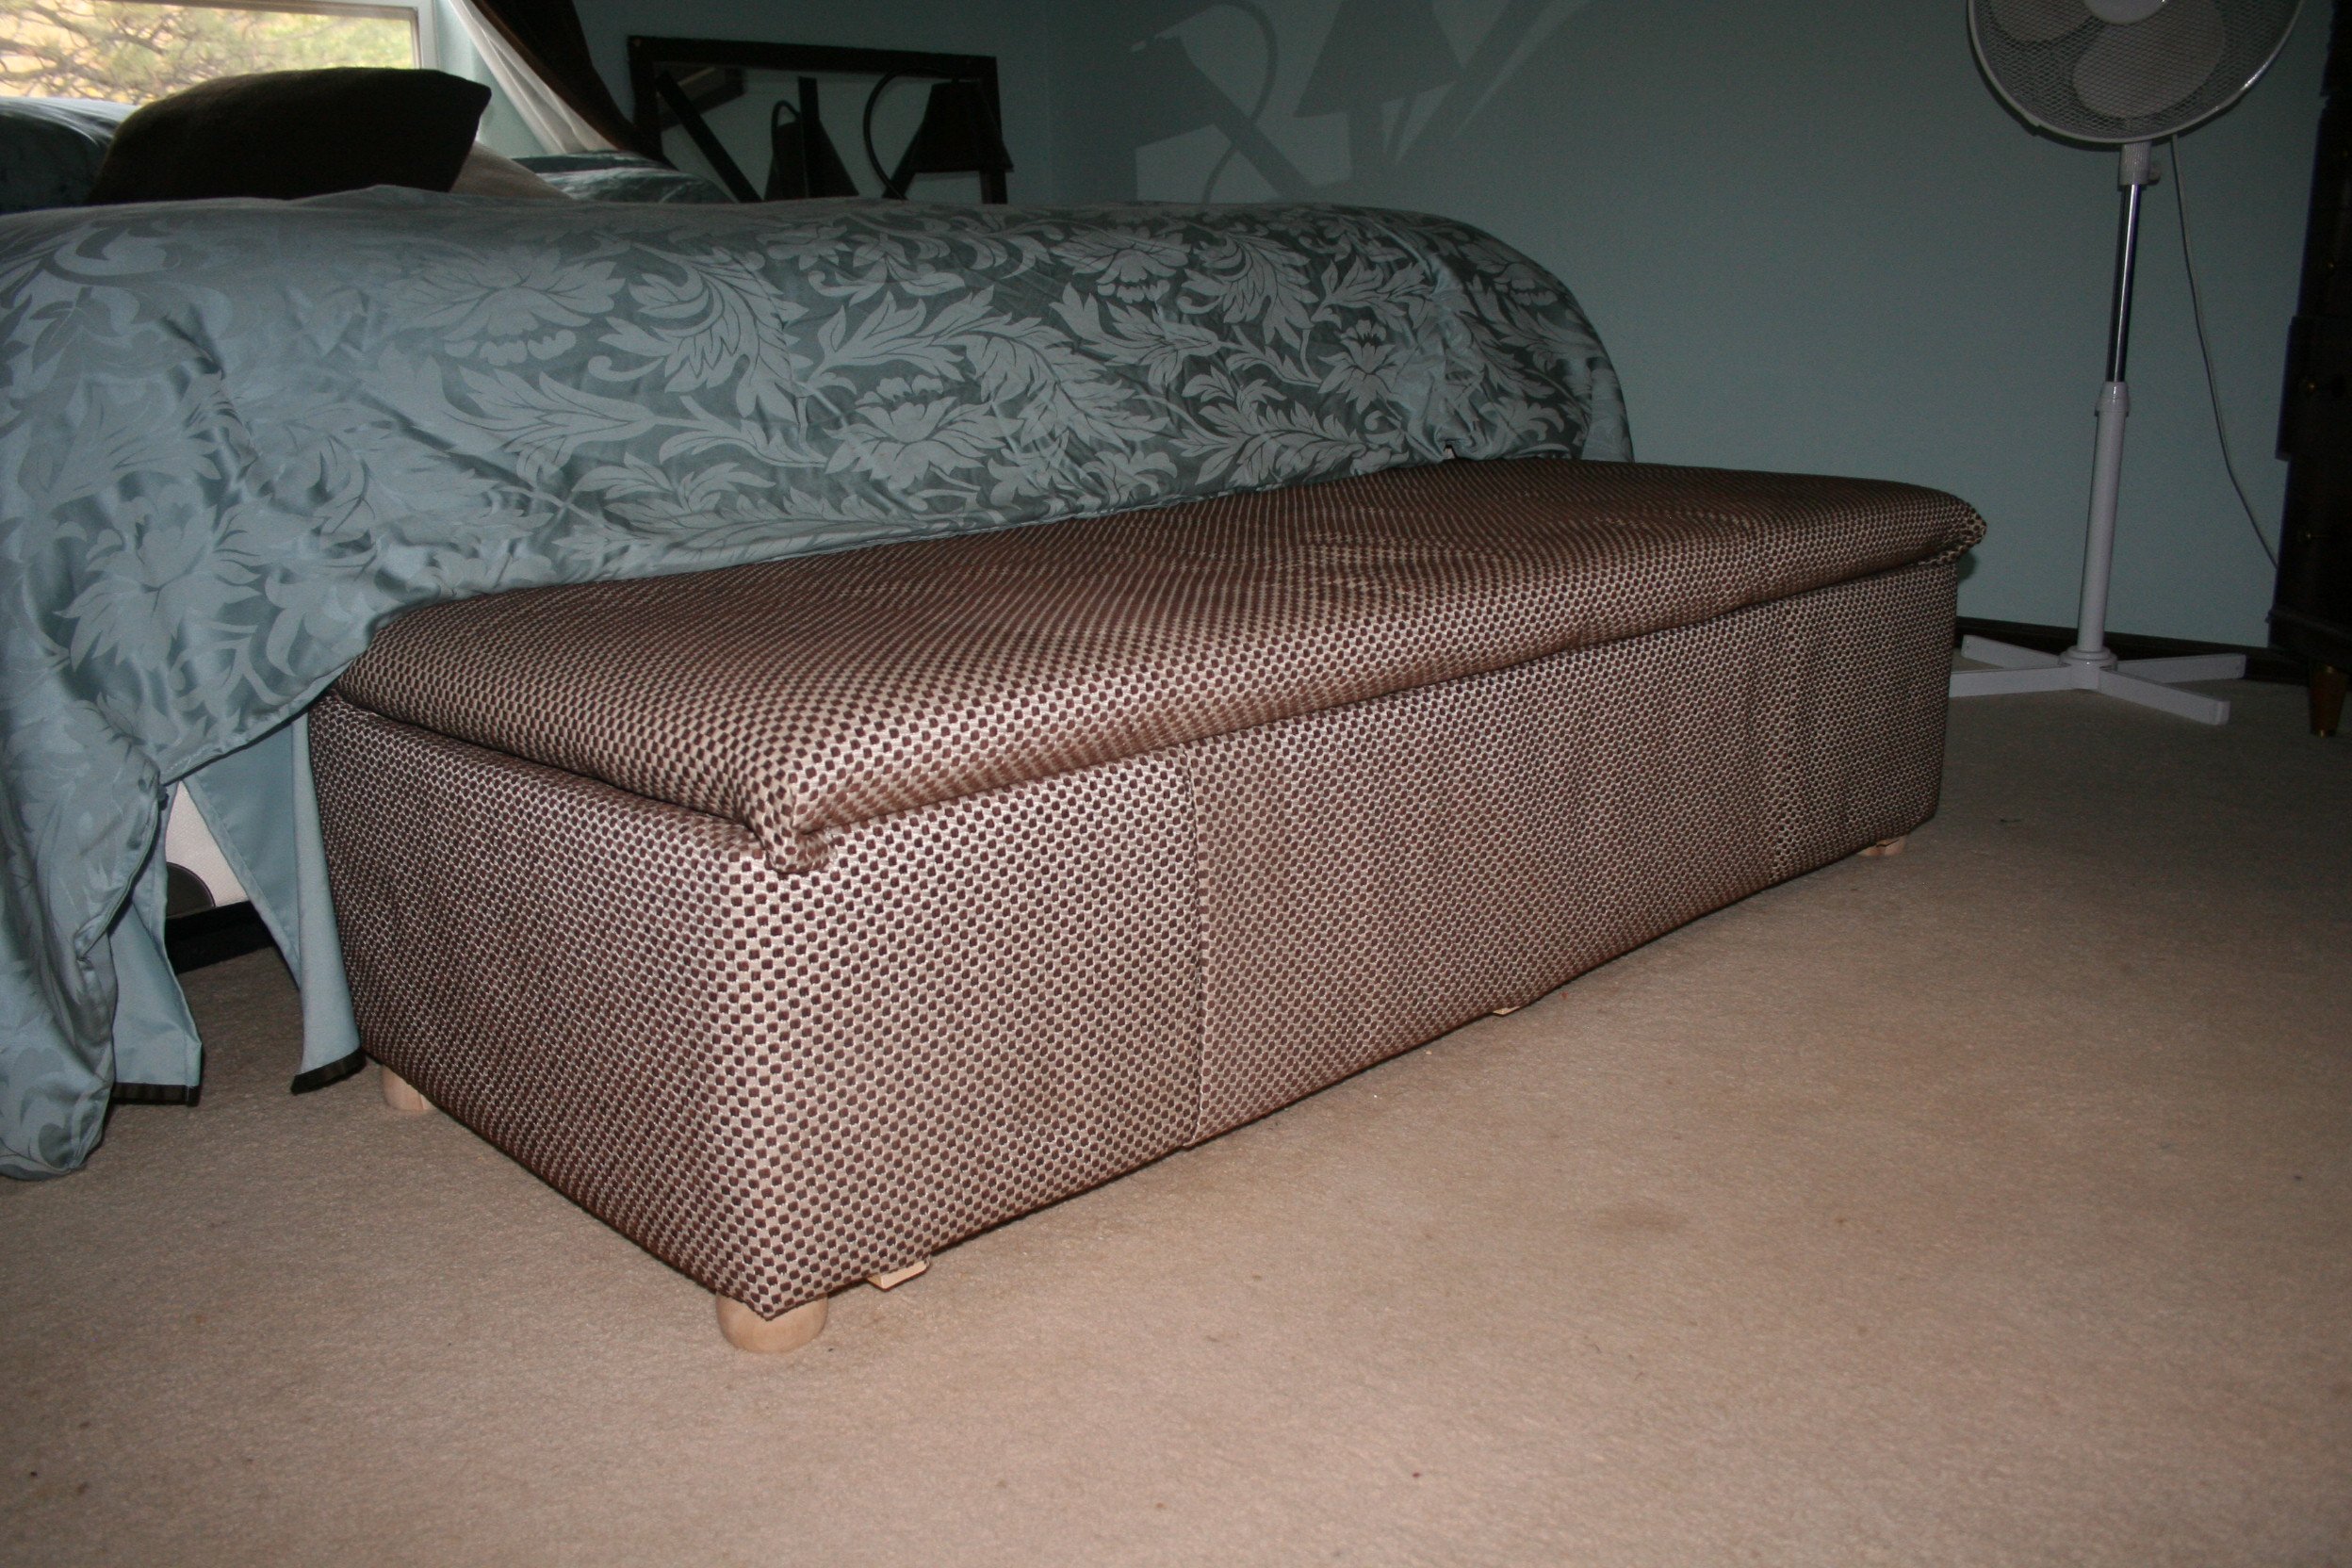
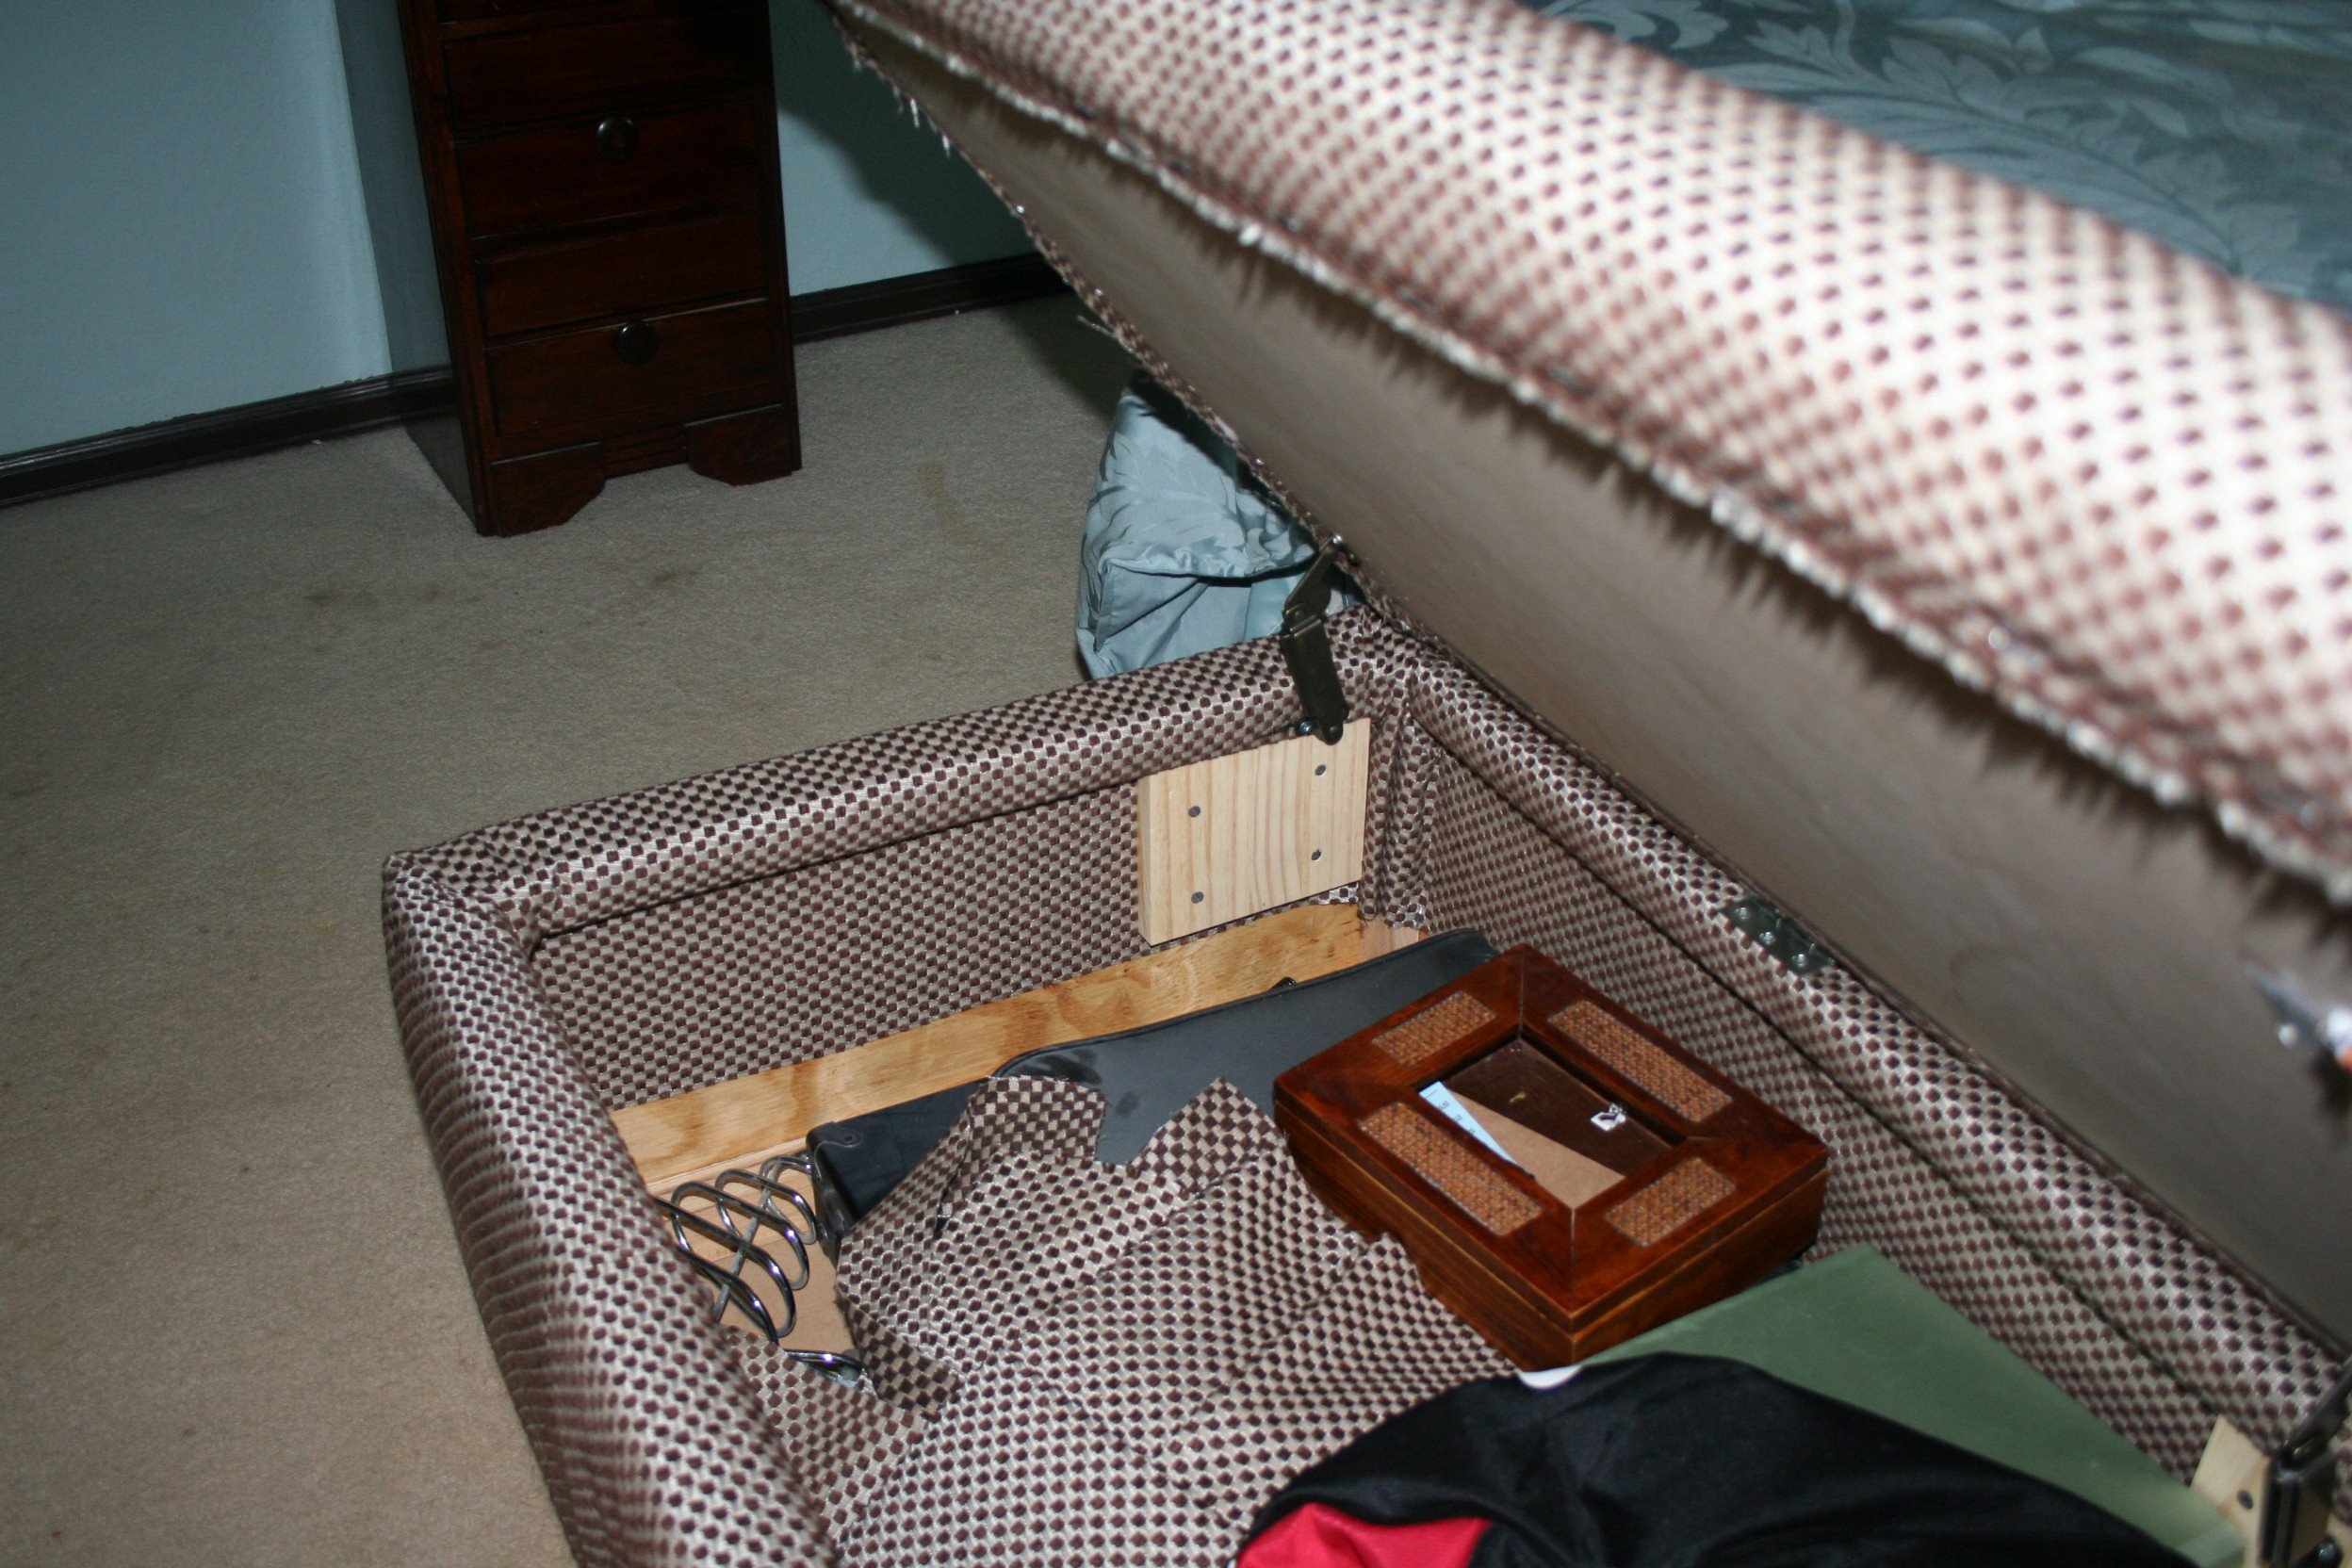
This was my first project. I already had a large ottoman, but it didn't hold anything. So I broke it apart for the box frame, added a bottom and hinged the lid. I was able to reuse the padding and upholster the pieces with sale fabric from Joann Fab ( love that store). Than I attached the fabric with a staple gun. Since it's in my bedroom, I like to keep wedding photos and such inside. Plus my 2 year old cannot open it!
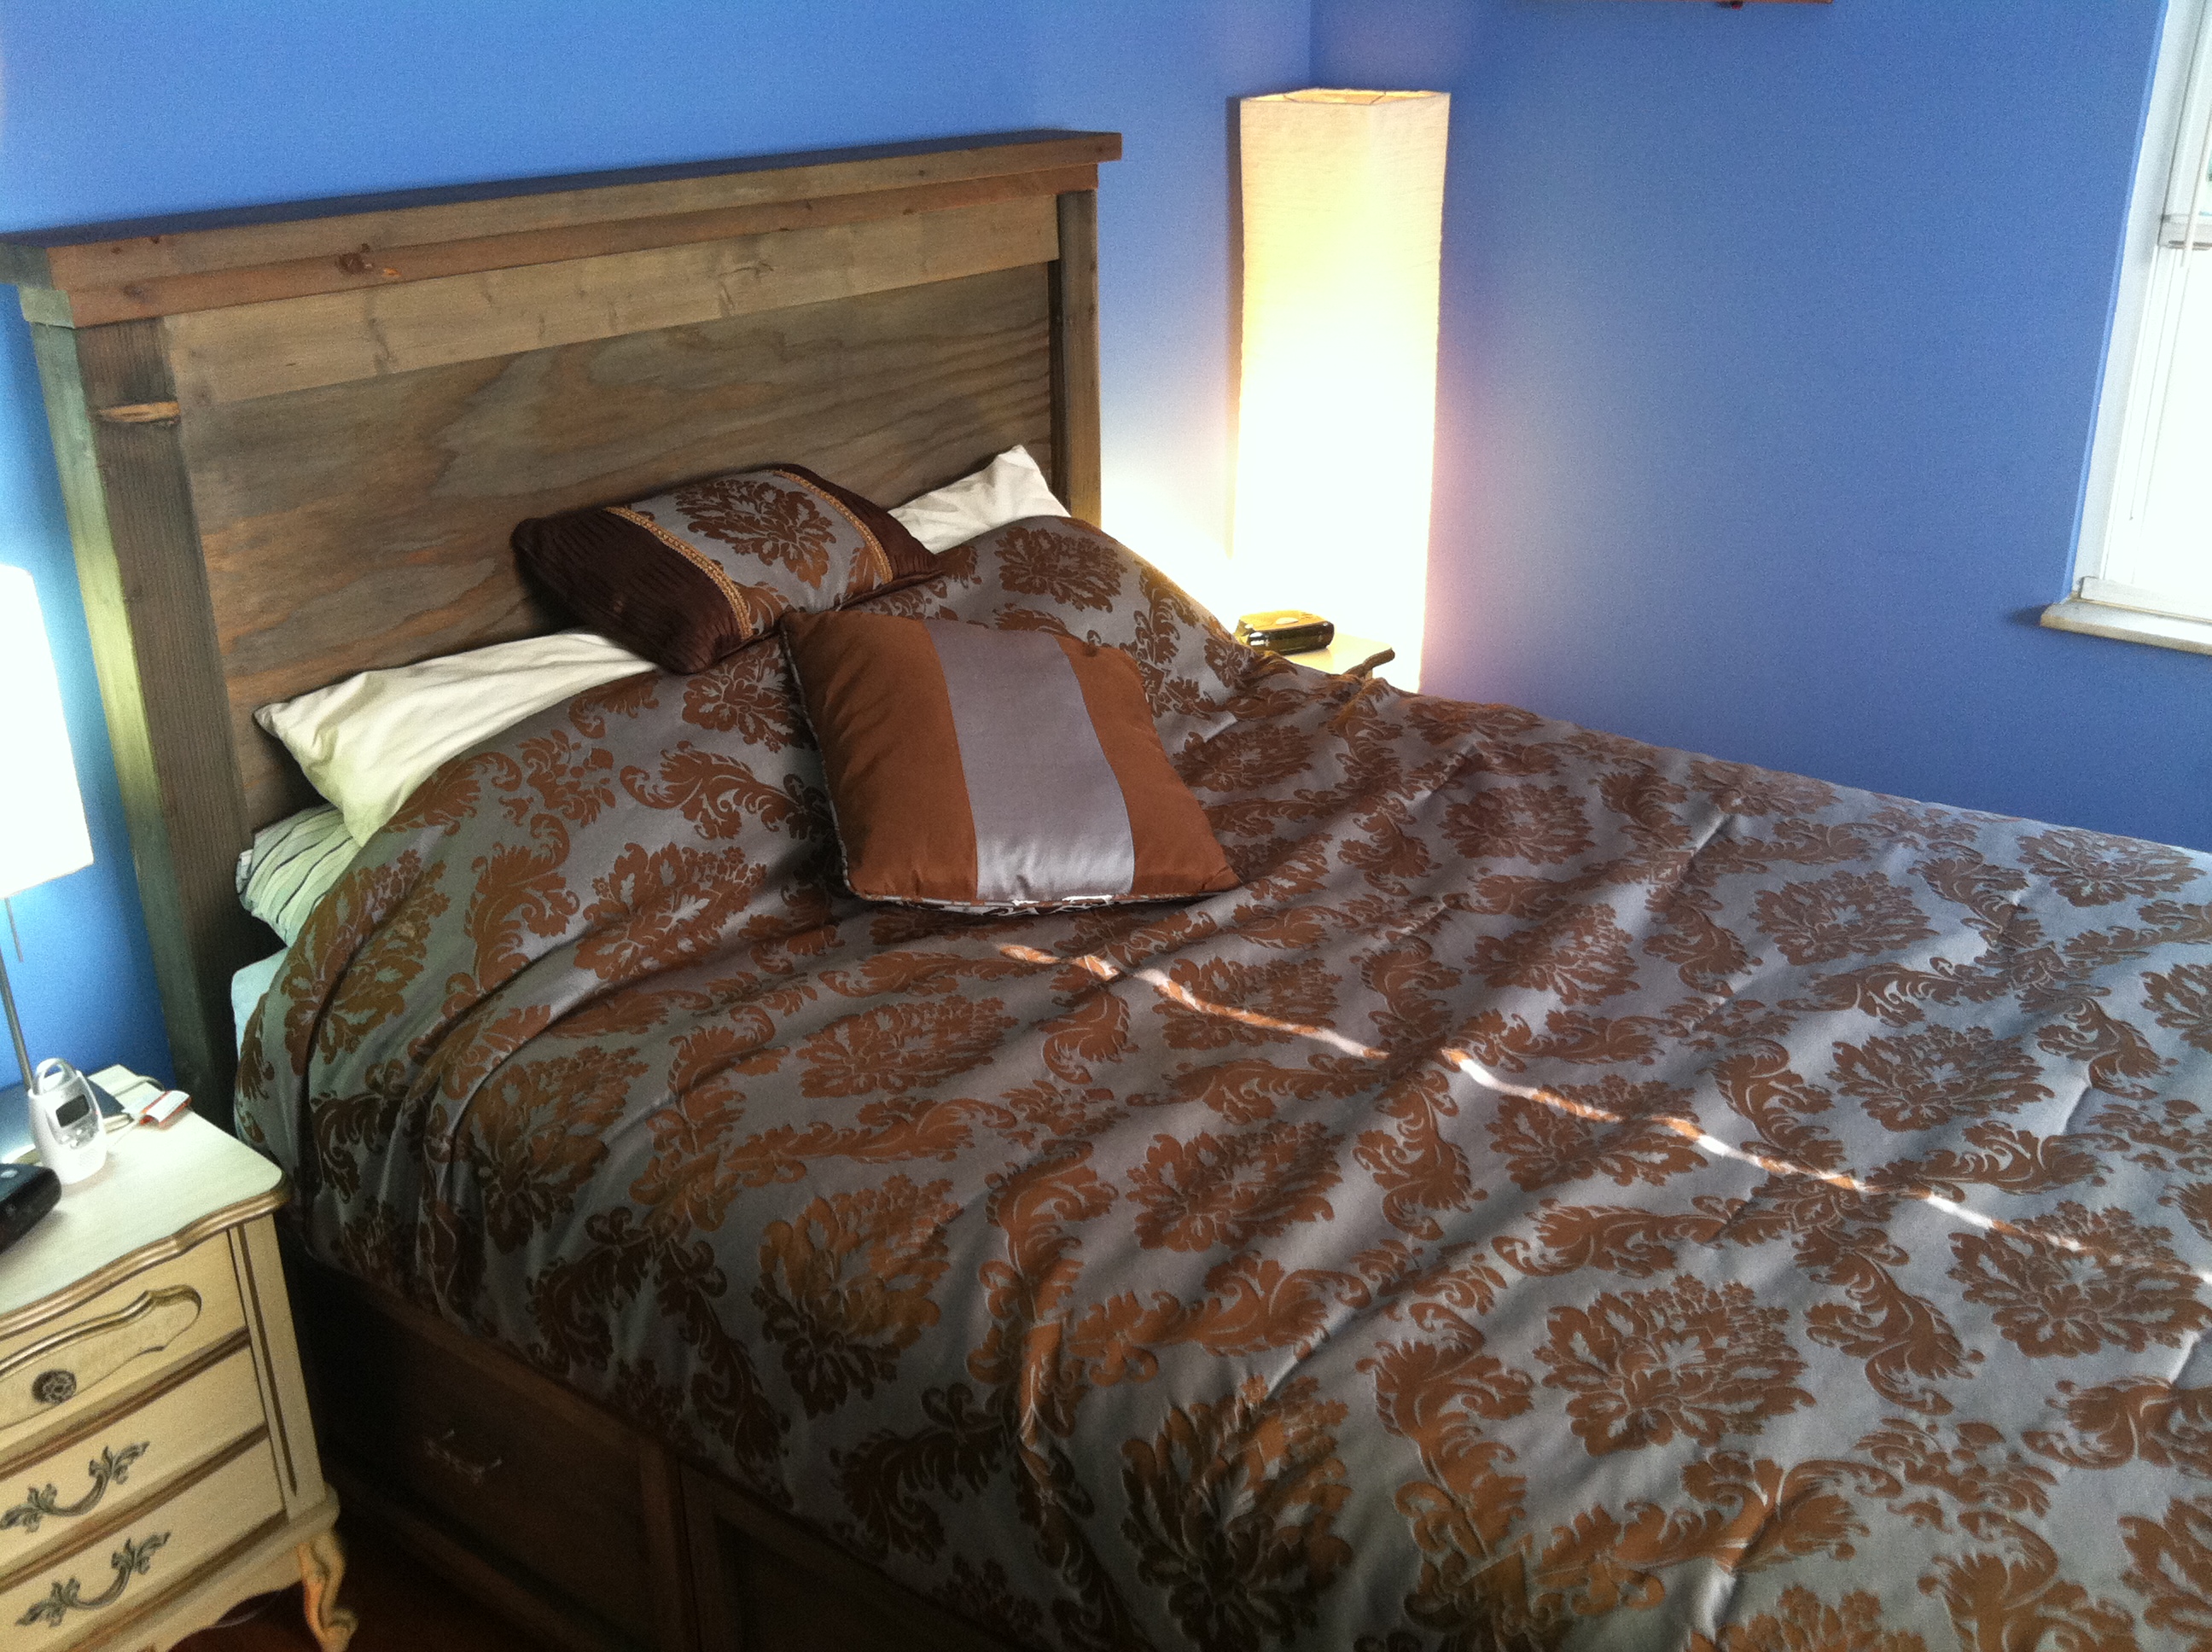
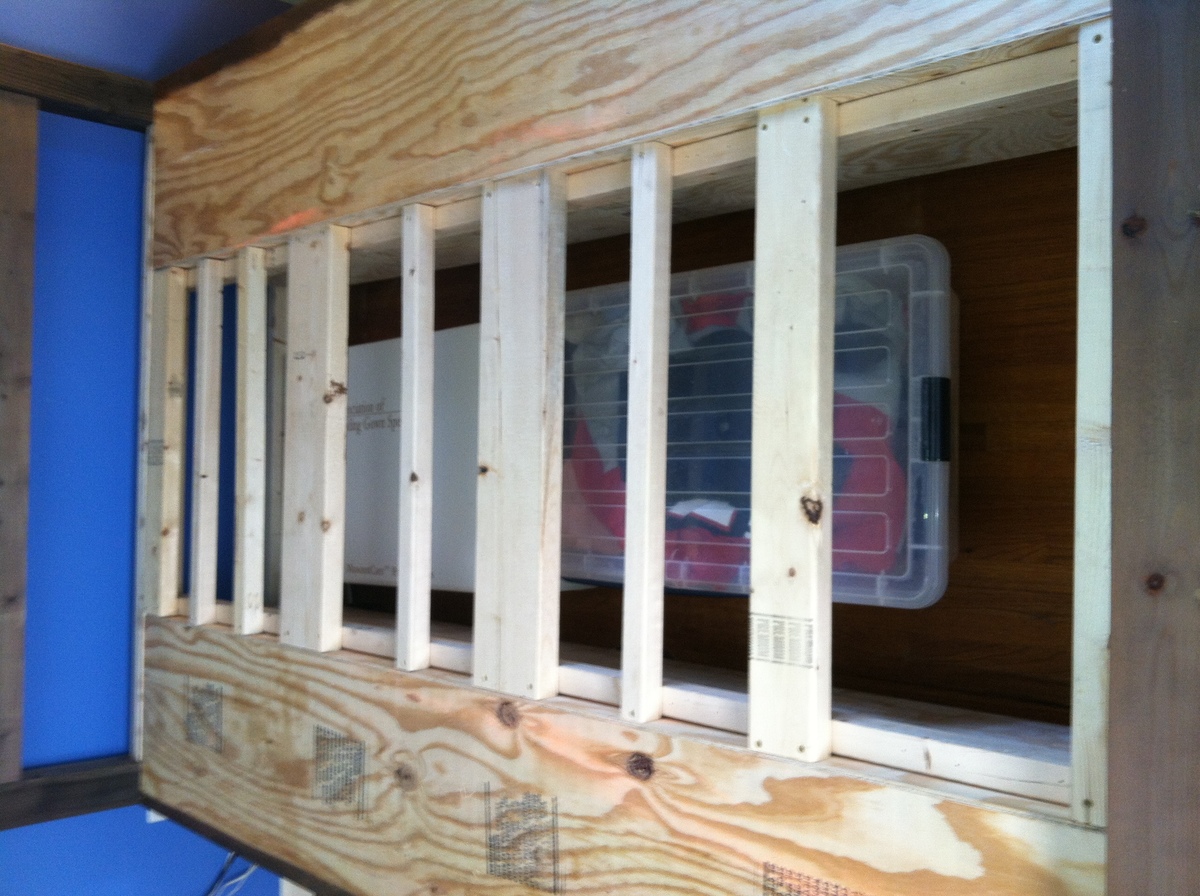
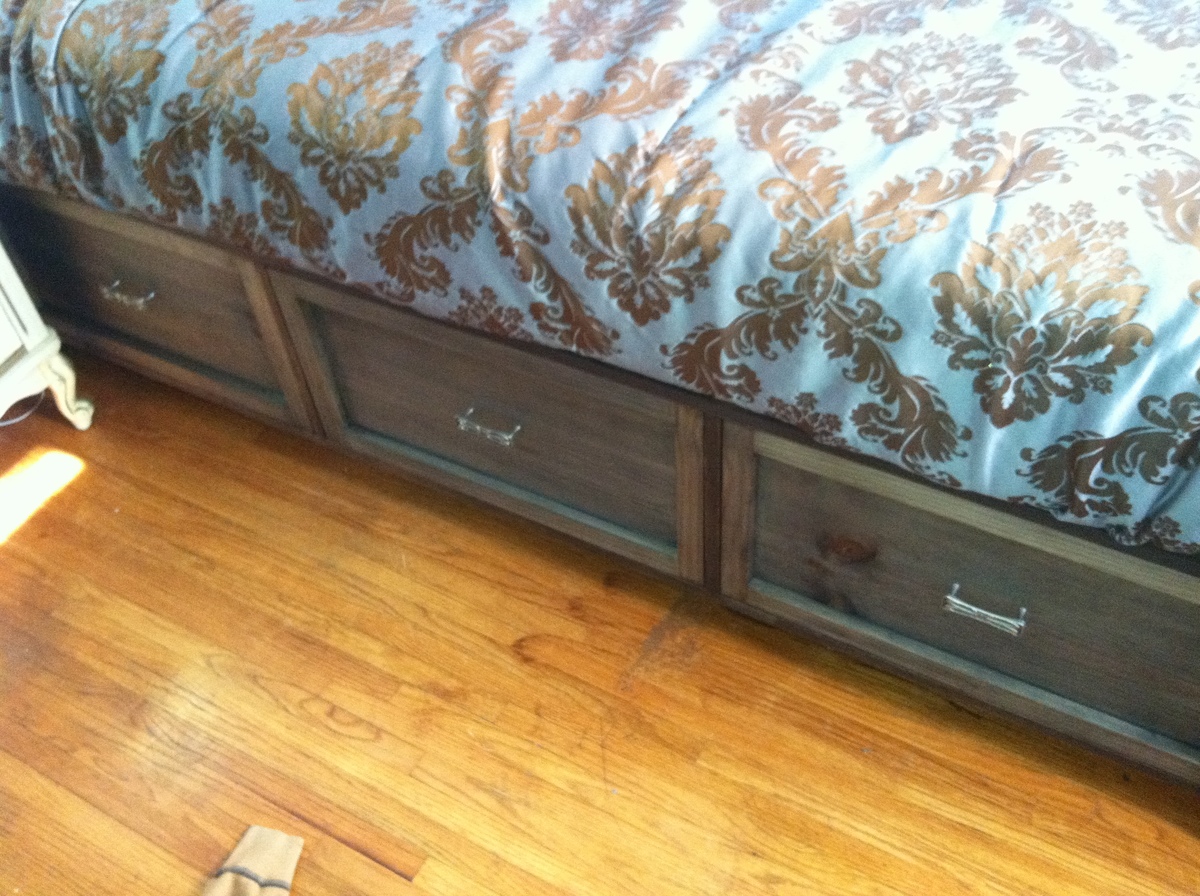
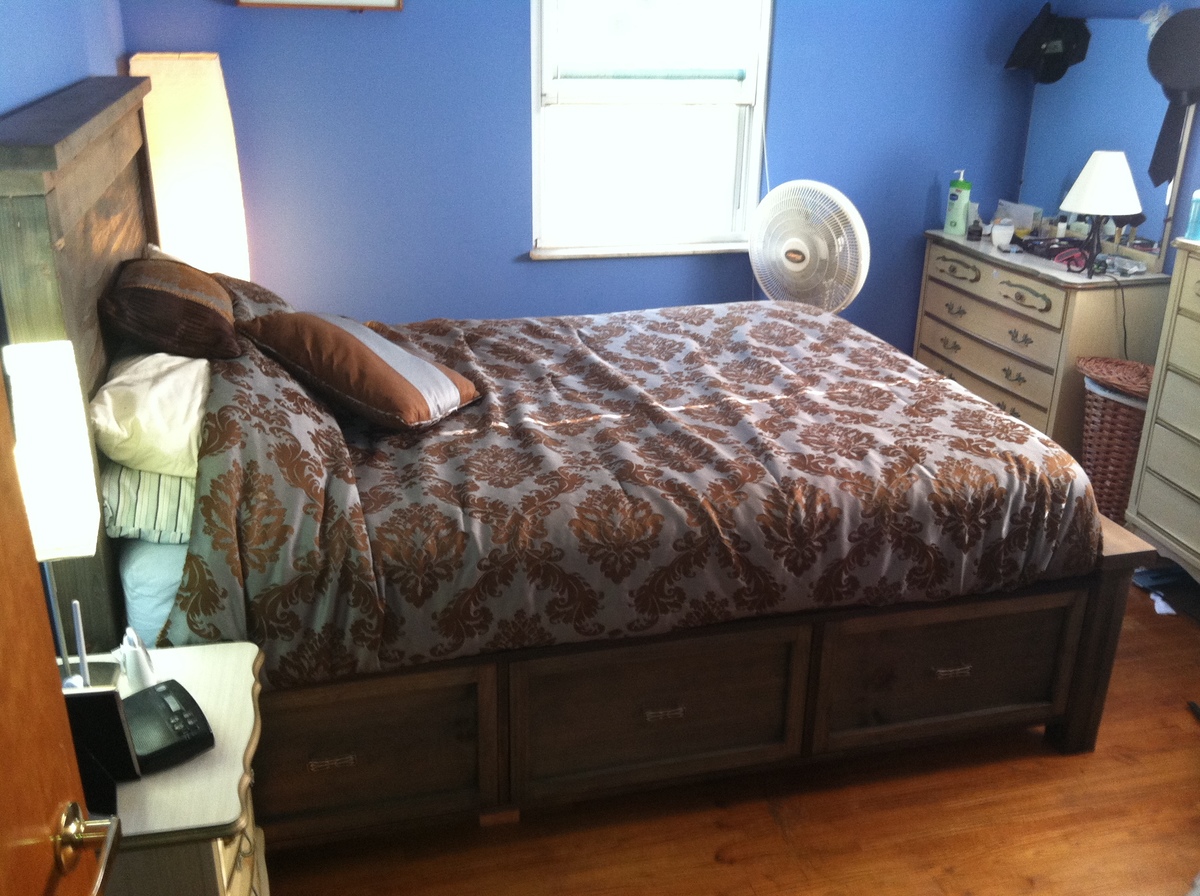
The first piece of our replacement bedroom set. We have this hand me down set from the 70's that is just awful looking. I have dressers, bed side tables, a wardrobe, and closet doors to do still. I love the way this turned out. I tried the oxidized finish from Hillary and with some trial and error I found the right colors. I replaced the standard slats with a one-piece frame that can be lifted out for the storage space below. I can't wait to replace the rest of that awful blonde furniture and repaint the room. I made wood slides like those on my built in dresser although this time they are positioned beneath the drawers. The front of the drawer boxes make up the drawer faces with a face frame. I changed the front of the boxes to 1x12 to achieve this concept. The drawers work flawlessly and will be perfect for seasonal clothes accessed less often.


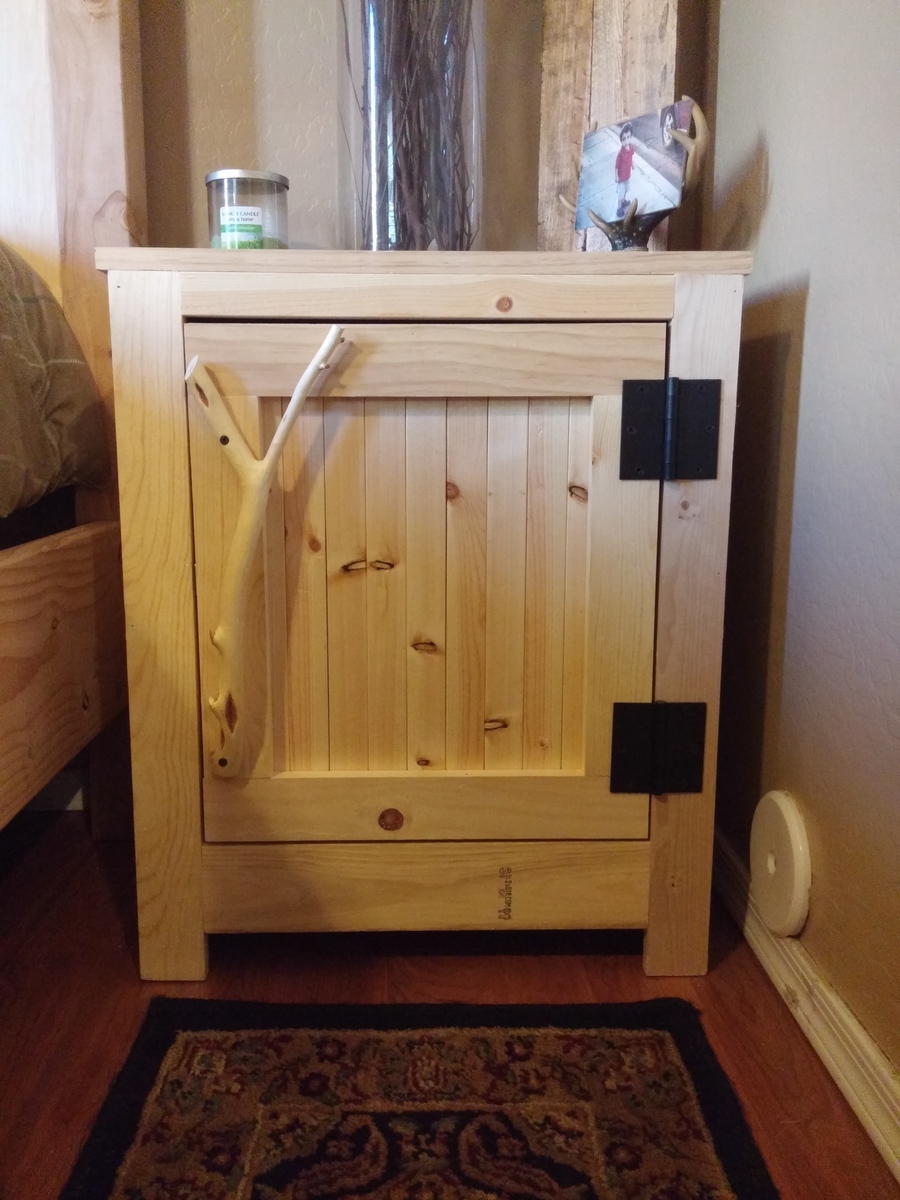
I made this nightstand and one other from the Kentwood plans. The handles are diamond willow from Wisconsin. I used 1x2's for the door.

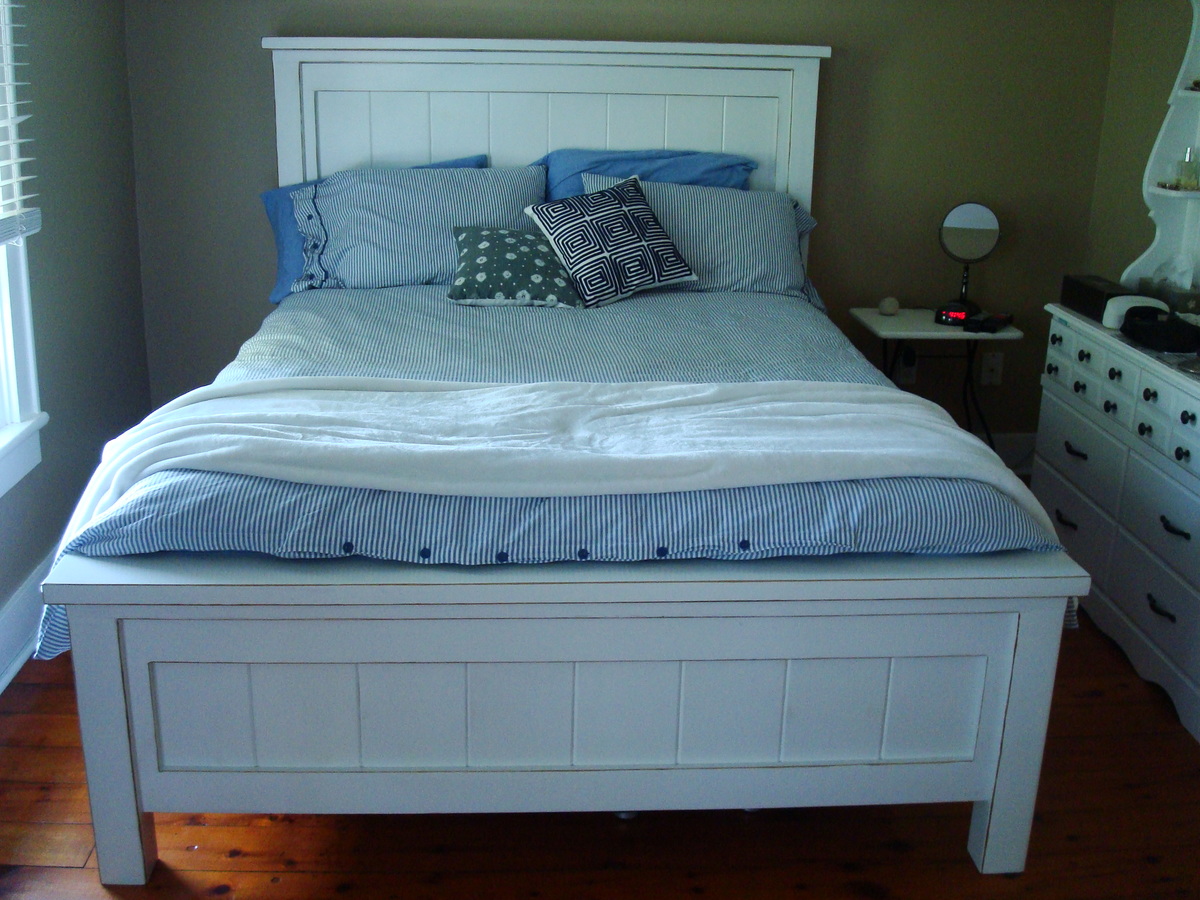
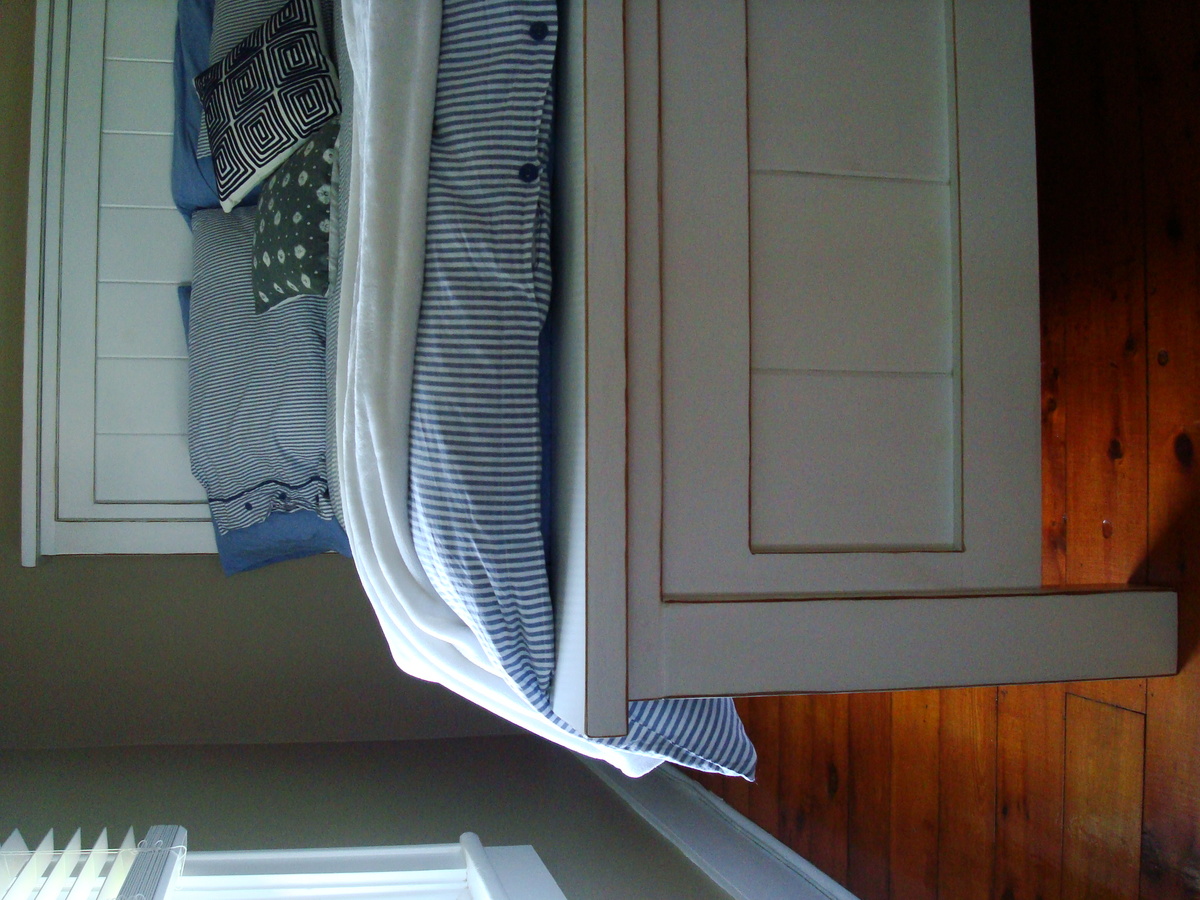
My husband and I built this bed over the course of several weeks working on it a few hours at a time due to long work days. It came out beautiful and is exactly what I wanted and how I had it pictured for our new bedroom redo. We added the Queen Storage Bed Drawers from the Ana White plans but had to make a modification as the drawer plans did not account for the trim as shown in the picture for the bed. Then we took things a step further and built matching nightstands. I LOVE how everything turned out.


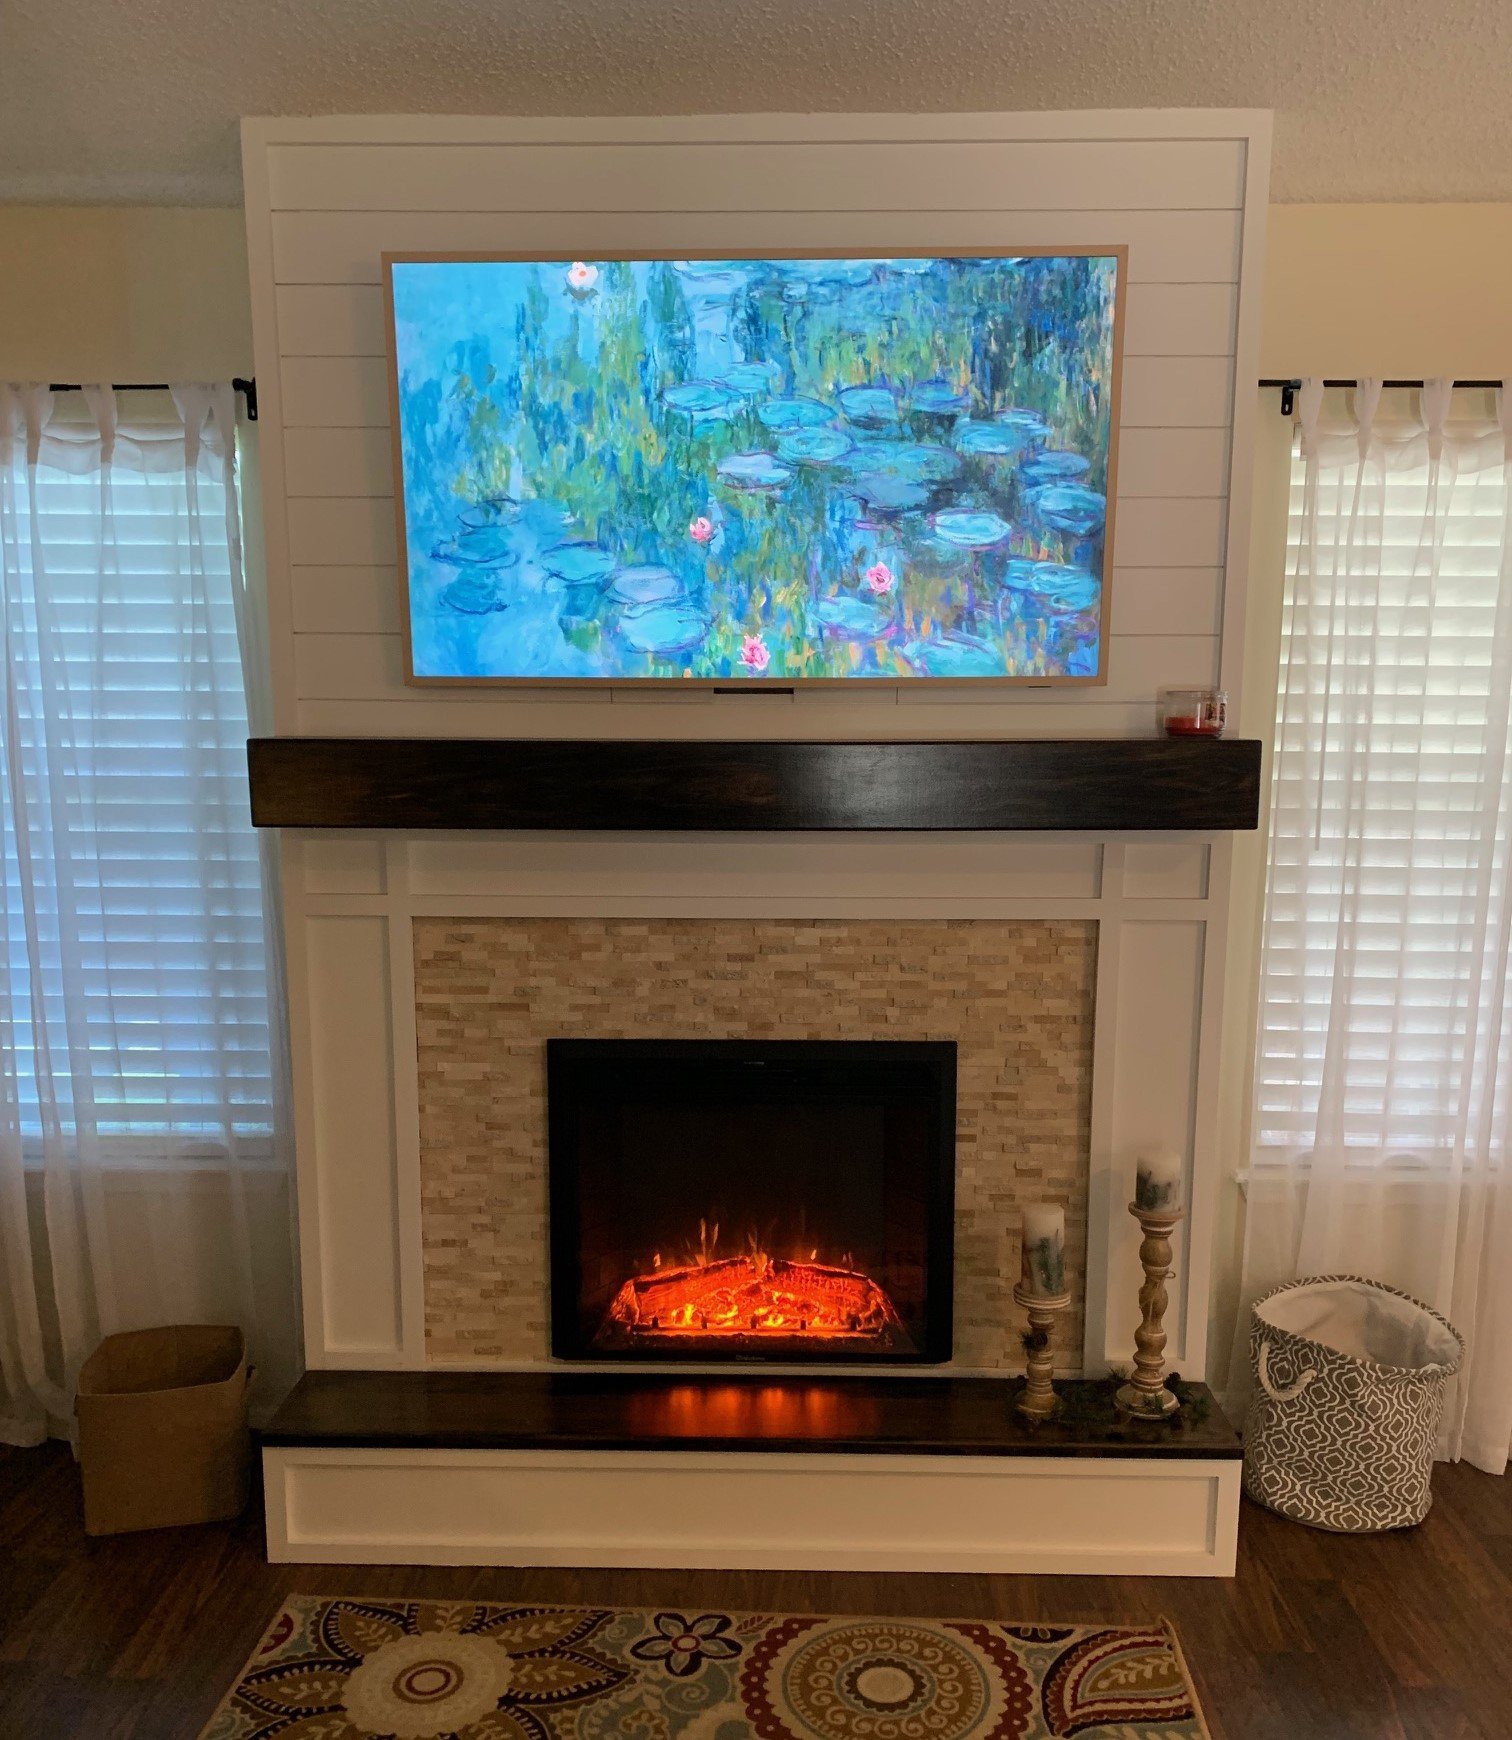
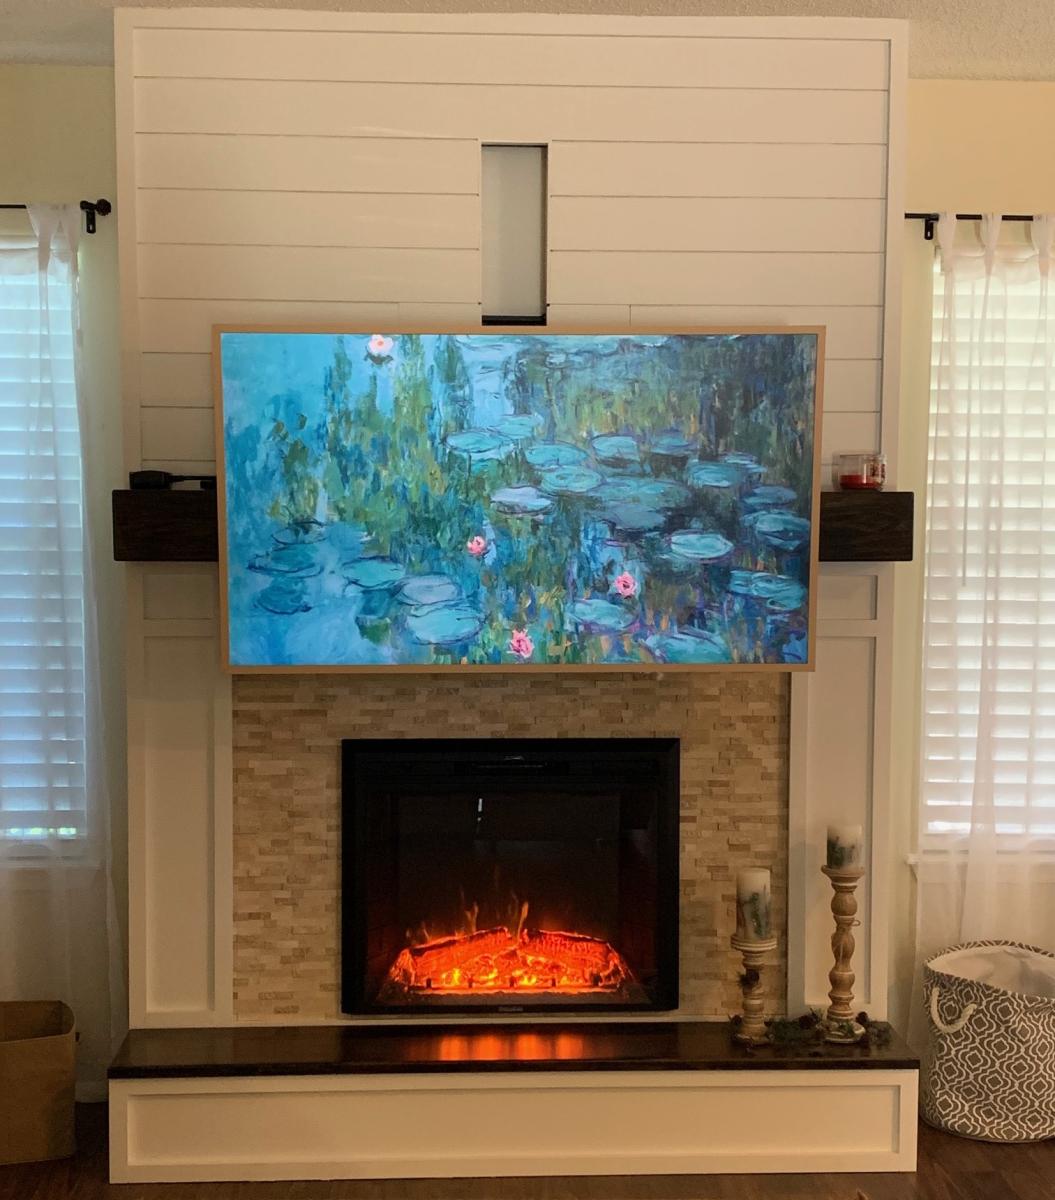
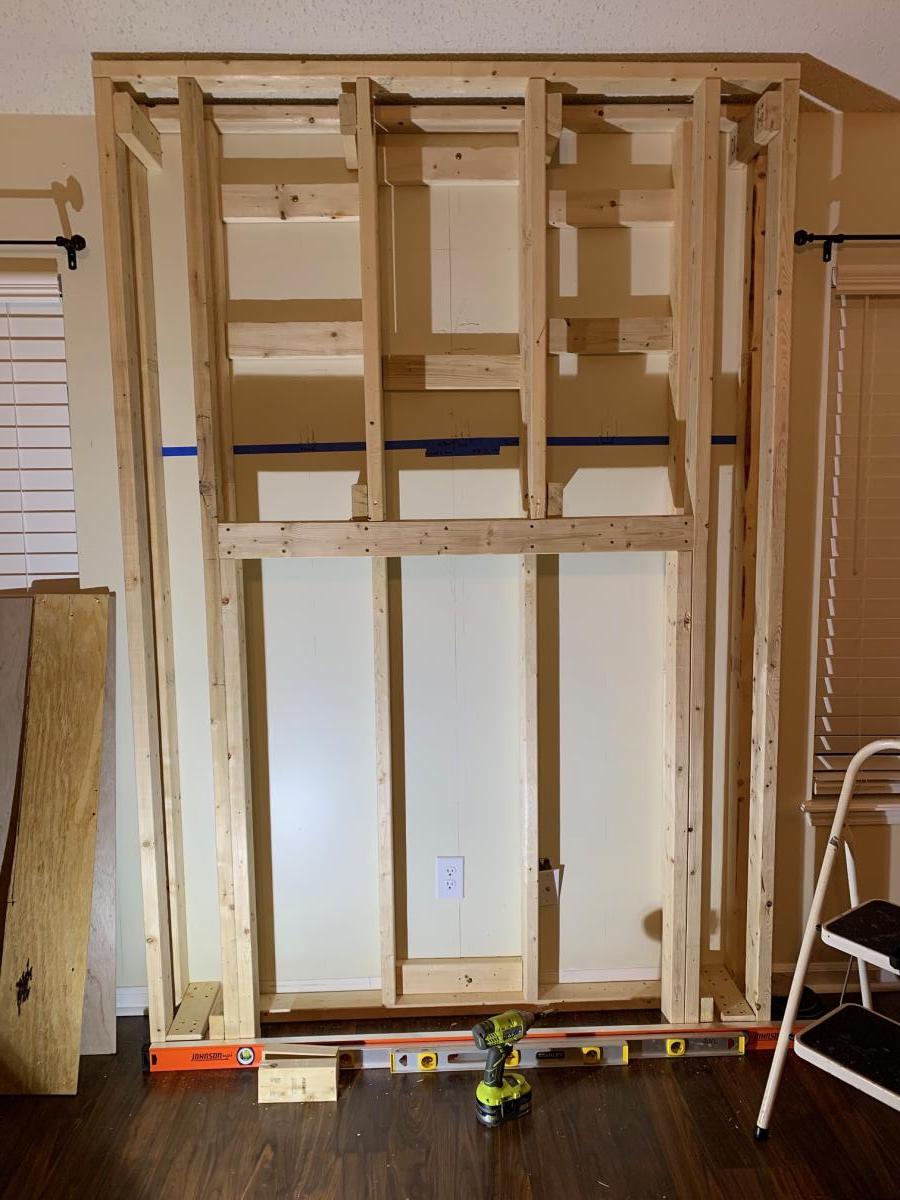
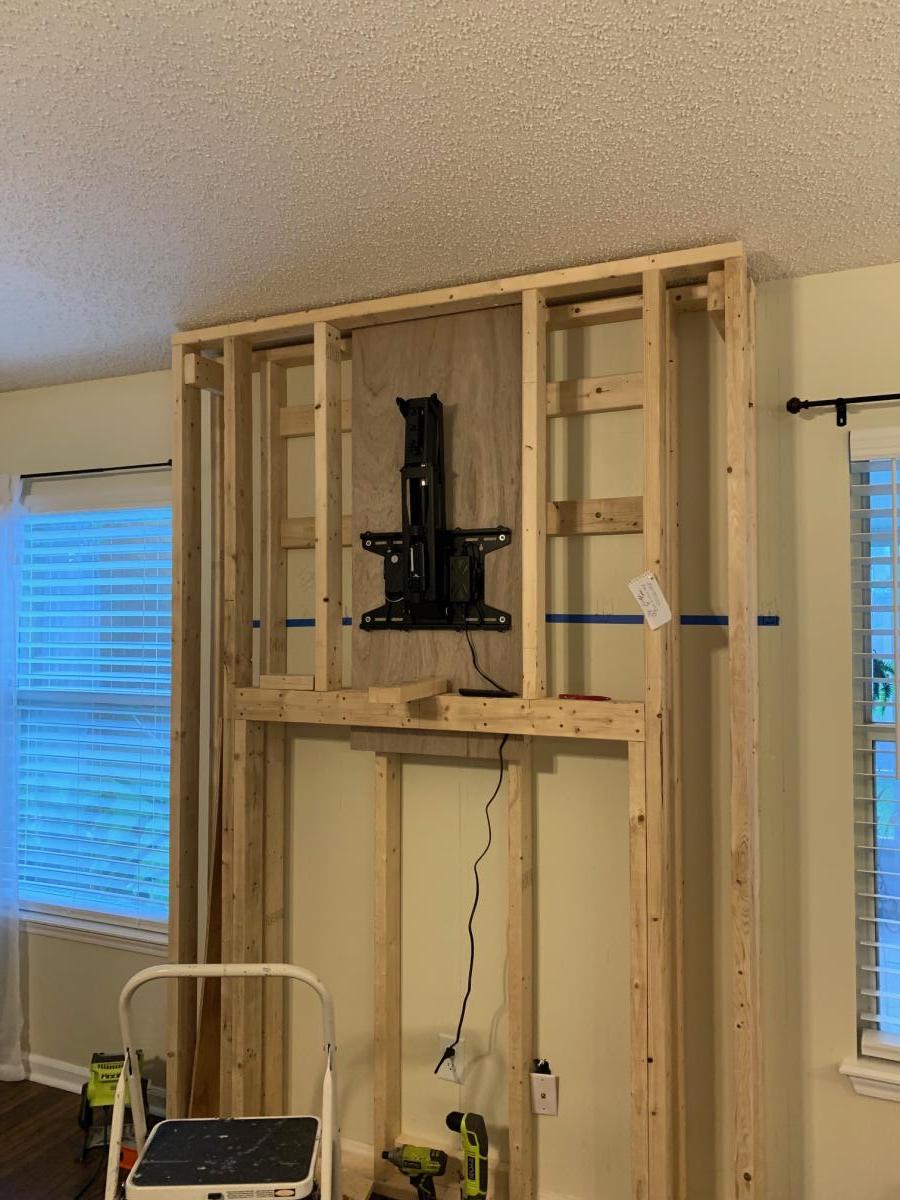
This is a very custom fireplace that I built for my wife as a 40th wedding anniversary gift. It is built around a Samsung 55” Frame TV and a Vivo motorized mount. The motorized mount allows the TV to be lowered to a better viewing height than the standard above mantle position which is usually too high for comfortable viewing.
In order to maintain the flush mount effect with the TV in art mode, I recessed the mount into the fireplace. That required building a “back” frame for the TV mount then the outer frame for the surround. I covered the outer frame with ½” OSB then ship lap. The mantle and hearth is made from Poplar with walnut stain and Polyurethane satin top coat. The hearth opens for storage.
This was sourced from several different plan sets with a lot of customization and input from the Technical Support Staff at Vizo-US.

Thu, 02/16/2023 - 09:46
Happy Anniversary!
This is a beautiful, well thought out project.
I was hoping someone would do the recessed mount, and you nailed it! It's so much better with the tv flush like yours.
Also love the motorized mount.
Thank you very much for sharing photos.
Ana
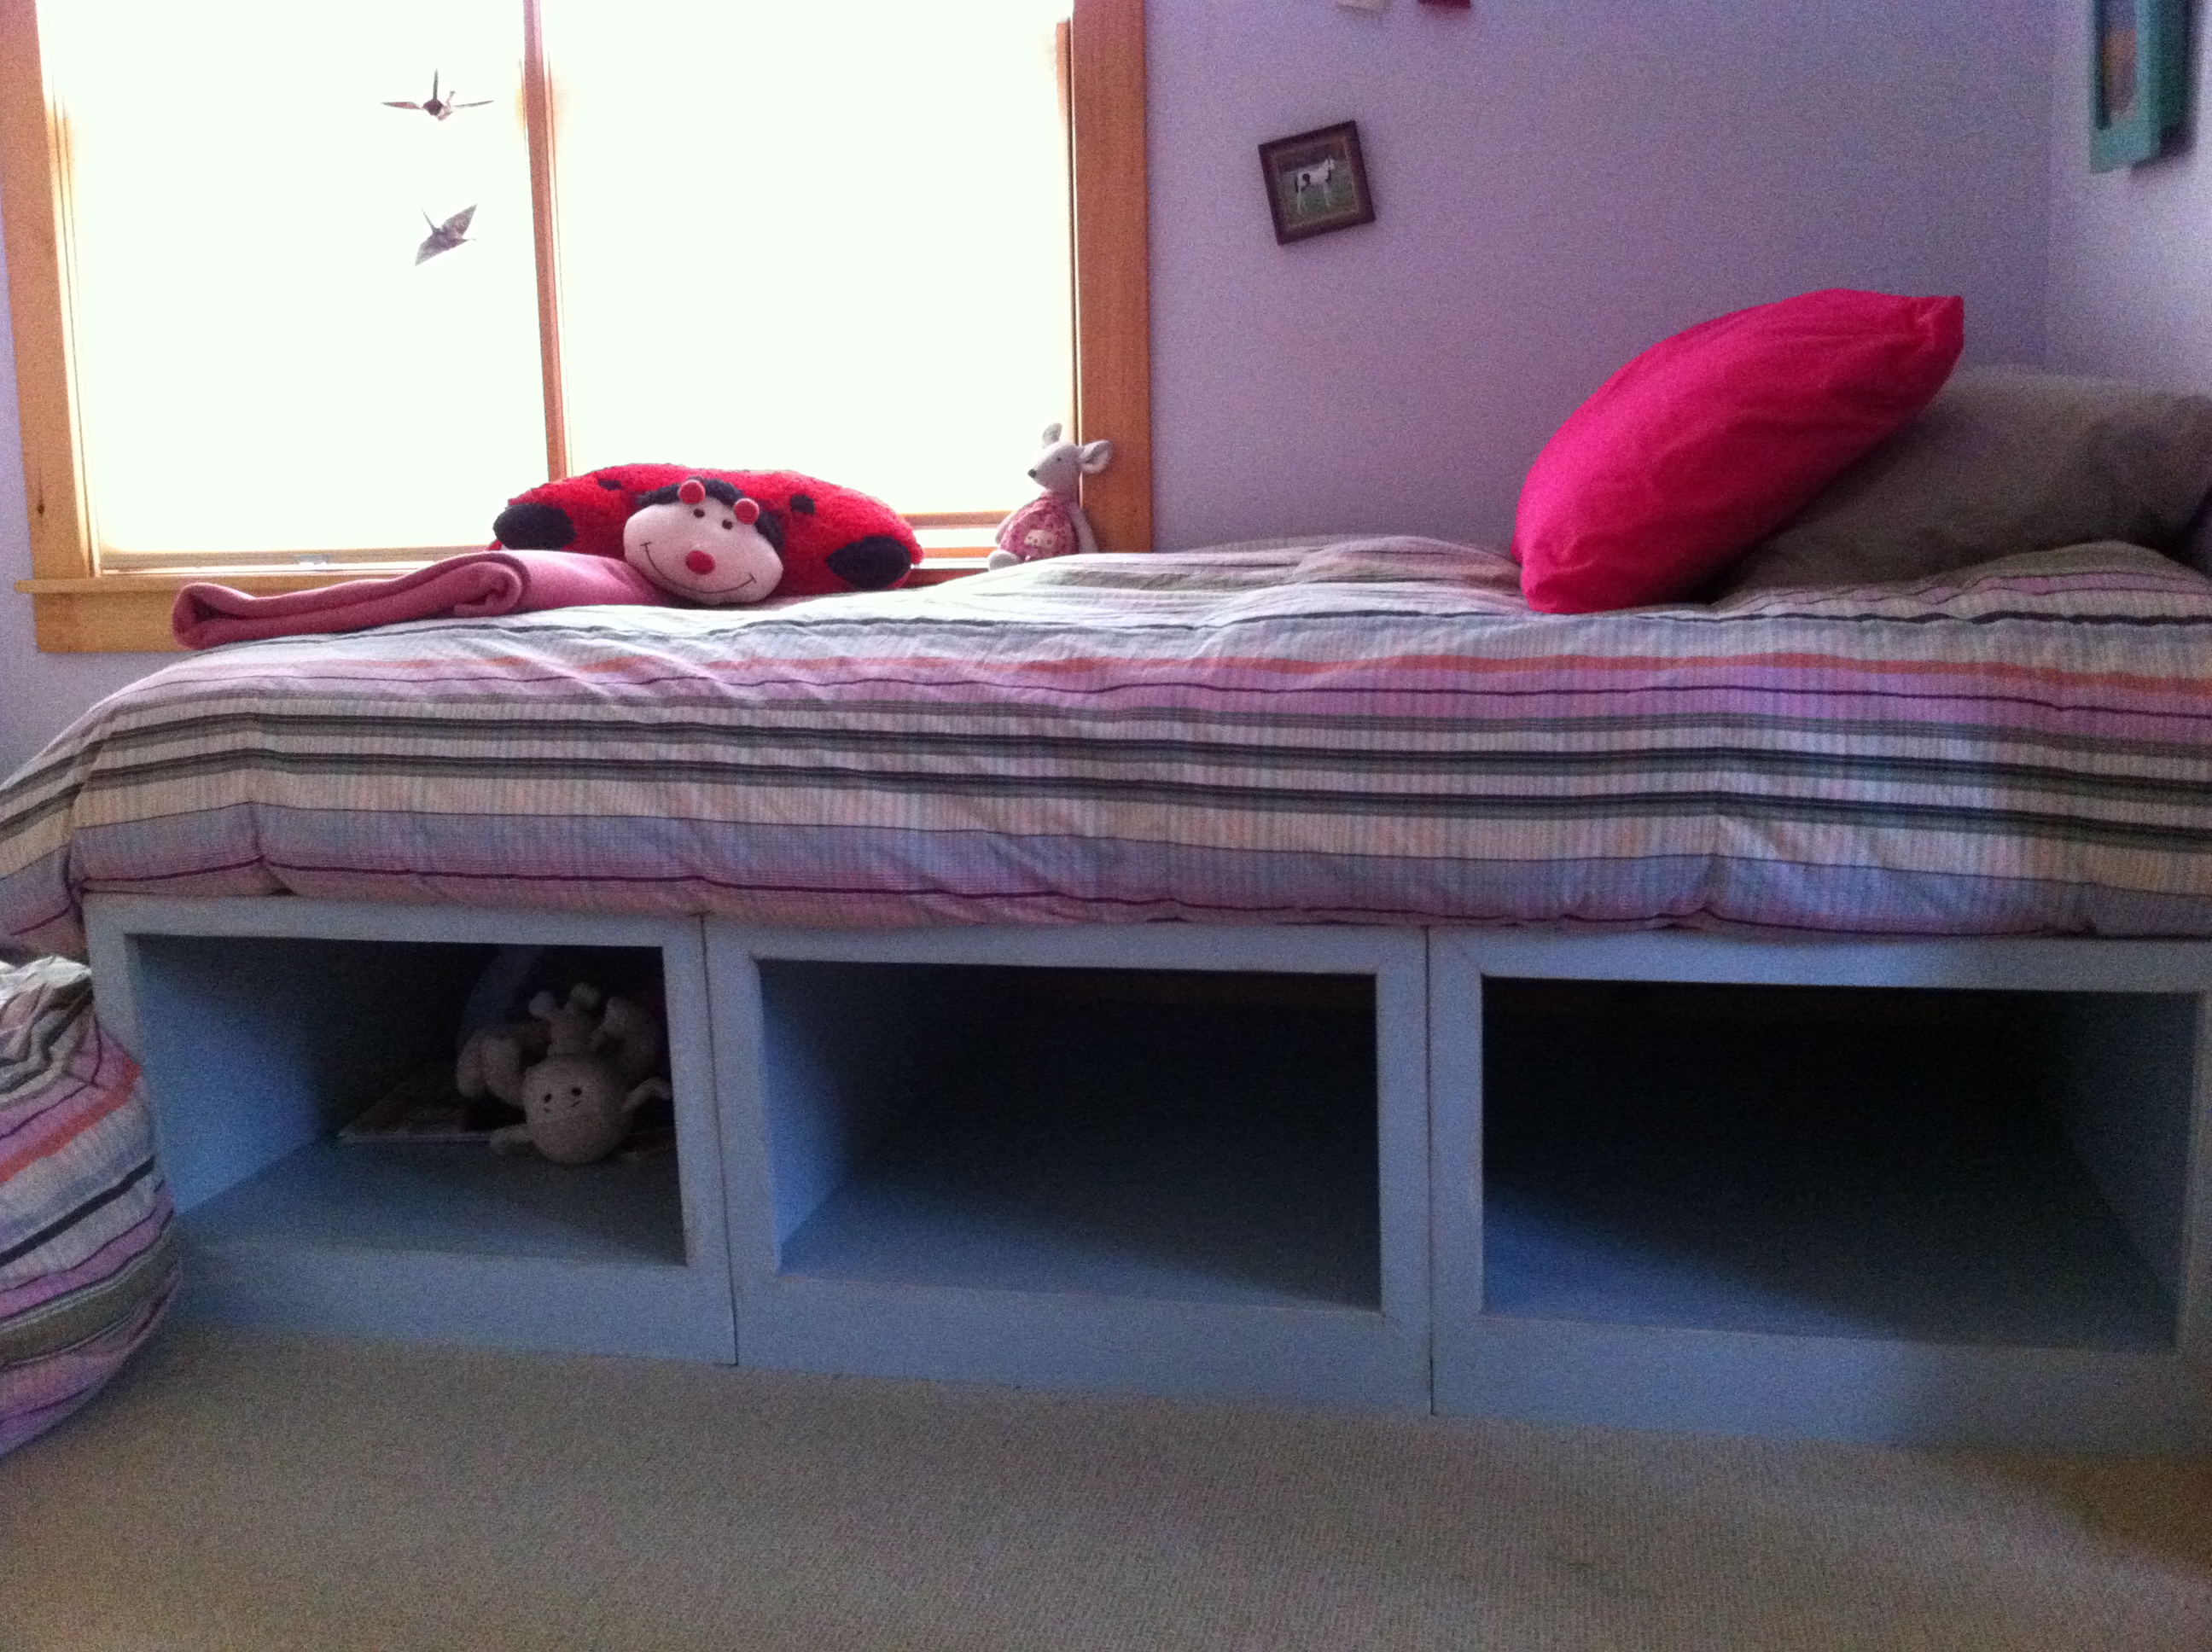
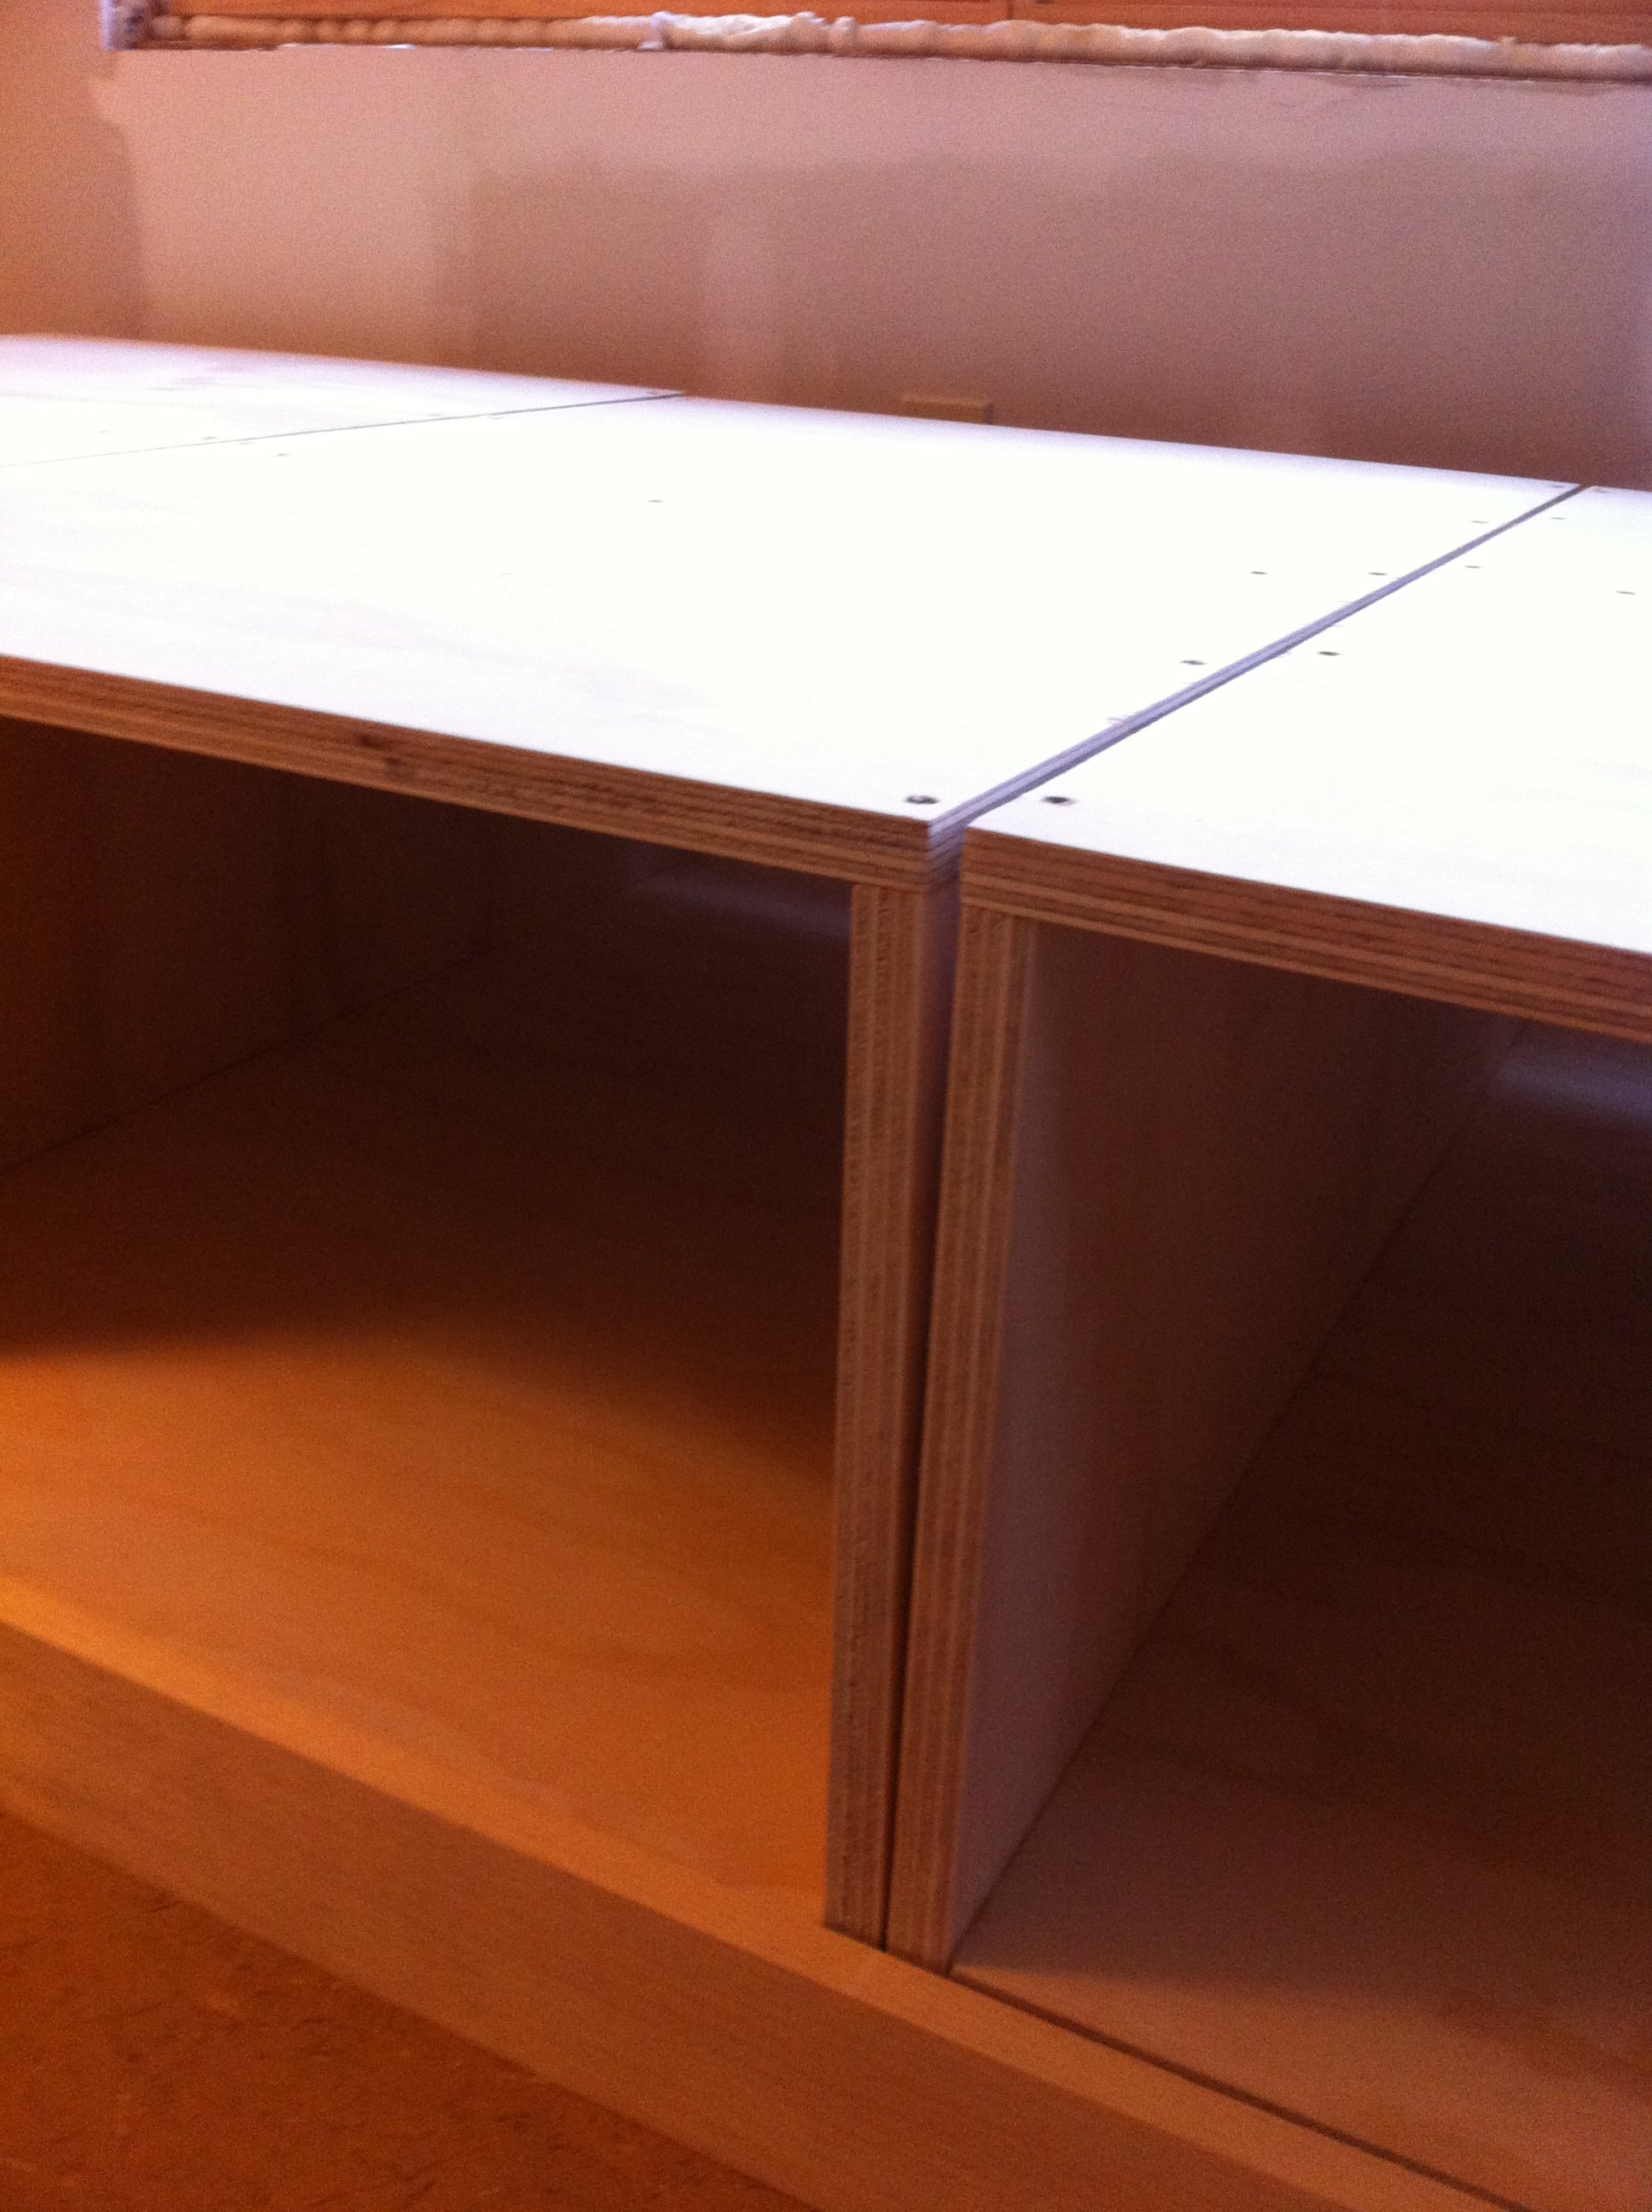
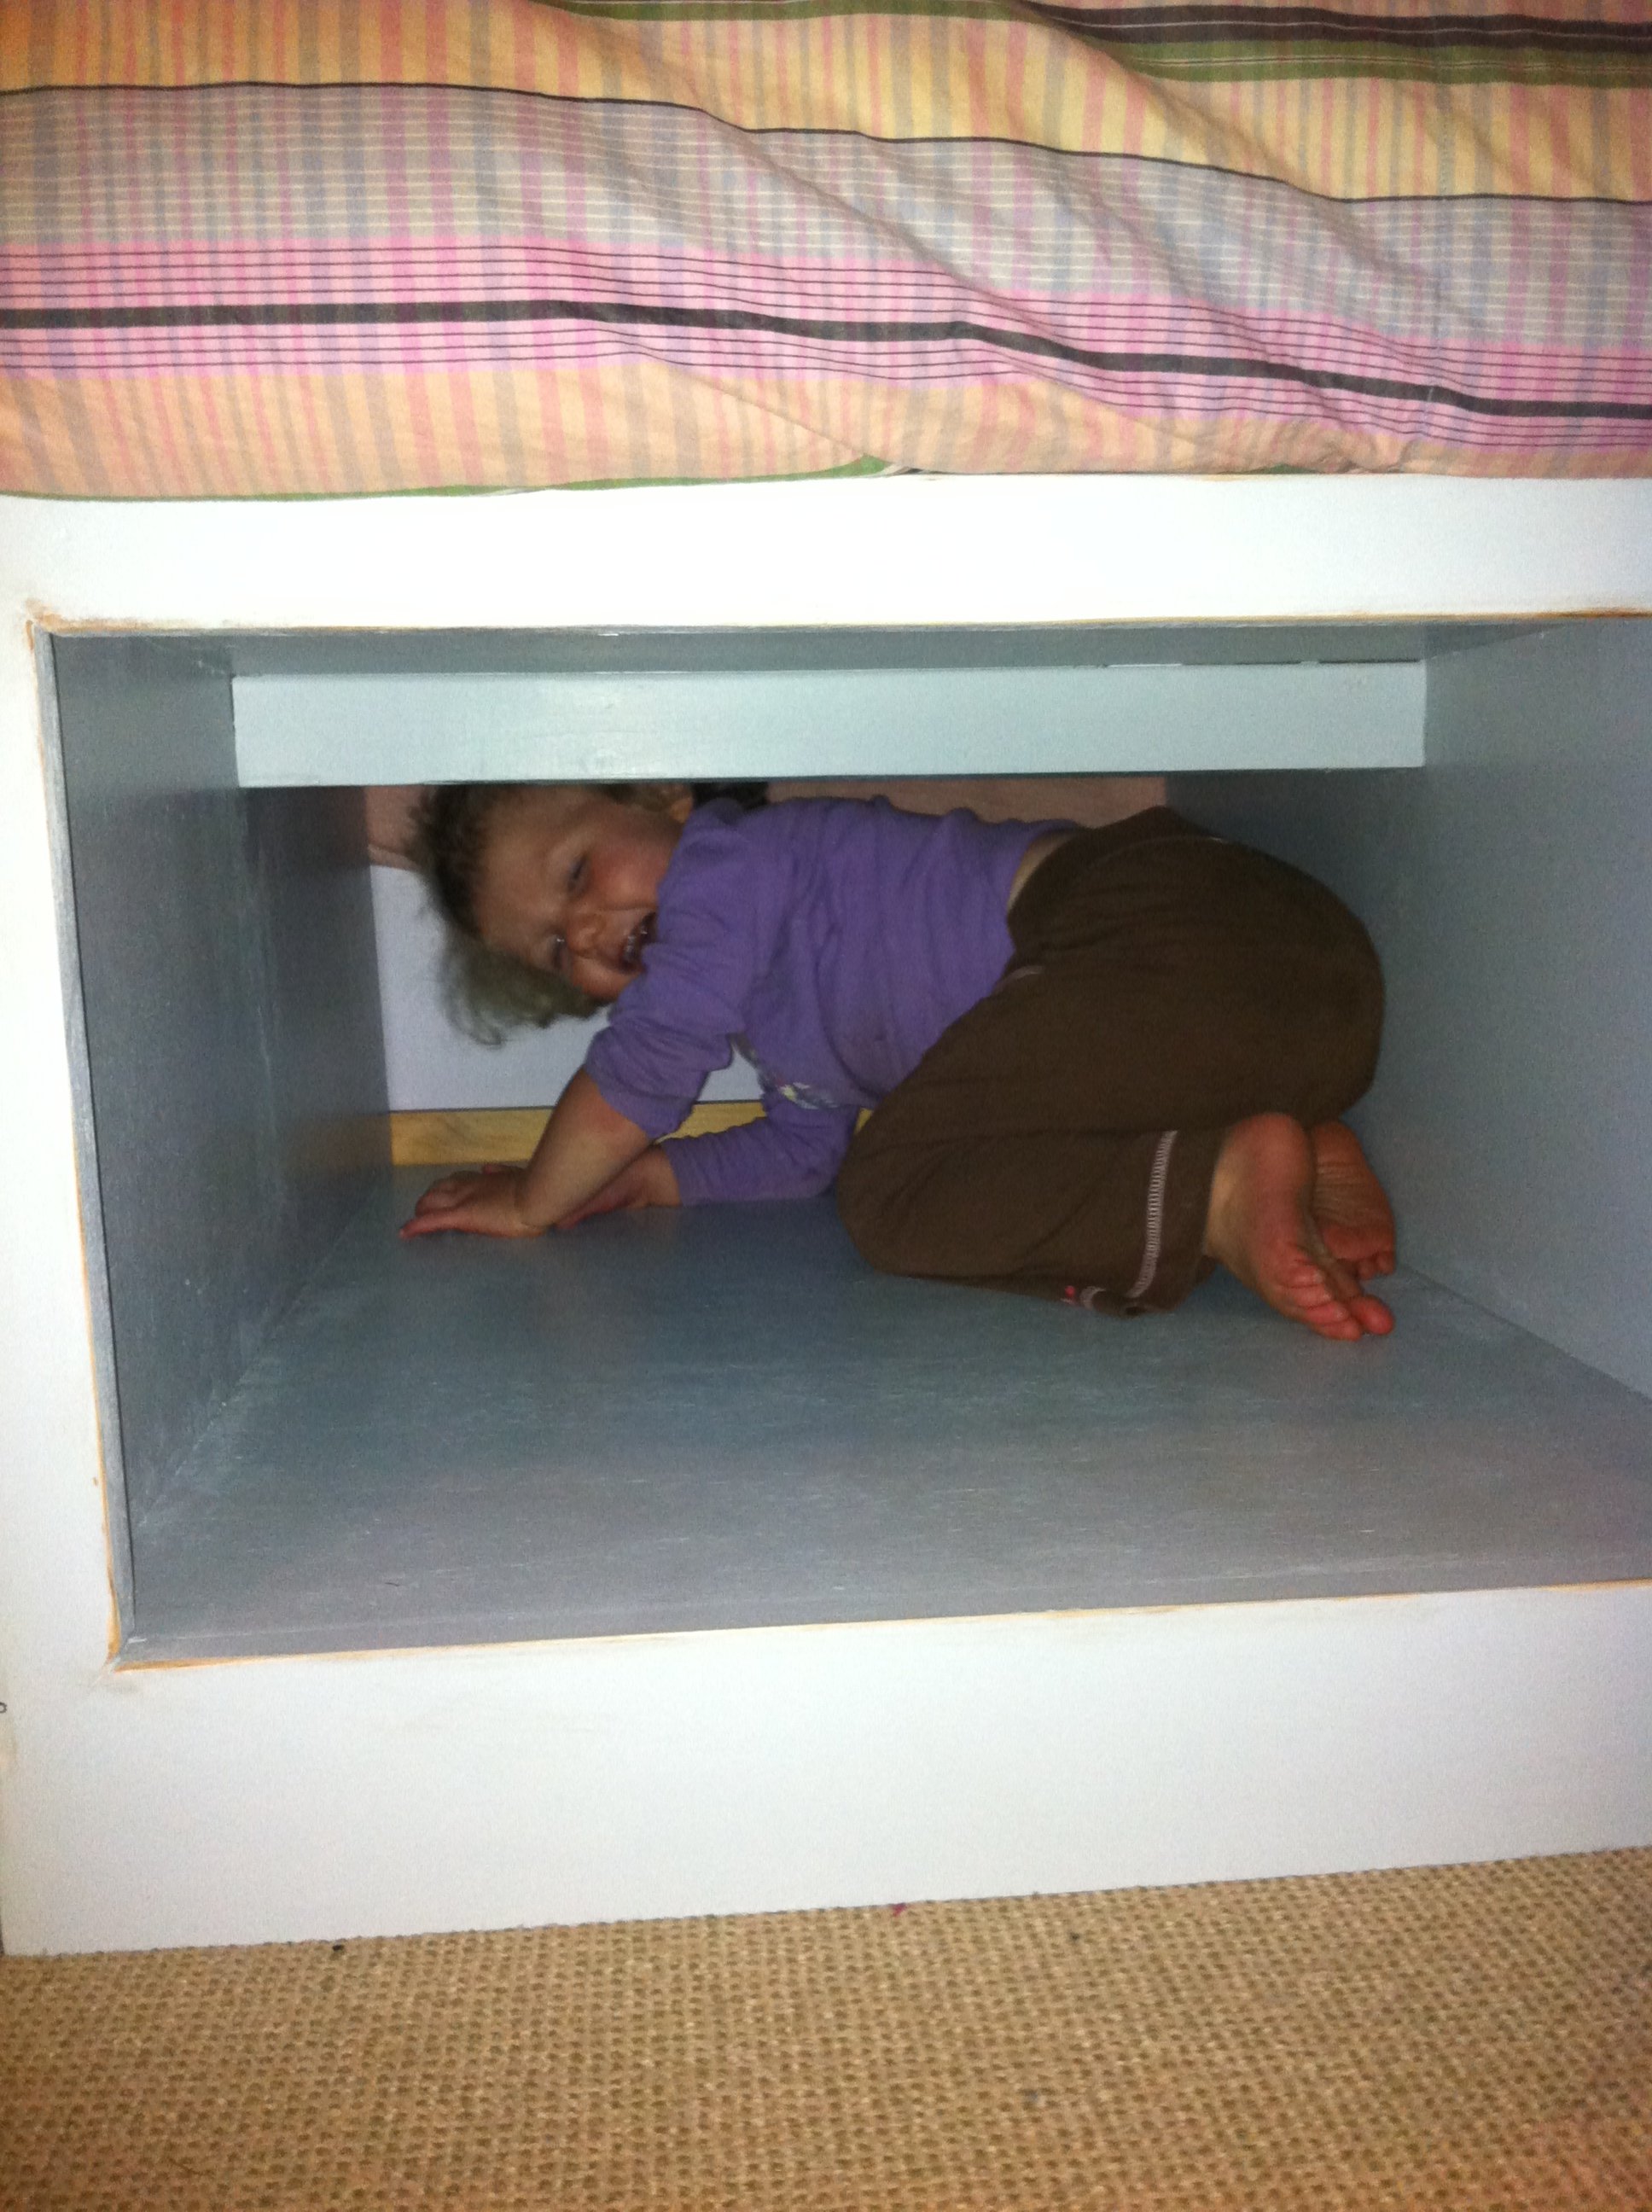
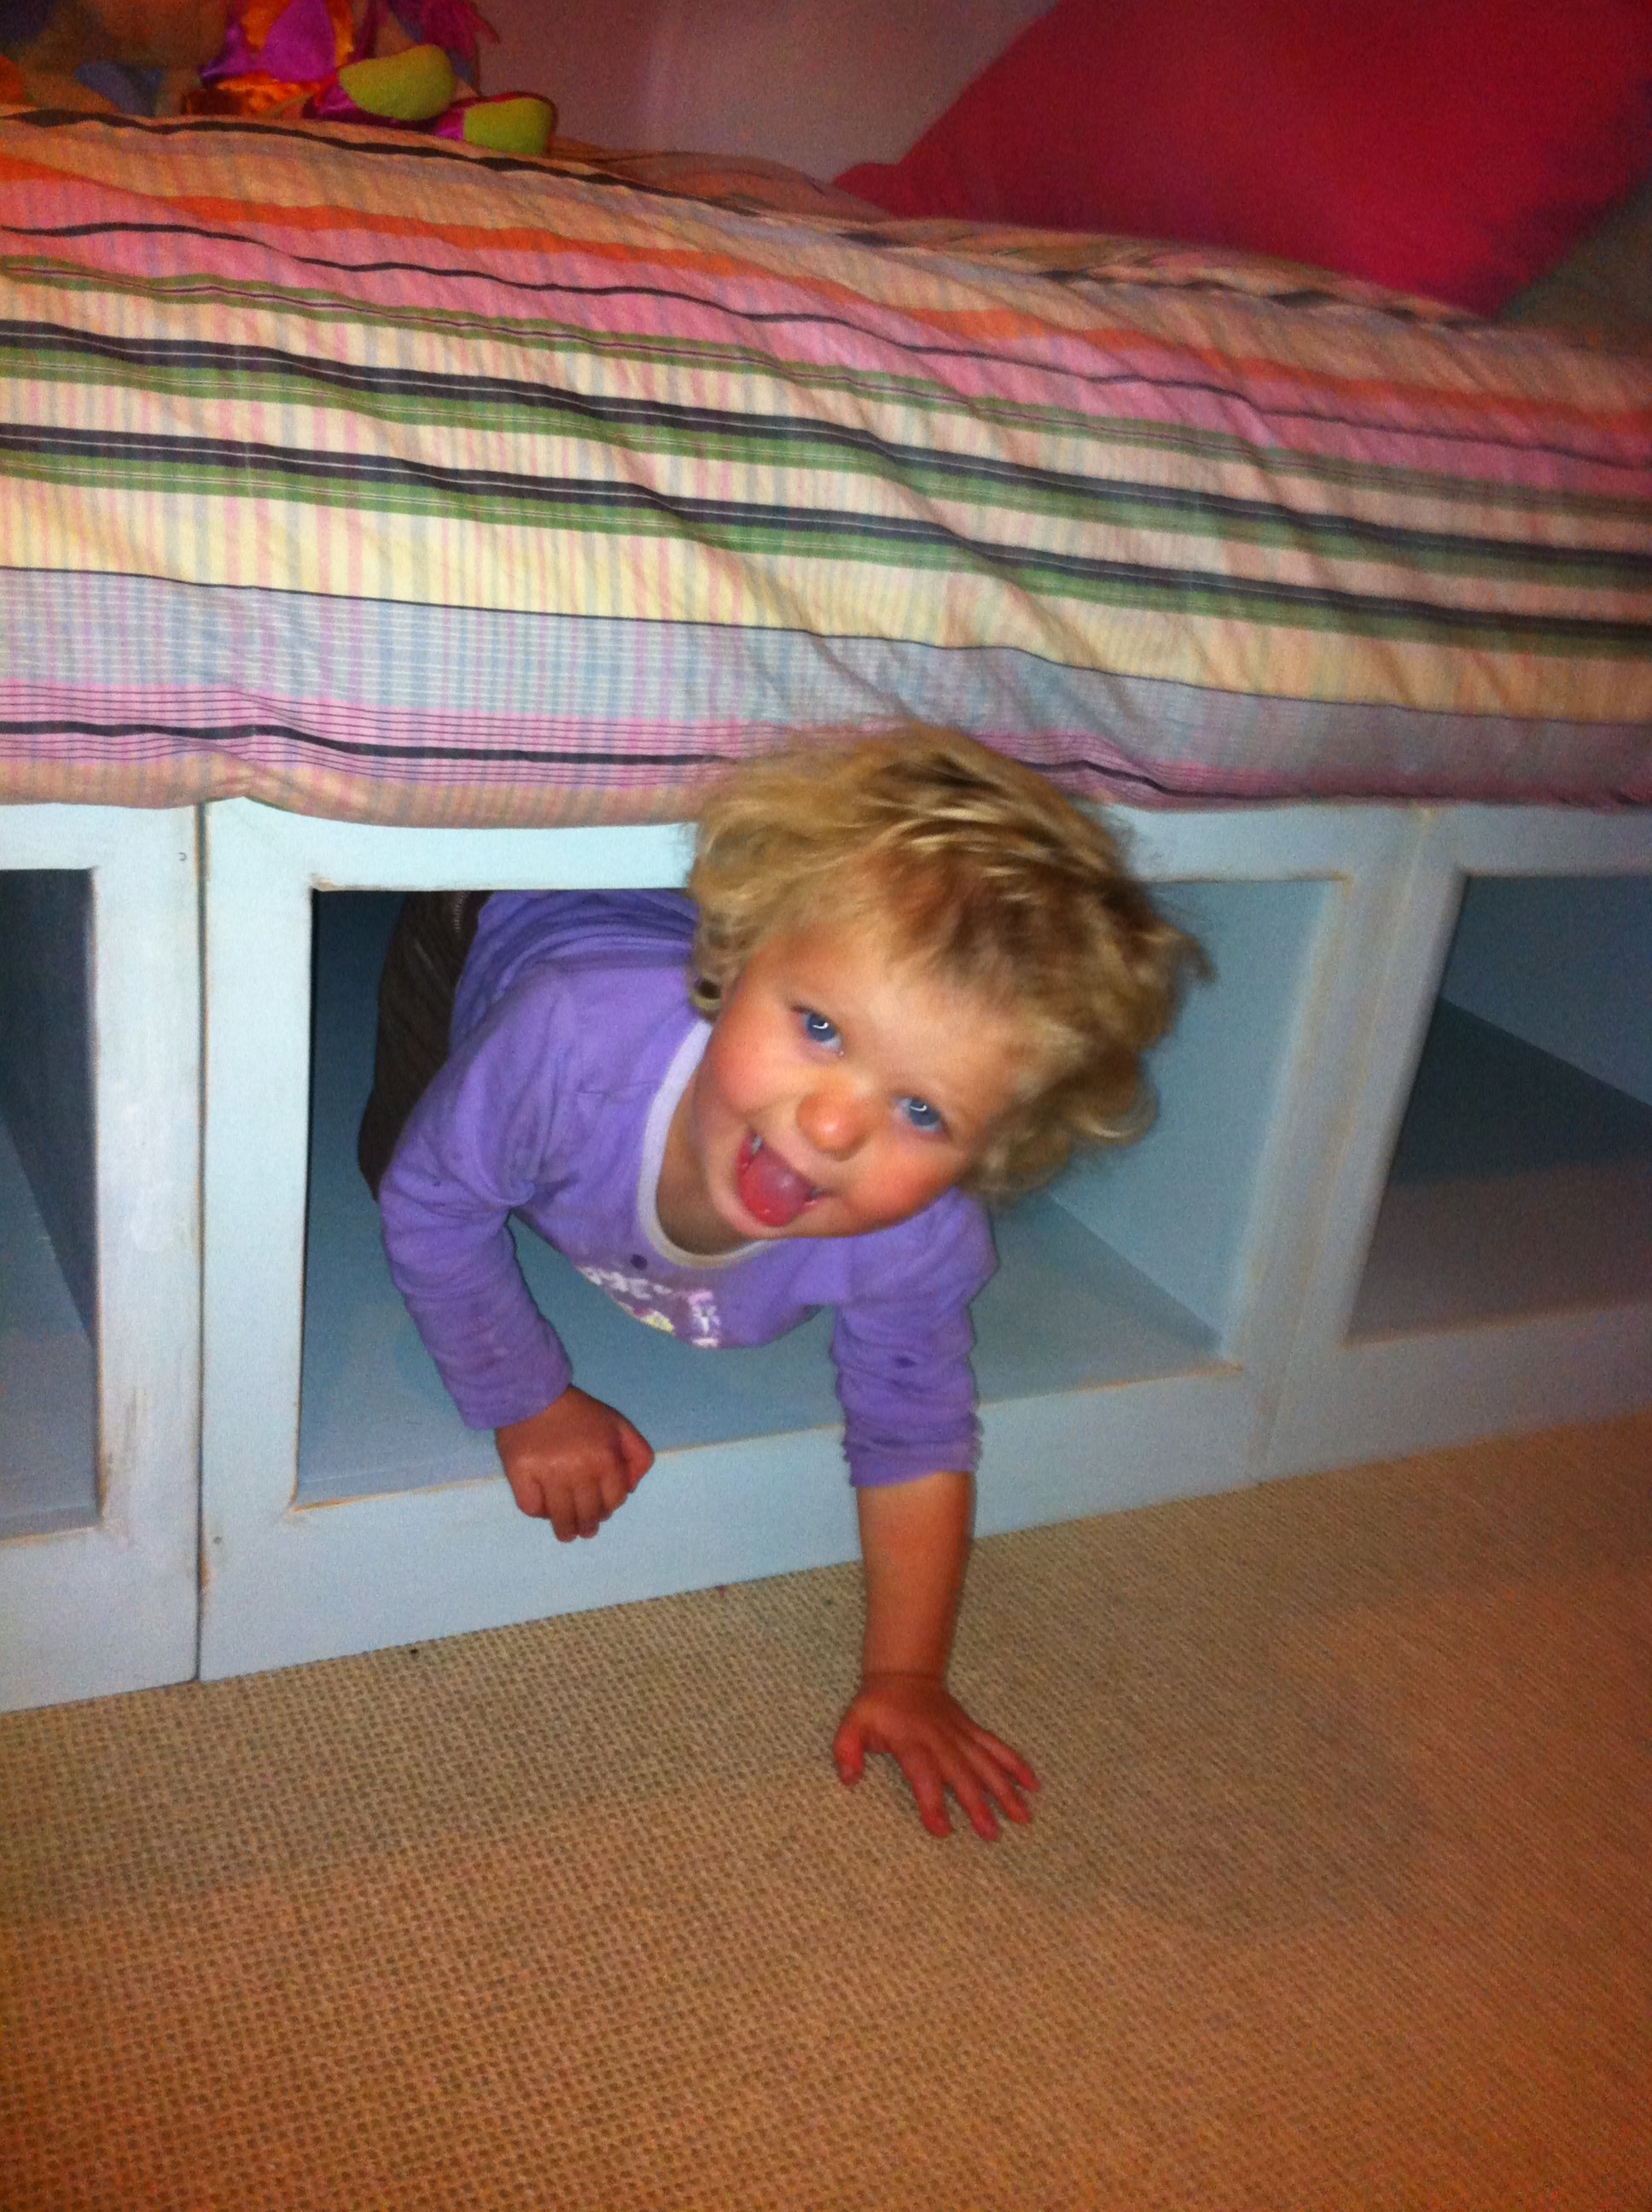
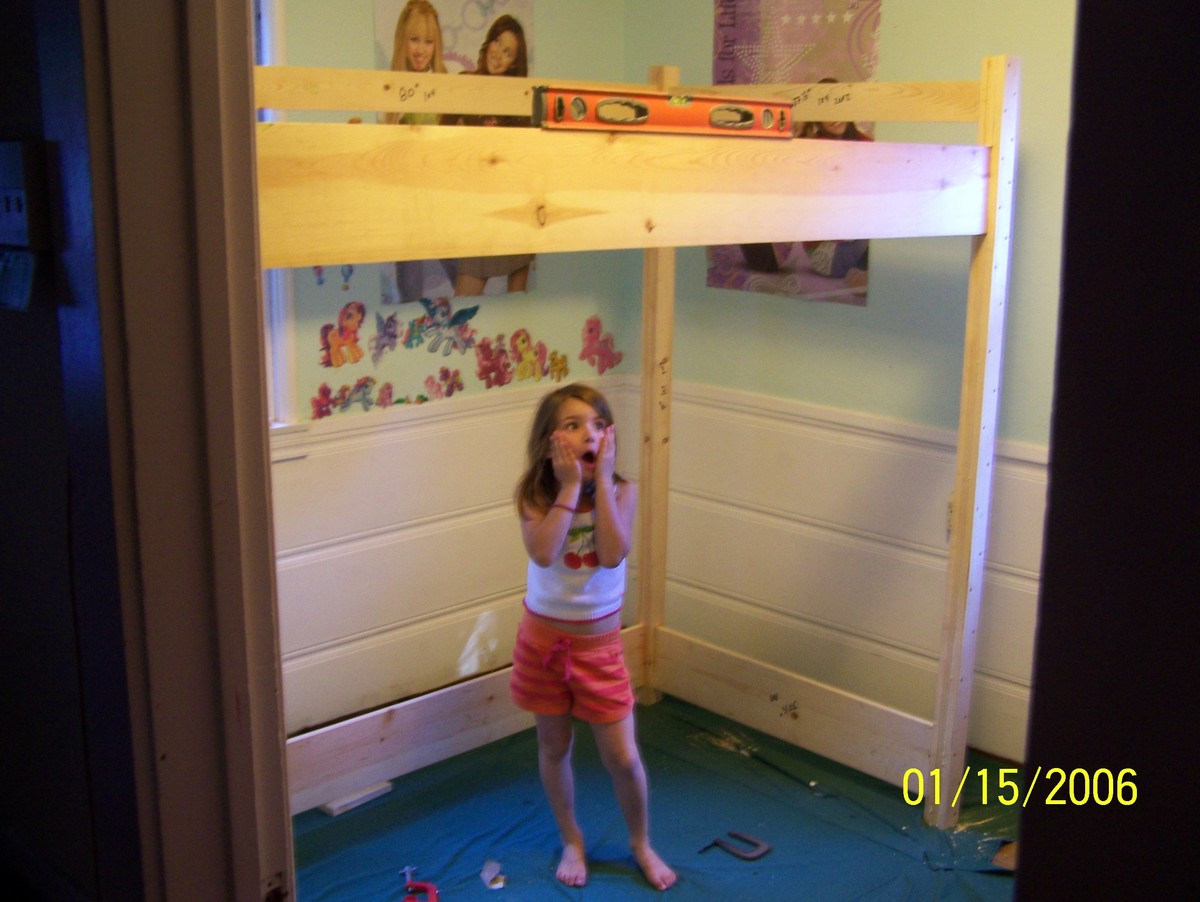
I finally did it! I purchased mattresses for our two girls (2 & 4) which have been just sitting on the floor for a while. Wanting to build some simple frames just to get them off the floor I ran across Ana's site. Oh boy! This site is amazing! We have a small house with very little storage so when I saw the storage daybeds I was smitten! The extent of my power tool comfort zone is dimensional lumber and a compound miter saw. Not plywood and definitely not the table saw, so I was a little leery about starting this project. In the end, I tackled it and am so glad I did! Even used the circular saw! Full disclosure, there's probably nothing square about the thing (see additional photos), but like mulch in your garden, trim covers a multitude of sins! I learned a lot and will take my time measuring and squaring for the next one. Also, as some readers commented, I would prime and do at least one coat of paint prior to assembly (that part was definitely time consuming). I also wanted the storage to go all the way back to the wall so I didn't include the center piece of plywood but instead trimmed down a 2x4 to a ~2.5" width and glue/screwed in into the plywood at the top center under the top piece. So far so good! On the finish, I wanted a distressed finish and started using a dark walnut stain but did not like how much it adhered to the paint as well as the sanded down edges. When I picked my daughter up from pre-school that day they had been doing flower rub pictures. I saw that the centers of the black-eyed susan’s and cone flowers came out a beautiful brown color. So when I got home my daughter and I went out and cut some old flower stems and we finished the other two cubby cubes that way. I think it turned out really well! I didn't end up top coating it with anything, I liked the scuffed up paint look. A big THANK YOU to Ana for doing all this work so we can too!

First building project ever! I wanted a new bed for our new mattress and got inspired when I came across this website. A compound mitre saw, orbital sander, nailer, and many more tools later, I am building furniture whenever I get a chance!
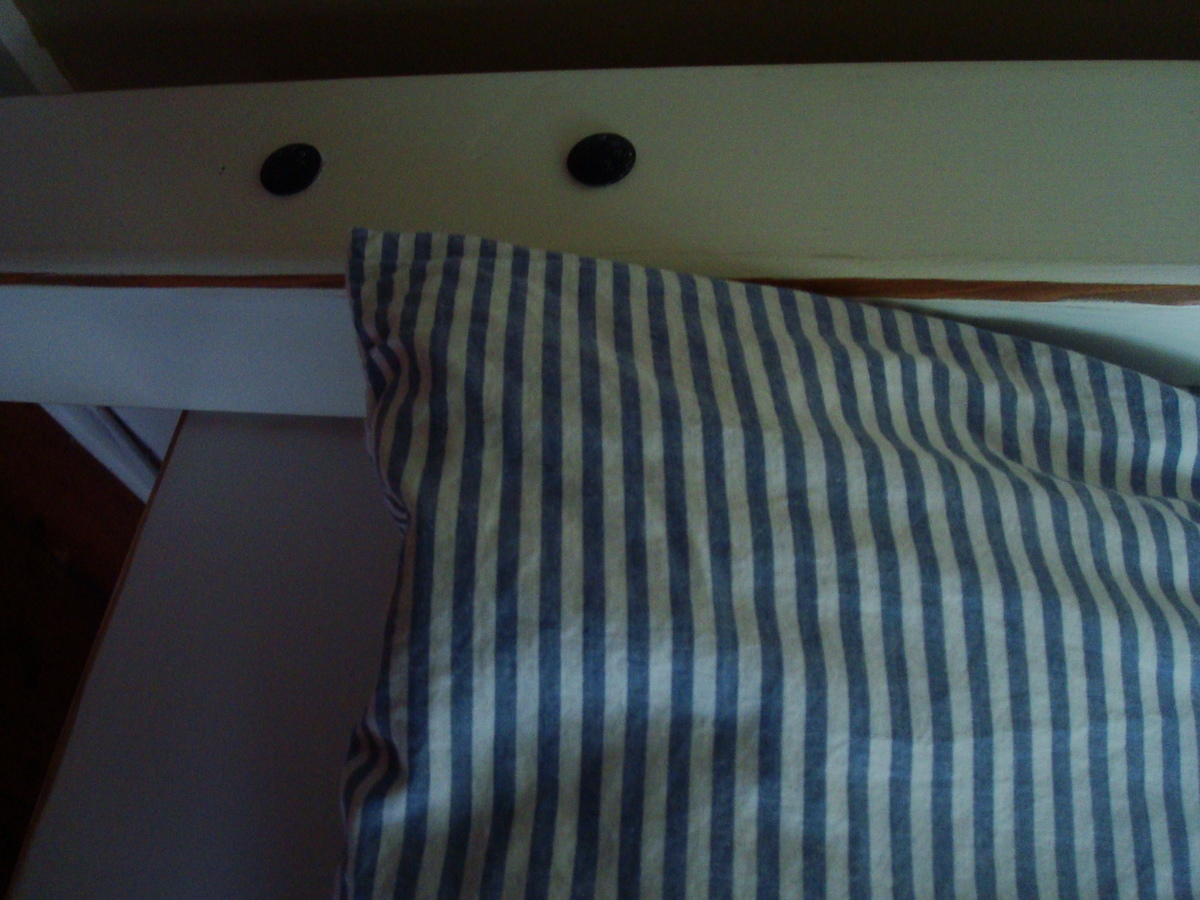
Modified the way I attached the frame to the head board and foot board a bit. I used joist hangers on the footboard, which the frame slid into perfectly, and secured it with a couple screws on each side. I attached the headboard with 2 large carriage bolts on each side through the posts and frame.
Overall, I loved the way it turned out. On to the next project!
Sat, 10/19/2013 - 08:14
Thanks for sharing this amazing build. It turned out beautifully, can't wait to see your next project!
In reply to First Build?!? by Ana White
Wed, 10/23/2013 - 19:38
Your website really guided me through everything, from buying the wood to the finish. I credit you and tell people to visit this website whenever anyone asks me about my projects :)
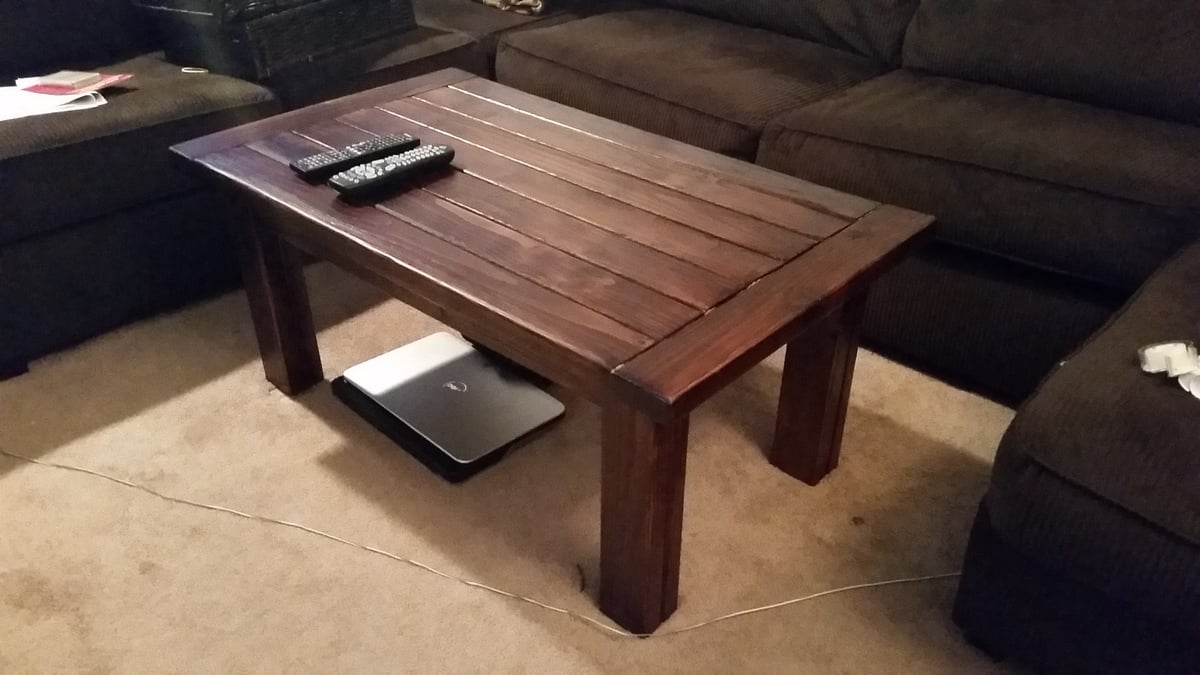
This is my first DIY build project and it turned out awesome. For some reason I was unable to find untreated 4x4's anywhere in Hawaii, so I took two 2x4's and attached them by countersinking wood screws. Beware, the dimensions of this project are massive. I scaled down the measurements drastically to fit in my living room with my sectional.
Built by request. They wanted a couple modifications, so I improvised on a few areas. The piece will be stained/painted by the owner.
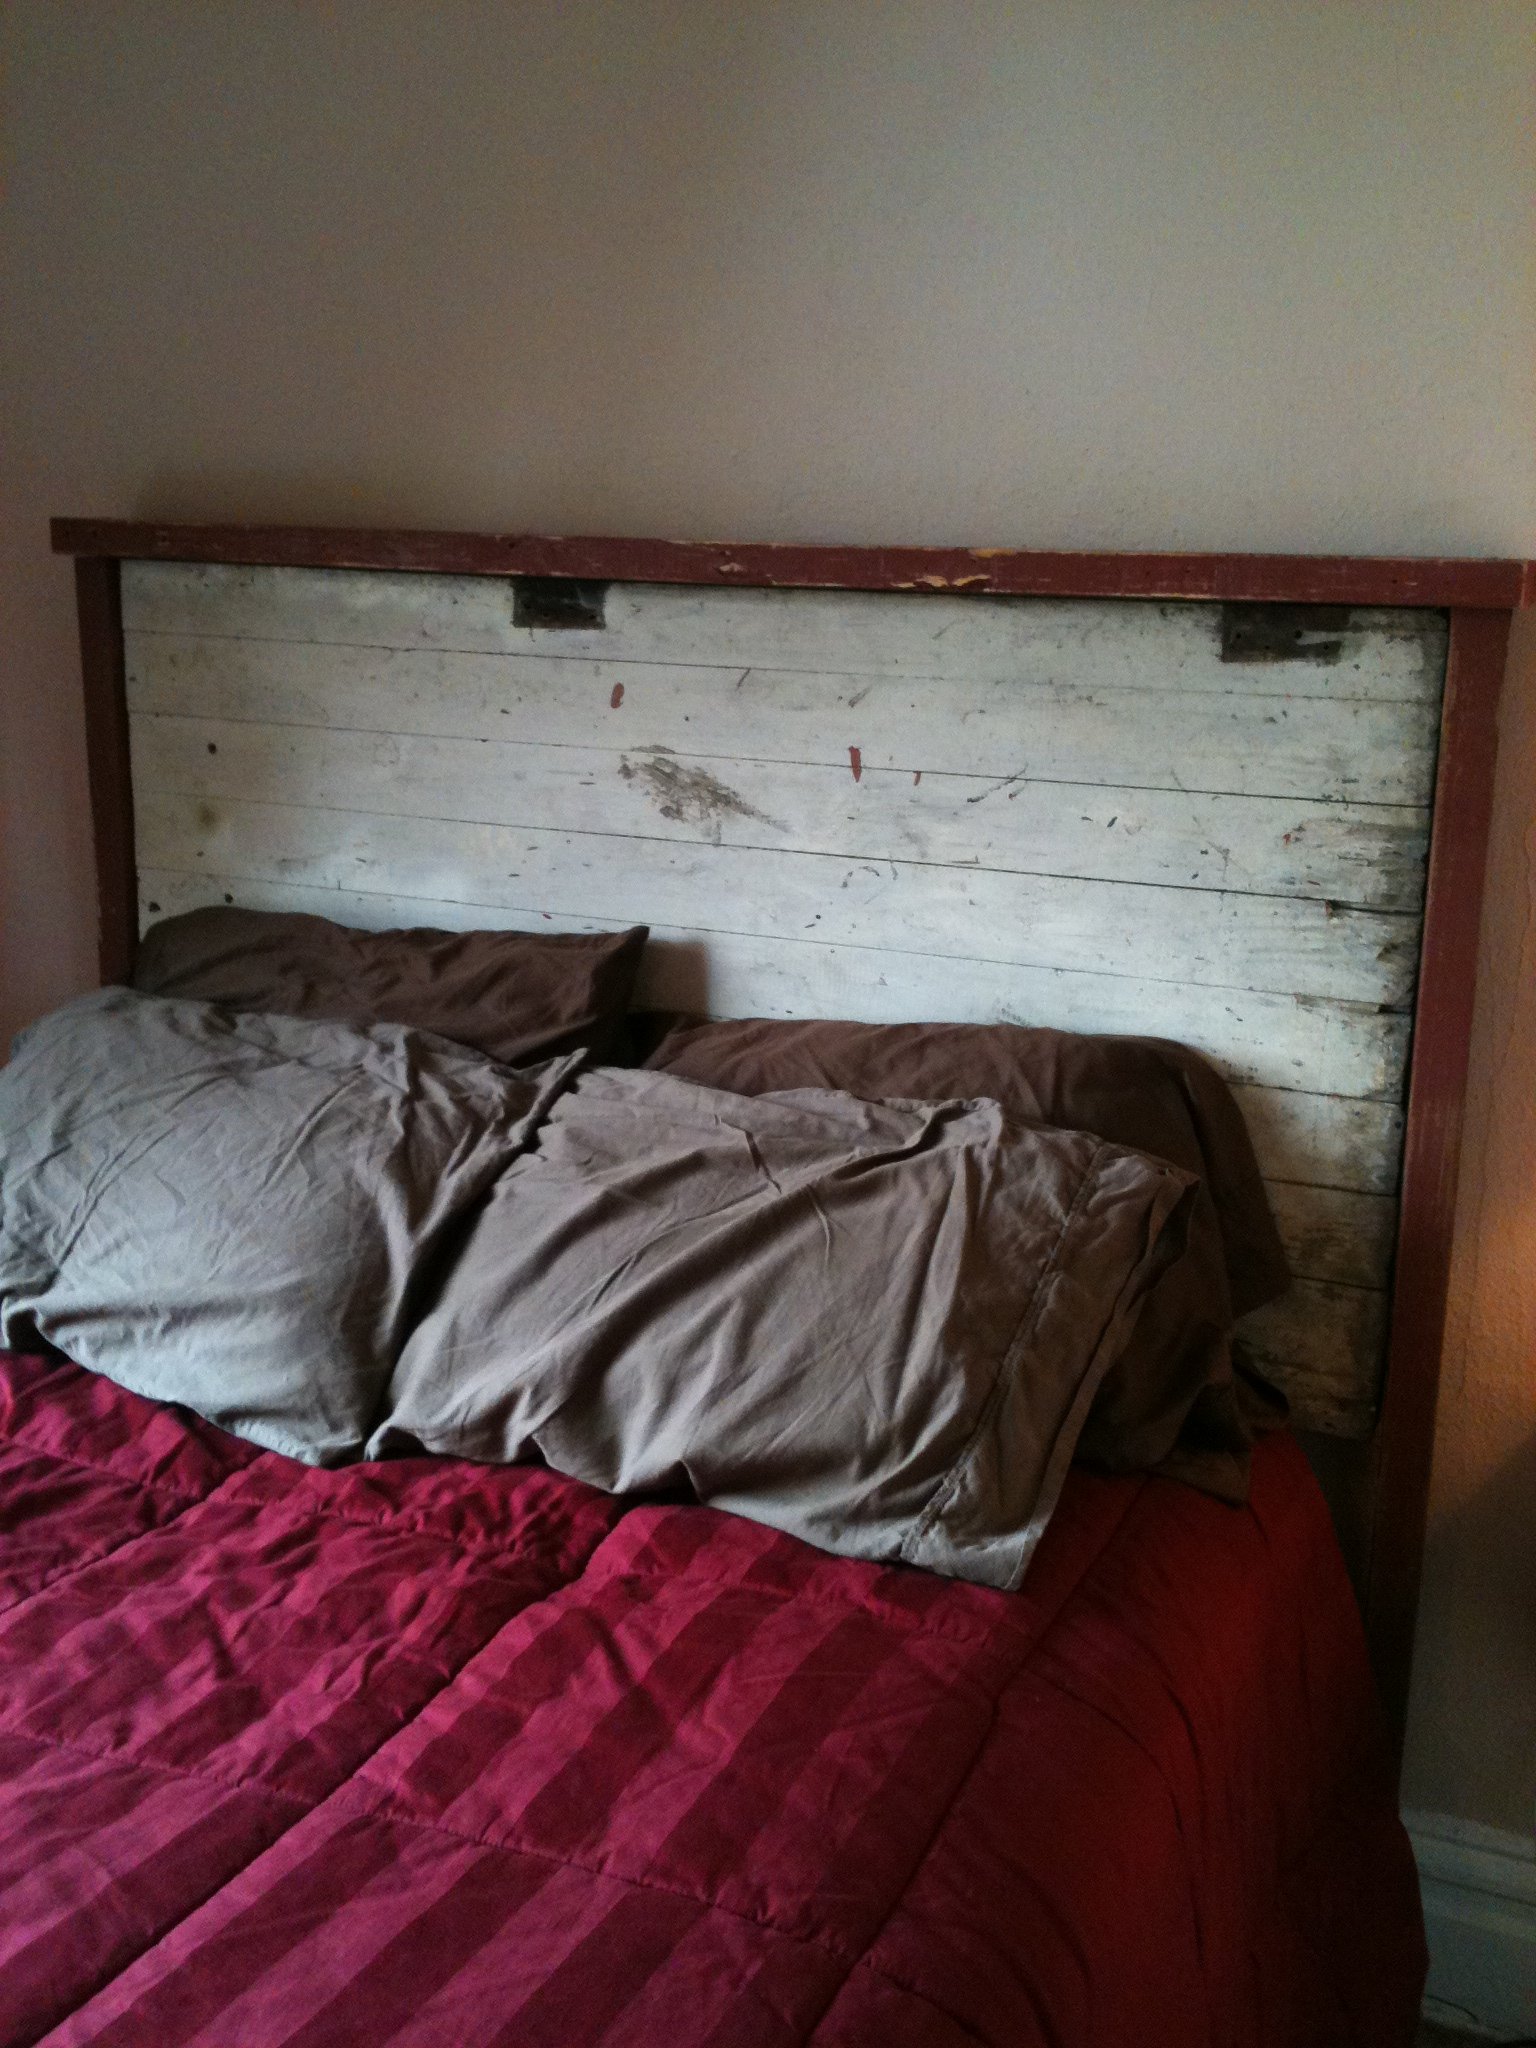
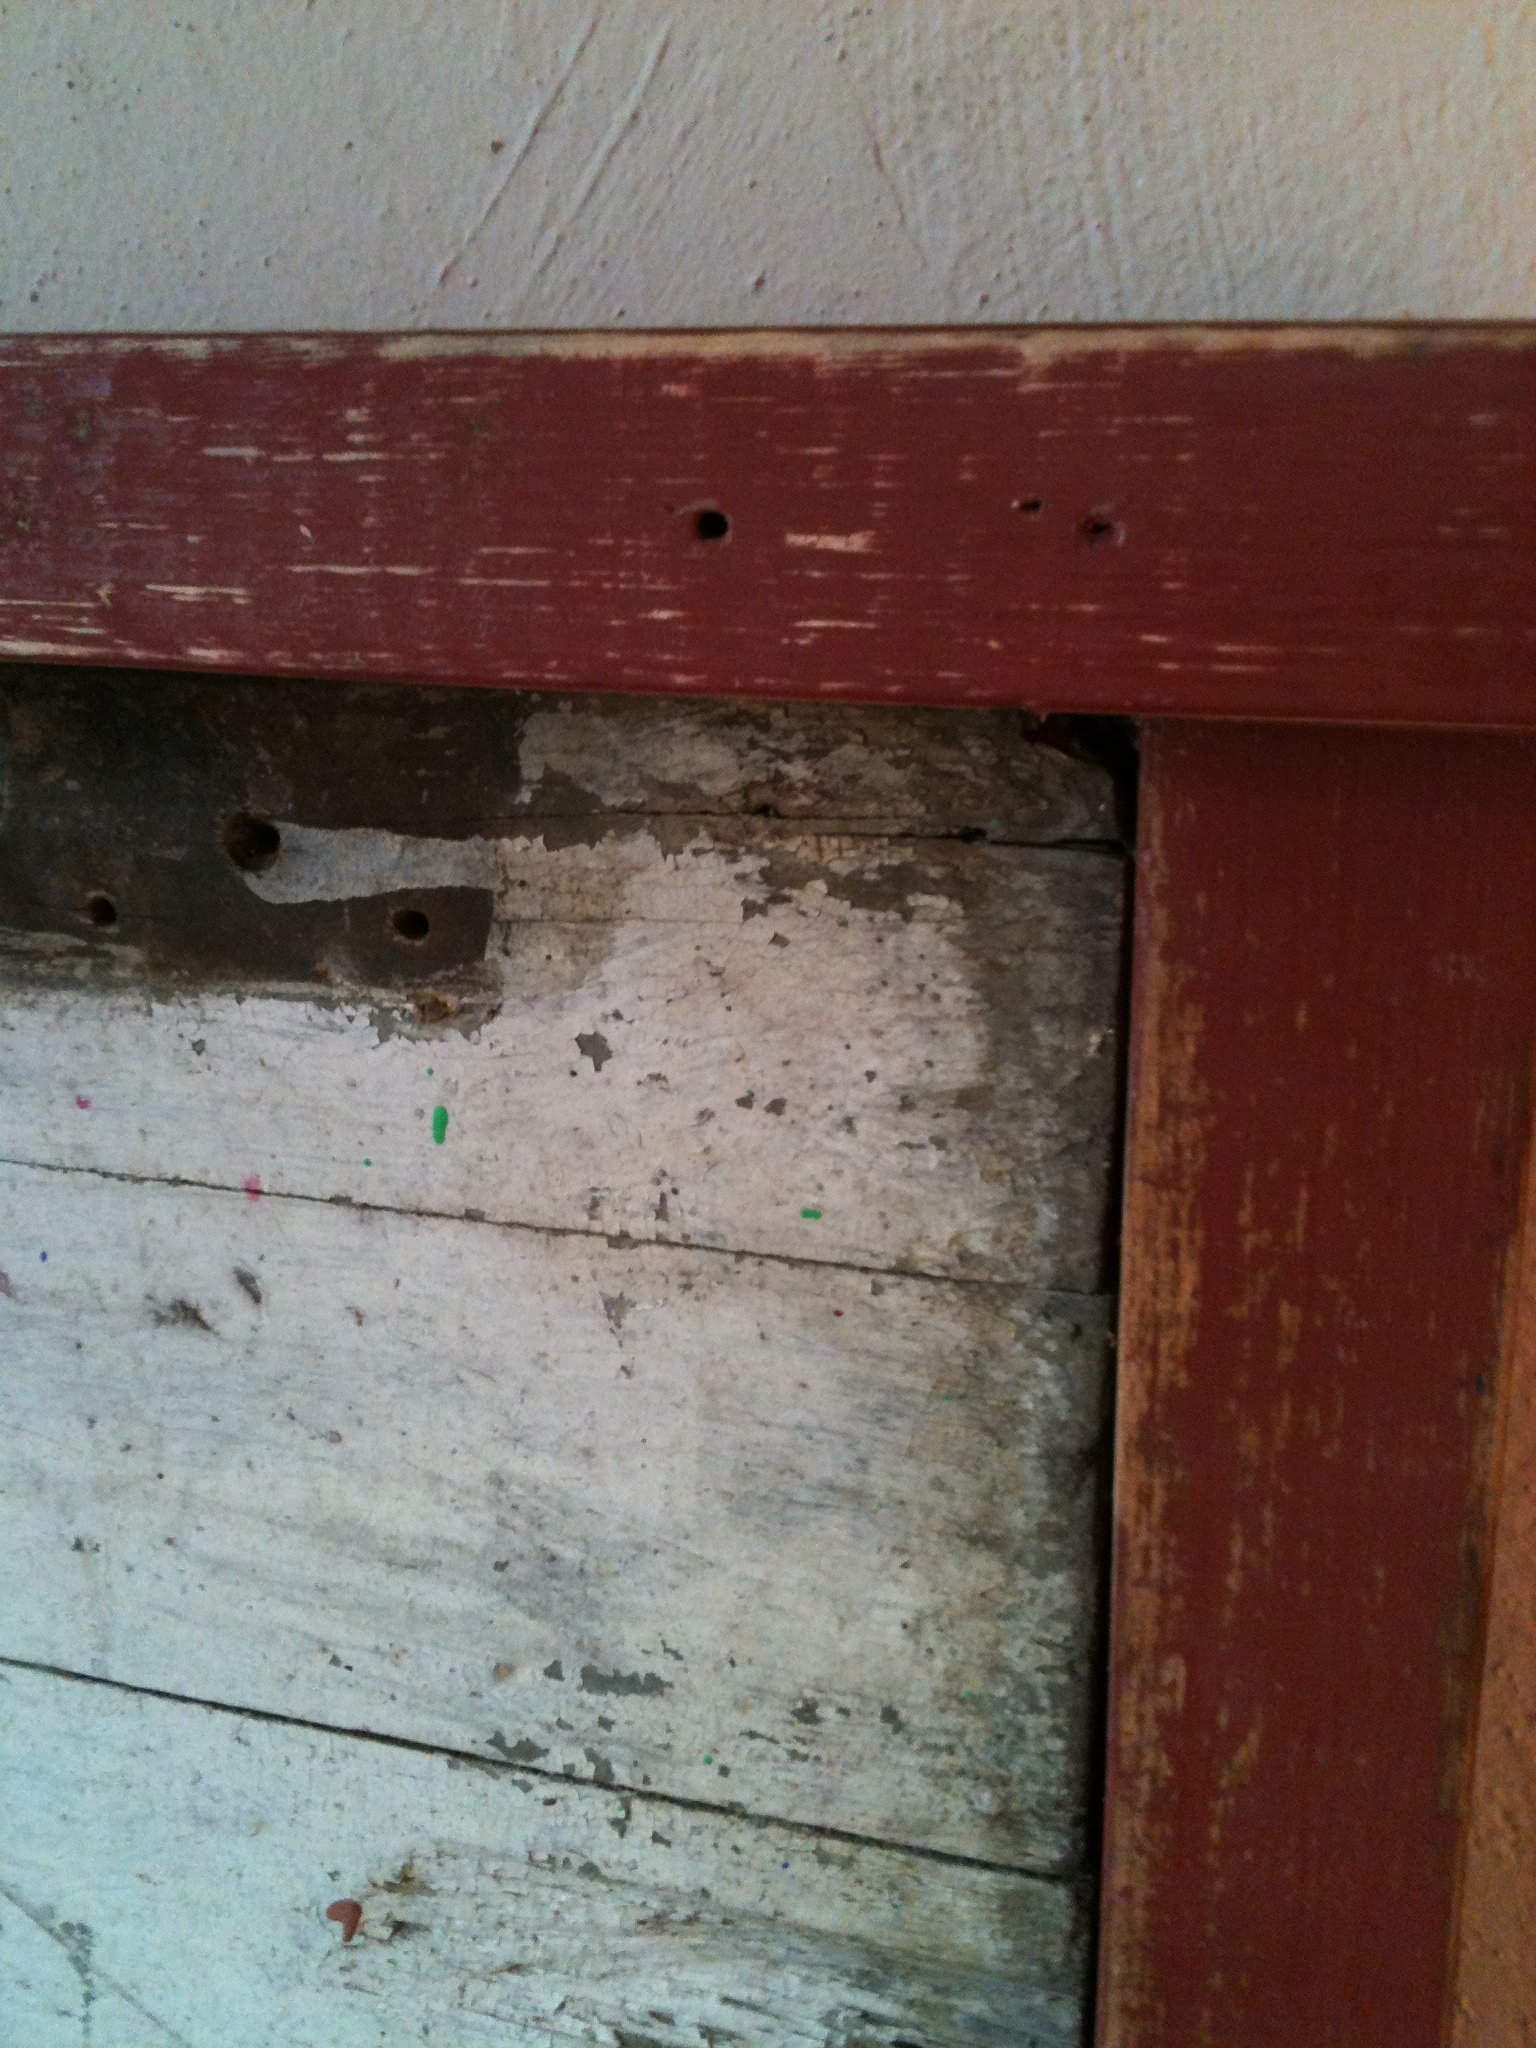
OK, first off this is not in any way, shape or form the Ana White plan for the Reclaimed Wood Headboard. However, I had to include a plan link and it IS a headboard made with reclaimed wood. So yea, air quotes. Second, I apologize for the poor quality photos of my recent brag posts. The digital camera is gone so these are iPhone specials. On with it now. This is my quick and dirty way of making a headboard, and kind of cheating. All you're looking at in these photos is some 2X3s and 2X4s around an old door to the root cellar in my basement. That's right, for once my main source of building material was not a pallet. As I took the door off the old rusty hinges and cleaned off the dust and cobwebs it occurred to me that this was probably original to the house from 1920. With that kind of history in mind the only thing I could do was take a saw to it and hack off 18 inches, oops. The 2X3 posts on the side were actually supports for a shelf that was made from a door(more on that to come). That shelf was actually found in the root cellar the door was for, this house has been pretty beneficial to me so far. The 2X4 top is from a pallet and aside from a 2X6 at the bottom to attach it to the bed, that's it. After that it was simply a matter of some oops paint on the trim(that would be the red) and a bit of sanding once it dried. The white is simply the condition the door was in.

Mon, 10/31/2011 - 11:21
And I'm really diggin' how the headboard turned out. Nice!
Mon, 10/31/2011 - 12:29
That is one cool headboard (air quotes!) and a very unique piece. Sweet!

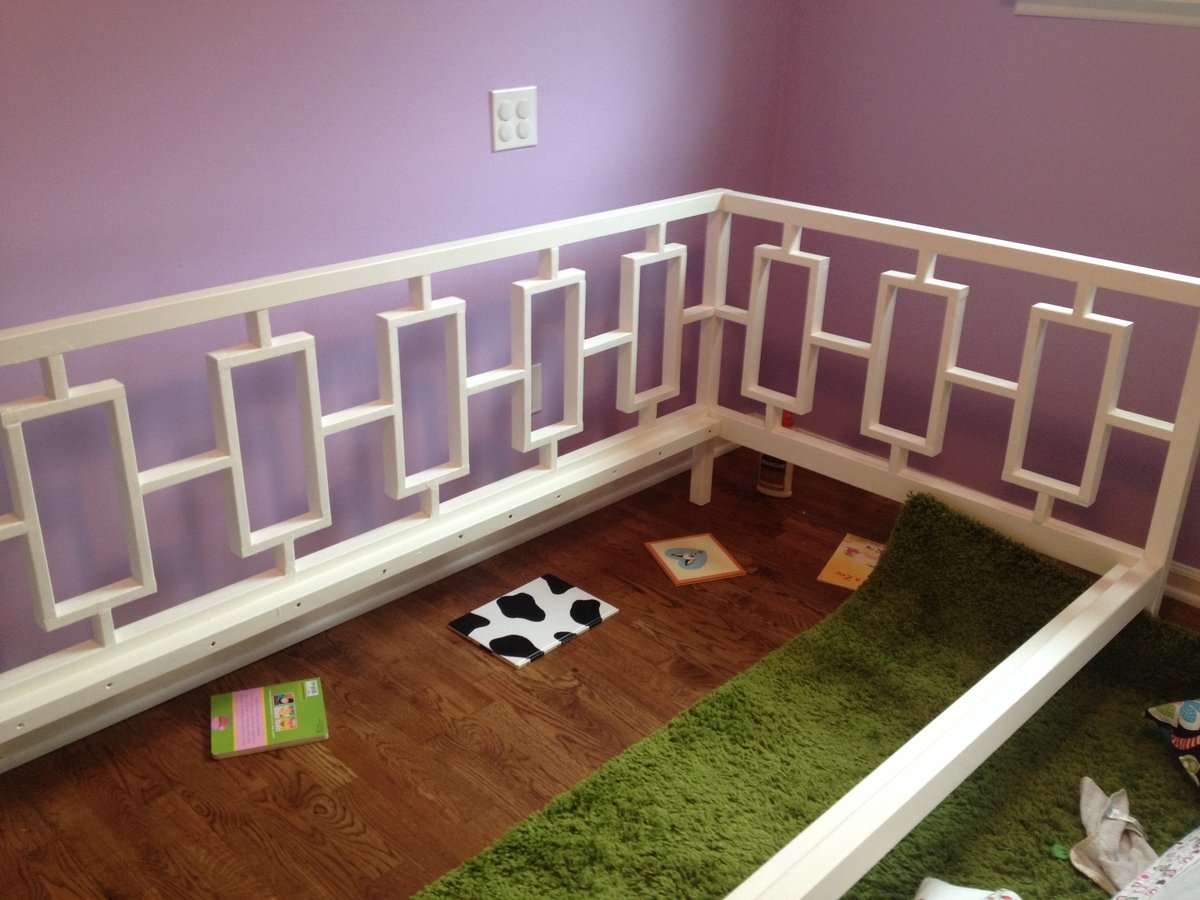
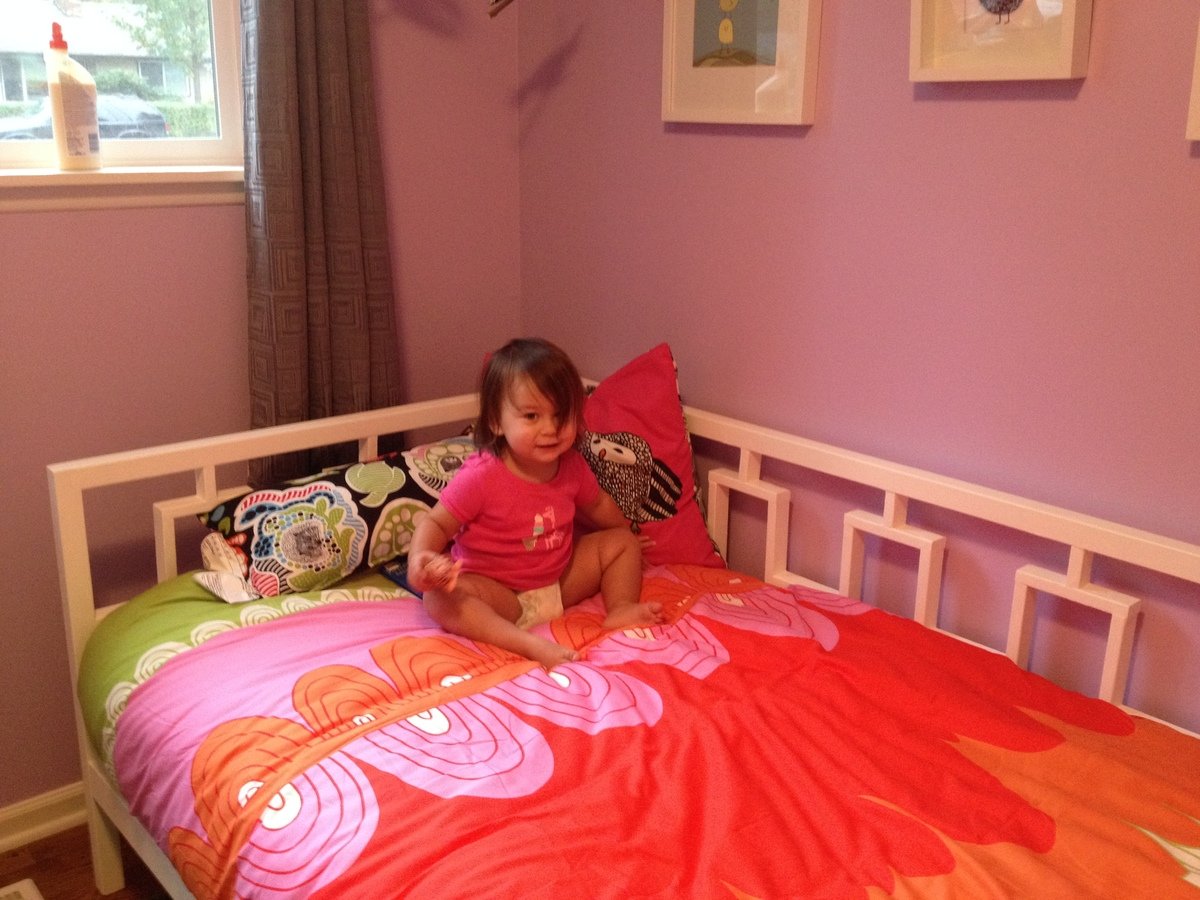
This was my first ever experience working with wood, circular saw, and a drill (other than hanging pictures in my house). After catching my toddler trying to climb out of her crib on three separate occasion, I started looking around for daybeds. I found one I loved, but it was no longer for sale. Luckily, this plan is the exact replica of the daybed on West Elm! It was a fun (and educational) first experience, and I think I'm hooked! It took me several weekends to put this together and paint it. The paint alone took nearly seven hours with three coats of paint to get the right color of white. I didn't add the extra support as mentioned at the bottom, but this coming weekend I'm going to add it for additional support. My toddler LOVES it!
Tue, 10/22/2013 - 19:07
What a perfect daybed for a little girl! I'm a big girl and I still love it! Cute.
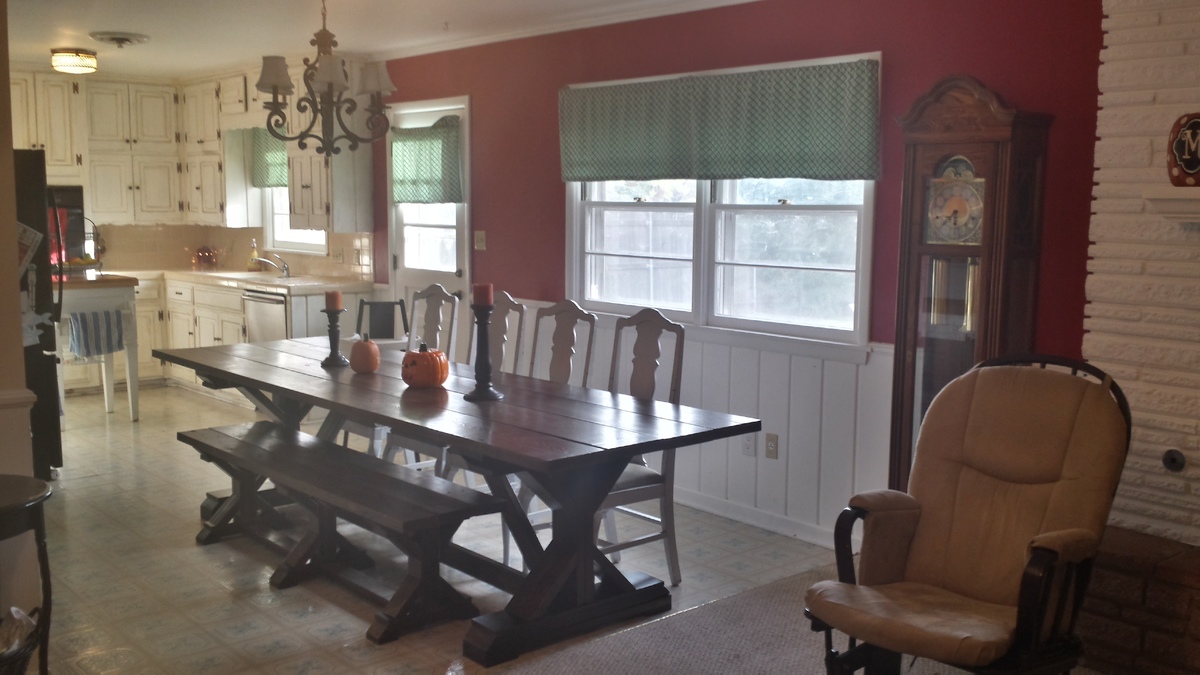
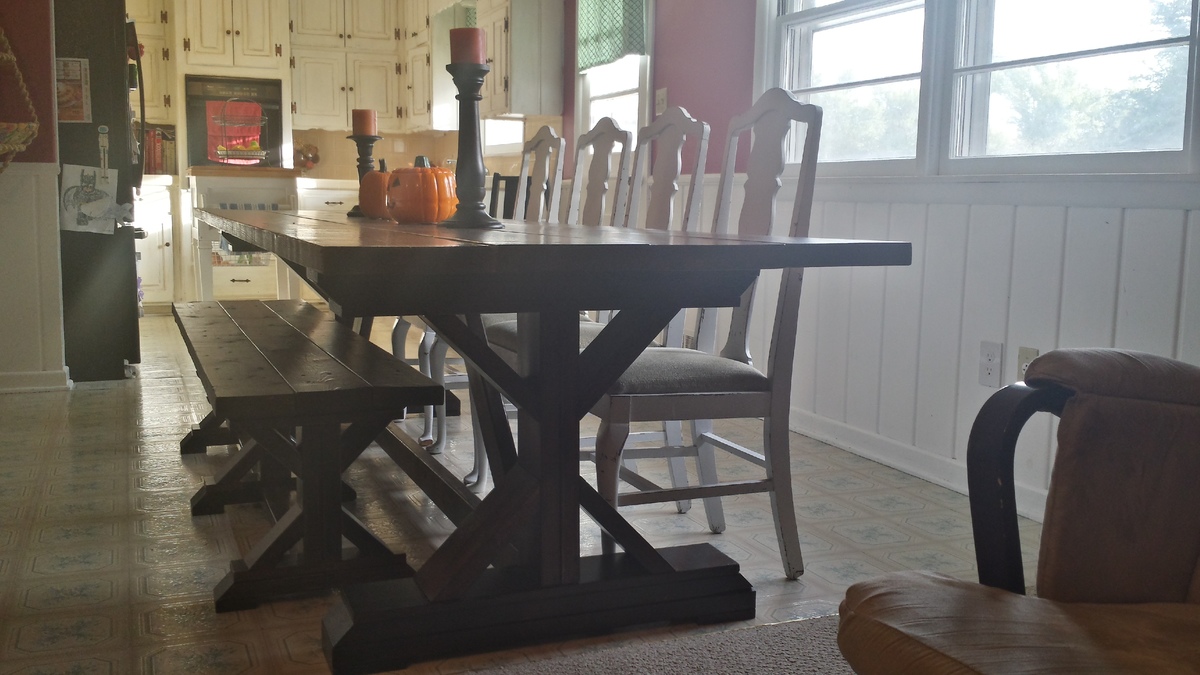
I saw this table on Pinterest and knew that I needed to have one in my life. I then bought a saw for my husband, for his birthday, and you can guess what happened. We followed the directions, except we made the table and bench a little longer in order to accomodate more people (I wanted at least 12 people to be able to sit at the same table). This was our first wood-working project and we learned a LOT. It took more time than we anticipated but it was well worth it.
My first build! Yay! Easy for a newbie!
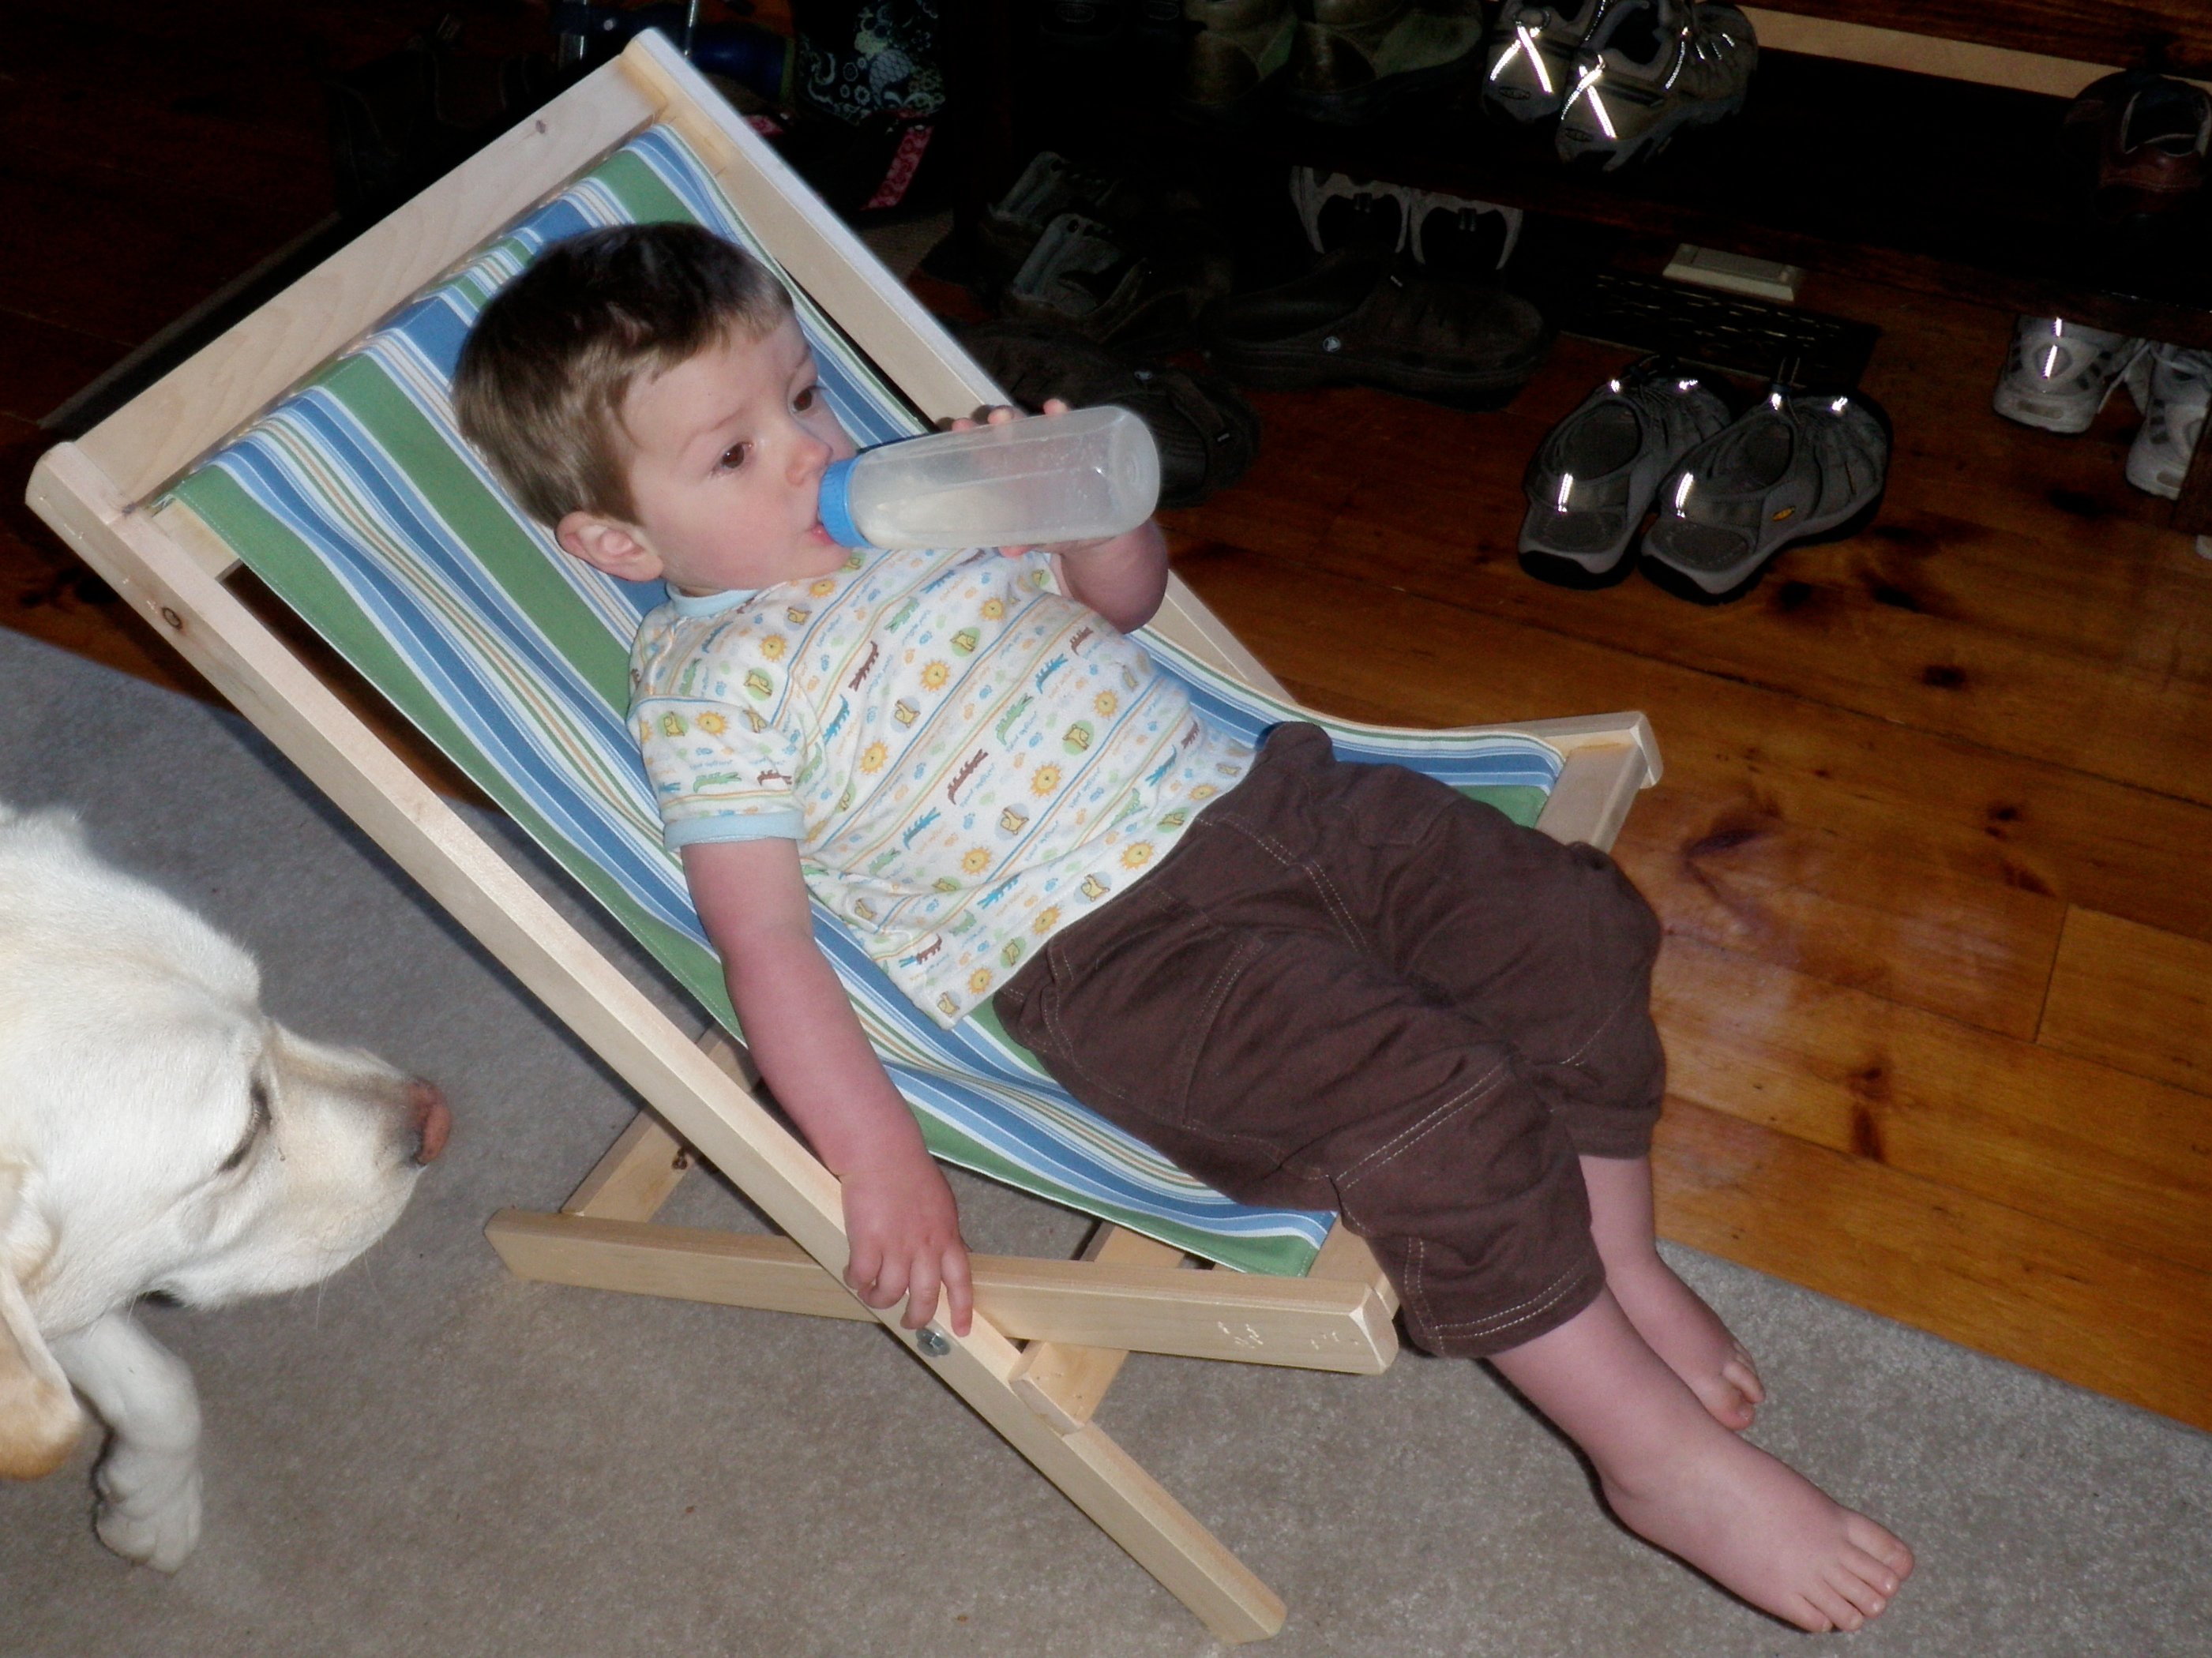
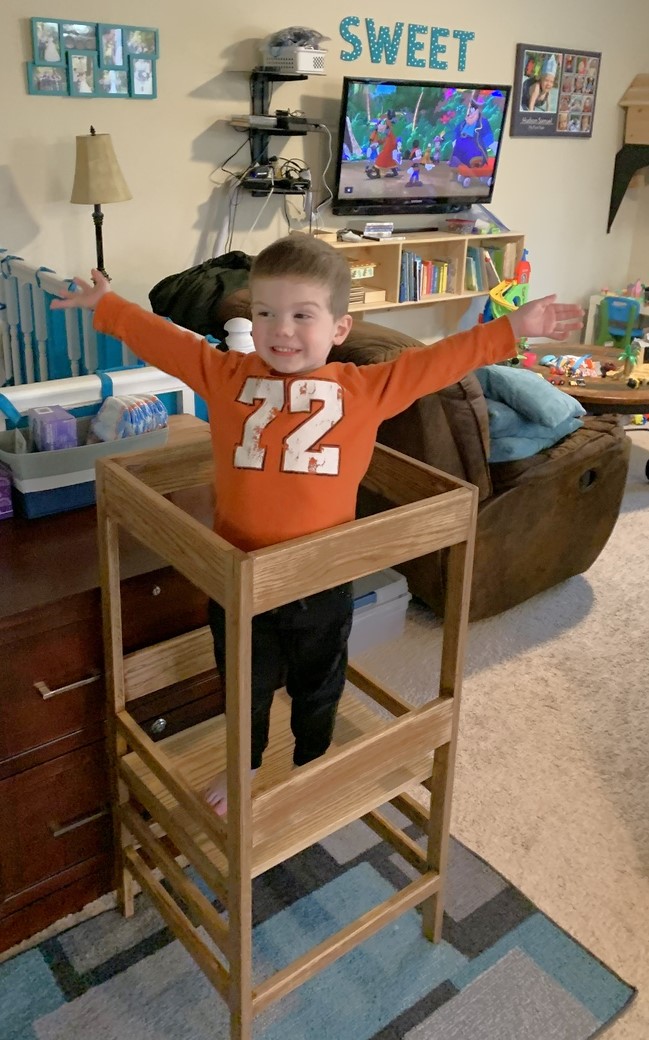
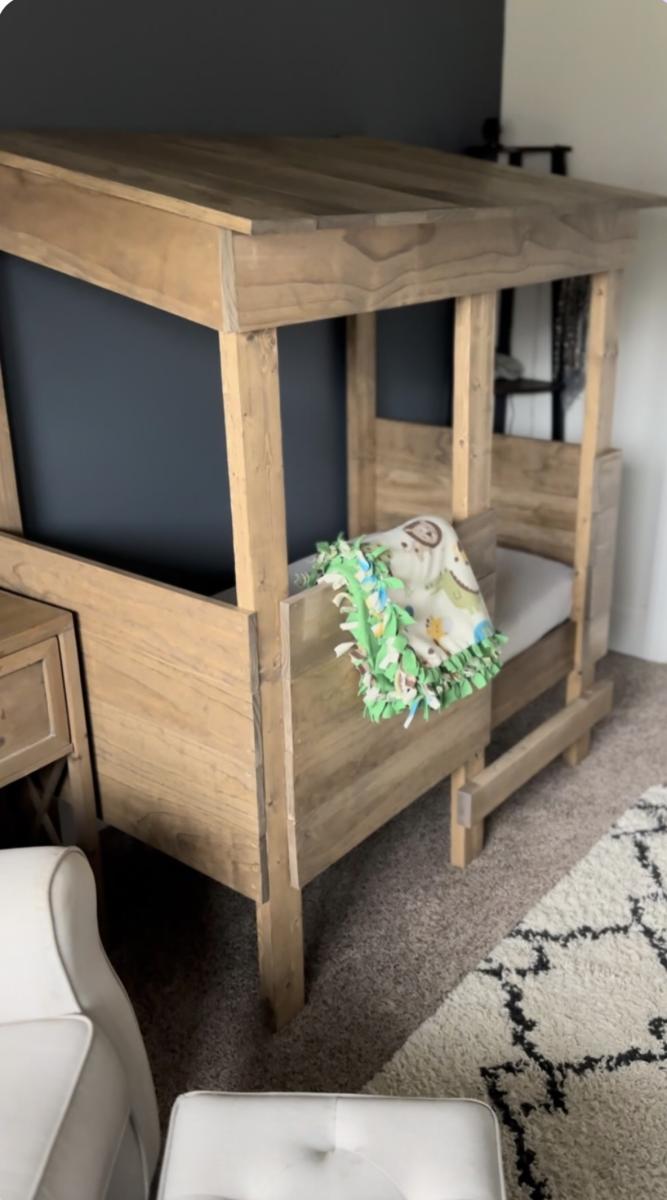
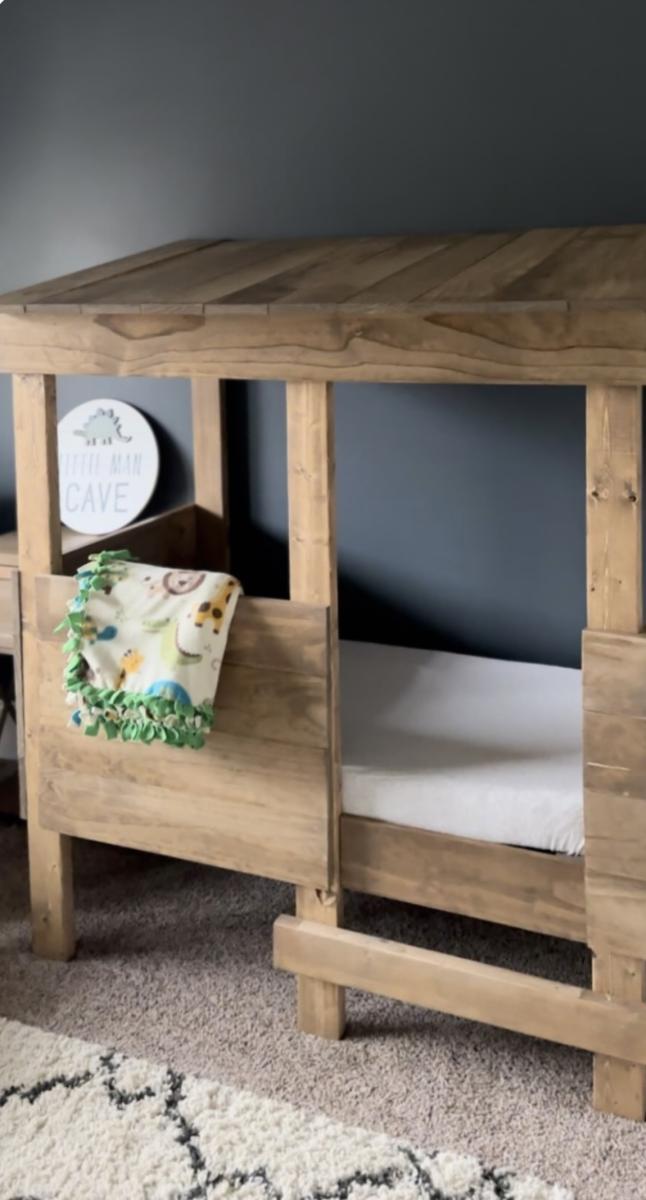
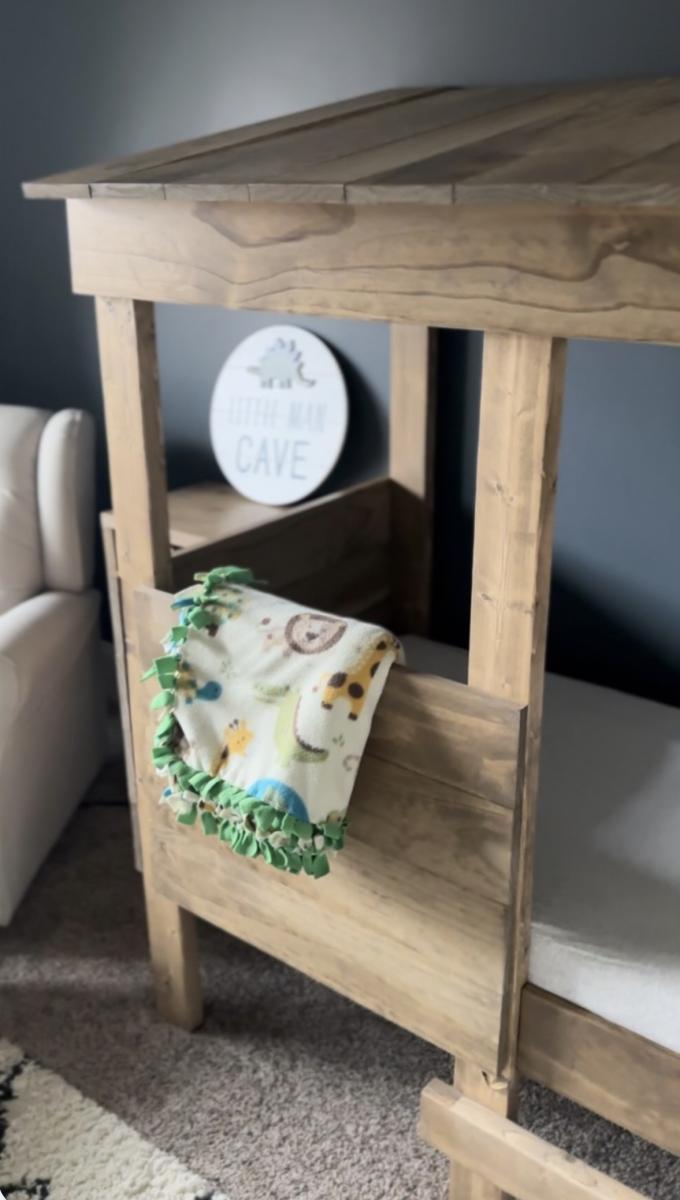
Built this for my 2 yr old son. It's adorable!
The only trouble we have is that when he climbs in it wants to tip forward, a weight or stake into the ground on the back cross brace would probably solve it.
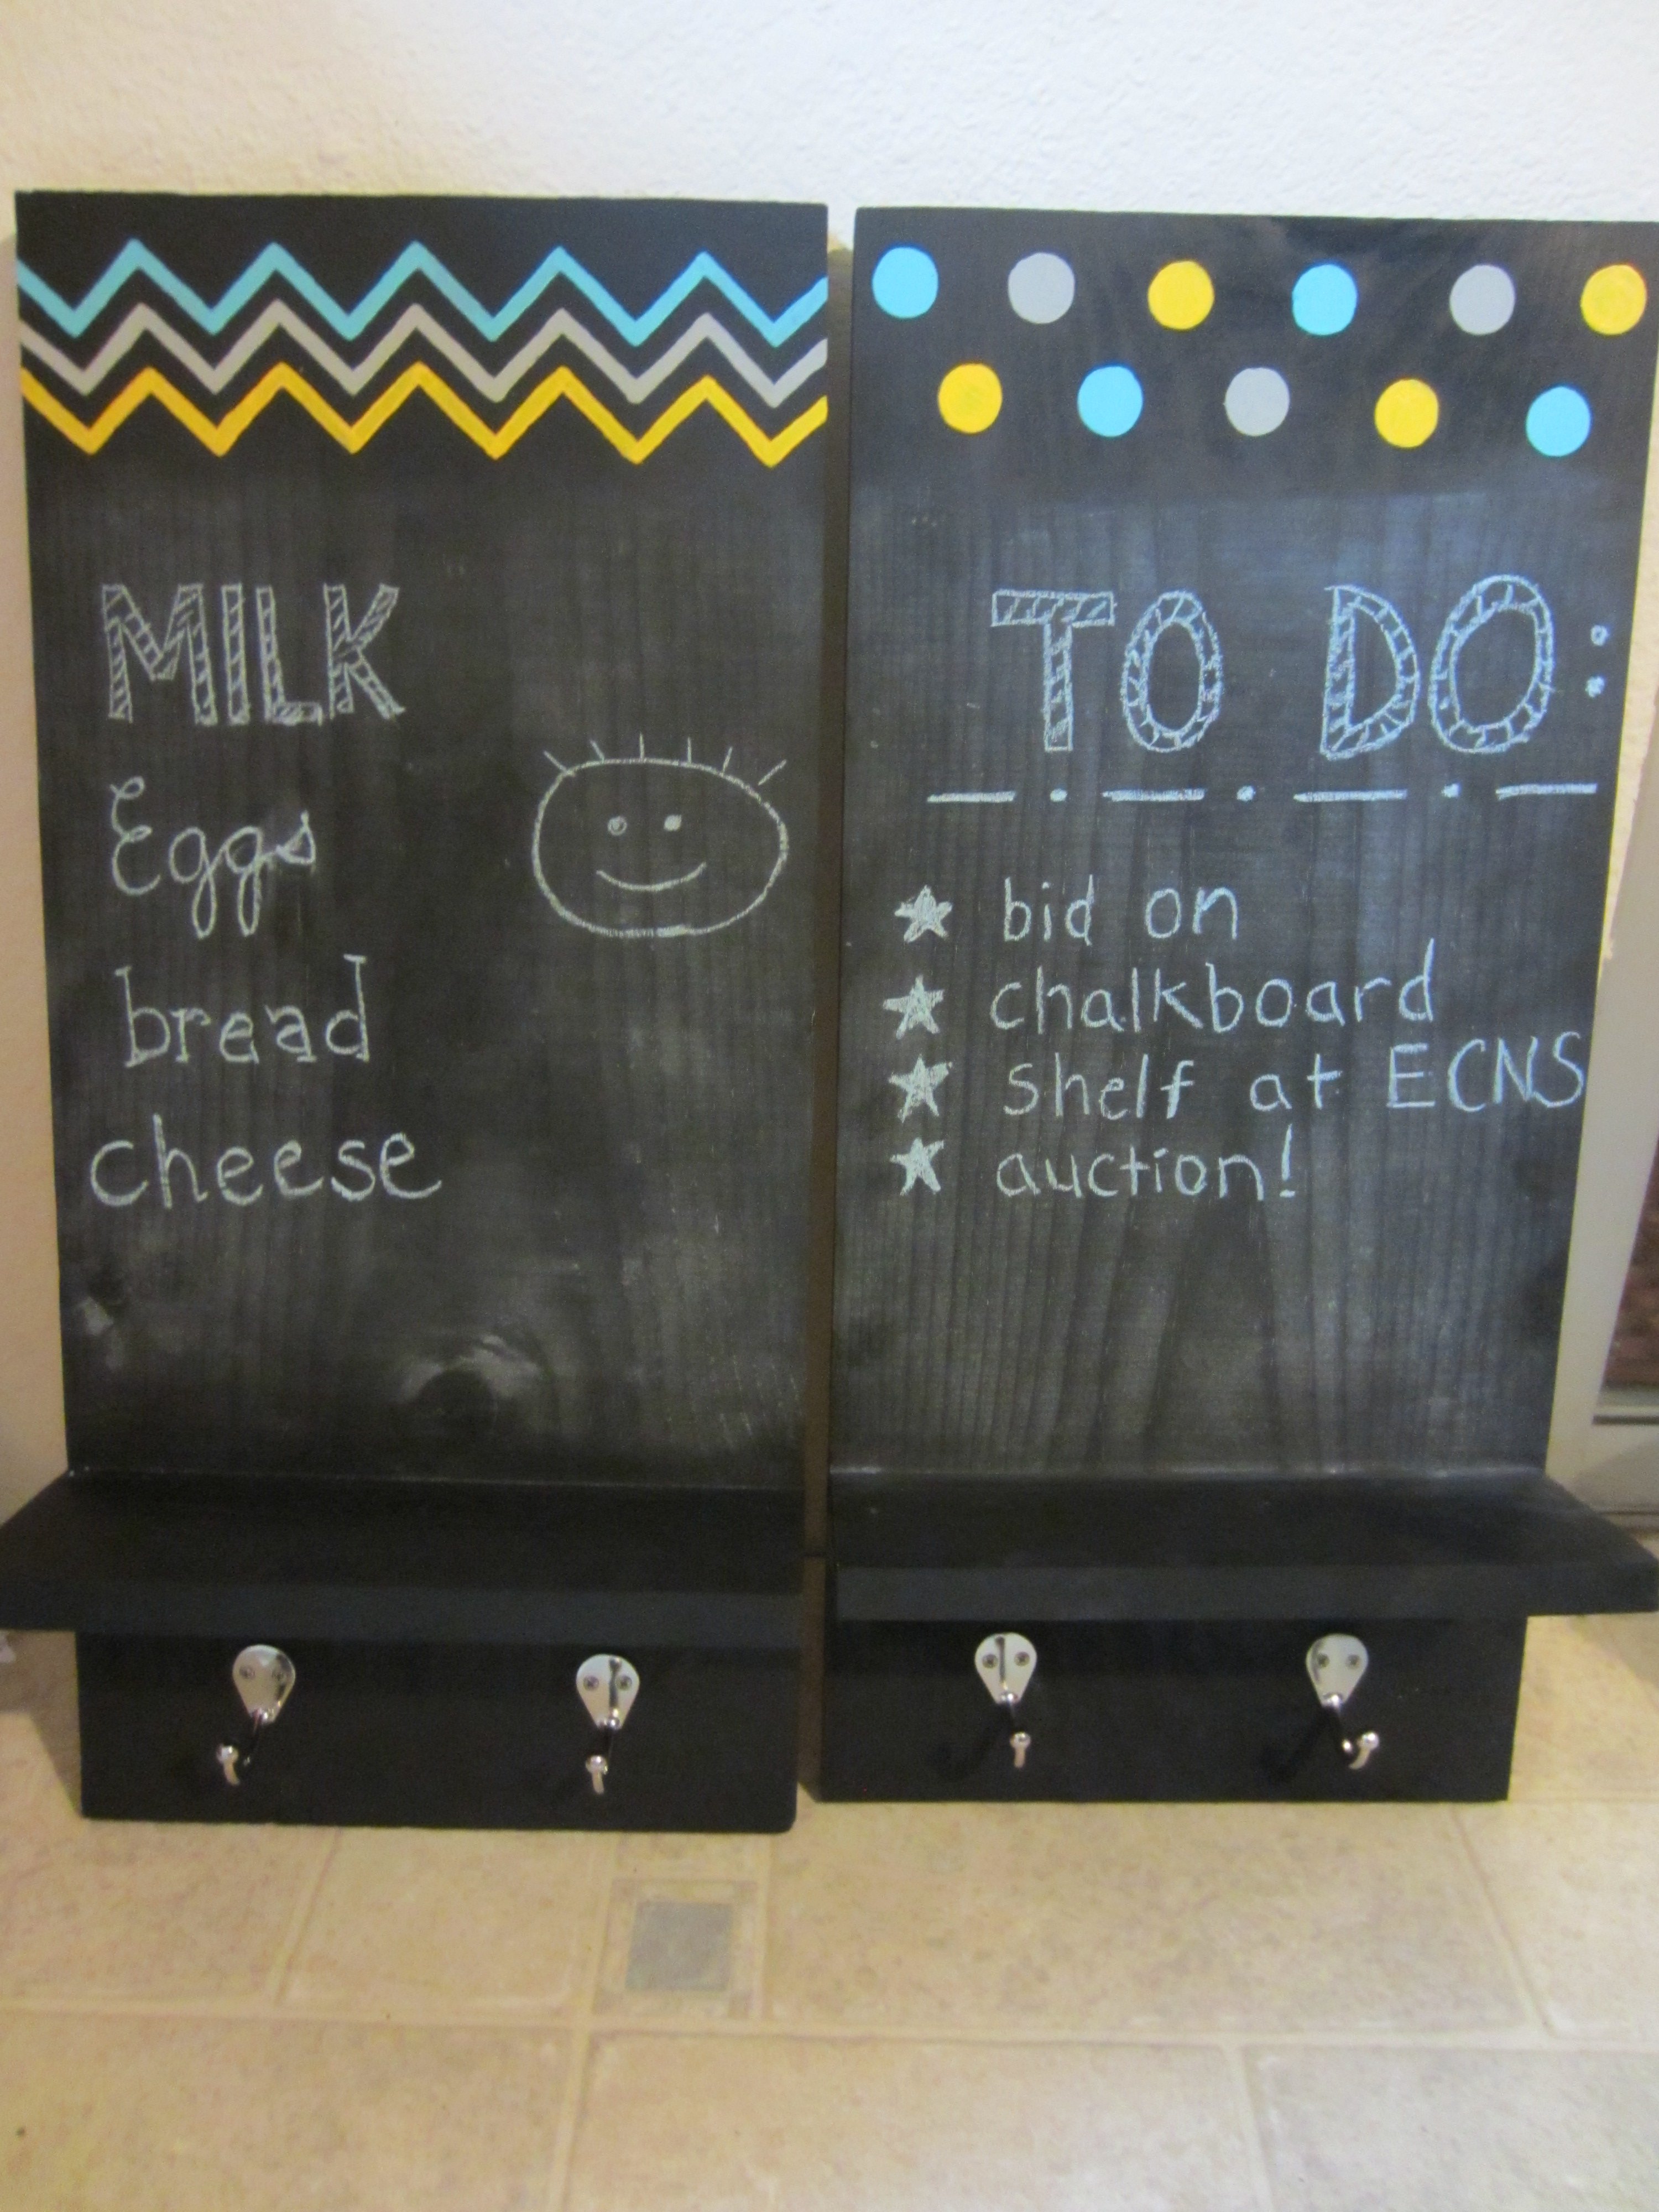
My husband and I built these chalkboard shelves today. We are very happy with the way they turned out! We are donating them to our son's cooperative preschool to be used in their upcoming auction, which is a big money maker for the school. Hopefully they make good money! We added some artistic touches to the tops of the shelves (polka dots and chevron stripes). A fun, easy build!

Comments
Emscan
Mon, 10/17/2011 - 20:16
Here it is.
Here it is.