Community Brag Posts
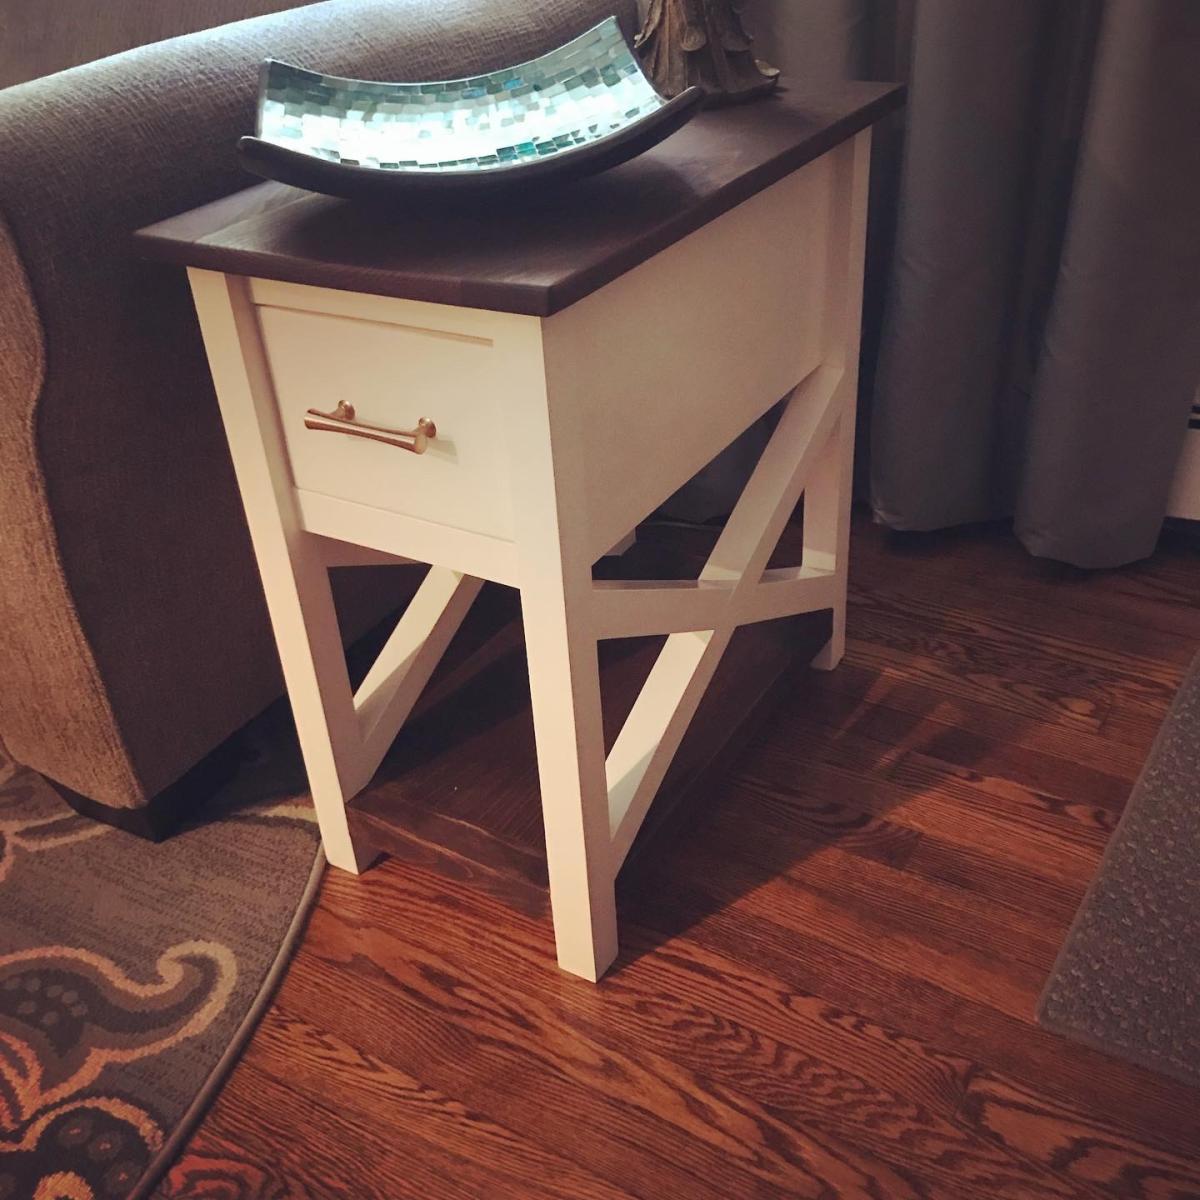
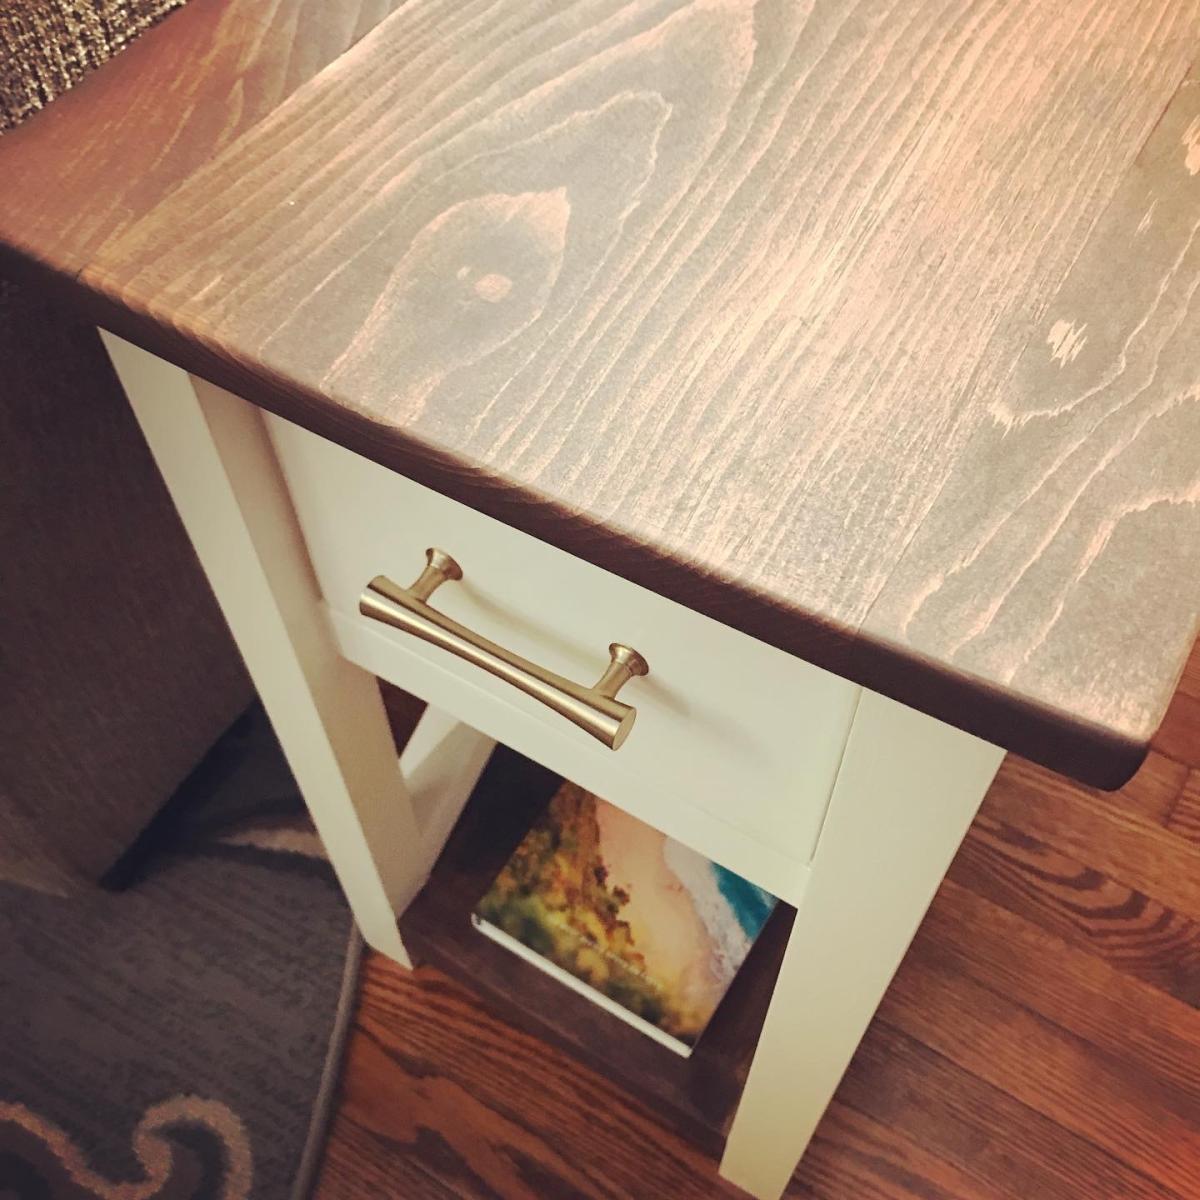
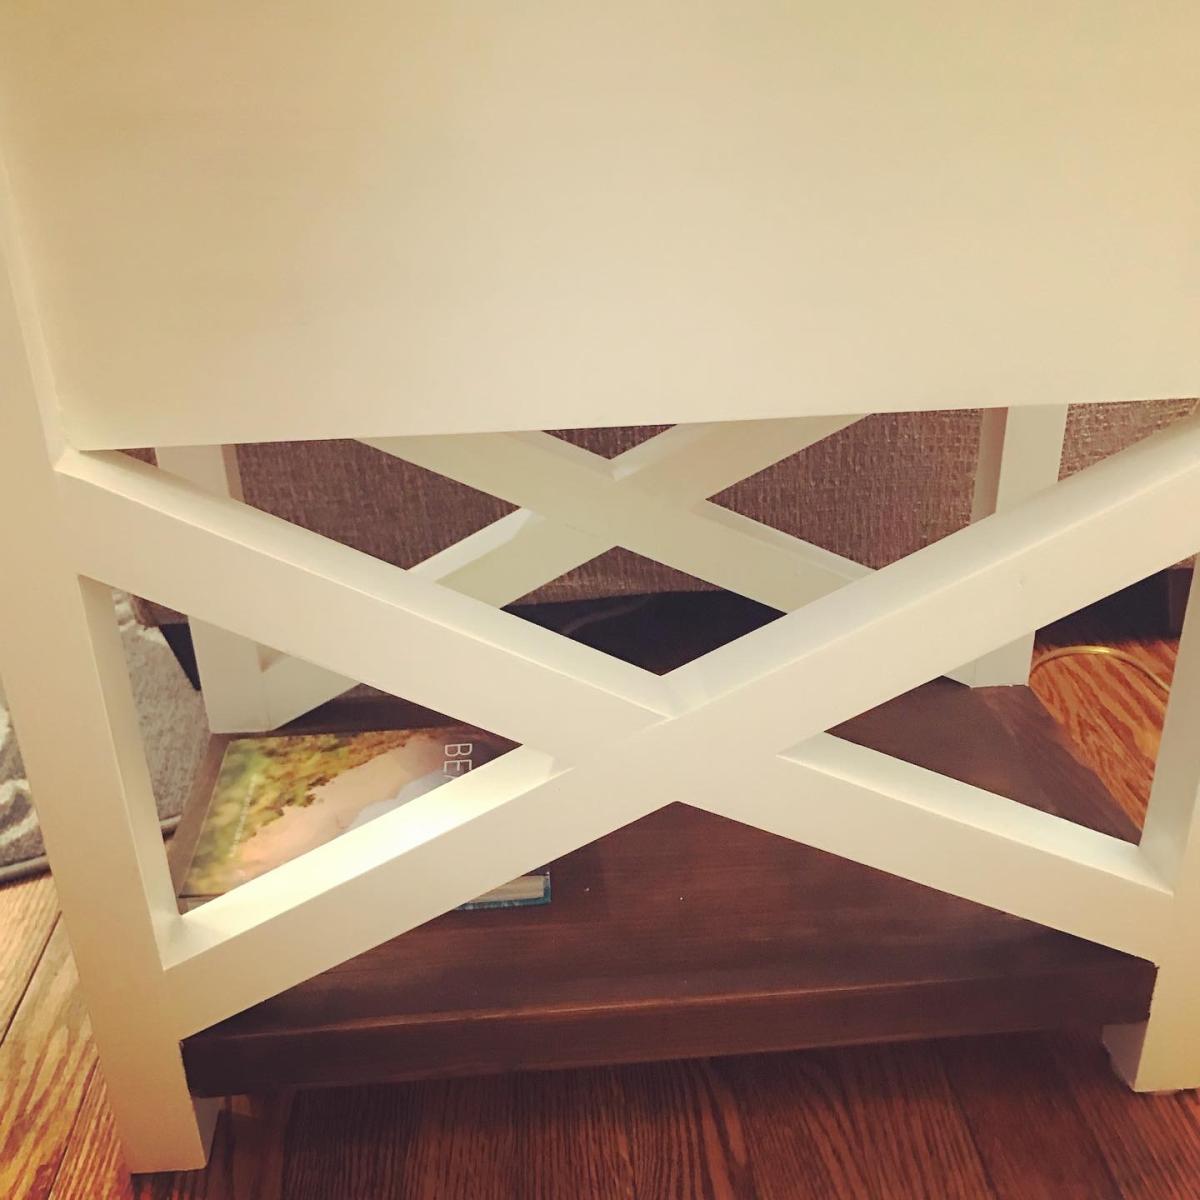
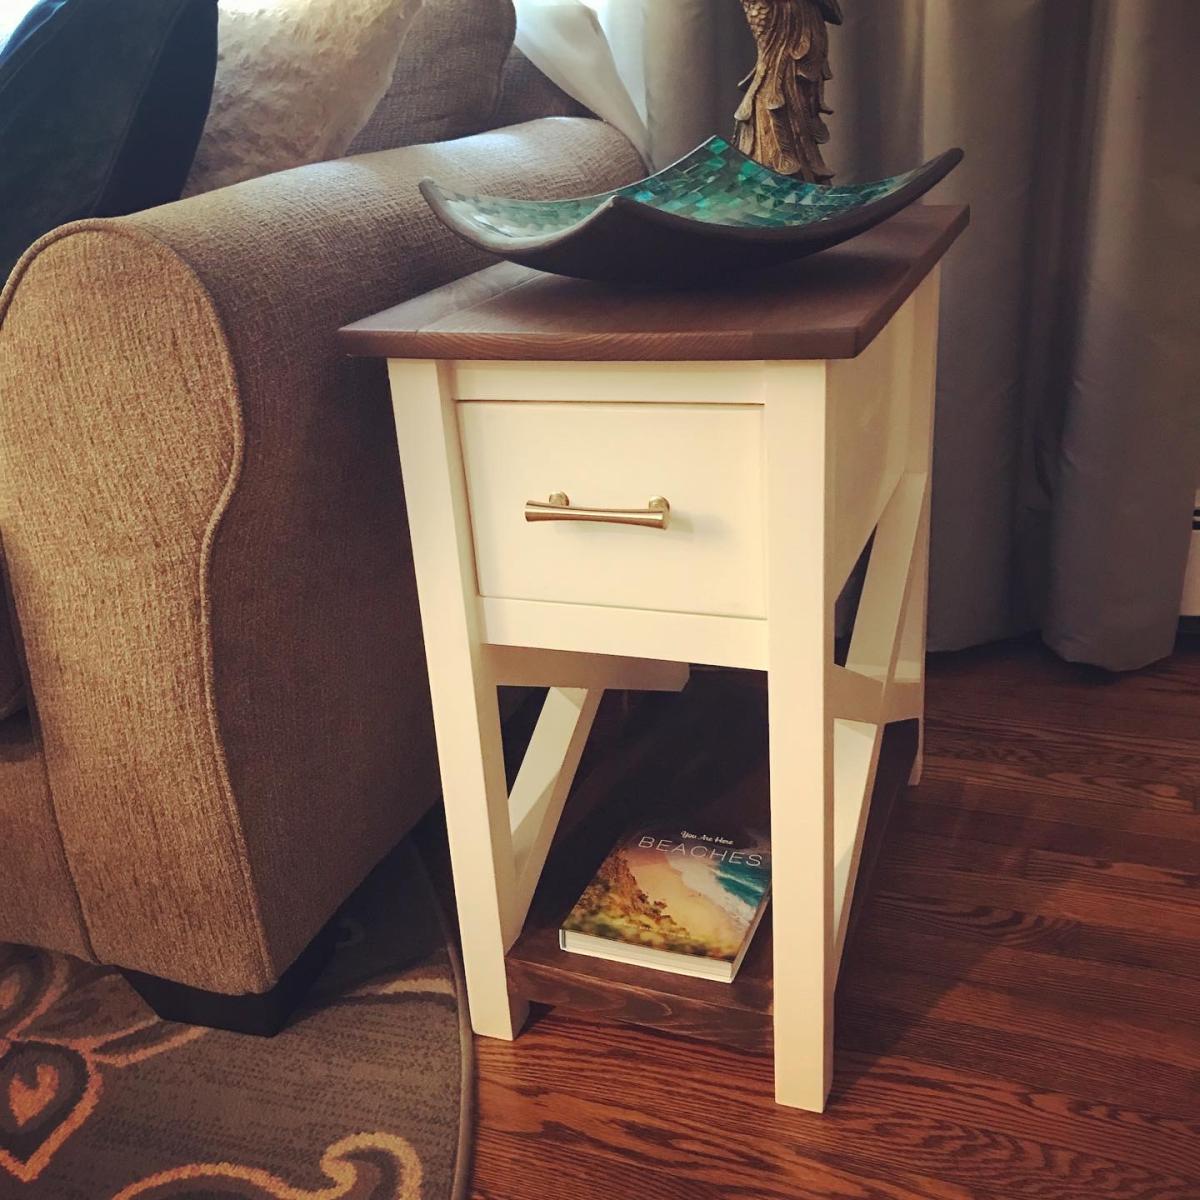
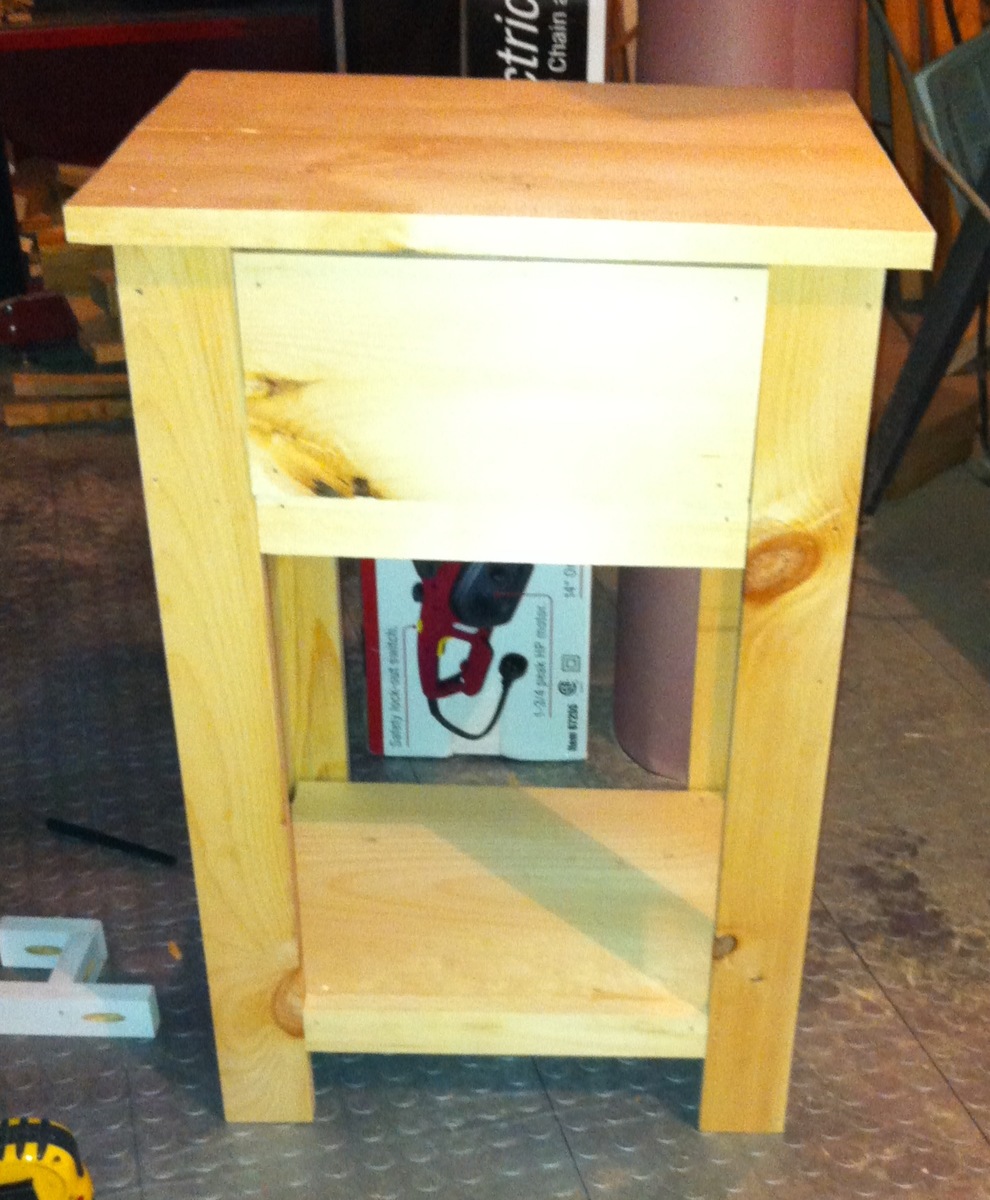
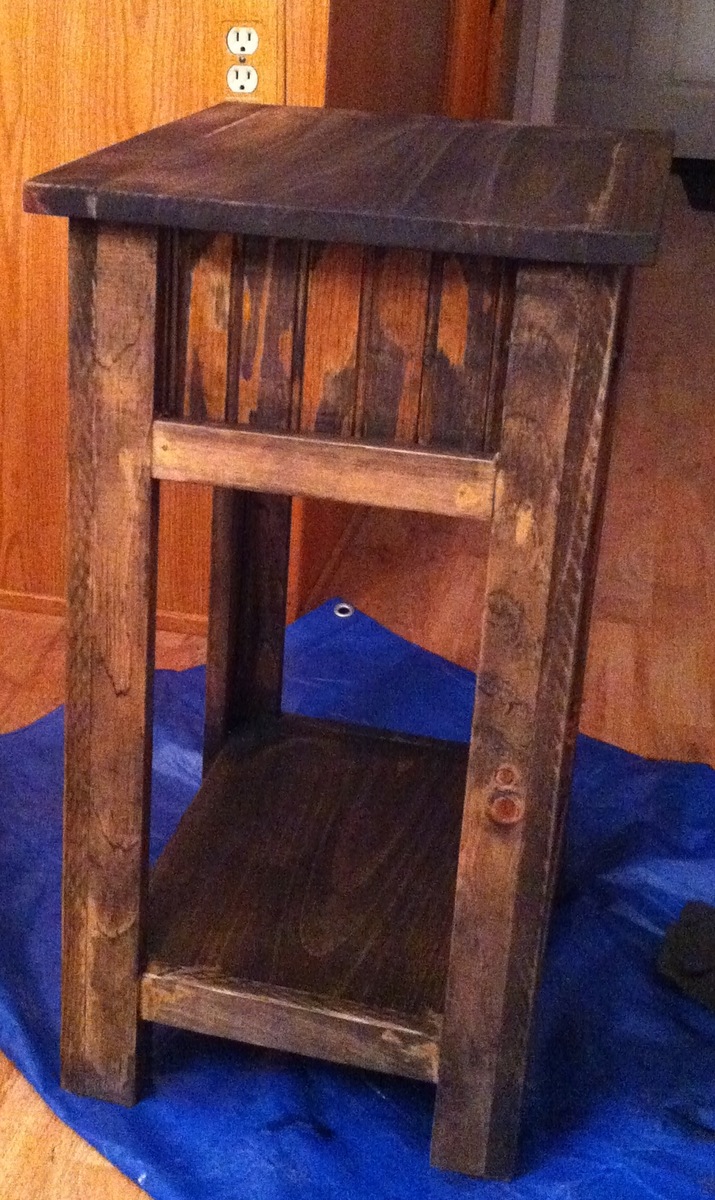
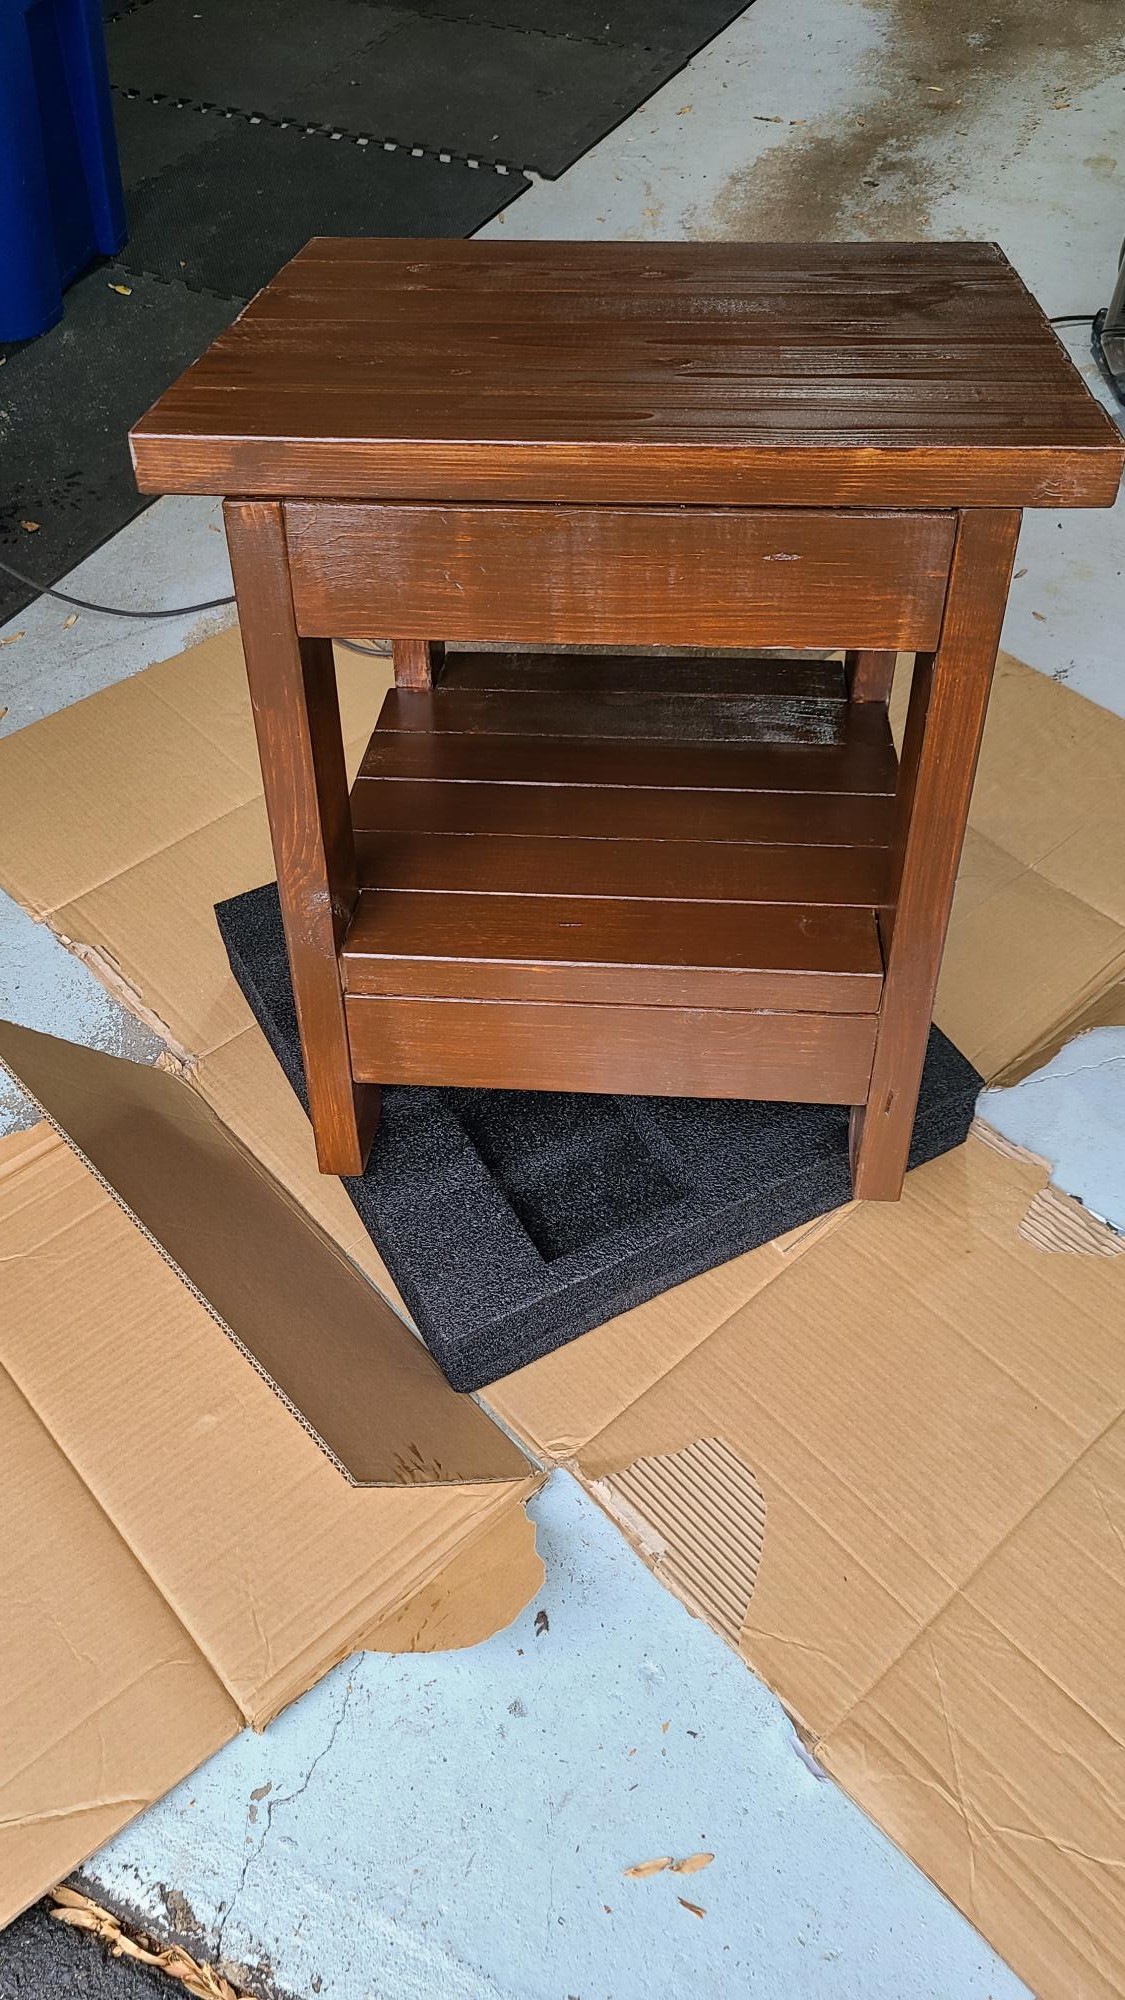
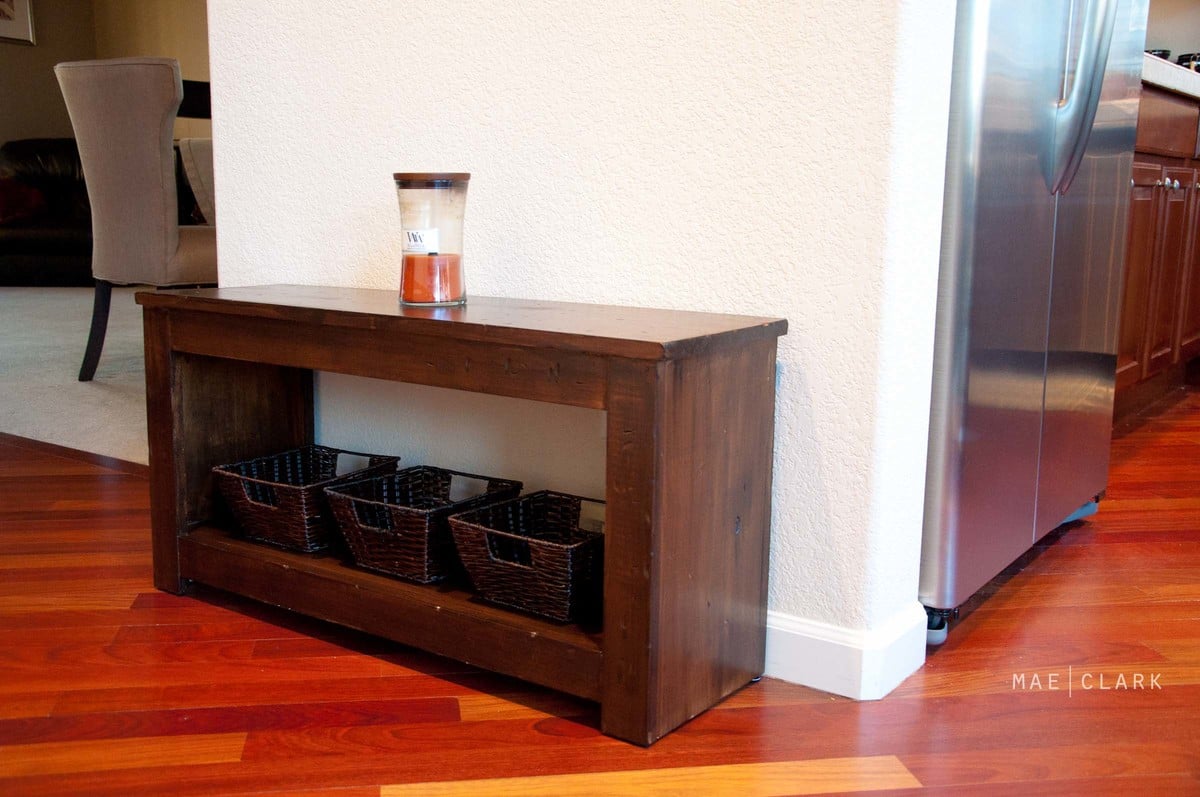
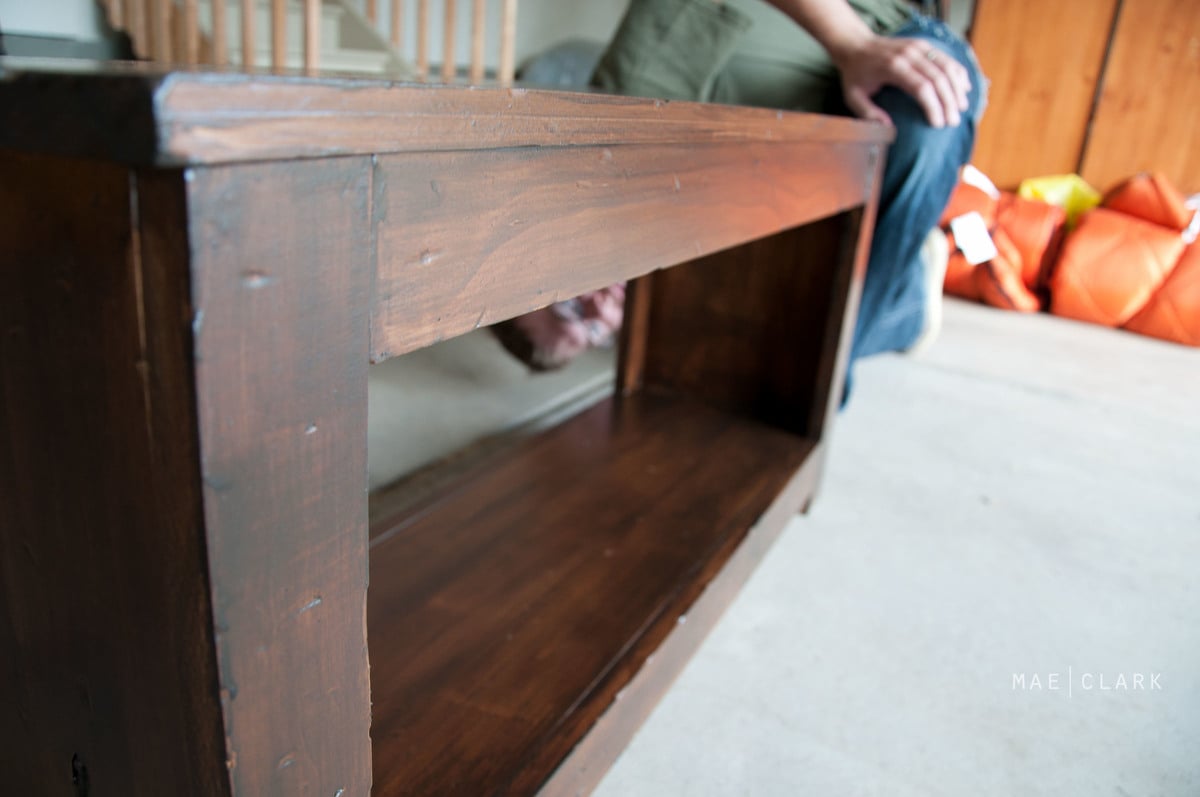
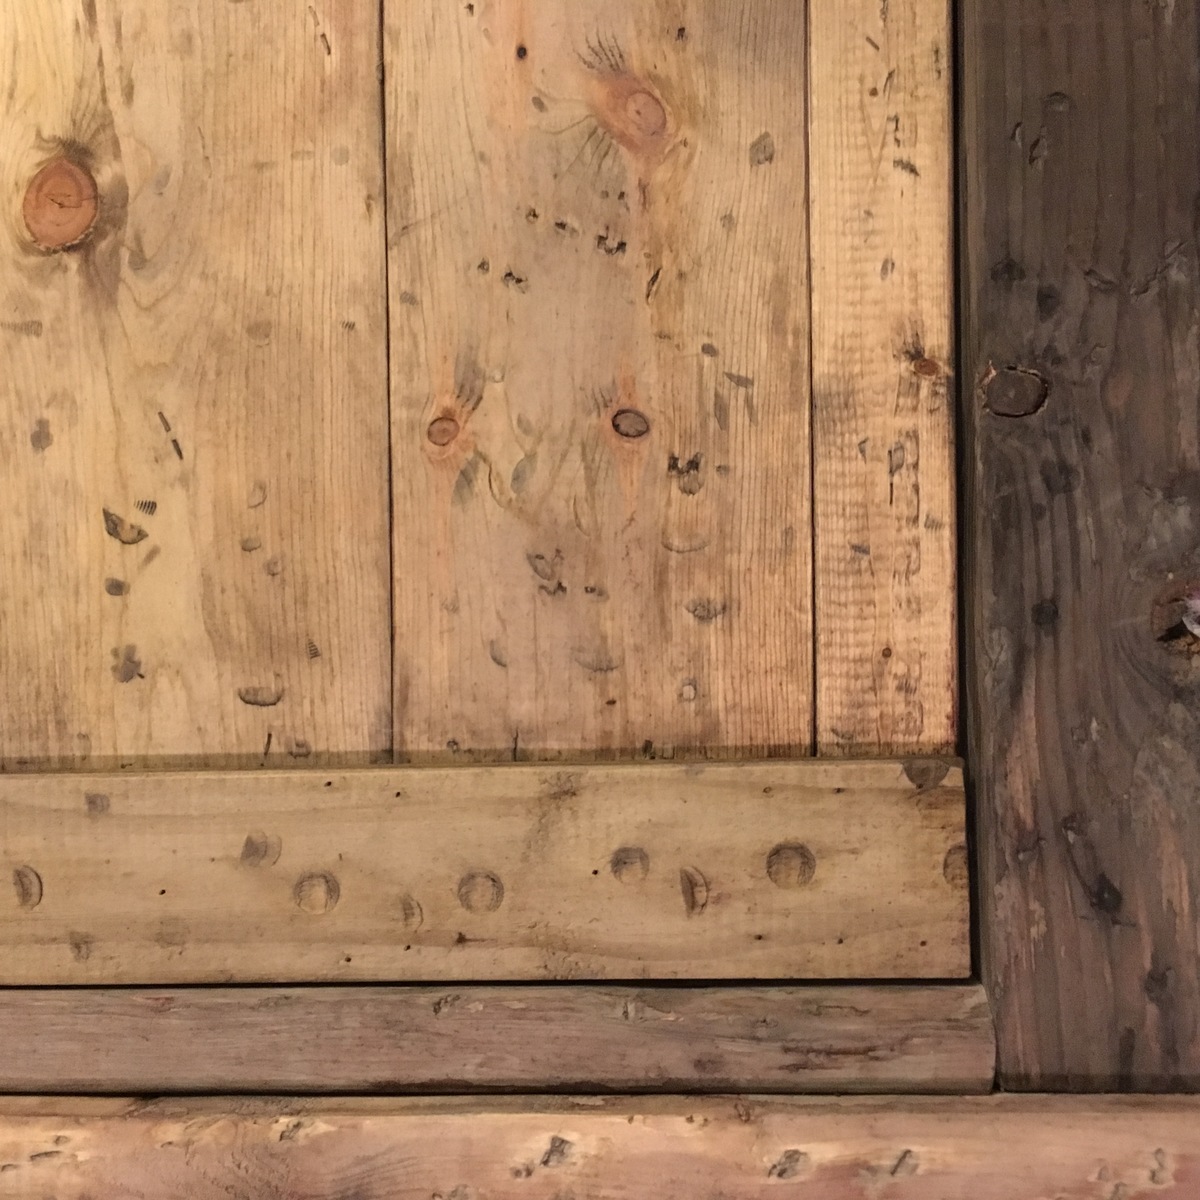
Cottage end table w/ rustic x
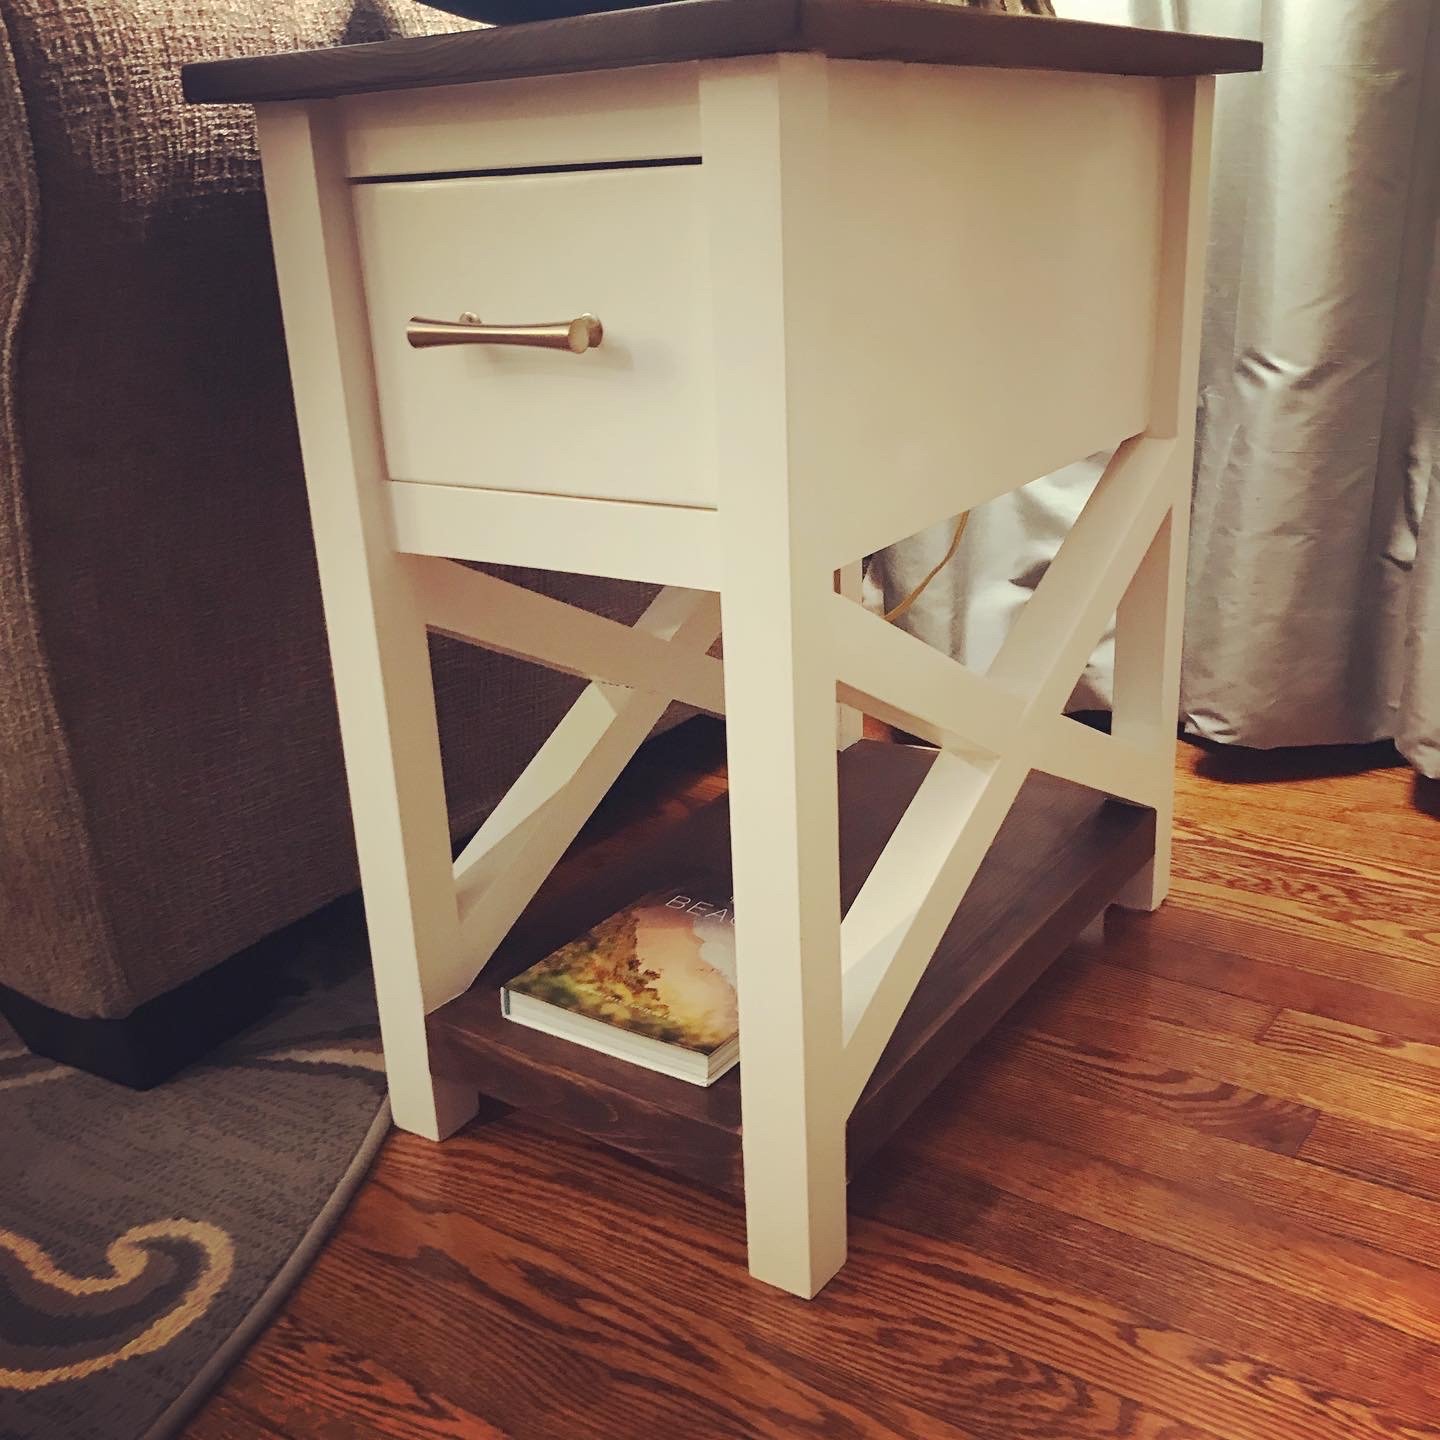
Made the cottage end table, but through in the rustic x style. I really needed a narrow end table. Oh and I threw a shelf on the bottom. First time making a drawer! Loved it!
Built from Plan(s)
Comments
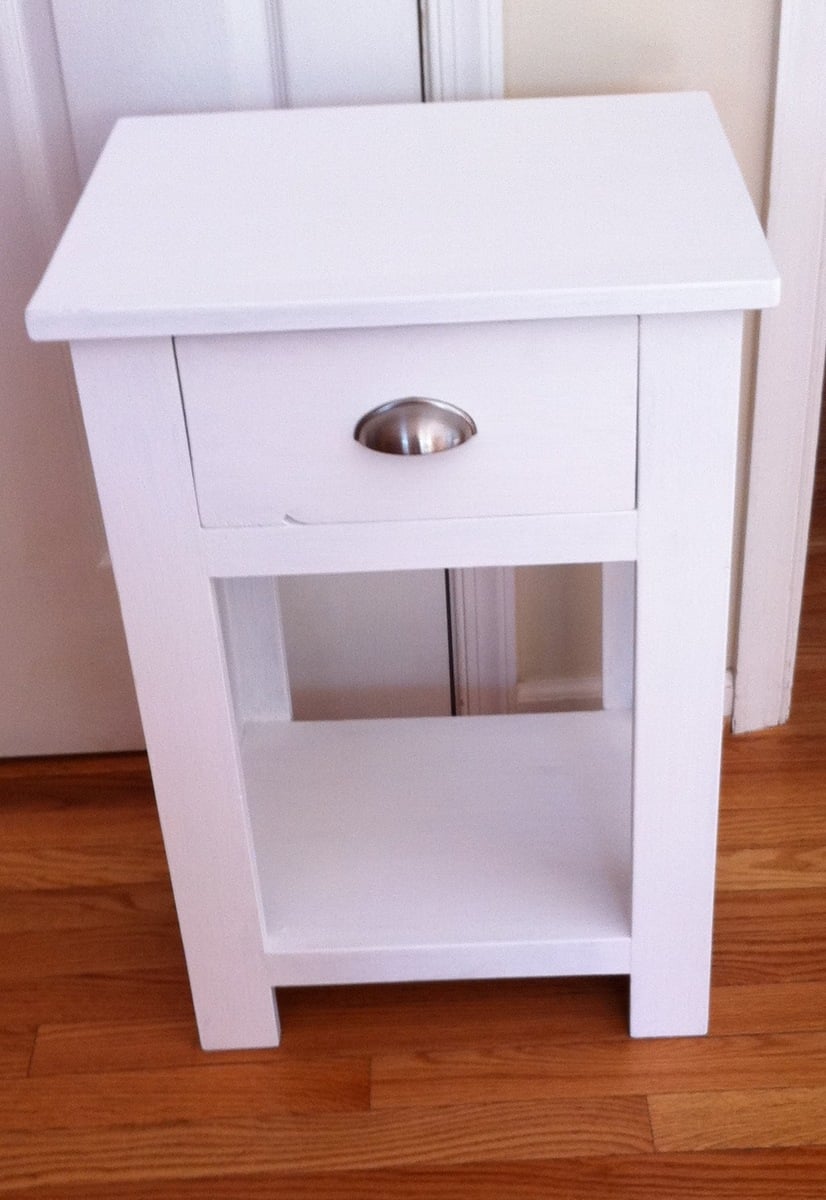
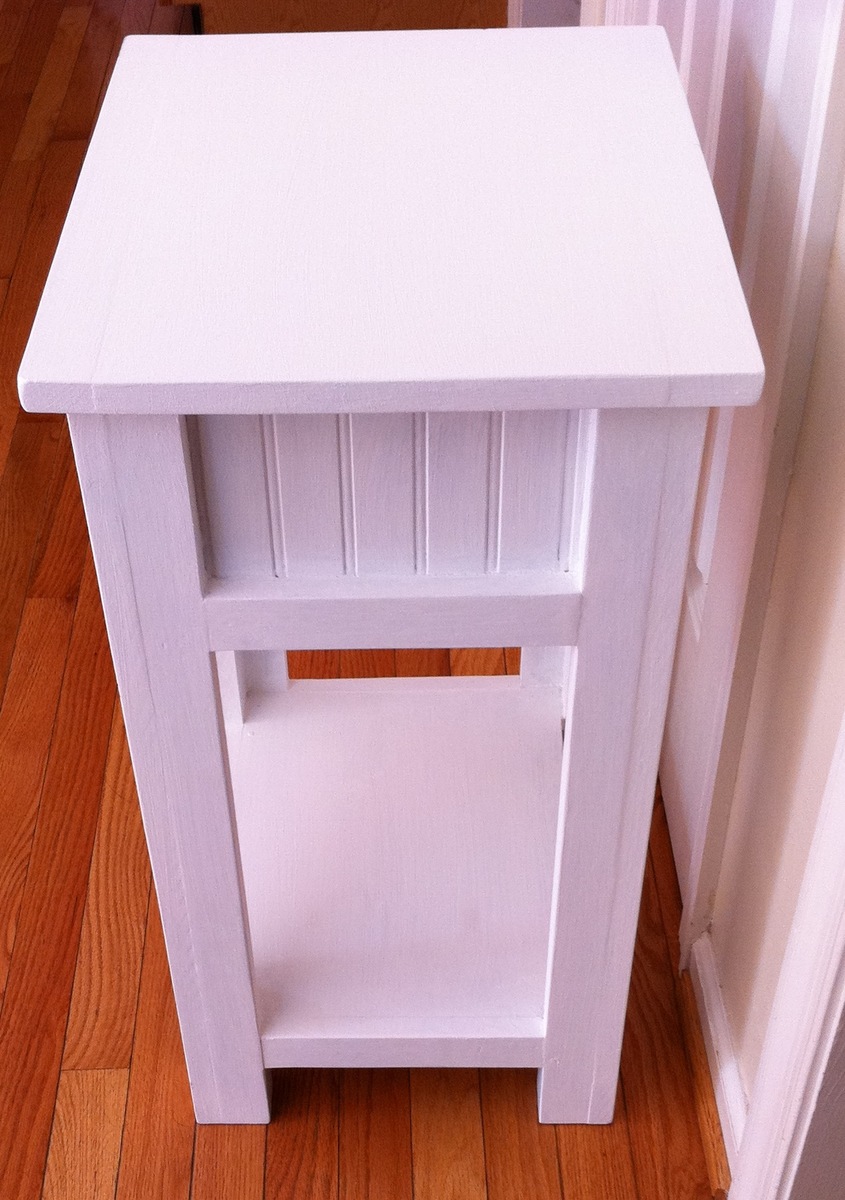
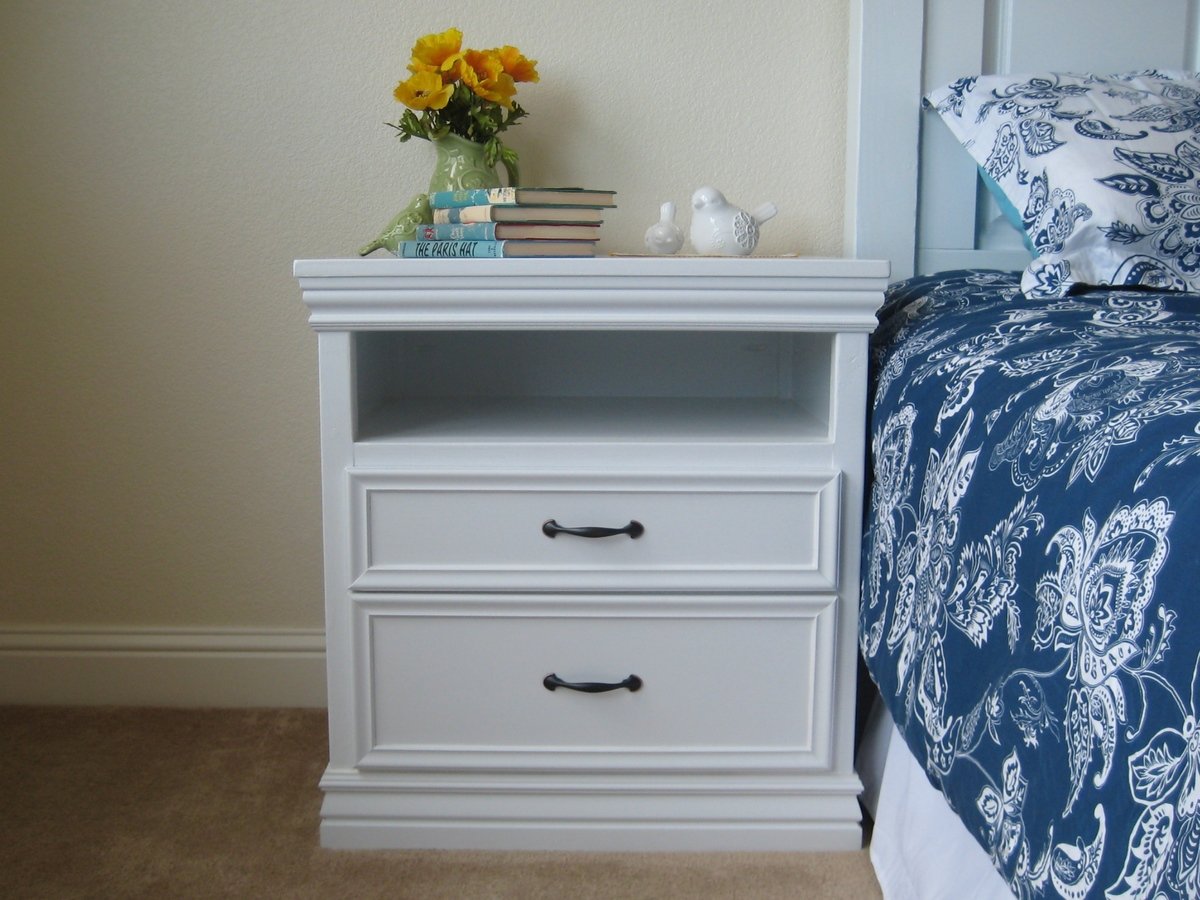
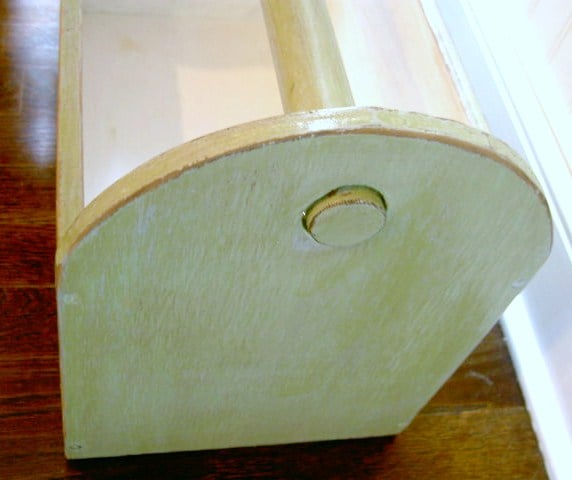
Simple White Nightstand
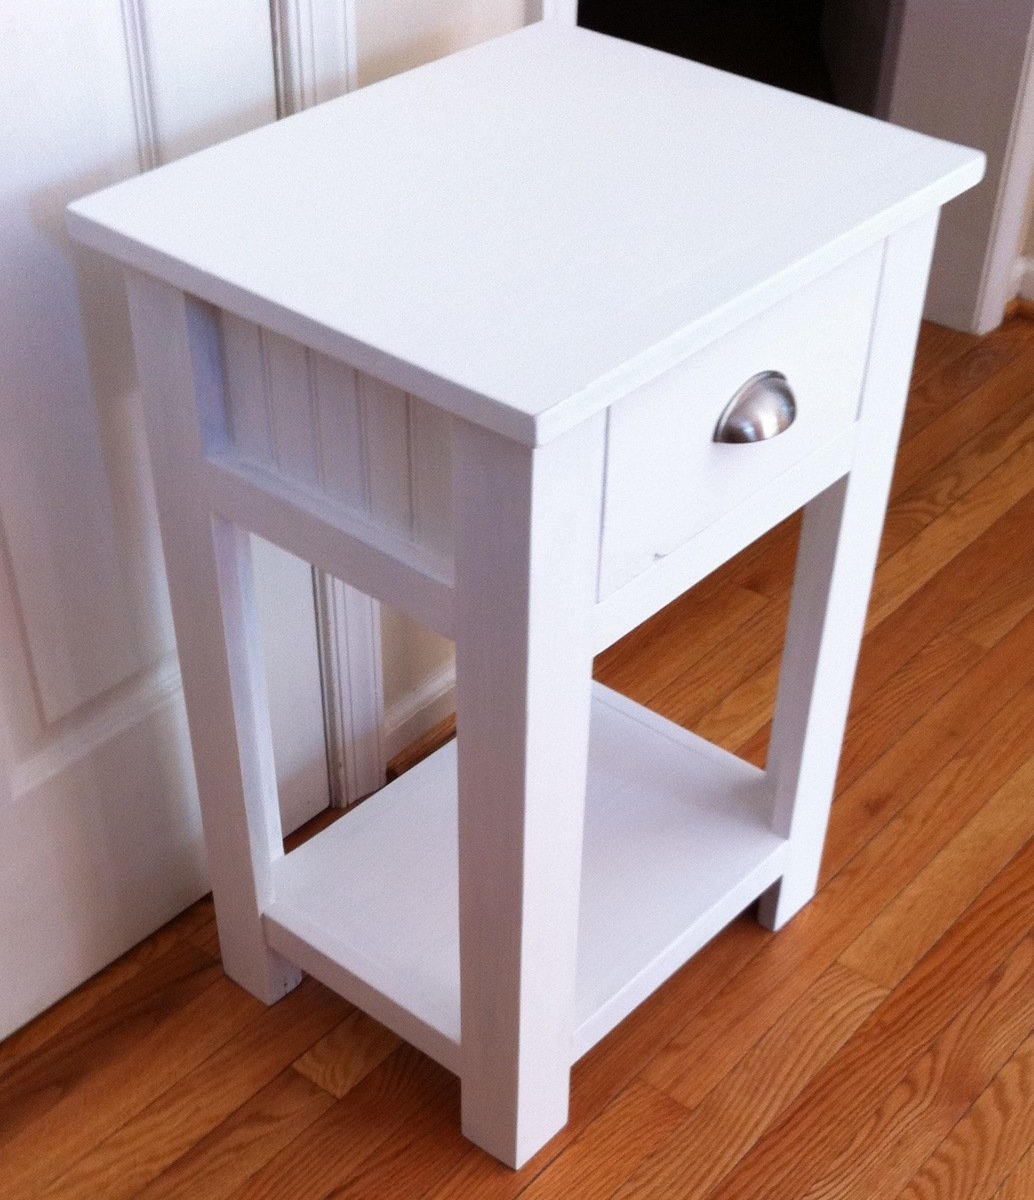
It is a friend's birthday on 5/6 and I noticed she didn't have a nightstand so instead of buying a present, I decided to make her a nightstand. I really liked how the person who built "Lee and Beth's Simple Nightstands" used bead-board on the sides, and I have a lot of bead-board left over from our master bathroom renovation, so I decided to use it, too, and that way I wouldn't have to buy the wood for there, because I didn't have any extra plywood to use there. I also used the bead-board on the back and as the bottom of the drawer.
It looks more modern-cottage than it does modern, like I wanted, but it still looks good.
Pictures are of what it looked like pre-sanding and wood-filling, with 1 coat of the stain on it, and then finished with white paint.
With the combination of scrap wood and new wood, I only spent $20 on new wood for the project, and $5 on the drawer pull!
For the top, instead of a 1x12 and 1x3, I used a 1x12 and and then flanked it with 2 1x2s - for a more balanced look. I also cut the 1x12 at like 19 1/2 inches instead of 18 1/2.

Built from Plan(s)
Estimated Cost
$25
Estimated Time Investment
Weekend Project (10-20 Hours)
Finish Used
I originally wanted this to look just like the one that Ana has posted (minus the distressing) - in an espresso stain with the brushed nickel pull on the drawer. I forgot to add the pre-stain and put the stain right on the wood and it looked horrible. The wood did not take the stain well, nor was it even, and the wood filler was visible all over the place. I decided to paint it a flat white instead. I put on 2 coats of white primer and 3 coats of FLAT white paint. I don't really like glossy paint as I feel like it's harder to get it to cover right. I haven't done it yet, but will add a couple coats of satin polyurethane to protect it.
Recommended Skill Level
Intermediate
Comments
My triple truss coffee table
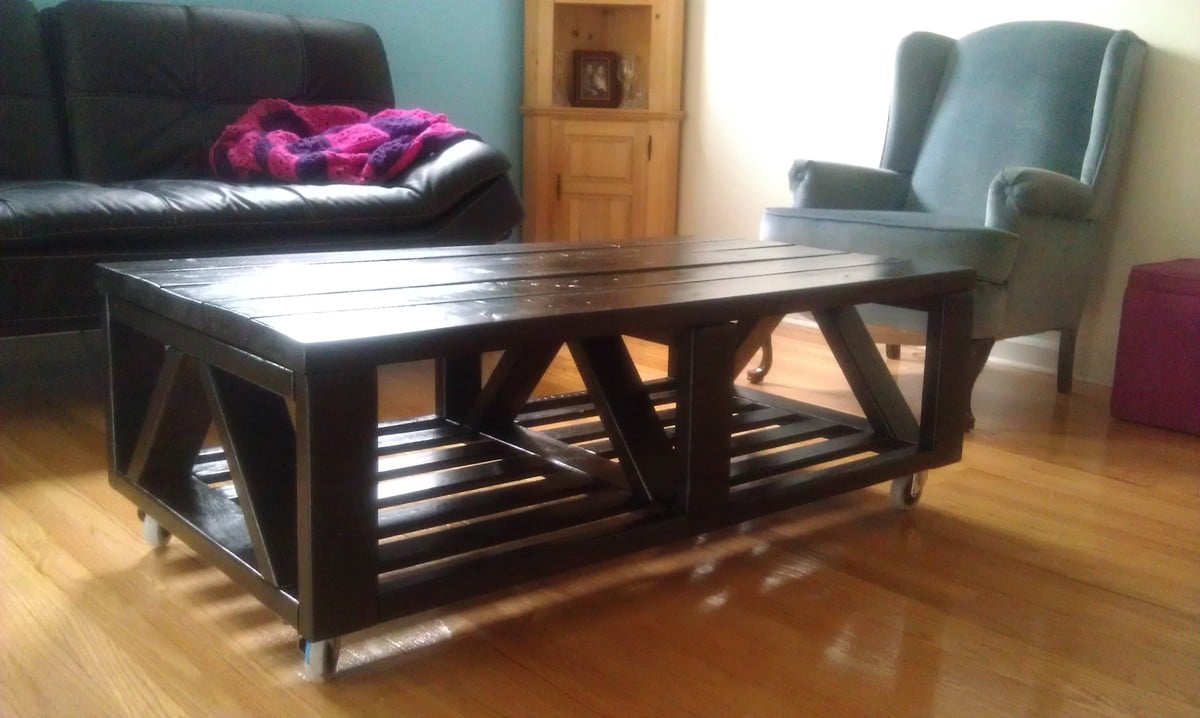
This is my very first furniture project. I'm happy with how it turned out.
Built from Plan(s)
Estimated Cost
$90
Estimated Time Investment
Day Project (6-9 Hours)
Finish Used
minwax stain & poly "espresso"
Recommended Skill Level
Starter Project
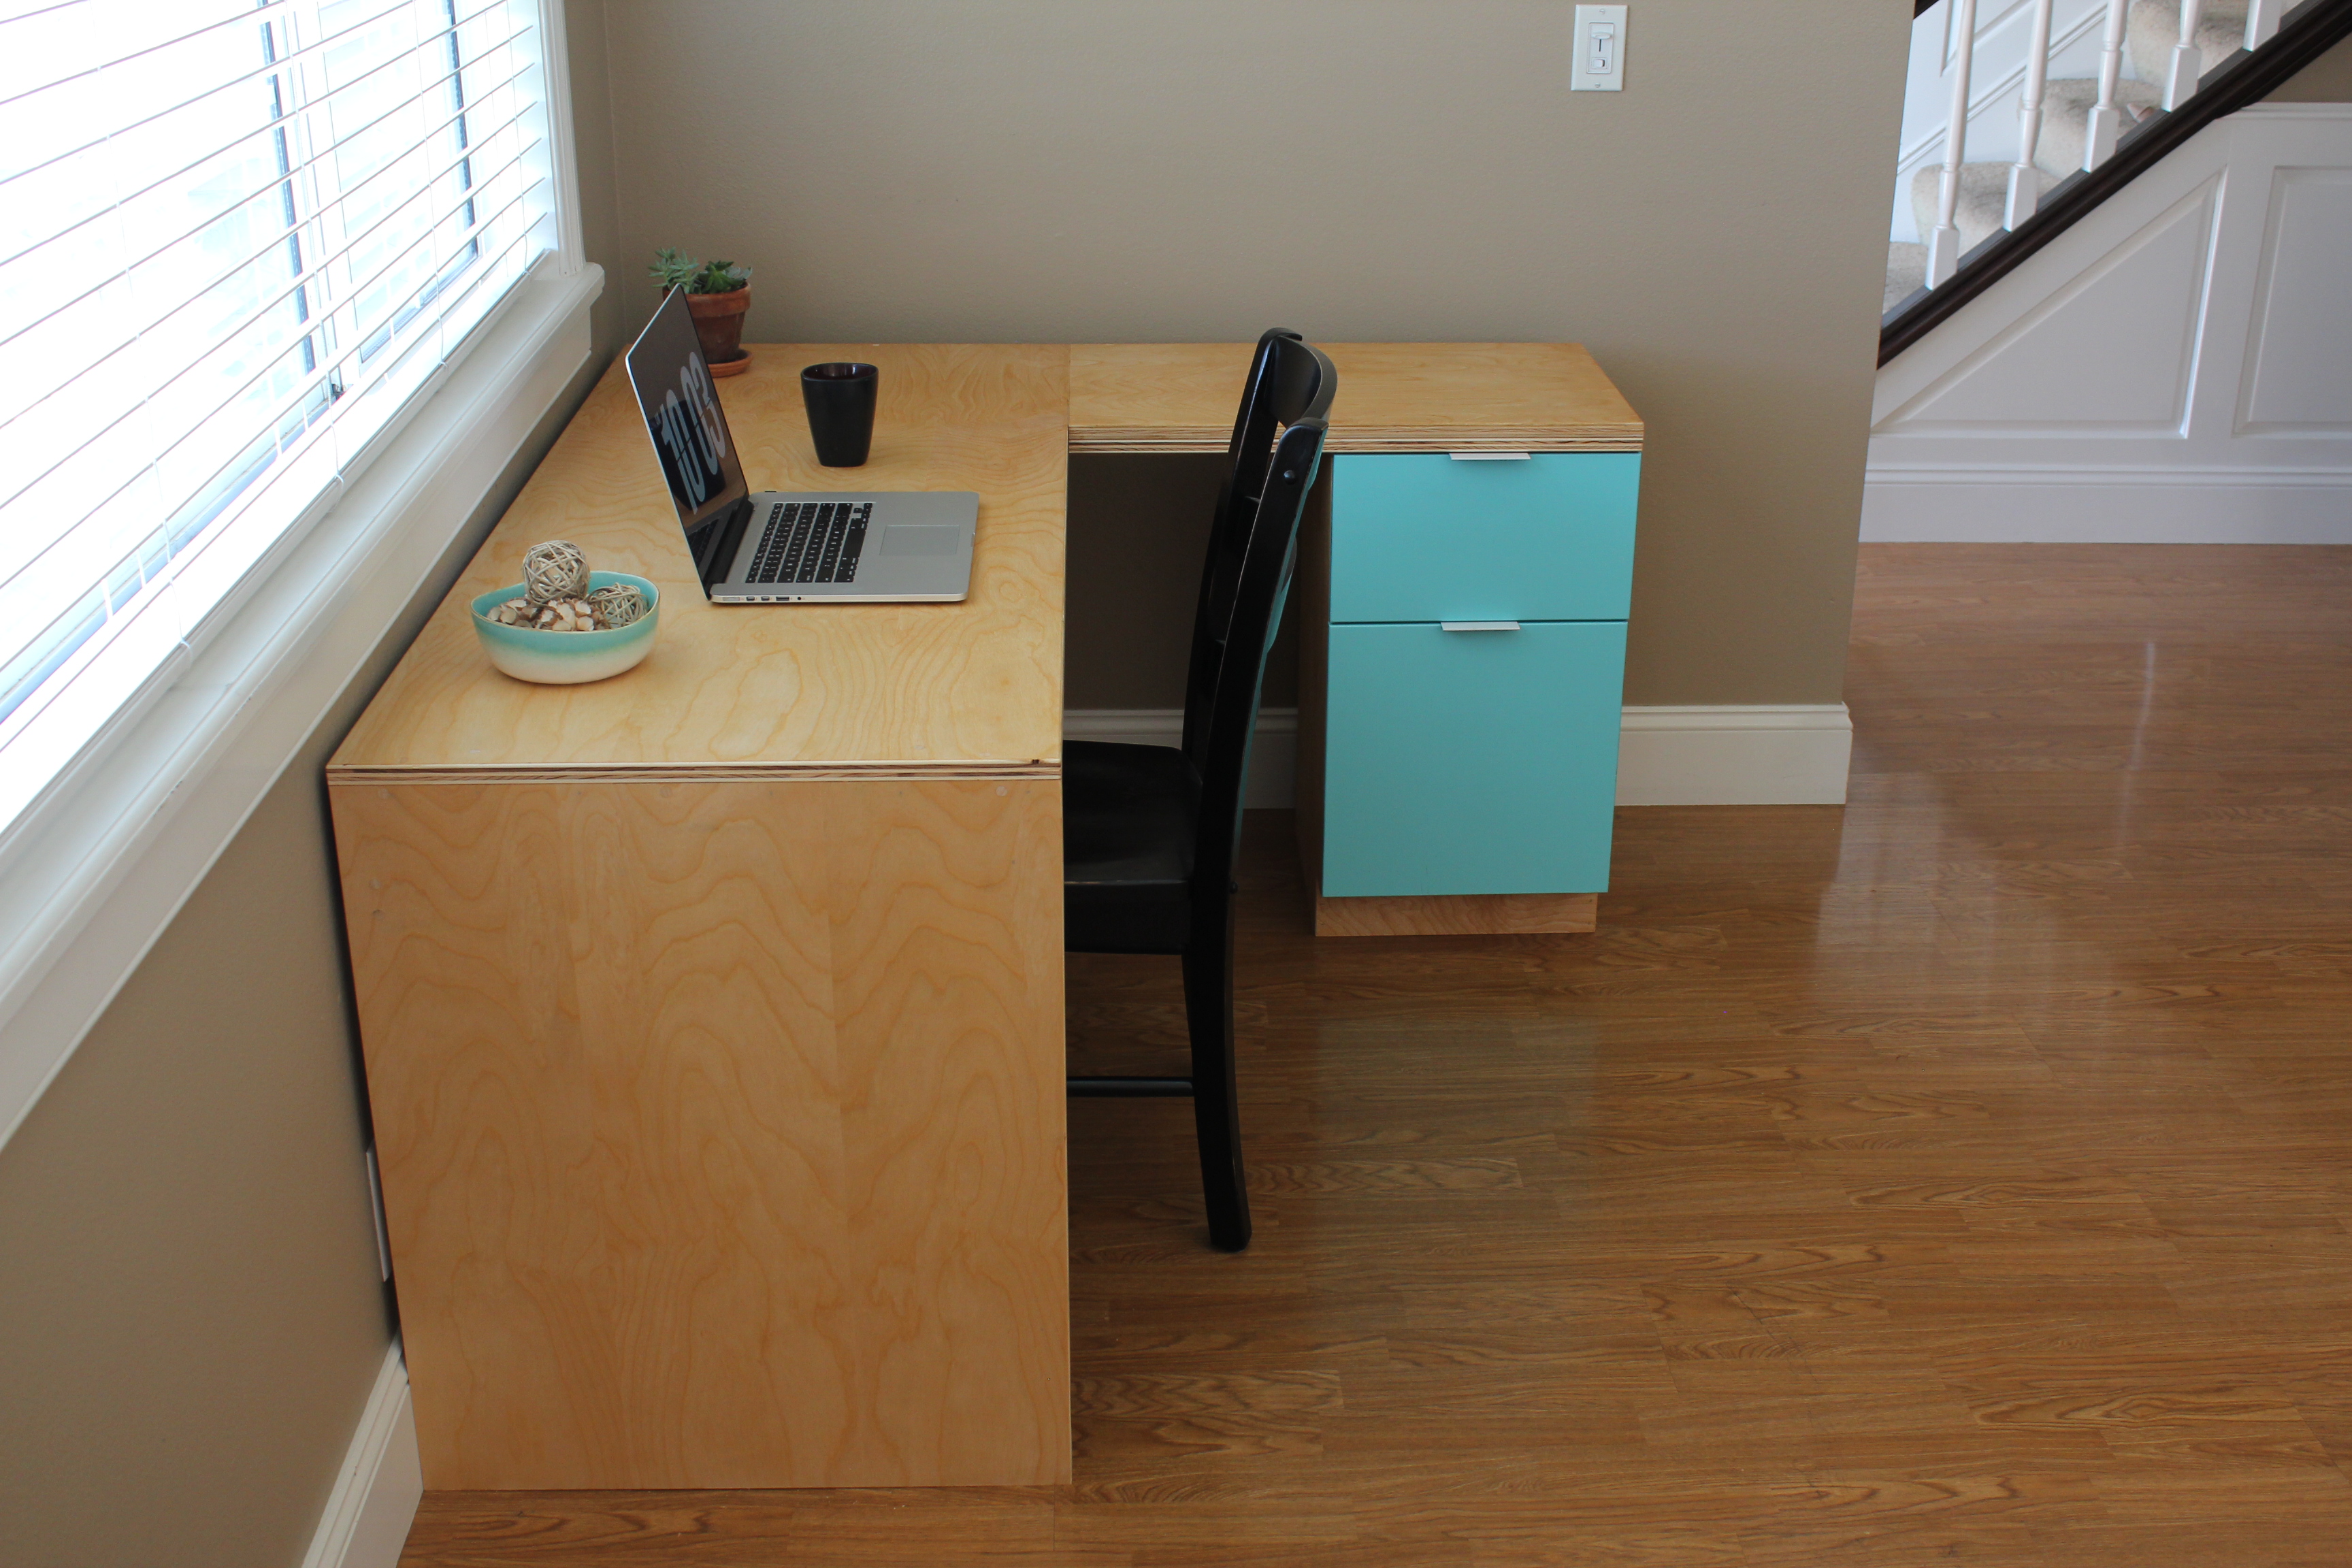
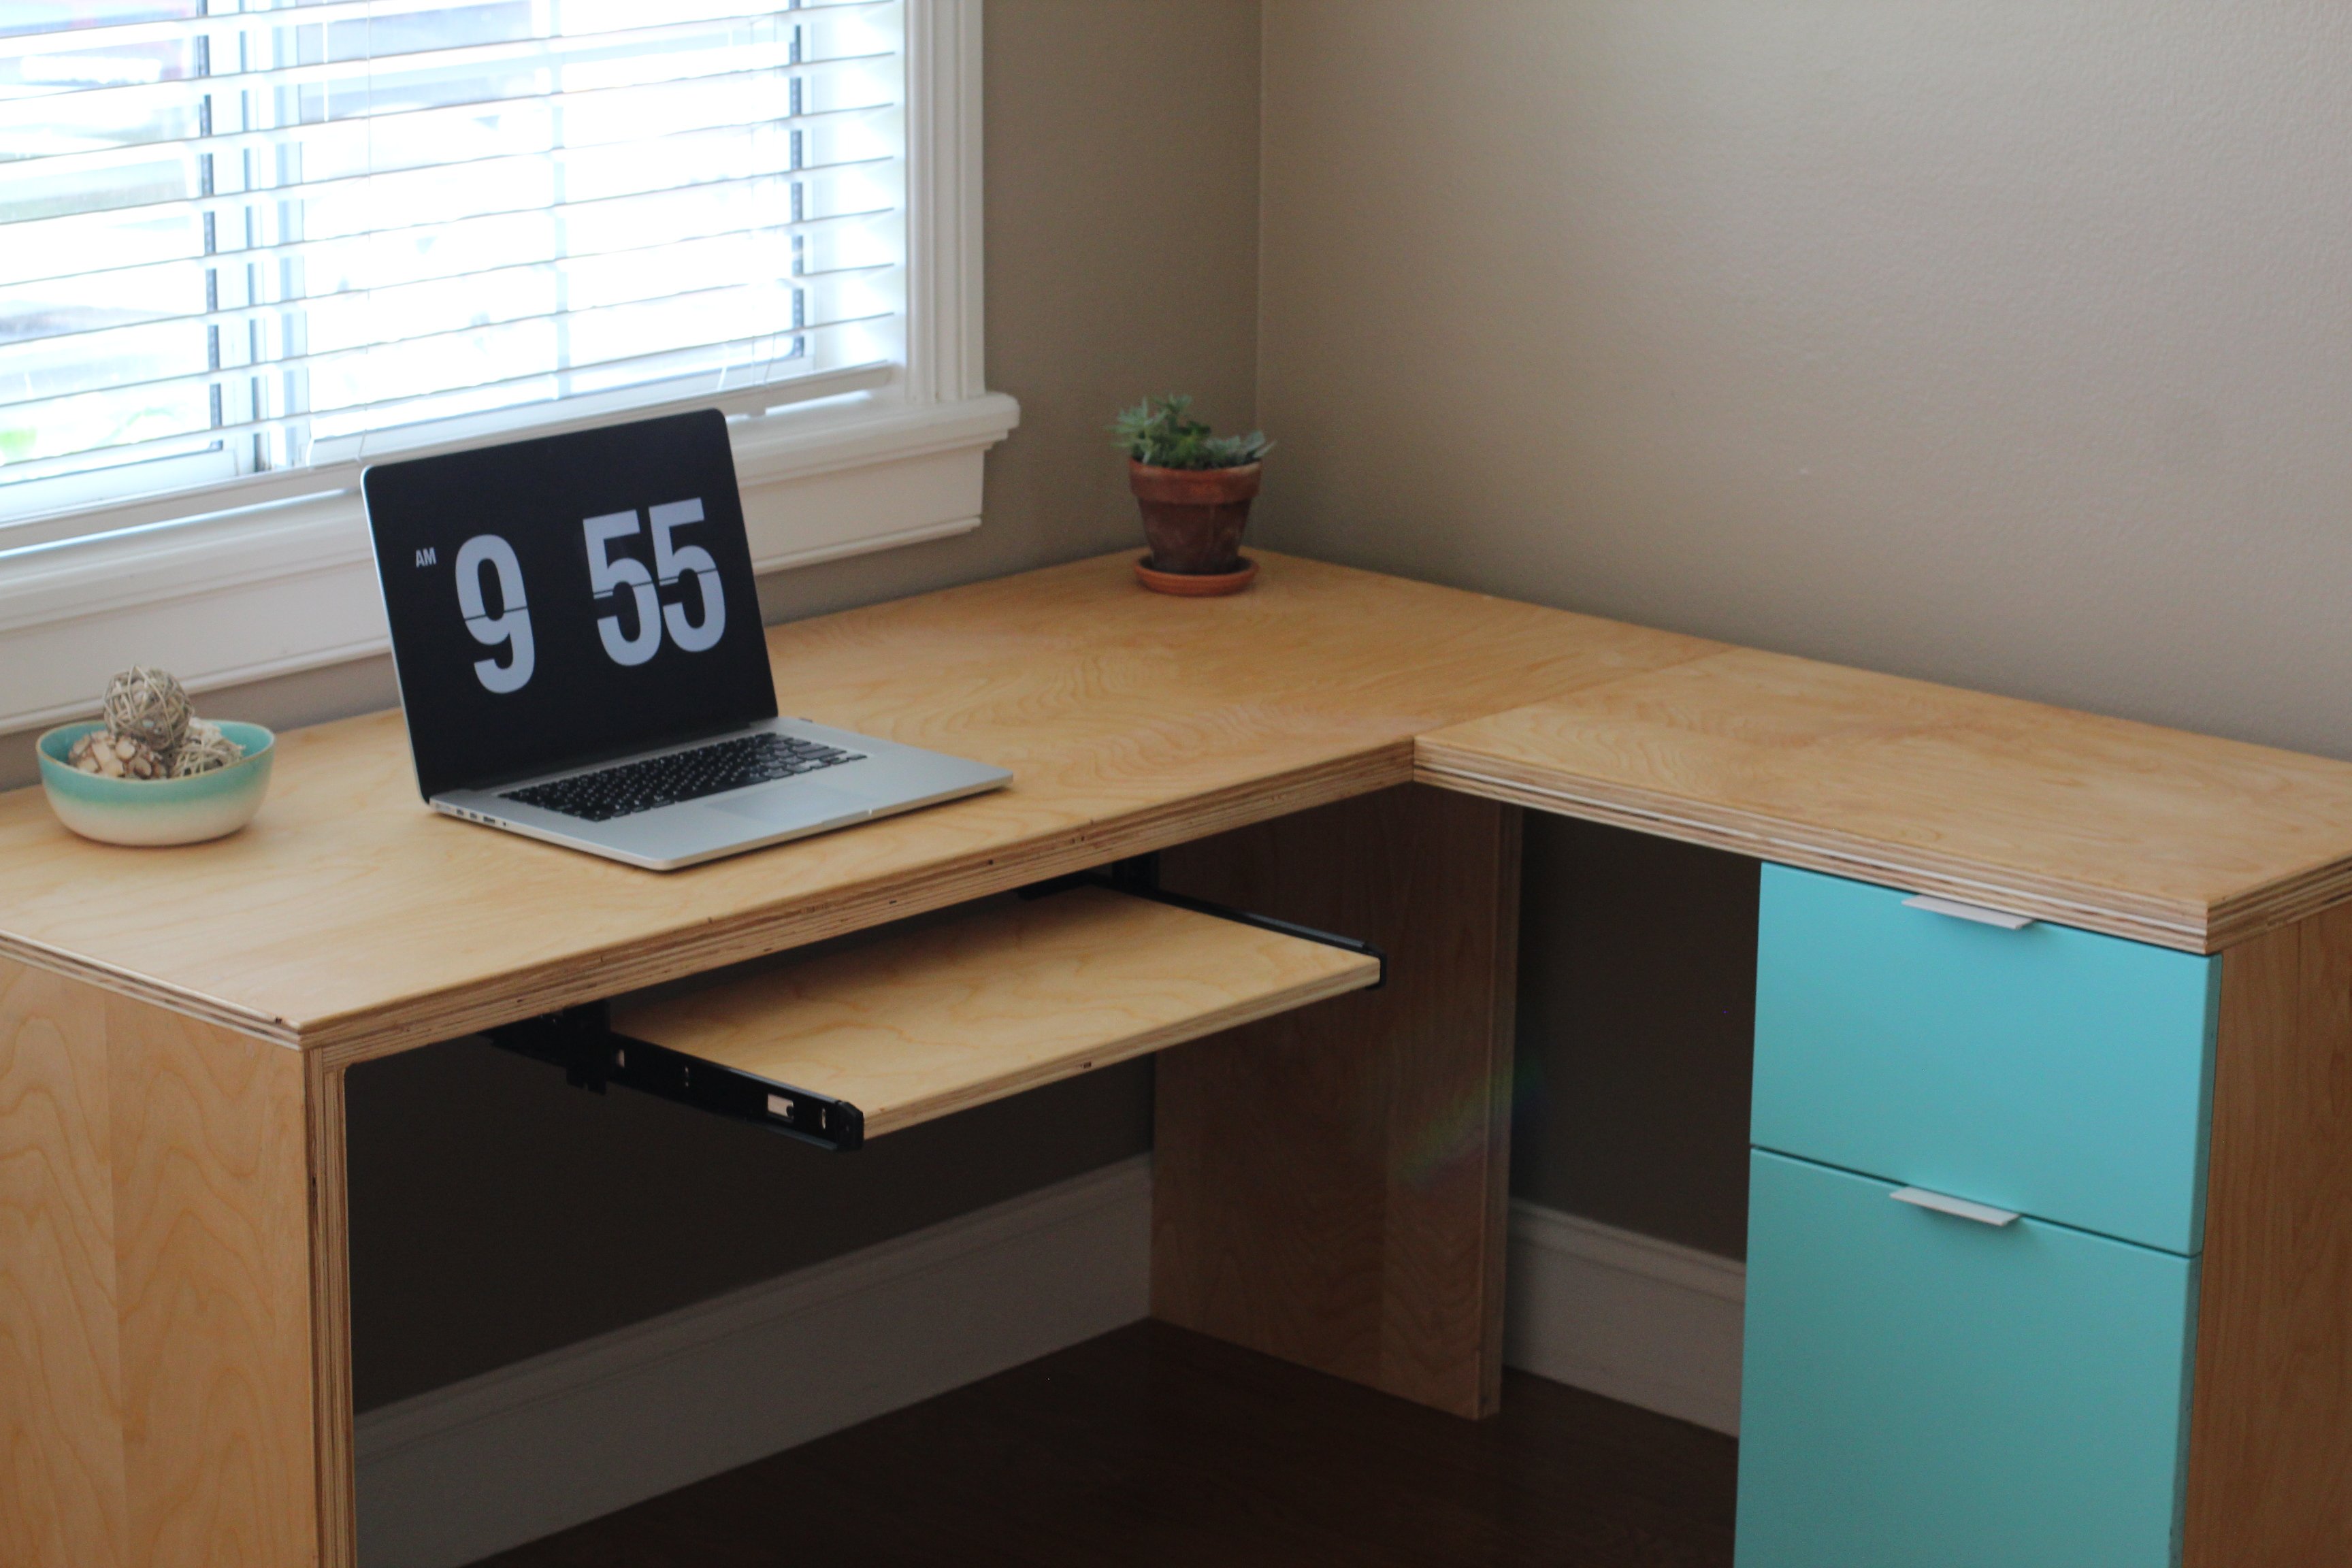
L-shape Modern plywood desk
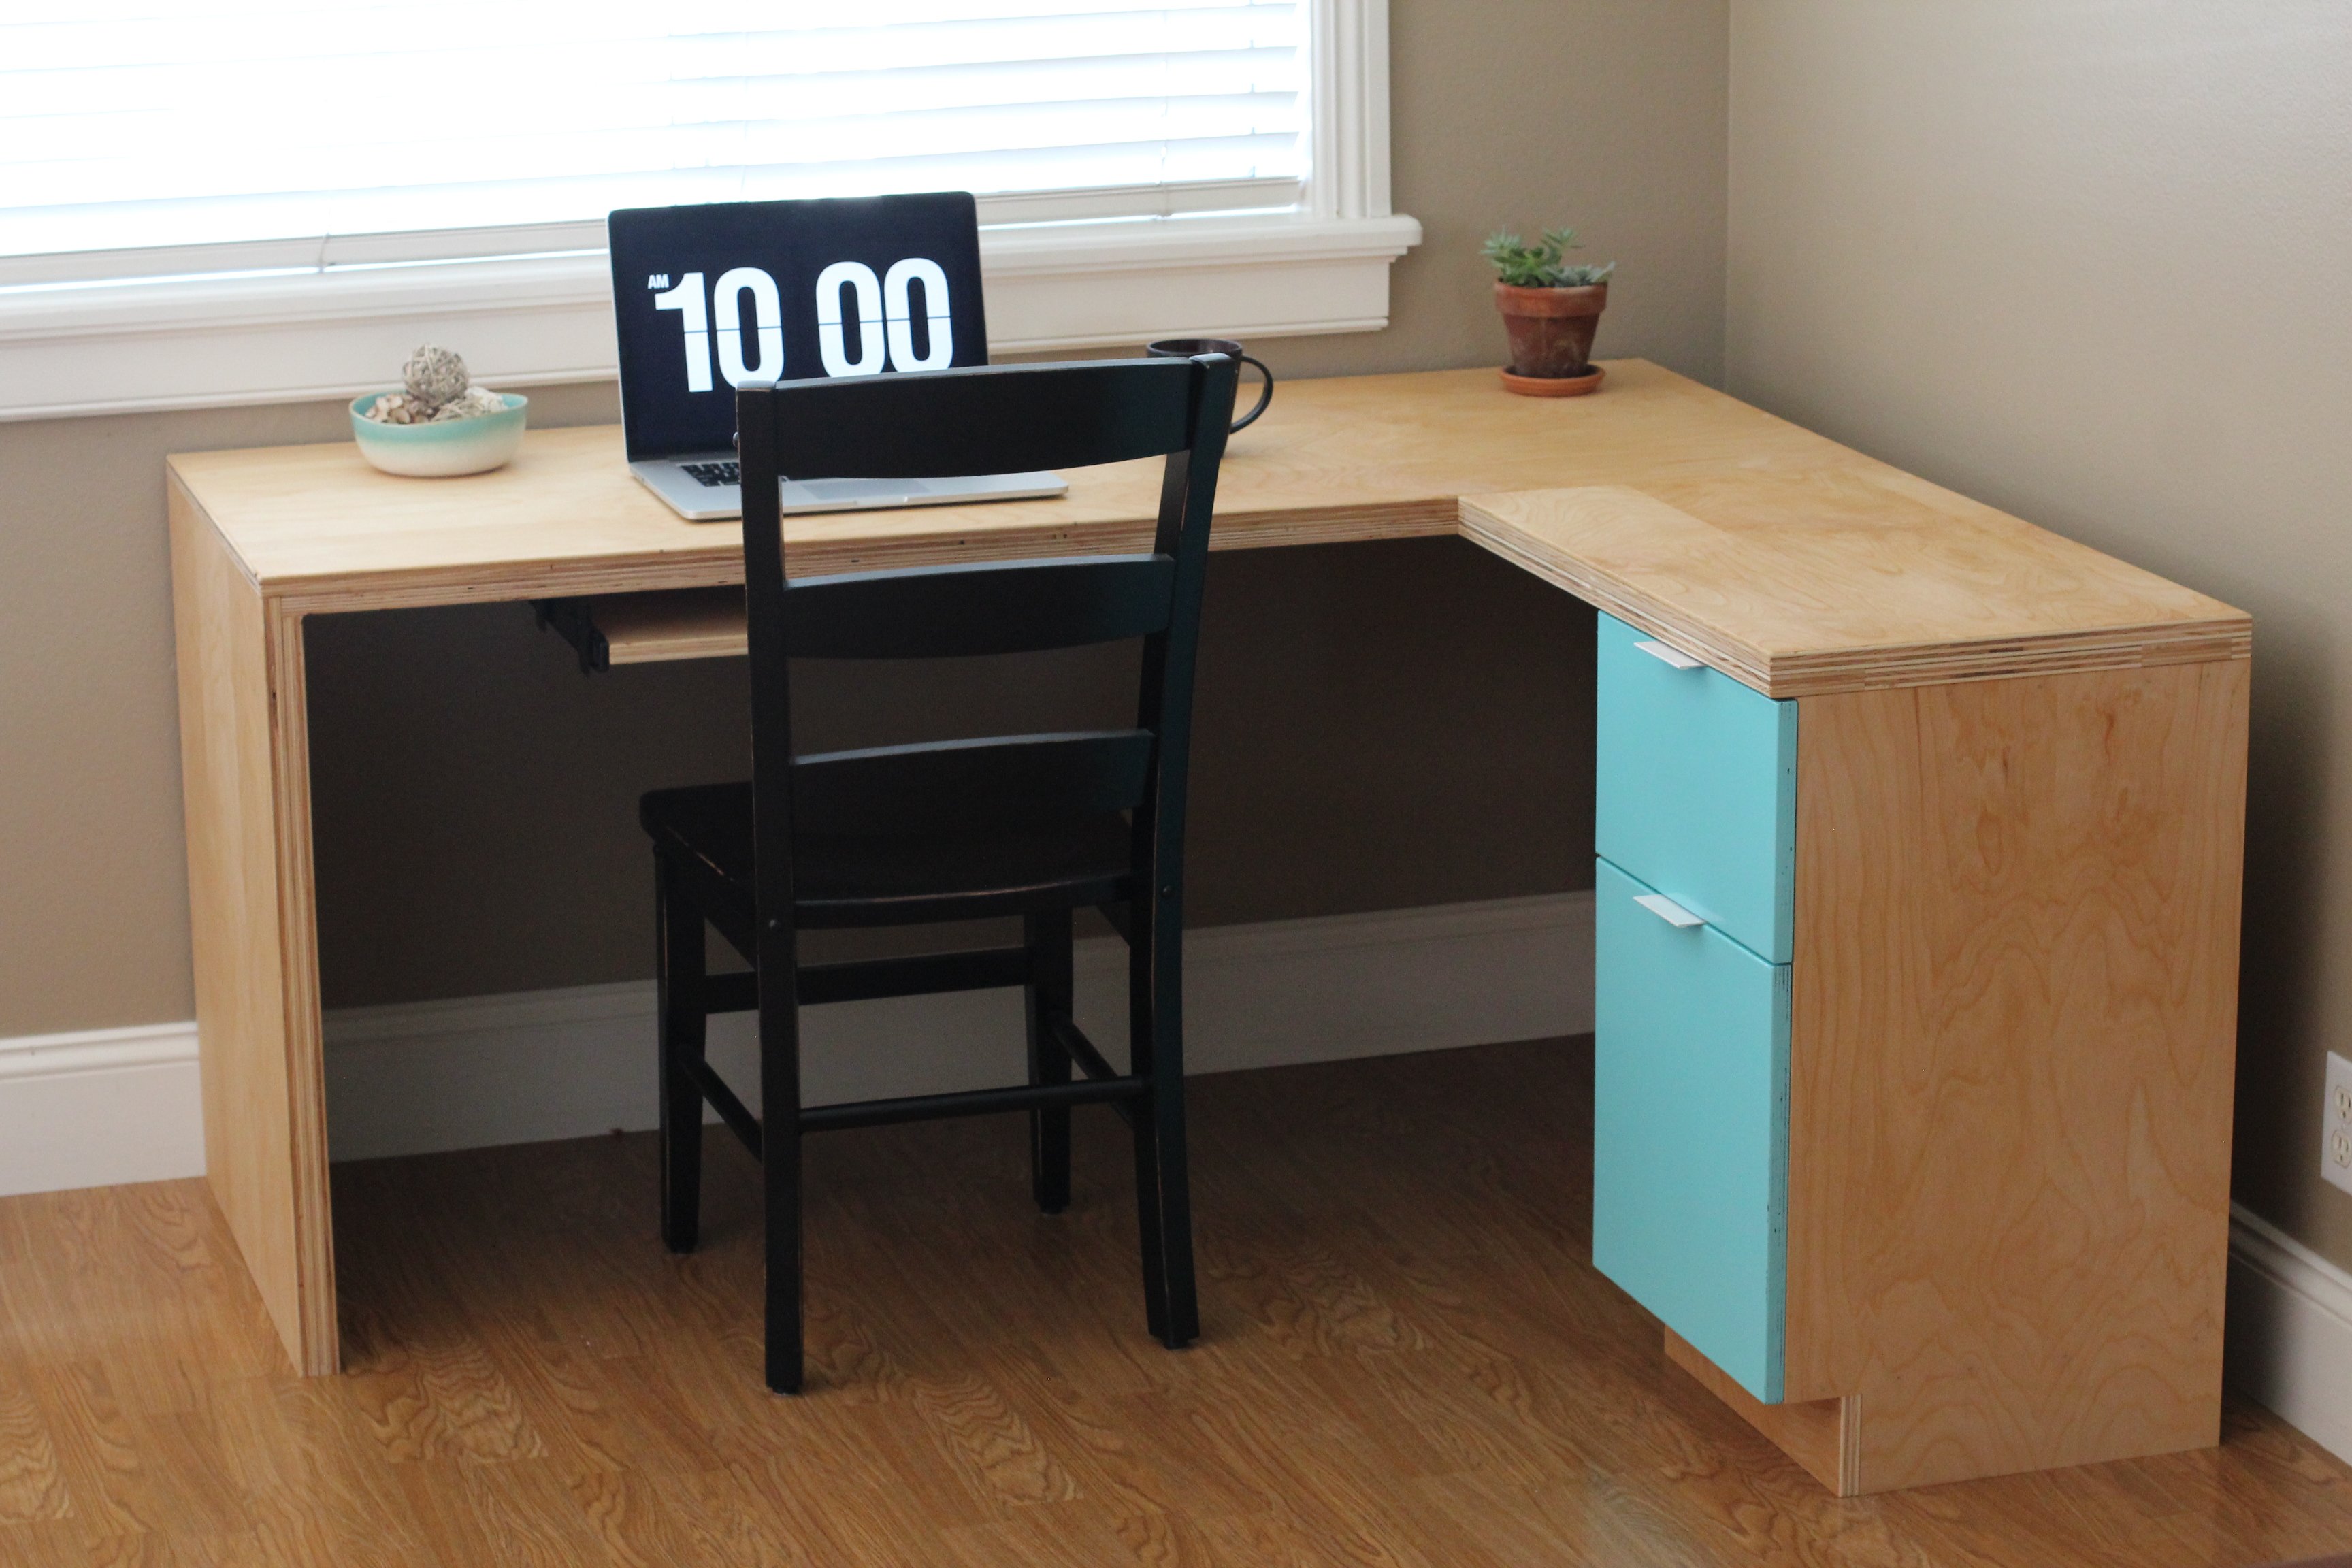
I constructed this desk all from birch plywood. It features a pull out keyboard tray, modern drawer finger pulls, and full extension drawer slides. The plywood was finished with a hand-rubbed danish oil for a natural wood appearance.
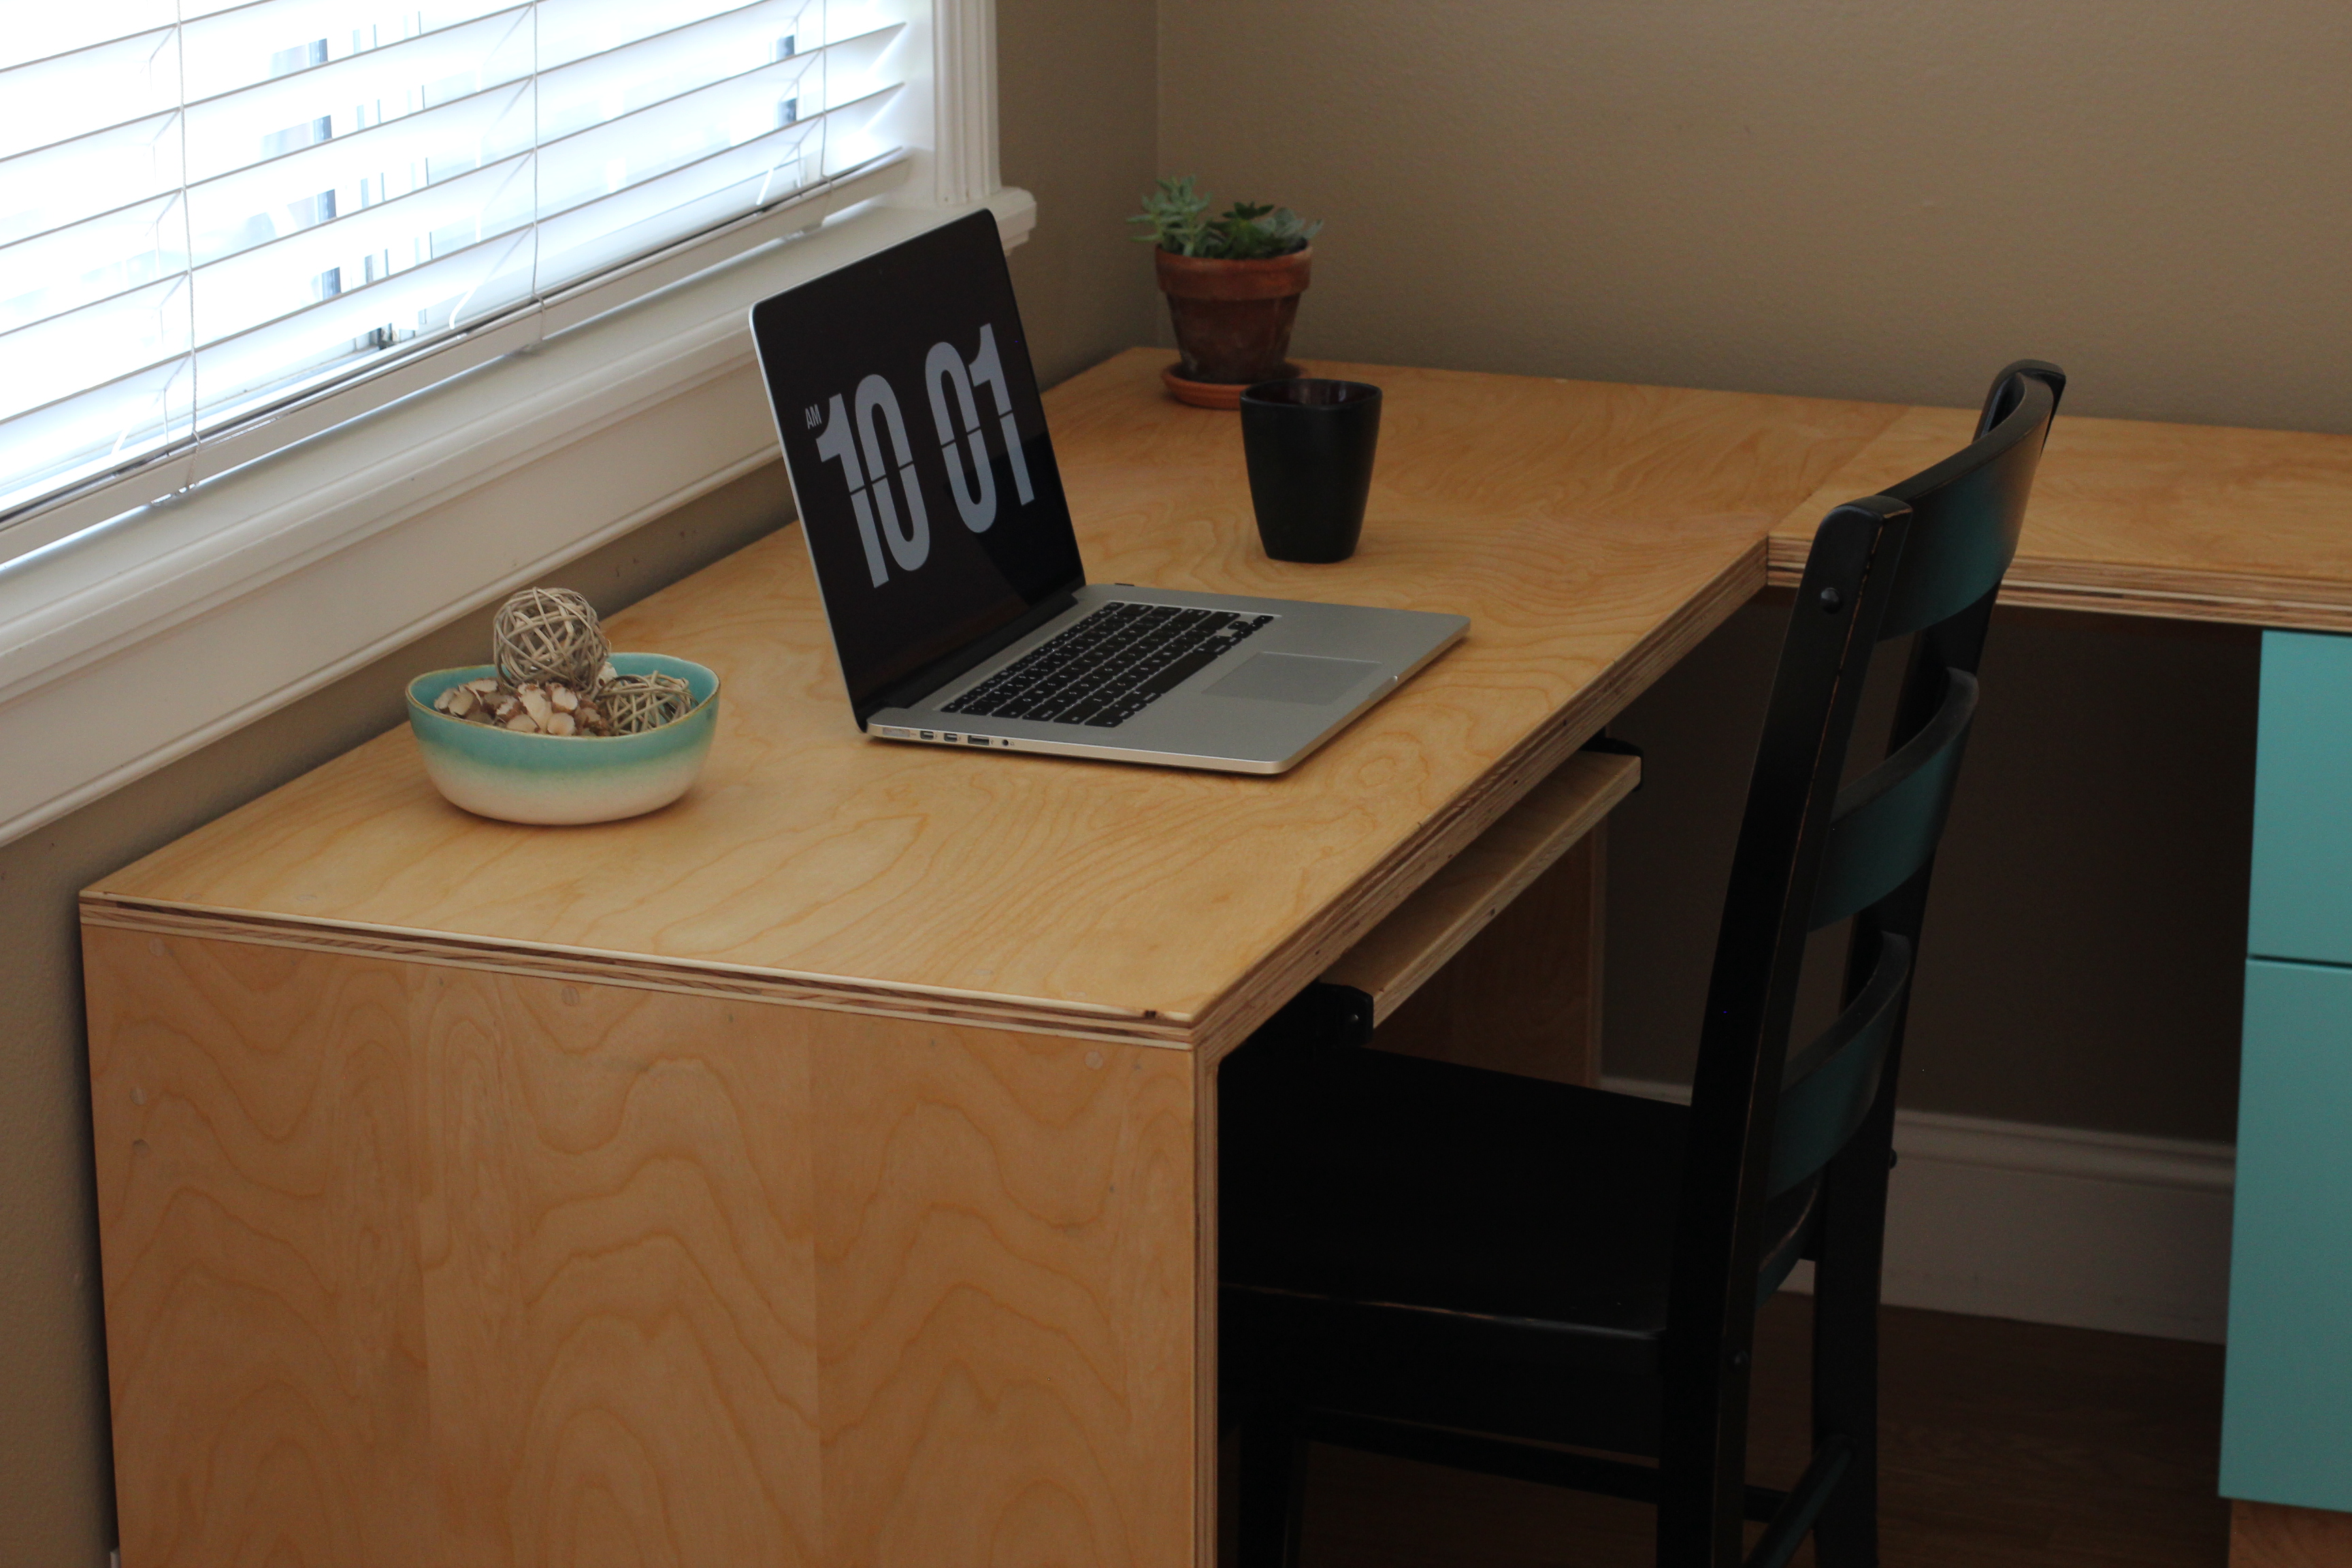
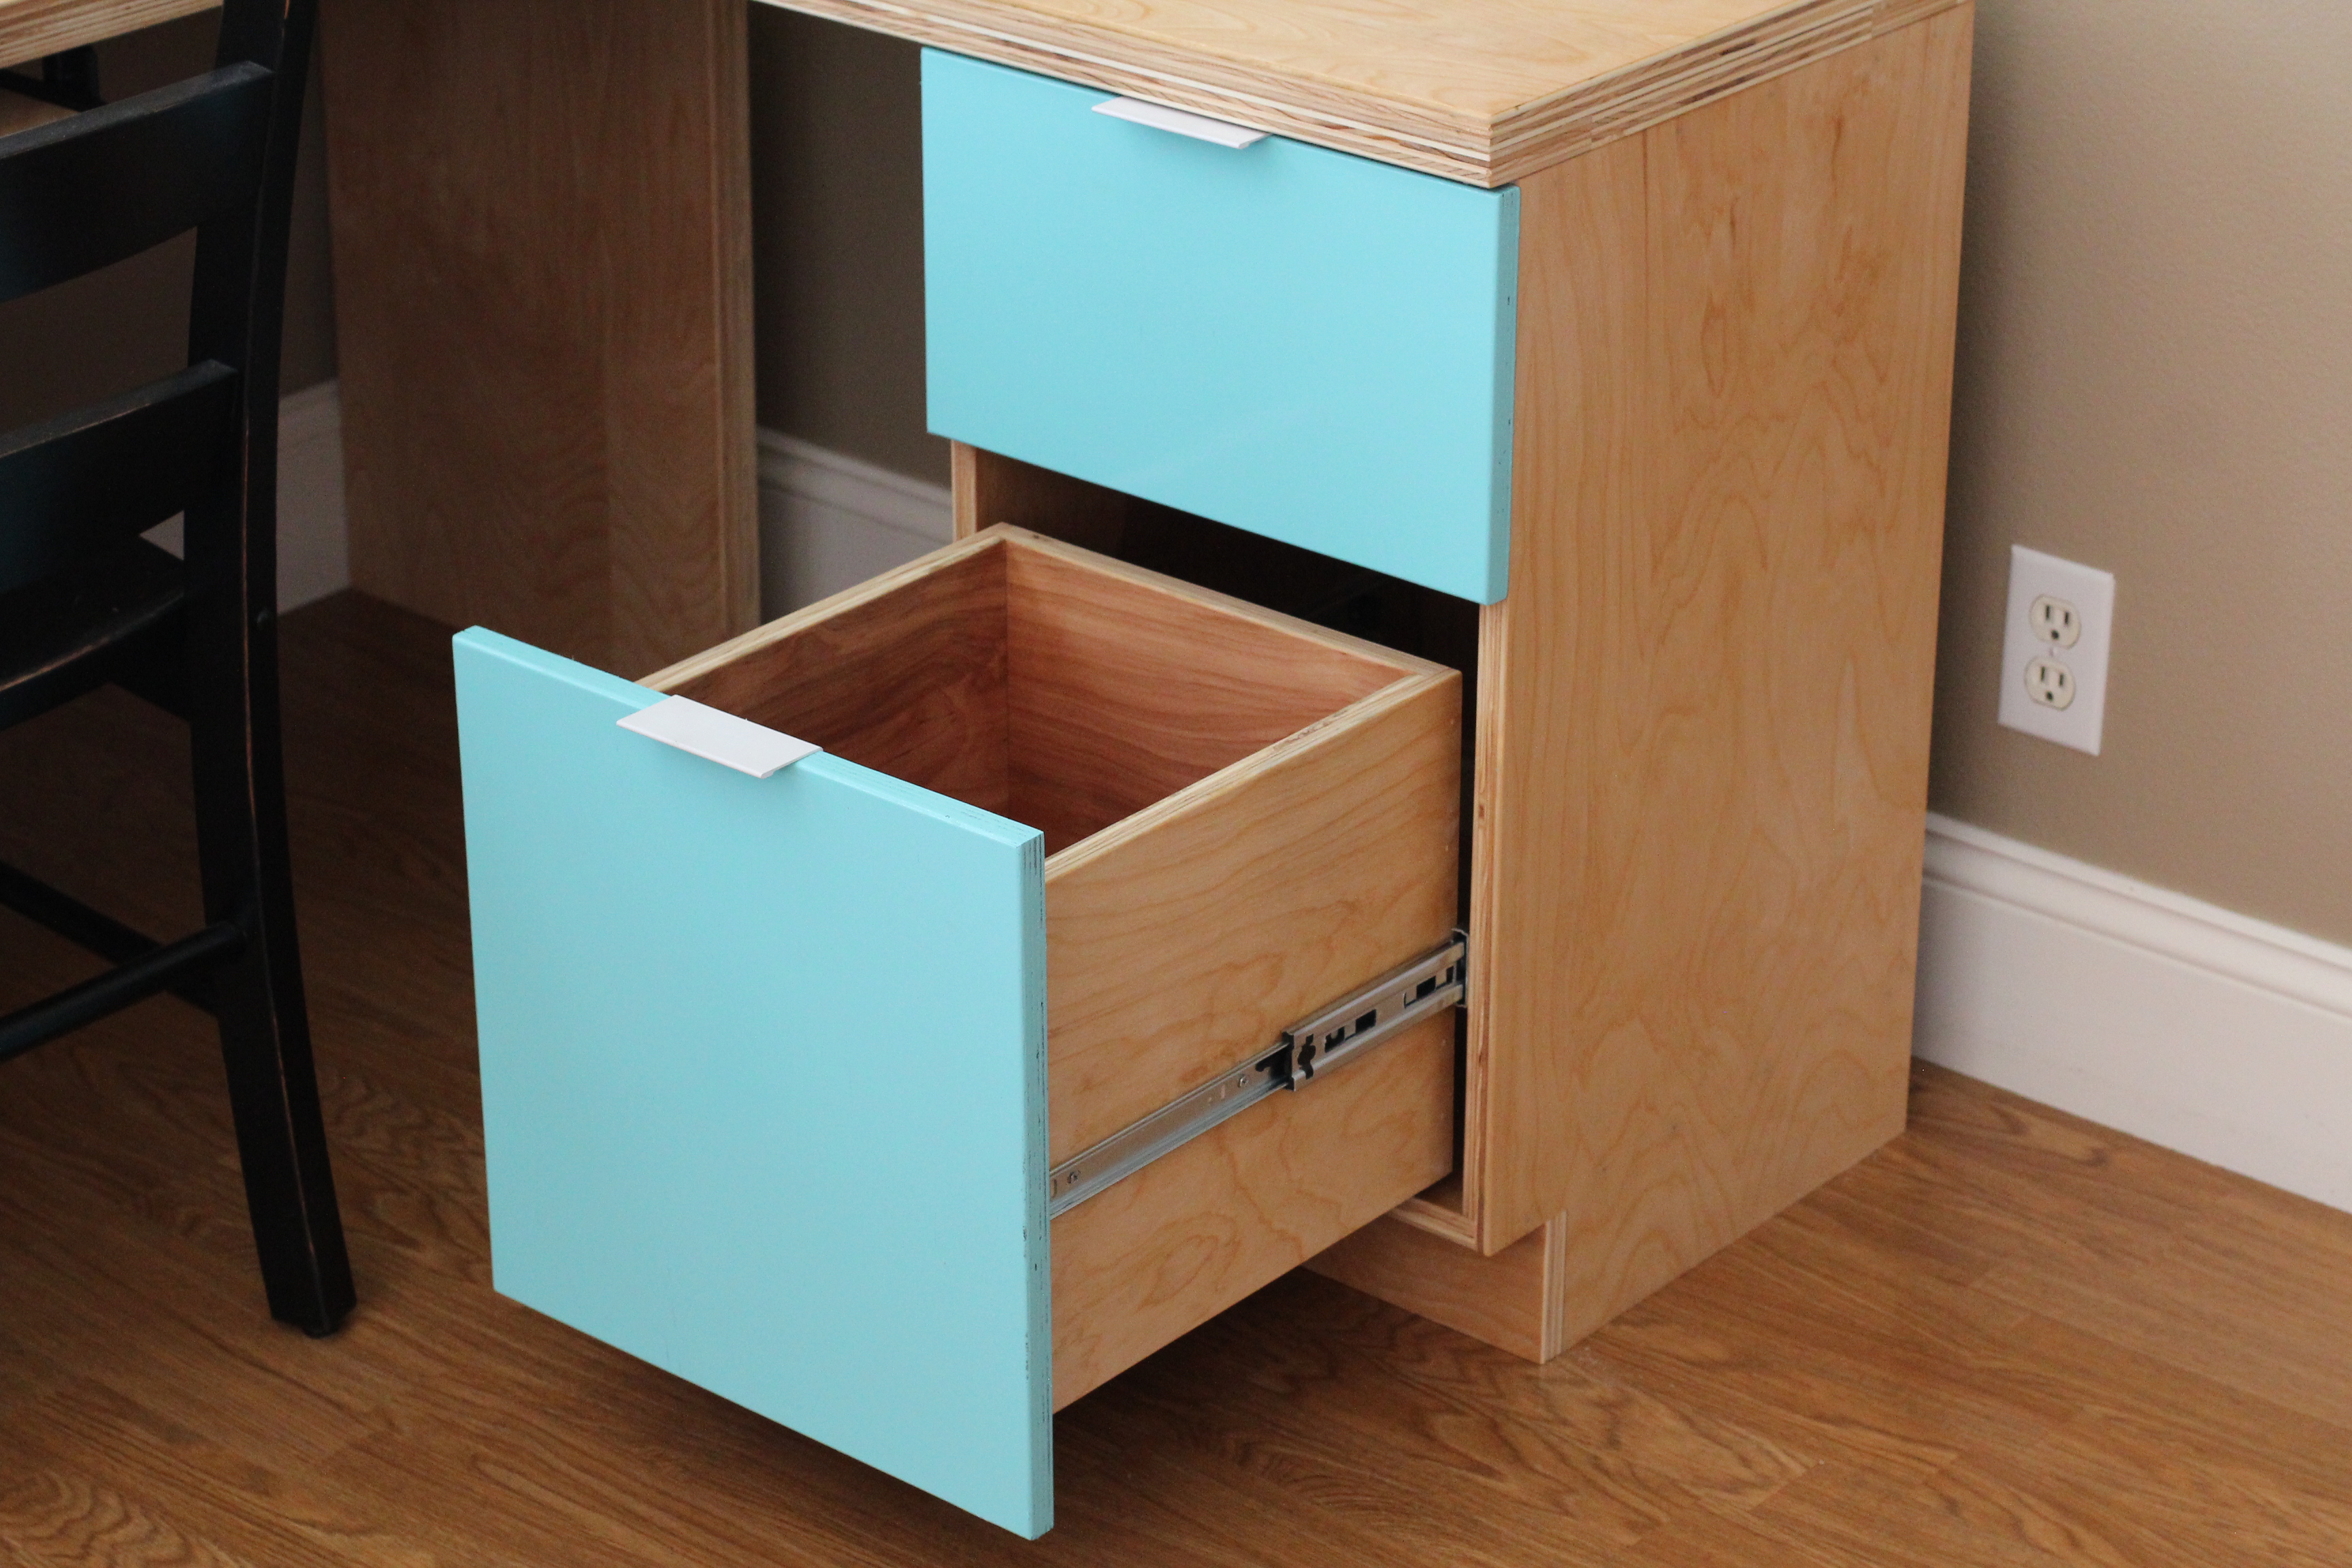
Estimated Cost
$150.00
Estimated Time Investment
Afternoon Project (3-6 Hours)
Finish Used
danish oil
Recommended Skill Level
Starter Project
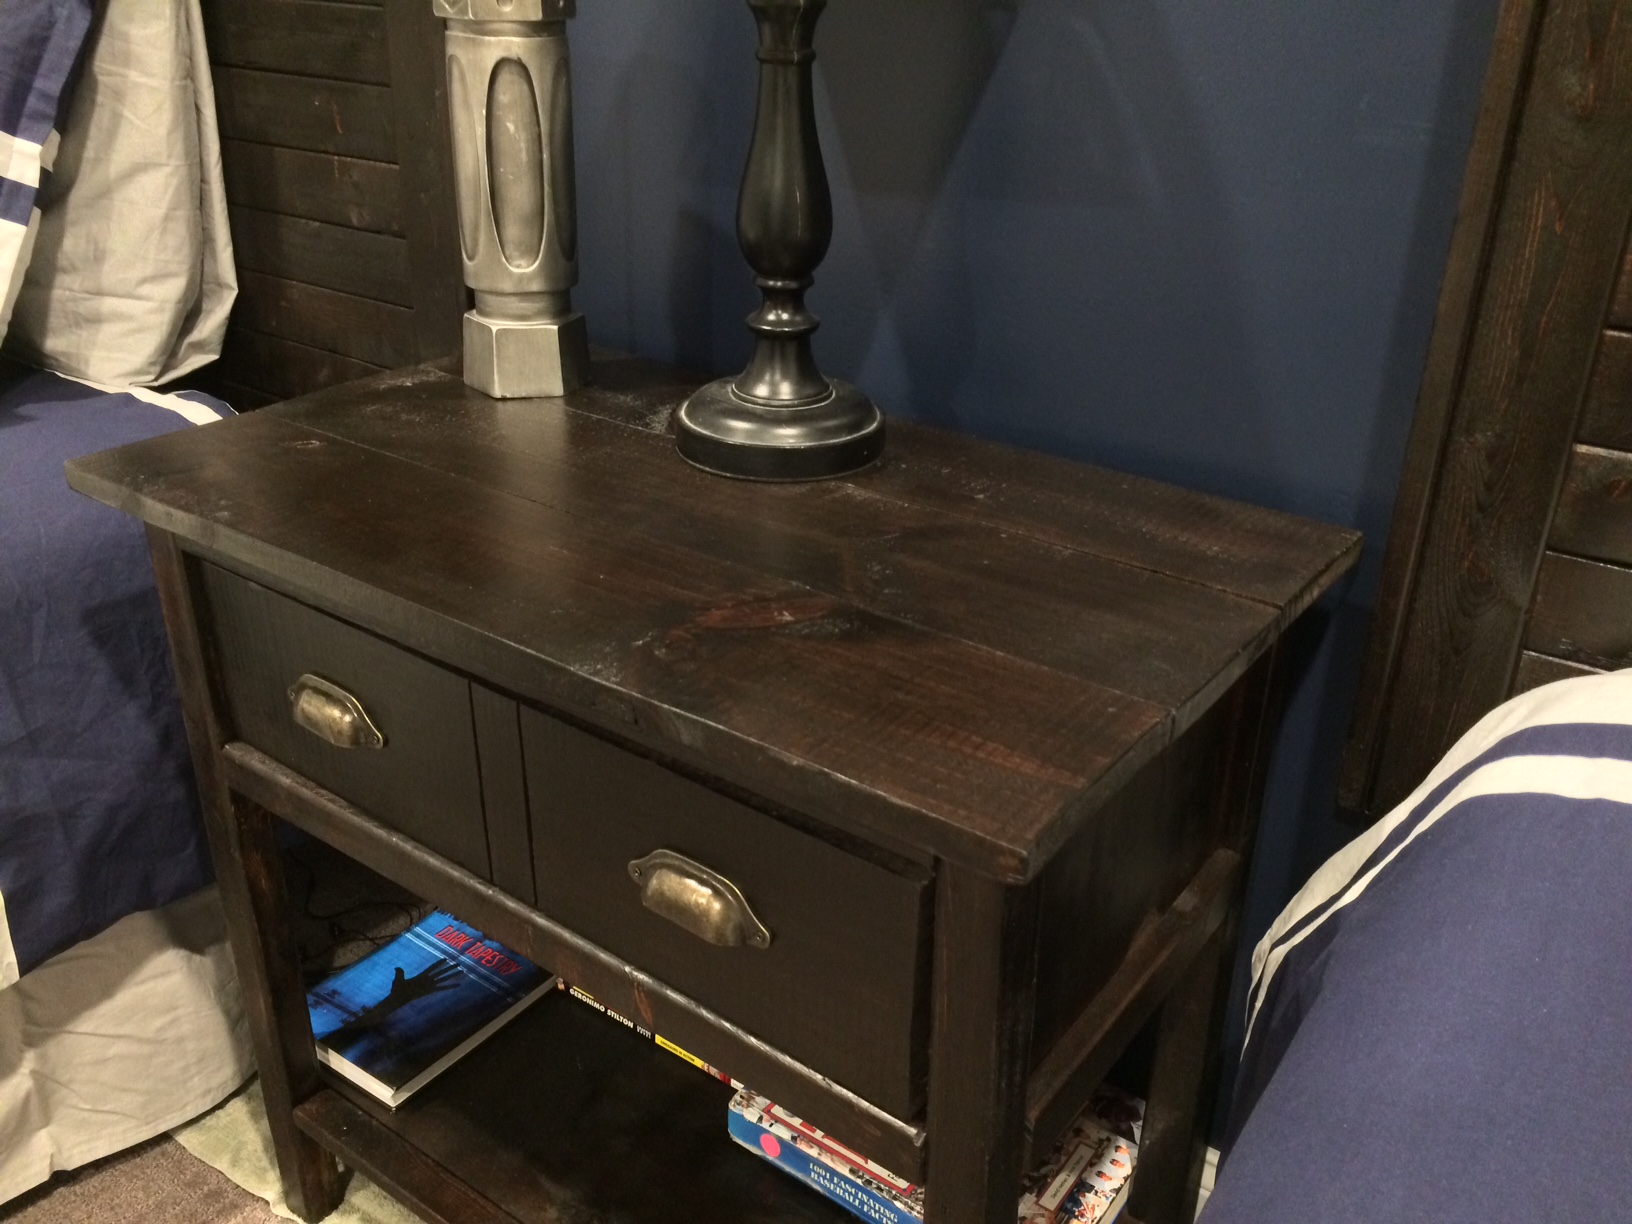
Nightstand
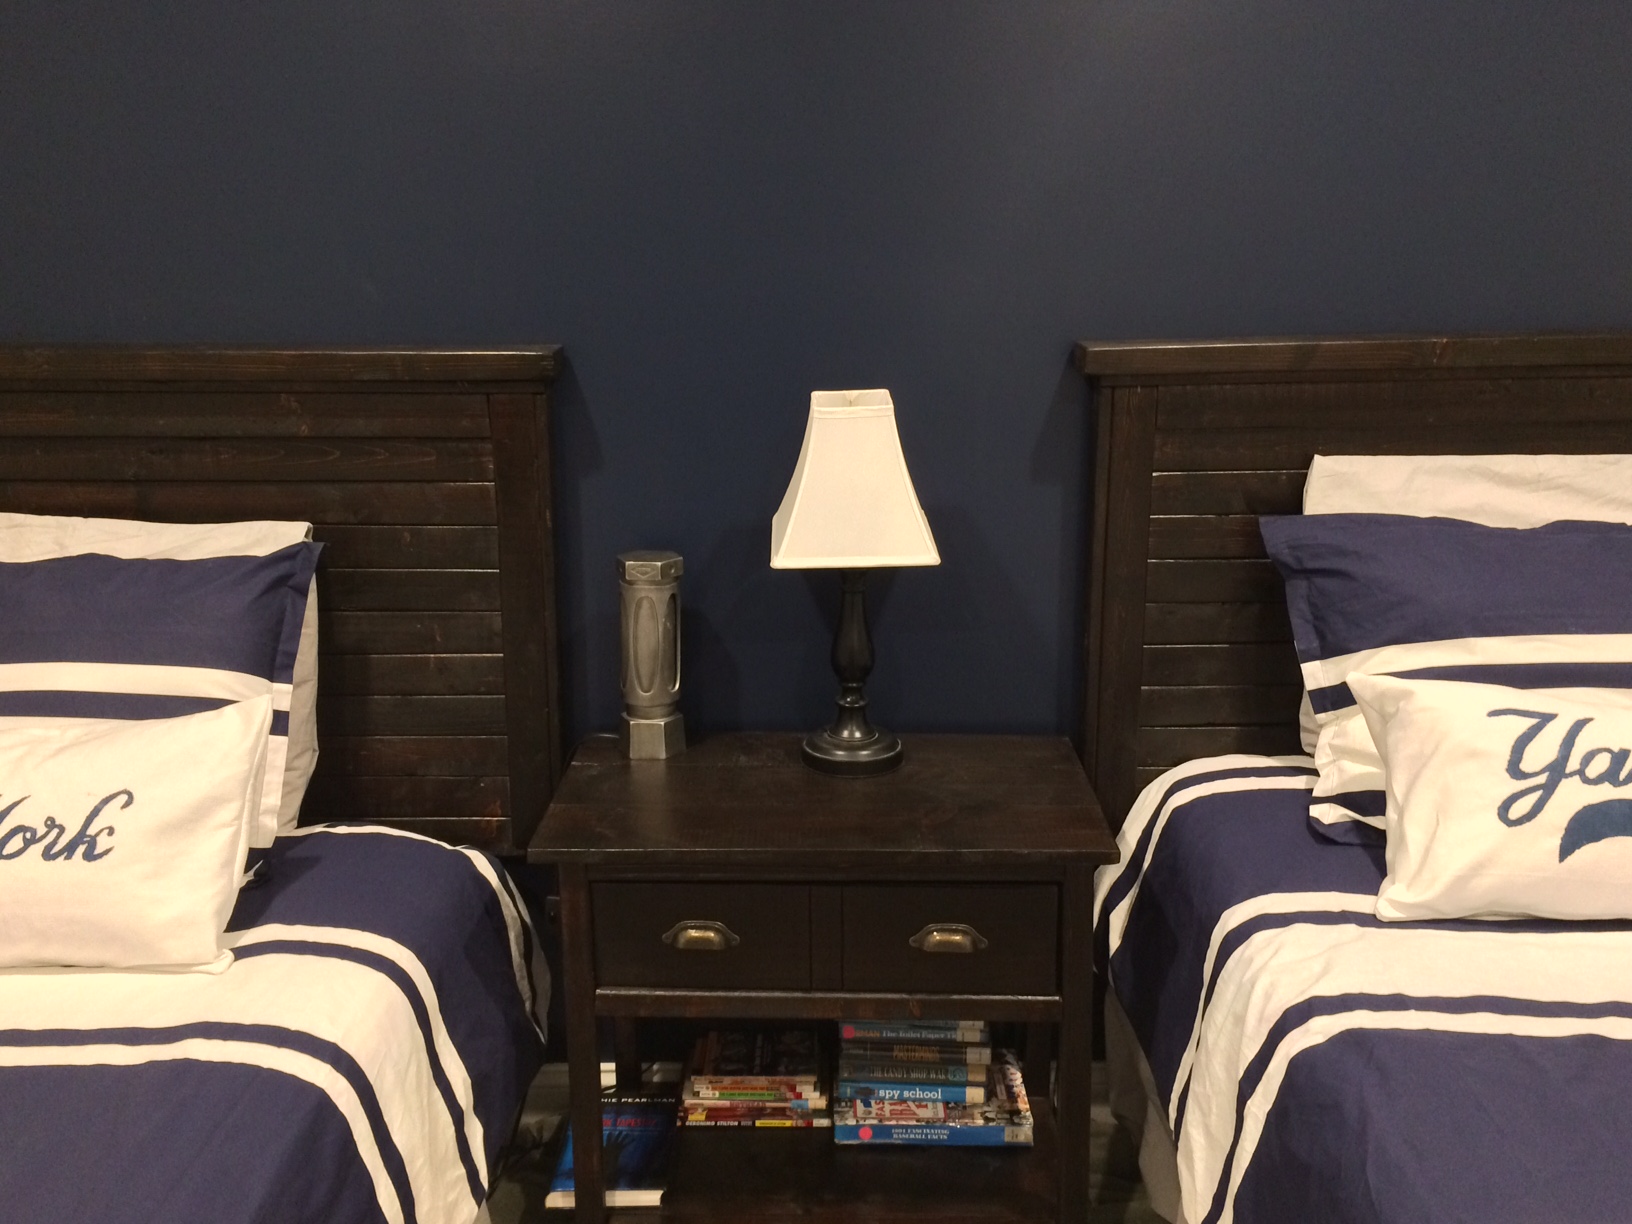
Built this nightstand for my boy's bedroom- built the farmhouse headboards to match. Was a straightforward project. I actually bought a circular saw instead of having the store make the cuts- best decision ever. Much better to cut as I go along.
Built from Plan(s)
Estimated Cost
$75
Estimated Time Investment
Day Project (6-9 Hours)
Finish Used
Minwax penetrating stain- 2 coats dark walnut, 1 coat red mahogany. Spray Minwax Lacquer in Satin
Recommended Skill Level
Beginner
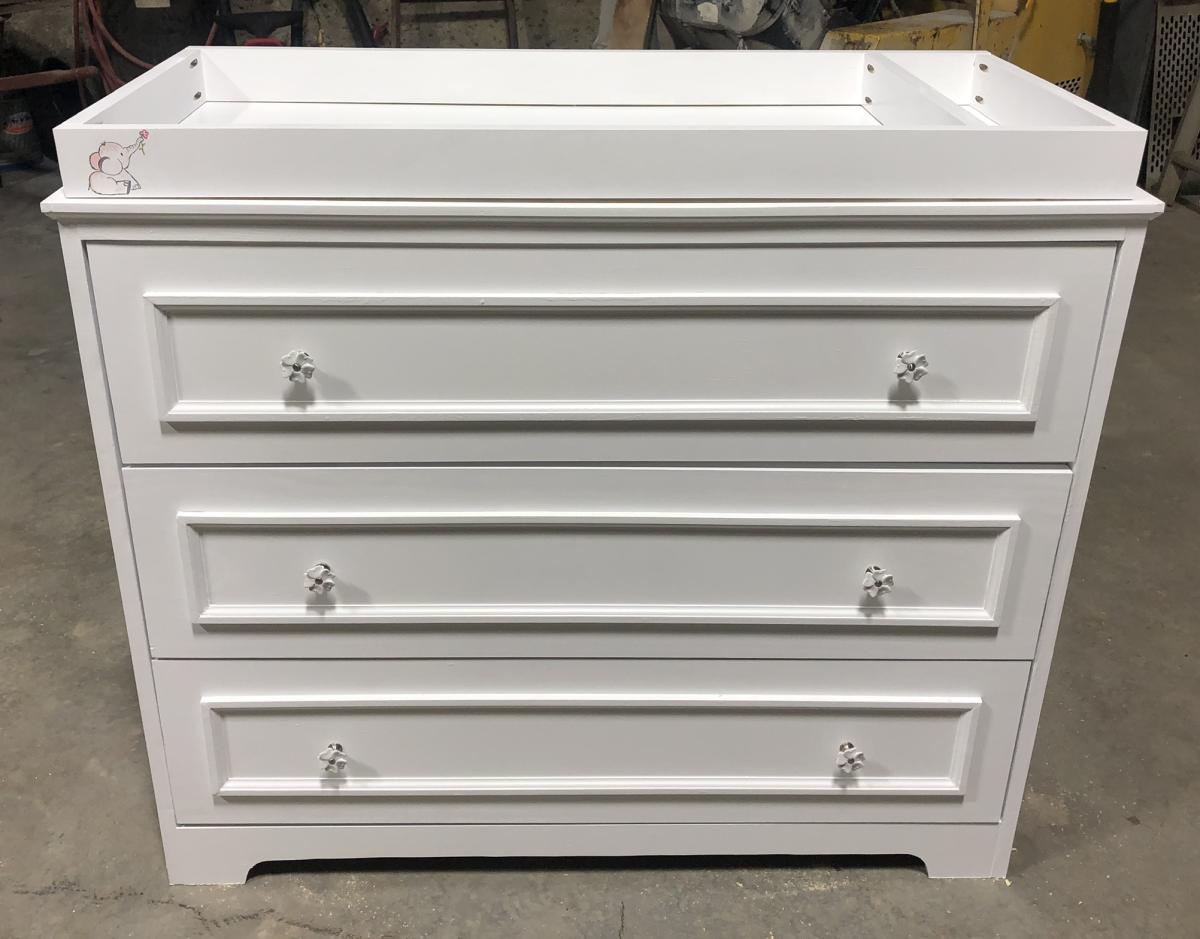
Your kitchen island
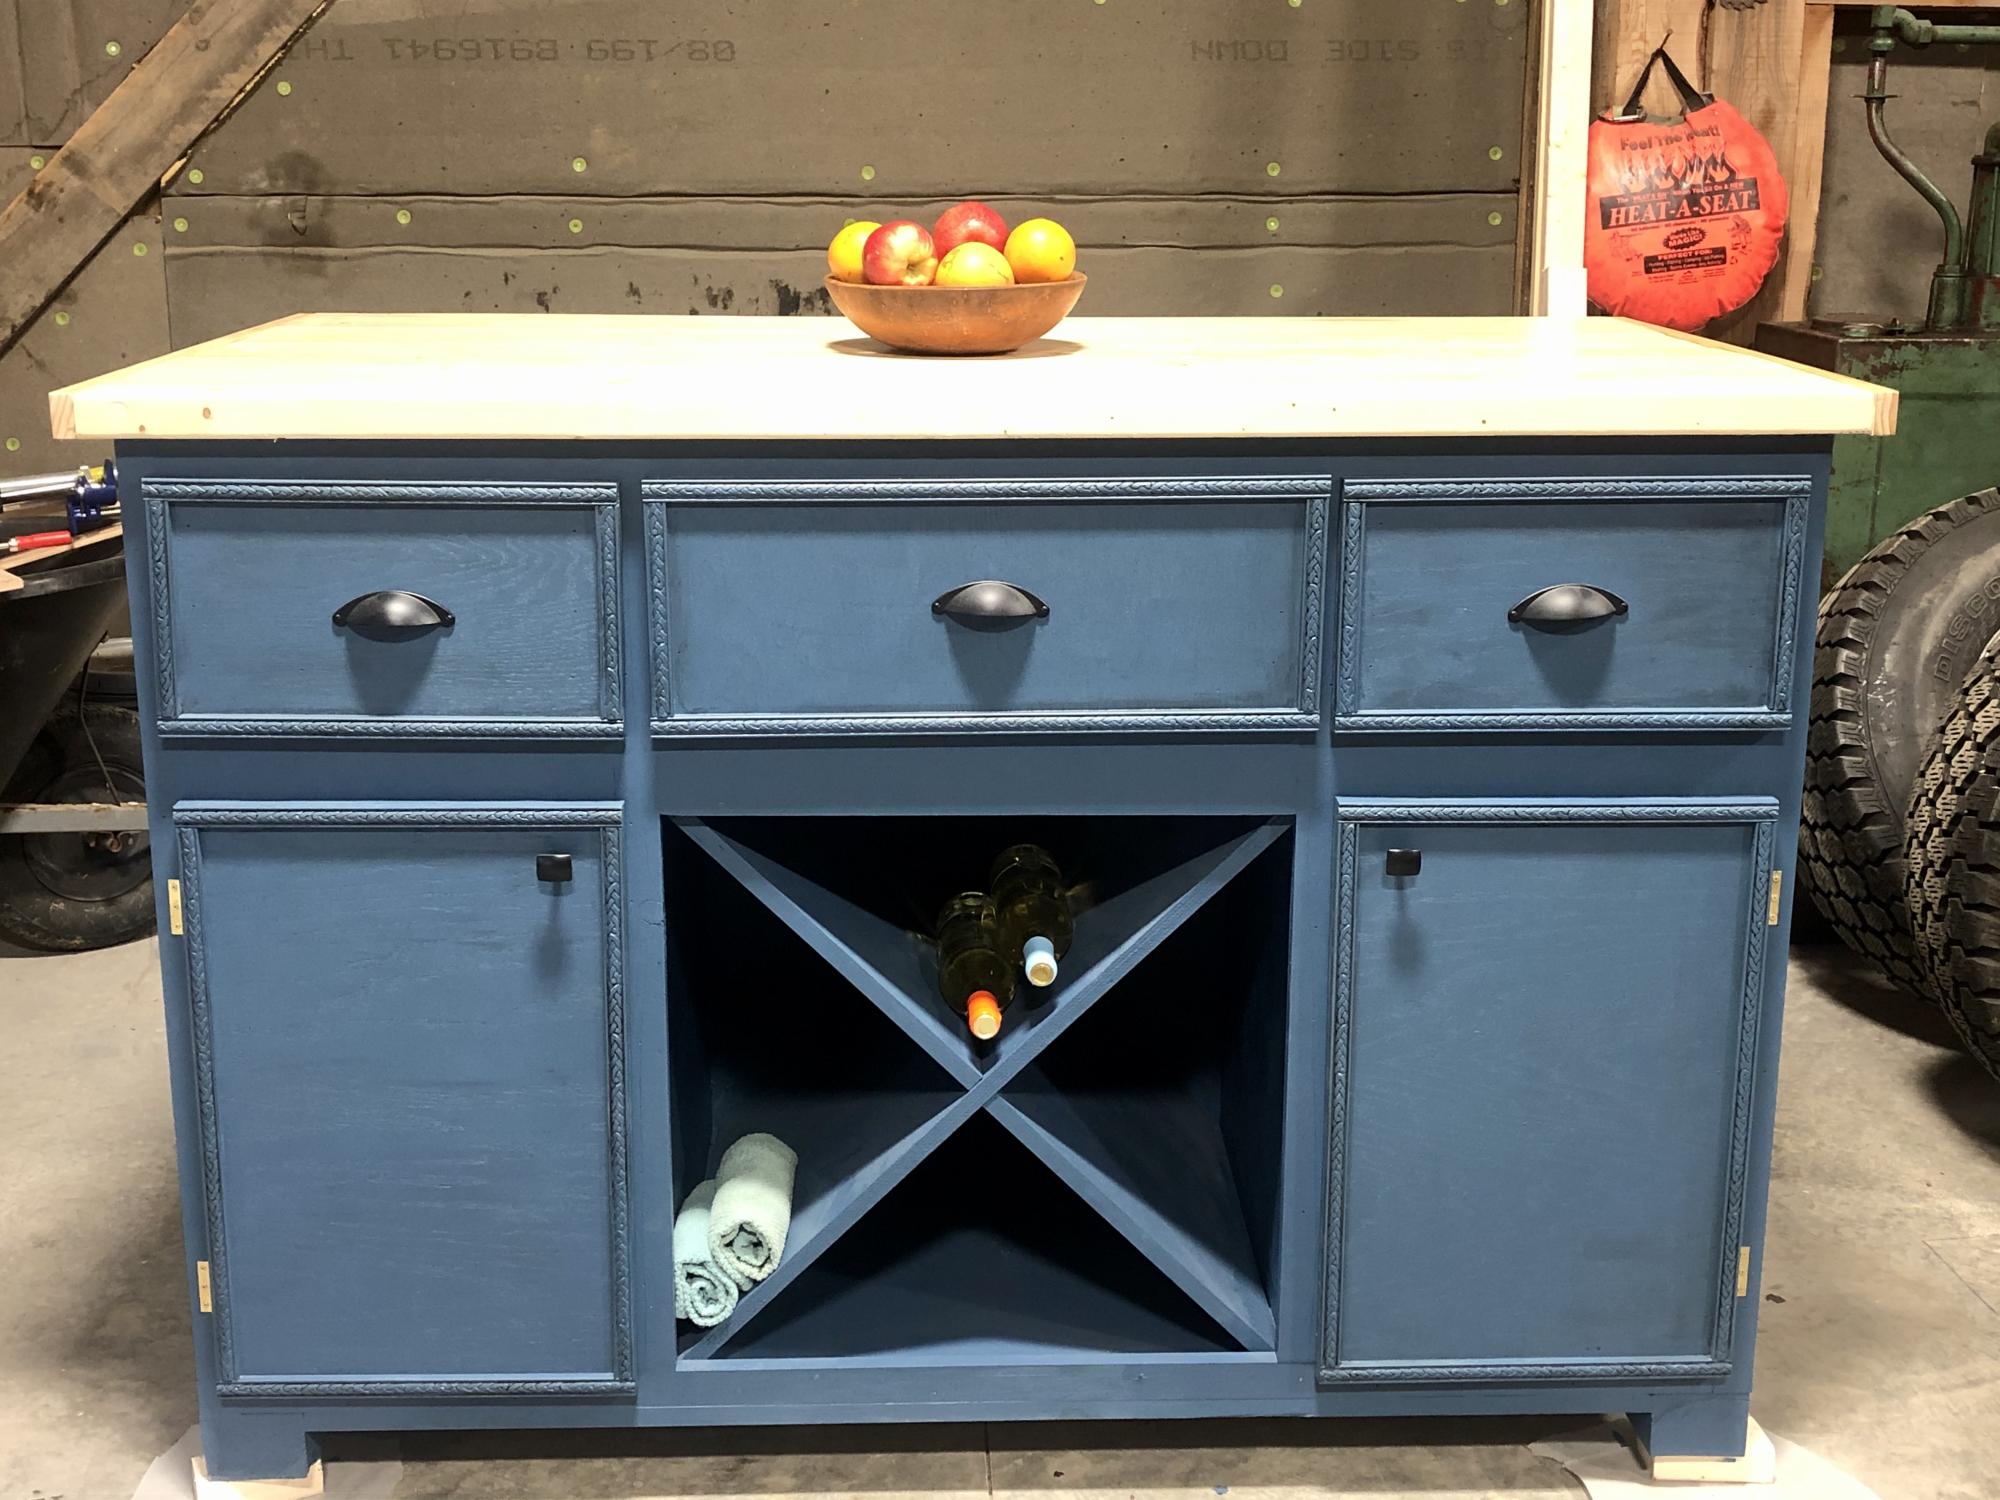
My first real project, which you gave me the courage to try!!! The kitchen island!
Made one error that I had to spend a bit of money to correct but in the long run the finished product is beautiful, I even used the same color you used.
After that success my daughter-in-law asked me to build the changing table for my expected granddaughter, I went into that with a little more confidence. Thank you for the inspiration that you give so many!
Built from Plan(s)
Comments
Mon, 12/27/2021 - 15:54
Those are superb!
WOW, WOW, WOW, you did a brilliant job! Thank you for sharing:)
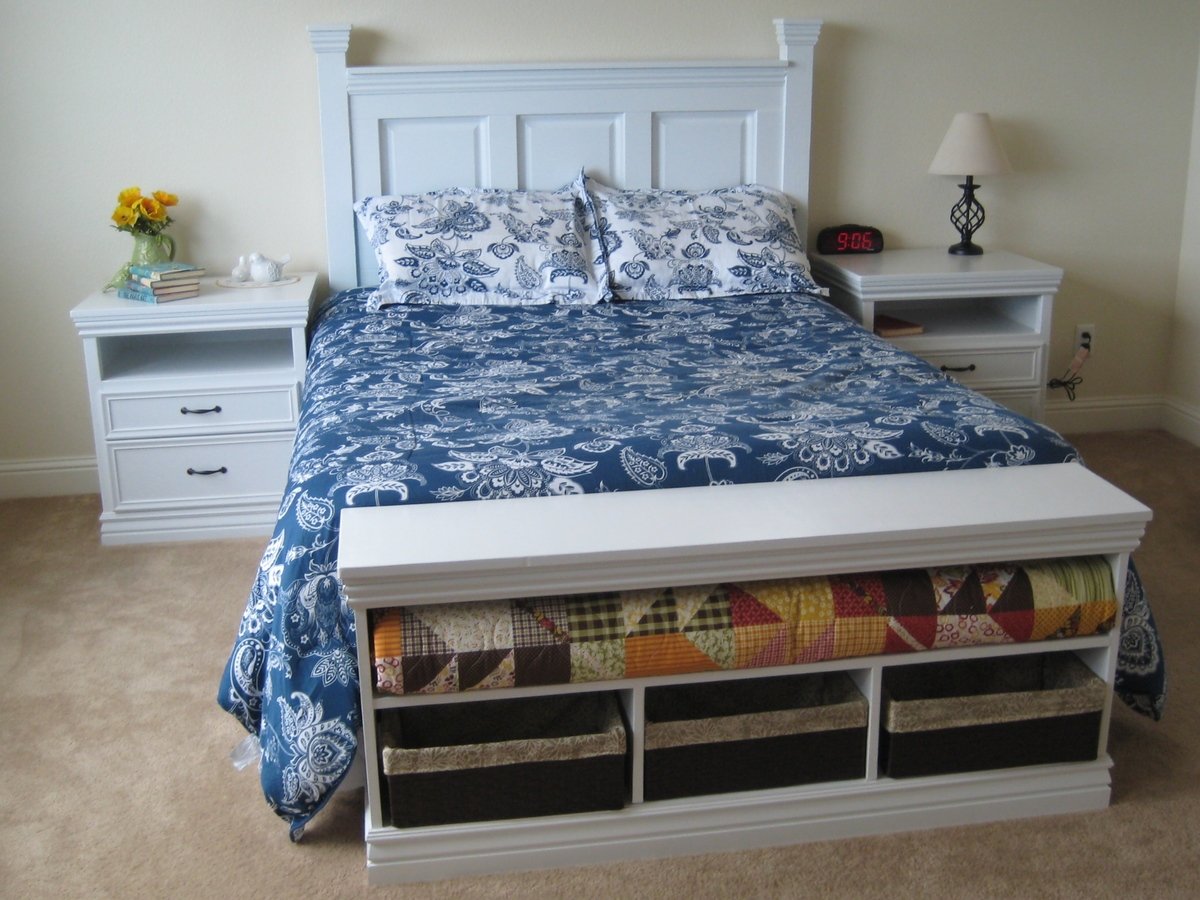
Not so "Rhyan" Nightstands
I used the Rhyan end table plan (with a few alterations) to make my nightstands. I changed the dimensions so mine turned out to be 20”D, 25”W, 27”H, I extended the side and back panels all the way to the top to close in the shelf and I made the bottom drawer larger. I decided to use under mount drawer slides but I think I will try out the side mount slides in the future though.
I wanted them to match the headboard and bench that I made for my bed so I added the same molding that I used on those pieces to finish it off.
I pre cut every piece for the main body of the nightstand and predrilled all of the Kreg holes which made it a really quick piece to put together! I purchased the Mini Kreg jig for this project and am so glad I did. Totally worth the money!

Built from Plan(s)
Estimated Cost
About $80 For 2 Nightstands
Estimated Time Investment
Weekend Project (10-20 Hours)
Finish Used
I painted with Rust-oleum painters touch semi gloss white and then sprayed a few coats of polyacrylic on the top.
Recommended Skill Level
Beginner
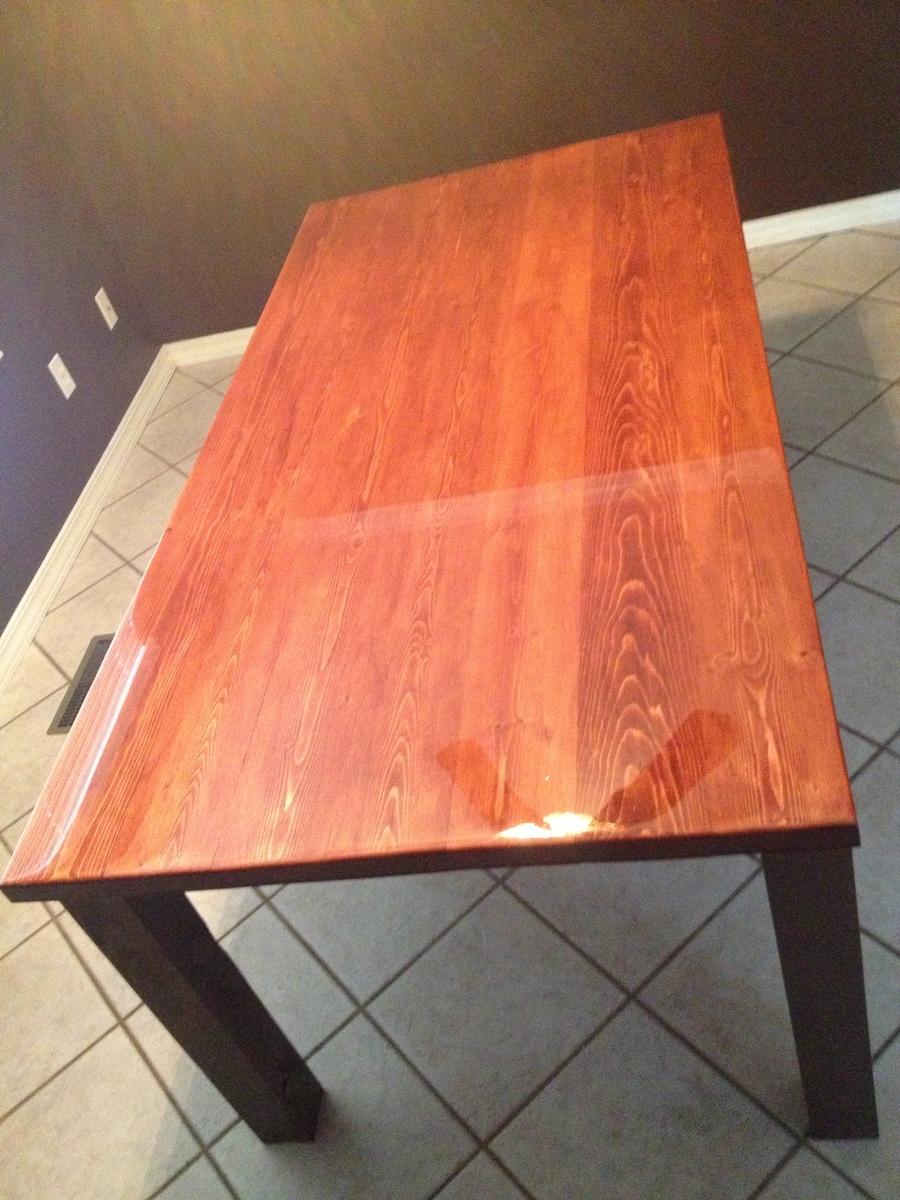
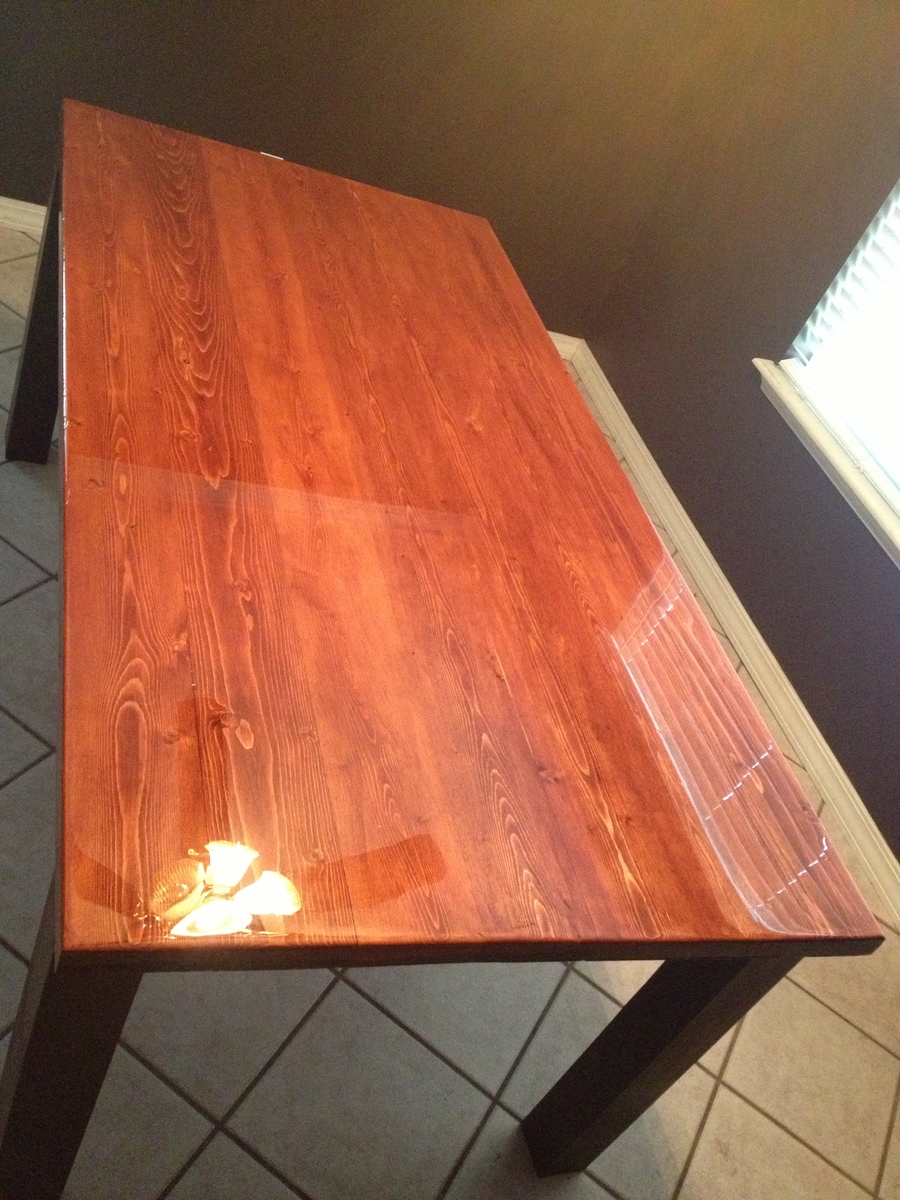
Farm House Table

This was from the farm house table plans and the finish I used was bar and table top resin that you pour on to get a mirror finish. It doesn't take very long at all to cut all the boards and put everything together with pocket hole screws. It just takes time for the paint, stain and top coat to dry.

Estimated Time Investment
Weekend Project (10-20 Hours)
Finish Used
Chocolate Swirl paint for the bottom and MinWax stain for the top which I bought at Orange. The Bar and table Resin I bought online.
Recommended Skill Level
Beginner
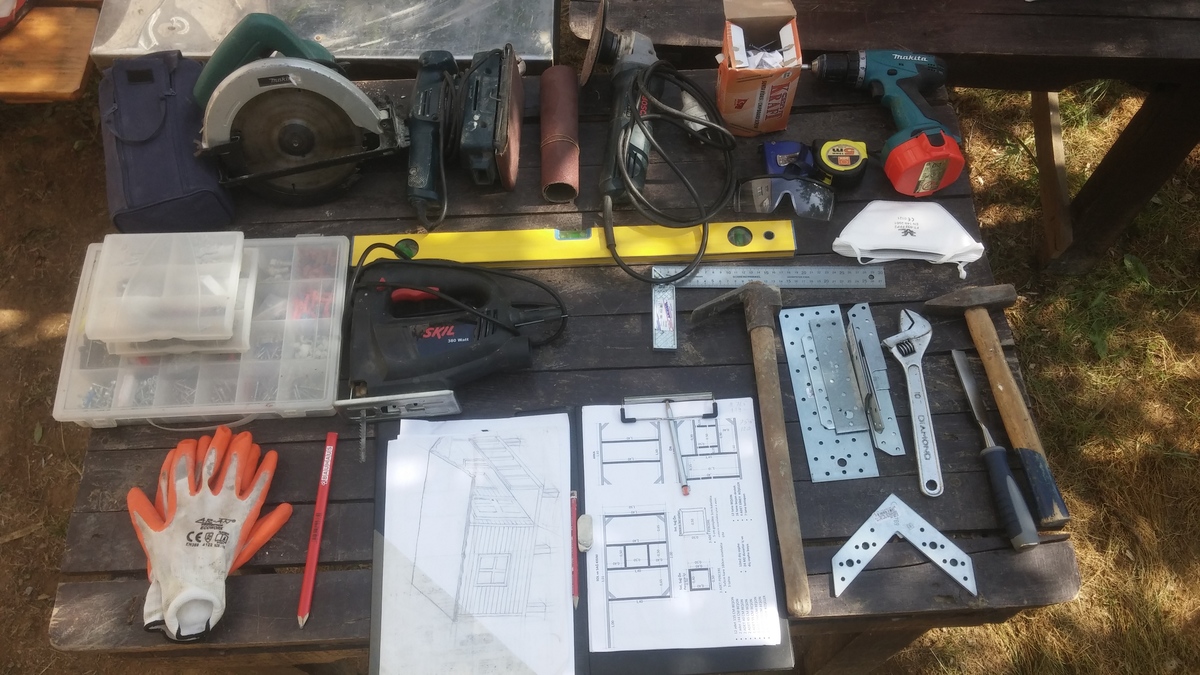
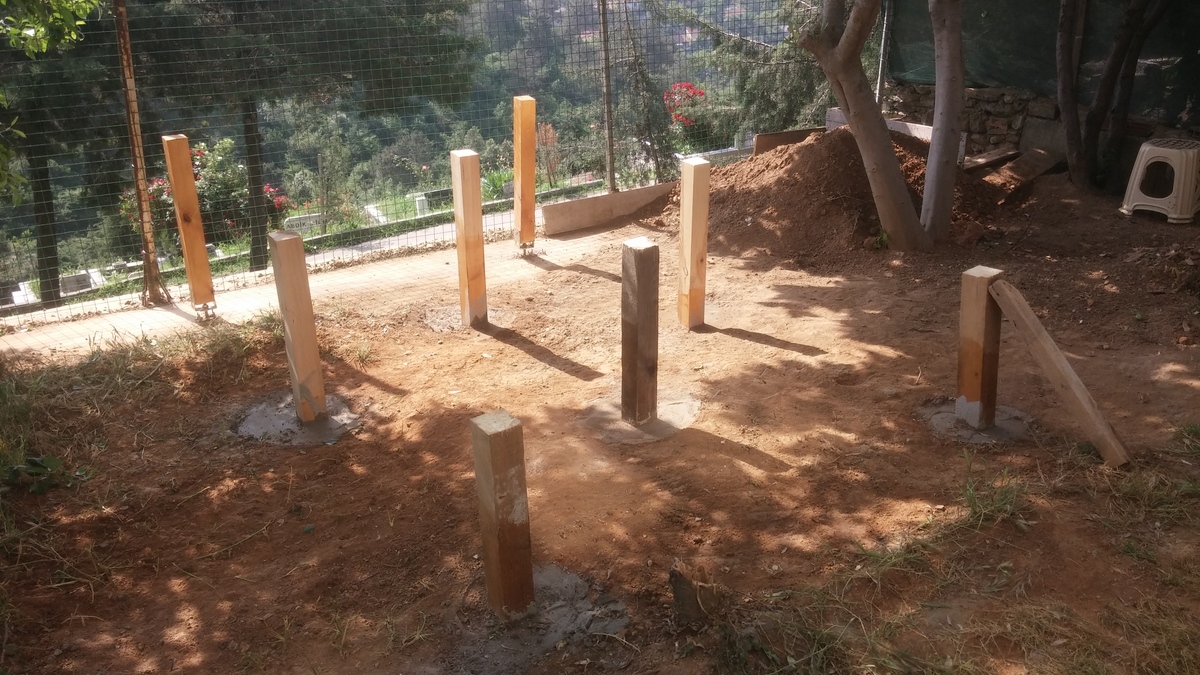
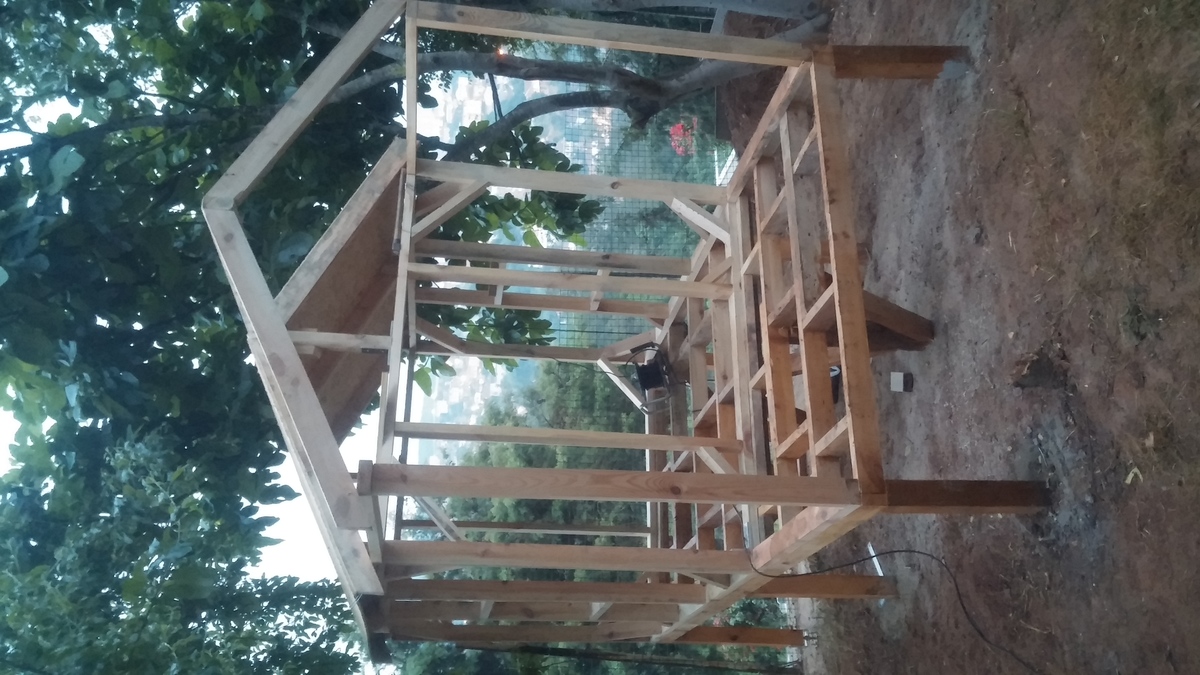
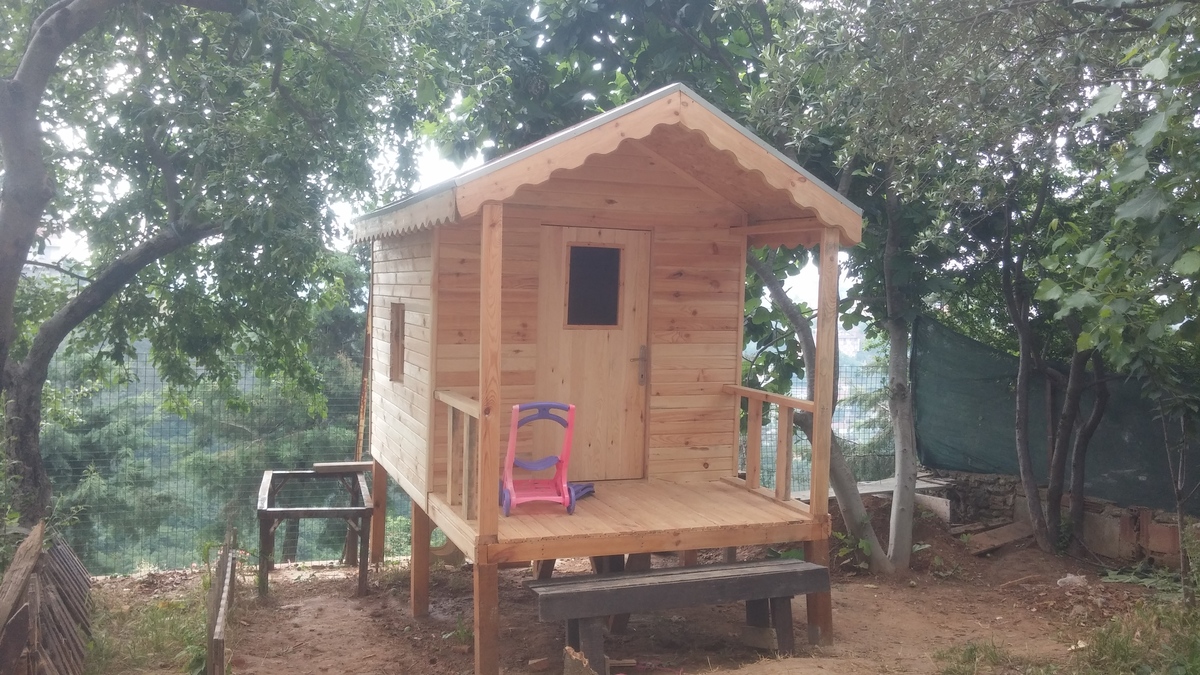
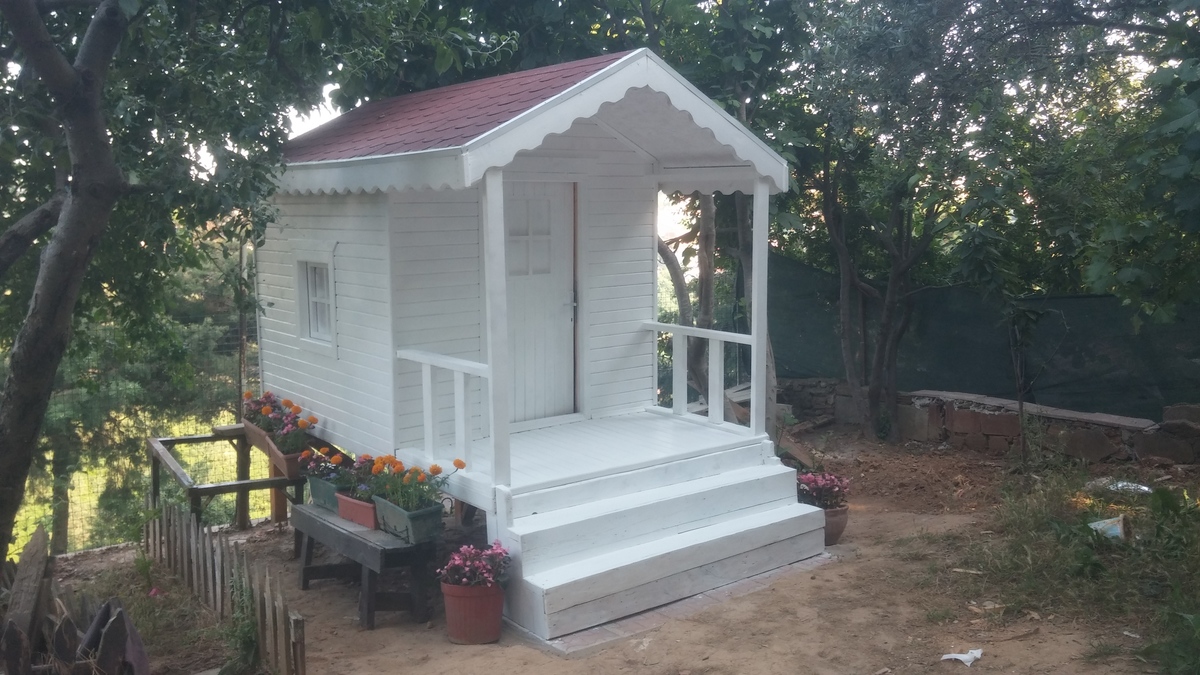
Play House For Ece & Zeynep
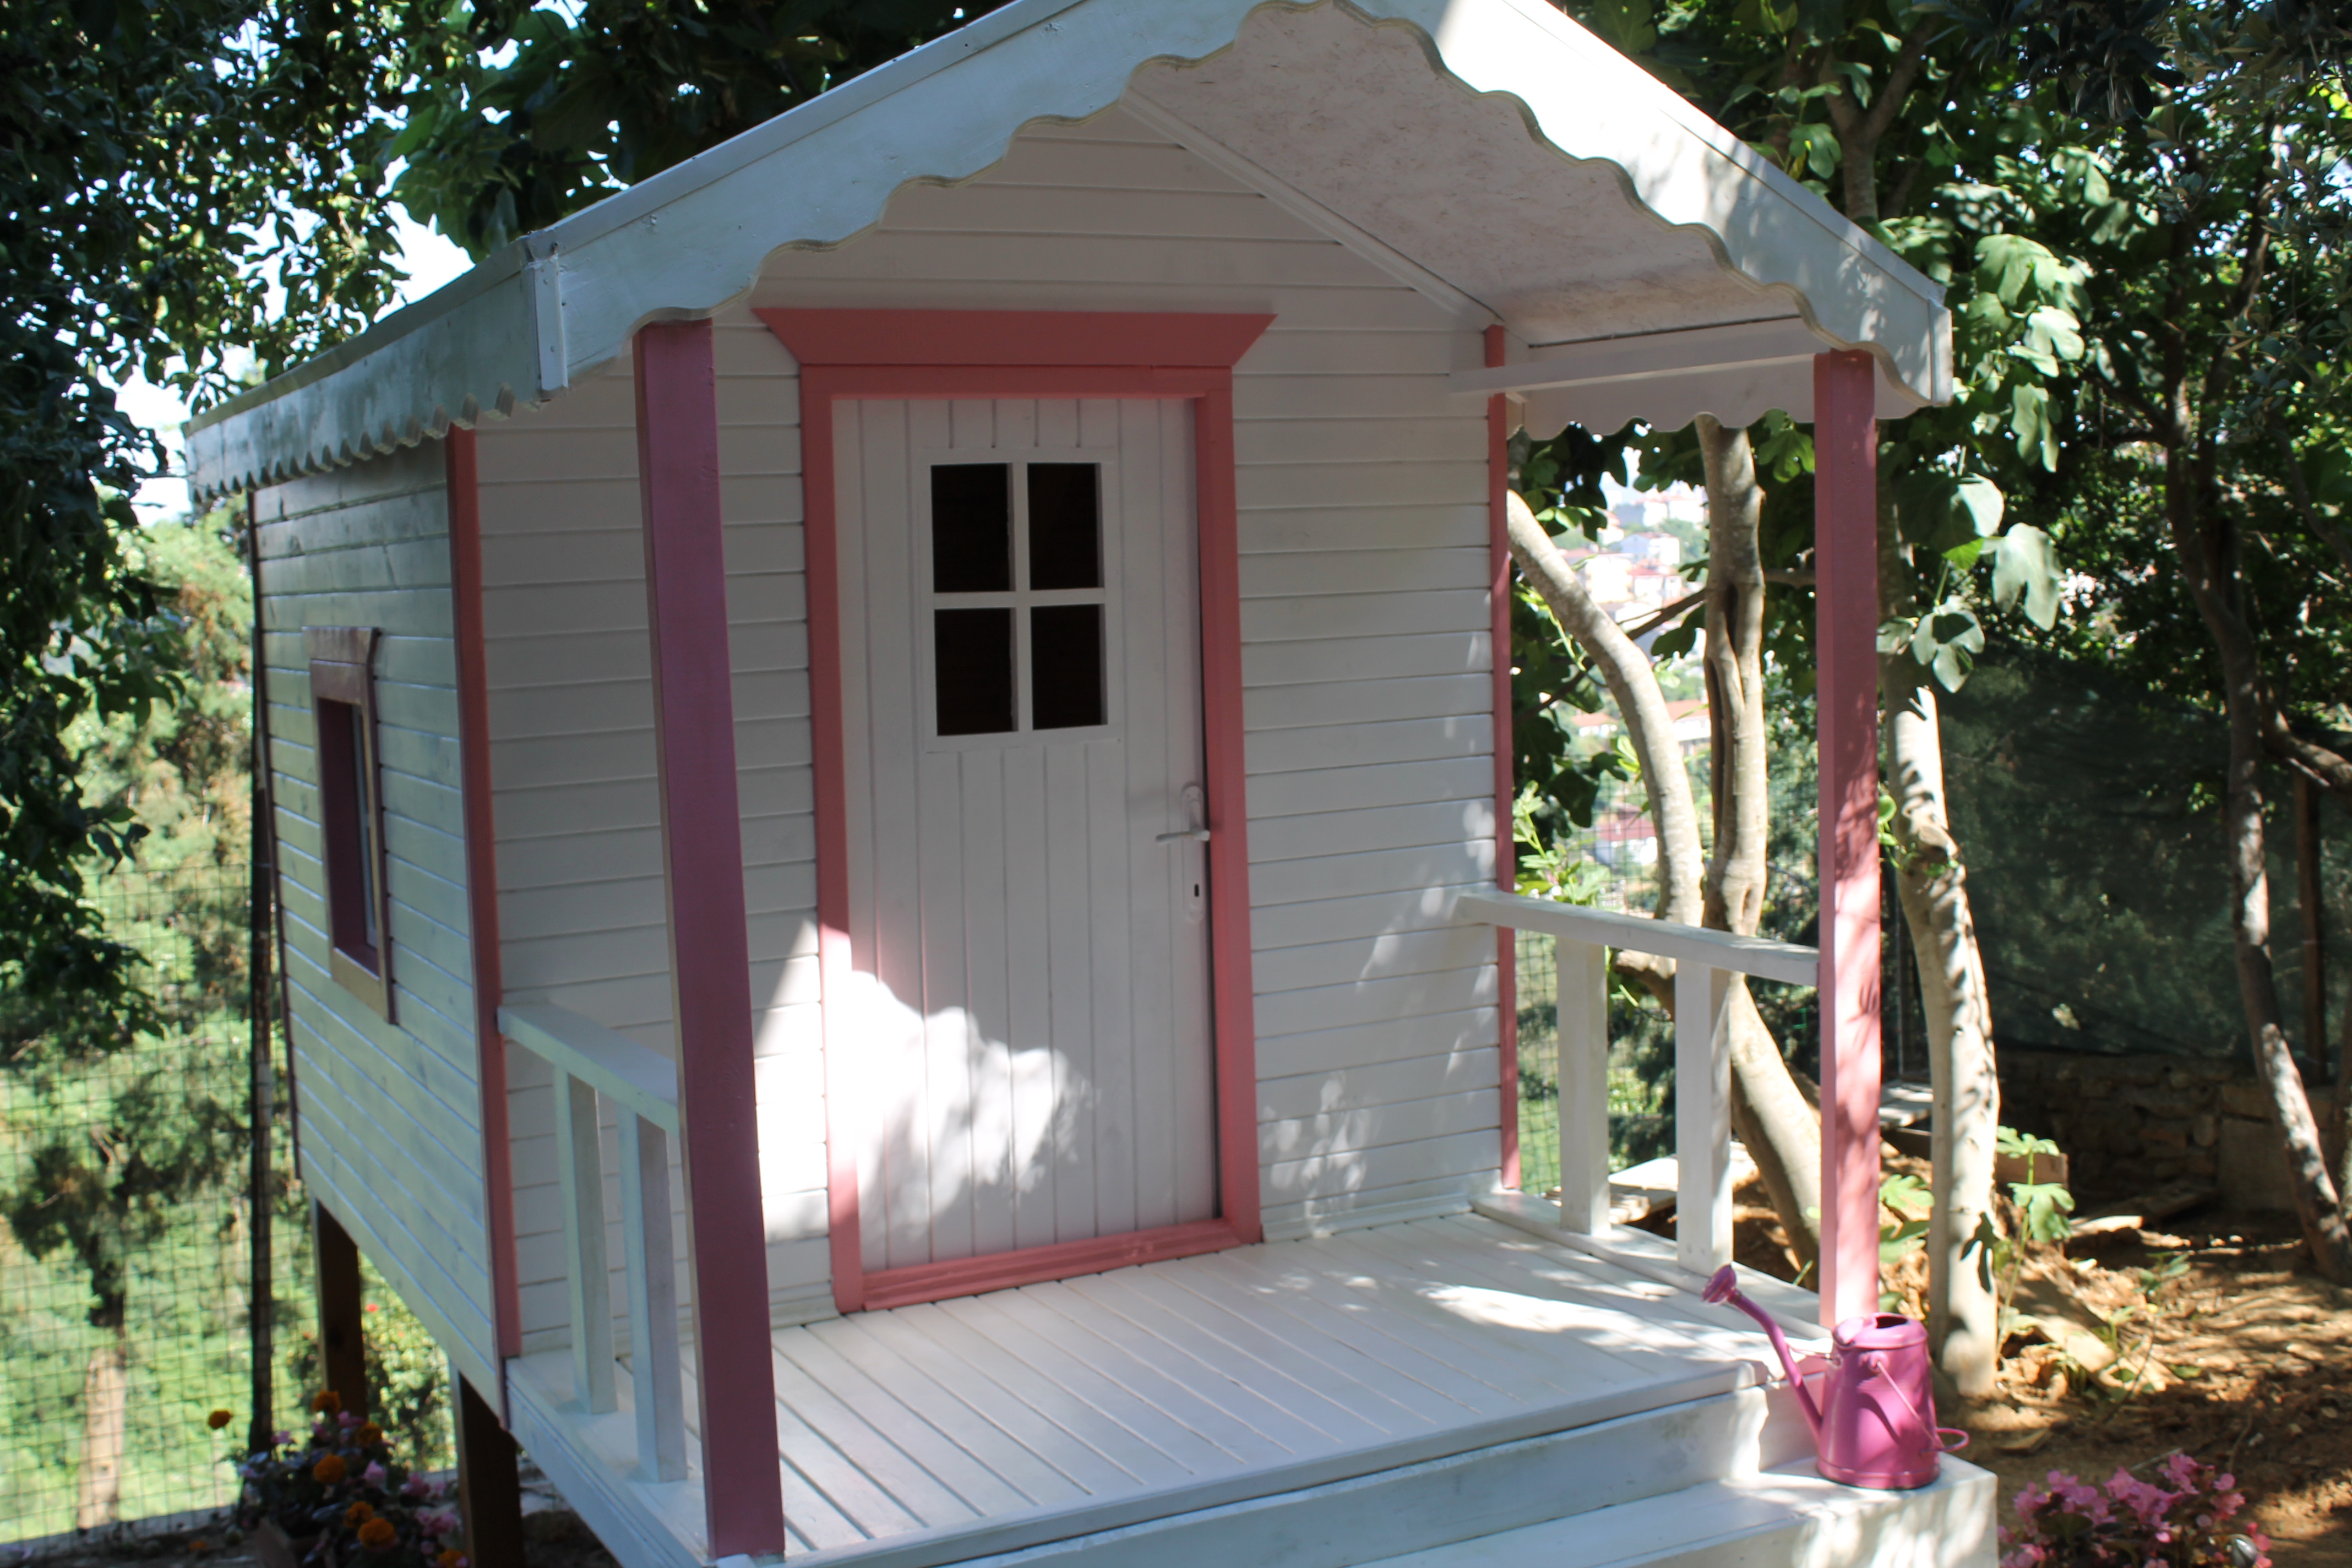
Hi, My name is Ibrahim I am a Project management Unit Manager in an Information technologies. I have two daughters, 3 and 8 years old. We have garden around 150m2. I want to do play house in our garden to play. First of all I searched how can do it in internet. Than I did preliminary work. I provided equipment and materials. And I take a holiday my company as a week. I started my first project which is wooden house.
My daughter and all around me was liked wooden house. I hope you like it:)
Sorry my English :)
.
Estimated Cost
all inclusive around 1.500 TL (Turkish Lira) around 564$
Estimated Time Investment
Week Long Project (20 Hours or More)
Finish Used
I painted white and pink the project.
Recommended Skill Level
Starter Project
Comments

Fri, 06/26/2015 - 19:37
This is too cute, I bet your
This is too cute, I bet your little girls love it :)

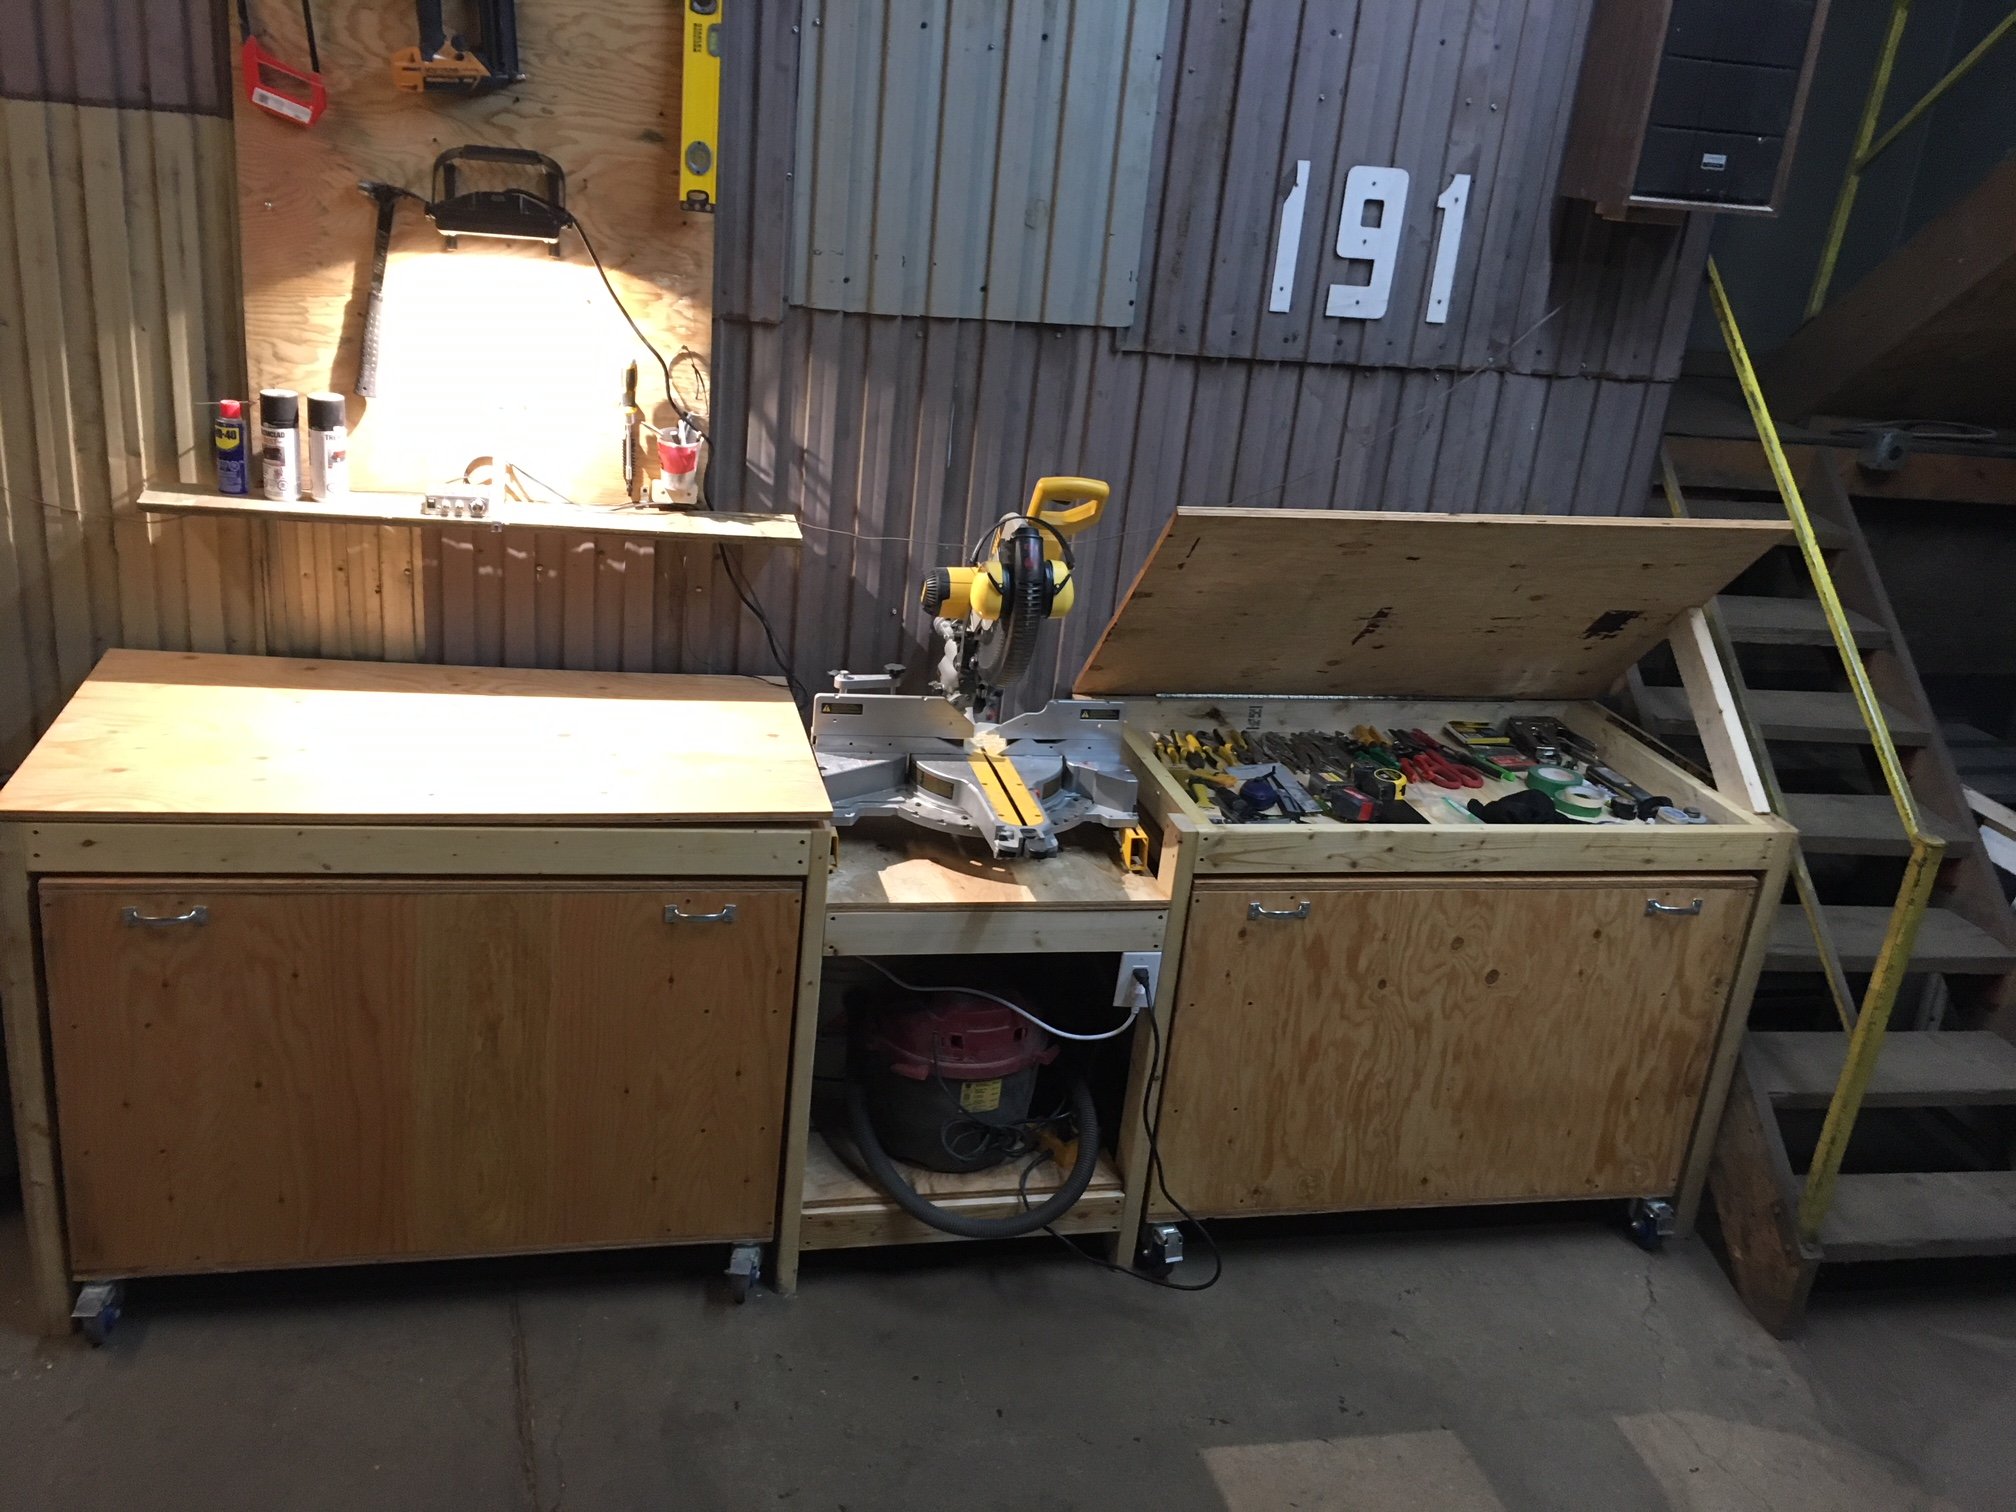
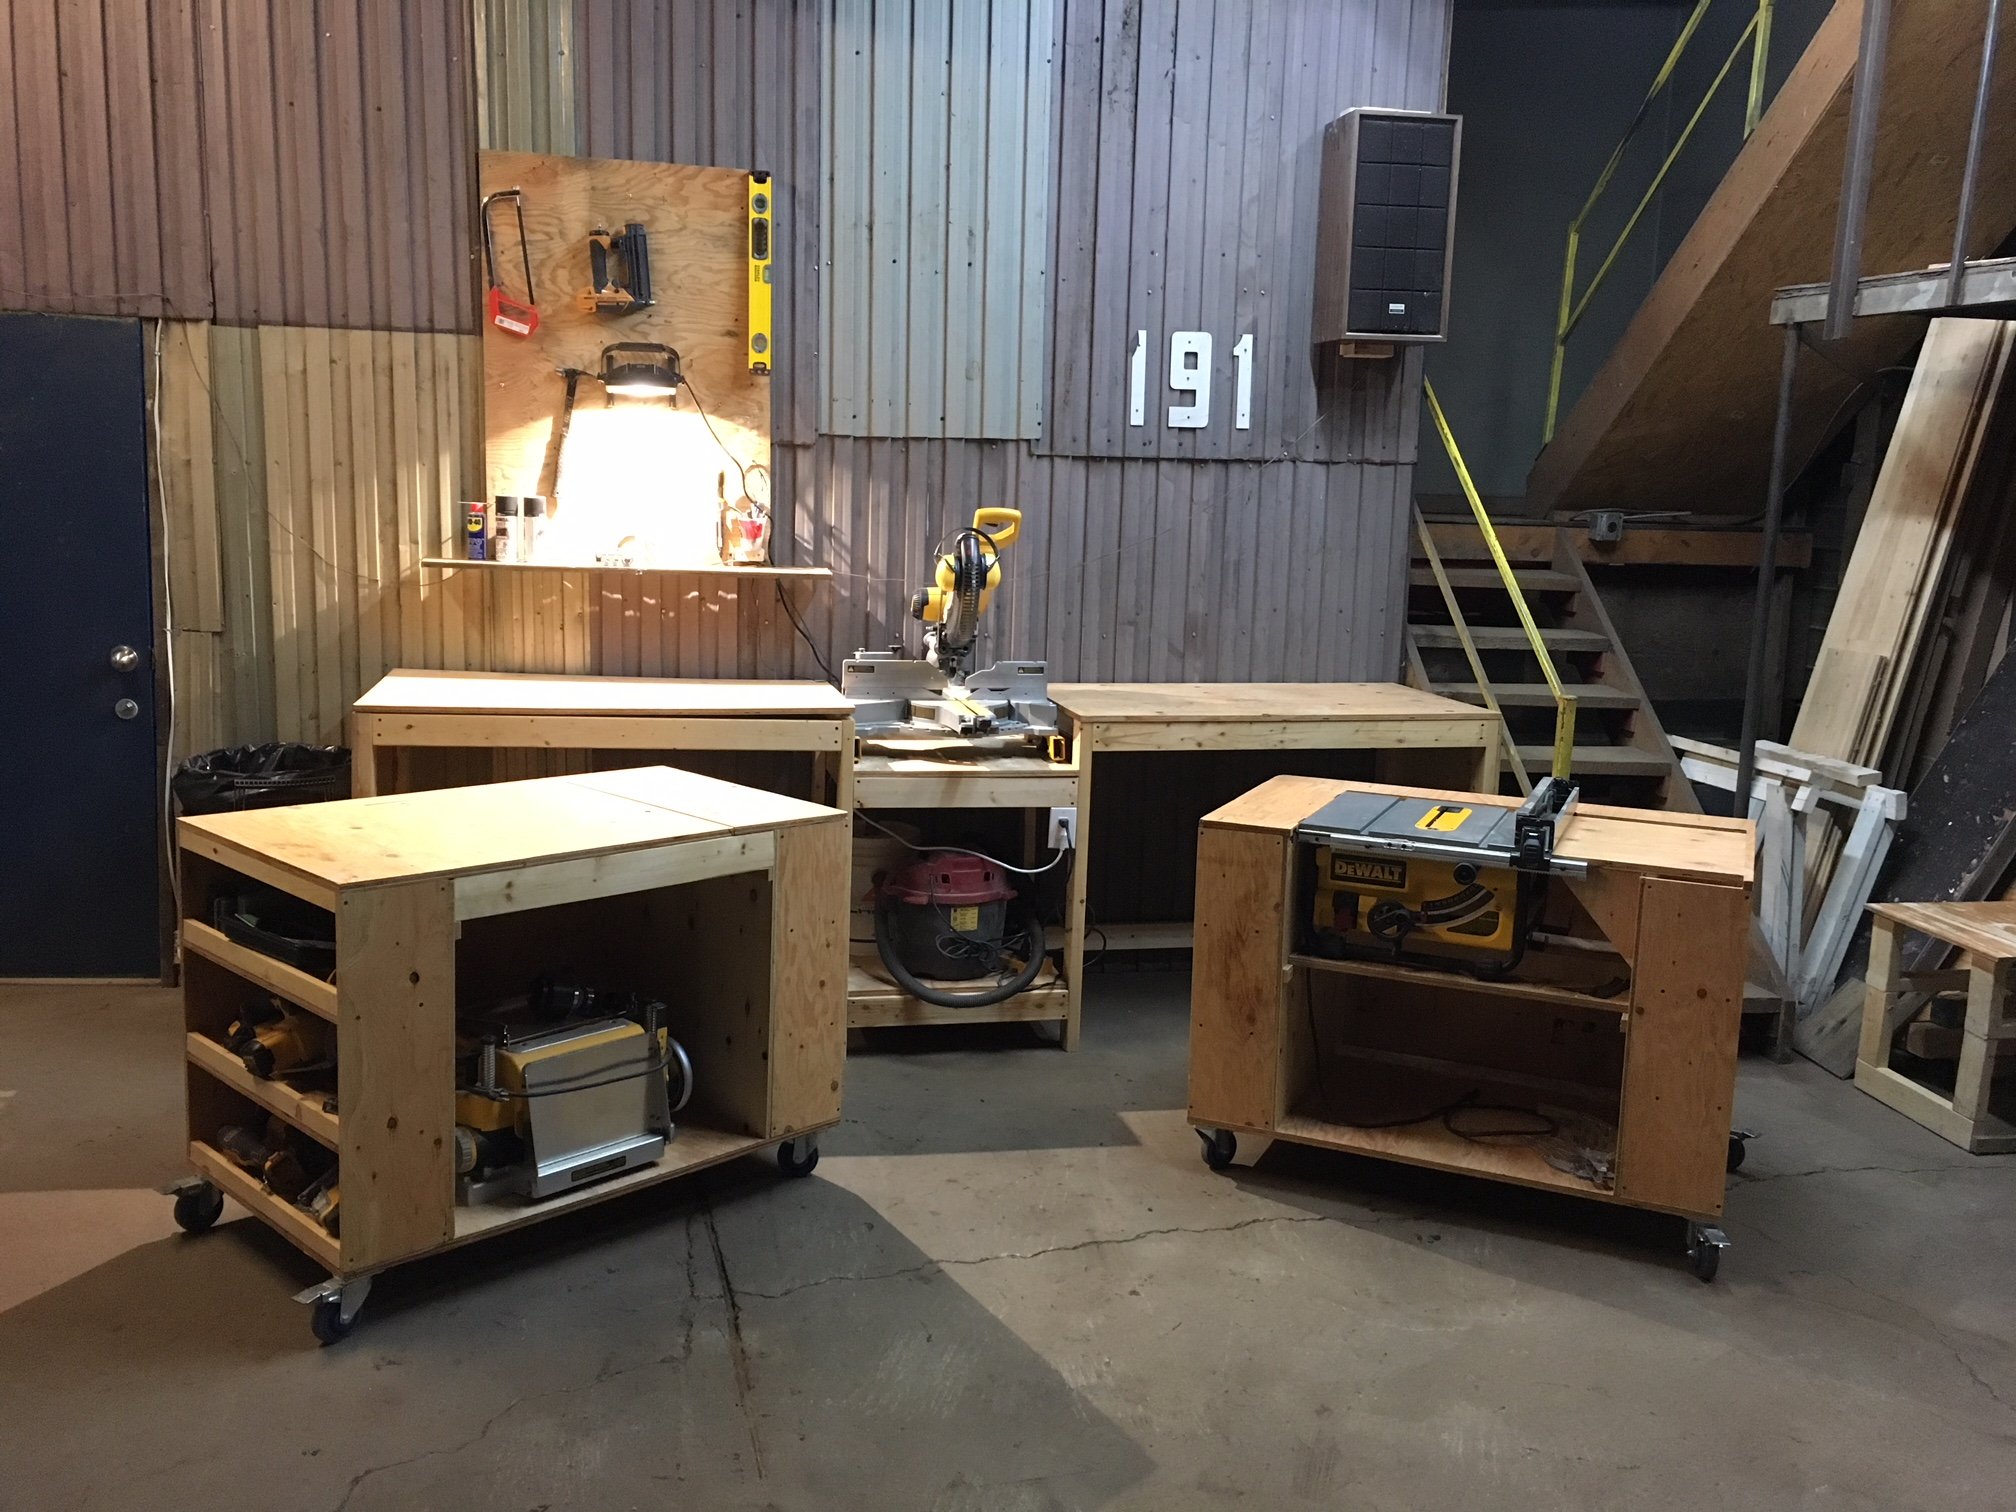
Ana's ultimate workbench (Ryobi)
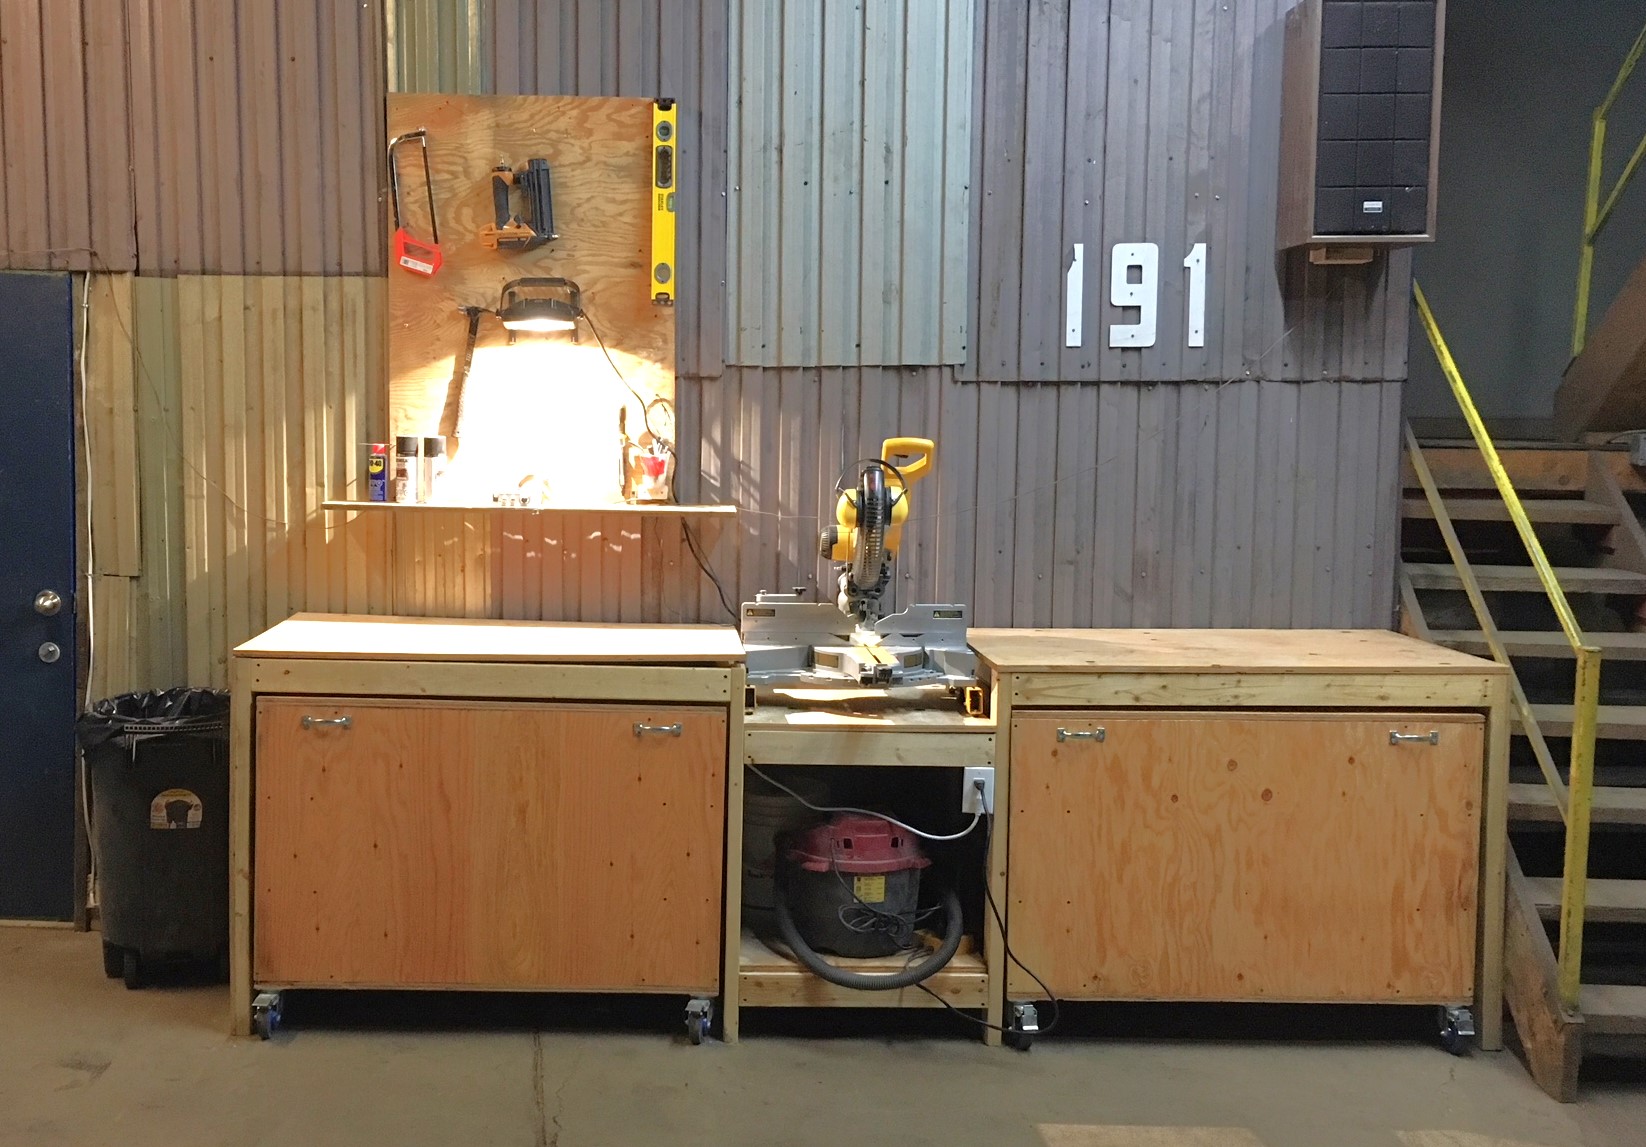
This is the perfect workbench for my needs.
I upgraded the casters to bigger ones as my shop's floor is in rough shape.
I also added storage under the two work surface next to the miter saw. This was just a matter of closing under the 2X4 frame and making the two sections on casters a little shorter. The only downside for that mod is that the plywood can bend a bit since it is not screwed to the frame. I don't mind since it falls flat as soon as there is weight on it. Also, this mod makes it hard to include fence system (it would need to be removable, like fixed with dowels only, no glue) and almost impossible to include a precise fence system since it would need to be removable. In my case, I do rough, non-repetitive cuts, so there is no need.
TIP : Pay a little extra for smooth plywood. I lost a lot of time sanding mine :(
Built from Plan(s)
Estimated Cost
$150 CAD
Estimated Time Investment
Weekend Project (10-20 Hours)
Finish Used
Linseed oil
Recommended Skill Level
Beginner
Comments

Tue, 02/04/2020 - 08:21
Dewalt table saw cart
Awesome! Do you have pictures/info for the cart that has the Dewalt table saw? I have the same one and would love to build the cart for it.
Adirondack chairs
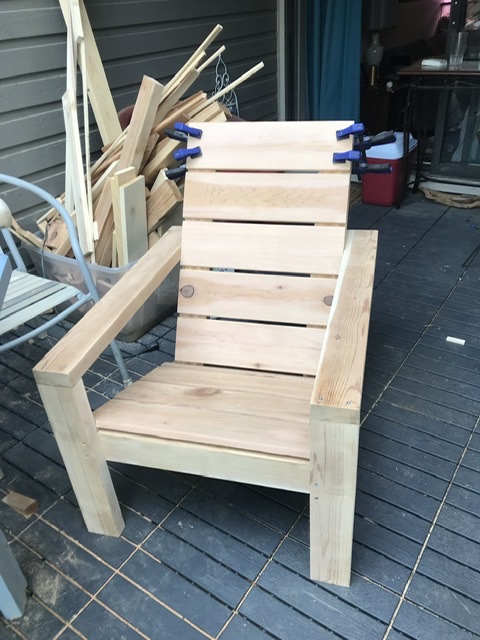
I made a pair of these
and my friends arrive early so they can have one to sit in. The other is mine!
Built from Plan(s)
Comments
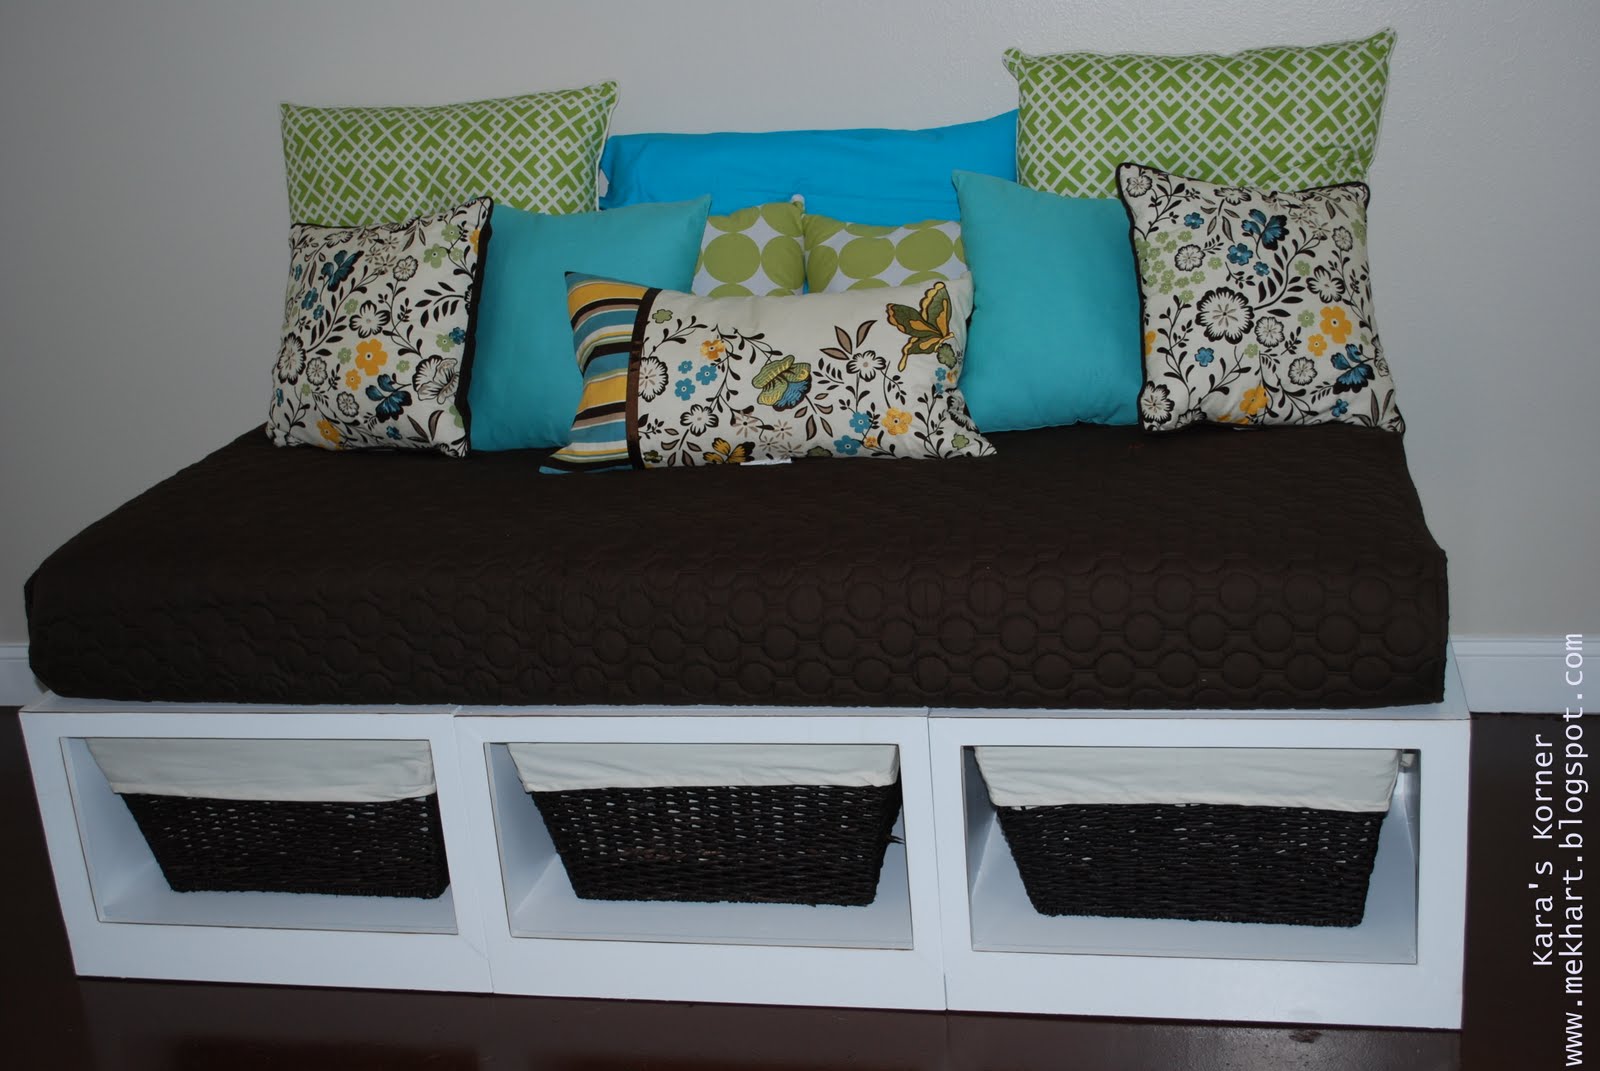
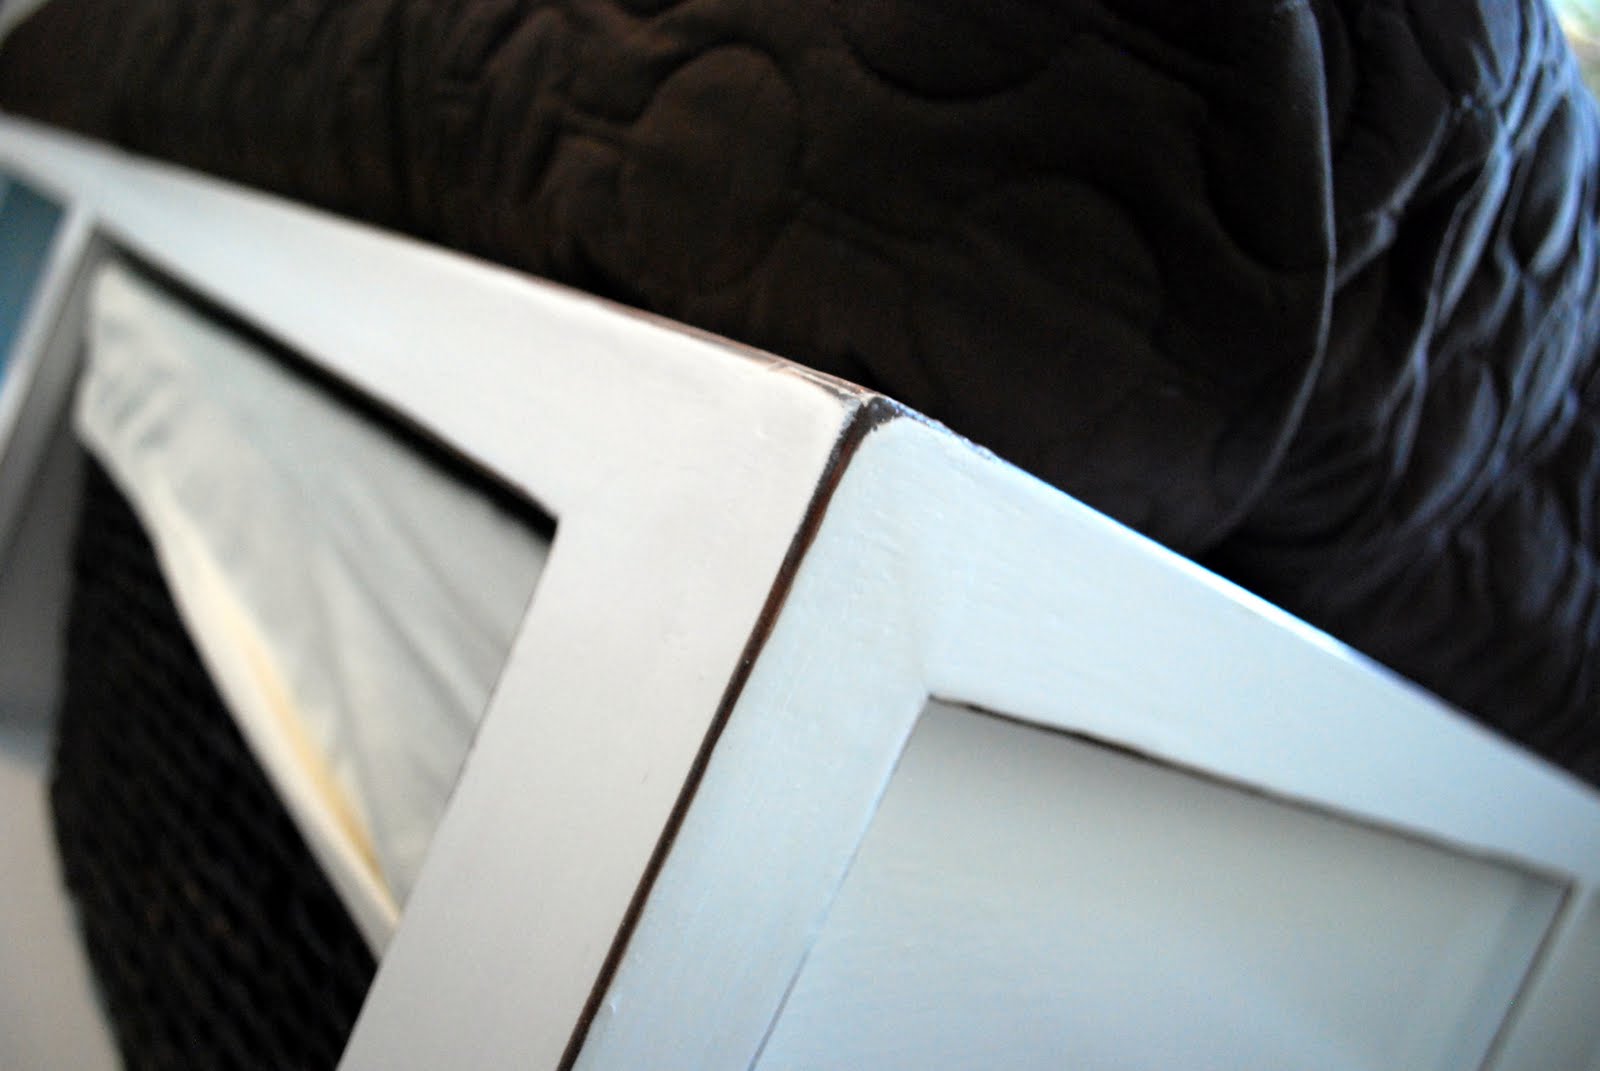
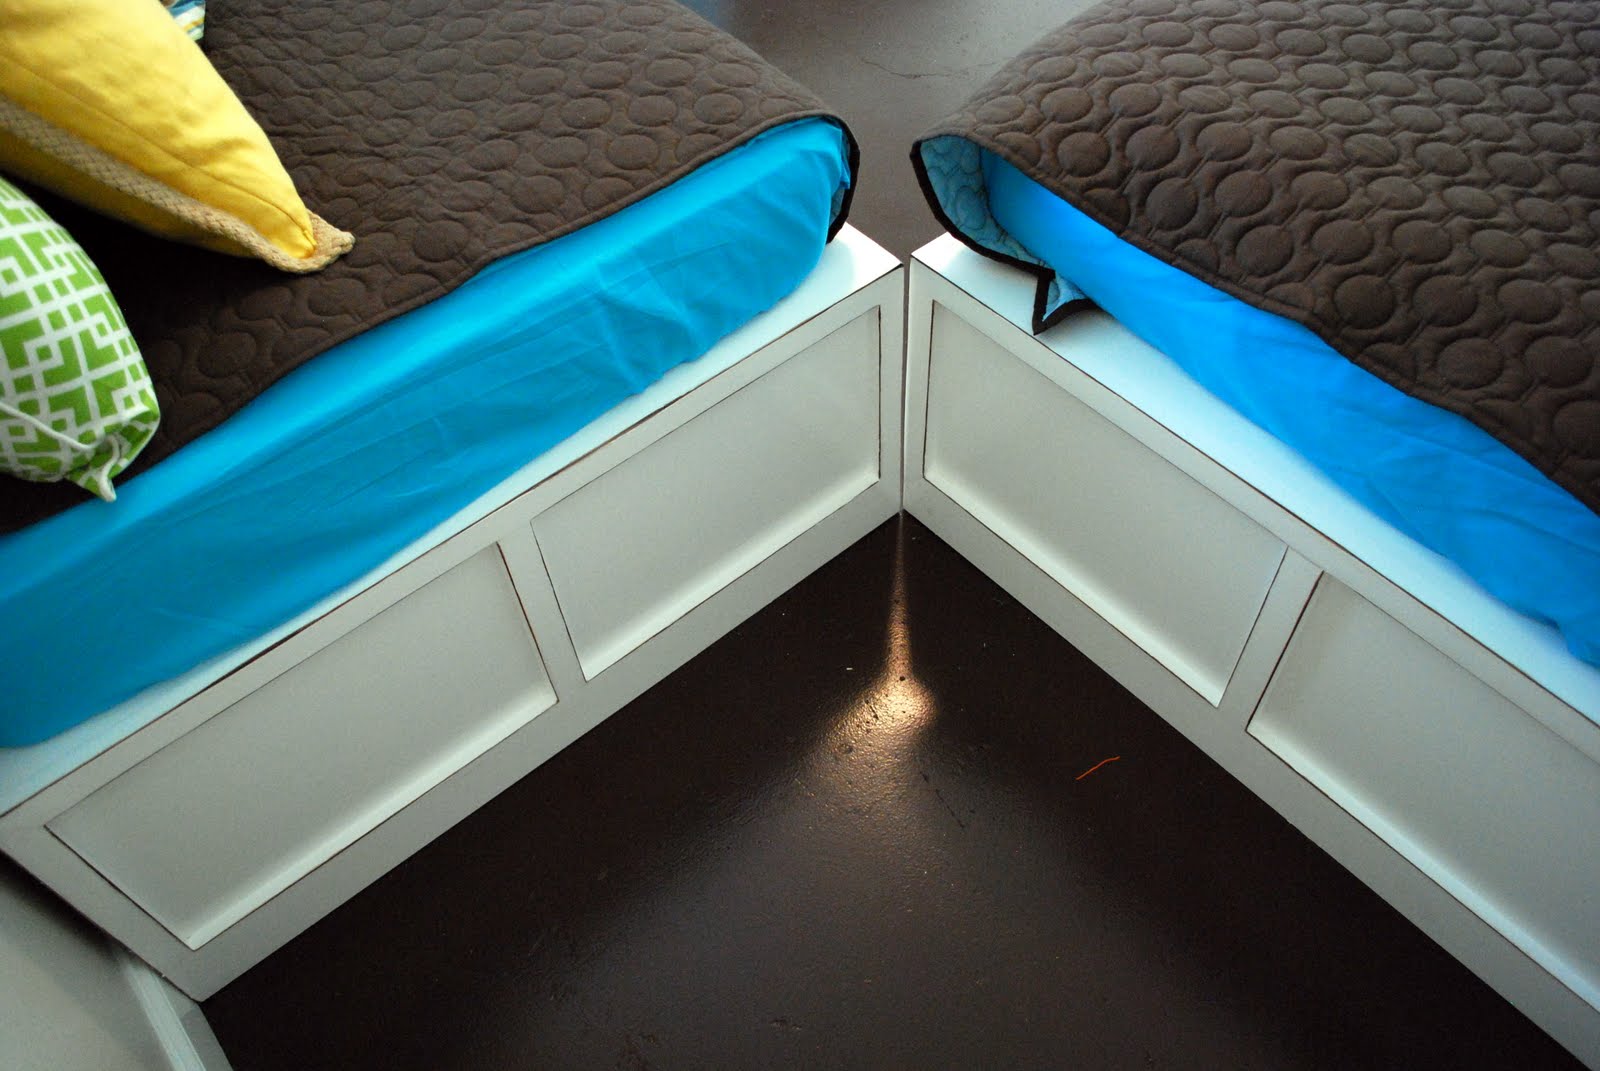
Stratton Daybeds times Two
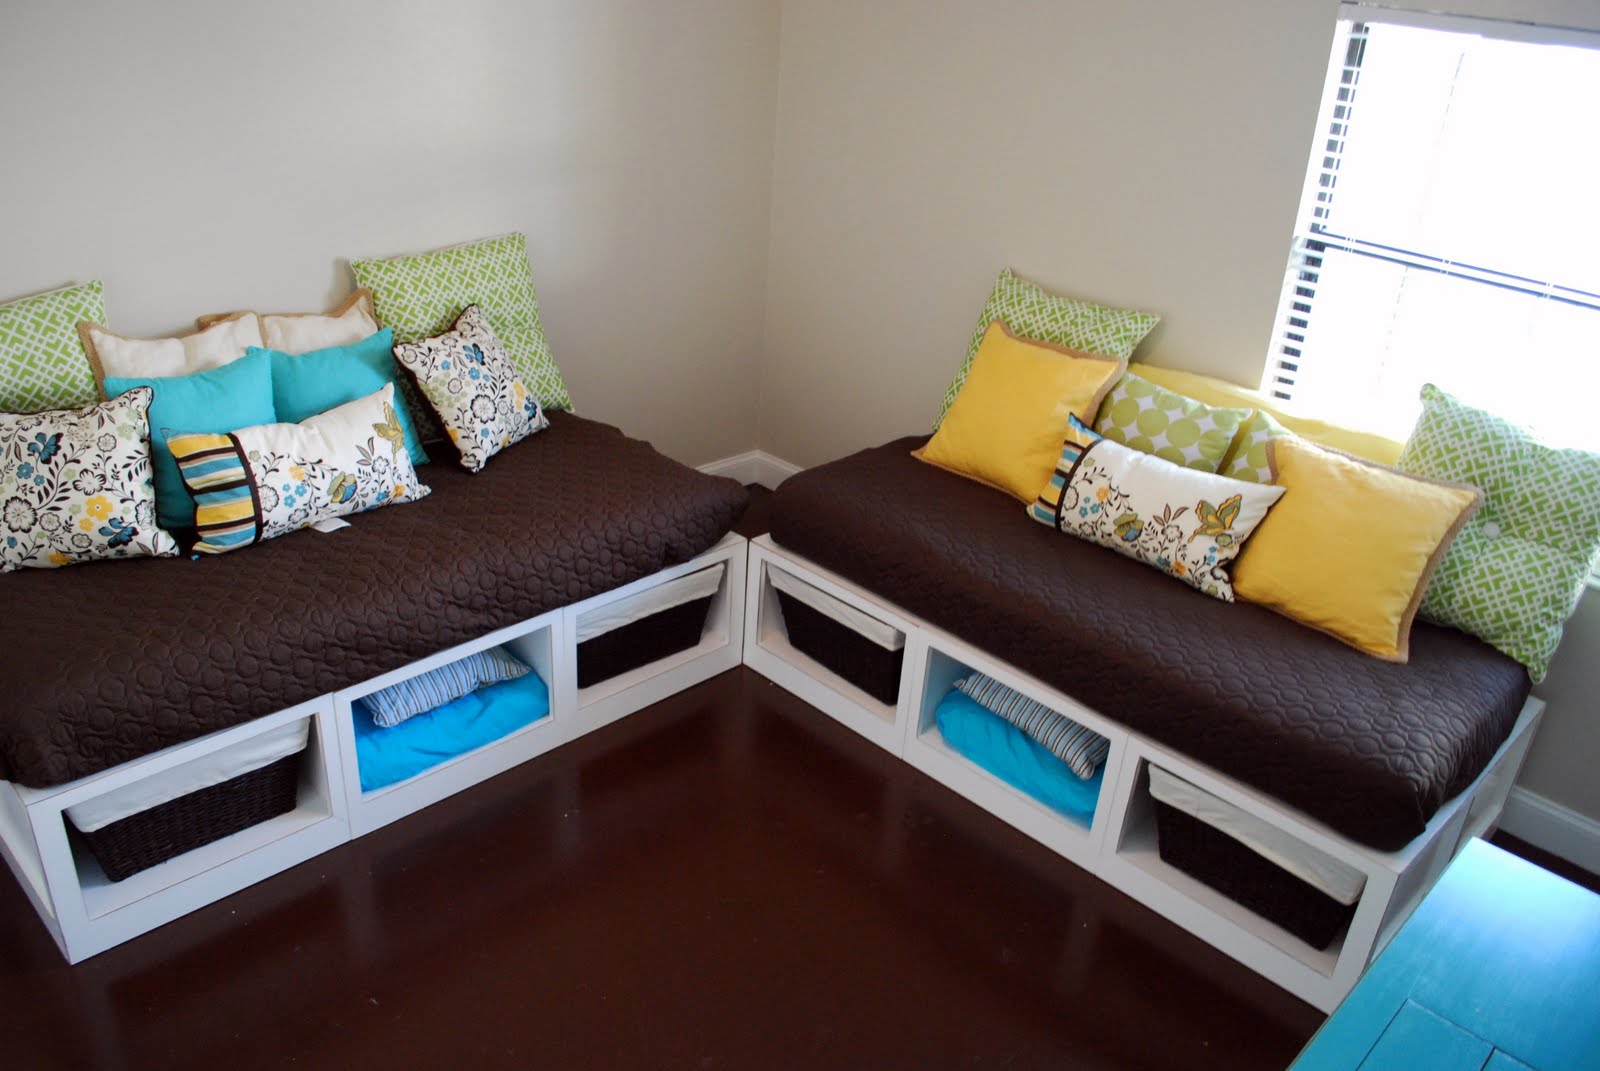
I built my first daybed in May of 2010, and my second one in August of 2010. I've since moved one of the daybeds to my new nursery I'm creating. These beds are so versitle, so sturdy, and can be moved anywhere and 'go' with whatever decor. I love both of them!
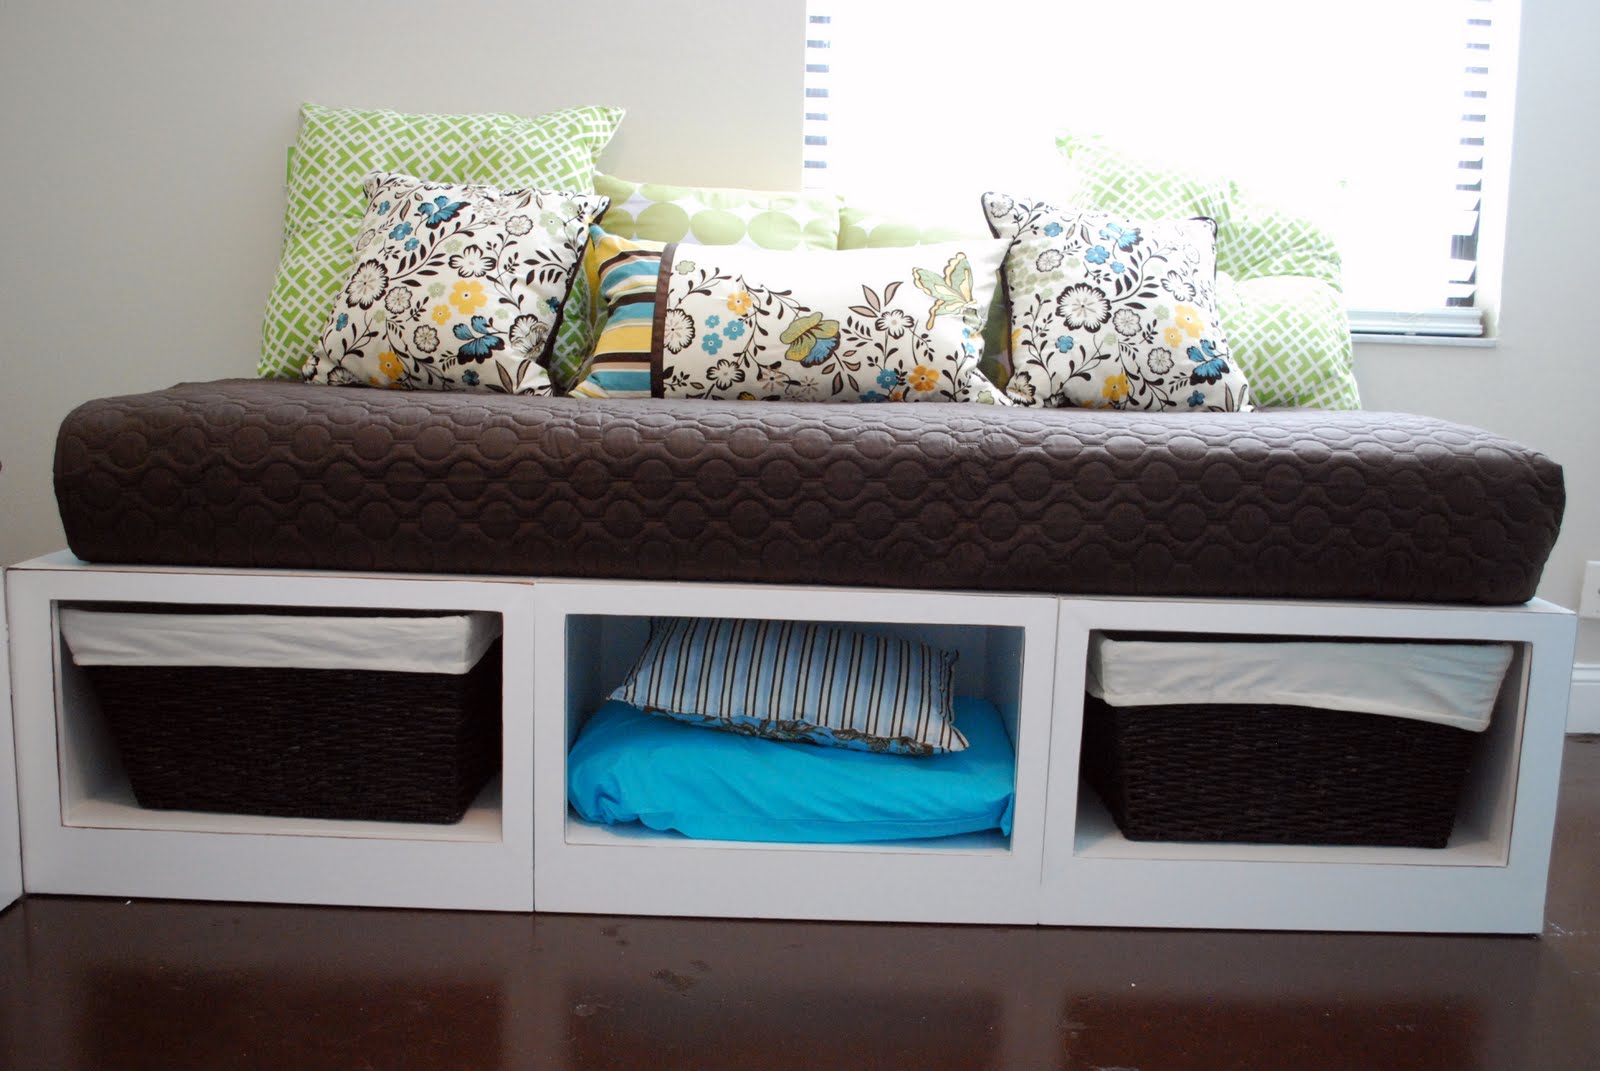

Built from Plan(s)
Estimated Cost
$450 for BOTH beds
Estimated Time Investment
Week Long Project (20 Hours or More)
Finish Used
I primed the beds with Kilz oil based primer, then added a bunch of ultra white paint by Behr. I finished with sanding down the edges and staining them, before applying a top coat of polycrylic. Only use polycrilic, not polyurethane for white painted furniture!
Recommended Skill Level
Intermediate
Simple Stackable Outdoor Chairs for DIY Wedding
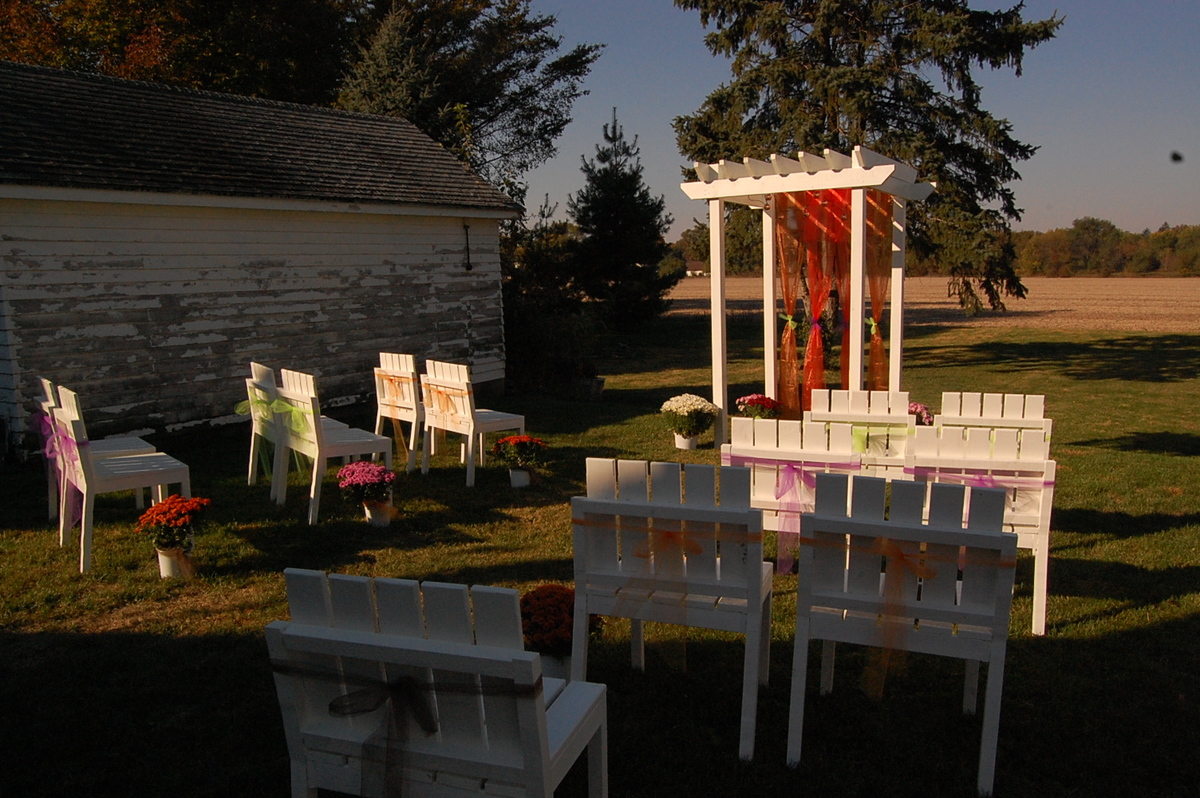
For our wedding we wanted to make seating for our guests. We ended up making 16 chairs total over several weekends. We also made the pergola.
Built from Plan(s)
Estimated Cost
about $350
Estimated Time Investment
Week Long Project (20 Hours or More)
Finish Used
White paint
Recommended Skill Level
Intermediate
Comments

Sun, 07/07/2013 - 16:27
Beautiful chairs!
These are so lovely! Congrats on your DIY wedding, the setting is beautiful. Popped over to your blog, your new siding and floors look super too. :)
In reply to Beautiful chairs! by JoanneS
Sun, 07/07/2013 - 18:30
Thank you!
Thank you so much. It has been a labor of love. Being able to have our wedding in our backyard made it so much more special.
Channing Bookcase
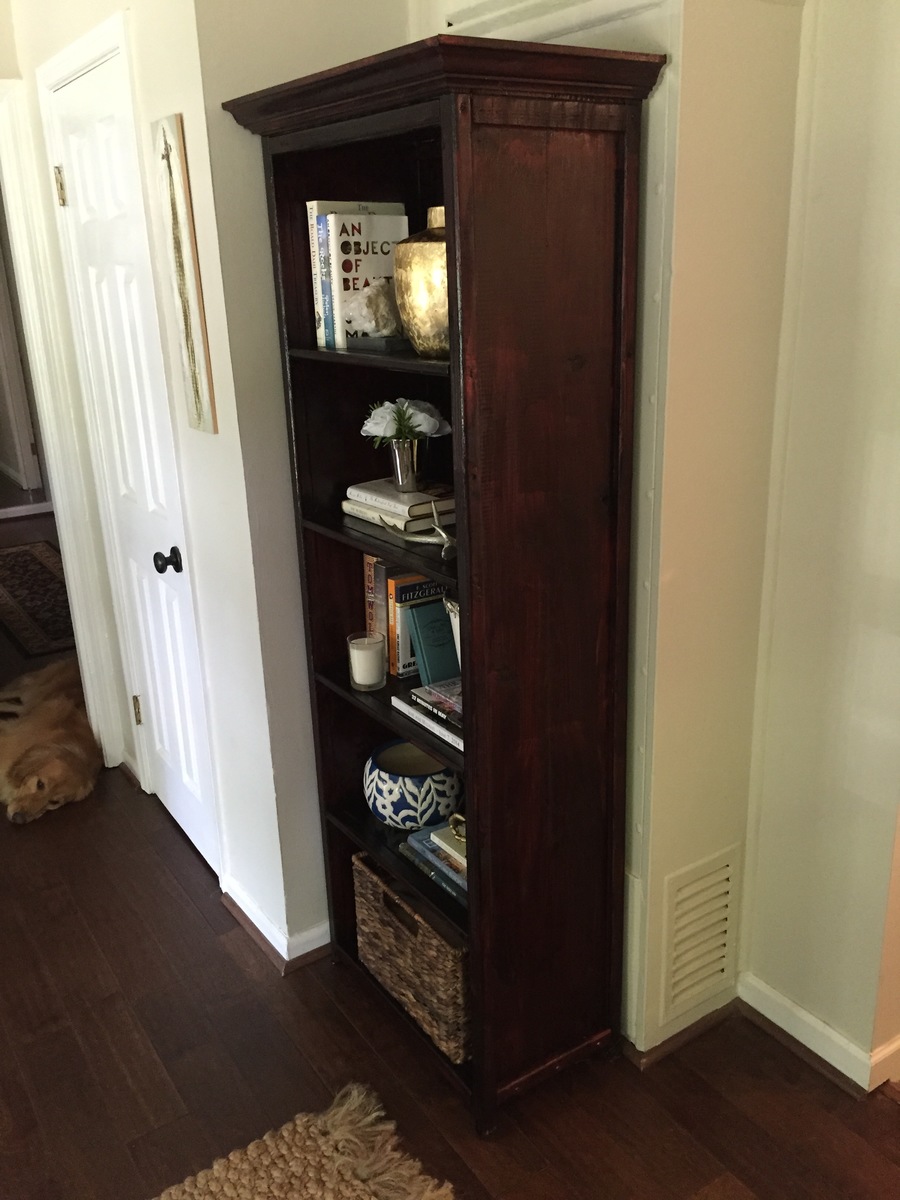
We needed a bookcase to fill a void in our living room and this was it. I altered the dimensions to increase the height to 72.5". I also added crown molding to the top which turned out nice. I used the same Bombay mahogany stain suggested by a previous post.
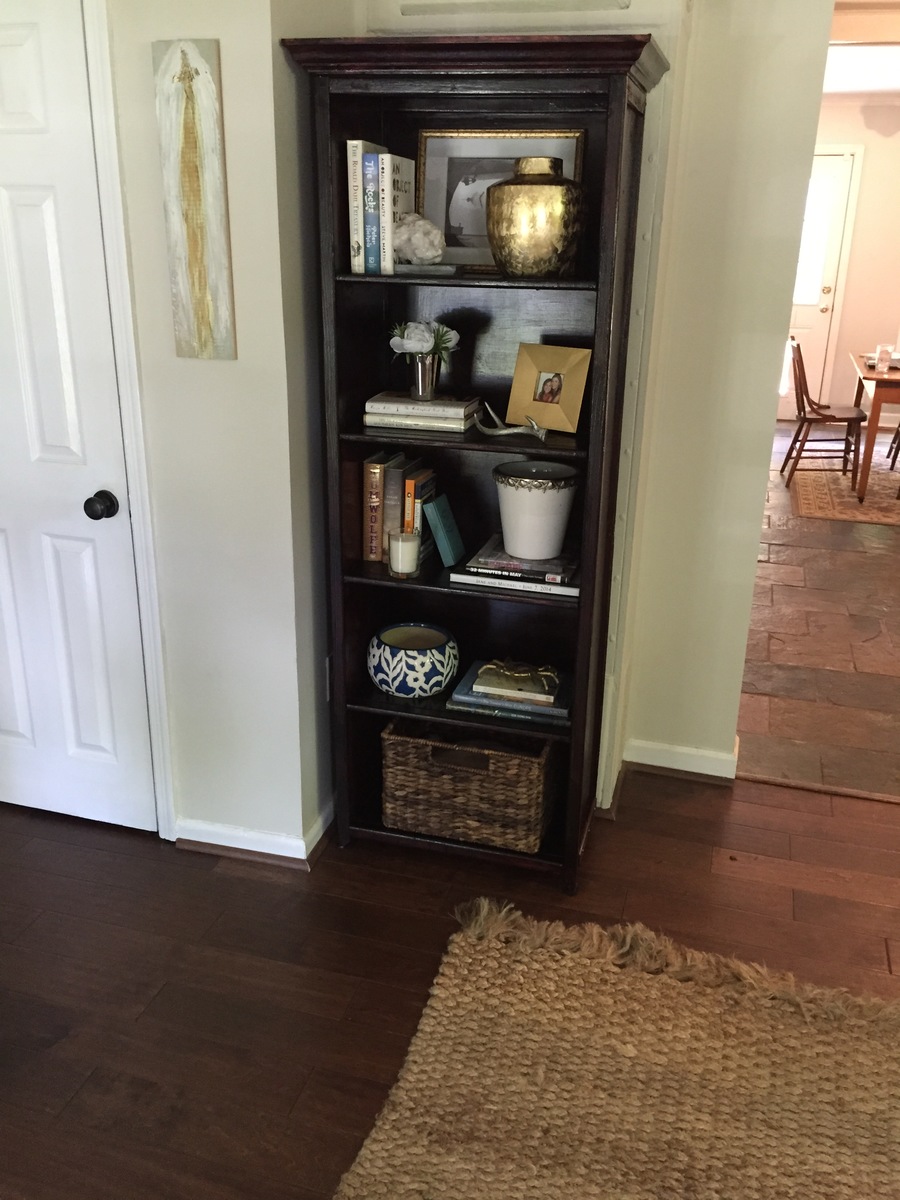
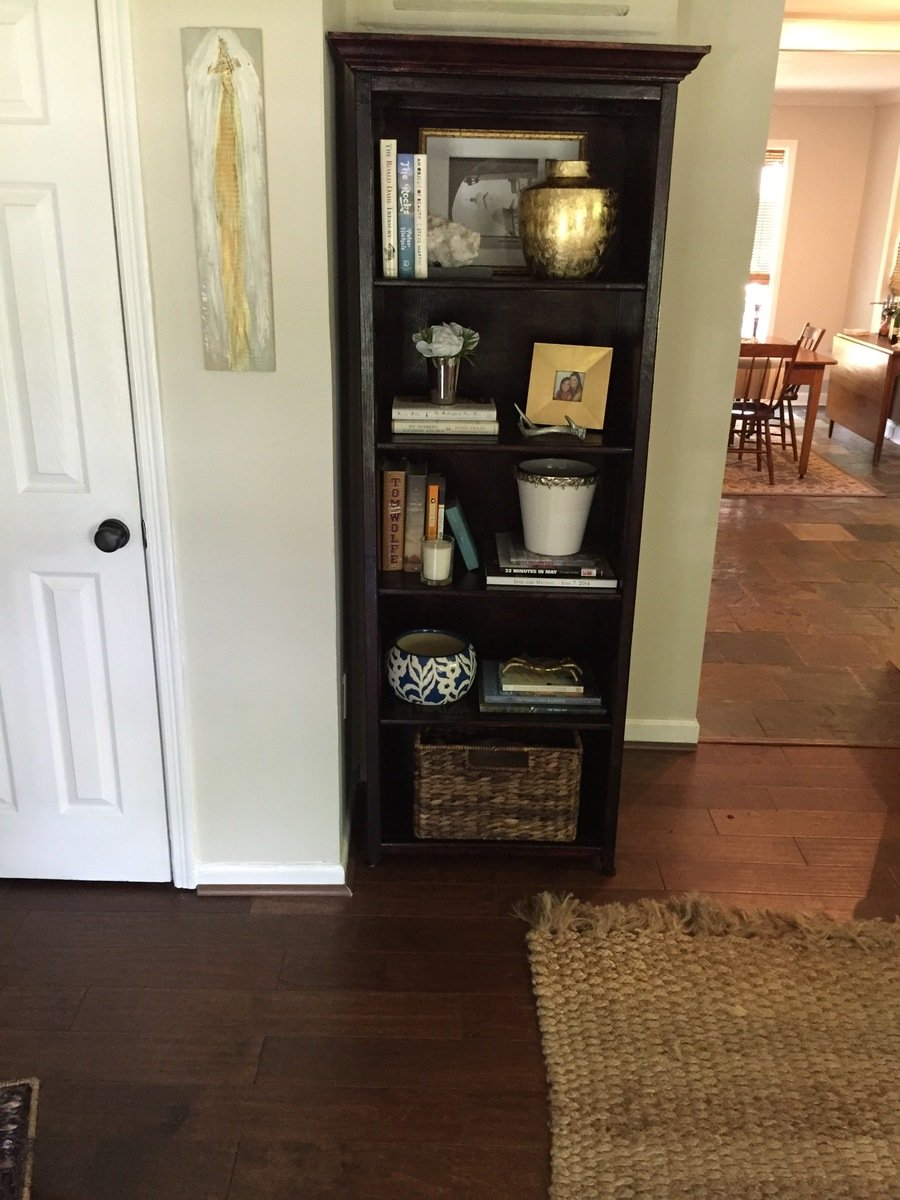
Built from Plan(s)
Estimated Cost
$150
Estimated Time Investment
Weekend Project (10-20 Hours)
Recommended Skill Level
Beginner
Baby Crib for $200
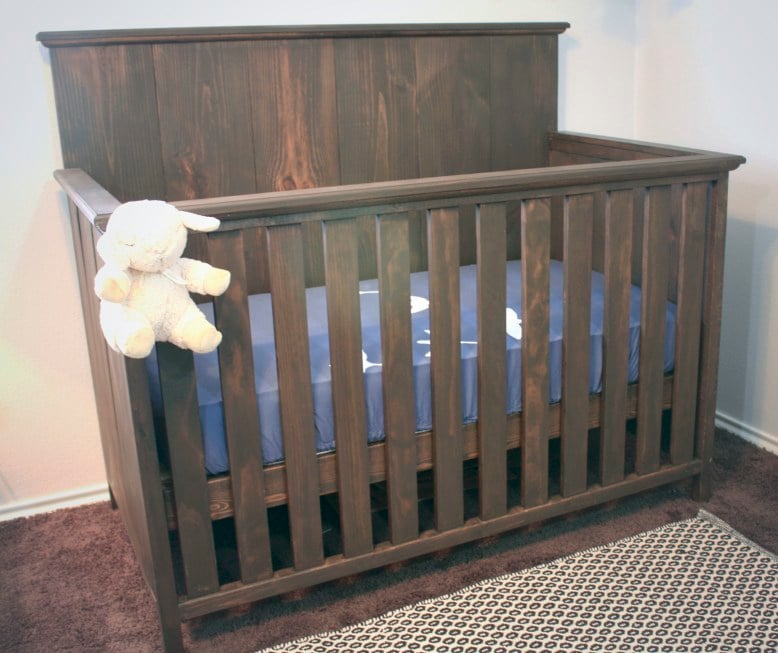
Hey yall! This is Sara from OnHouseandHome.com with plans for my favorite build ever: my son's baby crib for less than $200. This is a super simple design that is fairly easy to build. It's built from pine and poplar, both available at Lowe's or Home Depot, and I only used basic tools like a table saw, drill, kreg jig, and router to buil this. The crib has survived a move to a new house and is currently housing my 2nd son so I can promise it's just as strong as it is stylish!
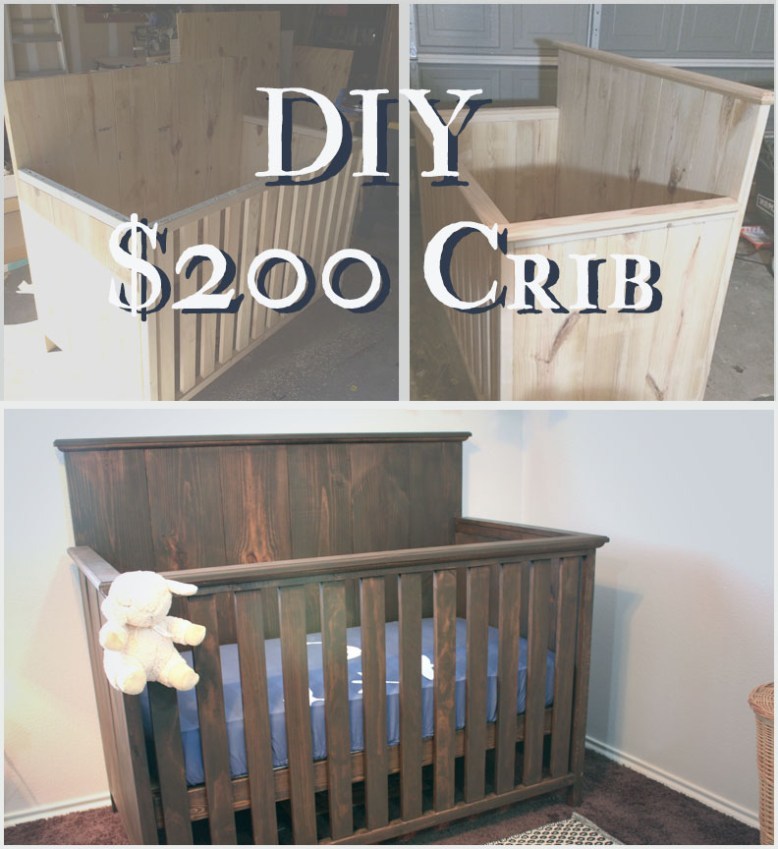
Estimated Cost
$200
Estimated Time Investment
Week Long Project (20 Hours or More)
Finish Used
General Finishes Java Gel Stain
Recommended Skill Level
Intermediate
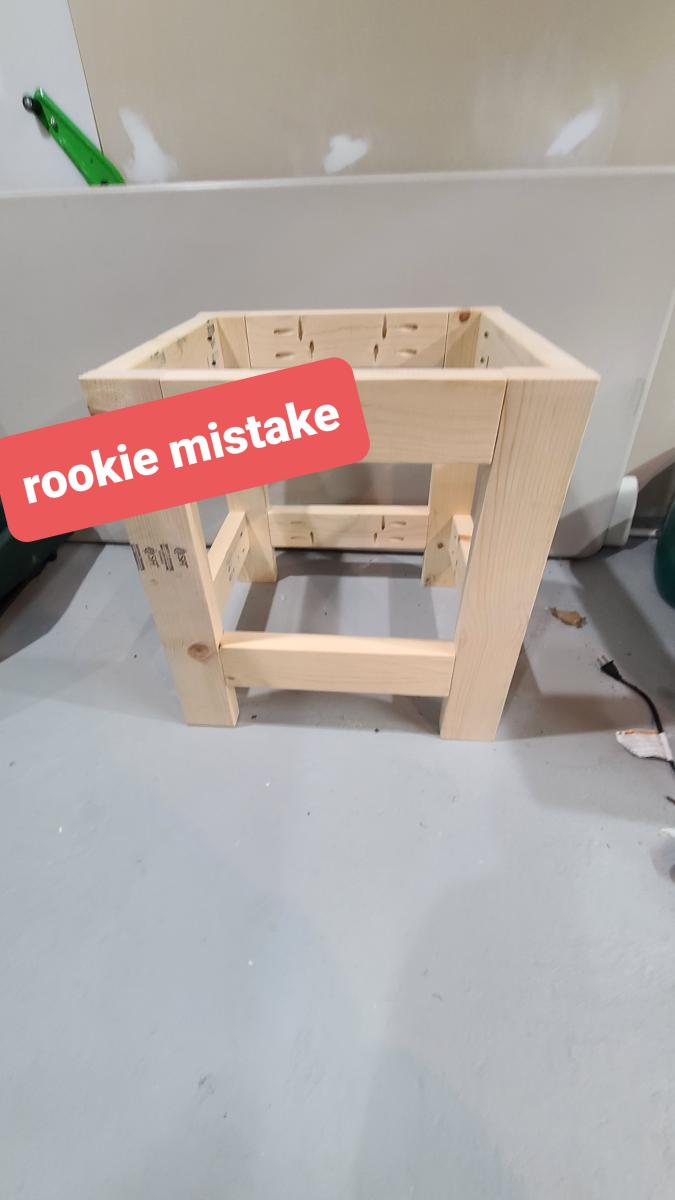
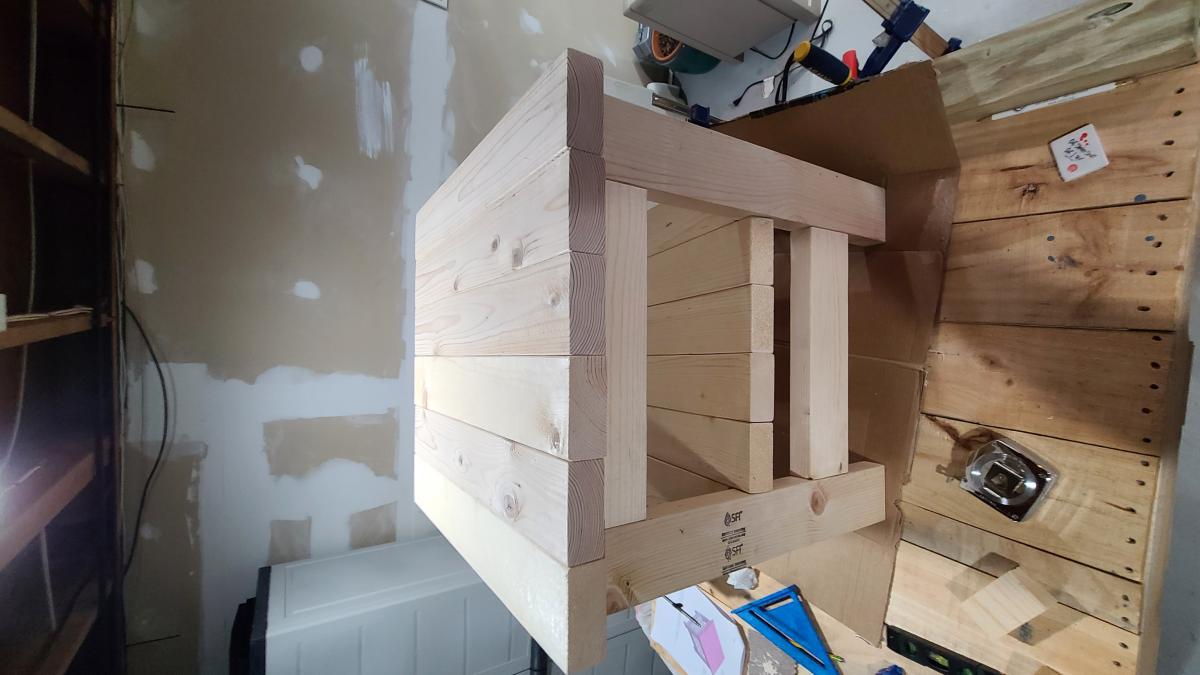
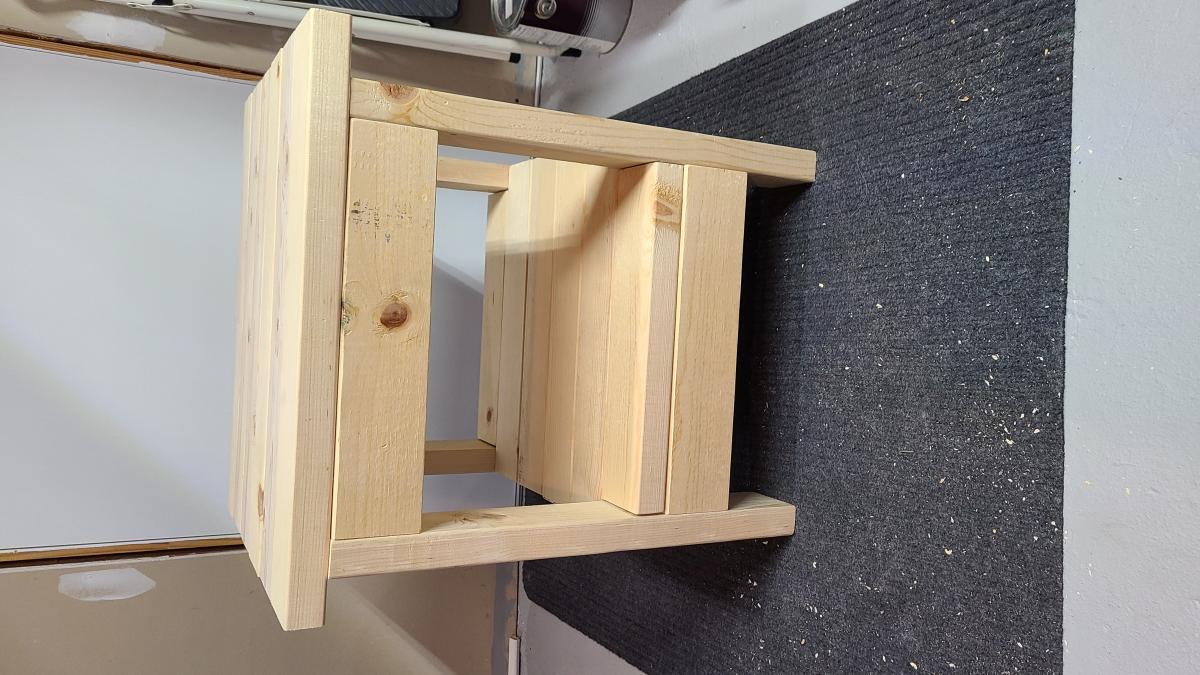
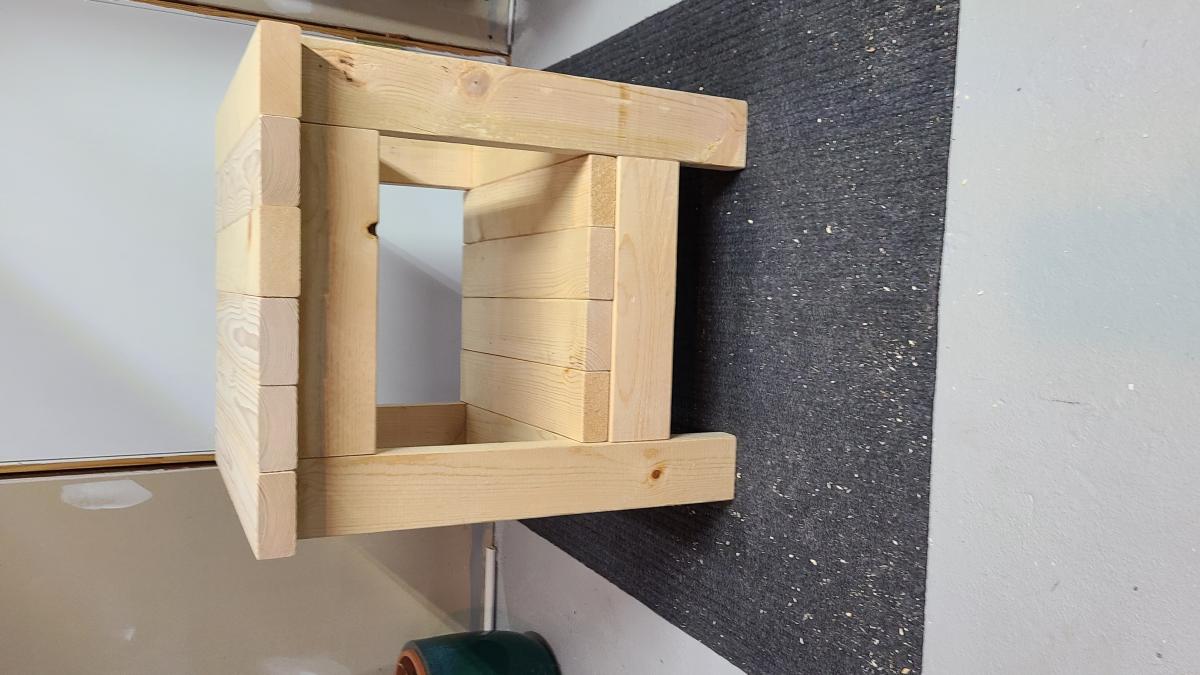
Second project ever
This end table was the second woodworking project I have completed. The first was a doghouse that came out pretty well but was definitely not "furniture grade," so this time I knew I needed to up my game. For the most part, I think I did do that. It was not a completely seamless process, but considering my newness and the number of new skills involved (e.g., pocket holes, staining and polyurethaning) I like how it came out. It also showed me how I can continue to improve my skills so that the next projects will be even better still. The pine 2x4's were very easy to work with and dried out nicely once I got them home to reveal a nice grain. Clearly I have to learn how to cut boards to the same length, but that's part of what gives the project it's character (If you believe it then it's not a lie.). I also need to figure out how to sand polyurethane without scraping it and the stain all off. Thanks to Ana for developing this great page and for all the really nice plans on here. It made the whole process far less intimidating. (sorry for the sideways pics)
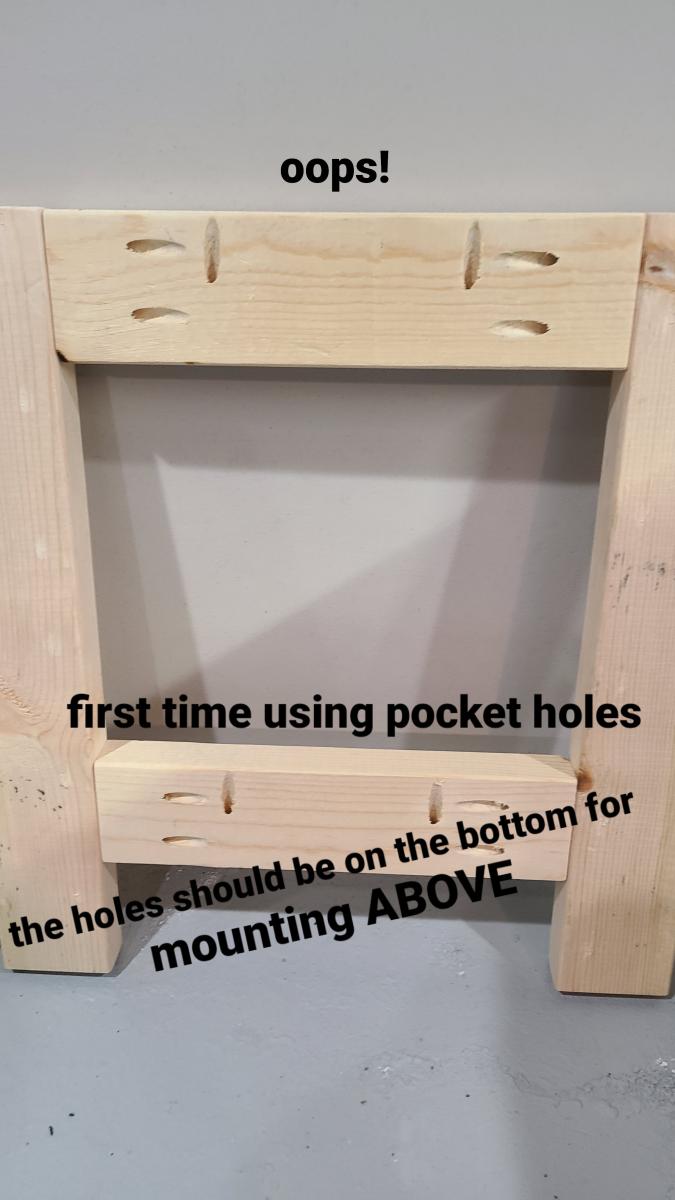
Built from Plan(s)
Comments
Sat, 01/01/2022 - 18:22
That's what it's all about!
Way to go, lots of great learning here and it looks pretty and functional! Thanks for sharing!
Spa Bench
My first project! A friend of my husband's came to visit for a weekend and was nice enough to show me how to use my handy dandy new air nailer. We had the bench put together in 15 minutes! And so began a beautiful friendship with furniture building...
Built from Plan(s)
Estimated Cost
$30
Estimated Time Investment
An Hour or Two (0-2 Hours)
Finish Used
dark oak polystain - distressed with hammer, nails, screwdriver, chains
Recommended Skill Level
Starter Project
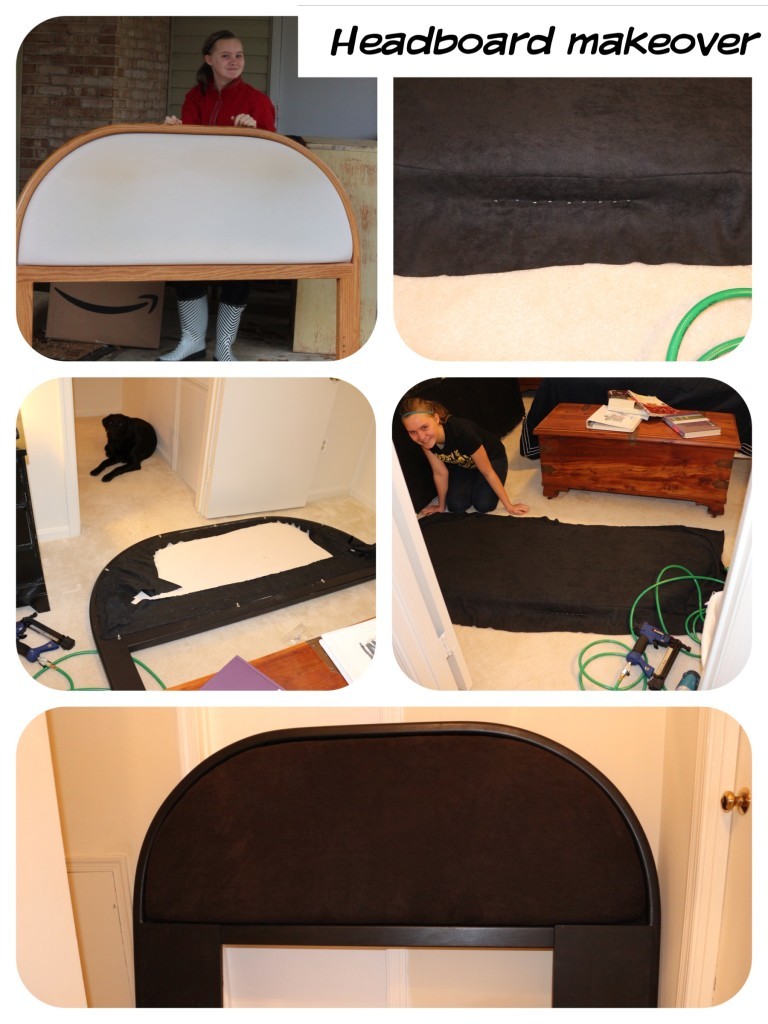
Chic Teen Girl Bedroom
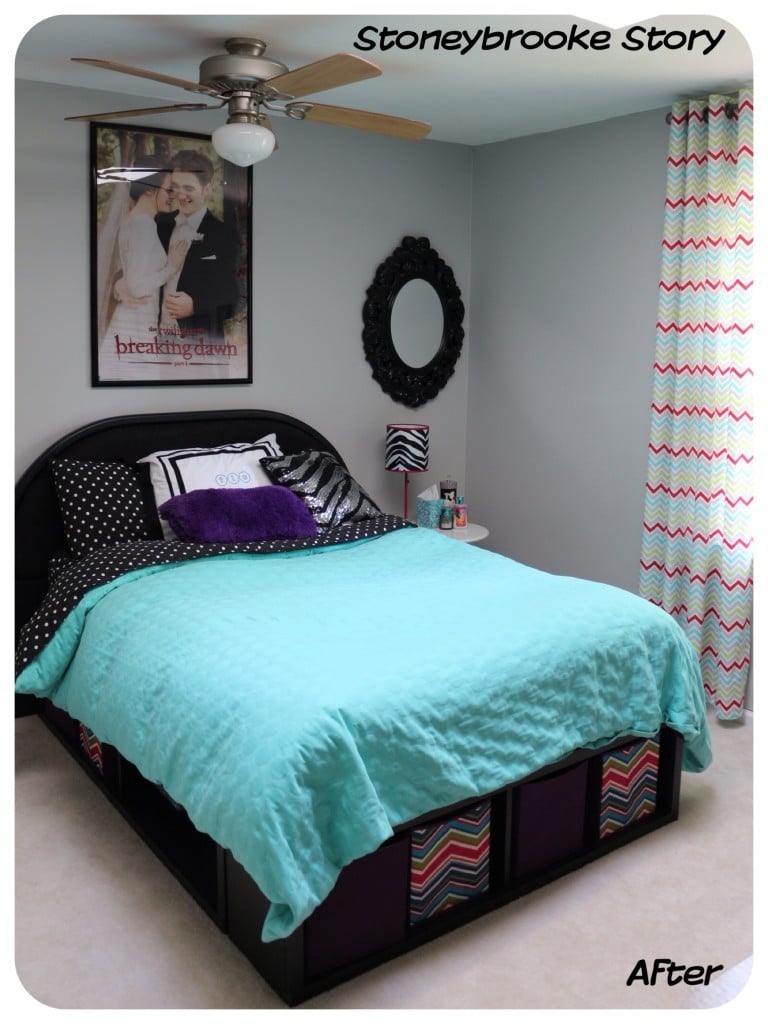
Our niece recently moved to Virginia to live with us. I may or may not have been pinning ideas to a Pinterest Board http://pinterest.com/stoneybrookesty/teen-bedroom/ non-stop day and night from the moment I found out because I was so excited to get to decorate a “fun” room. Her only requests were that it include animal print and bright colors. After looking through dozens of inspiration pictures and taking a trip down the paint aisle at Lowes, she decided on bright pink (Valspar “First Kiss”), green (Valspar “Parakeet Green”), lavender (Valspar “Berries Galore”) and teal for her color scheme.
The headboard we scored for a cool $15 at the Habitat for Humanity ReStore and it just needed a coat of paint and a 1.5 yards of Nu-Suede fabric. We didn’t realize until we had the headboard home that it was sized for a queen and not a full so we had to do a little improv on the legs and attached a 12 inch section of 1 x 12 pine. These were leftover from the frame were no added cost.
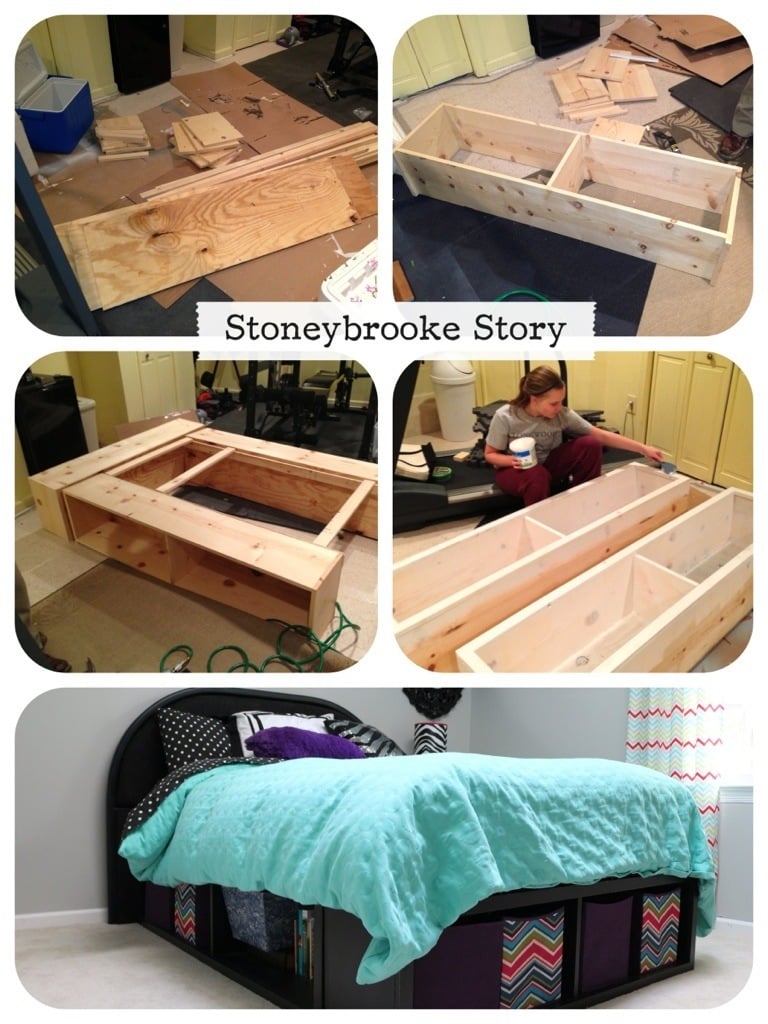
We chose to make the Captain's storage bed from the Ana White plans because I wanted to make sure Tiff had plenty of room to put away all her books and make it easier to keep her room clean. The chevron storage bins are from Lowes. Which happened to have cheapest bins in fabric we liked and that fit when we were looking. We also found lots of good options at Target.
Built from Plan(s)
Estimated Cost
$100
Estimated Time Investment
Afternoon Project (3-6 Hours)
Finish Used
Zinnser Oil Based Primer and Valspar Ultra Eggshell Black paint
Recommended Skill Level
Starter Project
Farmhouse Table
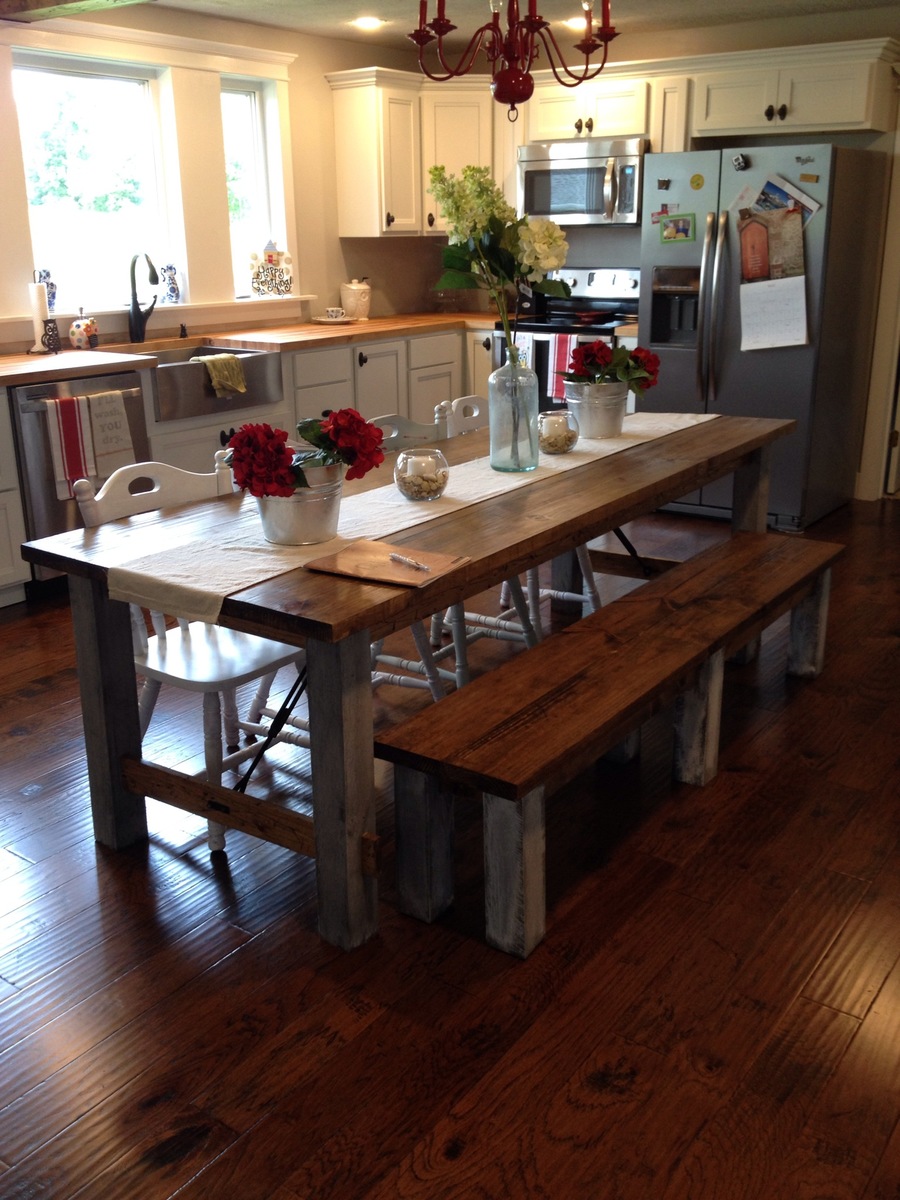
This 8ft dining table and bench was created with inspiration from Ana White (with a few modifications). It was made with all scrap wood except the table top. Full details of the table build (and kitchen remodel) can be found at www.chasingadreamblog.wordpress.com.
Built from Plan(s)
Finish Used
Minwax Stain Provincial, whitewashed legs (50/50 white paint/water)--paint on lightly with a brush, let sit a couple minutes, wipe in/off with a old rag, repeat until you get the desired color
Recommended Skill Level
Beginner
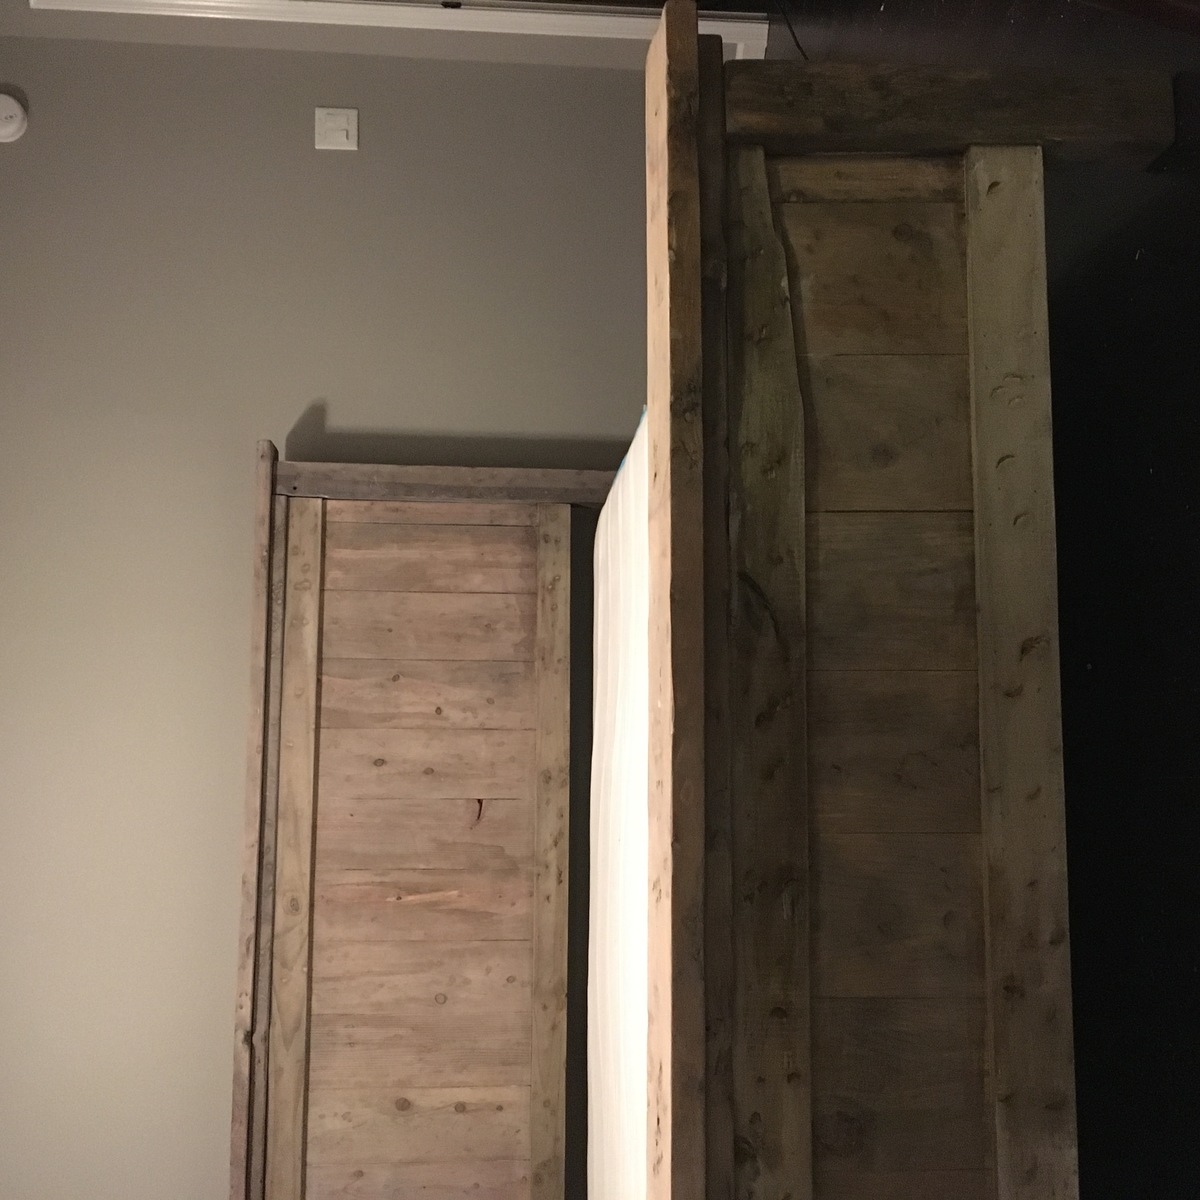
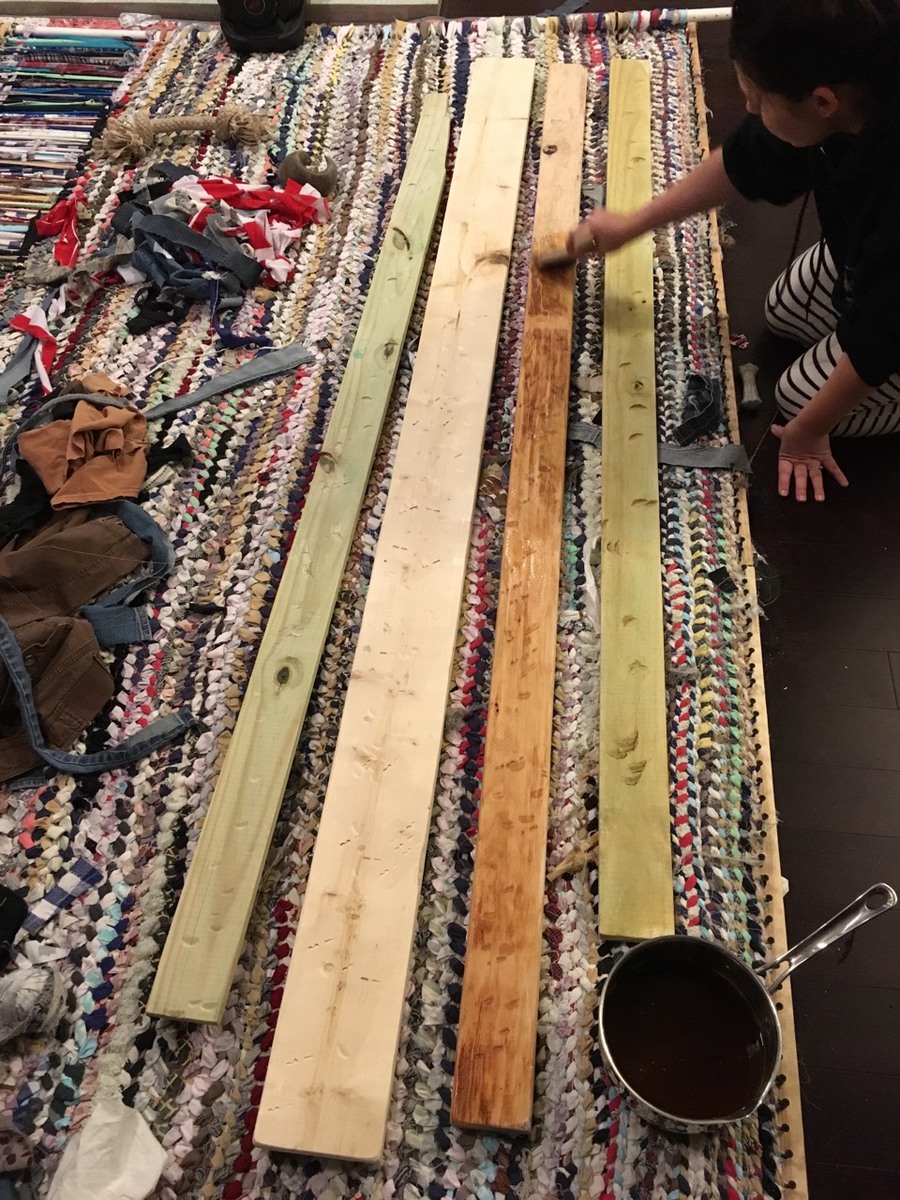
Farmhouse bed - King
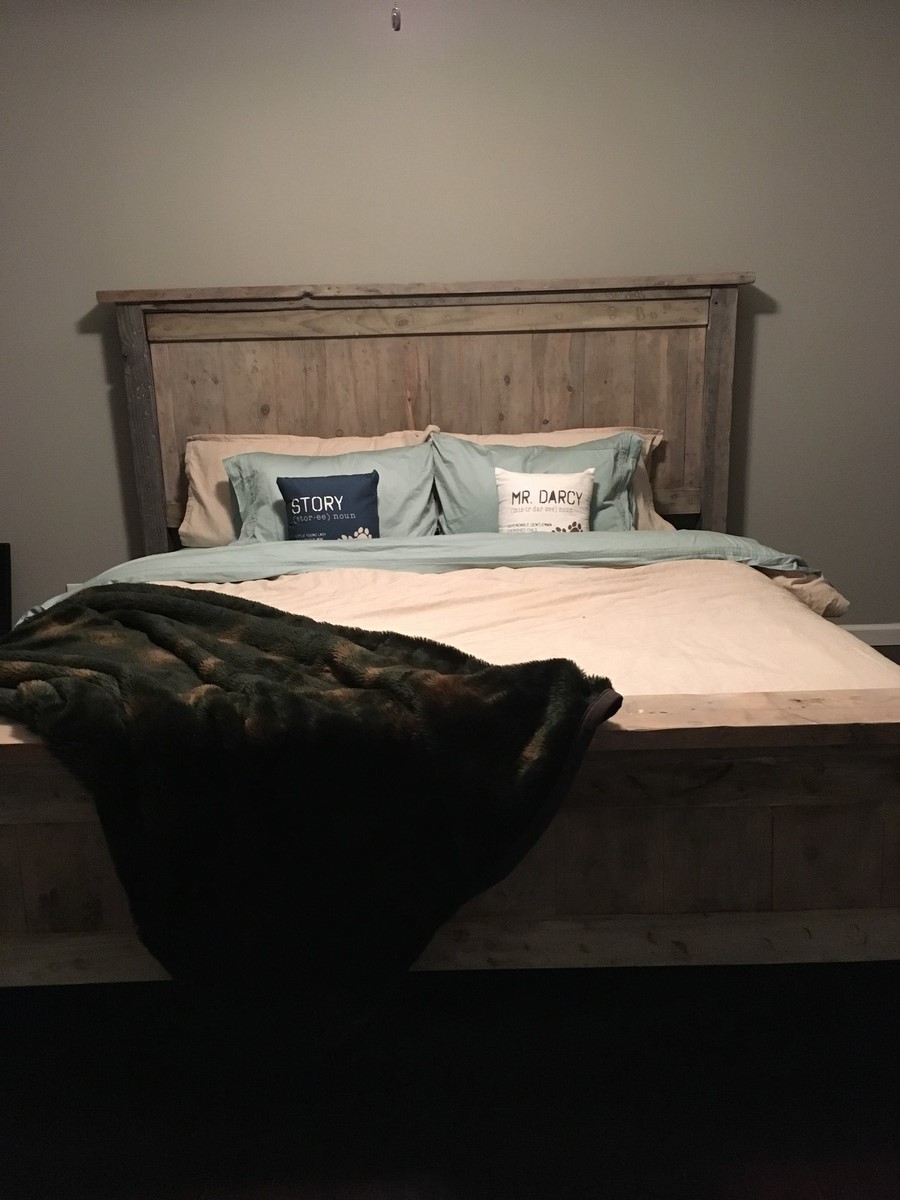
We made the farmhouse bed with a few modifications. We distressed the wood and did a whitewash finish. Absolutely love how this turned out!
Built from Plan(s)
Estimated Cost
250
Estimated Time Investment
Weekend Project (10-20 Hours)
Finish Used
Stained with tea, then with apple cider vinegar and steel wool stain. Has two applications of the steel wool stain to deepen the aged wood look. Last painted with a basic white paint to white wash.
*Note: wood was warped but adds to the more rustic look. This may not be for everyone!
*Note: wood was warped but adds to the more rustic look. This may not be for everyone!
Recommended Skill Level
Intermediate