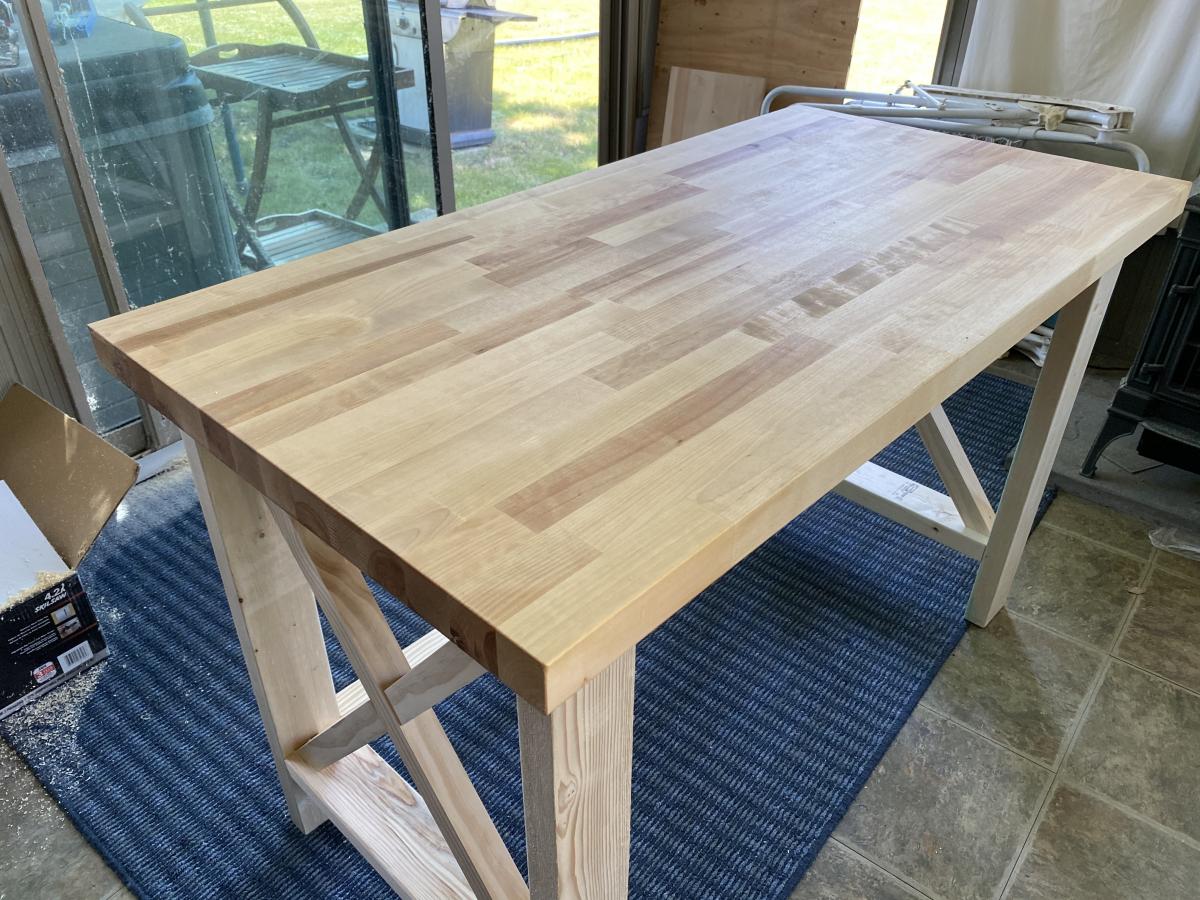
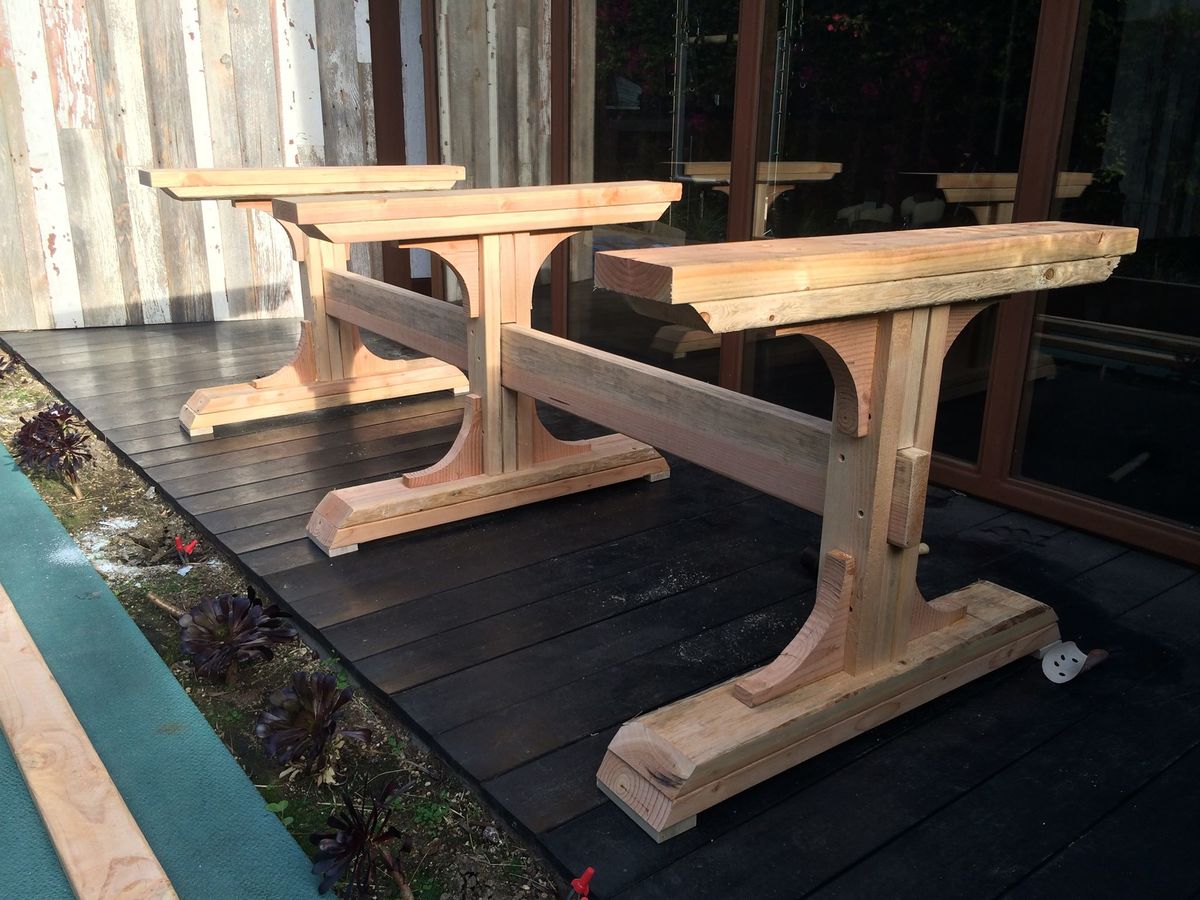
Desk rustic x
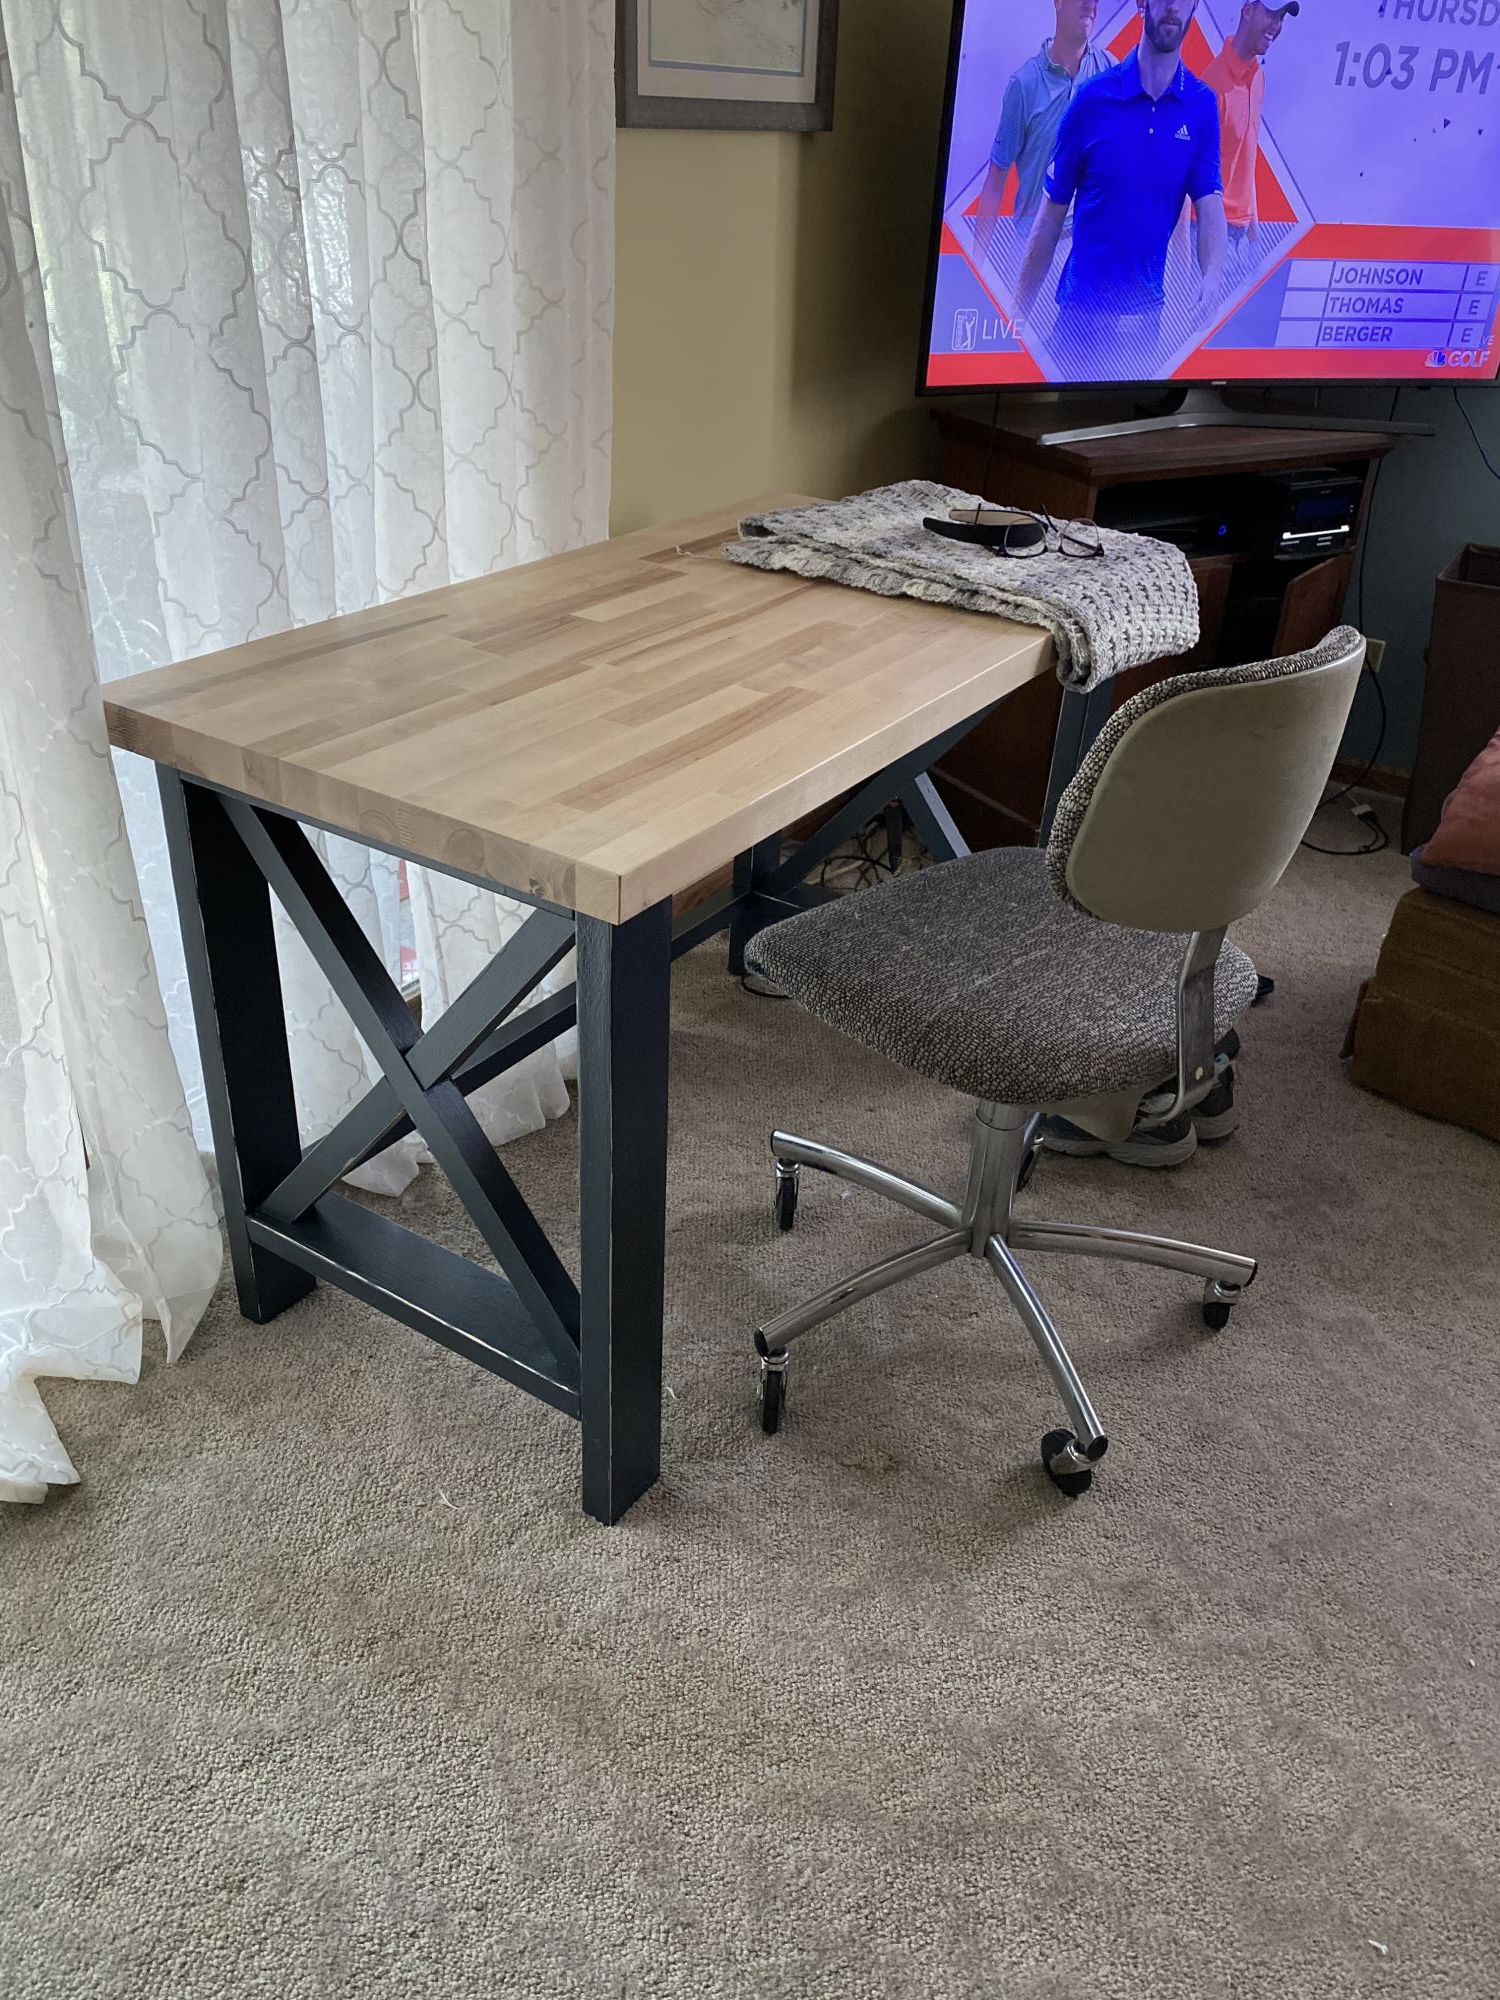
To simplify and elevate the design I chose a pre made butcher block top. It turned out beautiful!
Built from Plan(s)
To simplify and elevate the design I chose a pre made butcher block top. It turned out beautiful!
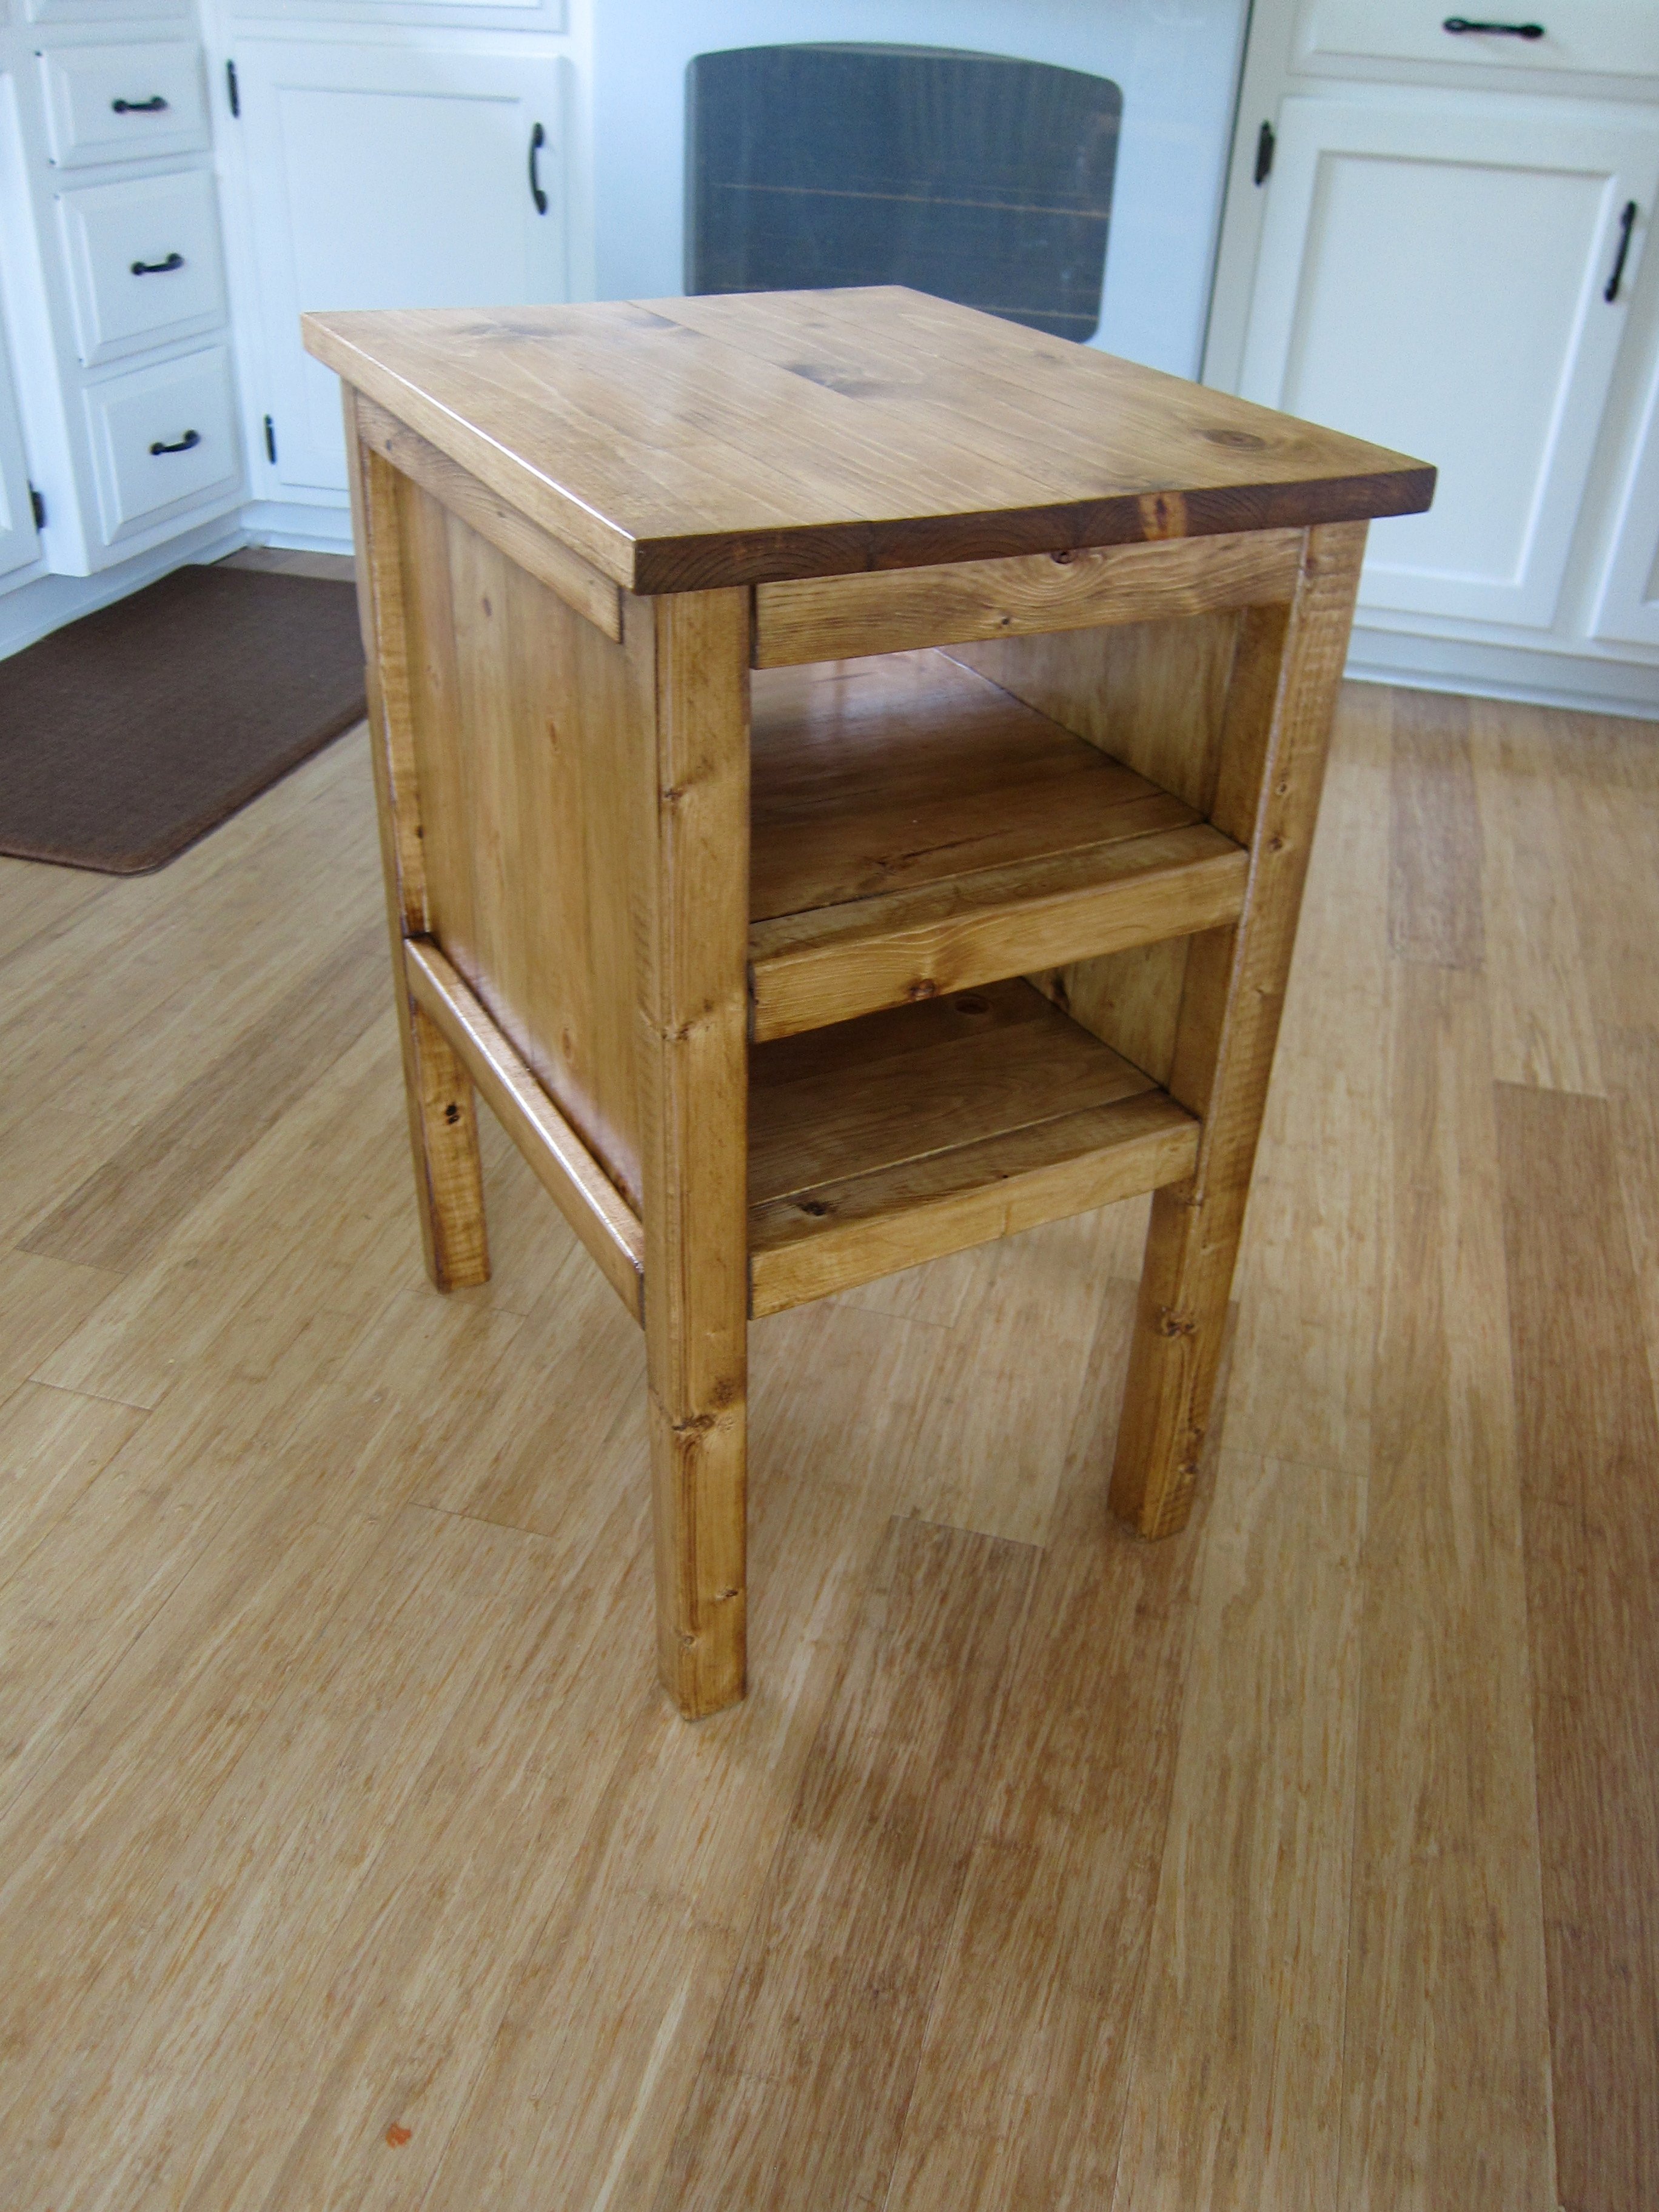
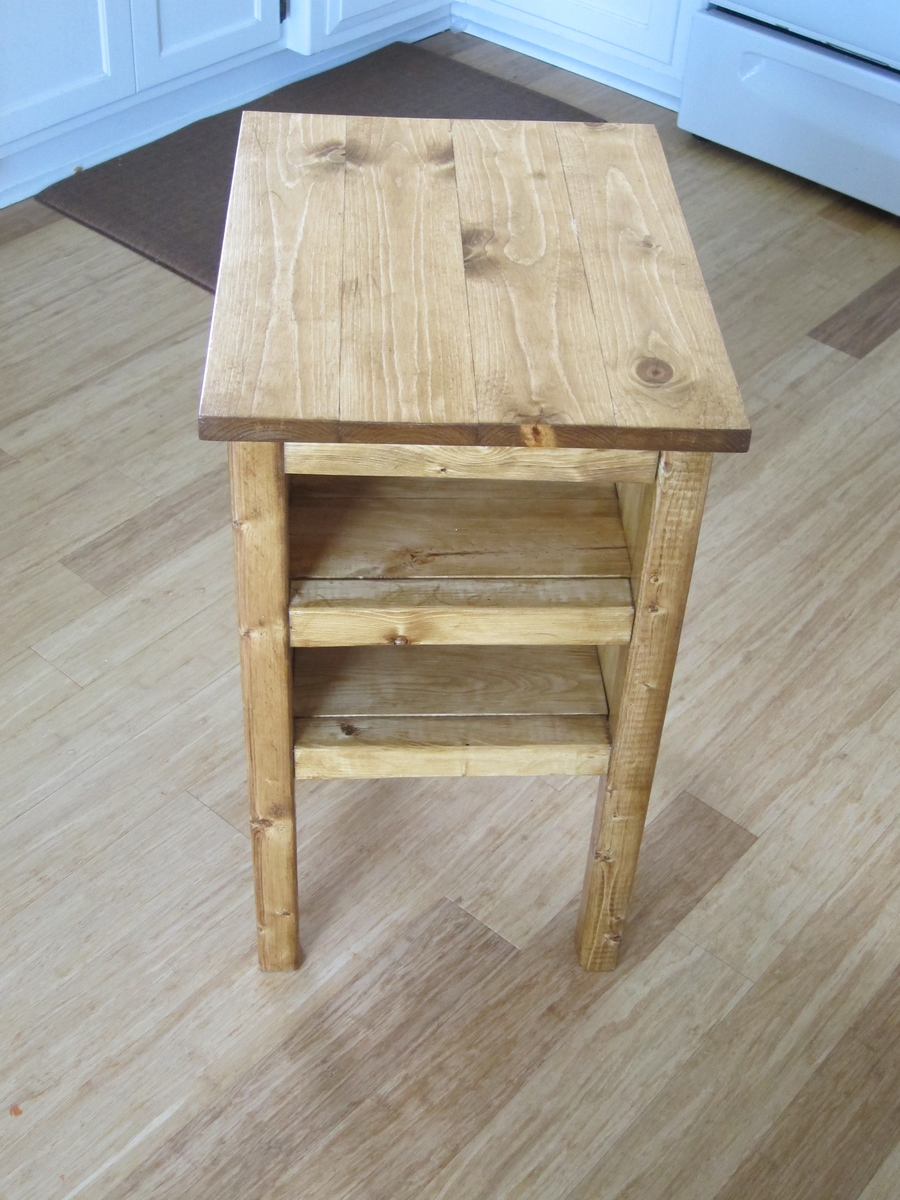
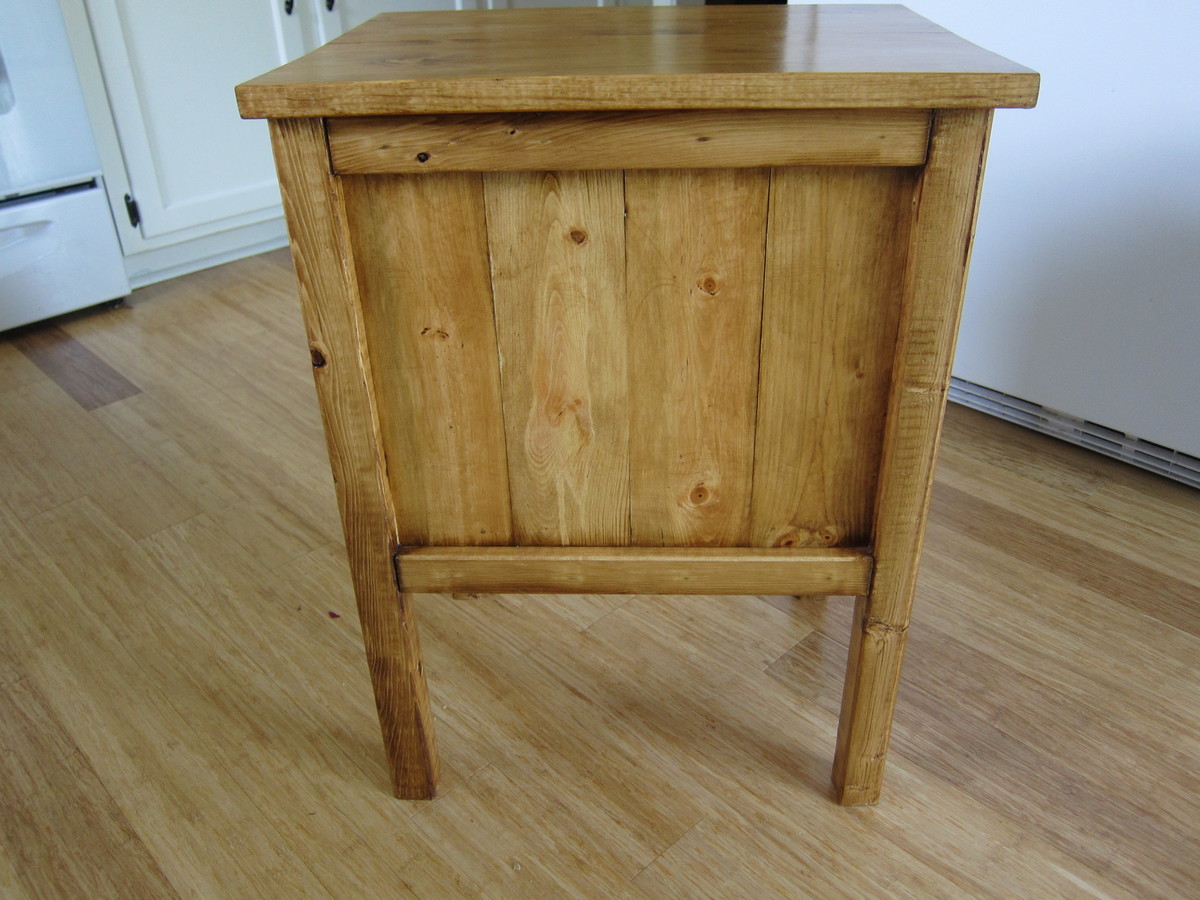
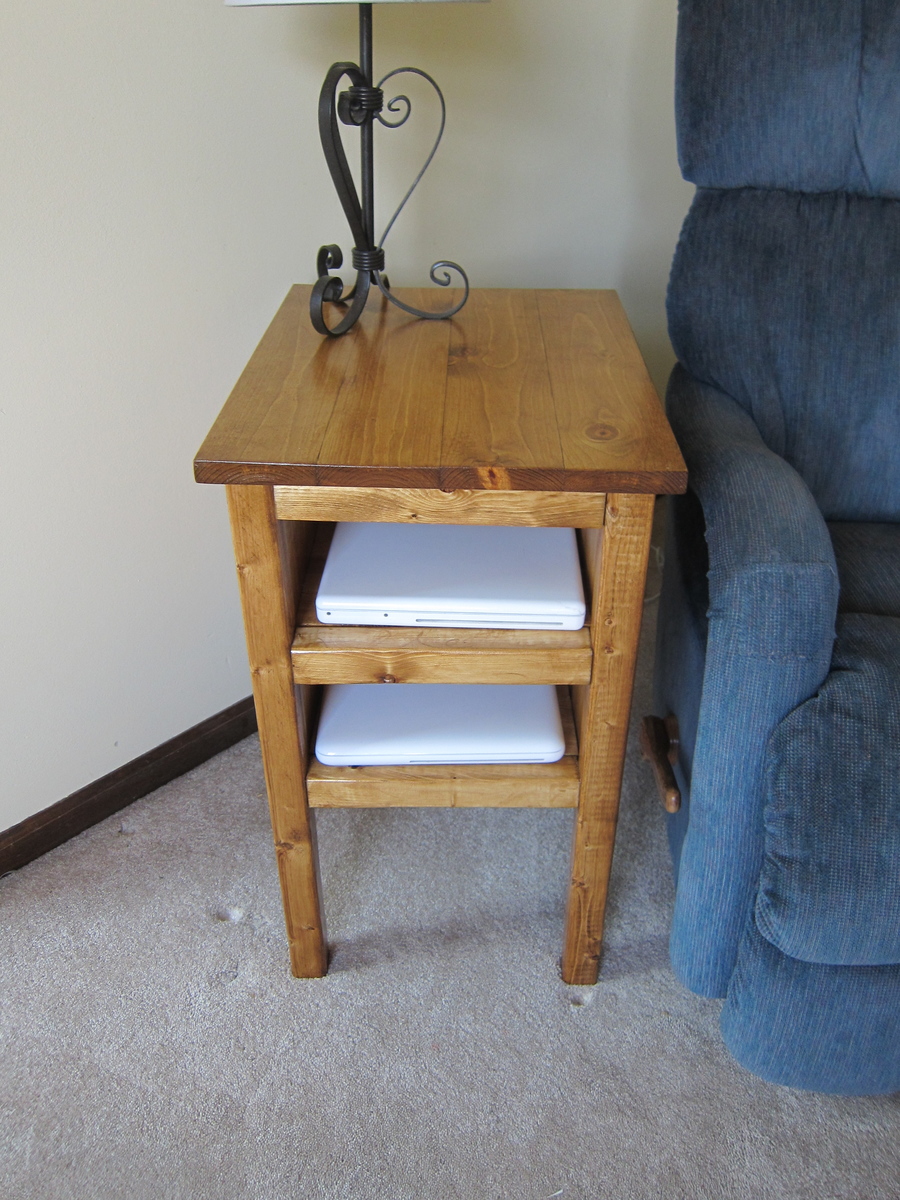
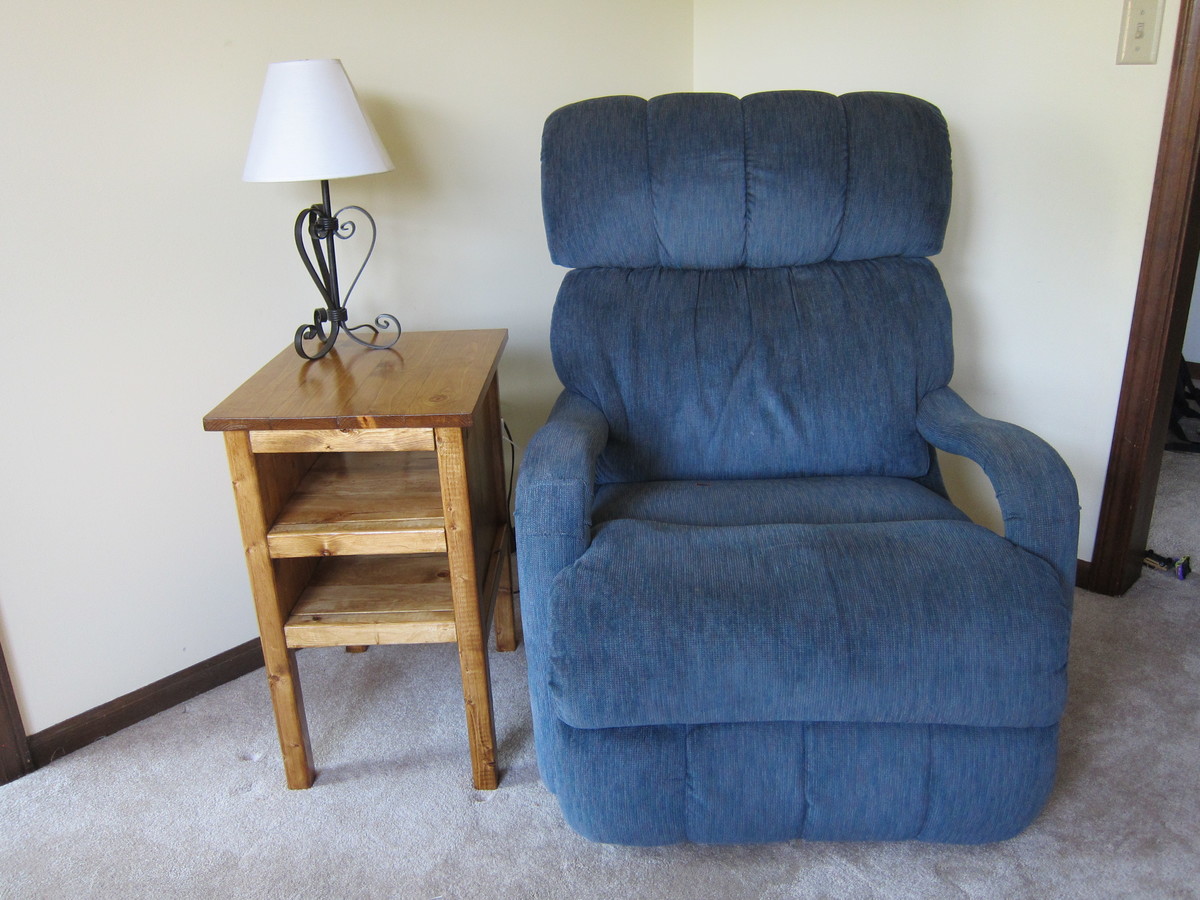
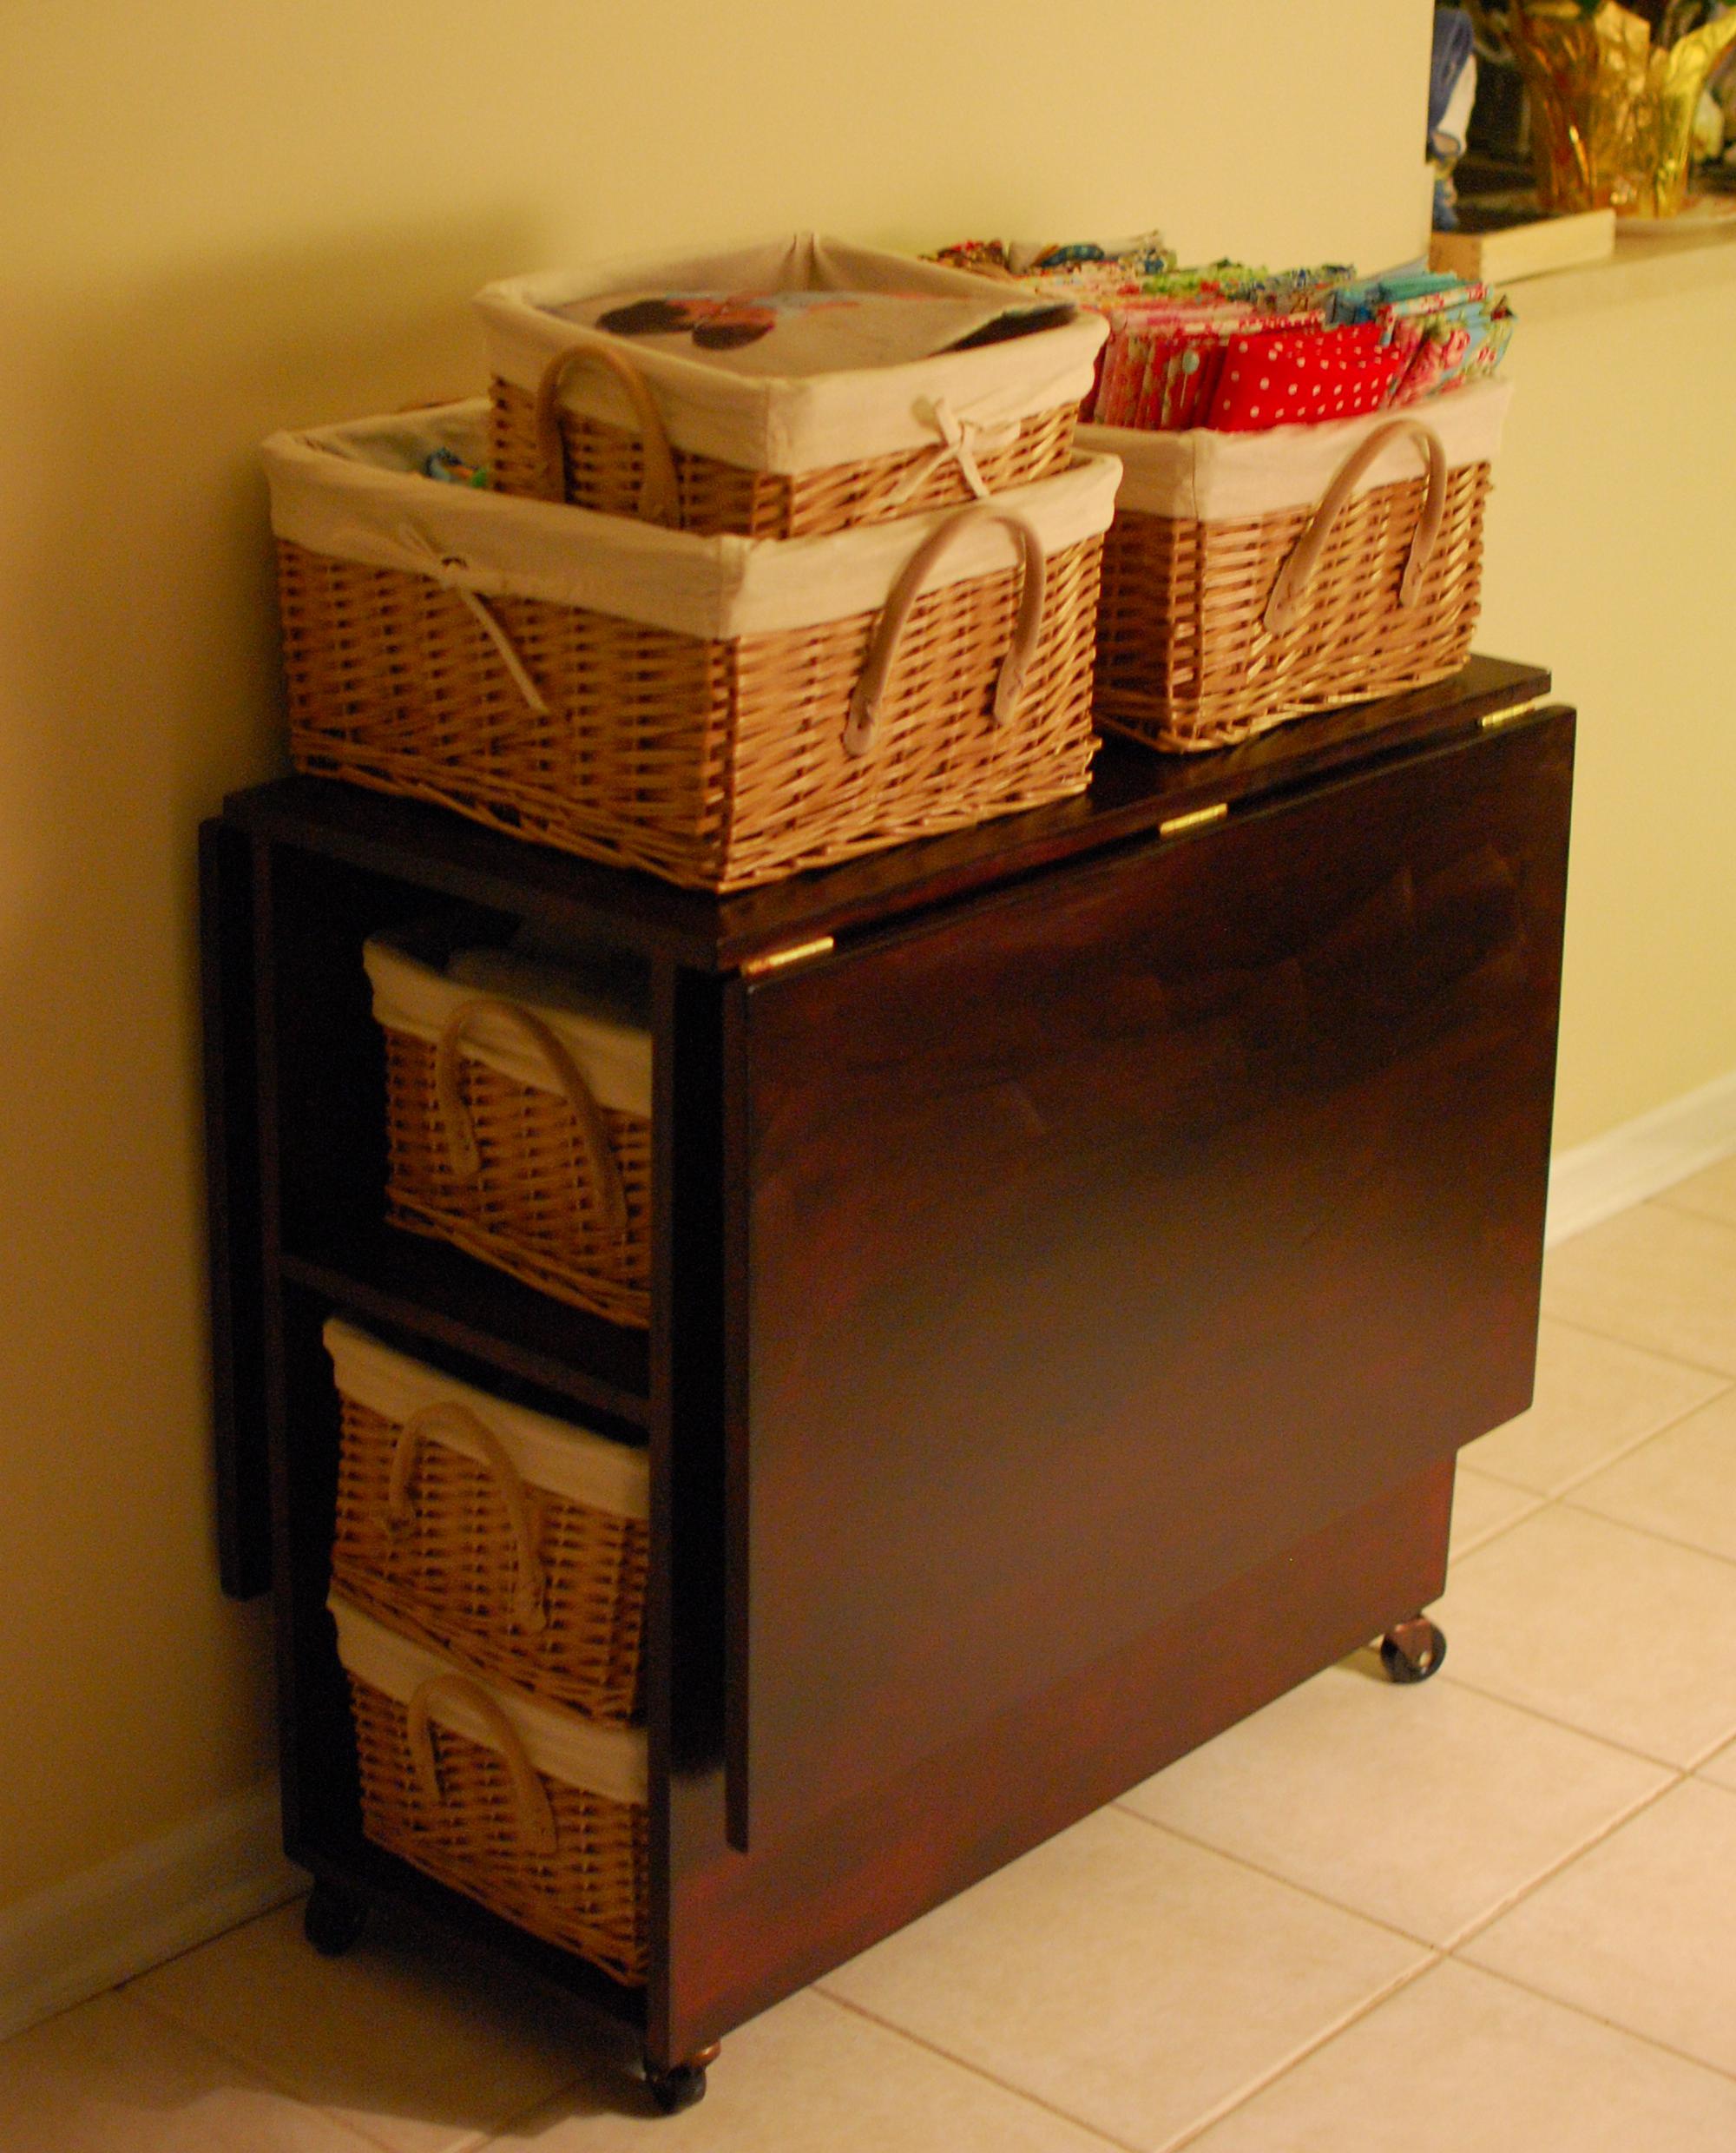
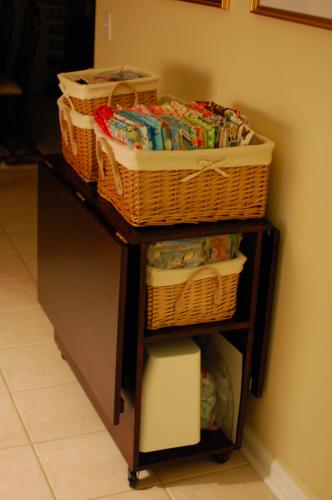
This is a variation on the tidy up end table. The dimensions for the tidy up end table were too big for my space, so I made it a little smaller and added an extra shelf to store our laptop computers. This makes it easier to charge our laptops and keep them out of the way. It took me a little longer than it should have because I had a 3 year old and a 5 year old "helping" me.

Thu, 11/14/2013 - 21:33
What a good idea, adding an extra shelf to tuck the laptops away for charging! Looks great!
Val
artsybuildinglady.blogspot.ca
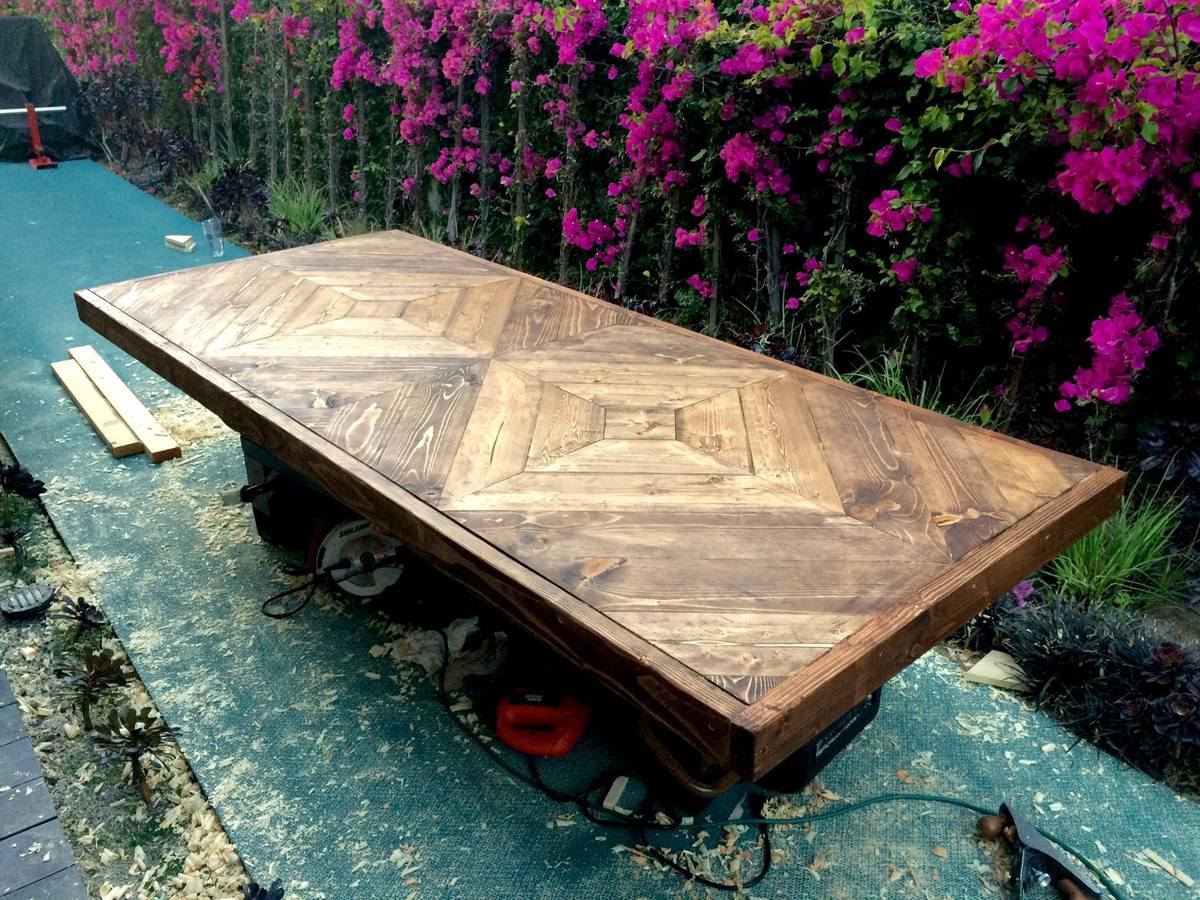
Took a lot more wood than I thought and time, but was a nice distraction from Law School.
Mon, 04/20/2015 - 18:19
The table top is very impressive! Must have taken a very long time to cut / glue.
I made this for extra storage in the small Sunday school classroom for games and craft supplies for the kids.
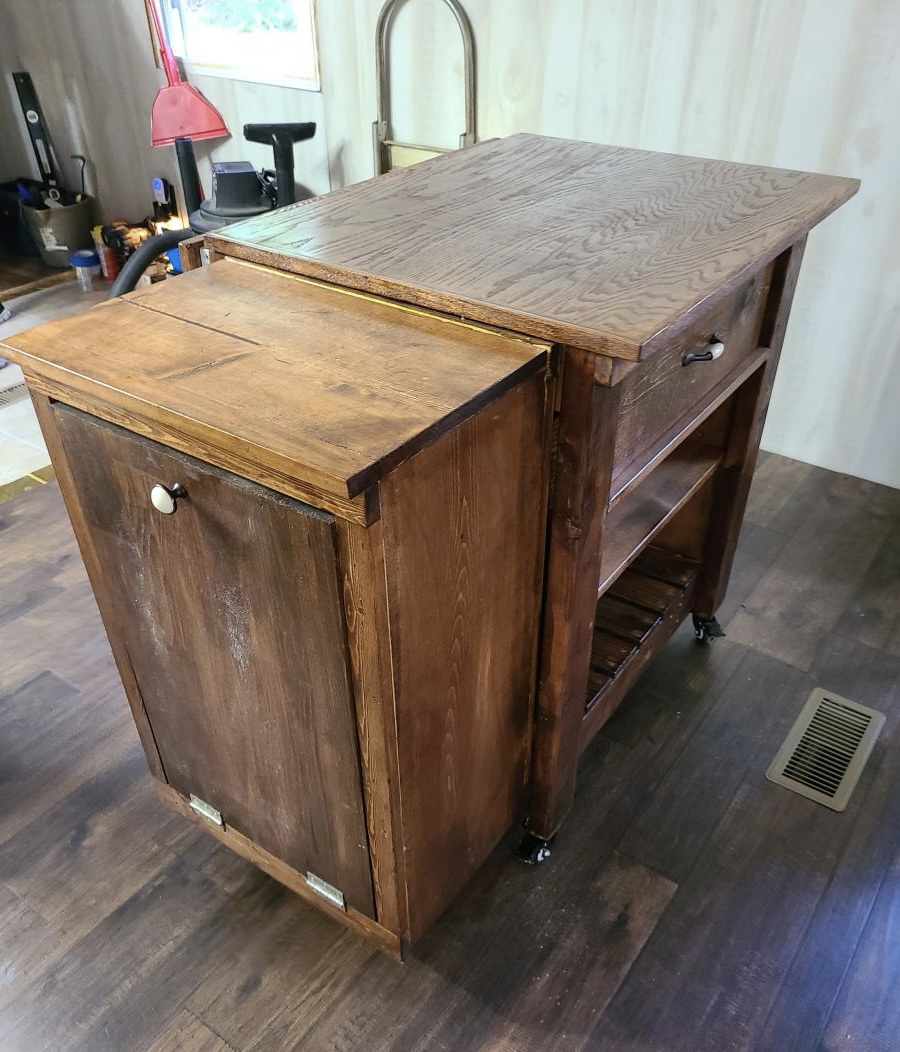
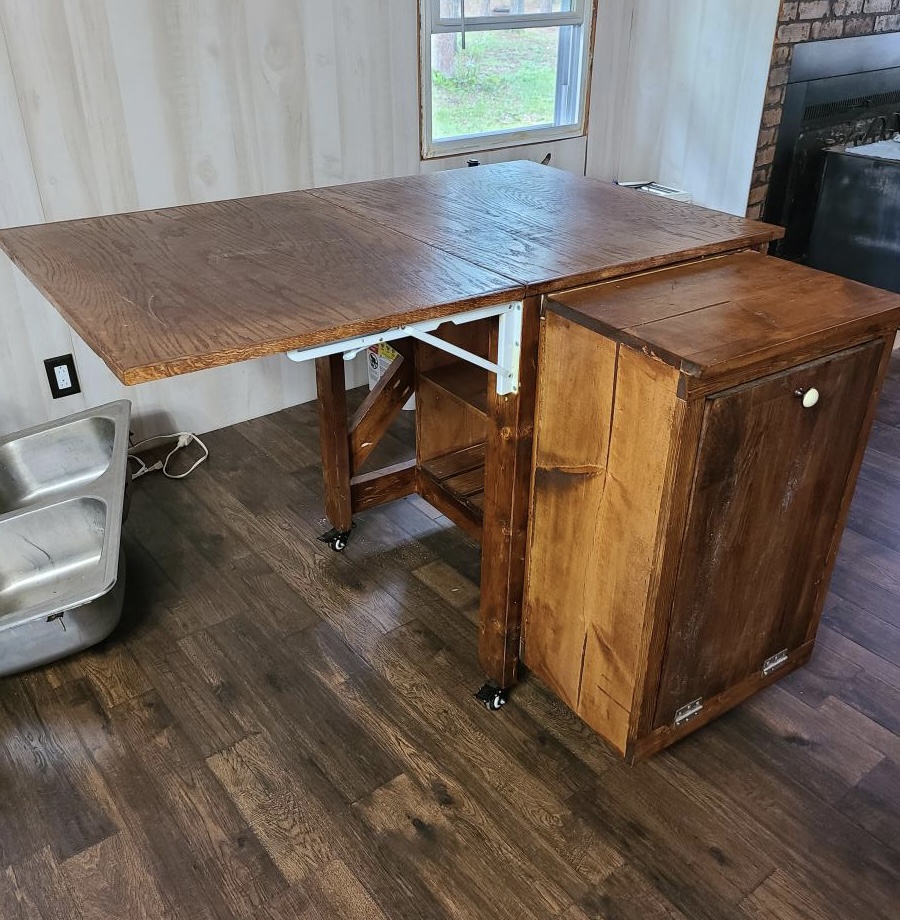
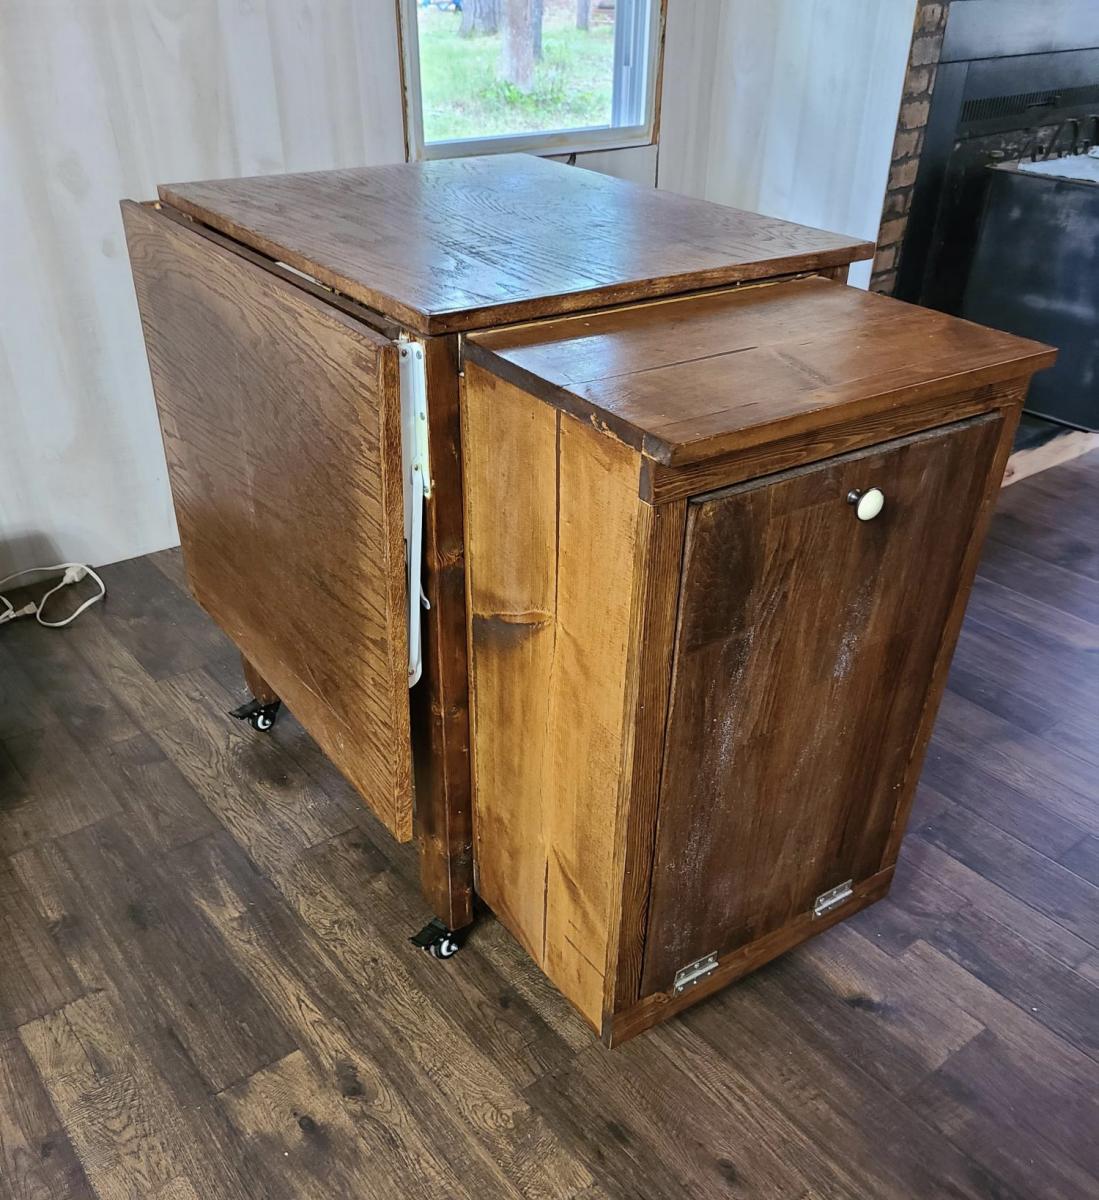
I decided to combine Ana's wastebasket project with her island project and then added a retractable tabletop so I can use it to prep food and even use it as a counter height table for two.

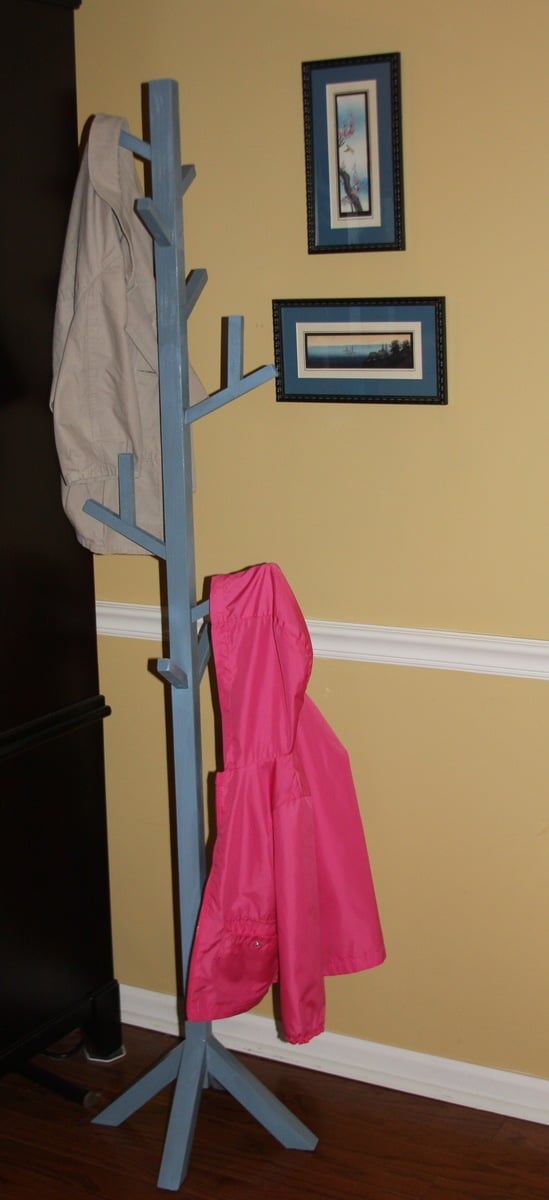
With my 3 young kids and all of their winter gear, I needed a coat rack that they can use. Since I don't have a miter saw, I asked my Father-in-law to make the cuts for me so I can't claim to have done that (although I am asking for a miter saw for my birthday!). Assembly was pretty easy with 2 pocket holes each on the roots and one for each of the limbs. With the small pieces of wood, it was tricky to get the holes centered using my Kreg Jig Jr. so I added some small finishing nails to some of the limbs for more support. (Think young kids tugging to get their coats down!) Some things I learned: Sand all pieces to the way you want them BEFORE assembling as it's nearly impossible to do later. Stagger the bottom roots because screwing in 8 screws to the same center point does not work. I ended up using shorter screws than the 2 1/2" recommended and had to add felt pads to stabilize the legs that were moved up to allow for me to fit the screws in. I am pleased with this project and while it's not perfect, it will get a lot of use around here!
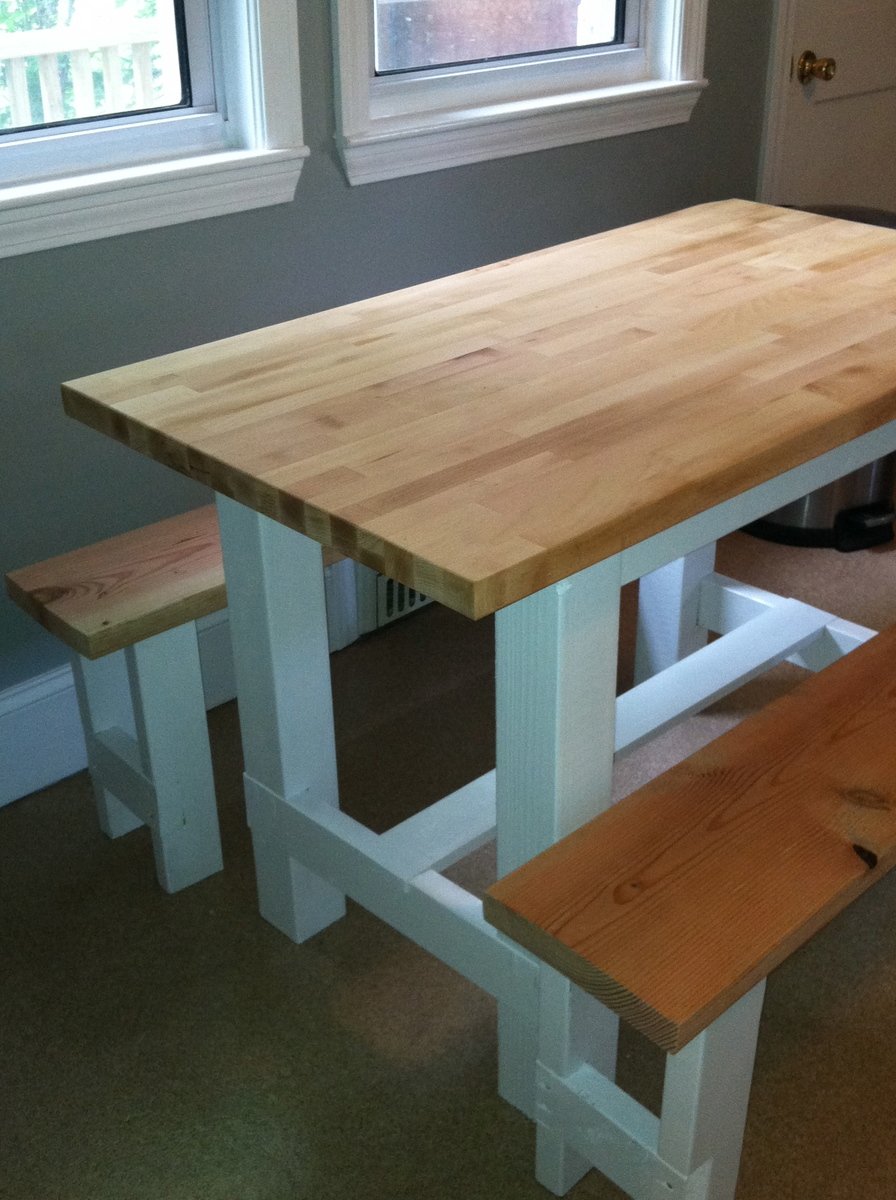
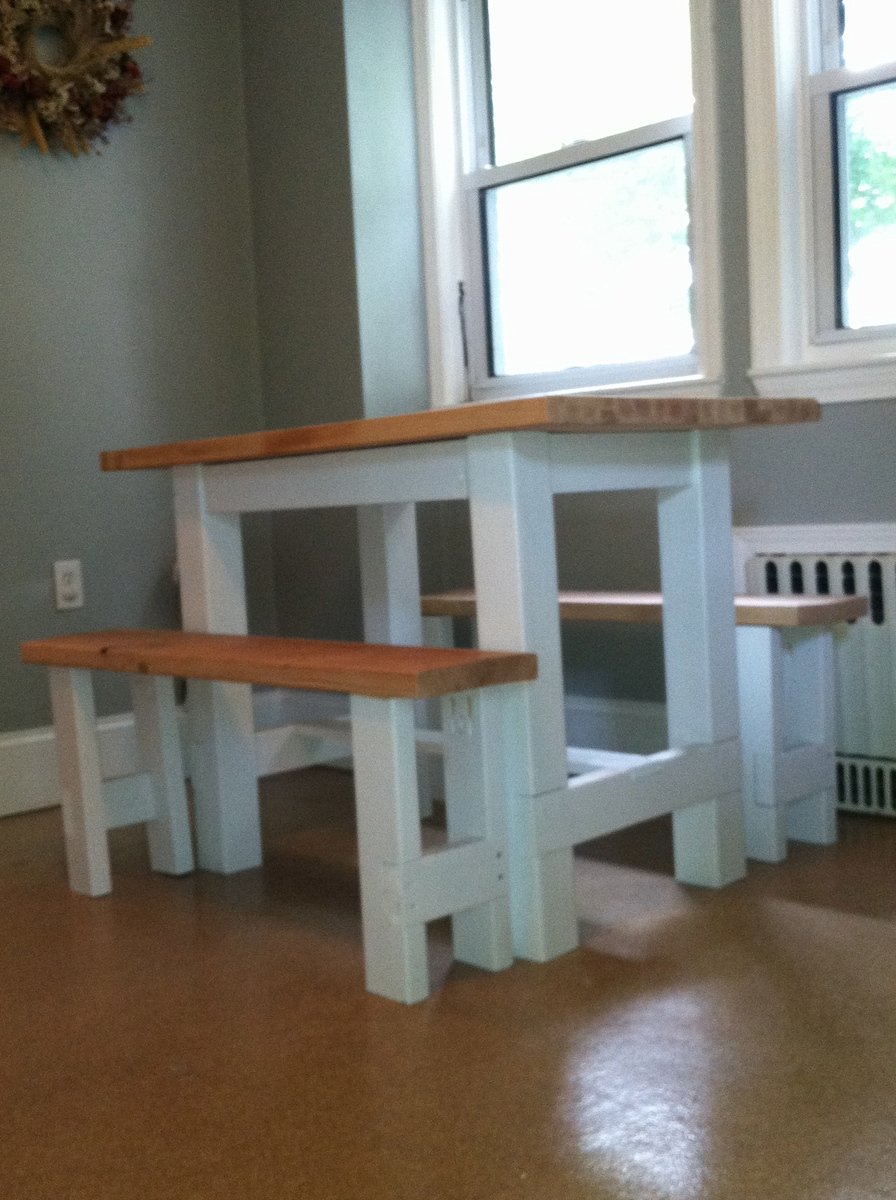
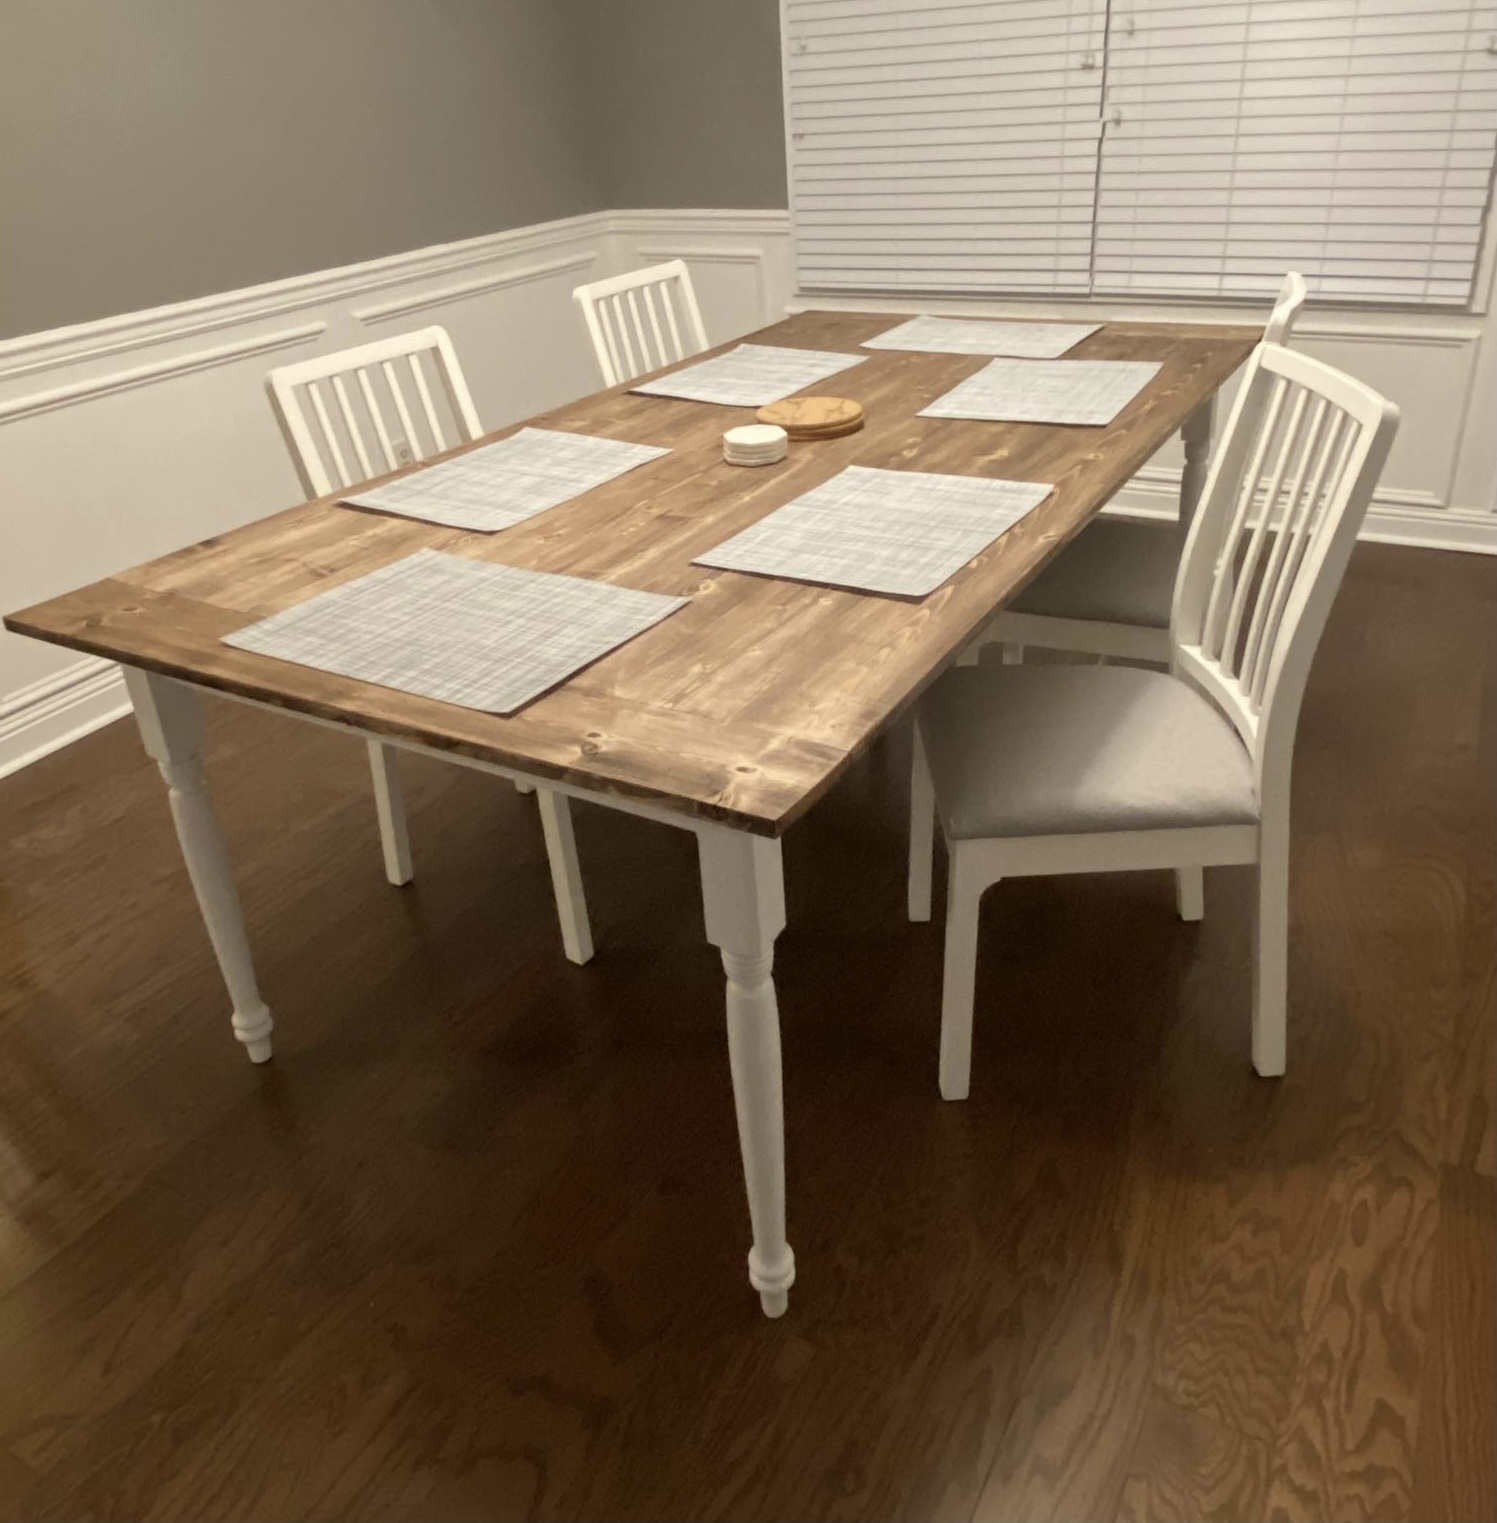
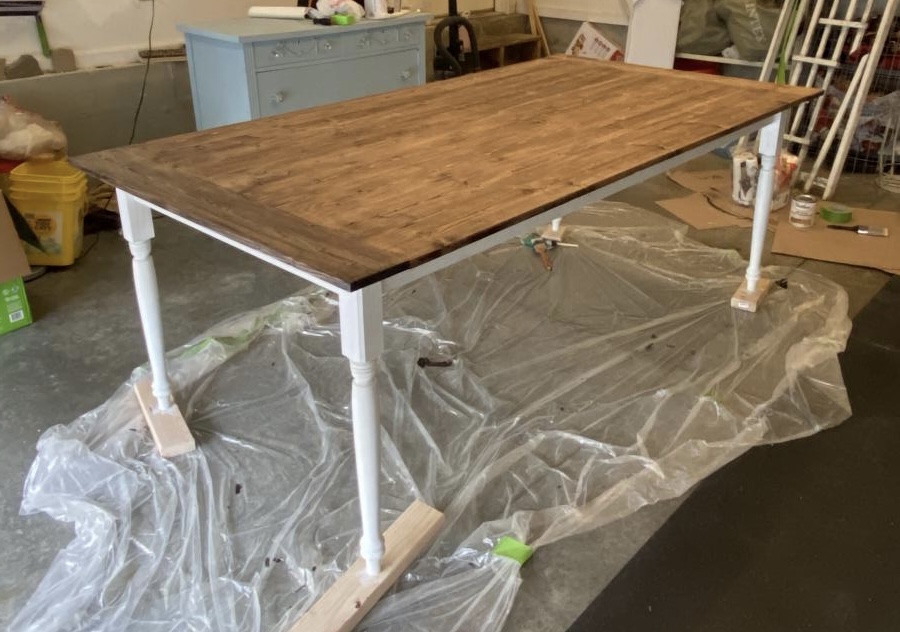
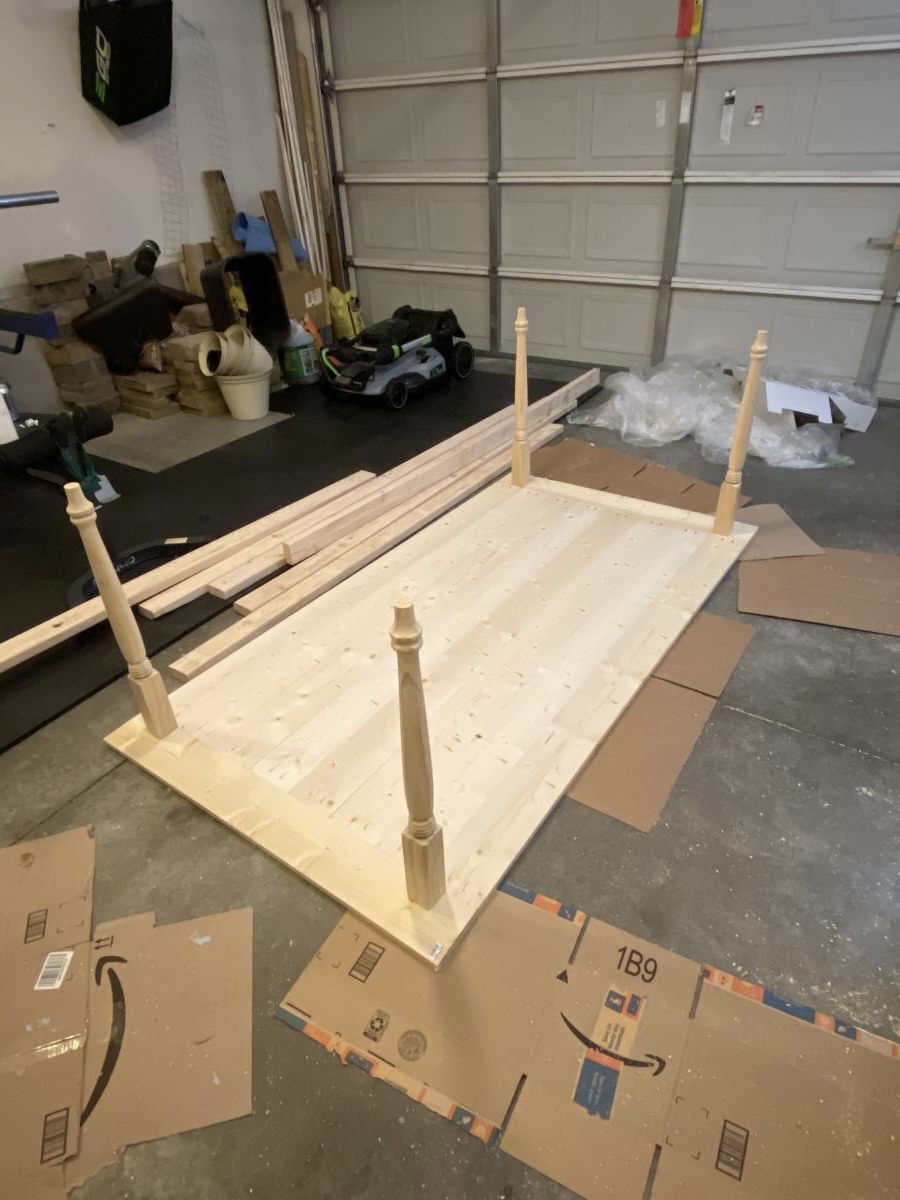
We are selling our house and needed a small table for the corner of our kitchen. Since we had leftover butcher block after replacing the countertops, I modified the Farmhouse Table and bench plans. The piece worked perfectly in the space and the house sold immediately after our open house.

This is such an easy and fun project! This is the second time I've made this cabinet. The first time I made it identical to the one in the plans but this one was for my 11yr old niece so I wanted it to look more girly and less rustic. I used hooks instead of nails which I really like. Thanks for such a great plan!
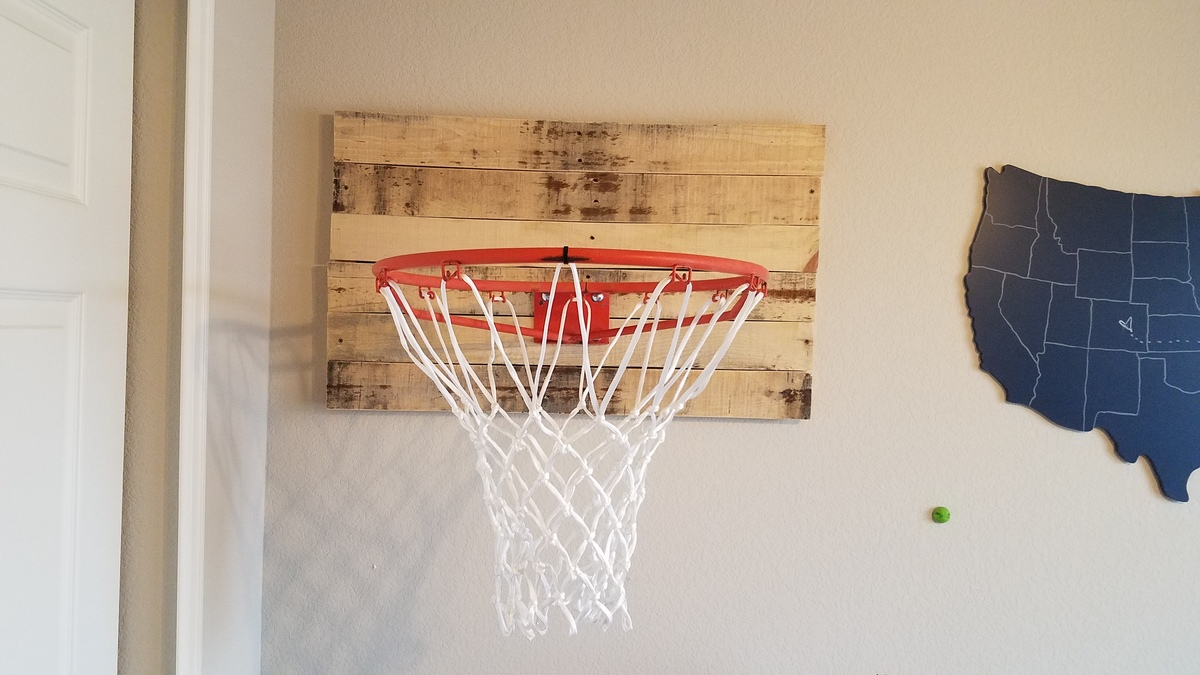
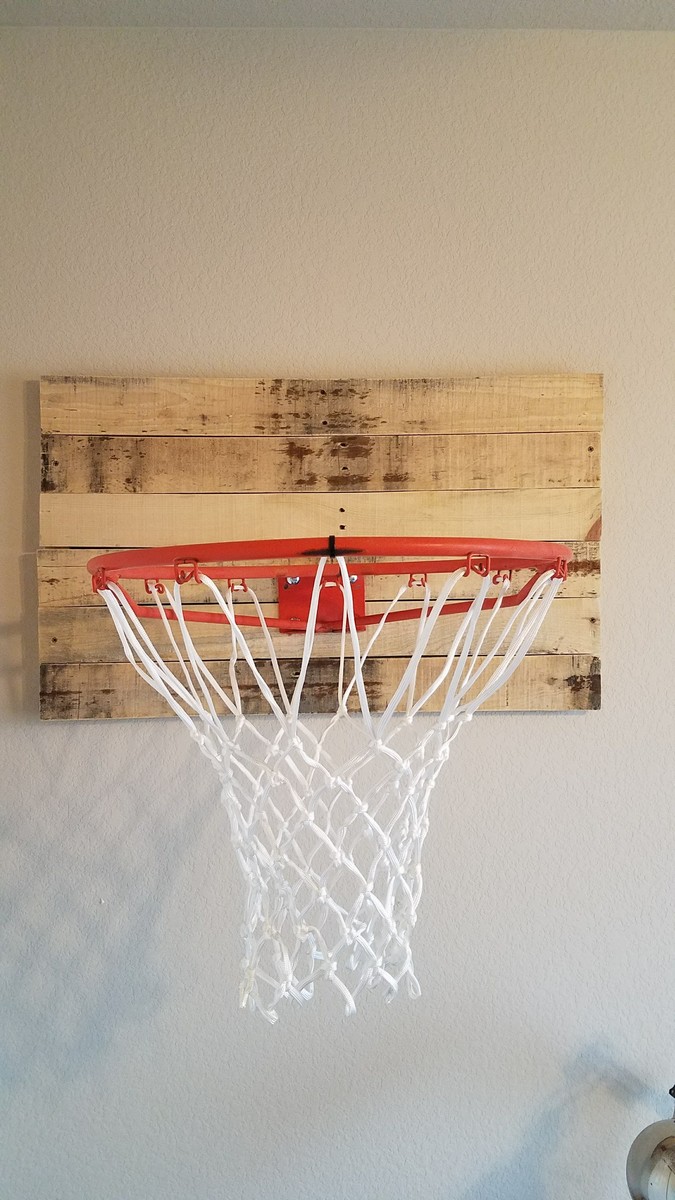
My son found an old basketball rim and wanted it for his room. I googled plans and lo and behold, Ana provided again!! He wanted it simple (i.e. so he didn't have to do much work) so we stripped a pallet down and followed Ana's plans, sanding it but not staining it. He didn't want the frame for it either. The back is held together with 3 1x2's, 1 1/4" nails, and wood glue. Thankfully it is 32" wide so I could drill it into wood studs, although I did tell him this is not to be dunked on :-) He ordered a new net from Amazon for $5 and there you have it!
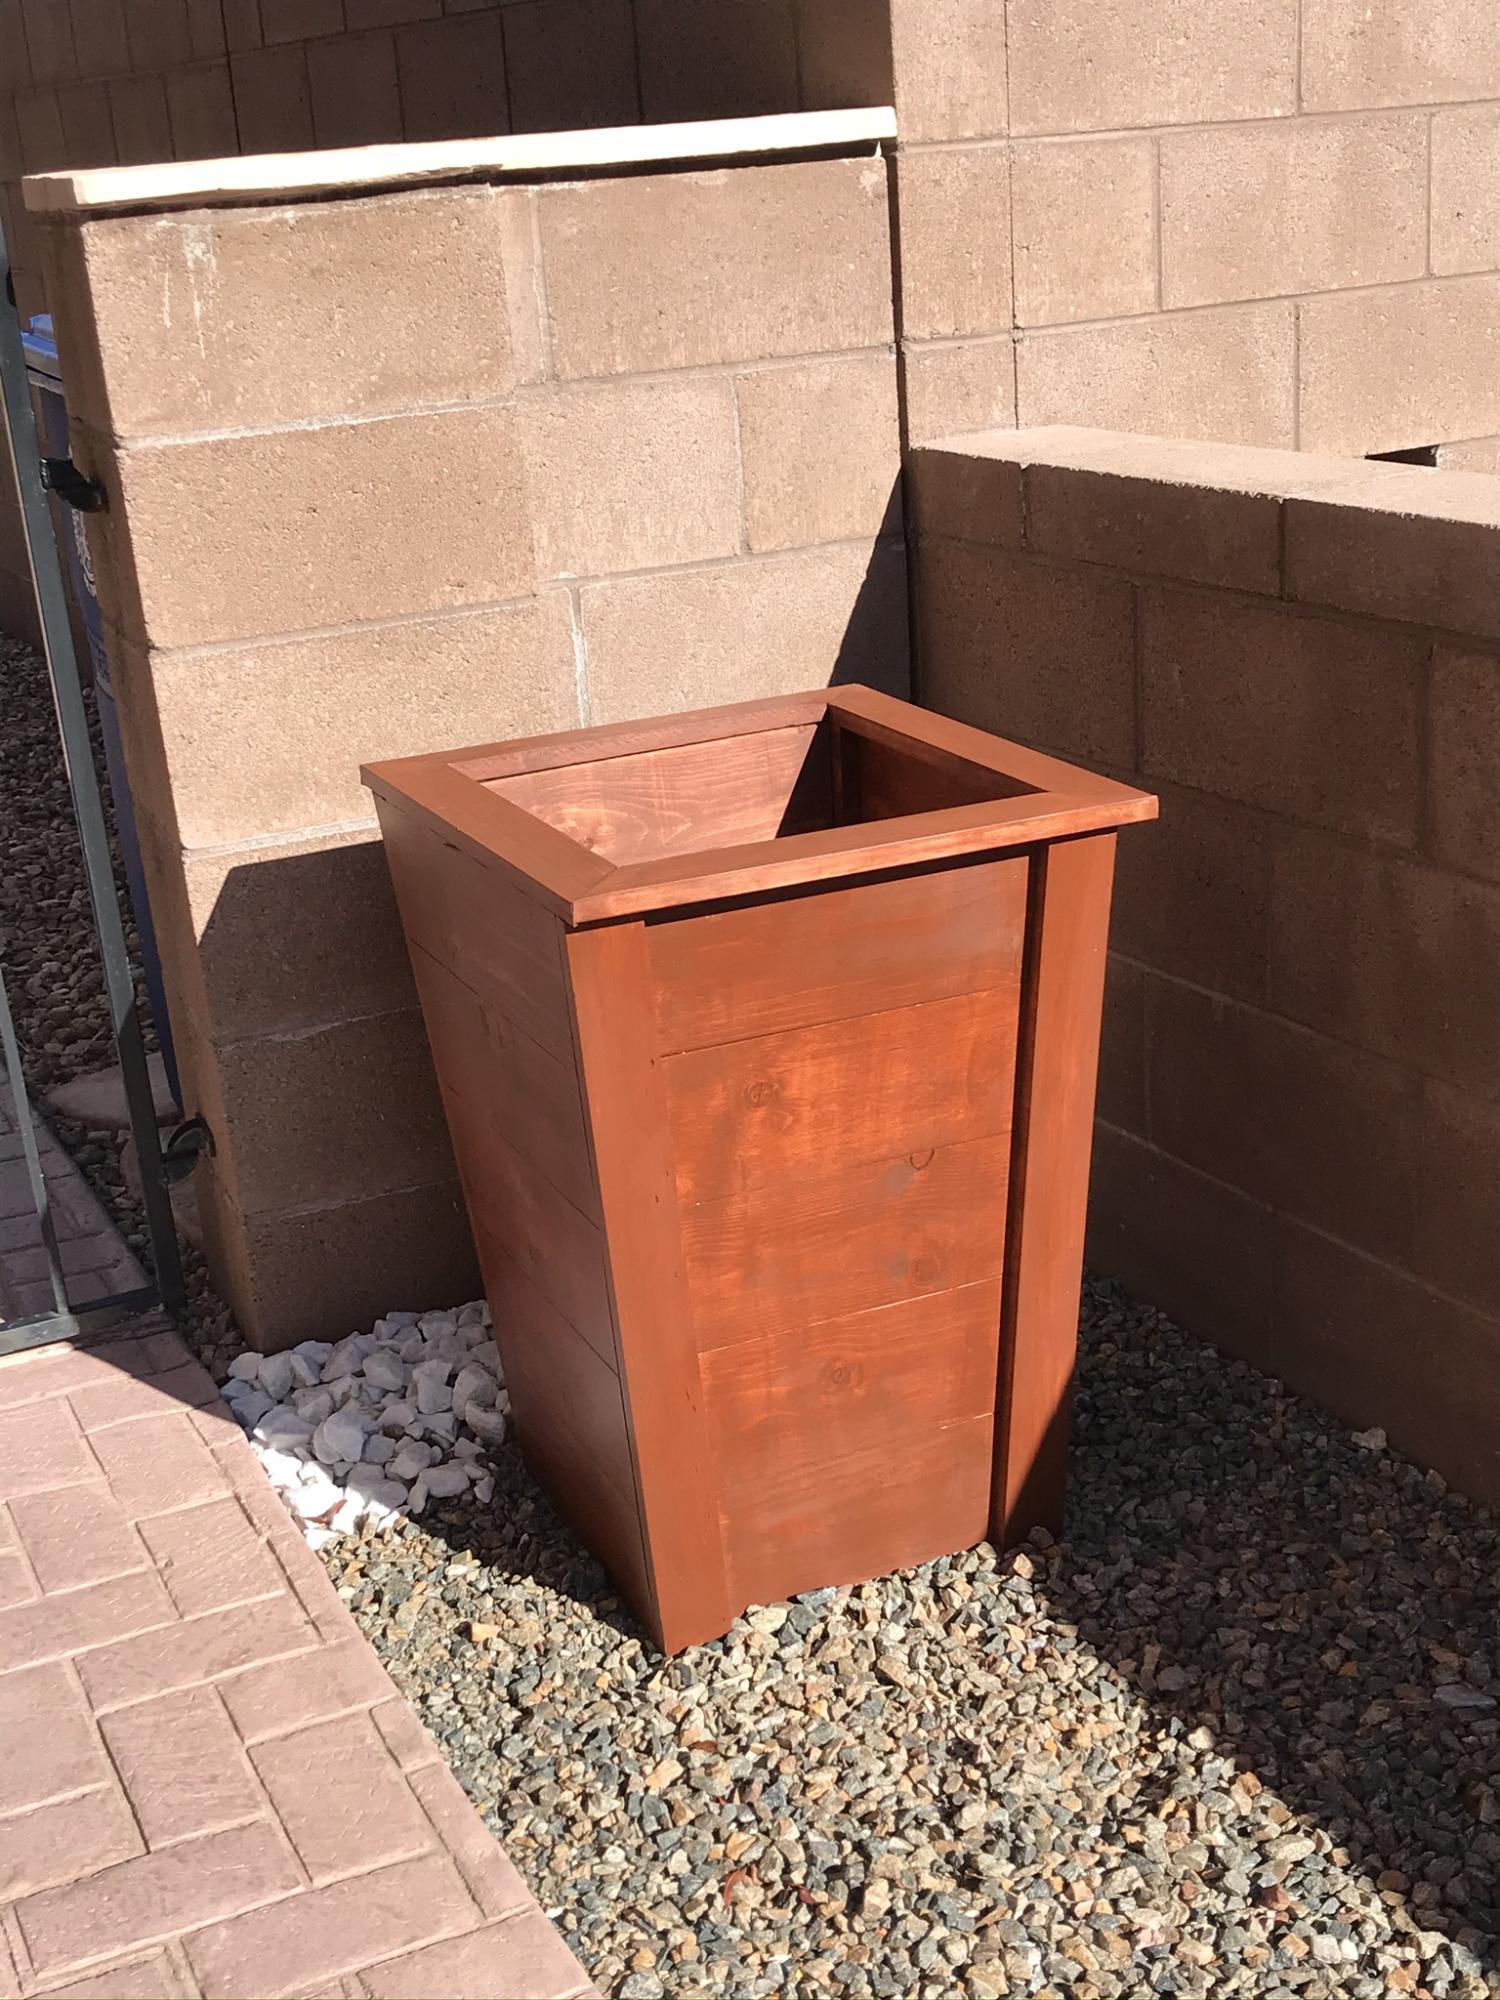
This planter was easy to make. Two days including finish.
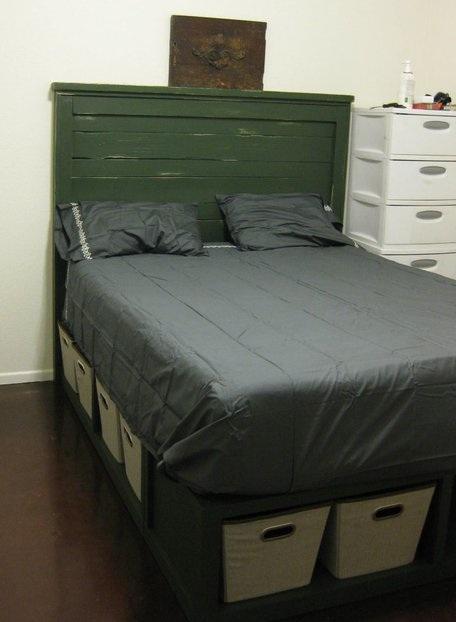
So we really needed a better bed than the flimsy moderny thing that would shift at least a few inches when I would get into the bed. And I like storage. So this was a great fit. The folks at blue were really good to me and help me cut all my lengths of plywood. I did modify the headboard to be 3 inches taller. Otherwise the plans were great! I had one hiccup in adding the divider to one of the benches. It came out kind of slanted. So I would recommend having a lot of light and measuring it out in the back of the box when you are inserting the divider
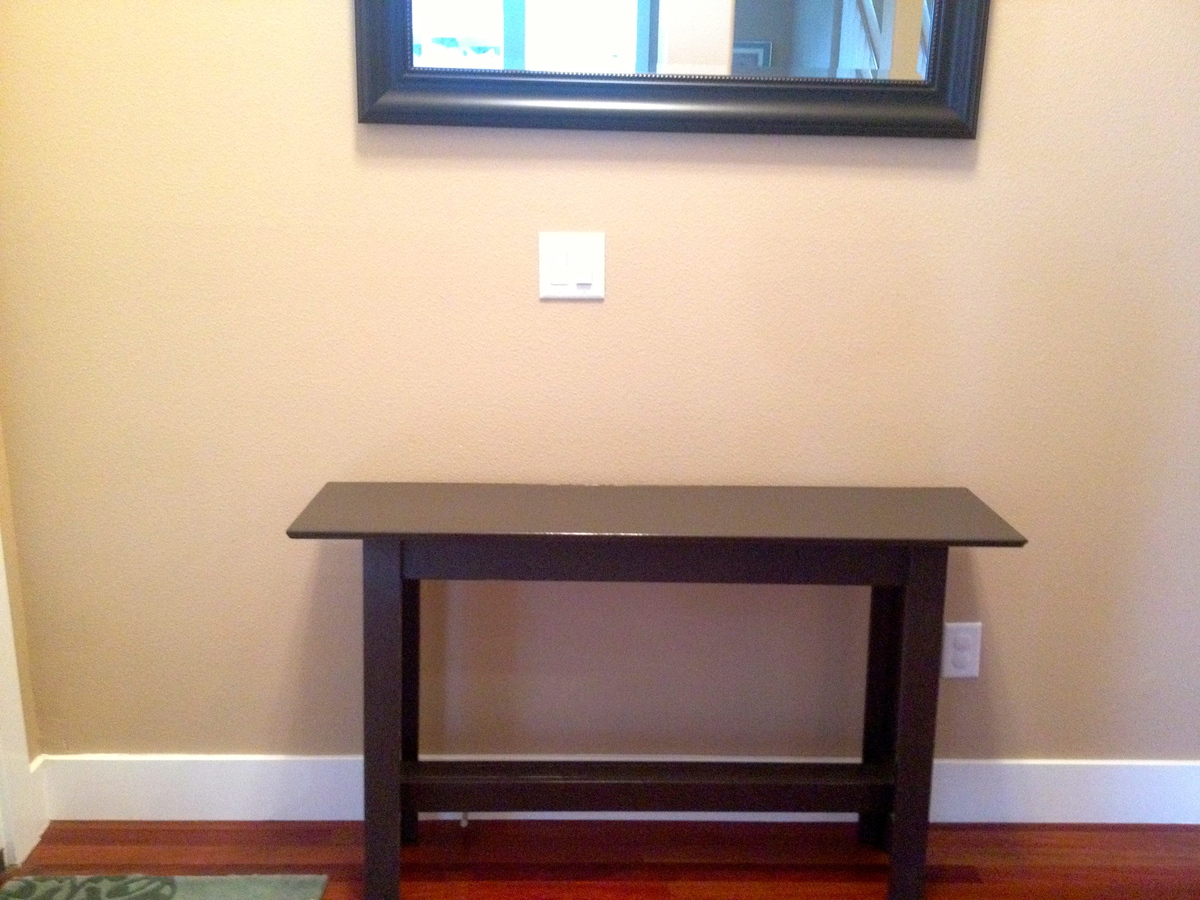
I made this entry table to go by our front door. It's a spin off from the "console table" posted by Anna. I read some of the comments from people who had problems with her plans as a result of different standards in lumber and decided to alter this some!
I cut the side braces short enough so when I included the measurements of the legs the actual table top extended approx. 3/4" further past the legs and apron of the table. I also went with one sheet of wood on the table top and finished it up with some trim around the edge of the table top.
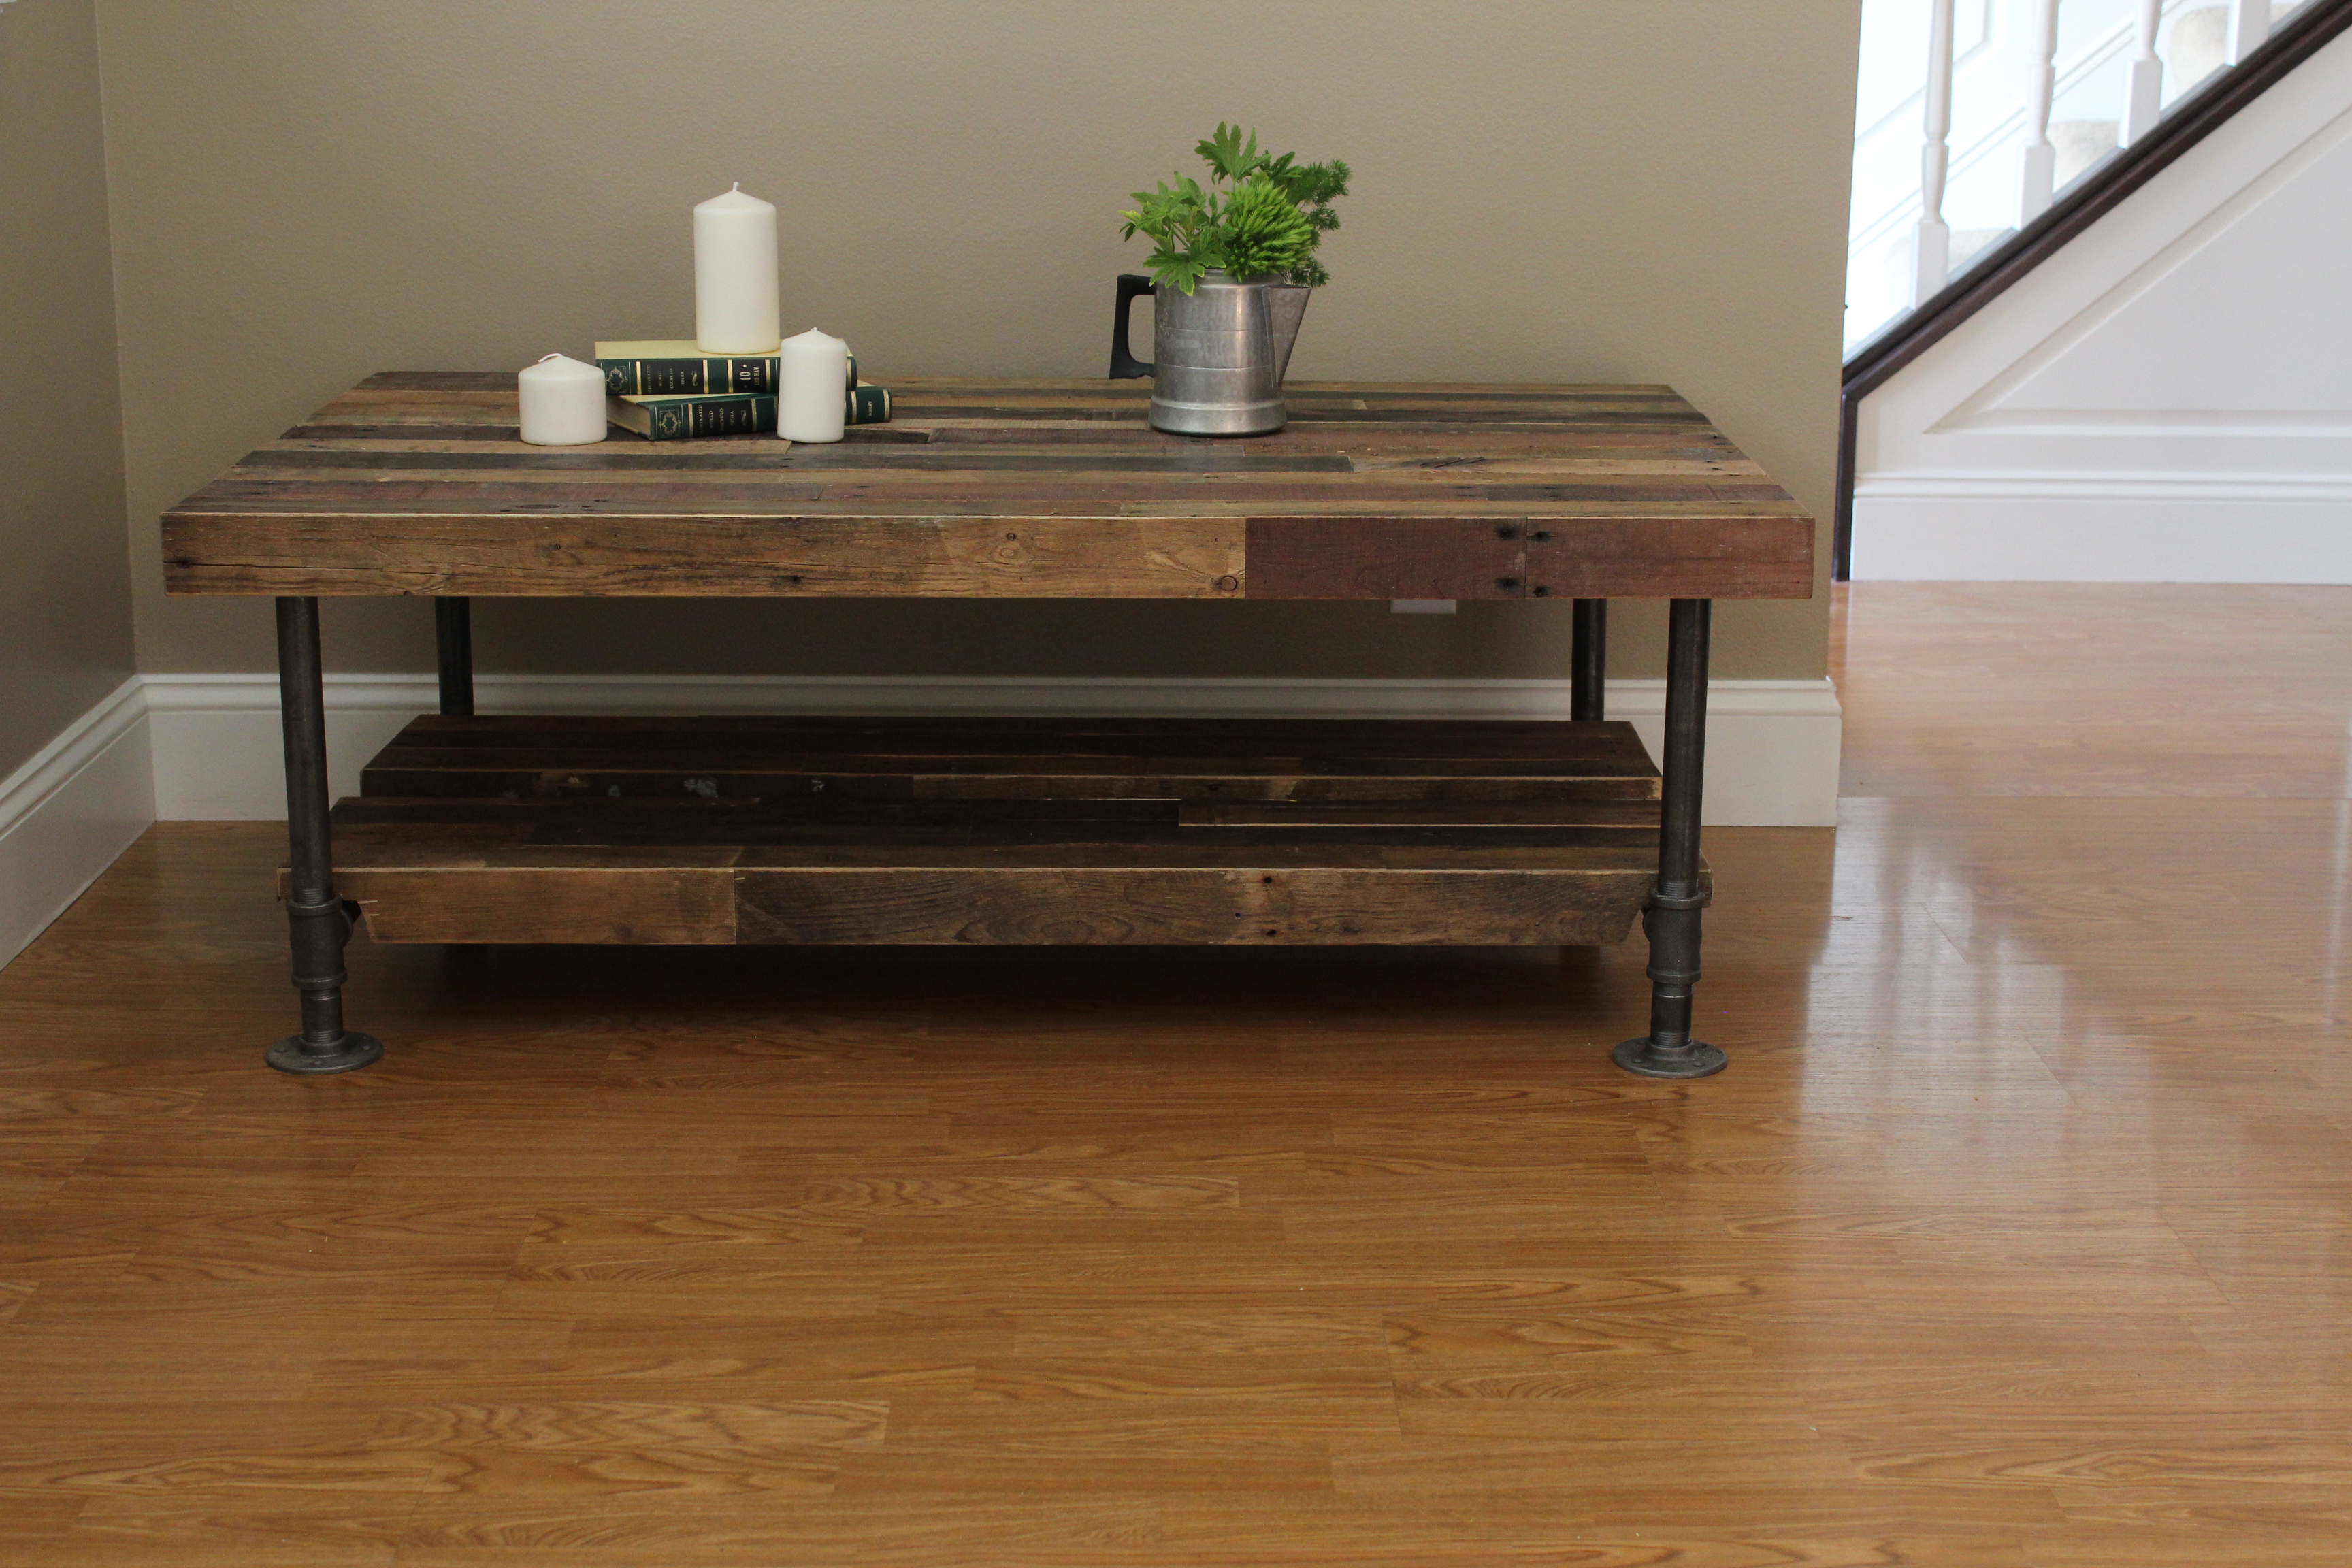
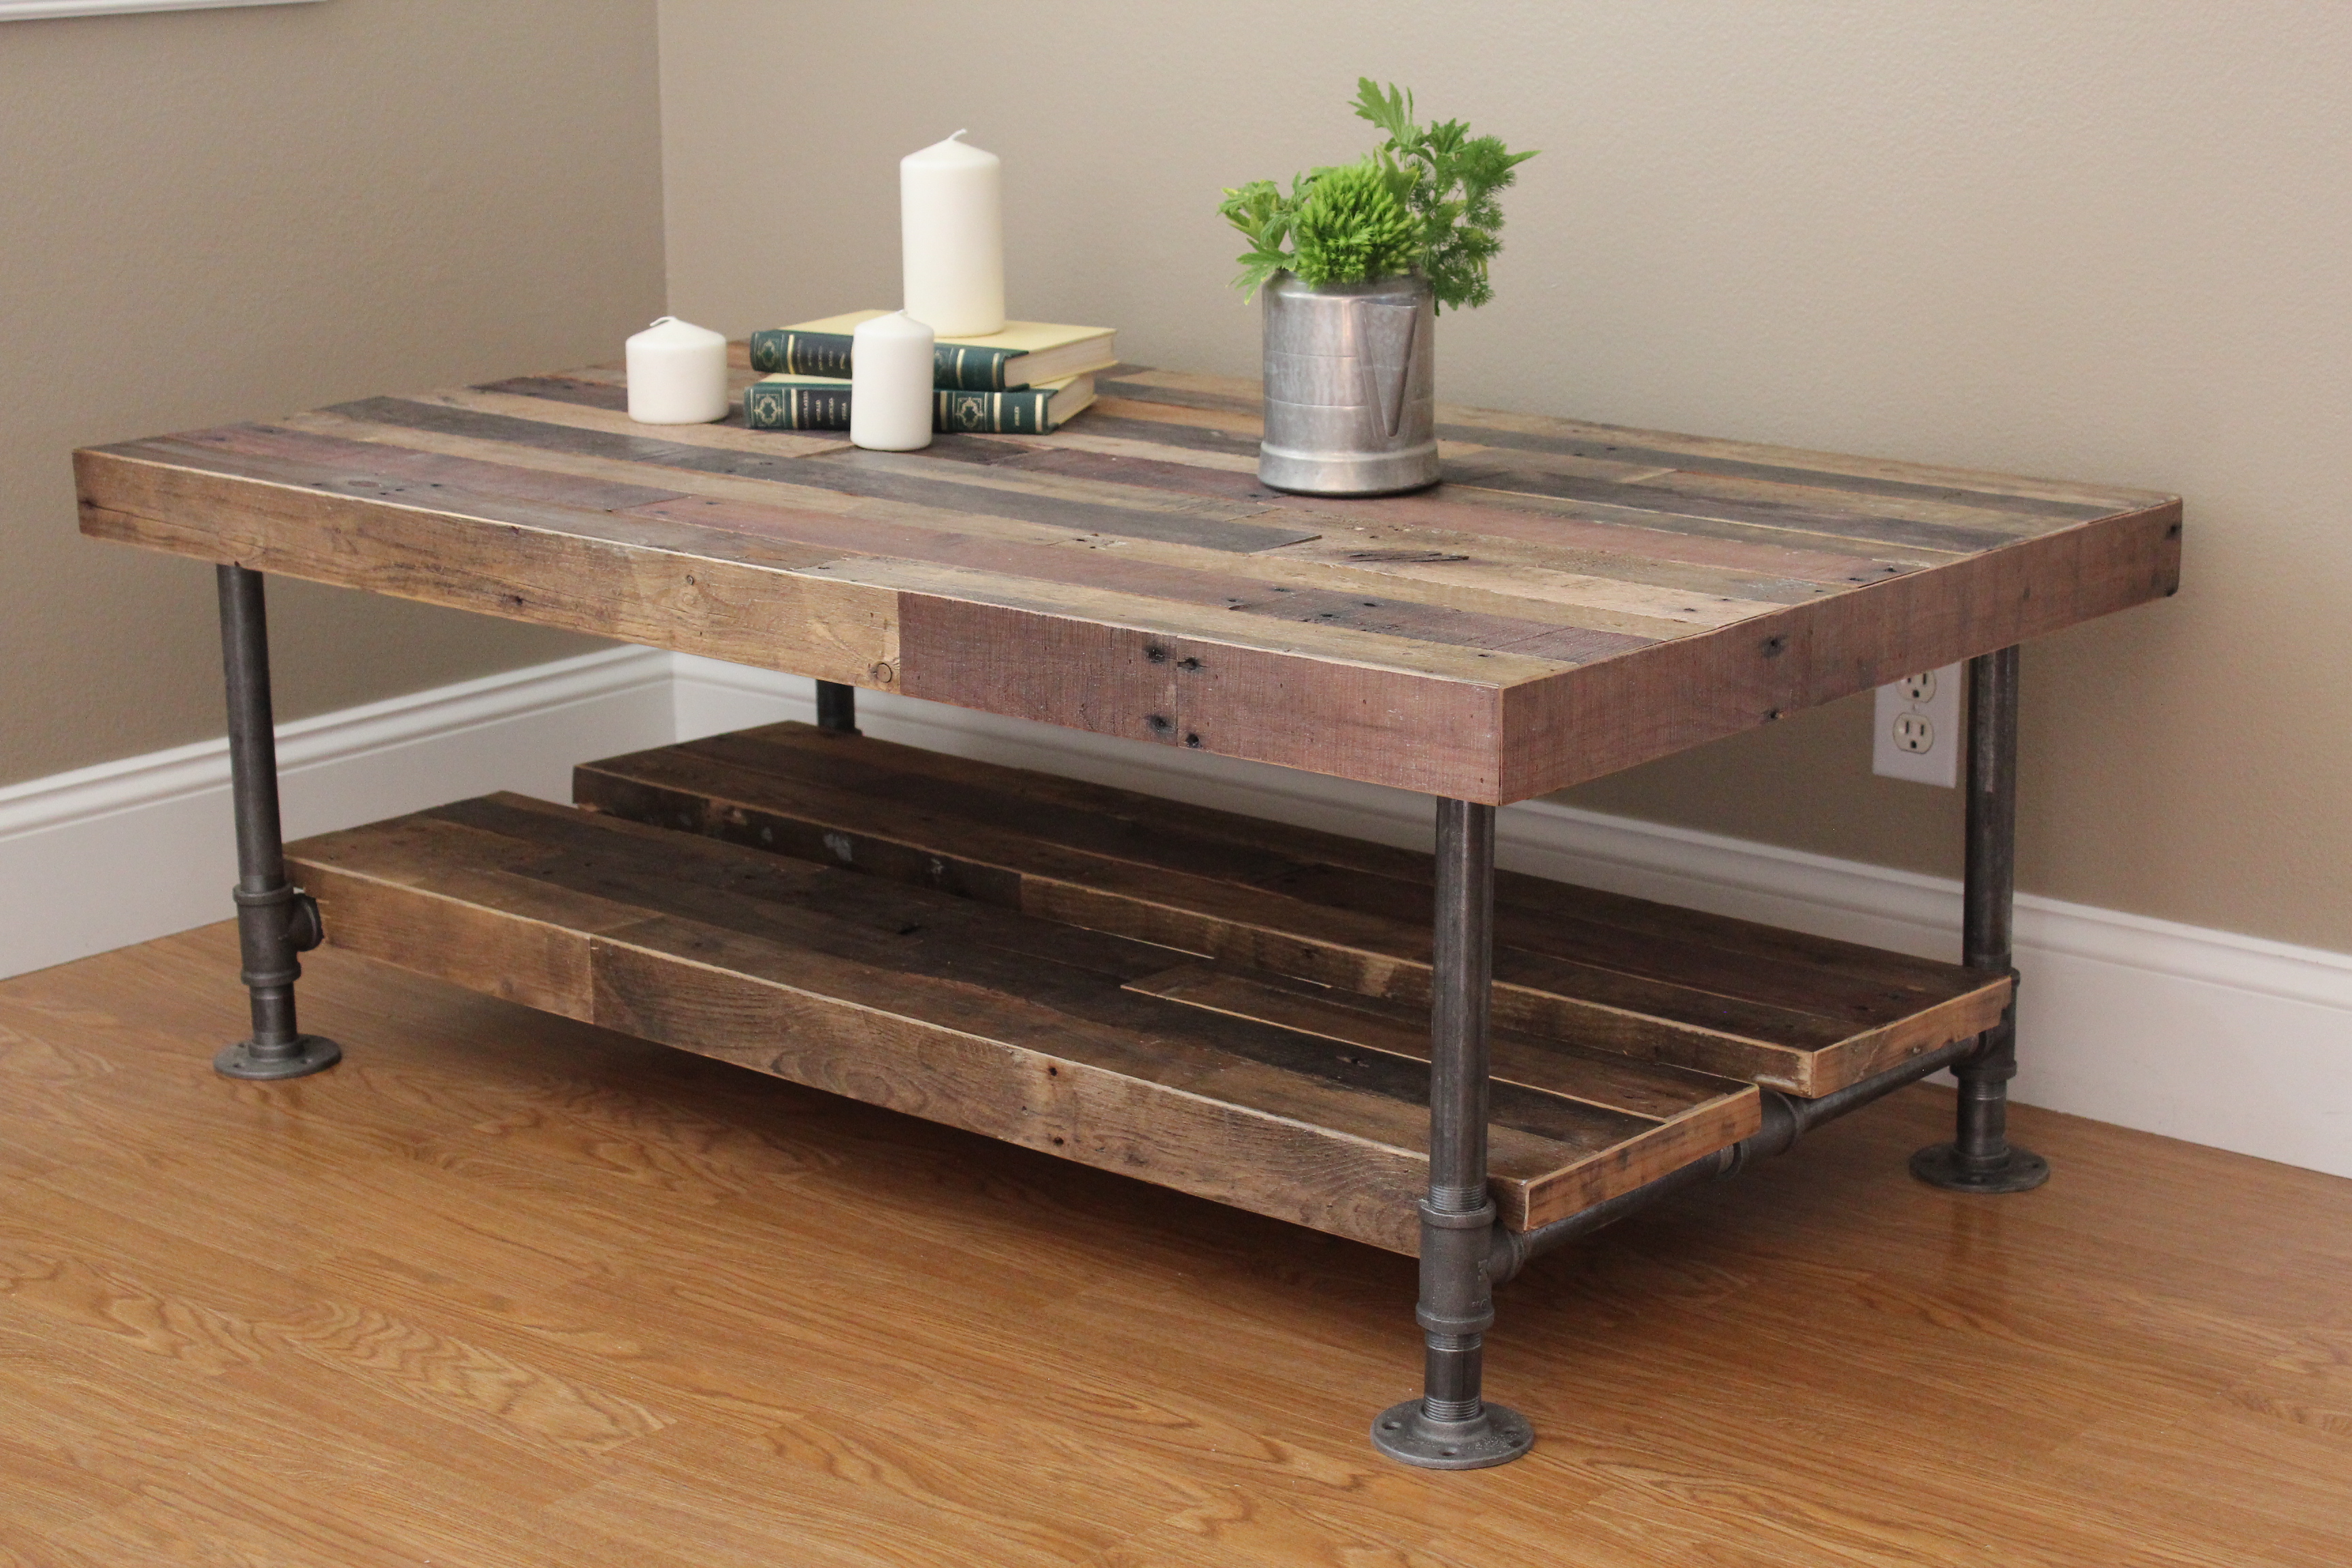
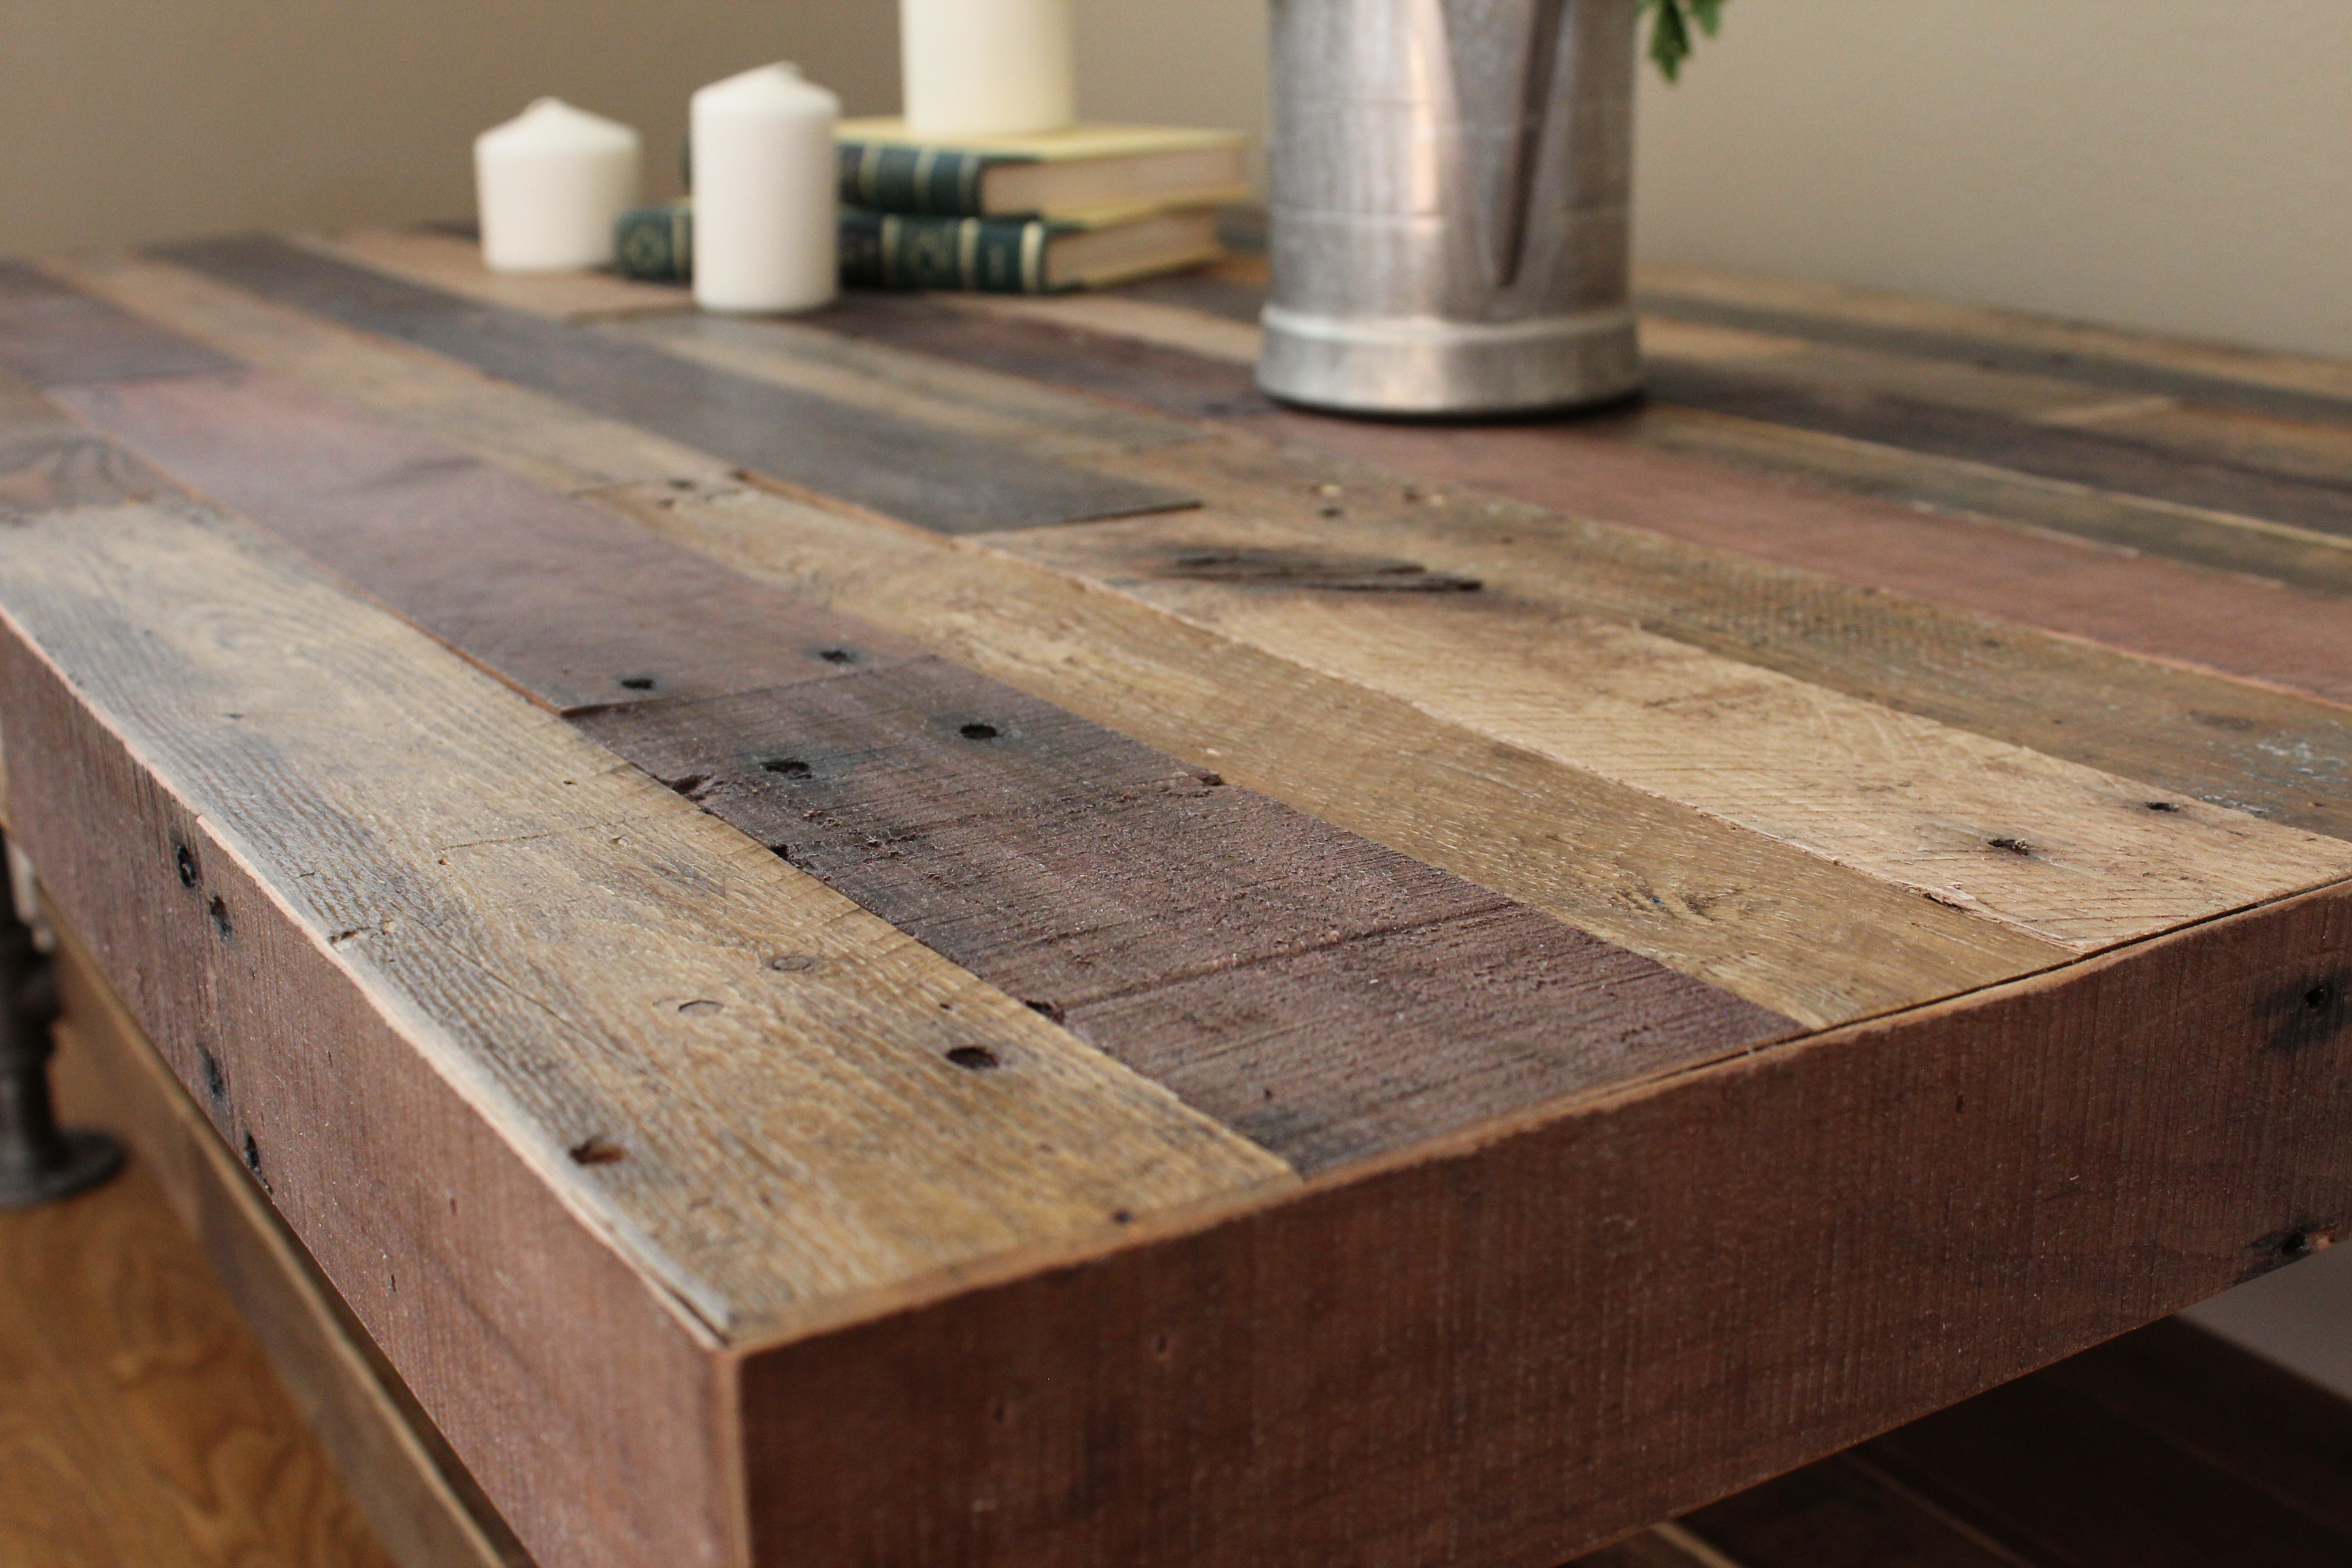
Here is an industrial style coffee table I recently built. I used reclaimed pallet wood for the top and shelves and I built the shelves to be removable if needed. For the finish I used oil based poly in a satin.
@timberandsoul

Behemoth of a build, and definitely took a long time to make.

We could not find a table that we liked within our price range so we decided to take matters into our own hands. Thanks to Anna White we were inspired to create this piece, our first wood building project ever!

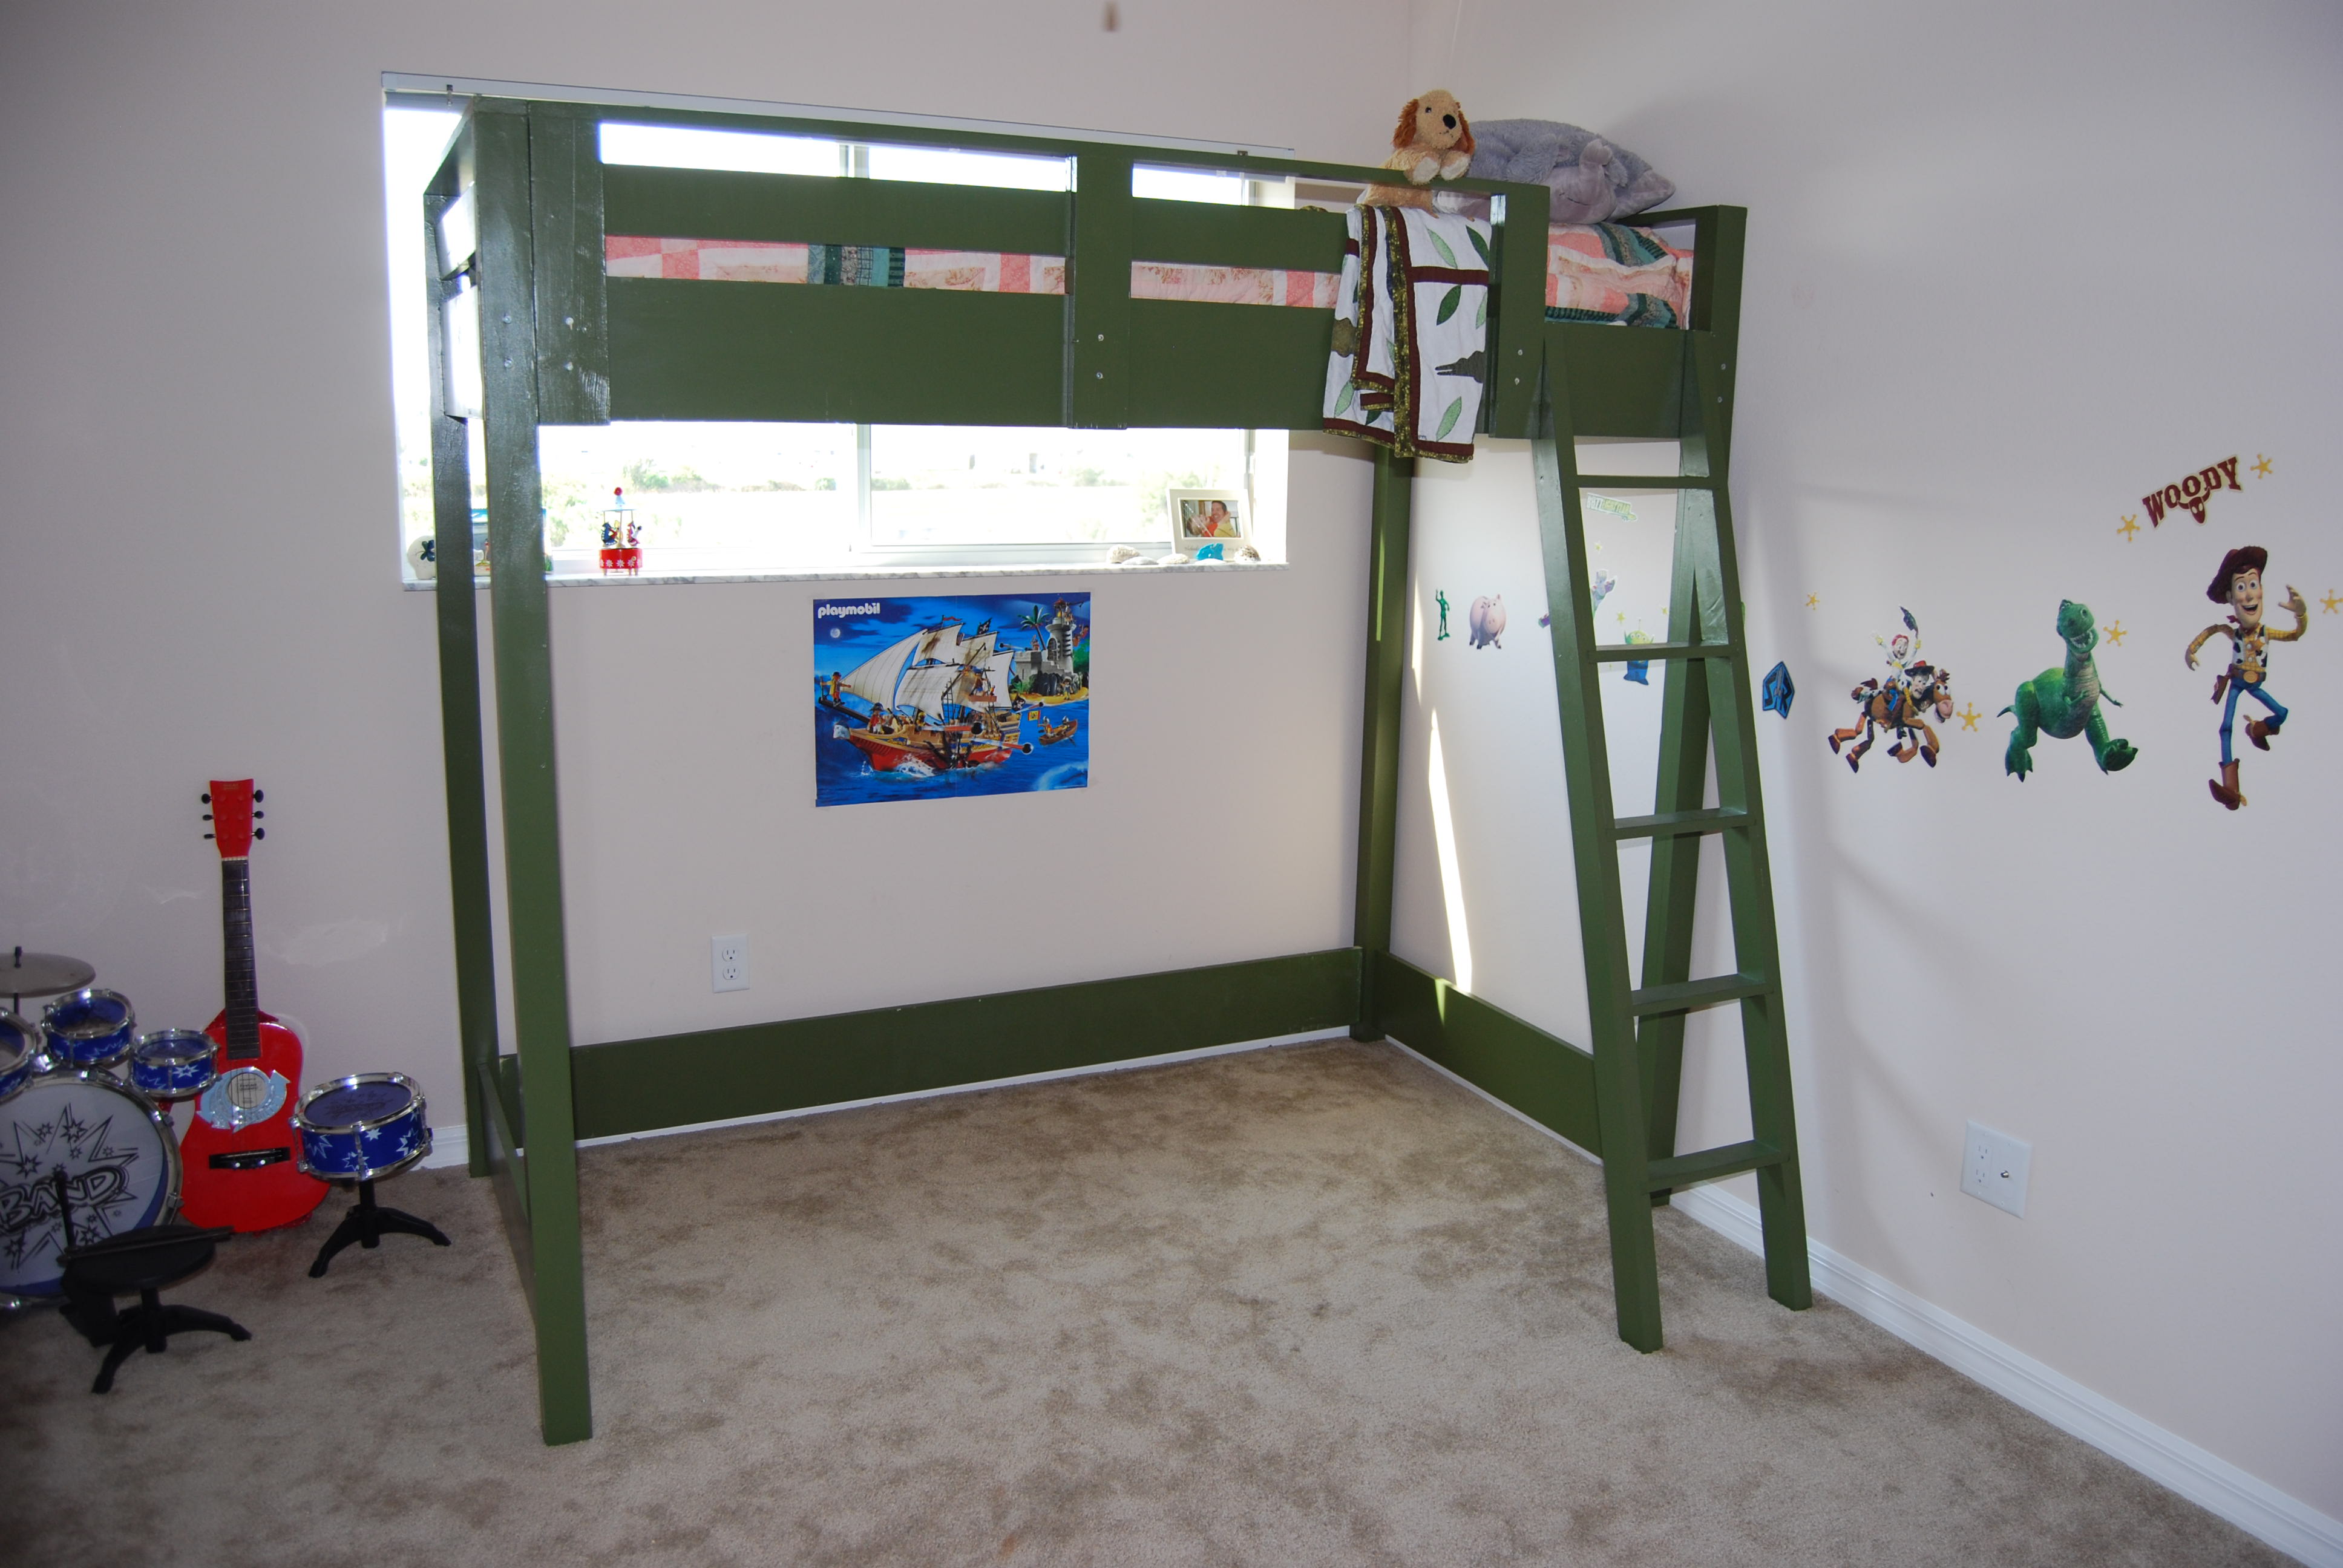
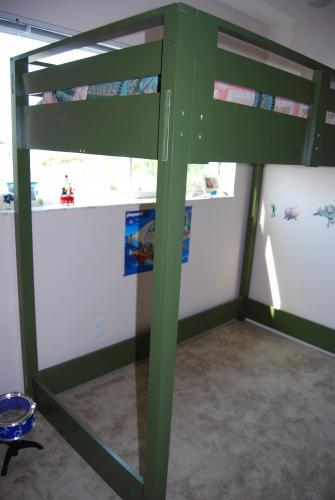
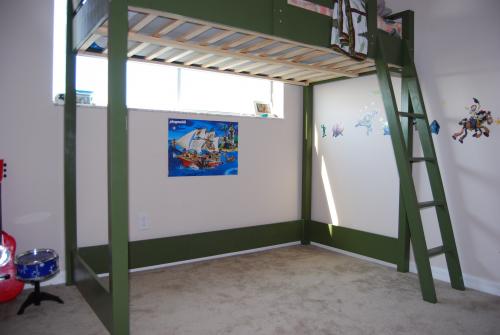
I made this loft bed for my 4-year-old son. It is plenty strong. It can easily hold him and his daddy for bedtime stories. I followed the plans to the letter. I found this a challenging but attainable second project and only needed help with final assembly. I'll start working on some bookshelves for under it but need to figure out how to work around the supports I already added (that are omitted in the bookshelf plans).

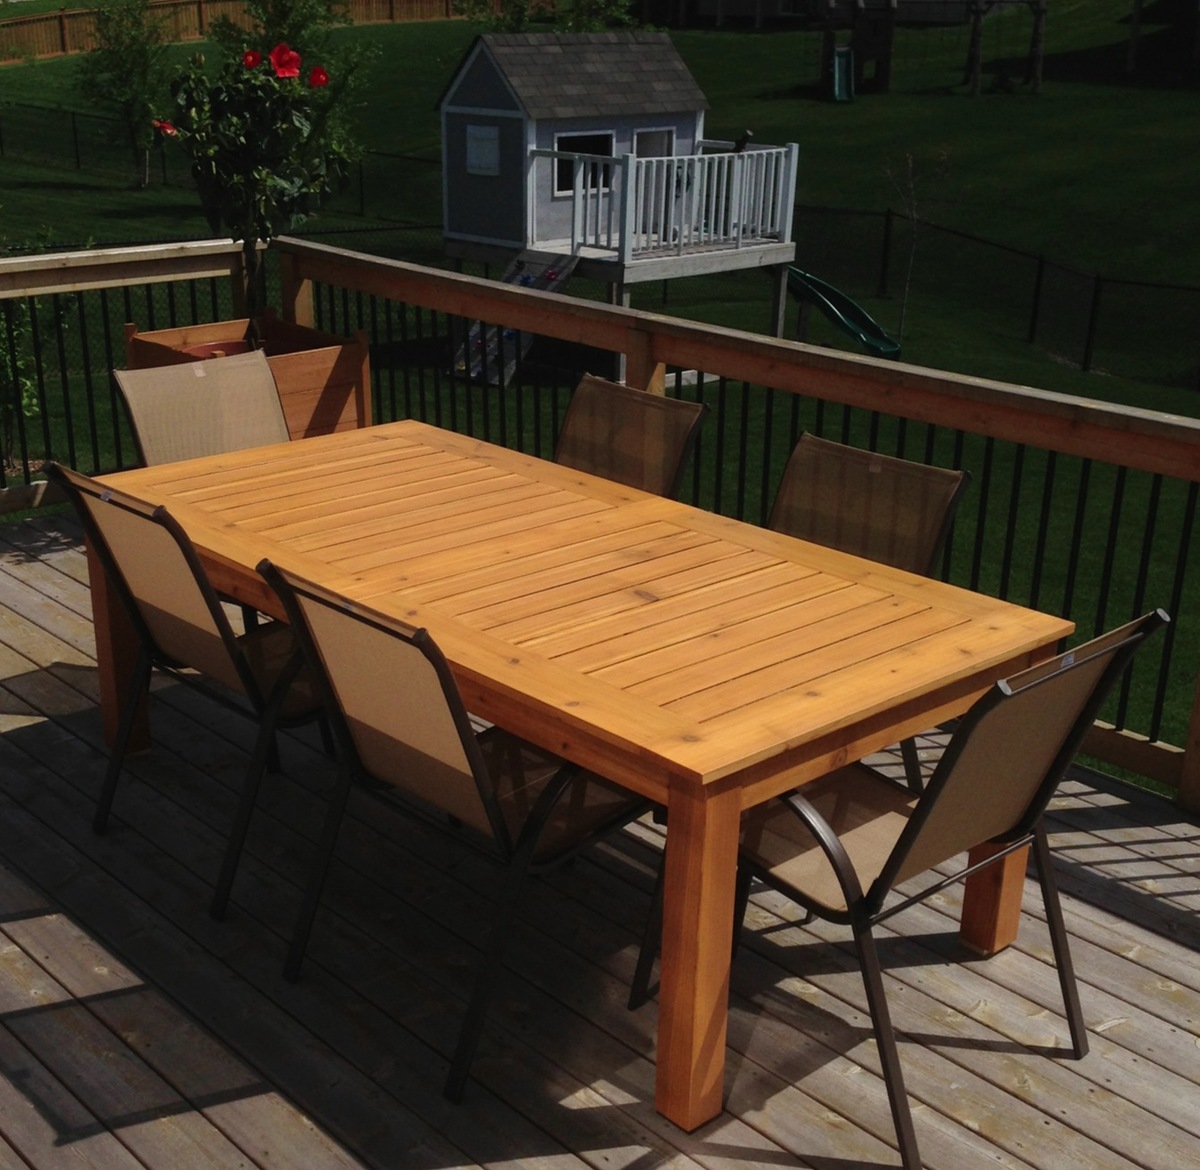
I took the Simple Outdoor Table along with a table I had seen at Pottery Barn and kind of put this together. It made of cedar and stained with a natural to keep the pretty color.
Mon, 06/03/2013 - 16:58
I really love the way you did this table! I've been considering a bunch of different plans and haven't been entirely satisfied with any of them. What are the dimensions of your table? And do you have measurements, or did you just figure it out as you went?

In reply to Size? by storchinsky
Wed, 06/05/2013 - 08:33
I started out with the size of 8 ft by 40 inches. It isn't exact but it's real close. After I had the initial measurements I just kind of pieced it together. I got ideas from looking at different tables on here and followed the pattern of the one I liked at Pottery Barn.
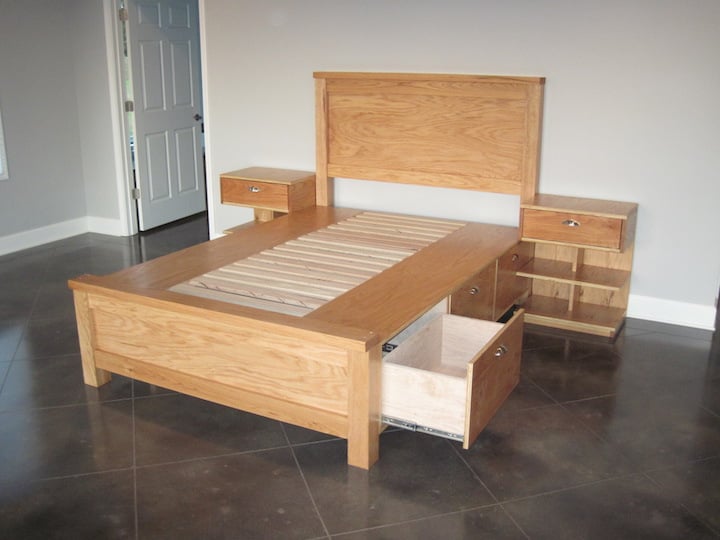
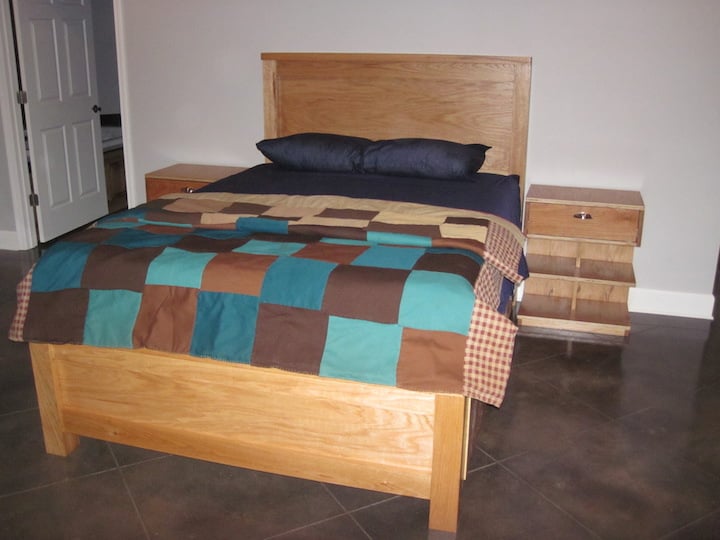
I went ahead and splurged on this project. It's all oak with a clear finish to show off the wood. I also put full extension slides on all the drawers. The bed is solid. It doesn't move a bit.
Fri, 05/01/2015 - 12:19
Thanks for sharing, lots of storage right there! Beautiful build!

In reply to This looks great! by Ana White Admin
Thu, 10/22/2015 - 05:18
I especially love the storage options. Lots of stuff !
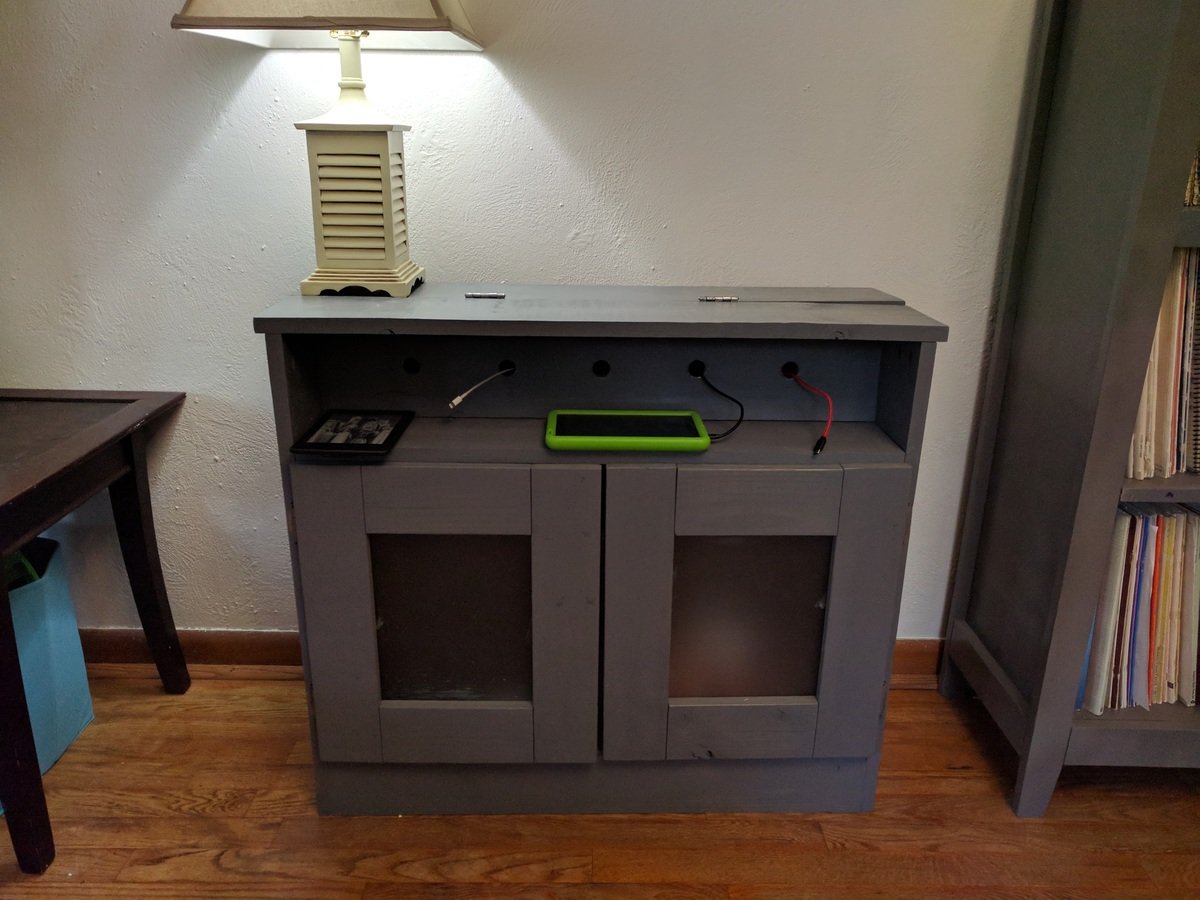
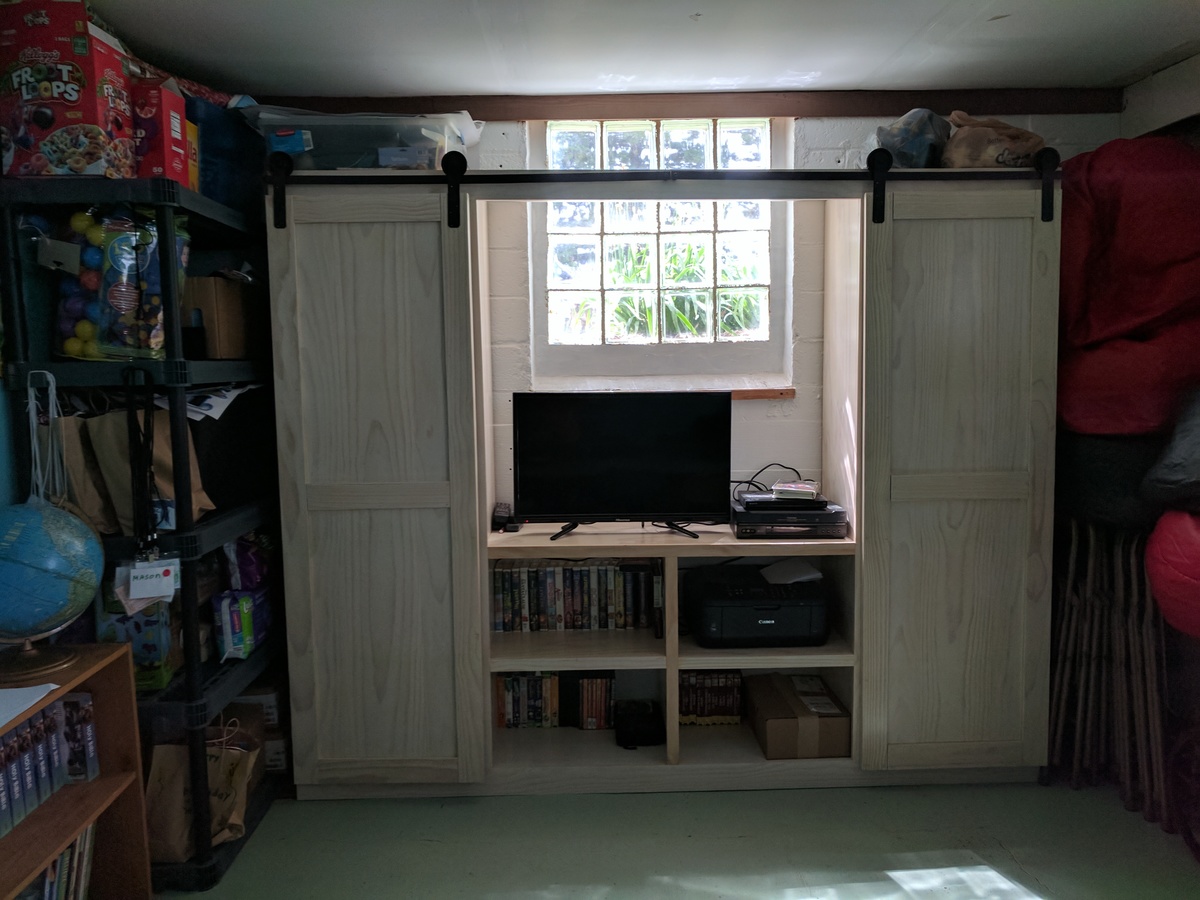
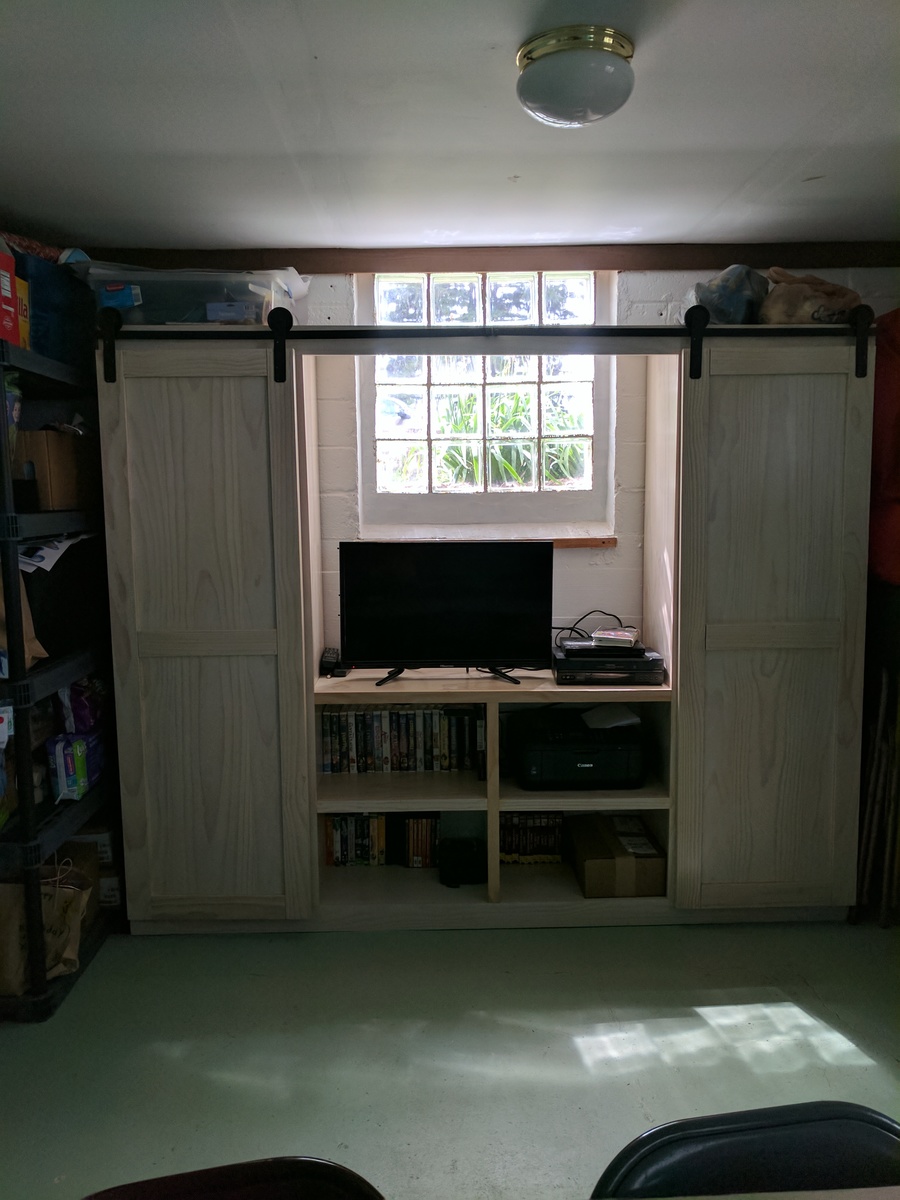
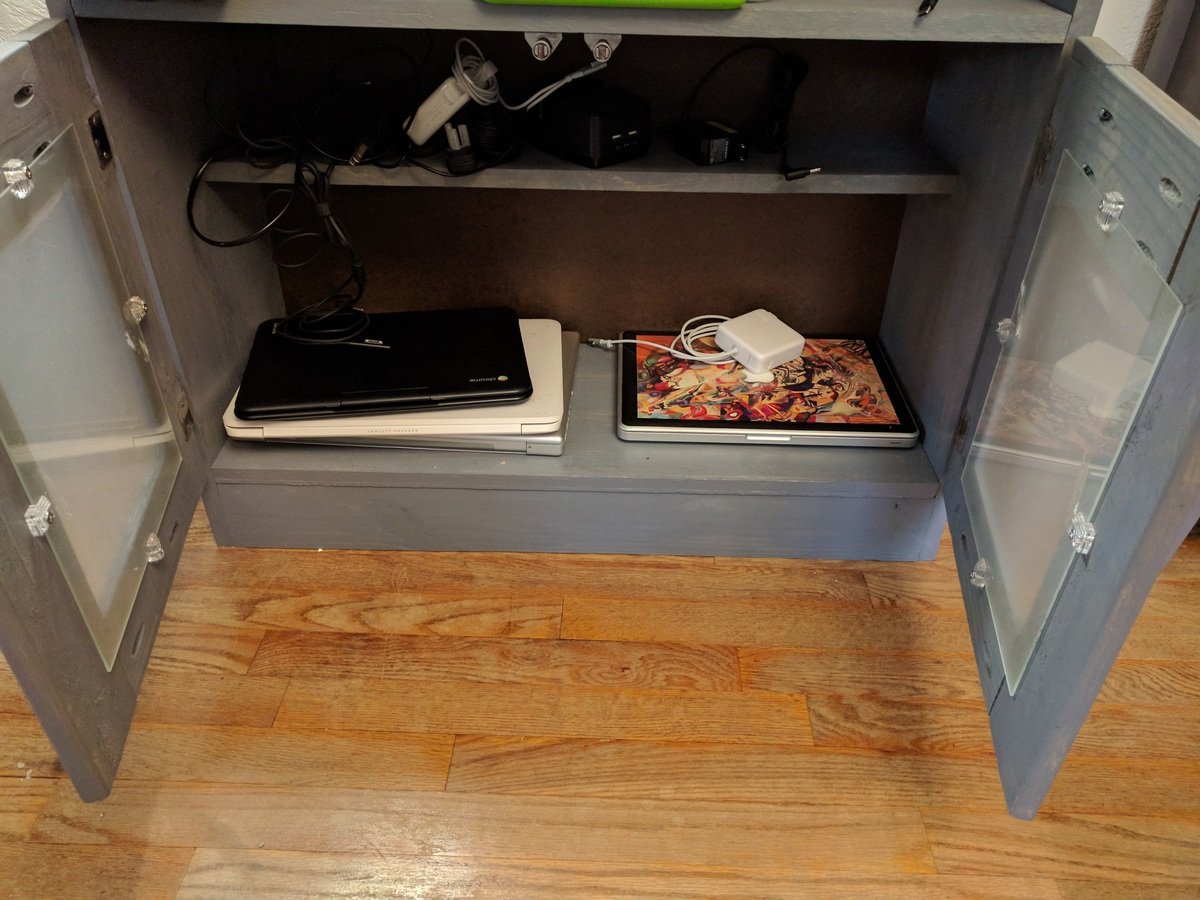
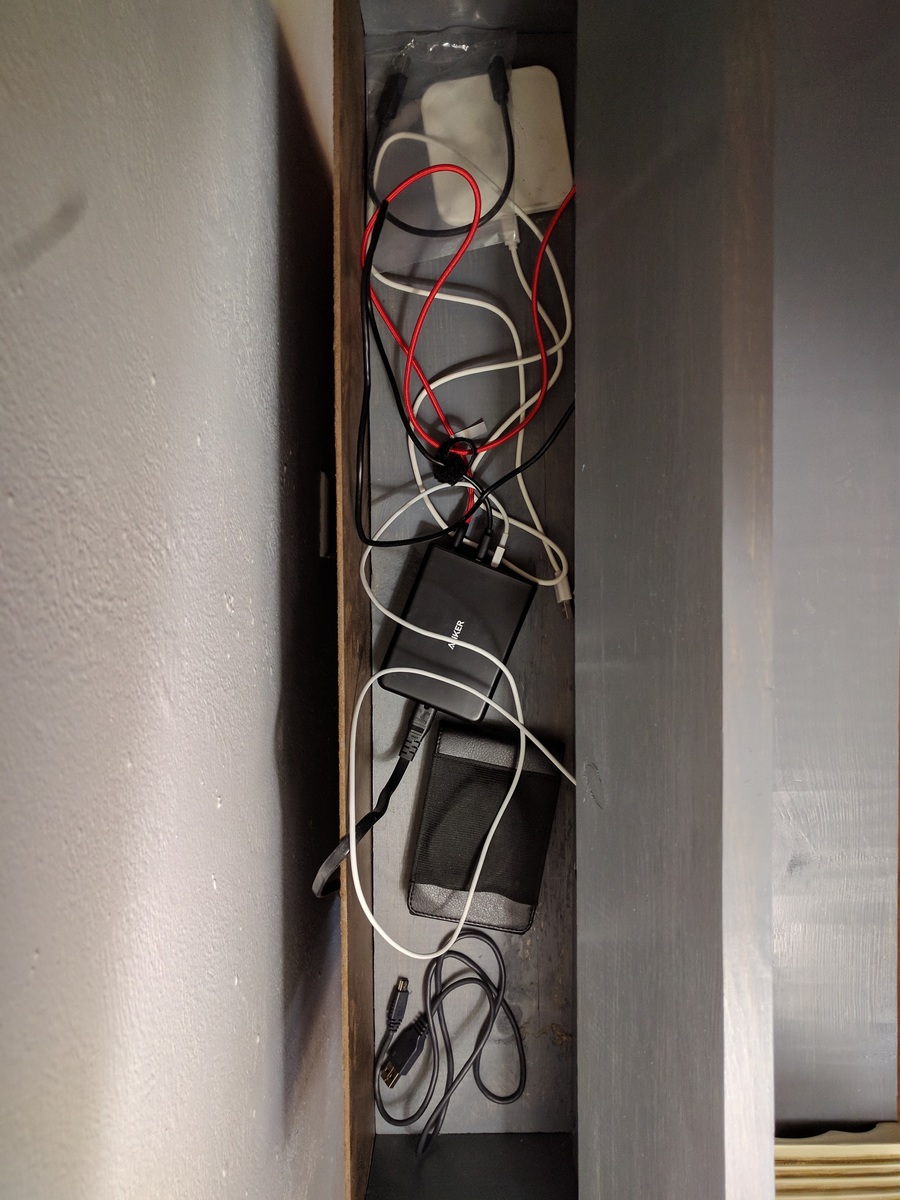
I used the charging station plans as my first attempt at building something using pocket holes, and also my first real attempt at building any piece of furniture from scratch. I stuck pretty much to Ana's plans except for not cutting the front footer (I didn't own a jigsaw at the time) and using panes of frosted glass as the center of the doors.
As a piece of furniture it gets used every day, but it has been most invaluable to me as a learning experience. I've built many pieces of furniture in the time since I made the charging station, growing my skills each time. But this project was where I started, so it always feels a little extra special to me.


Comments
Ana White Admin
Wed, 10/06/2021 - 10:39
Oh Yes!
Love it, super cool with the butcher block top!