Firewood Shed
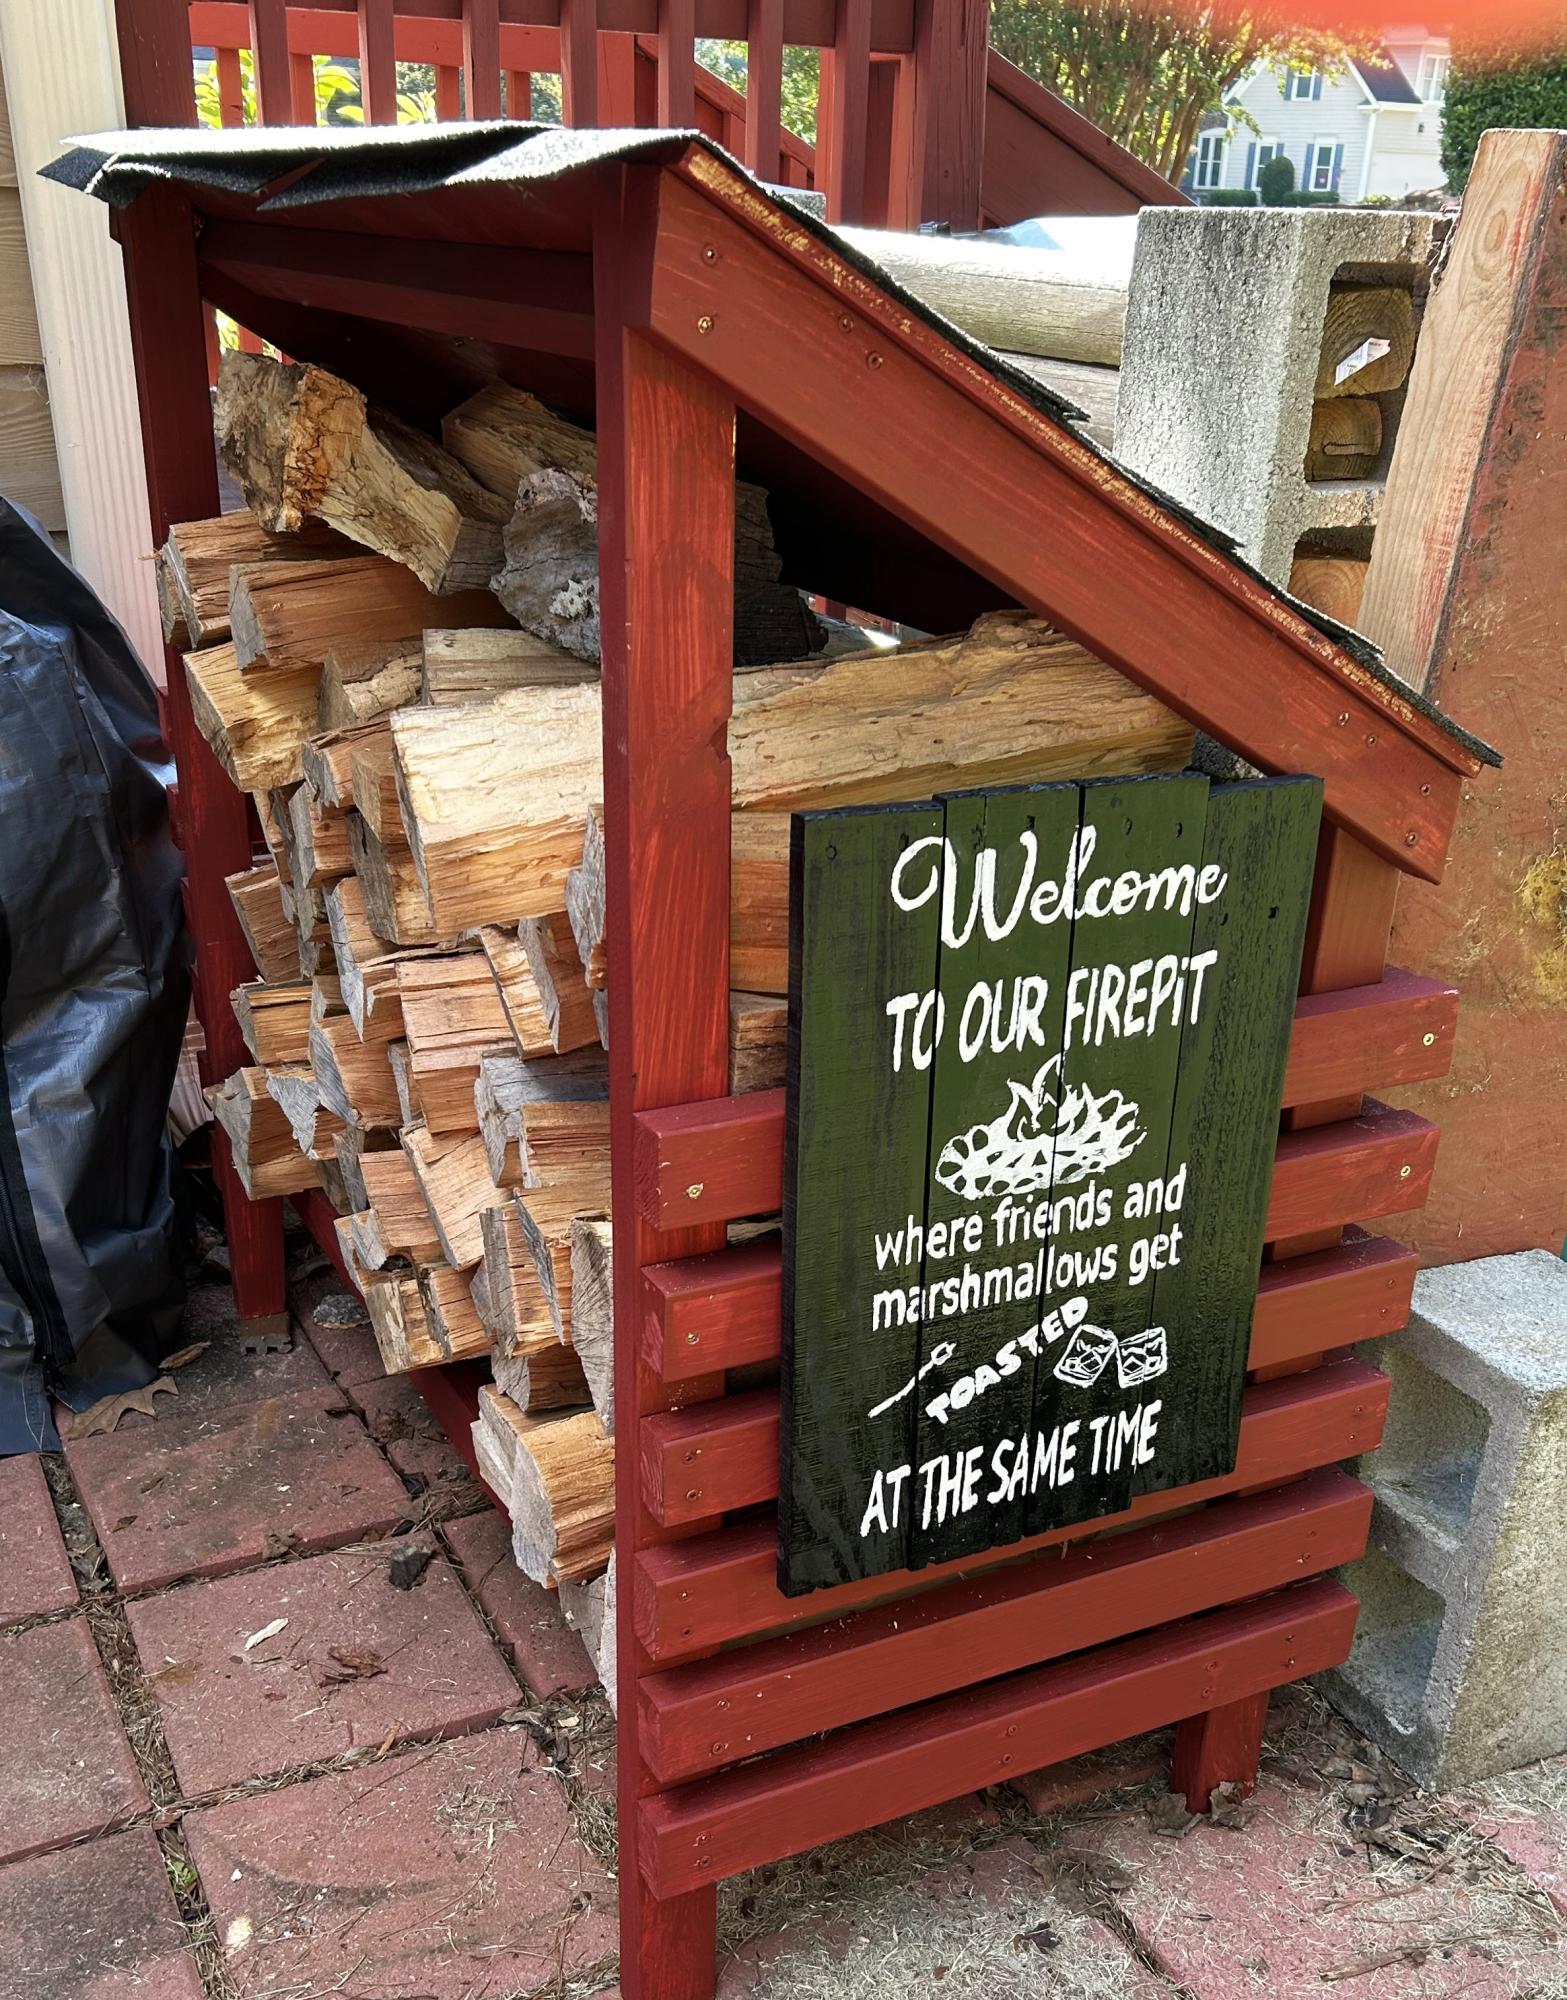
Smaller firewood shed. So pleased with how it turned out.
Skellykath
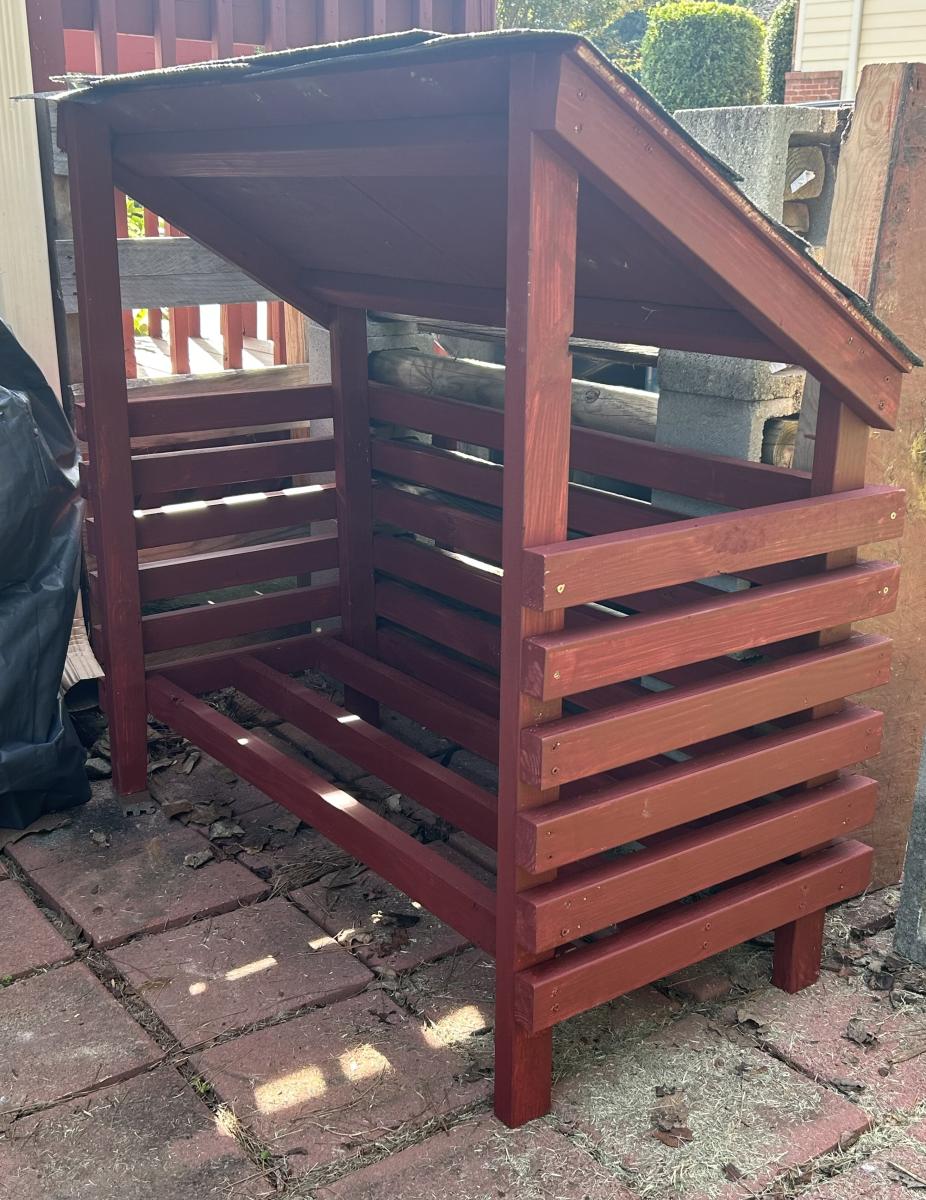
Built from Plan(s)
Smaller firewood shed. So pleased with how it turned out.
Skellykath
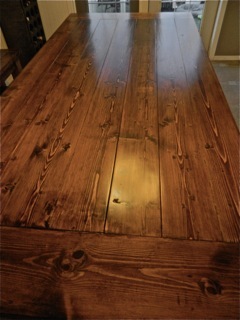
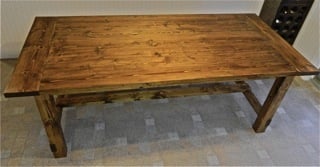
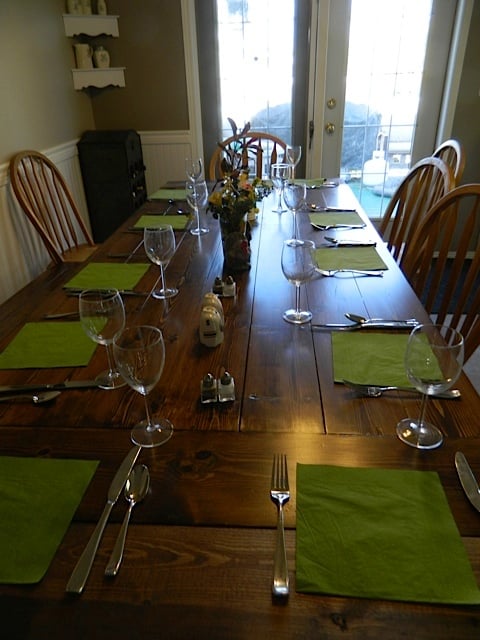
Love this stain and how it makes the grain stand out!
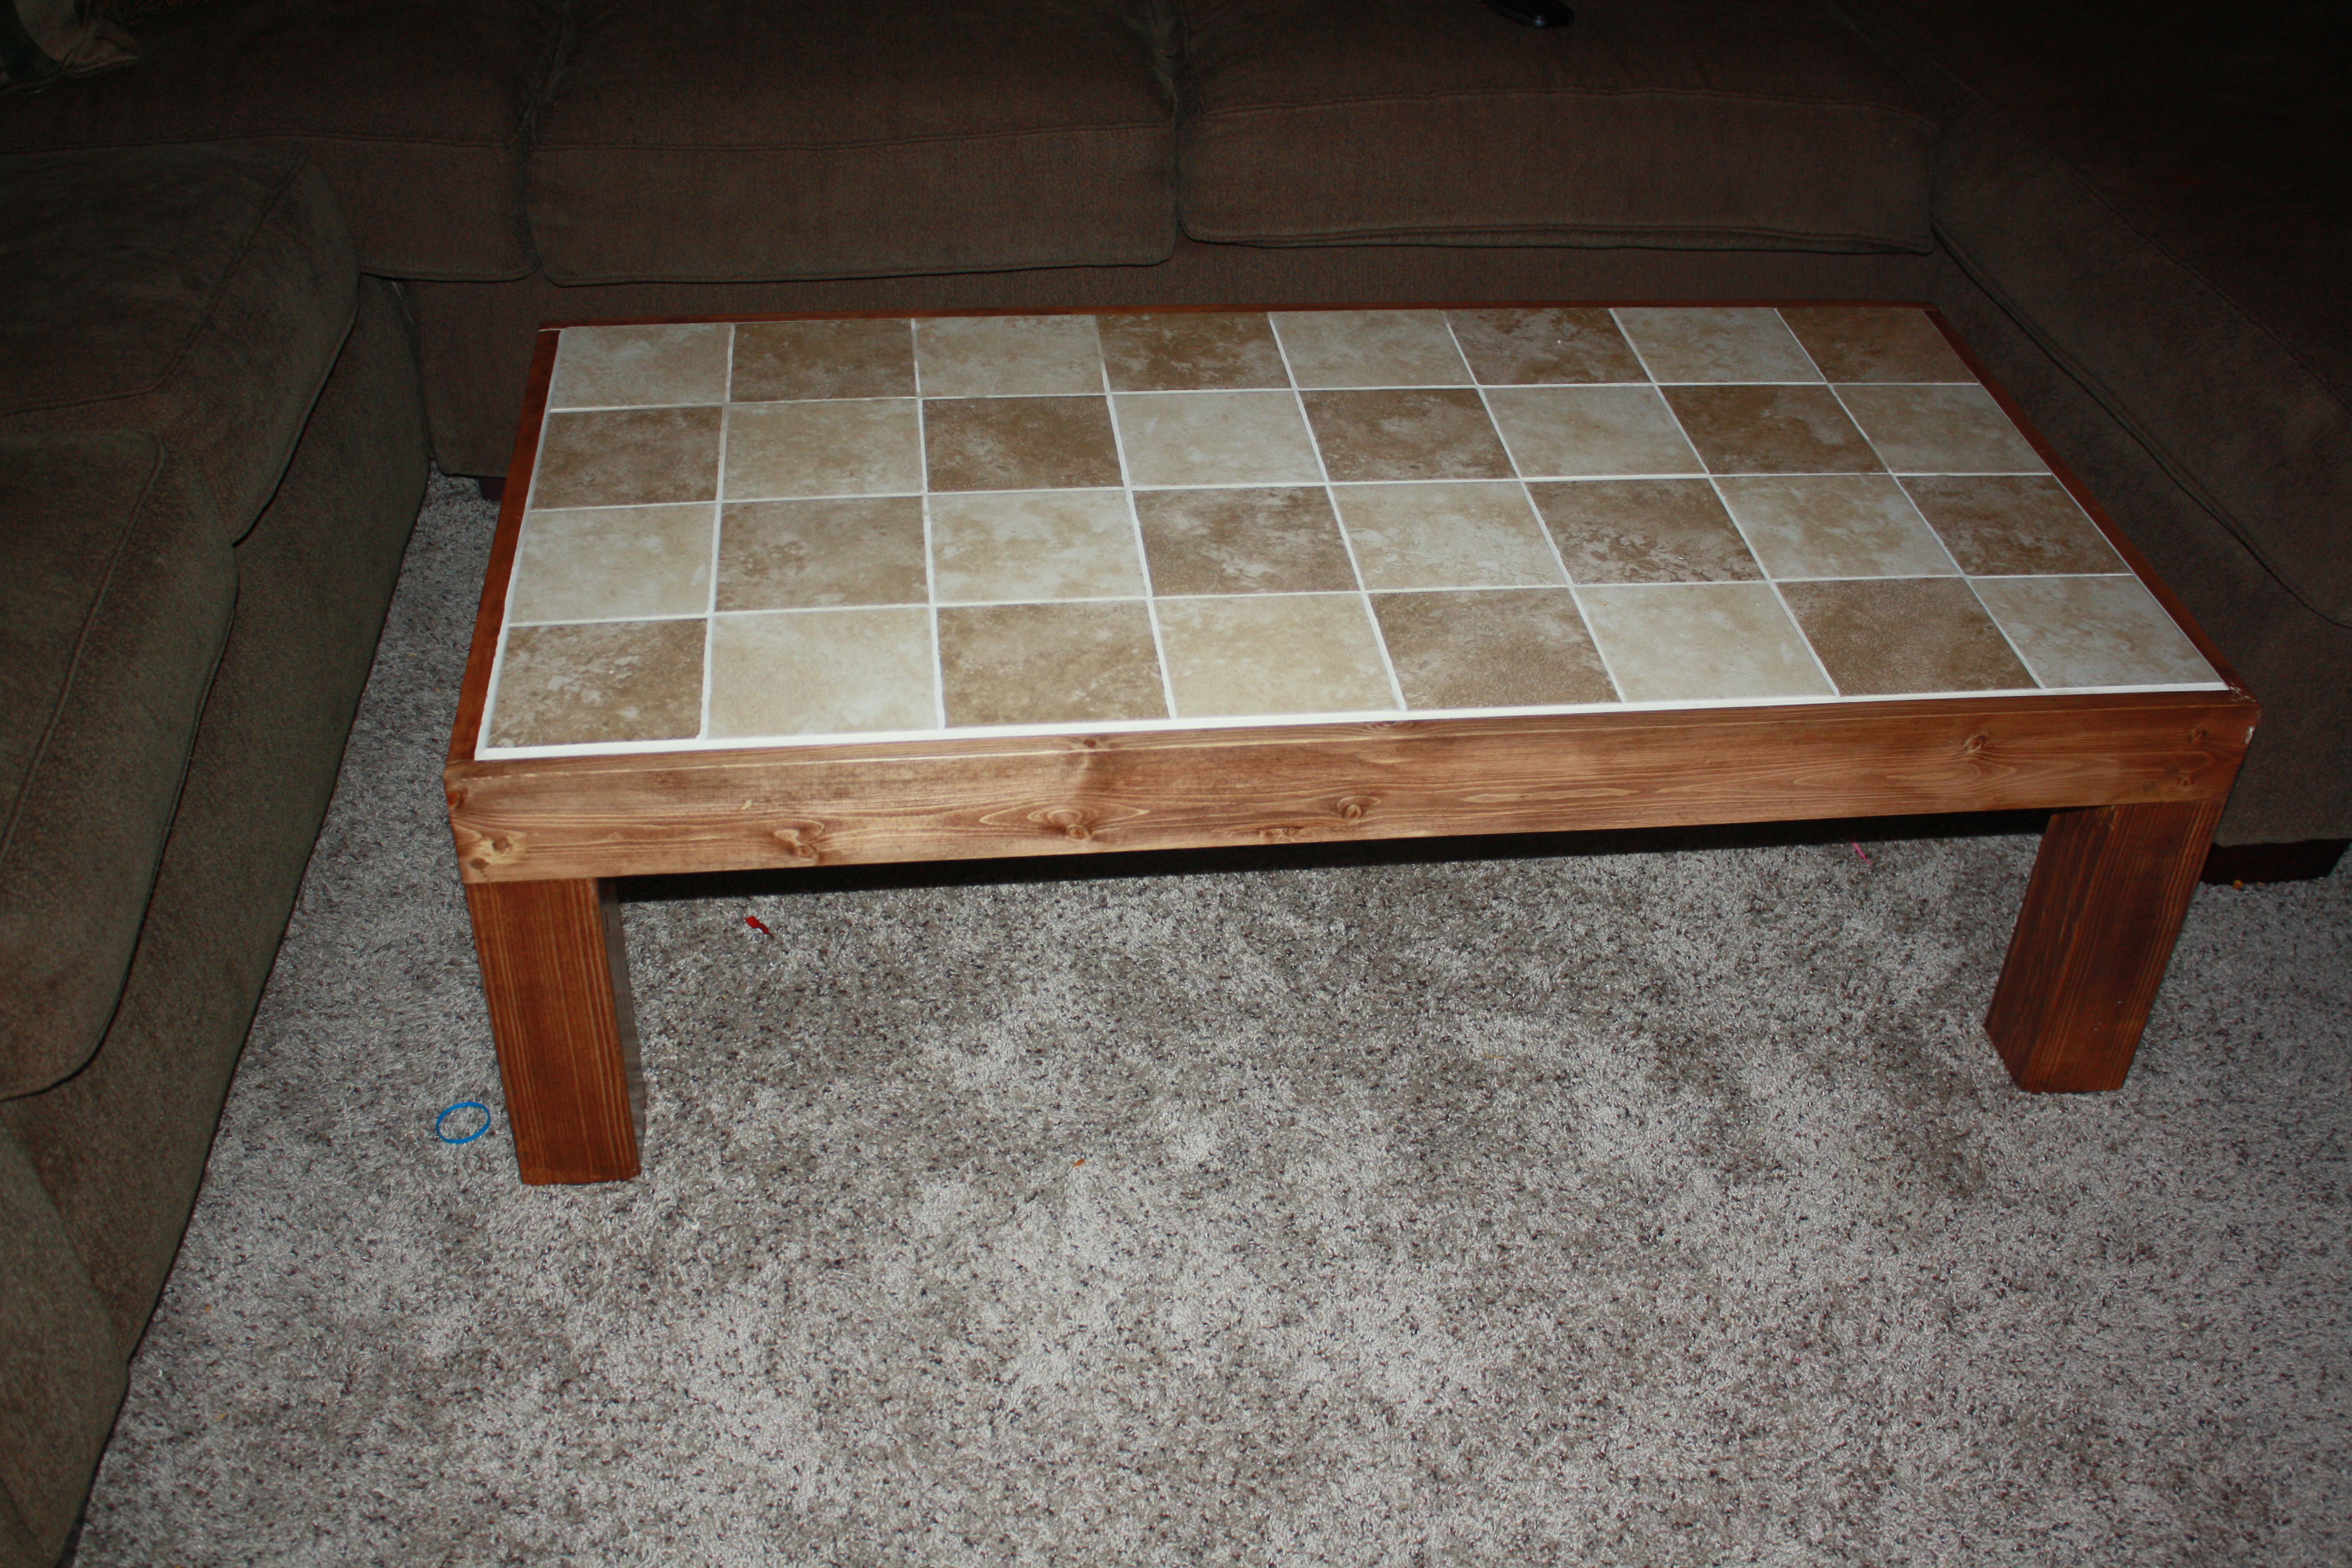
This was one of the 1st woodworking projects I did on my own. I never tiled before so it was a challenge. Even bought myself a tile saw to do it. I could not be more happy with the way it turned out and I love having it in my living room.
Sun, 02/16/2014 - 19:32
This was a fun project to do and a great conversation piece when people come over!

I built 3 30" picture ledges for my daughters for all of their books.
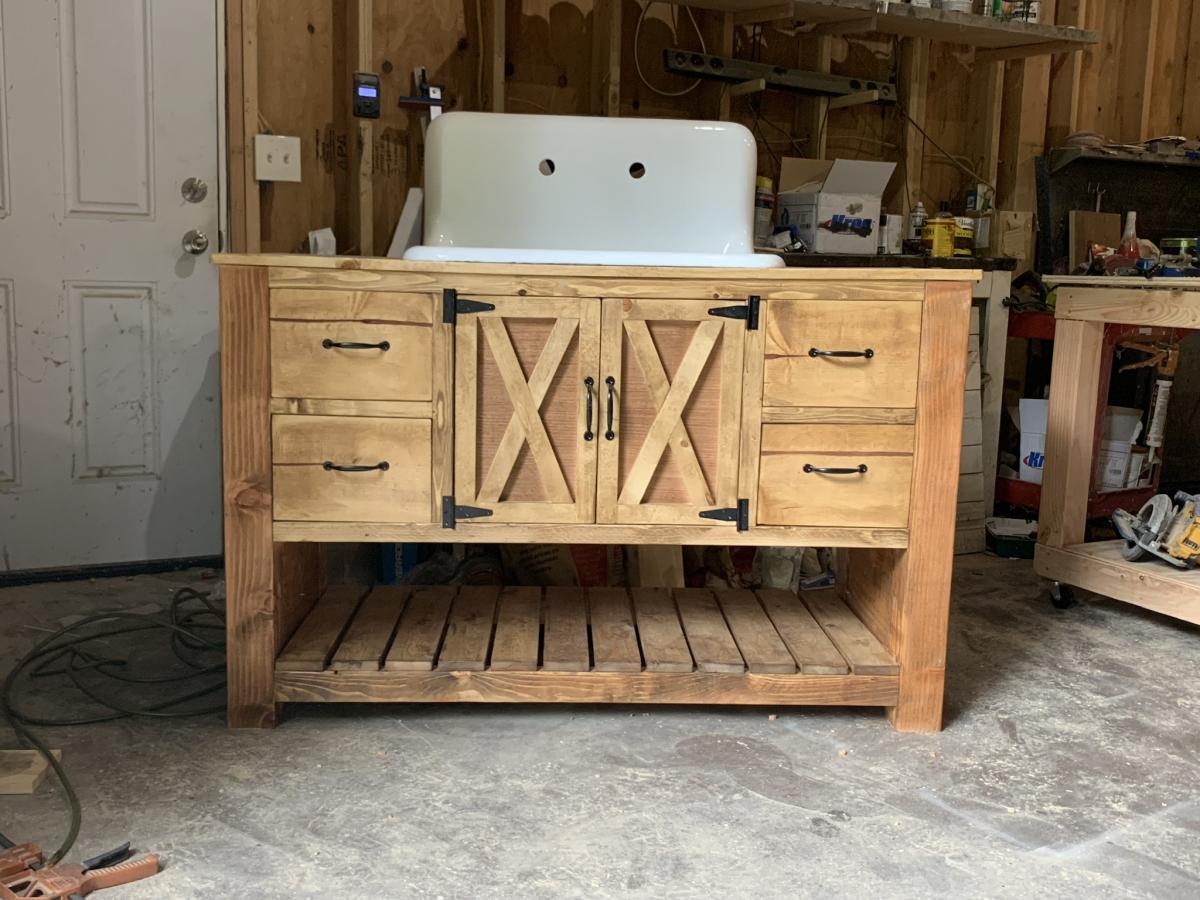
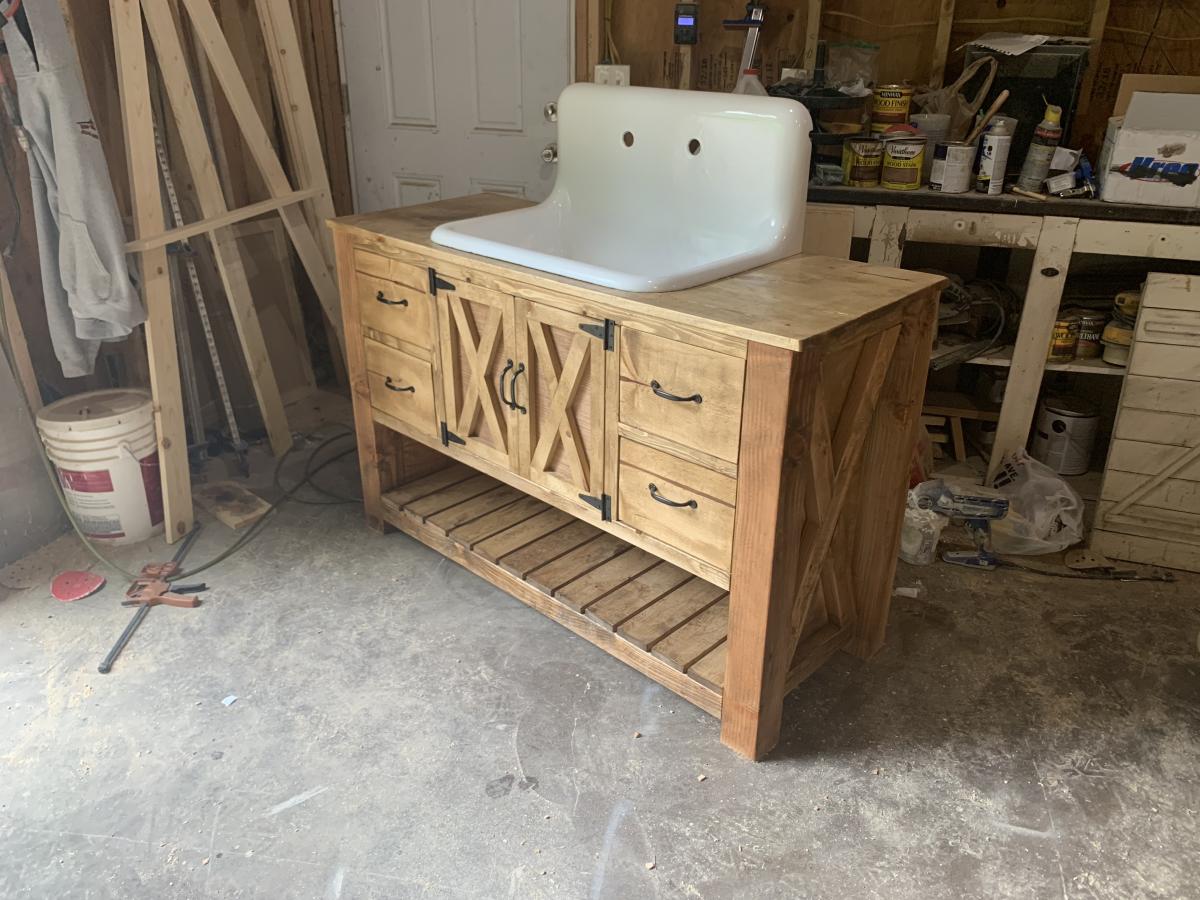
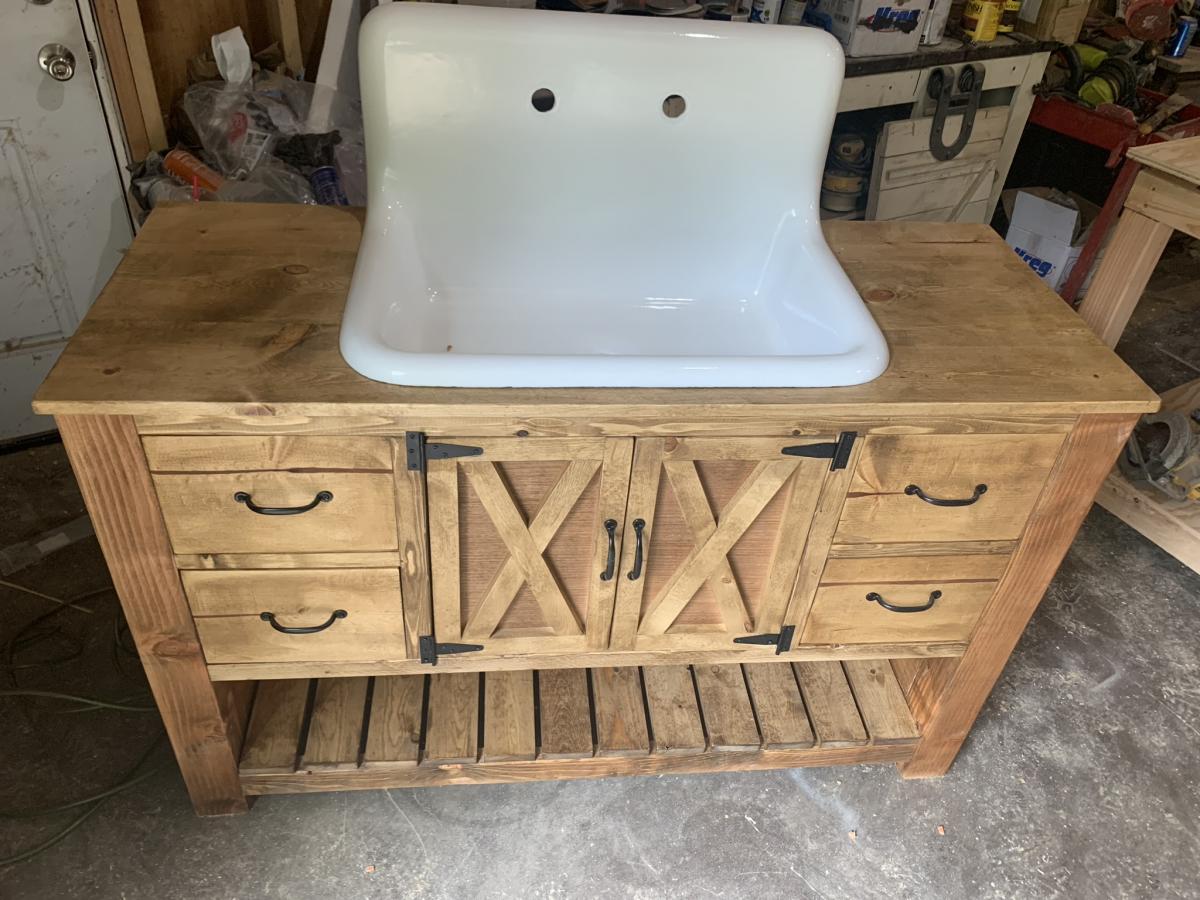
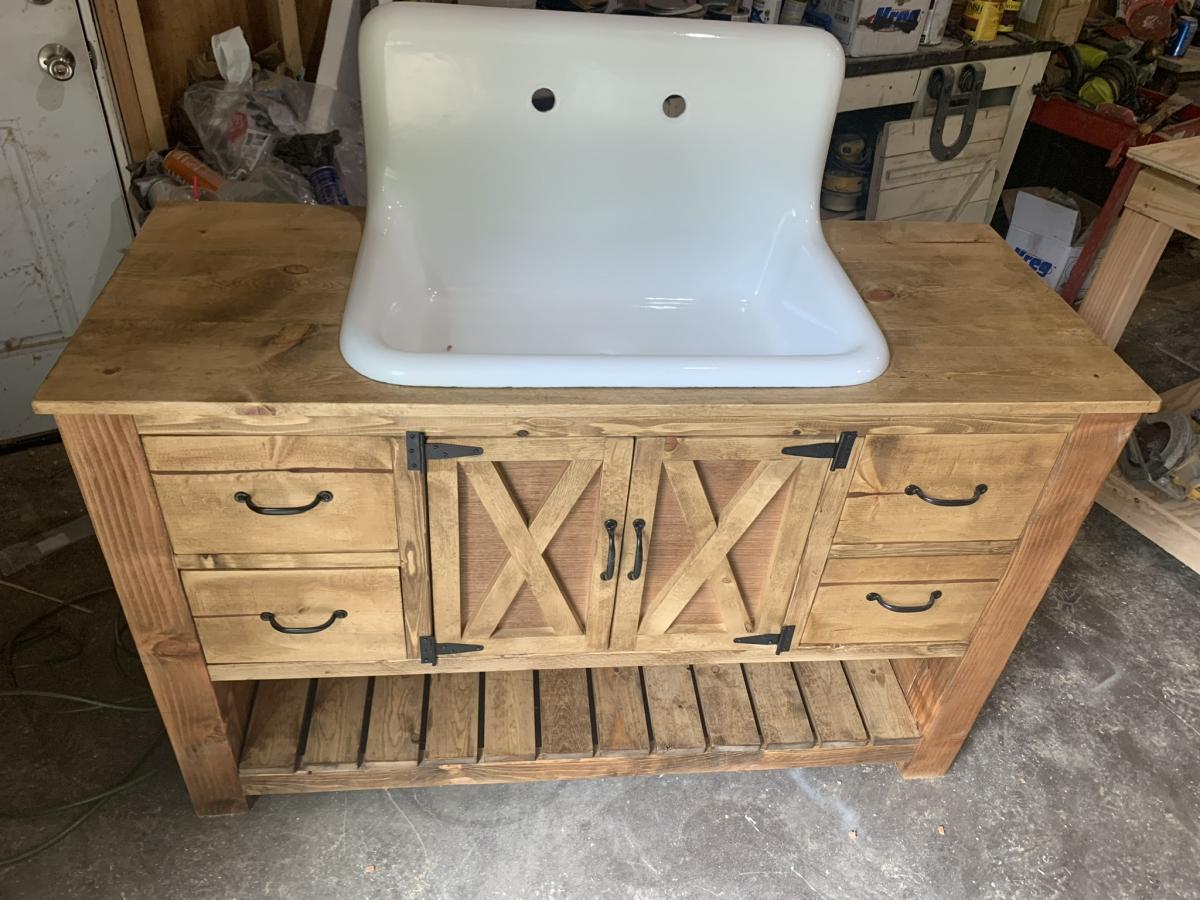
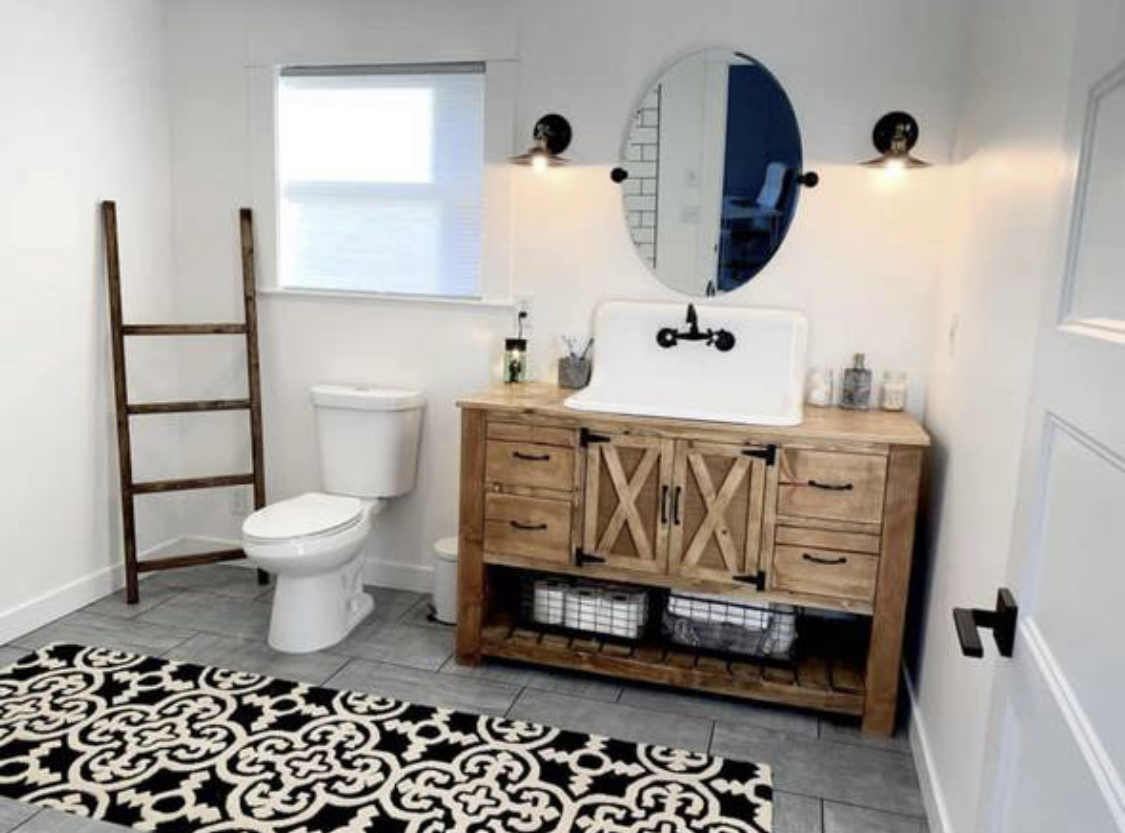
Hand made bathroom vanity


Wed, 06/30/2021 - 23:28
I've been searching for WEEKS to find this vanity. I knew it existed somewhere but didn't know where. Please, PLEASE, post the plans for this. The video posted above it is for the pantry organizer. Thank you in advance!
Wed, 06/30/2021 - 23:35
What angles did you cut the "X"s at? They're cut at the top and bottom instead of the sides like the kitchen island plans show and I want to make sure that I cut mine at the correct angle. Thank you again.
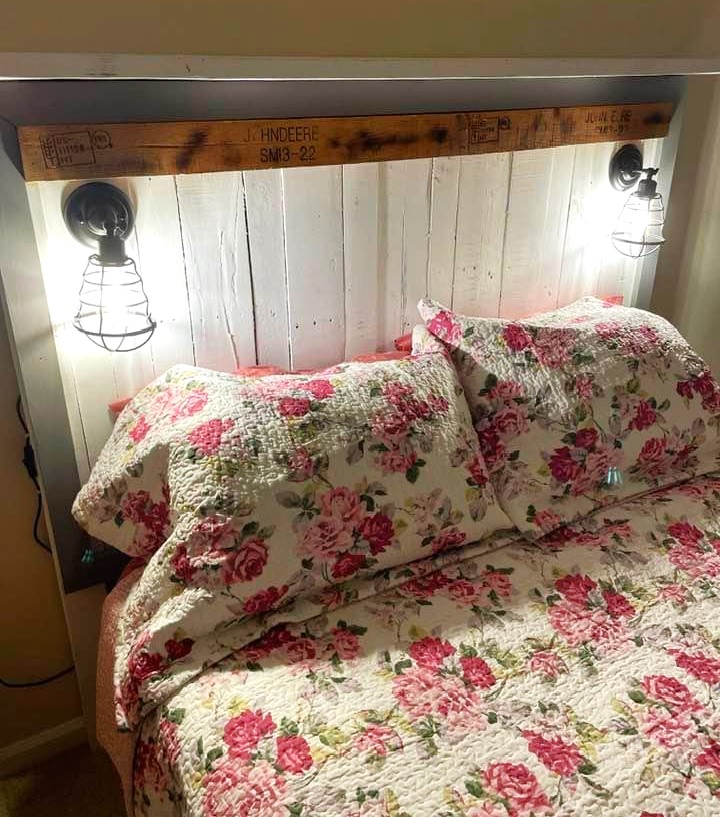
My daughter wanted a Farmhouse/Industrial look for a headboard, so I found a nice selection of hardwood pallets that had heat treated wood and put together this headboard & attached and wired a light set.
P.Schimmelpenningh
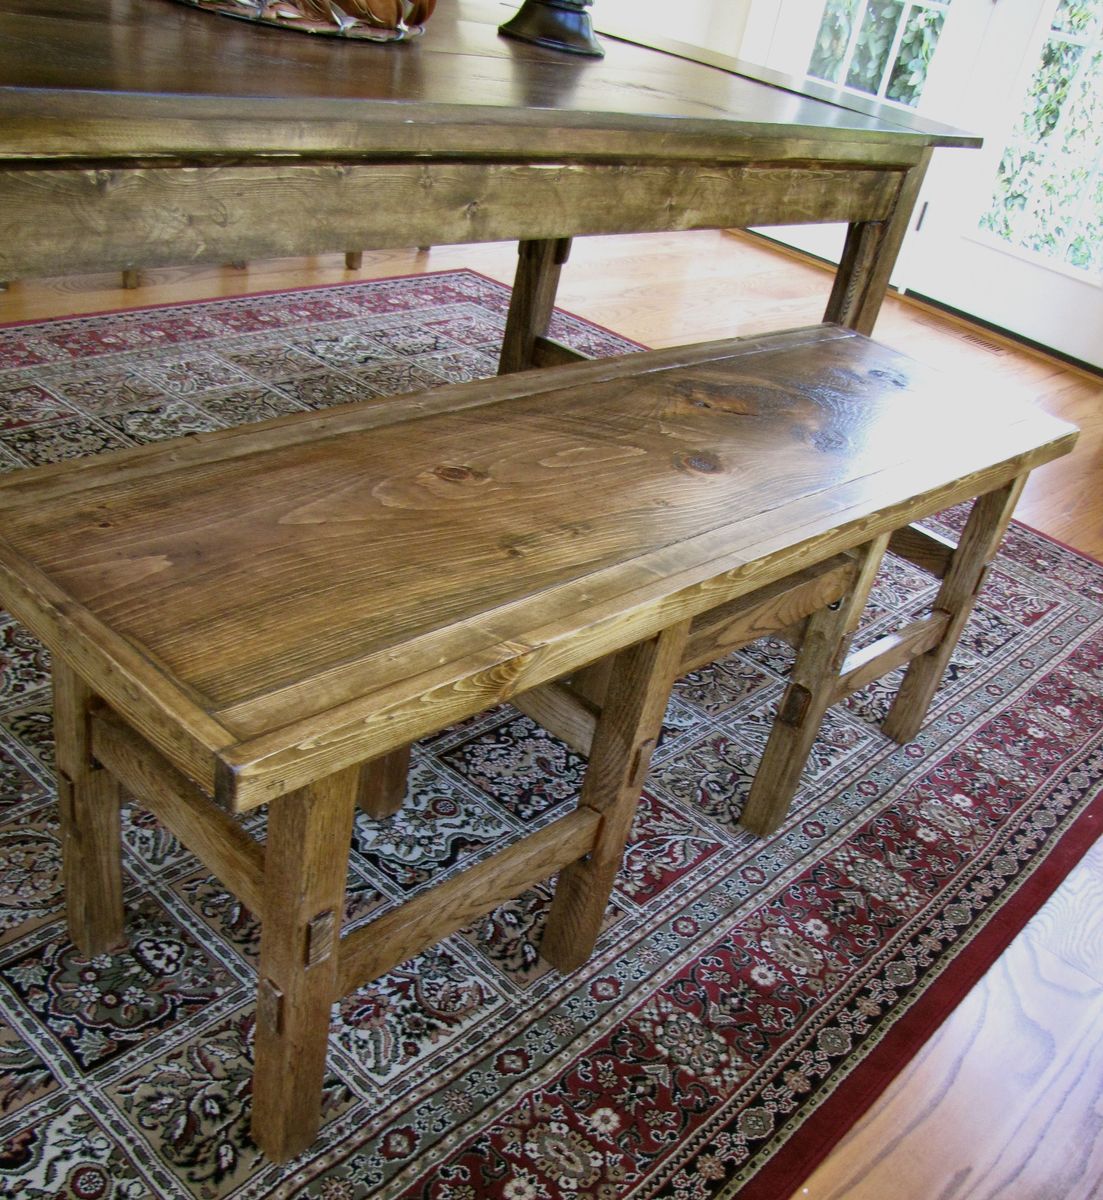
This was a very modified version of this plan. I mostly just dismantled two stools and built the top. The top is one solid plank of wood and two layers of 1x2's to create the frame. It goes perfectly with my Farmhouse table. I love the character of the wood top, its so unique. Enjoy!

This was the easiest and quickest build I've done yet. The more time consuming part for me was stapling down the curtains on the underside.
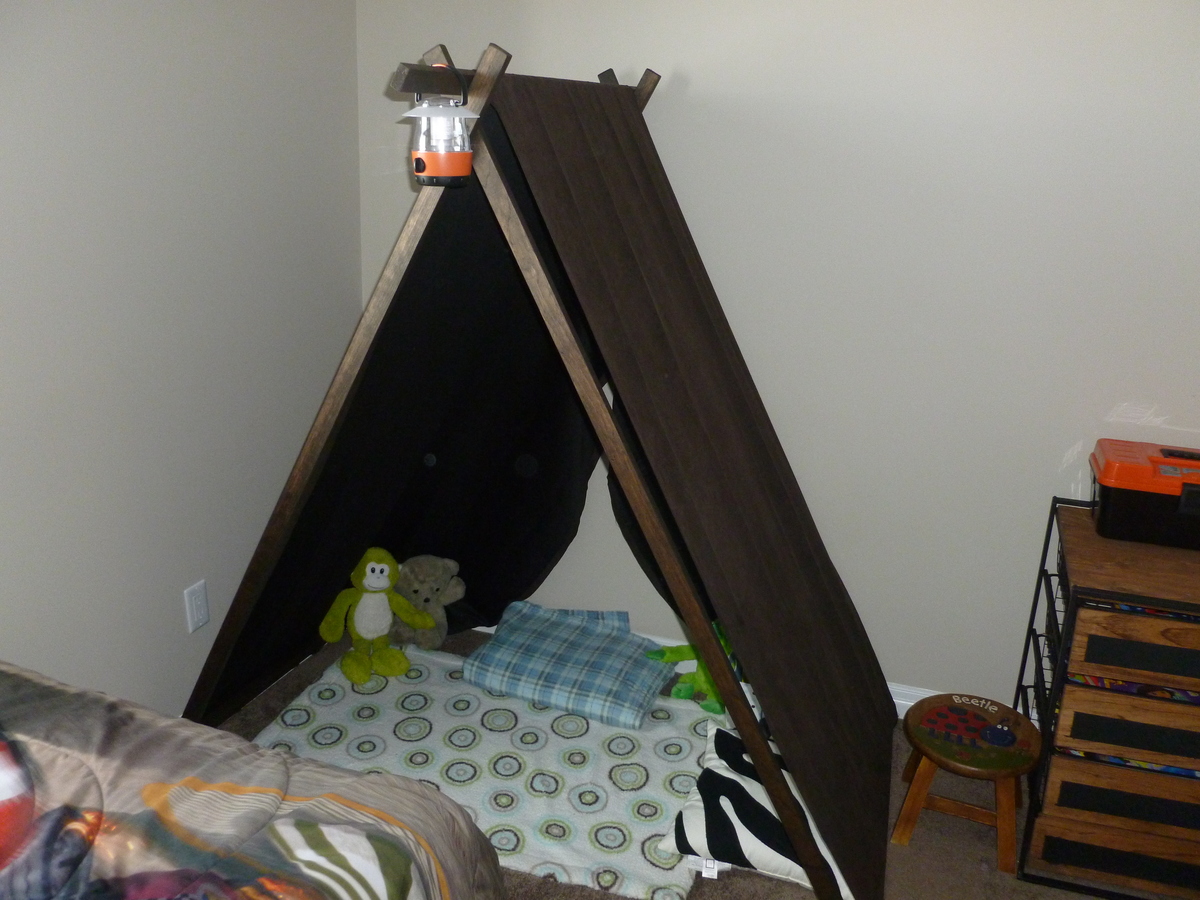
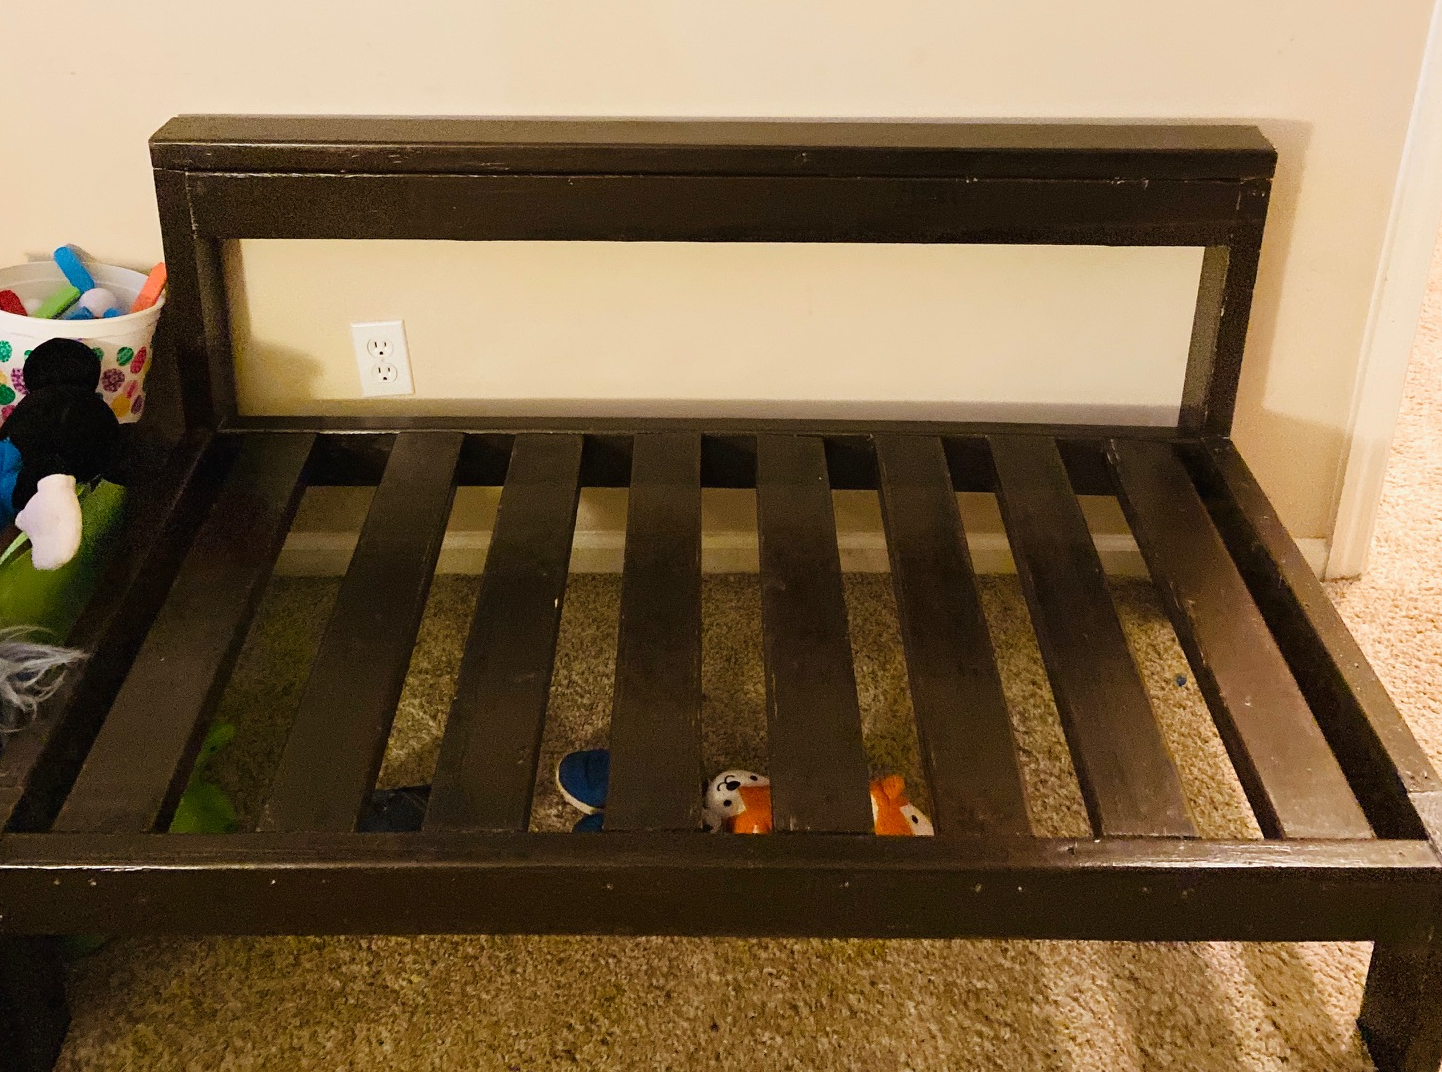
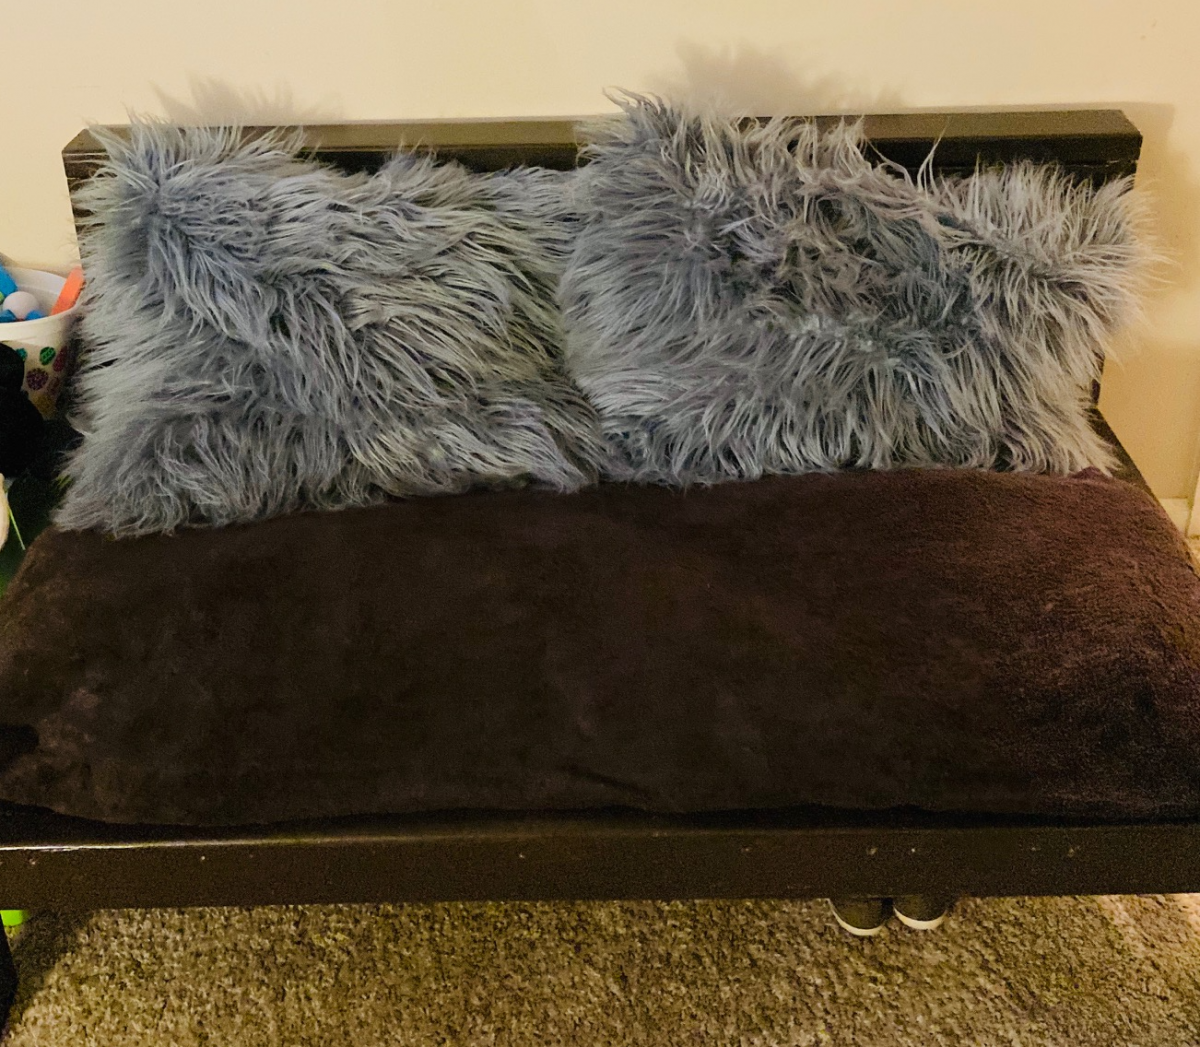
I had some wood laying around with all the new home construction around us and needed a reading seat for my 3 & 7 year old. I took the sectional plans and whipped this together pretty quick (as you can tell as I still need to put in wood filler for the screws...). It's perfect and we all can sit on there while reading books for night time (and he can keep all his little shoes under there for easy storing). Takes a few hours to come together for s novice like me. Paining took the longest. I need to remember to paint first but tend to get so excited to build, painting comes after. Thank you for the plans!
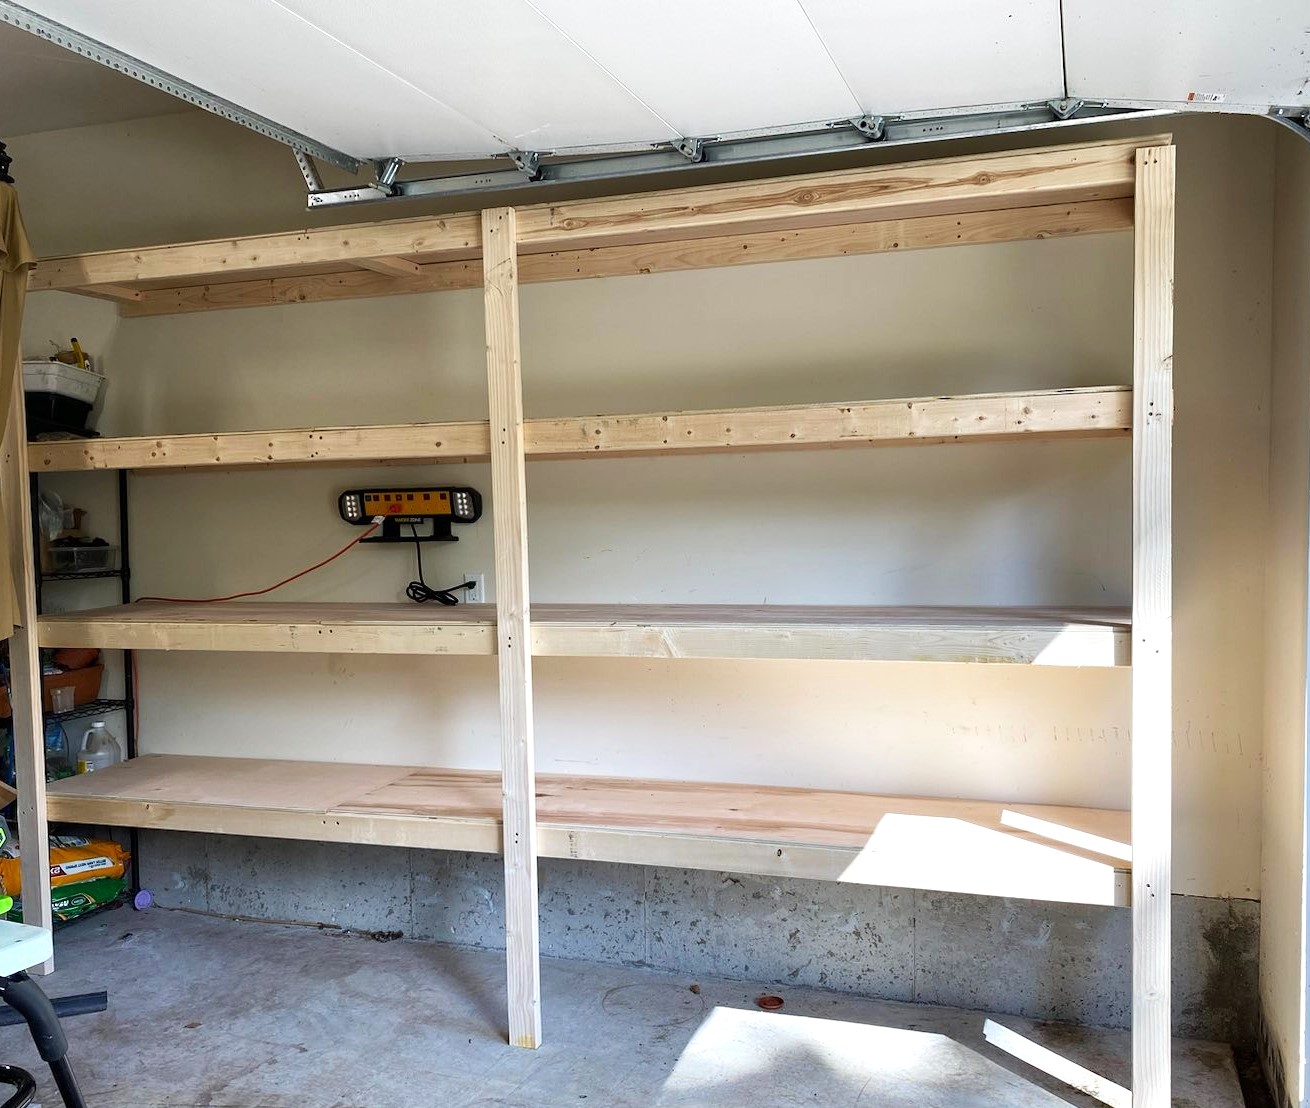
I want to thank you for such great videos and plans!! They worked so well that now I will do the wall on the left side of the photo.
Bill
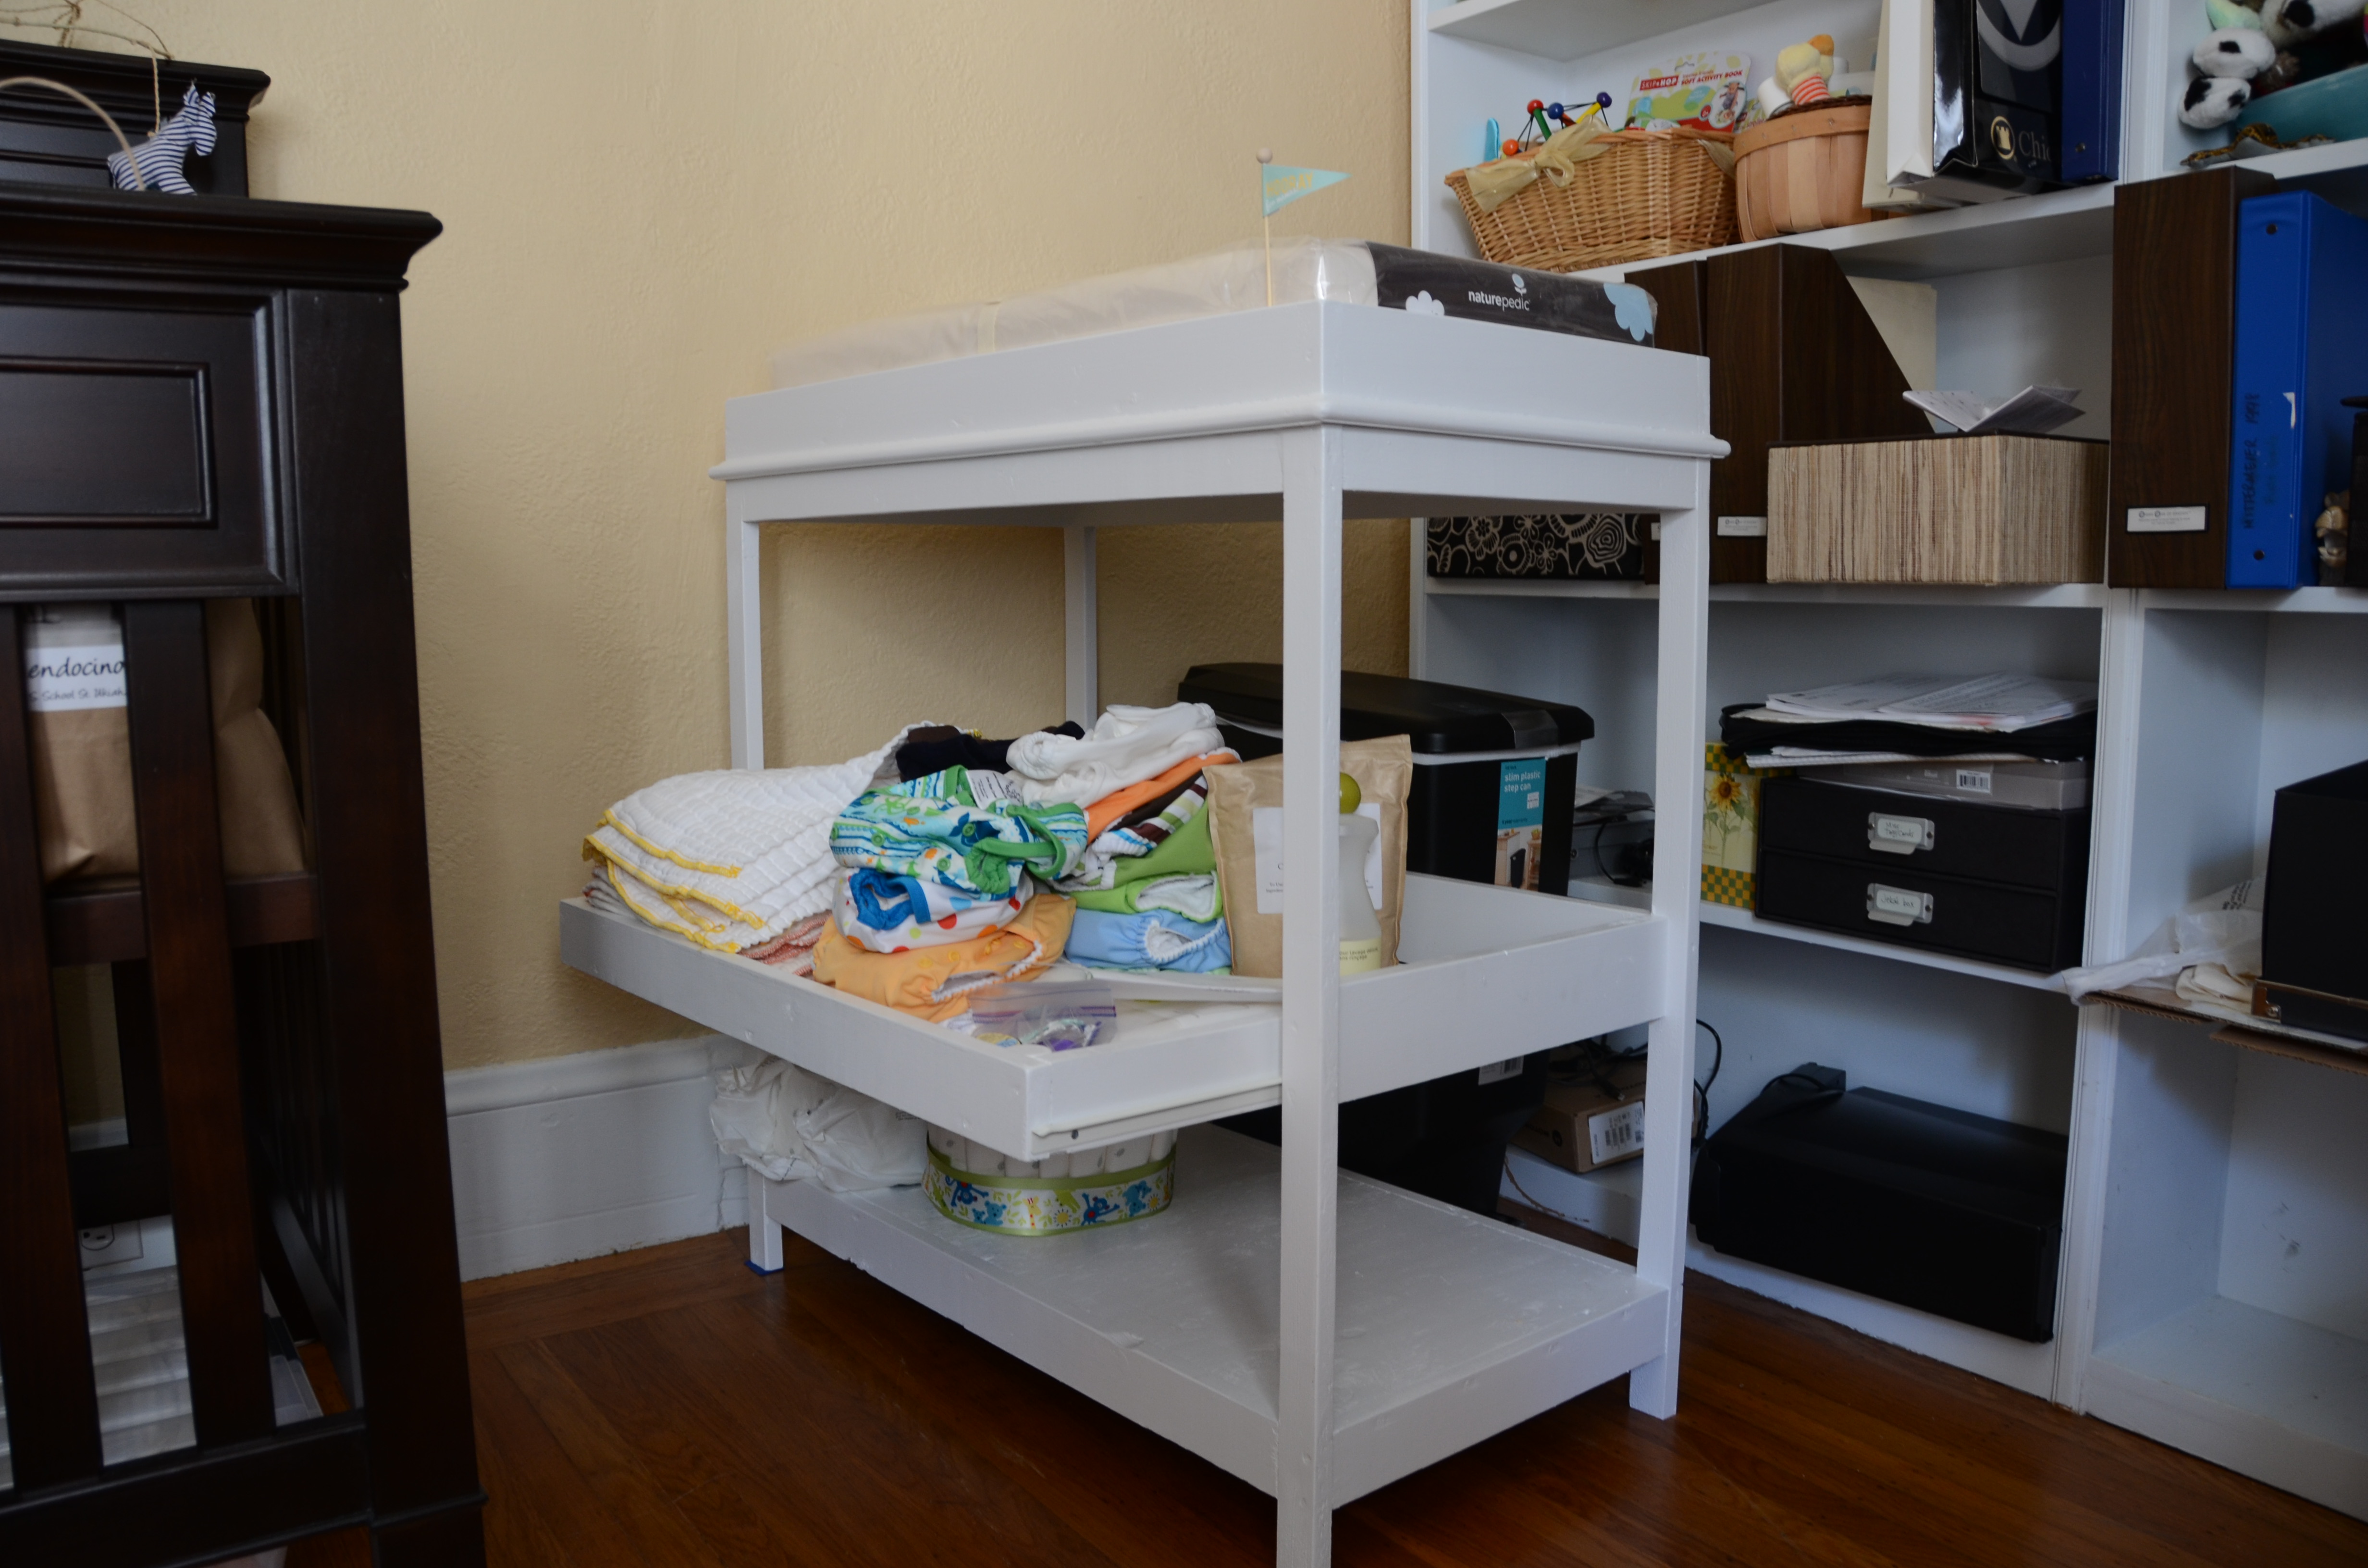
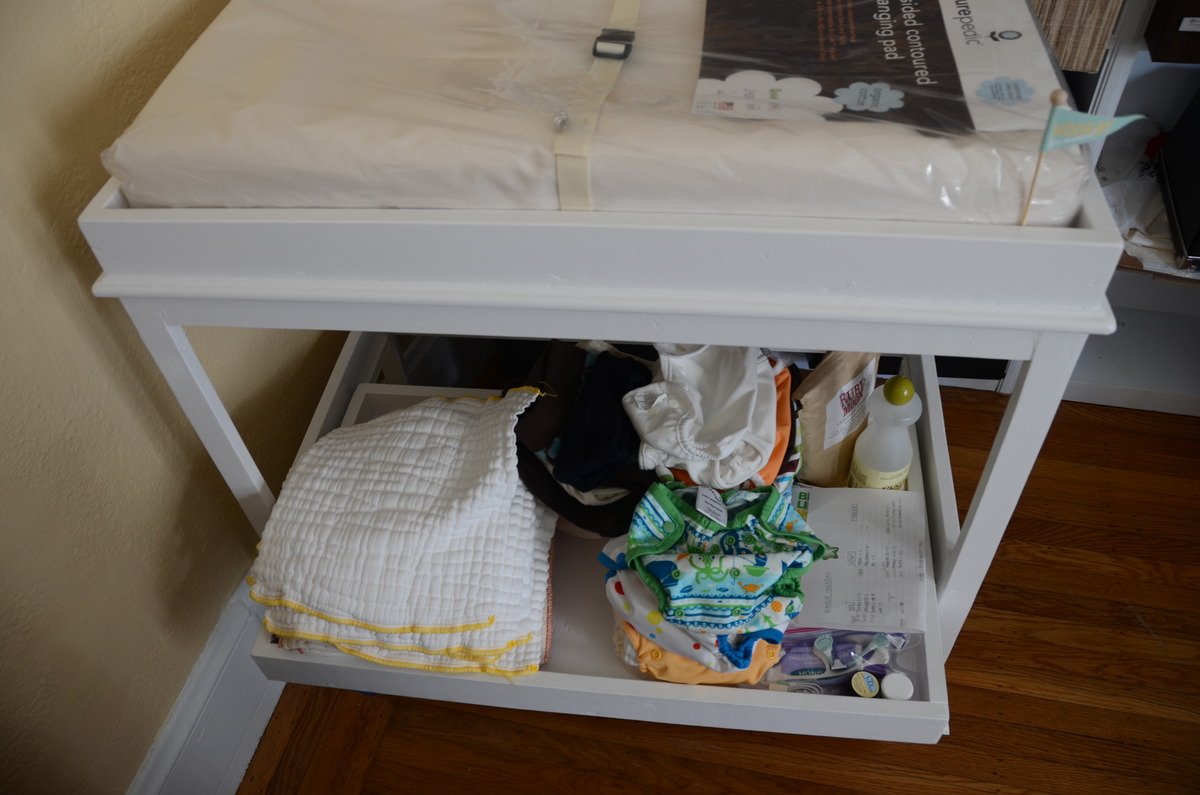
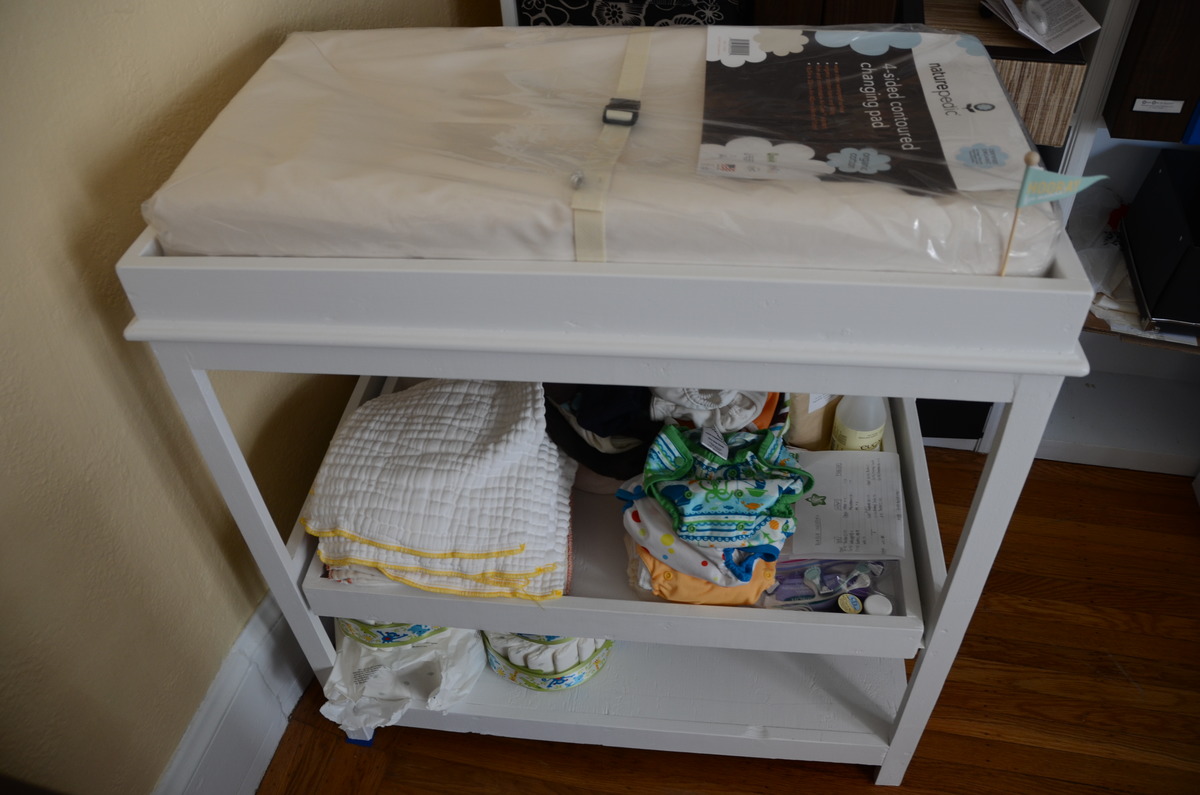
With a little one on the way, we just couldn't find a changing table that fit our space and wasn't too expensive. So, thanks to Ana's plans, I was able to put together a smaller changing table with a slide out shelf. In the future, I'd do a better job of measuring out the height of the middle sliding shelf...anyone over 5'5" will have to bend way over to slide it in/out. I switching the 1x4s from the top to the middle shelf and made sure to measure my changing pad before starting (after reading the comments on Ana's original design). My local lumber store cut my 3/4" ply to size for free, so if you can go in with dimensions already planned out, it'll save tons of time and headache driving with 4'x6' ply floppin' around.
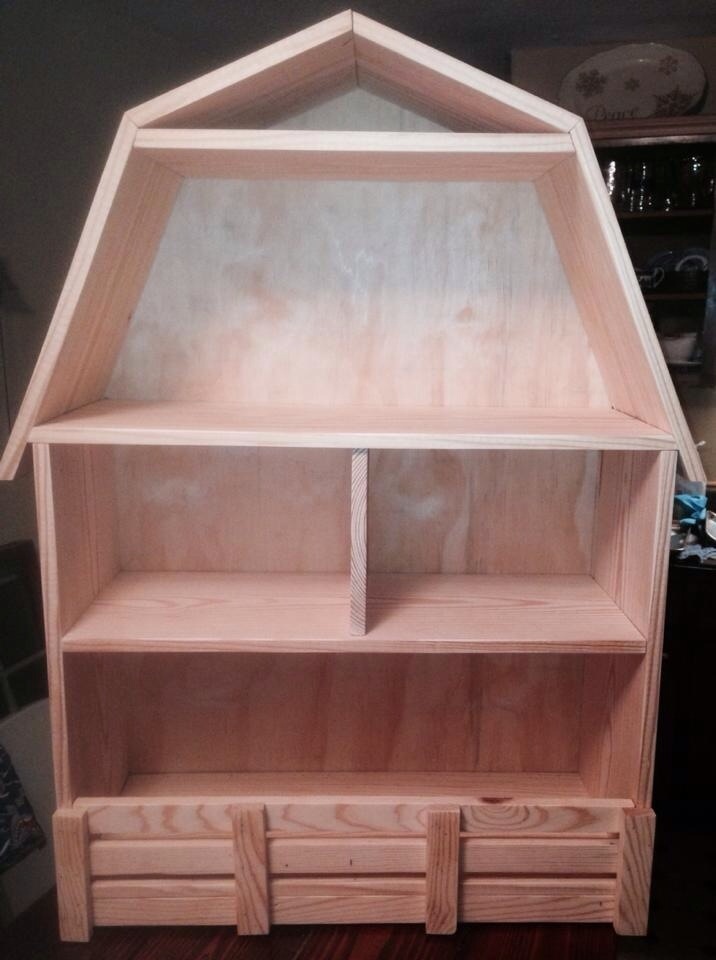
I built this for a friend's daughter who collects the Tractor Supply farm animals. This is the first time I have cut on angles to make the roof. The directions say built it from bottom to top but I found it easier to start for the top and work down. Then attach the whole roof where it marched on the barn... Hope this helps. I did not finish it cause the friend wanted to stain it herself...

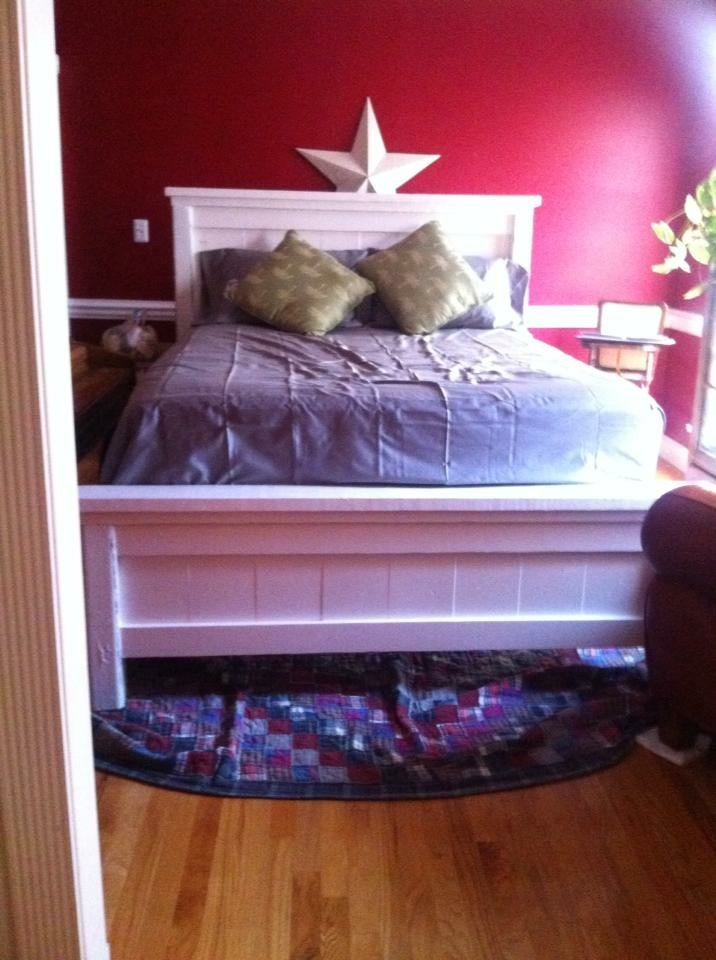
I stumbled across Ana White one day 3 years ago when I was 18 and about to go off to college. My parents weren't home for the weekend, I was bored, and decided a twin bed at my rental just wasn't going to cut it but I was an 18 year old who had champagne taste on a beer budget. I had been helping my dad ever since I was little with wood work all around the house but furniture was something we had never tackled and the idea of building a bed was a little daunting. However, these plans were super easy to follow and I must say, the finished product is absolutely beautiful. After 3 years and many more projects, this bed is still my favorite.
Needless to say my mom asked me for a few years to bring it back to go in my old bedroom at their house - so now I get to build another one!
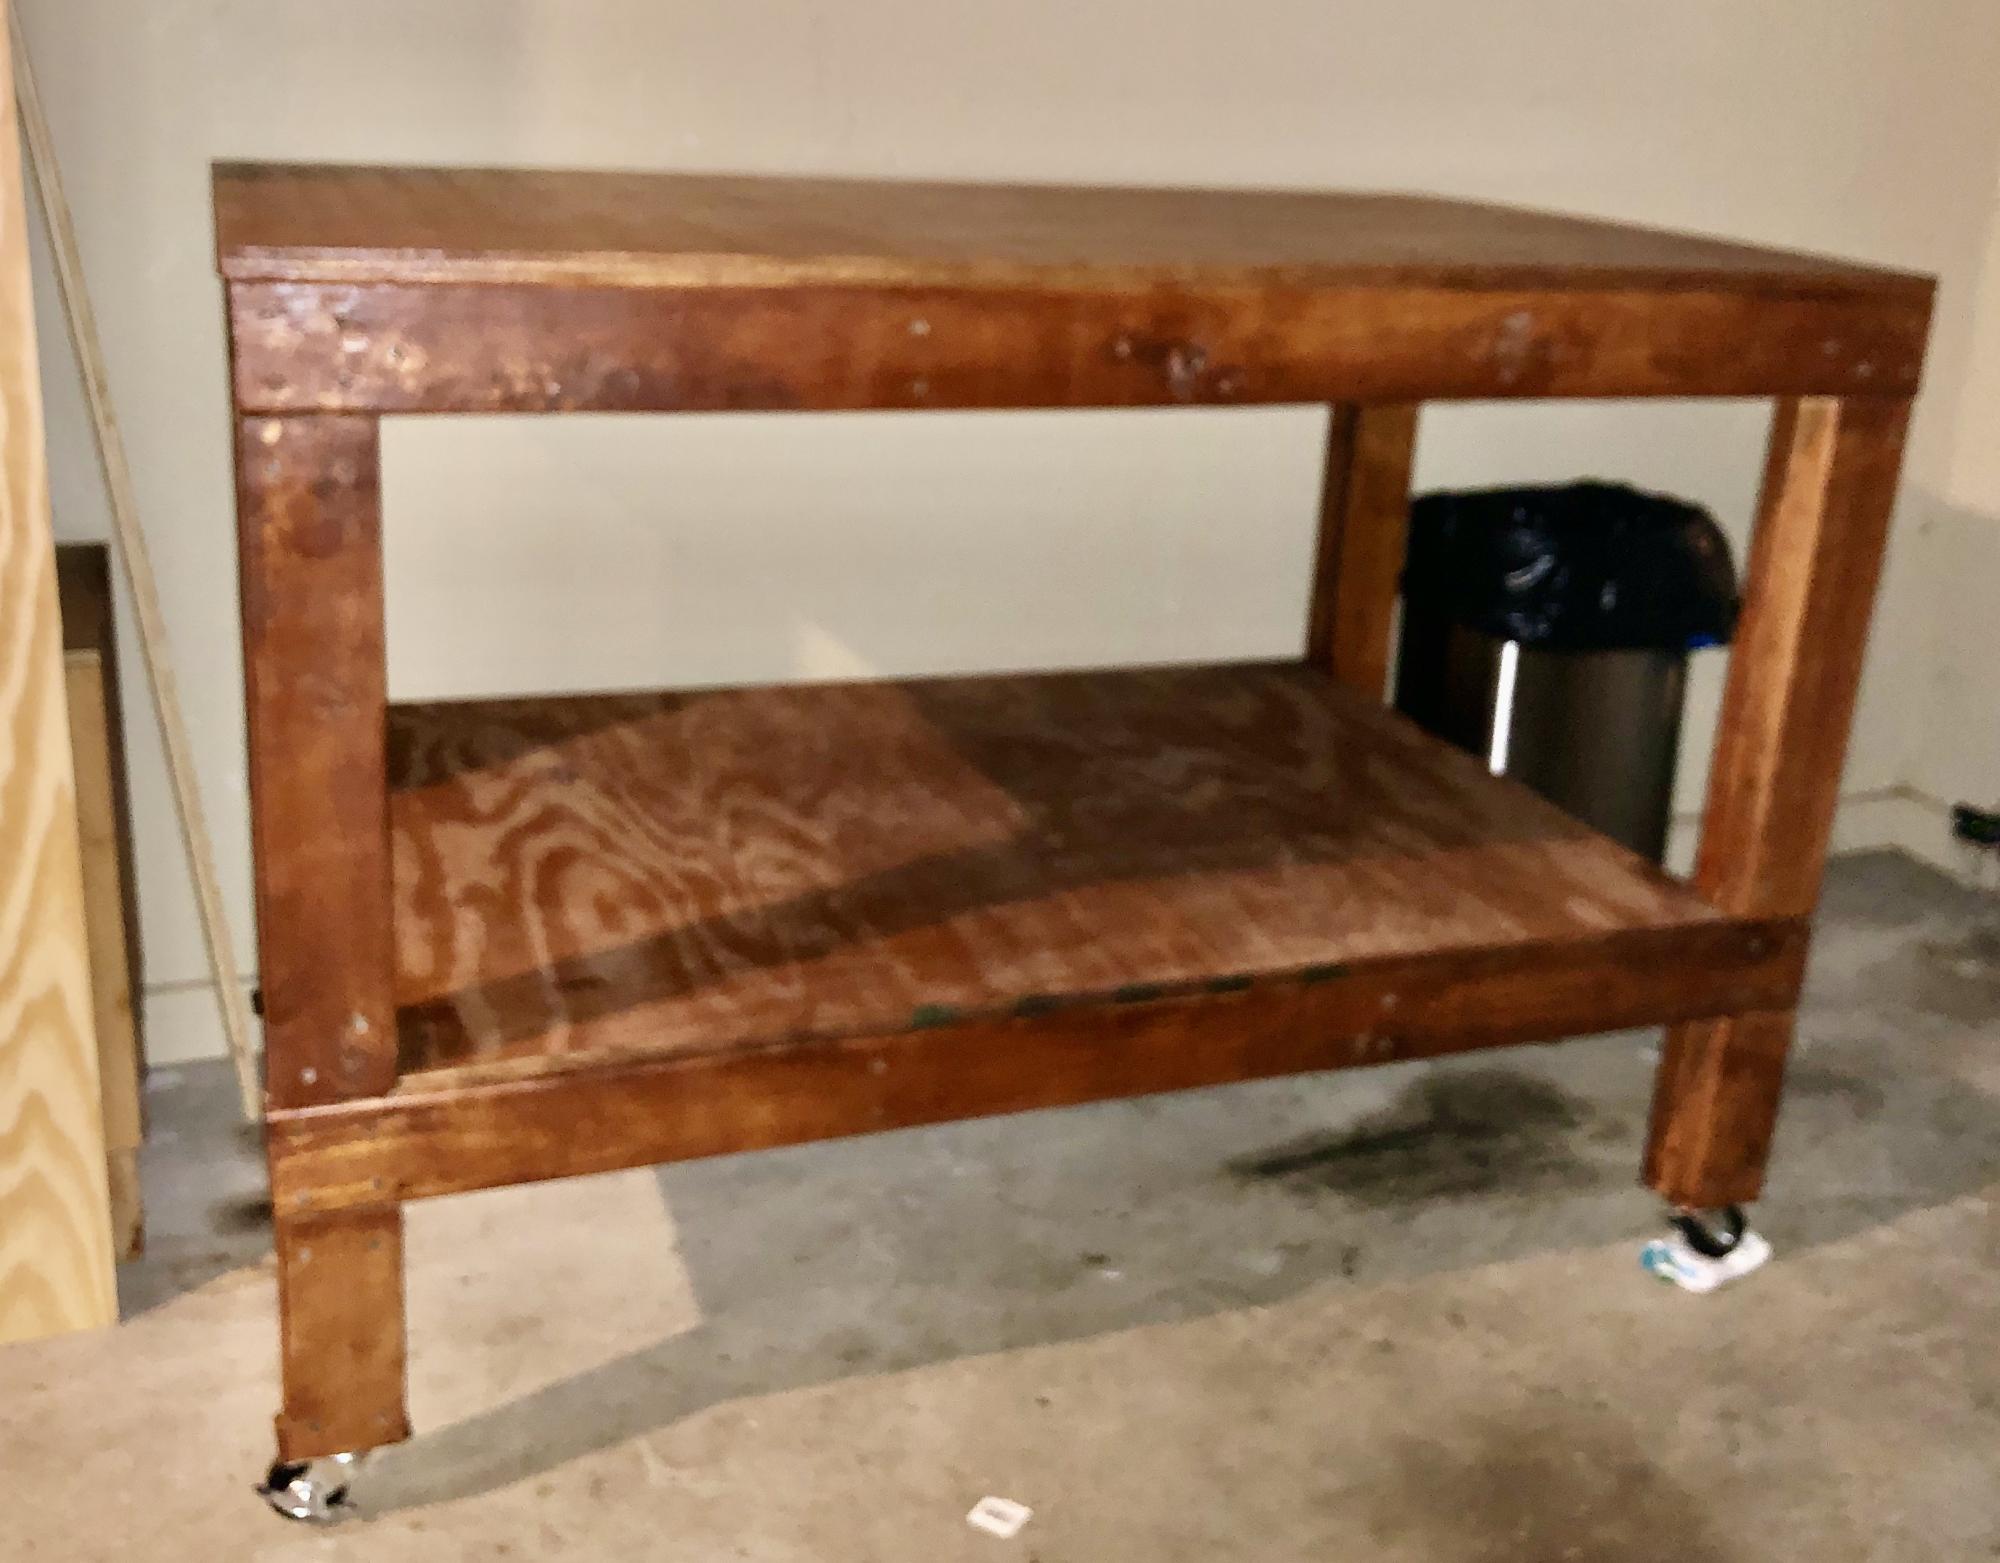
This was my first build and experience with power tools. The size of the workbench table is absolutely the perfect length and height. I ended up adding wheels that lock in place. I’m hooked! Thank you Ana White for providing the plans for a workbench.

Thu, 02/20/2020 - 11:04
This project is perfect for the beginner. The plans are very simple to follow especially for one that’s never picked up a power tool. I am absolutely hooked.
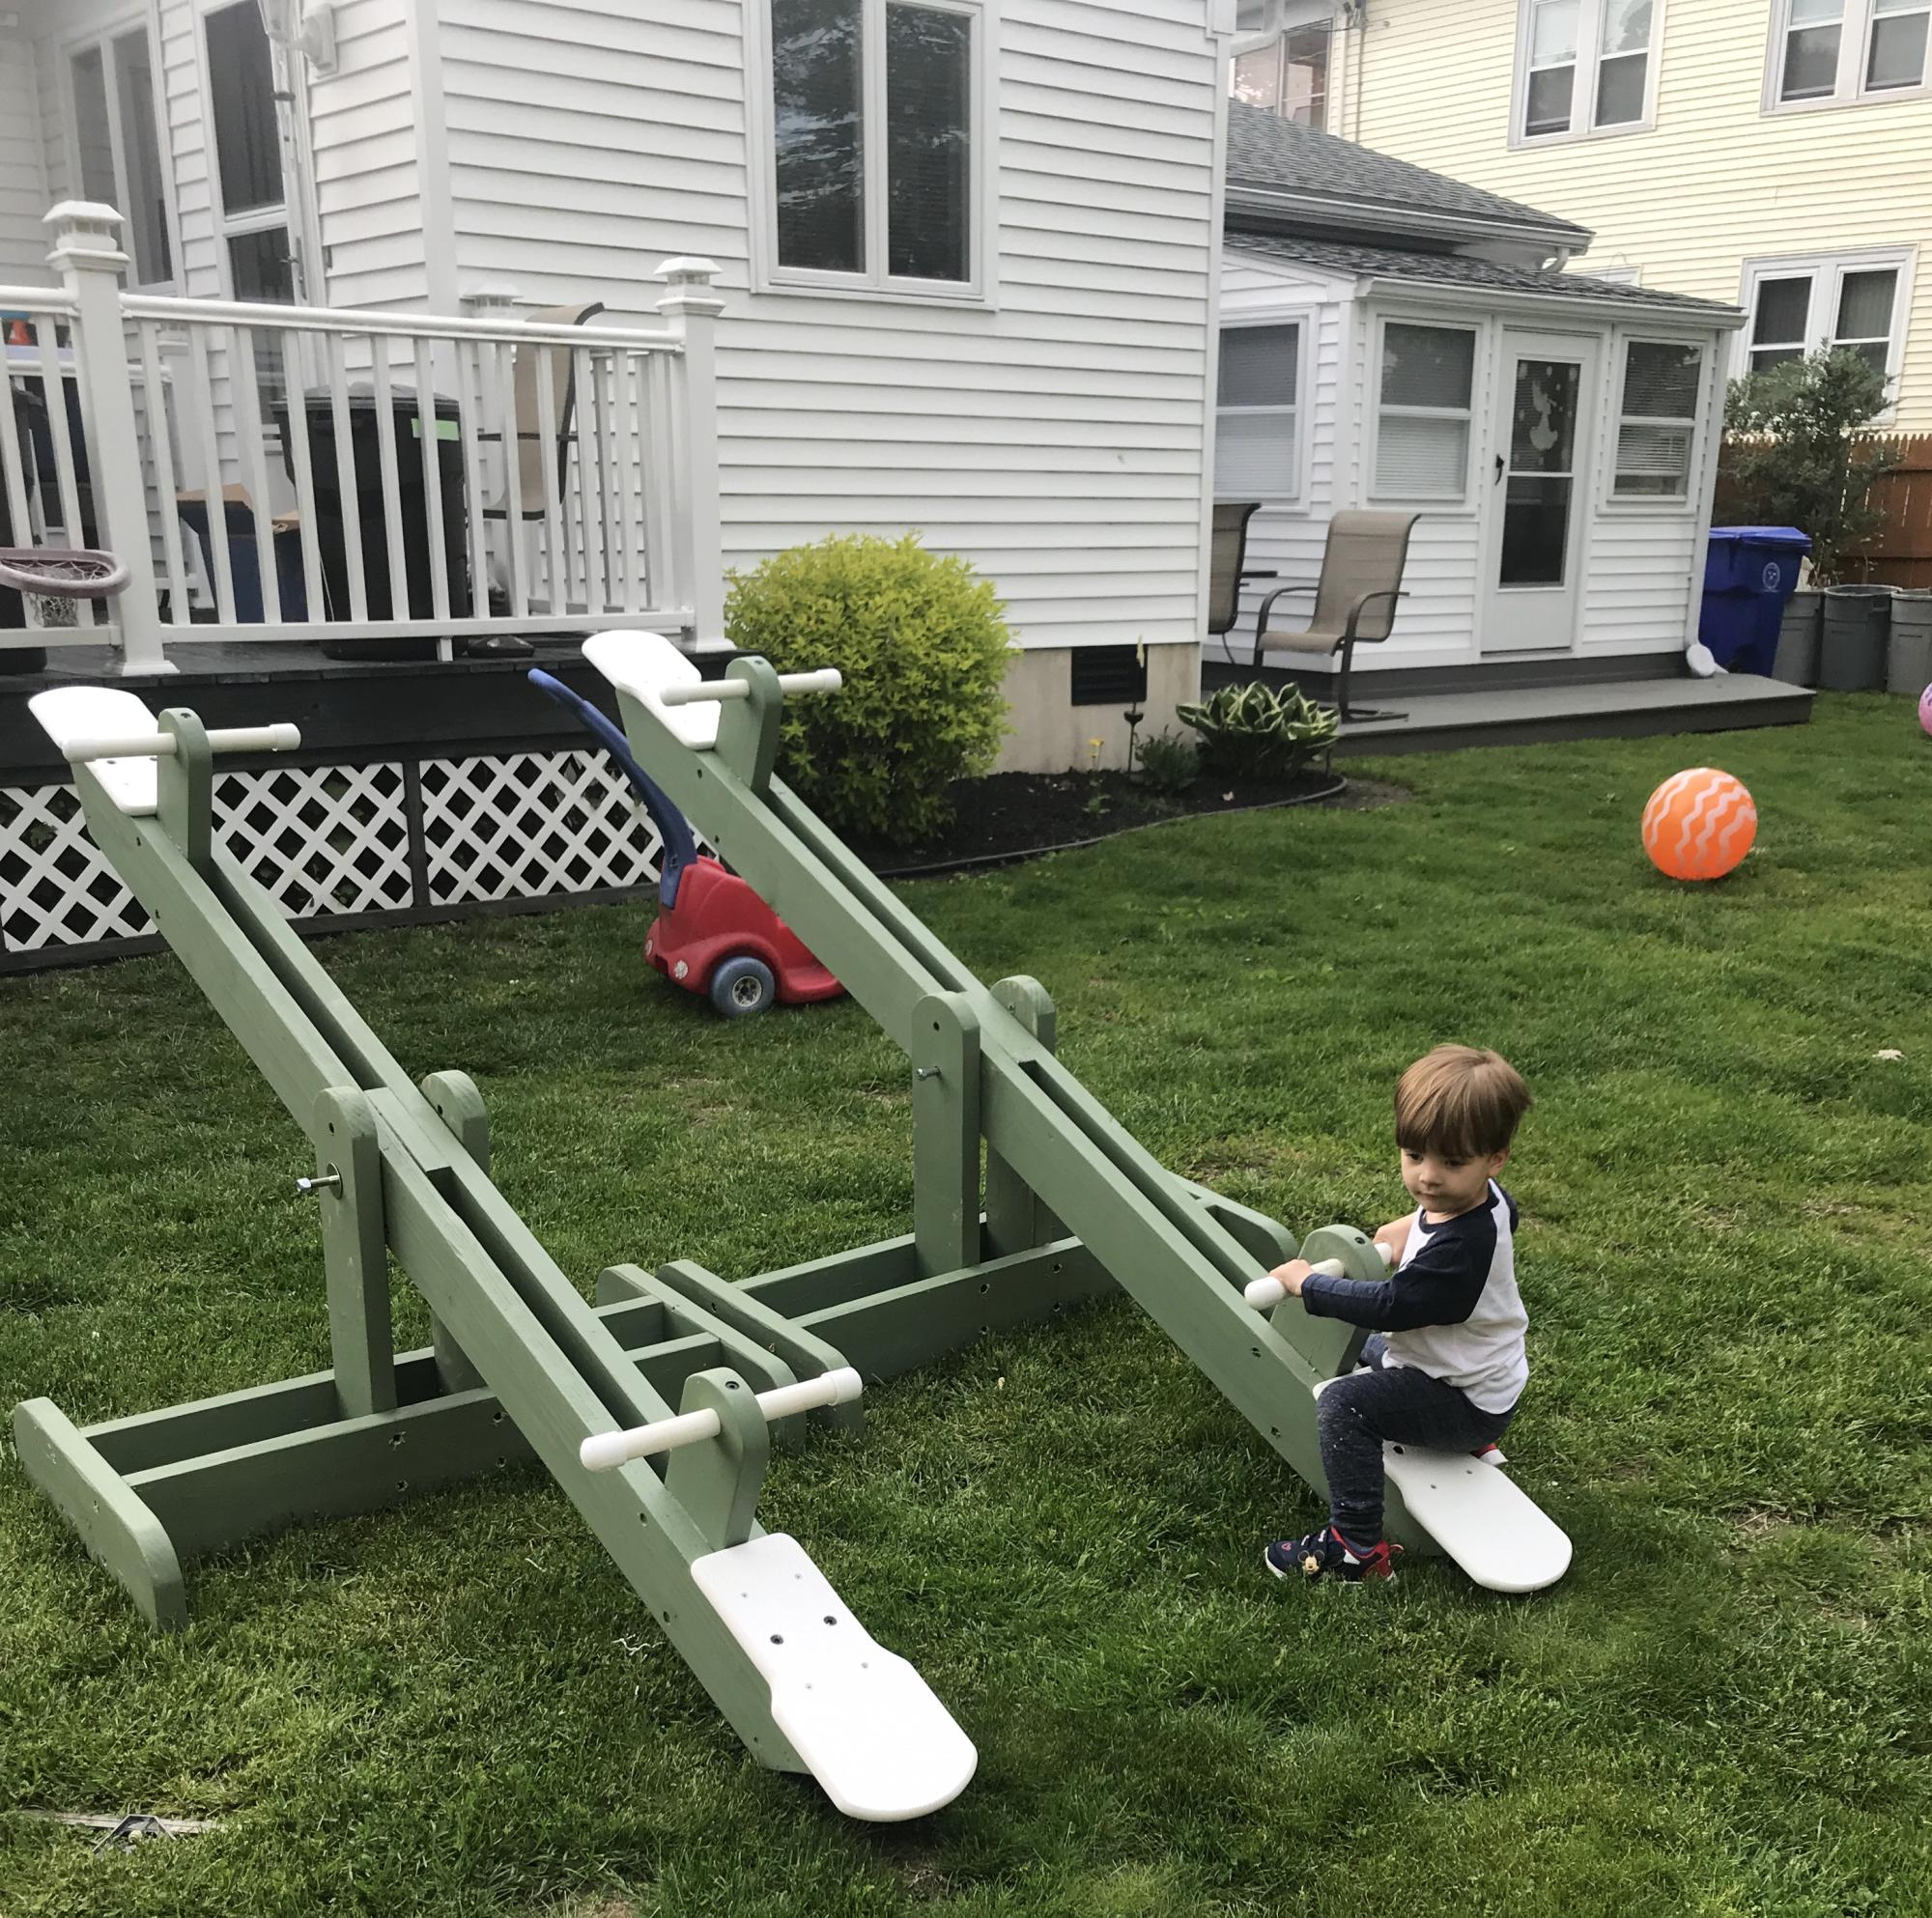
Here are a couple my Grandson and I built with pressure treated lumber with PVC handles and Azek seats. Grand kids love them!
Rocco Q.
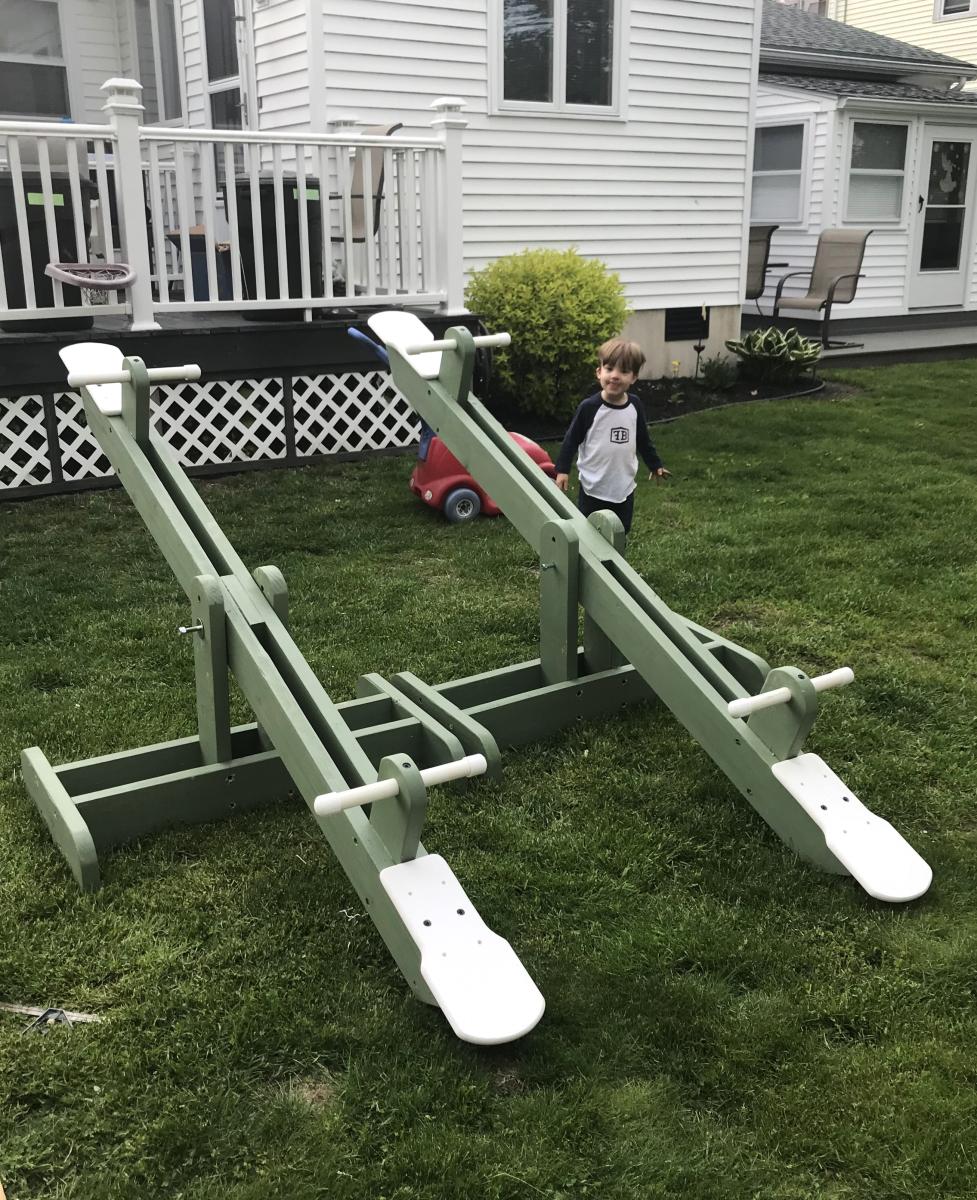
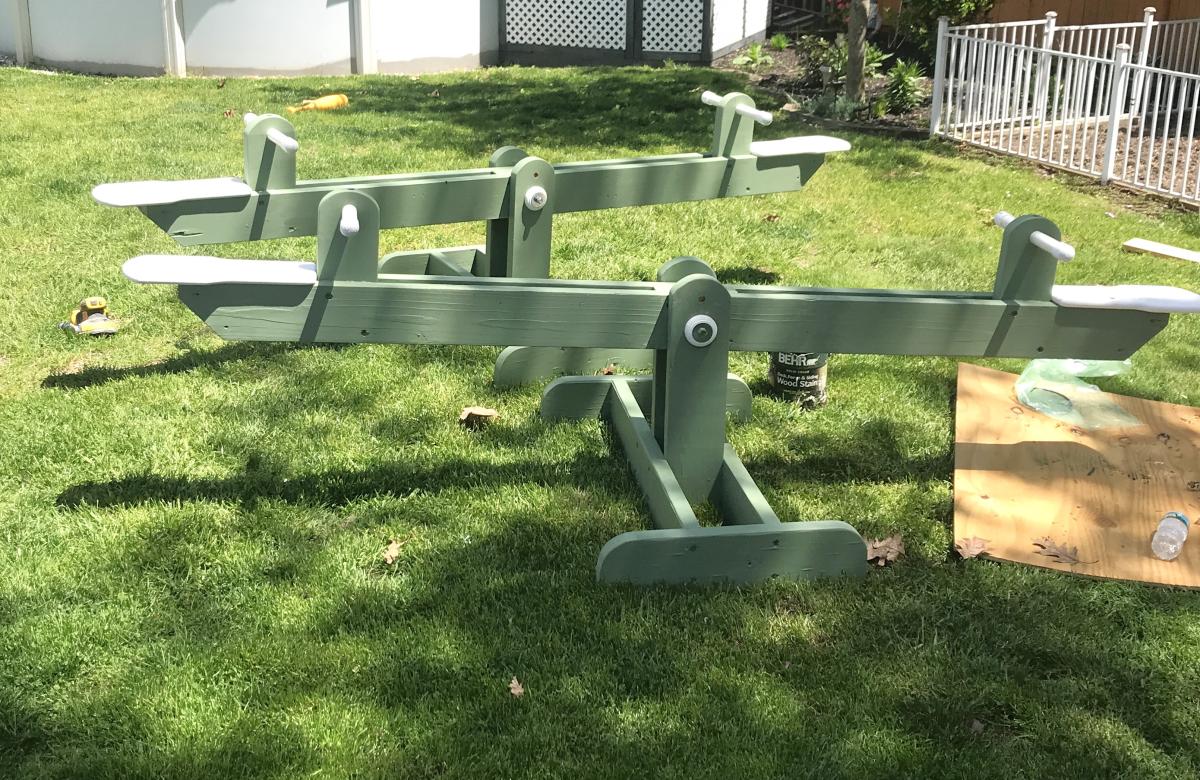
Mon, 10/16/2023 - 11:10
These look amazing, thank you for sharing! I'm sure hours of fun are happening here.:)
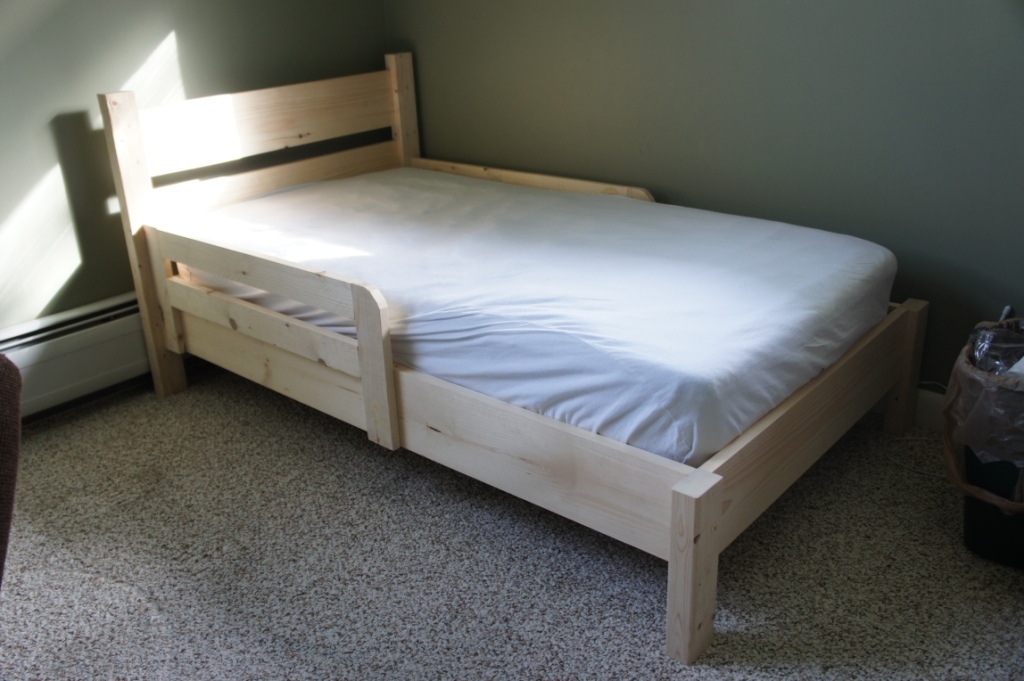
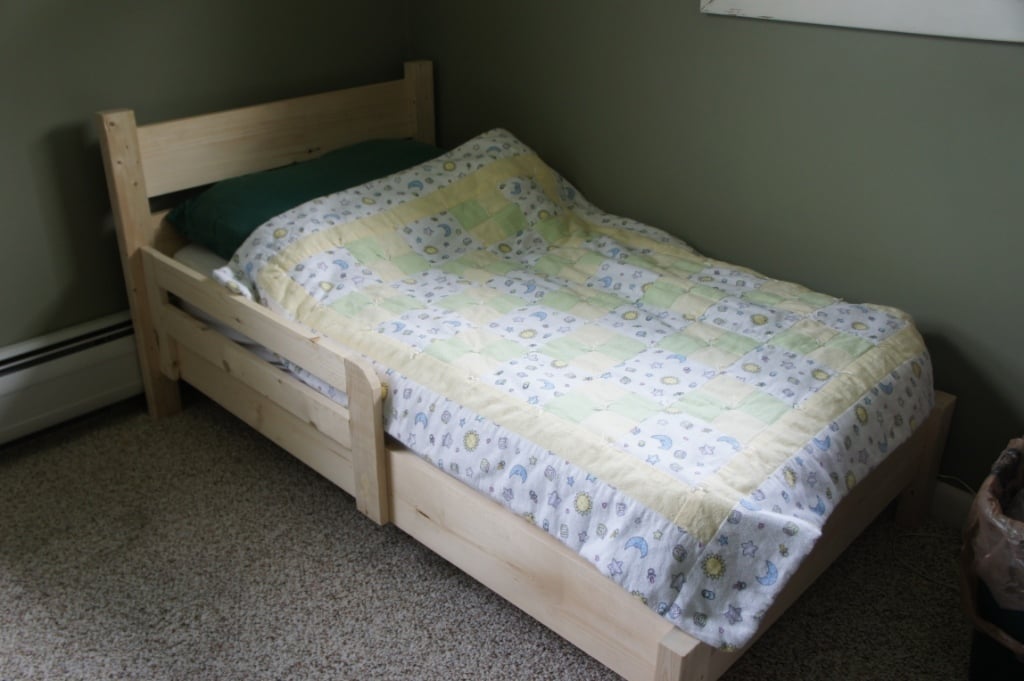
I made this bed for my daughter who is not yet two, but can climb out of her crib.
I needed to use some different lumber: 2x3's instead of 2x2's and 1x3's instead of 1x2's. I adjusted the headboard, as beadboard was not available and this simple design seemed more suitable for us. I was very pleased with the simplicity of the plan, although I wish I had read it more carefully before I began. I loved the Kreg jig also. Very easy to use.
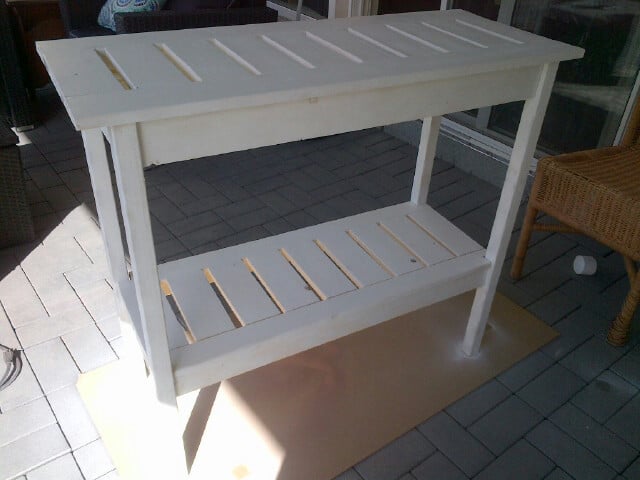
Console table with straight stair legs

Your plans are awesome!! Your YouTube videos rock!

Made this for my daughters new house! Love how it turned out!!
Elaine Freitas
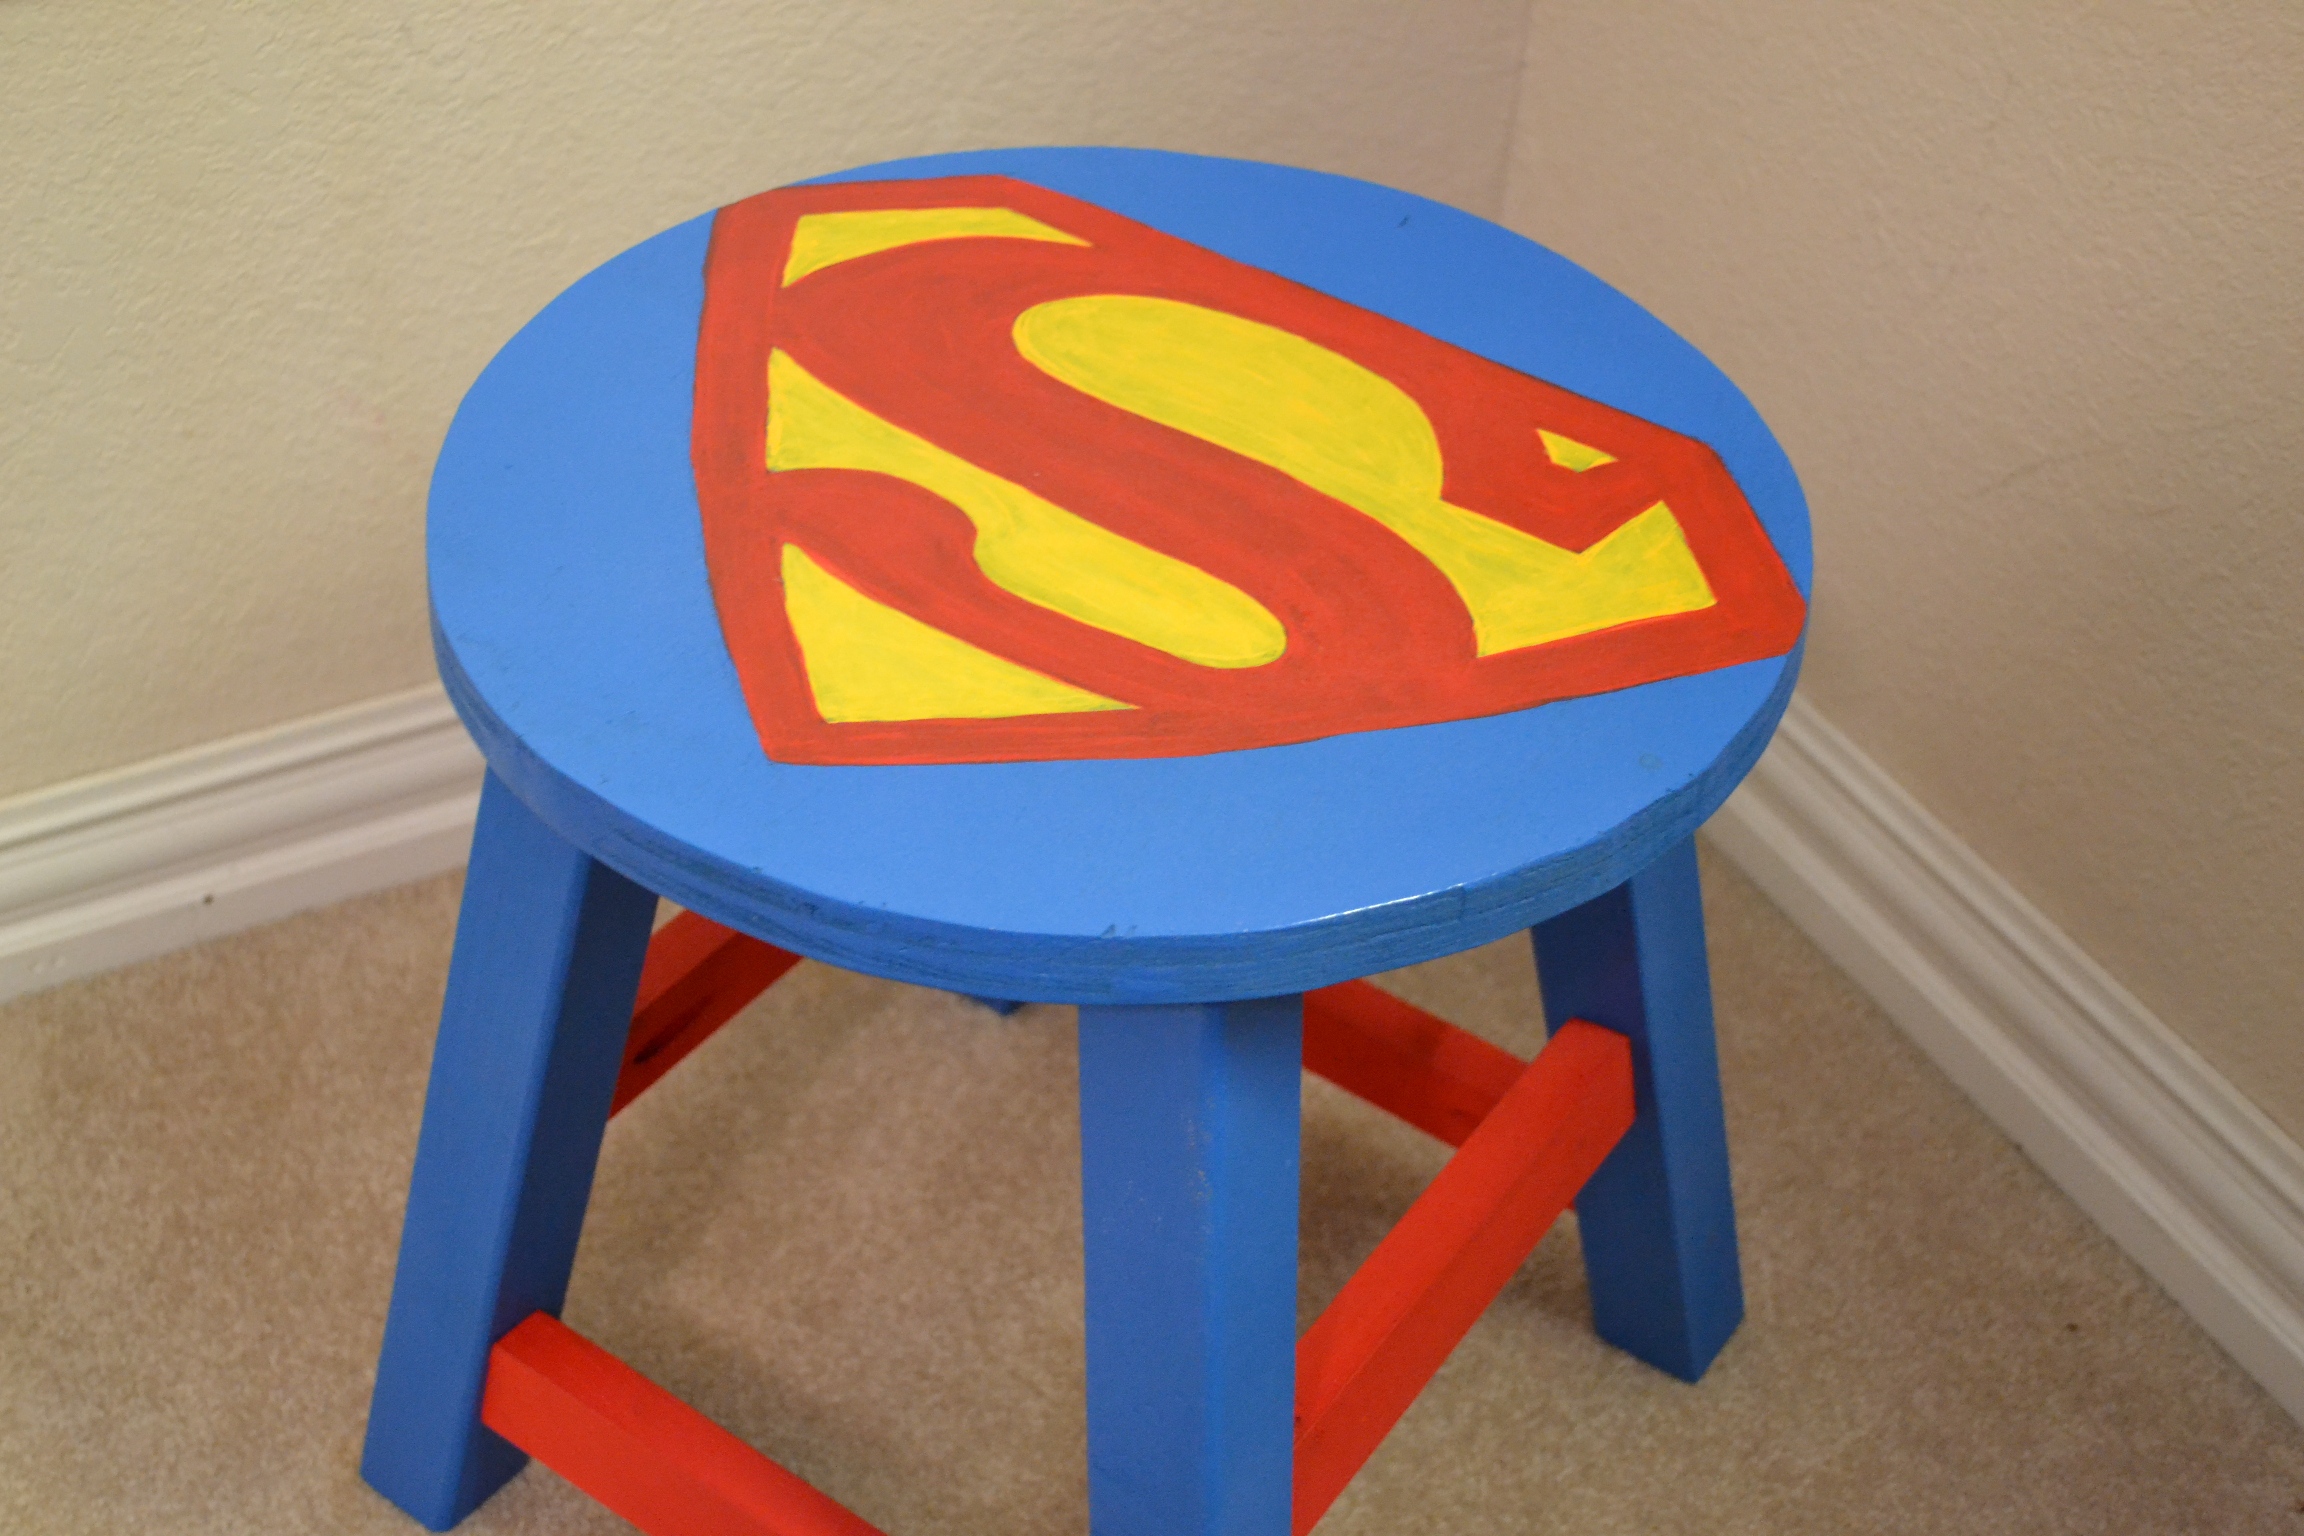
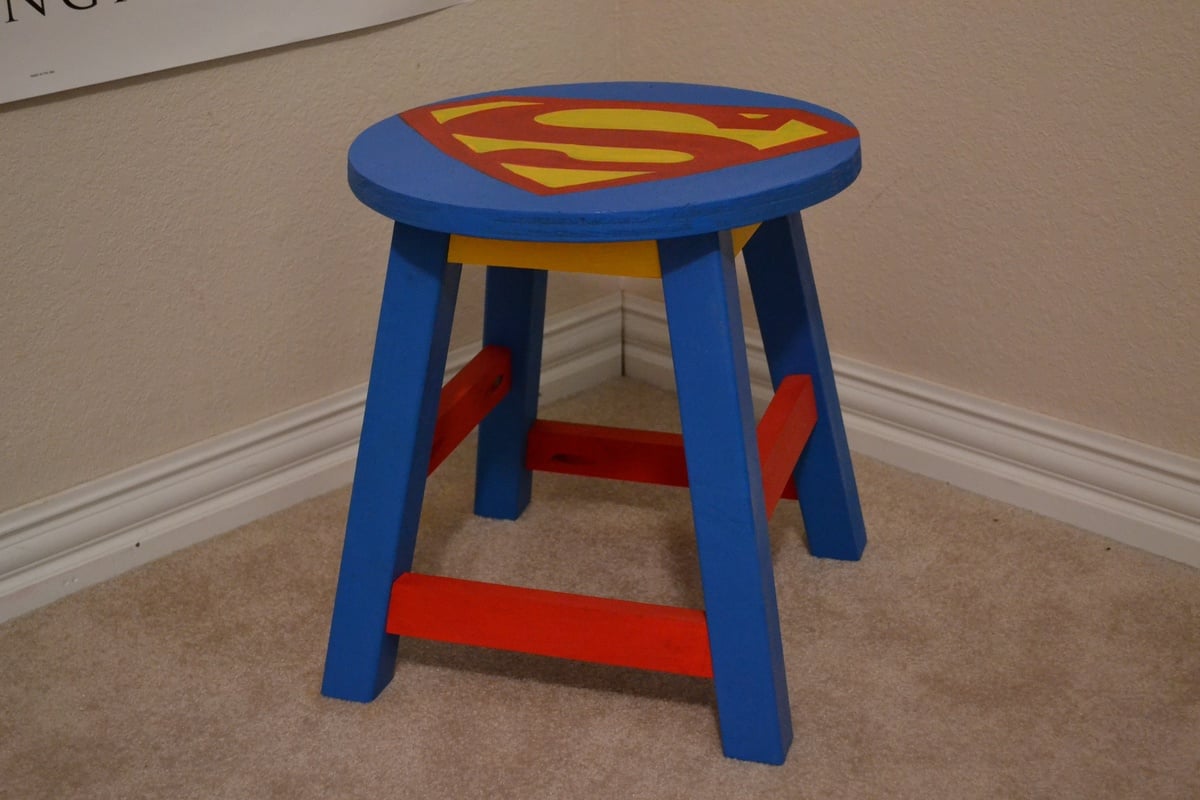
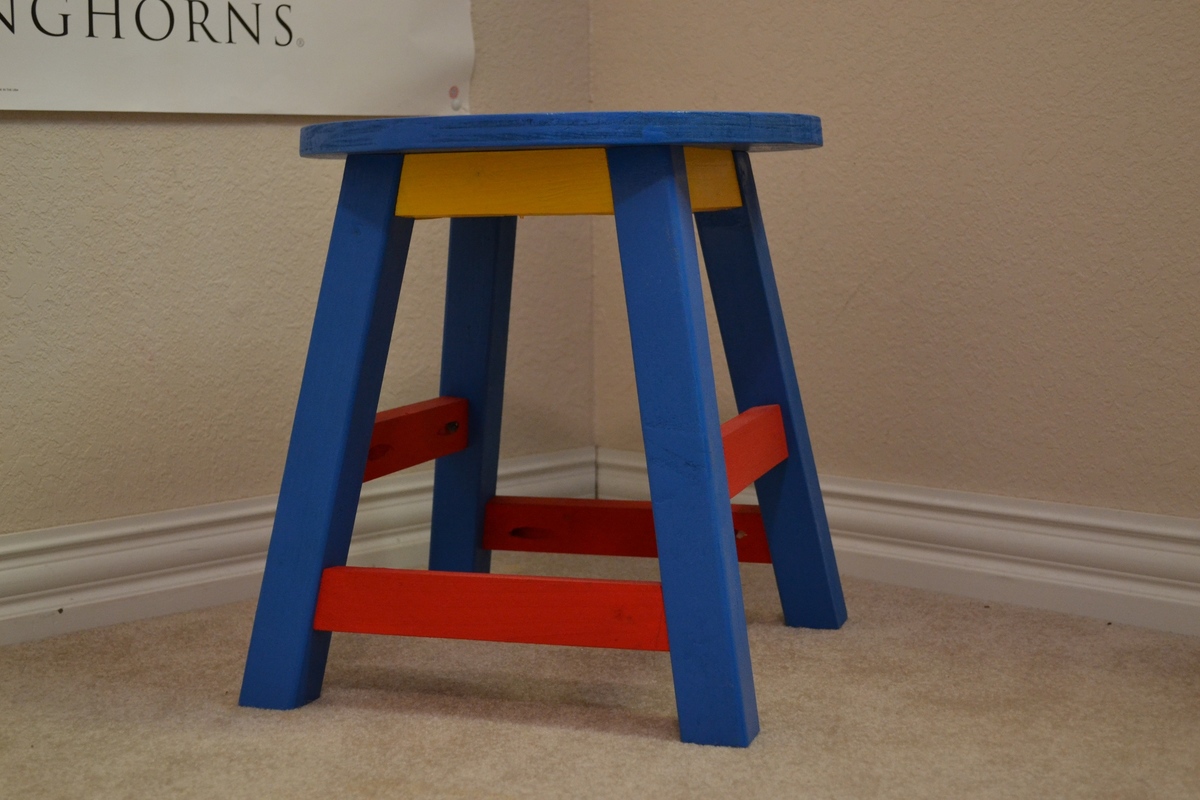
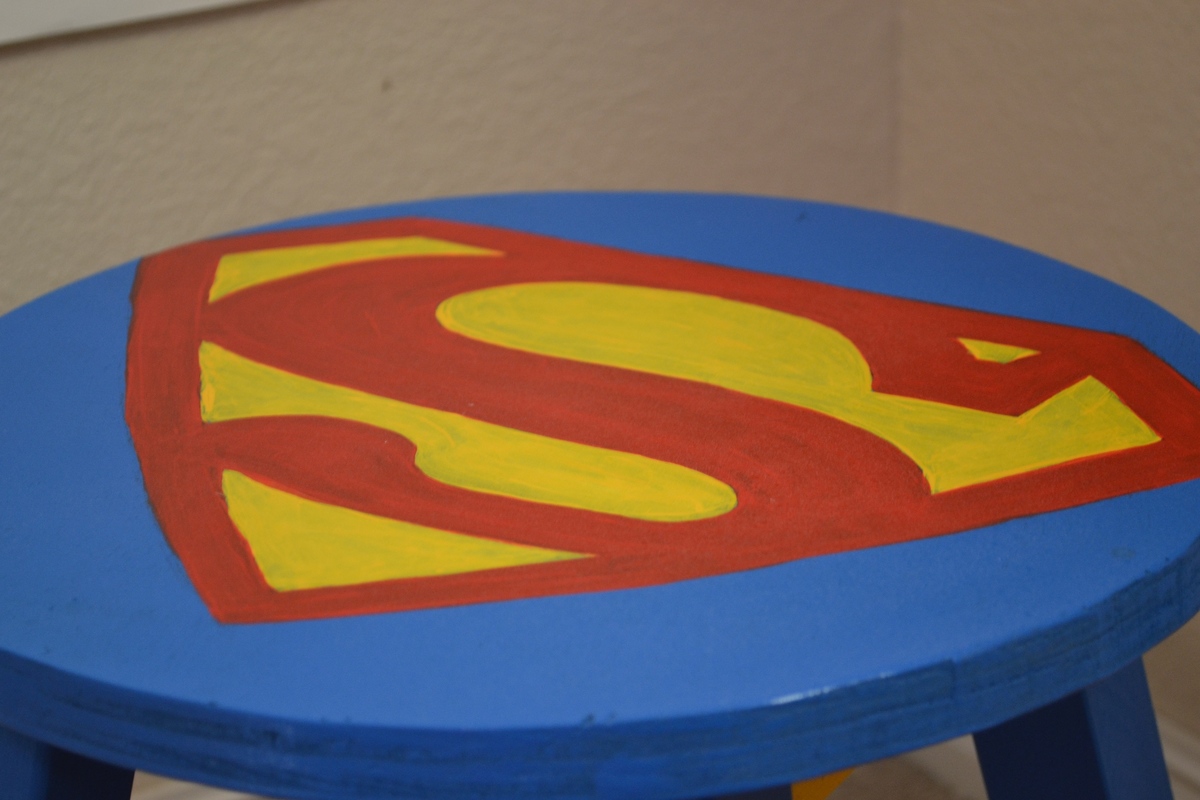
This stool is a gift for my nephew's 4th birthday!! The hardest thing about this stool is trying to get all the legs put together without having enough room to get the drill at the right angle. This time, we used an extender piece on the drill bit (duh!) and it was MUCH easier than the other stools we have built.
I used a projector to put the trace the Superman symbol, then painted it.
I hope he likes it!!!