Heavy Duty Christmas Tree Stand

The free plans on this website are made possible with advertising and affiliate links.  Thank you for helping us keep plans free.


Difficulty
Intermediate
| Print this plan

How to build a heavy duty christmas tree stand - diy tutorial by ANA-WHITE.com

Building a heavy duty christmas tree stand is easy and economical.  

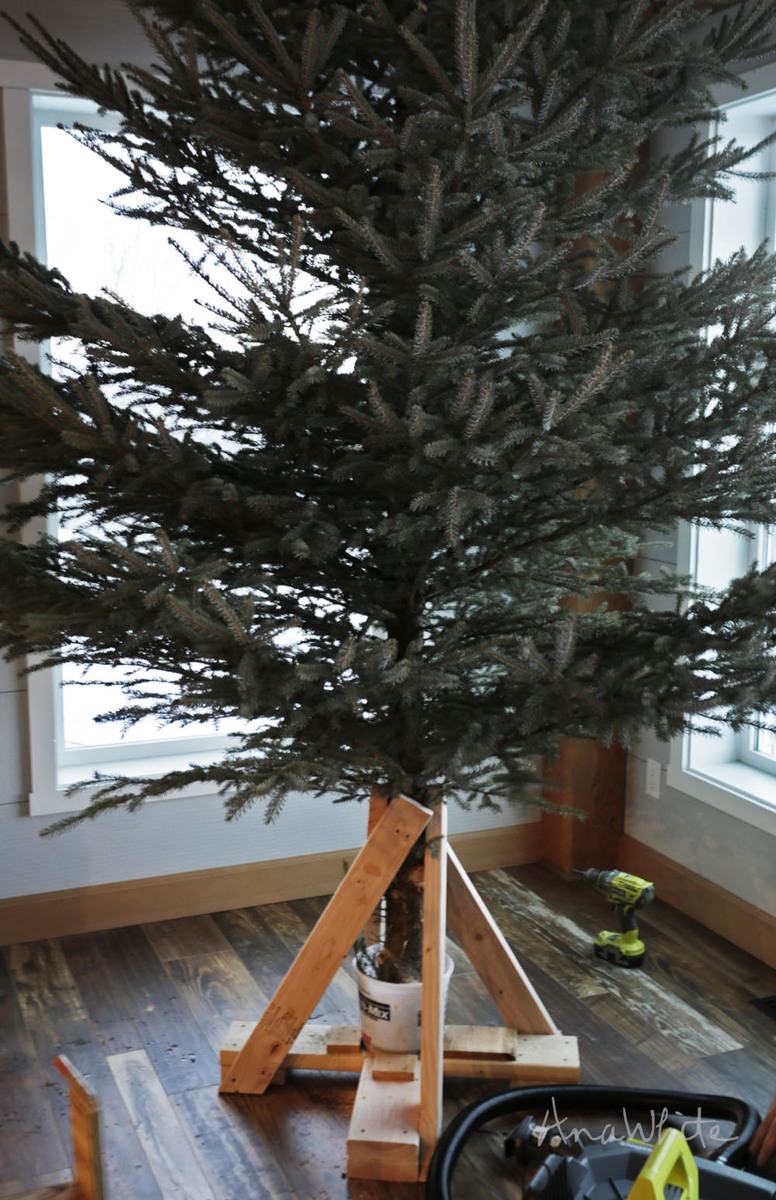
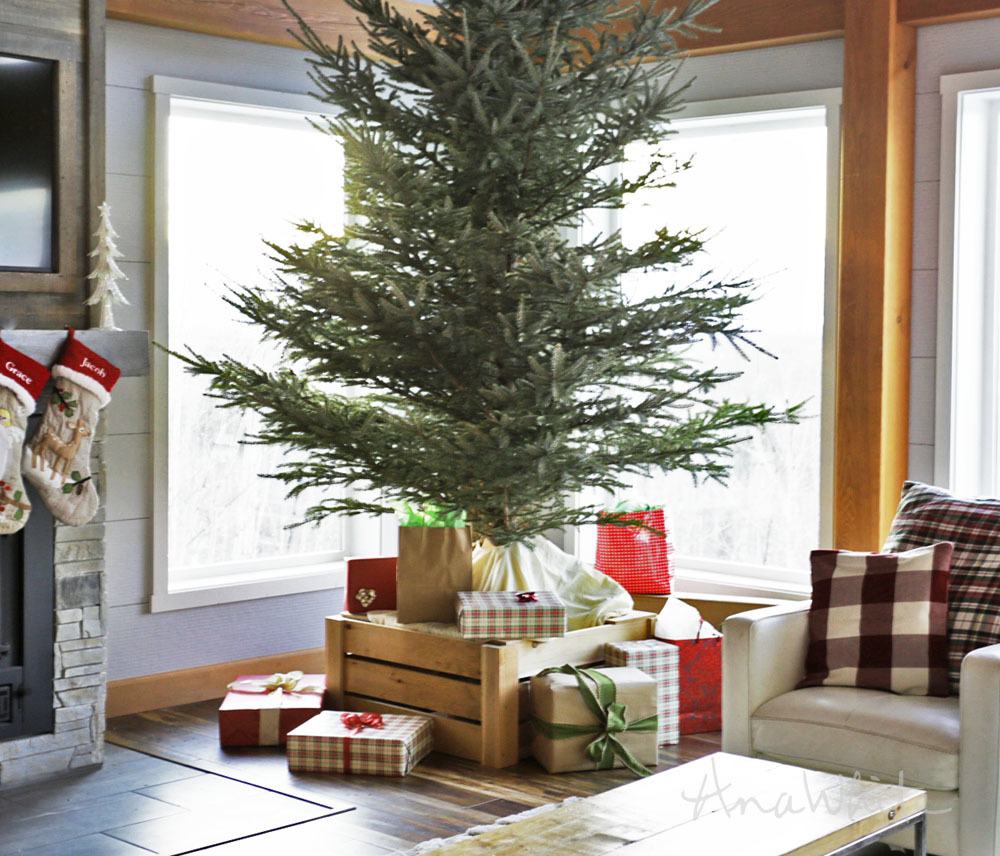
This year, our family harvested a 12' tall tree with a base 6" in diameter.  This tree was so large, I had a hard time just holding it upright - We knew a store bought tree stand would never fit the large base or support the weight and height of our large Christmas tree, so we decided to DIY our own heavy duty Christmas tree stand.

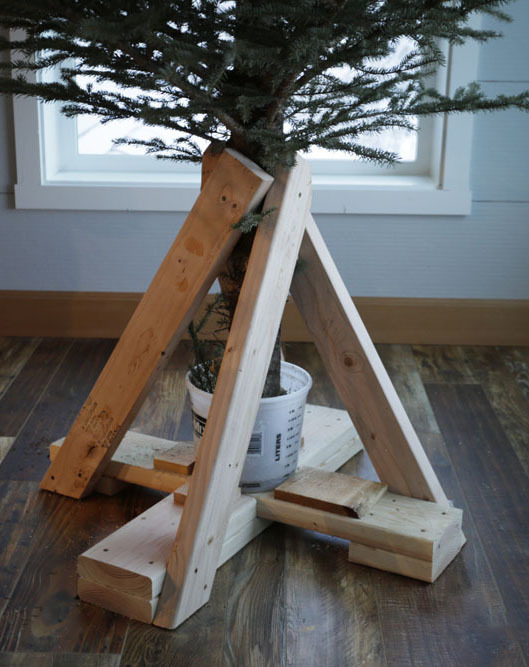
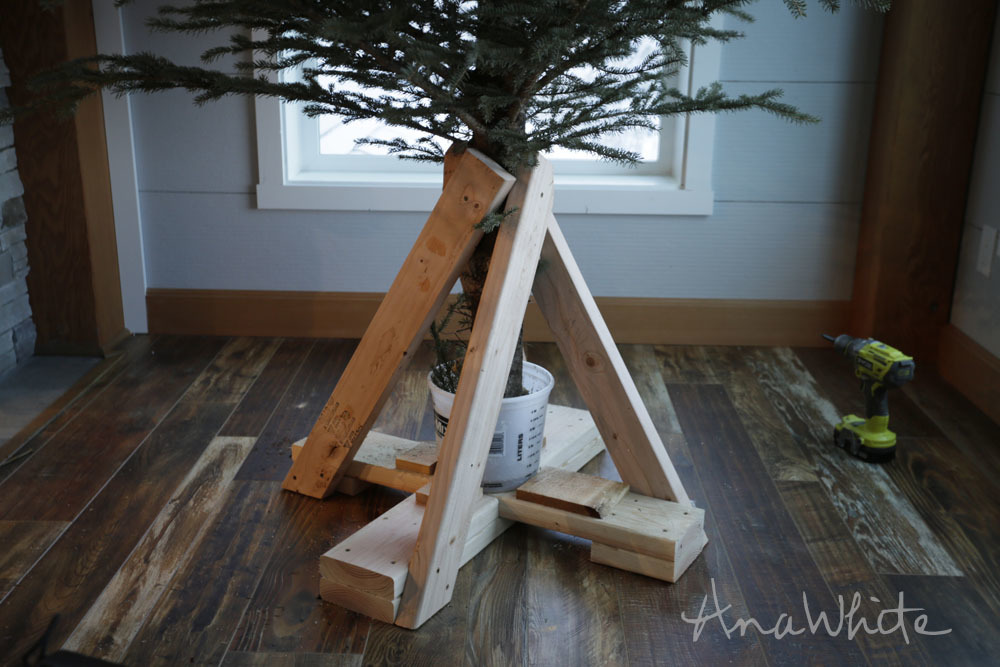
Using 2x6 and 2x4 scraps (if you had to buy new, probably about $10-$15 in lumber) and some screws, and an old bucket, we simply screwed this Christmas tree stand together.

It worked great, and no extra support was needed!  

To cover it, we added a wood Christmas tree collar -

The wood tree collar was just as easy to build, and I'm sharing the plans here for you.

But let's do the base first so you can adjust how tall the tree skirt should be.  You'll find the plans for this heavy duty Christmas tree base below.

Enjoy and Happy Holidays!

XO Ana


PS - Make sure you watch the video build here for more tips and build steps.


NOTE: Every tree is different.  You should adjust the plans below to fit your tree and adequetely support it.  When in doubt, you can also anchor the tree to the wall to keep from tipping over.

Dimensions
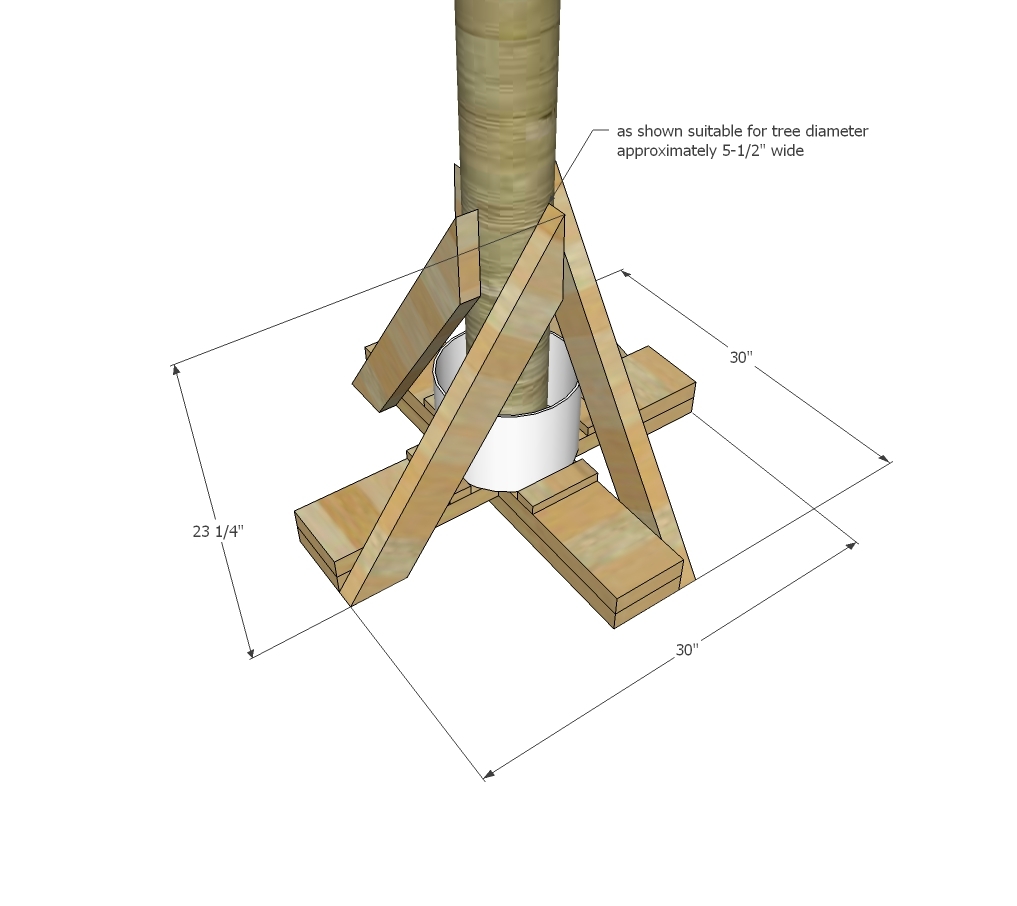
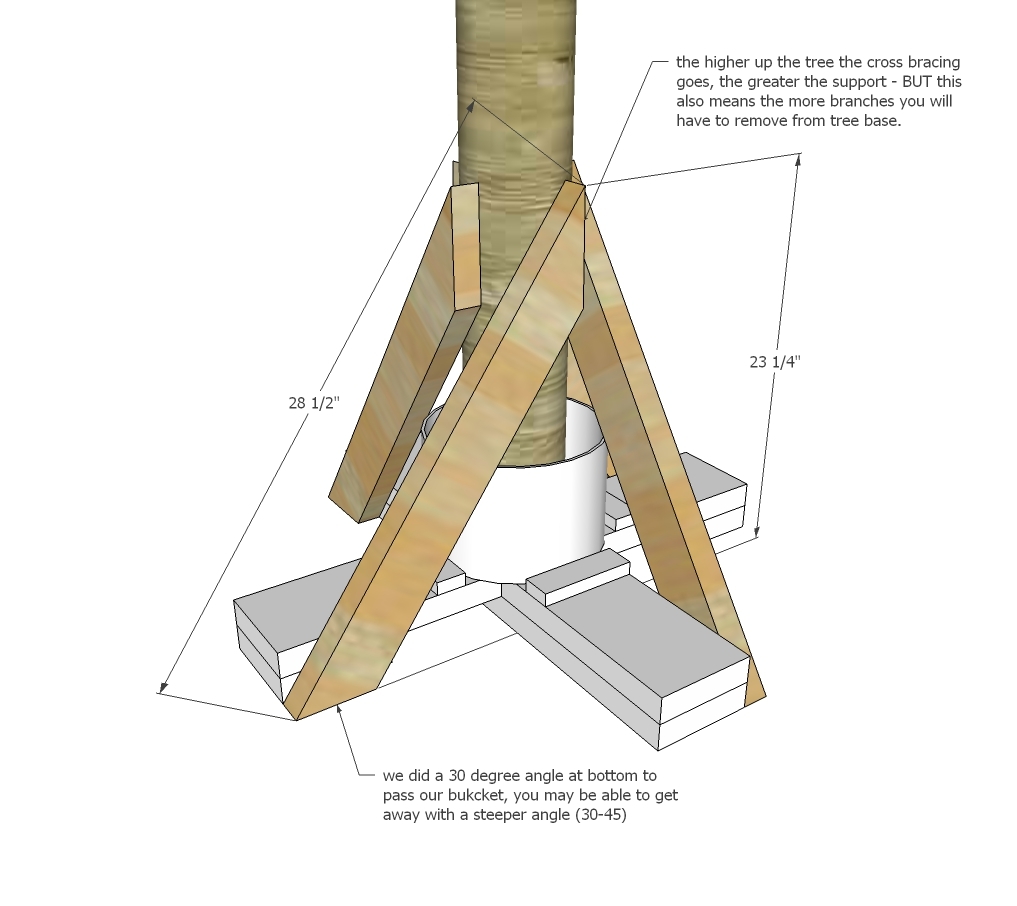
Dimensions shown above. For a smaller tree, you could downsize by building base out of 2x4s, starting with 2x4s cut to 22" length.

Preparation

Shopping List

1 - 2x6 @ 8 feet long

1 - 2x4 @ 12 feet long (can cut in half for transport)

2-3/4" self tapping wood screws

1 - 1/4" brad nails

bucket

Saws-All or Jigsaw 

Cut List

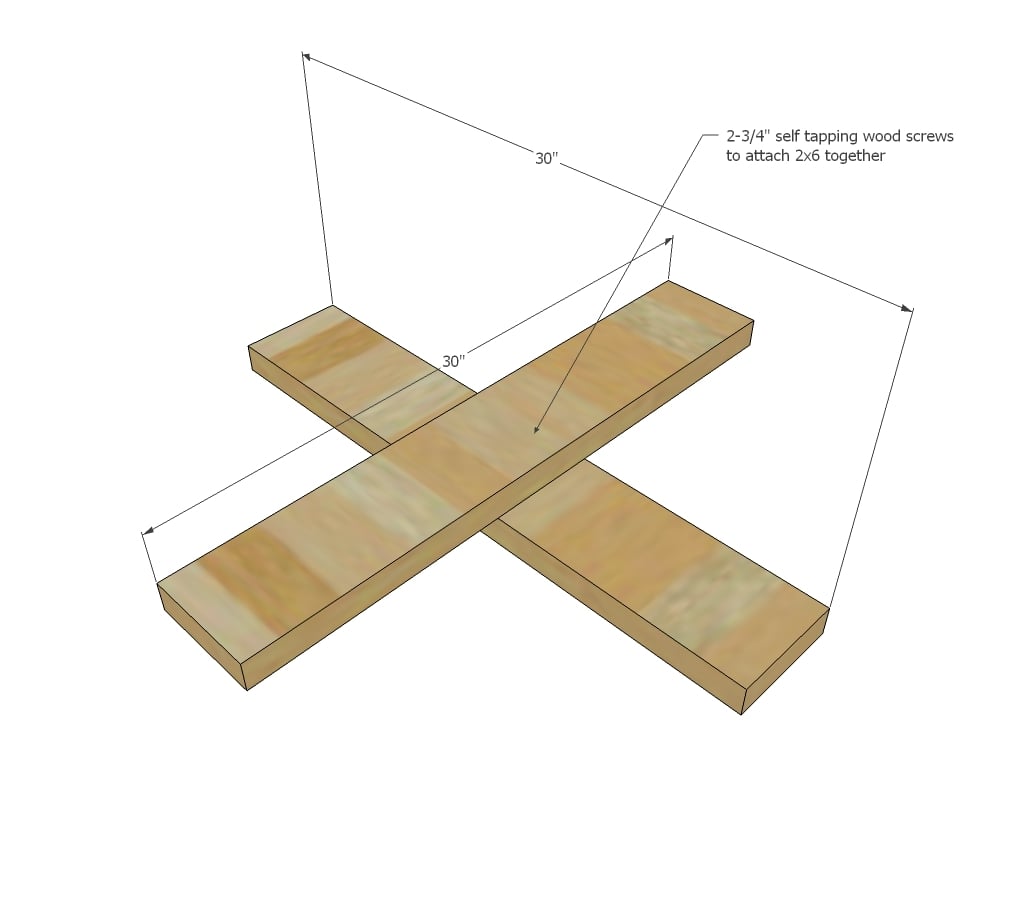
2 - 2x6 @ 30"

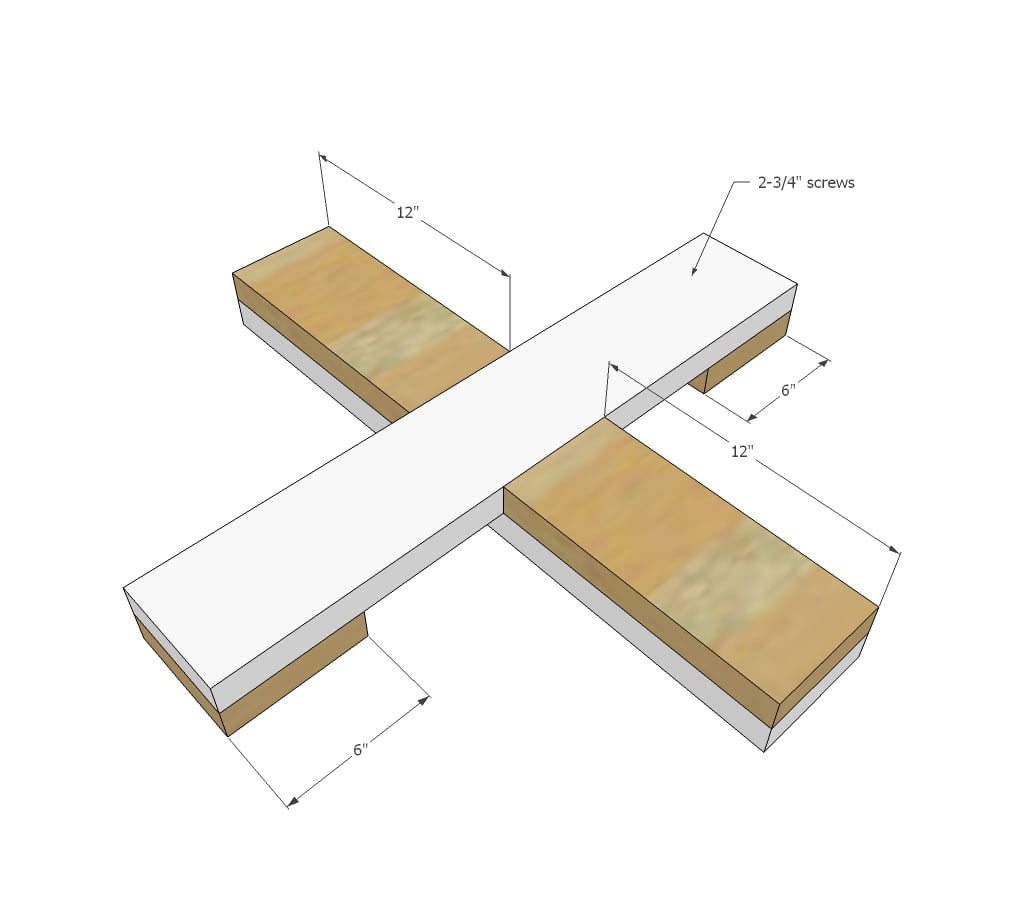
2 - 2x6 @ 12"

2 - 2x6 @ 6"

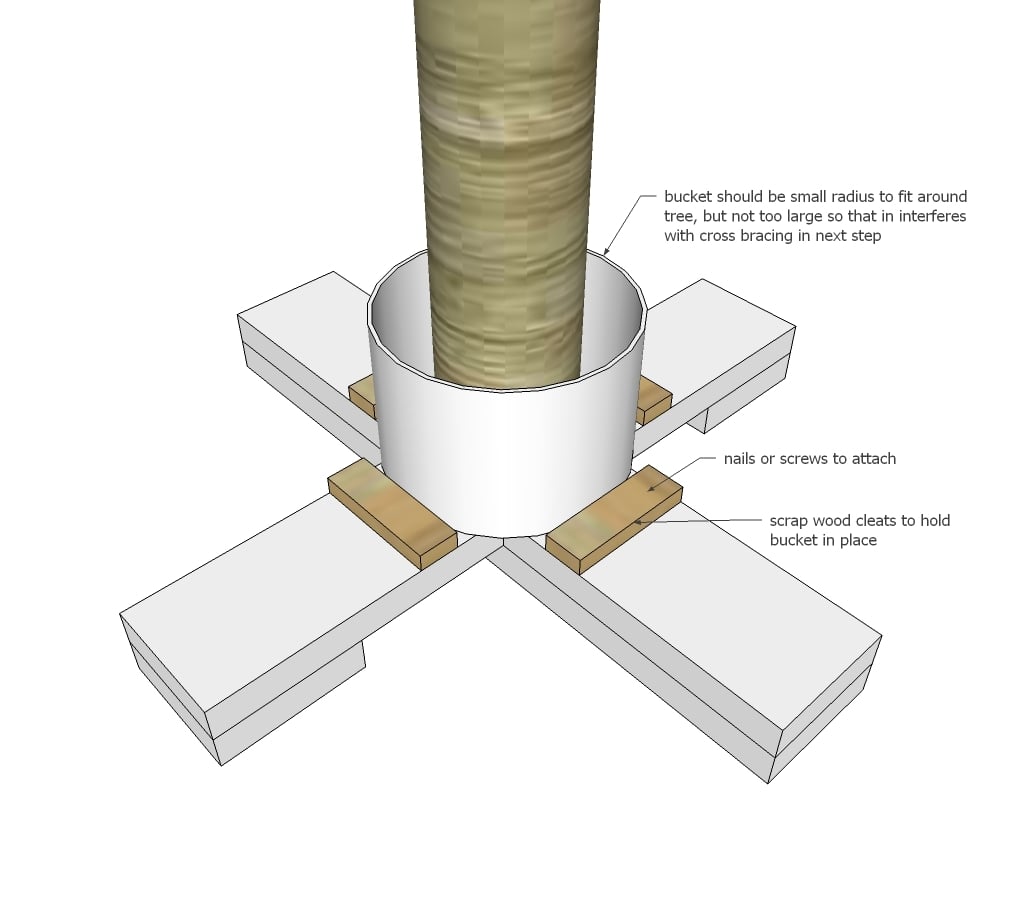
4 - scrap wood pieces @ 5-1/2" long (1x2 or 1x3 work great)

4 - 2x4 @ 30" - approximate length - with one end cut at angle on bottom 

Tools
Tape Measure
Speed Square
Hammer
Safety Glasses
Hearing Protection
Drill
Miter Saw
Brad Nailer

Instructions

Step 1

Attach 2- 2x6 boards together at center in large X.  Make sure each 2x6 overhangs the same amount from the center.  Use a speed square to make sure boards cross at a 90 degree angle.

Step 2

Fill in under the upper 2x6 on ends.  Fill in the lower 2x6 on top - this helps support the bucket and gives you more to attach cross bracing to.

Step 3

Set bucket in center and attach scrap wood pieces around to secure bucket in center.  Place tree in bucket.

Step 4

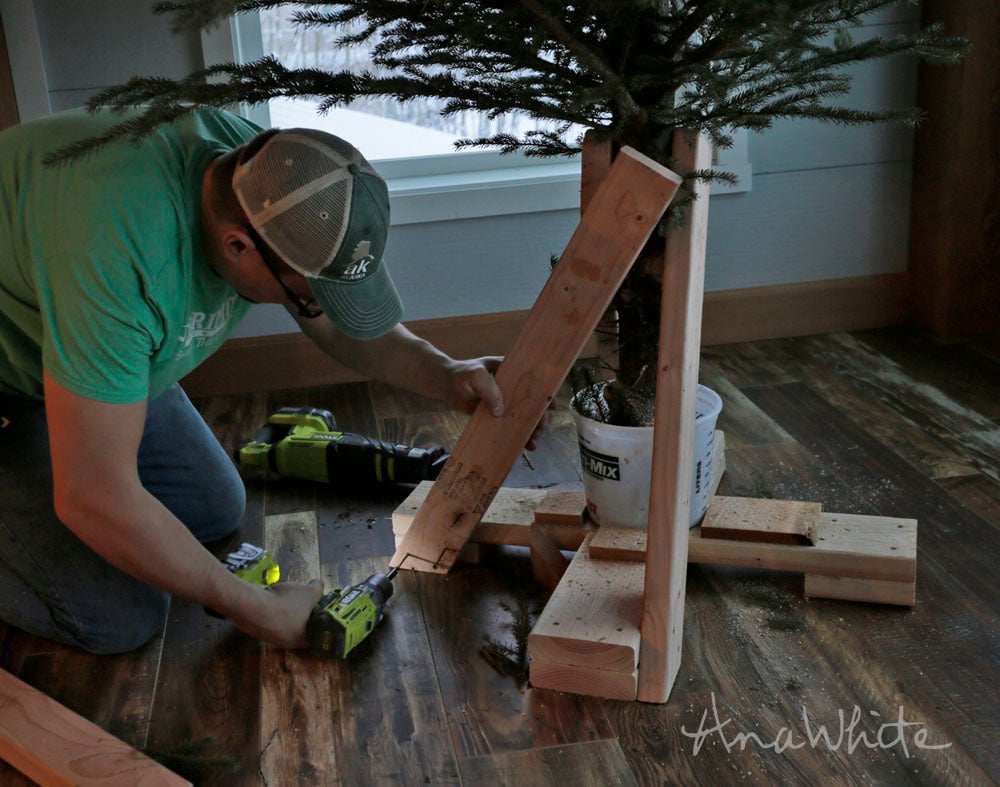
Cut cross bracing to fit tree from 2x4s and screw to base and tree trunk.  We ended up using a saws-all to trim the tops of the 2x4s ends to fit around the tree.

Project Type